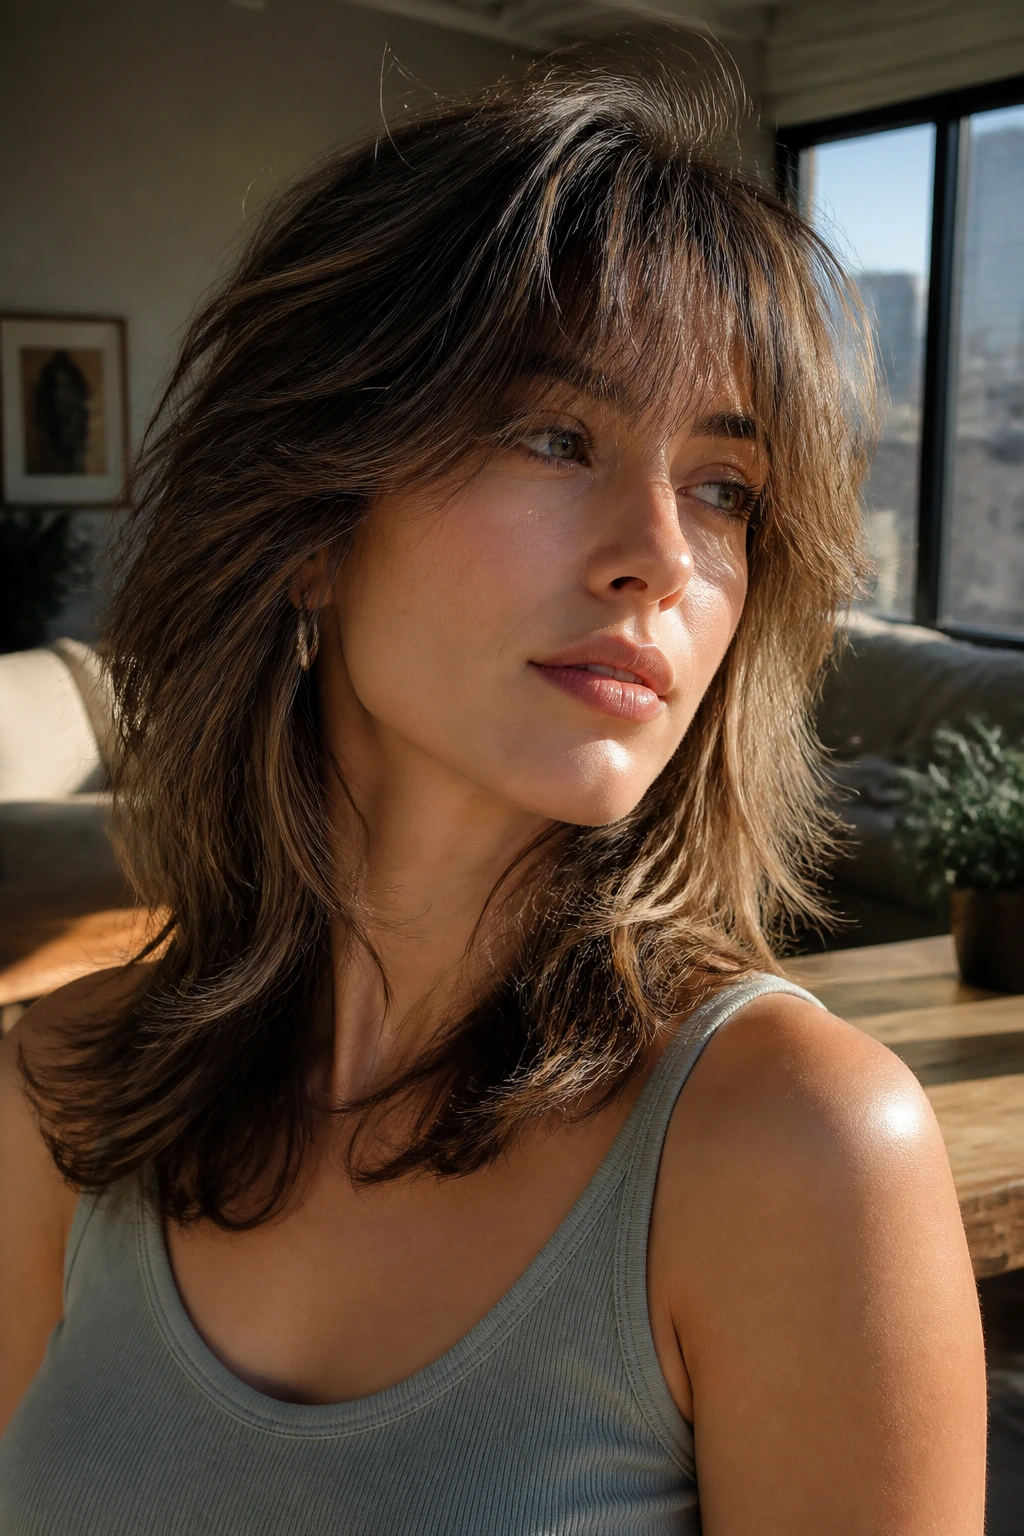
Thick hair at medium length can look chic, or it can look like a single heavy sheet with no bend in it. The difference usually comes down to two things: the shape of the cut and how the color breaks up the mass. Babylights do the second job beautifully because they’re so fine they don’t announce themselves with obvious stripes. They whisper. They make layers visible, they soften the weight line, and they stop medium hair from reading like one solid block.
I like medium length haircuts for thick hair with babylights because they sit in that sweet spot between control and movement. Go too long and dense hair starts to drag itself down; go too short and it can expand outward in a way that feels more helmet than style. Collarbone to upper-chest length gives the hair room to swing, and those fine ribbons of light keep the surface from looking flat or muddy.
Babylights also solve a problem thick-haired people know all too well: the top can look great, and the lower half can turn into a dark curtain. A good placement plan fixes that. The right haircut gives shape. The right babylight placement gives air. Put them together and the result is hair that moves when you turn your head, instead of sitting there like it’s waiting for a meeting.
Why These Medium-Length Cuts Work So Well on Thick Hair
Less bulk, more bend: Medium length takes enough weight off the ends that thick hair stops ballooning outward at shoulder level.
Babylights soften the outline: Ultra-fine light strands break up the dense surface, so the hair reads as dimensional instead of heavy.
The grow-out is kinder: Fine highlights blur the line between fresh color and regrowth, which matters when you don’t want a hard root every few weeks.
The cut does the heavy lifting: Layers, curves, and internal removal matter more here than dramatic color contrast. Thick hair needs architecture.
Easy to wear straight or wavy: These cuts hold a clean blowout, but they still have enough movement to look good with a bend iron or a rough dry.
Face shape flexibility: A smart placement plan around the cheekbone, jaw, and collarbone lets the same haircut flatter very different faces.
1. Collarbone Layered Lob with Soft Babylights
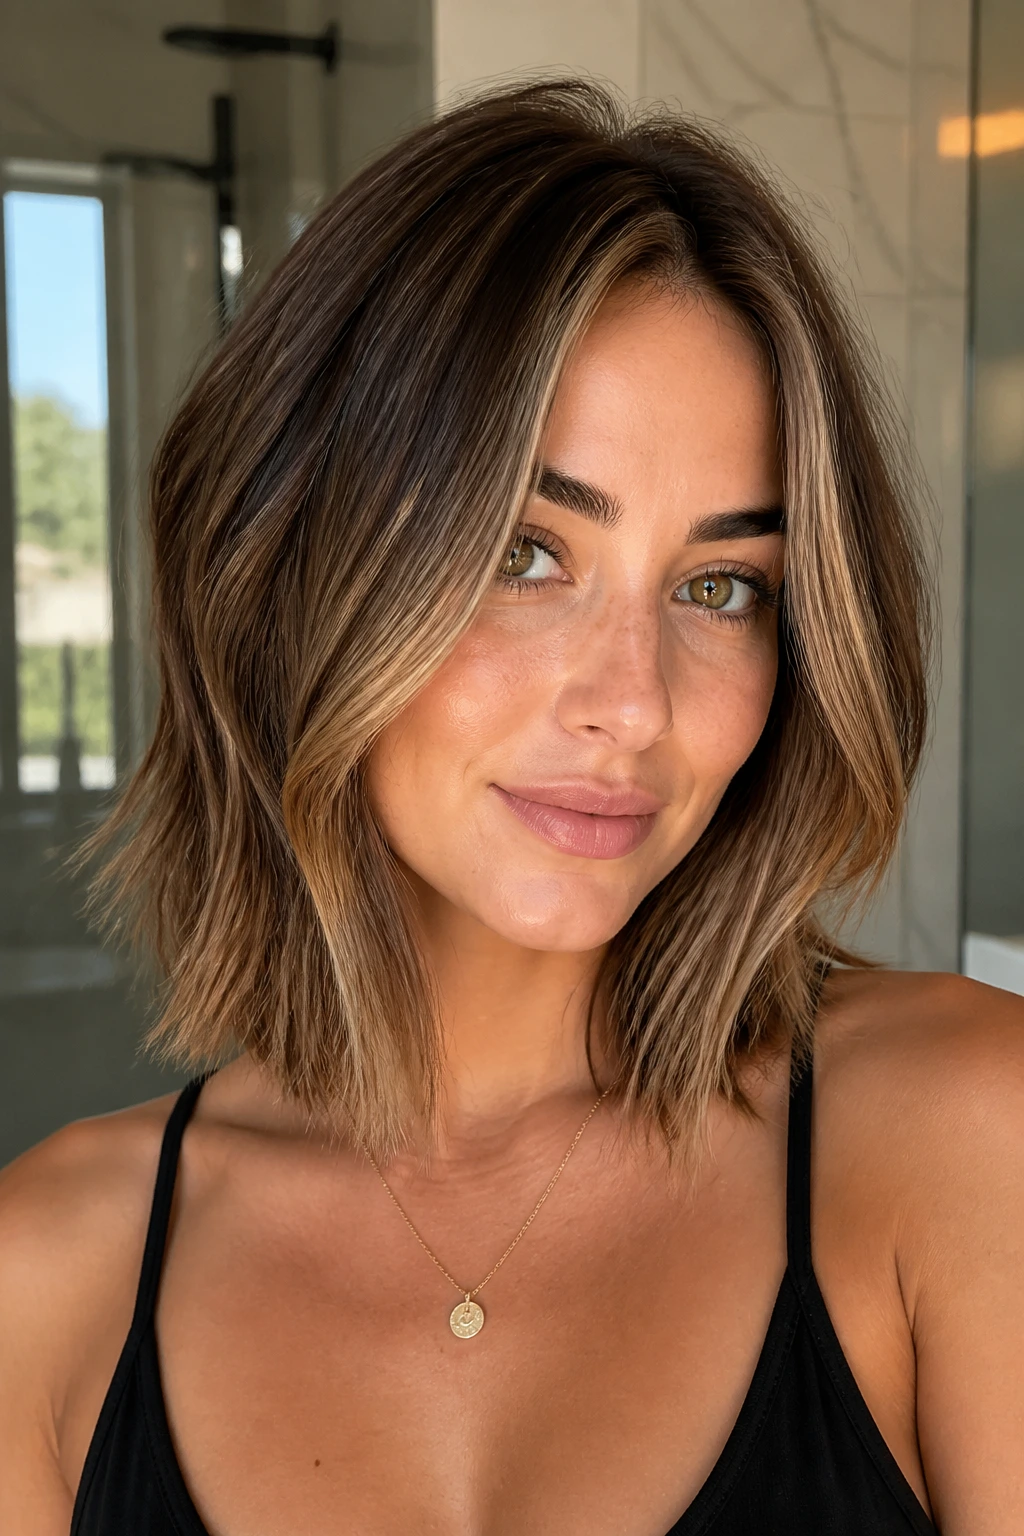
The collarbone lob is the old reliable of thick hair, and that’s not a bad thing. It lands right where the neck opens up, so the hair gets a little swing without piling up at the shoulders. With soft babylights feathered through the top and front, the whole cut looks lighter even when the density is still there.
Why It Works:
This shape removes enough length to stop thick hair from dragging, but it keeps enough body for a clean bend at the ends. Babylights around the face and crown stop the lob from turning into a dark rectangle.
Key Details:
- Keep the length at collarbone, about 11 to 13 inches from the root on most adults.
- Ask for internal layers that begin around cheekbone level.
- Babylights should be woven in tiny sections, especially at the hairline.
- Best on straight, wavy, and softly curly textures.
- Looks best when the ends are slightly beveled, not chopped bluntly.
Quick Styling Notes:
A round brush gives this cut polish fast. If you want less fuss, rough-dry to 80 percent and then wrap the ends under with a 1.25-inch iron. The babylights catch that bend without needing a lot of styling.
Equipment for This Look:
- Sharp cutting shears
- Medium round brush
- Blow dryer with nozzle
- 1.25-inch curling iron or wand
- Heat protectant spray
How to Wear It:
This cut looks clean with a center part, but a soft off-center part gives the layers more lift. It works with jeans and a tee, sure, but it also handles a blazer without looking too casual.
Pro Tips for This Cut:
- Keep the shortest face-framing pieces at chin or slightly below.
- Ask for babylights that stay softer under the top layer.
- Finish with a light shine spray on the mid-lengths only.
Variations on This Cut:
- More Swing at the Front: Ask for slightly longer front pieces and shorter internal layers in back.
- Softer Regrowth Line: Add a subtle root shadow two shades deeper than the highlight.
- Polished Blowout Version: Keep the layers longer and the ends beveled under.
Common Mistakes to Avoid with This Cut:
- Don’t over-layer the sides or the lob loses its clean outline.
- Don’t place highlights in thick stripes; thick hair needs fine weaving.
- Don’t flatten the crown too hard when styling, or the cut loses its lift.
2. Blunt Midi with Micro-Babylights
A blunt midi can be stunning on thick hair because it turns density into shape instead of trying to fight it. The line is clean, the ends feel full, and the whole thing has a kind of calm confidence that shaggy cuts don’t always give you. Micro-babylights keep that solid shape from looking too heavy.
Why It Works:
The blunt perimeter keeps the hem crisp, which is a smart move when thick hair tends to puff at the bottom. Micro-babylights add just enough surface variation to stop the cut from looking like one dark shelf.
Key Details:
- Aim for a length that sits between collarbone and upper chest.
- Keep layers minimal, or hidden only inside the shape.
- Babylights should be extremely fine, almost thread-like.
- Best for hair that already has some natural smoothness or a strong blow-dry habit.
- Ask for a slightly soft edge if your ends are coarse.
Quick Styling Notes:
This one loves a flat brush blowout. If you air-dry it, use a smoothing cream from mid-length to ends and let the perimeter fall where it wants. The payoff is in the line; don’t overthink it.
Equipment for This Look:
- Straight-cut shears
- Paddle brush
- Blow dryer
- Smoothing cream
- Shine serum for ends
How to Wear It:
Worn sleek, it feels sharp and modern. Worn with loose waves, the blunt edge gives the babylights a bigger contrast, which can look especially good under indoor light.
Pro Tips for This Cut:
- Keep the highlight placement softer underneath so the perimeter still reads blunt.
- Ask for a gloss if the babylights start to look too bright.
- Trim every 8 to 10 weeks to protect the clean line.
Variations on This Cut:
- Glass-Hair Midi: Keep the edge straighter and use fewer visible layers.
- Soft Blunt Finish: Micro-point the very ends so the line stays clean but not severe.
- Side-Part Shift: Change the part for a little root lift without changing the cut.
Common Mistakes to Avoid with This Cut:
- Don’t add too many short layers; they can create a triangle shape.
- Don’t use chunky highlights or you’ll lose the blunt elegance.
- Don’t skip trims; a blunt cut shows ragged ends fast.
3. Butterfly Cut with Face-Framing Brightness
The butterfly cut gives thick hair a clever illusion: a lot of movement around the face, length kept through the back. That means you get softness without sacrificing the weight that keeps thick hair from floating into frizz. Babylights near the front pieces help the layers read clearly instead of blending into one big shape.
Why It Works:
The shorter top layers mimic the lift of a blowout, while the longer bottom layers keep the silhouette grounded. Babylights around the face catch the eye first, which is handy because thick hair can hide its own structure if the color is too uniform.
Key Details:
- Keep the shortest layers around lip to chin length.
- Leave the bottom layer longer, usually just below the shoulders.
- Ask for babylights concentrated around the money pieces and cheekbones.
- Best for medium to dense hair that can support a layered crown.
- Works especially well if you like volume at the top and movement at the sides.
Quick Styling Notes:
A big round brush or hot rollers make this cut shine. The shortest layers should flip away from the face just enough to show off the light ribbons; too much curl and it gets fussy fast.
Equipment for This Look:
- Cutting shears
- Large round brush
- Hot rollers or 1.5-inch iron
- Root-lift mousse
- Heat protectant
How to Wear It:
This is a blowout haircut more than an air-dry haircut. It looks expensive with a smooth finish and still has enough shape to look good on day two with a little dry shampoo at the roots.
Pro Tips for This Cut:
- Ask your stylist to keep the shortest pieces soft, not chopped.
- Babylights should follow the motion of the layers, not cross them at random.
- Use mousse only at the roots if you want the crown to hold.
Variations on This Cut:
- Airy Butterfly: Keep the top layers a touch longer for less drama.
- Brighter Frame: Put the lightest babylights only around the front two inches.
- Soft Glam Version: Round-brush the ends inward for a smoother finish.
Common Mistakes to Avoid with This Cut:
- Don’t cut the top layer too short if your hair is coarse; it can puff.
- Don’t place bright highlights through the back indiscriminately.
- Don’t skip a smoothing product, because the shorter layers show flyaways fast.
4. Curved Lob with Internal Layers
A curved lob is one of my favorite fixes for thick hair that grows out blunt and boxy. The shape bends slightly inward around the jaw and collarbone, which gives the hair a softer outline without turning it wispy. Internal layers keep the bulk from sitting like a shelf, and babylights threaded through the curve make the silhouette easier to read.
Why It Works:
The curve helps thick hair follow the head instead of jutting out at the sides. Internal layers do the weight removal where it matters, inside the shape, so the perimeter still looks clean.
Key Details:
- Keep the front a touch longer than the nape.
- Ask for light internal layering, not obvious exterior chopping.
- Babylights should sit in the midsection and around the face.
- Best if your hair has some natural bend or you use a brush when styling.
- Great for dense hair that needs control more than drama.
Quick Styling Notes:
A medium round brush and a quick under-turn at the ends are enough. The cut should do most of the work. If you overcurl it, the curve can look too puffy.
Equipment for This Look:
- Shears
- Tail comb for sectioning
- Medium round brush
- Blow dryer
- Smoothing cream
How to Wear It:
It looks especially good with a side part because the curve gets a little lift. If you wear glasses, this cut sits neatly around frames instead of fighting them.
Pro Tips for This Cut:
- Ask for a very soft curve, not a dramatic A-line.
- Keep babylights fine on the underside so the shape doesn’t split visually.
- Dry the front sections first; they frame the whole look.
Variations on This Cut:
- Gentle A-Line: Slightly longer in front for more angle.
- Rounded Jawline Version: Curve the front inward a little more to soften a strong jaw.
- Smoothed-Out Finish: Use a flat brush instead of a round brush for less volume.
Common Mistakes to Avoid with This Cut:
- Don’t let the back get too short or the shape stacks up.
- Don’t over-texturize the ends; you want curve, not fray.
- Don’t place babylights in harsh blocks that interrupt the curve.
5. Textured Shag with Airy Babylights
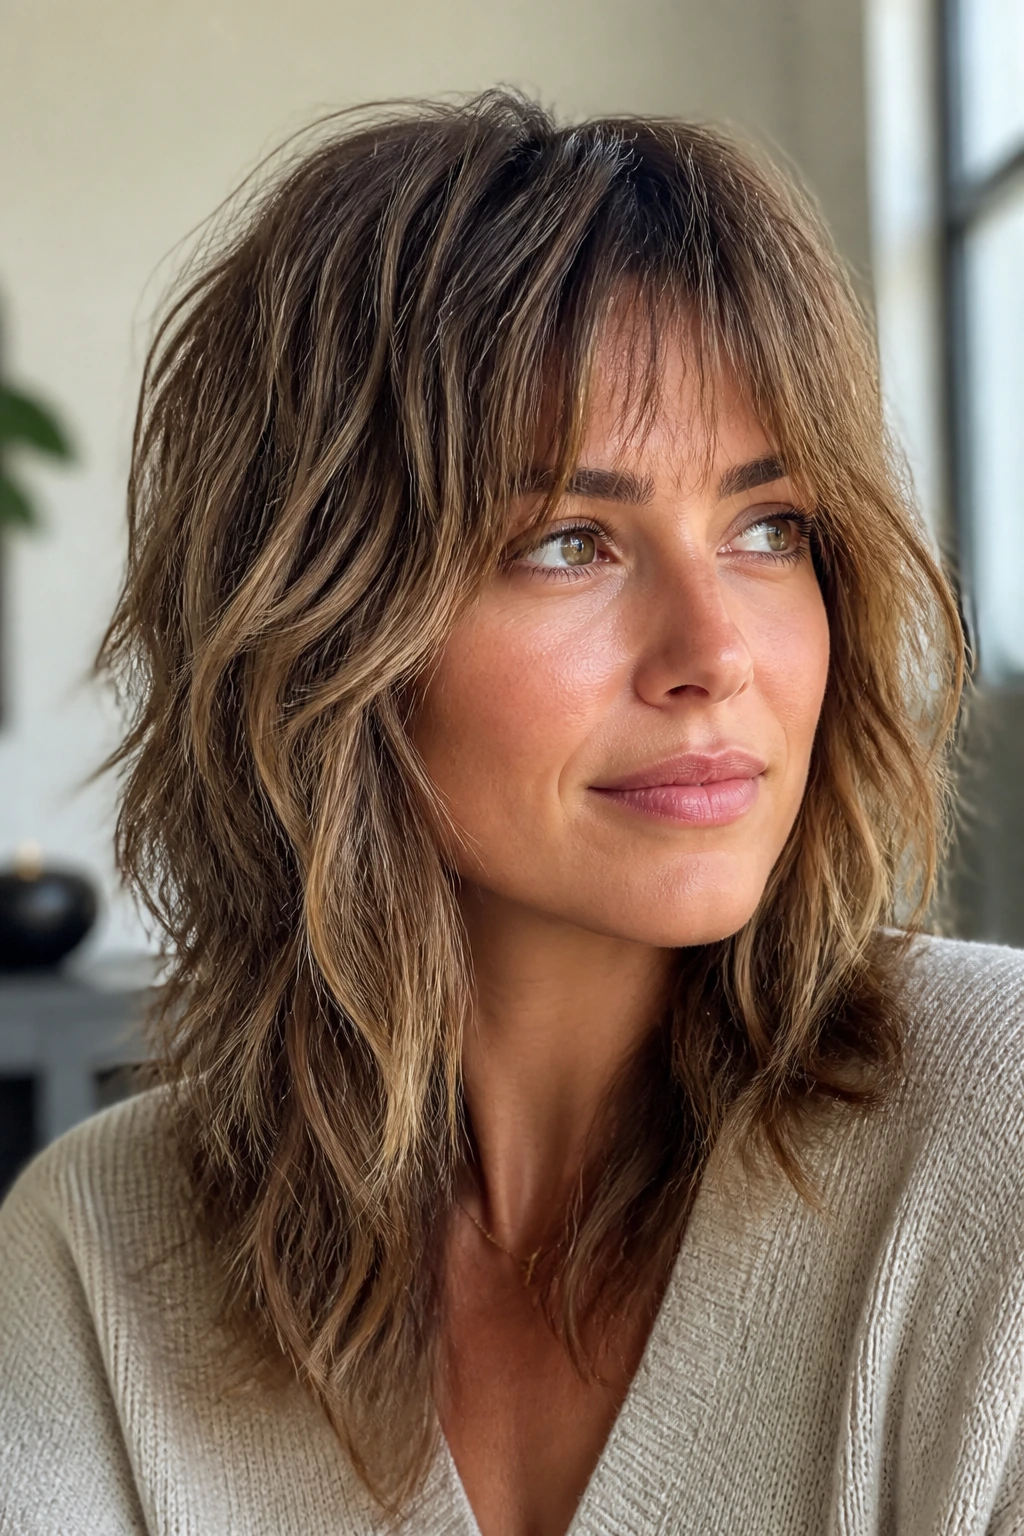
The shag can be tricky on thick hair, but when it’s cut well, it feels like a release valve. Suddenly the bulk has somewhere to go. The ends move, the layers break up the mass, and babylights tucked through the mess of texture make every bend look intentional instead of accidental.
Why It Works:
Thick hair can carry a shag without collapsing. The layers create space between the crown, sides, and ends, which is exactly what dense hair needs. Babylights keep all that texture from turning into a dark, fuzzy mass.
Key Details:
- Ask for choppy, feathered layers through the mid-lengths.
- Keep the perimeter softer than a classic 1970s shag.
- Babylights should be scattered, not striped.
- Best on wavy or naturally tousled hair.
- Curtain fringe or bottleneck bangs fit this shape well.
Quick Styling Notes:
A little mousse at the roots and a diffuser can make this haircut come alive. If you want it sleeker, use a flat brush on the crown and let the ends stay piecey.
Equipment for This Look:
- Razor or texturizing shears
- Diffuser attachment
- Mousse
- Curl cream or wave spray
- Wide-tooth comb
How to Wear It:
This is one of those cuts that looks better when it isn’t trying too hard. It works with soft waves, messy buns, and second-day texture. It does not need to be perfect.
Pro Tips for This Cut:
- Keep the layers soft near the crown if your hair is very dense.
- Babylights around the fringe make the whole cut look lighter.
- Use less conditioner at the roots, more on the ends.
Variations on This Cut:
- Soft Shag: Fewer choppy layers for a gentler shape.
- Rockier Shag: More separation and a rougher edge.
- Curly Shag: Keep the layers longer so curls don’t spring too high.
Common Mistakes to Avoid with This Cut:
- Don’t razor the ends too hard if your hair is coarse or dry.
- Don’t overdo the highlights; the shag already has movement.
- Don’t flatten the crown completely, or the cut loses its lift.
6. U-Shaped Cut with Ribbon Babylights
A U-shape sounds small on paper, but on thick hair it makes a real difference. The longer center preserves weight, the sides taper gently, and the whole outline looks softer than a straight line. Ribbon babylights following the curve make the shape read as fluid instead of dense.
Why It Works:
The U-shape keeps length in the back while taking the corners out of the silhouette. Thick hair keeps enough body to support the shape, and the babylights help guide the eye down the center rather than out to the sides.
Key Details:
- The back stays longest, often grazing upper back or collarbone.
- The sides graduate shorter in a soft arc.
- Babylights should follow the U outline, especially at the edges.
- Best if you like to wear your hair down more often than up.
- Great for hair that grows into a heavy wall at the bottom.
Quick Styling Notes:
This cut likes a soft wave through the middle rather than every piece curled the same way. If you tuck one side behind the ear, the U shape becomes easier to see.
Equipment for This Look:
- Cutting shears
- Sectioning clips
- 1.25-inch iron
- Blow dryer
- Light styling cream
How to Wear It:
It’s pretty forgiving. You can wear it straight, blown out, or with loose bend. The center length keeps the whole cut grounded, which is useful if your hair tends to explode in humidity.
Pro Tips for This Cut:
- Ask for babylights that are brighter near the sides and softer in the back.
- Keep the shortest side pieces below the cheekbone if your hair is very full.
- A small amount of smoothing serum on the ends helps the U shape stay visible.
Variations on This Cut:
- Deeper U: More pronounced center length for extra softness.
- Softer Frame: Gentle face-framing pieces without losing the center weight.
- Glossy Finish: Pair it with a subtle toner for a smoother color blend.
Common Mistakes to Avoid with This Cut:
- Don’t let the sides get too short or the U disappears.
- Don’t make the babylights equally bright everywhere; the shape needs contrast.
- Don’t skip a blow-dry if your hair flips outward at the shoulders.
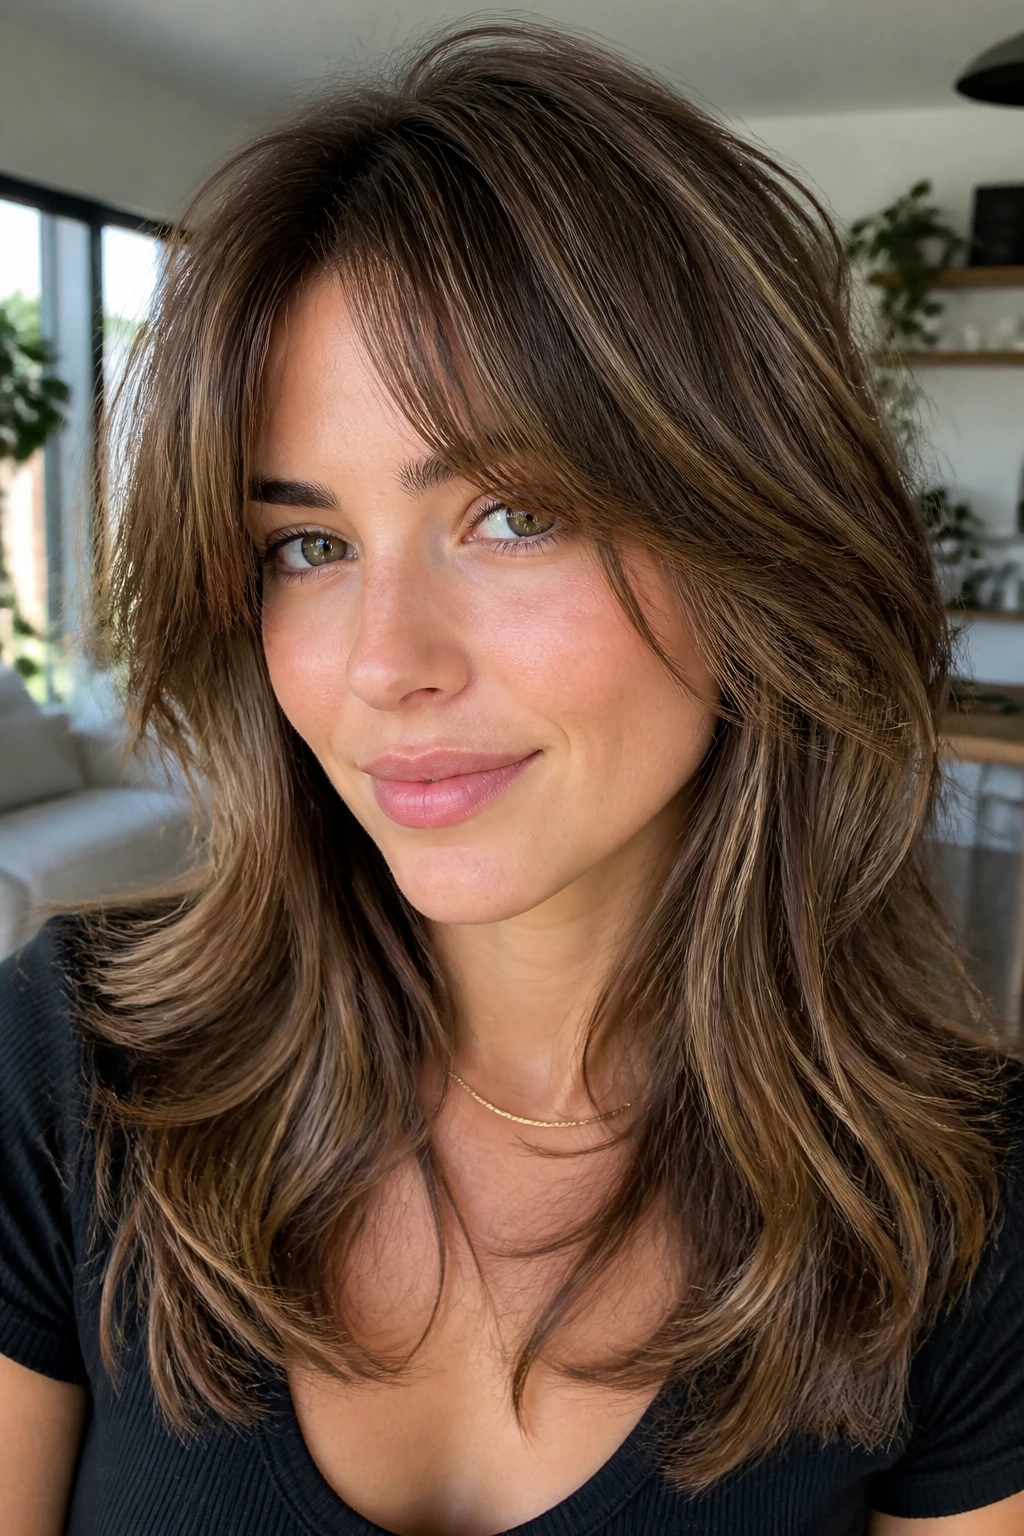
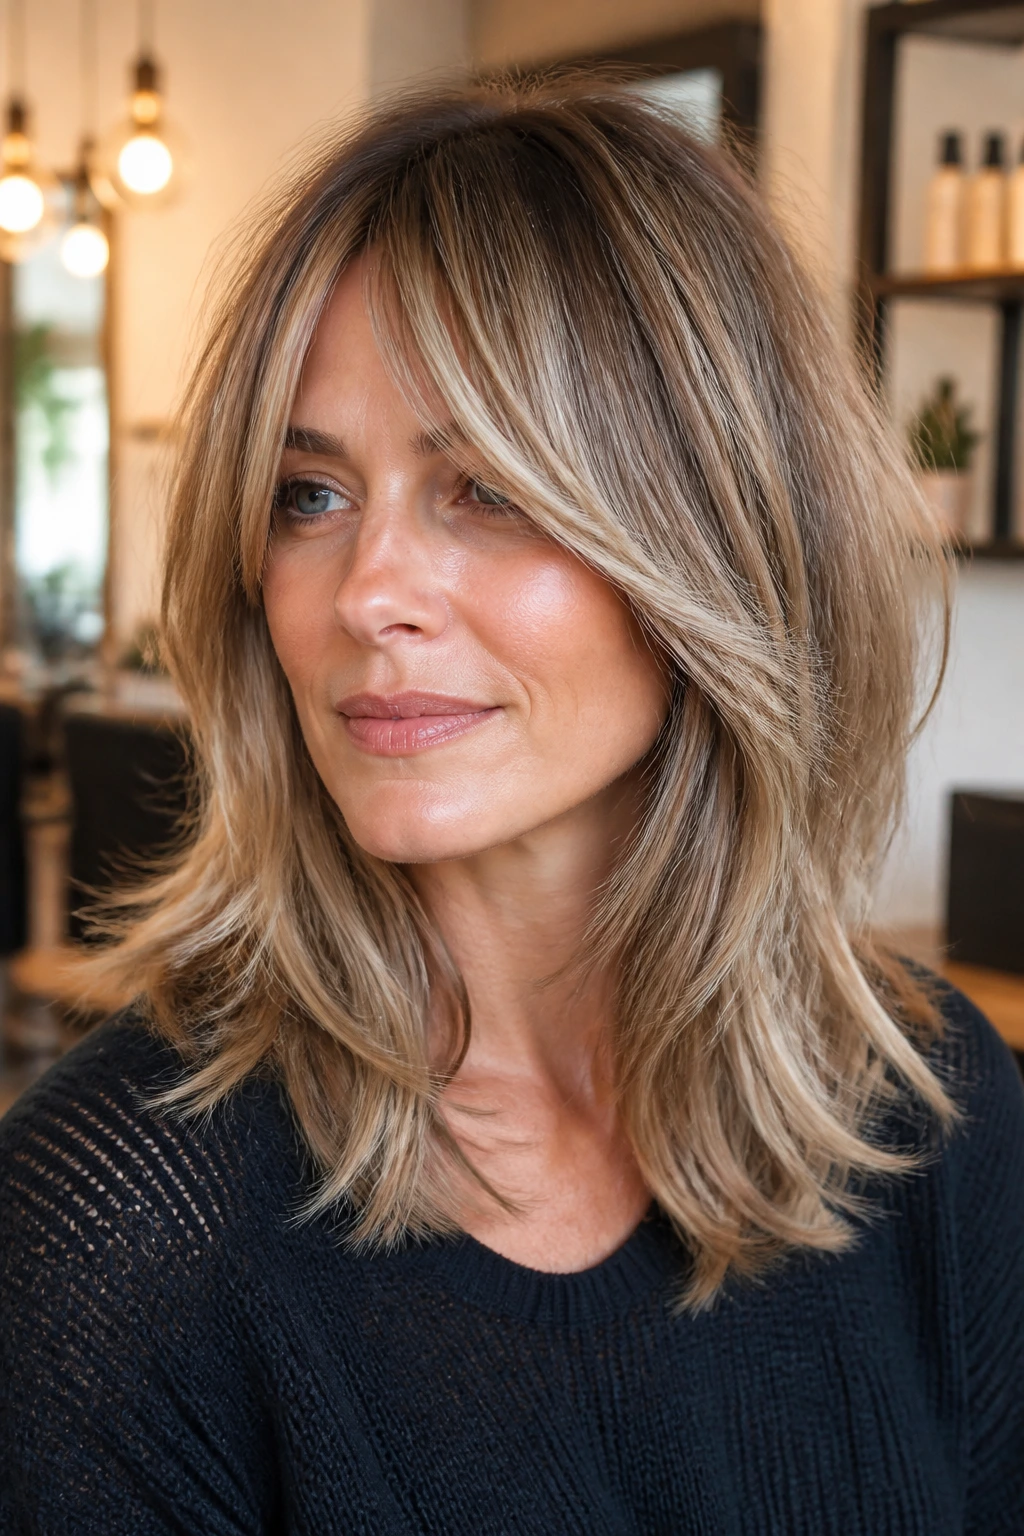
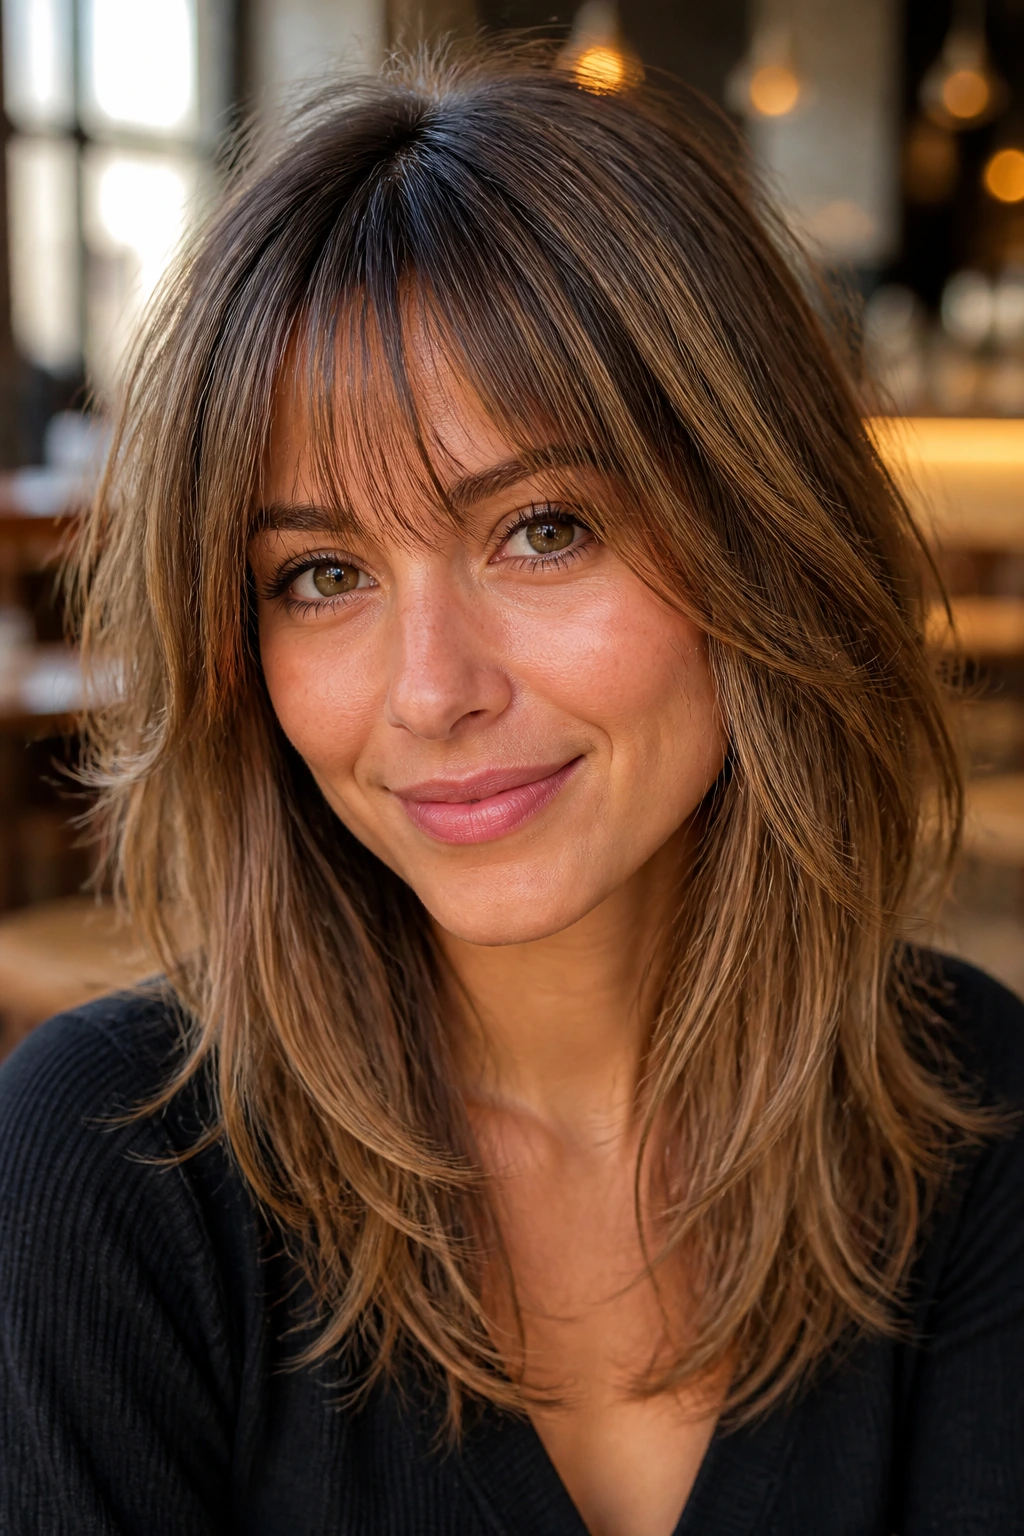
7. Curtain Bangs and Long Layers
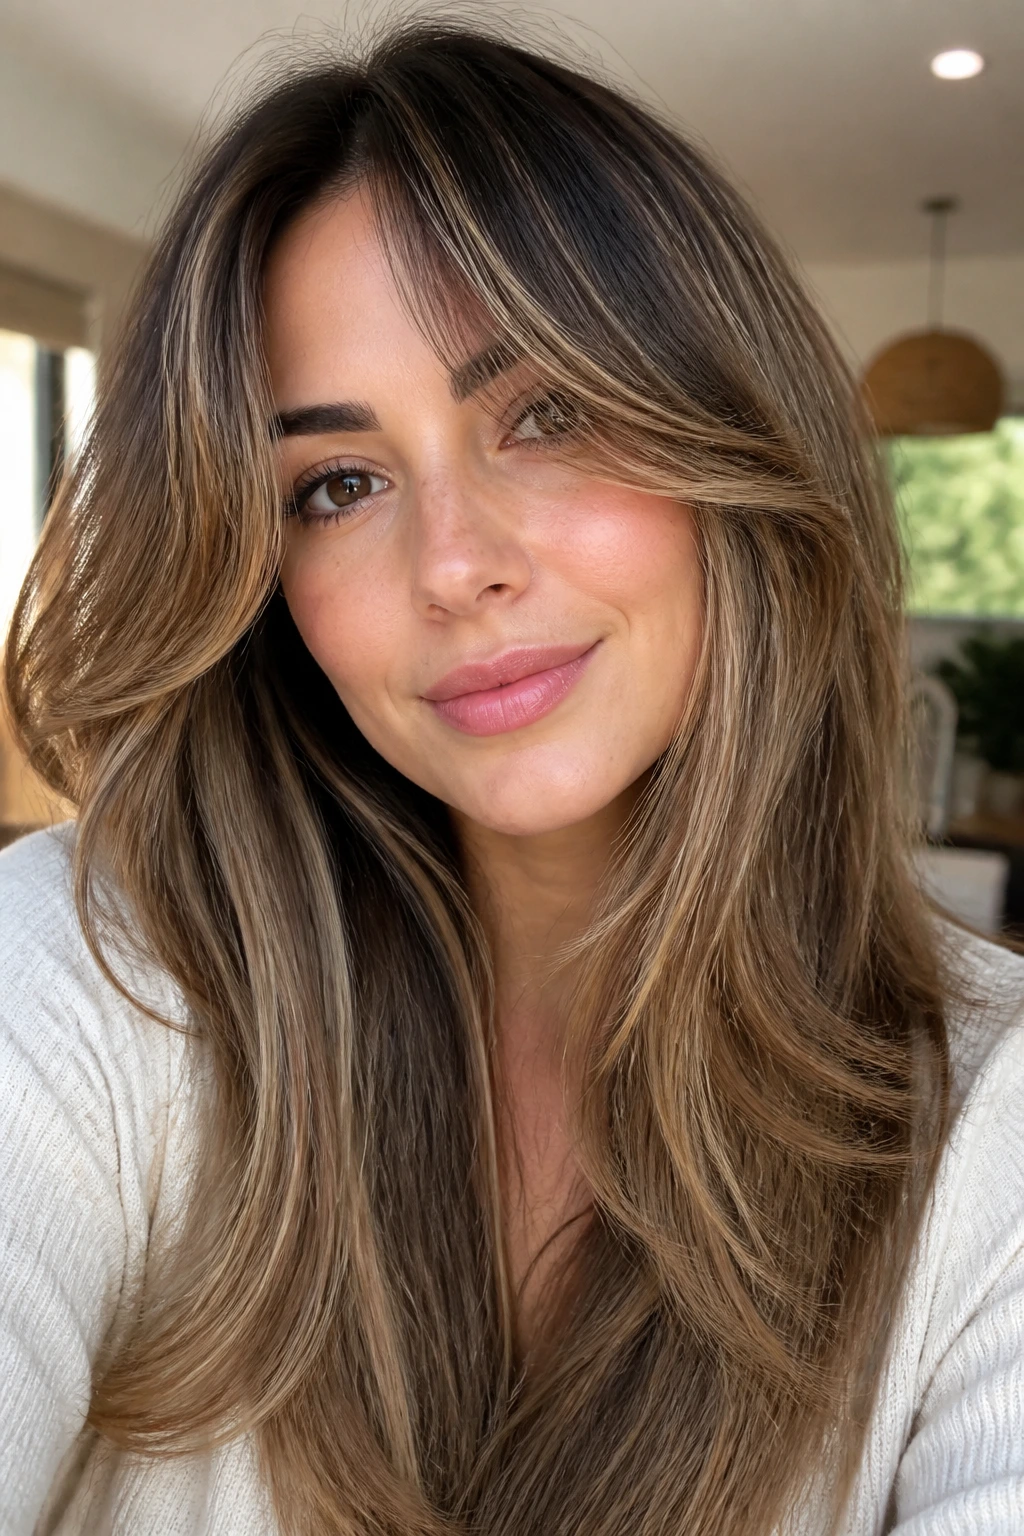
Curtain bangs are popular for a reason: they make thick hair feel lighter at the front without demanding a full fringe commitment. With long layers underneath and babylights around the face, the whole cut softens up in a way that flatters cheekbones and jawlines fast. It’s the kind of haircut that can look relaxed or polished depending on how you style it.
Why It Works:
The bangs carve out space around the forehead, which is useful when dense hair can make the upper half of the head feel crowded. Long layers keep the rest of the length moving, and babylights at the fringe draw light to the eyes instead of the ends.
Key Details:
- Bangs should open near the cheekbone, not stop at the eyebrow.
- Layers should start below the chin so the perimeter keeps some weight.
- Babylights belong around the part and fringe first.
- Best for medium to thick hair with some natural wave.
- Works especially well if you like to tuck hair behind the ears.
Quick Styling Notes:
Use a small round brush or a bend iron on the bangs only. That little bit of movement makes the whole cut look deliberate, not accidental. The rest can stay looser.
Equipment for This Look:
- Small round brush
- Blow dryer
- Lightweight mousse
- Tail comb
- Heat protectant
How to Wear It:
If you want a softer look, let the bangs air-dry and just redirect them with your fingers. If you want more polish, give them a quick blow-dry forward and then split them at the center.
Pro Tips for This Cut:
- Keep the bang density lighter than the rest of the hair.
- Ask for babylights that frame the part, then fade out toward the back.
- Trim bangs a little sooner than the rest of the cut.
Variations on This Cut:
- Longer Curtain Fringe: Easier grow-out, less upkeep.
- Brighter Eye Line: Put the lightest pieces around the cheekbone.
- Soft Blowout Version: Round-brush the layers away from the face.
Common Mistakes to Avoid with This Cut:
- Don’t cut the bangs too thick or they’ll sit like a shelf.
- Don’t overlight the back and ignore the front.
- Don’t let the layers start too high if your hair is very dense.
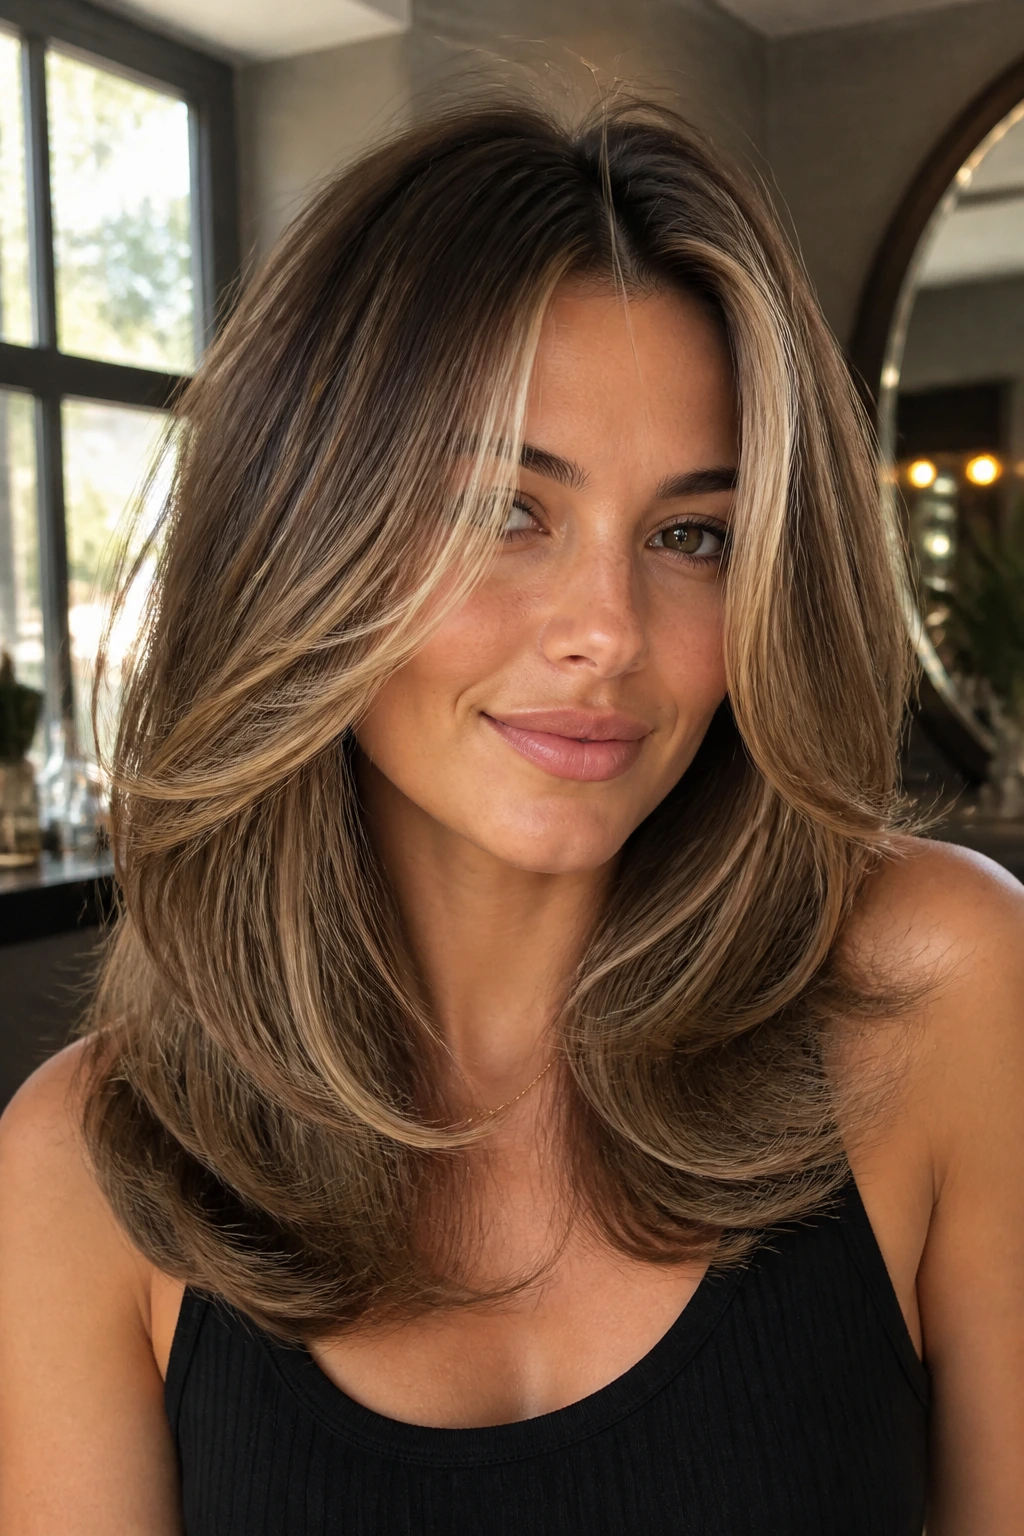
8. Italian Lob with Polished Volume
The Italian lob is a little fuller, a little bouncier, and more polished than a messy lob. Thick hair is a natural fit because the cut uses density as part of the look. Babylights add the kind of soft sparkle that keeps all that volume from reading heavy.
Why It Works:
This style wants roundness, especially through the ends and crown. Thick hair can hold that shape without going flat by lunch, and babylights make the surface look more lifted when the light hits it.
Key Details:
- Length usually lands just above or on the shoulders.
- The silhouette should be full, not skinny.
- Babylights are best placed in the top layers and around the face.
- Best for a round brush finish.
- Works well with a side part or a soft center part.
Quick Styling Notes:
Think smooth, bouncy, and controlled. The ends can flip under slightly, but they should still move. The beauty of this cut is that it looks styled without looking stiff.
Equipment for This Look:
- Round brush
- Blow dryer nozzle
- Velcro rollers or large iron
- Lightweight volumizing mousse
- Heat protectant
How to Wear It:
This cut loves hoop earrings, clean necklines, and a neat sweater. It has a dressed-up feel even when you’re wearing almost nothing else.
Pro Tips for This Cut:
- Keep layers long enough to preserve the rounded silhouette.
- Ask for babylights that brighten the front without streaking the back.
- Use mousse at the roots, not the ends, if you want more body.
Variations on This Cut:
- Softer Italian Lob: Less volume at the crown for a gentler shape.
- Glam Blowout Lob: Larger brush, more bend, more bounce.
- Casual Version: Air-dry with a smoothing cream and finger-twist the ends.
Common Mistakes to Avoid with This Cut:
- Don’t over-texturize the ends or the rounded shape collapses.
- Don’t go too flat at the roots; the cut needs some lift.
- Don’t use chunky highlights, which fight the softness.
9. Soft Wolf Cut with Diffused Highlights
A wolf cut on thick hair can be brilliant or a total mess, and the line between those two is the amount of control in the shape. A soft version keeps the movement, dials down the extreme choppiness, and gives you a lived-in edge without the full mullet effect. Diffused babylights keep the layers from looking harsh.
Why It Works:
Dense hair supports the chopped crown and longer length combo. The trick is keeping the perimeter soft enough that the haircut still feels wearable. Babylights blur the different lengths together, which helps a lot.
Key Details:
- Keep the top layers short enough to lift, but not so short they puff.
- The length should remain below the shoulders.
- Babylights should be faint and broken up, especially through the crown.
- Best for wavy or texture-friendly hair.
- Ask for a softer transition between top and bottom sections.
Quick Styling Notes:
This cut wants a little mess. A touch of mousse, a scrunch, and a diffuser can do more than a full blowout. If you want a sleeker version, smooth the top and leave the ends piecey.
Equipment for This Look:
- Texturizing shears
- Diffuser
- Mousse or wave foam
- Curl cream
- Wide-tooth comb
How to Wear It:
It works with leather jackets, oversized shirts, and anything with a little edge. The shape has attitude, but the soft babylights keep it from turning severe.
Pro Tips for This Cut:
- Keep babylights subtle at the nape so the cut doesn’t feel chopped to pieces.
- Ask for a longer fringe if your forehead is short.
- Refresh with dry shampoo and a few scrunches, not a full wash every time.
Variations on This Cut:
- Cushioned Wolf: Longer, softer layers for a more wearable finish.
- Extra Piecey Version: Add a little more slicing through the ends.
- Low-Contrast Wolf: Babylights only a shade or two lighter than the base.
Common Mistakes to Avoid with This Cut:
- Don’t ask for extreme layers if your hair already frizzes.
- Don’t over-light the top or the crown can look patchy.
- Don’t smooth every strand perfectly; this cut needs some separation.
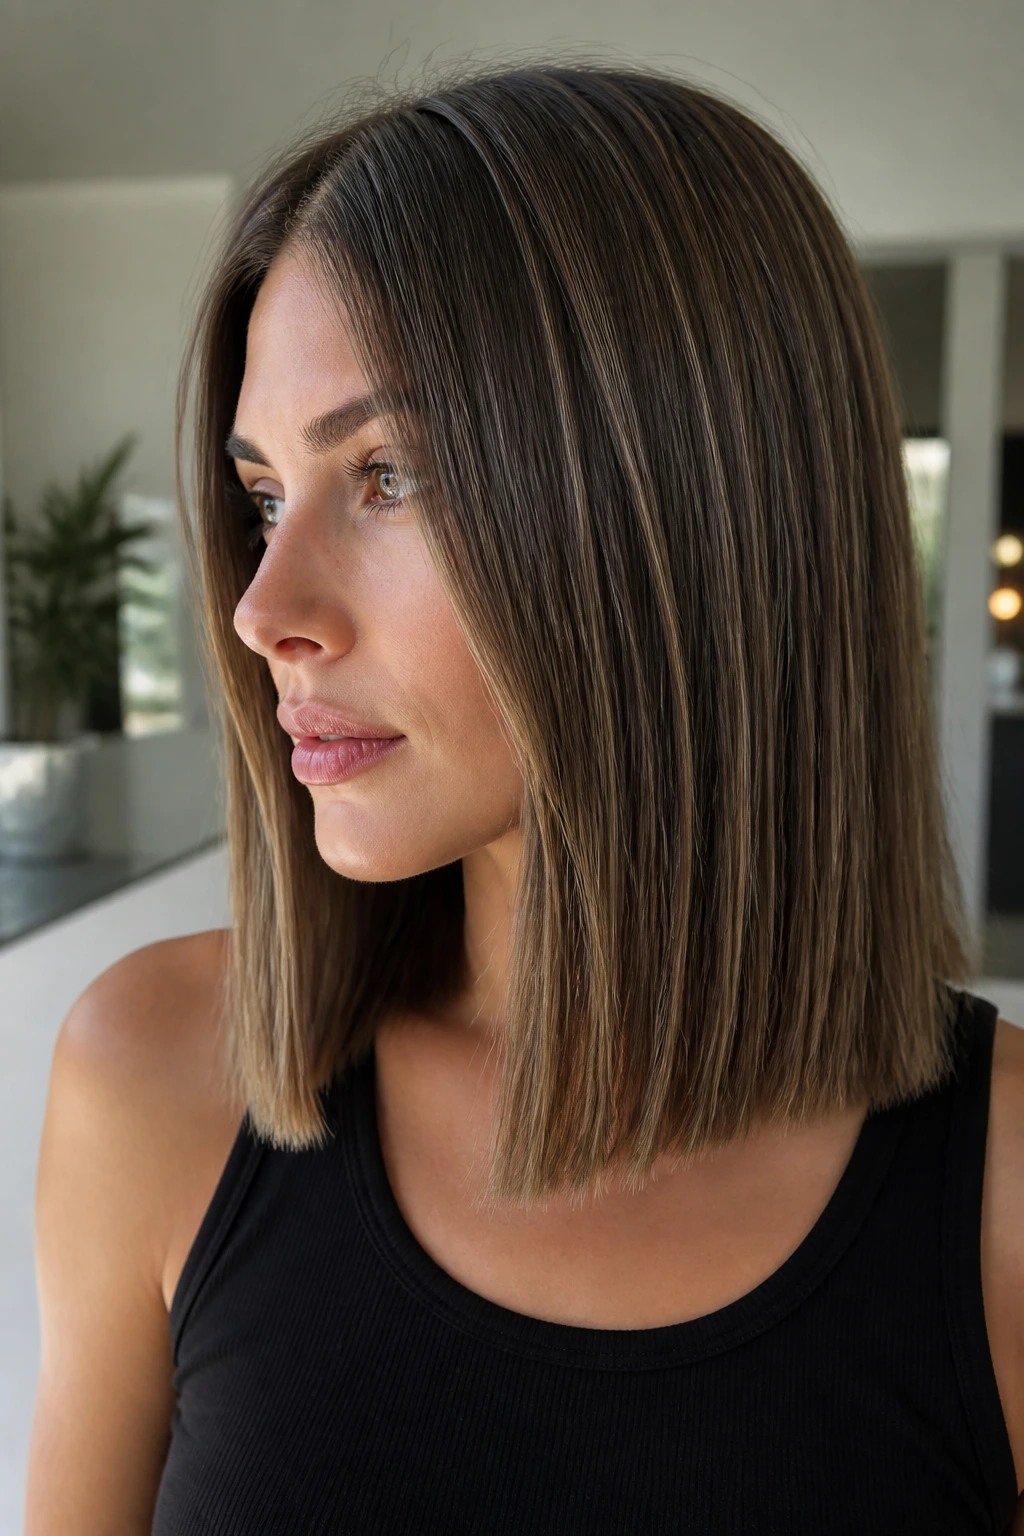
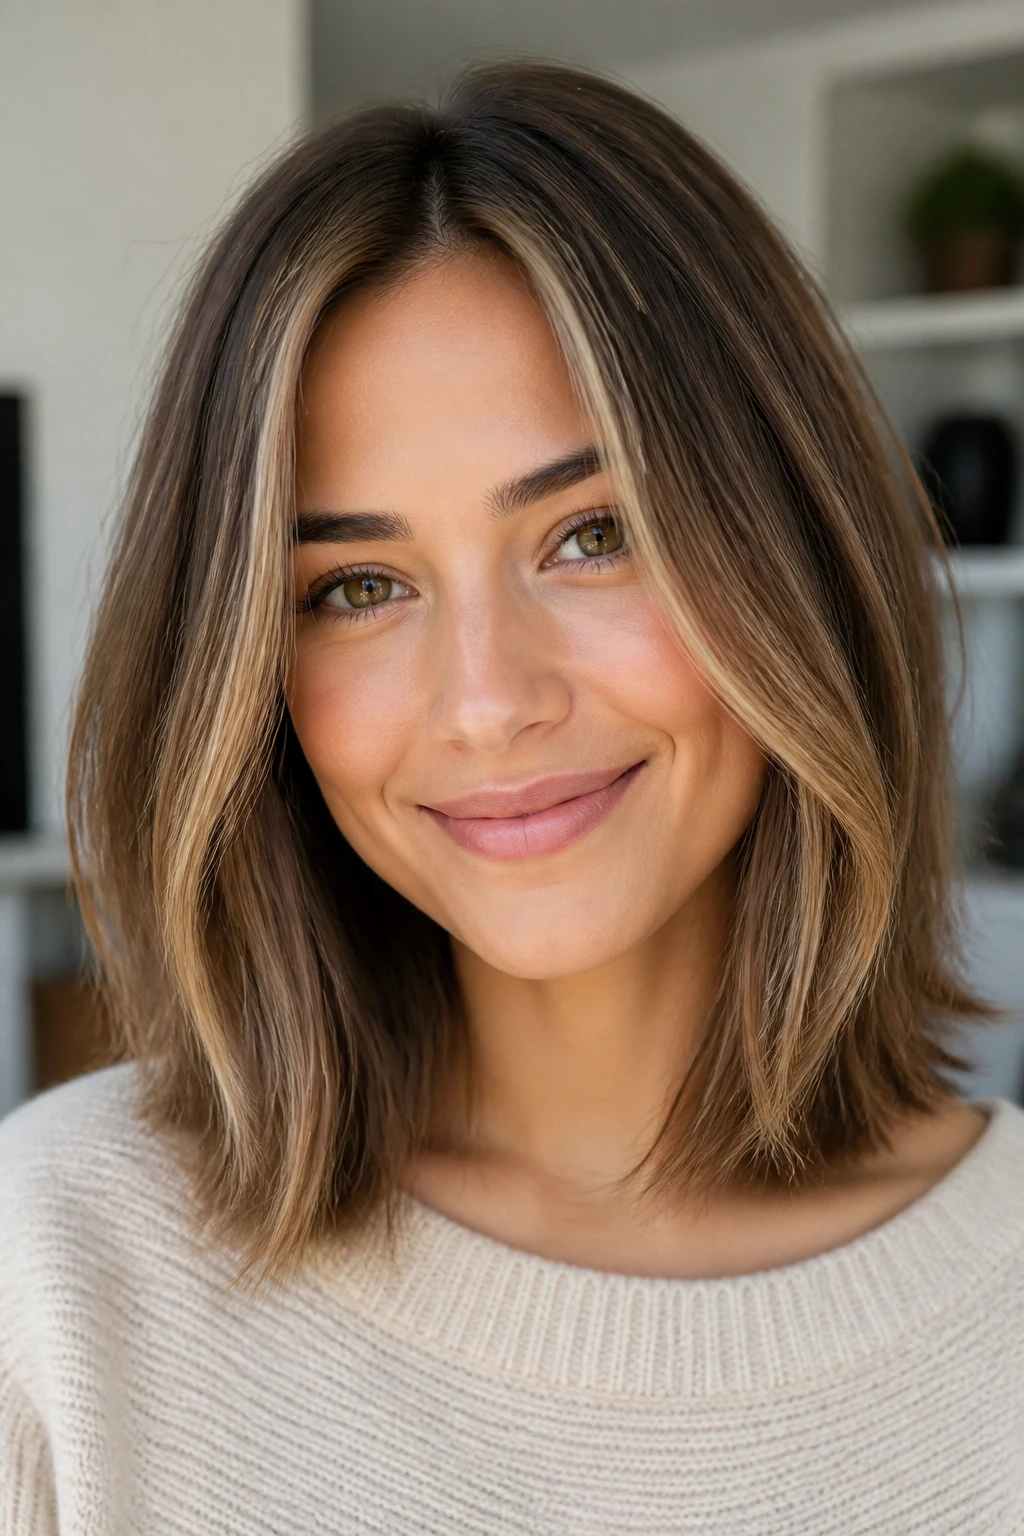
10. One-Length Midi with Hidden Layering
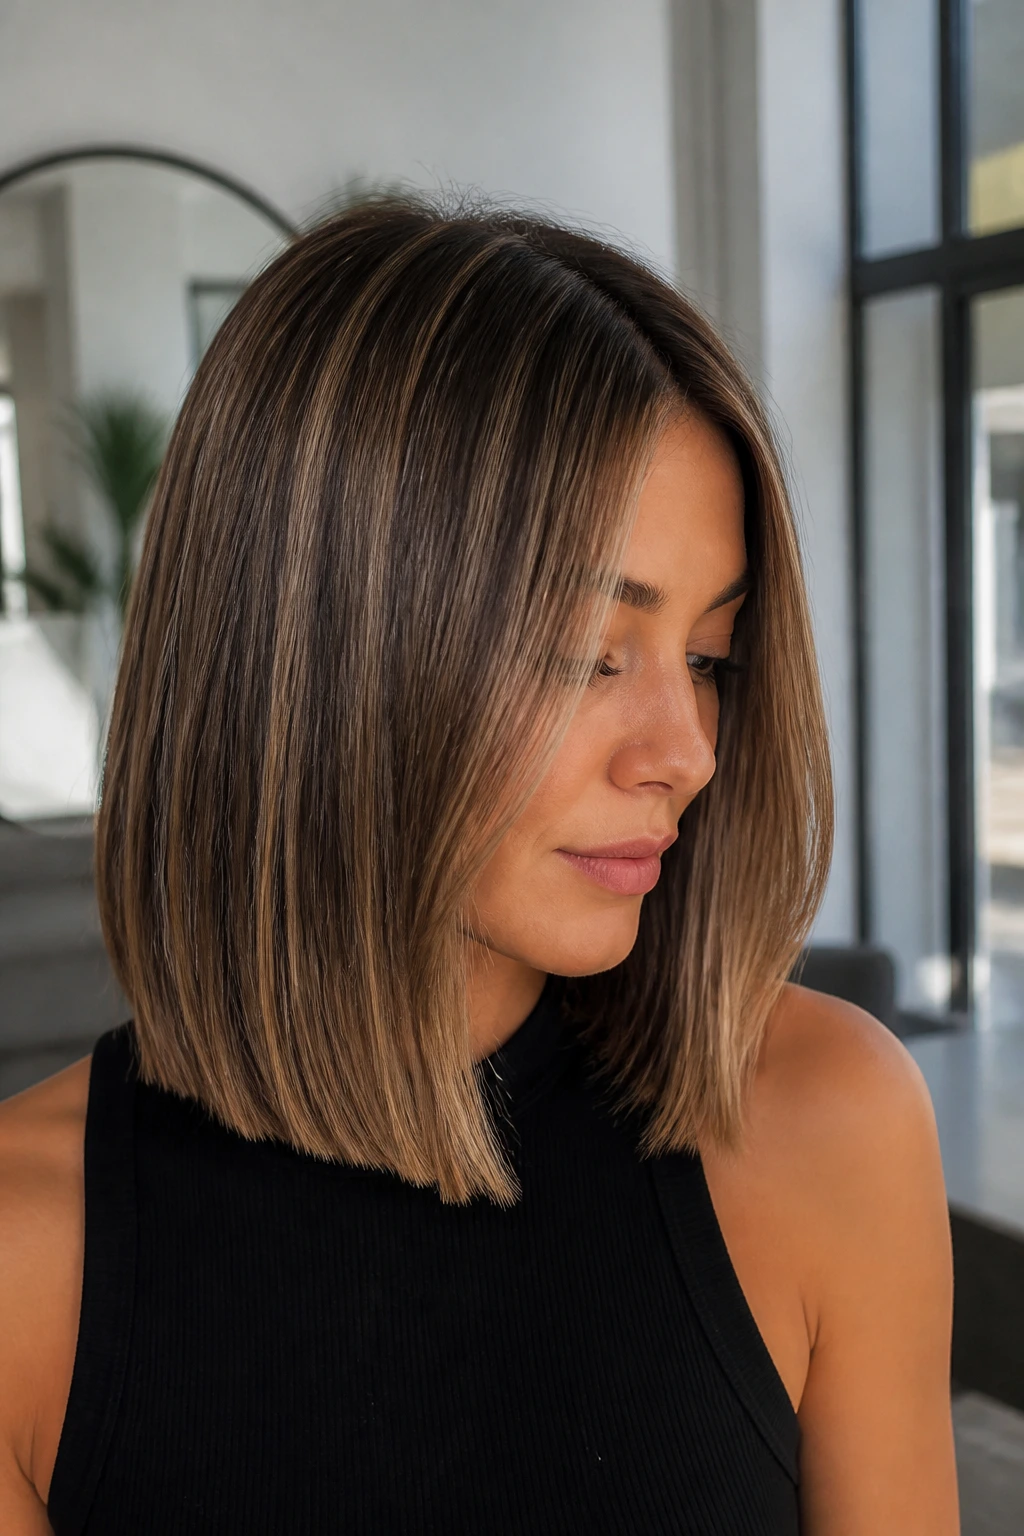
A one-length midi sounds plain until you see it on thick hair with the right color. Then it becomes clean, blunt, and quietly expensive-looking. Hidden layering inside the cut keeps the weight from feeling suffocating, and babylights give the surface enough movement that the blunt edge doesn’t look like a wall.
Why It Works:
The outer line keeps density under control, which is useful if you like a tidy shape. Hidden layers create just enough internal release so thick hair doesn’t wedge outward at the bottom.
Key Details:
- Keep the visible perimeter straight and strong.
- Ask for internal removal only, not obvious exterior layers.
- Babylights should be softer at the underside and brighter near the part.
- Best for people who like easy styling and minimal mess.
- Works on straight hair especially well, but can suit waves too.
Quick Styling Notes:
This cut is easy if you own a decent blow dryer and a brush. The line should stay smooth while the interior does the work. Don’t overdo the curl; it defeats the point.
Equipment for This Look:
- Straight-cut shears
- Paddle brush
- Blow dryer
- Shine serum
- Heat protectant
How to Wear It:
If you want a sharper finish, tuck one side behind the ear. If you want softness, add a loose bend just through the ends. Either way, the silhouette stays strong.
Pro Tips for This Cut:
- Ask your stylist to keep the interior weight removal conservative.
- Keep babylights ultra-fine so the perimeter still reads solid.
- Flatiron only the top layer if you want a faster routine.
Variations on This Cut:
- Softer One-Length: Slight point-cutting at the ends.
- Glossy Midi: Finish with a demi gloss for a glassier surface.
- Side-Part Midi: Adds lift without changing the cut at all.
Common Mistakes to Avoid with This Cut:
- Don’t ask for too many layers or the line loses its point.
- Don’t make babylights wide enough to interrupt the blunt edge.
- Don’t skip smoothing products if your ends flip outward.
11. Choppy Midi with Sliced Ends
A choppy midi gives thick hair a little rebellion, which can be a relief if the usual response to density has been “let’s tame it.” Sliced ends soften the bulk without making the cut look frayed, and babylights add a broken-up texture effect that fits the shape.
Why It Works:
The uneven finish helps thick hair move in sections instead of as one block. Babylights reflect light at different points, which makes the choppiness look intentional rather than accidental.
Key Details:
- Keep the base around shoulder to collarbone length.
- Use point-cutting or slicing to soften the ends.
- Babylights should be scattered through the mid-lengths and ends.
- Best if you like a slightly undone finish.
- Works well on thicker waves and straight hair that holds a bend.
Quick Styling Notes:
A quick wave with a flat iron makes the ends separate nicely. If you want to keep it casual, rough-dry and use a little texture spray through the bottom half.
Equipment for This Look:
- Texturizing shears or razor, if skilled
- Flat iron or wave iron
- Texture spray
- Light mousse
- Heat protectant
How to Wear It:
This cut feels easy with a denim jacket, boots, or anything a little rough around the edges. It’s not fussy. That’s the point.
Pro Tips for This Cut:
- Keep the choppiness strongest in the lower third of the cut.
- Ask for babylights that are brighter on the ends, softer near the roots.
- Use a light hand with finishing cream or the texture gets weighed down.
Variations on This Cut:
- Piecey Choppy Midi: More separated ends for extra movement.
- Smoothed Choppy Version: Less texture, more shape.
- Lighter Front Fringe: Add soft face framing without changing the base.
Common Mistakes to Avoid with This Cut:
- Don’t slice the ends too aggressively or they’ll look ragged.
- Don’t overload the hair with heavy cream.
- Don’t place babylights in big panels; this cut needs irregularity.
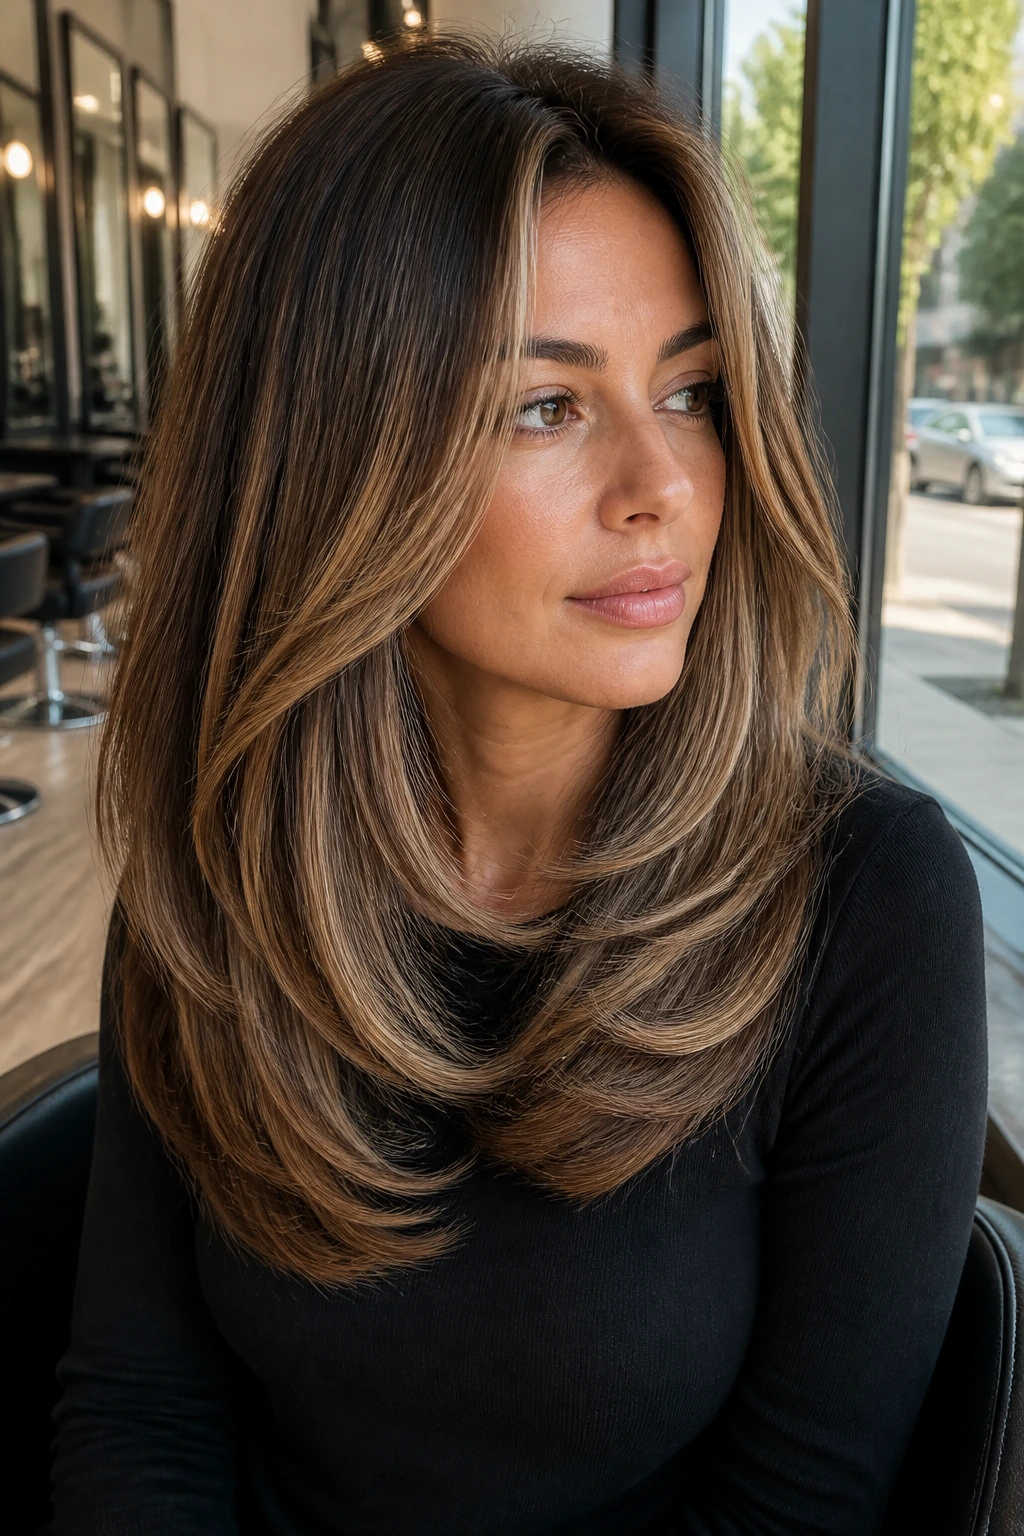
12. Rounded Layers with a Deep Side Part
Rounded layers give thick hair a shape that follows the head instead of spreading outward. Add a deep side part and the crown gets a lift that makes the whole thing feel richer and softer. Babylights around the higher side and face frame pull the eye upward, which is a nice trick on fuller hair.
Why It Works:
The round shape keeps volume balanced from root to end. A deep side part breaks up the symmetry, which is useful when hair density is so high that even a good haircut can look too uniform.
Key Details:
- Layers should curve in an arc, not fall in straight steps.
- Keep the longest layer around the collarbone or just below.
- Babylights should brighten the high side of the part and the front.
- Best for round, oval, and square faces.
- Particularly good if your hair gets flat at the crown.
Quick Styling Notes:
A side part plus round brush root lift can do a lot here. You don’t need a ton of curling; the shape itself gives movement. If you do wave it, keep the waves broad and loose.
Equipment for This Look:
- Round brush
- Root-lift spray
- Blow dryer
- Large clips for setting the part
- Light hairspray
How to Wear It:
This one can feel very polished with a tucked side and a clean neckline. It also works as a casual “I brushed it and left” haircut, which is rare for thick hair.
Pro Tips for This Cut:
- Move the part a half-inch if the crown falls flat.
- Ask for babylights on the part line, not only the face frame.
- Keep the layers soft through the lower half to maintain the rounded shape.
Variations on This Cut:
- Soft Side-Sweep: A more gentle part for everyday wear.
- Drama Part: Deeper part, more lift, more shape.
- Rounded Blowout: Smooth the layers under with a medium brush.
Common Mistakes to Avoid with This Cut:
- Don’t place the part too far over if your hair has a strong cowlick.
- Don’t over-layer the crown or it gets fluffy.
- Don’t use highlights that only live around the hairline; the part needs brightness too.
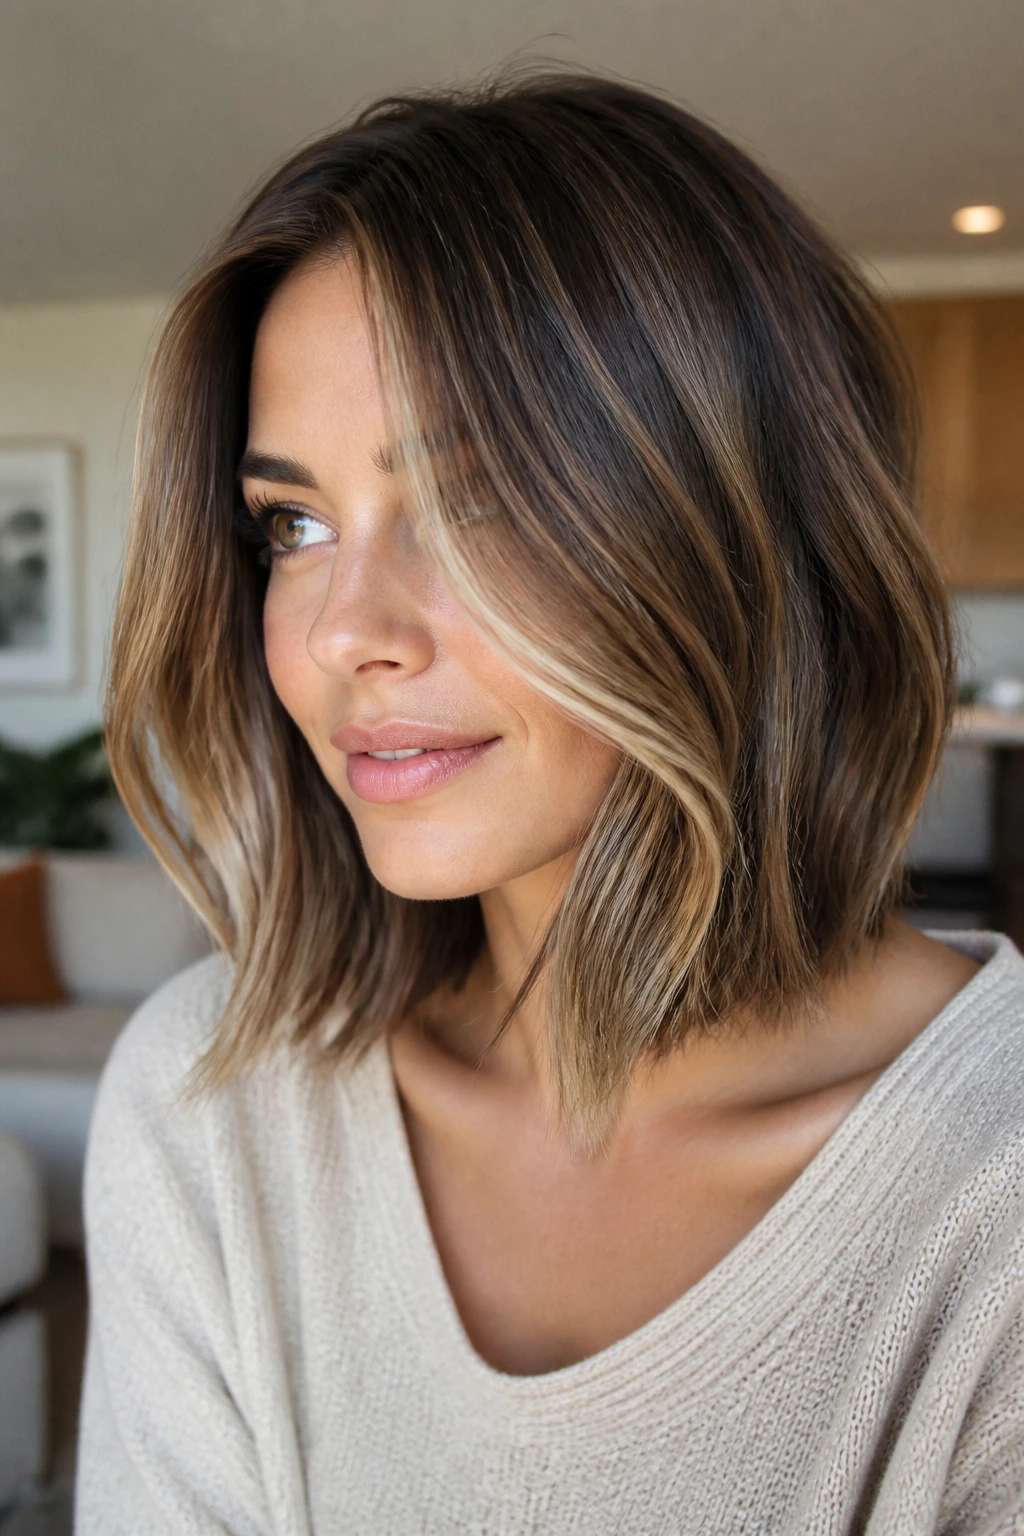
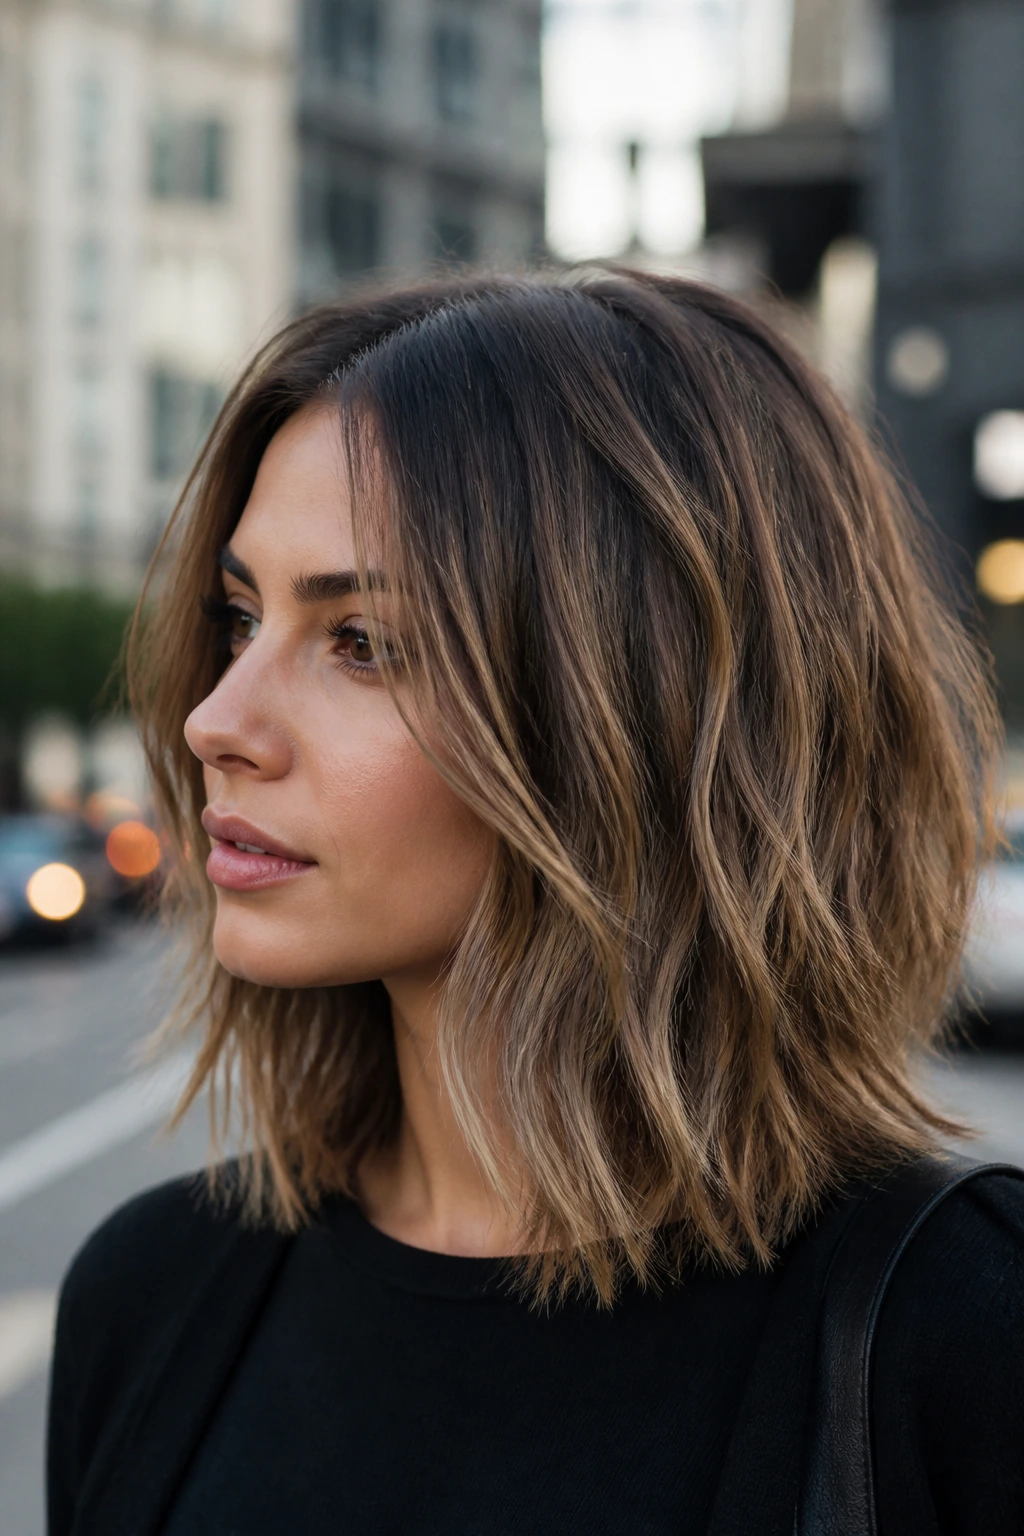
13. Tousled Lob with Piecey Ends
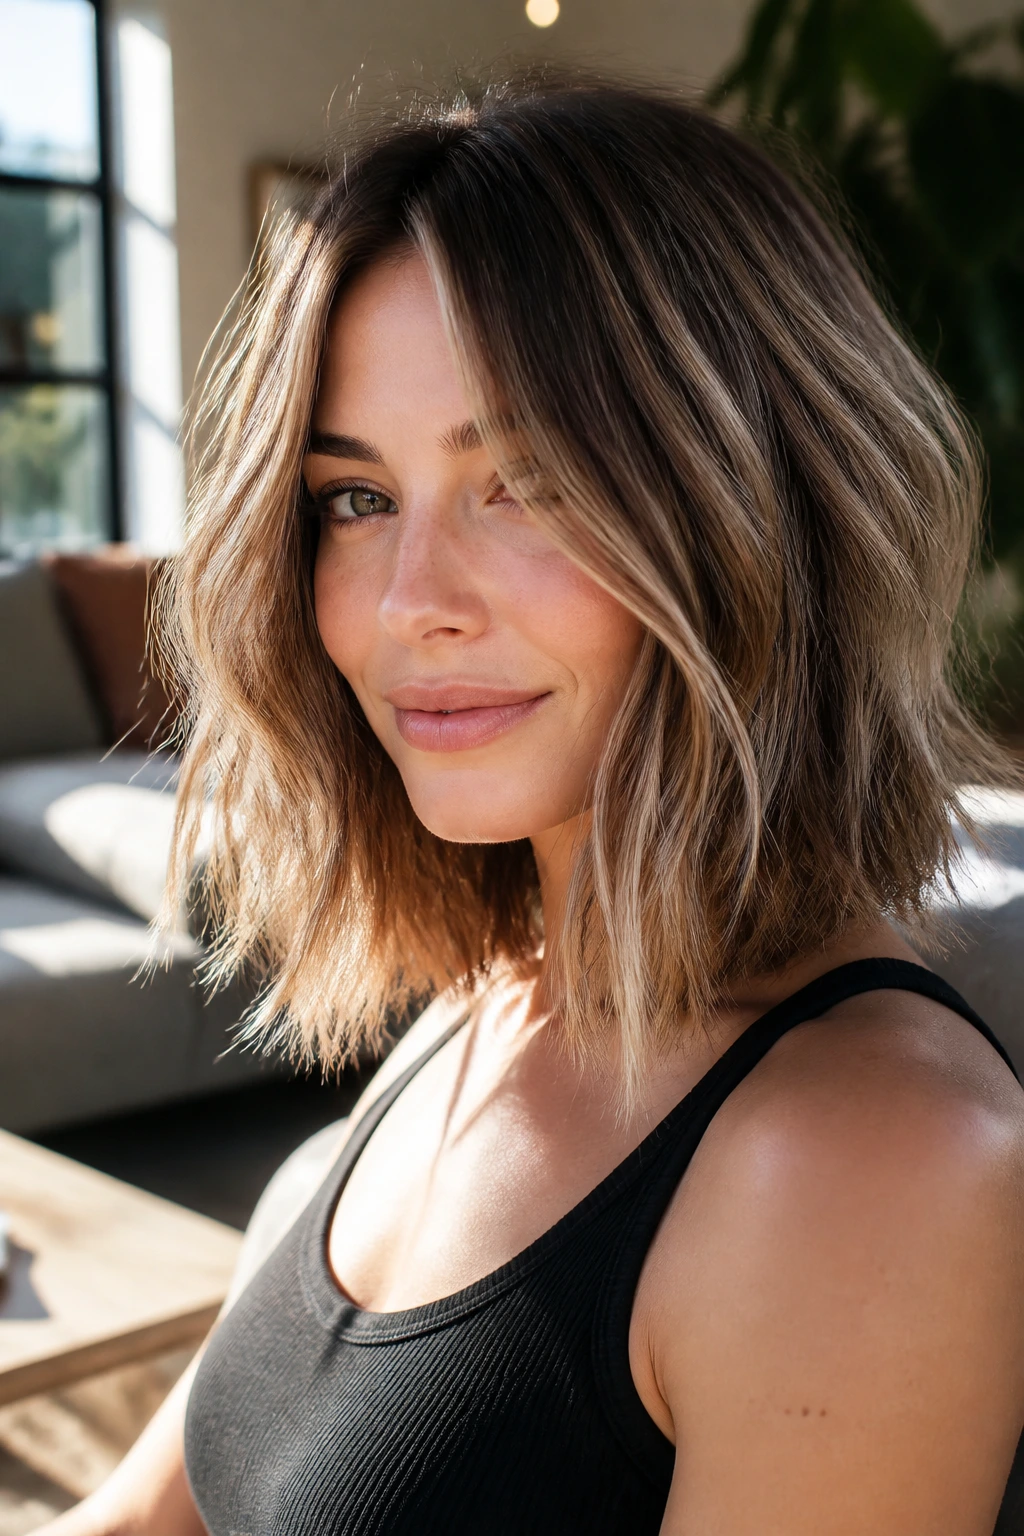
The tousled lob is a safe place for thick hair to look relaxed without looking messy in the wrong way. The ends stay piecey, the length stays manageable, and the babylights make the bends look lived-in instead of blunt. This is one of the easiest cuts to wear with natural texture.
Why It Works:
A lob gives thick hair enough length to lie down a little, but not so much that the shape drags. Piecey ends stop the base from turning heavy, and babylights scattered through the mid-lengths create the sense of movement.
Key Details:
- Length usually lands just at or below the shoulders.
- Ends should be soft and broken, not thick and square.
- Babylights should be woven in loose ribbons through the top and sides.
- Best for natural waves and easy air-dry routines.
- Great if you want a cut that doesn’t demand a full blowout.
Quick Styling Notes:
Scrunch in a light mousse, dry halfway, then use a wand on random sections. The trick is not to curl everything. A few imperfect waves make the babylights look far better.
Equipment for This Look:
- Wave wand or iron
- Mousse
- Texture spray
- Wide-tooth comb
- Diffuser, optional
How to Wear It:
Wear it tucked on one side, half pulled back, or down and loose. It’s one of the most adaptable cuts in this whole group, which is why it shows up so often in good salons.
Pro Tips for This Cut:
- Leave a few ends straighter so the texture doesn’t look overworked.
- Ask for babylights that are slightly brighter on the outer layer.
- Keep the wave pattern broad, not tight.
Variations on This Cut:
- Beachy Tousled Lob: More texture spray, less polish.
- Sleek Tousled Lob: Smooth the top and leave only the ends piecey.
- Brighter Outer Shell: Lighten the outer layer more for extra dimension.
Common Mistakes to Avoid with This Cut:
- Don’t curl every section the same direction.
- Don’t over-texturize the ends until they fray.
- Don’t let babylights get too even; the cut needs randomness.
14. Midi Shag with Bottleneck Bangs
Bottleneck bangs are a smart choice on thick hair because they open at the center and widen softly toward the cheekbones. Paired with a midi shag, they create movement without the heavy fringe line that can box in the face. Babylights around the fringe make the whole cut feel lighter from the first glance.
Why It Works:
The bangs carve softness into the front, while the midi length keeps the rest of the hair from getting too floaty. Thick hair carries this shape well, and the babylights help the layers separate visually.
Key Details:
- Fringe should start narrower at the center and open outward.
- Keep the midi length around collarbone to shoulder level.
- Layers should be soft and slightly disconnected.
- Babylights belong around the bangs, cheekbones, and upper layers.
- Best for people who want fringe without a heavy forehead curtain.
Quick Styling Notes:
The bangs need their own styling pass. A small brush or bend iron helps them curve away from the face. The rest can stay looser and more textured.
Equipment for This Look:
- Small round brush
- Blow dryer
- Texturizing shears
- Light styling cream
- Heat protectant
How to Wear It:
This cut looks especially good with glasses or strong brows because the fringe opens the face instead of hiding it. It has enough edge for casual wear and enough structure for dressier outfits.
Pro Tips for This Cut:
- Keep the fringe a touch longer if your hairline is strong.
- Ask for babylights concentrated around the fringe and crown.
- Dry the bangs first so they don’t separate badly later.
Variations on This Cut:
- Softer Bottleneck Fringe: Longer opening around the eyes.
- Messier Midi Shag: More texture, less polish.
- Face-Brightened Version: Extra light just around the front pieces.
Common Mistakes to Avoid with This Cut:
- Don’t cut the fringe too blunt or it can get bulky.
- Don’t overlight the underlayers if you want softness.
- Don’t skip maintenance on the bangs; they show their shape fast.
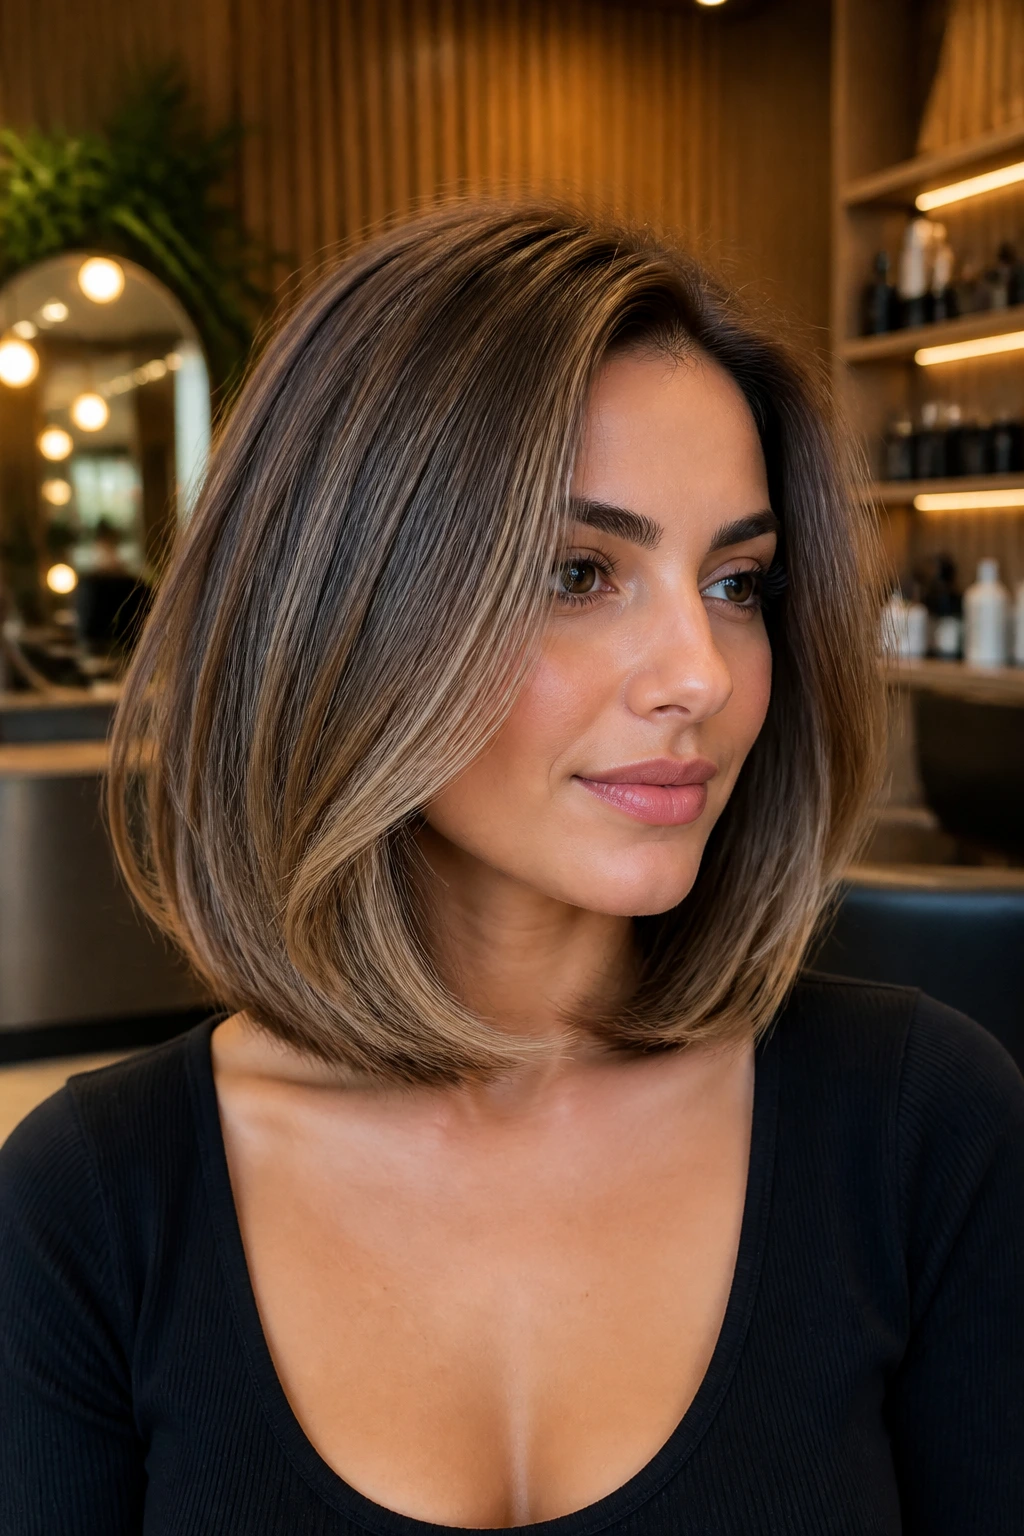
15. Angled Lob with Brighter Money Piece
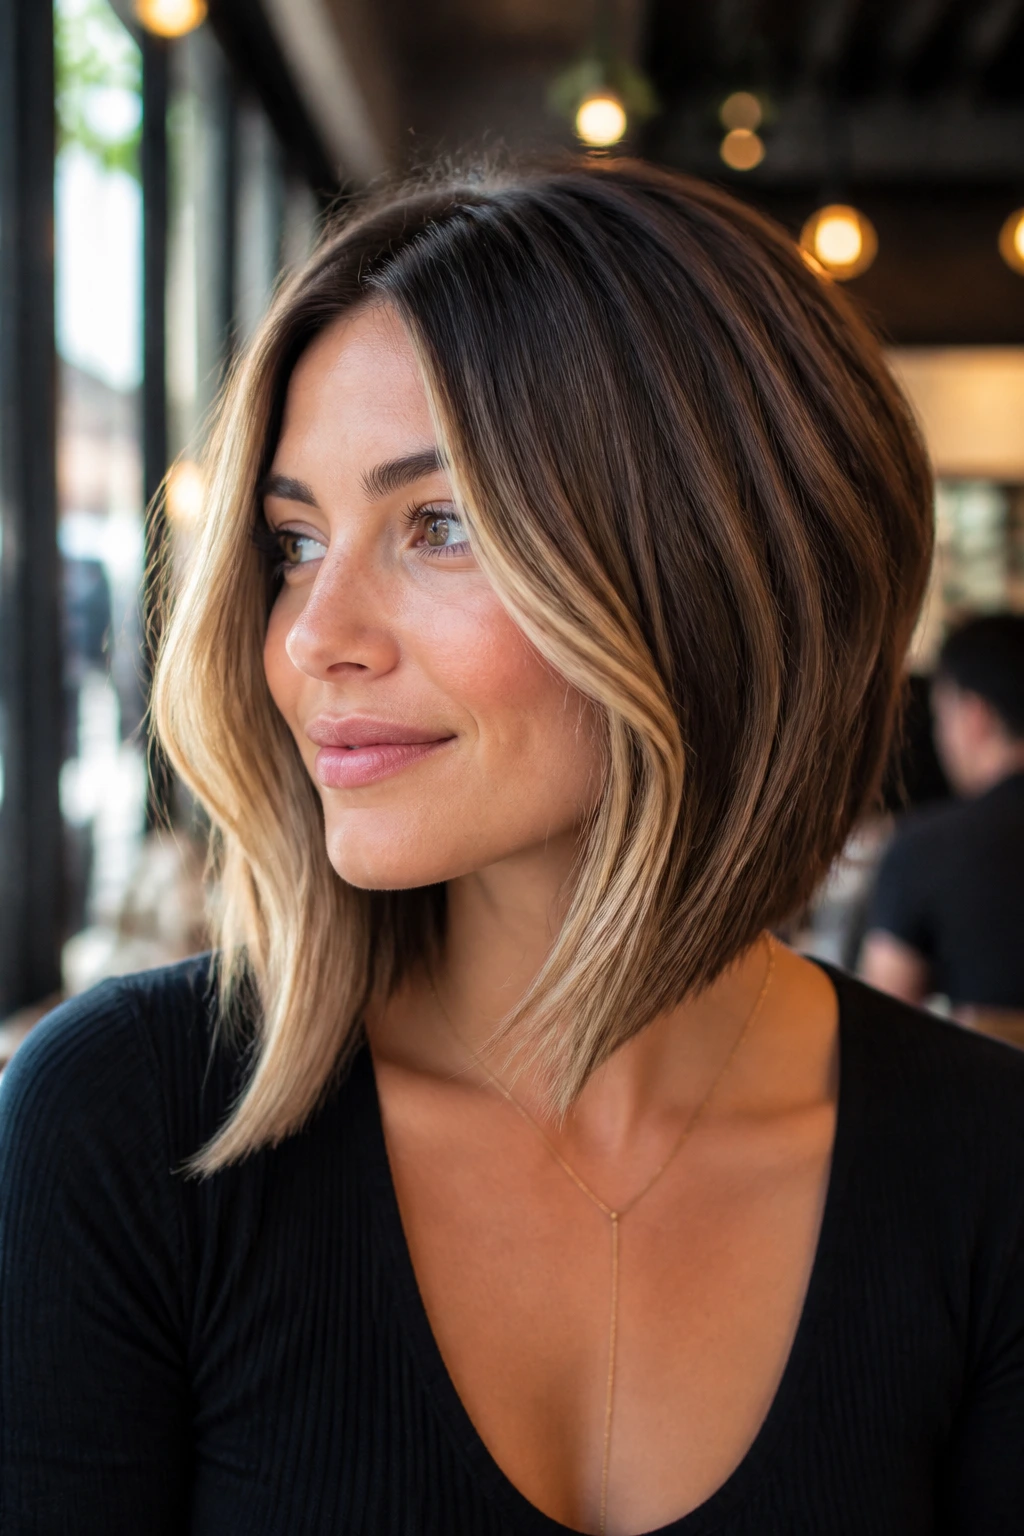
An angled lob gives thick hair a little forward motion. The front pieces sit longer, the back stays more compact, and that slope creates a clean line that babylights can follow beautifully. A brighter money piece up front adds just enough contrast to keep the cut from feeling weighty.
Why It Works:
The angle lifts the eye, which is useful when dense hair can pull attention straight down. The longer front length slims the jawline visually, while the brighter face frame keeps the haircut from looking too solid.
Key Details:
- Front pieces should hit below the collarbone.
- The back should be slightly shorter, not stacked aggressively.
- Babylights should be concentrated in the front and upper sides.
- Best if you want shape without lots of layers.
- Works especially well on straight and softly wavy hair.
Quick Styling Notes:
This haircut looks strongest with a smooth finish and a tucked one-side style. If you wave it, keep the front pieces looser so the angle still shows.
Equipment for This Look:
- Straight shears
- Round brush
- Blow dryer
- 1.25-inch iron
- Shine spray
How to Wear It:
It feels sharp with a blouse, blazer, or high neck, because the longer front pieces frame the face. If you wear it with a center part, the angle is subtler; with a side part, it’s more obvious.
Pro Tips for This Cut:
- Keep the angle gentle if your hair already has a lot of volume.
- Ask for the brightest babylights at the front only.
- Trim the back cleanly so the slope stays readable.
Variations on This Cut:
- Soft Angle: Barely-there slope for an easier grow-out.
- Contrast Front Piece: Brighter face frame, darker interior.
- Smooth Angled Lob: Flat brush blowout for a crisp silhouette.
Common Mistakes to Avoid with This Cut:
- Don’t stack the back too high; it can look dated fast.
- Don’t overlight the back and lose the directional effect.
- Don’t let the front layers get too short or they spring out.
16. Feathery Layers with a C-Shape Face Frame
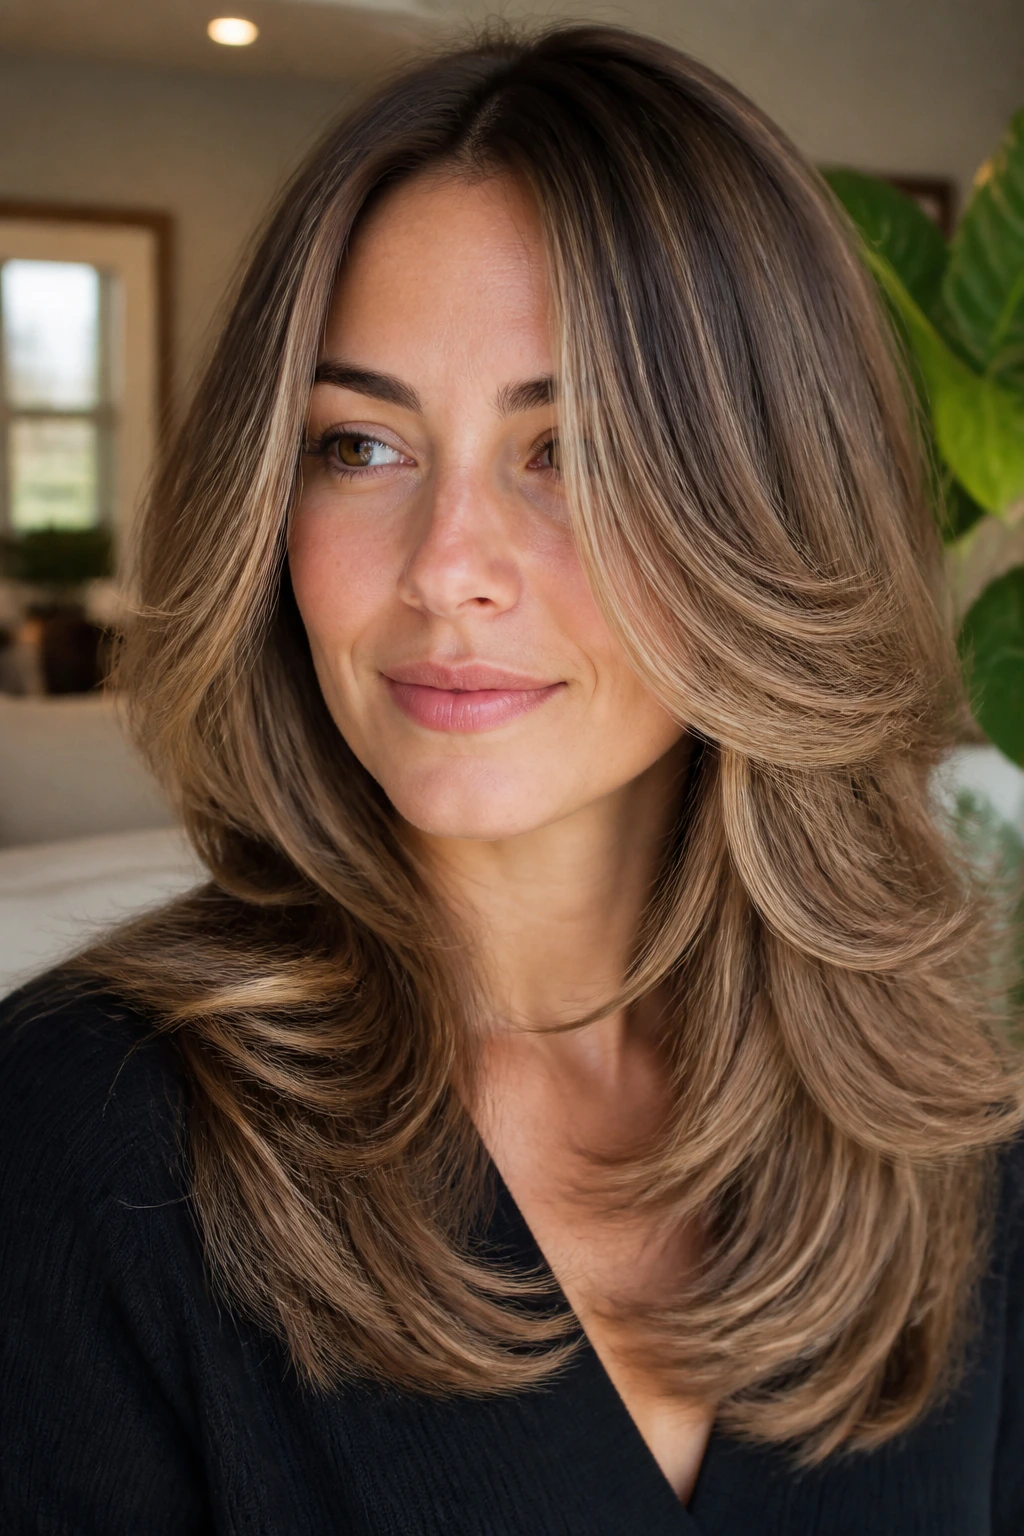
Feathery layers are underrated on thick hair because they move without making the haircut look chopped apart. The C-shape face frame curves from cheekbone to collarbone, which softens the front of the haircut in a way that’s flattering and easy to wear. Babylights painted along those arcs make the shape even clearer.
Why It Works:
The feathering lightens the bulk, but the overall silhouette still feels controlled. Thick hair handles this kind of layer blend well, and the babylights keep the layered edges from disappearing into each other.
Key Details:
- Layers should taper softly instead of stopping in hard lines.
- The face frame should curve in a C, not a straight diagonal.
- Babylights should trace the curve around the face and top layers.
- Best for people who want softness more than edge.
- Great with side parts or soft center parts.
Quick Styling Notes:
A medium round brush or even a hot brush can make this finish easy. Keep the ends soft and feathered out; don’t push them too inward or you lose the airy feeling.
Equipment for This Look:
- Round brush
- Blow dryer
- Hot brush, optional
- Light smoothing cream
- Texturizing spray
How to Wear It:
This is an easy everyday cut. It looks nice with a scarf, a collar, or a simple T-shirt because the frame around the face does enough work on its own.
Pro Tips for This Cut:
- Ask for the shortest front pieces to start around the cheekbone.
- Keep babylights soft at the ends so the feathering stays visible.
- Use a lightweight finishing spray, not heavy oil.
Variations on This Cut:
- Long Feather Version: Even softer, with less visible layering.
- More Defined C-Frame: Stronger curve toward the jawline.
- Blended Bob-Lob Version: Slightly shorter for more lift.
Common Mistakes to Avoid with This Cut:
- Don’t chop the face frame too short or it turns fluffy.
- Don’t use thick highlight panels that fight the feathered look.
- Don’t overcurl the ends; feathering needs motion, not spirals.
17. Sliced Blunt Cut with Texture
A sliced blunt cut sounds contradictory, and that’s exactly why it works on thick hair. The outline stays blunt enough to feel strong, but the inside is gently sliced so the mass doesn’t sit like a block. Babylights add another layer of texture, especially if they’re placed with a light hand.
Why It Works:
Thick hair often needs the stability of a blunt edge. Slicing removes the hidden bulk without making the haircut look thin. Babylights help the surface feel broken up, which makes the cut look more expensive than plain one-length hair.
Key Details:
- Keep the outline straight and intentional.
- Use slicing only inside the shape, not around the perimeter.
- Babylights should be scattered, especially through the crown and front.
- Best if you want polish with a little air underneath.
- Works well on straight or slightly wavy hair.
Quick Styling Notes:
This cut is one of the fastest to smooth into place. A paddle brush and a quick bend at the ends are enough. If you want a bit more style, wave just the front.
Equipment for This Look:
- Shears
- Styling razor, optional
- Paddle brush
- Blow dryer
- Smoothing serum
How to Wear It:
It looks neat and grown-up without feeling stiff. If you wear statement earrings or sharp jackets, this shape supports them nicely.
Pro Tips for This Cut:
- Keep the slice marks hidden inside the hair.
- Ask for babylights that brighten the top surface only slightly.
- Trim often enough that the blunt outline stays crisp.
Variations on This Cut:
- Softer Slice: Slightly more movement through the mid-lengths.
- Sharper Blunt: Less slicing, cleaner edge.
- Dimensional Finish: Add a subtle lowlight for contrast.
Common Mistakes to Avoid with This Cut:
- Don’t over-slice or the ends get wispy and weak.
- Don’t overlight the whole head; the shape should stay strong.
- Don’t let the perimeter go ragged between trims.
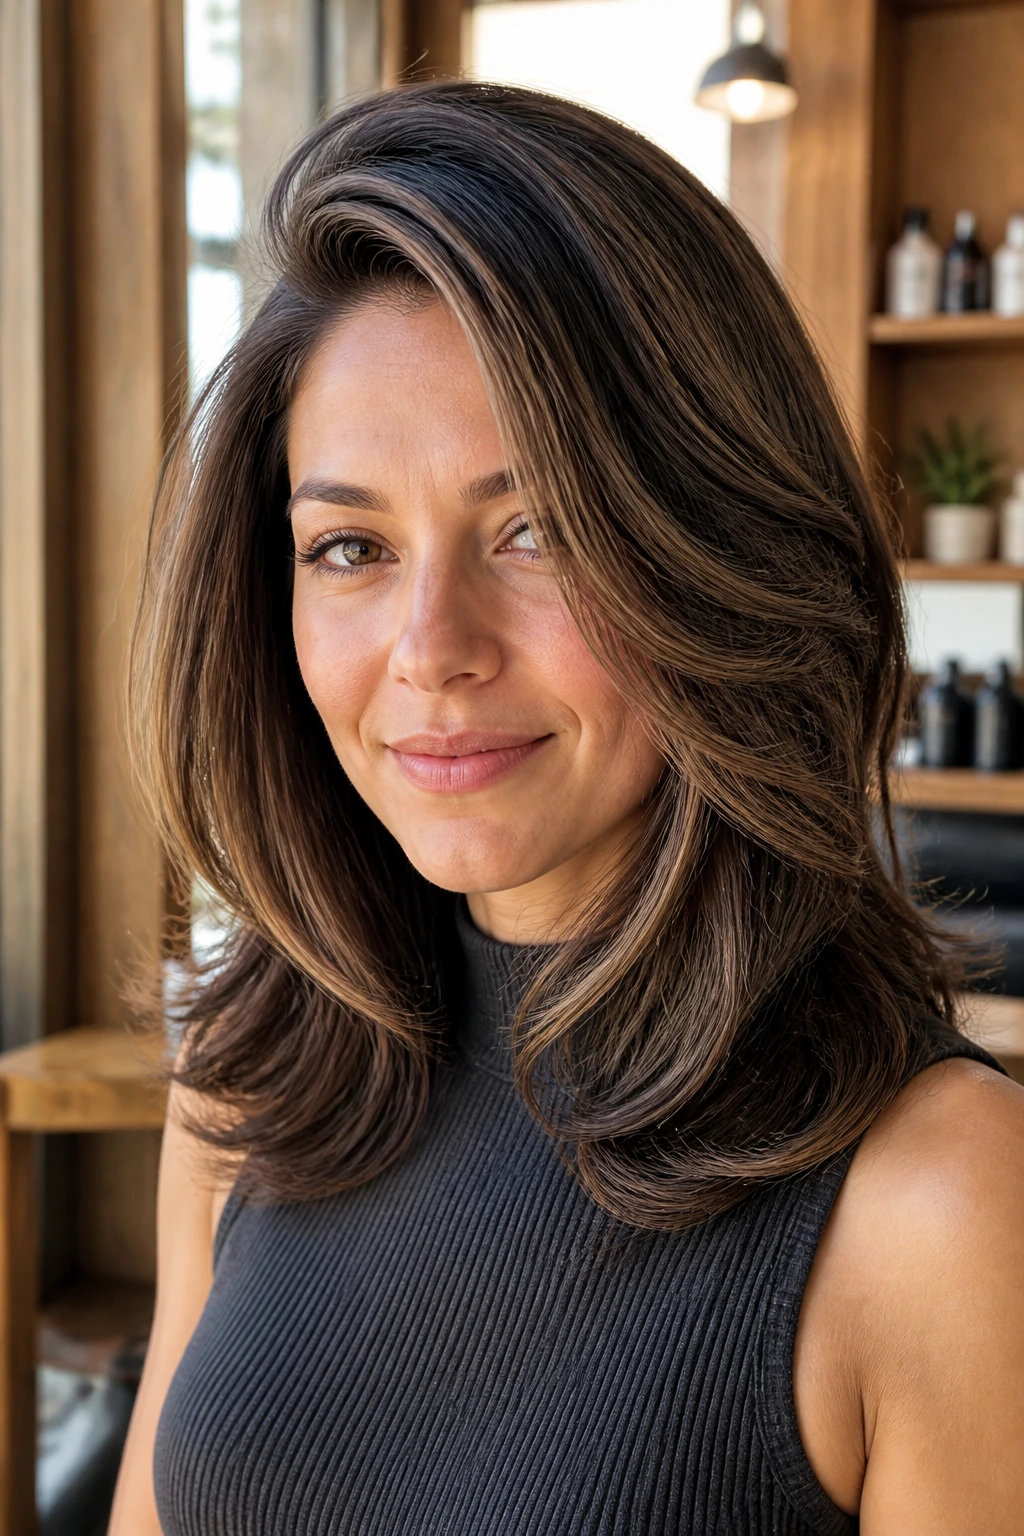
18. Layered Midi with Airy Crown
If thick hair tends to feel like too much at the top, a layered midi with an airy crown is worth a serious look. The crown gets enough internal removal to stop the helmet effect, while the rest of the length hangs with purpose. Babylights at the crown and part make the lift visible instead of hidden.
Why It Works:
Dense hair often needs weight removed right where the head starts to round. This cut does that without creating a lot of short layers around the face. The babylights show off the lift at the top, which is the part people usually miss.
Key Details:
- Keep the length around shoulder level.
- Concentrate layers through the crown, not the bottom only.
- Babylights should be denser around the part and upper canopy.
- Best for hair that gets flat on top but bulky underneath.
- Good with both straight and wavy styling.
Quick Styling Notes:
Blow-dry the roots upward first, then smooth the rest. If you ignore the crown and only style the ends, the cut won’t show its best shape.
Equipment for This Look:
- Root-lift spray
- Round brush
- Blow dryer
- Light hold hairspray
- Tail comb
How to Wear It:
It looks best with a little height at the roots and movement through the sides. That makes the hair feel lighter near the scalp, which is often the real problem with thick hair.
Pro Tips for This Cut:
- Ask for the most removal at the crown, not the front only.
- Keep babylights fine where the hair parts.
- Flip your part occasionally so the crown doesn’t settle too hard.
Variations on This Cut:
- Root-Lift Midi: More height at the crown.
- Side-Part Lift: Easy volume without a big styling routine.
- Soft Crown Blend: Less dramatic layering for a calmer shape.
Common Mistakes to Avoid with This Cut:
- Don’t leave all the weight at the top; that’s where the bulk shows first.
- Don’t ignore the roots when styling.
- Don’t make the babylights too bright near the scalp or the regrowth will look harsh.
19. Mid-Length Cut with Deep Side Sweep
A deep side sweep can do more for thick hair than a whole pile of layers. It shifts the weight, adds movement at the front, and gives babylights a place to shine. The cut itself can stay fairly simple, which makes it a smart option if you want style without too much daily effort.
Why It Works:
Thick hair often looks best when the balance is slightly off-center. A deep side part creates that imbalance on purpose. Babylights on the heavier side and front sweep keep the shape lively.
Key Details:
- Medium length should hit somewhere between collarbone and upper chest.
- Keep the layers long and soft.
- Babylights should be brightest along the sweep and front edge.
- Best for square, oval, and round faces.
- Works well if you like volume without lots of cutting.
Quick Styling Notes:
You can set the part while the hair is damp and clip it for a few minutes. That tiny bit of training helps the sweep stay in place. The rest can be soft and loose.
Equipment for This Look:
- Tail comb
- Clips for setting the part
- Round brush
- Blow dryer
- Flexible-hold hairspray
How to Wear It:
This one has an easy glamour to it. It can look office-ready with a smooth finish or more casual with loose bends and tucked ends.
Pro Tips for This Cut:
- Set the part before drying, not after.
- Ask for babylights to follow the direction of the sweep.
- Keep the length long enough to hold the side balance.
Variations on This Cut:
- Soft Sweep: Less dramatic parting, more everyday wear.
- Formal Sweep: Extra root lift and a smoother finish.
- Loose Bend Version: Add just a few waves through the front.
Common Mistakes to Avoid with This Cut:
- Don’t fight a natural cowlick too hard; work with it.
- Don’t highlight both sides equally if you want the sweep to stand out.
- Don’t make the front too short or the shape falls apart.
20. Graduated Lob with Soft Taper
A graduated lob gives thick hair structure in the back without turning the cut into a stacked haircut from another era. The taper is soft, the line is smooth, and babylights keep the transition from crown to ends visually light. It’s a useful cut when you want volume control but not a heavy, blunt edge.
Why It Works:
The slight graduation supports the natural bulk of thick hair, especially at the nape. The soft taper makes the front and sides fall more gently, while babylights stop the structure from looking too dense.
Key Details:
- Back should be modestly shorter than the front.
- The graduation should be subtle, not obvious.
- Babylights should brighten the top and sides, not just the hairline.
- Best for people who want neatness and movement together.
- Works well on straight or lightly wavy textures.
Quick Styling Notes:
A round brush gives the back enough curve to show the graduation. Keep the front softer so the angle doesn’t feel stiff. The cut should never look overbuilt.
Equipment for This Look:
- Shears
- Round brush
- Blow dryer
- Smoothing serum
- Medium hold spray
How to Wear It:
It looks especially good with collars, turtlenecks, or anything that frames the neck. The back shape keeps the style from collapsing against clothing.
Pro Tips for This Cut:
- Keep the graduation soft enough that it doesn’t shout.
- Ask for babylights concentrated around the crown and top sides.
- Use a light gloss if the contrast between layers gets too sharp.
Variations on This Cut:
- Subtle Graduation: Barely-there slope for easy maintenance.
- More Defined Taper: Slightly shorter back for extra shape.
- Sleek Graduated Lob: Straight blowout, very clean outline.
Common Mistakes to Avoid with This Cut:
- Don’t ask for too much stacking; it can date the cut.
- Don’t overlight the nape and underlight the top.
- Don’t let the front get too thin if you need weight control.
21. Razor-Cut Midi with Wispy Fringe
A razor-cut midi can be gorgeous on thick hair if the stylist knows where to stop. The ends go airy, the fringe stays wispy, and babylights give the whole cut a blurred, soft-focus look. This is one of the best choices if your hair resists movement and needs a lighter finish.
Why It Works:
The razor takes away density in a softer way than blunt shears alone, which helps thick hair feel less heavy. Wispy fringe opens the face, and babylights keep the cut from disappearing into one tone.
Key Details:
- Keep the midi length around the shoulders or a little below.
- Use razor work only where the hair can handle it.
- The fringe should stay light, not full.
- Babylights should be fine and slightly brighter around the face.
- Best for thicker hair that still wants softness.
Quick Styling Notes:
A small amount of mousse or light cream can help the wispy pieces separate without clumping. If the ends feel too fuzzy, switch to a smoother blow-dry finish.
Equipment for This Look:
- Razor, in skilled hands
- Light styling cream
- Blow dryer
- Small round brush
- Heat protectant
How to Wear It:
It works with a soft boho feel, but it can also look modern and clean if you smooth the fringe. The cut has a little motion even when you don’t do much to it.
Pro Tips for This Cut:
- Don’t razor dry, crunchy ends too hard.
- Keep the fringe sparse enough to move.
- Ask for babylights that blend through the front layers, not the whole head.
Variations on This Cut:
- Softer Razor Midi: Less edge, more movement.
- Shag-leaning Version: Add more separation through the crown.
- Face-Framing Wisps: Longer fringe pieces around the cheekbone.
Common Mistakes to Avoid with This Cut:
- Don’t let the razor chew up coarse ends.
- Don’t overdo the fringe density.
- Don’t use heavy oil, or the wispy texture collapses.
22. Soft Rectangle Cut with Dimensional Babylights
The soft rectangle cut is for anyone who likes structure but hates the look of a boxy shape. The outline stays clean, the corners are softened, and thick hair gets to show off its mass in a controlled way. Dimensional babylights keep the rectangle from reading flat, which matters a lot on fuller hair.
Why It Works:
A rectangular silhouette can be striking on dense hair because it uses the natural body of the hair instead of trying to remove everything. The softening around the edges keeps it wearable, and the babylights add depth so the shape doesn’t feel like one solid slab.
Key Details:
- Keep the perimeter straight with softened corners.
- Use minimal layers, mostly for internal relief.
- Babylights should create depth, not bright contrast everywhere.
- Best on hair that naturally falls straight or with a soft wave.
- Works well if you like minimal daily styling.
Quick Styling Notes:
A simple blow-dry is enough if the perimeter is clean. If you want more movement, bend just the ends and leave the middle flat. That contrast makes the shape look modern instead of severe.
Equipment for This Look:
- Straight shears
- Paddle brush
- Blow dryer
- Light serum
- Gloss spray
How to Wear It:
It pairs nicely with sharp collars, clean lines, and structured clothes. The haircut itself carries the visual weight, so you can keep the rest of your look simple.
Pro Tips for This Cut:
- Ask for softened corners, not a fully blunt block.
- Keep babylights understated so the shape stays the star.
- Trim on schedule so the corners don’t blur out.
Variations on This Cut:
- Softer Rectangle: More rounding through the sides.
- Sharper Rectangle: Cleaner outline with fewer face layers.
- Dimensional Shadow Version: Add lowlights under the top layer for depth.
Common Mistakes to Avoid with This Cut:
- Don’t let the corners get too square.
- Don’t place babylights in wide panels.
- Don’t skip smoothing products if your hair frizzes at the ends.
Why Medium Length and Babylights Are a Smart Match for Thick Hair
Thick hair has a lot going for it, but ease is not usually one of the first things people get. Medium length helps because it cuts down the sheer mass that long hair can collect, especially around the shoulders and mid-back where dense strands start to feel heavy. You keep enough length to style, braid, clip, and wave, but you avoid that blunt drag that makes hair hang instead of move.
Babylights are the second half of the equation. They’re tiny, finely woven highlights that break up the solid look of thick hair without creating obvious stripes. On dense hair, that matters more than people think. Big chunky highlights can read harsh against a full base, while babylights soften the entire surface and make layers visible even when the haircut itself is subtle.
There’s also a grow-out advantage. Fine highlights blur the regrowth line, so the color stays softer for longer. That can matter a lot if you don’t want to sit in a chair every few weeks, or if your natural root color is close enough to the lightened pieces that you want a calmer transition.
And maybe the most practical part: thick hair can hold a shape better when the haircut sits in this length range. You’re not asking the hair to behave like fine hair. You’re asking it to cooperate. That’s a different thing entirely.
Essential Equipment for These Looks
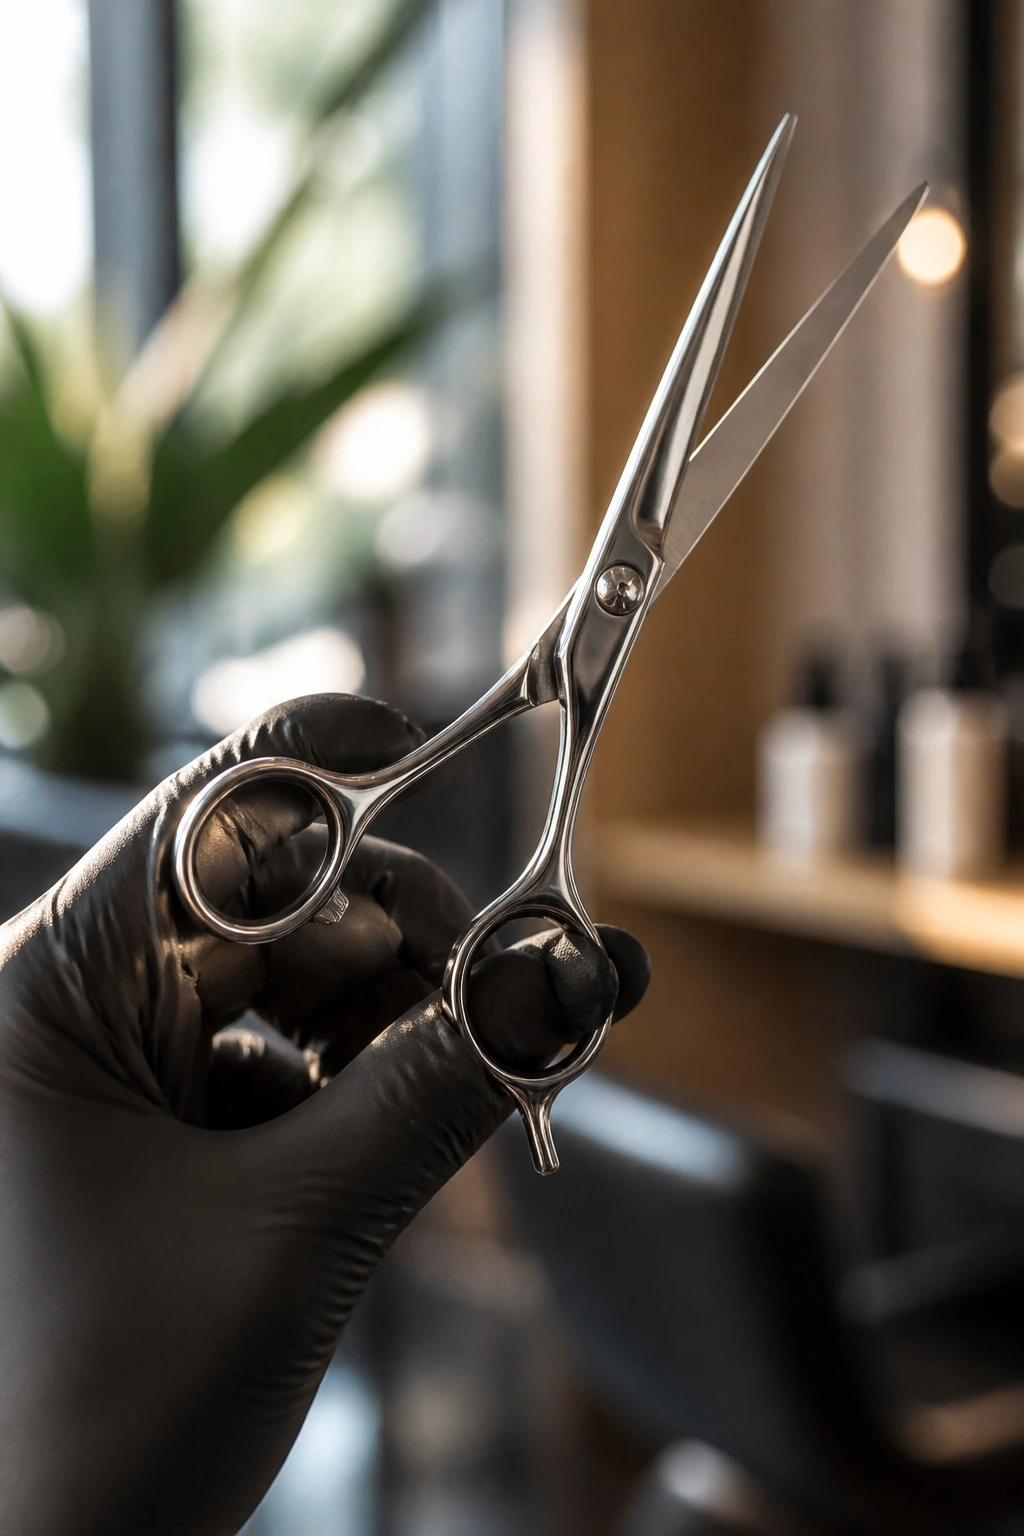
- Sharp cutting shears: Clean edges matter on thick hair; dull shears chew the ends and make the shape look frayed.
- Texturizing shears: Useful for removing bulk inside the shape, but they should be used lightly.
- Tail comb: Fine sectioning is the whole point of babylights, and a tail comb keeps parts tidy.
- Sectioning clips: Thick hair needs to be divided into manageable zones or the cut gets sloppy fast.
- Blow dryer with nozzle: Direct airflow helps smooth the cuticle and show the haircut’s true line.
- Medium and large round brushes: Different diameters give different bends; a medium brush suits most lobs, a large one suits smoother blowouts.
- 1.25-inch curling iron or wand: Good for loose bends that show off babylights without making the hair too tight.
- Heat protectant: Non-negotiable if you use any hot tool.
- Color-safe shampoo: Keeps babylights from fading dull and brassy.
- Light smoothing cream or serum: Helps the ends lie down without turning greasy.
How to Choose the Right Photo and Explain the Look
Bring photos, yes, but bring the right photos. A picture of a haircut on fine hair is not the same as the same cut on dense hair. Look for examples with the same kind of thickness, texture, and part pattern you have, because that’s what shows the shape honestly. If your hair is coarse and wavy, a silky straight example can mislead you fast.
Tell the stylist where your hair feels bulky. Some people carry all their weight at the sides. Others get the puff at the crown, or a heavy shelf at the nape. That detail matters more than a generic “I want layers.” A good stylist can place babylights and weight removal to suit the problem area, but only if you name it.
Ask for the babylights in plain language. Say you want fine, woven pieces that keep the color soft around the root and brighter around the face, not chunky streaks. If you want low maintenance, say so directly and ask for a shadow root or a softer grow-out plan. If you like a very polished finish, say you’re willing to style it with a round brush and want the cut built for that. Quiet specificity beats a vague wish list every time.
How to Wear These Cuts Day to Day
Presentation: Wear the haircut in the finish it was designed for. A blunt midi wants smooth edges; a shag wants texture; a butterfly cut looks best when the face frame has movement. If you fight the shape, the babylights won’t save it.
Accessories: Choose clips, earrings, and headbands that don’t hide the part or the face frame. Thin clips and low-profile pins usually work better than oversized claws, especially if the cut depends on line and angle.
Length balance: If your hair is very dense, keep the longest pieces long enough to hold weight. Cutting too much off the front can make the whole head puff outward. The right length keeps the haircut sitting close to the head where it should.
Daily reality: Not every medium cut needs a full blowout. Some are better with a rough dry and a quick bend at the ends. Others need the brush. The trick is matching the styling habit to the silhouette, not trying to force one method onto every look.
Additional Styling Tips and Color Boosters
Gloss Boost: A demi-permanent gloss between highlight visits can keep babylights from looking dusty. On thick hair, the surface can go dull faster than the color itself, so shine matters.
Volume Boost: Mousse at the roots and a round brush at the crown do more than heavy teasing ever will. Thick hair can handle support; it does not need rough backcombing.
Texture Boost: If the cut needs movement, use a light texture spray through the mid-lengths and a bend iron on a few random sections. Don’t curl every strand. That’s how the hair starts looking overdone.
Color Boost: Ask for lowlights under the top layer if the babylights start feeling too bright. A little depth underneath makes the lights look richer and keeps the whole head from going flat.
Make-It-Yours: If your hair is curly, keep the layers longer and the babylights slightly lower so the curl pattern doesn’t hide them completely. If it’s straight, you can go a touch sharper with the lines and still keep softness through color.
Maintenance, Refreshing, and Grow-Out Plan
Medium haircuts on thick hair usually hold their shape for a decent stretch, but they still need maintenance if you want the outline to stay crisp. Blunt and angled shapes tend to want a trim every 8 to 10 weeks. Softer shags, butterfly cuts, and heavily layered looks can often go 10 to 12 weeks, sometimes a touch longer if you’re happy with a softer edge.
Babylights need their own rhythm. If you like a fresh, bright face frame, plan on refreshing the front pieces about every 8 to 12 weeks. If you’re happy with a softer grow-out, the interior babylights can wait longer. A gloss or toner between full lightening sessions helps the color stay clear, especially if your water runs hard or your hair pulls warm.
At home, color-treated hair usually behaves better with a sulfate-light or color-safe shampoo and a weekly conditioning mask on the ends. Thick hair can trick people into using too much heat because it “handles” it, but that’s a fast way to scorch the lighter pieces. Keep hot tools under the minimum heat that gets the job done, and use heat protectant every single time. If the babylights start feeling dry first, lower the iron before you add more product.
Common Mistakes That Make Thick Hair Look Too Heavy
The first mistake is asking for too much weight removal in the wrong place. If the crown gets stripped too hard and the perimeter stays blunt, the hair can puff out like a triangle. The fix is simple: keep the internal layers balanced and let the silhouette stay controlled.
The second mistake is using highlight placement that’s too chunky. Thick hair can hold bold color, sure, but babylights are supposed to soften the surface. Big slices can make the cut look striped instead of dimensional.
The third mistake is ignoring the styling habit when choosing the cut. A butterfly cut, shag, or curtain fringe looks one way with a round brush and another way when air-dried. If you won’t style it at all, ask for a shape that stays tidy on its own.
The fourth mistake is over-thinning coarse ends. On thick hair, that often leads to frizz and a fuzzy edge rather than movement. You want internal release, not shredded tips.
The fifth mistake is waiting too long for the trim. Thick hair hides damage for a while, then suddenly the shape vanishes. Once that happens, the babylights can’t carry the haircut by themselves.
Variations and Adaptations to Try
Curly Crown Version: Keep the perimeter longer and the layers more gradual so curls don’t spring too far upward. Babylights should sit lower and a little wider to show through the curl pattern.
Sleek Blowout Version: Ask for longer layers, softer babylight placement, and a clean face frame. This works when you want the cut to feel polished and office-ready.
Low-Maintenance Shadow Version: Add a deeper root shadow with babylights concentrated around the front and part. The grow-out is softer, and the color still looks dimensional between visits.
Extra Volume Version: Shorten the crown layers slightly and style with a root-lift mousse. This is good if your thick hair sits heavy at the top and you want more shape up high.
Cooler Blonde Version: If your base is dark brown or medium brown, keep the babylights beige or ash-beige rather than icy. That usually blends better on thick hair and avoids a patchy finish.
Warm Sunlit Version: Honey and soft caramel babylights can make dense hair look richer without going too high contrast. This is one of the easiest ways to make a haircut feel more expensive without changing the cut at all.
Frequently Asked Questions
Will babylights make thick hair look thinner?
Not usually. They make the hair look less dense visually, which is different from making it actually thin. That softness is often the goal on thick hair, because it helps the haircut show its shape.
Which medium haircut is easiest to maintain on thick hair?
A blunt midi or a soft collarbone lob is usually the easiest. Both keep the outline clear, and they don’t need a complicated styling routine to look finished.
How often should babylights be touched up?
Most people can stretch a partial refresh to 8 to 12 weeks, especially if the placement is fine and the root is left a little deeper. If you want a bright face frame, that front section may need attention sooner than the rest.
Can thick curly hair wear babylights well?
Yes, but the placement needs to respect the curl pattern. If the lightening sits too high, the curls can hide it; if it’s too chunky, it can look striped. Fine weaving around the outer curl pattern usually works better.
What should I ask for if I want low-maintenance grow-out?
Ask for soft babylights, a shadow root, and a cut with longer layers rather than sharp short pieces. That gives you a softer line as the hair grows and keeps the regrowth from shouting at you.
Do layers or blunt cuts work better on thick hair?
Both can work. Blunt cuts give a cleaner, denser shape, while layers reduce bulk and add movement. The better choice depends on whether you want polish or softness at the ends.
What if my thick hair starts puffing out after the cut?
That usually means the weight was removed in the wrong spot or the ends were over-texturized. A smoothing cream and a better blow-dry can help short term, but the real fix is a shape adjustment at the salon.
Can I wear a side part with babylights?
Absolutely, and thick hair often looks excellent with one. A side part can lift the crown and make the babylights show more clearly along the sweep.
The Shape Thick Hair Wants
The best medium length haircut for thick hair is the one that knows where to hold weight and where to release it. Babylights help because they keep the eye moving. They soften the outline, pick out the layers, and stop the whole head from turning into one dense mass.
If you’re choosing between these looks, start with the shape you actually want to live with. A blunt midi gives you structure. A butterfly cut gives you motion. A shag gives you attitude. The babylights are the finishing language, not the whole sentence.
Ask for the silhouette first, then the color placement. That’s the order that usually gets you hair that feels lighter without losing its body, and that’s the part worth carrying into the salon with you.