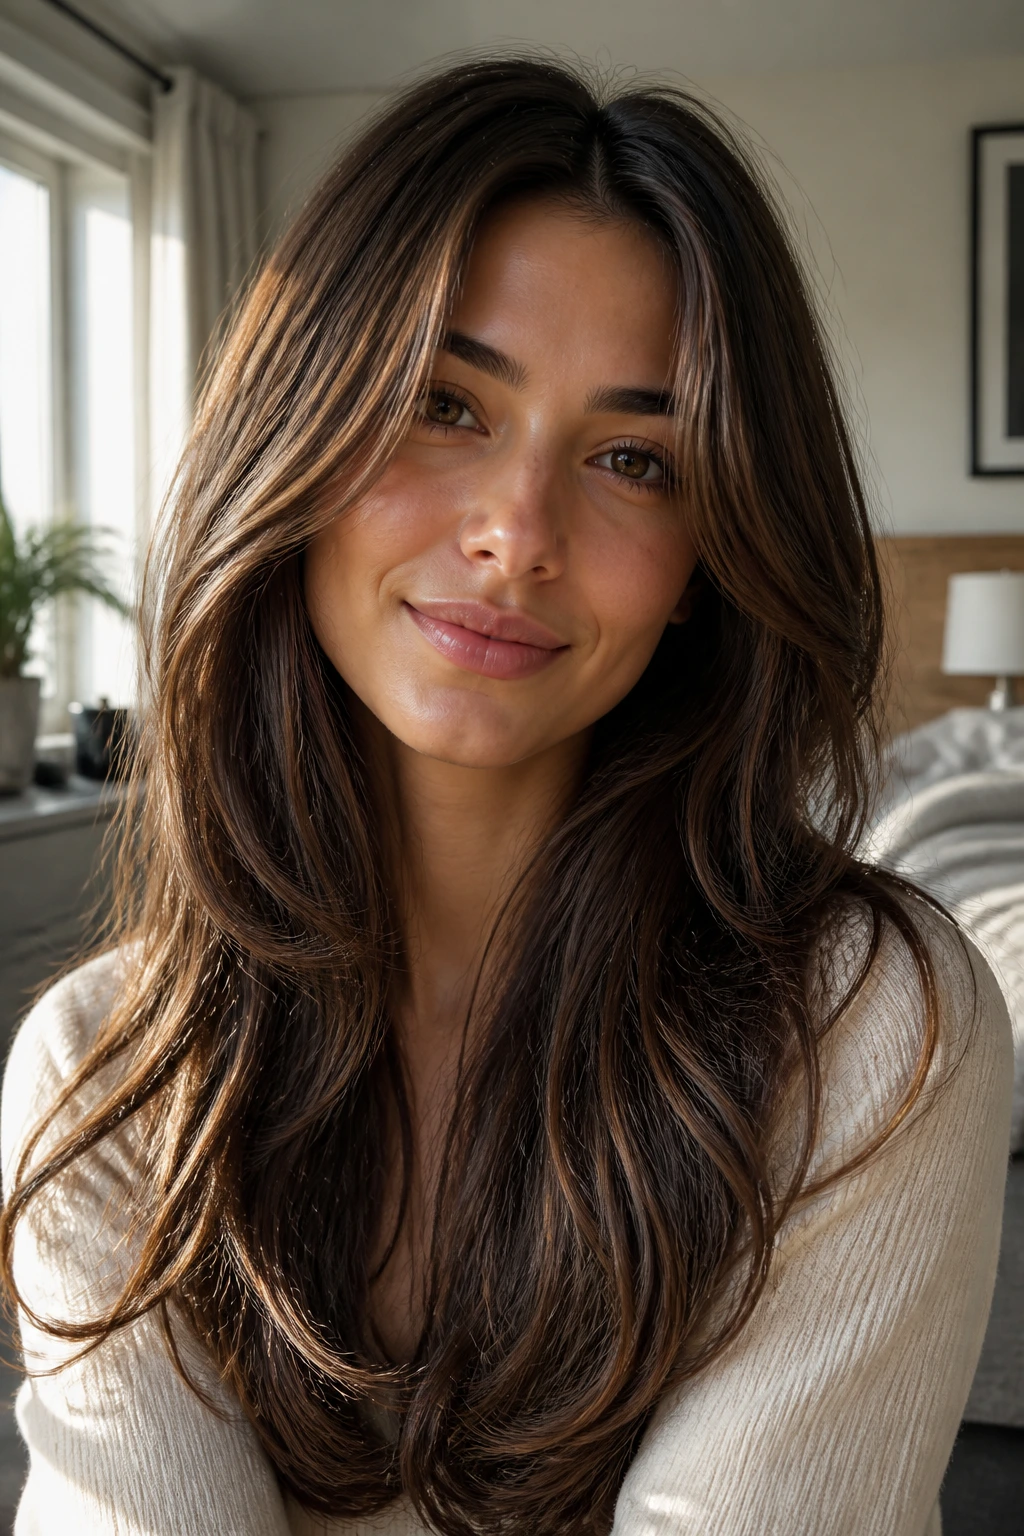
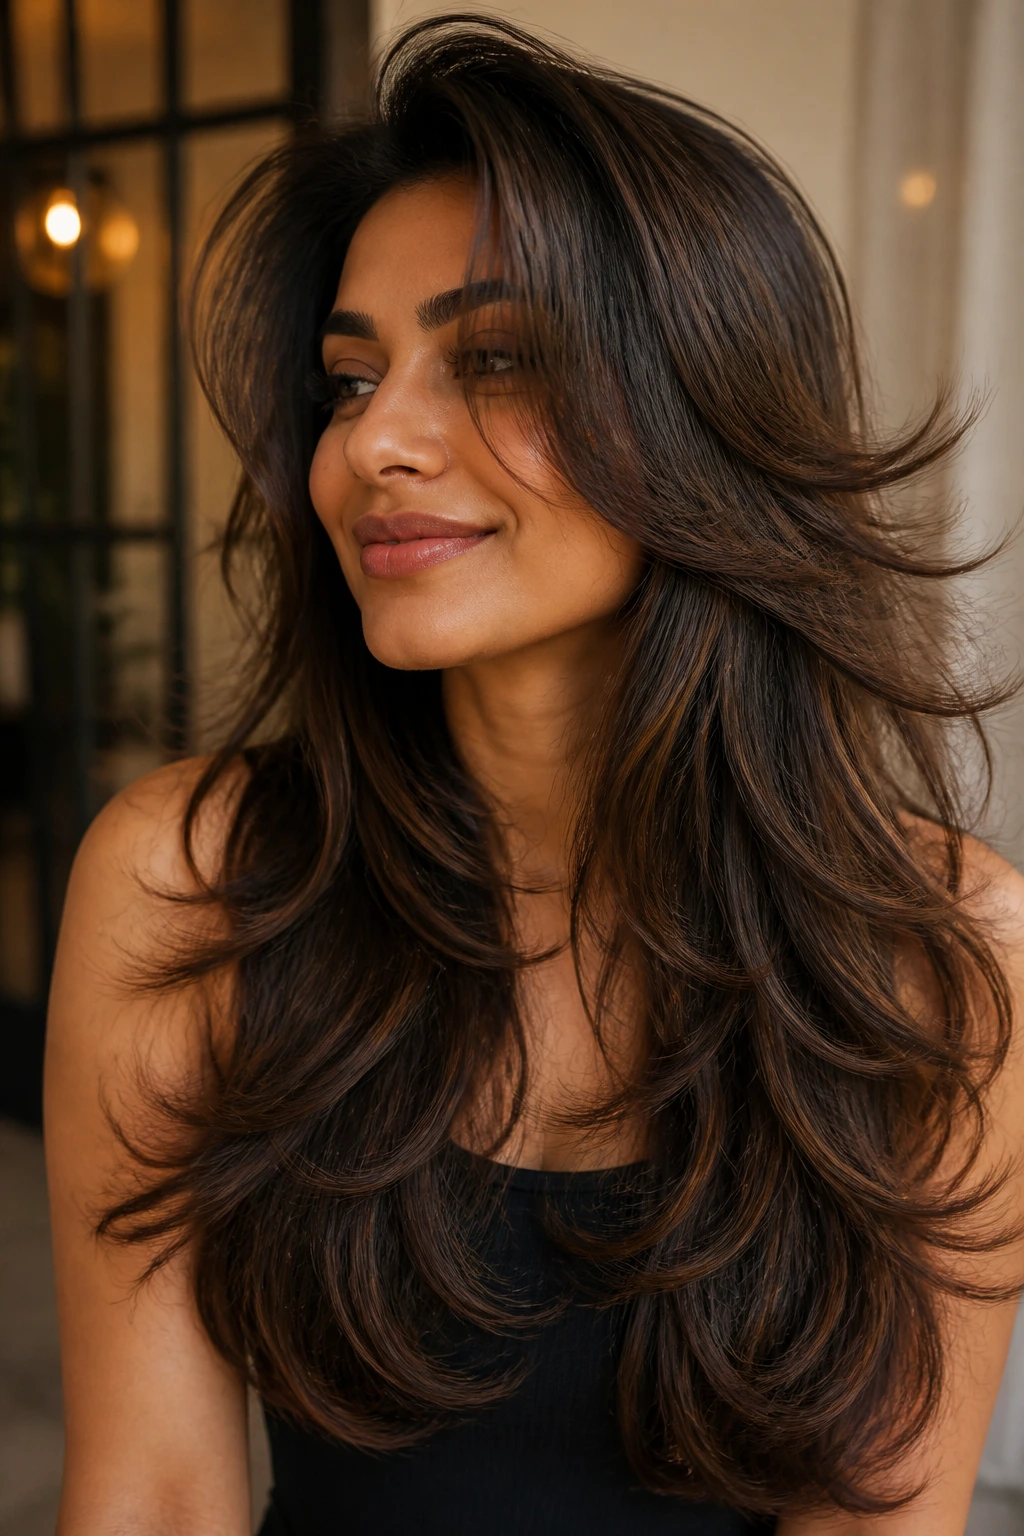
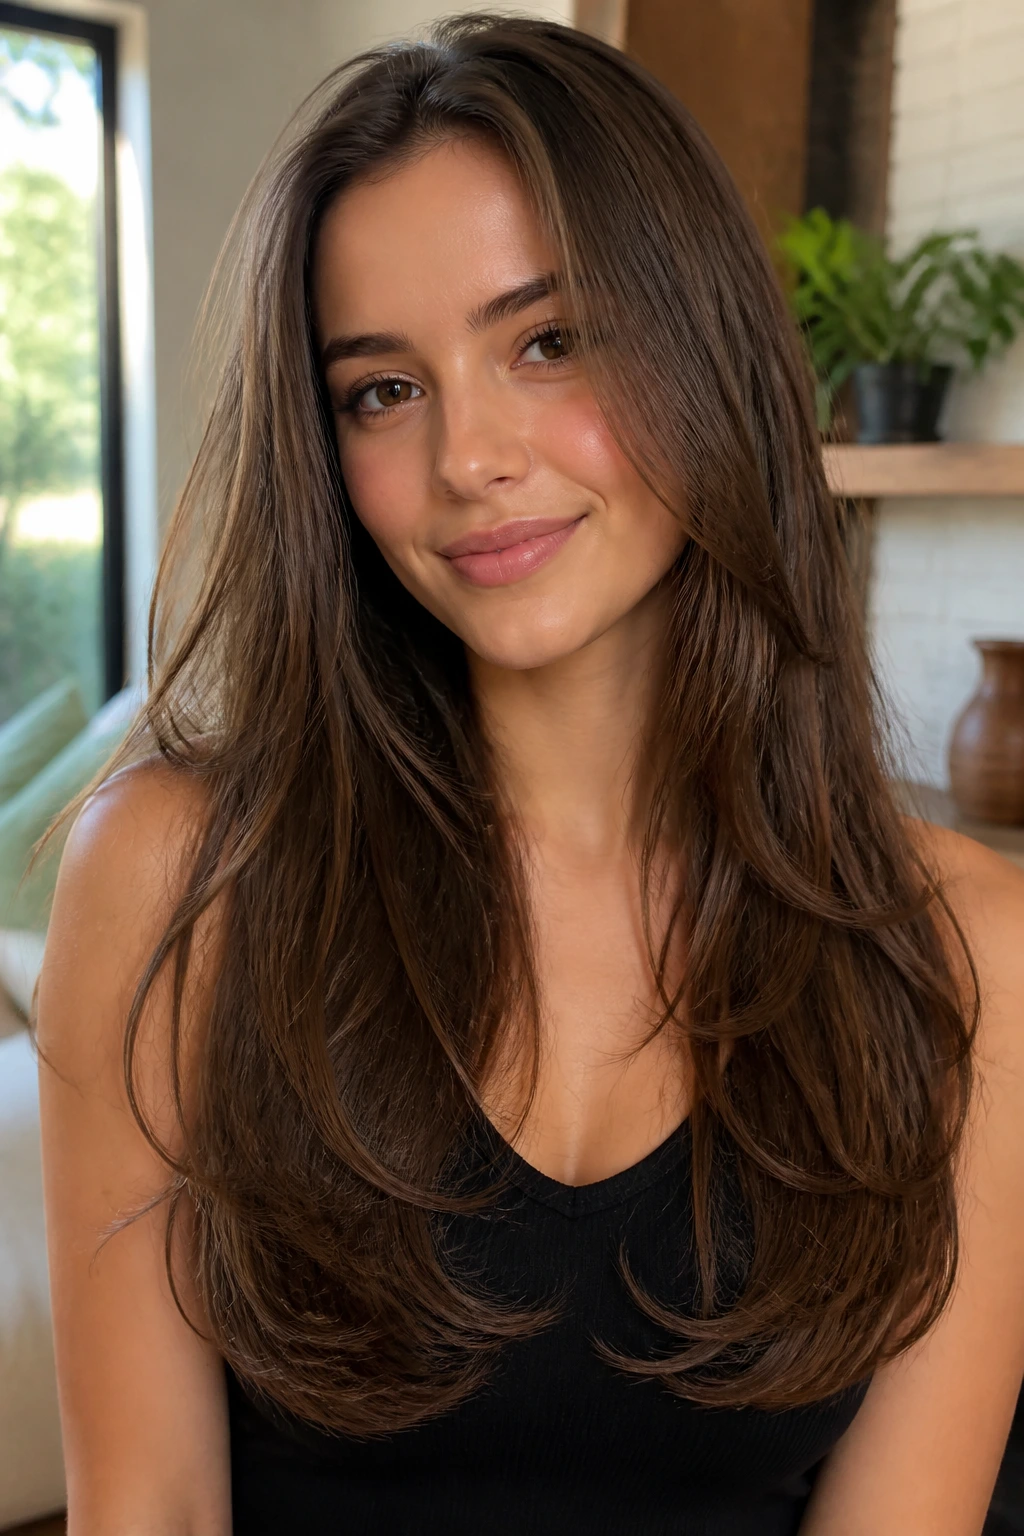
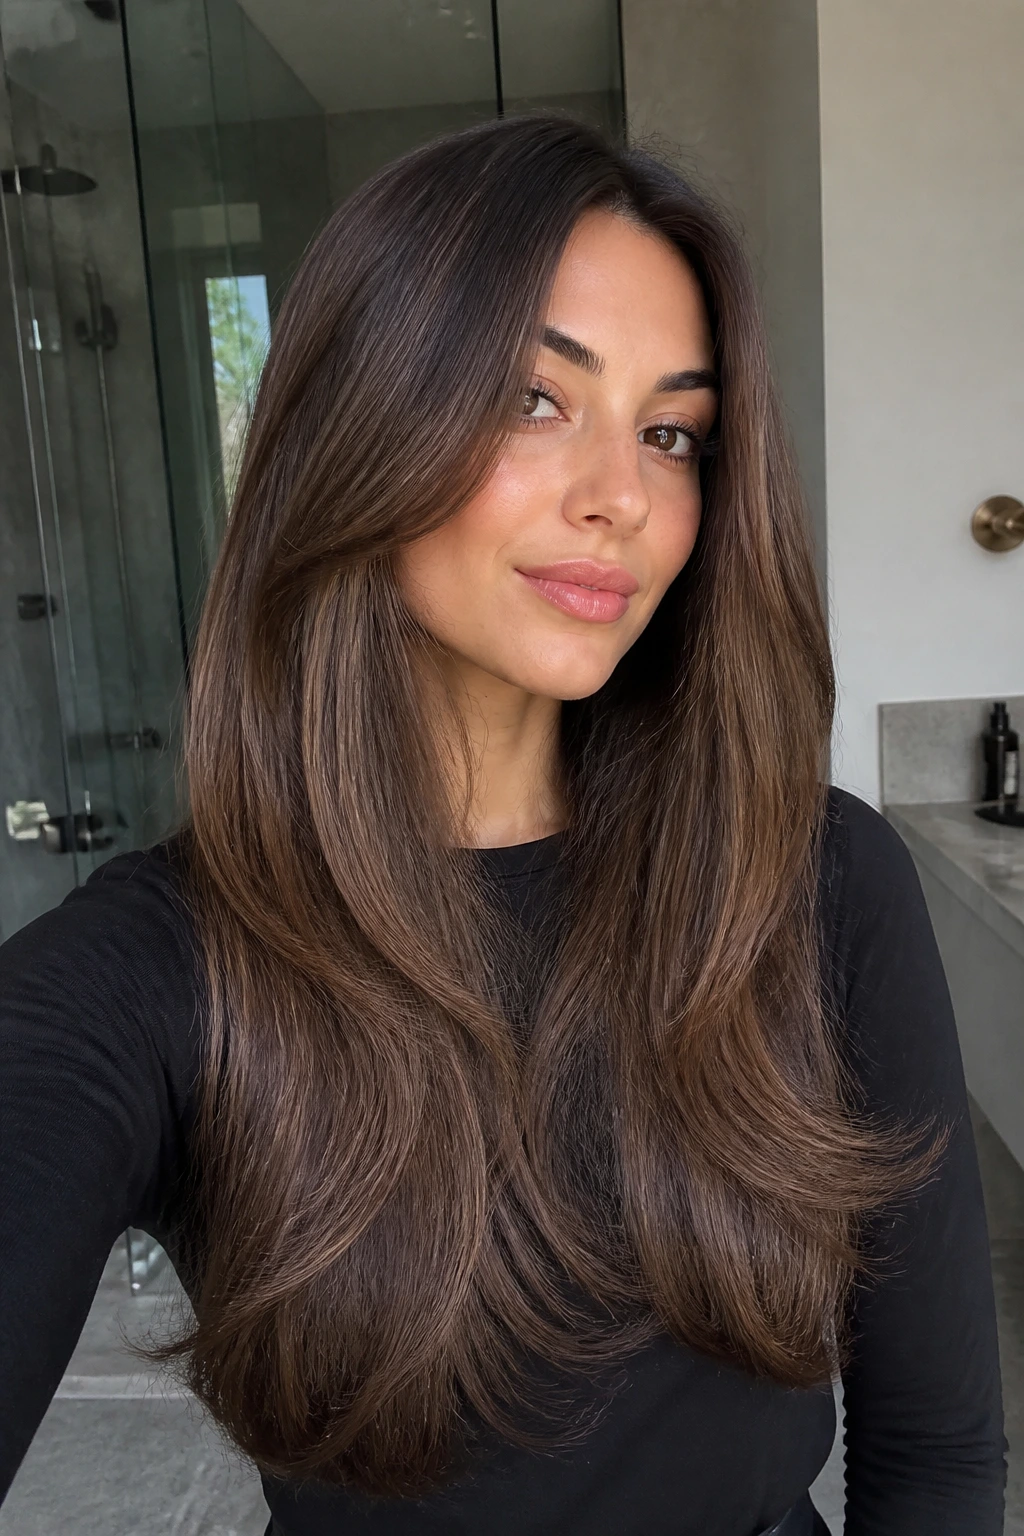
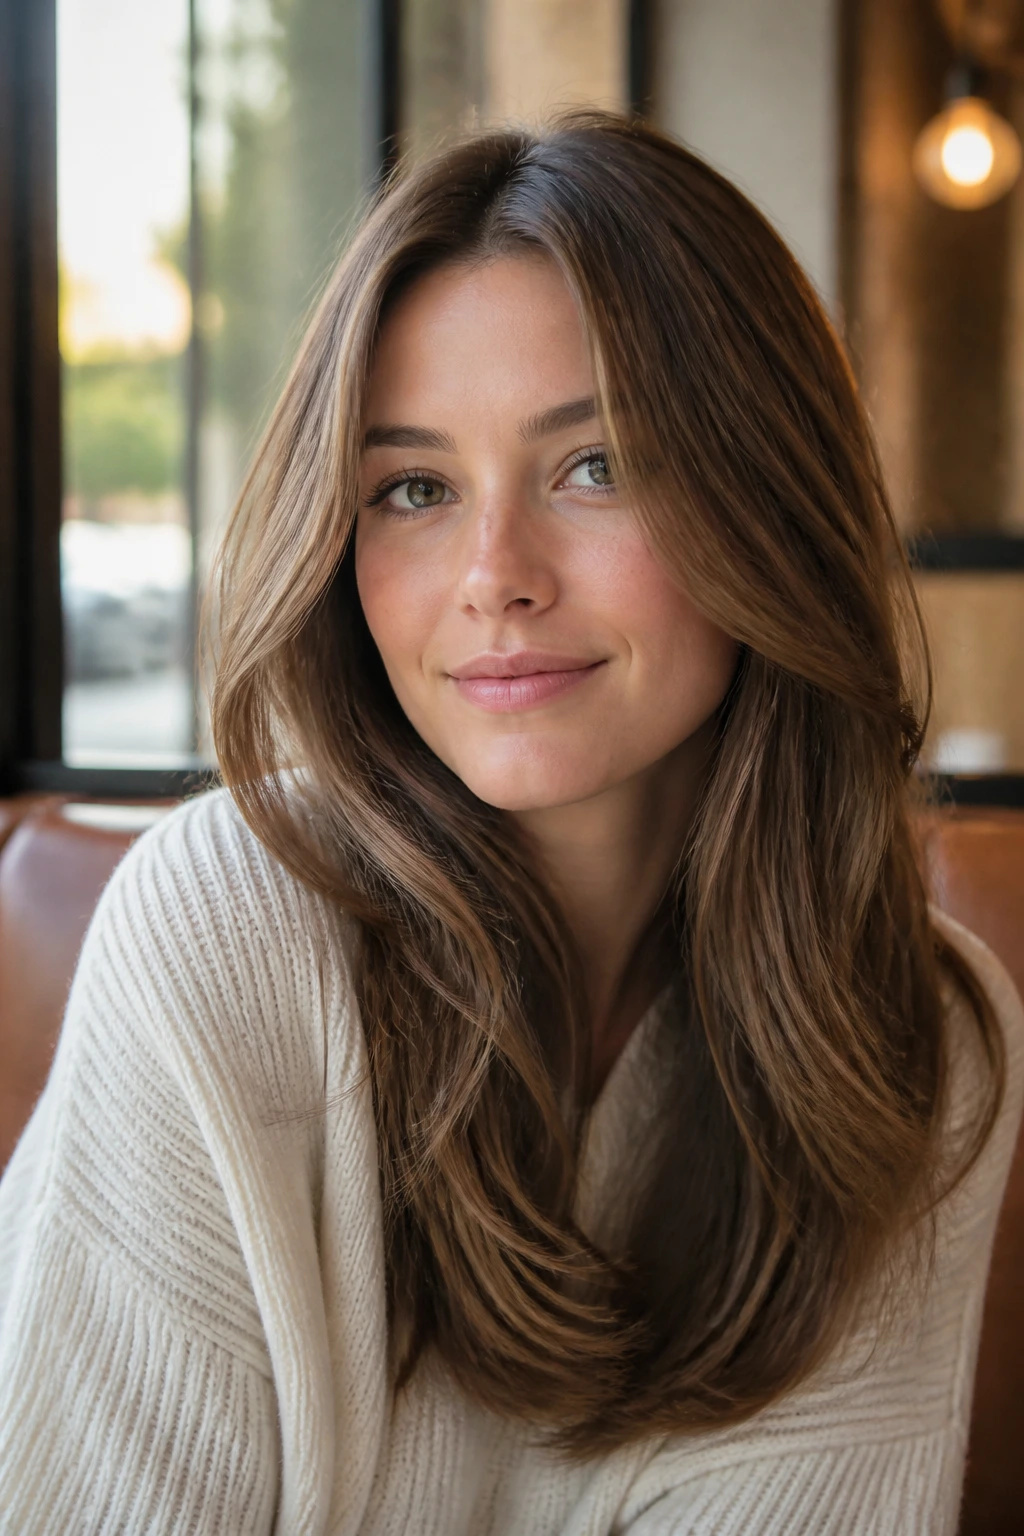
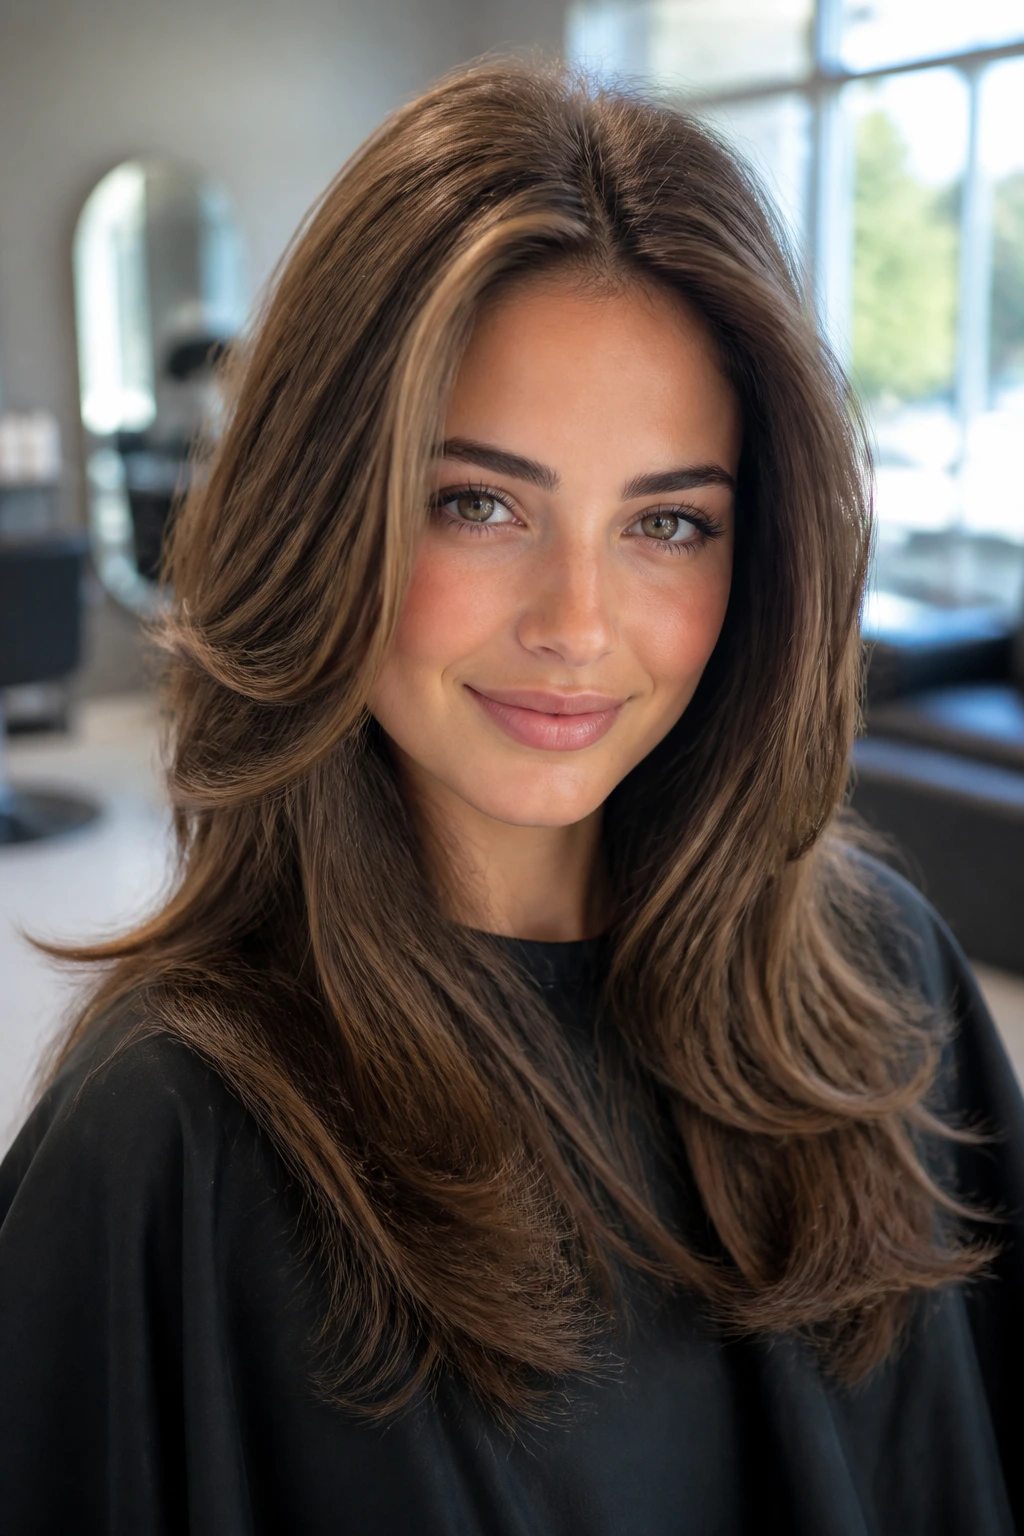
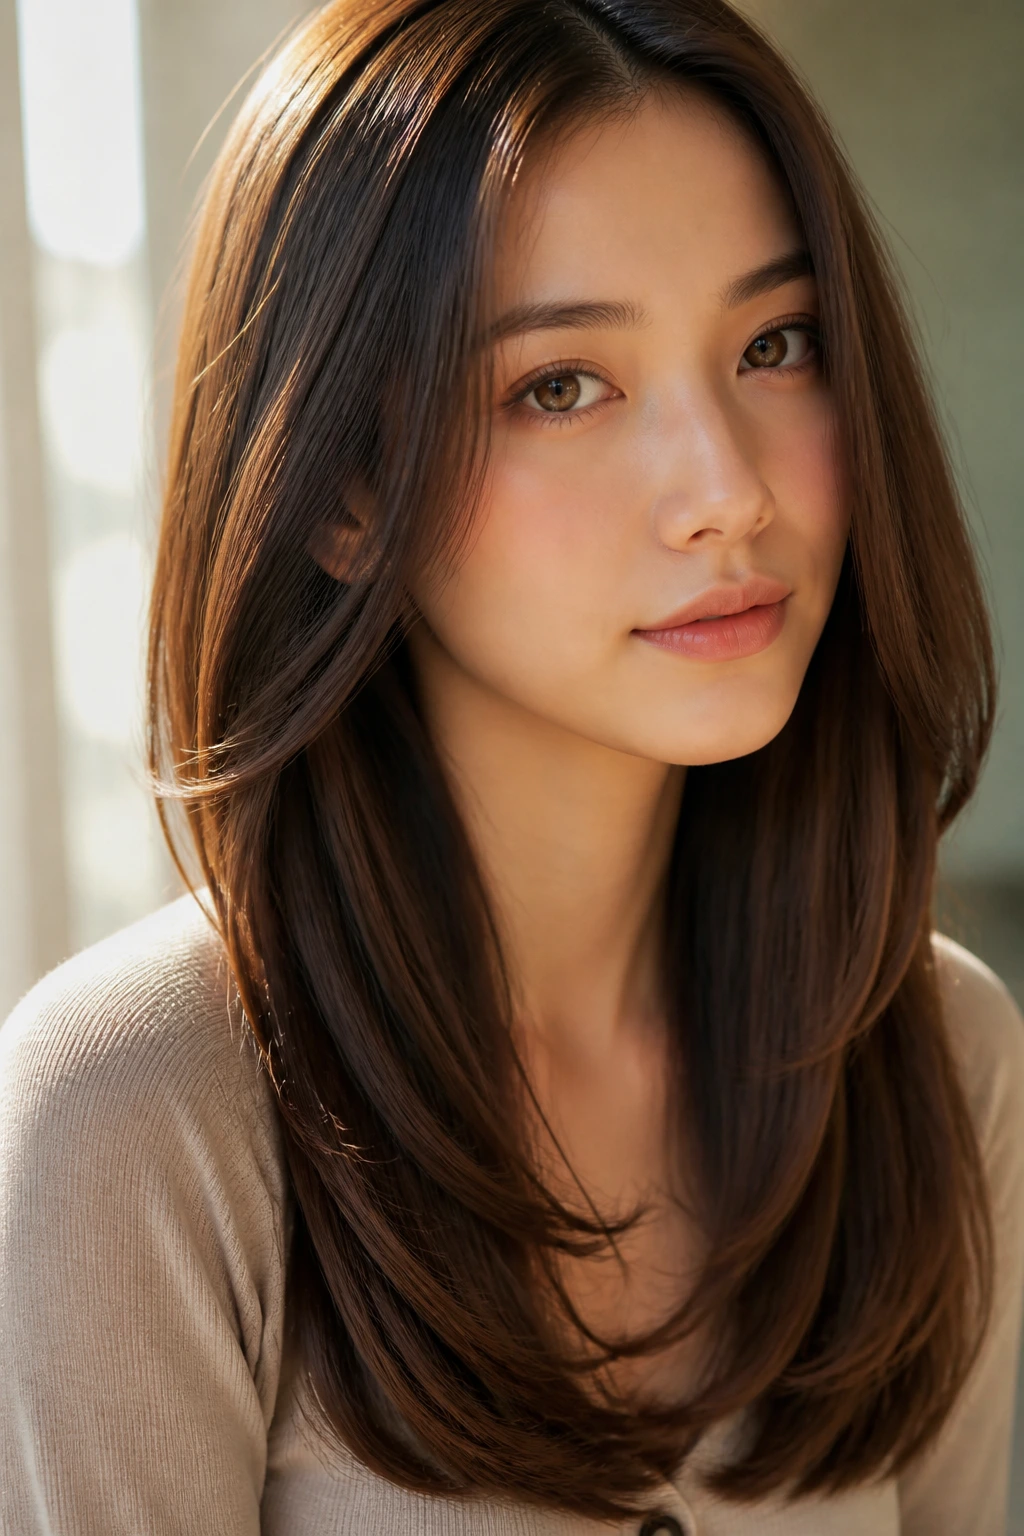
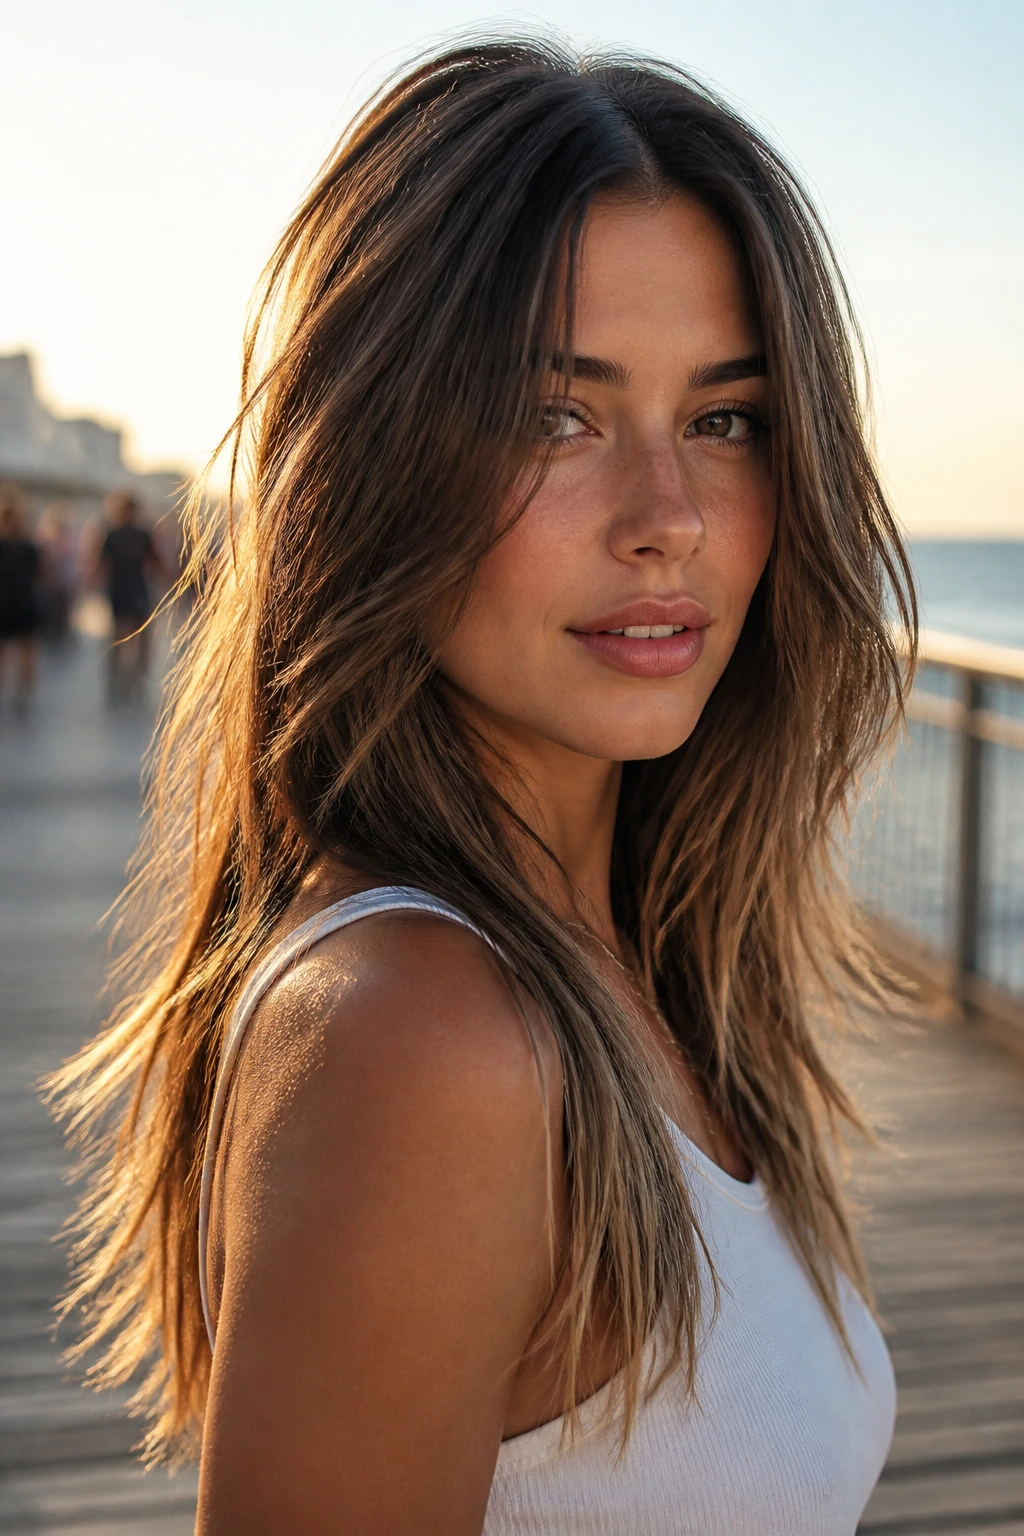
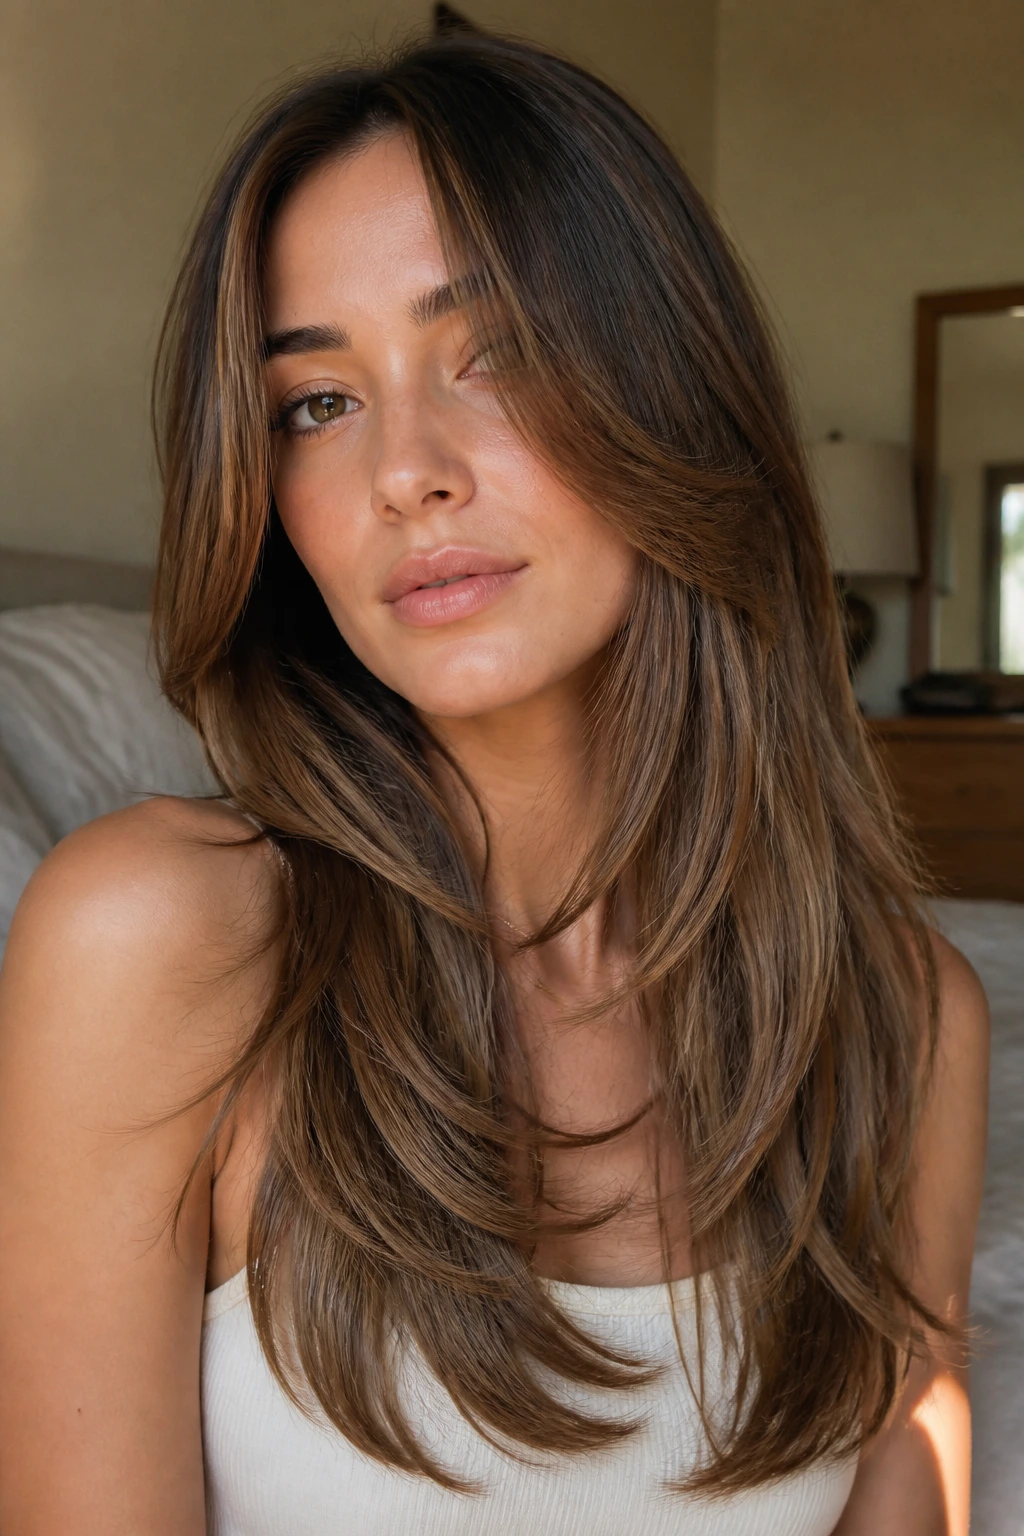
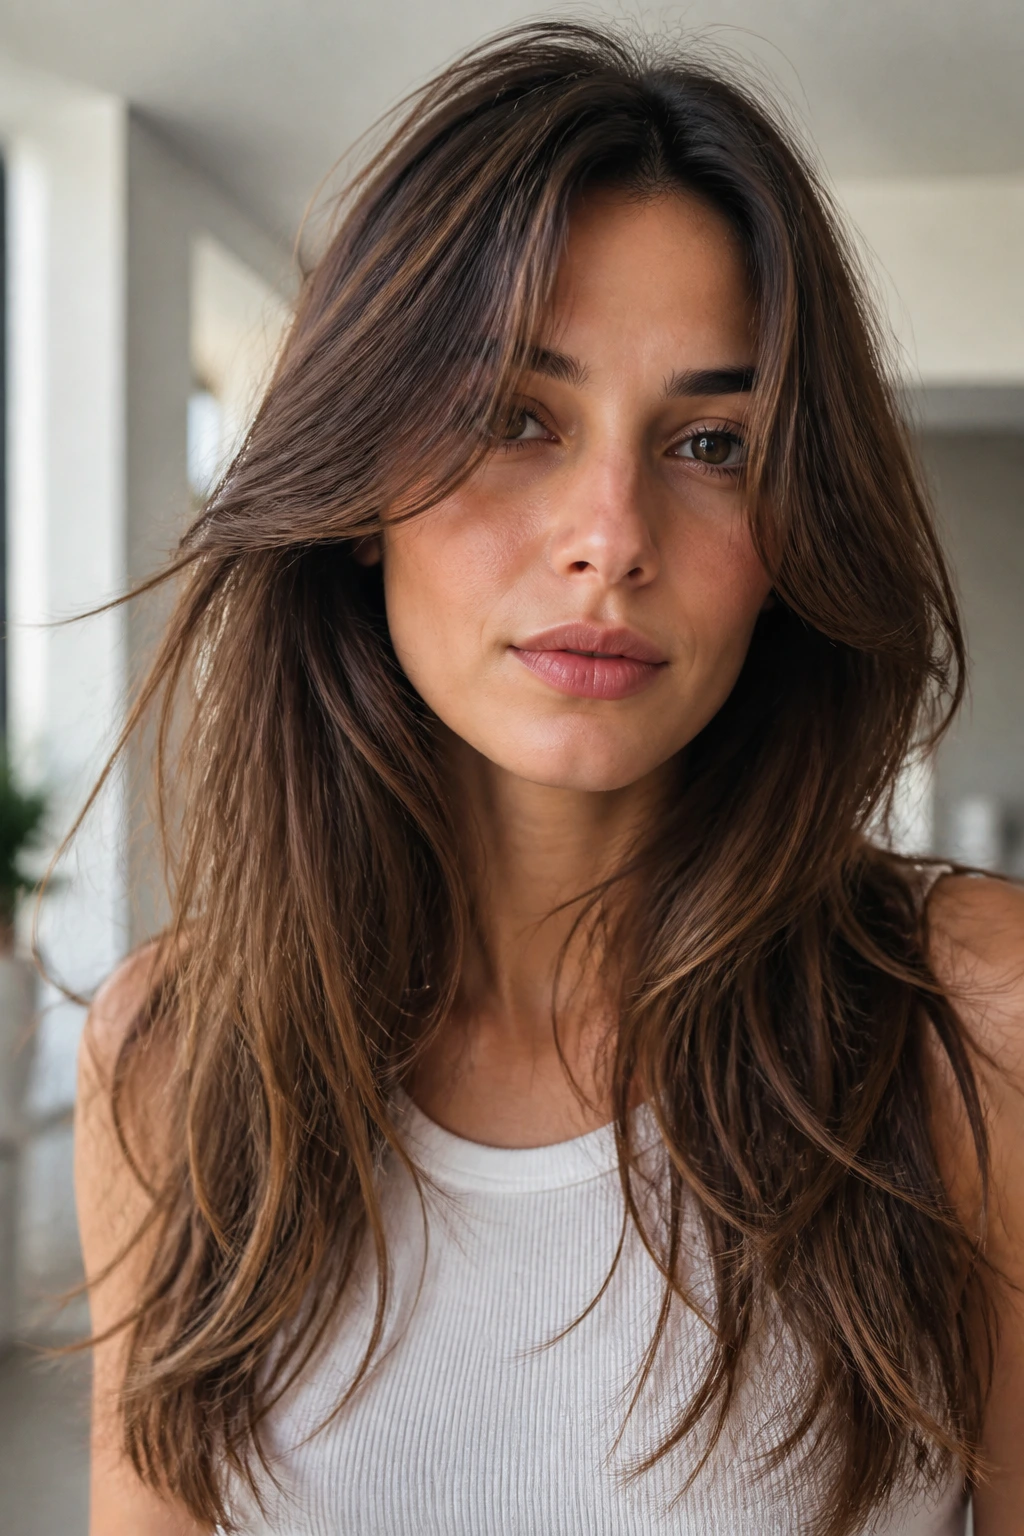
Blended layers for long hair and oval faces are one of those haircut ideas that can go from flat to expensive-looking in a single appointment — or collapse into a limp curtain if the layers are placed badly. The difference is not the number of layers. It’s where they start, how they melt into the length, and whether the front pieces actually do anything for the face instead of hanging there like afterthoughts.
Oval faces can carry a lot of looks, which is exactly why this topic gets messy fast. A blunt, heavy perimeter can make long hair sit like one long sheet. Too many high layers can thin out the ends and make the whole cut feel fussy. The sweet spot is a cut that moves when you walk, keeps enough weight at the bottom to look full, and opens the cheekbones without dragging the eye straight down.
That balance is what makes long layered hair worth paying attention to. Done well, it gives you lift around the face, softness through the sides, and enough shape that a quick blow-dry or a loose bend with an iron actually looks intentional. Done badly, you spend months trying to hide the awkward bits with clips and ponytails. So the details matter. A lot.
Why This Collection Feels Different on an Oval Face
- The face shape gives you room, but not a free pass: Oval faces can handle center parts, side parts, curtain pieces, and longer fringe, but the layer start point still changes how the whole haircut sits.
- Length stays useful here: These looks keep the bottom line intact, so you get movement without losing the heavy, swingy ends that make long hair look rich.
- Styling time stays honest: Some of these cuts look best air-dried, while others need a round brush or a bend with a 1.25-inch iron; I like that honesty because it saves you from salon-photo disappointment.
- Fine hair and thick hair both have options: The right version of blended layers can add lift to finer strands or remove weight from dense hair without making either look chopped up.
- The front matters more than people think: On an oval face, the shortest face-framing pieces can make the cut look balanced or oddly stretched, and that choice is usually more important than the back view.
- The grow-out can be graceful: Good blending lets the haircut soften as it grows, which matters if you’re not into strict trim schedules every six weeks.
The Face-Framing Rules That Make Long Layers Work
Oval faces are forgiving, but they still have geometry. That’s the part people skip. A layered cut on long hair needs to respect where the eye naturally lands: cheekbones, jawline, and the narrow point near the chin. If the layers begin too high, the top half of the head can look busy while the ends go sparse. If they begin too low, the face frame barely exists and the whole cut feels like it was trimmed out of obligation.
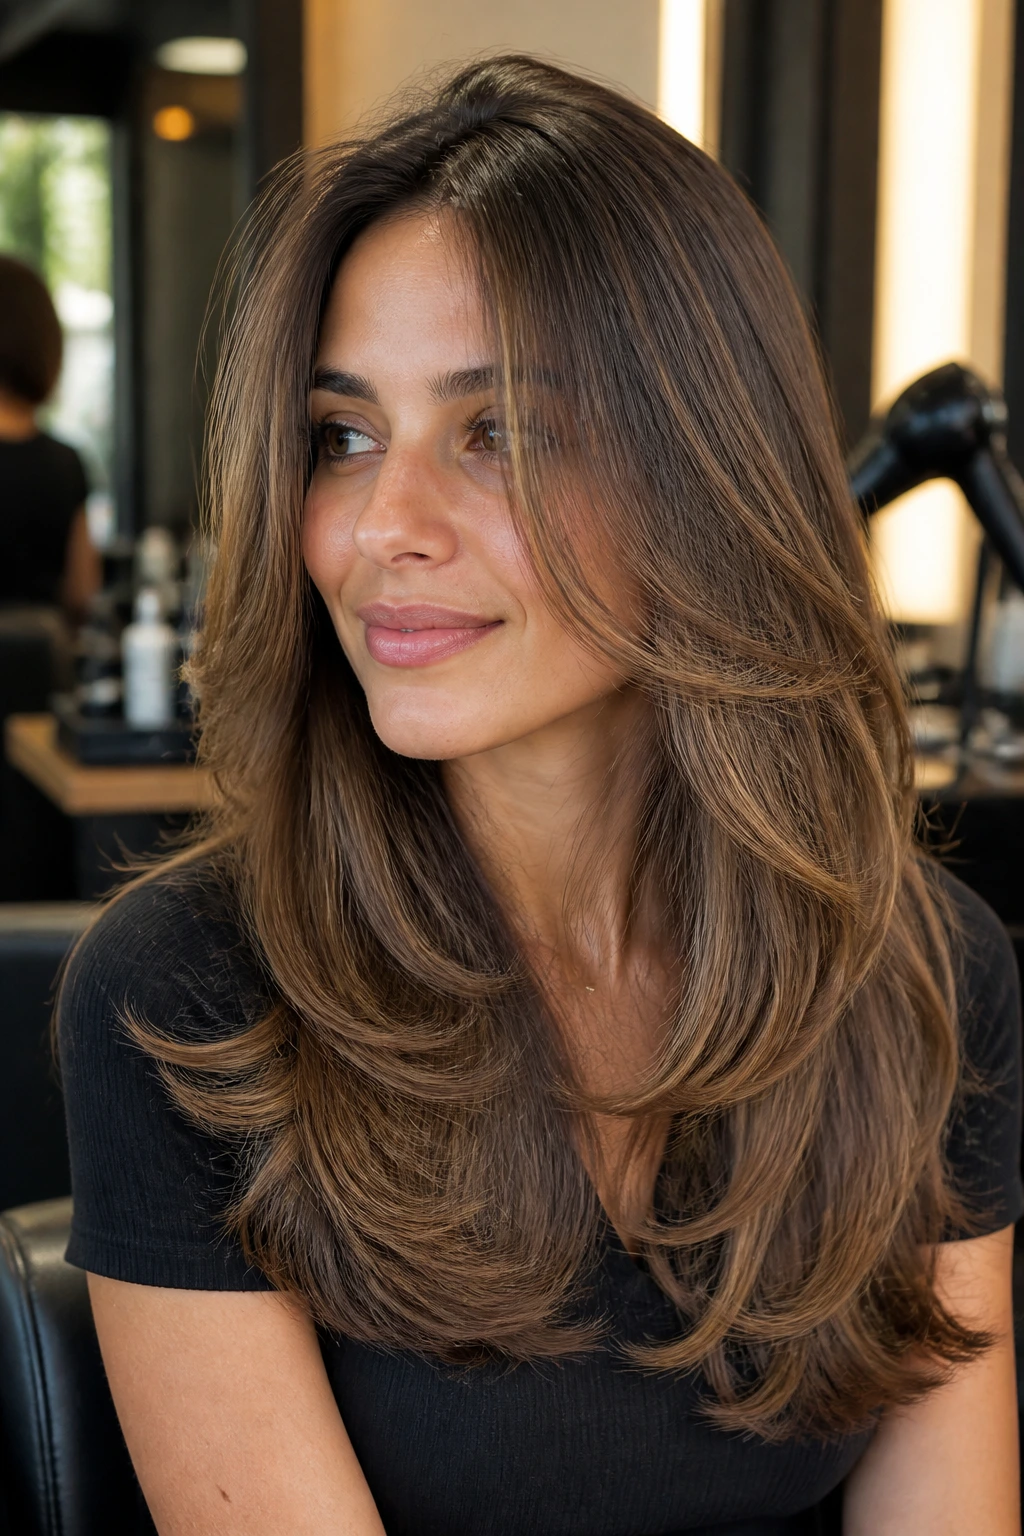
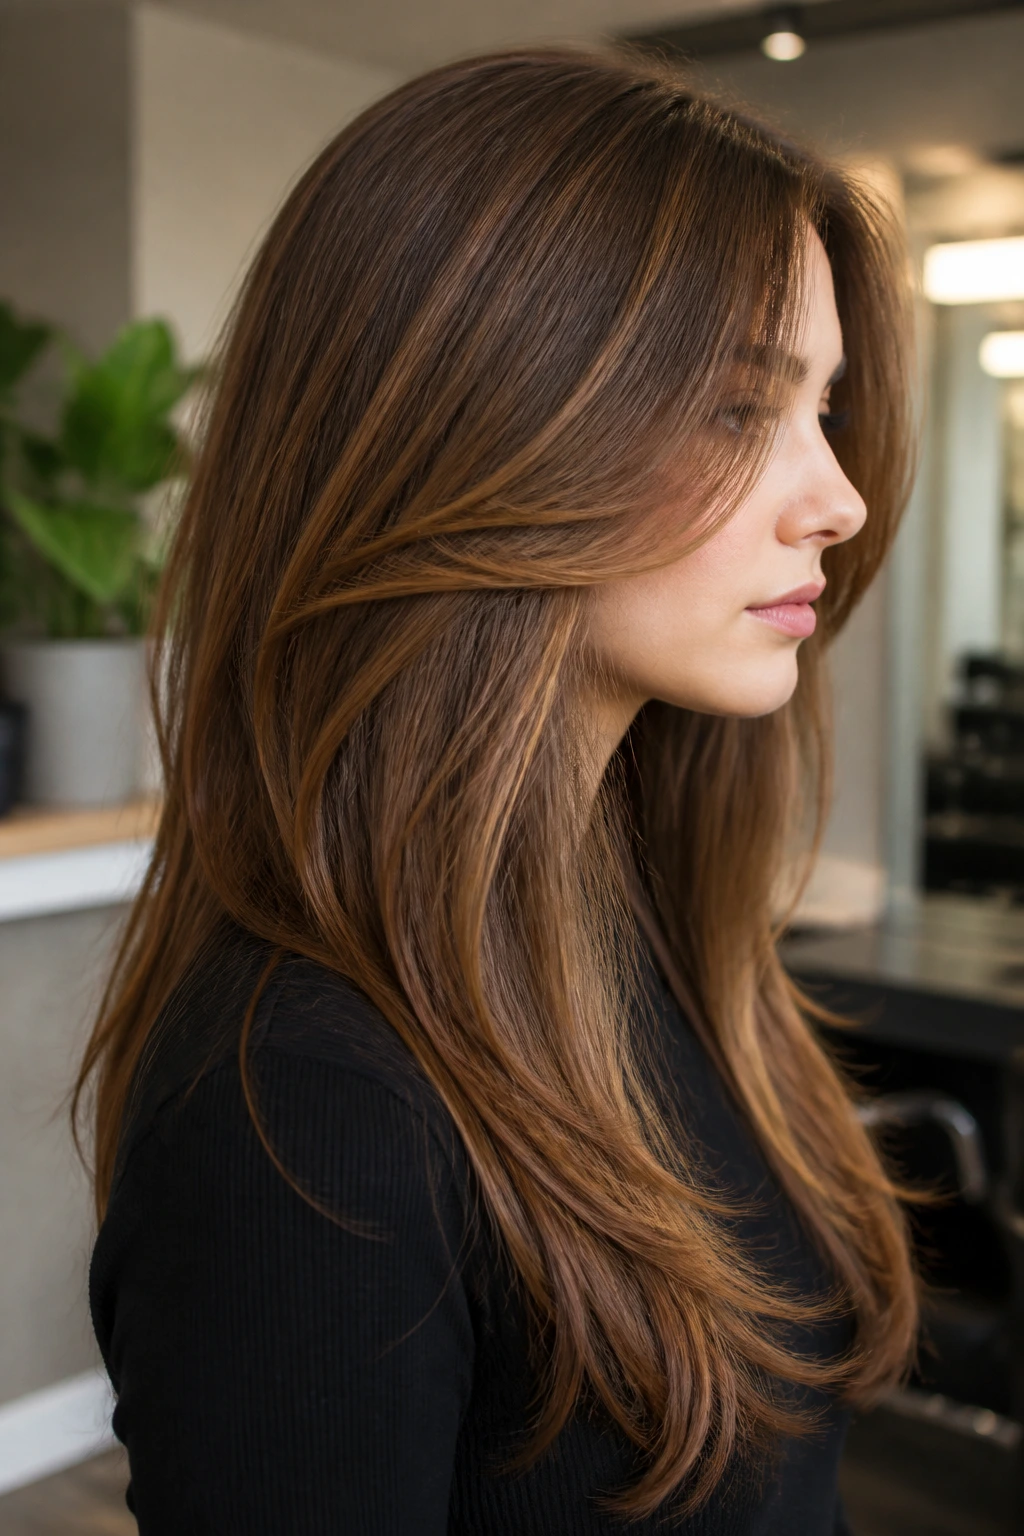
Cheekbone is the sweet spot
For most of these cuts, the first visible face-framing pieces should graze somewhere between the cheekbone and upper lip. That range opens the face without cutting the length into pieces that feel disconnected. It also gives you a place to tuck hair behind the ear and still have movement fall back into the front.
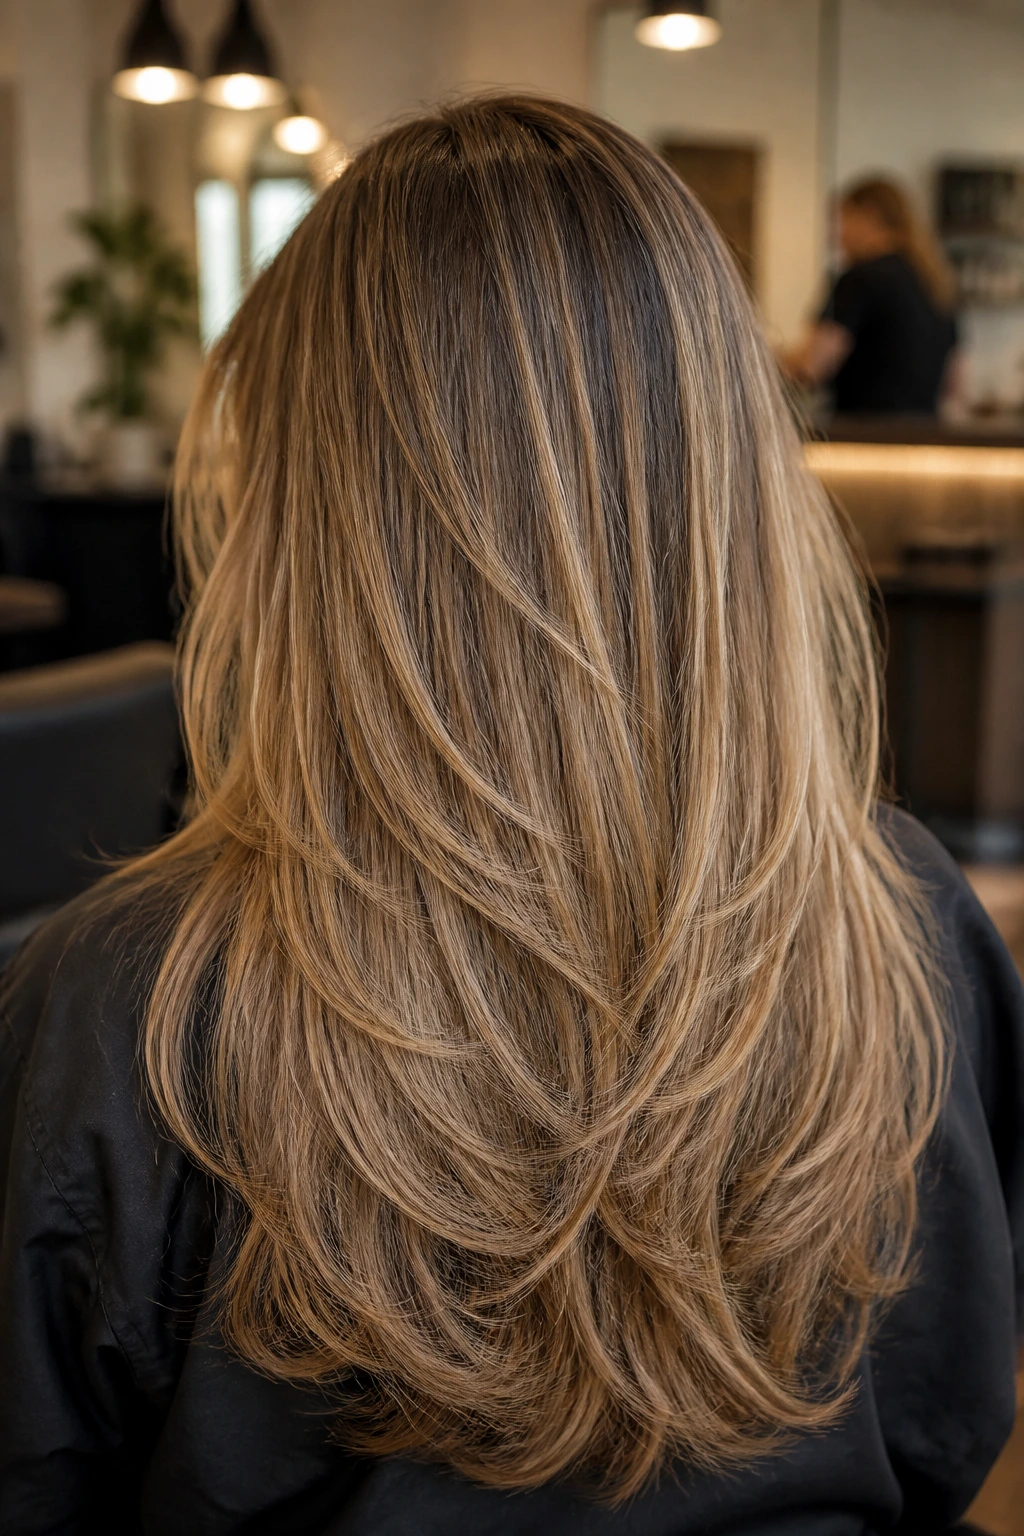
The perimeter should still carry weight
This matters more on long hair than on medium lengths. A strong bottom line keeps the hair from looking stringy at the ends, especially if you wear it straight. I prefer long layers that let the perimeter stay full enough to swing when you turn your head.
Texture changes the placement
Straight hair shows every layer line. Wavy hair hides more, which means the cut can be a little softer. Curly hair needs layers placed by curl pattern, not by a ruler. That’s where a lot of bad haircuts begin — somebody cuts for the photo, not for the actual texture.
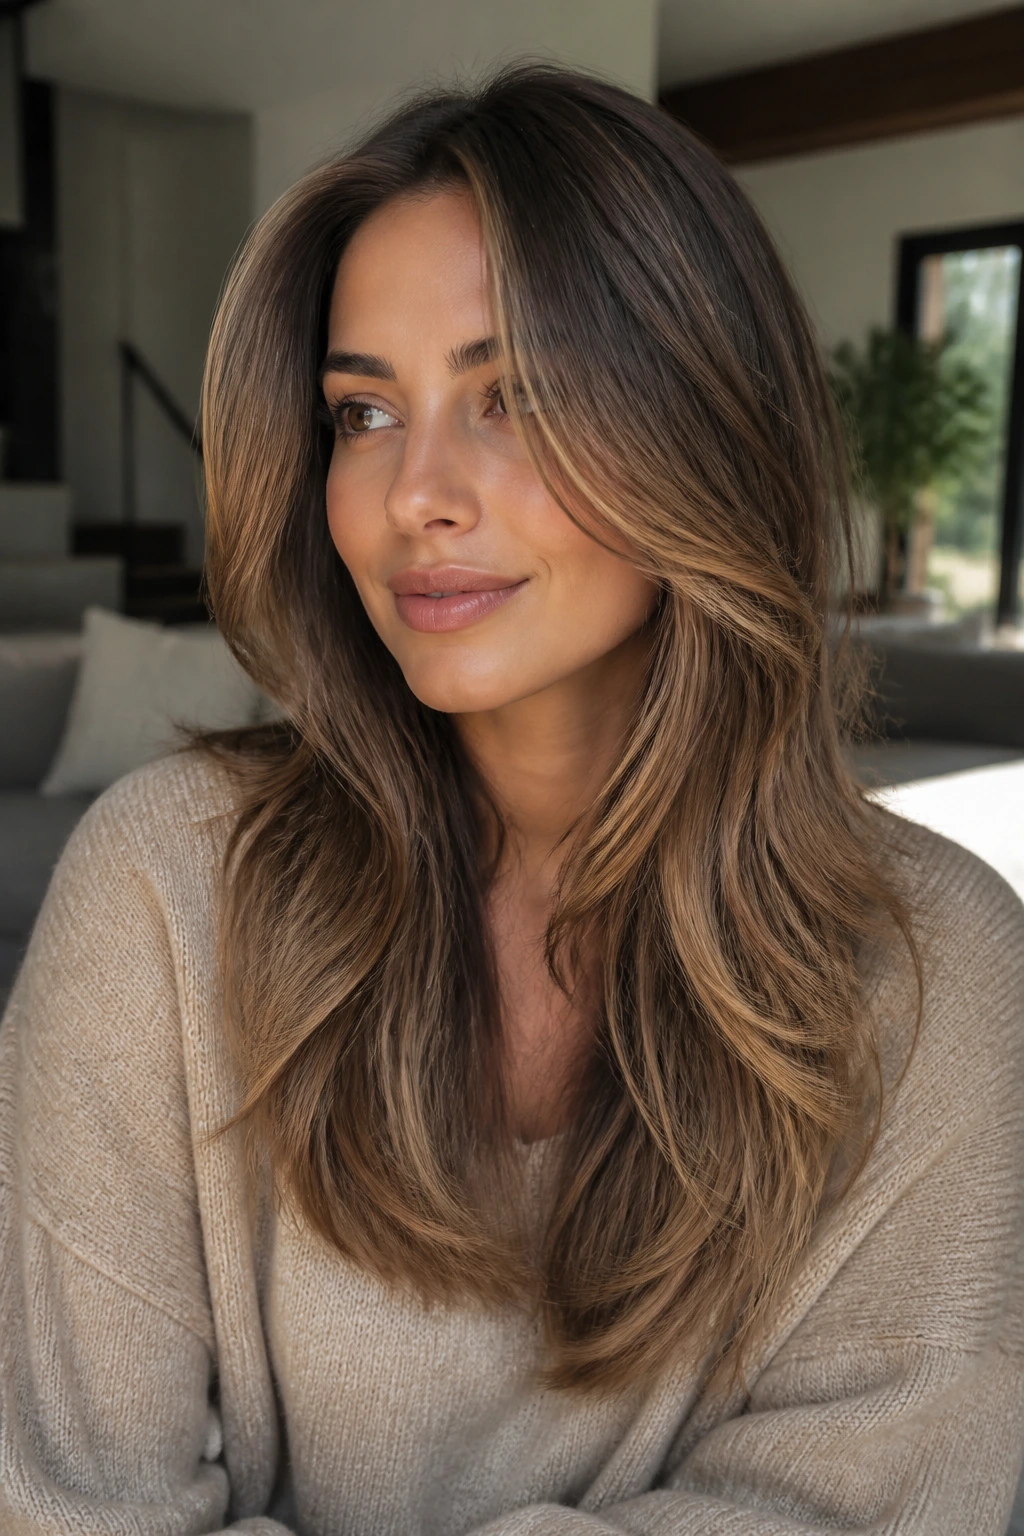
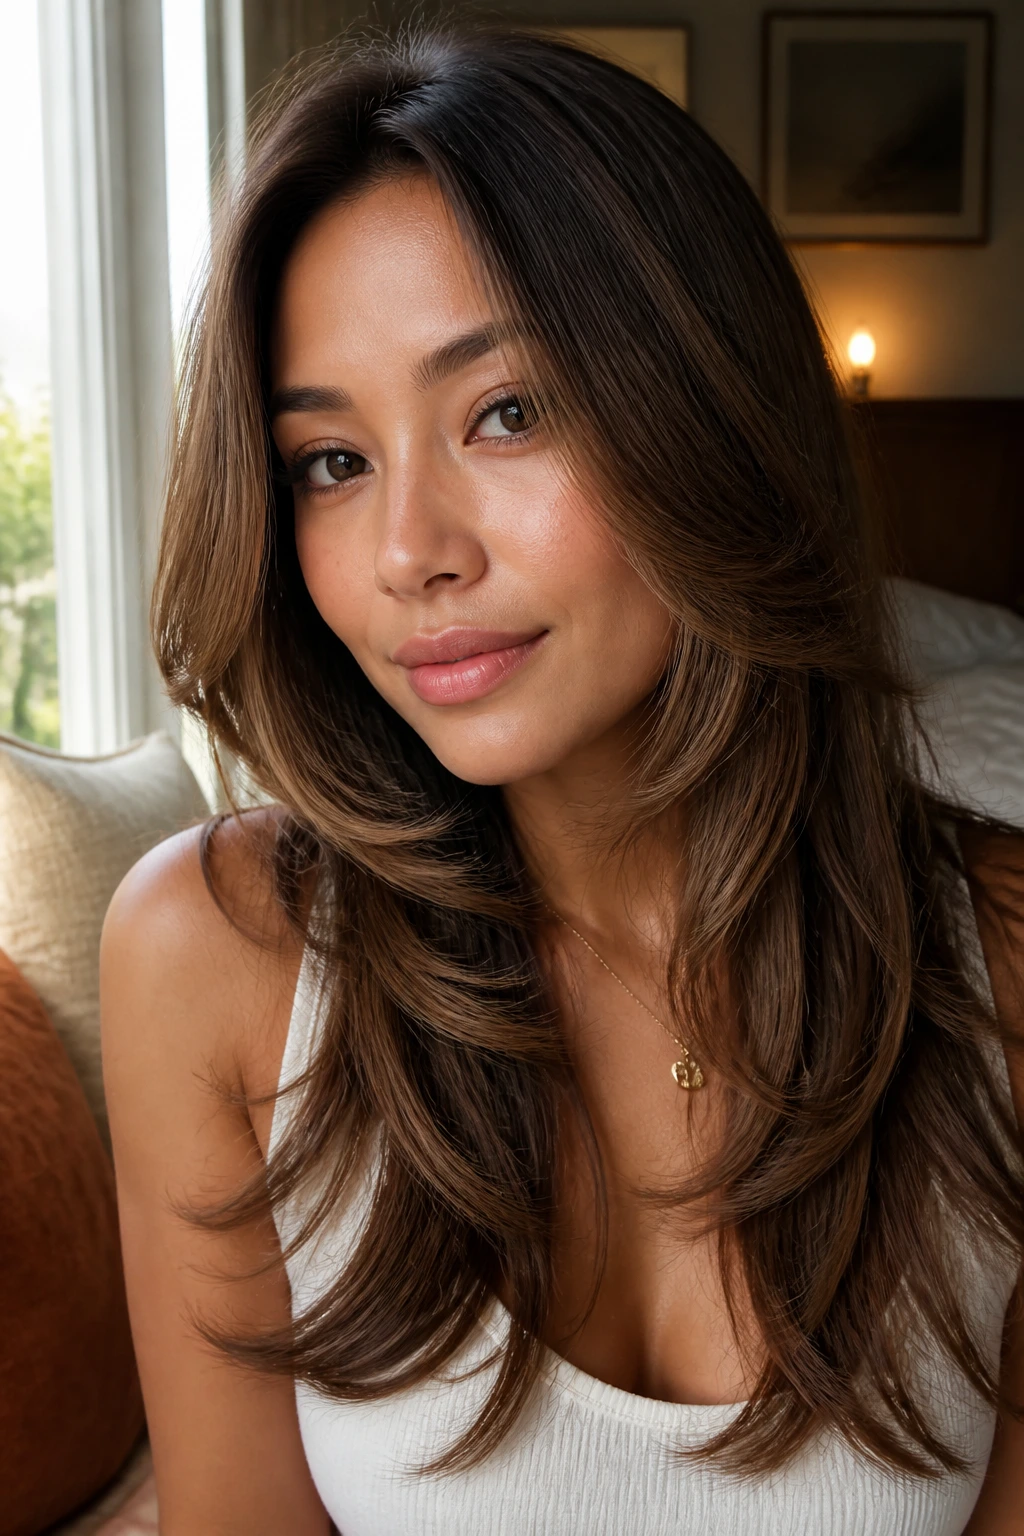
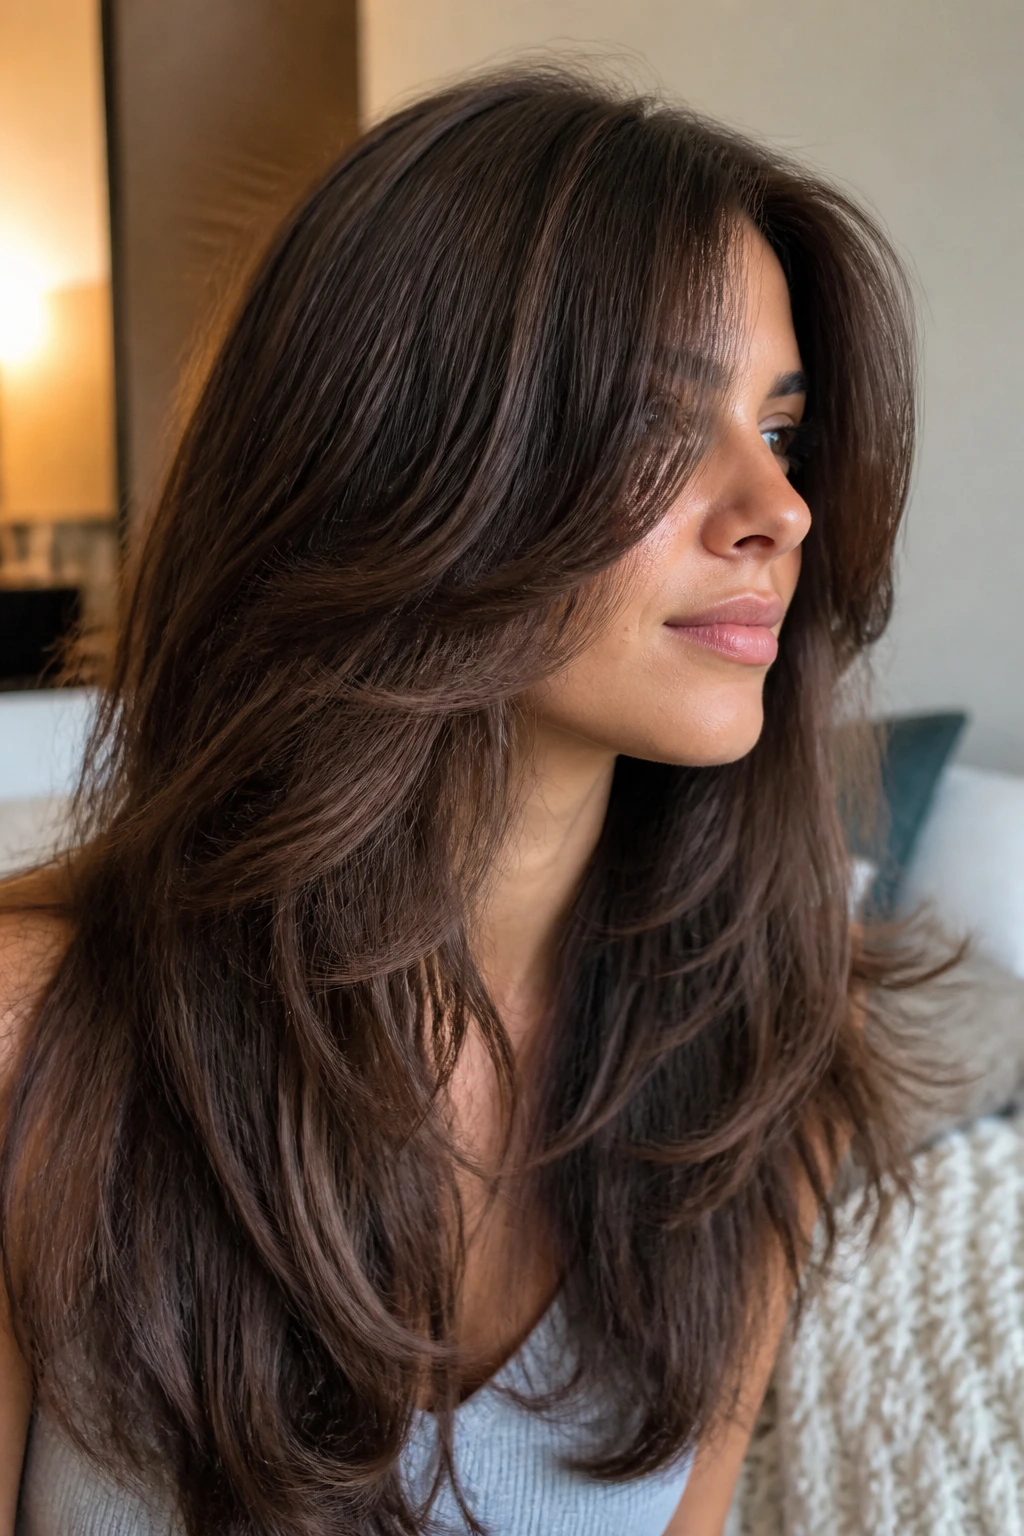
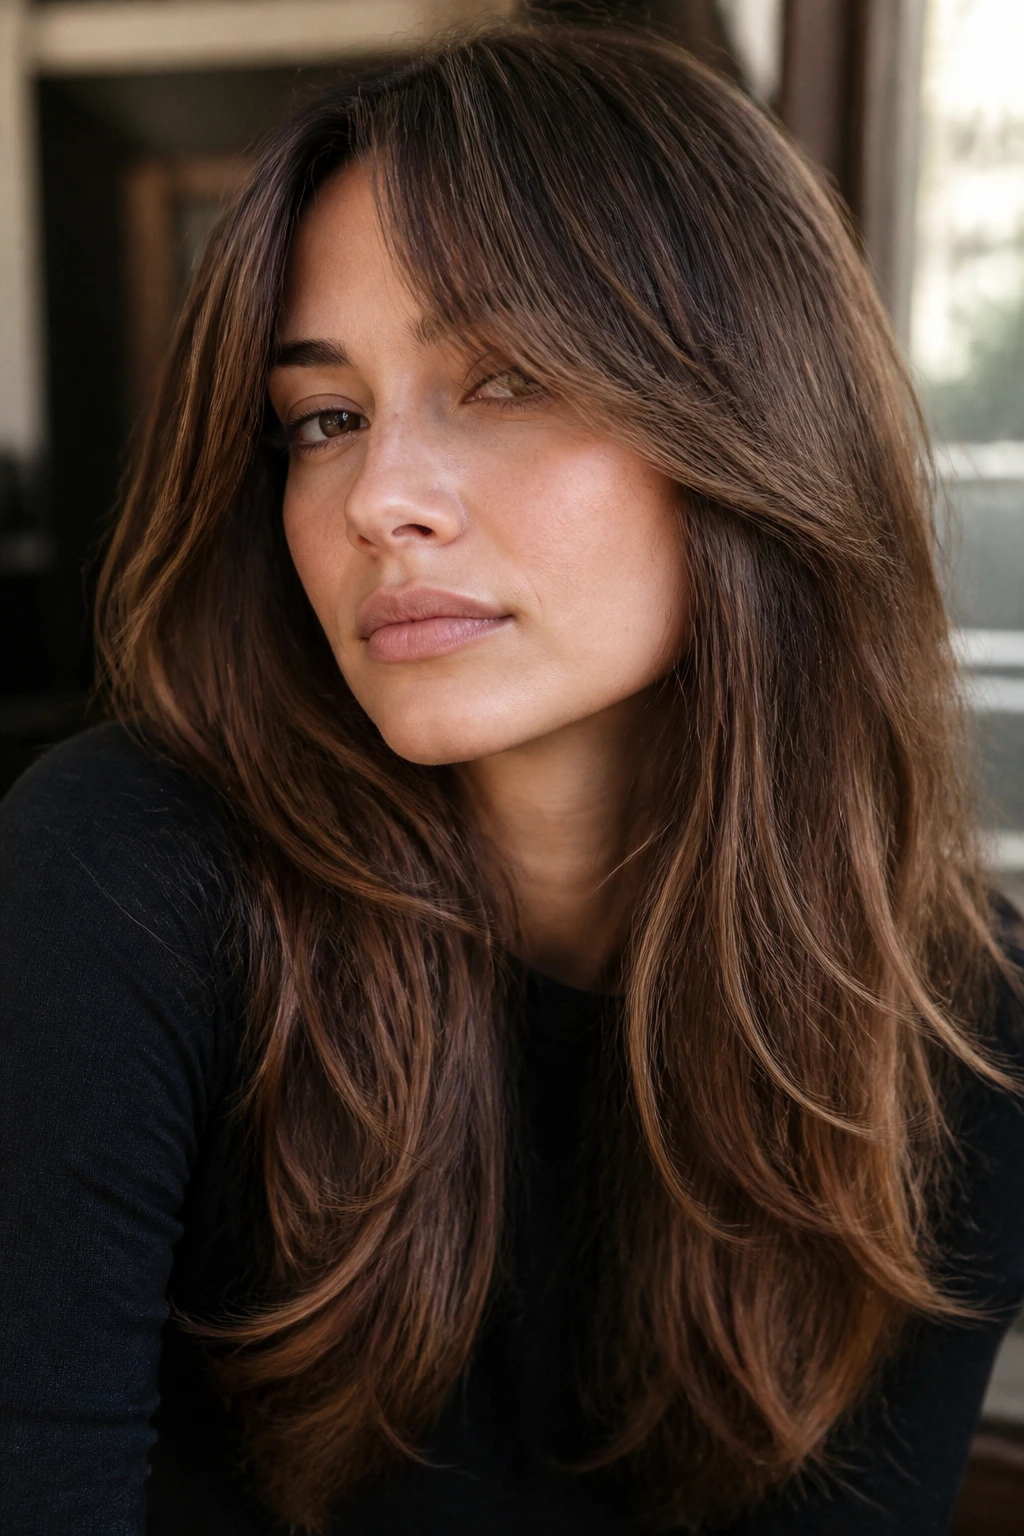
1. Curtain Layers That Split at the Cheekbone
Curtain layers are the safe bet that still looks thought-through. The front pieces split at the center and fall away from the face in a soft arc, which suits an oval face because it keeps the symmetry open instead of boxing it in. On long hair, I like this version when the shortest pieces skim the cheekbone and then drift down into the rest of the length.
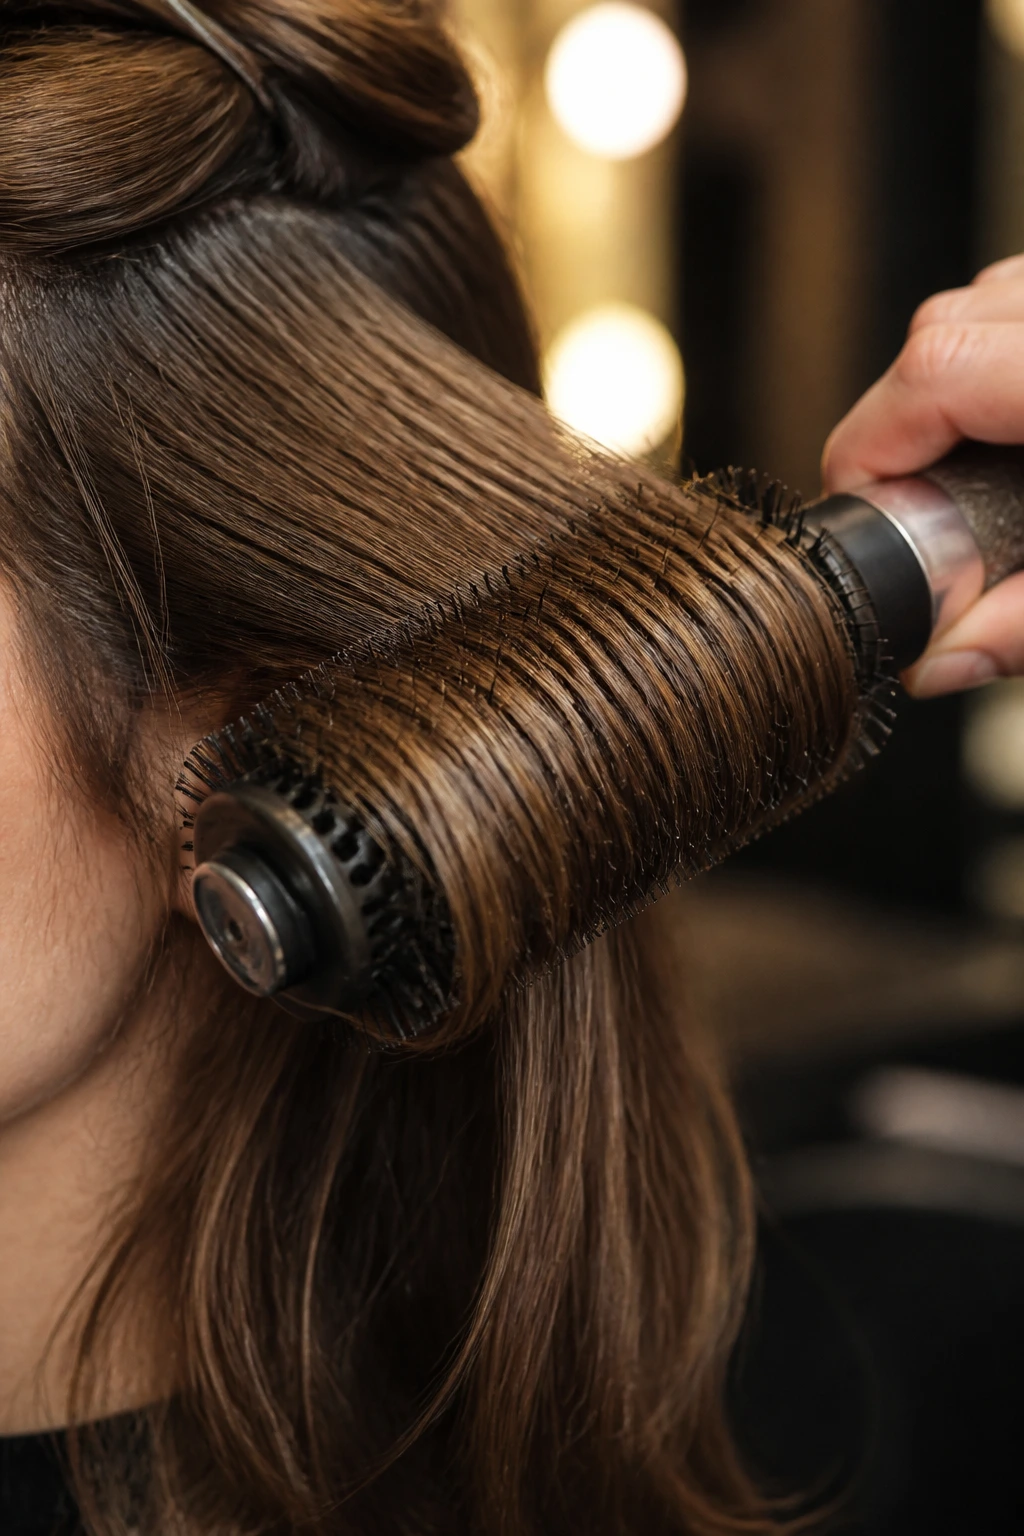
The shape works because it gives you movement right where the face needs it, not at the very ends where nobody notices. Blow-dried inward with a round brush, the front sits like a frame. Air-dried, it looks relaxed and a little undone. Use a lightweight mousse at the roots if your hair tends to go flat by lunchtime.
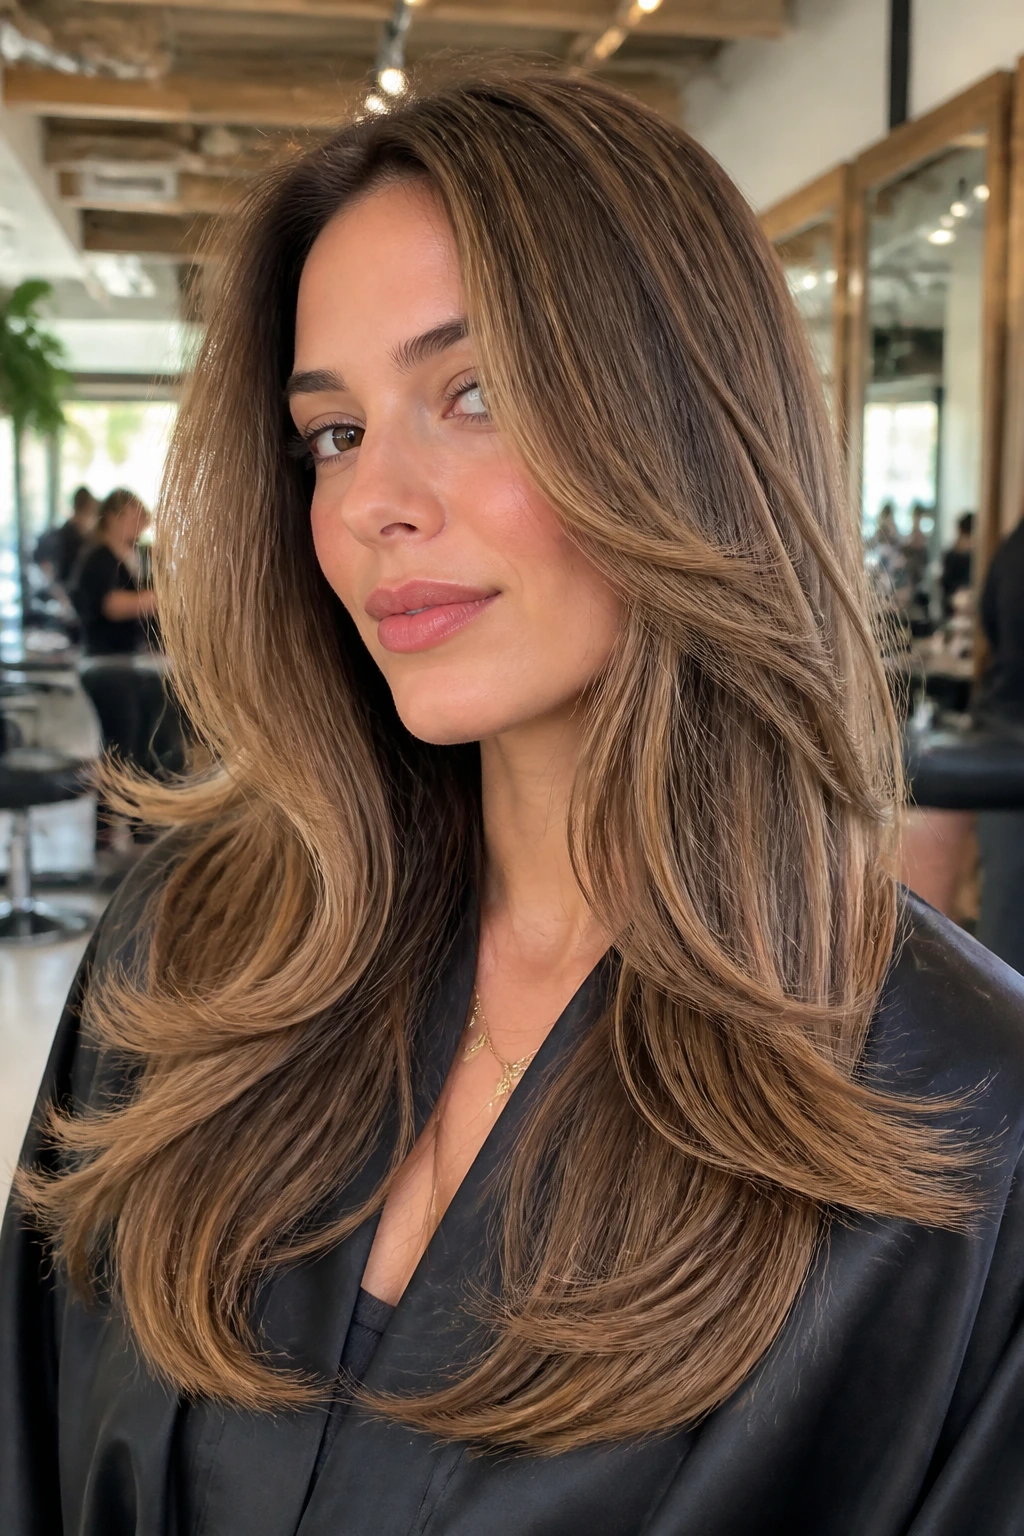
2. Butterfly Layers With a Lifted Crown
Butterfly layers are for the days when you want long hair to feel lighter without surrendering the length. The crown gets a few shorter internal layers, while the lower section stays long and full. On an oval face, that extra lift at the top keeps the profile from looking stretched, especially if your hair is heavy or your forehead is taller.
I like butterfly layers when the hair has enough density to hold shape. Fine hair can get swallowed by too much internal cutting. Thick hair, though, can turn this into a real advantage because the top section moves and the bottom still has weight. A blowout brush and a little root spray make the difference between “layered” and “collapsed.”
3. U-Shaped Layers That Keep the Ends Full
Why does the U-shape work so well on long hair? Because it keeps the perimeter rounded instead of sharp, which makes the length look thicker at the back and softer near the shoulders. For oval faces, that curve keeps the eye moving instead of stopping at a blunt line.
This is one of my favorite cuts for people who like long hair but hate when it looks stringy. The face frame can stay soft and the bottom can keep enough weight to feel expensive, even if that word gets overused to death. If you straighten your hair, the U-shape shows up cleanly. If you wave it, the ends look more plush than pointy.
- Best for: dense straight hair, soft waves, and anyone who likes length that still has shape.
- Styling note: a 2-inch round brush or a large-barrel blowout brush keeps the curve soft instead of floppy.
- Watch for: layers cut too short in the back, which can make the U look accidental instead of deliberate.
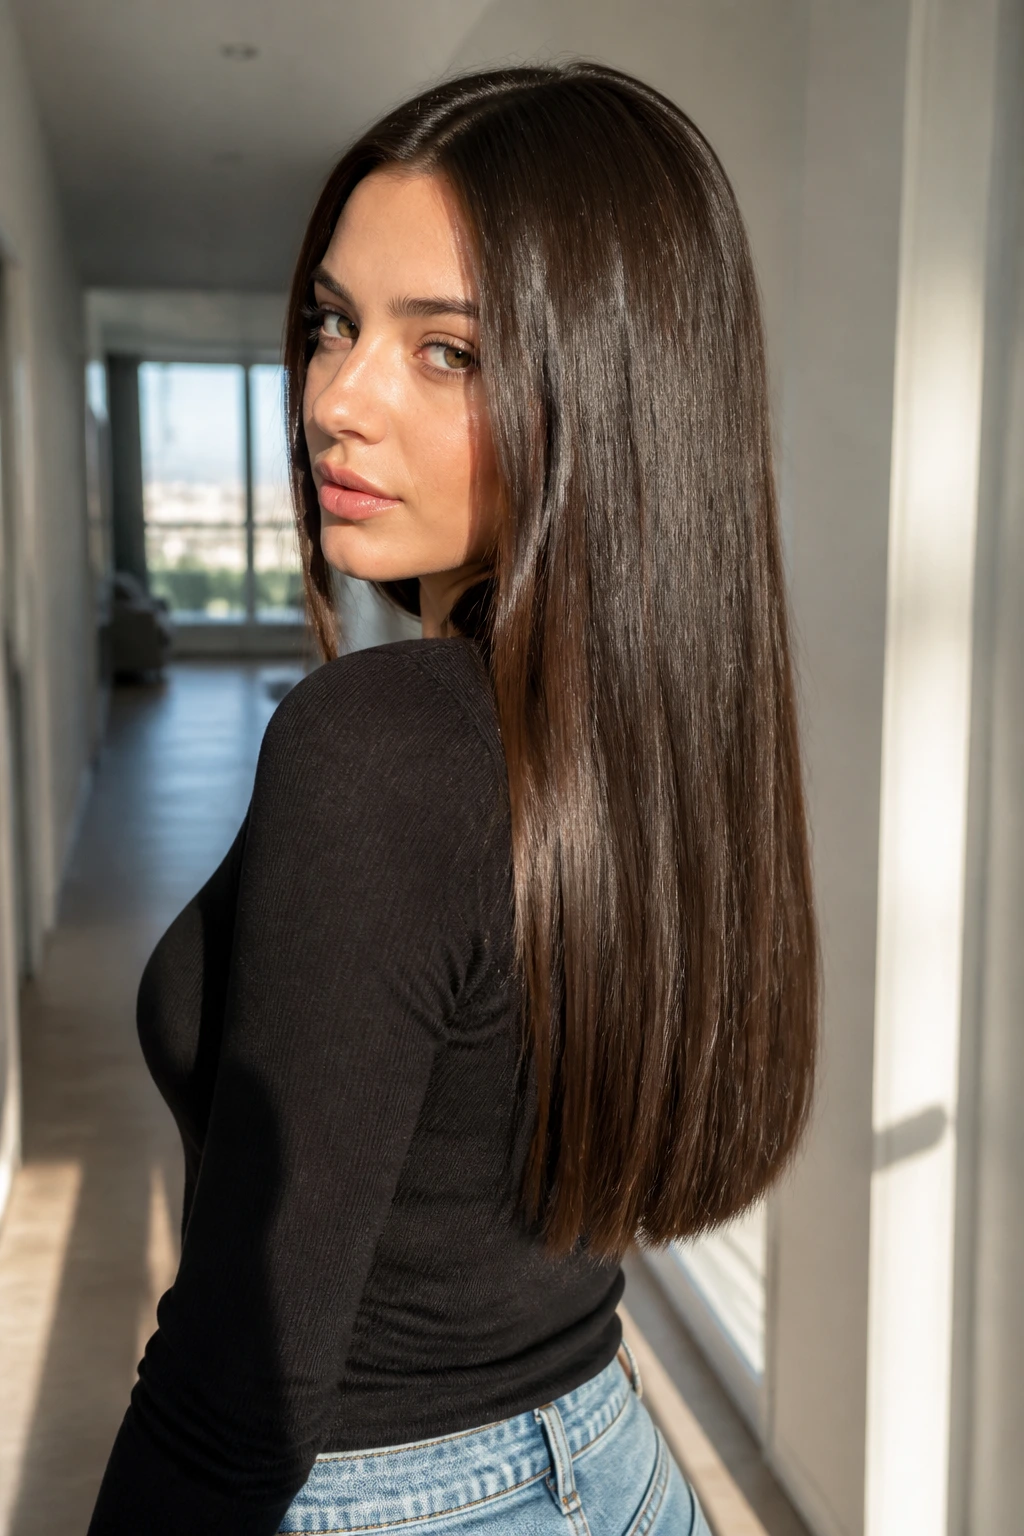
4. Invisible Layers for a Sleek Finish
Invisible layers are the quiet ones. You do not see a dramatic step between lengths, which is exactly why they work on long, straight hair that needs movement without a visible chop. On an oval face, that sleeker approach keeps the shape clean and polished while still opening the front.
This is the cut I’d choose if you love hair that swings but don’t want obvious layer lines. A stylist usually cuts these internally, so the outer perimeter stays smooth. The result can look especially good when the hair is flat-ironed or brushed into a soft bend. Use a heat protectant with a little slip, because glossy long hair shows every rough patch.
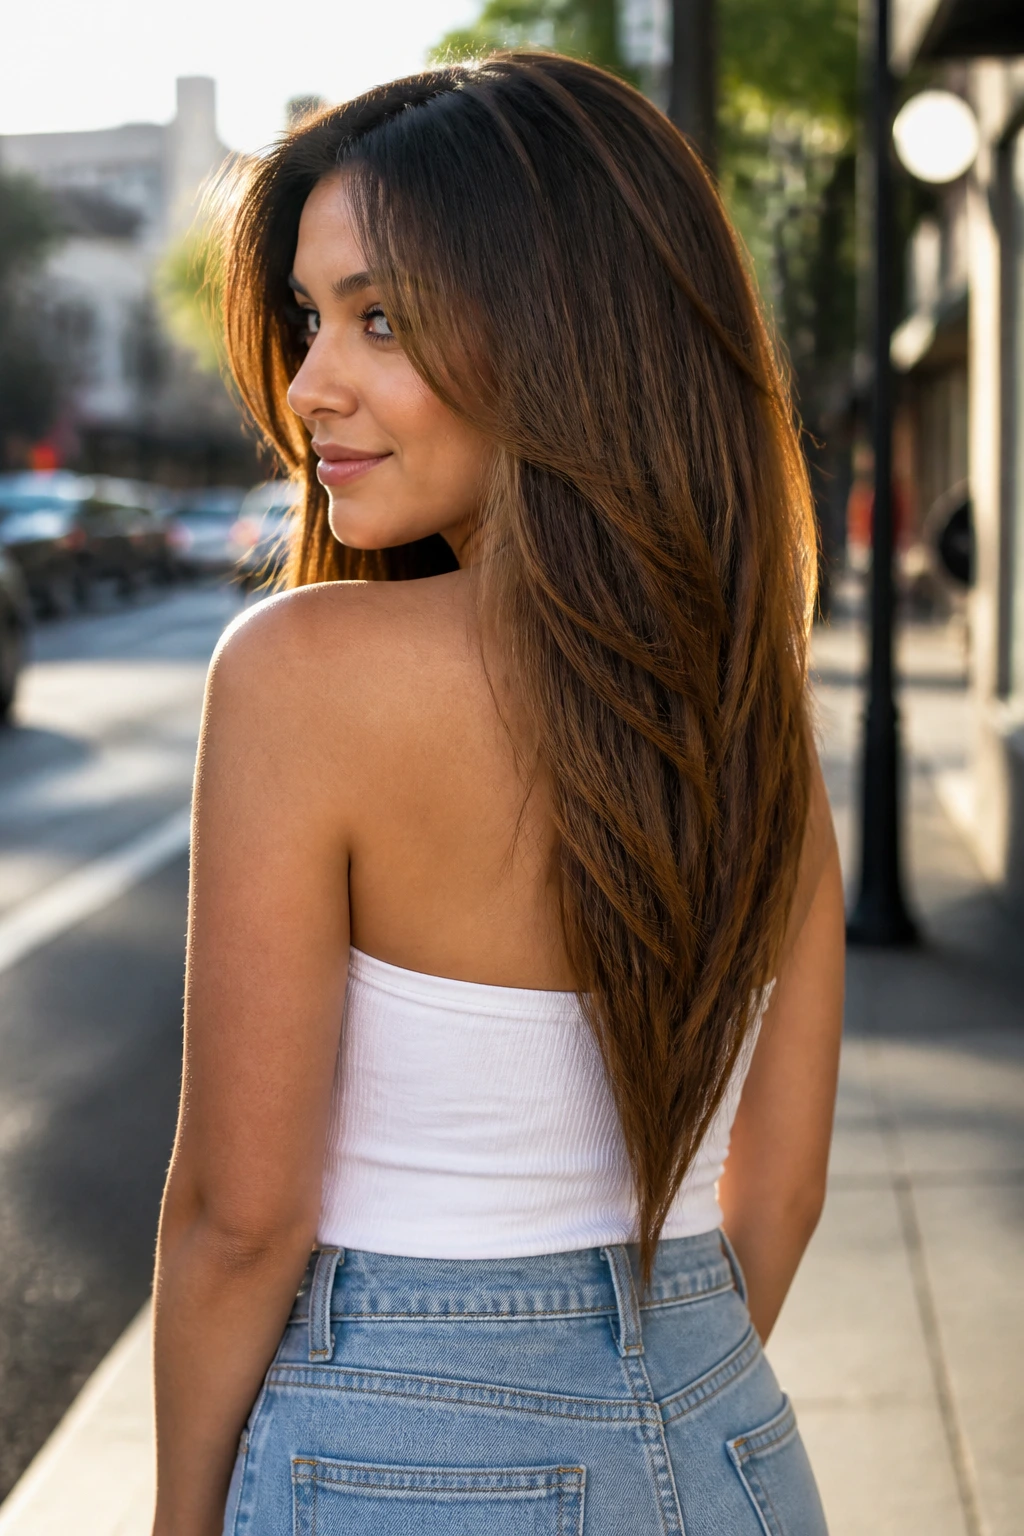
5. Feathered Blowout Layers
Feathered layers bring that old-school salon swing, but the newer version is softer. The ends don’t need to flick out like a helmet. They just need enough movement to catch air when you turn your head. On an oval face, this kind of lift can make long hair feel lively without making the cheek area look crowded.
This cut depends on styling, and I’m fine with that. Not every hairstyle should be lazy. A round brush, a nozzle on the dryer, and a medium-hold mousse at the roots will create the smooth bend that makes feathering look intentional. If your hair is thick, ask for the feathering to stay longer through the mid-lengths so the bottom doesn’t disappear.
6. Razored Layers for Soft Separation
Razored layers are where people get nervous, usually because they’ve seen a bad shag. Fair. But when the blade work is controlled, the result is soft separation, not shredded ends. For long hair on an oval face, razor cutting can keep the front pieces light enough to move while still preserving length.
The best version of this cut has a little slip through the mid-lengths and a clean edge at the bottom. It’s especially good on wavy hair, where the texture hides the technique and the layers settle into natural bends. On fine hair, keep the razor work restrained. Too much can leave the ends wispy in a way that looks thin rather than airy.
7. Waterfall Layers Around the Jaw
Waterfall layers are the kind that seem to tumble forward without obvious steps. They’re flattering on oval faces because they add width right where the face can handle it, near the jaw and upper cheek area, without turning the whole haircut into a pyramid. That subtle spread is the difference between shape and bulk.
I like this cut on hair that already has some body, because the layers can fall like overlapping ribbons instead of sharp stairs. If your hair is straight, a loose bend at the ends helps the effect show up. If it’s wavy, you may not need much styling at all. The layers do the work.
8. Center-Part Layers That Open the Face
A center part with layered front pieces sounds basic until you see how much it changes the balance on an oval face. The part creates symmetry, and the layers prevent that symmetry from becoming severe. The result is open, clean, and easy to wear with long hair because the face frame falls evenly on both sides.
This version is at its best when the shortest pieces hit around the cheekbone and the next wave of layers slips down toward the collarbone. That gives the front some rhythm. Keep the ends full. A center part with thin ends can look strangely severe, like the haircut forgot the last two inches.
9. Side-Swept Layers With a Long Slope
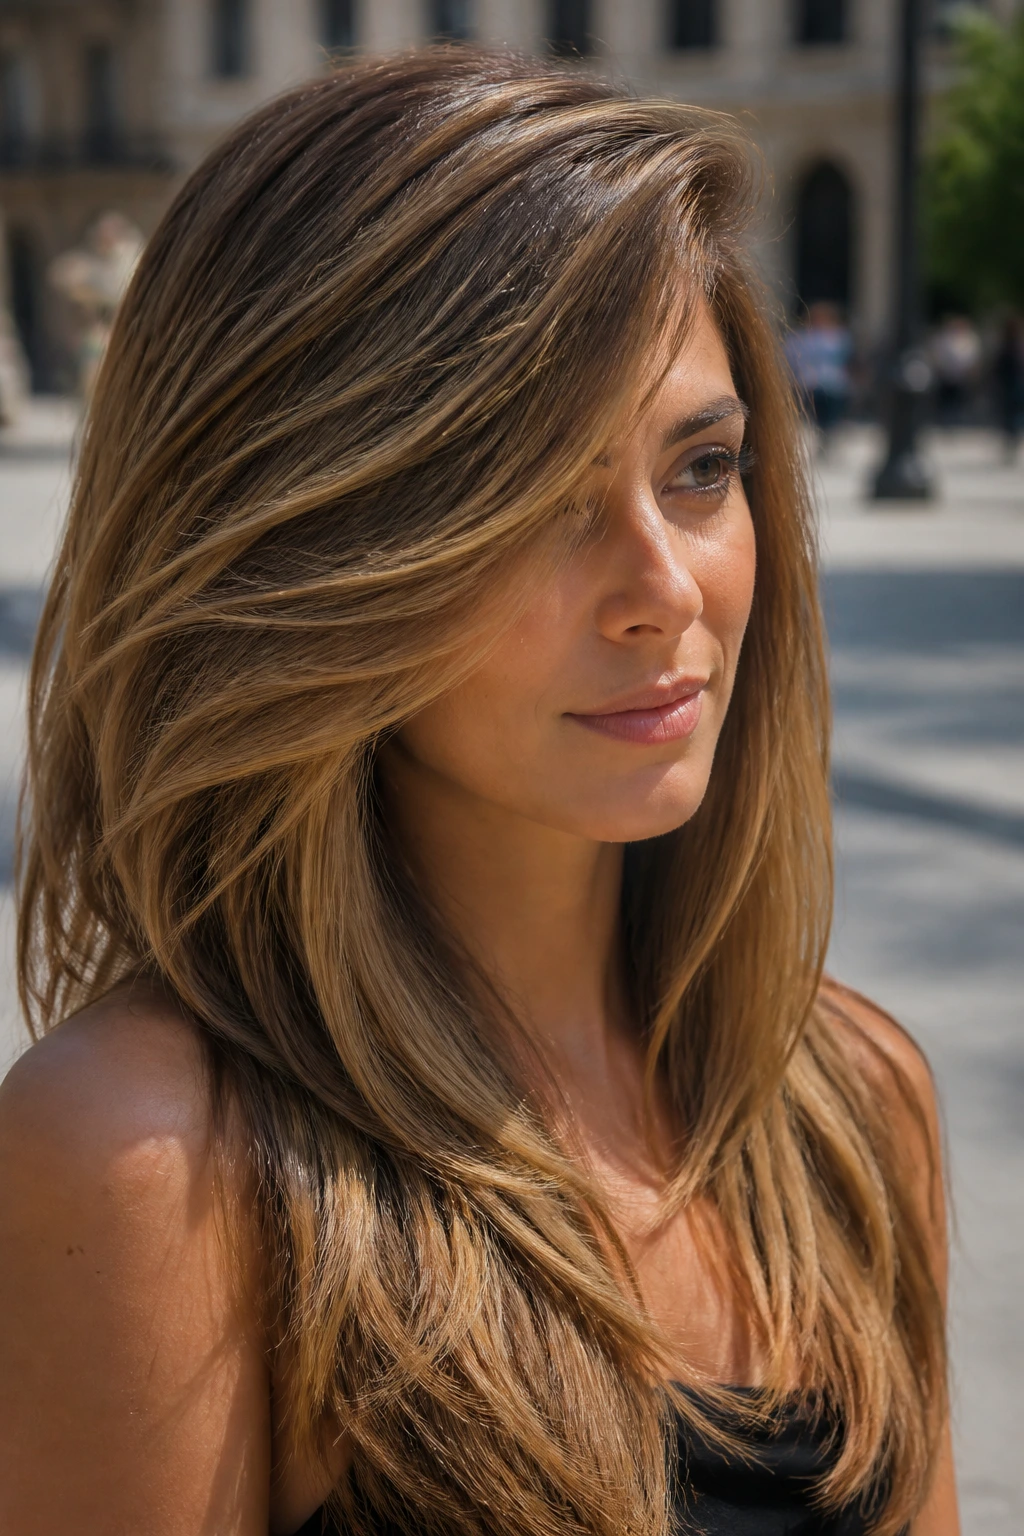
Side-swept layers bring a softer diagonal into the shape. On an oval face, that diagonal breaks up symmetry and adds a little tension in the right way. It also gives long hair a more dramatic line without needing bangs or a major cut around the forehead.
This one works especially well if you already part your hair off-center. Ask for the face-framing pieces to fall with the part instead of fighting it. That sounds obvious, but it gets ignored constantly. A long slope through the front also means the cut can grow out for a while before it starts to feel heavy.
10. Rounded Volume Layers for Balanced Width
If your long hair hangs too straight and too narrow, rounded volume layers fix that in a way blunt cuts can’t. Oval faces can handle extra width through the sides, which is why this shape feels balanced instead of puffy. The curve makes the haircut sit around the face, not just below it.
I like this when the hair is medium-to-thick and wants to collapse at the crown. The shortest layers live higher than a curtain cut, but not so high that the perimeter looks thinned out. A velcro roller at the crown or a round brush at the roots gives the top a little lift. Skip heavy oils near the roots. They kill the shape fast.
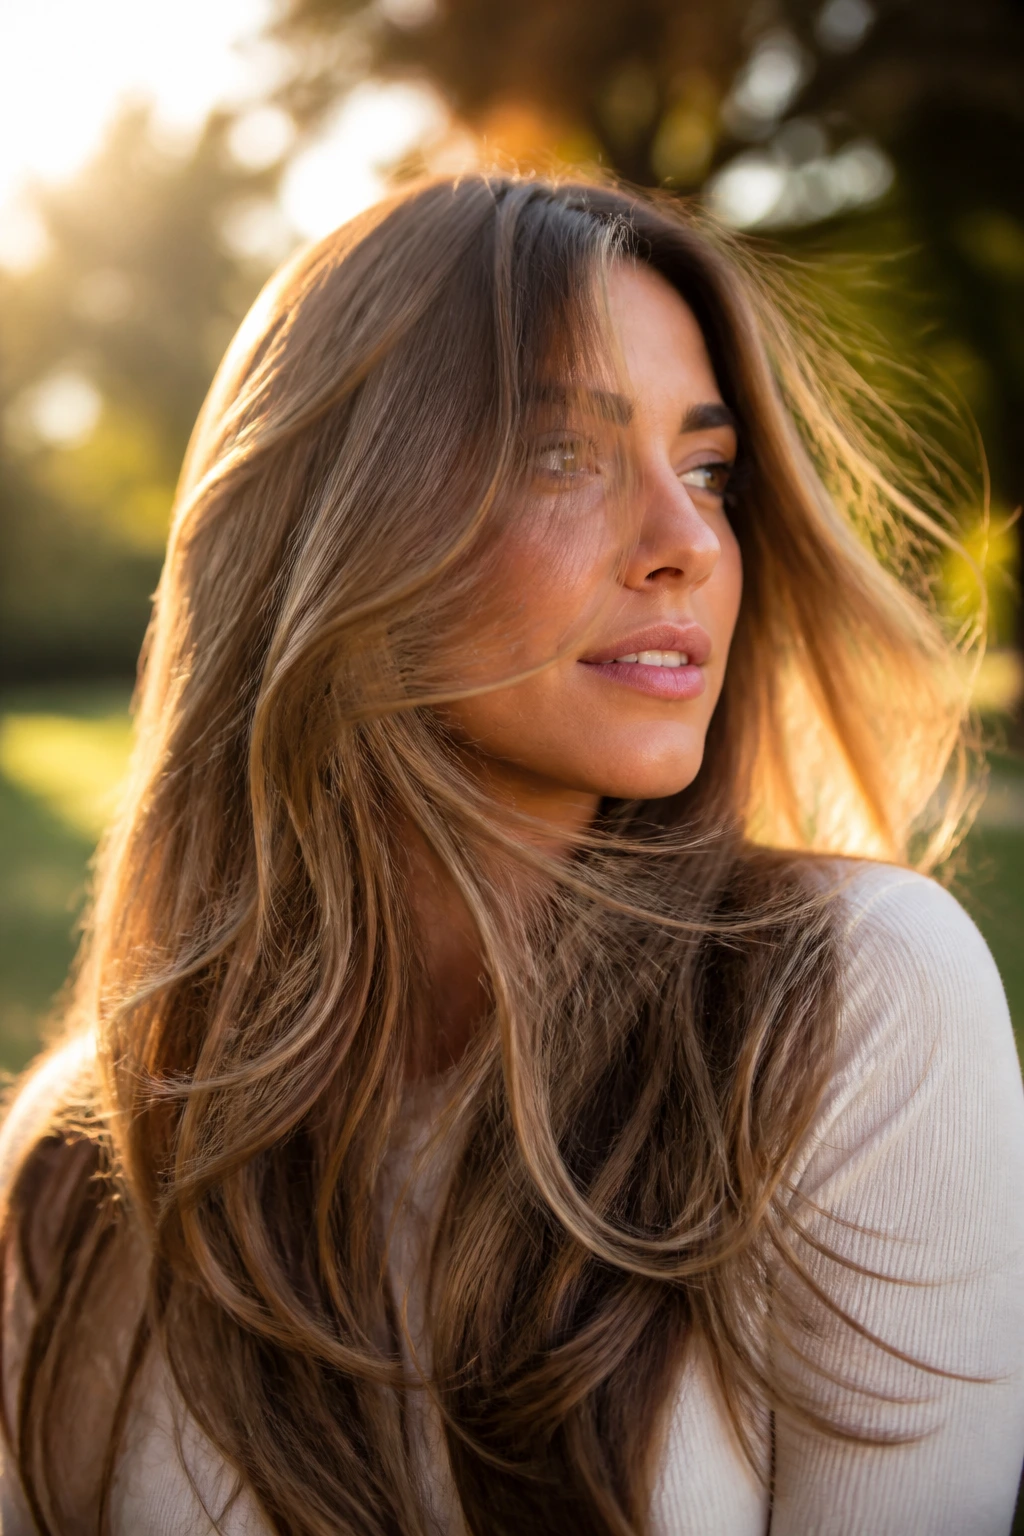
11. Beach-Wave Layers That Ruffle at the Ends
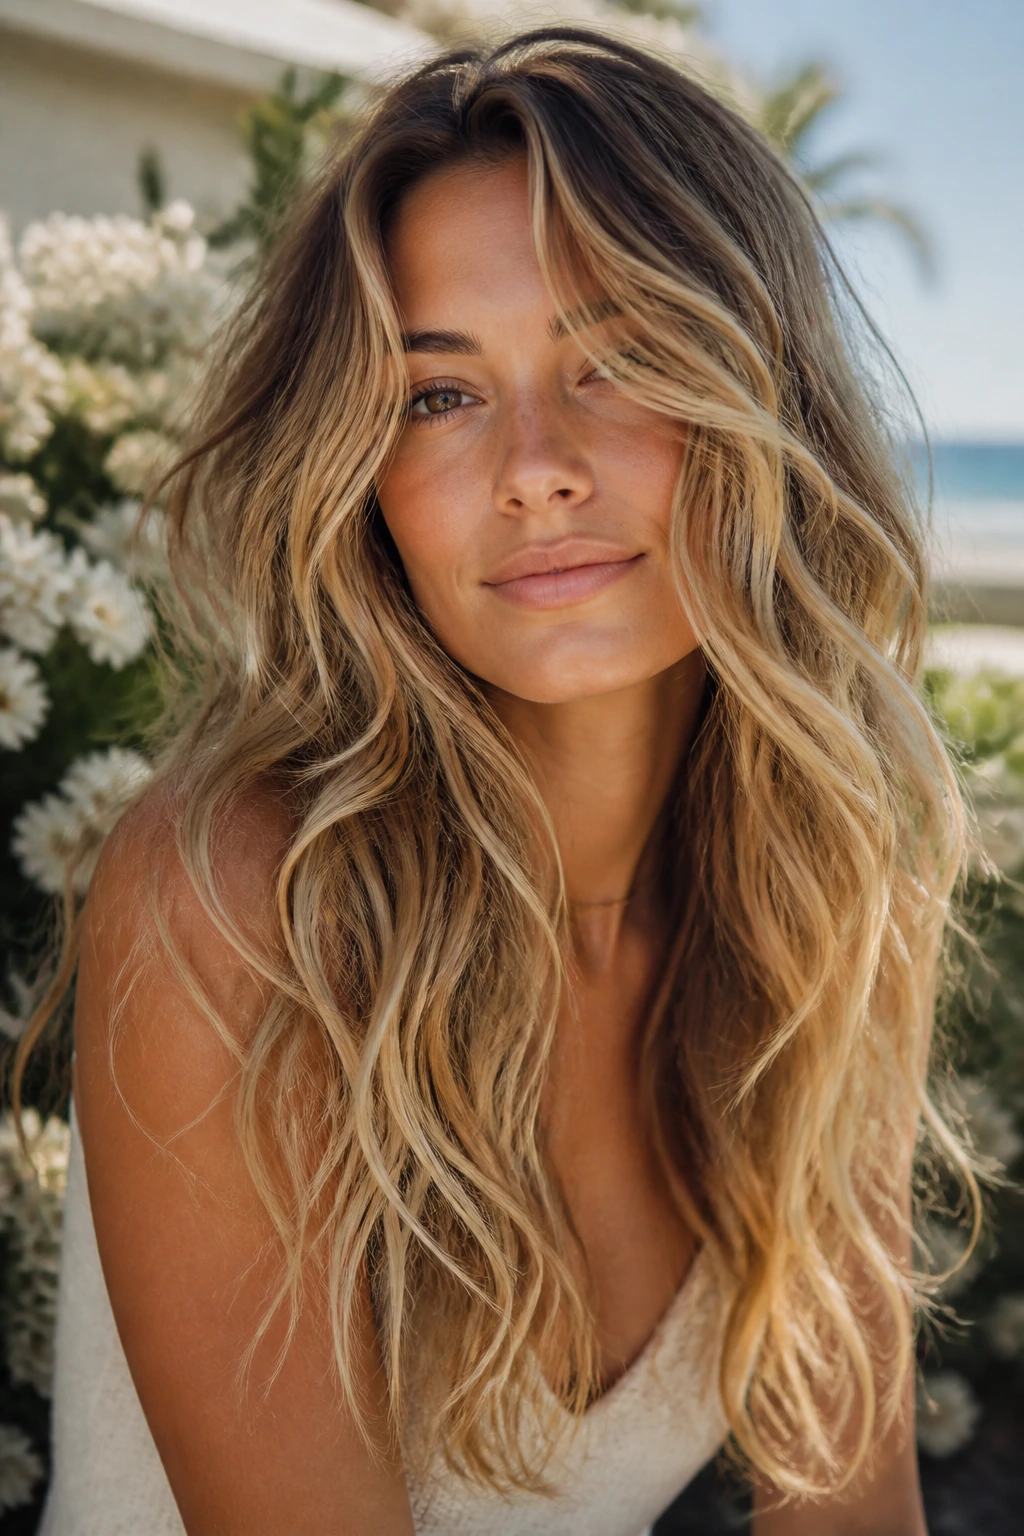
Beach-wave layers are for long hair that looks better with bend than with pin-straight polish. The layers are usually long and soft, which lets the waves stack in a way that feels loose rather than messy. On an oval face, the movement adds width at the sides and keeps the face from looking overly elongated by the length.
What matters here is not overcutting the ends. The wave pattern needs weight. If the layers are too high or too light, the texture turns fluffy at the wrong places and the bottom starts to fray. A salt spray can help, but I’d rather see a cream-based texturizer if your hair is dry. Salt is a blunt instrument.
12. C-Curve Layers for Straight Hair
C-curve layers are one of the cleanest options for straight long hair. The ends bend inward just enough to shape the haircut without shouting about it. On an oval face, that slight inward arc keeps the long hair from hanging like a curtain and gives the sides a soft contour.
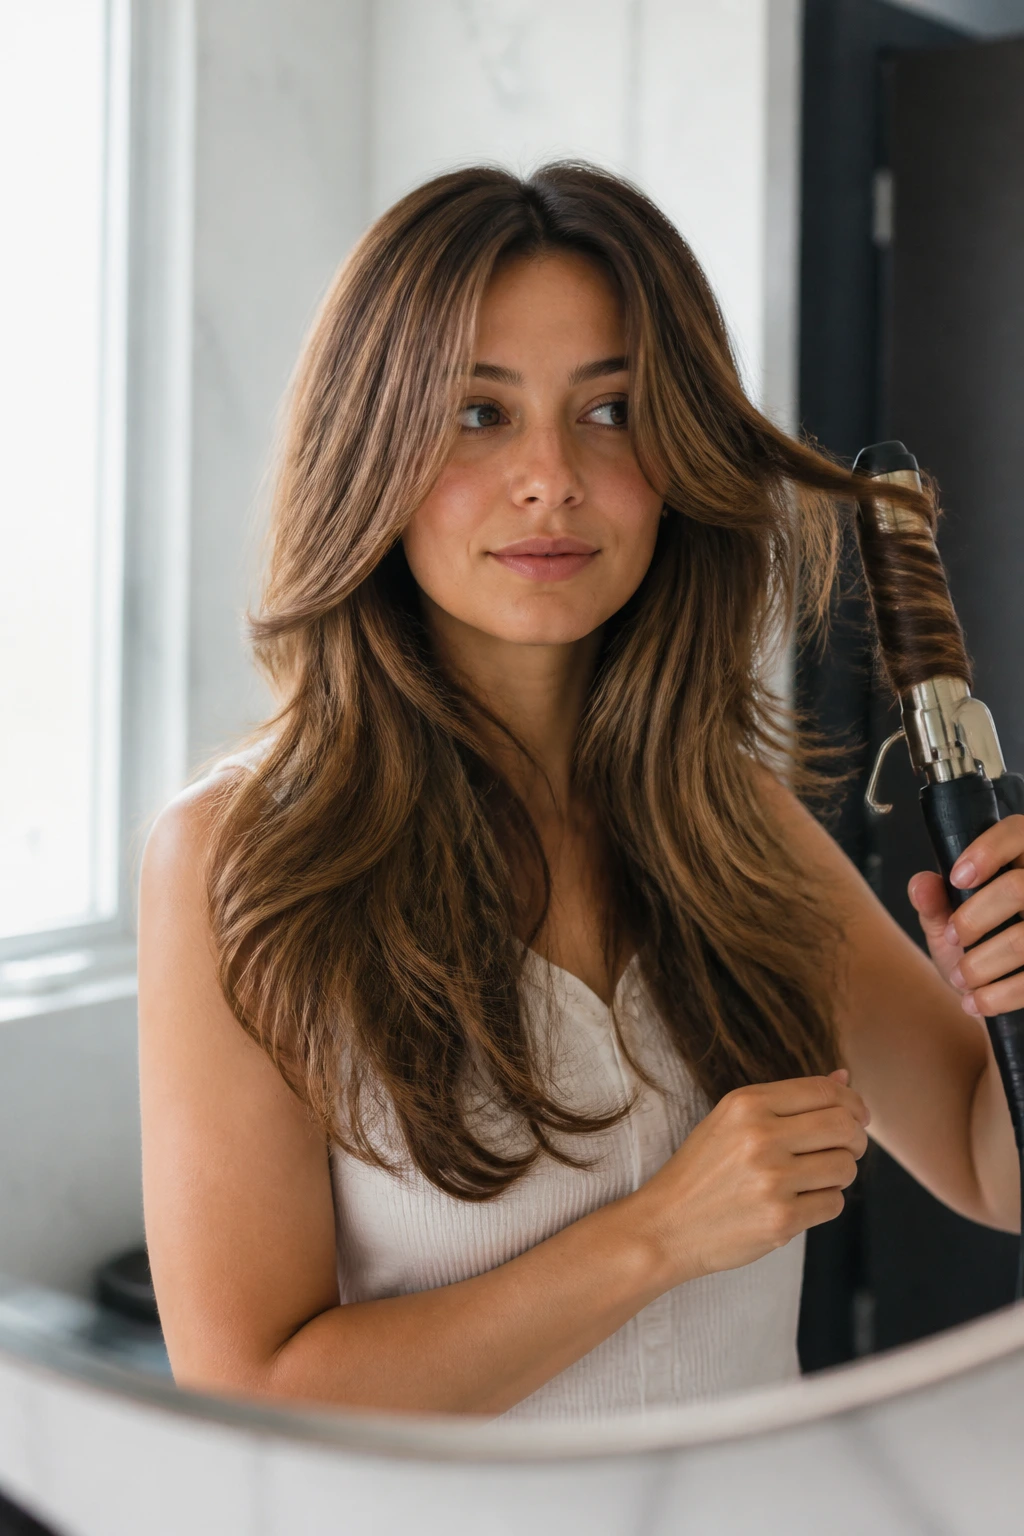
This cut lives or dies by the blow-dry. Use a medium round brush, bend the ends under, and let the hair cool before you touch it. That cooling step matters more than people admit. If you brush it out too soon, the curve drops and you’re left with a flat line. Straight hair loves this cut because it looks tidy with very little visible effort.
13. Weight-Removing Layers for Thick Hair
Thick hair needs a different conversation. You are not just “adding layers.” You’re removing the boxy bulk that can make long hair sit heavy around an oval face. The goal is movement through the interior without turning the ends thin and ragged.
This is where longer layering pays off. Ask for bulk removal below the cheekbone and through the mid-lengths, not a bunch of short pieces around the crown. That keeps the face open while letting the hair lie smoother. Thick hair often gets puffy at the wrong places when it’s overlayered. Avoid that. A clean perimeter with interior movement is usually the smarter answer.
14. Airy Layers for Fine Hair
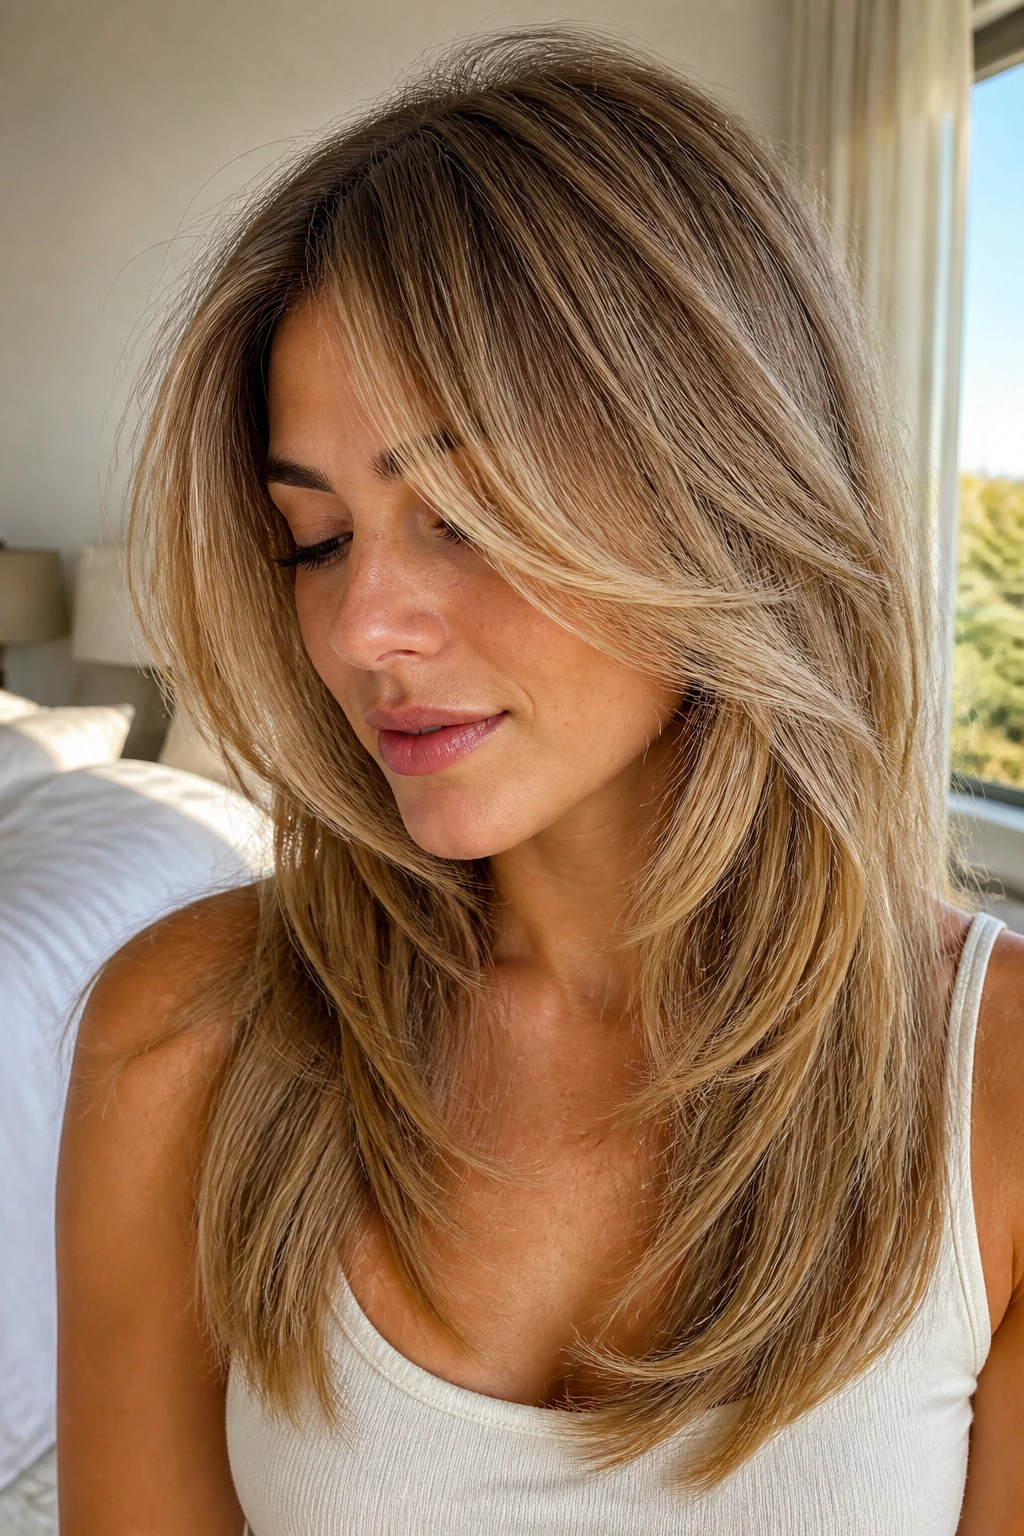
Fine hair needs restraint. Too many layers and the ends disappear; too few and the hair falls flat against the cheeks. Airy layers are a softer option, with the shortest pieces staying modest and the perimeter left fuller than you’d expect. On an oval face, that balance keeps the hair from swallowing the face or vanishing into it.
I’d ask for light face-framing pieces and internal movement rather than a dramatic step pattern. Then style with root lift and a small amount of lightweight cream, not a heavy serum. Fine hair often looks best when it moves as one polished sheet with just enough separation near the front. Overtexturing it is a fast way to lose presence.
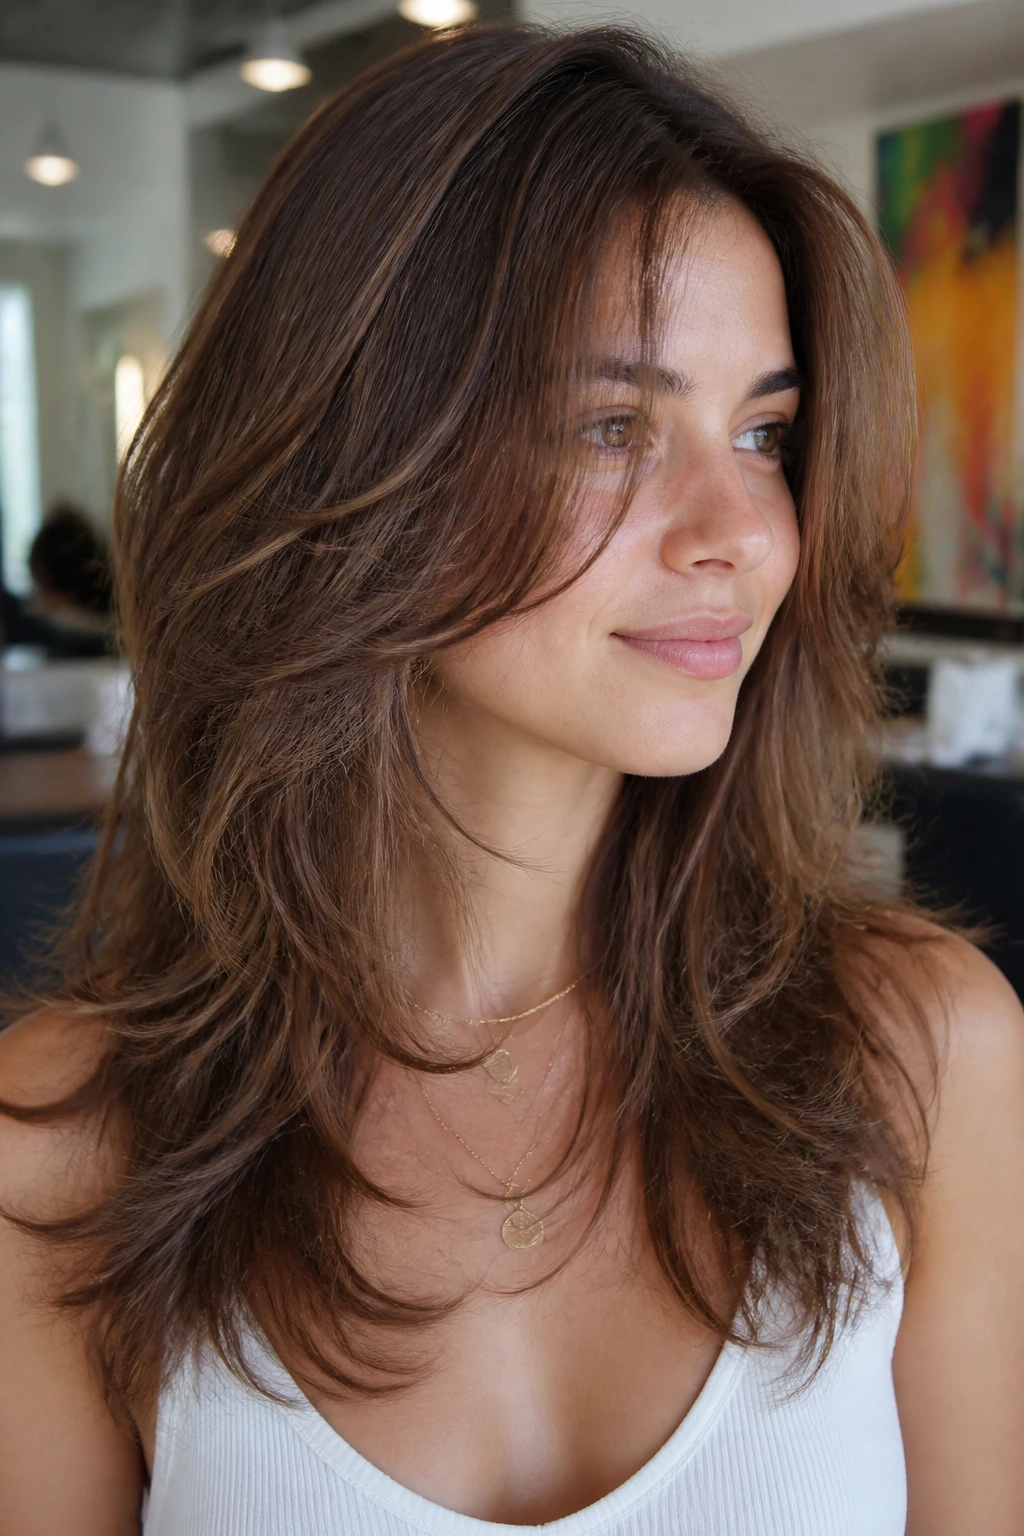
15. Long Shag Layers With a Softer Edge
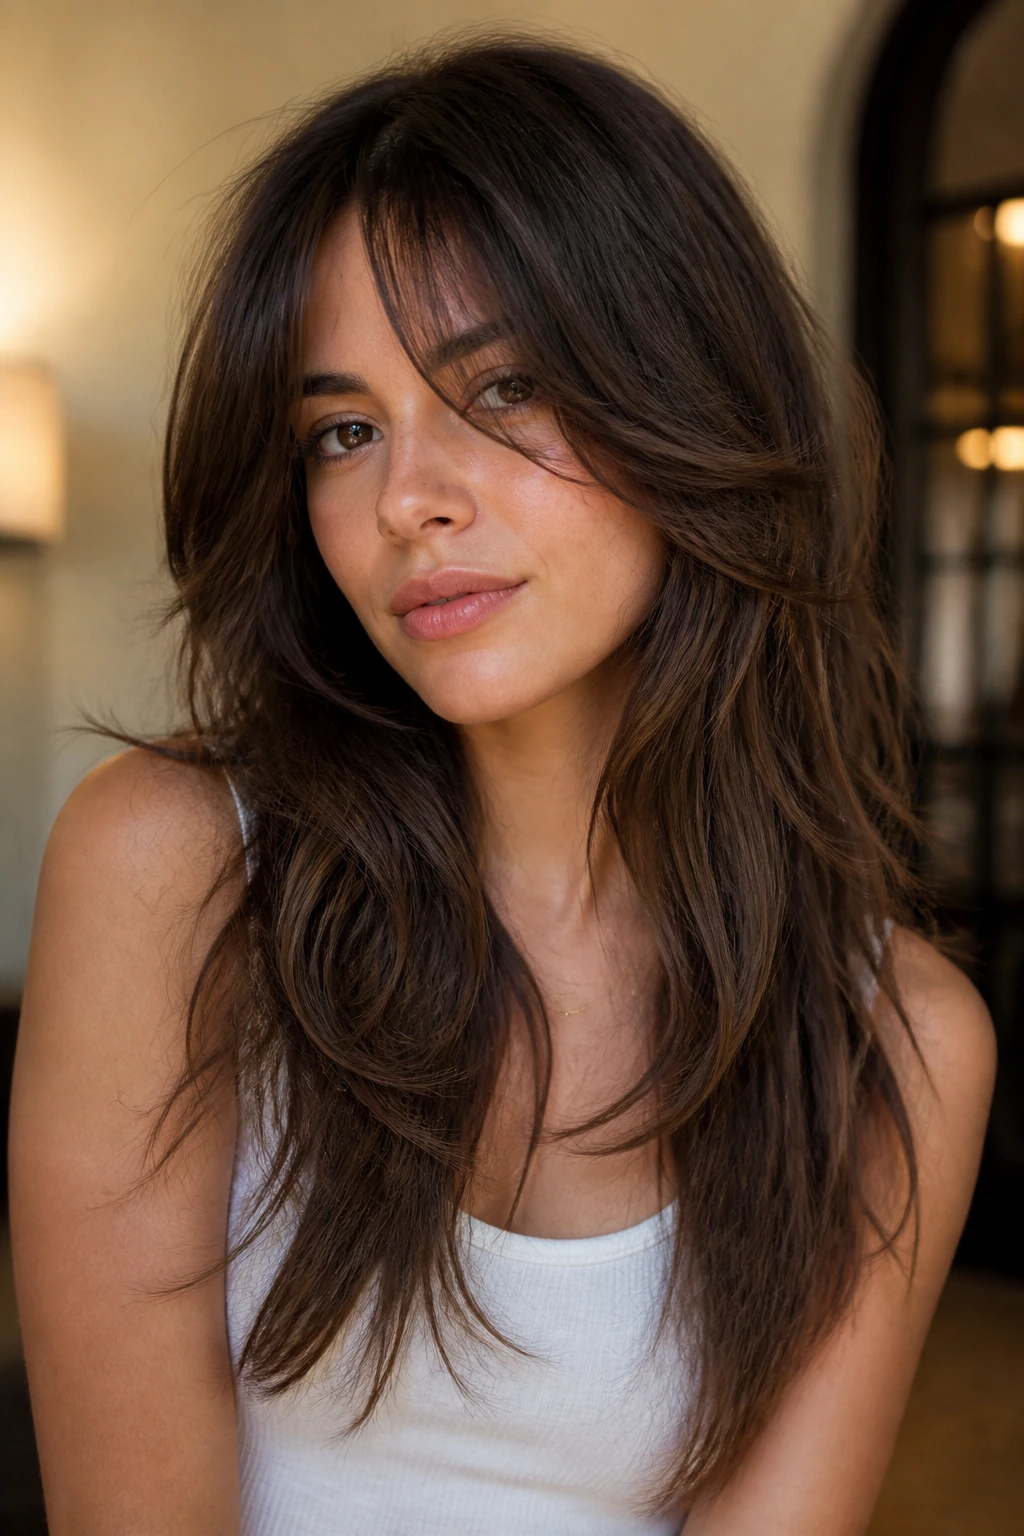
The long shag has a reputation for being loud. It does not have to be. The softer version keeps the texture and the fringe energy, but the steps are blurred enough that the haircut still feels wearable on an oval face. That softness helps the face frame stay open instead of choppy.
This is a good choice if you like hair that looks better with a little mess in it. The top can have lift, the front can have pieces that break around the cheekbone, and the bottom can still stay long. I’d avoid making it too short around the sides unless you want the haircut to read more fashion than practical. The softer edge is the part that keeps it easy.
16. Bottleneck Fringe With Long Layers
Bottleneck fringe works because it narrows in the center and opens wider toward the temples. That shape plays nicely with an oval face, especially when the rest of the hair stays long and blended. It gives you a bit of forehead coverage without turning the front into a blunt wall.
The fringe needs to be cut so it can split and move, not sit in one heavy block. Pair it with long layers that start low, around the cheekbone or lower, so the rest of the cut doesn’t fight the fringe. This is one of those styles that looks more expensive when it’s slightly imperfect — a tiny bend, a little separation, a soft air-dry. Not polished to death.
17. Chin-To-Collarbone Frame Pieces

When someone wants the face framed but doesn’t want obvious curtain bangs, I often like longer pieces that start near the chin and drift down to the collarbone. That range flatters an oval face because it keeps the line long and fluid instead of breaking the front too high. It also gives long hair a face-softening edge without losing the length people worked to grow.
This version is especially good if you wear your hair tucked behind one ear or flipped to one side. The pieces keep falling back into place. If your hair is thick, these longer frame pieces stop the front from feeling bulky. If it’s fine, they add shape without exposing too much scalp at the part.
18. Deep Side-Part Cascade Layers

A deep side part changes the entire mood of long layered hair. The cascade creates volume on one side and a softer fall on the other, which can be really flattering on an oval face because it breaks the symmetry in a controlled way. The eye sees movement first, length second.
This style is not subtle, and that’s the point. It works especially well when the front layers are kept long enough to sweep across the cheek rather than sit at it. A root-lifting spray near the heavier side helps the part hold through the day. If your hair has a habit of refusing to stay put, clip it in the opposite direction while it cools after drying. Old trick. Still useful.
19. Glossy Straight Layers With Clean Ends
Glossy straight layers are for people who like hair that looks sharp in a quiet way. The layering is there, but it’s tucked in just enough that the perimeter still reads as one clean line. On an oval face, that sleekness lets the facial symmetry do the work while the layers keep the length from turning flat.
This cut benefits from a good blow-dry and maybe a pass with a flat iron, but not a ton of product. Keep serums light or the ends look greasy instead of polished. I also prefer a blunt-ish finish at the bottom over a shredded one here. The hair should move when you turn your head, not fall apart.
20. Curly Blended Layers That Respect the Pattern
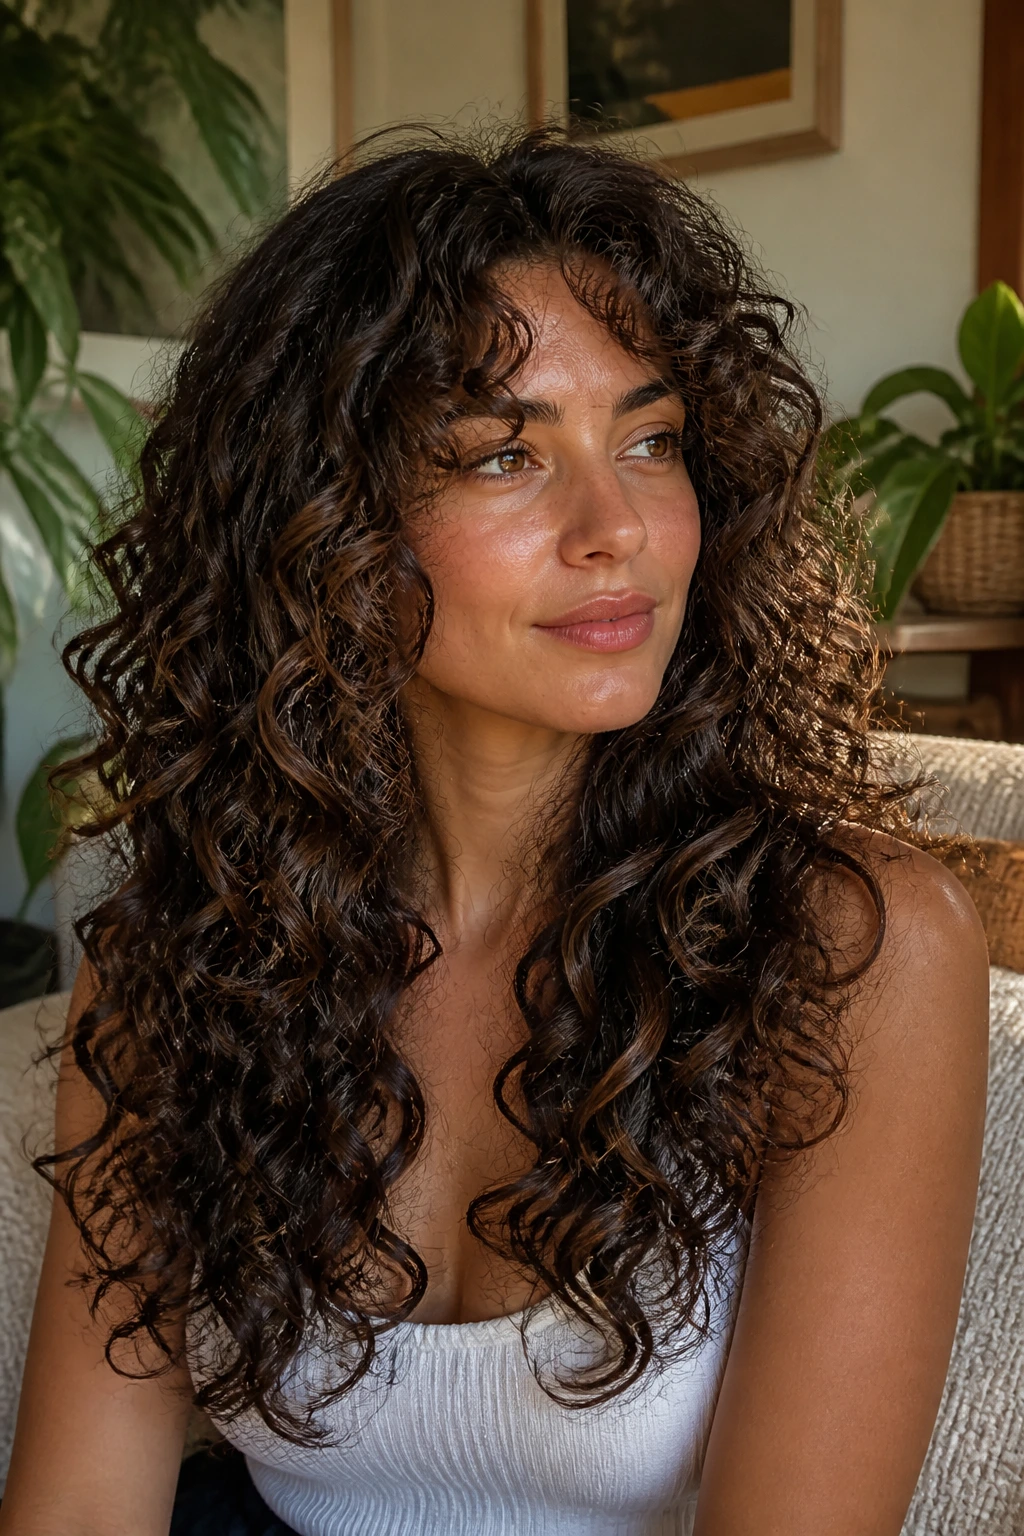
Curly hair needs its own rules. Long blended layers on an oval face should work with the curl pattern, not against it, which usually means cutting dry or nearly dry so the spring shows up where it actually lives. The front should open the face, but the shape should still feel rounded and full.
A good curly layered cut keeps the sides from building too much width while preserving enough volume that the curls don’t look pinched. That balance is hard to fake with a wet cut. If you wear your curls stretched, ask for longer face-framing pieces. If you wear them springy, make sure the stylist checks shrinkage before taking off length. That tiny detail saves a lot of regret.
21. V-Cut Layers With a Long Point
The V-cut is for people who want the back to taper into a point while the sides keep their length. On long hair, that creates a clear shape, and on an oval face, it can make the whole cut feel longer and leaner without removing the softness around the face. The silhouette is neat. Very neat.
I like this when the hair is dense enough to support the point without looking sparse at the bottom. It also works well with waves, because the layers stack into a more obvious shape. If you straighten your hair, the V shows with almost graphic clarity. If you don’t want that much outline, ask for a softer point and keep the angle gentle.
22. Piecey Ends for Texture Without Choppiness
Piecey ends are a good middle ground for anyone who wants texture but hates obvious layer steps. The cut keeps the perimeter intact, then adds subtle separation near the bottom so the hair doesn’t hang in one heavy slab. On an oval face, that small amount of motion keeps the length from feeling too severe.
This is one of those cuts that looks best when the ends aren’t too perfect. A little bend, a tiny flip, a bit of lived-in separation — that’s the whole point. A cream texturizer or a very light spray wax can help, but use less than you think. Overdoing the product turns piecey into greasy fast.
23. Grow-Out Layers That Stay Neat for Months
Not everyone wants to babysit a haircut. Grow-out-friendly layers are cut with longer transitions, which means the shape stays legible even after the face frame has dropped a bit. For oval faces, this works because the proportions stay soft and the haircut doesn’t lose its balance the minute it grows half an inch.
The secret is to avoid a dramatic shortest layer that needs constant trimming. Keep the front pieces lower, the internal layering moderate, and the ends full. This cut is honest about maintenance. It won’t look as snappy as a fresh salon blowout forever, but it will keep looking like you meant it.
24. Salon-Blowout Layers With a Round-Brush Finish
Some layers are built for the dryer. This is one of them. The shape relies on smooth, rounded movement from roots to ends, with enough bend in the mid-lengths that the hair falls into place after a quick blowout. On an oval face, that roundness adds softness without cutting into the length.
If you have a round brush and a decent nozzle, the style is easier than it looks. Direct the roots up and away from the scalp, then wrap the ends under as they cool. A cool shot matters. Otherwise the shape falls before you leave the bathroom. I like this version for events, interviews, or any day you want the hair to look deliberate without being stiff.
25. Internal Layers That Leave the Perimeter Heavy
This is the cut I recommend when someone says, “I want layers, but I do not want to lose my length.” Internal layers remove bulk from the middle of the hair while keeping the outer line solid and full. On an oval face, that means the front gets movement, the sides stay alive, and the ends still look thick enough to matter.
It’s a smart choice for long hair that’s heavy at the bottom or prone to puffing in humidity. You get shape without obvious steps, which is useful if you like wearing the hair straight, curled, or half-up. The cut won’t scream for attention. It just behaves better. Sometimes that is the real luxury.
How to Explain the Cut So the Stylist Doesn’t Guess
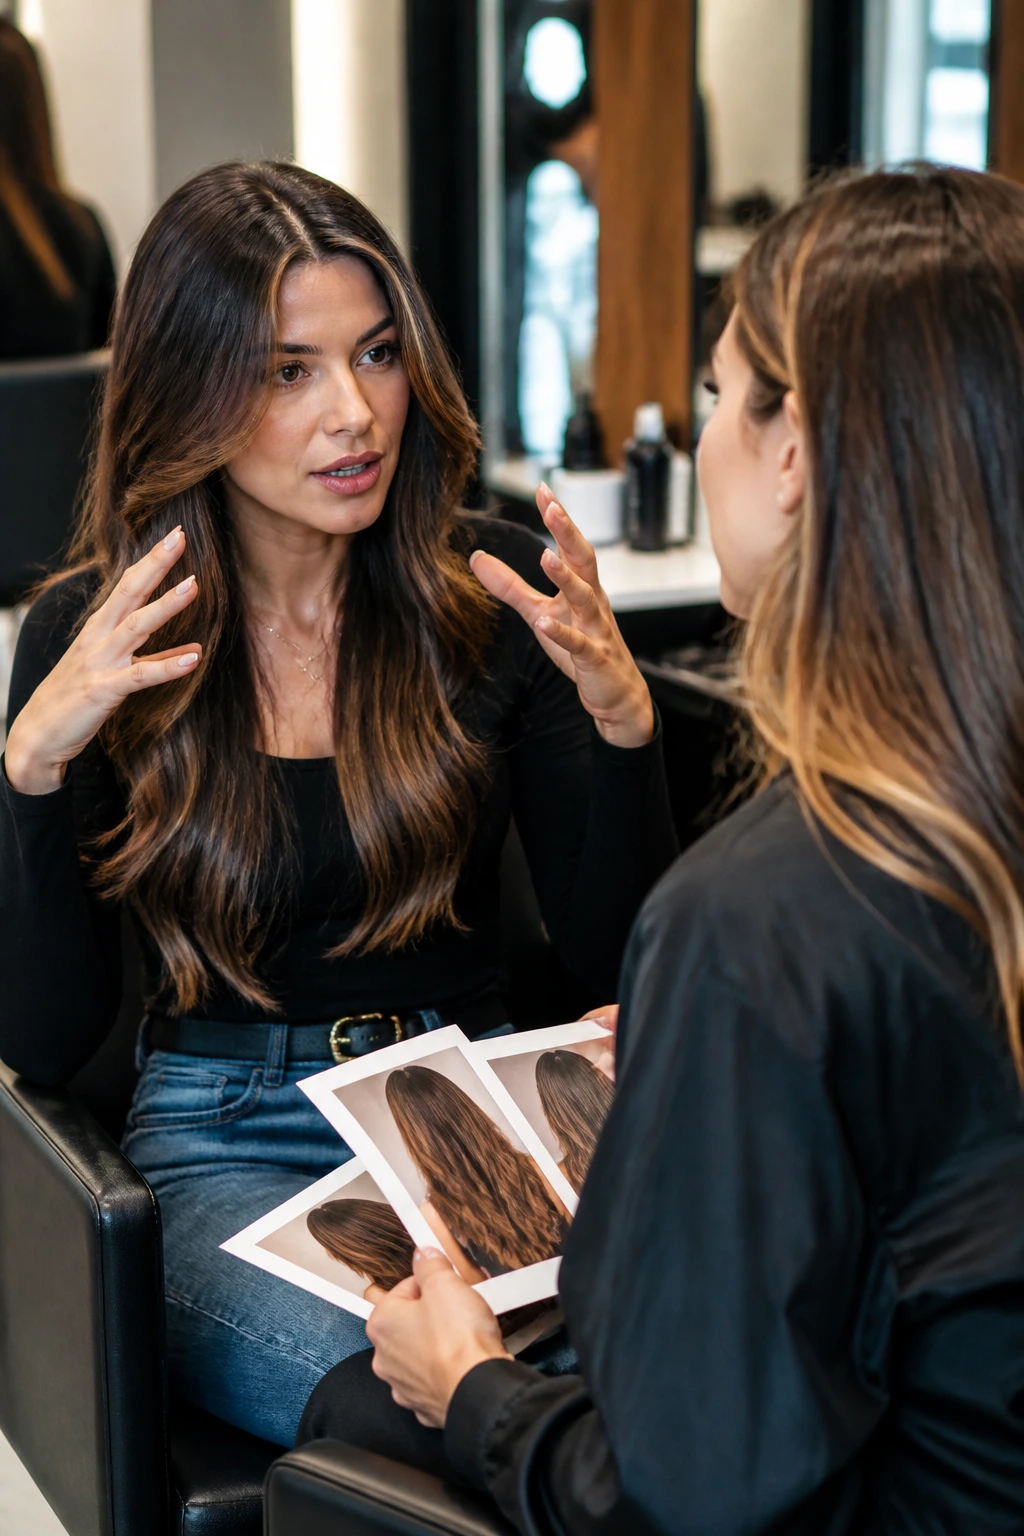
Bring photos, yes, but do not stop there. Photos show the shape; words tell the stylist how your hair behaves. Say where your part lives, how often you heat-style, and whether you want the layers to show when the hair is straight or only when it’s curled. Those details change the cut more than people expect.
I’d also say the words “keep the perimeter full” if you care about length and weight. If you want face framing, name the zone: cheekbone, lip, chin, or collarbone. That one sentence saves a lot of confusion. And if your hair is thick, ask for internal movement rather than short layers everywhere. That usually gets you the softness you wanted in the first place.
Tools That Make the Layers Behave
- Round brush, 2 to 3 inches: Best for curtain layers, feathering, and any cut that needs a bend at the ends.
- Blow-dryer with a nozzle attachment: Directs airflow so the front pieces don’t puff out while the rest dries.
- Heat protectant spray: Worth using every time you use a flat iron, round brush, or curling iron.
- Lightweight mousse or root lift foam: Helps the crown keep shape without making the layers crunchy.
- 1.25-inch curling iron or wand: Gives a soft bend through long layers, especially on straight or slightly wavy hair.
- Wide-tooth comb: Better than a brush for wavy or curly cuts when you want to keep the layer pattern intact.
- Texturizing spray: Useful for piecey ends and shag-lite cuts, but keep it light on fine hair.
- Velcro rollers or clips: Handy if you want the front to cool with a little lift.
- Clarifying shampoo: Good once every 2 to 4 weeks if product buildup starts weighing the layers down.
How to Style the Layers Without Fighting Them
The fastest way to ruin blended layers is to style them like one flat curtain. The hair needs direction. When you blow-dry, lift the roots at the crown first, then shape the front pieces away from the face or under it, depending on the cut. Drying the lengths before the face frame is half done usually gives you a weird bend in the front and limp ends below.
For straight or softly layered cuts, I like a blow-dry with a round brush, then a few loose passes with a curling iron just through the mids and ends. That keeps the shape from looking overworked. If the cut is meant to look airy, use less product than you think. Hair that’s coated too heavily will stop showing the blending at all, and then you’re back to one flat shape. Nobody wants that.
Keeping the Shape Between Salon Visits
Long layers grow out better than short ones, but they still need some care. A trim every 8 to 12 weeks keeps the face frame from dropping past the point where it does any good. If you wear curtain pieces or bottleneck fringe, you may want a clean-up every 6 to 8 weeks so the front doesn’t start hanging in your eyes or collapsing into the rest of the hair.
At home, sleep on a silk or satin pillowcase if your hair tangles easily. It won’t fix a bad haircut, but it will help the ends stay smoother. If you use texture spray, clarifying shampoo every couple of weeks keeps the layers from going sticky at the roots. And if the ends start to feel dry, keep conditioner off the scalp and focus it from the ears down. The cut looks better when the perimeter stays soft, not fuzzy.
Common Mistakes That Flatten Blended Layers
- Starting the layers too high: The hair can end up thin through the bottom and crowded through the crown. Ask for a longer transition if you want length to stay visible.
- Cutting the face frame too short for the rest of the cut: Short front pieces can make long hair feel disconnected. On an oval face, that often looks accidental instead of flattering.
- Over-thinning fine hair: Fine strands need movement, not a feathered cleanup that leaves them wispy. Keep the perimeter fuller and the internal layering light.
- Ignoring how you actually style your hair: A cut that needs a round brush every day is not the same as one that air-dries well. Be honest about your routine.
- Using heavy oil near the roots: It collapses the lift that makes layers show. Keep heavier products on the last few inches instead.
- Letting grow-out go too long: Once the shortest face-framing pieces fall past the sweet spot, the haircut can lose the shape that made it work.
Variations for Different Hair Types and Routines
- Soft Lift for Fine Hair: Keep the layers longer, remove less weight, and ask for face-framing pieces that stop around the lip or chin. It gives movement without exposing too much scalp or thinning the ends.
- Sculpted Flow for Thick Hair: Add internal layers and a cleaner perimeter so the hair moves without ballooning at the sides. This is the version that behaves in humidity better than most.
- Curl-Friendly Shape for Wavy and Curly Hair: Cut with the natural pattern in mind, and keep the front pieces long enough to spring back after drying. Dry cutting usually gives a truer result here.
- Low-Maintenance Grow-Out: Keep the shortest layers below the cheekbone and avoid hard fringe lines. The haircut will soften gracefully, which is the whole point if you hate frequent trims.
- Heat-Styled Polish: If you wear your hair straight or blown out, choose cleaner layers with less texturizing and a stronger bottom line. The shape reads better when the finish is smooth.
Questions People Ask Before They Cut the Layers
Where should the shortest layers start on an oval face?
Most of the time, somewhere between the cheekbone and the upper lip is the safest place for visible face-framing pieces. That keeps the front open without turning the haircut into a ladder.
Do blended layers make long hair look thinner?
They can, if the layers are cut too high or the ends are over-texturized. A good cut keeps the perimeter full enough that the hair still looks dense from the shoulders down.
Are curtain bangs a good idea with long layers?
Yes, if you want the forehead softened and the face opened at the same time. Just make sure the fringe blends into the side layers, or the front can feel chopped off from the rest of the hair.
What if my hair is fine and flat?
Choose longer layers with light internal movement and keep the ends heavier. Then style the crown with root lift instead of spraying the lengths to death.
What if my hair is thick and puffy?
Ask for weight removal inside the cut, not a lot of short layers near the top. That keeps the outline smooth while stopping the sides from ballooning.
Can I wear these layers without heat styling?
Some of them, yes. The softer curtain, waterfall, and grow-out styles can air-dry well if your natural texture has a little bend. Sleeker cuts usually need at least a quick blow-dry at the front.
How often should I trim face-framing pieces?
Every 6 to 8 weeks if you want them to sit in a precise spot. If you’re fine with a softer grow-out, 10 to 12 weeks is usually workable.
Does an oval face need bangs with long layers?
No. Oval faces can wear bangs, but they do not need them to look balanced. A long face frame often gives the same softness with less maintenance.
A Cut That Keeps Its Movement
The nice thing about long hair on an oval face is that the cut has room to breathe. The bad thing is that lazy layering shows fast. If the front is cut thoughtfully and the perimeter stays full, the whole thing looks intentional from the first day and forgiving three months later.
I keep coming back to that balance for a reason. Long hair should move. It should also hold its shape when you’re not standing under a salon dryer with a round brush in your hand. Pick the version that matches your texture, your routine, and how much styling you’re willing to do, and the haircut starts working with you instead of asking for constant repairs.