Twisted updos for little girls with wavy hair work best when you stop trying to bully the waves into behaving. The bend in the hair is not the problem. It’s the grip, the softness, the little bit of movement that makes a twist stay put without the stiff, shellacked look you get from overloading it with product.
That’s why wavy hair is such a sweet spot for this kind of styling. It has enough texture to hold a twist, but not so much coil that every section has to be wrestled into submission. A few clean parts, a light mist of water, and the right pins usually matter more than a drawer full of gels. Get the balance right and the style can survive school drop-off, a birthday cake smeared with frosting, and the sort of playground chaos that makes polished hairstyles surrender fast.
The best versions of these styles do one thing well: they keep the hair secure while still letting it look like a child’s hair. Soft edges. A little movement. No helmet effect. That’s the lane.
Why These Twisted Updos Work So Well on Wavy Hair
Soft grip without stiffness: Wavy hair already has enough bend to help twists lock together, so you do not need heavy gel or tight braiding to get control.
Less pulling at the scalp: Twists can anchor hair with far less tension than slick ponytails, which matters on a child who will absolutely tell you if the style feels pinchy.
Better hold on second-day hair: Clean, freshly washed waves can slip more than you’d expect; a little natural oil gives the twist something to catch.
Easy to dress up or down: The same base style can look plain with a clear elastic and look party-ready with a ribbon, bow, or floral clip.
Good for mixed hair textures: If the crown is smooth and the ends are wavy, these styles bridge both textures instead of fighting them.
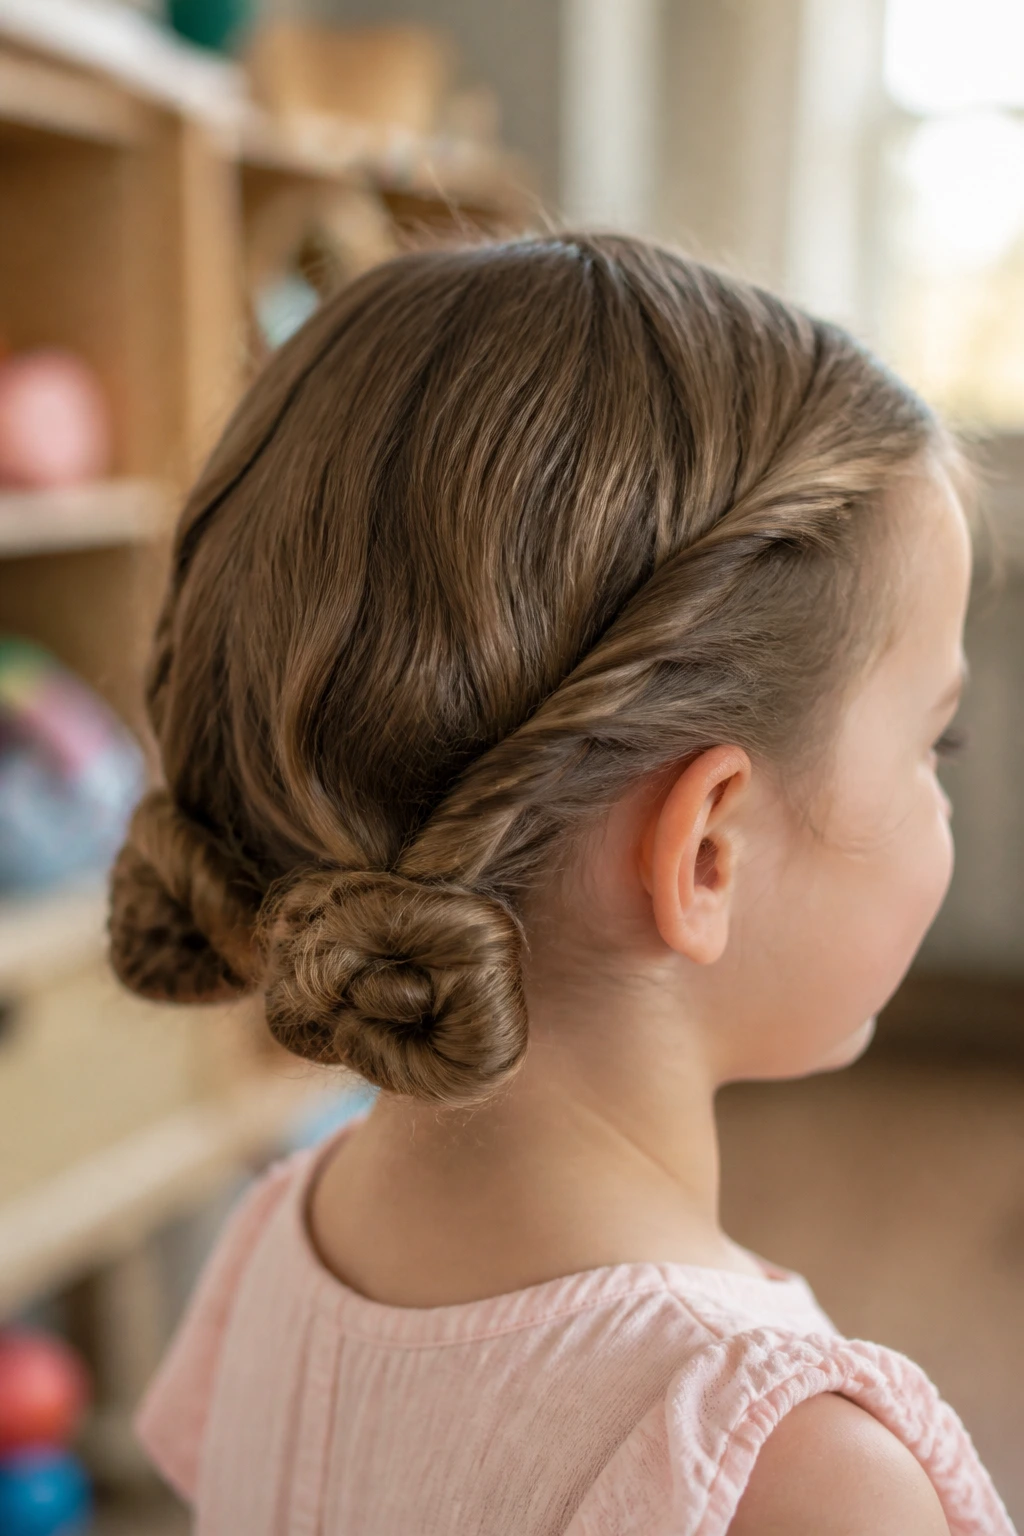
1. Crown-Twist Low Bun
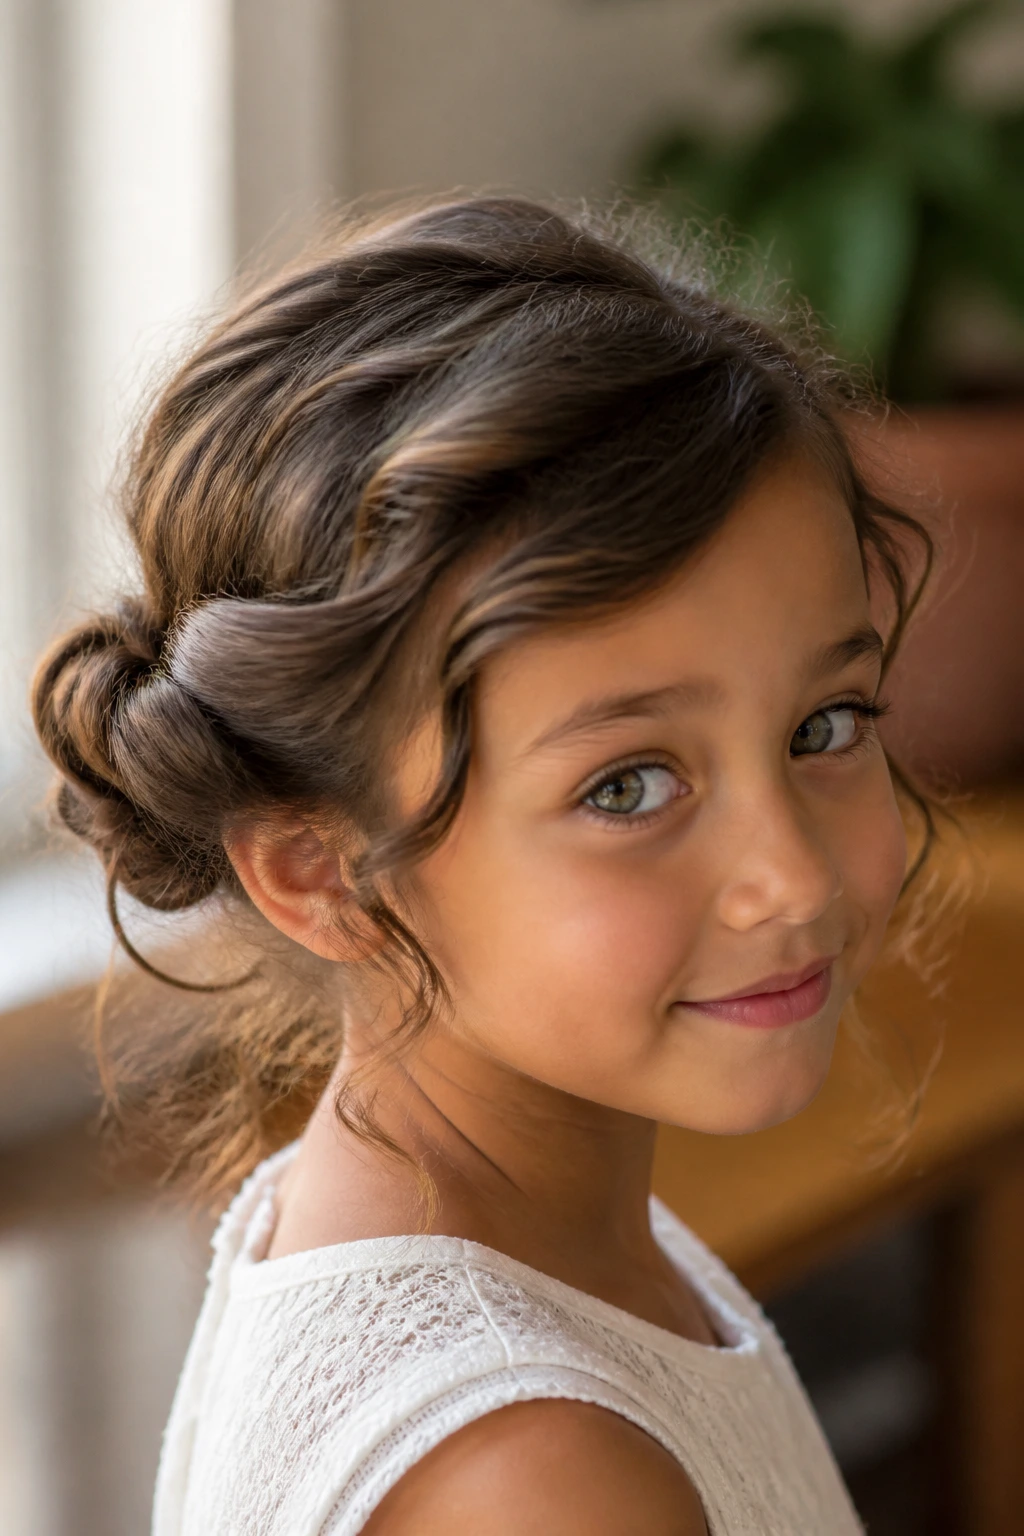
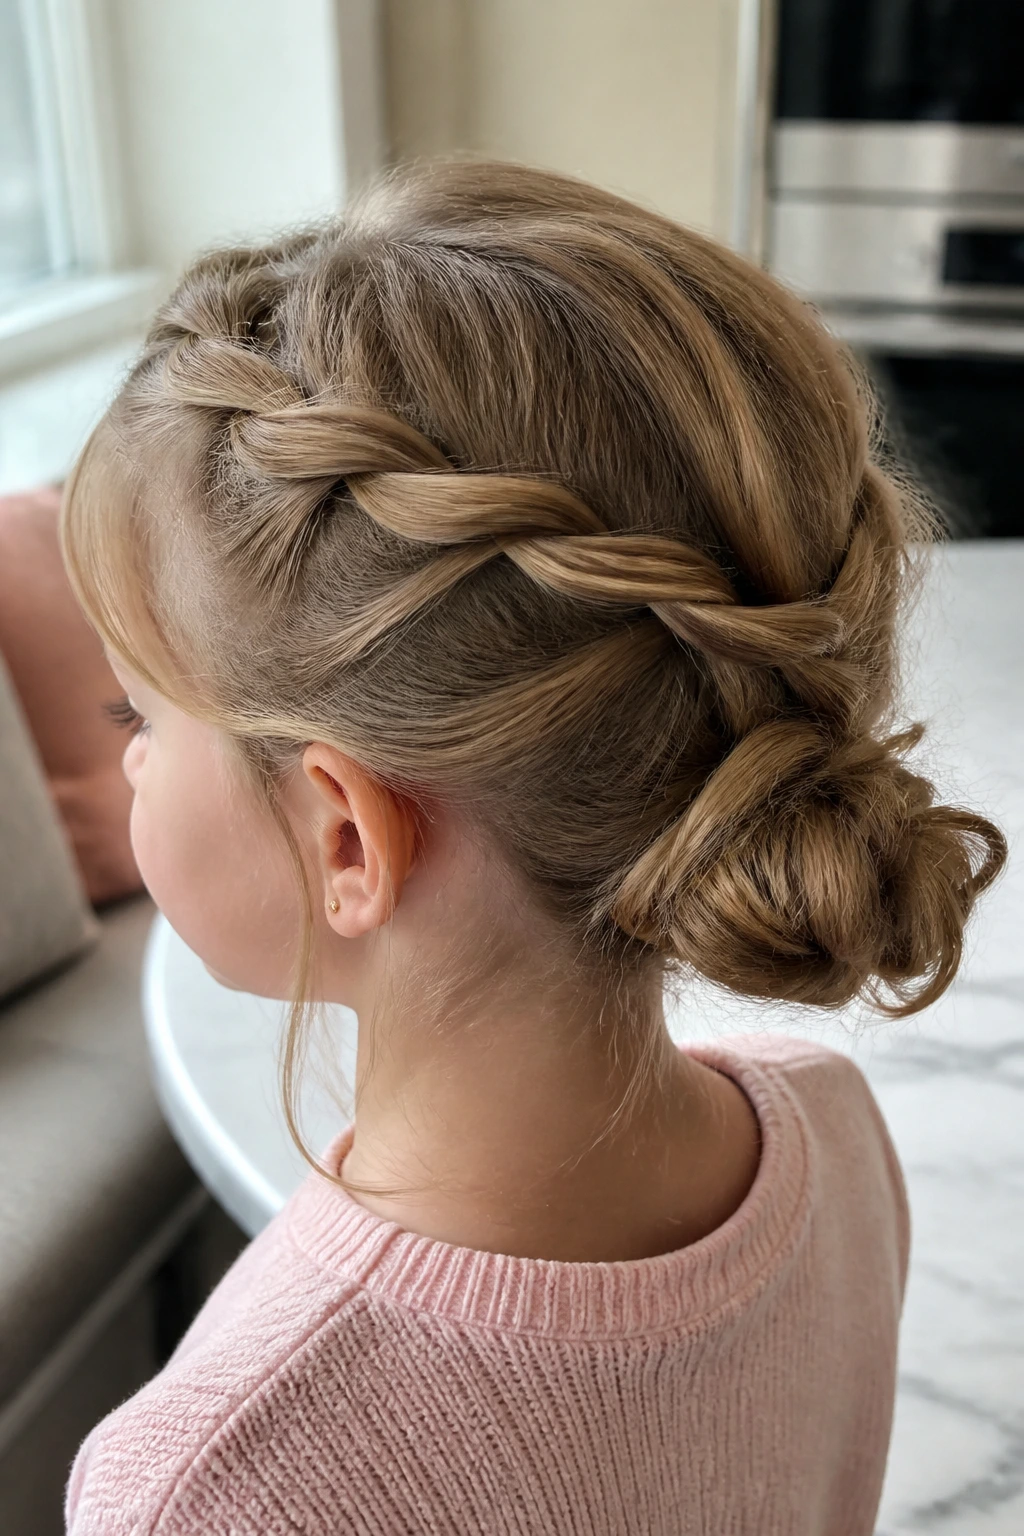
A crown-twist low bun is the style I reach for when I want something neat, low, and calm-looking without flattening all the wave out of the hair. It starts with two twisted sections at the temples, and those twists meet at the nape where they fold into a small bun. The shape sits close to the head, so it stays tidy even when the rest of the day gets noisy.
Why It Works
The twists act like little rails that guide the hair toward the bun, which means you do not need a lot of pins. That’s a win on wavy hair, because too many pins can create bumps that never quite disappear.
The low placement also keeps the style comfortable for kids who hate anything tugging at the top of the head. If the hair is a little frizz-prone, smooth the twists with a pea-sized amount of leave-in on your fingertips, not on the roots.
Quick Fit Notes
- Best for shoulder-length or longer wavy hair.
- Works especially well with a middle part.
- Use two crossed bobby pins at the bun base if the ends feel slippery.
Finish Tip
A tiny velvet bow right above the bun gives the whole style a cleaner line. Skip the heavy clip. It throws the balance off.
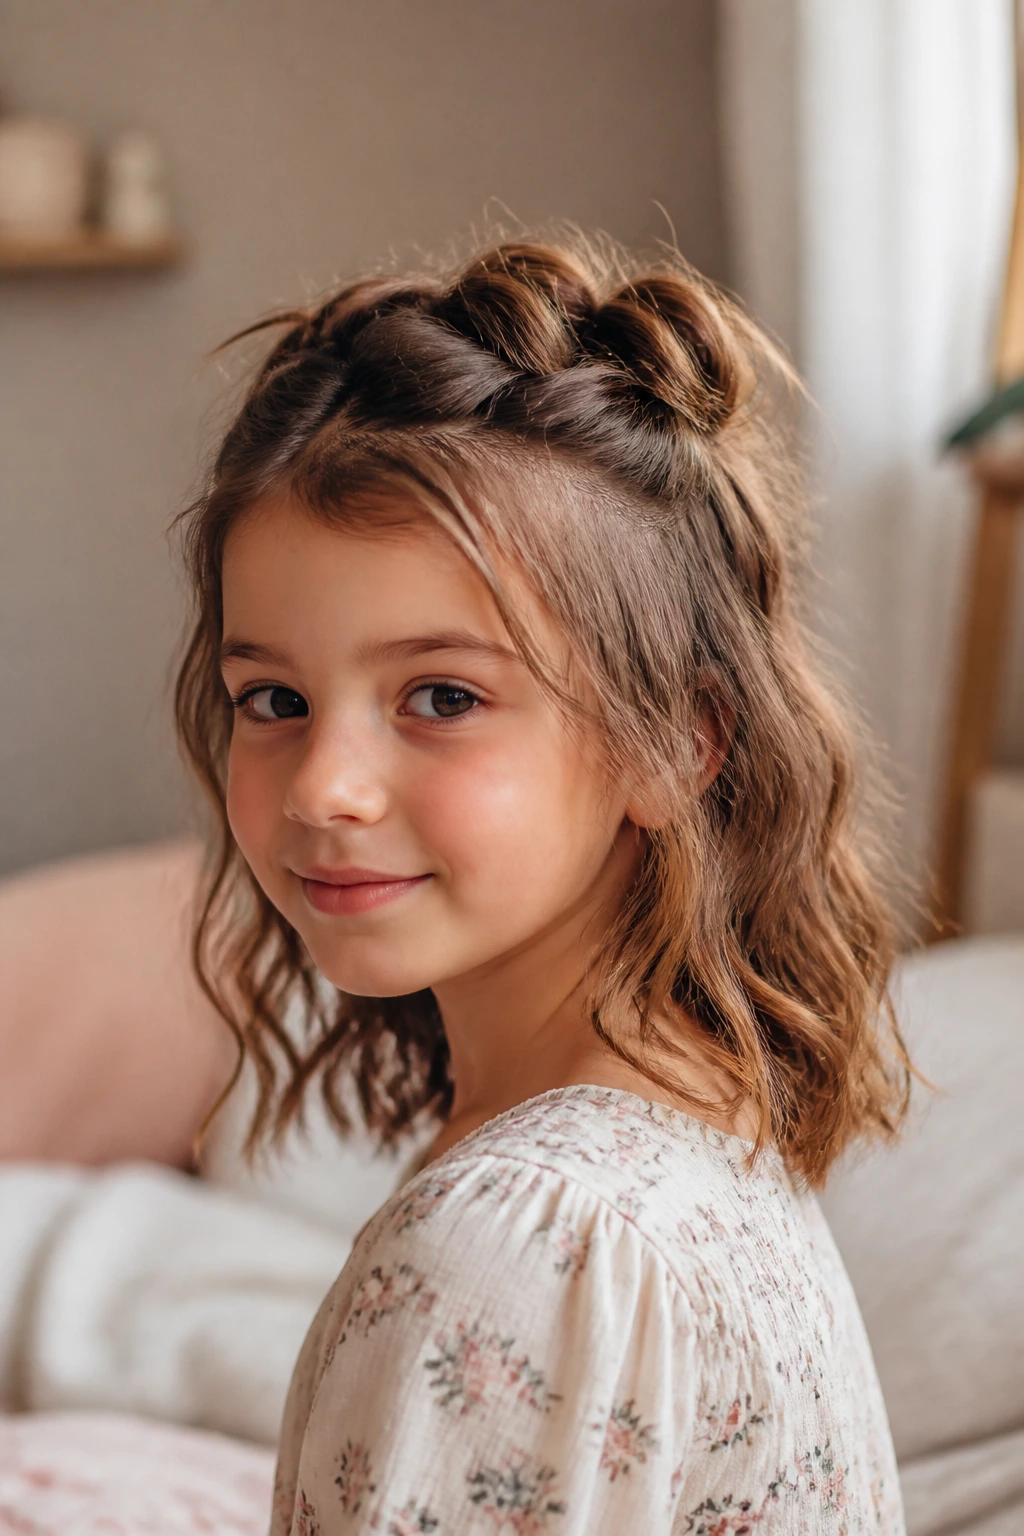
2. Half-Up Halo Twists
This one keeps the front and sides under control while leaving the length loose and bouncy. Two twists begin near the temples, sweep back over the head like a soft halo, and pin together at the back. The rest of the hair hangs free, which is useful when you want a style that feels dressed up but still looks like a child could run in it.
Why It Works
Wavy hair has enough texture to keep the halo from sliding, especially if you twist on hair that is slightly damp and not squeaky-clean. The front stays off the face, but you still get movement through the lengths.
I like this style for photo days and family events because it does not look overworked. It has a gentle shape. That matters.
Best If
- The child does not want all of her hair pinned up.
- You want to show off long waves at the bottom.
- You need something that sits nicely under a headband or flower crown.
Small Caution
If the twists are anchored too high, the style can puff out near the temples. Pin them a little lower than you think.
3. Side-Swept Twist Knot
A side-swept twist knot has a little personality. It gathers most of the hair toward one side, twists it back in a curved line, then folds the length into a knot near the opposite ear or just behind it. The look is softer than a strict side bun, which is exactly why it suits wavy hair.
The asymmetry is the fun part. One side stays smooth and controlled; the other side can keep a bit of wave and lift. It’s a good answer when a child wants something pretty but does not want to sit still for a forever-style.
How to Finish It
A single decorative pin at the knot is enough. More than that starts to feel busy.
Good For
- Shorter wavy lengths that do not quite reach a full low bun.
- Kids who wear side parts naturally.
- Days when you want the hair out of the face, but not pulled straight back.
One Little Warning
Do not twist the front section too tightly across the forehead. On a child, that can create a headache fast, and a side-swept style should look soft anyway.
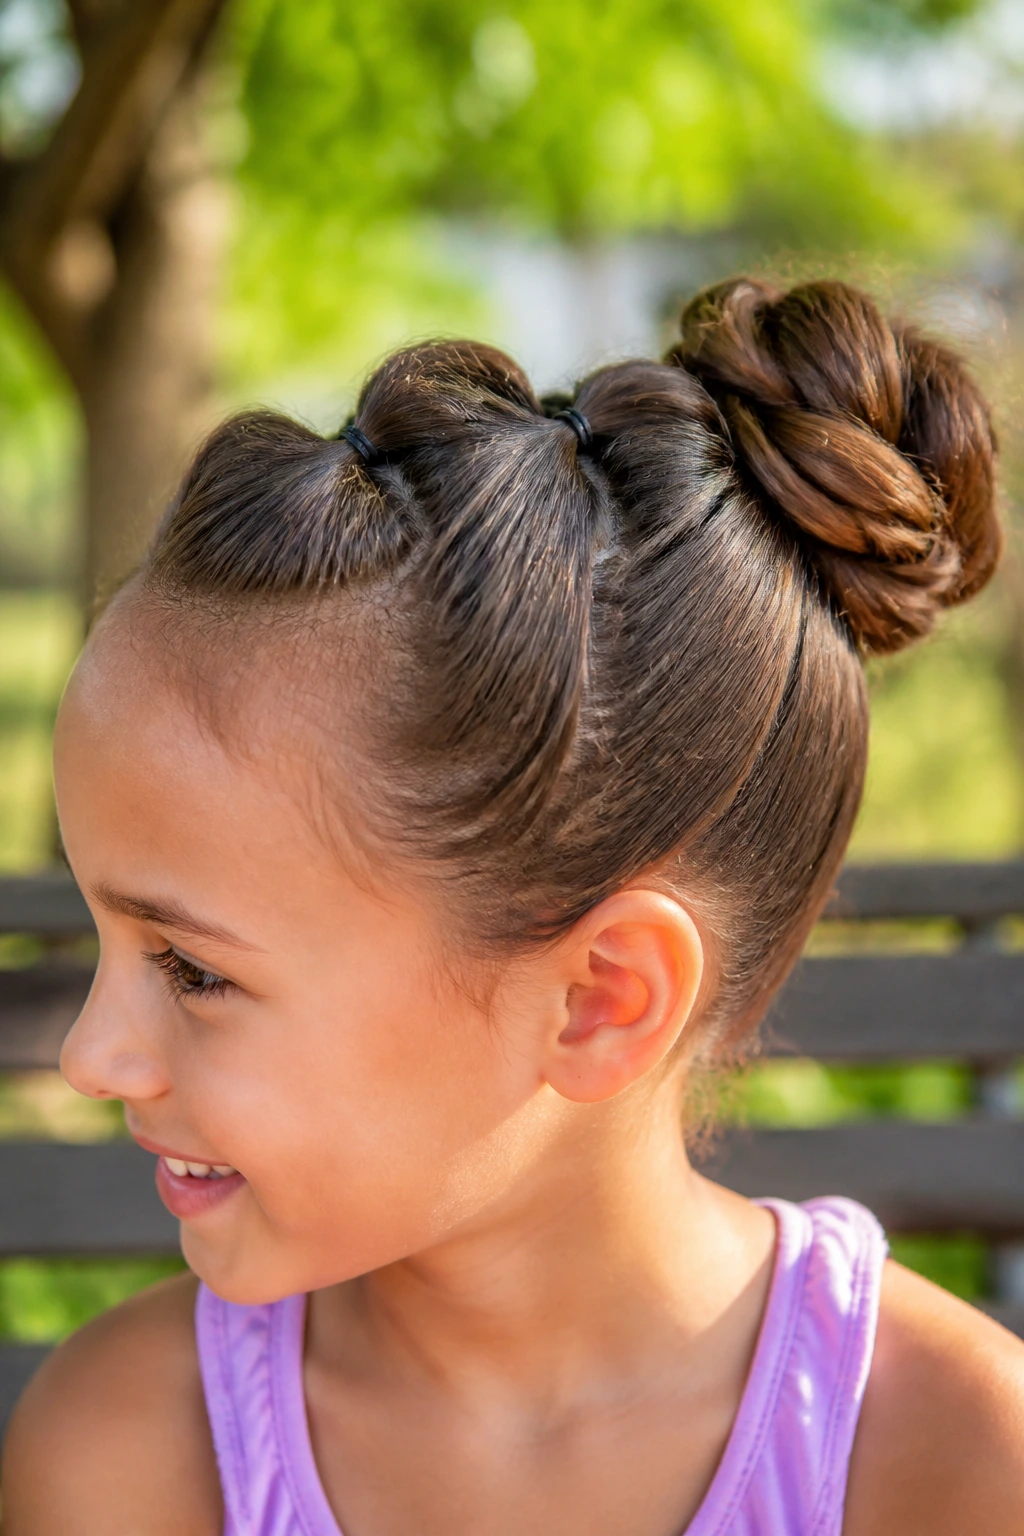
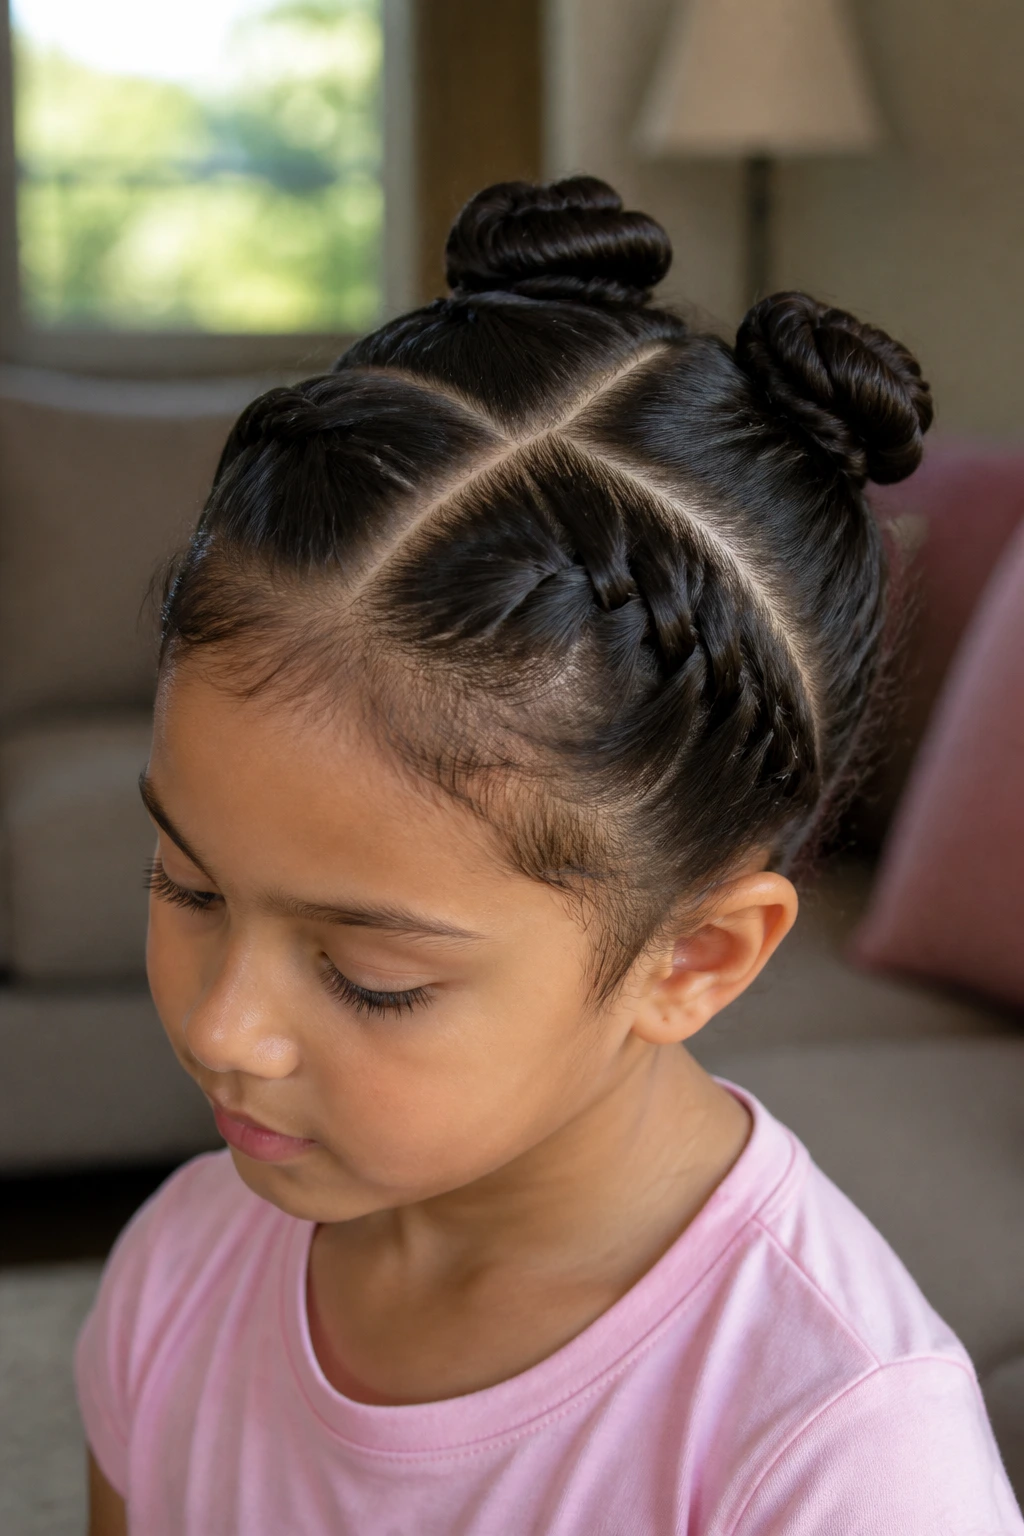
4. Double Rope-Twist Space Buns
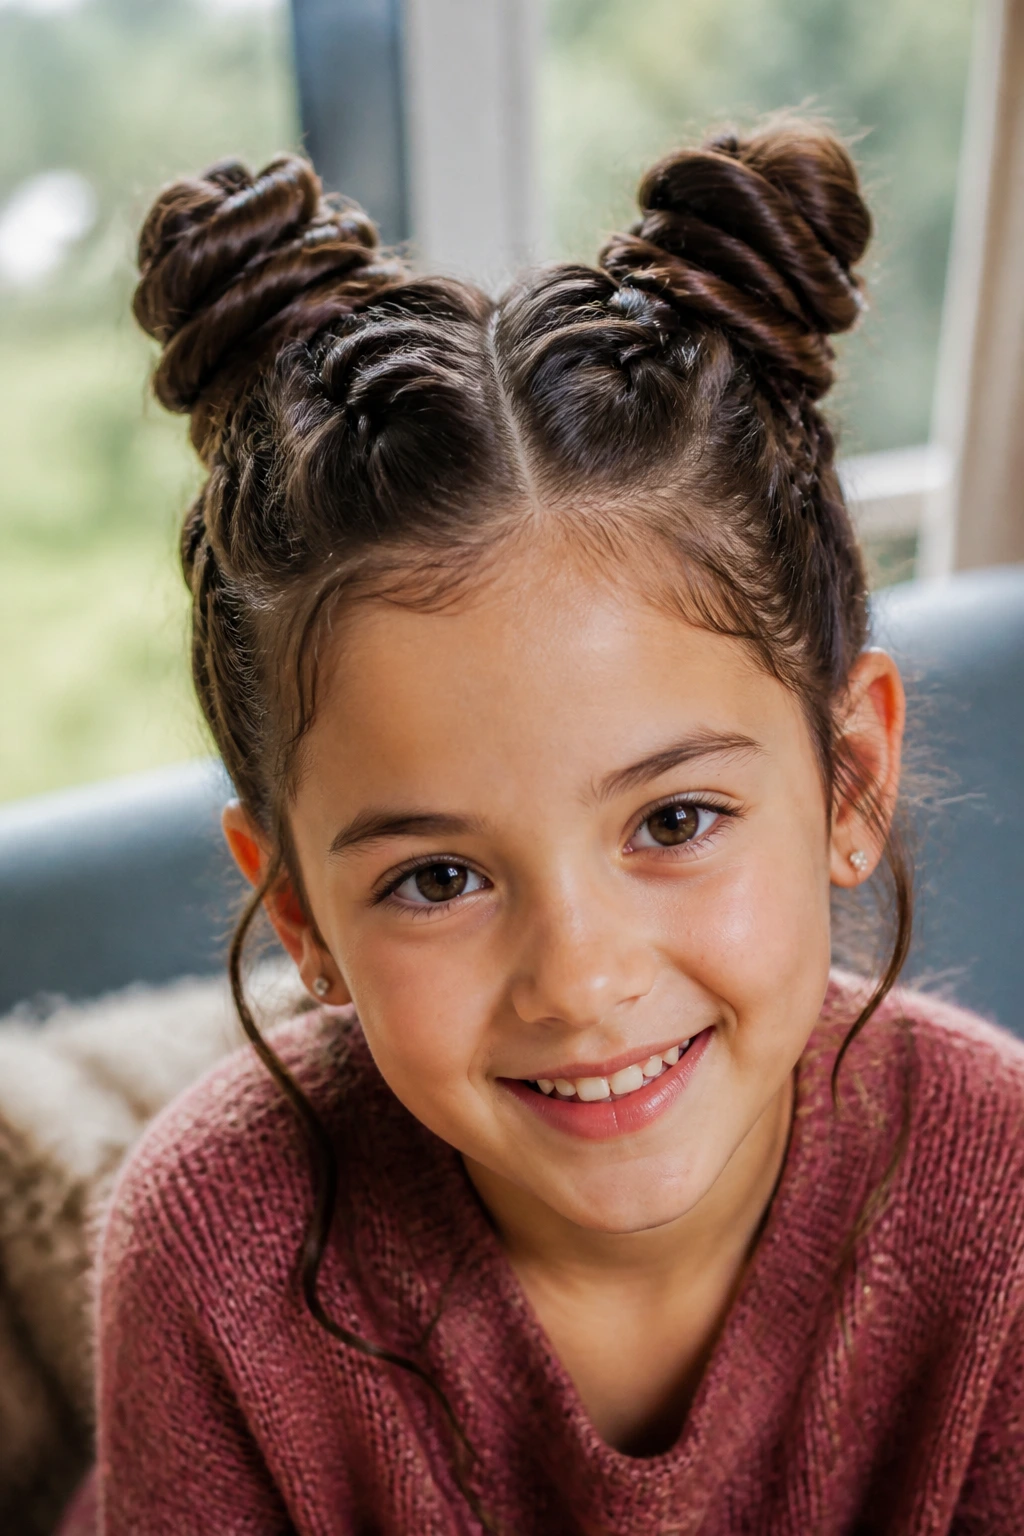
If you need a style that can survive an active day, this is one of the best bets. Two rope twists rise from the sides or just above the ears, then coil into twin space buns on top. Rope twists hold well on wavy hair because each section wraps around the other and locks the bend in place.
The style reads playful right away. It has lift, shape, and a little bounce. And because the buns sit high, the ends stay tucked away instead of getting caught in backpack straps or jacket collars.
Why It’s a Smart Choice
The dual bun structure spreads the weight out. That means less pulling in one spot and less chance of the style leaning to one side by lunchtime.
Use This When
- Hair is medium length and naturally textured.
- You want the style to last through playtime.
- You need something that looks fun without requiring perfect symmetry.
Pro Move
Make each twist slightly puffier before you coil it. Tiny, flat rope twists can look a bit severe on a child’s head.
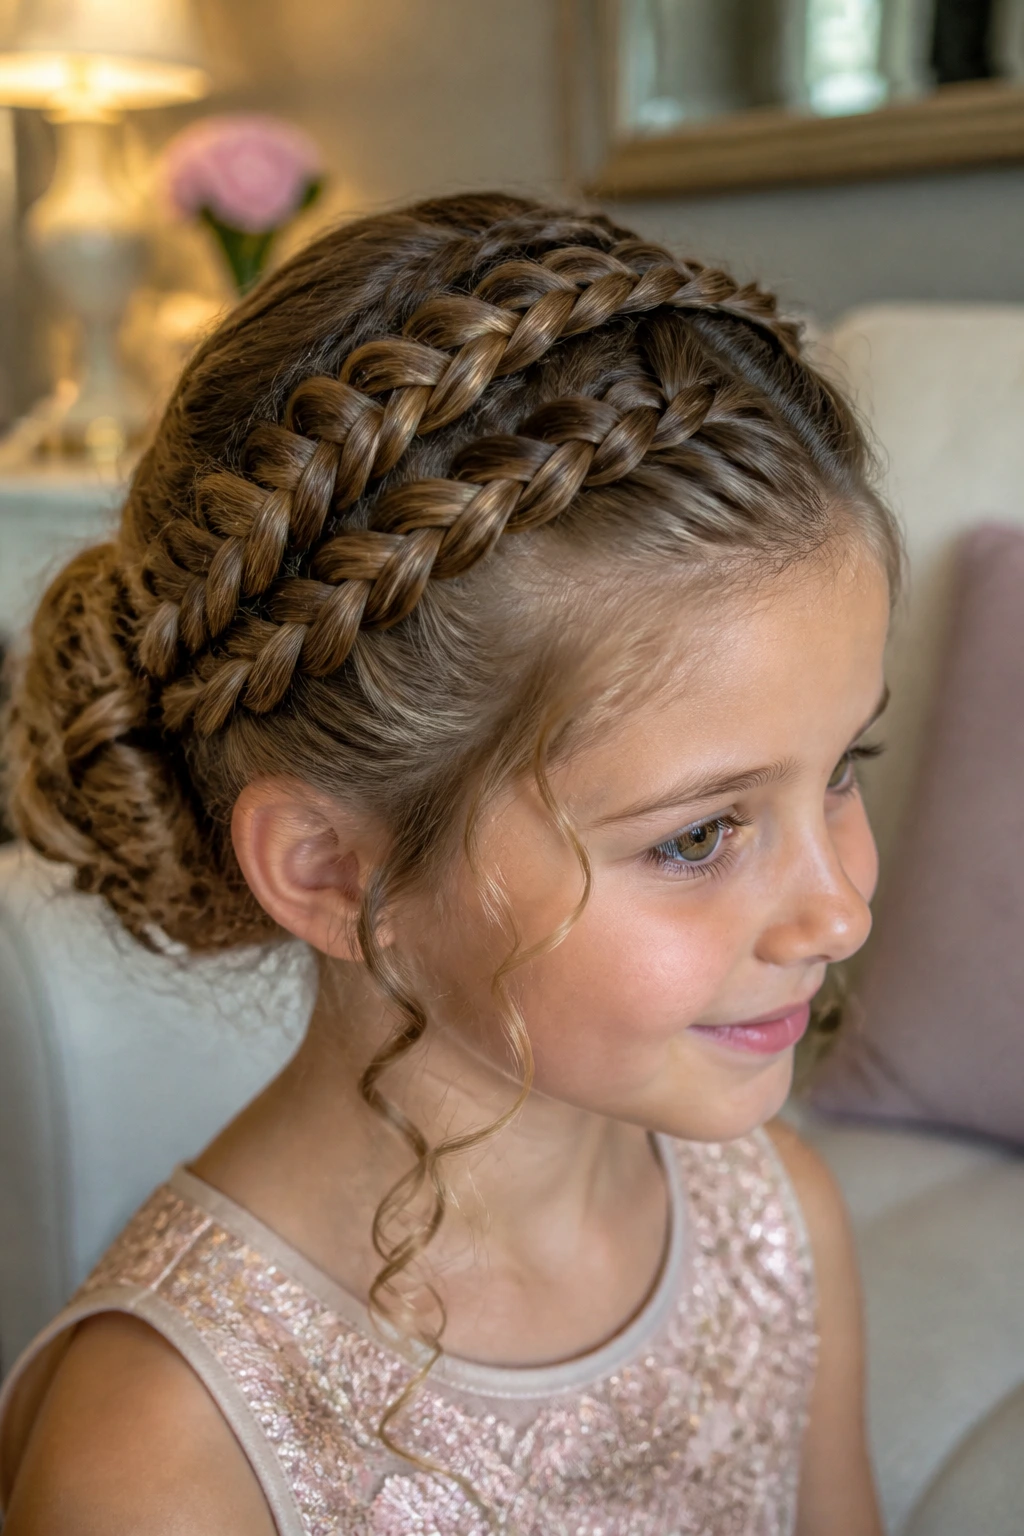
5. Braided-Front Twist Chignon
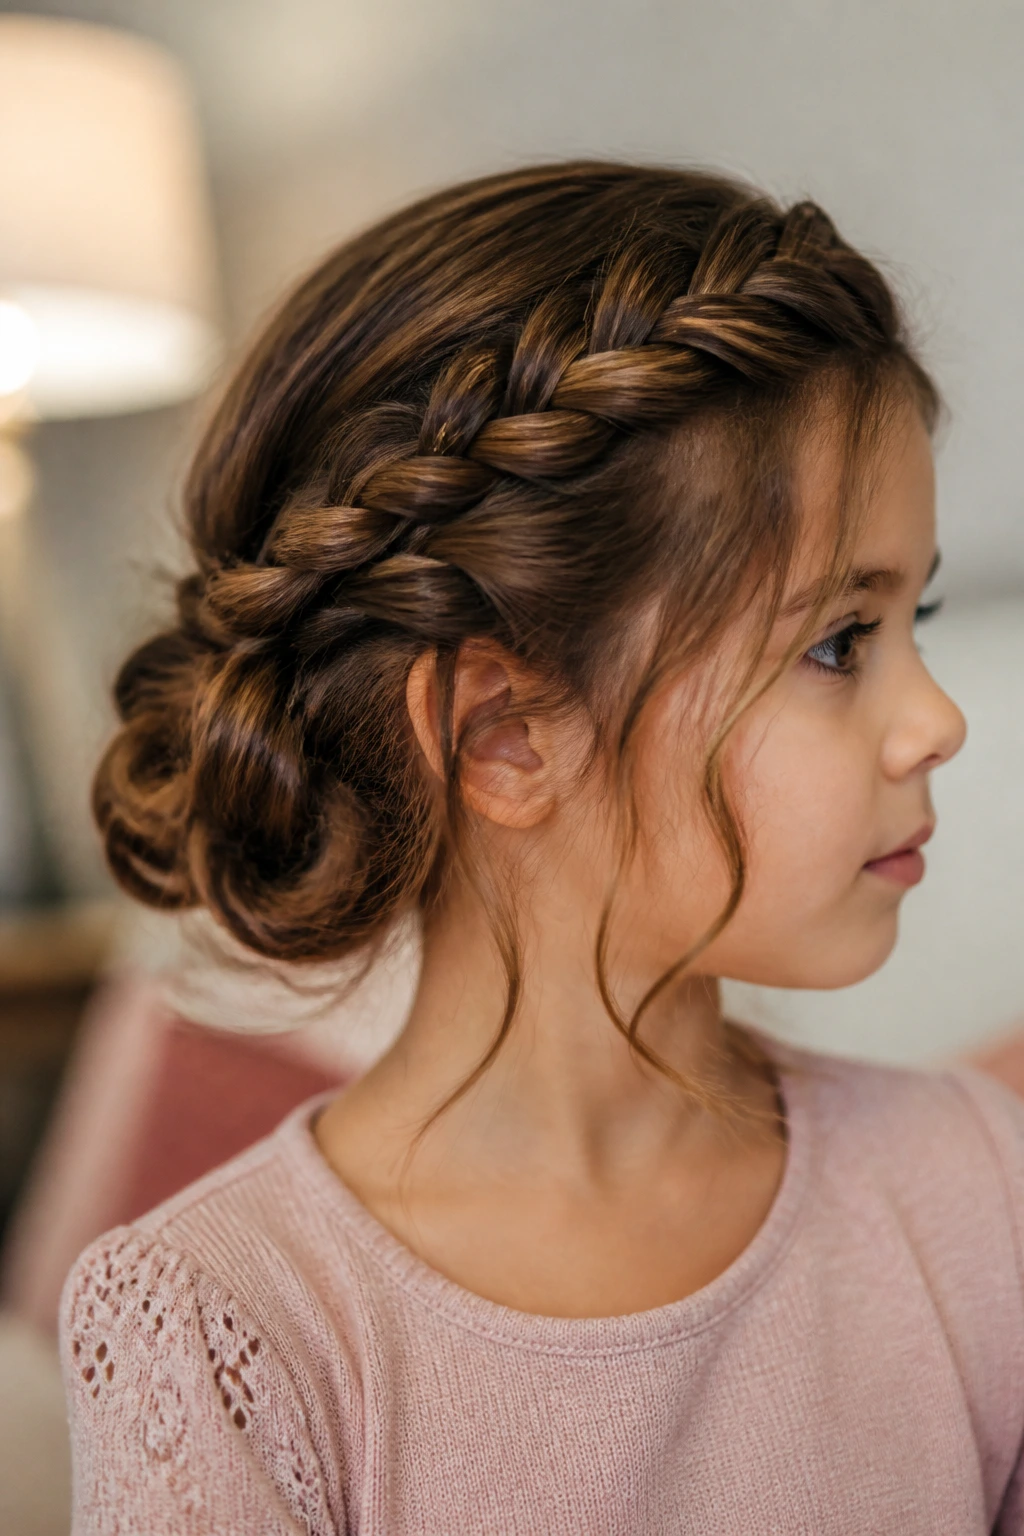
This style borrows a little braid at the front and keeps the rest in a twist-backed chignon at the nape. The braid frames the face cleanly, then melts into a tucked bun or knot at the back. On wavy hair, that front braid helps keep shorter layers from escaping, which is the part most home stylists fight with.
I like this one for formal dresses, concerts, or any day when the front of the hairstyle needs to stay put for hours. It feels more structured than a simple twist bun, but it still has a soft finish.
What Makes It Different
The braid at the front controls the hairline without flattening the rest of the texture. That gives you shape near the face and movement everywhere else.
A Good Match For
- Wavy hair with face-framing layers.
- Kids who need a style that won’t fall apart under a headband.
- Longer hair that tends to break loose around the ears.
Small Detail That Helps
Cross two bobby pins in an X at the base of the chignon. It keeps the bun from sagging by the third hug.
6. Twisted Ponytail Wrap
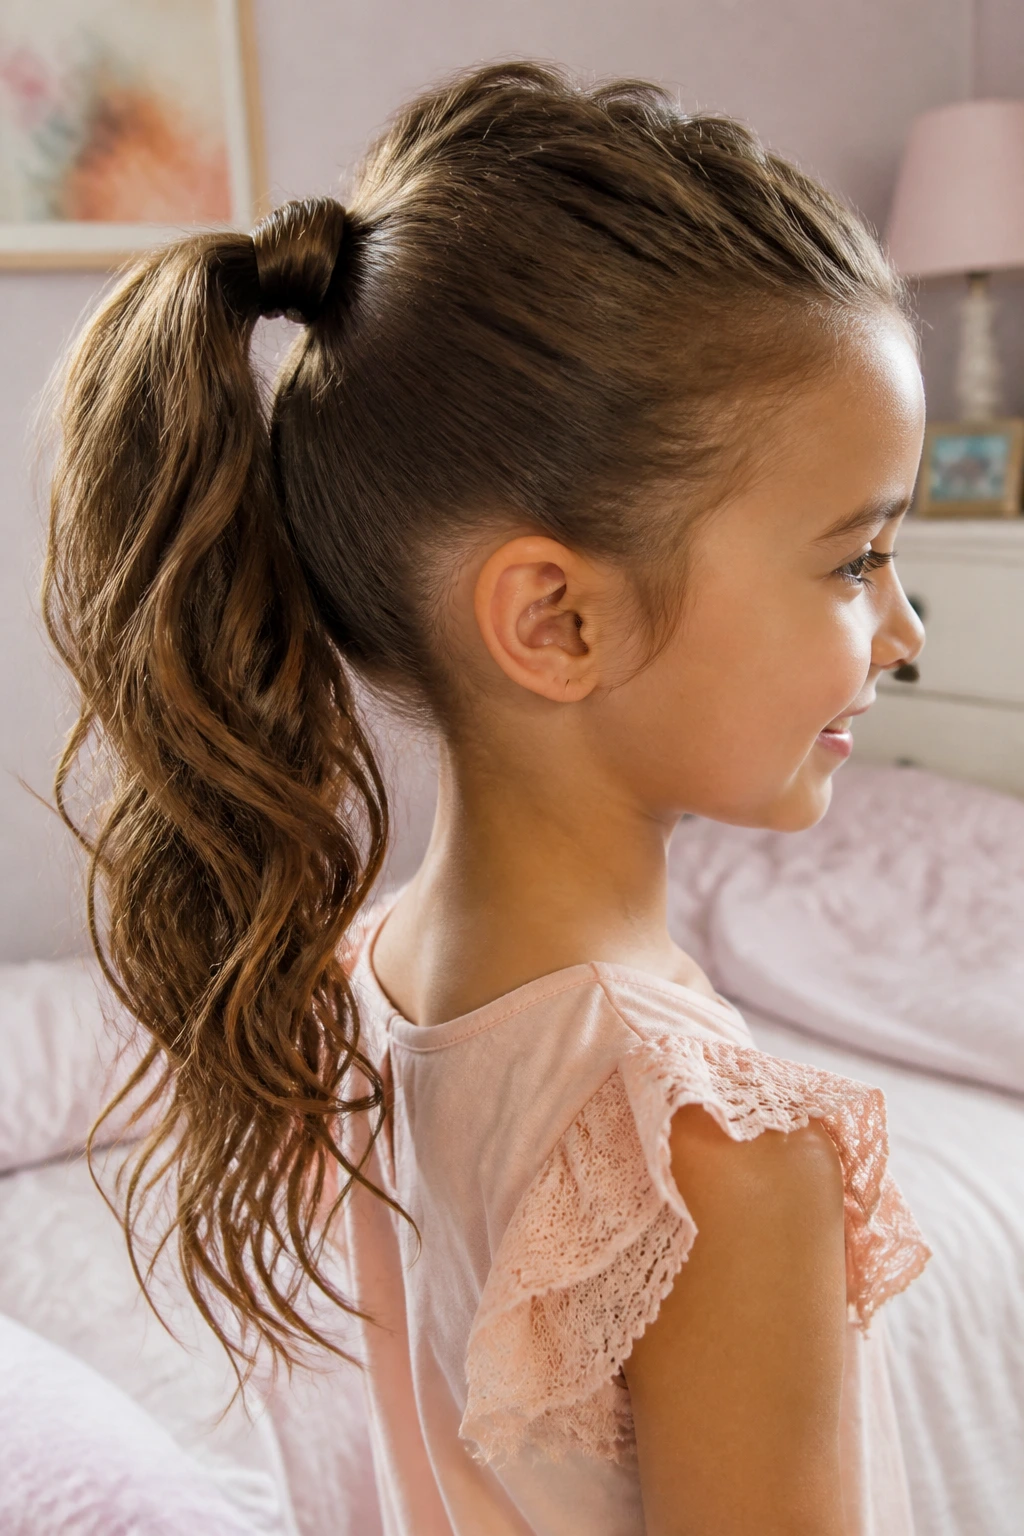
This is one of the quickest styles in the bunch, and that alone earns it a spot. You gather the hair into a ponytail, split a small section from the tail, twist it around the elastic, and pin or tuck the end underneath. The rest of the ponytail stays wavy and loose, which makes the style feel lighter than a full updo.
The wrap hides the elastic and gives the ponytail a cleaner finish. On little girls, that little polish matters more than people admit. It turns a regular pony into something that looks deliberate.
Why It Works
Wavy hair adds body to the tail, so the wrapped section has enough texture to blend in instead of looking like a tiny ribbon around a rope. If the hair is fine, a touch of mousse at the base helps.
Best For
- Busy mornings.
- Hair that is already brushed out and detangled.
- Kids who want their hair up, but not all the way up.
Keep in Mind
If the ponytail sits too high, the wrap can tilt. A mid-height pony usually balances best for wavy hair.
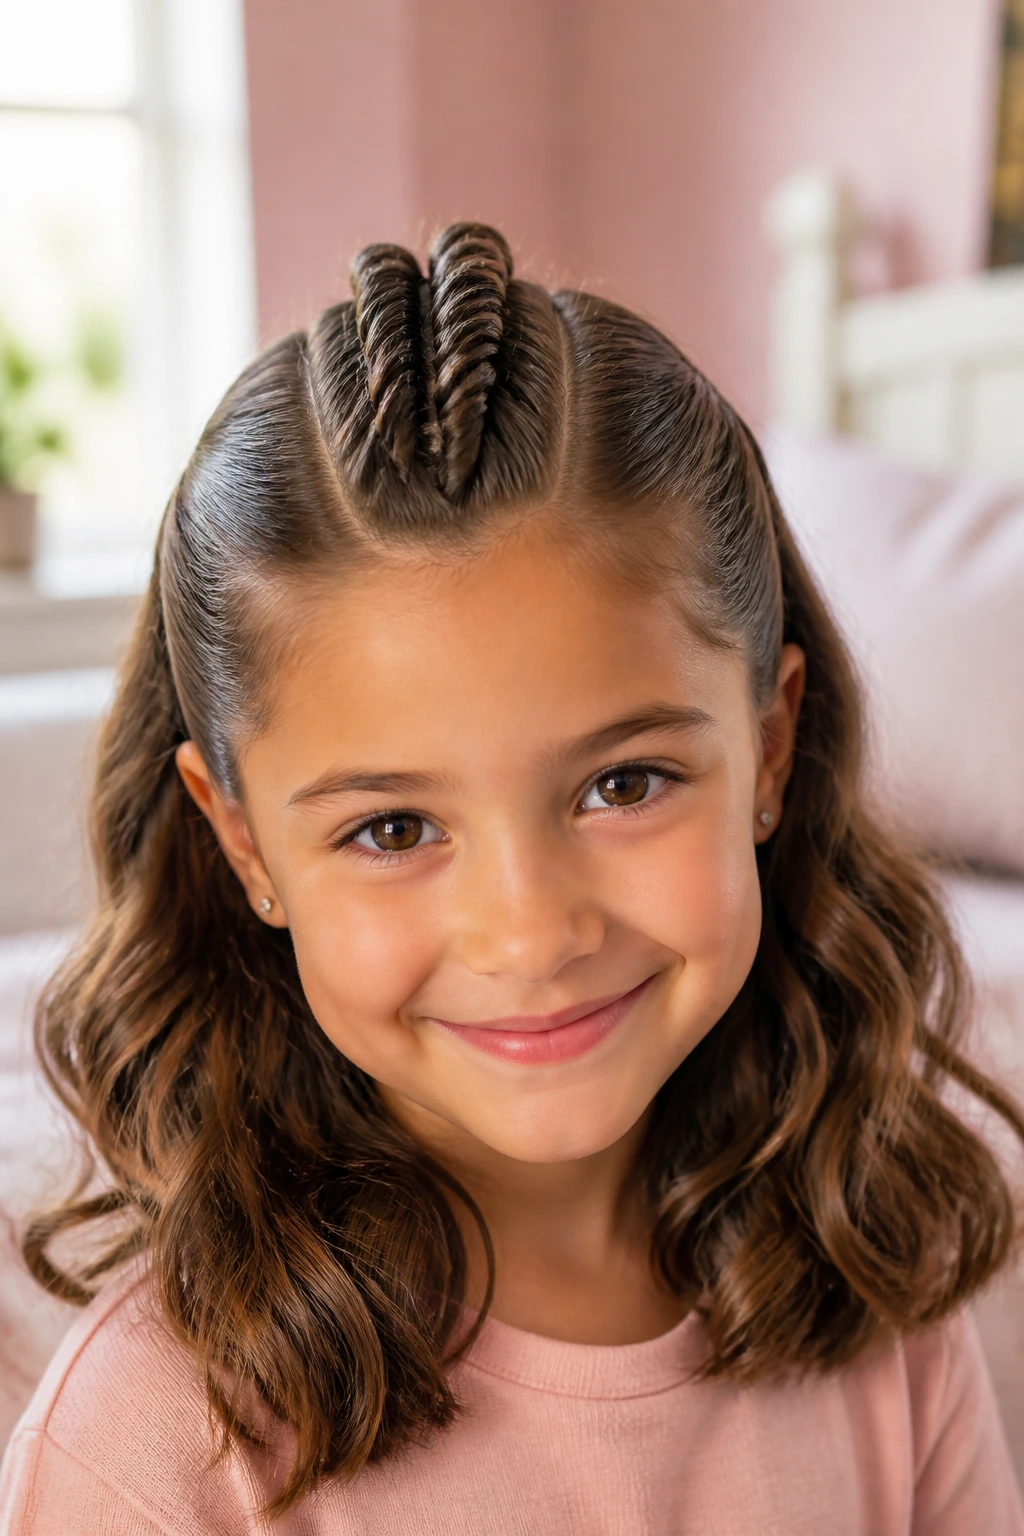
7. Heart-Part Twisted Bun
A heart-part twisted bun is the sort of style that makes a child grin in the mirror before she even sees the bow. You part the hair into a heart shape at the crown, then gather the sections into a twist or small bun at the back. The part becomes the decoration, which means you do not need much else.
It sounds fussy. It isn’t, once you get the shape right. The part is the showpiece, and the twist is the anchor. That’s a nice split of labor.
Why It Works
The heart part gives the style a built-in focal point, so the bun itself can stay simple. Wavy hair helps here because the texture softens the lines and keeps the design from looking too sharp.
When to Use It
- Birthdays.
- School picture day.
- Any time a child wants something special without a big accessory load.
Practical Note
Use the tip of a rat-tail comb, not the blunt side. A clean part makes the heart shape legible; a fuzzy one just looks like a mistake.
8. Crisscross Crown Twist
Crisscross styles sound more complicated than they are. Two or four sections are twisted from the sides, crossed over each other at the crown, then pinned into a low knot or tucked finish at the back. The visual effect is tidy and a little sculptural, which makes it a nice match for wavy hair with some natural bounce.
I reach for this style when the hair has multiple lengths and I need a way to hide the shorter pieces. The crossed sections catch them and keep them from springing loose around the ears.
The Reason It Holds
Crossing the twists gives the style friction points. That friction is what keeps everything anchored, especially if you use pins that match the hair color instead of shiny ones that slide.
Good Pairing
- Dresses with a simple neckline.
- Hair that is medium to thick.
- Kids who don’t mind a few pins hidden under the top layer.
One Honest Caveat
If the twists are too thick, the crisscross starts to look bulky. Thin, clean sections are better here.
9. Twisted Pigtail Knots
Twisted pigtail knots are playful without being messy. You split the hair into two sections, twist each side back from the front or temples, and then coil each section into a knot at the nape or behind the ears. The result is balanced, secure, and easy to adjust if one side needs to be a little fuller than the other.
There’s something practical about this style that I like. It gives a child the feeling of pigtails, but with enough structure to keep the hair away from the neck.
Why It Works
The twin structure spreads the hair evenly, so one side does not feel heavier than the other. Wavy hair also helps these knots look soft instead of stiff.
Best For
- Everyday wear.
- Kids with medium-density hair.
- Active afternoons when a single bun would get knocked loose.
Tiny Upgrade
Wrap a small ribbon around each knot base. It softens the look instantly and hides any pins that show through.
10. Bubble-Twist Pony Bun
This style has a bit of movement and a bit of shape. You make a ponytail, add small elastics down the length at regular intervals, then twist the tail upward into a bun or loop at the base. The “bubbles” give the pony a rounded look before it gets tucked up, so even shorter or layered wavy hair can feel fuller.
It’s a clever trick for hair that tends to look flat in regular updos. The bubbles add texture and visual interest without much work.
Why It’s Useful
The elastic sections keep the tail under control, which is a big deal if the waves at the ends start to fray. It also gives the bun more grip when you wrap it back up.
When to Pick It
- Thick or layered wavy hair.
- School spirit days.
- Styles that need to look fun from the side and the back.
One Caution
Use soft, snag-free elastics. Tight rubber bands make the tail harder to unwrap later, and nobody wants that fight at bedtime.
11. Rolled Low Twist Knot

A rolled low twist knot sits at the nape and looks calm in the best possible way. You twist the hair into a low rope, then roll or fold it inward until it becomes a compact knot. On wavy hair, the roll adds enough texture to keep the style from looking too flat against the head.
This is one of those styles that makes sense for dressier outfits but does not scream “special occasion.” It’s neat, grown-up in shape, and still soft around the edges.
Why It Works
The fold-in finish hides the ends and protects them from brushing against sweaters or straps. That matters when you want fewer tangles at the end of the day.
Best If
- The child has medium to long hair.
- You want a low-profile style for church, concerts, or formal photos.
- You need the nape to stay comfortable in warm weather.
Small Tip
A light mist of flexible-hold spray on the outer layer keeps little flyaways from standing up at the crown.
12. Faux-Hawk Twist Row
This one is for the child who likes a little edge. Sections are twisted along the center of the head, then pinned into a raised row from front to back. The sides can stay smooth, or they can be tucked behind the ears for a cleaner profile. It’s playful, but it still counts as controlled.
Wavy hair is a good base here because the center twist row has enough texture to hold its shape. Fine, slippery hair sometimes needs a few extra pins, but the idea stays the same.
Why It Pops
The lifted center line gives the style shape without making the sides hard or slick. That contrast is what makes it look cool instead of stiff.
Good For
- Medium-length hair.
- Kids who dislike flat styles.
- Casual events where you want something a bit more interesting than a regular bun.
Watch This
If the center row is pinned too tight, the style can feel like a tug at the hairline. Leave a little give. A child should be able to blink without noticing her hairstyle.
13. Ribbon-Threaded Twist Updo
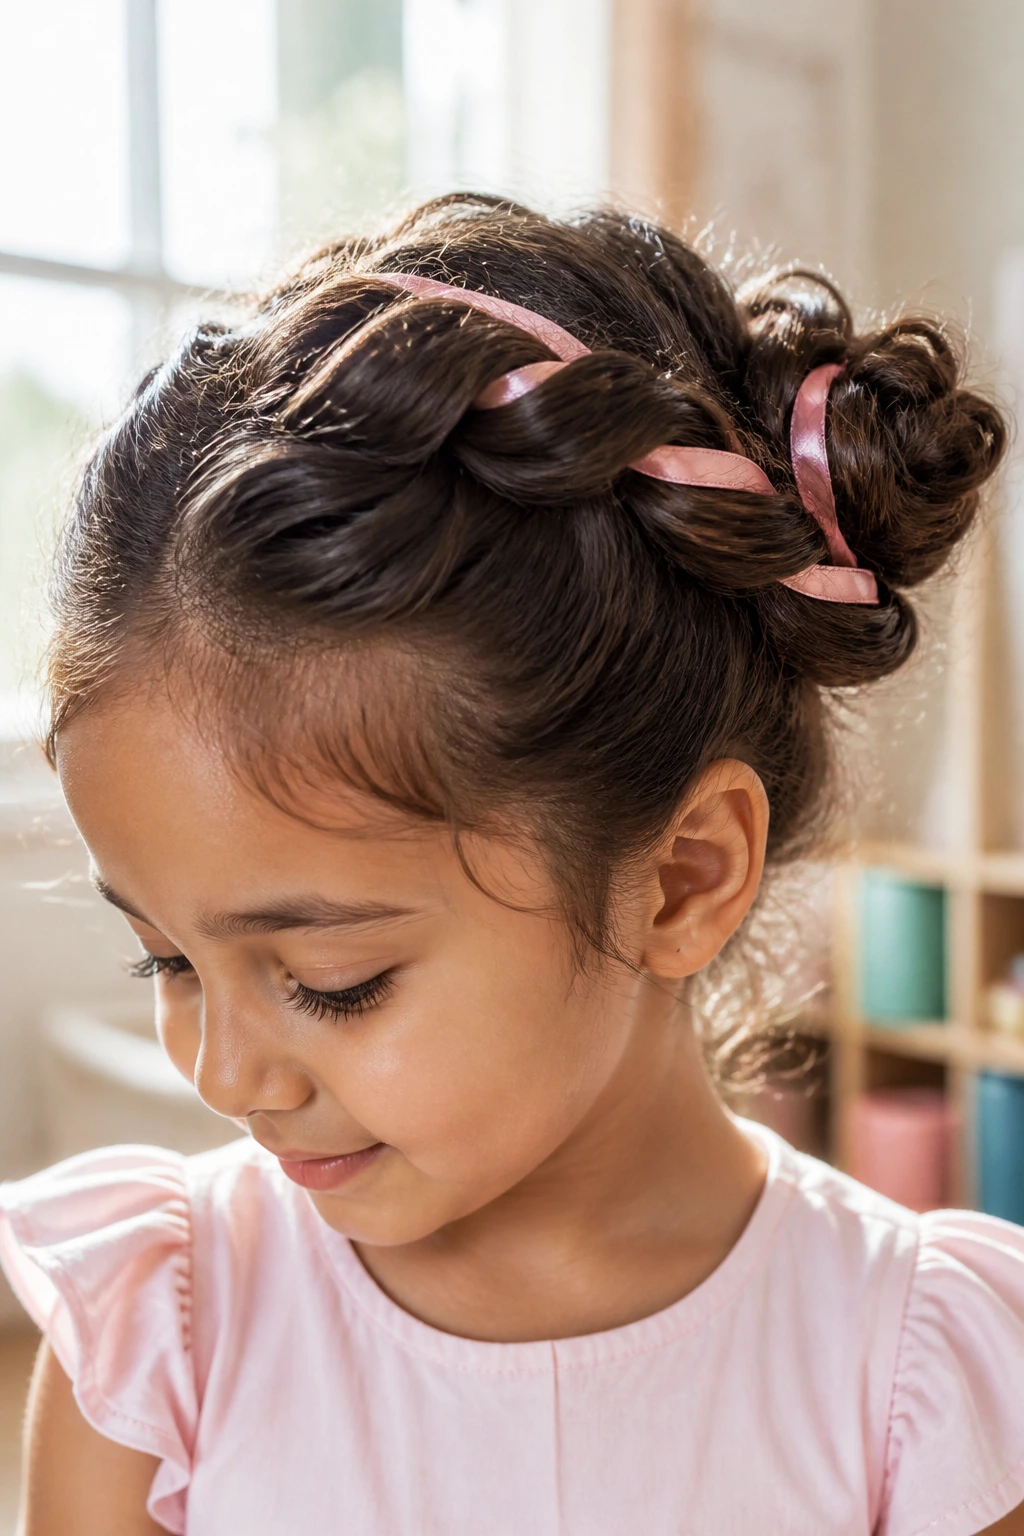
Ribbon in a twist is one of my favorite ways to turn a plain updo into something that looks intentional without piling on more clips. You twist two or more sections, then thread a narrow ribbon through the twists or wrap it around the base of the bun. The ribbon becomes part of the structure, not just an afterthought slapped on top.
This style works especially well when the outfit has one color you want to echo in the hair. Not matchy-matchy. Just coordinated enough to feel clean.
Why It Works
Ribbon adds a soft point of grip and also helps disguise any small gaps in the twist. On wavy hair, that little bit of fabric can blend in better than hard plastic accessories.
Best For
- Parties.
- School performances.
- Days when the hairstyle needs a small decorative lift.
Keep It Comfortable
Choose a soft, thin ribbon with no rough edges. Stiff ribbon can poke the neck or unwind awkwardly by lunch.
14. Flower-Clip Side Twist Roll
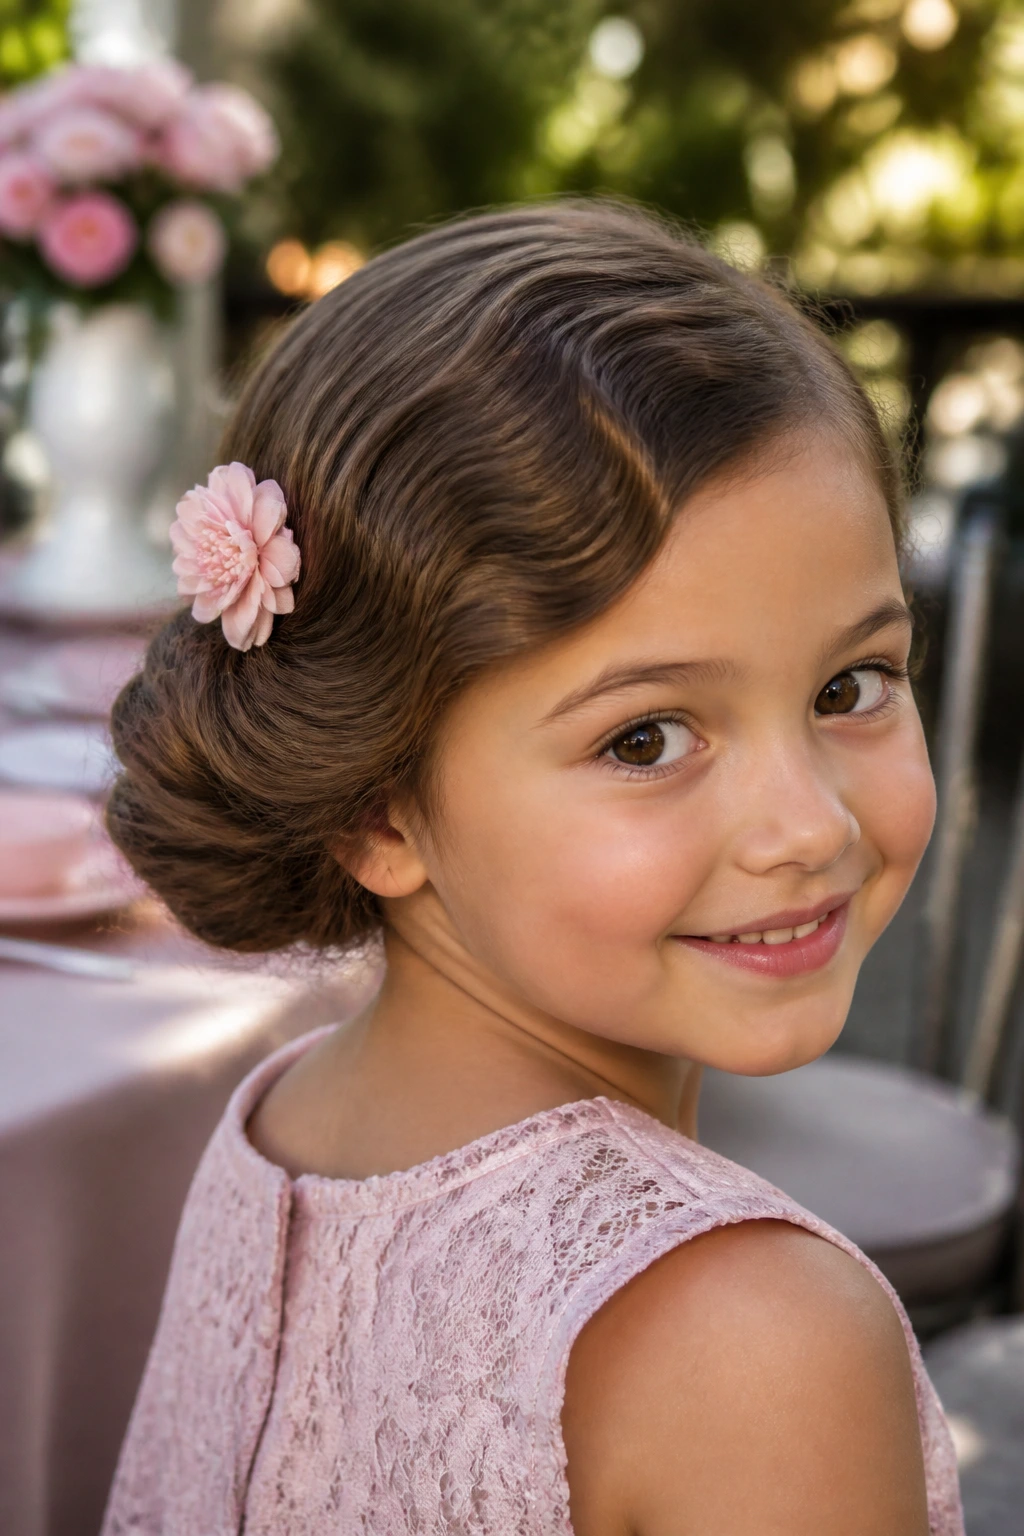
A flower-clip side twist roll is simple, pretty, and very usable. You sweep the hair to one side, roll or twist it inward, and pin it low behind one ear. A flower clip sits where the roll ends, and that’s usually enough to make the whole style feel finished.
The beauty of this style is how little it asks from the hair. Wavy strands do the softening for you. The clip just finishes the sentence.
Why It Works
The side roll creates a natural curve, and the clip gives the ends a place to disappear. That’s useful if the hair has shorter layers that don’t want to stay tucked on their own.
Best For
- Little girls who like one-sided styles.
- Spring events, garden parties, or photo days.
- Hair that is not quite long enough for a full updo.
Honest Note
If the clip is heavy, it slides. Pick a lightweight flower or fabric piece with a secure clasp.
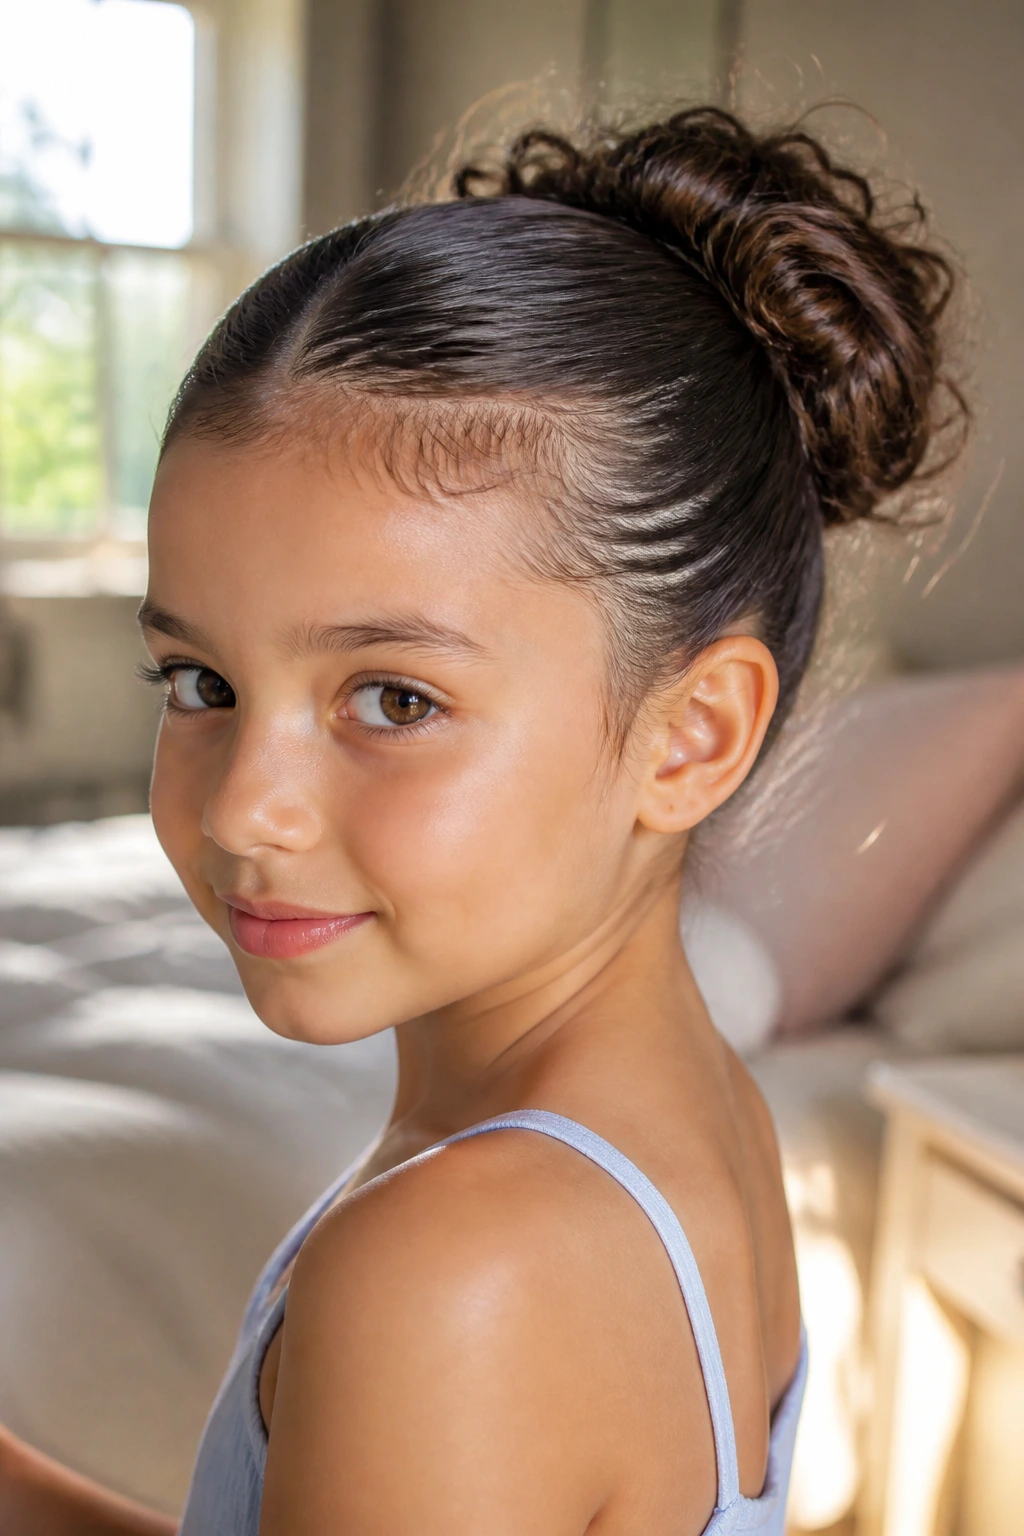
15. Four-Section Mini Twist Bun
This is a smart style for thick wavy hair that can feel like too much all at once. Divide the hair into four sections, twist each one, and gather them into one bun at the back or crown. Because each section is smaller, the bun feels more controlled and less bulky than a single huge twist.
It also gives you more control over direction. You can bring the twists in from the sides, top, and lower back in a way that suits the child’s hair growth pattern.
Why It Helps
Four smaller twists distribute the weight better than one or two heavy sections. That makes the style easier on a sensitive scalp and often easier to pin securely.
Good Match For
- Thick, wavy hair.
- Children who need a style that lasts through a long day.
- Parents who want a neater bun without flattening the whole head.
One Trick
Twist each section in the same direction before gathering them. Mixed directions can make the bun fight itself.
16. Curved Side Twist Pony
The curved side twist pony moves away from the strict straight-back ponytail shape and gives the hair a little sweep. Start with a side part, twist the front sections along that curve, then gather everything into a ponytail over one shoulder or low at the back. The shape feels softer, which suits wavy hair beautifully.
It’s the kind of style that looks like it took longer than it did. That’s always useful.
Why It Stands Out
The curve in the part gives the style motion from the start, so even a simple ponytail feels shaped. Wavy hair adds fullness through the tail, which keeps the pony from looking stringy.
Best For
- Kids who like wearing their hair partly down.
- Smaller faces that benefit from a soft side sweep.
- Quick mornings where you still want a little polish.
Tiny Detail
Use a narrow elastic and hide it with a small wrapped strand. That tiny change makes the pony look finished instead of improvised.
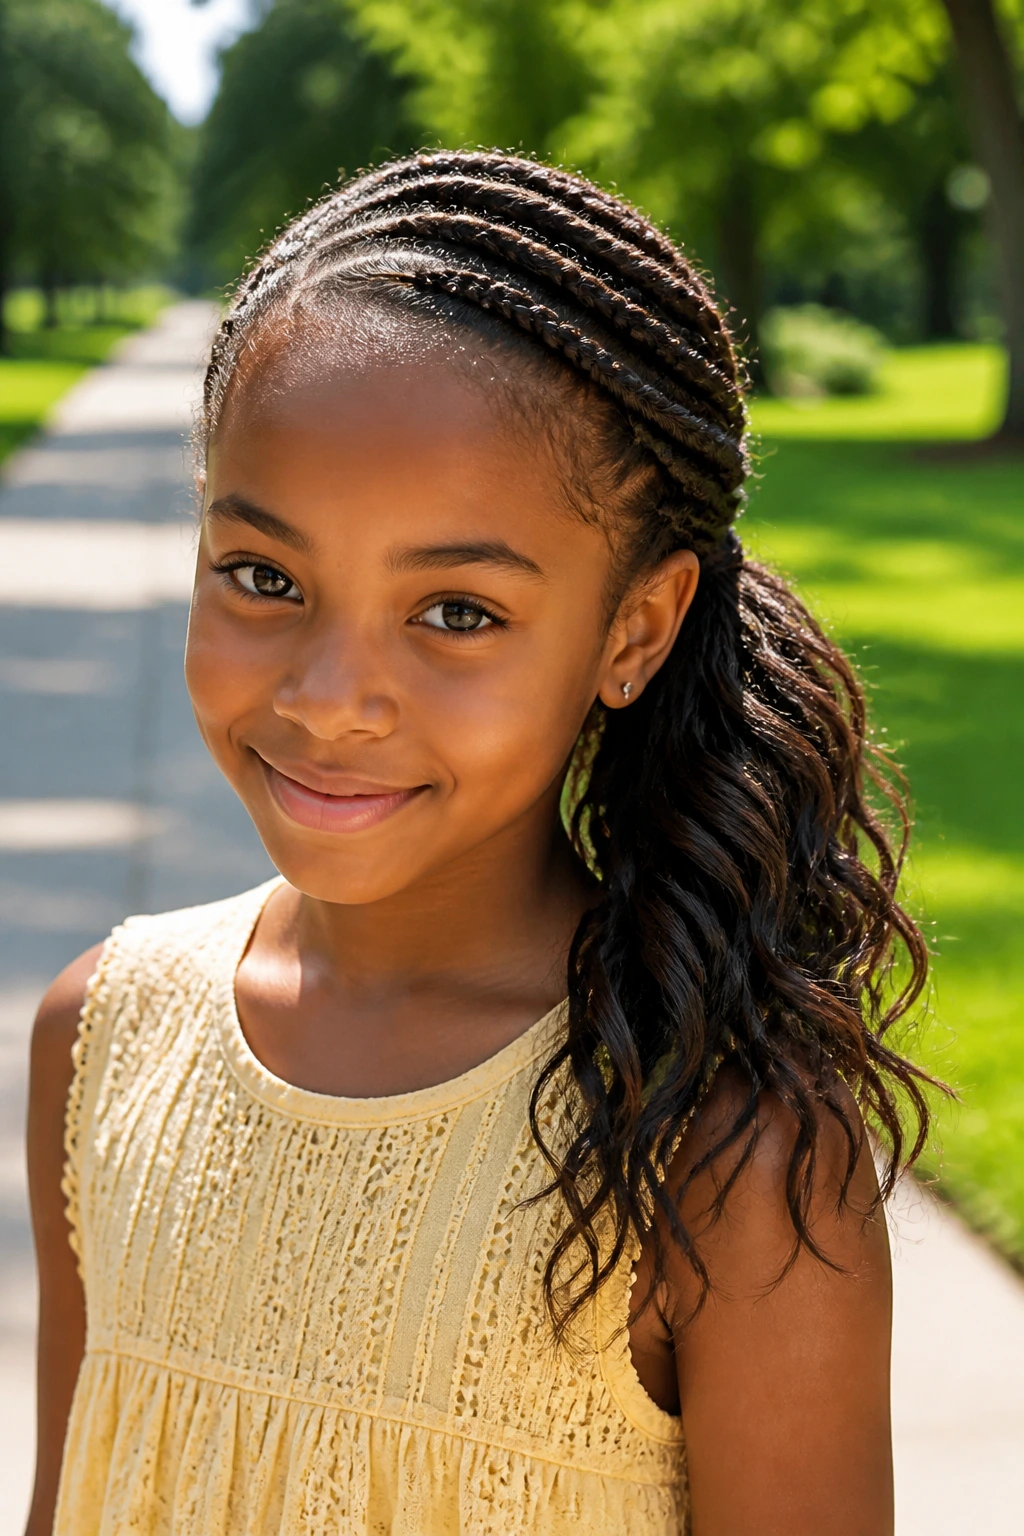
17. Double Crown Braids Into Bun
This style borrows from braiding, and that’s fine. The crown braids help corral the front pieces, then they feed into a bun at the back. For wavy hair, it gives you a very secure top section while leaving the bun soft and round.
I especially like this when the hairline has short layers that refuse to stay out of the face. The braids take care of that problem neatly.
Why It Works
The braids create structure at the front, while the bun gives the style a clean finish. That combination is hard to beat for children whose hair gets fuzzy around the temples fast.
Best For
- Dressier occasions.
- Medium to long hair.
- Kids who can sit still long enough for two neat crown sections.
One Caution
Don’t pull the braids too tight. Crown styles look prettier when the edges stay soft and the scalp is not straining.
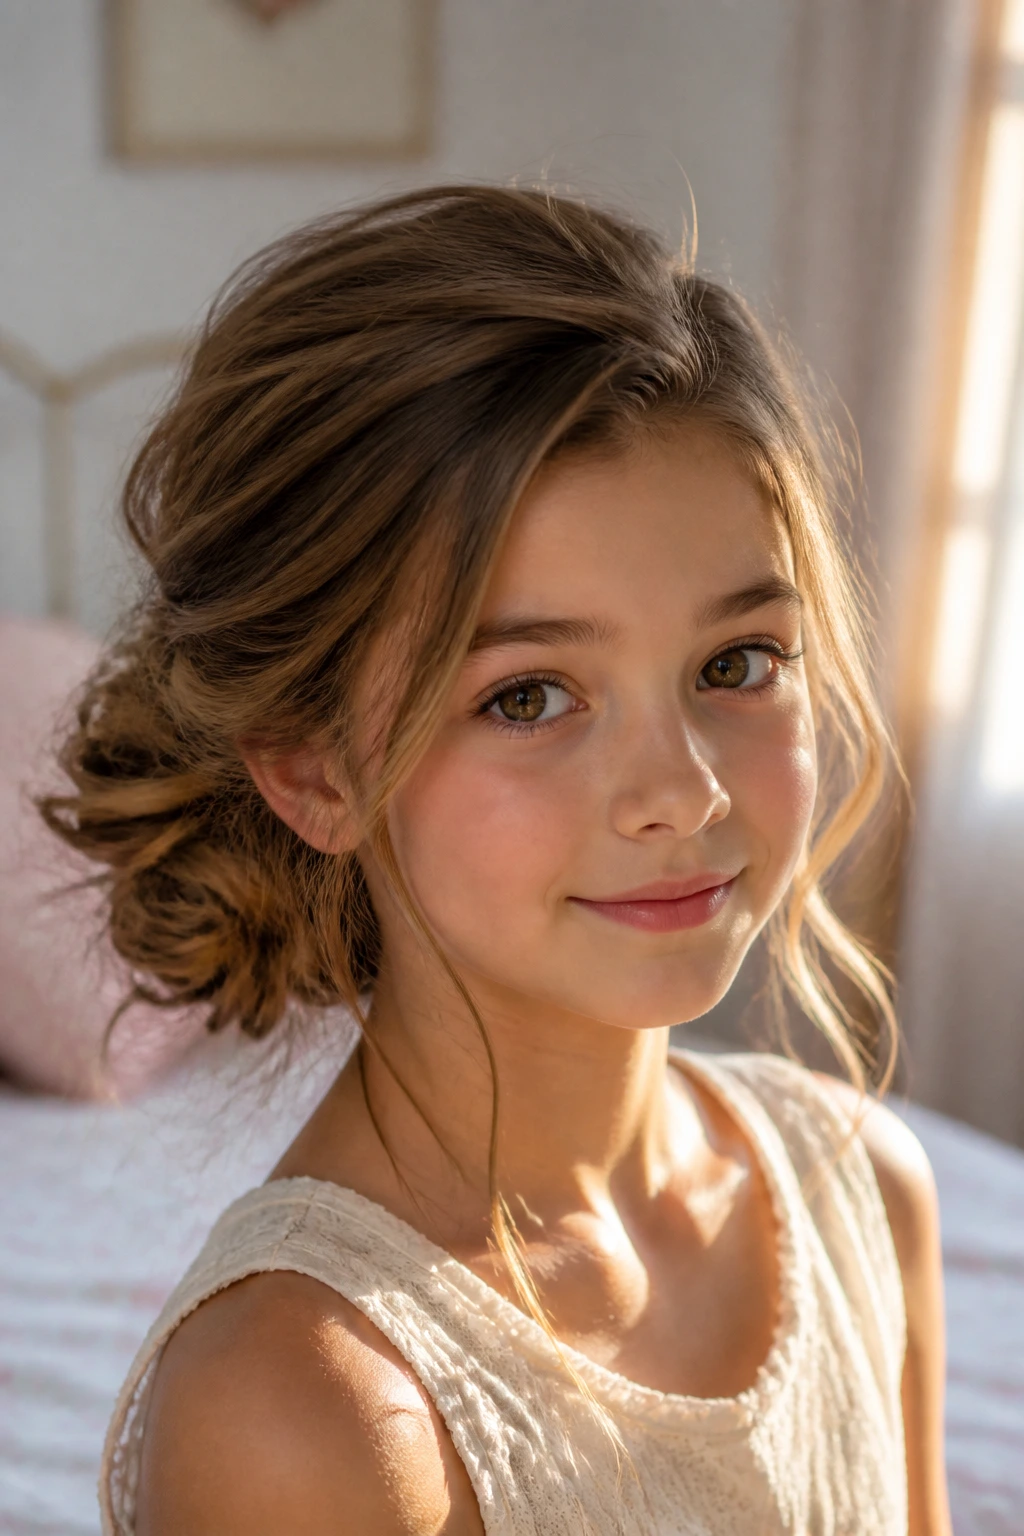
18. Sleek-to-Soft Festival Bun
This style starts smooth at the front and gets looser as it moves toward the bun, which is why I like it for kids with wavy hair. The front sections are brushed in cleanly, then the back is twisted into a soft bun with a little texture left in it. The result feels polished but not severe.
That contrast is the trick. The sleek front keeps hair out of the face, and the softer bun keeps the style from looking like it belongs to a mannequin.
Why It’s Useful
It handles mixed textures well. If the top is a bit smoother and the ends are wave-heavy, this style makes both look deliberate.
Good For
- Photo days.
- Dance events.
- Any outfit that needs a clean front line.
Keep the Balance
If you slick the top too hard, the bun can look disconnected from the rest of the hair. Leave a tiny bit of natural puff at the crown.
19. Twisted Half-Up Bow Bun

This one has a little whimsy to it. You twist two sections from the sides and shape them into a bow-like loop at the back, while the rest of the hair stays down. It reads playful, and it works better than you might expect on wavy hair because the texture helps the loops hold their shape.
The style is not about perfect symmetry. It’s about making something recognizable and cute without so much fuss that a child gets bored halfway through.
Why It Works
The half-up format keeps the hair out of the face while leaving the length loose. That makes it a good compromise for kids who do not want a full updo.
Best For
- Birthdays.
- Family photos.
- Kids with medium-length waves that still have bounce.
Practical Tip
Use two small elastics inside the bow loops before pinning. It makes the shape hold much better than pins alone.
20. Gibson-Tuck Twist
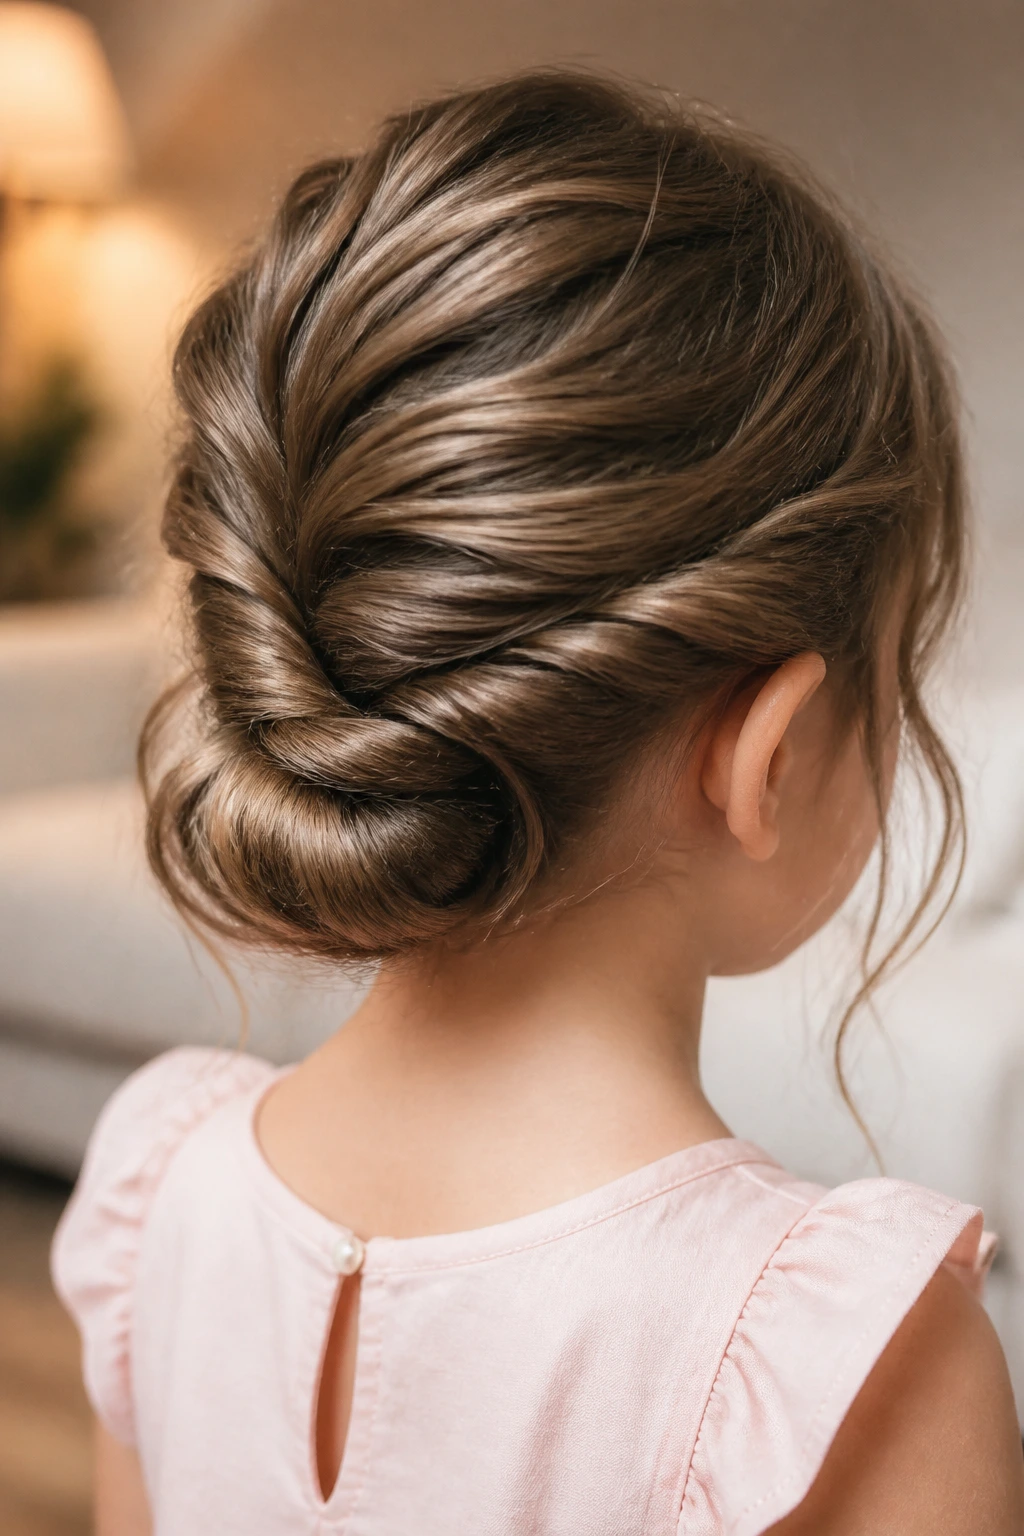
A Gibson-tuck twist has an old-school feel, but it looks lovely on little girls because the shape is soft and low. You twist the hair and tuck it inward at the nape, creating a rolled finish that feels classic without looking fussy. On wavy hair, the roll naturally fills out so it doesn’t collapse into a flat line.
I like this style for occasions where you want a neat back view and no loose ends brushing the collar. It’s calm, contained, and comfortable.
Why It Works
The tucked roll protects the ends and keeps the style compact. That means fewer tangles later, which any parent will appreciate after a long day out.
Best For
- Longer wavy hair.
- More formal clothes.
- Kids who do not like hair touching the neck.
A Good Habit
Pin the tuck from the inside first, then add one or two support pins at the seam. It holds better than trying to pin only the outside edge.
21. Soft Side Roll With Face Pieces
A soft side roll with face pieces is one of the prettiest “easy but not plain” styles in the group. You sweep the hair to one side, roll it in a loose curve, and leave a few face-framing pieces out so the style does not feel too strict. That little softness is exactly what wavy hair does best.
This is a style for kids who like movement. The front pieces can curl naturally around the cheekbones, which keeps the whole look from becoming boxy.
Why It Helps
Leaving a few pieces out keeps the style gentle on the eyes and forehead. It also gives you some forgiveness if the part is not perfect, because the loose pieces blur the line.
Good For
- Shoulder-length or longer hair.
- Children who dislike very tight front styles.
- Events where the outfit is simple and the hair should do a little more work.
Small Warning
Do not leave out too many pieces. A few face-framing strands look soft; a tangle of random bits just looks unfinished.
22. Quick Playground Twist-Up
This is the “we need the hair off the neck and we need it now” style. Split the hair into two or three sections, twist each one, and pin or tie them into a compact bun or tucked cluster at the back. It is not the fanciest option here, but it is one of the most useful because it holds up to running, climbing, and the sort of head-thrown-back laughter children do with no warning.
Wavy hair gives this style a little texture without much effort. That’s the whole point. It should look cheerful, secure, and uncomplicated.
Why It Works
The twists create enough structure to keep the hair from exploding outward by midmorning. The lower profile also keeps the style comfortable under jackets, hoodies, and car seat headrests.
Best For
- School mornings.
- Playground days.
- Hair that needs to stay contained but not overly styled.
Fast Fix
If pieces start slipping, add one small elastic to each twist before tucking. That tiny step buys you more hold than an extra spray ever will.
Why Wavy Hair Gives Twists a Head Start
Wavy hair has a useful kind of memory. It bends, then it stays bent for a while, which is exactly what a twist needs. Straight hair often slips before the twist can settle. Coily hair can hold almost anything, but it sometimes needs more shaping. Wavy hair sits in the middle, and that middle is a sweet spot for updos that need softness and grip at the same time.
The trick is to work with the wave pattern instead of scrubbing it away with heavy product. A light leave-in, a small amount of mousse, and clean sectioning usually give better results than a thick cream that weighs the hair down. If the hair is freshly washed and squeaky, it may be too slippery. If it’s too dry, the twists can puff and fray. That in-between stage, when the hair still has movement but the roots are not sliding around, is where the styles behave best.
There’s another bonus. Wavy hair looks good when it’s not perfect. That sounds like a cop-out, but it isn’t. The texture hides tiny bumps in the twists, softens part lines, and keeps the style from looking overbuilt. That’s why these updos can be dressy without looking severe.
Tools That Make Twisted Styles Easier
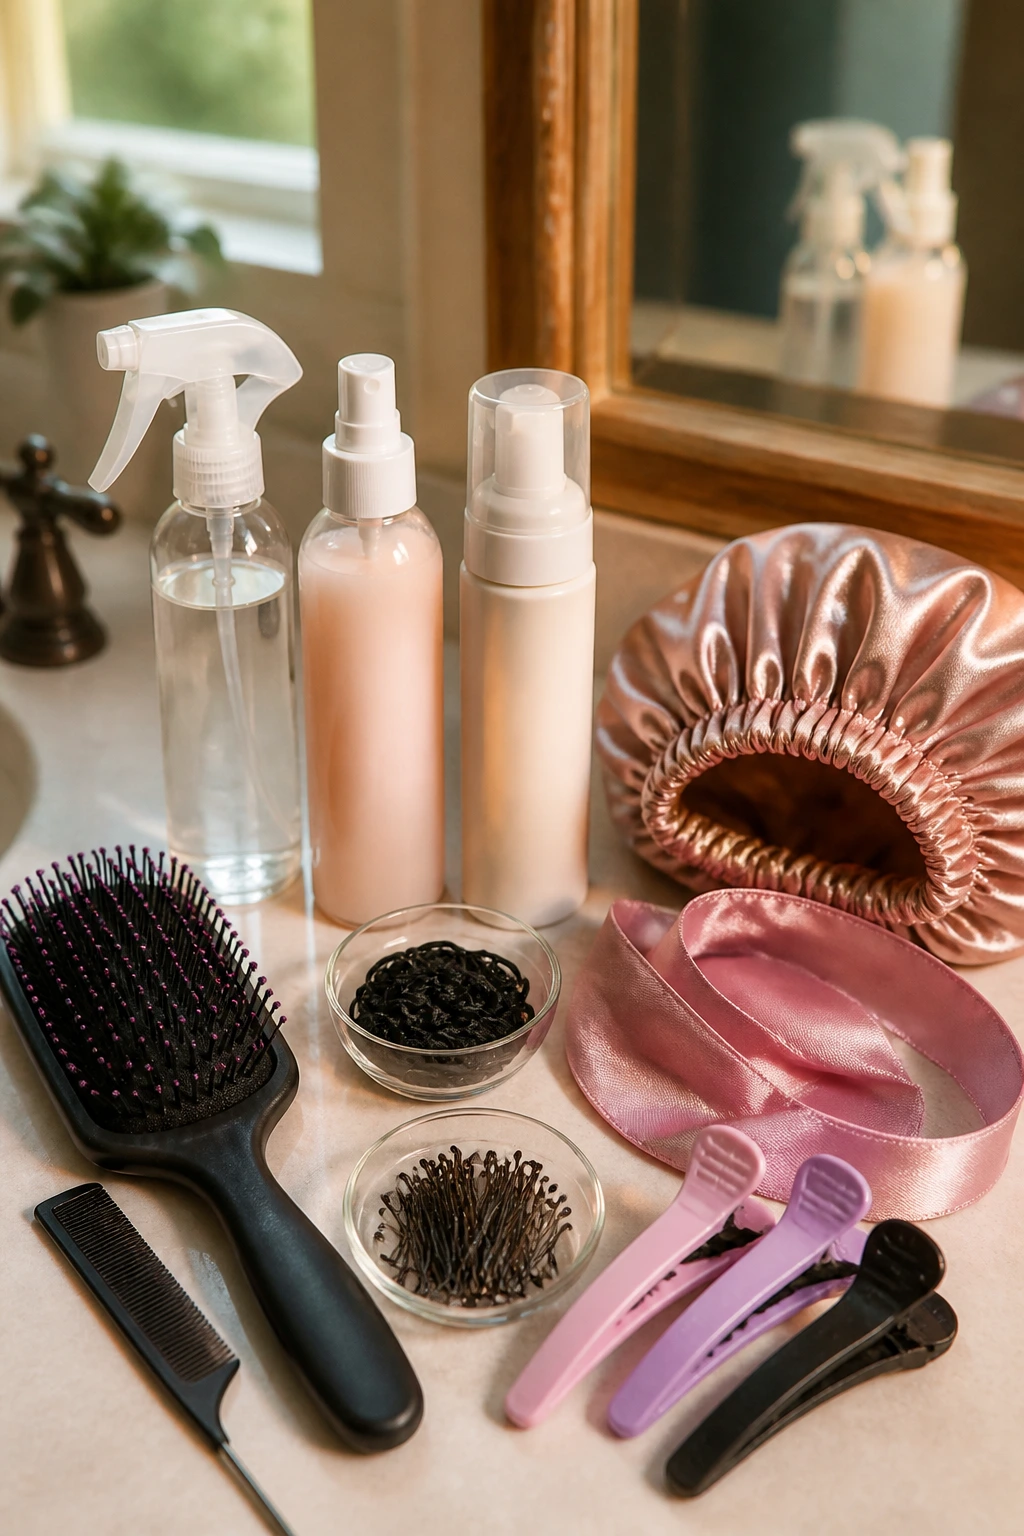
- Rat-tail comb: Use this for clean parts, especially on crown shapes, heart parts, and crisscross styles.
- Detangling brush with flexible bristles: This helps smooth waves without dragging too hard through the hair.
- Spray bottle filled with water: A light mist makes twisting easier; you want damp, not wet.
- Lightweight leave-in conditioner: A pea-sized amount on the ends keeps frizz from popping up everywhere.
- Medium-hold mousse or foam: This gives wavy hair some grip without the crunch of heavy gel.
- Snag-free mini elastics: These are the workhorses for pony wraps, bubble styles, and quick twist-ups.
- Bobby pins in the hair’s color: They disappear better and hold better when crossed in an X.
- Duckbill clips: Great for holding sections while you work; they save a lot of finger juggling.
- Soft ribbon or narrow bows: Useful when you want the style to look finished without adding weight.
- Satin bonnet or pillowcase: Not for the styling session, but very useful at bedtime if you want the style to last.
How to Shop for Products and Accessories That Work With Wavy Hair

Wavy hair on little girls usually does best with light, flexible products. That means you should reach for a mousse or foam before a thick curl butter. Heavy creams can make the crown limp and greasy by noon, especially if the child’s waves are fine. A detangling spray or leave-in with a watery feel is easier to control and less likely to build up at the roots.
Accessory quality matters more than most people think. Tiny elastics should stretch without snapping after one use. Bobby pins should have a smooth finish so they do not scrape the scalp, and if the child has very fine hair, the shorter pins usually hold better than long, slippery ones. For bows and clips, look at the clasp. If it doesn’t shut firmly in your hand, it probably will not hold in hair that moves as much as wavy hair does.
If you’re choosing between products, read the first five ingredients and trust the texture more than the label. A product that feels too heavy between your fingers will probably feel heavy in the hair too. That’s the rule I keep coming back to, because it saves you from the greasy-root problem that ruins so many otherwise pretty styles.
How to Wear These Styles
Presentation: Low buns and Gibson-style rolls sit best with dresses that have collars or details near the neckline, while half-up halos and bow buns show off hair length better with simple tops. A style should complement the neckline, not fight it.
Accessories: One focal piece is usually enough. A ribbon, a velvet bow, or a flower clip can finish the look; piling on three things turns the style busy and makes it harder to keep in place.
Fit: For fine hair, choose lighter styles like the twisted pony wrap or side roll. For thick hair, the four-section mini twist bun or crisscross crown twist gives the weight somewhere to go. If the child has shorter layers, styles with front braids or face-framing pieces will behave better than a strict slick-back bun.
Occasion Pairing: School days call for low-tension styles that can survive a hood or backpack. Photos and family events can handle more decorative work, while playground days are happiest with compact buns, pigtail knots, or anything that keeps the ends tucked.
Additional Tips and Style Boosters
Grip Boost: If the hair is extra slippery, mist the roots lightly and work in a small amount of mousse before you start twisting. Do not soak the head. Damp is the goal, not dripping.
Customization: Change the part and you change the whole style. A middle part gives symmetry, a side part softens the face, and a curved part can make even a simple bun look more polished. Small changes matter here.
Finish: Smooth flyaways with the faintest smear of leave-in on your palms, then press the surface of the style once. A light flexible-hold spray from about 8 to 10 inches away can help if the hair has a tendency to puff up.
Make-It-Yours: For a child who hates tightness, keep all the tension low and choose styles that sit at the nape or halfway down the head. For a child who loves sparkle, swap one bow for two tiny clips near the twists. For sensory-sensitive kids, skip the slicked-back finish and leave a little softness around the hairline.
Time-Saver: Prep the hair the night before by detangling and putting it in a loose braid or low pony. In the morning, it will twist faster and make fewer knots.
Common Mistakes to Avoid
-
Starting with soaking-wet hair: Wet waves can look cooperative at first, then dry into strange dents and puff at the ends. Start with lightly damp or second-day hair, then mist only the sections you’re twisting.
-
Using too much product at the roots: Heavy cream or a thick gel can make the front look greasy and collapse the wave pattern. Use a small amount on your hands first, then smooth it over the surface instead of dumping it straight on the scalp.
-
Pulling the twists too tight: A style that looks sleek for five minutes but gives a child a headache is already wrong. Leave a little give at the hairline and ask if it feels comfortable before you finish pinning.
-
Skipping anchor pins: Twists can look secure and still slide after lunch if they are not pinned at the base. Cross two bobby pins where the twist meets the bun or tuck, especially on fine hair.
-
Choosing heavy accessories: Big clips and chunky bows can drag the style sideways, especially on lighter hair. Pick a lightweight finish piece and place it where the twist already has support.
Variations and Adaptations to Try
The School-Morning Shortcut: Use a simple twisted ponytail wrap or quick playground twist-up when time is tight. These styles need fewer sections, fewer pins, and less perfect parting, which makes them realistic for a weekday morning.
The Ribbon-Finish Version: Thread a narrow ribbon through the twists or wrap it around the base of a bun. It gives the style a softer edge and works well when the outfit has a matching color you want to echo.
The Humidity-Smart Version: Keep the style low, tuck the ends, and use a light mousse before twisting. Humid air loves to puff out loose styles, so compact buns and nape rolls tend to hold better than high, airy shapes.
The Sensitive-Scalp Version: Choose side rolls, half-up halos, or low buns with minimal crown tension. Avoid tight ponytails and do not slick the hair hard against the head; the style should feel secure, not squeezed.
The Thick-Hair Version: Split sections into smaller pieces before twisting, and pin from the inside first. Thick wavy hair can bulge if the sections are too large, so smaller twists usually give you a cleaner, flatter finish.
The Dress-Up Version: Add one focal accessory, then stop. A bow, flower clip, or pearl pin can make a simple twist feel formal without changing the whole structure.
Nighttime Care and Next-Day Refresh
Twisted updos on little girls with wavy hair usually hold best for one full day, and many of them can be stretched to two if you protect them at night. Use a satin bonnet, satin pillowcase, or a loose satin scarf tied gently over the style. The goal is to reduce friction, not crush the shape flat.
Before bed, remove any clips that poke, check the pins at the nape, and smooth the top with clean hands. If the front has puffed a little, a quick mist of water on your palms and a light press over the surface is usually enough. Do not soak the hair to “reset” it. That tends to collapse the twist and leaves you with overnight frizz.
If you want to redo the style the next morning, start by loosening only the visible loose pieces, not yanking everything apart. Some styles, especially the low bun, Gibson tuck, or side roll, can be refreshed in under 10 minutes with one or two extra pins. If the hair smells sweaty or feels sticky, take it down, detangle gently from the ends upward, and start fresh. Reworking a tired style is usually more trouble than it’s worth.
Frequently Asked Questions

Are twisted updos better on damp or dry wavy hair?
Slightly damp hair usually twists more cleanly because the strands grip each other, but the hair should not be wet enough to drip. If the hair is freshly washed and very slippery, let it air-dry a bit first or work in a small amount of mousse for hold.
How do I keep twists from unraveling on fine hair?
Use smaller sections, add one tiny elastic at the end of each twist if needed, and pin the base in an X. Fine hair often slips because the sections are too big, not because the style itself is wrong.
Can these styles work on shoulder-length hair?
Yes, but some of the larger buns will need tighter rolling or a half-up version. Styles like the twisted ponytail wrap, side-swept knot, and half-up halo usually work especially well at shoulder length.
What product keeps wavy hair soft instead of crunchy?
A light leave-in conditioner or foam mousse is usually enough. Heavy gel can make the surface stiff and can flatten the wave pattern, which is the opposite of what you want for soft twisted styles.
How long will one of these styles last on a child?
Most will last through a school day if they’re pinned well and not pulled too tight. With a satin bonnet at night, some of the lower styles can carry over into the next day with only a quick refresh.
What if my child hates bobby pins?
Lean on styles that use mini elastics and tucked ends, like twisted pigtail knots or a quick playground twist-up. You can also hide fewer, stronger pins inside the style rather than using lots of small ones around the surface.
Can I use these on straight or curly hair too?
Yes, though the hold changes. Straight hair often needs a bit more product or extra pins, while curlier hair may need more gentle detangling and slightly larger sections to avoid frizz.
How do I take a twisted updo down without making a tangle mess?
Remove pins first, then unravel the style from the ends back toward the scalp. A little leave-in on your fingers helps separate the twists, and if the hair has been worn for more than a day, detangle in small sections instead of one big sweep.
Little Twists, Big Payoff
The best thing about twisted updos for little girls with wavy hair is that they do not ask the hair to become something else. They use the wave, the softness, the bend, the little bit of movement that makes children’s hair look alive instead of lacquered into place.
Once you get comfortable with a few clean parts, a light touch, and pins placed where the hair already wants to sit, the whole process gets easier. Pick one low-maintenance style for school days, one decorative style for weekends, and keep the rest of the tools within arm’s reach. That’s usually enough to turn a rushed morning into a decent one.