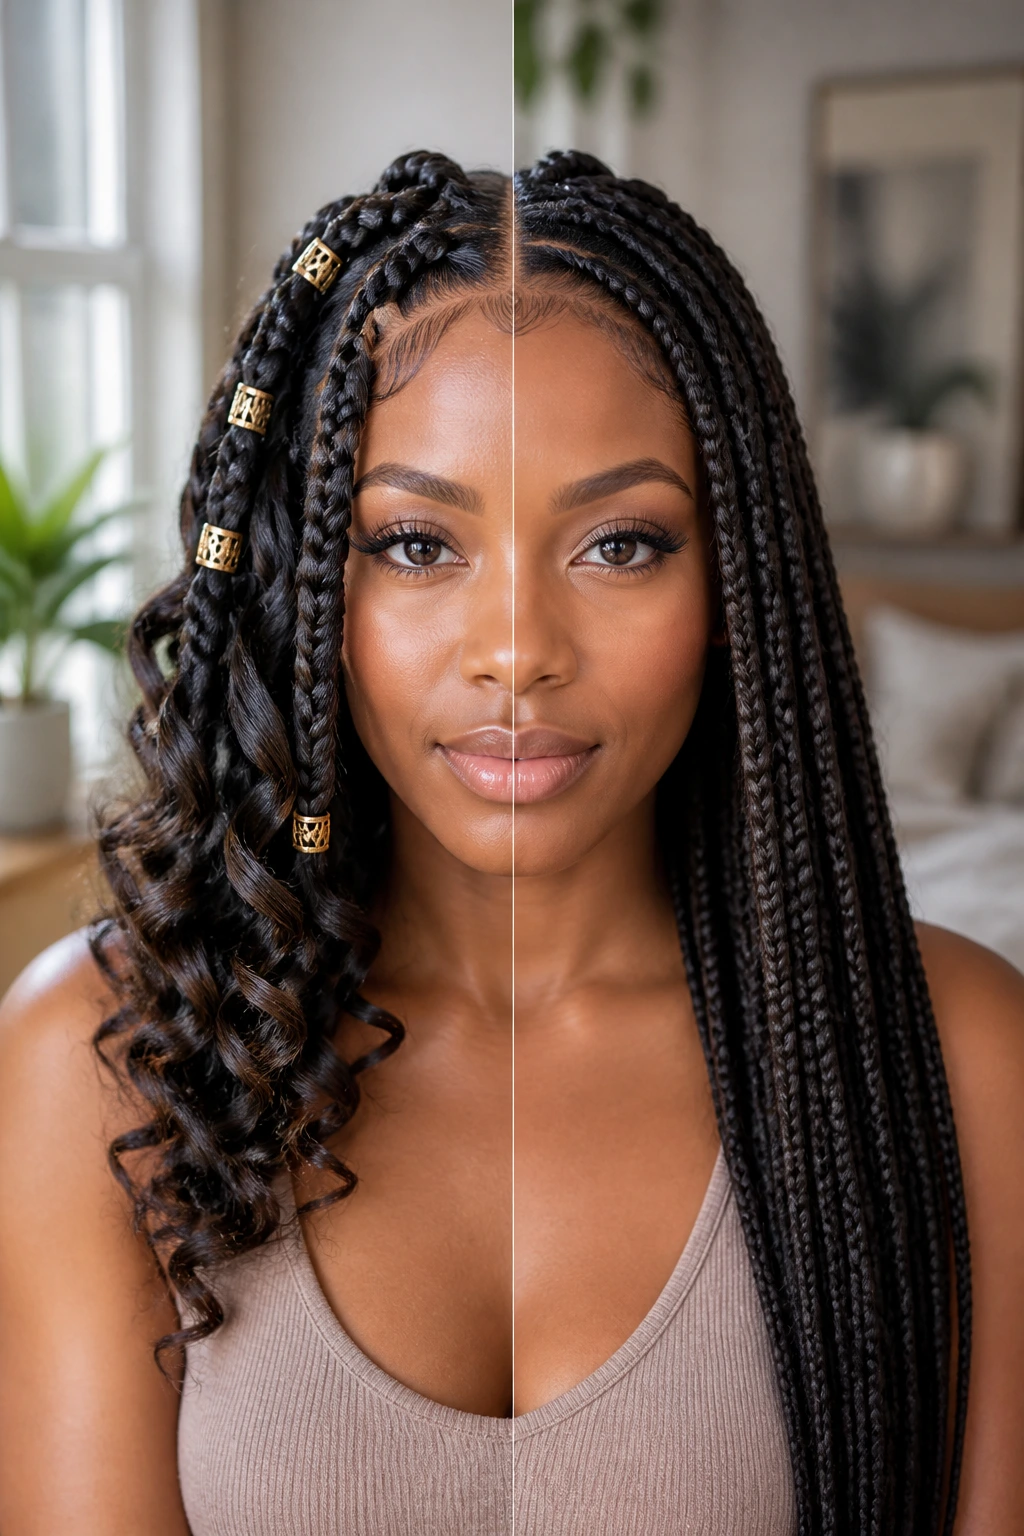
Tight is not the same as polished. Dutch braids on Black natural hair look best when the parting is clean, the braid ridge sits proud of the scalp, and the layers around the face stay soft enough to move. That combination gives you structure without the stiff, boxed-in finish that makes some braided styles feel more like a helmet than a style.
Soft layers change the whole mood. A few curved pieces at the temples, a tapered nape, or a face-framing fringe can take a braid set from severe to finished, and that matters even more on natural hair because shrinkage likes to steal length the second you step away from the mirror. Dutch braids sit on top of the hair instead of disappearing into it, so they already have more visual weight than a flat plait. Add layers, and the shape starts breathing.
The smartest versions are not the tightest ones. They’re the braids that hold close to the scalp without yanking it, and they’re usually the ones where the stylist has thought about where the shortest pieces should fall before the first section is even parted. That’s the difference between a style you keep touching and a style that settles in.
What Makes These Dutch Braid Looks Worth Saving
-
The braid pattern stays visible: Dutch braids lift off the scalp, so the stitch line reads clearly on dense natural hair instead of getting swallowed by texture.
-
Soft layers stop the style from looking boxy: Face-framing pieces, tapered nape layers, and loose ends round out the silhouette and keep the finish from feeling too hard.
-
They work with shrinkage instead of fighting it: Whether your hair is blown out lightly or left in a stretched state, the layers give the style movement even when the roots puff a little.
-
The tension can stay gentle if the sections are smart: Smaller hairline pieces and wider first stitches protect the edges better than a tiny, over-pulled start.
-
They leave room for personality: Beads, cuffs, curled ends, a side part, or a braid bun can shift the whole mood without changing the basic structure.
-
They last better when the shape is balanced: A braid that is neat at the scalp and softened at the edges tends to look intentional longer, even after a few nights of sleep.
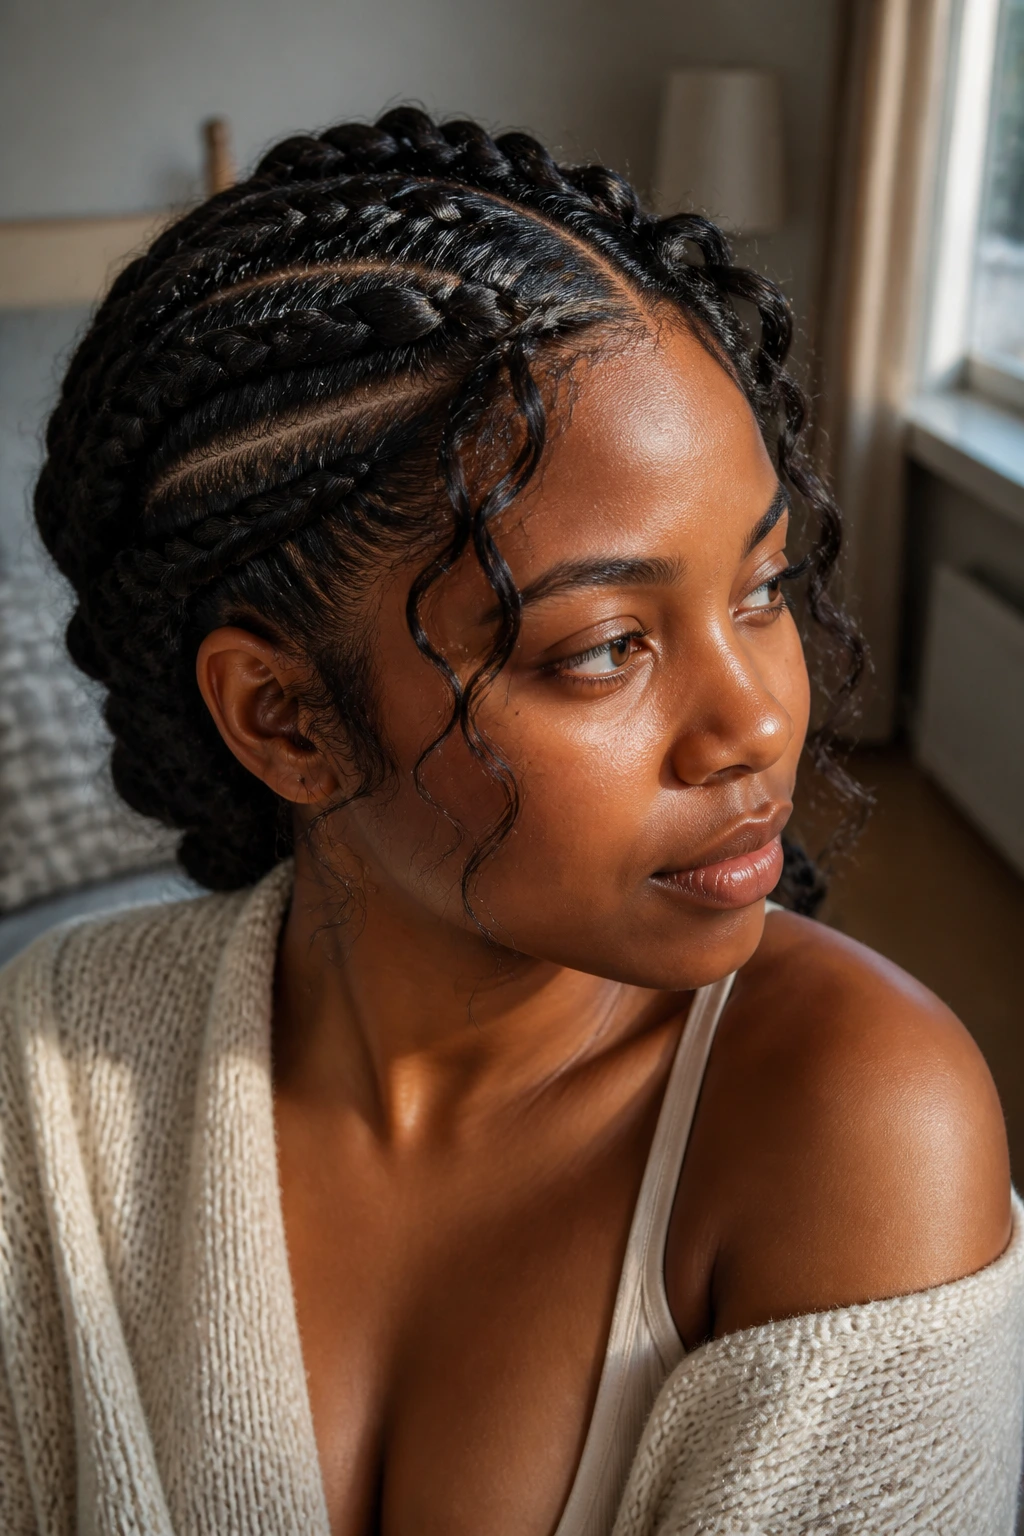
1. Classic Center-Part Double Dutch Braids with Face-Framing Layers
This is the version most people picture first, and for good reason. Two clean Dutch braids running straight back give you that crisp, symmetrical look, while a few soft pieces at the temples keep the front from going severe. On Black natural hair, this style looks especially good when the front layers are cut so they skim the cheekbones instead of sitting like a blunt curtain.
The trick is in the balance. Keep the first stitch close enough to the scalp to read clearly, but not so tight that the hairline feels pulled the minute you sit down. If your hair shrinks hard, stretch it lightly first so the parts stay visible and the braids don’t bulge at the root.
Best for: workdays, school, errands, and any day you want one style that behaves.
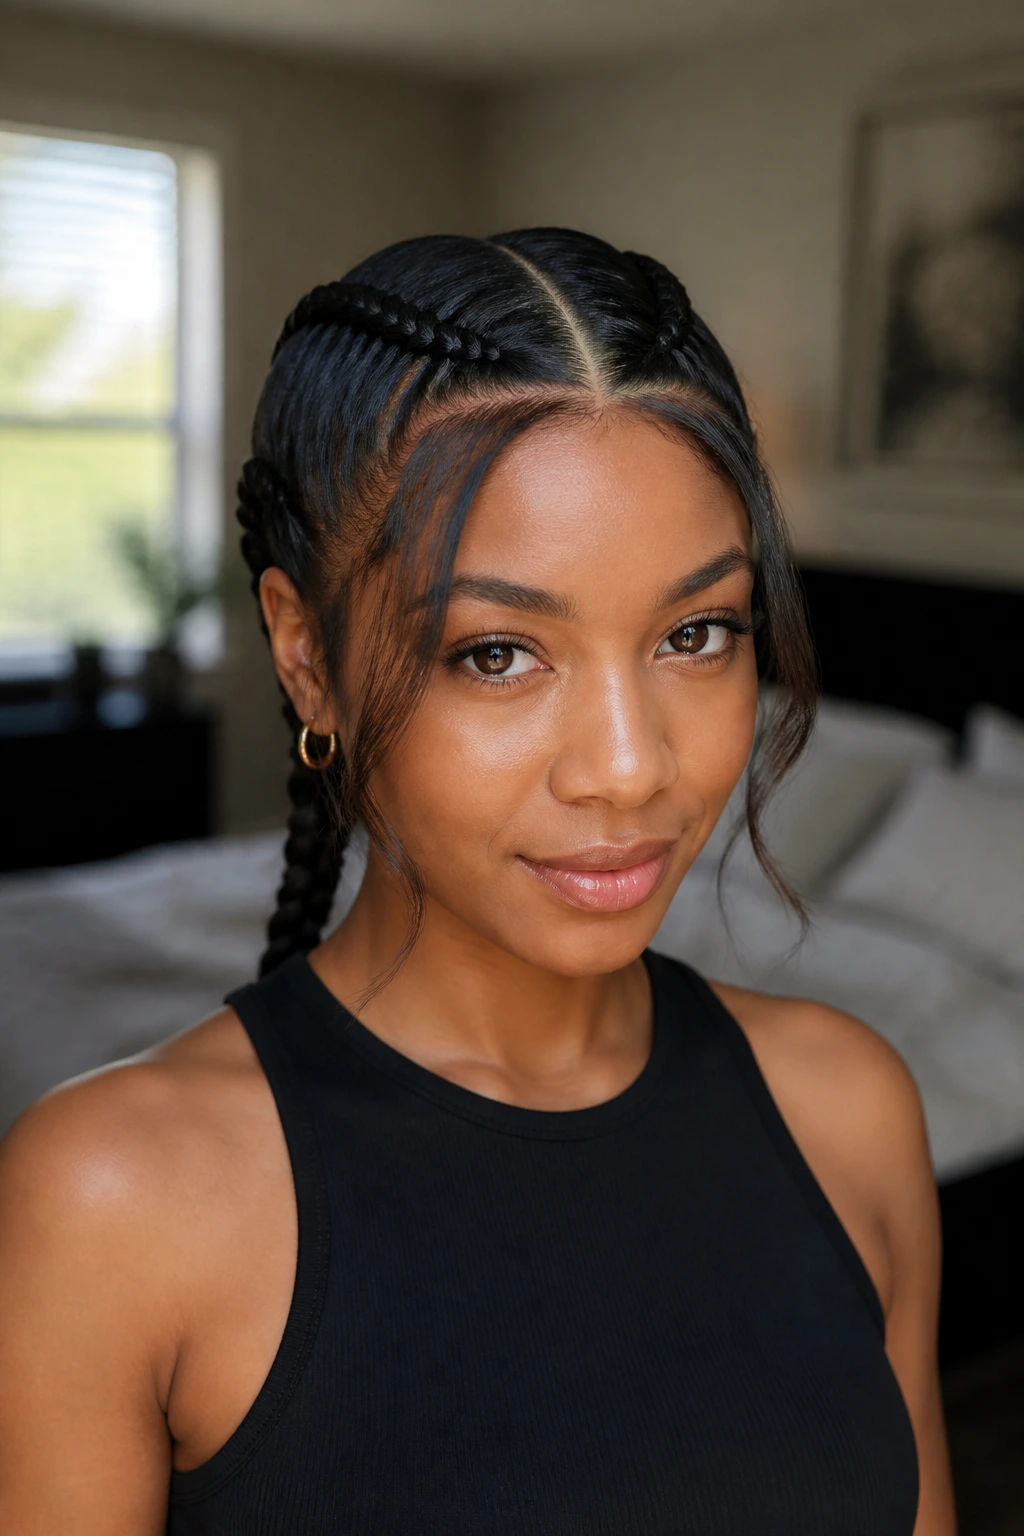
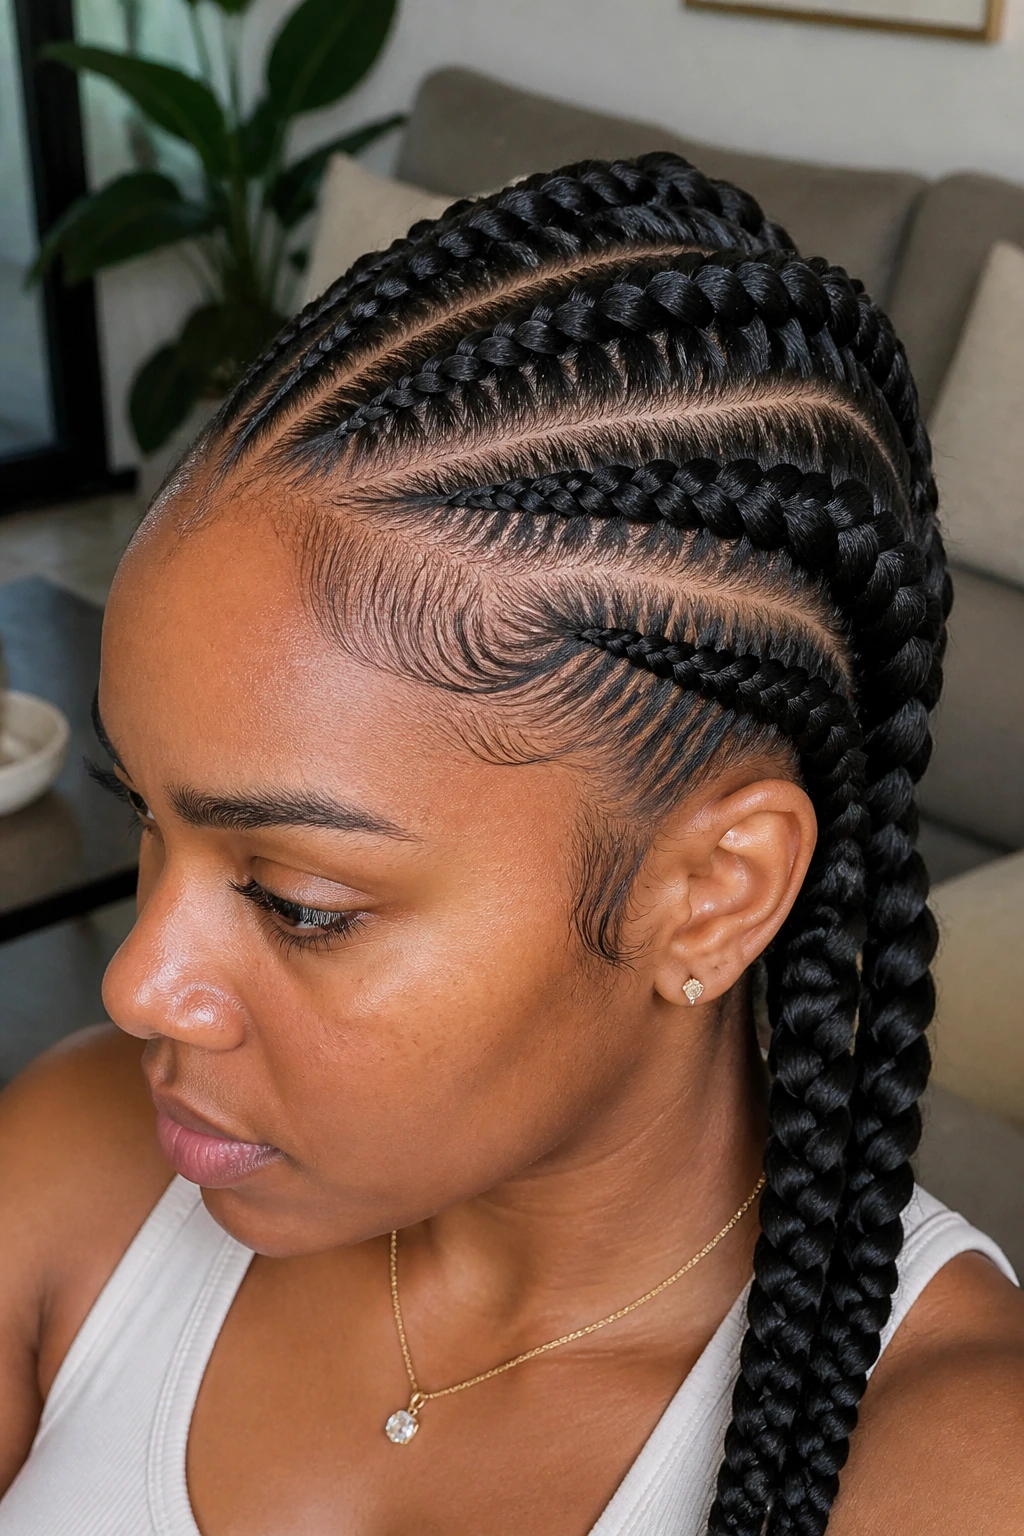
2. Deep Side-Part Double Dutch Braids with Swept Layers
Want the same braided shape with a little more attitude? Move the part to one side and let the front layers sweep across the forehead before they tuck into the braid. The whole style softens immediately. It feels less uniform, more lived-in, and that side-swept line works beautifully when your hair has a mix of curl patterns.
The side part is doing more than changing the silhouette. It also helps a longer fringe fall naturally instead of being forced straight back, which is a lifesaver if your front pieces are stubborn or your temple hair is finer than the rest. I like this one when the goal is polish, but not stiffness.
Try this if: you like center-part braids but want something that frames the face a little more.
3. Crown Dutch Braid with Curved Front Pieces
Picture a braid that starts near one temple and curves over the crown like a stitched headband. That is the appeal here. The braid pulls the eye upward, which is a neat trick if you want height at the top without actually wearing a high bun or ponytail.
Soft layers matter a lot in this look because the braid sits so close to the hairline. A curved front piece or a few loose baby hairs can keep the crown from feeling too formal. On natural hair, this style also works well if the hair is medium length and you want the front to do most of the talking while the back stays tucked in.
A small note: keep the braid wide enough at the start that it does not bite into the temple. The style should look regal, not tense.
4. Two Dutch Braids Feeding Into a Low Puff
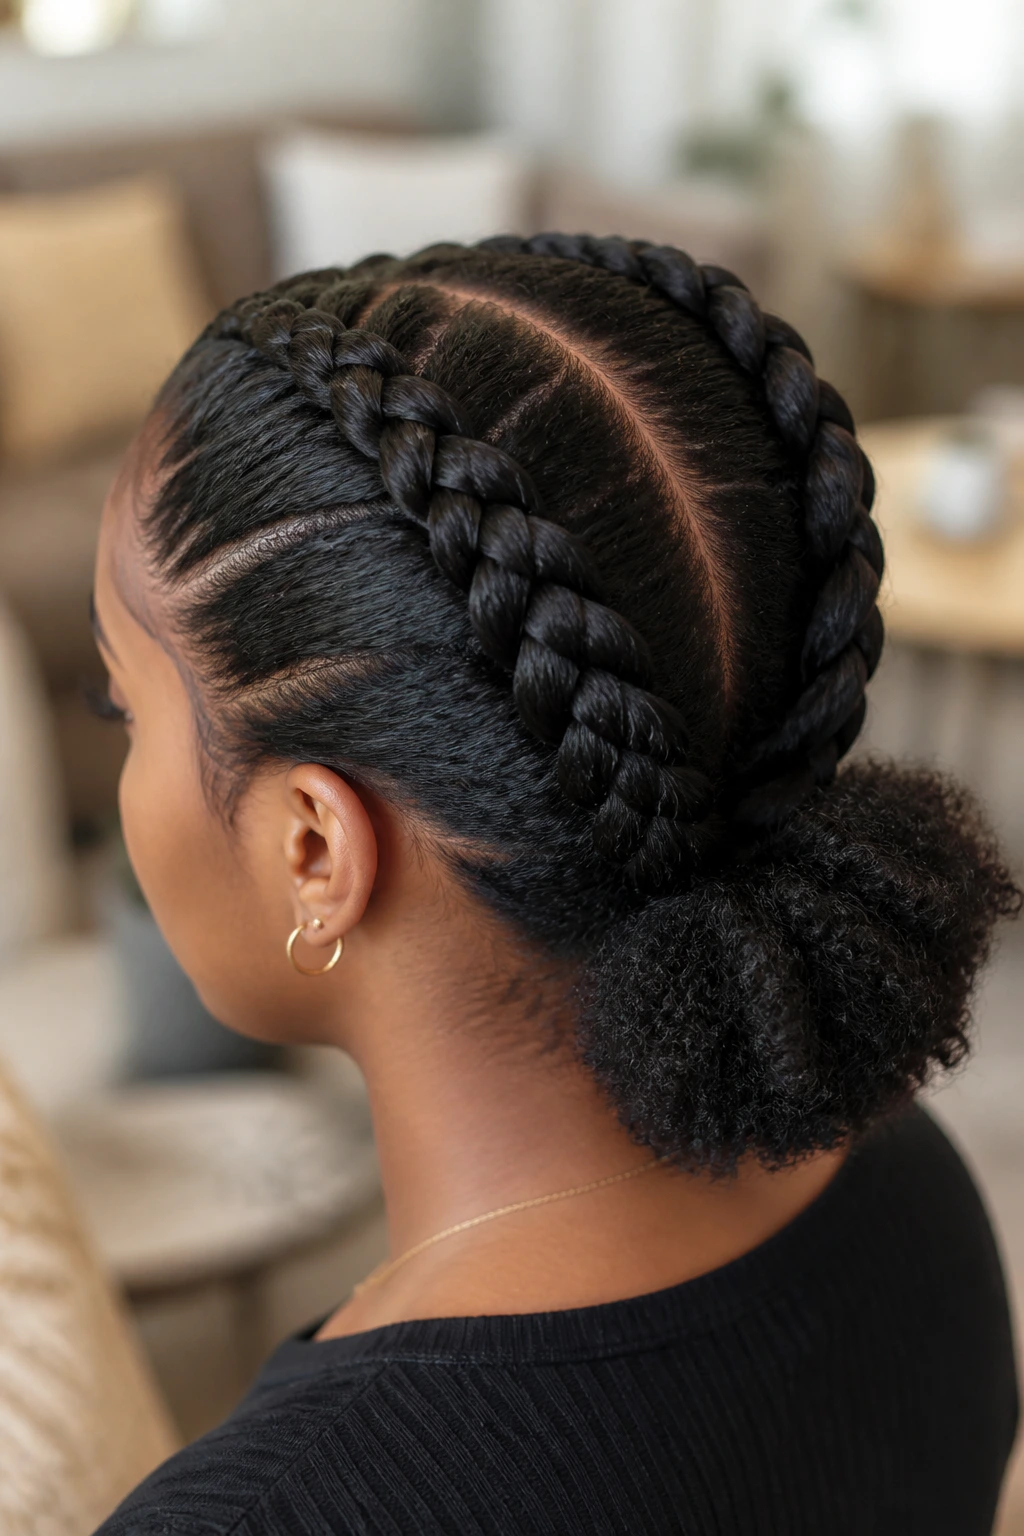
Not every Dutch braid has to end in another braid. This version starts with two strong braids at the front and then opens into a low puff at the back, which gives you structure up top and a softer, fuller finish at the nape. It’s a good compromise when you want your curls to stay visible.
The puff adds movement, but the soft layers are what make the transition feel smooth. Leave a little shape around the crown and keep the nape pieces rounded rather than chopped straight across. That way the braid doesn’t end in a hard line where the puff begins.
Best for: stretched natural hair, second- or third-day curls, and people who want a little volume at the back.
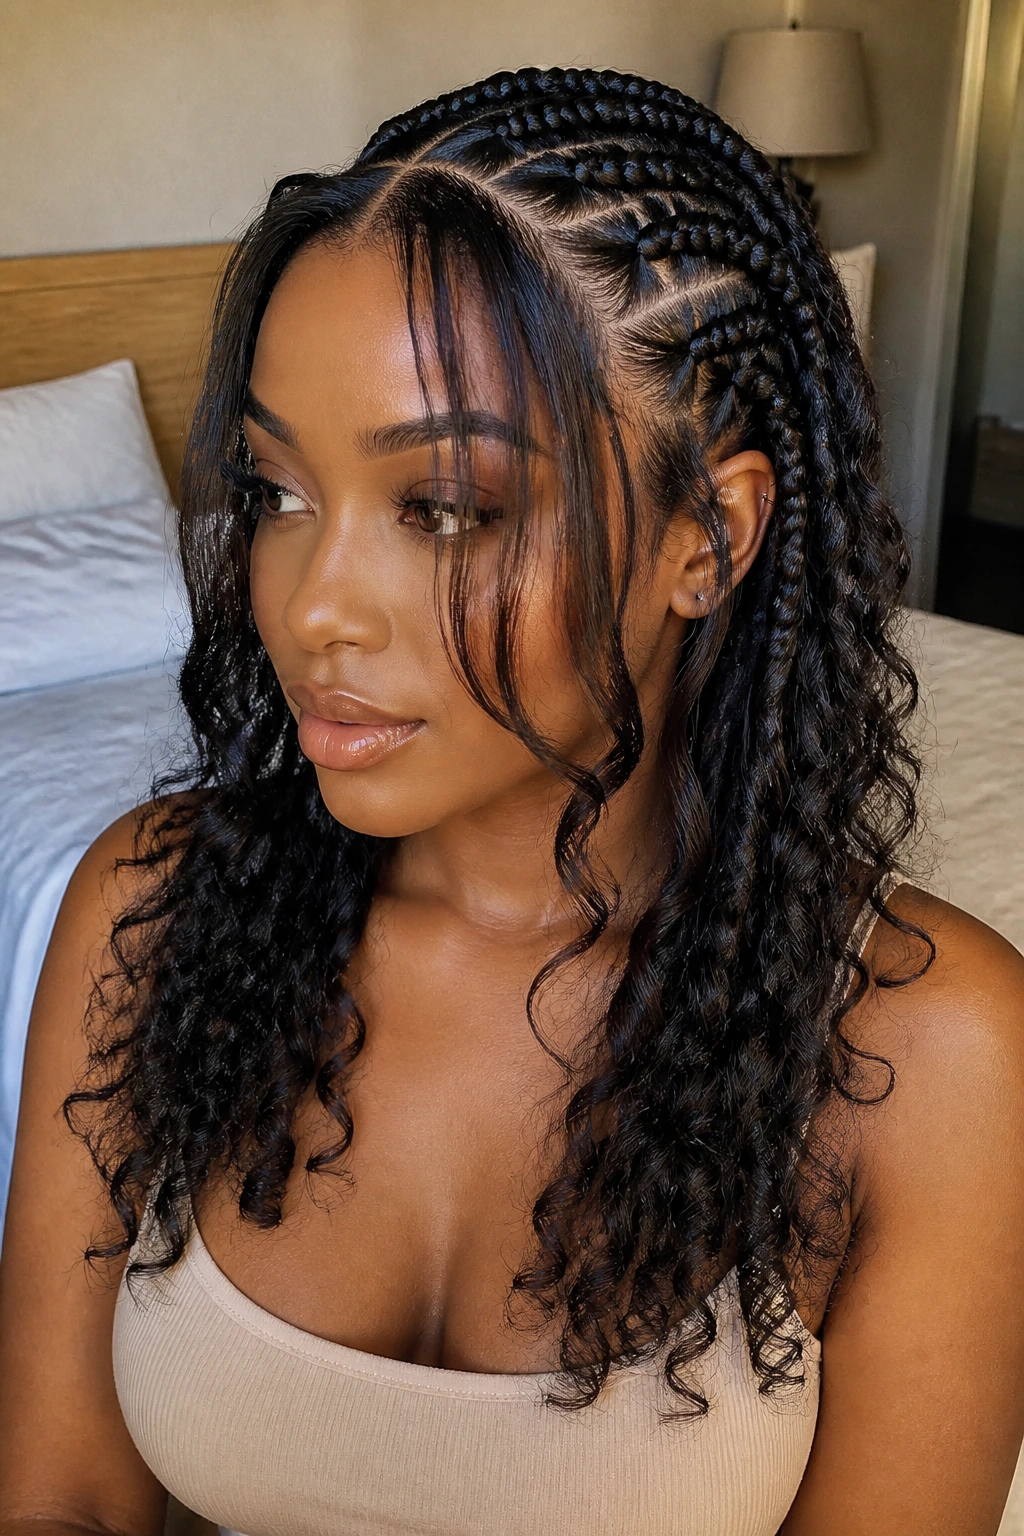
5. Dutch Braids with Curly Ends and Layered Leave-Out
When the braids stop a few inches before the ends and those ends are set into curls, the whole style suddenly feels lighter. The contrast between the tight braid and the springy finish is one of my favorite things to do with natural hair. It keeps the look from feeling too locked down.
The soft layers help the curls blend into the braid instead of looking pasted on. Flexi rods, perm rods, or small bantu knots overnight can give you that rounded finish, depending on the amount of hold you want. Keep the leave-out pieces around the face slightly longer so the curls frame the cheek rather than sticking straight out.
This is one of the easiest ways to make braids read a little more dressy without adding a lot of extra work.
6. Zigzag-Part Dutch Braids with Feathered Edges
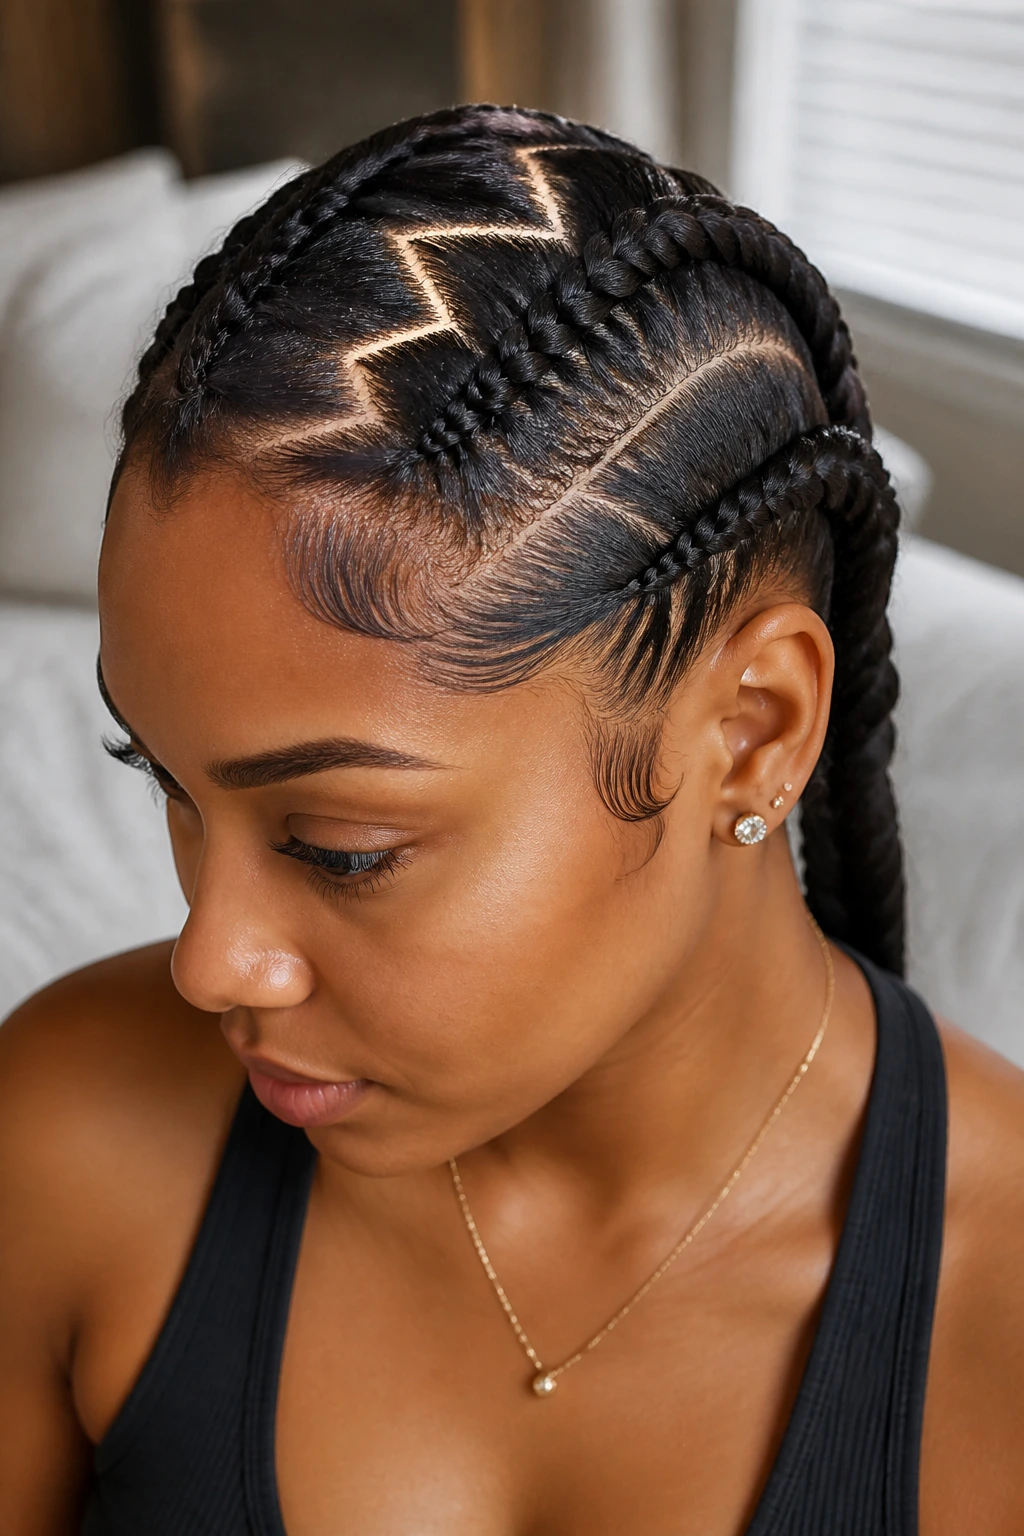
A zigzag part changes the whole energy. The braids themselves can stay simple, but the parting line makes the style feel deliberate and a little more graphic. It’s a clean choice if you like scalp detail and want the parts to be the star.
Soft edges matter here because a sharp part with harsh front pieces can look busy fast. Feather the hairline, leave the temple pieces a touch longer, and keep the baby hairs brushed into small, neat curves rather than thick swirls that fight the part design. The result is tidy, not fussy.
This style holds up especially well when the hair is stretched beforehand. On densely coiled hair, that zigzag stays readable longer when the roots are not fighting the comb.
7. Dutch Braid Bun with a Soft Halo
A braided bun can look severe if every strand is slicked flat and locked down. Leave a soft halo around the hairline and the whole thing changes. The bun still feels finished, but the loose edges stop it from looking overbuilt.
This is one of the better Dutch braid styles for a dressier setting because the shape is lifted and clean without becoming hard. I like a low or mid bun best here. High buns can get a little stiff on natural hair if the base is too tight, while a lower knot lets the layers around the face breathe.
If your braid ends are thick, tuck them under and pin in a few places instead of forcing one giant wrap. The bun will sit flatter and look neater.
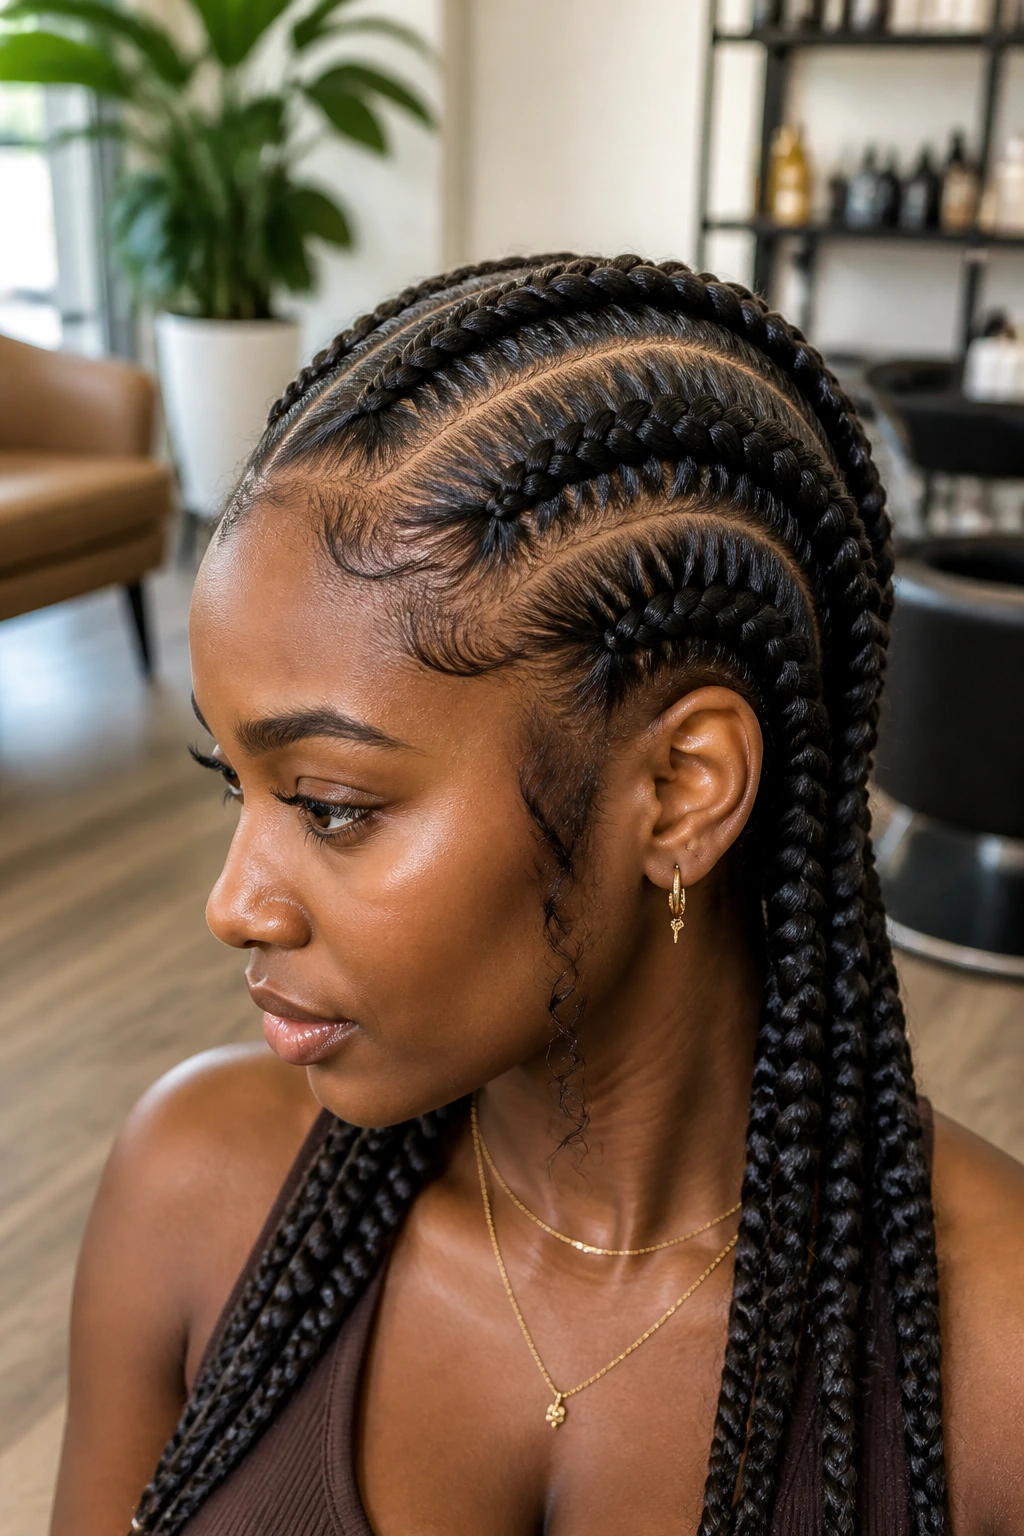
8. Feed-In Dutch Braids with Extra Length
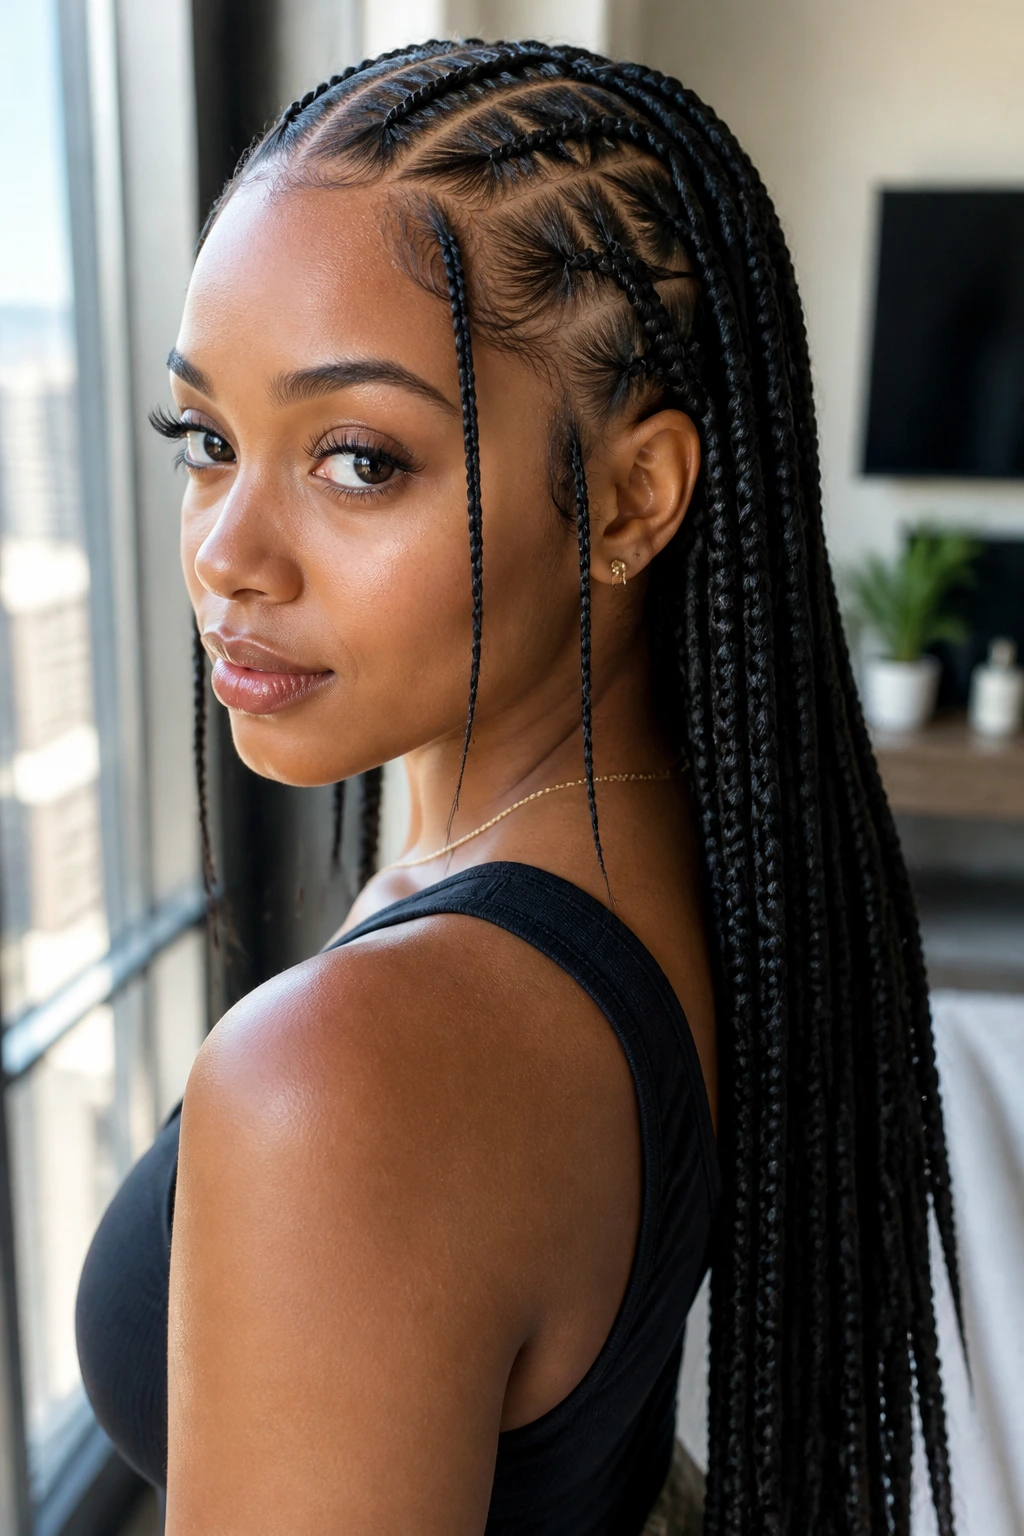
Feed-in Dutch braids are the neatest way to add length without starting with one heavy block of synthetic hair. The braid begins small at the scalp and gradually gets fuller as hair is added, which makes the line look smooth instead of bulky. On natural hair, that gradual build matters more than people think.
The softer layers help the longer length feel intentional. If you keep a few pieces around the face and temple a little shorter, the extra length at the back does not swallow your features. This is one of those styles that can look very sleek with a center part or slightly softer with a side sweep.
Best for: when you want drama, length, and a braid that still lies flat at the roots.
9. Dutch Braided Mohawk with Tapered Sides

Unlike a full-head braid set, a Dutch braided mohawk keeps the sides quiet and the center line bold. That contrast is the whole point. It’s a strong look, but it gets a softer read when the front pieces are tapered and the crown doesn’t start with a harsh, helmet-like edge.
The mohawk shape is especially good if you like your natural texture to show up in a controlled way. You can braid the sides tightly back, flat-twist them, or smooth them into the base, then let the center section carry the style. Soft layers keep the whole thing from tipping into harsh territory.
This one is not shy. That’s fine. It just needs balance.
10. Dutch Braids into Space Buns with Loose Tendrils
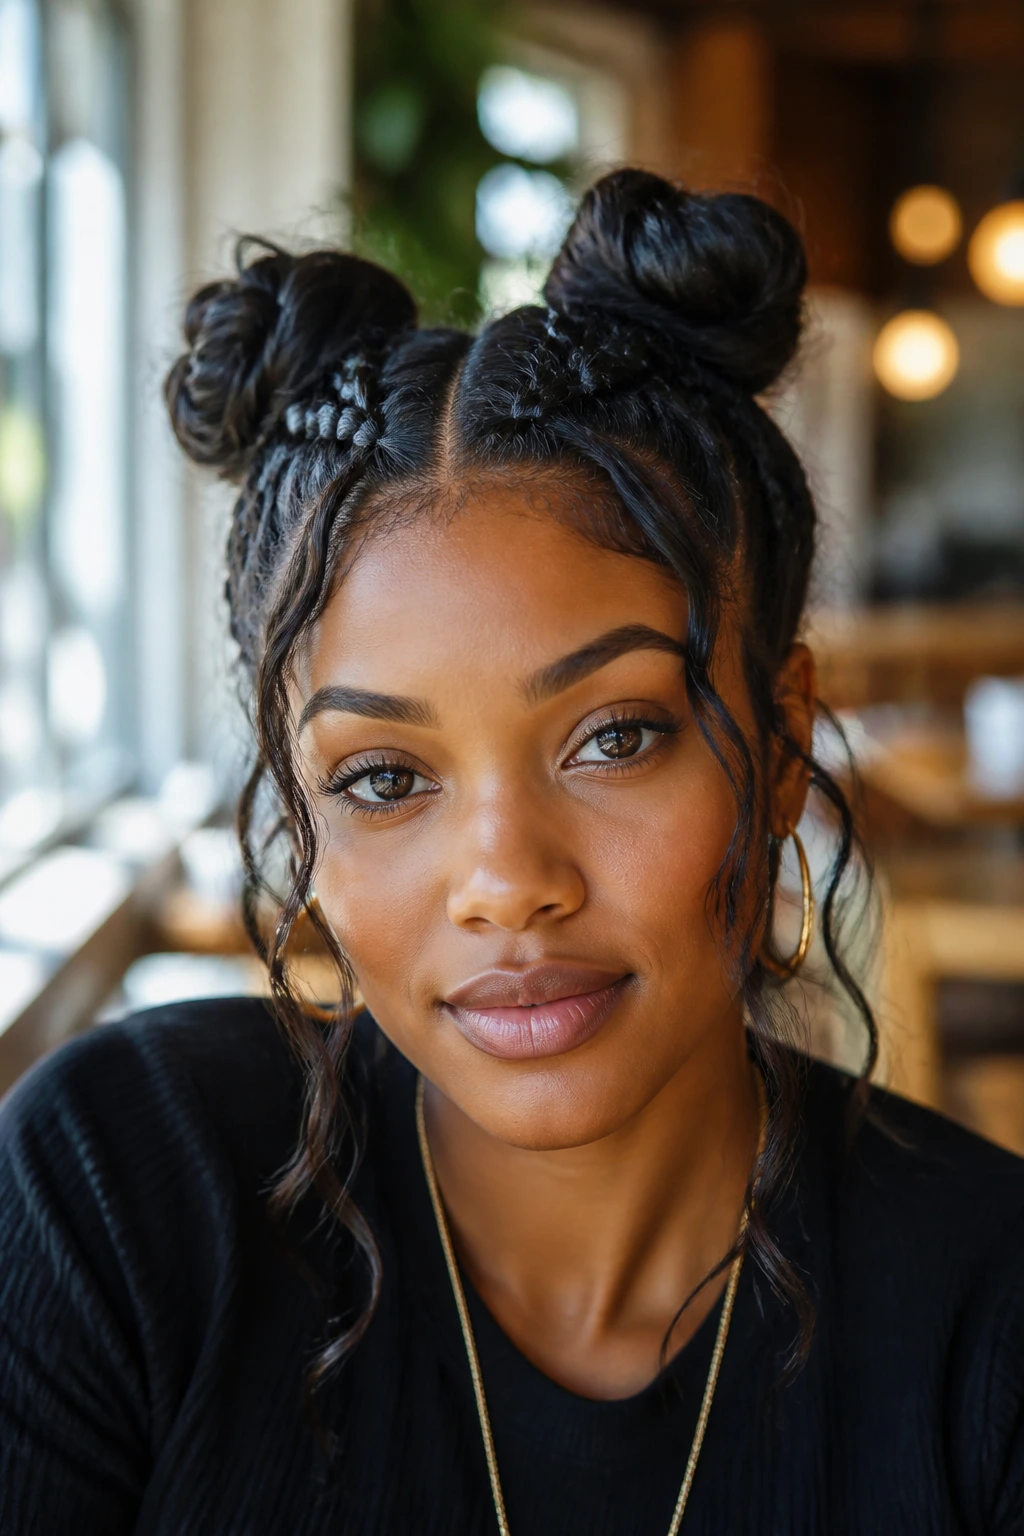
Two braided buns can look playful or childish, and the difference is almost always in the front pieces. Leave a few soft tendrils at the temples and the style instantly reads more grown and more finished. The buns themselves can sit high or mid-level, but the front layers are what keep the look from feeling cartoonish.
On natural hair, space buns also solve a practical problem: they keep the length off your neck while still giving you shape on top. If your hair is thick, keep the braids a little slimmer so the buns do not sit like two heavy knots. A few loose curls around the face add movement and make the whole style feel lighter.
This is a fun one, but it still needs clean parting. Messy parts and space buns are not the same thing.
11. Half-Up Dutch Braids with Free Back Curls
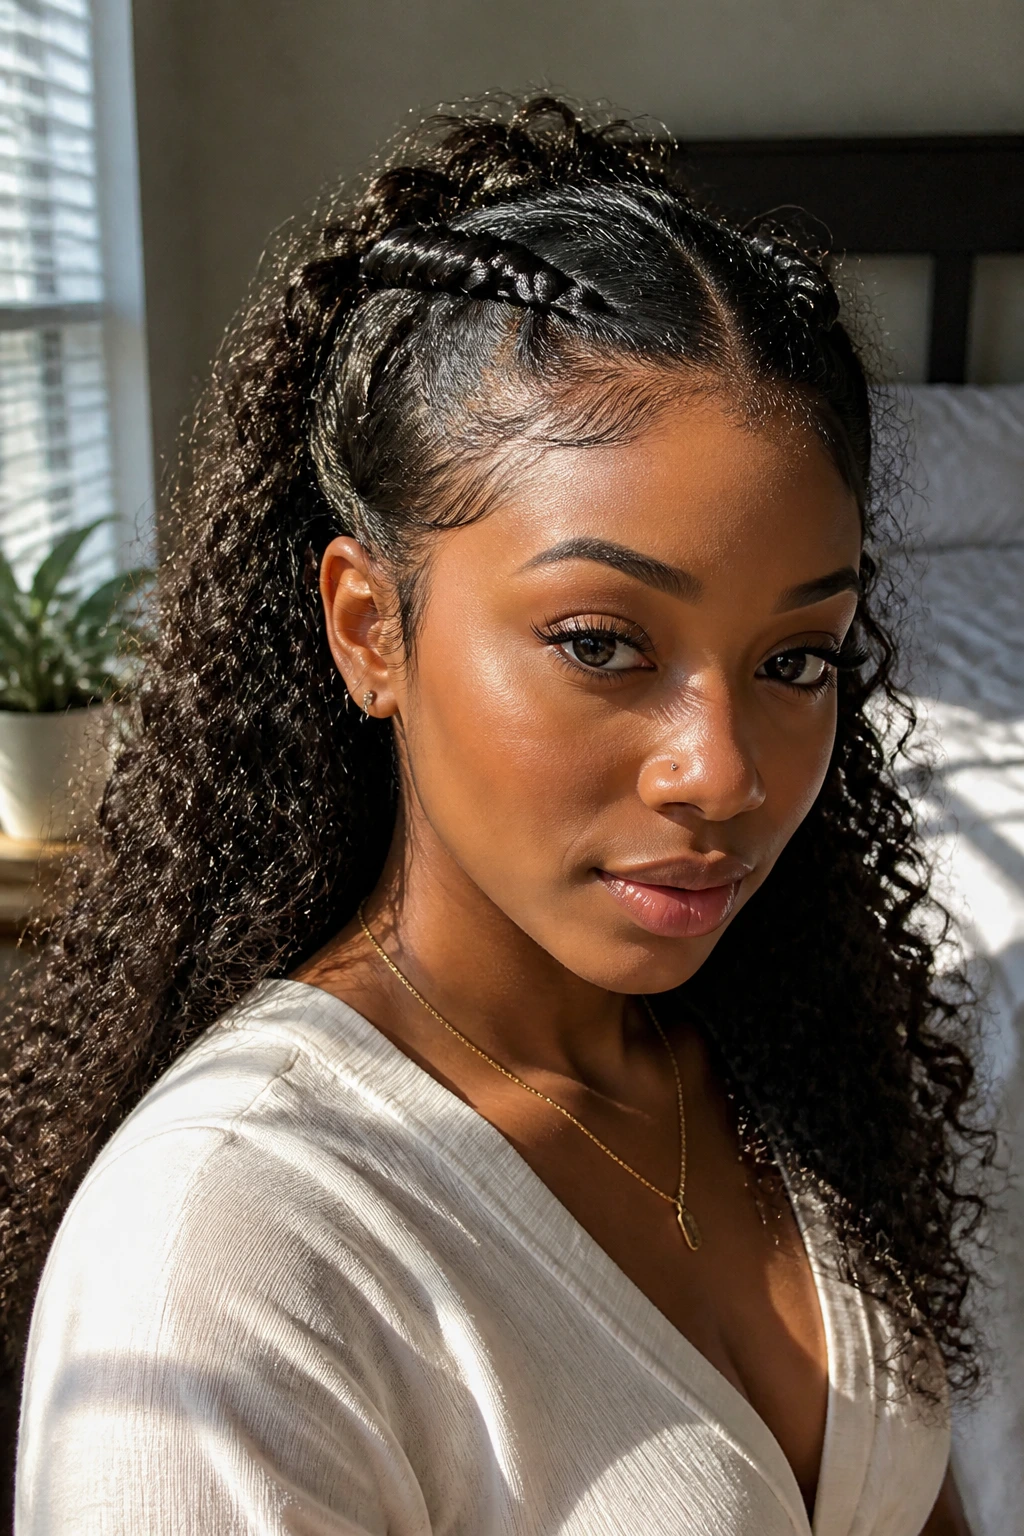
Do you want the structure of braids but still want your curls out? This is the answer. The top section gets braided back in one or two Dutch braids, while the rest of the hair stays loose, curly, and visible. It gives you control at the front without hiding the texture in the back.
Soft layers are what make the seam between braided top and loose bottom feel smooth. If the shortest pieces sit around the cheekbone and the ends of the back section are shaped, the cut looks blended instead of accidental. This is a good style for people who like volume but do not want hair hanging all around the face.
Best for: natural curls, twist-outs, and wash-and-go textures that still need a little structure.
12. High Ponytail Dutch Braids with Curled Ends
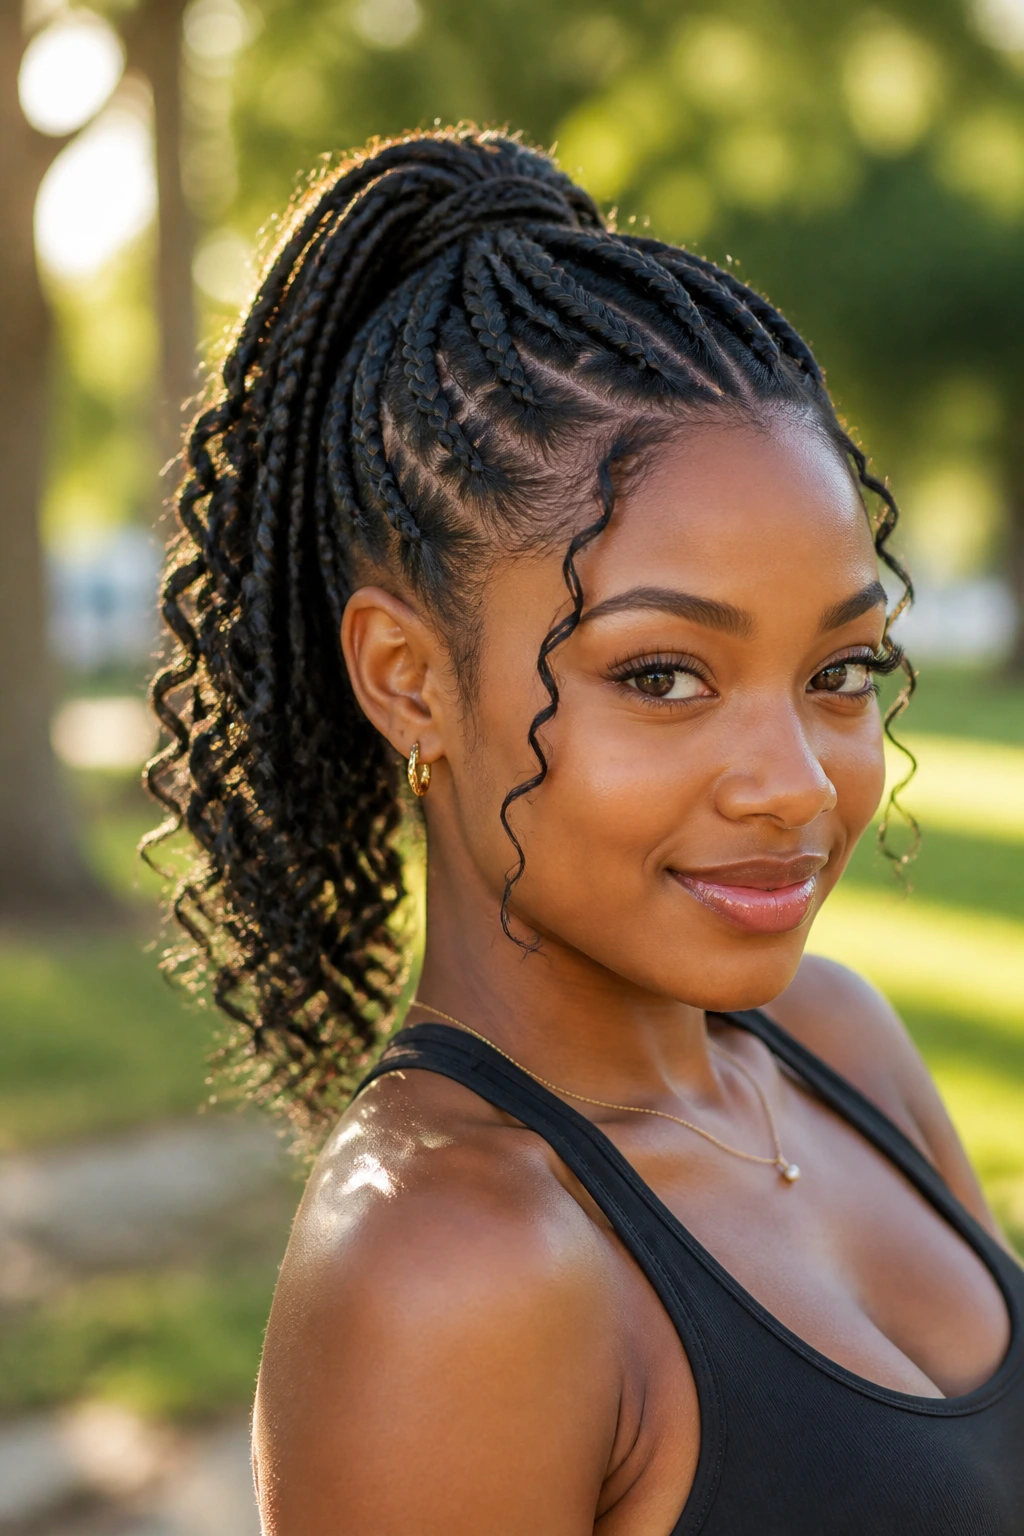
A high ponytail pulls the face upward in a way that low styles never quite do. When you braid the front into Dutch braids and gather everything into a high tail, the look gets lifted fast. The soft layers around the hairline stop that lift from feeling severe.
The curled ends matter here. Straight, stiff ends can make a high ponytail look too hard, especially on natural hair where the braid base already has a lot of texture. Set the ends with rods, a braid-out, or even a quick curl with flexi rods, and the style reads more finished. Keep the ponytail base secure, but not yanked so tight that your scalp starts talking back.
This is a strong workout-to-evening style. It keeps moving, but it also has shape.
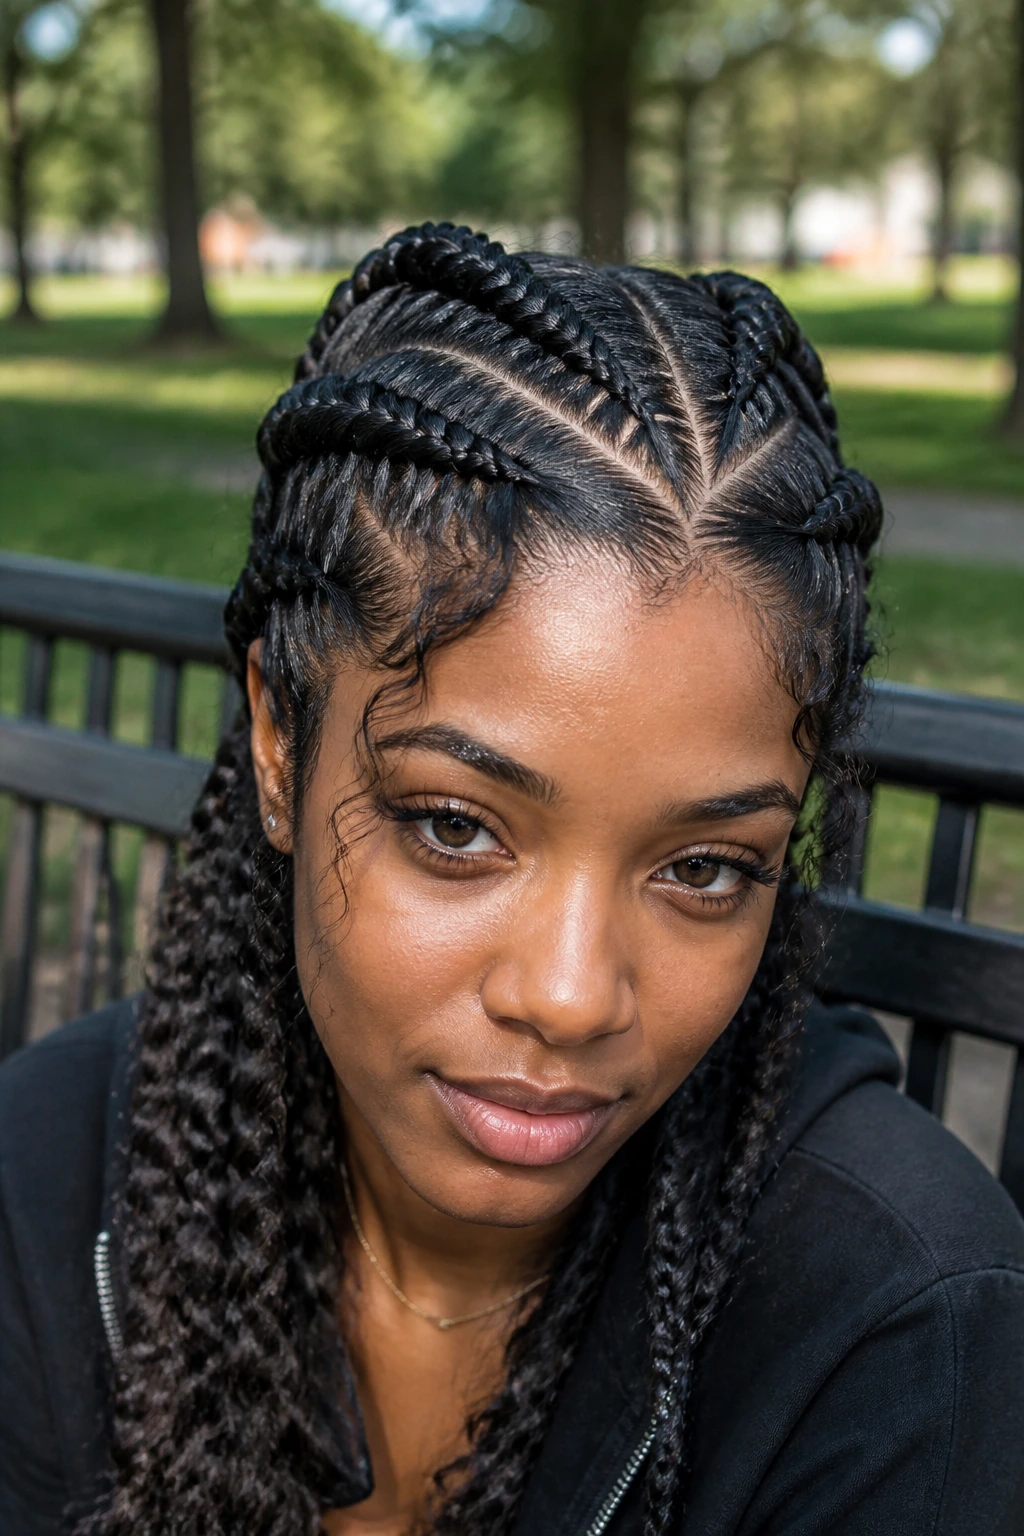
13. Four Slim Dutch Braids for a Neat Scalp Pattern
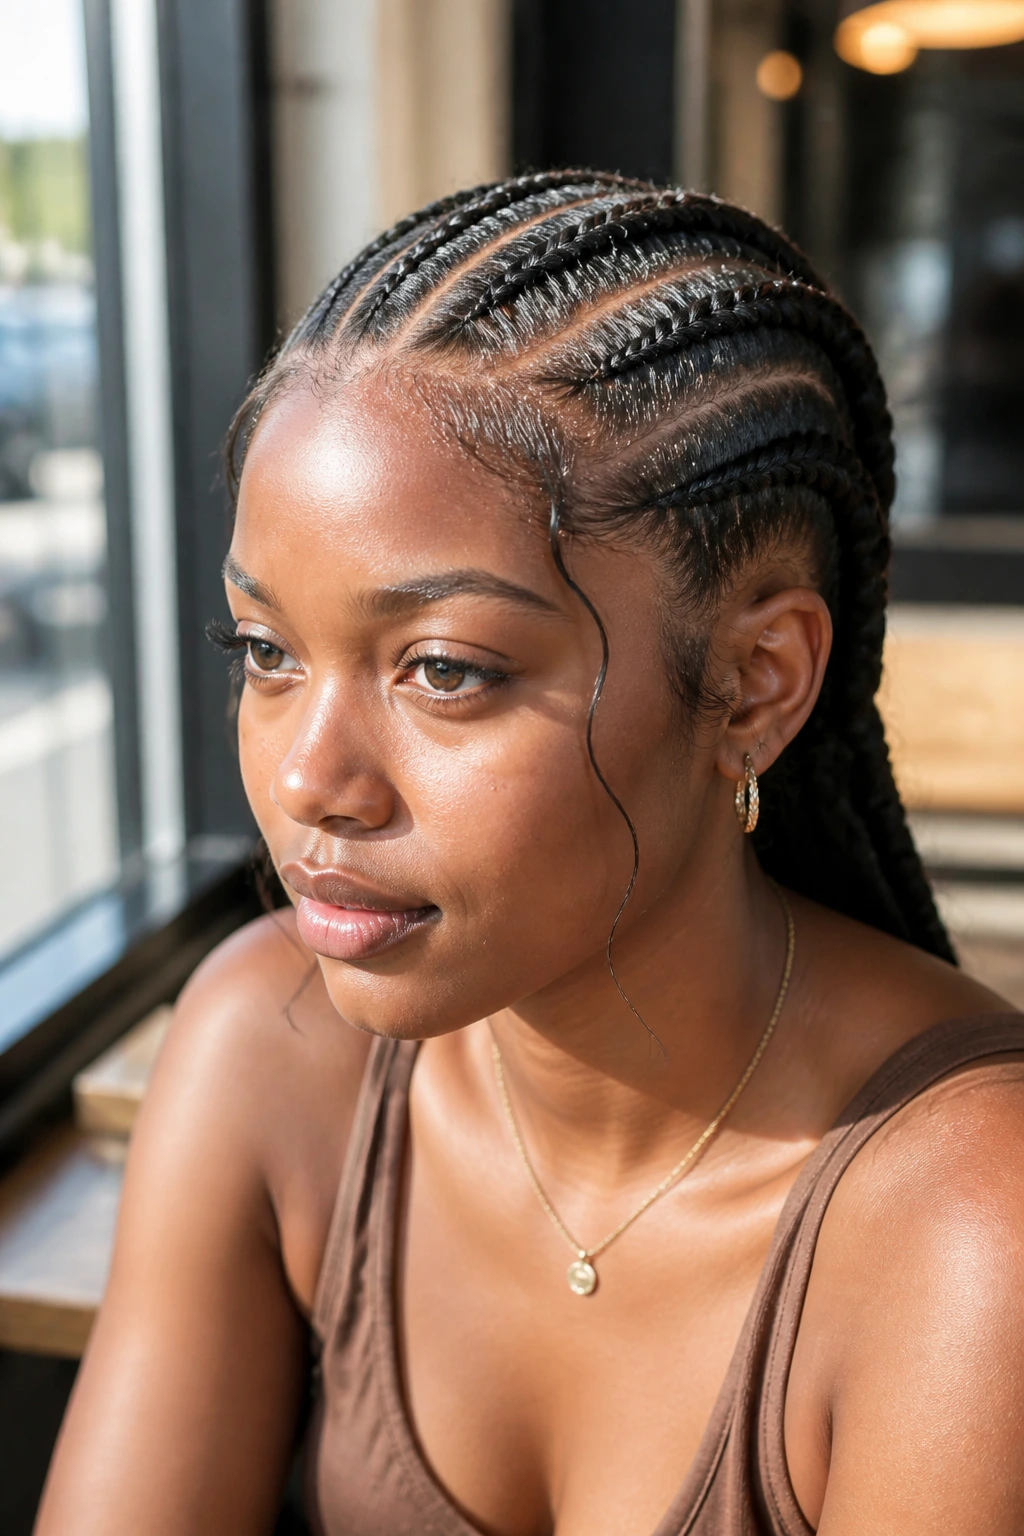
Four braids give the scalp pattern more detail than two, and they often hold better on medium-density natural hair because the tension is spread across more sections. The look is neat, ordered, and a little more sculpted. It also gives you a chance to make the parting part of the style instead of just the setup.
Soft layers keep the braid count from feeling too rigid. A few face-framing pieces or a curved temple section soften the grid-like effect that can happen when four braids are parted too perfectly. If you like a clean scalp pattern, this is one of the most reliable choices.
Tip: keep the braids slim enough that they move, but not so tiny that the style becomes a maintenance job.
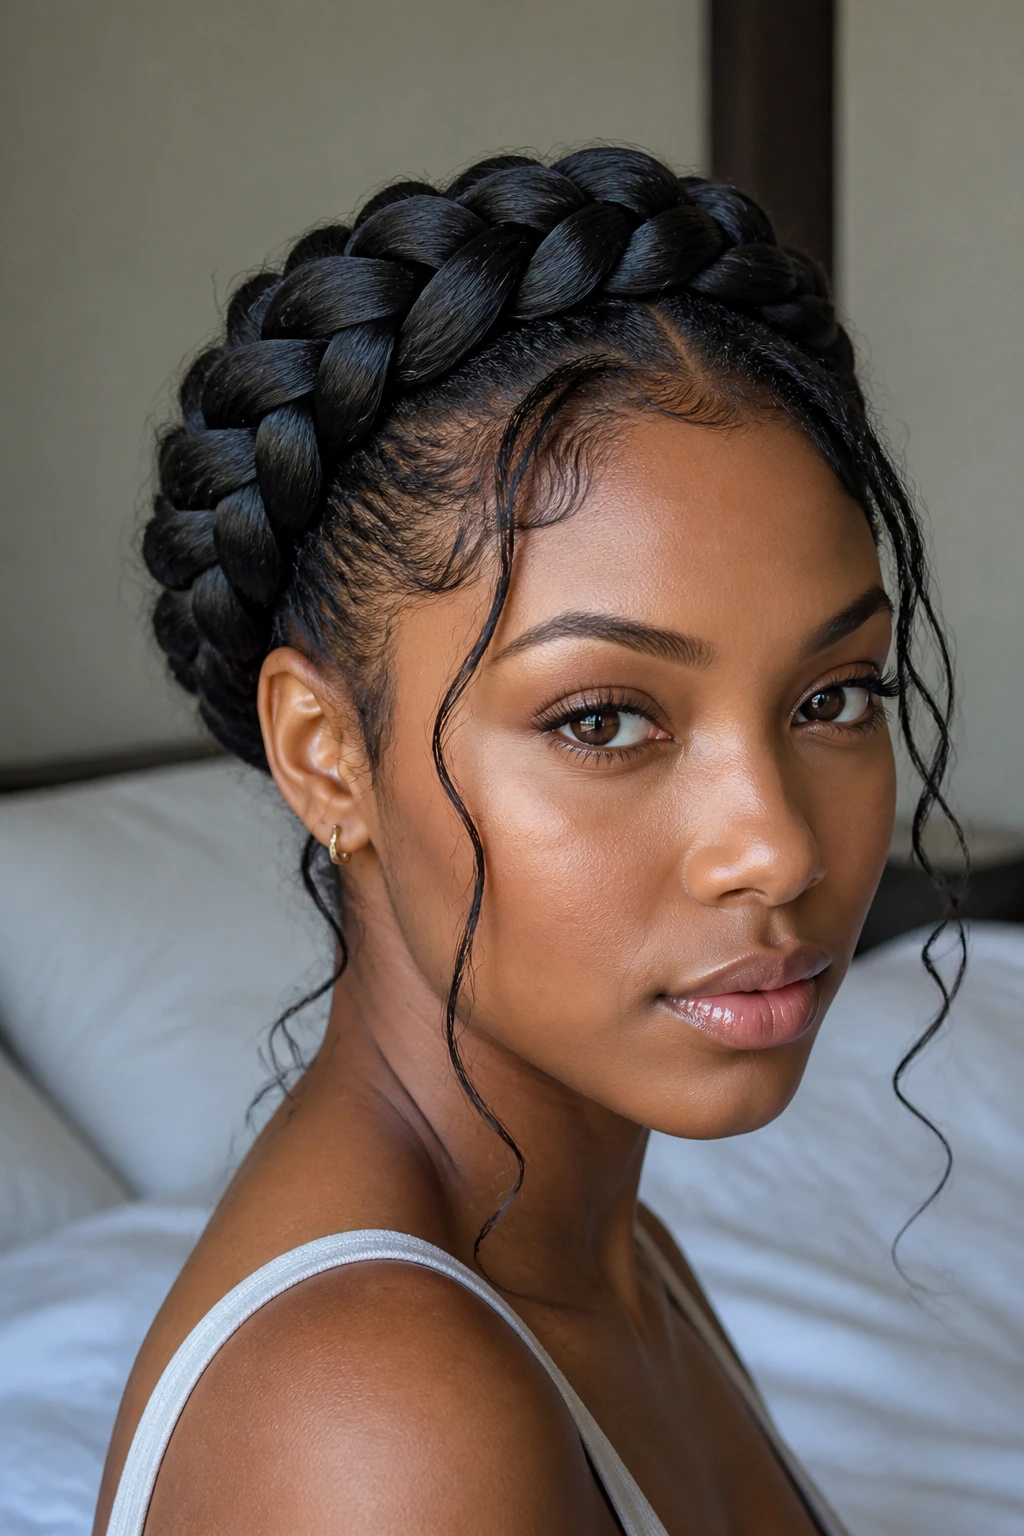
14. Side Crown Dutch Braid with a Dramatic Sweep
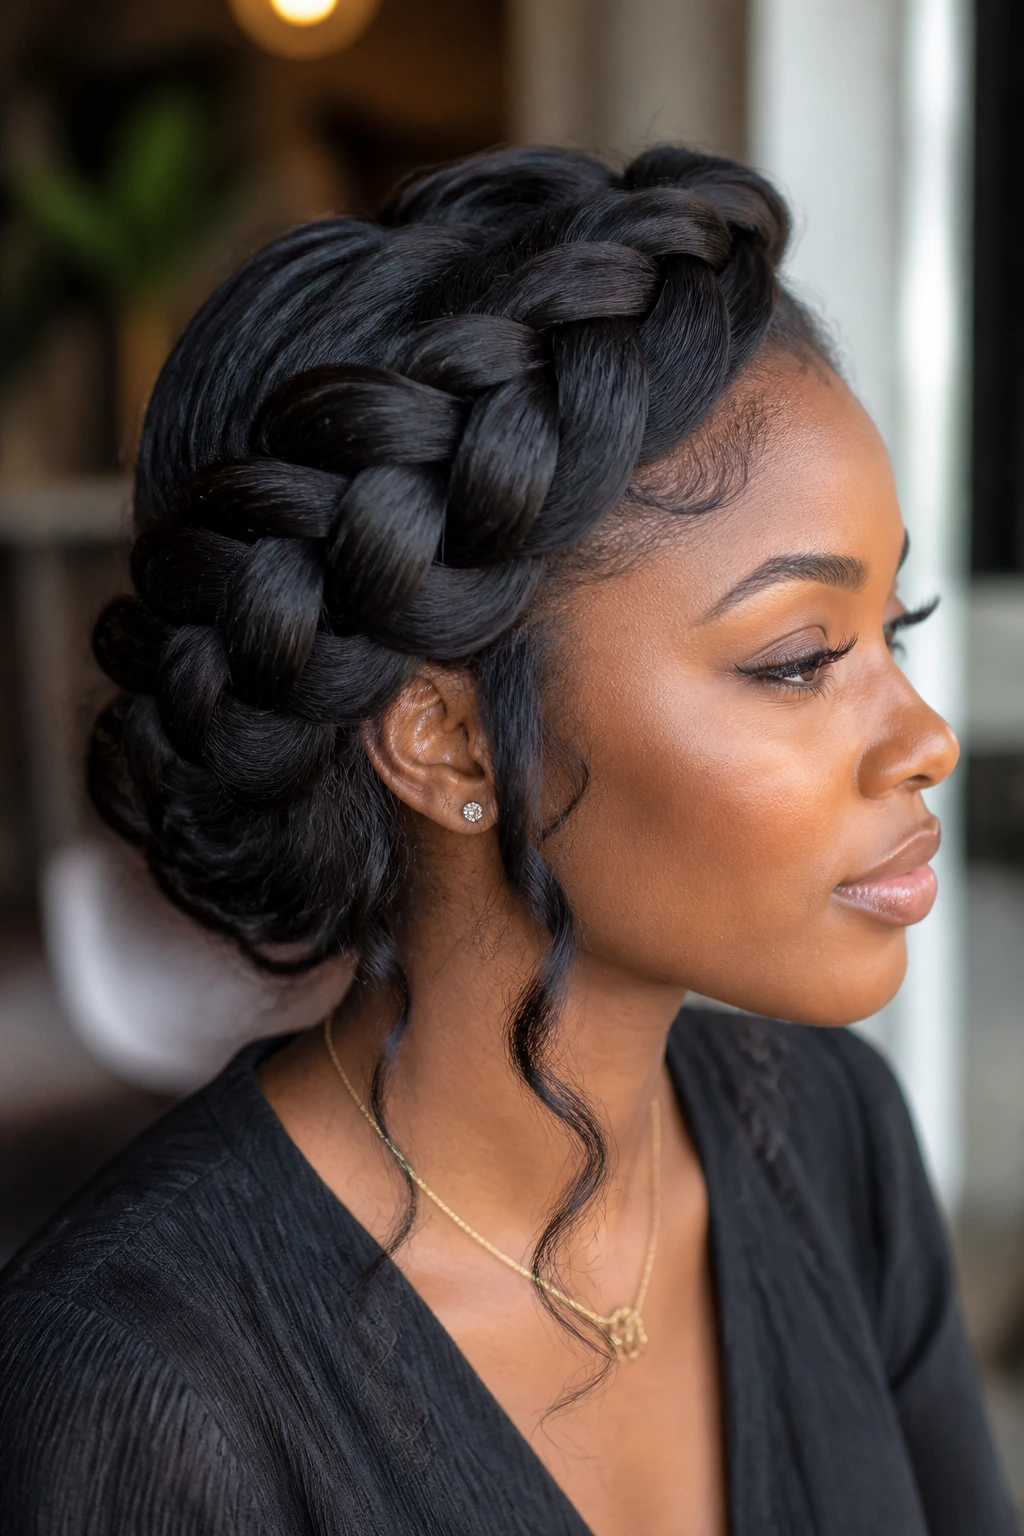
A side crown braid has a bit of romance to it, and on Black natural hair it looks best when the curve is full enough to show the texture of the braid itself. The braid sweeps across the head and gives the whole style a strong directional line, which is nice when you want something more polished than loose curls but less severe than a full set of straight-back braids.
Soft layers are what keep the sweep from looking like a hard shell. A longer front piece can trail into the braid, and a few nape wisps can loosen the back edge. That’s the part that keeps this style from feeling overworked.
This one is a favorite for events where you want a braid style that still feels soft in profile.
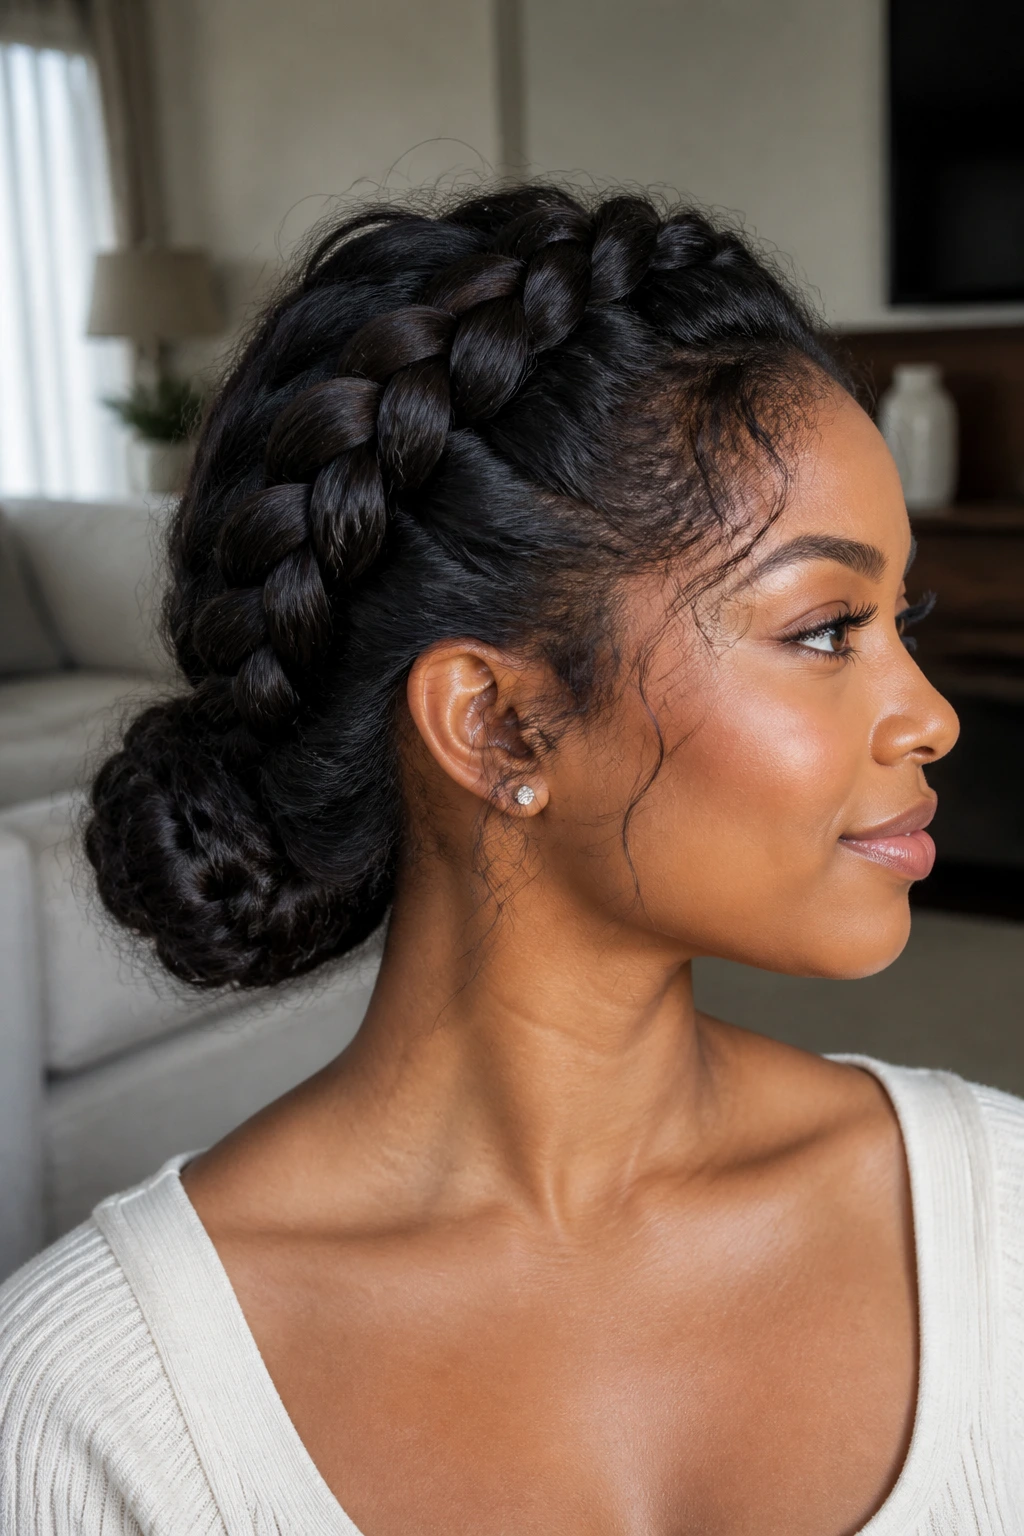
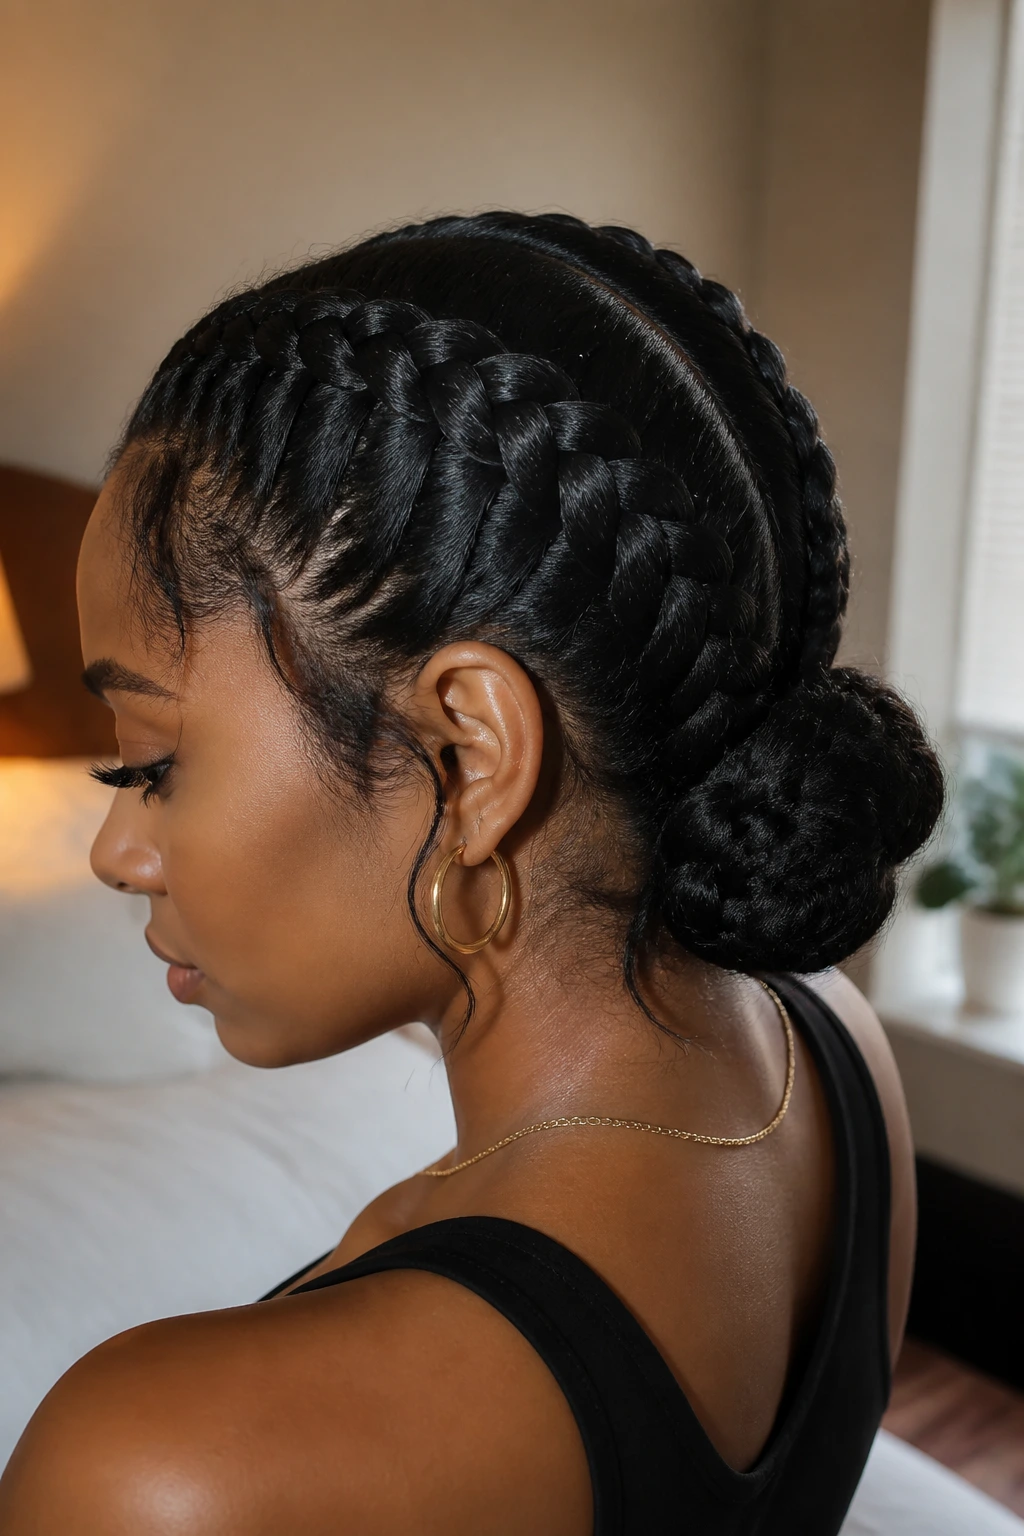
15. Dutch Braids Swept Into a Low Chignon
A low chignon is the polite version of braided hair. It sits near the nape, keeps the neck clear, and looks clean without shouting. When Dutch braids feed into the bun, the braid texture gives the style enough detail that it doesn’t disappear into the back of the head.
The soft layers are the difference between elegant and overly tight. Let a few pieces rest near the ears or at the side of the neck, and keep the chignon slightly rounded instead of packed flat. If the bun is too compressed, natural hair can make it look bulky from the side.
This is the style I’d pick when I want something neat that still has a bit of softness around the edges.
16. Dutch Braids with Beads and Soft Layered Ends
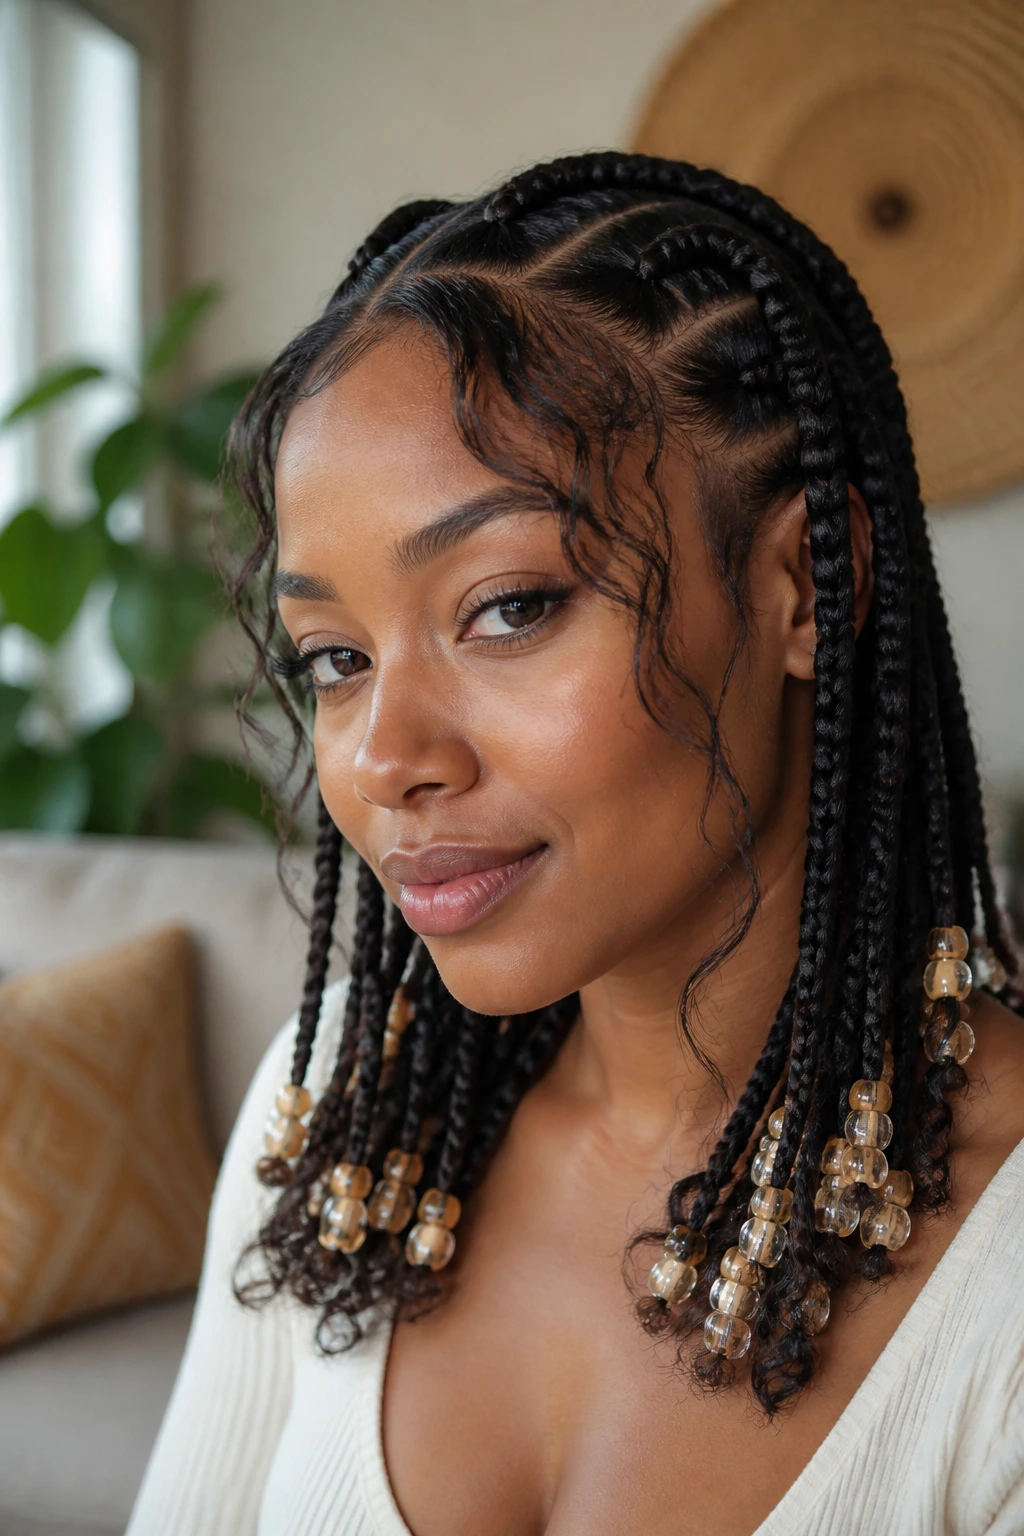
Beads are not old-fashioned here; they are one of the quickest ways to give a braid some sound and movement. A few beads at the ends of Dutch braids can change the whole mood, especially on natural hair where the braid itself already has texture and presence. The trick is not to overdo it.
Soft layers help the beads feel like an accent instead of the main event. Keep the face-framing pieces light, and let the braid ends carry just enough weight to swing without dragging. Lightweight wooden beads or smooth plastic beads are usually easier to wear for longer stretches than heavy metal ones.
If the rest of the style stays clean, a bead or two is enough.
17. Crisscross Dutch Braids with Controlled Volume
Crisscross parting is for people who like detail but do not want the same old straight section every time. The intersecting parts create visual interest at the scalp, and the Dutch braid pattern keeps that detail from disappearing. On dense natural hair, this can look sharp in the best way.
The soft layers matter because crisscross parts can start to feel busy if the front is too blunt. Let the hairline pieces bend a little, and keep the sections around the temple just soft enough to break up the geometry. That’s what keeps the design from feeling like an engineering project.
This style rewards patience. If the parts are clean, the whole head looks intentional from every angle.
18. Braided Bob with Layered Leave-Out
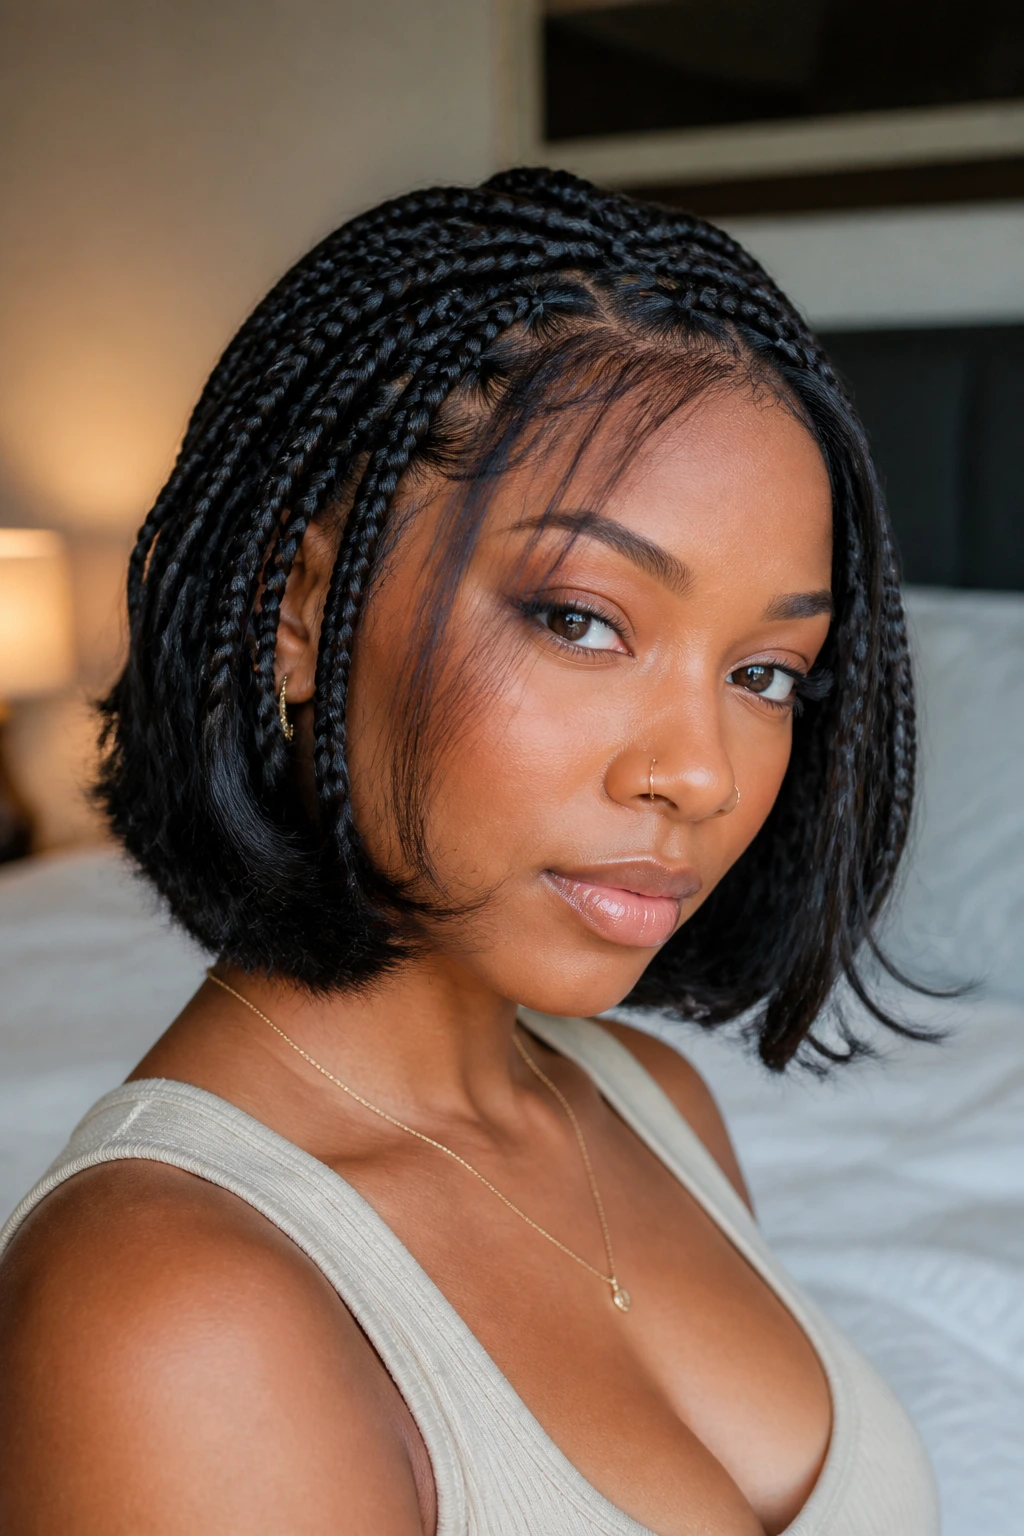
Can Dutch braids feel fresh on shorter hair? Absolutely. A braided bob is proof. Instead of chasing length, this style leans into shape, stopping around the chin or shoulders and letting the braid finish with a clean, compact silhouette.
The layers do a lot of work here. A little leave-out at the front keeps the bob from looking flat, and a softly shaped perimeter gives the style movement at the ends. On natural hair, a braided bob is a strong choice when you want something lighter on the head but still protective enough to last.
I like this one because it does not pretend to be longer than it is. It owns the shape, and that makes it look better.
19. Dutch Braids into Twist-Out Ends

This style gives you two textures in one look: the braid at the root and the twist-out at the tail. The transition keeps the braid from ending too abruptly, and the twisted ends add a softer finish than straight plaited tips ever could. It’s one of the easiest ways to make a braid set feel more textured.
Soft layers help the ends blend into the rest of the hair, especially around the front and nape. If the shortest pieces are shaped well, the twist-out finish looks like a choice, not a workaround. Use small two-strand twists on the ends if you want a defined curl pattern, or larger twists if you want a looser fall.
This is a nice middle ground between polished and free.
20. Stitch-Part Dutch Braids with Sharp Lines
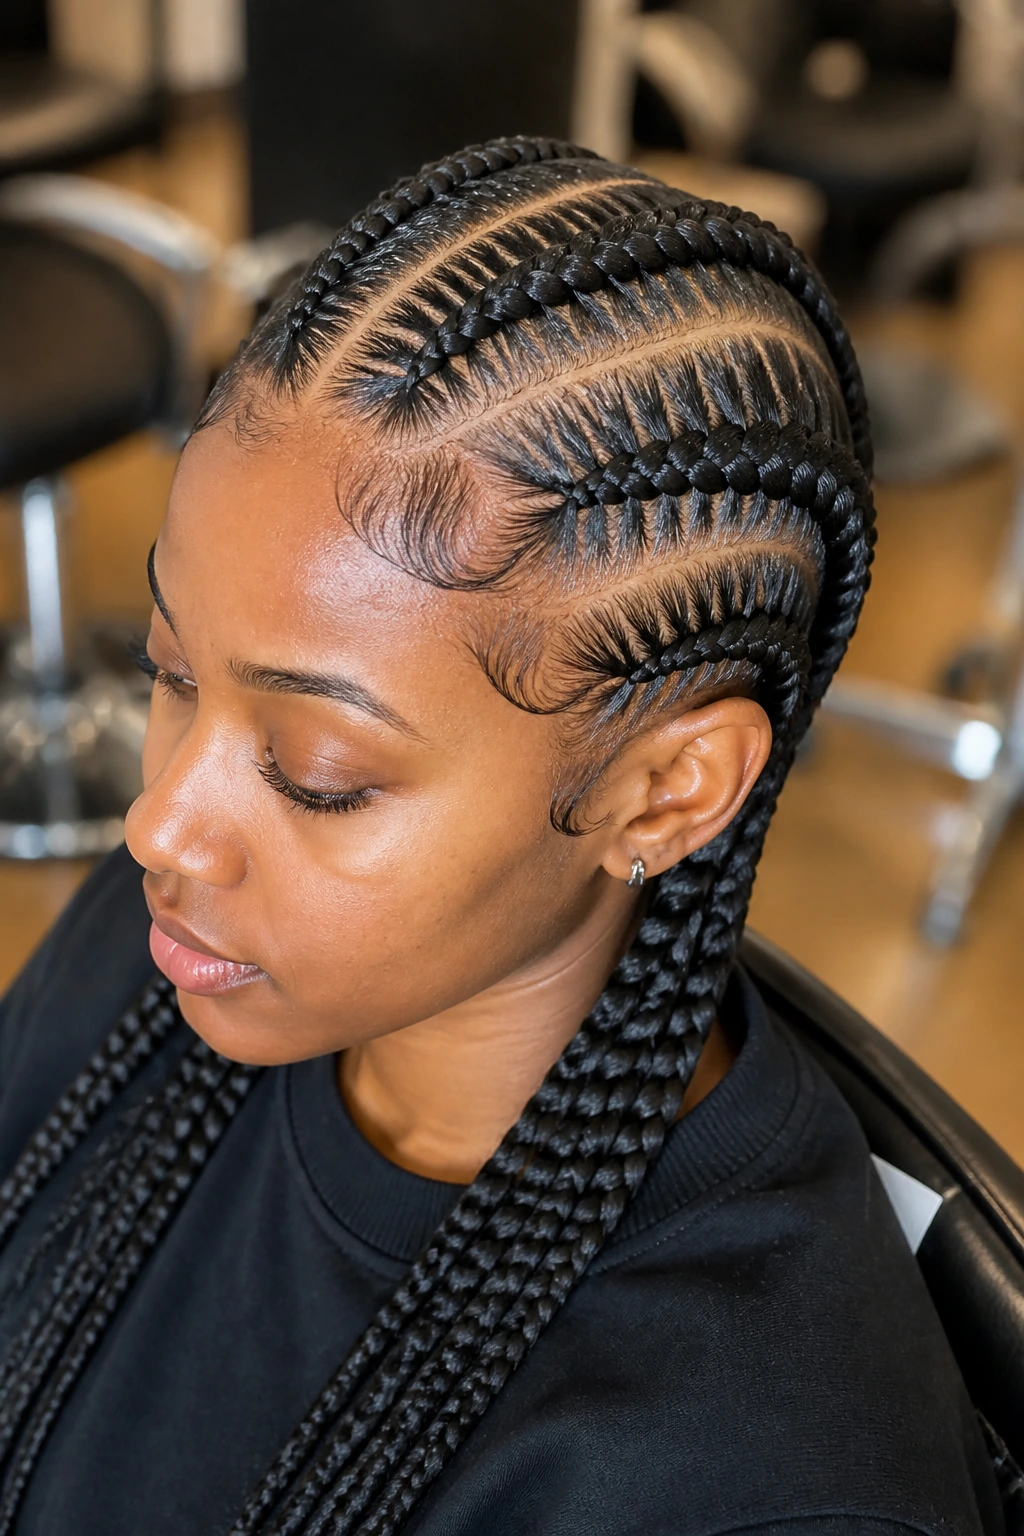
Stitch parts are for anyone who likes a braid style that looks engineered, not fluffy. The lines are crisp, the sections are precise, and the braid sits in a way that makes the scalp pattern part of the design. On natural hair, the contrast between the sharp parts and the soft layers can be gorgeous.
That softness is what keeps the style from turning strict. A few curved pieces near the face, or a subtle taper at the nape, stops the whole thing from feeling too hard. If your braids are small, stitch parts can get busy fast, so keep the front layers simple and let the pattern itself carry the detail.
This is not a lazy style. The payoff is in the clean lines.
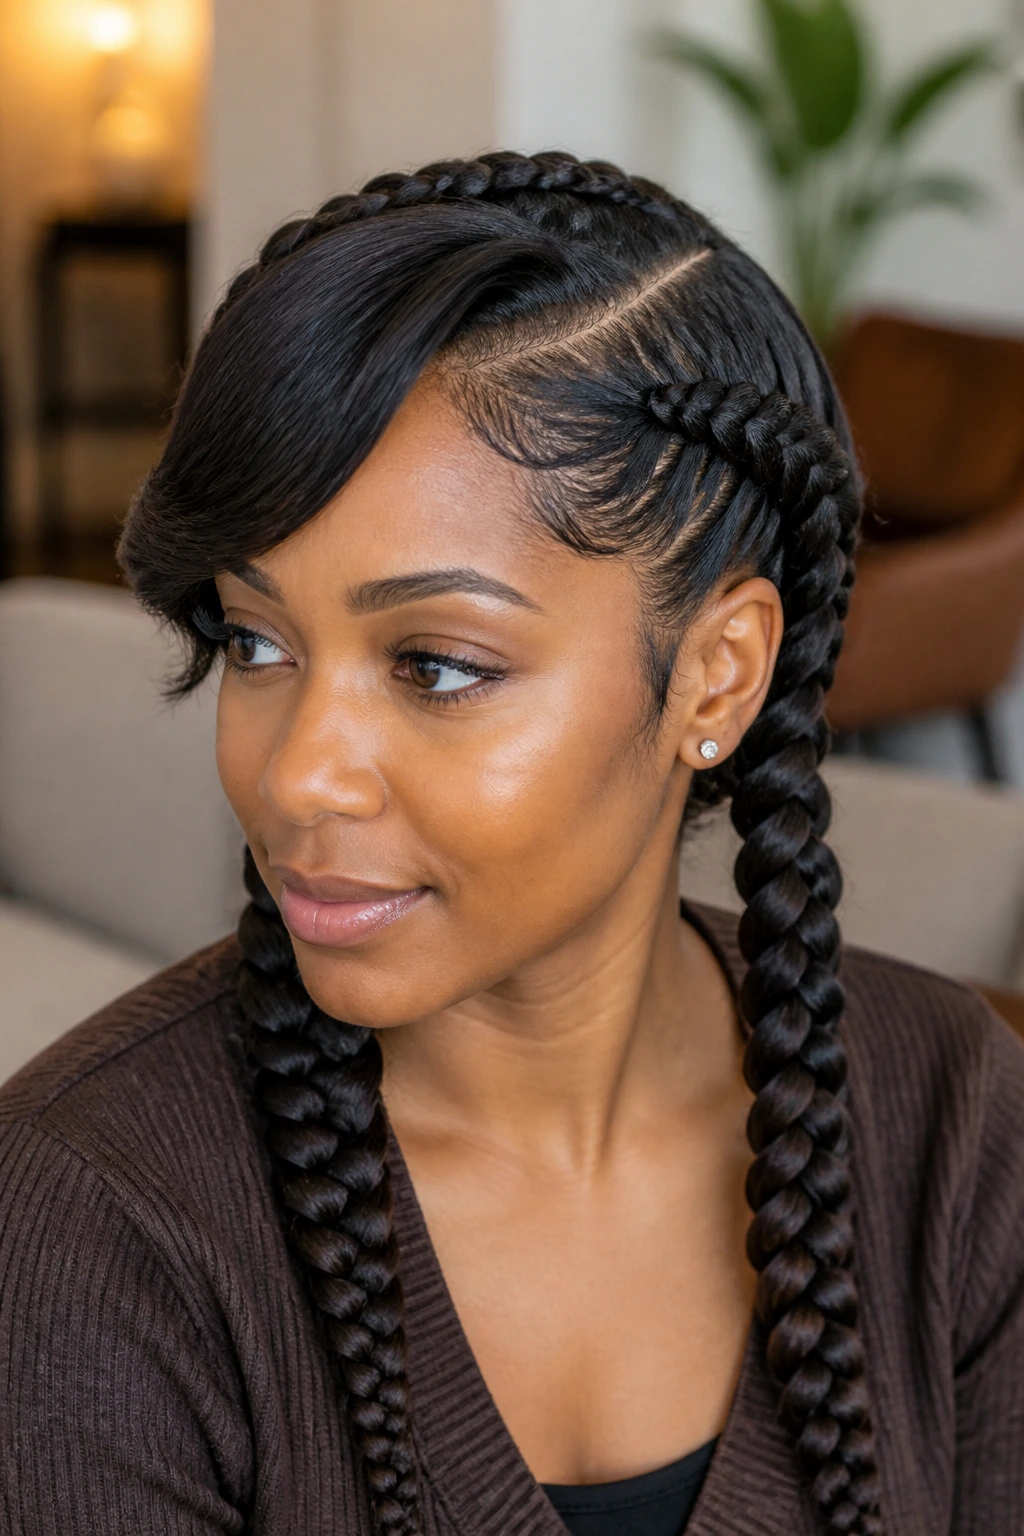
21. Two-to-One Dutch Braids with Mixed Width Sections
This is the braid version of a gradual fade: wider at one end, narrower at the other, and that change in width keeps the look from feeling flat. You might start with four smaller Dutch braids at the front and merge them into two larger braids at the back, or reverse the idea depending on your hair length. The shape feels dynamic without being fussy.
Soft layers make the transition smooth. If the front pieces are shaped around the temples and the back section has a little movement at the ends, the switch in braid size looks intentional rather than improvised. I like this look for natural hair that has enough density to support the change in volume.
There’s a lot going on here, but it still reads clean when the parts are smart.
22. Dutch Braids with Curly Fringe and an Open Hairline
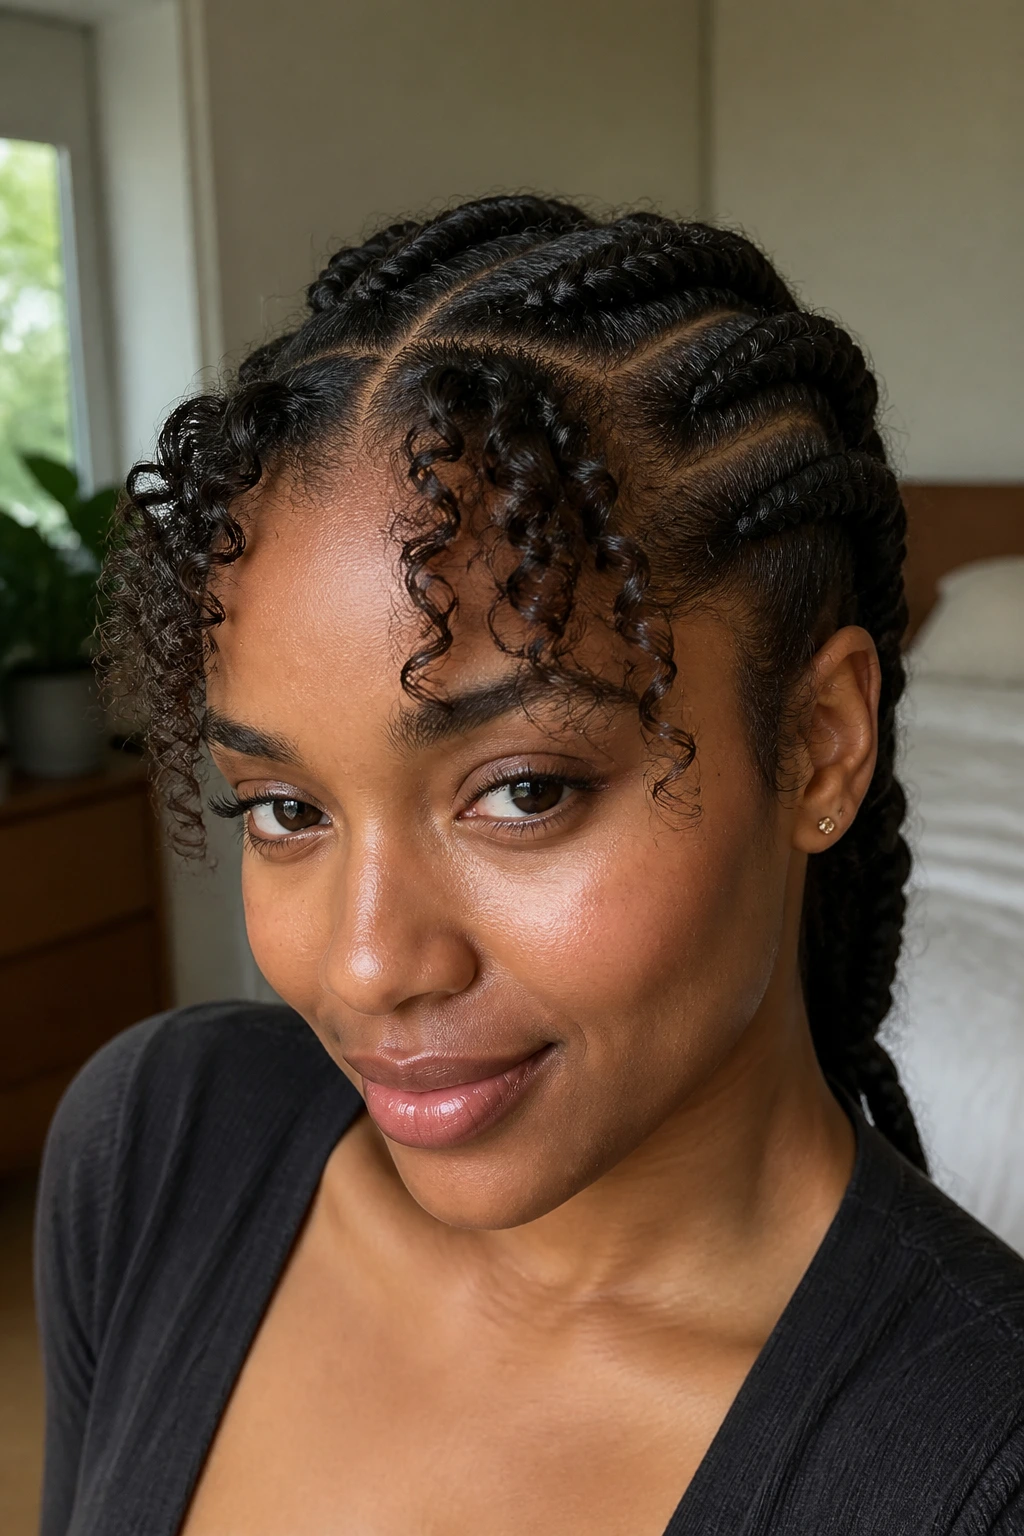
If you want the softest possible finish, stop fighting the front. Let the fringe curl, let the temples fall, and let the braids do the structure work behind the hairline. This style feels open right away, which is why it is so good when you want braids that still show off your face.
The curly fringe is the point. On Black natural hair, that little bit of movement around the forehead can change the whole mood of the braid set, especially when the rest of the hair is neatly tucked or braided back. Keep the fringe shaped so it lands around the brow or cheekbone, not halfway into the eyes unless you want to deal with that all day.
It’s soft, but not messy. That’s the sweet spot.
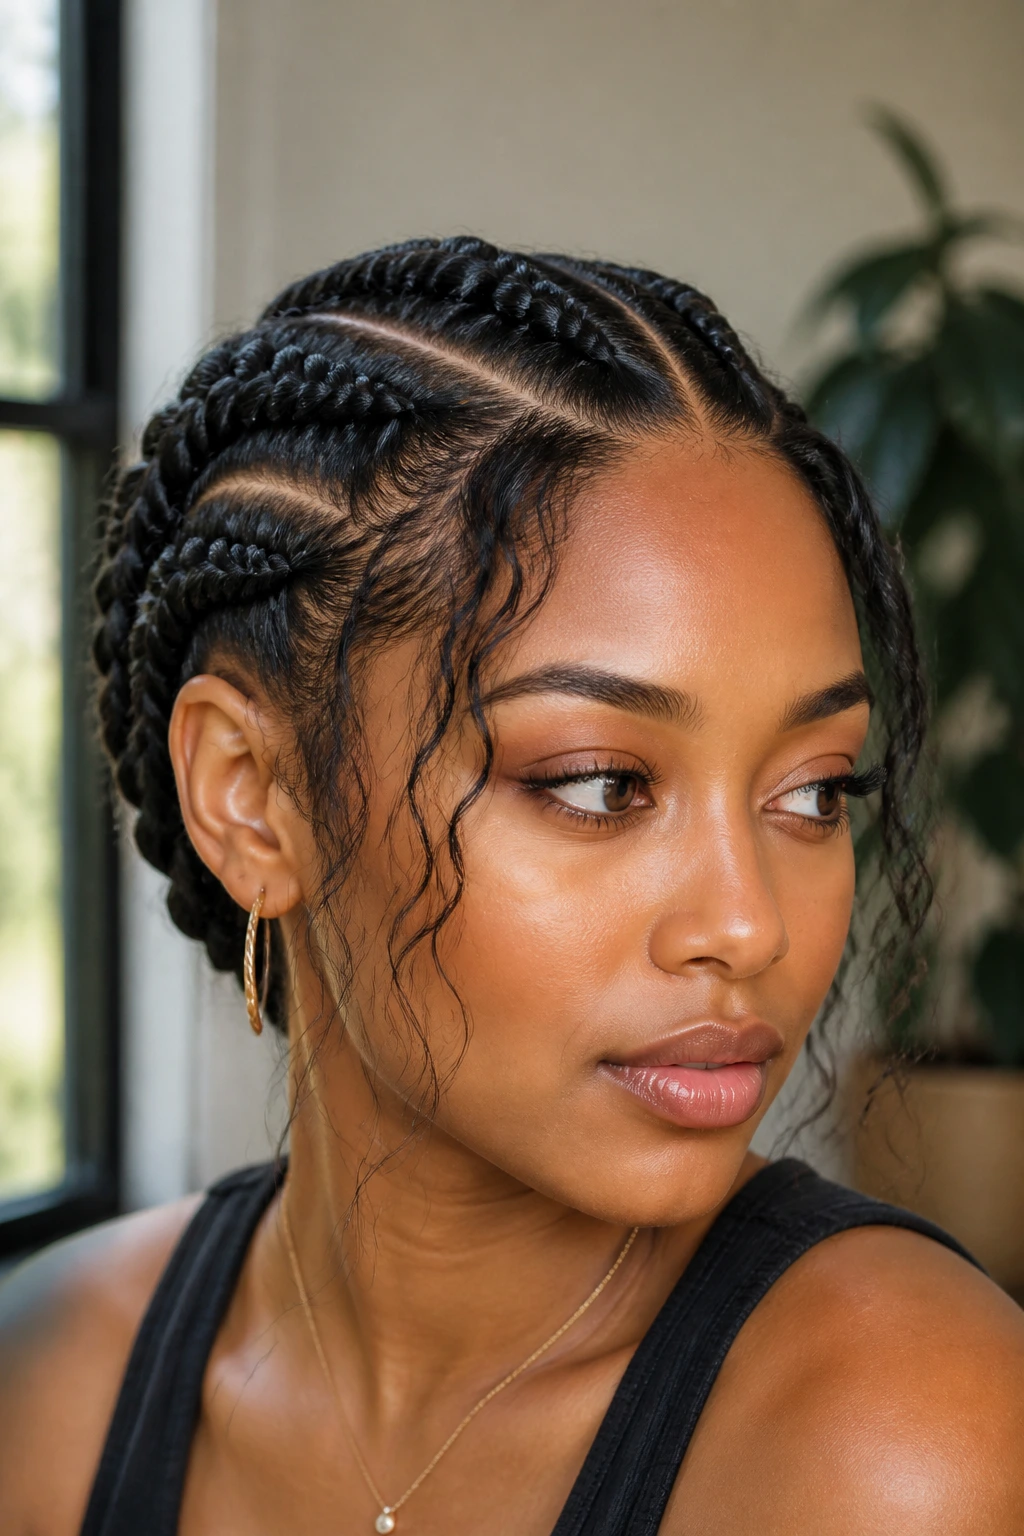
Why Dutch Braids Sit So Nicely on Natural Hair
Dutch braids are not the same thing as French braids, even though people mix them up all the time. The strands cross under instead of over, which lifts the braid off the scalp and gives you that raised ridge people notice from across the room. On Black natural hair, that raised shape can be a gift because it keeps the braid visible even when the hair underneath has plenty of density.
Soft layers matter because natural hair rarely sits in one flat plane. Some pieces shrink more than others. Some curl tighter at the temple than at the crown. If the whole style is cut into one blunt outline, the braid can look boxy fast. A few curved pieces at the front, a tapered nape, or a longer fringe makes the silhouette feel less squared-off.
The braid pattern does the structure work
The braid itself controls the shape, and that is why Dutch braids work so well for protective styling. You get a secure base, but the braid still sits above the scalp instead of melting into it. That means the texture is visible even if the hair underneath is coily, puffy, or freshly stretched.
Soft layers are the pressure valve
Soft layers are not there to hide the braid. They are there to stop the head from looking too blocky. Around the face, that usually means shorter pieces that skim the cheekbone or jaw. At the nape, it can mean a soft taper that lets the style curve instead of ending in a blunt line.
Tension is the part to watch
A Dutch braid can be neat and still be too tight. That first inch along the hairline should feel secure, not sharp. If your scalp starts throbbing, the braid was pulled too hard or the sections were too narrow at the front. The style should stay put because the pattern is solid, not because your temples are working overtime.
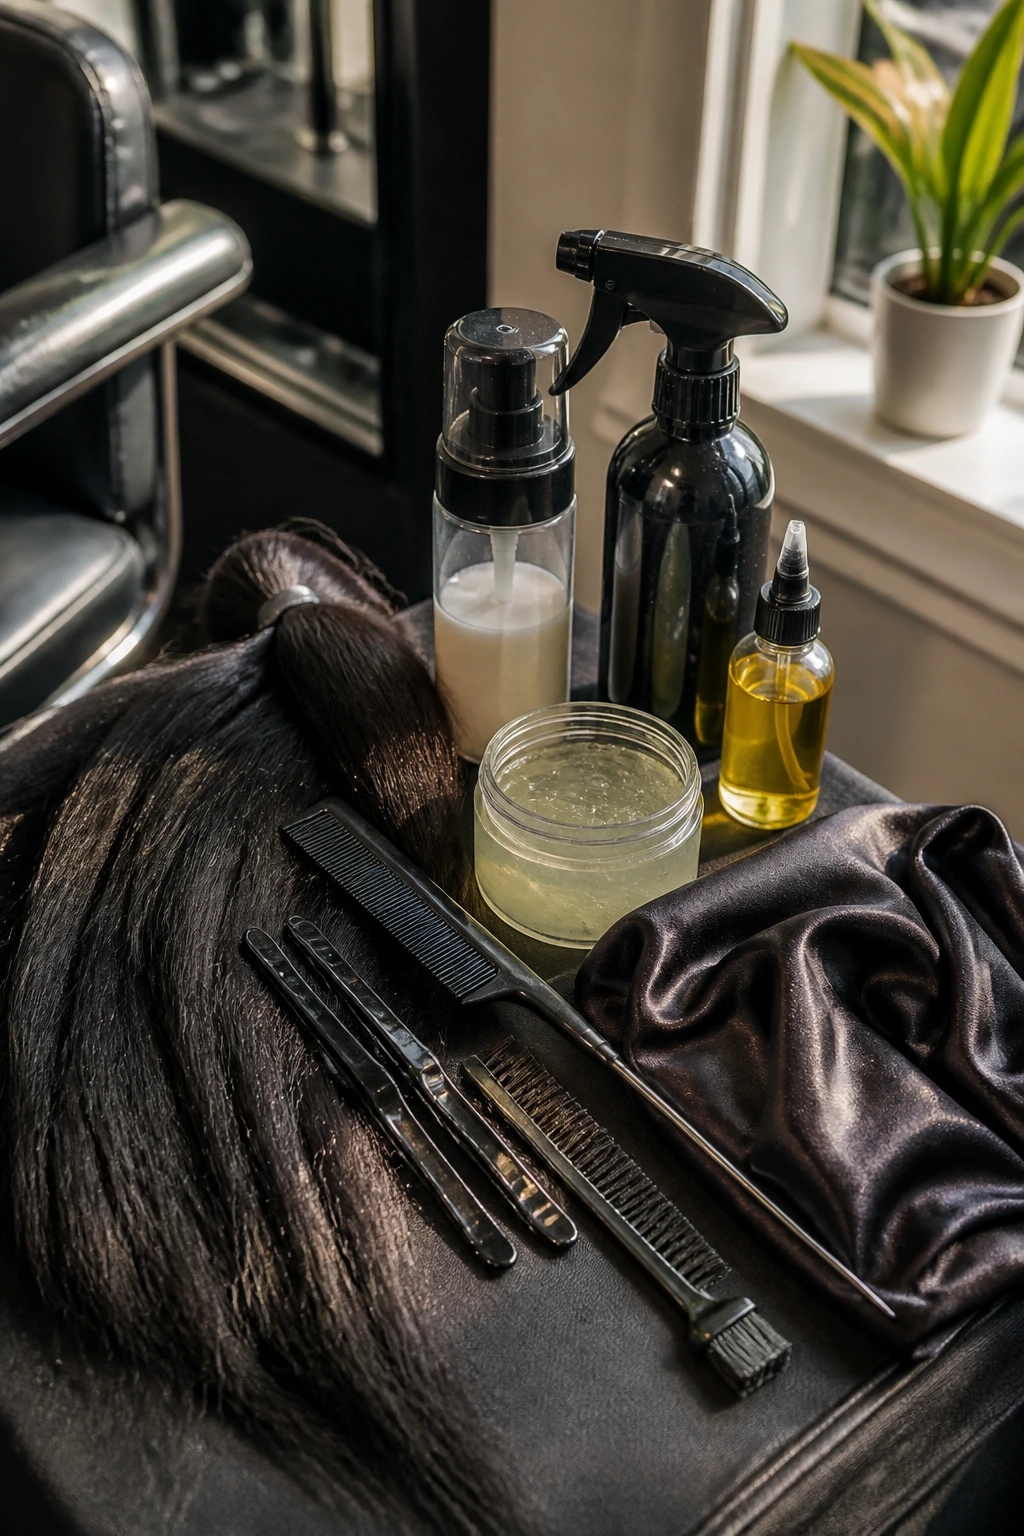
Essential Tools for These Looks
-
Rat-tail comb: A fine-point comb gives you the clean parts Dutch braids need, especially when the style depends on sharp sections.
-
Sectioning clips: These keep the rest of the hair out of the way while you braid one area at a time, which matters a lot on dense natural hair.
-
Braiding gel or lightweight styling gel: Use it on the part lines and the first inch of the braid for grip, but do not cake it on.
-
Mousse or foam wrap: This helps smooth flyaways once the braids are finished and gives the style a softer, neater finish.
-
Edge brush: Handy for brushing down baby hairs without overloading them with product.
-
Satin scarf or bonnet: Night protection is non-negotiable if you want the parts and the soft layers to stay tidy.
-
Spray bottle with water and leave-in: Useful for light stretching and for waking up dry ends before styling.
-
Lightweight oil or scalp applicator: A little oil on the scalp helps with dryness, but too much makes the parts greasy fast.
-
Pre-stretched braiding hair: Optional, but helpful if you want longer feed-in braids without a bulky start.
How to Prep Soft Layers Before Braiding
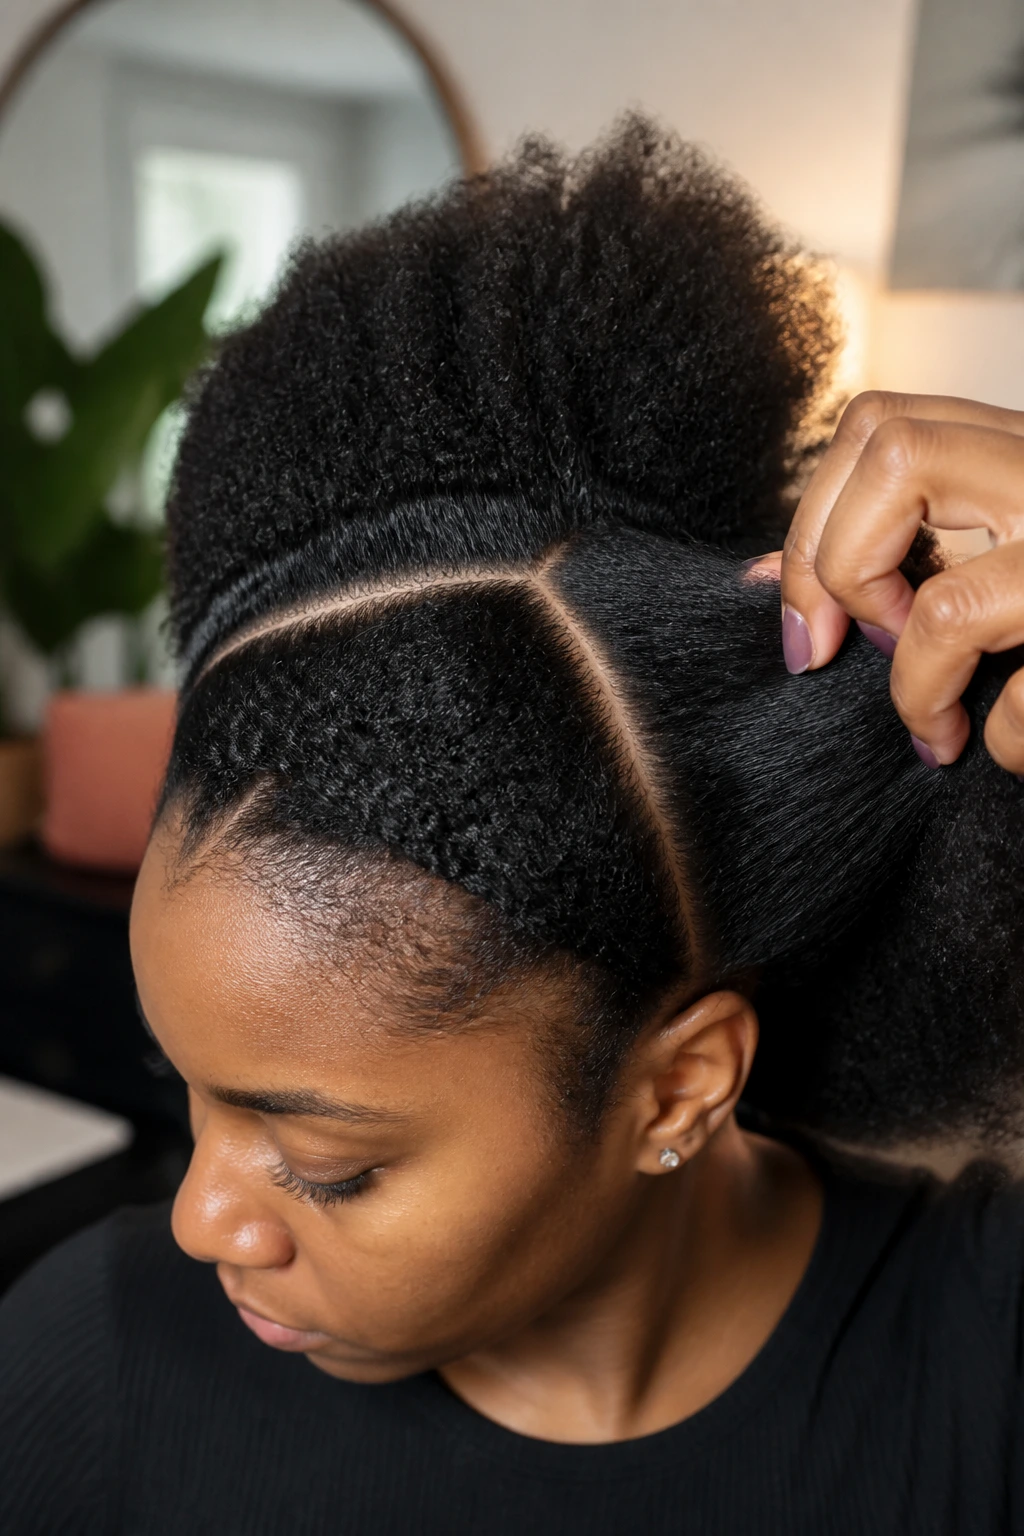
The cleanest Dutch braid starts before the first section is parted. Hair that is fully dry, detangled, and lightly stretched braids more smoothly than hair that is damp and swollen at the root. That matters even more when you want soft layers to stay visible instead of disappearing into puff.
Start with dry, clean roots
Braiding damp natural hair is a bad trade. The style may feel easier for the braider in the moment, but the roots can stay damp too long, which leads to itchiness, buildup, and a finish that frizzes faster than it should. Clean roots also make it easier to see the part line, and part lines are half the look here.
Stretch just enough
You do not need bone-straight hair. You do need enough stretch that the braid lies neatly. Banding, African threading, a braid-out, twists, or a low-heat blow-dry can all work depending on your texture. The goal is control, not transformation.
Decide where the soft layers belong
This part gets overlooked. Before you start braiding, look at where you want the braid to soften: temple, cheekbone, jaw, or nape. If the shortest layer falls too high, it will stick out. If it sits too low, the braid can look heavy. A skilled stylist shapes those pieces on purpose, and you can do the same by deciding the outline before the comb touches the scalp.
How to Wear These Braids Without Losing the Softness
Presentation: Keep the parts crisp and the surface smooth, then let the layers do the softening. A little mousse on the finished braids and a quick wrap for 10 to 15 minutes can flatten fuzz without turning the hair stiff.
Accessories: Gold cuffs, small beads, a satin scrunchie, or a clean scarf can all work, but don’t pile on everything at once. One accent usually looks better than three. If the braids already have a strong parting pattern, a simple hoop earring or glossy lip can be enough.
Scale: Two braids create the cleanest outline. Four or more give you more scalp detail and usually keep the style tighter for longer. Smaller braids read busier; larger braids read smoother. Pick the one that matches your face shape and how much time you want to spend on maintenance.
Best settings: These styles work for everyday wear, gym days, weddings, photo shoots, or travel, depending on how polished you make the front. A braided bun or crown braid looks more formal, while a half-up set with curly ends feels relaxed. Same braid pattern. Different mood.
Additional Tips and Personalization

Shape Boost: If you want the braid to open up the face, make the braids slightly smaller near the hairline and a touch fuller toward the back. That shift gives the style lift without making the front tight.
Texture Play: Curled ends, twist-out tips, or a few loose coils around the temples keep the style from looking too locked down. On natural hair, that mix of textures is often what makes the style feel expensive without needing a lot of extras.
Low-Tension Swap: Sensitive hairline? Use fewer, thicker braids and avoid tiny sections right at the front. The style will still look clean, and your scalp will thank you later.
Personal Touch: Beads, cuffs, ribbon, or a little color in the added hair can work, but keep the accent focused. One detail is enough. If everything is trying to stand out, nothing does.
Keeping Braids Fresh Overnight and Between Washes
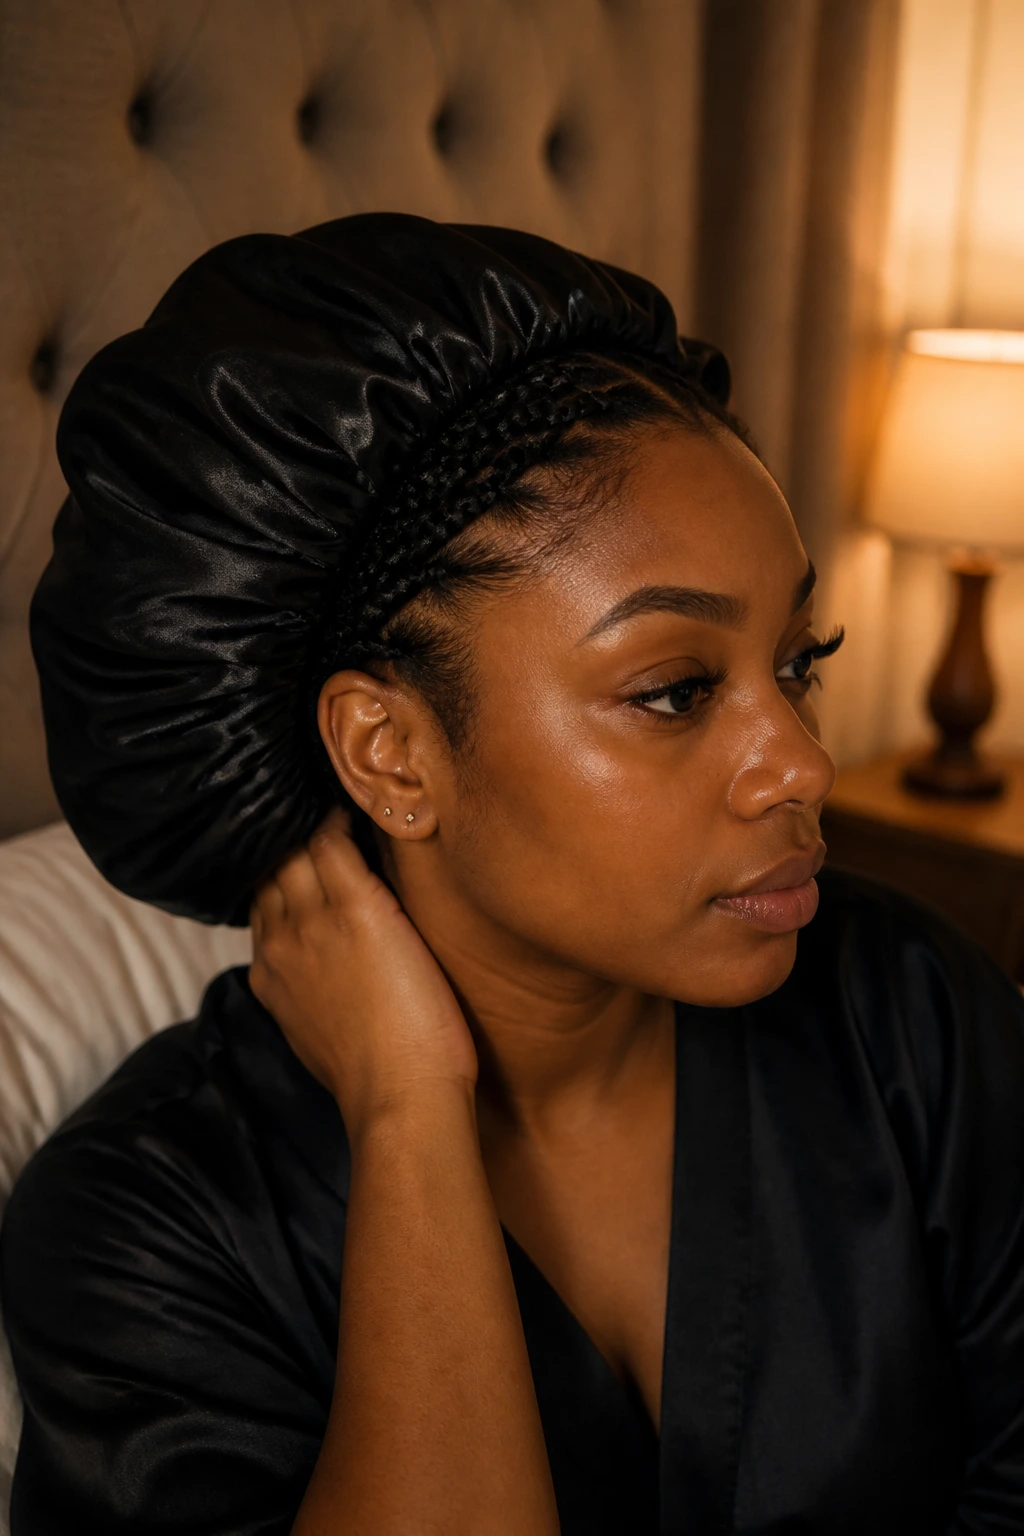
Night wrap and pillow defense
A silk scarf or bonnet is the easiest way to protect the braid surface and the soft layers at the edges. If you sleep rough, pair the bonnet with a satin pillowcase so the fabric does not rub the braids flat in one spot. The front pieces frizz first, not the back, so focus on the hairline when you wrap.
Scalp refresh without product pileup
A little scalp oil goes a long way. Use a light applicator and keep the product on the parts, not all over the braid. If the front starts to puff, smooth the loose pieces with a tiny bit of mousse on your fingertips. Heavy cream products will make the roots look dull and attract buildup faster.
When to wash and when to take them down
If your scalp starts itching, cleansing it matters more than preserving the style. A diluted shampoo on the scalp, applied carefully along the parts, can freshen the style without unraveling everything. Many braided styles look best for about 4 to 6 weeks, but if the hairline feels sore or the parts are lifting badly, take the style down sooner. The edges are not a place to be stubborn.
Variations and Adaptations to Try
Soft-Glam Braids: Keep the center or side part clean, curl the ends, and add a few gold cuffs near the middle of the braid. This version leans dressy without turning into a full formal updo.
Gym-Ready Braids: Go with two medium braids, tucked ends, and almost no leave-out. You get less face-framing movement, but the style stays secure through sweat and long days.
Short-Hair Mini Braids: Use smaller sections and skip extensions. The style will sit closer to the scalp and look neater on chin-length or collarbone-length hair.
Length-Add Feed-Ins: If you want longer braids, add pre-stretched hair little by little instead of forcing a heavy start. That keeps the root comfortable and the finish smooth.
Low Chignon Finish: Gather the ends into a small bun at the nape for a more formal shape. This works well when you want to keep the neck clear and the silhouette compact.
Curly Fringe Version: Leave the front out, shape it into a soft curl or twist-out, and let the braids do the structural work behind it. This is the gentlest-looking variation in the whole set.
Common Mistakes to Avoid
-
Pulling the hairline too tight: If the scalp aches or the temples feel hot, the braid is already too tight. Loosen the first stitch next time and use wider sections at the front.
-
Braiding damp hair: Damp roots make the style frizz faster and can leave the scalp itchy. Make sure the hair is dry before you start.
-
Cutting the soft layers too short: Tiny front pieces can stick out instead of framing the face. Keep the shortest layers long enough to bend, not spring straight up.
-
Using too much product at the part: Thick gel piles up, flakes, and makes the parts look greasy. Use a thin layer for grip, then stop.
-
Skipping night protection: Cotton pillowcases rough up the braid surface and flatten the shape. A scarf or bonnet keeps the parts cleaner and the layers smoother.
-
Overloading the style with extras: Beads, cuffs, color, and a busy part pattern can fight each other. Pick one main detail and let the braid shape stay the star.
Frequently Asked Questions
Do Dutch braids work on tight coils and 4C hair?
Yes, and they look especially good when the sections are clean and the hair is stretched just enough to lie flat. The braid ridge stays visible, which is part of the appeal on dense natural hair.
Should I braid natural hair stretched or straight from wash day?
Lightly stretched hair usually braids cleaner and frizzes less at the root. You do not need a full blowout unless you want extra length or a flatter finish.
How tight should Dutch braids feel?
They should feel secure, not painful. If you get a headache, pressure at the temples, or a burning scalp, the braid is too tight and needs to be loosened the next time.
How long do soft layers need to be for this style?
Long enough to bend around the face instead of sticking straight out. A few temple pieces that reach the cheekbone or jawline usually soften the look better than very short, choppy bits.
Can I add extensions to Dutch braids without making them heavy?
Yes. Feed-in braids are the better choice if you want length without a bulky start. Add the hair gradually so the root stays comfortable.
How do I keep the front from frizzing so fast?
Smooth the hairline with a little mousse, wrap it at night, and avoid piling on heavy cream products. The front pieces get touched, slept on, and rubbed the most, so they need the most protection.
Can I wash my scalp while wearing Dutch braids?
You can, and sometimes you should. Use diluted shampoo or a scalp cleanser along the parts, then rinse carefully and dry the roots well so moisture does not sit under the braids.
What if my parts puff up after a few days?
That usually means the hair was not stretched enough, the part was too thin, or the style needs a mousse refresh. A little frizz is normal; a fuzzy root line that erases the braid shape is a sign to clean up the front.
Braids That Still Move
The best Dutch braids on Black natural hair do two things at once: they hold their shape and they leave room for softness. That’s the whole reason soft layers matter so much. They stop the style from becoming rigid, and they give the braid a face-framing finish that feels intentional instead of accidental.
If you pick one thing from all of this, make it the tension rule. The braid should feel secure, not sharp. The layers should frame, not fight. And once those two pieces are working together, almost any version in this set can look good on you.
The nice part is that you do not need to choose between neat and soft. You can have both, and the styles above make that balance a lot easier to wear day after day.