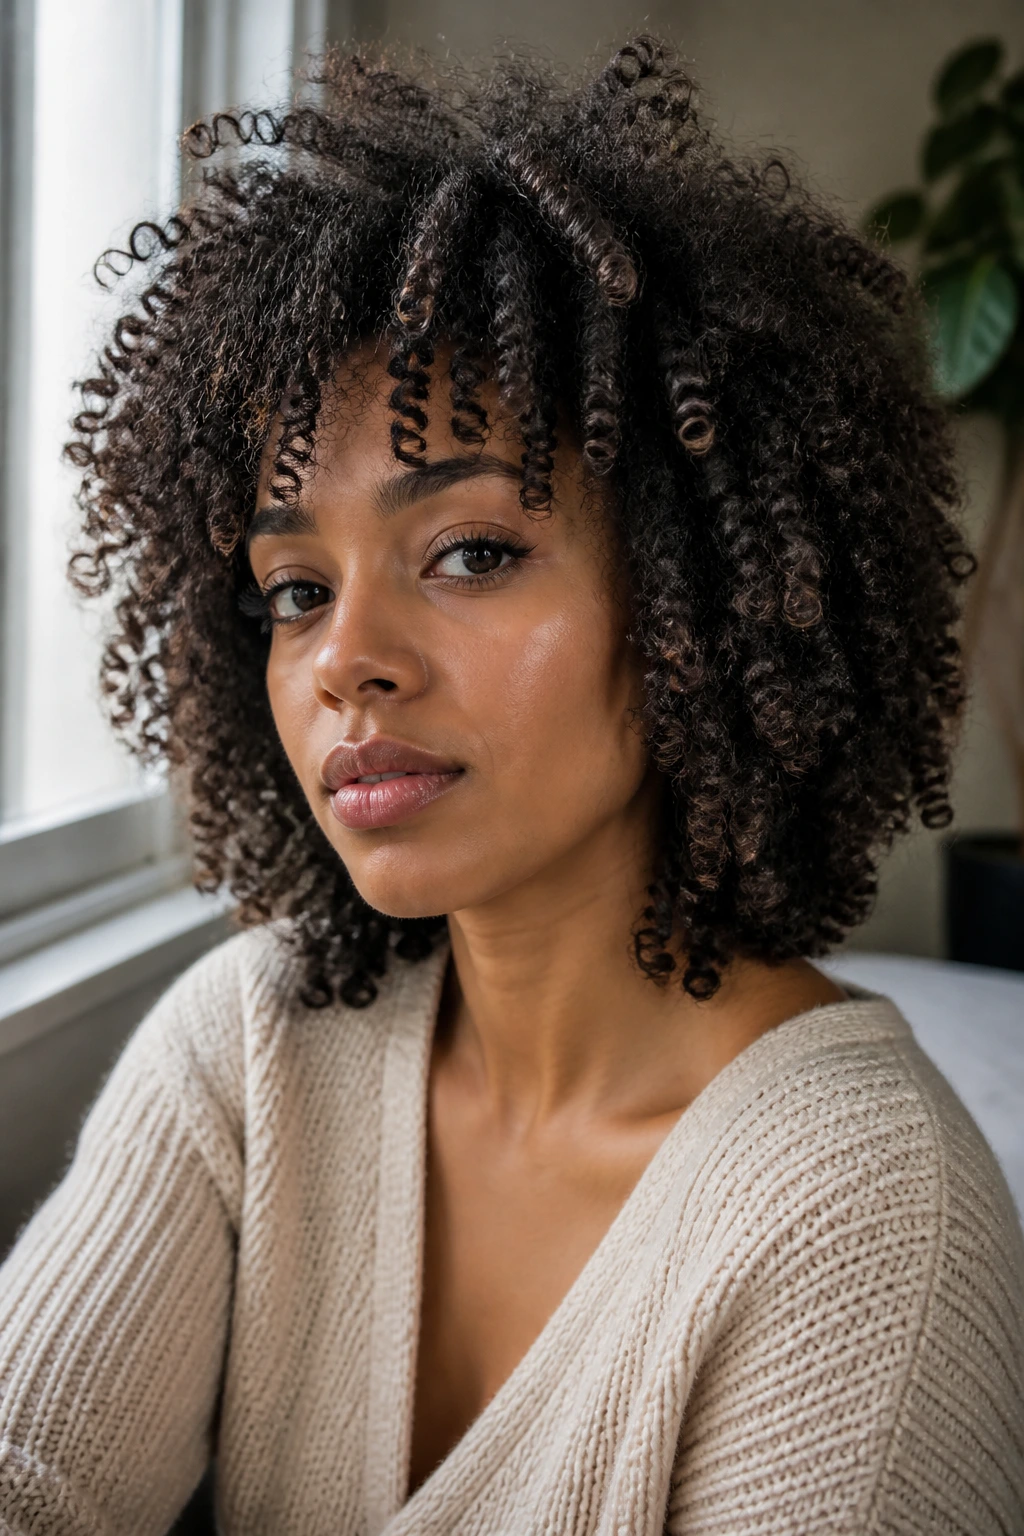
Natural layered hairstyles for Black women can solve the one problem blunt cuts rarely solve well: shape. Coils and curls do not sit politely in one flat line, and if you’ve ever watched a gorgeous head of hair turn into a triangle by lunchtime, you know exactly what I mean. Layers bring the silhouette back under control. They lift the crown, open the face, and keep the ends from behaving like one heavy curtain.
The real trick is that layers on textured hair are never only about length. Shrinkage changes everything. Density changes everything. The way you wear your hair between wash days changes everything again. A cut that looks airy in a salon mirror can spring up two inches higher once it dries, which is why the smartest layered shapes are built around the way Black hair actually lives, not how it looks under perfect lighting.
I keep coming back to the same point because it matters: the right layers should make your routine easier, not give you a new puzzle to solve every morning. They should let curls move around the cheekbones, let a puff sit higher without looking lopsided, and let a wash-and-go keep some structure instead of collapsing into one soft mound. The 22 styles below cover all of that, from neat chin-length shapes to long, dramatic curves that keep their bounce. A good place to start is the first style that makes you pause and think, that’s the shape I’ve been missing.
Why This Collection Is Different
-
Shape Before Length: These layered hairstyles focus on where the hair sits on your head, not just how long it hangs, which matters a lot more on coily and curly textures.
-
Face-Framing That Shows Up in Real Life: The best front layers land near the cheekbone, jaw, or collarbone so they still read clearly after shrinkage, not only on the day you leave the salon.
-
Works With How You Already Style Your Hair: Wash-and-gos, twist-outs, braid-outs, puffs, frohawks, and loc styles can all carry layers without forcing you into one routine.
-
Less Bulk in the Wrong Places: Strategic layering takes weight out of the crown and sides, which is exactly where natural hair tends to widen if it’s left in one block.
-
Flexible Across Lengths: Whether your hair is a TWA, shoulder-length, or waist-length, there’s a layered shape that keeps the outline clean instead of boxy.
-
Built for Movement, Not Just Photos: These styles are chosen because they hold their shape as you move, turn your head, and get through a whole day, which is the part many pretty cuts forget.
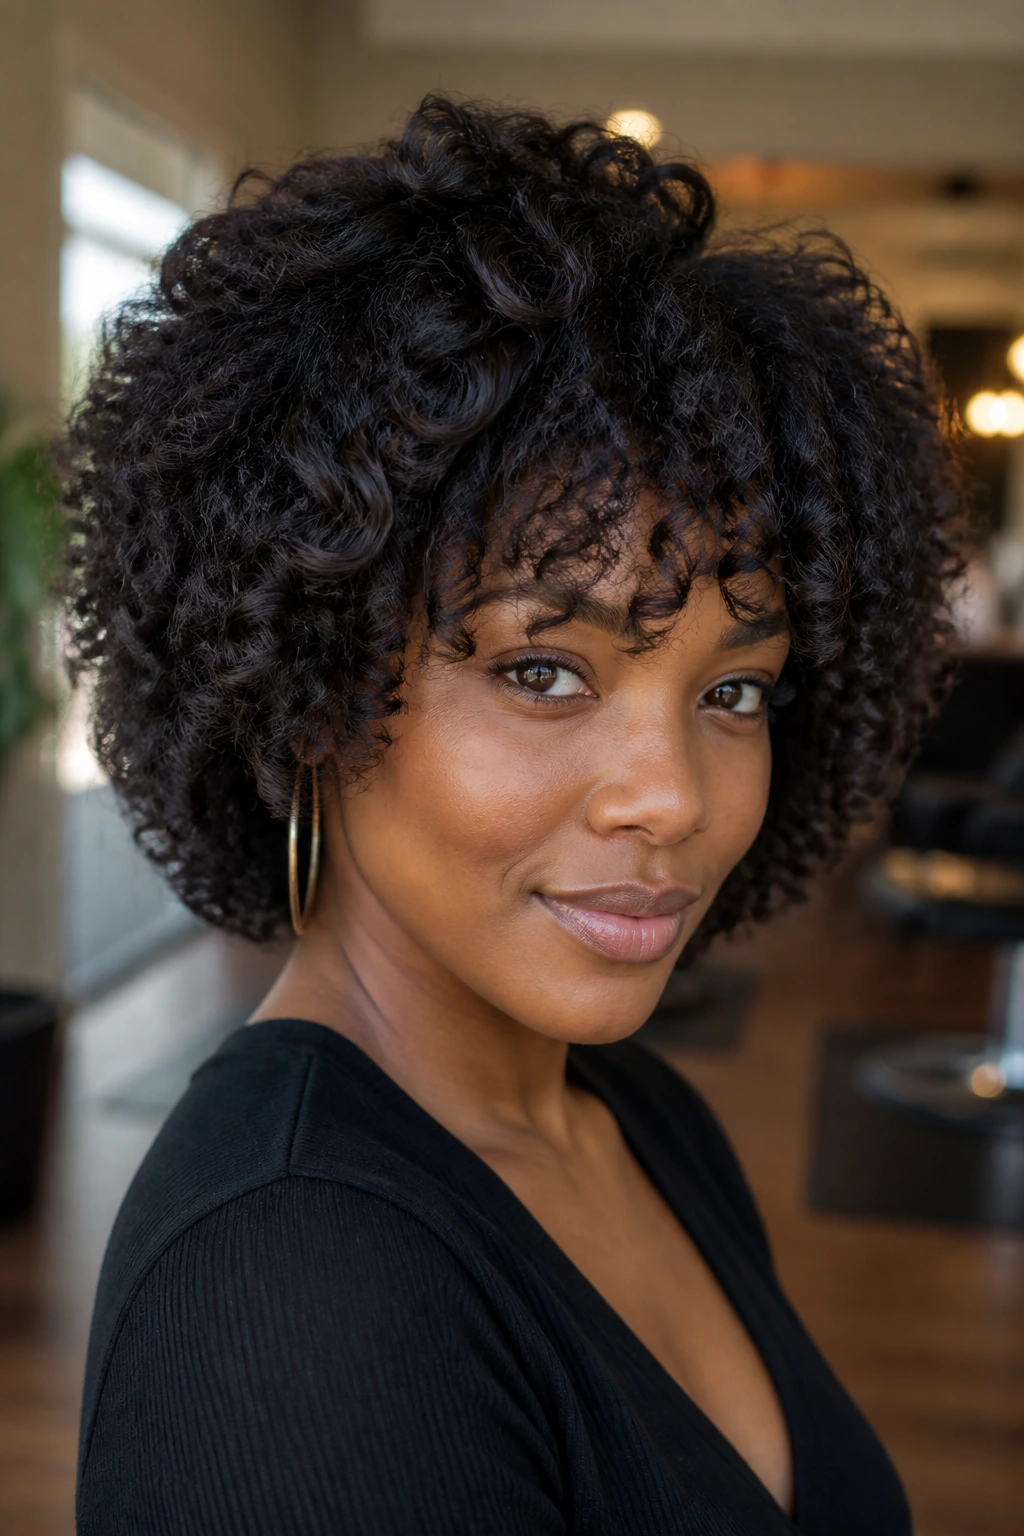
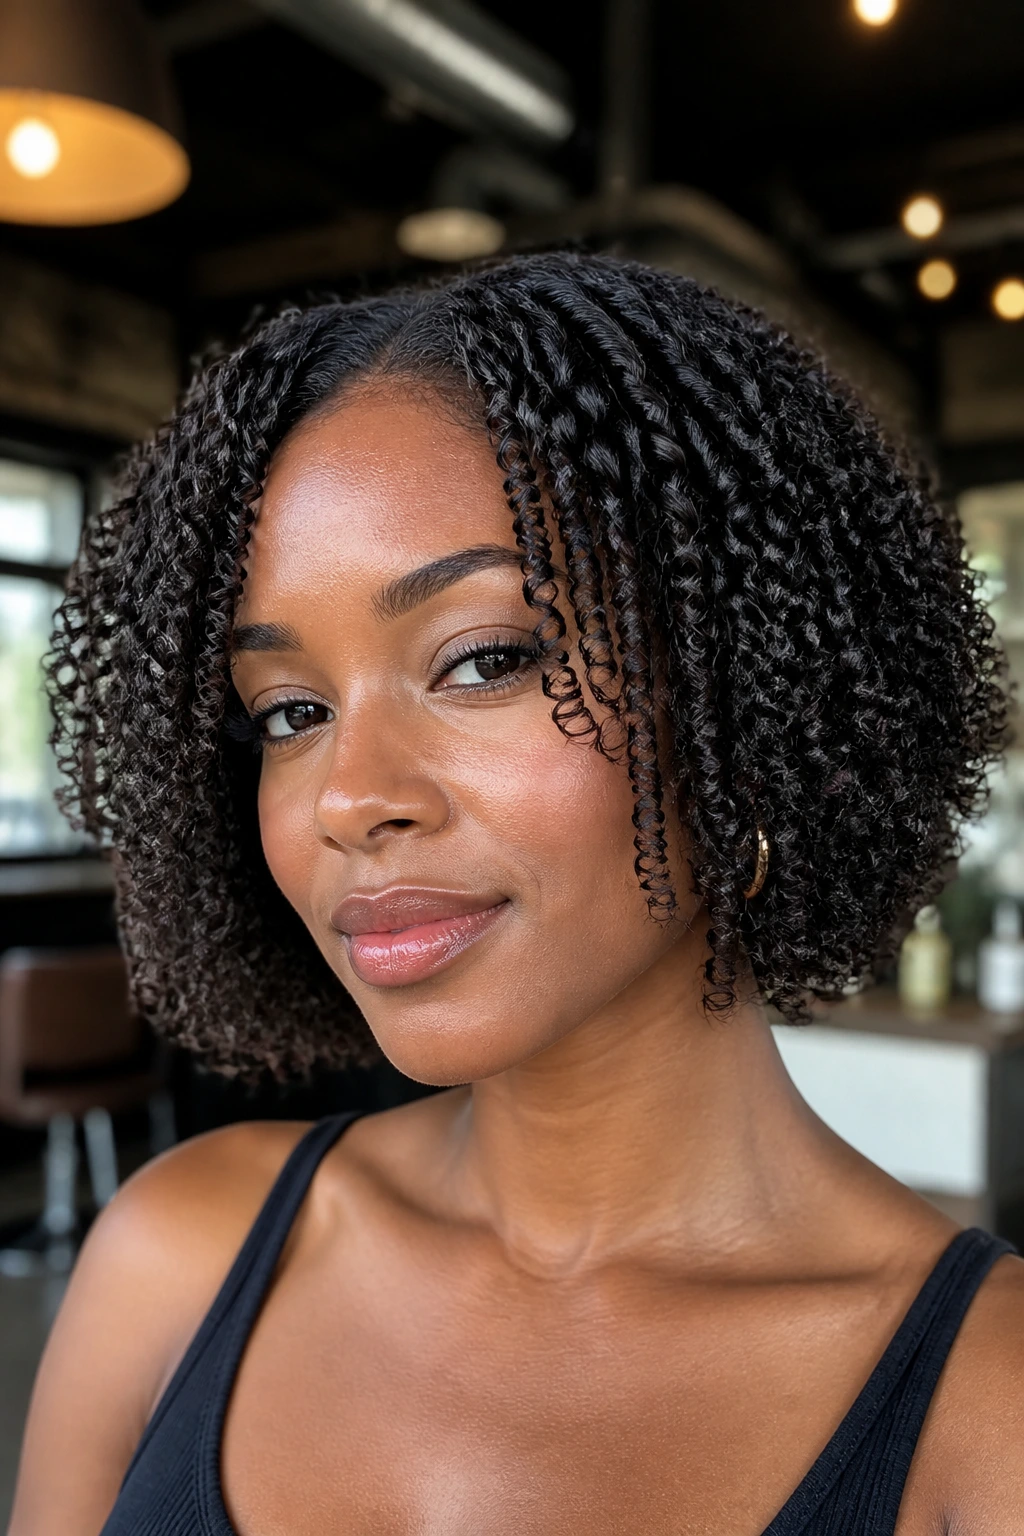
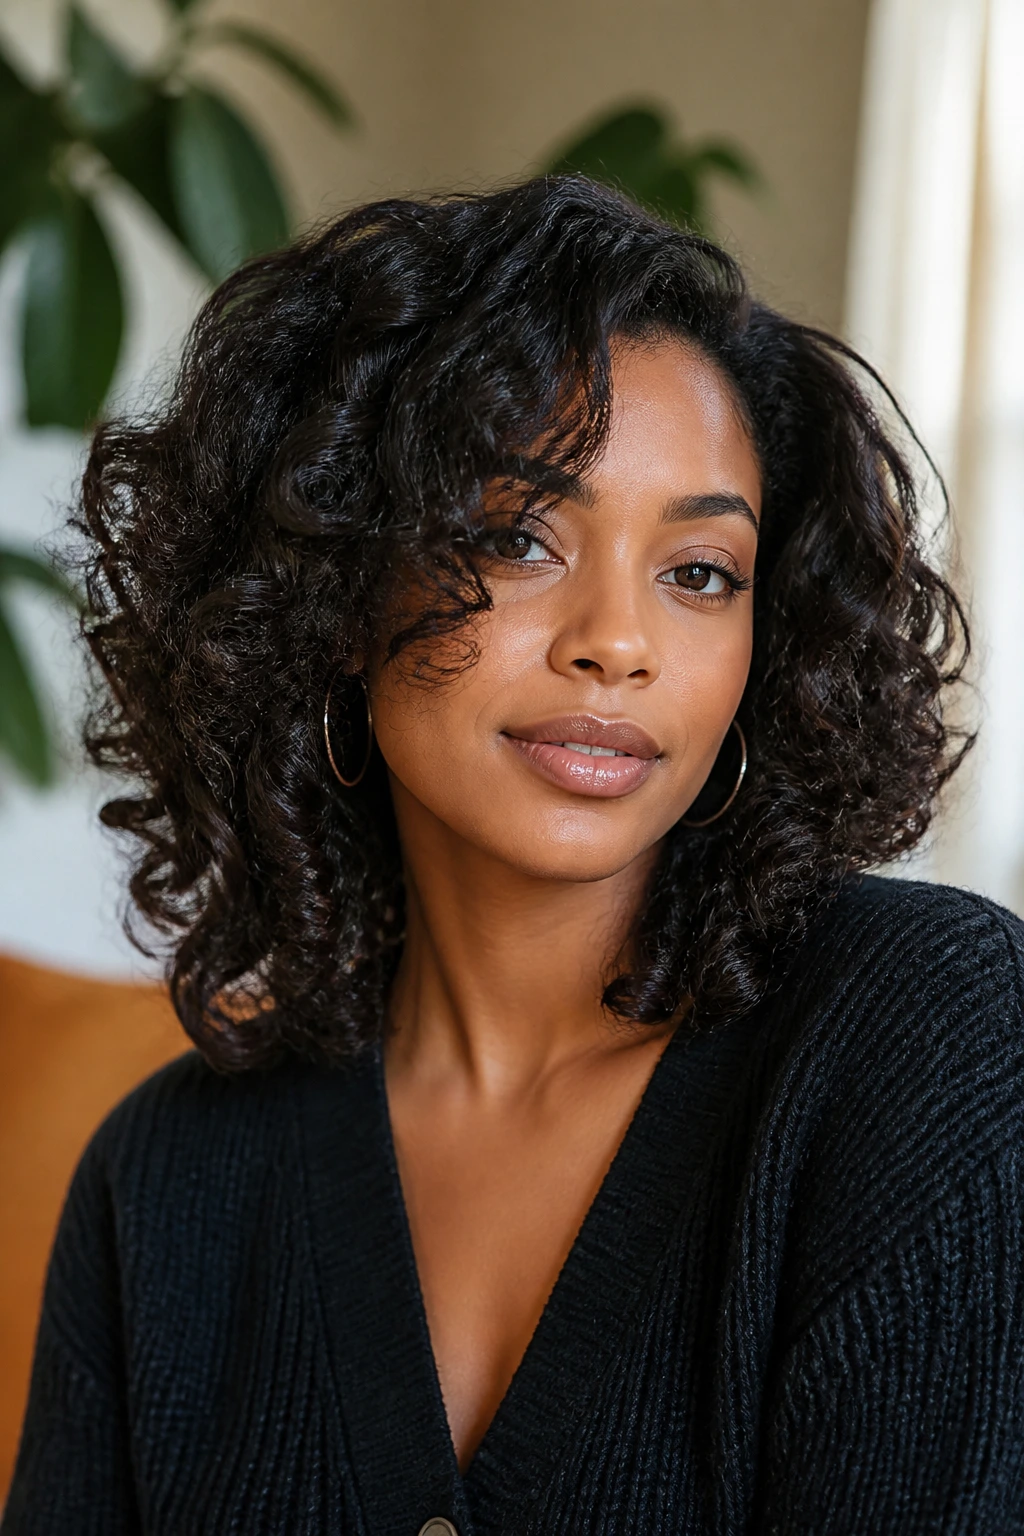
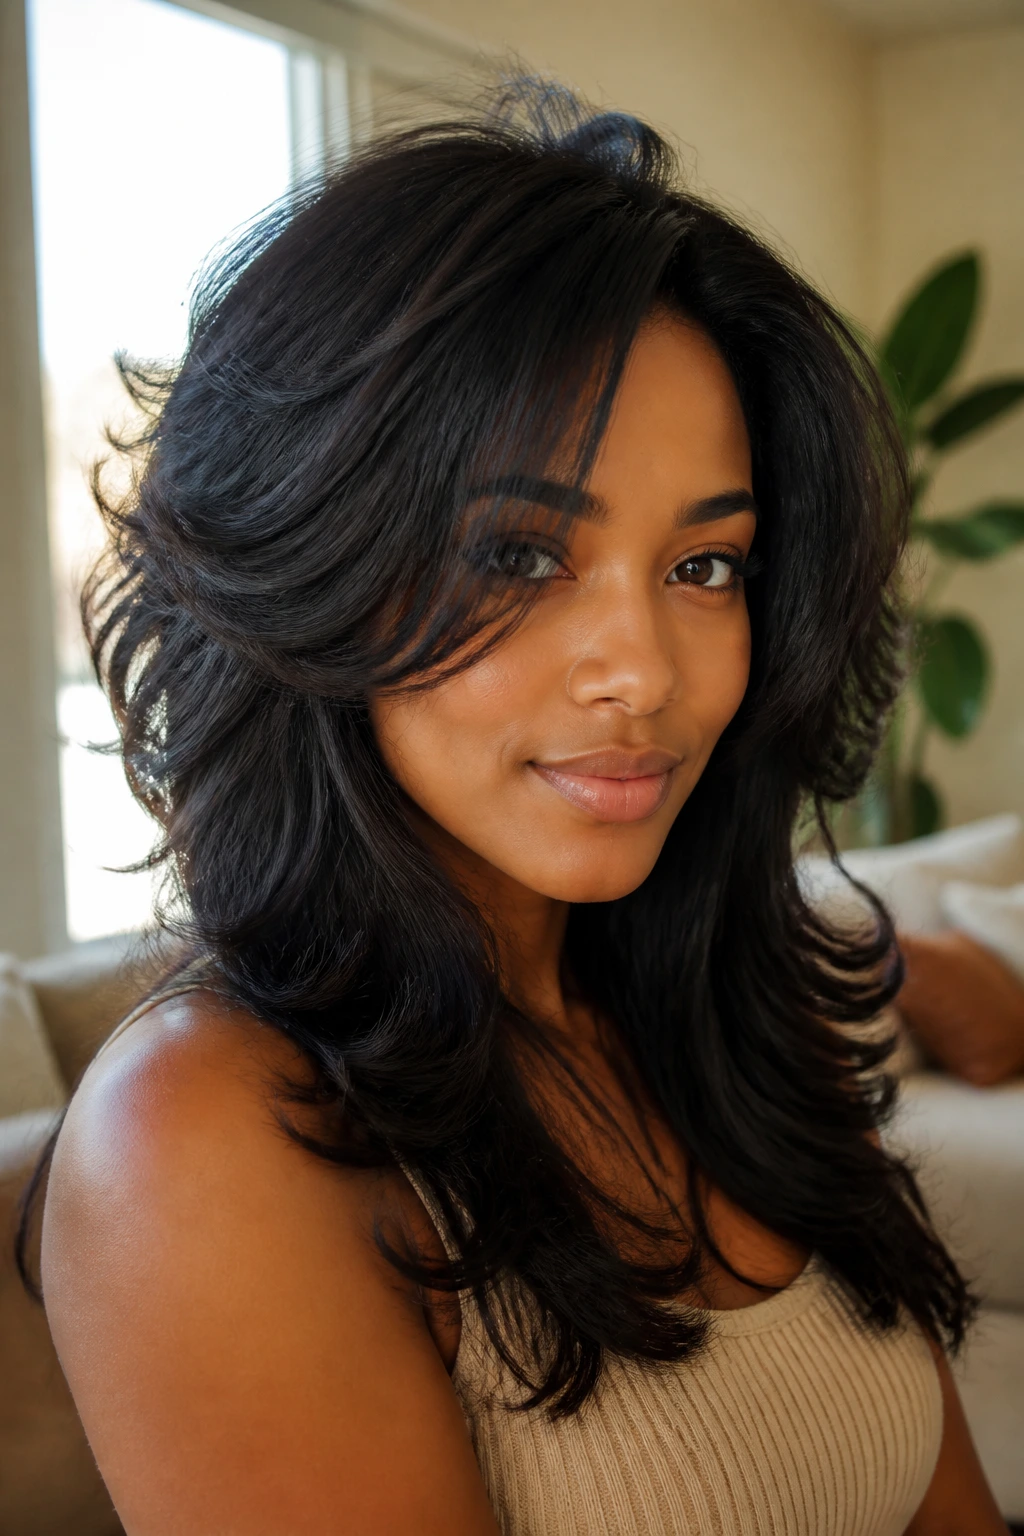
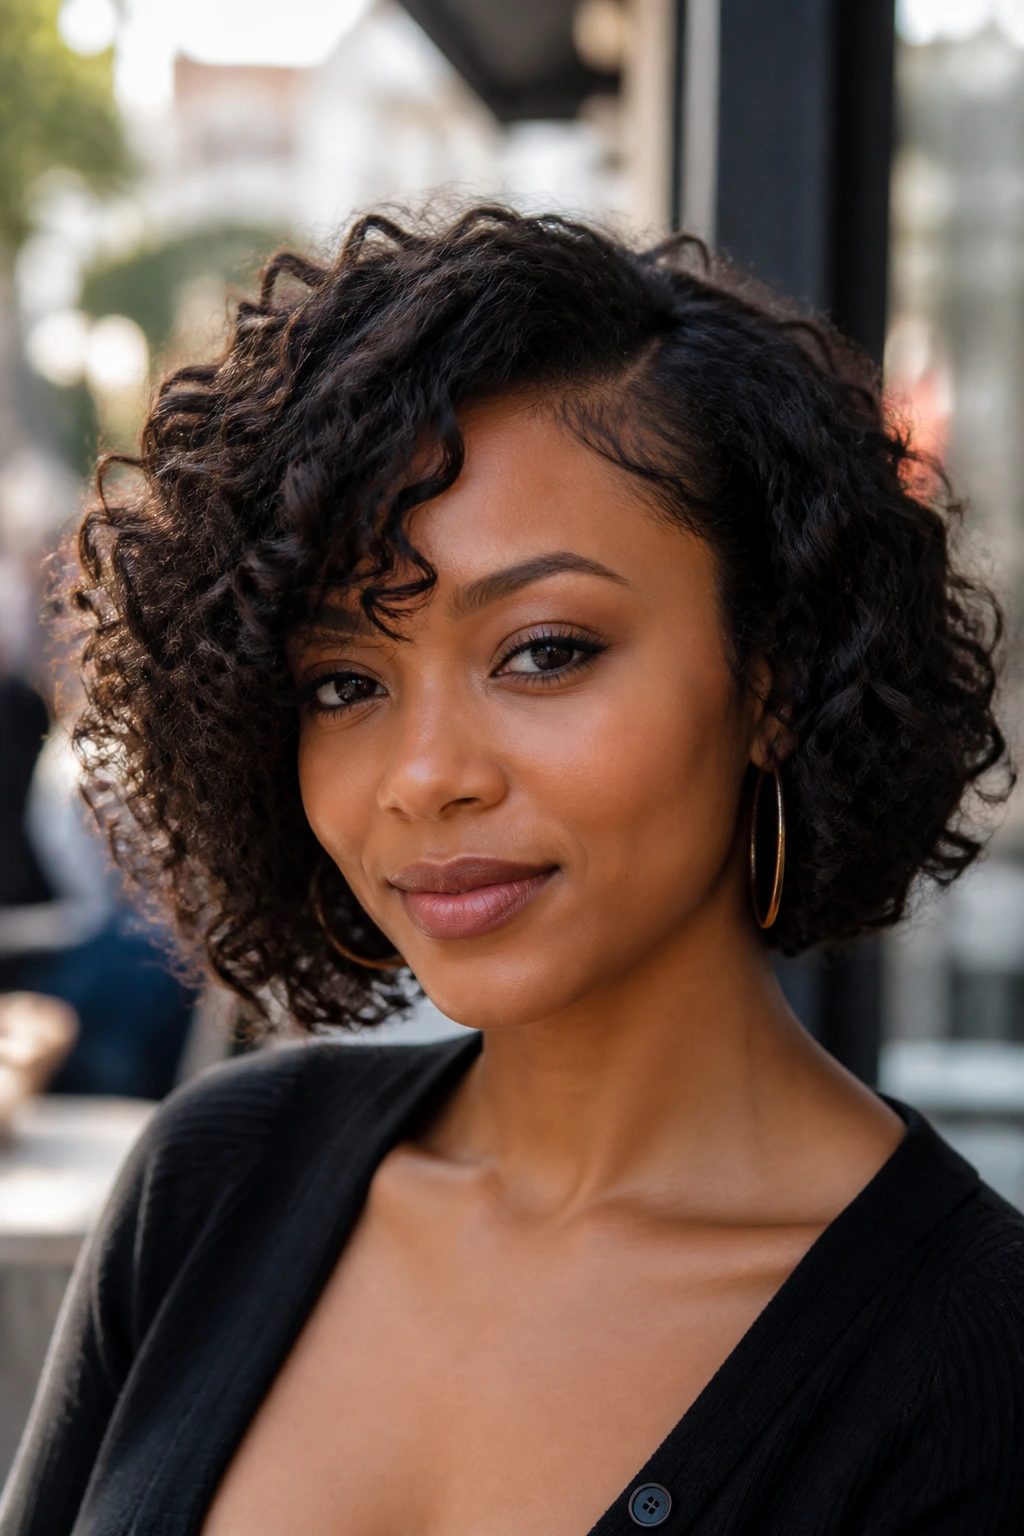
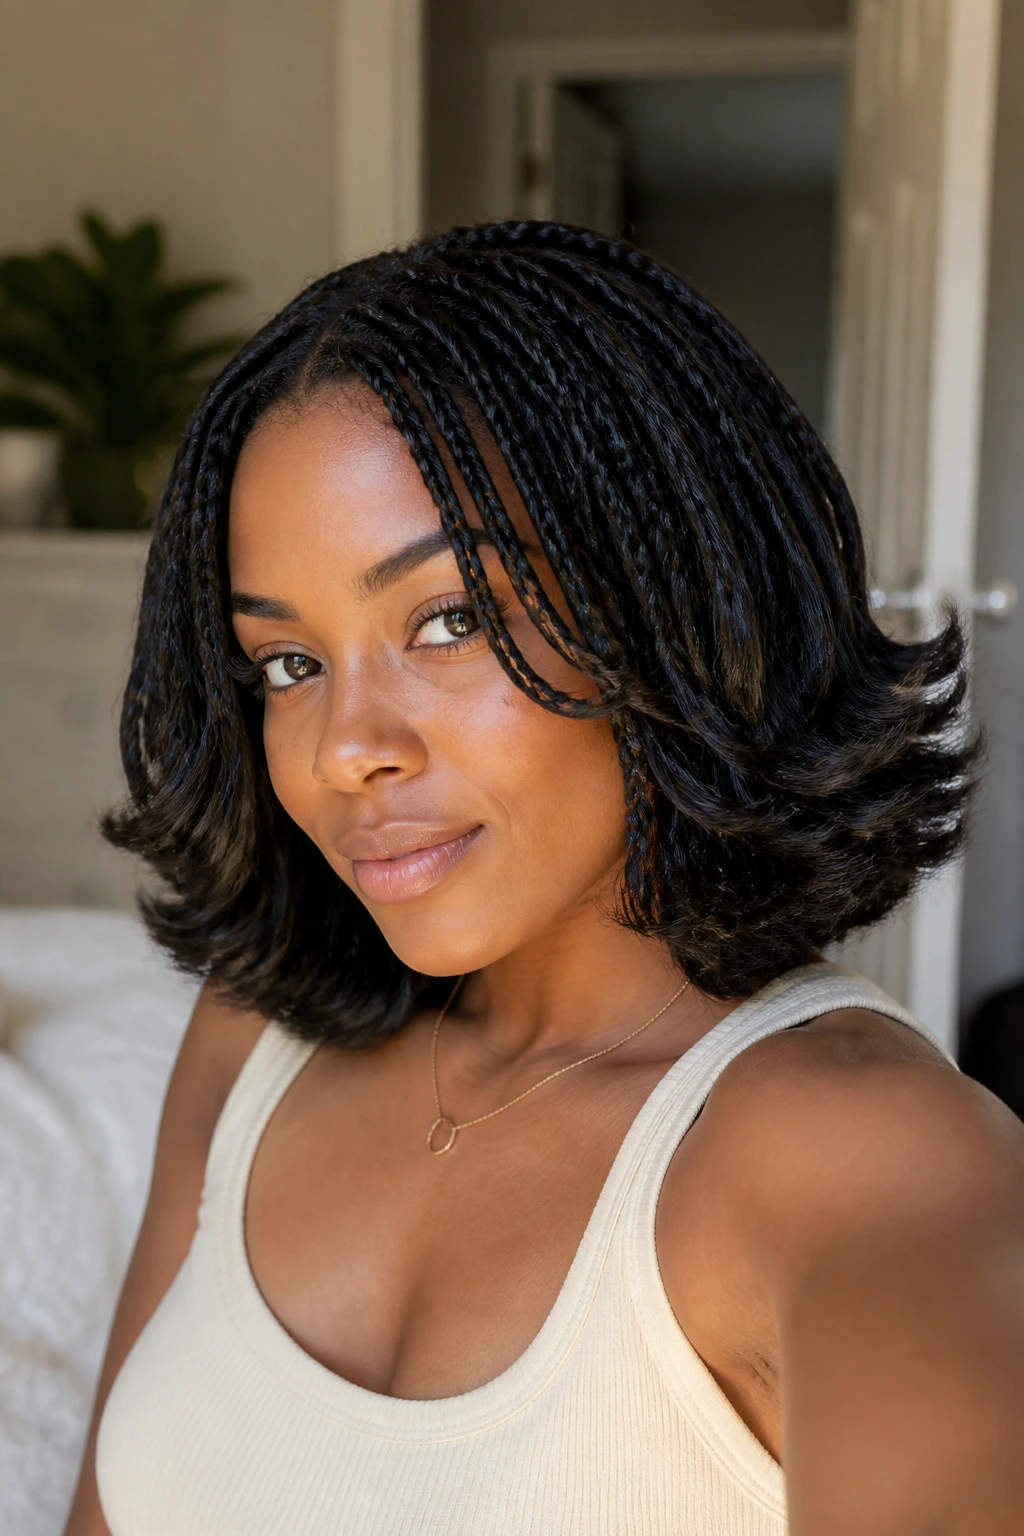
1. The Curly Lob That Skims the Jaw
A curly lob with internal layers is one of those shapes that looks calm from the front and quietly clever from the side. The length usually lands somewhere between the chin and the collarbone, which gives your curls room to move without dragging the whole silhouette down. On dense natural hair, that extra bit of lift keeps the lob from turning into a square block.
The best version keeps the outer line soft while trimming some weight inside the shape. That way, your curls still look full, but they do not balloon at the sides every time humidity shows up with an attitude. A side part helps too. It breaks the symmetry, lets one side sweep forward, and makes the layers read as intentional instead of accidental.
If you want a practical shape that works for errands, work, and dinner without changing the whole routine, this is a smart starting point. Ask for the shortest front pieces to land around the jaw or just below it, then keep the back long enough to brush the collarbone. That little gap matters. It keeps the cut from riding too high once your curls dry and shrink.
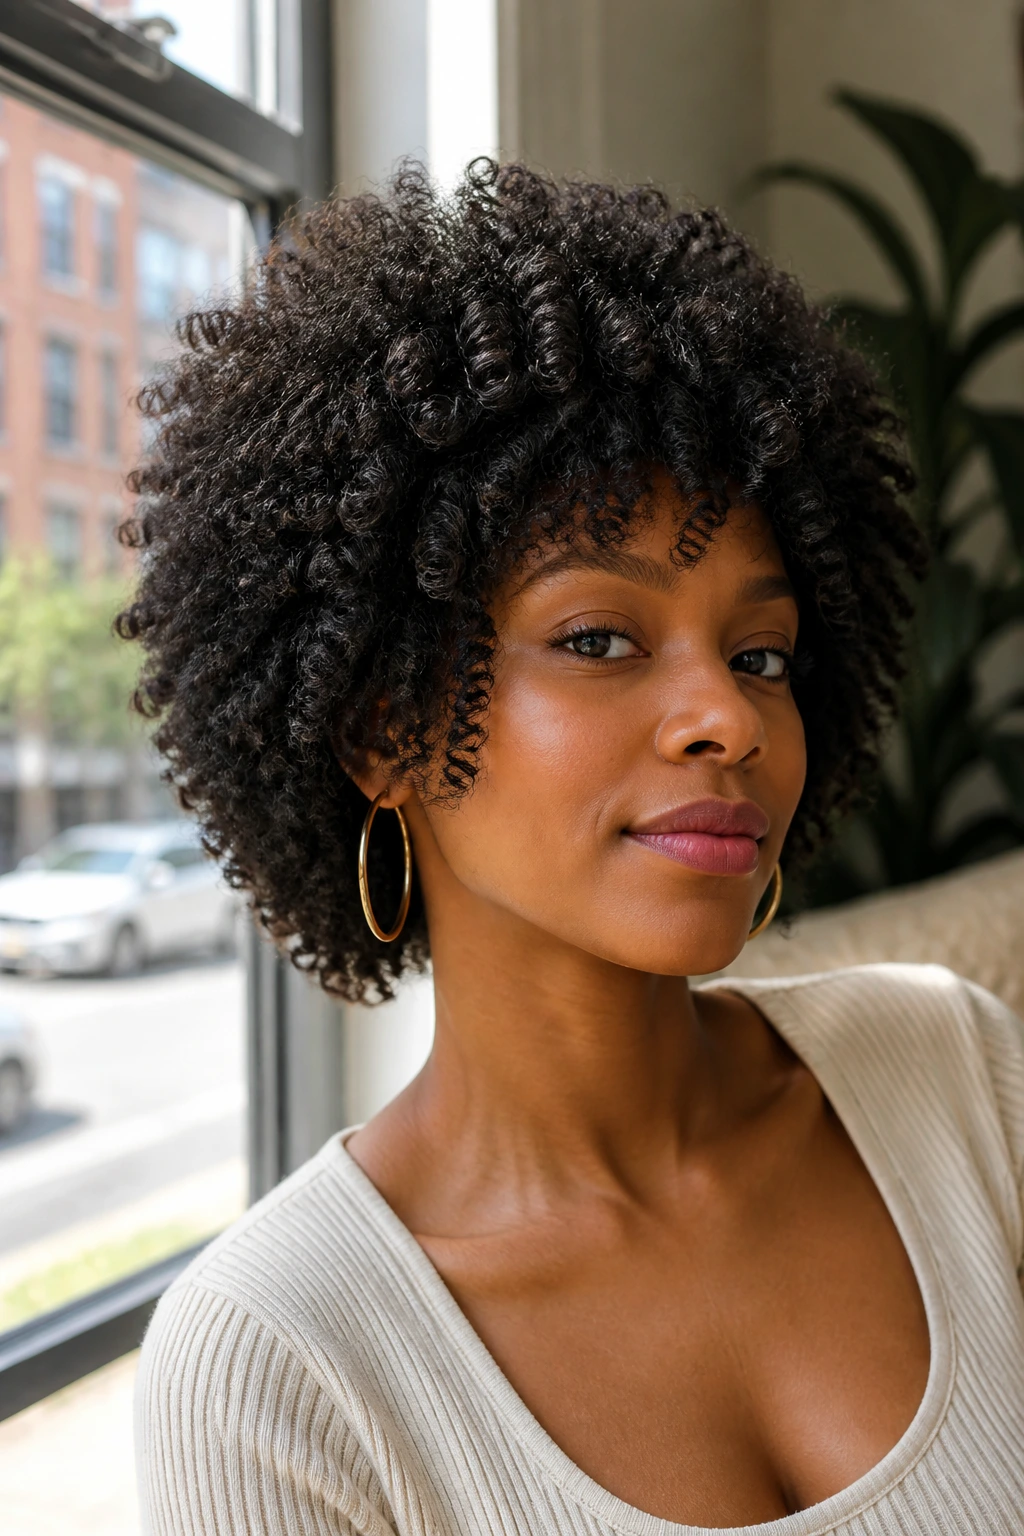
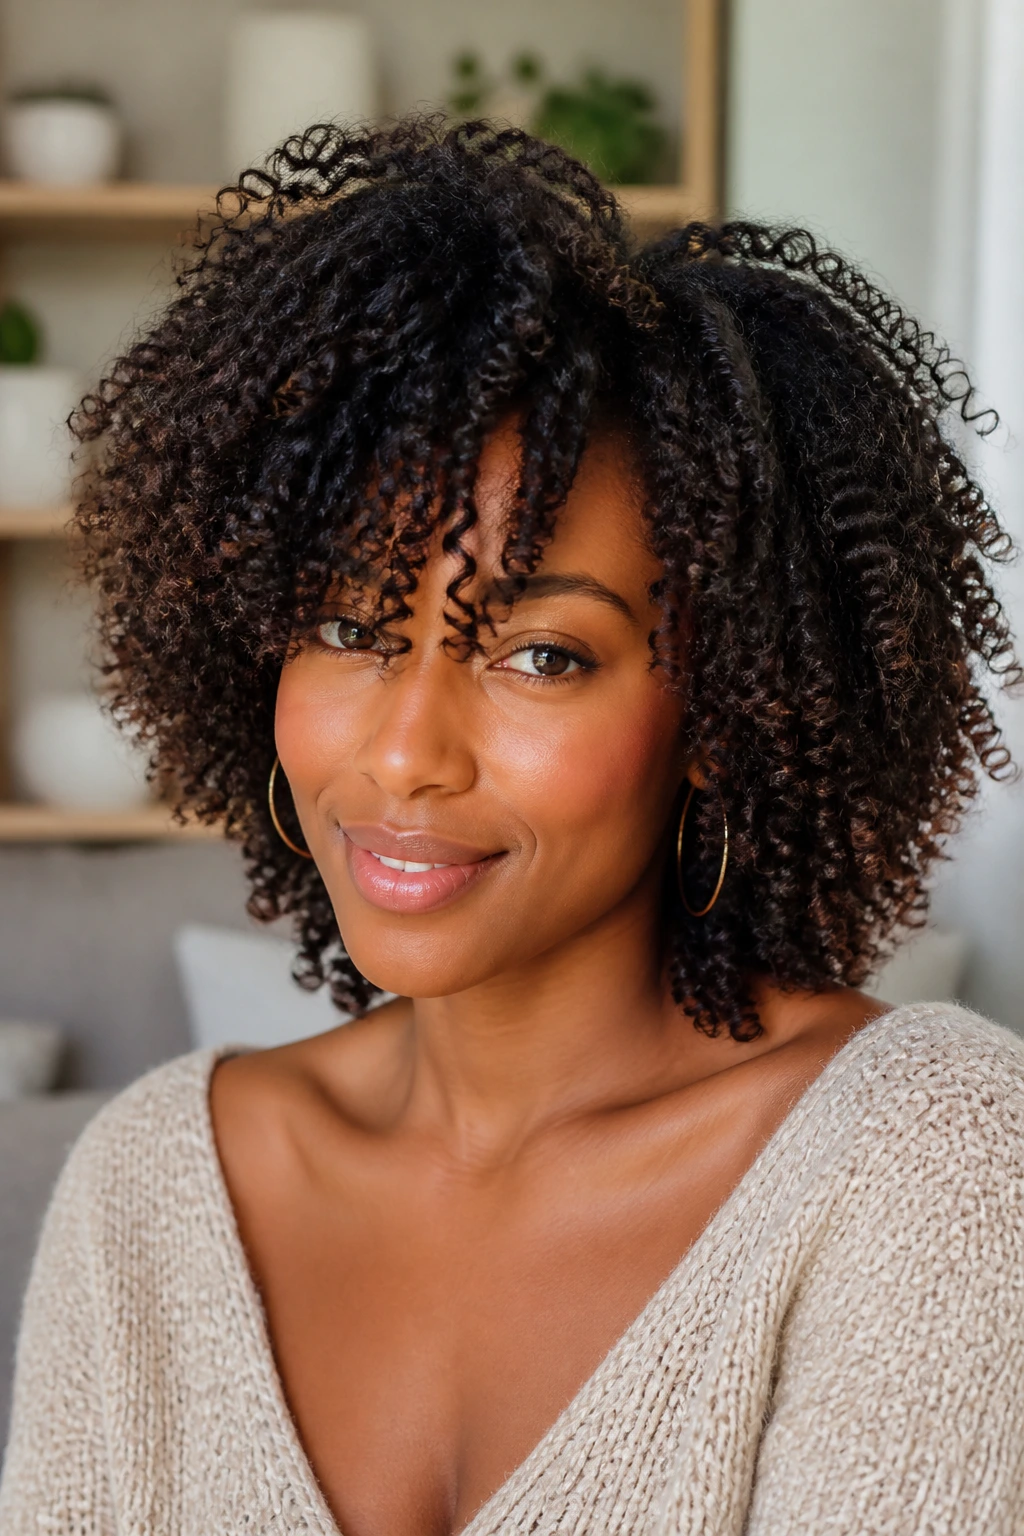
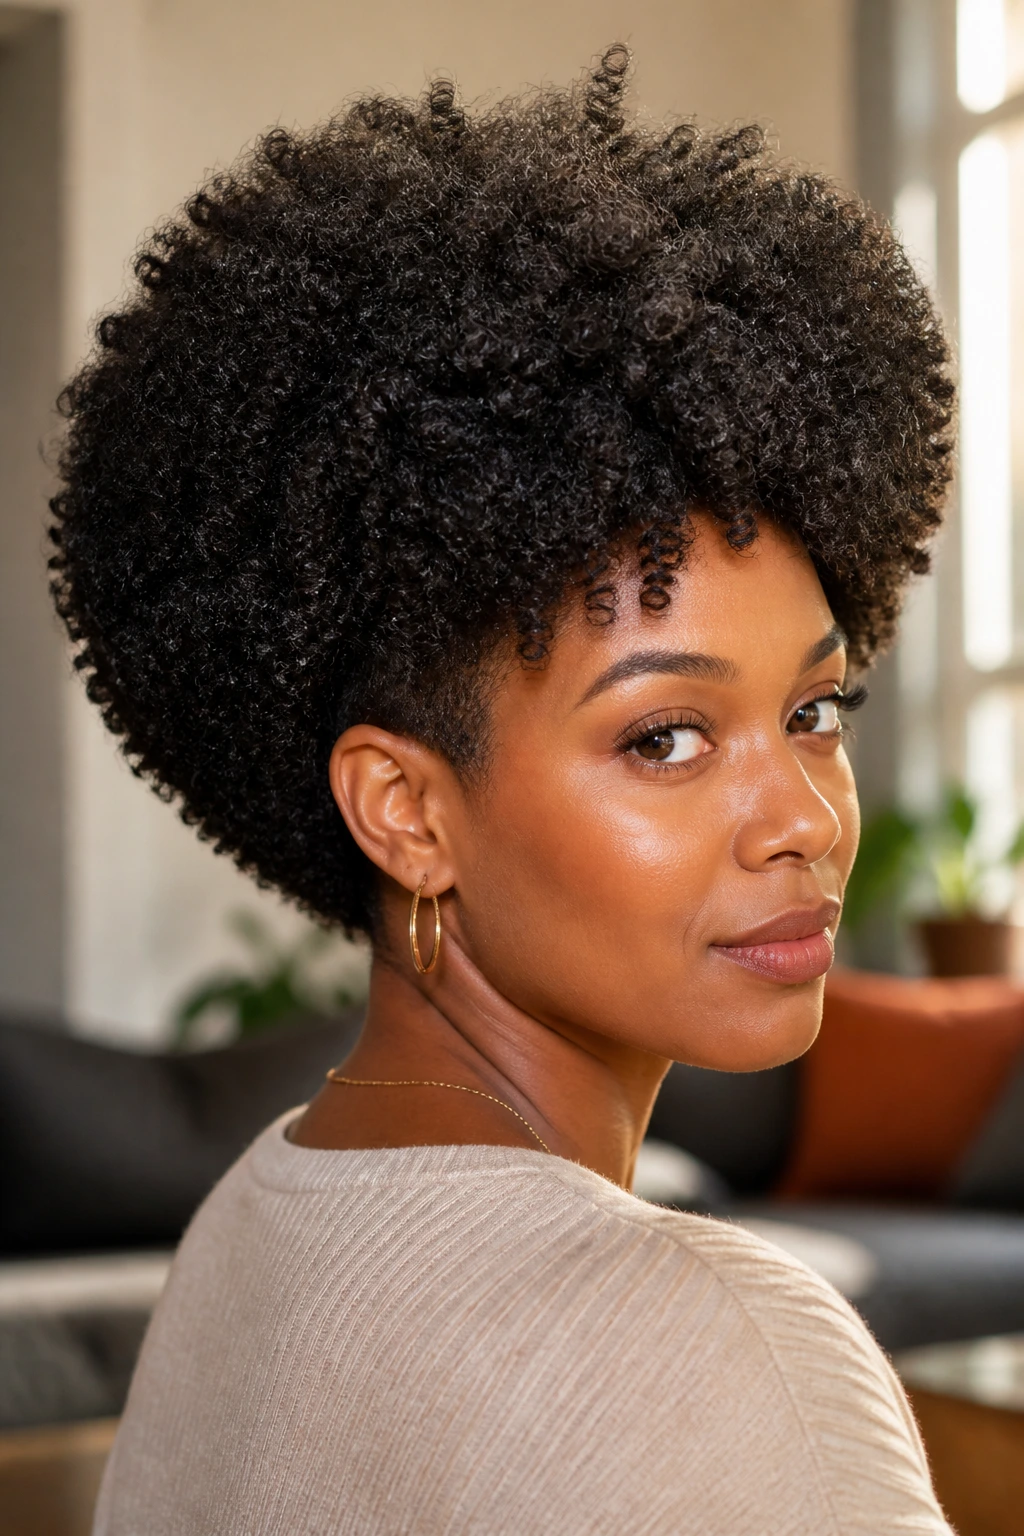
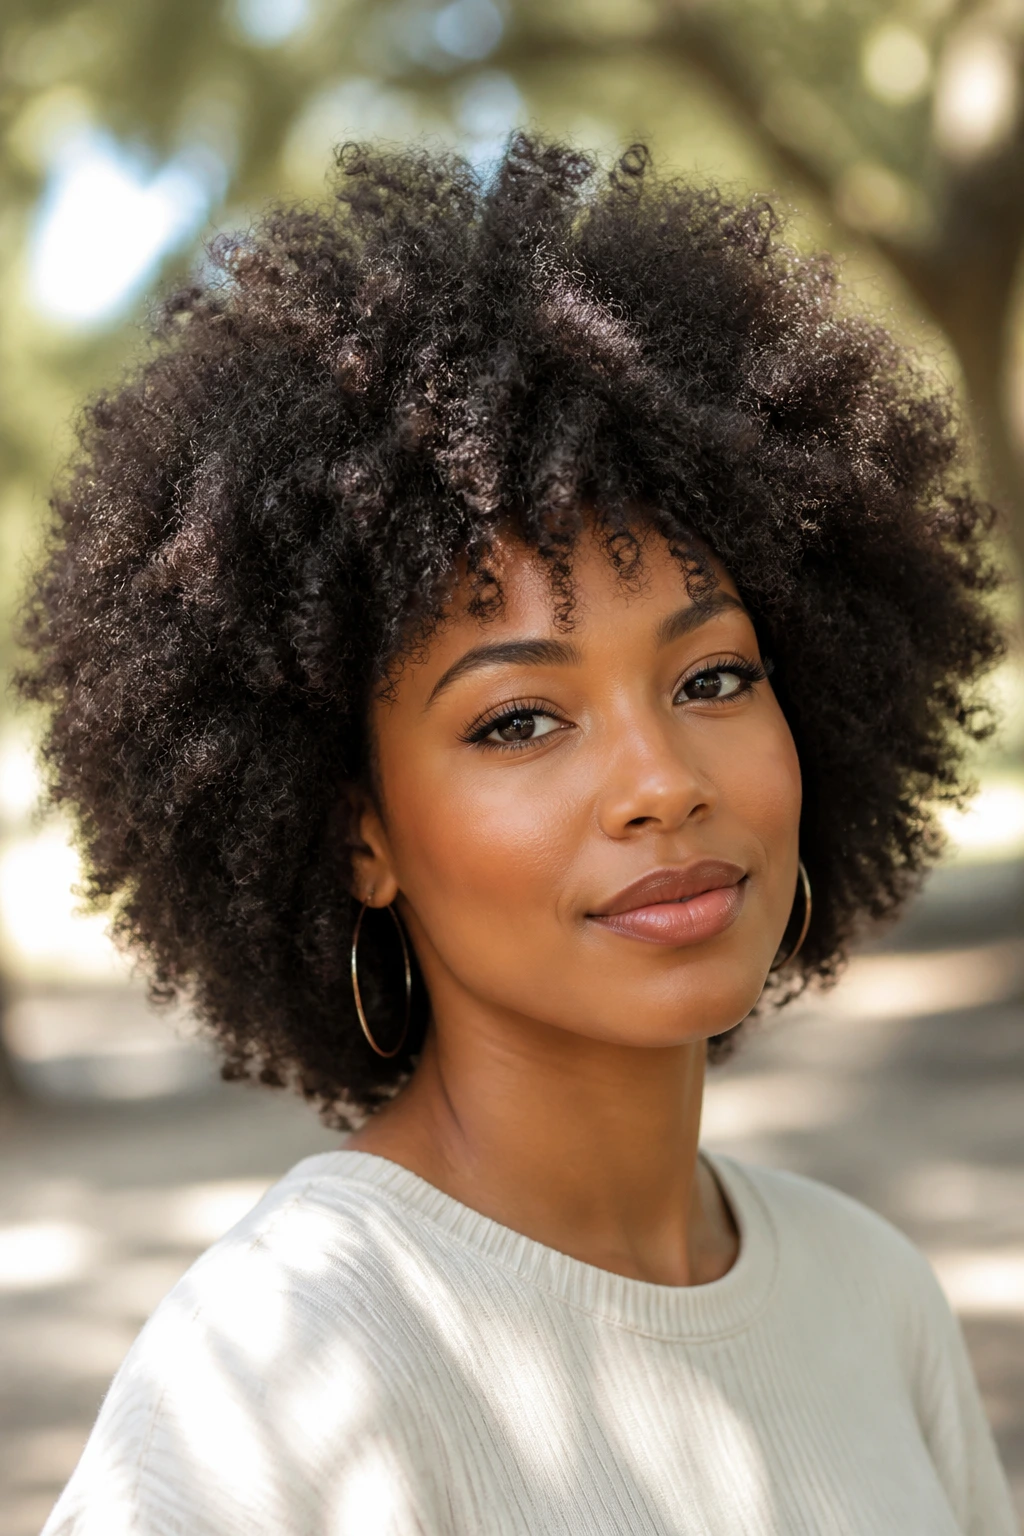
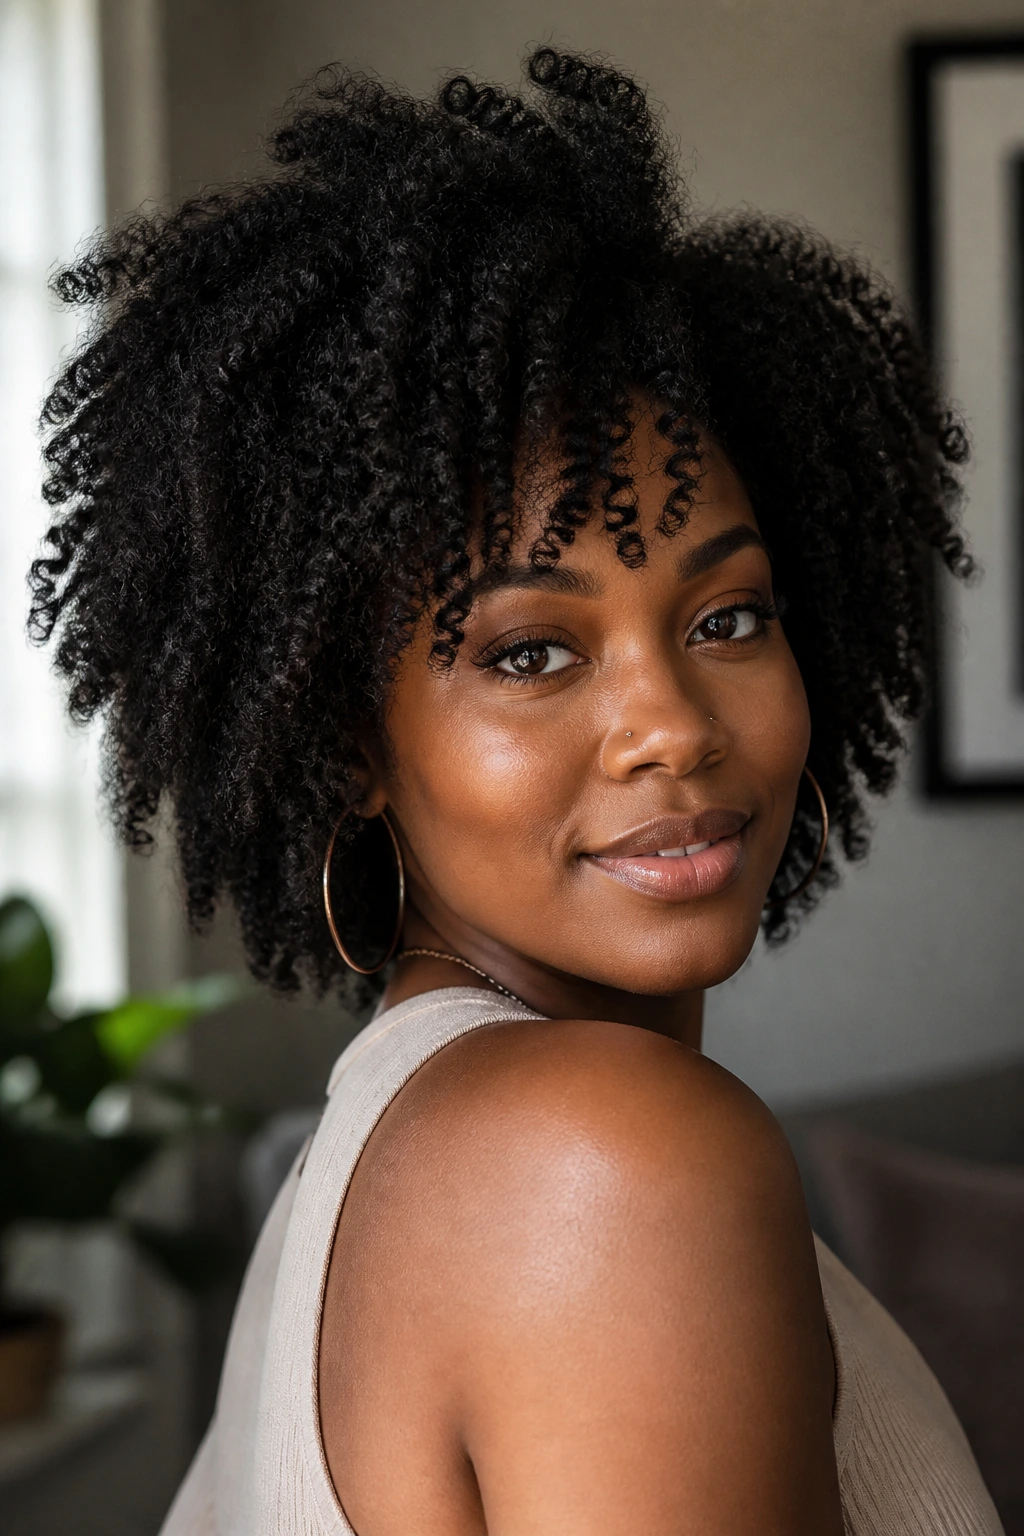
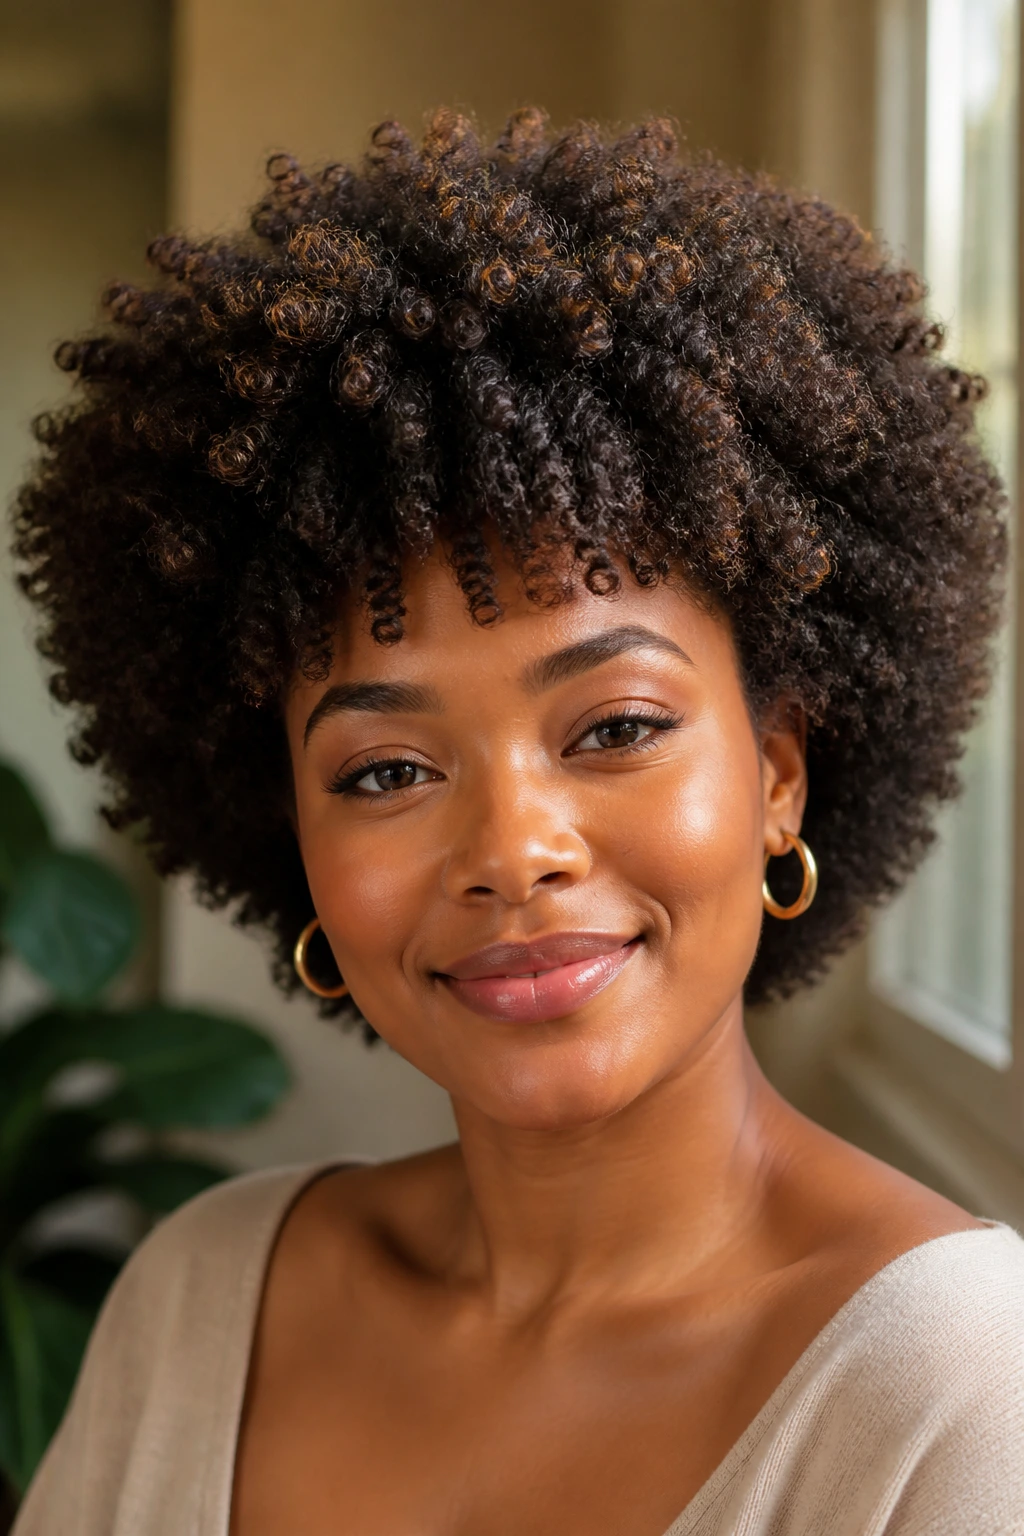
2. The Rounded Afro With Soft Crown Layers
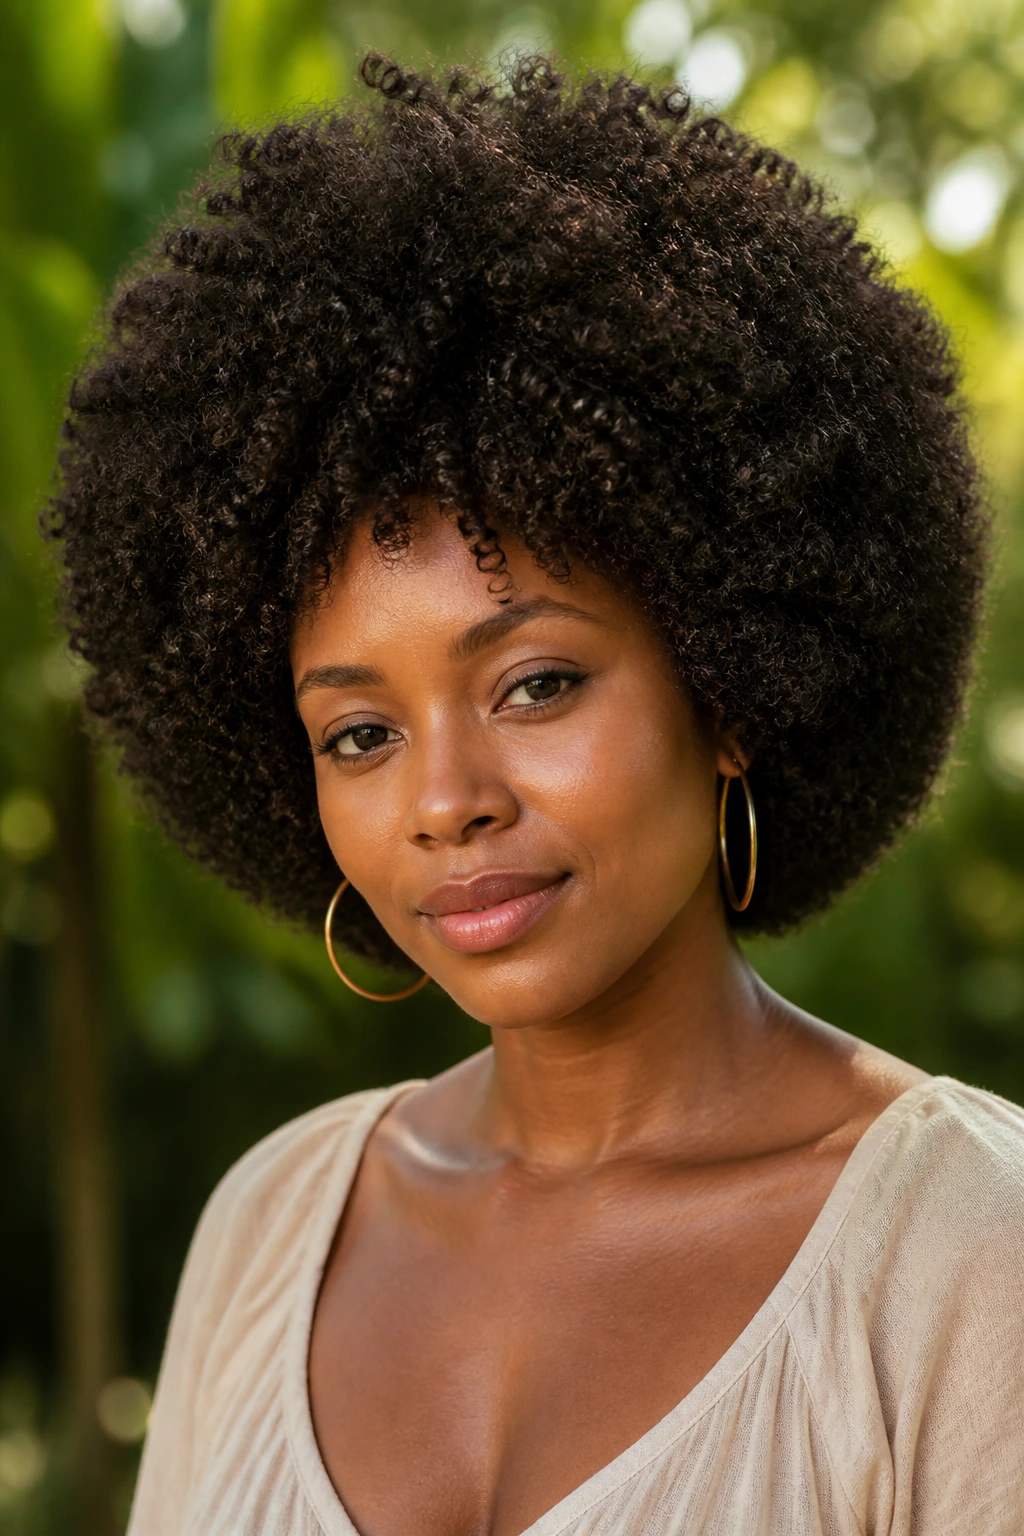
A rounded afro lives or dies by its crown. Without layers, the top can puff up while the sides hold too much width, and the result is the classic triangle shape people complain about but rarely know how to fix. Soft crown layers solve that by removing weight where the hair stacks up most.
The best rounded afro does not look carved with harsh edges. It looks full, even, and slightly lifted at the top, with the perimeter sitting in a clean curve around the face. That curve is what gives the style its polish. I like this shape especially on dense 4B and 4C hair, because the texture has enough body to hold the outline without looking sparse.
What to ask for at the salon
- Keep the perimeter rounded, not square.
- Trim the crown in small steps so the top rises without popping too wide.
- Leave enough length around the temples to soften the face.
- Cut on dry or stretched hair if you wear your fro in that state most of the time.
That last point matters more than people think. A wet trim can hide shrinkage and leave the final shape sitting much shorter than expected. Dry cutting takes more patience, but on a rounded afro, patience is usually the price of getting the shape right.
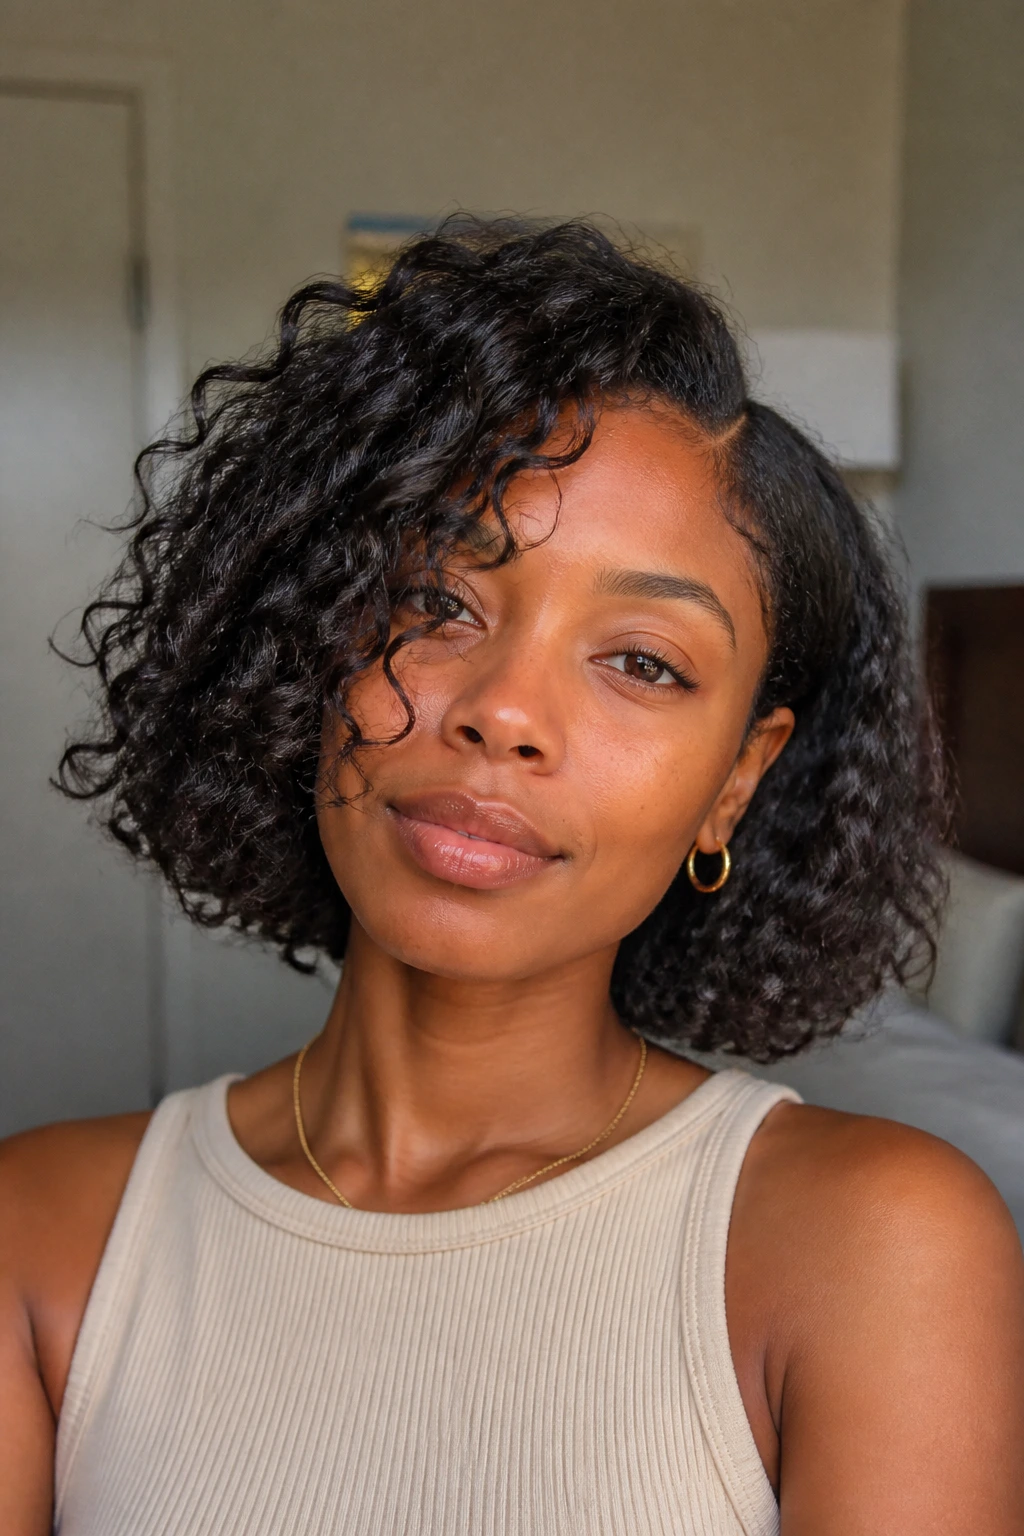
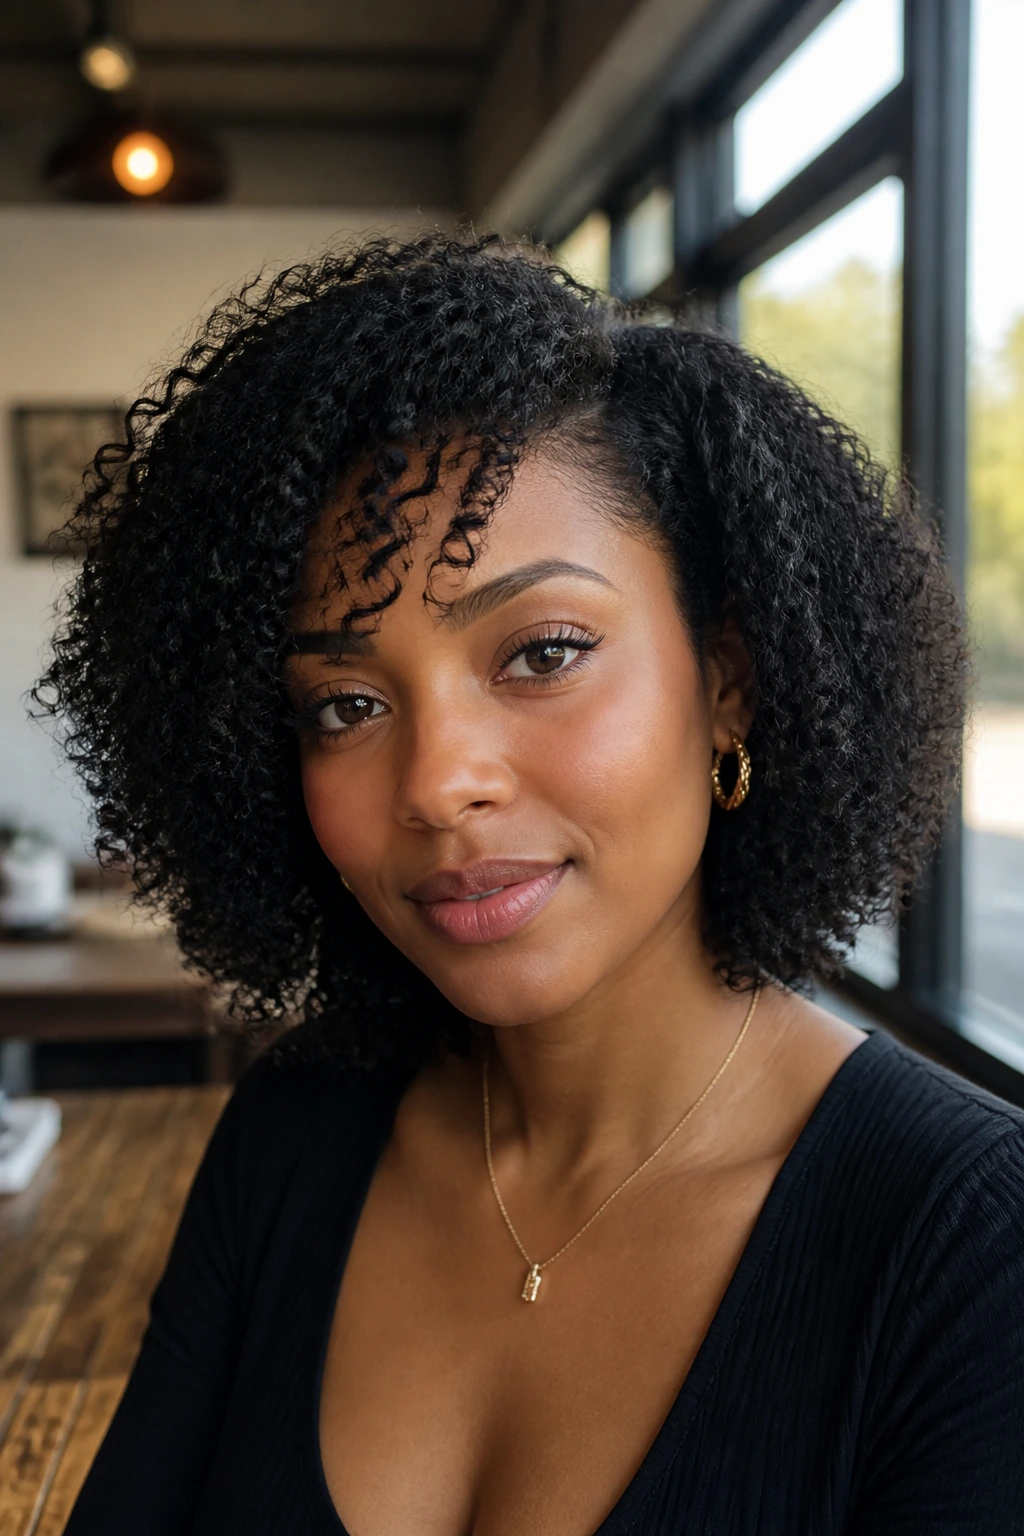
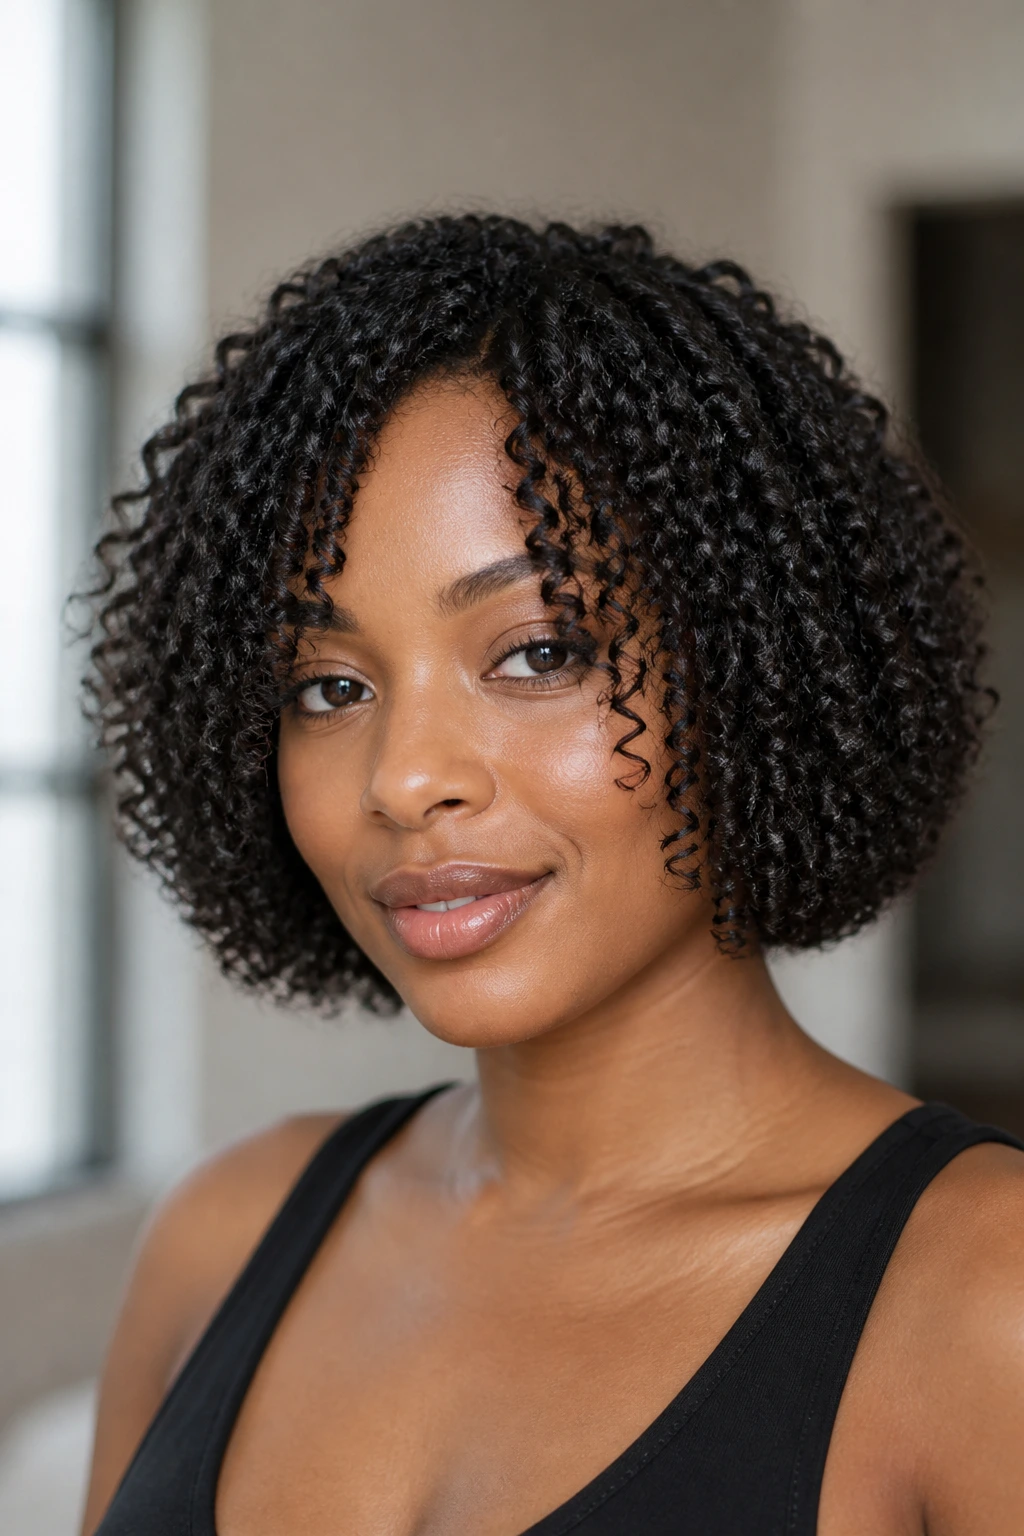
3. The Wash-and-Go Bob That Holds Its Shape
Why does a layered wash-and-go bob work so well? Because it gives curl definition a clear border. Instead of hair spreading outward in every direction, the bob keeps the outline close to the head while the layers stop the body from getting bulky in the wrong place. You get bounce without the helmet effect.
This shape is especially good if your curls clump easily and you like strong definition from gel or mousse. The shorter front pieces can skim the chin, while the back sits a little longer for balance. A diffuser helps, but air-drying works if you can leave the hair alone long enough. Leave it alone, though. Touching it too early ruins the curl clump and creates frizz at the crown.
The bob also makes shrinkage look purposeful instead of frustrating. When the curls spring upward, they still have a strong outline underneath, so the cut keeps its personality. That’s the difference between a style that looks edited and one that just looks short.
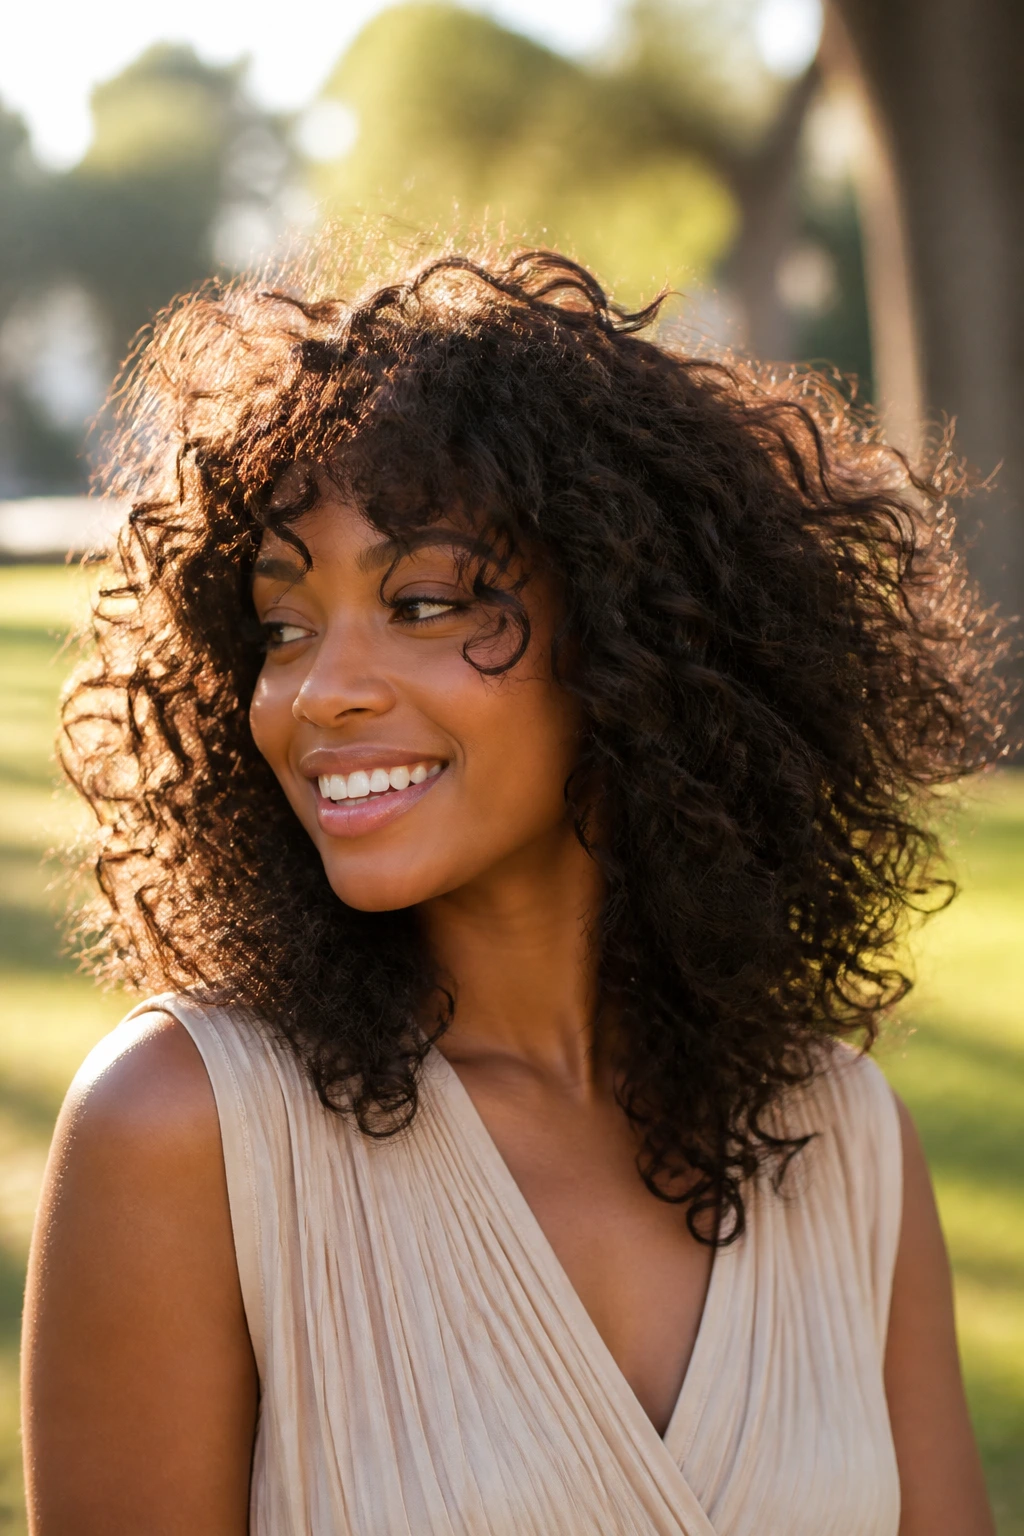
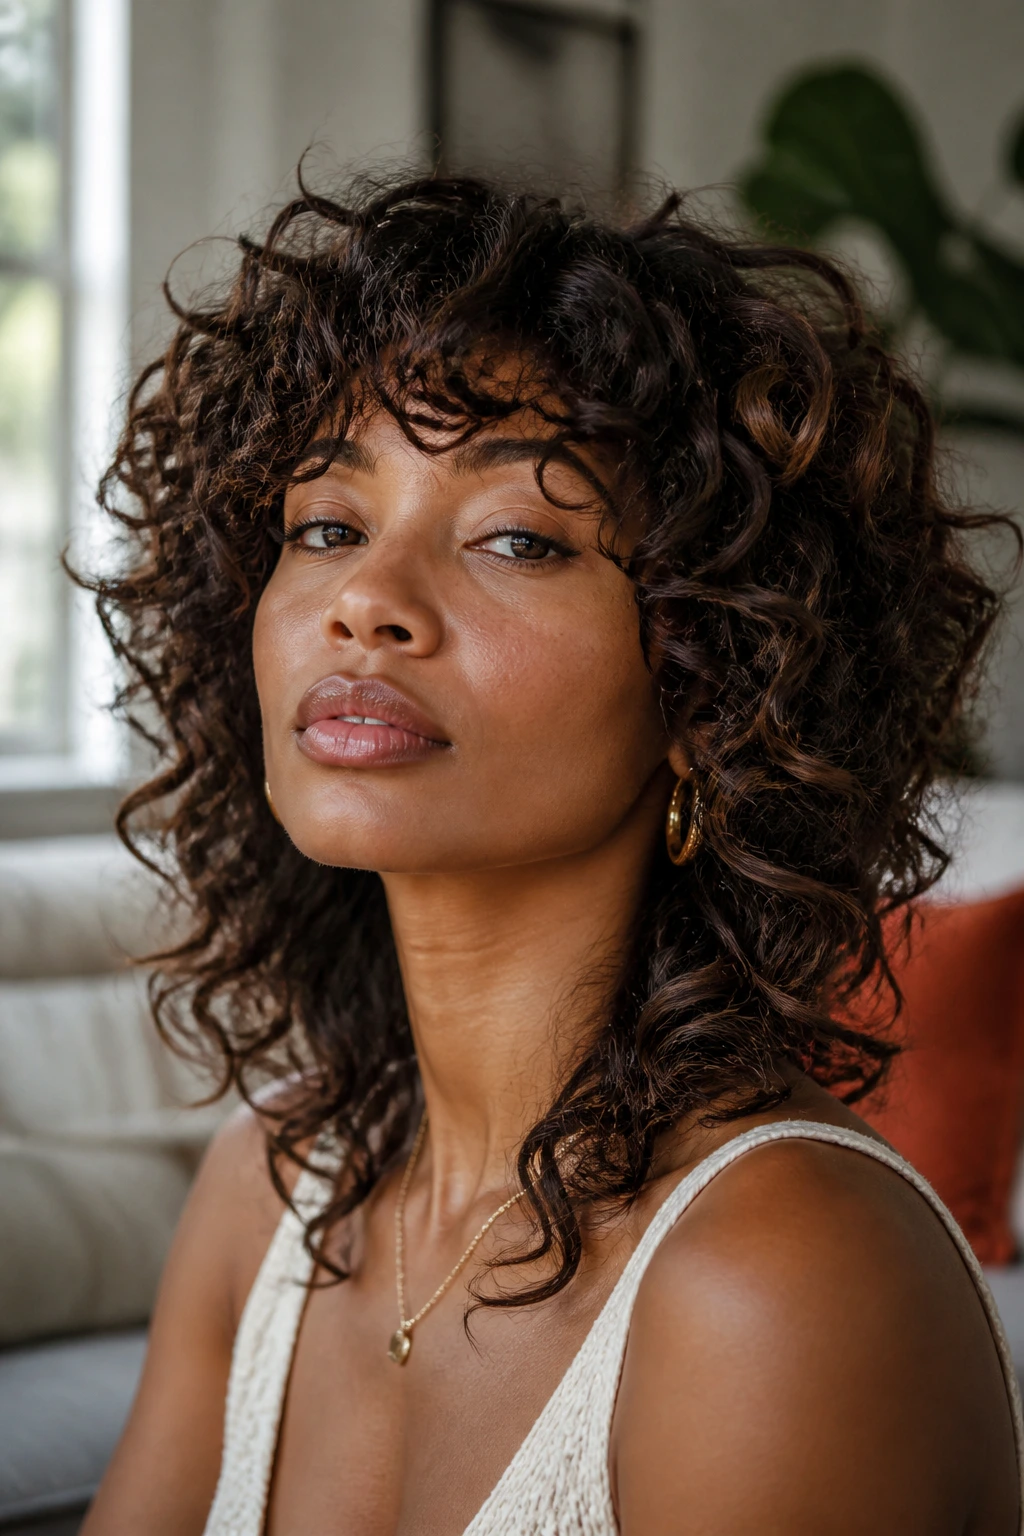
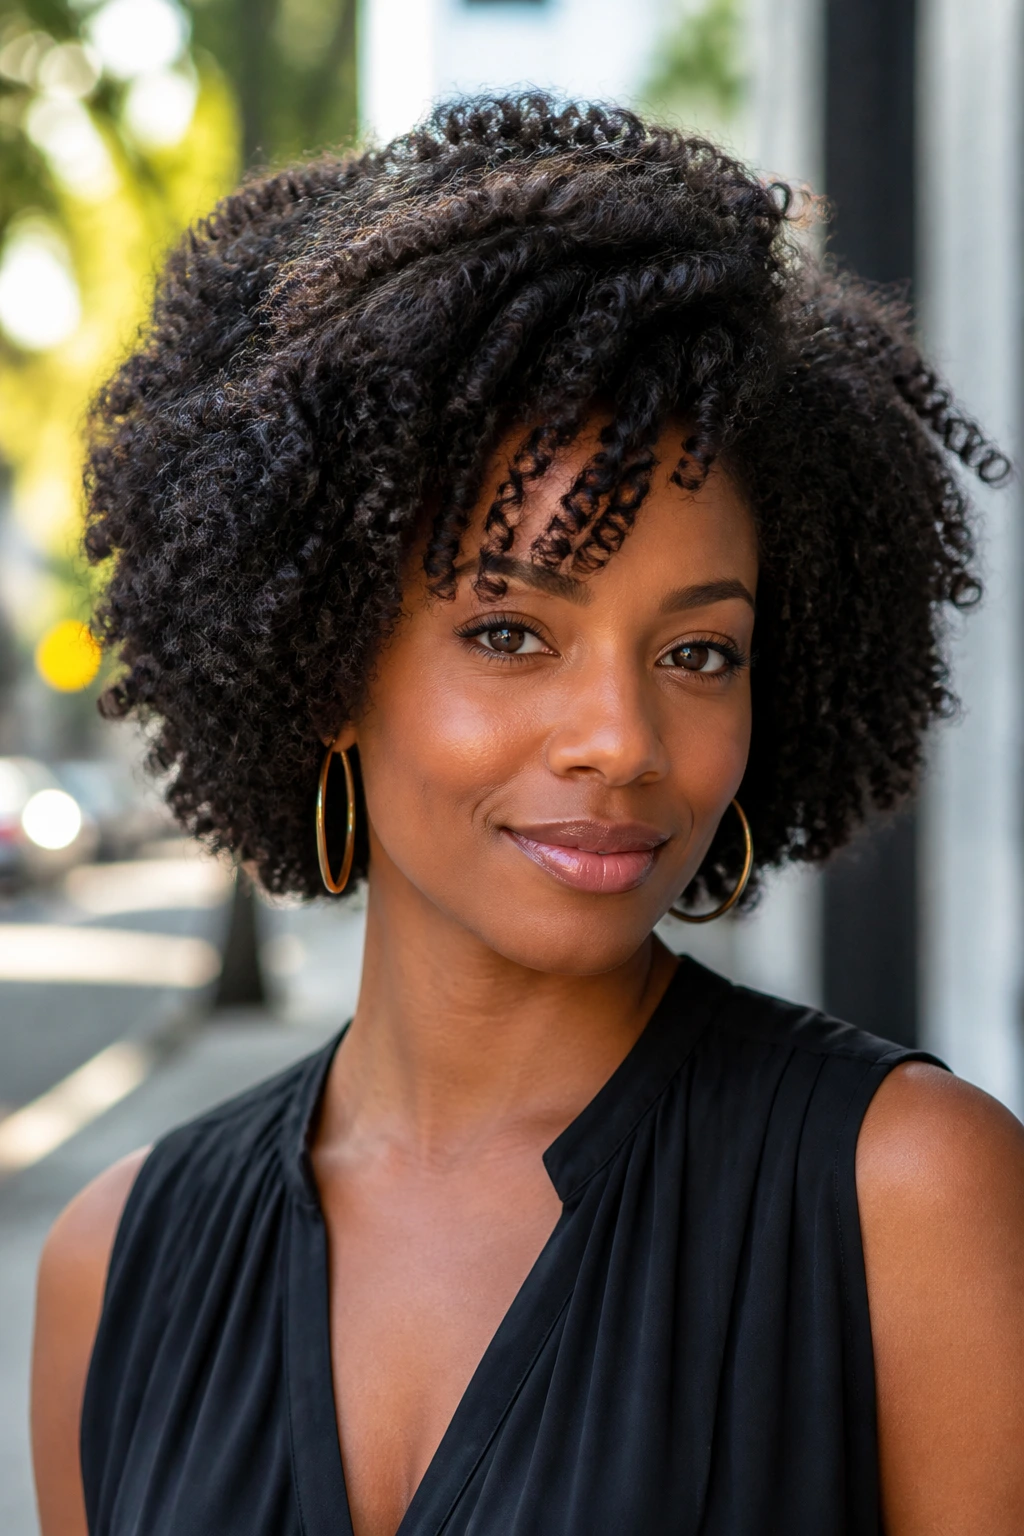
4. The Curly Shag With Real Attitude
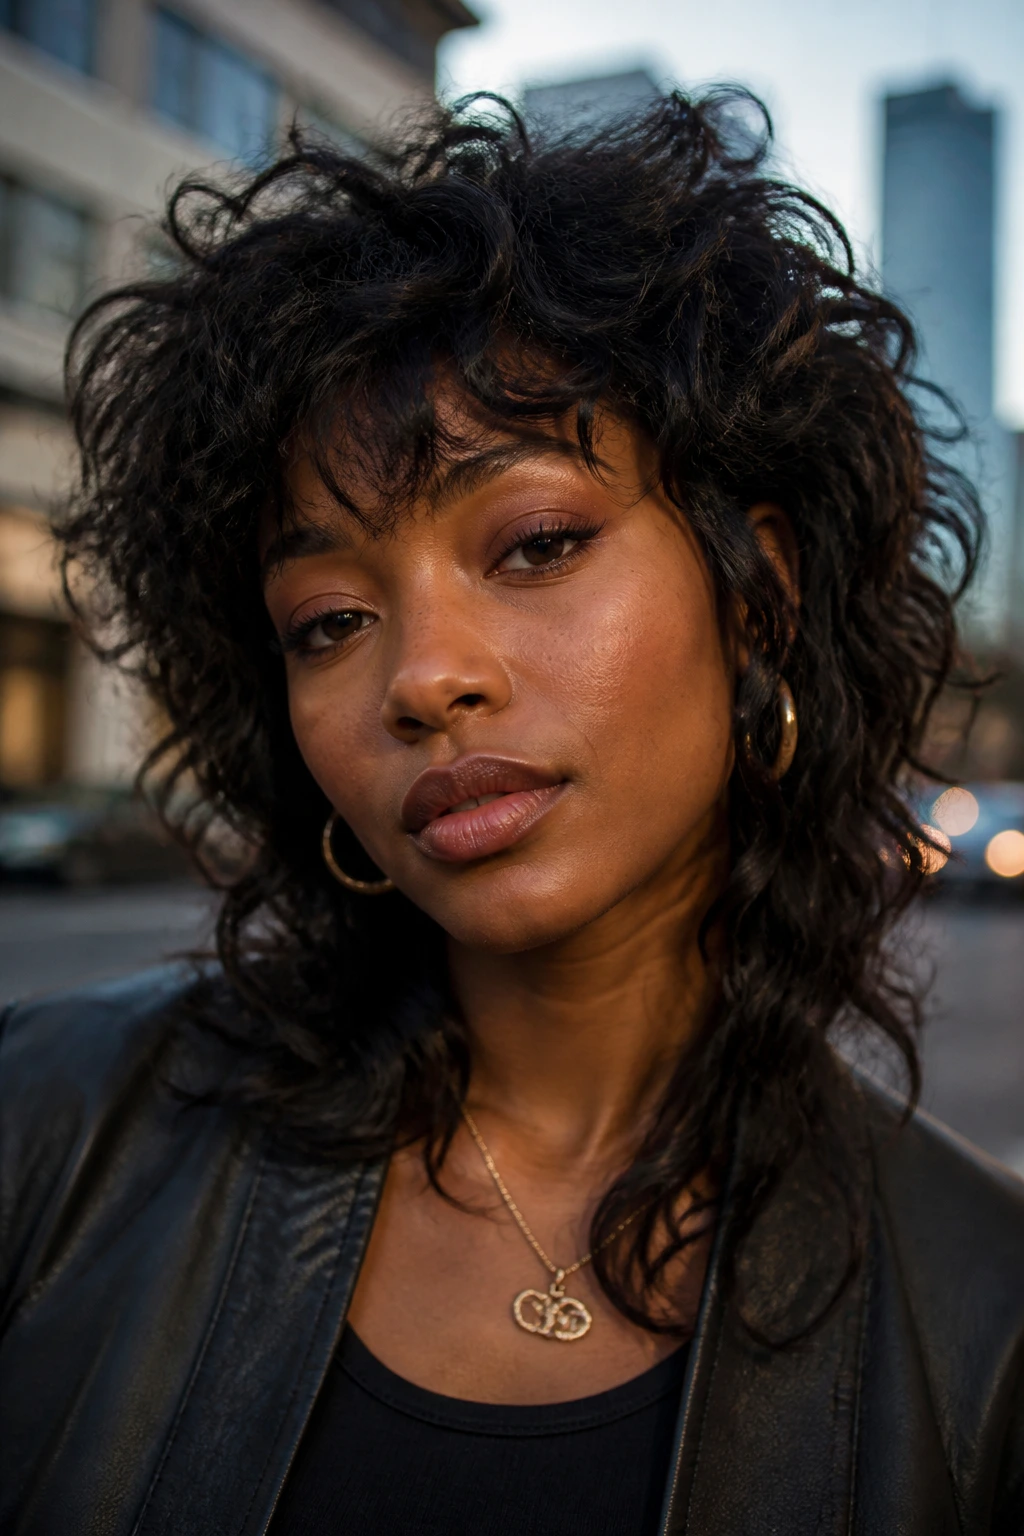
A curly shag is for the woman who wants movement, not discipline. The whole point is unevenness done on purpose: shorter layers around the crown, longer pieces around the sides, and enough piecey texture around the face to keep the style from feeling heavy. It’s a little messy in the best way.
The shag works because it gives coily and curly hair places to collapse and places to lift. Hair that naturally wants volume can start to feel less like a block and more like a shape with air in it. If you want face-framing pieces, keep them longer than you think. Short fringe on tight curls can jump up fast and sit higher than expected once dry.
Best when you want:
- A softer shape around the cheeks and jaw
- More lift at the crown
- Less weight in the back
- A style that still looks good when it gets a little lived-in
A shag does not need perfection. It needs structure. That’s why it ages well over a few days, especially if you refresh the front with a little water and leave-in instead of trying to rebuild every curl from scratch.
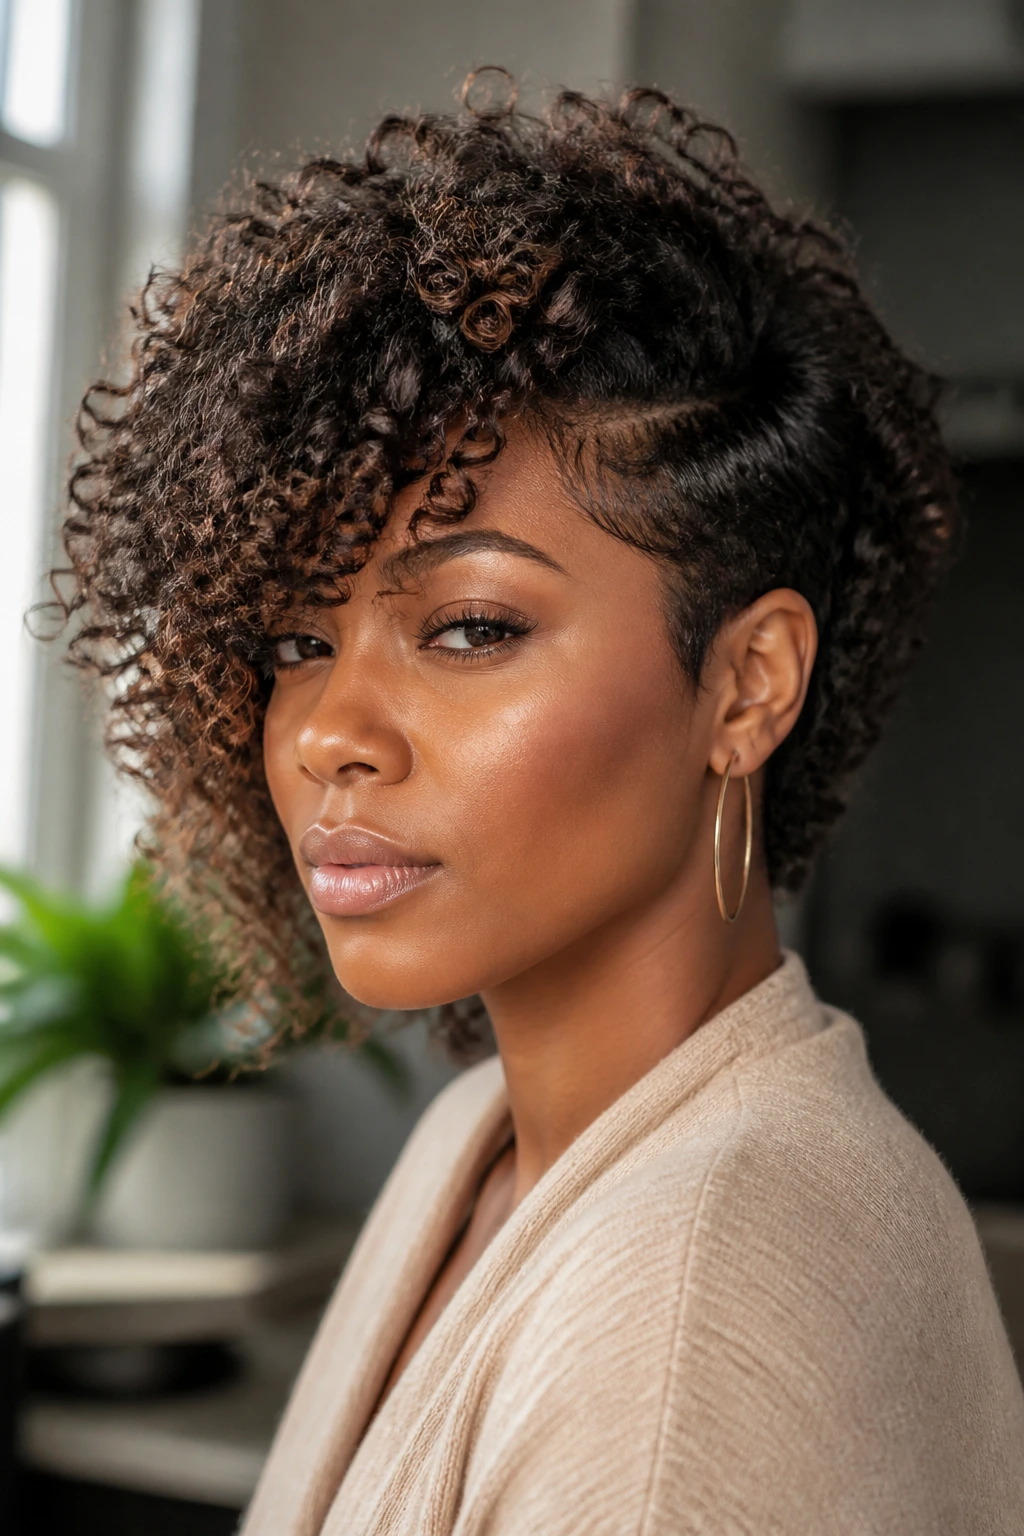
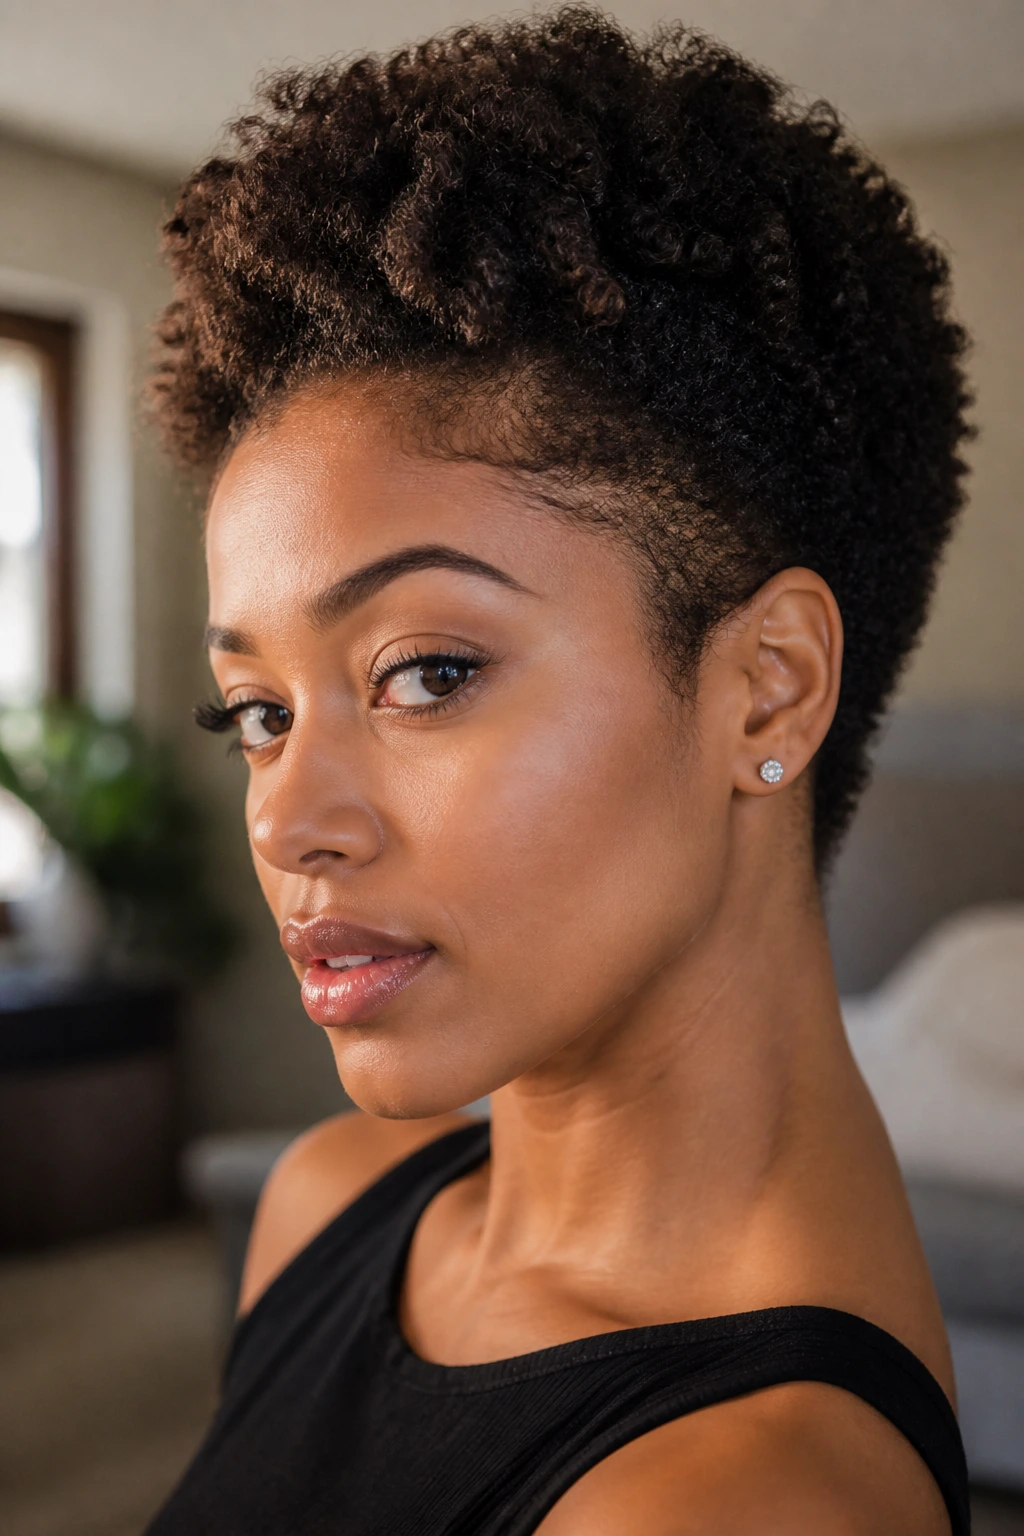
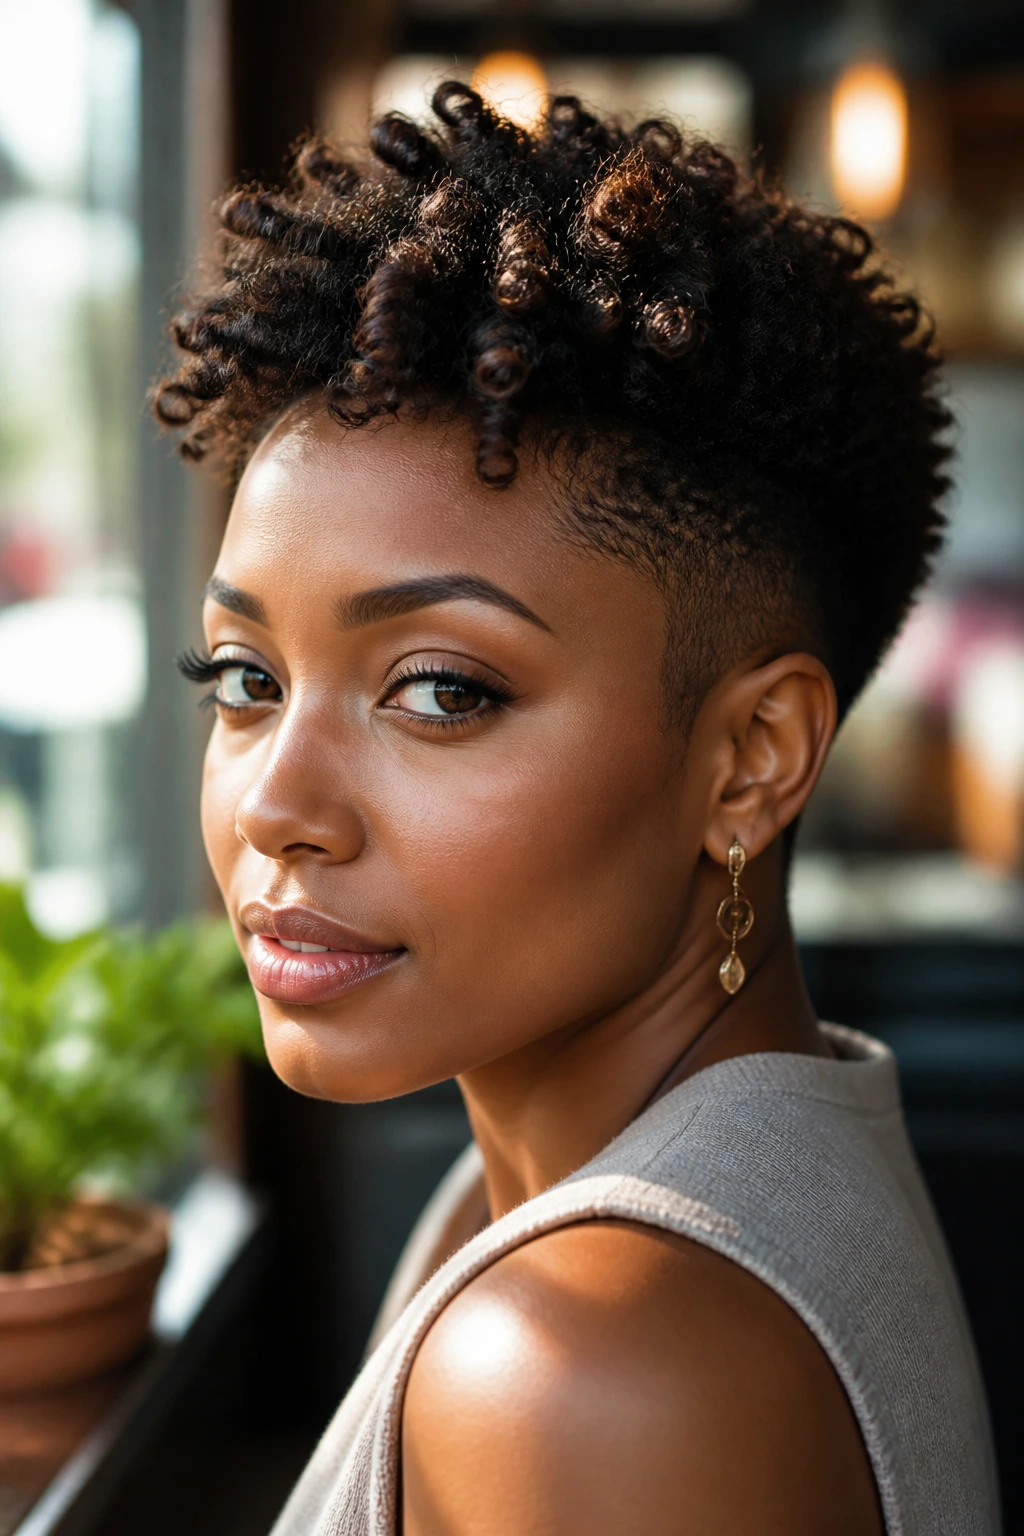
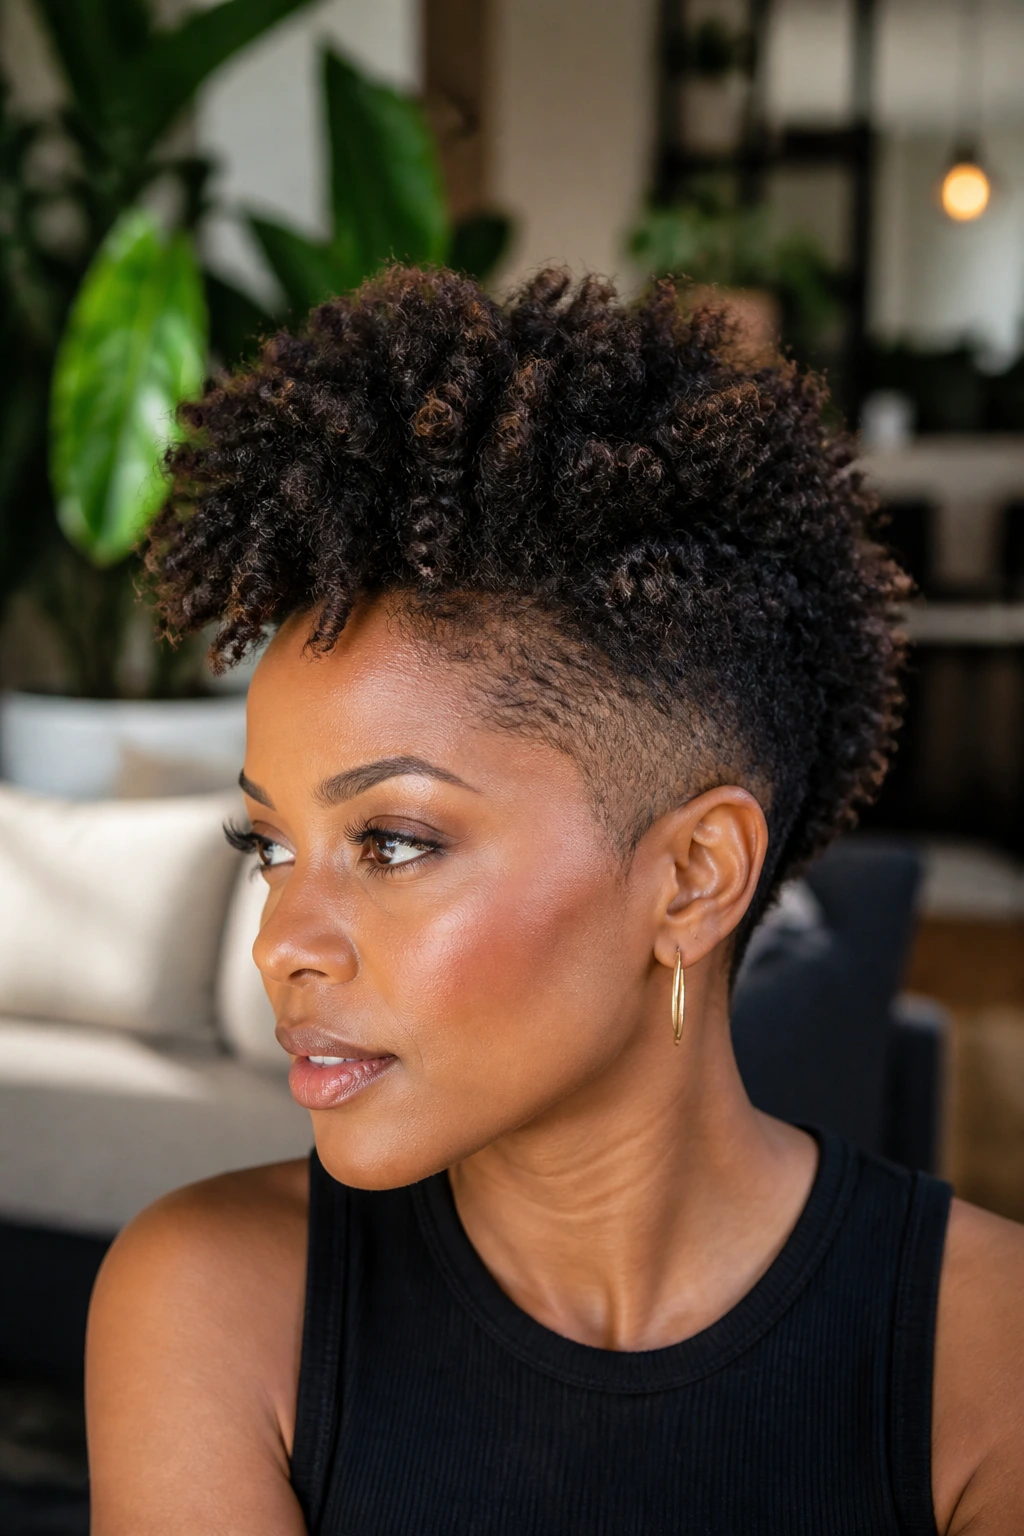
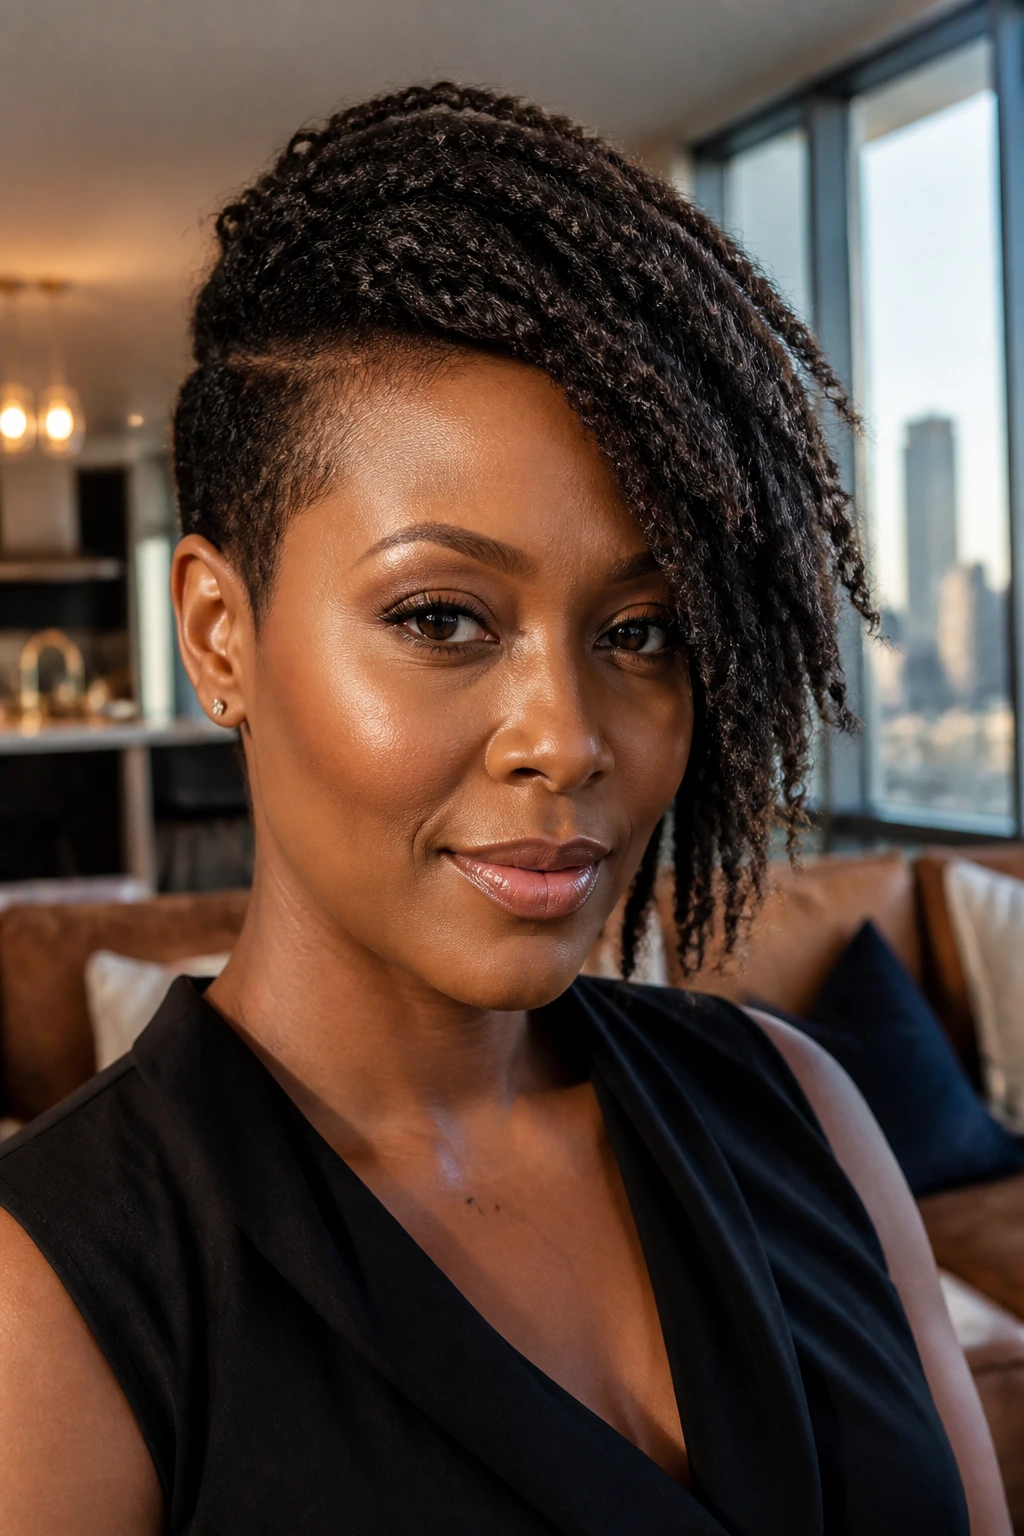
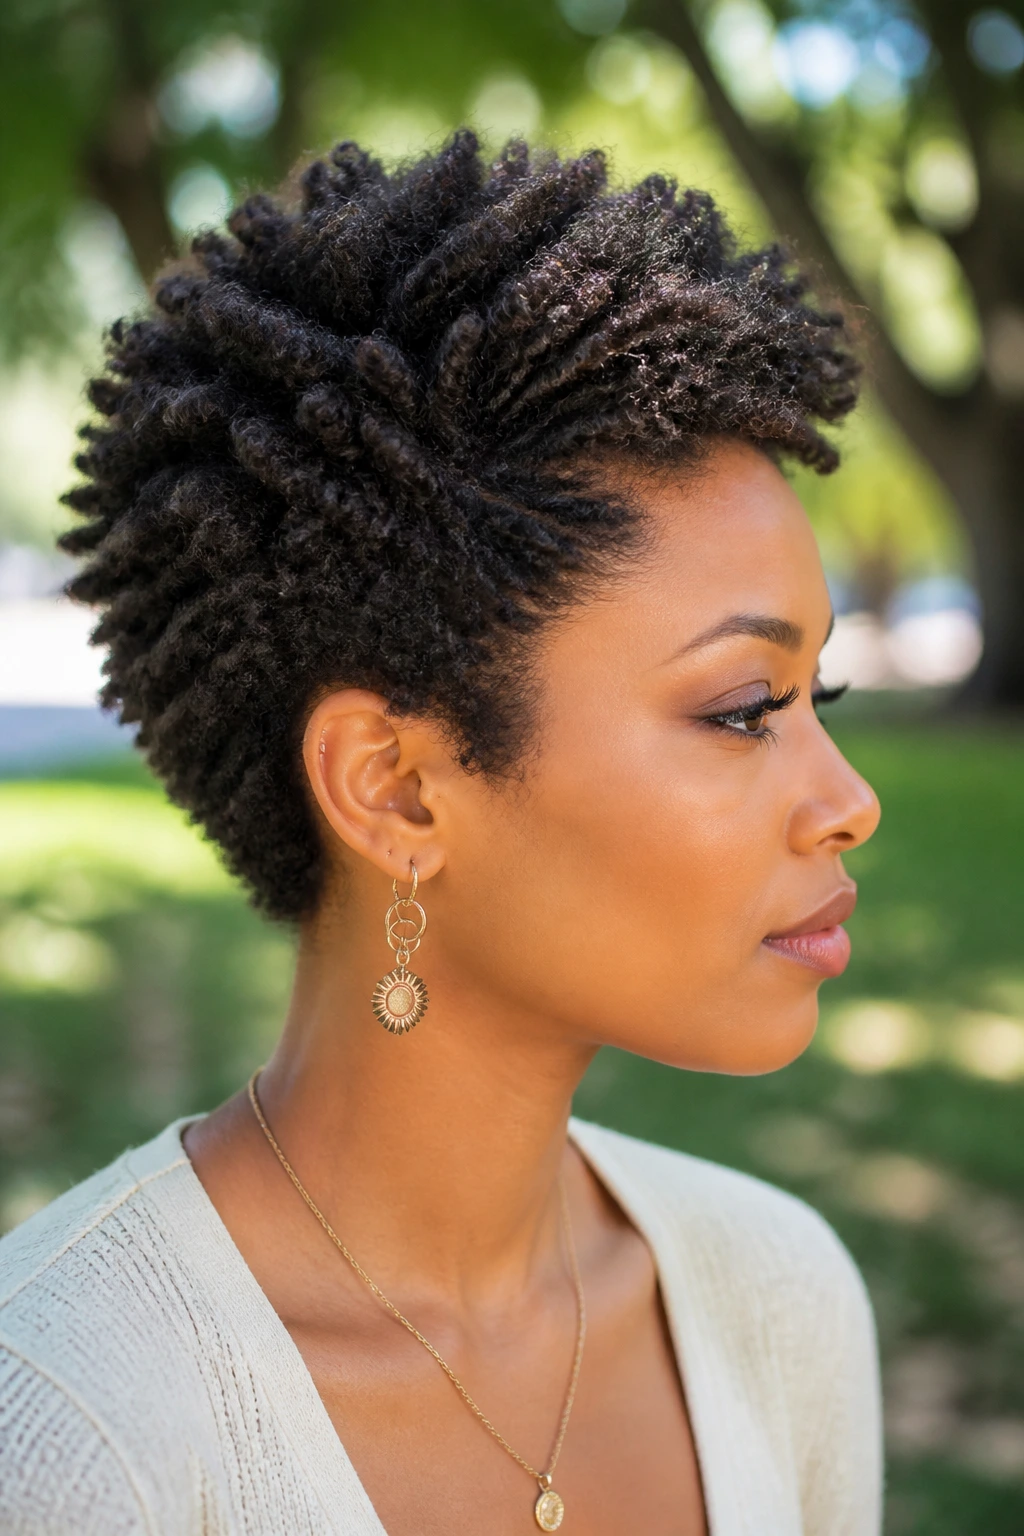
5. The Tapered Cut With Lifted Crown
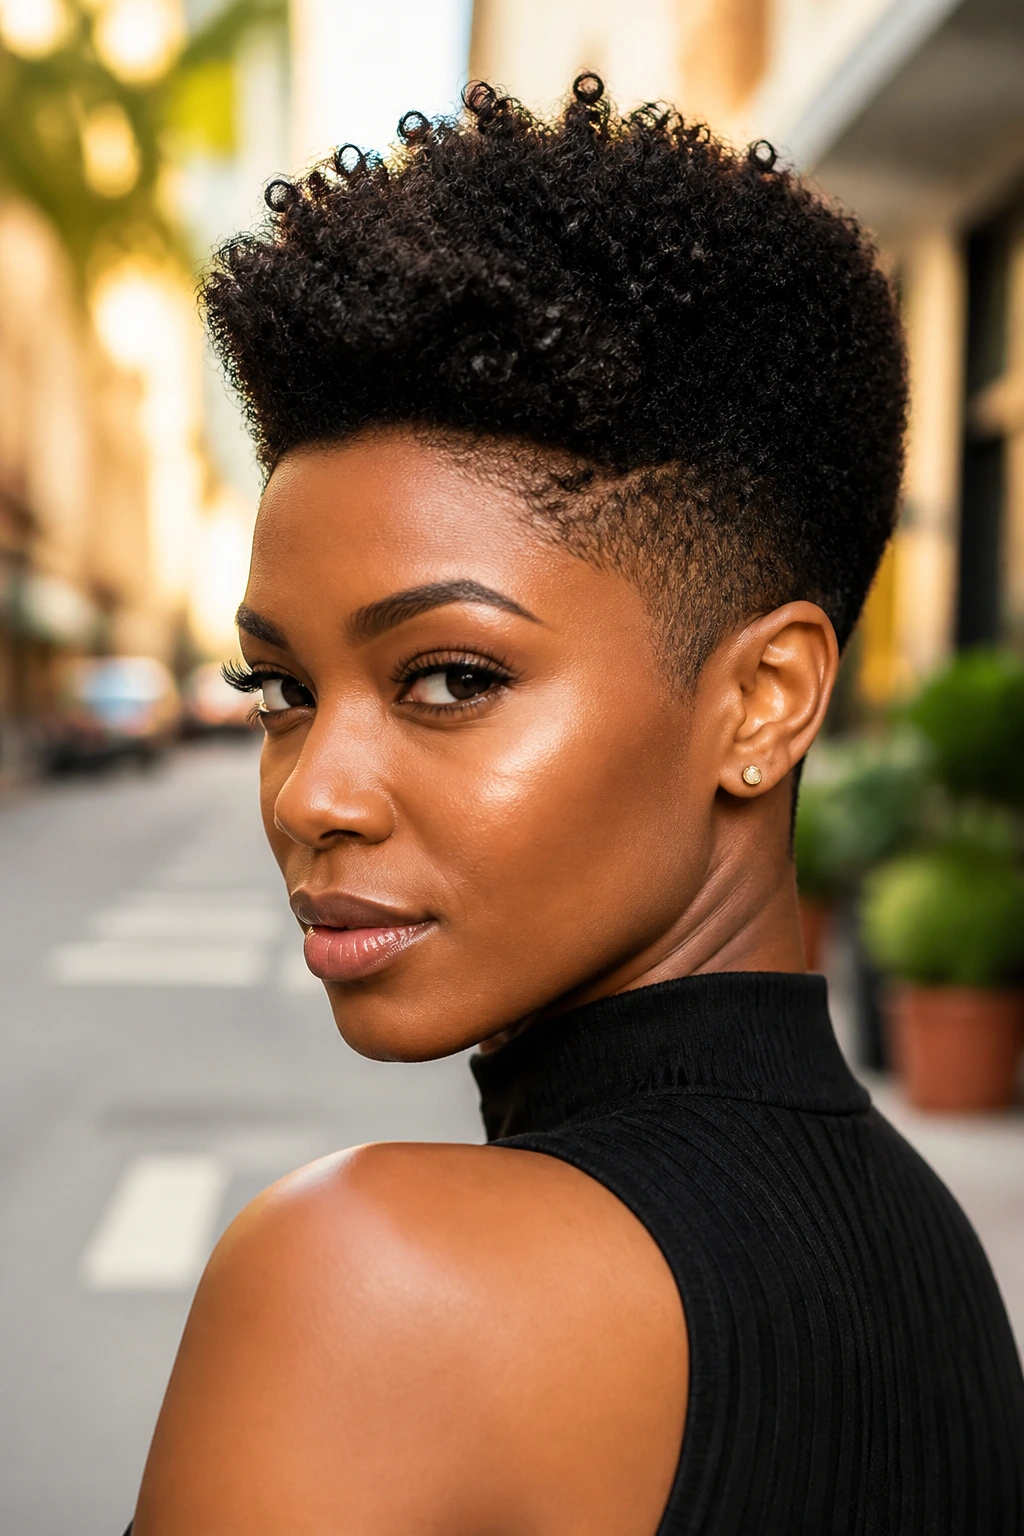
A tapered cut is one of the sharpest ways to let natural texture do the talking. The sides and nape stay short, while the top keeps enough length to show off curls, coils, or finger-coiled definition. Add layered crown pieces, and the whole style rises instead of sitting flat like a cap.
This shape is especially useful if you want low daily manipulation. You can finger-style the top, use a small amount of curl cream, and let the cut do most of the work. The shorter sides also make the face look more open, which is why this cut can feel both clean and bold at the same time.
The biggest mistake with a tapered cut is taking the sides too close before you know how much lift you actually want. Start a little longer if you’re unsure. Hair can always be trimmed shorter. It cannot grow back for the weekend.
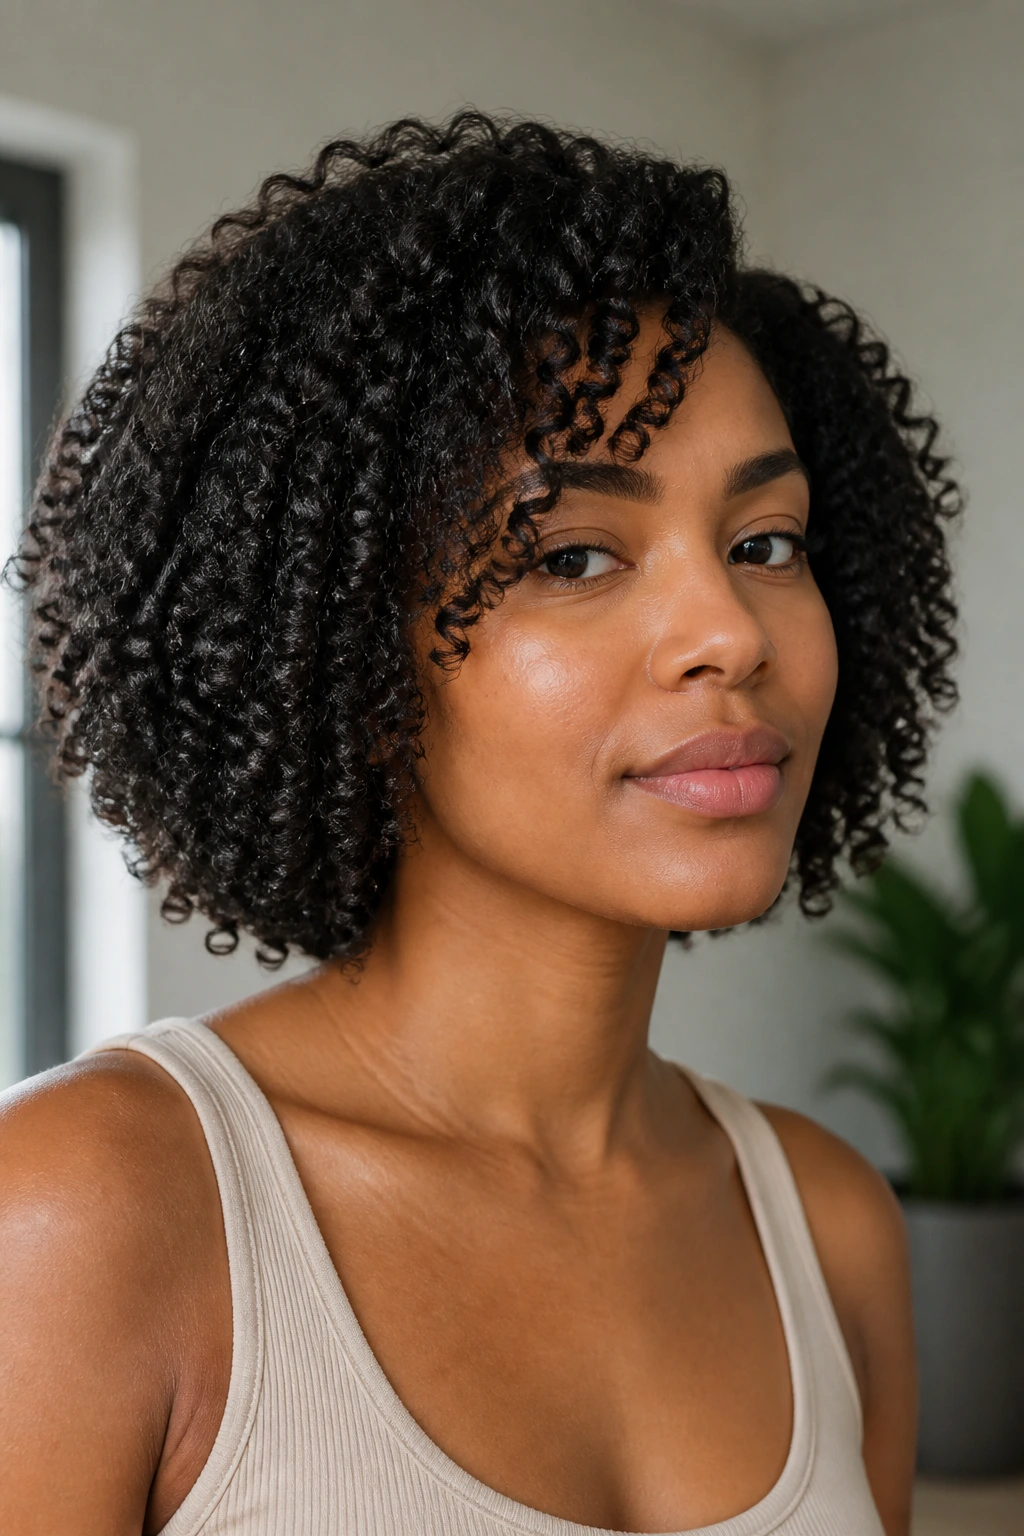
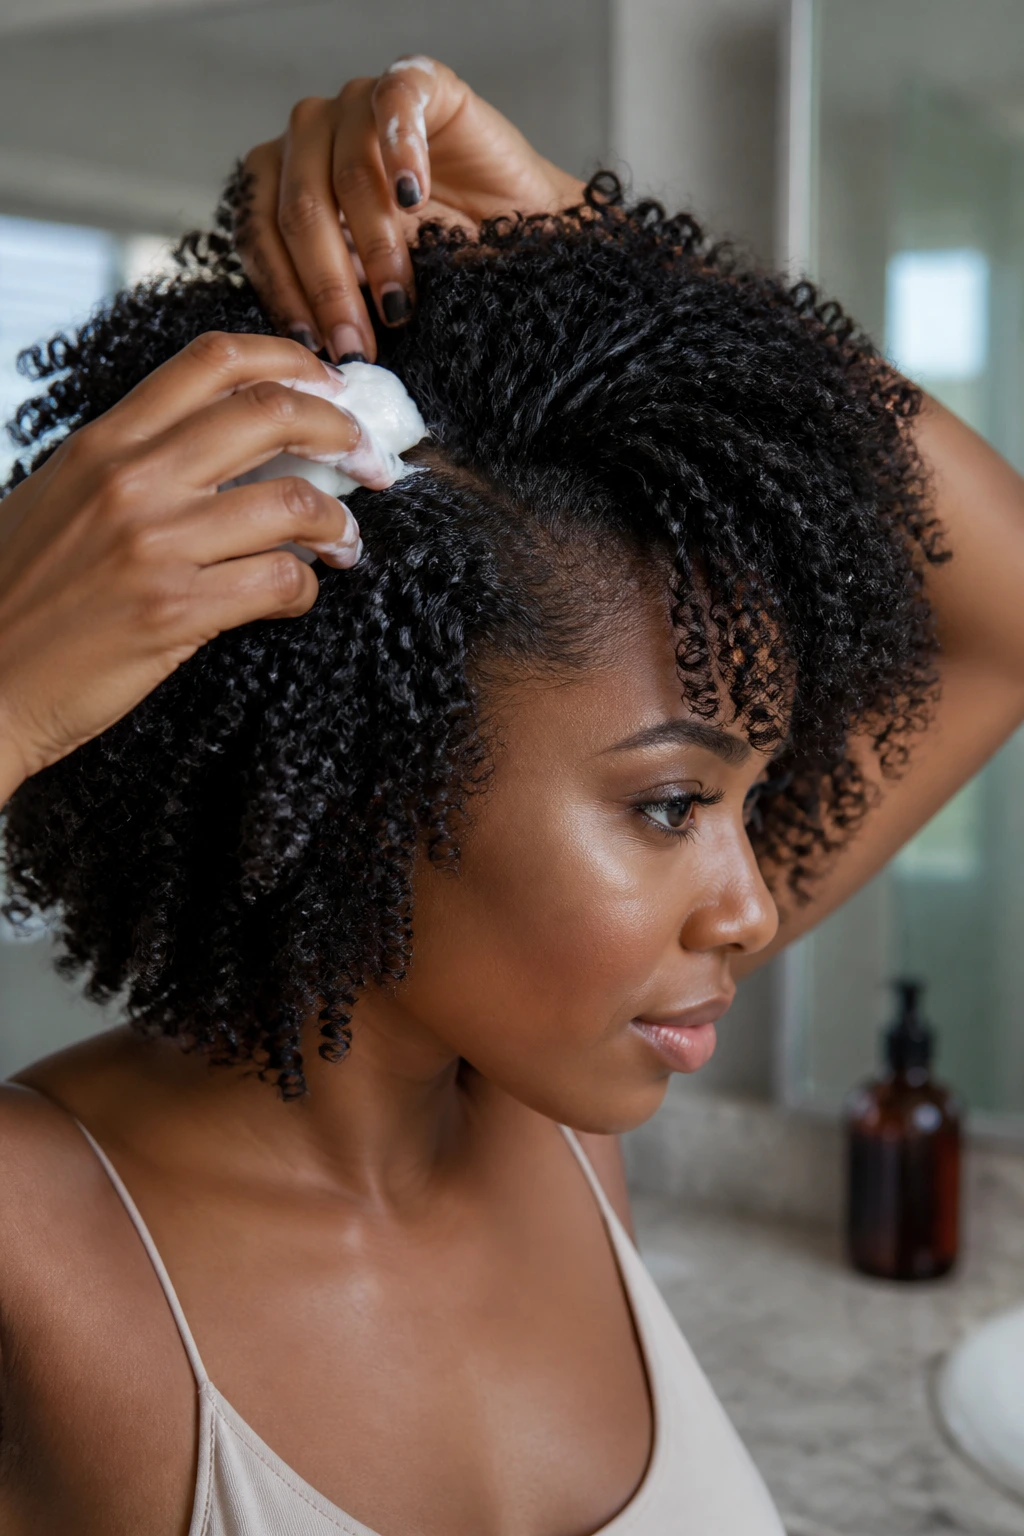
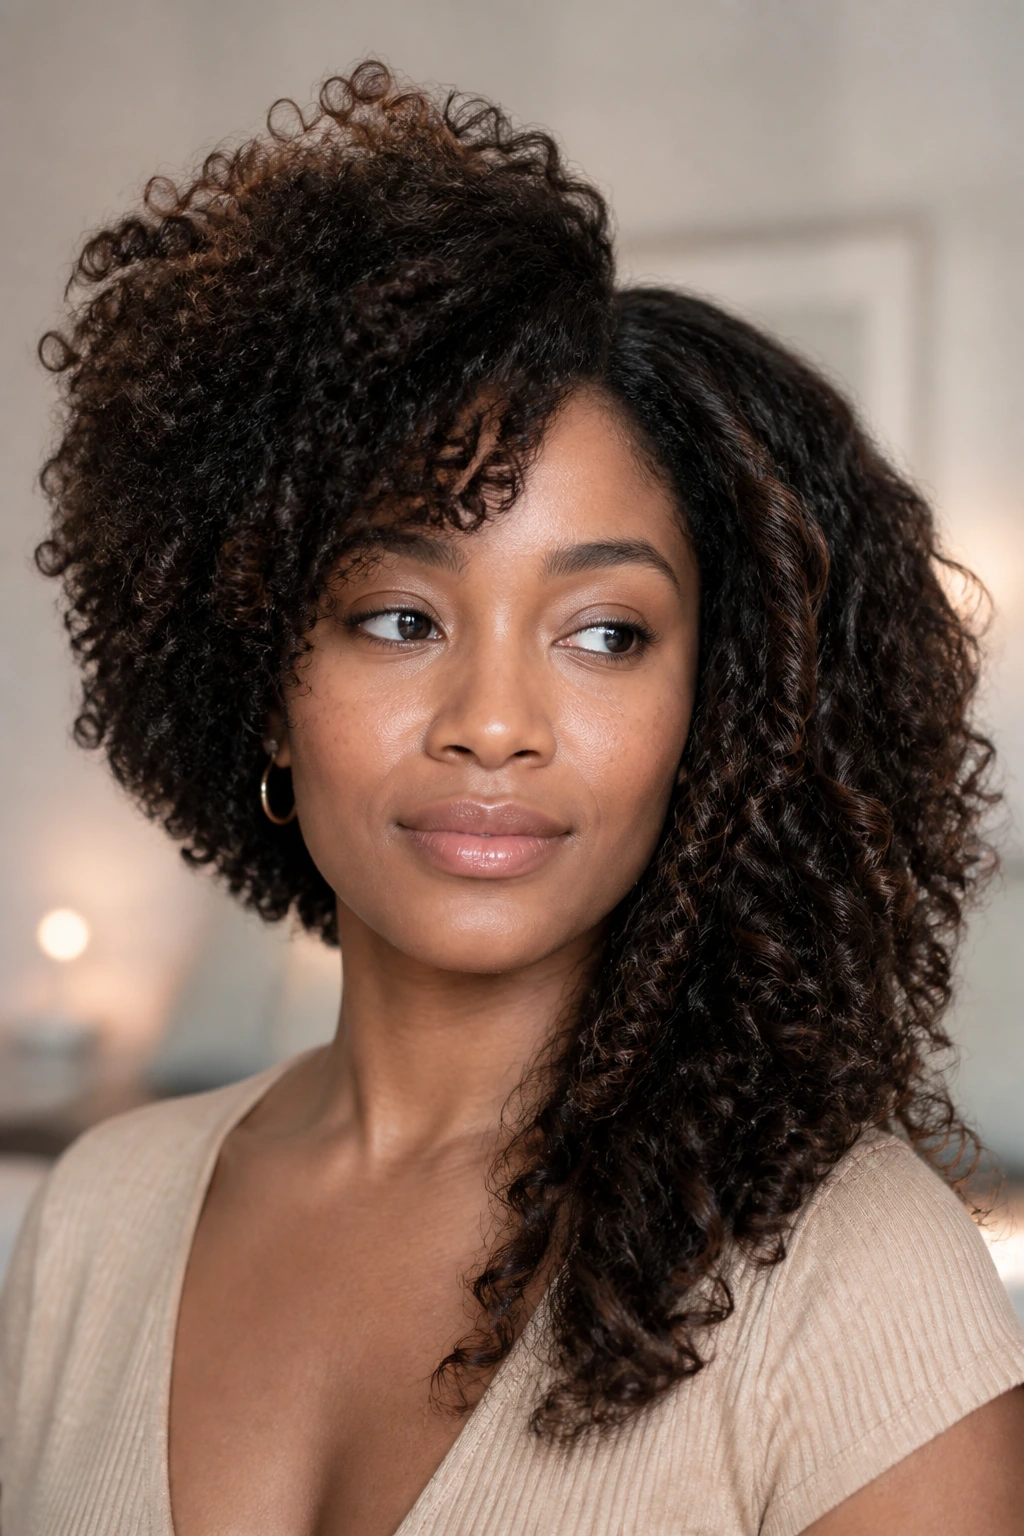
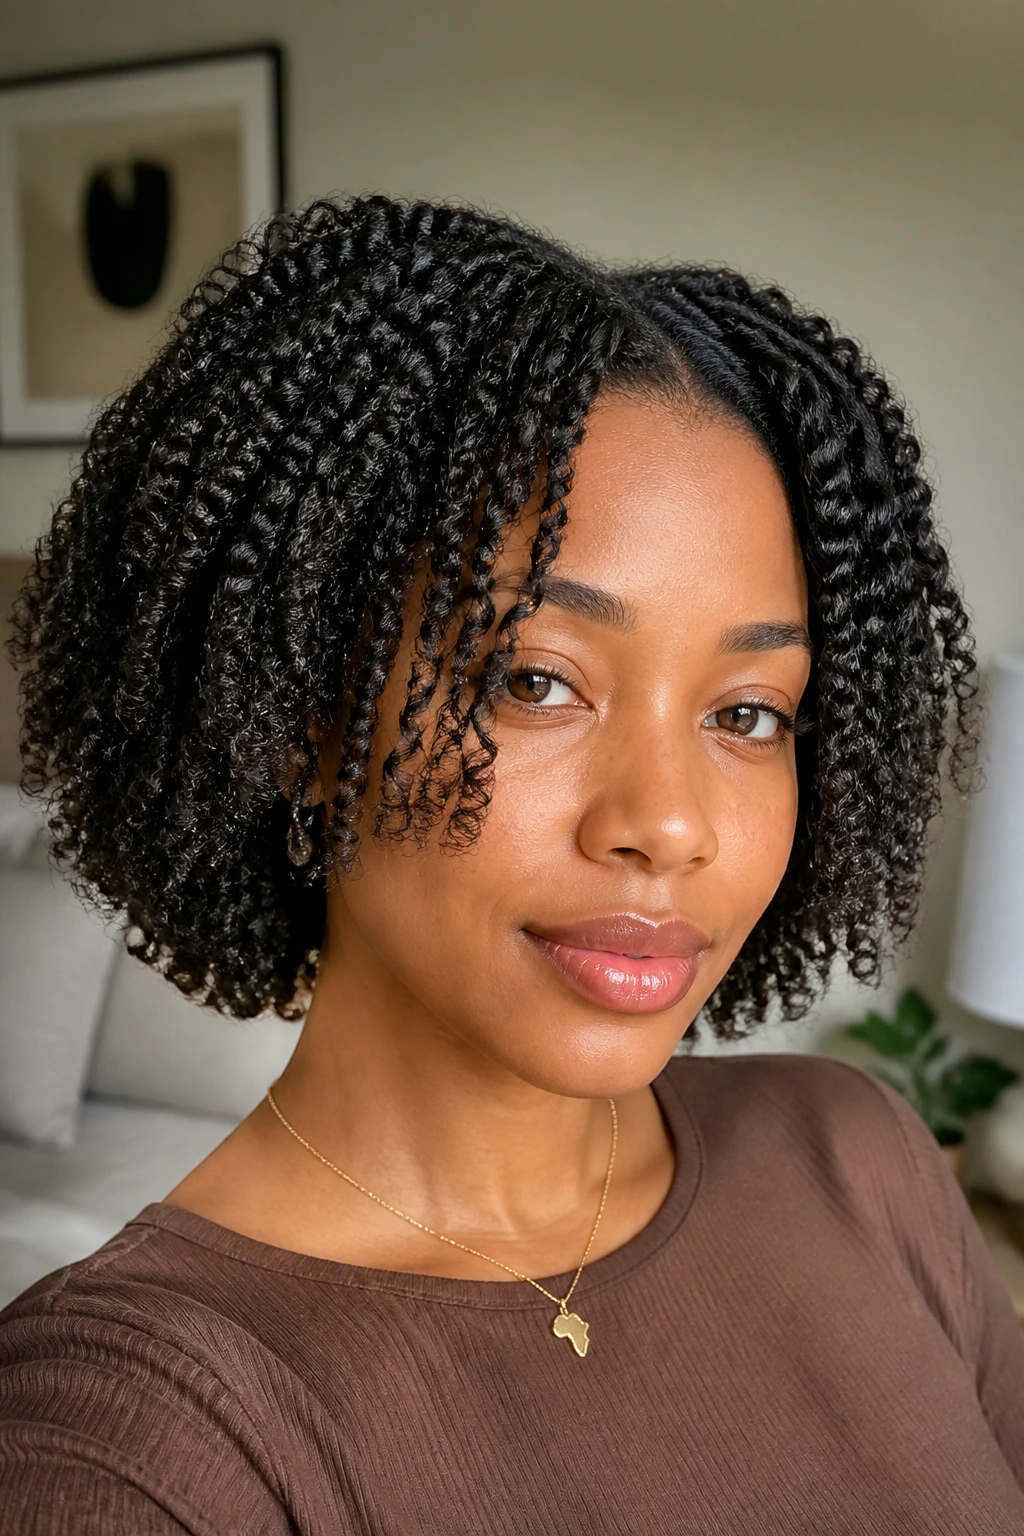
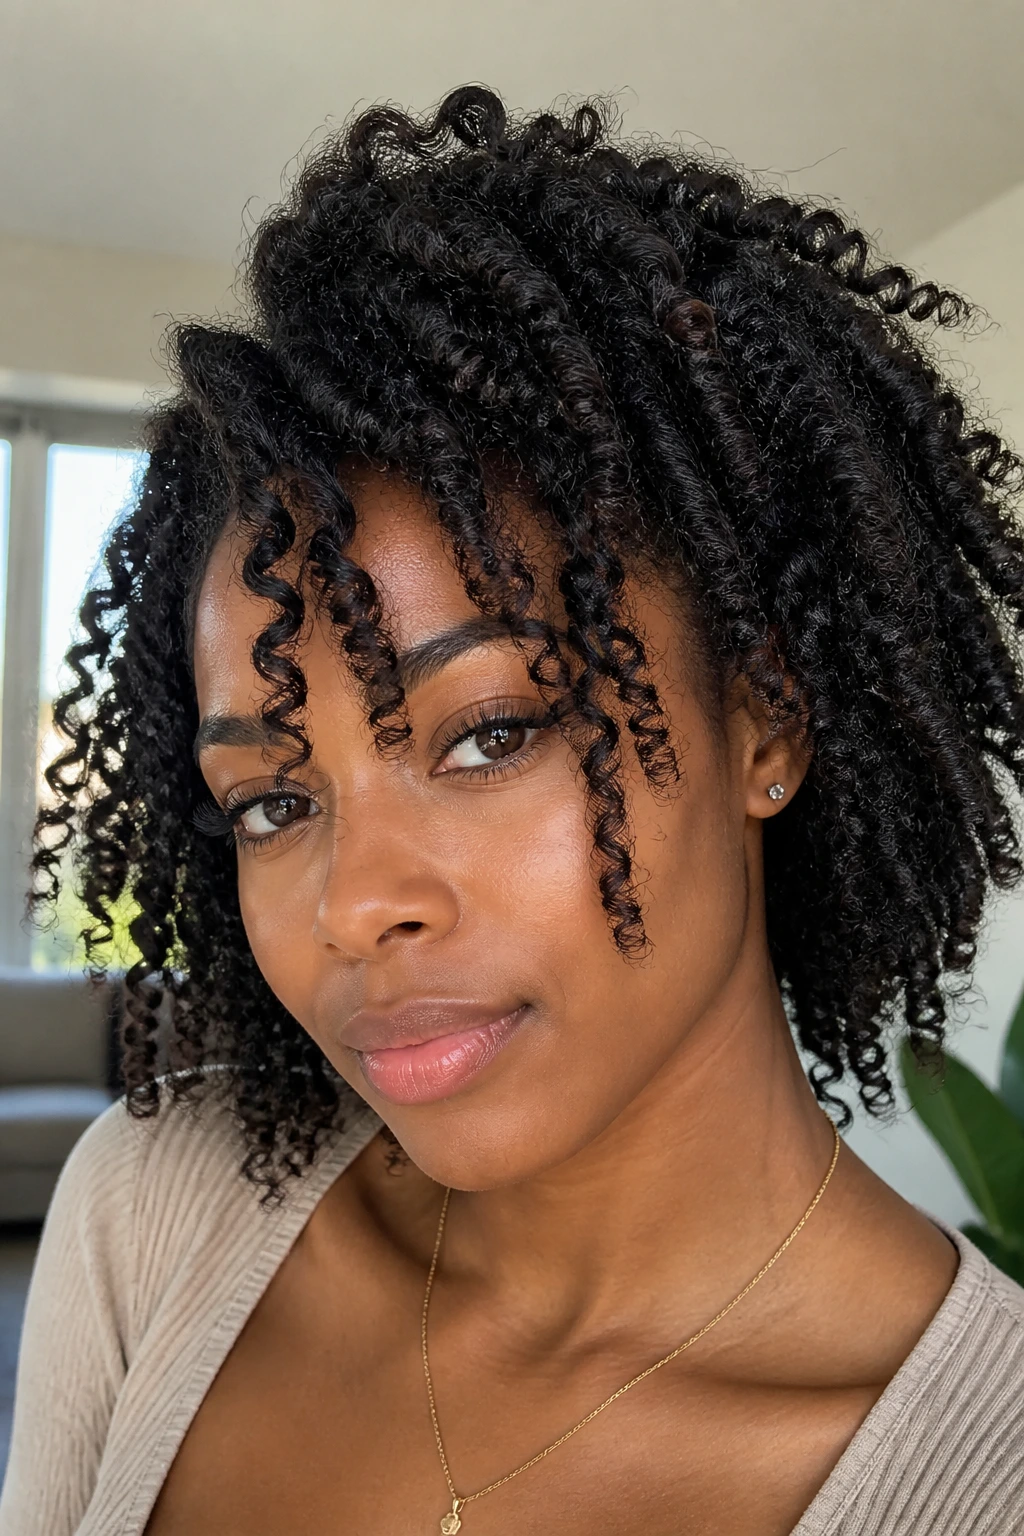
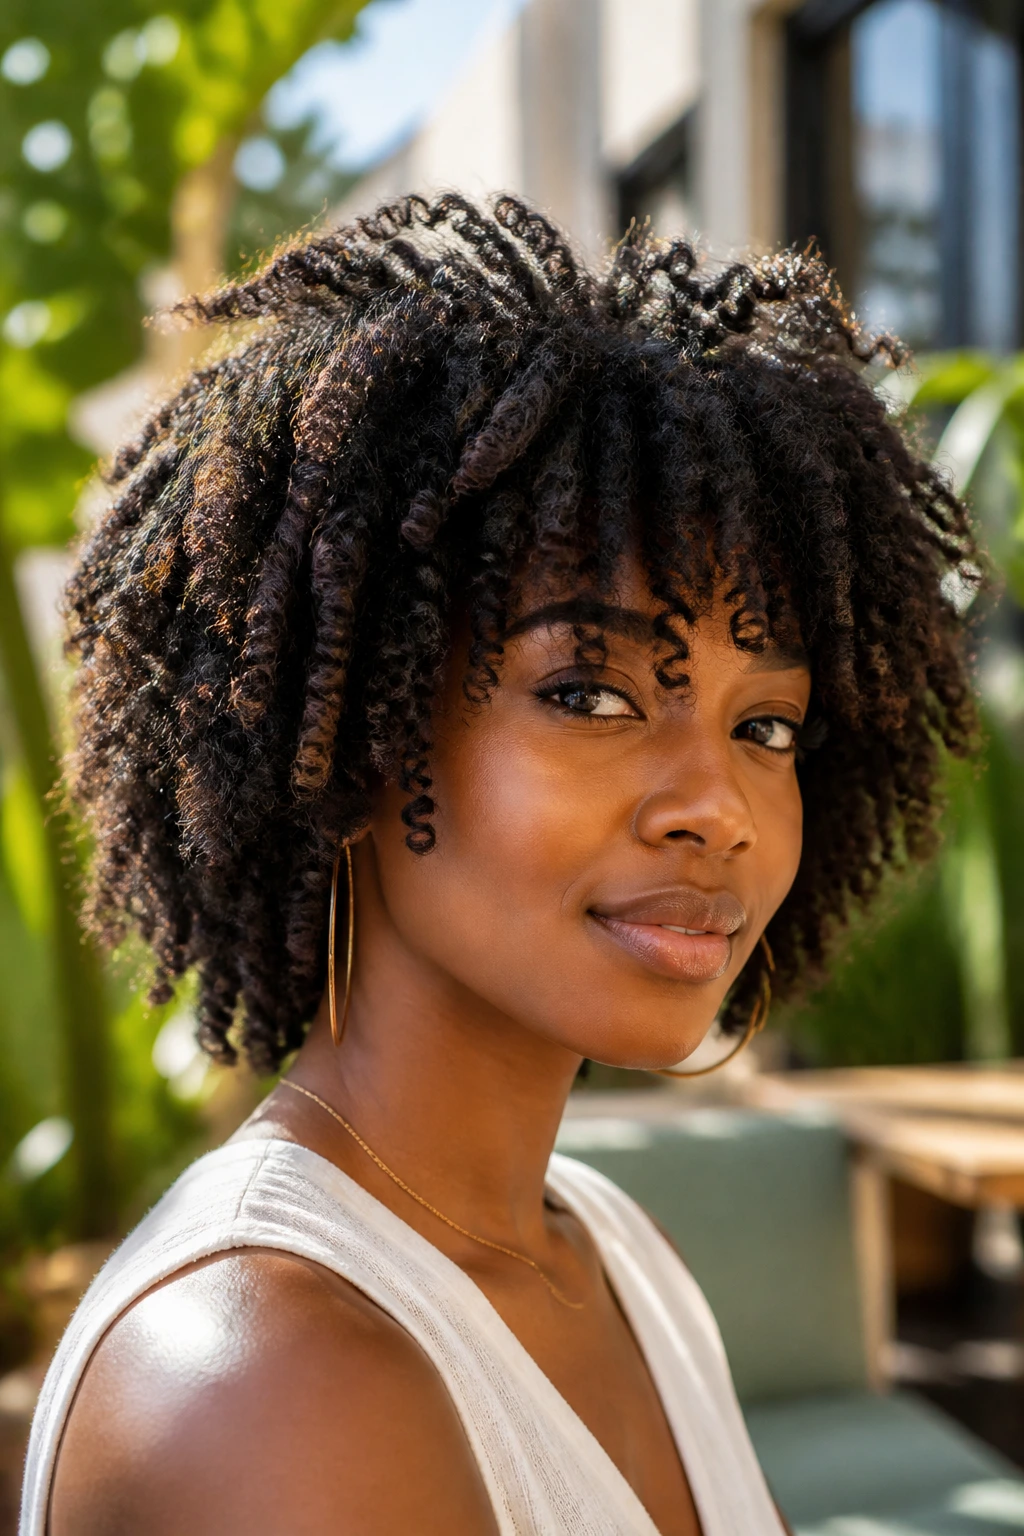
6. The Twist-Out That Frames the Face
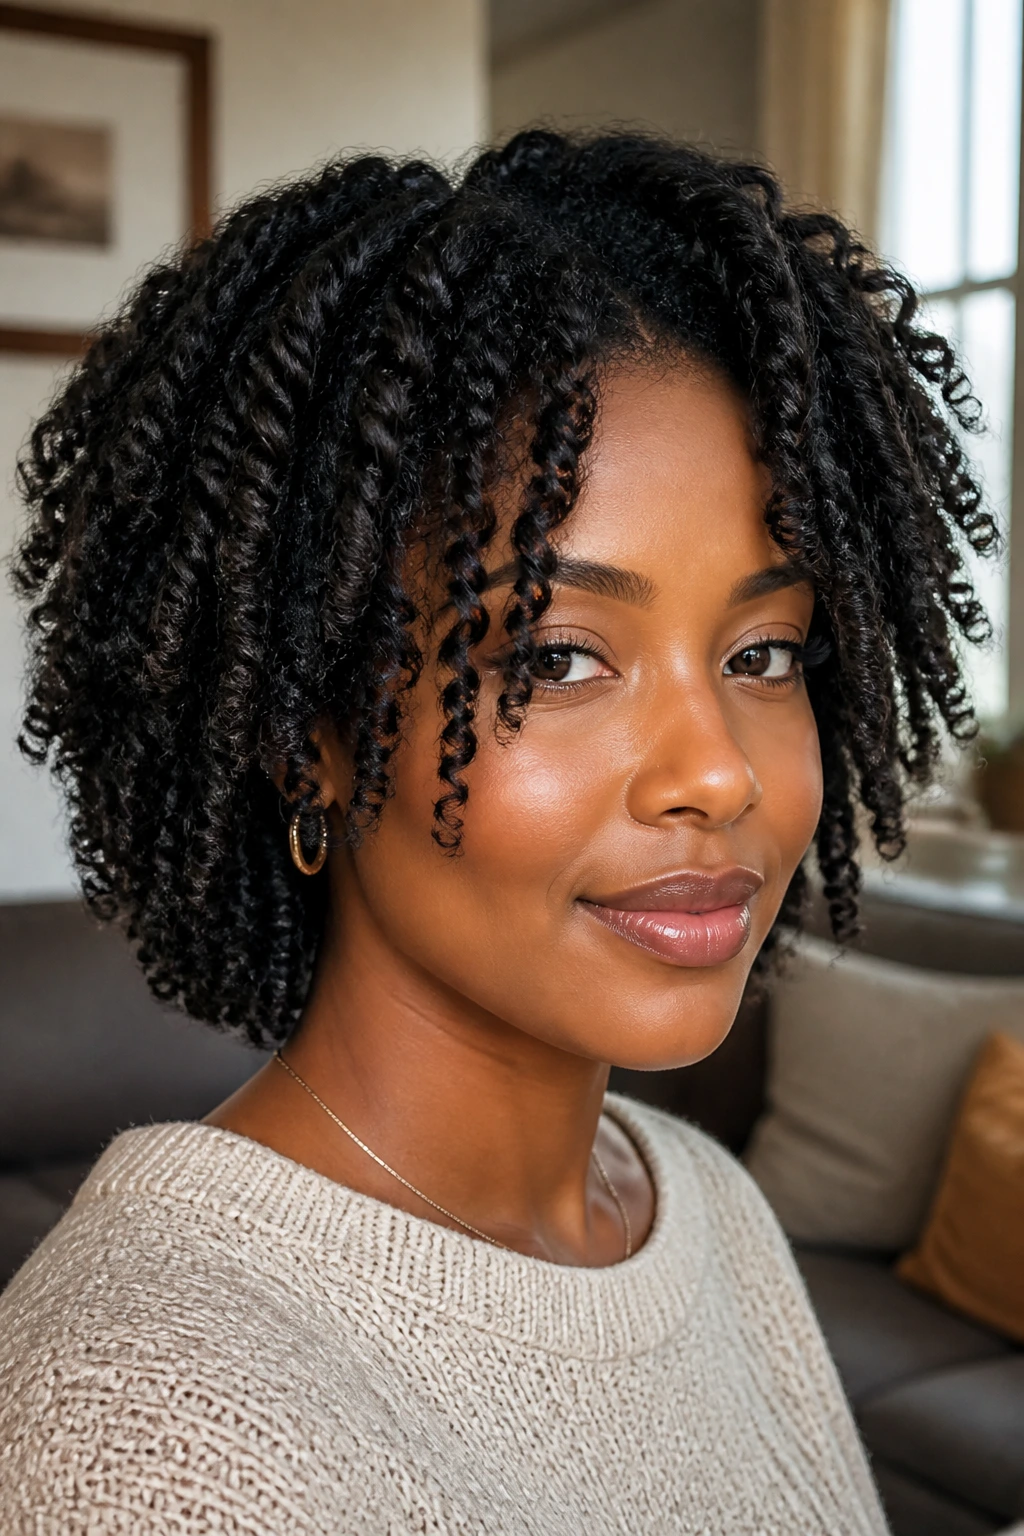
A layered twist-out has a kind of softness you can’t fake with product alone. The twists create a stretched base, and the layers keep the final release from looking like one flat sheet. When the front pieces are cut to land around the cheekbones, the whole style starts to frame the face instead of just sitting around it.
This style works best when the twists are set with enough consistency to clump well, but not so much product that they dry stiff. A creamy leave-in, a small amount of setting foam, and a light gel at the ends usually do the job. Too much oil on the first day will make the layers separate in a greasy way, not a pretty way.
If your hair is shoulder length or longer, a twist-out with face-framing layers can give you movement without heat. It’s also one of the easier ways to test whether you’re ready for a real layered cut, because you can see how the shape falls before committing to scissors.
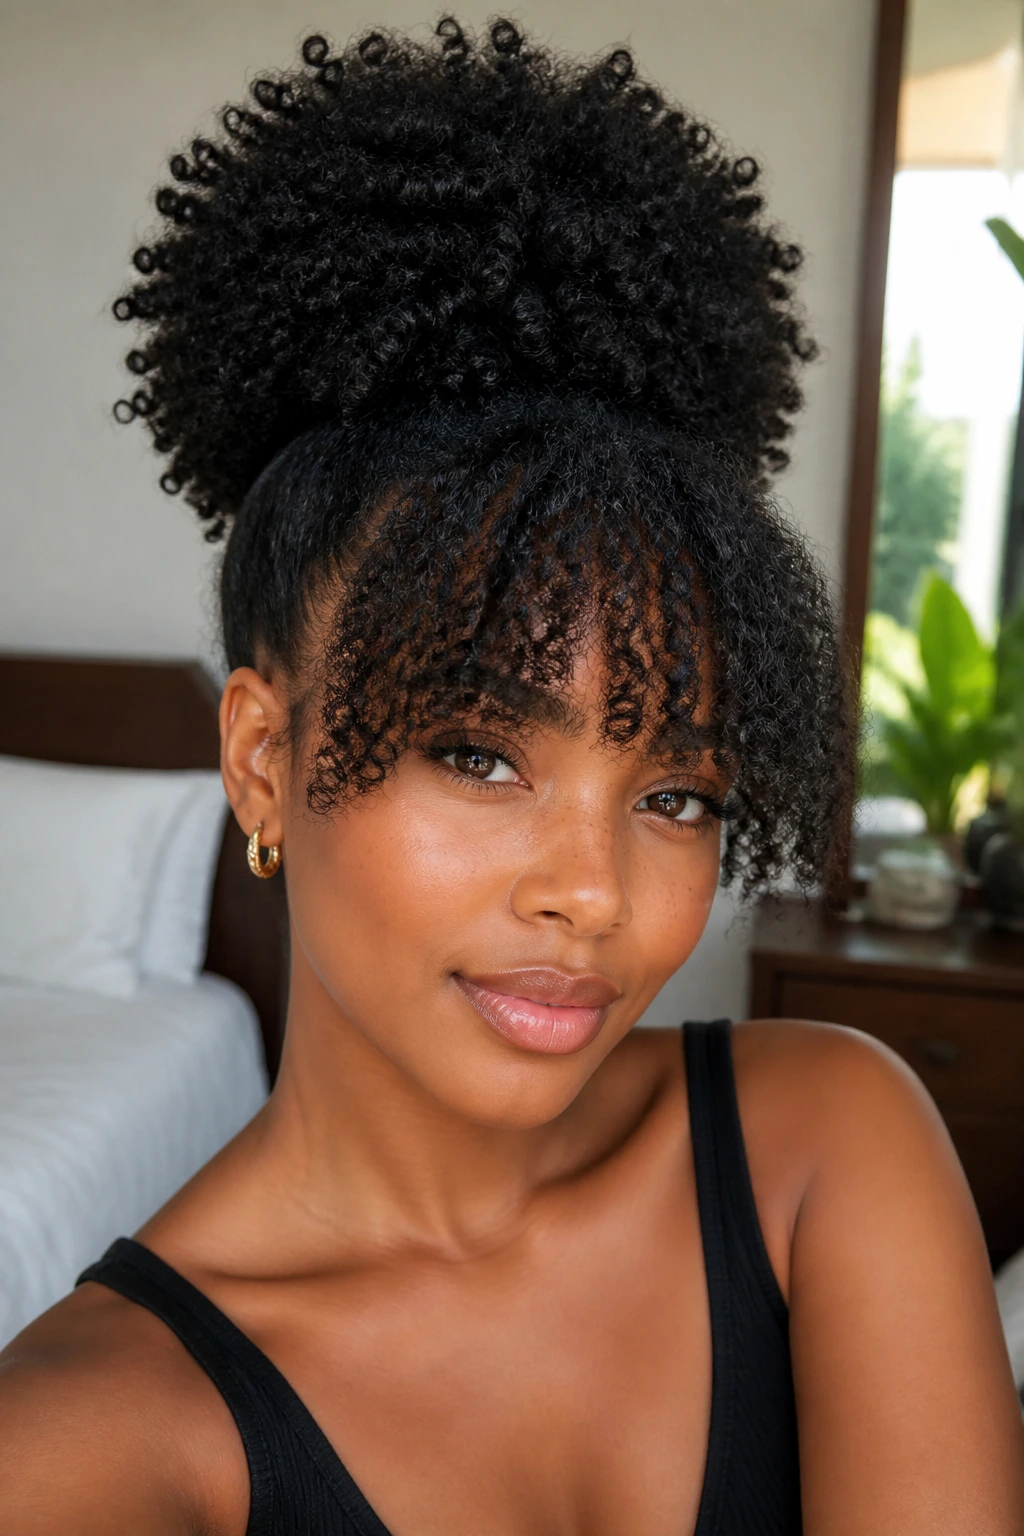
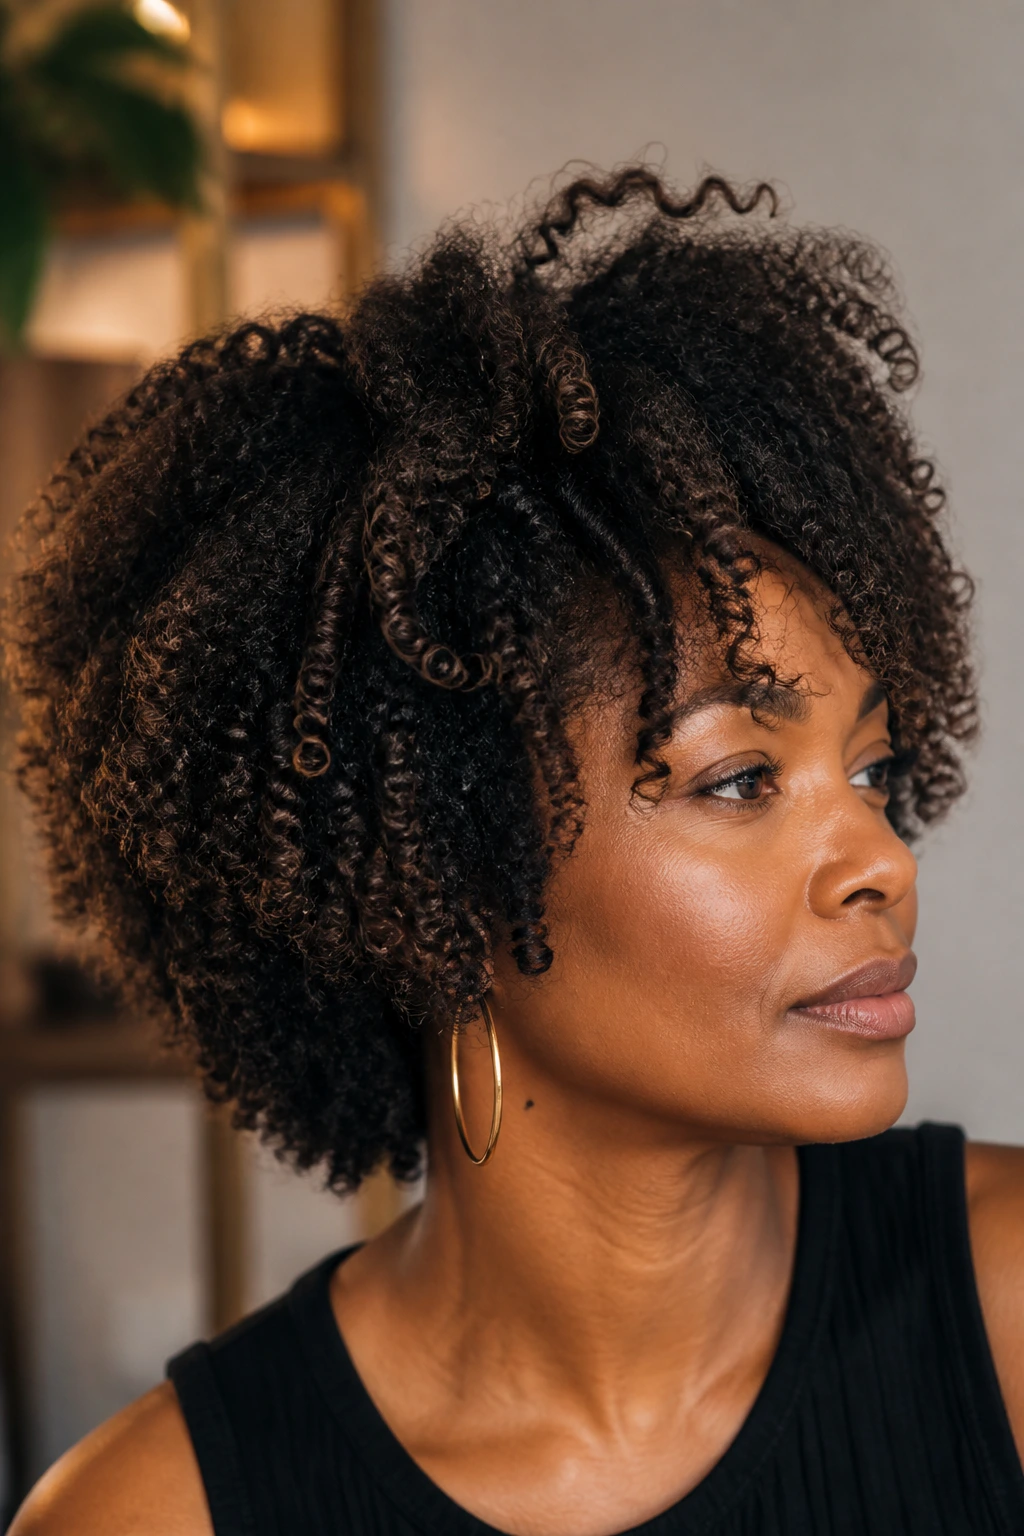
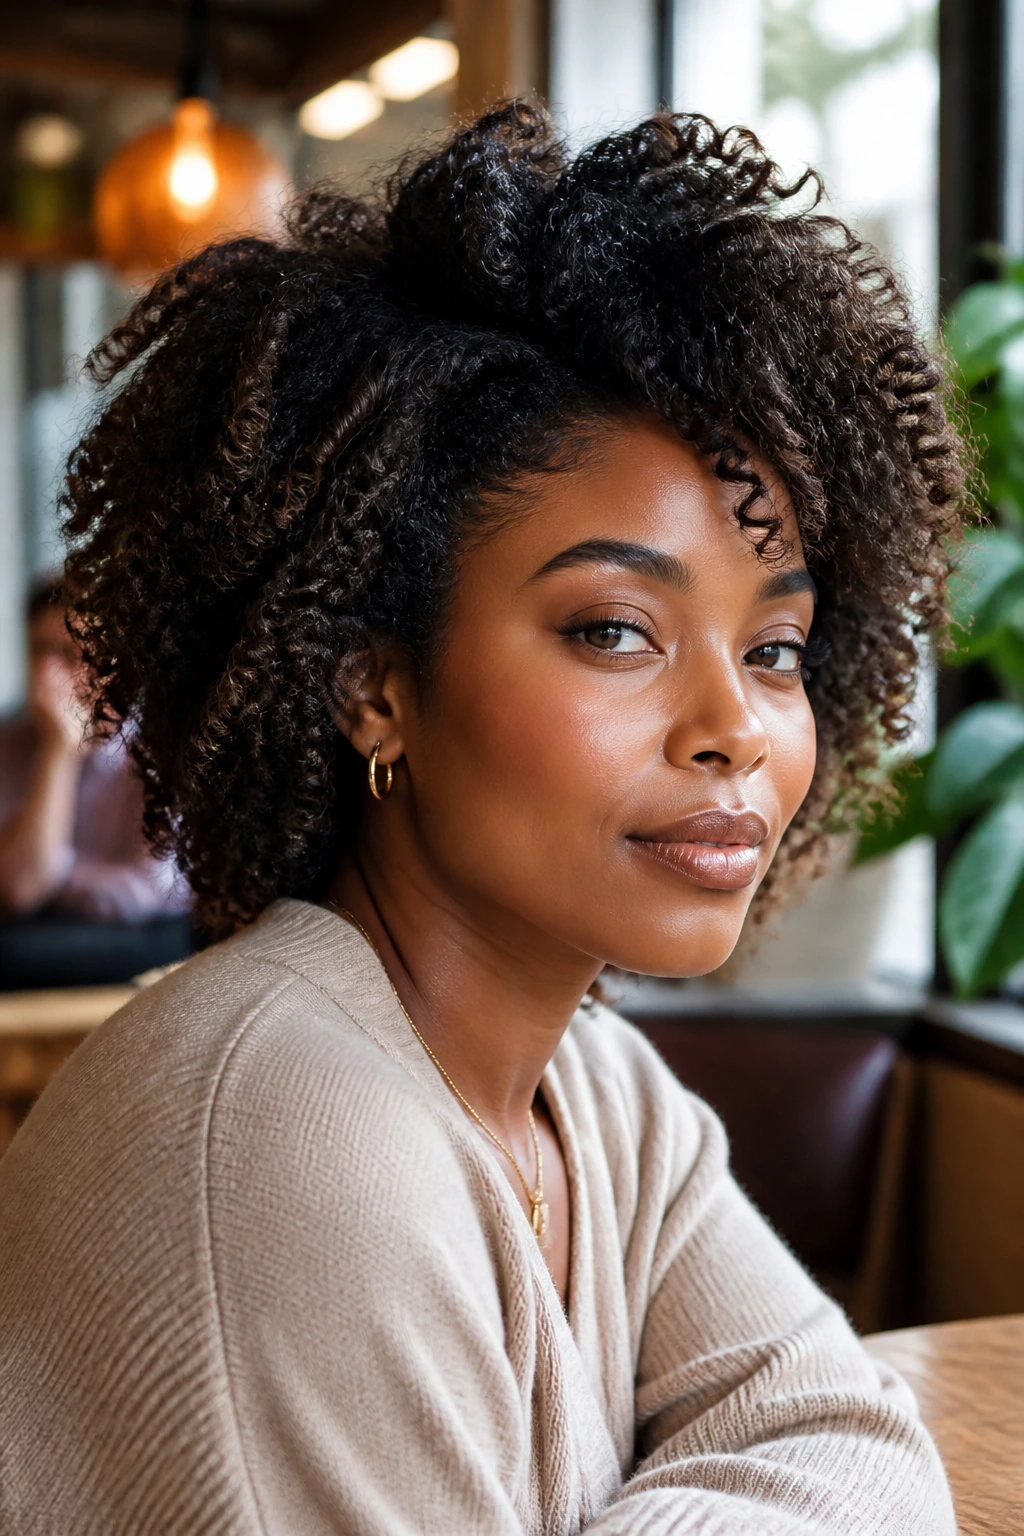
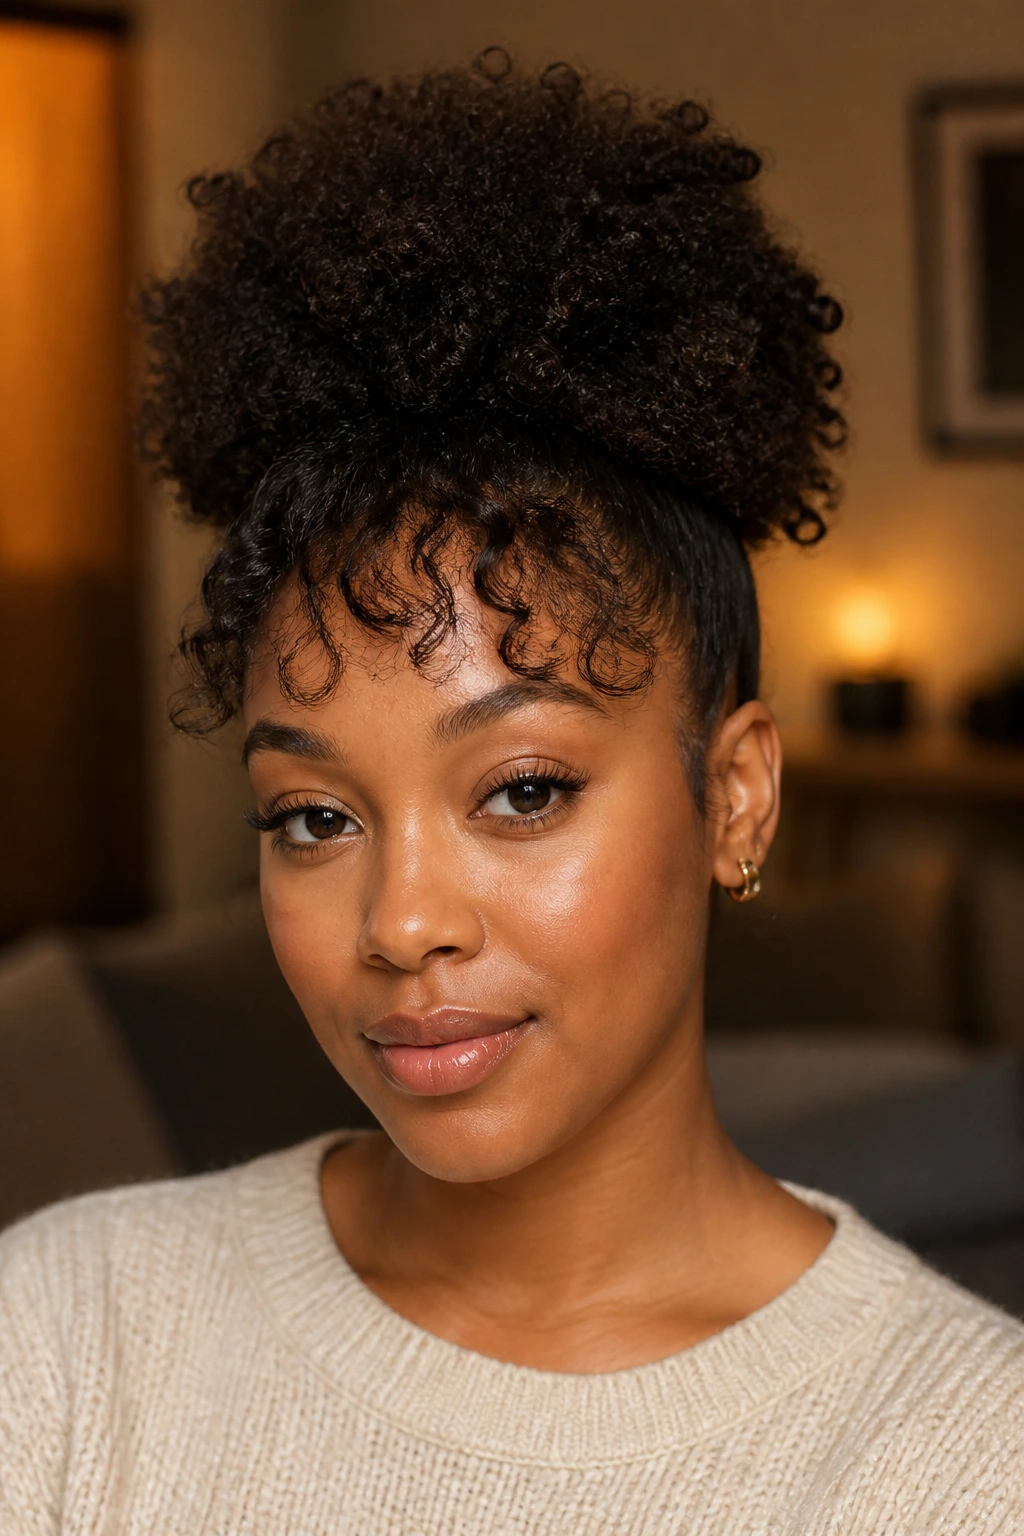
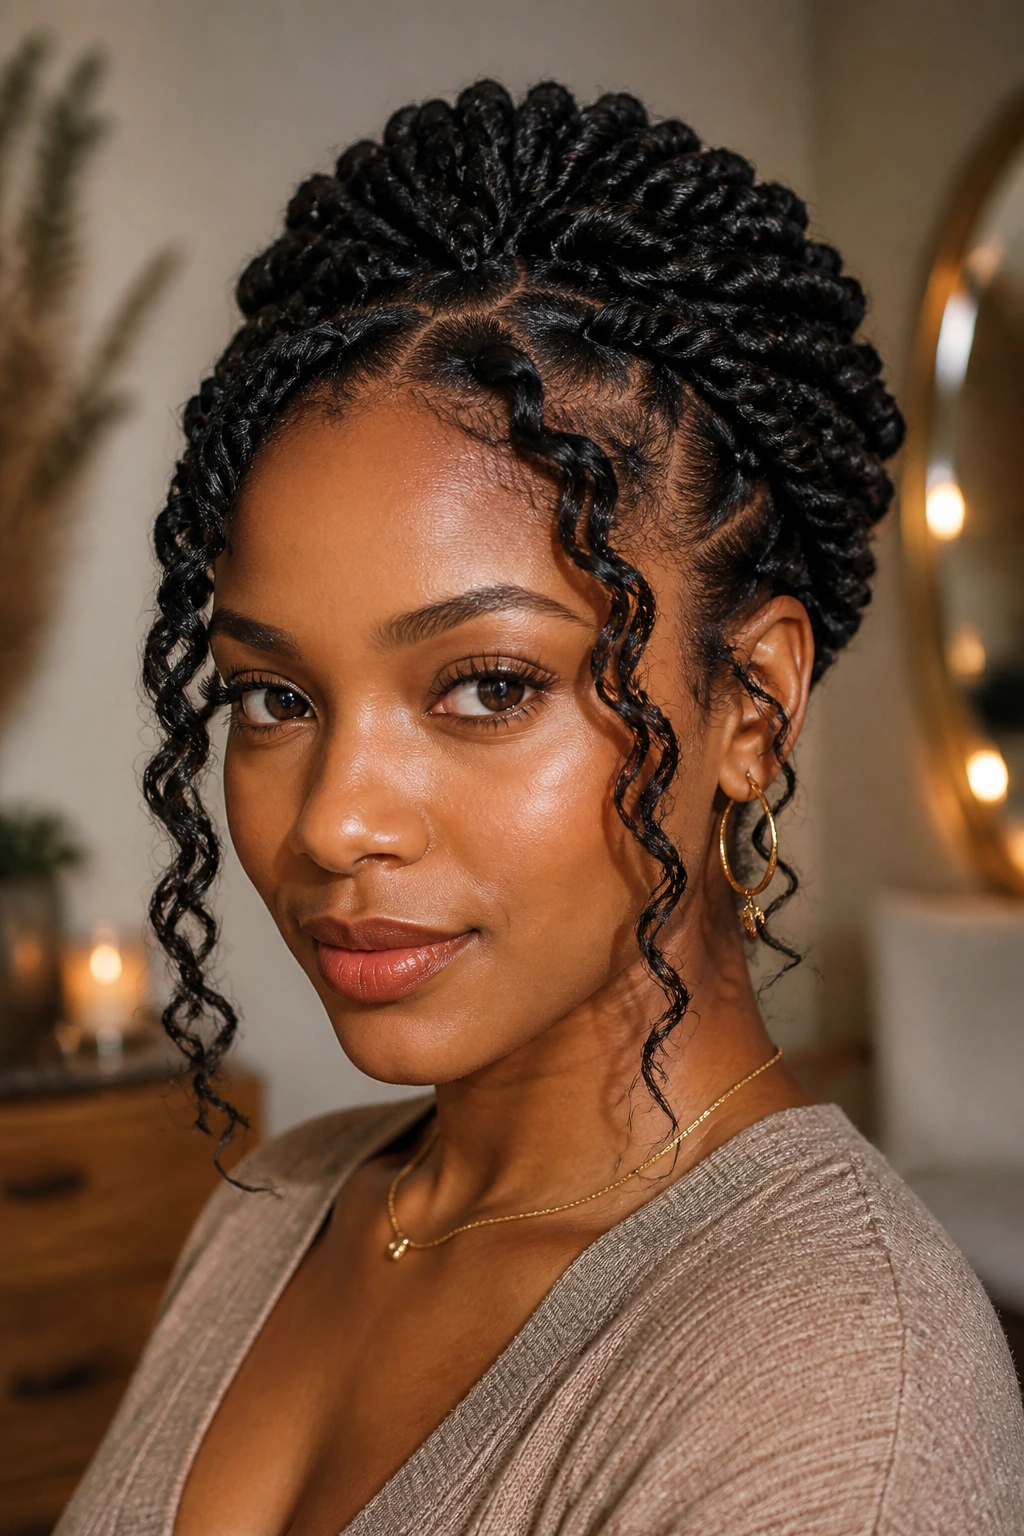
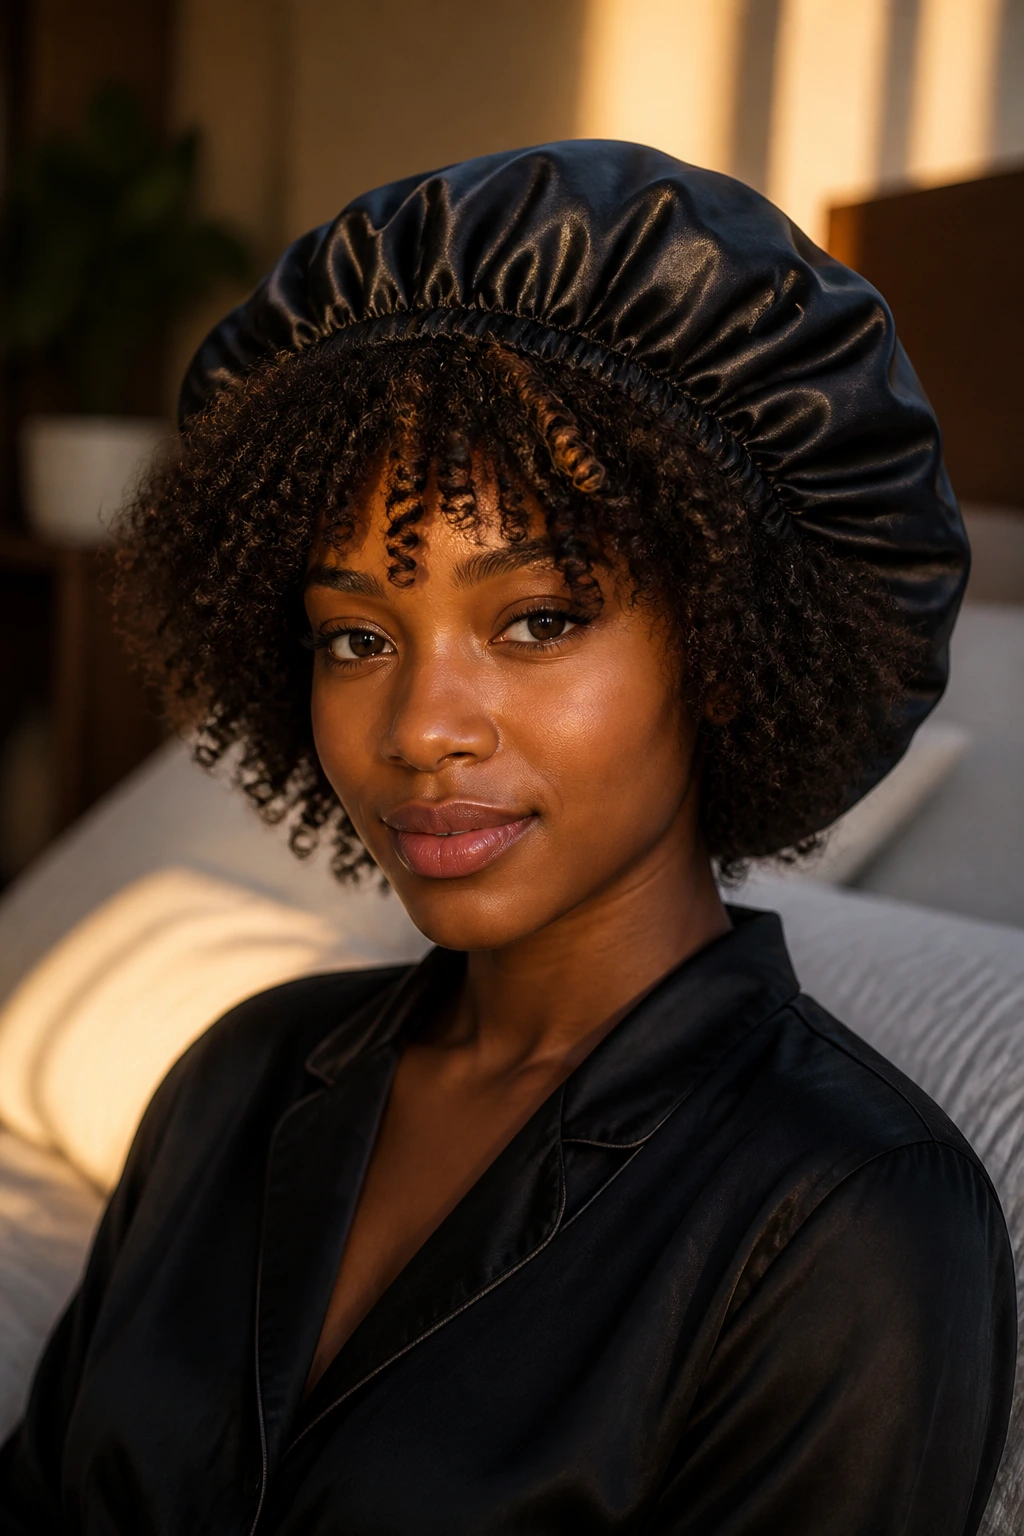
7. The High Puff With Soft Bangs

A high puff can look plain if the front is left untouched. Add soft bangs or layered front pieces, though, and the whole thing changes. Suddenly the puff has a face, not just a crown. The layers around the hairline and temples keep the style from feeling like a quick fix.
The key is tension. Too tight, and the puff pulls the hairline back and looks severe. Too loose, and the puff drops by midday. I like a strong satin scrunchie or elastic that holds without cutting into the roots, plus a small bit of moisture on the front pieces so they sit with shape instead of floating away.
This is one of the best styles for second- or third-day hair. You can refresh the front, fluff the puff, and keep moving. The style does not ask for much. That is part of its charm.
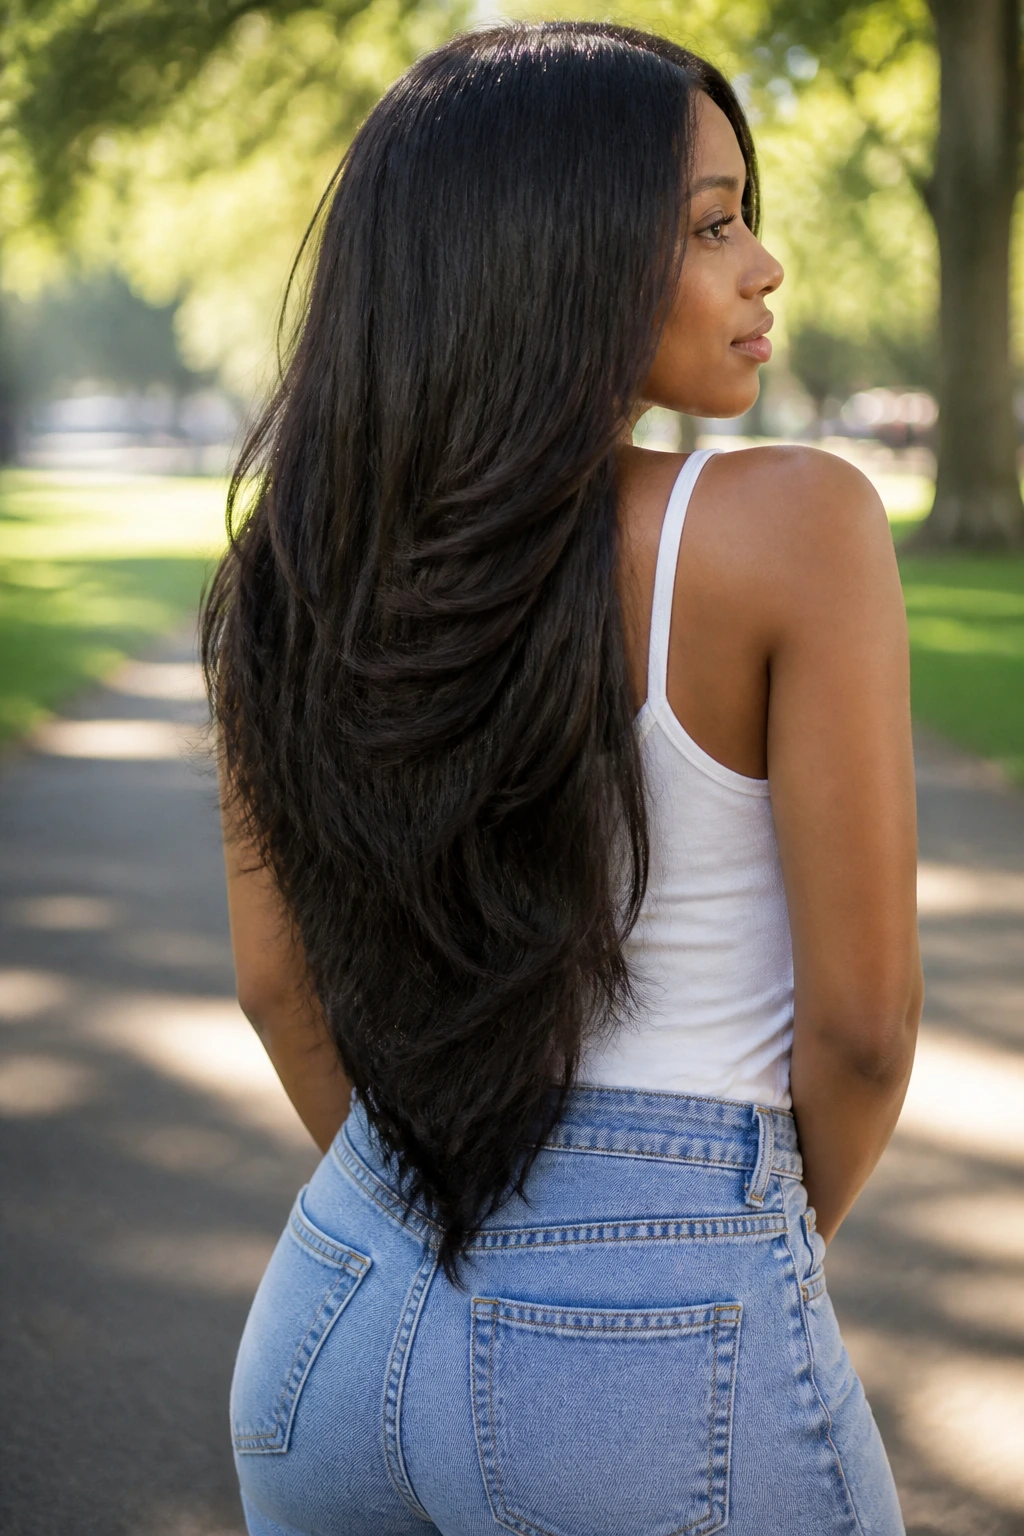
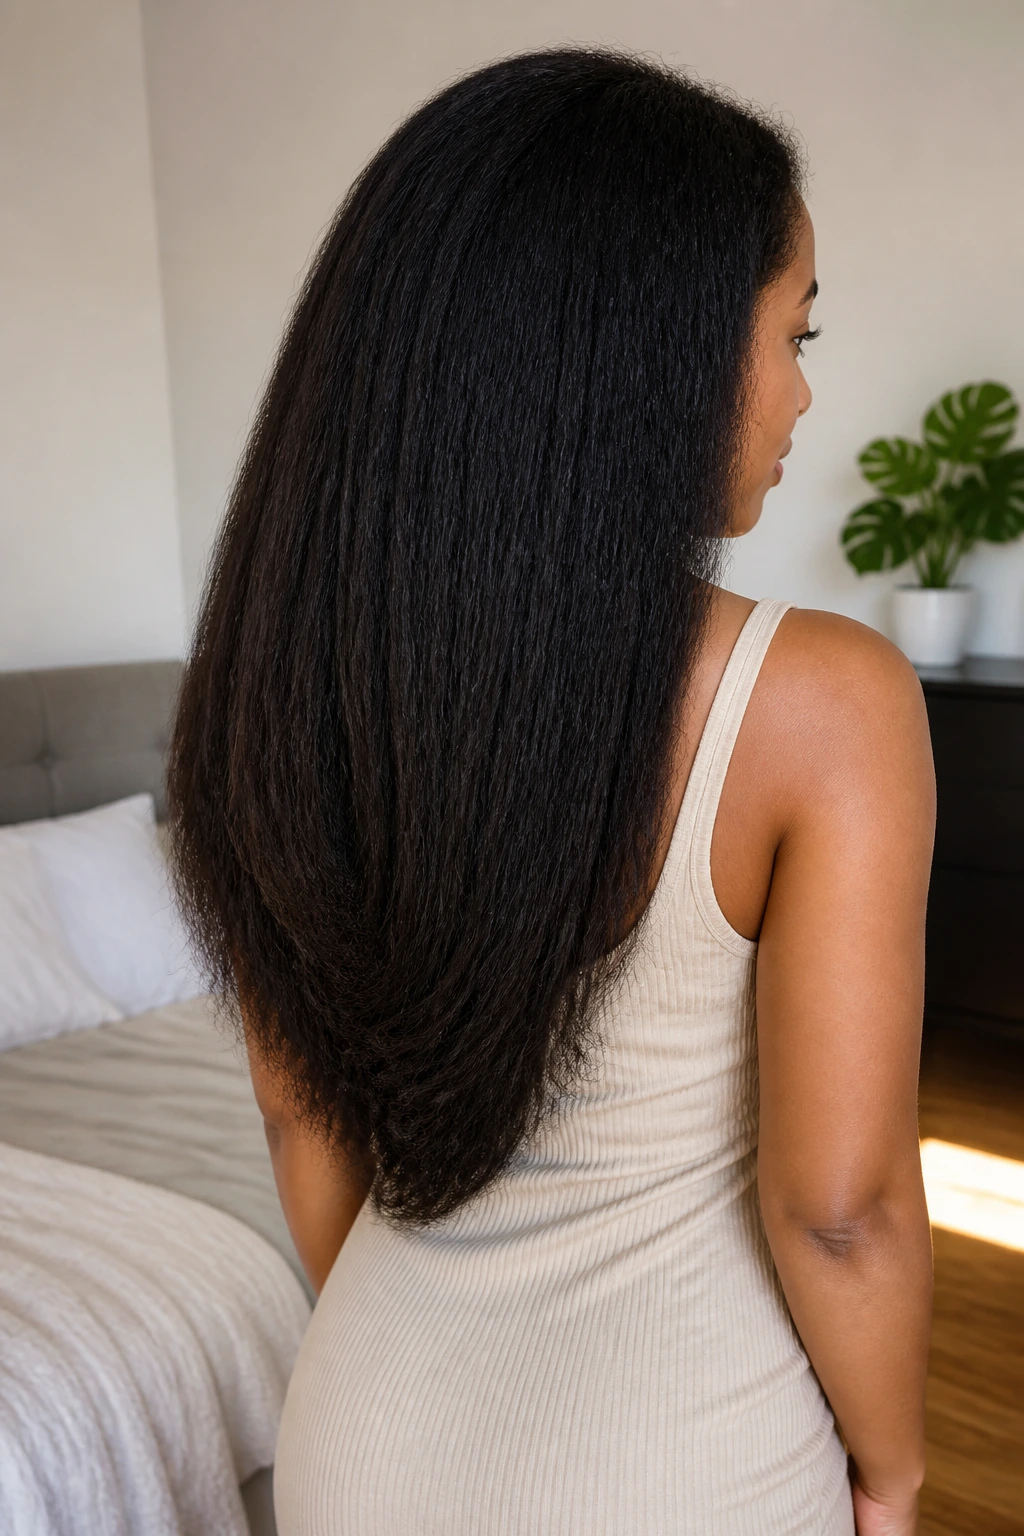
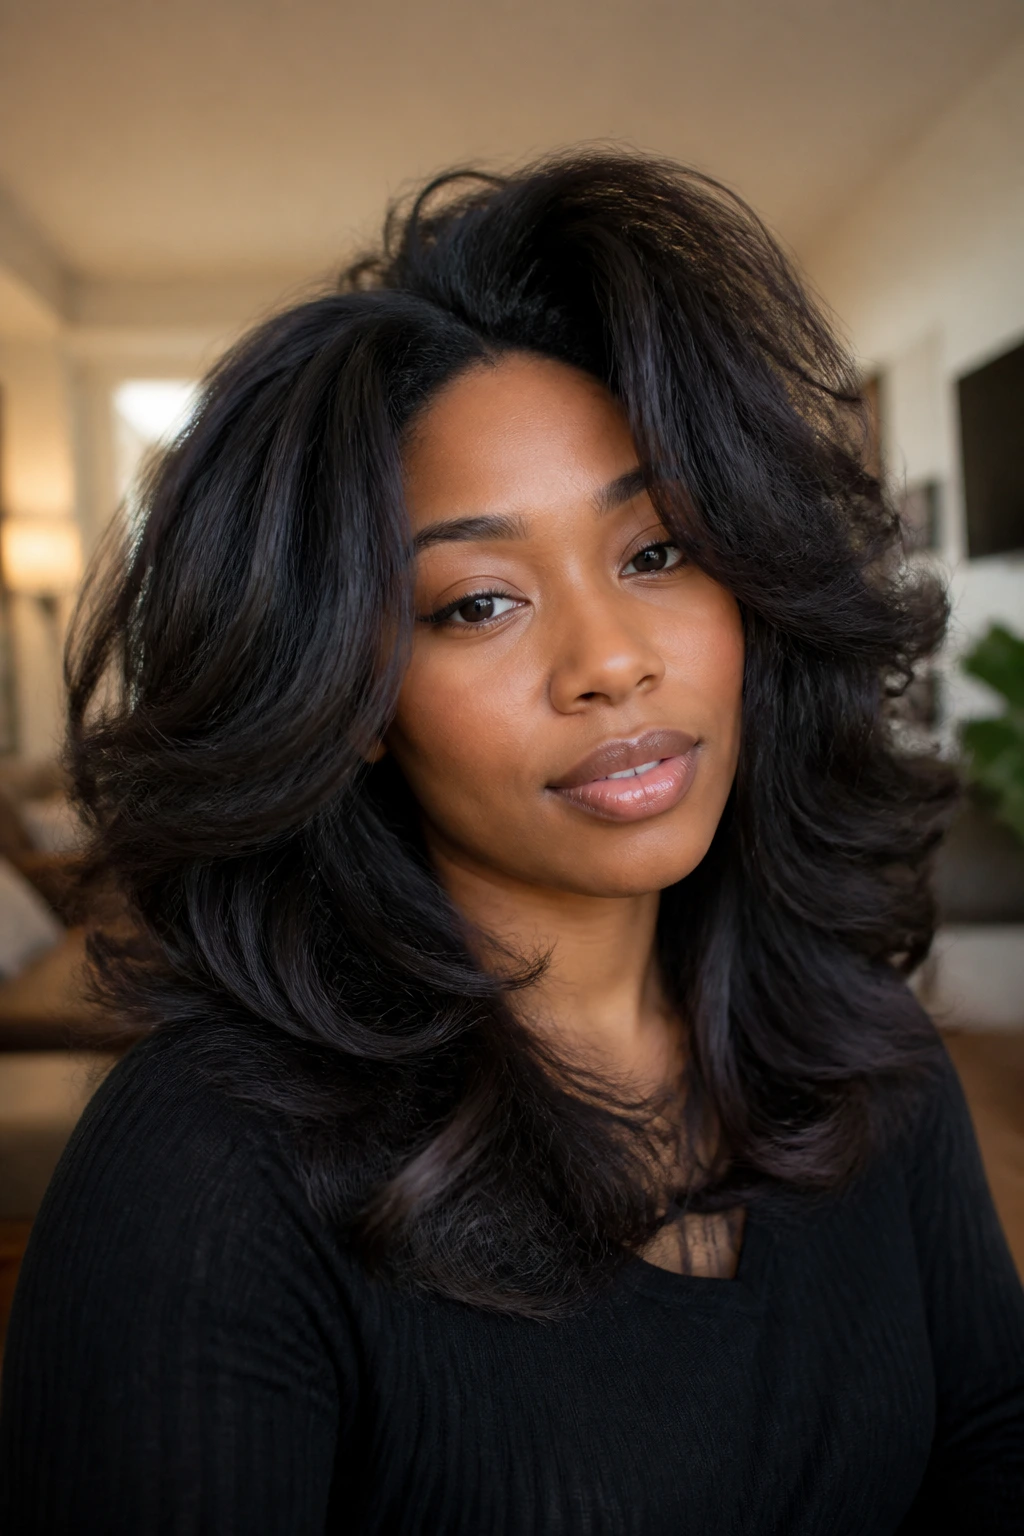
8. The U-Cut for Long Natural Length
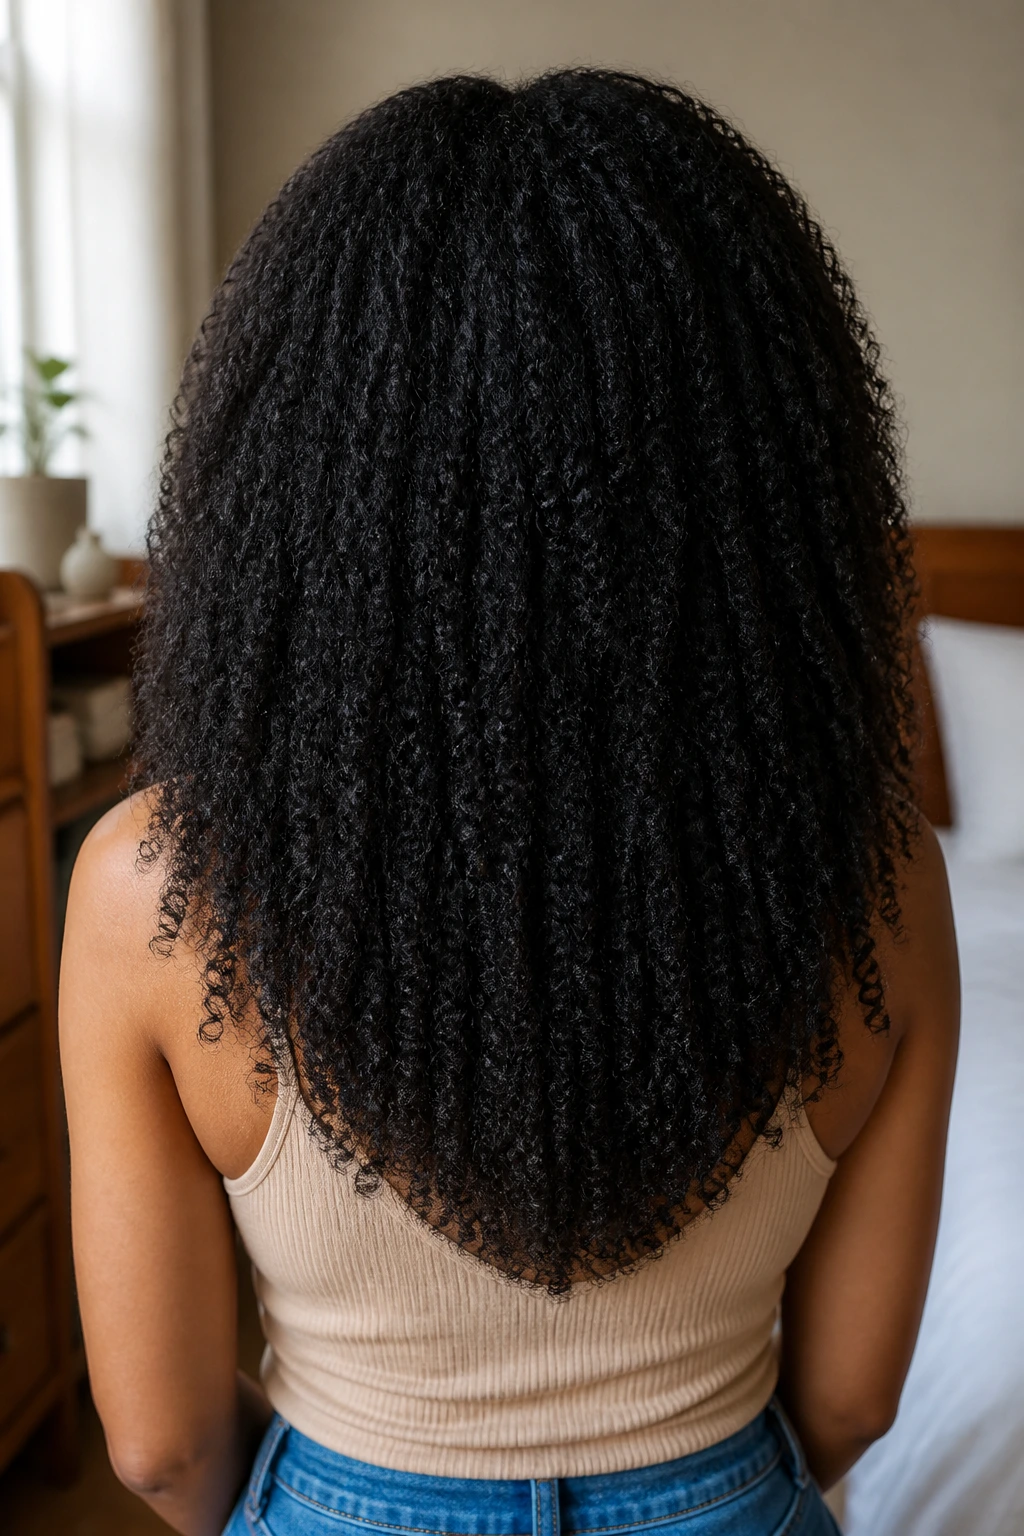
A U-cut is subtle, which is exactly why I like it on long natural hair. From the back, the hair drops in a gentle curve instead of a blunt shelf. That curve keeps the bottom from feeling heavy, but it does not remove so much length that the ends start looking thin and sorry.
The shape works especially well if you wear stretched styles, twist-outs, or braid-outs more than wash-and-gos. The U keeps the back soft and full while the front layers can still open around the face. On dense hair, it also helps reduce the drag that can make long styles feel thicker than they look.
Ask for this if you want:
- Length that still moves
- A softer back line
- Less bulk at the ends
- A cut that grows out cleanly between trims
A U-cut is not flashy. It is useful. And that matters more on long natural hair than people admit, because useful shapes are the ones you keep returning to.
9. The V-Cut for Dramatic Movement
A V-cut gives long natural hair a sharper finish than a U-cut. The longest point sits at the center back, which creates a subtle point and pulls the eye downward. On stretched coils, braid-outs, or rod sets, that shape looks especially clean because the layers fall in a visible cascade.
The danger is overdoing it. If the point is too aggressive, the ends can look sparse, especially on finer textures. I prefer a soft V rather than a hard one. It still gives drama, but it keeps the length believable and the perimeter strong.
This style is one of the best choices if you like long hair but hate the feeling of a heavy sheet hanging down your back. The layers give the hair a way to move when you walk, and that movement is the whole point. Long does not have to mean static.
10. The Braid-Out With Flipped Ends
A layered braid-out has more shape than the usual one-length braid set because the ends do not all stop in the same place. That matters. Once the braids come down and the curls start flipping outward, the layers create movement across the shoulders instead of one blunt line.
The trick is section size. If you use the same braid size everywhere, the result can look too uniform. I like smaller braids near the face and crown, then slightly larger sections lower down. It gives the braid-out a gentle shape shift from top to bottom, which looks more natural on textured hair.
Dry fully before unraveling. Fully. A braid-out that is even a little damp at the roots will swell into frizz the minute you separate it, and no amount of oil will save that. Use a small amount of oil on your fingers, separate once, fluff the roots, and stop there before you turn the whole thing into a halo of fuzz.
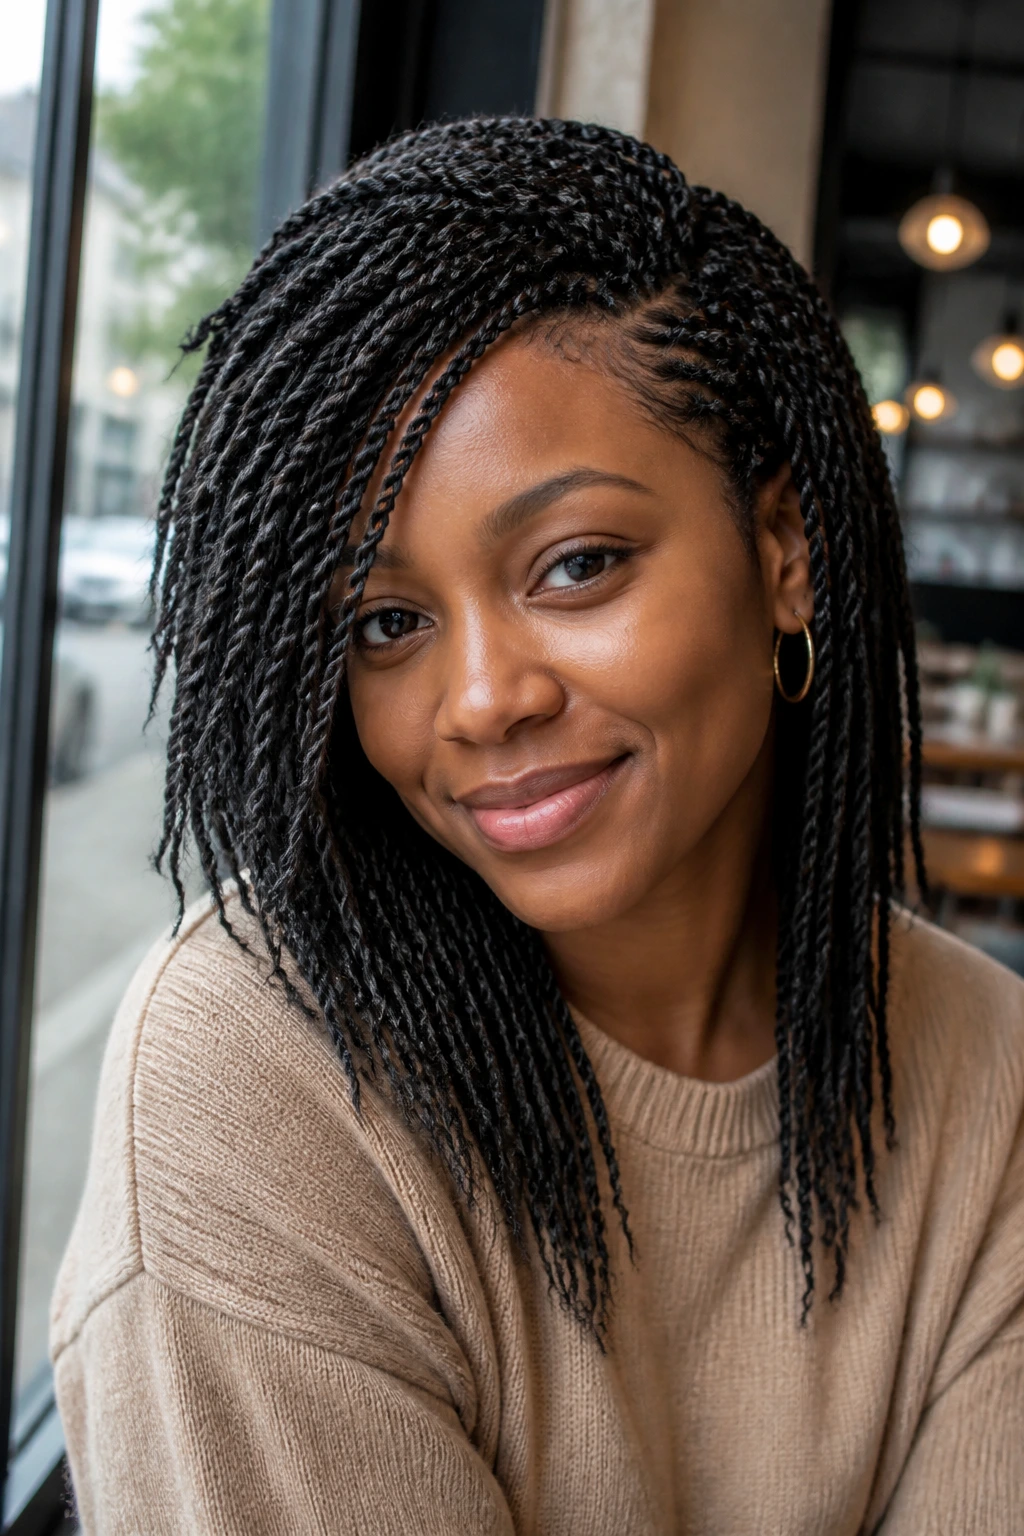
11. The Mini Twists With a Side Sweep
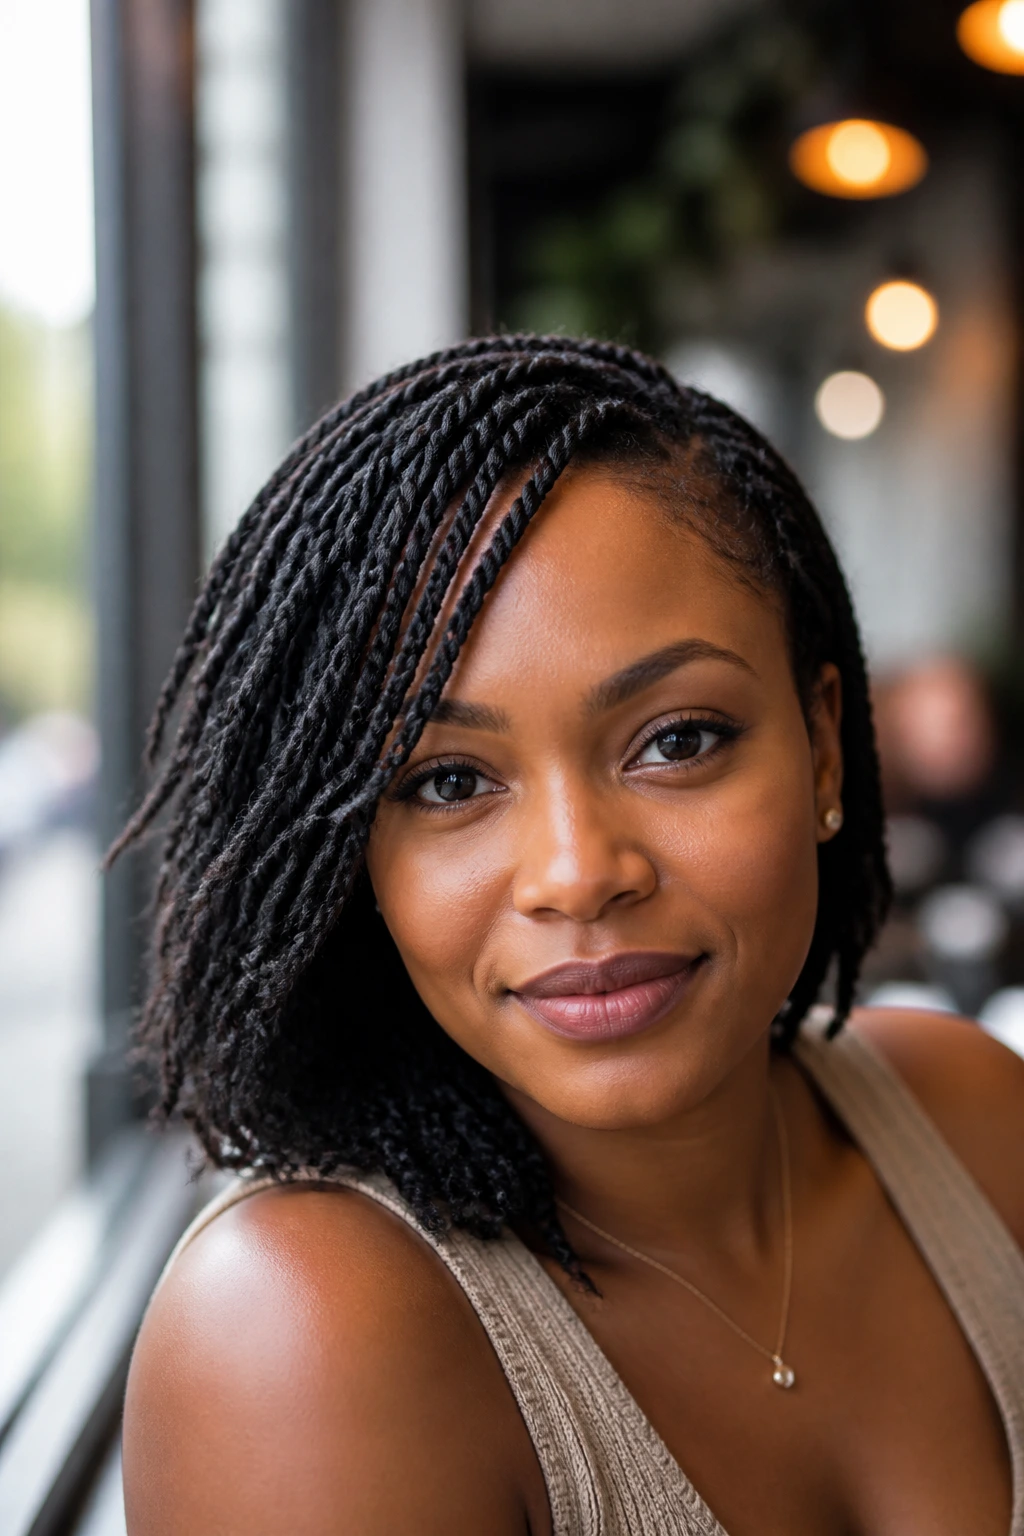
Mini twists are one of the quietest layered styles, and that is part of their appeal. They protect the hair, keep daily manipulation low, and can be arranged so the front section falls to one side for a soft face-framing effect. The layers are not loud, but they still matter.
This style works best when the twist lengths vary a little. Longer twists around the sides and front keep the shape from looking boxy, while a slightly shorter crown can add lift. If every twist lands at exactly the same place, the style starts to resemble a curtain. A little variation fixes that.
Mini twists are also practical for people who want a style that survives busy weeks without constant restyling. They can be worn down, pinned back, or gathered into a low puff. That flexibility makes them one of the easier ways to wear layers without needing heat or daily effort.
12. The Frohawk With Layered Sides
A frohawk is the style I reach for when I want natural hair to look unapologetically strong. The sides are shaped down or pinned flat, while the middle ridge keeps volume and lift. Add layers through the center, and the whole thing becomes more sculpted, less puffy.
This is not a style that benefits from too much product. The shape already does the heavy lifting. A little gel or styling cream at the sides keeps them close to the head, and the center can stay fluffy, defined, or stretched depending on your texture. If your hair is very dense, the frohawk can handle more height than you think.
The best thing about this shape is the contrast. Flat sides. Full center. Clean face framing. It has enough drama to feel special without needing extra hair or complicated prep.
13. The Chin-Length Coil Bob
A chin-length coil bob is small, sharp, and surprisingly versatile. Because the length sits around the jaw, the bob opens the face right where most people want lift, and the layers inside the shape keep coils from forming one thick block. On tight textures, that internal shaping is doing a lot of work.
What to ask for
- A perimeter that touches the chin or sits just below it
- Soft internal layers to reduce bulk
- Slightly longer pieces in front if you want a face-framing effect
- A dry or stretched trim if shrinkage is strong
This style looks especially good on hair that springs into clean coils or defined twist-outs. It has a neat outline, but it is not stiff. That balance matters. A bob that’s too blunt on coily hair can feel boxy fast, while a layered coil bob stays lively as it grows out.
14. The Asymmetrical Cut That Breaks the Box
An asymmetrical layered cut is for anyone tired of hair that sits politely and behaves like it’s waiting for permission. One side stays longer, the other side sits a little higher, and layers keep the difference from looking harsh. The result is shape with attitude.
This cut does a lovely job of redirecting attention. If one side of your face feels fuller, or if you like tucking hair behind one ear, asymmetry gives you a built-in reason for the movement. It also works well with side parts because the part and the cut can play off each other instead of fighting.
I like this cut on thick hair because it removes bulk in a way that still leaves the silhouette full. It grows out more gracefully than people expect too, provided the longer side is not cut too extreme. Keep it wearable. Wearable ages better than dramatic for the sake of drama.
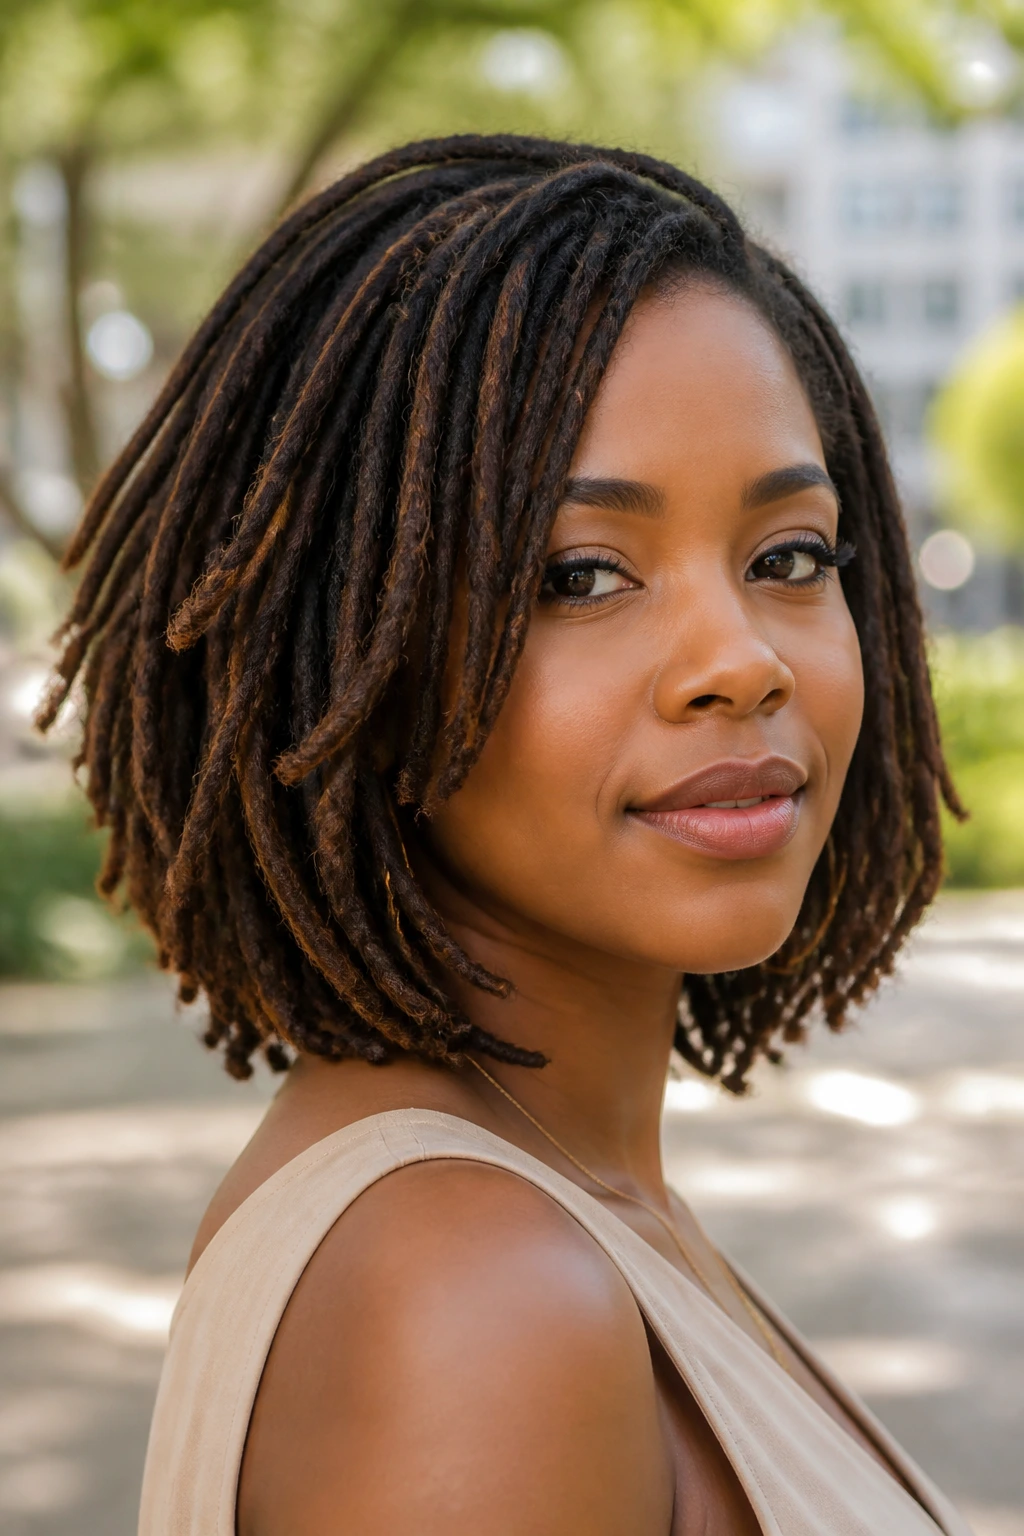
15. The Loc Bob With Curved Layers
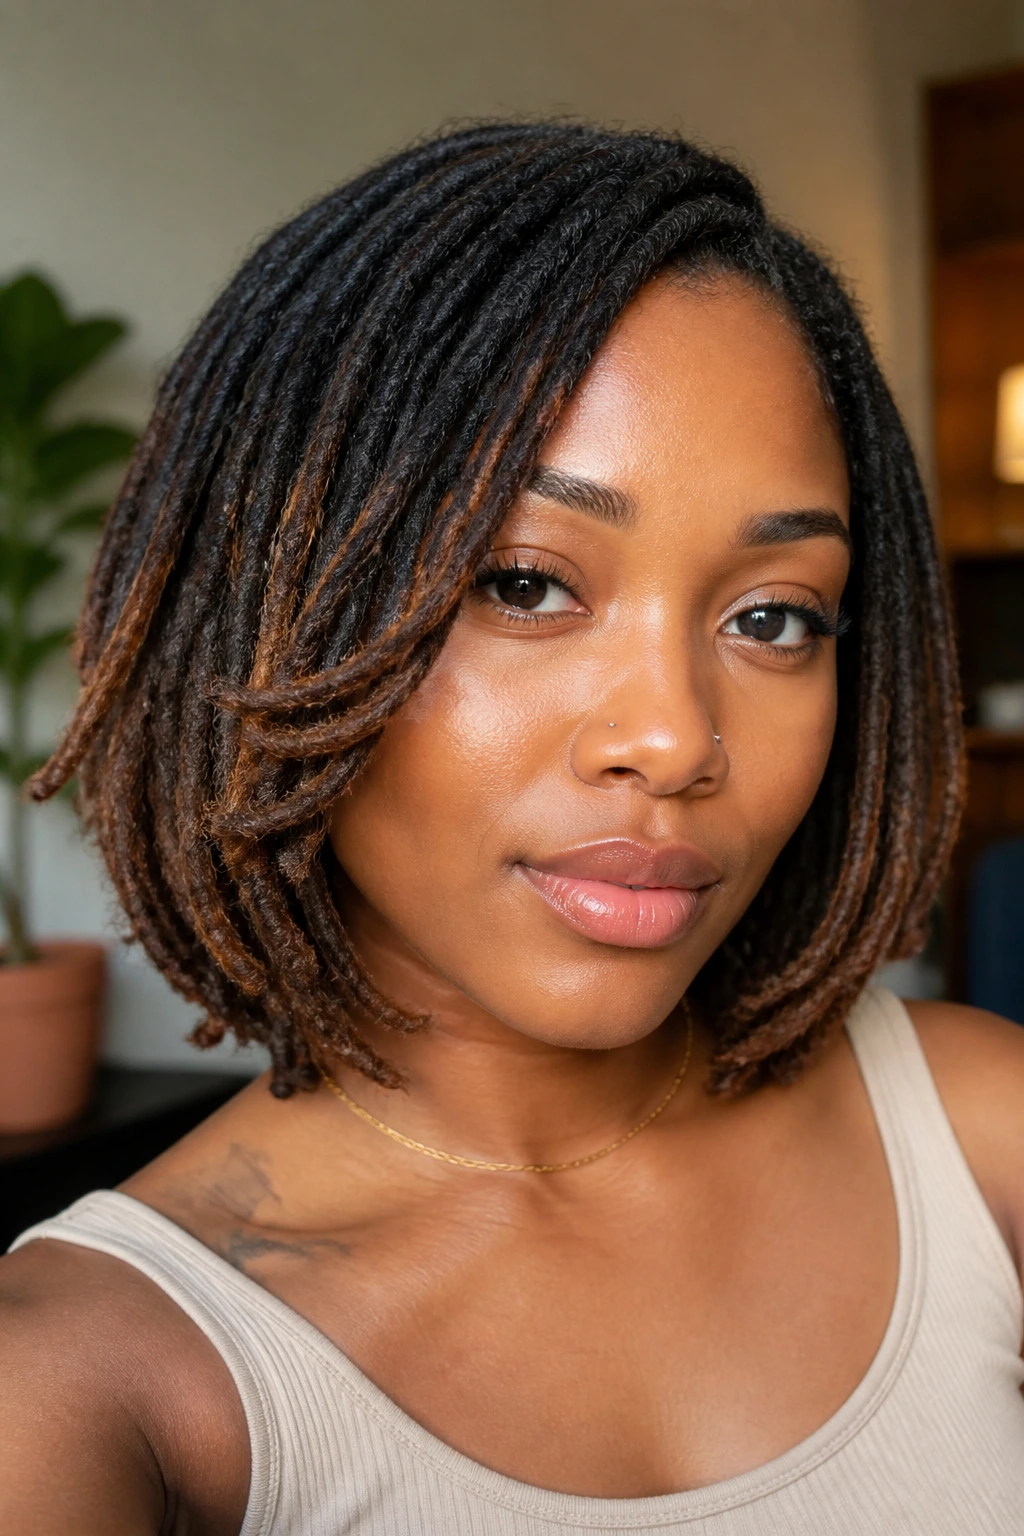
Locs can carry layers in a way that feels clean rather than choppy, especially when the length lands around the chin or shoulders. A layered loc bob gives the style more swing and keeps the ends from hanging in one solid line. If your locs are mature, the cut should be thoughtful. Locs do not forgive random scissors.
The most flattering versions keep some fullness around the cheeks and lift the hair away from the neck. That makes the jawline show up better and keeps the style from weighing the face down. Curved layers also help locs move when you turn your head, which sounds small until you notice how stiff locs can feel when every strand is the same length.
This is one of those styles where restraint pays off. A few carefully placed layers can do more than a heavy chop ever will.
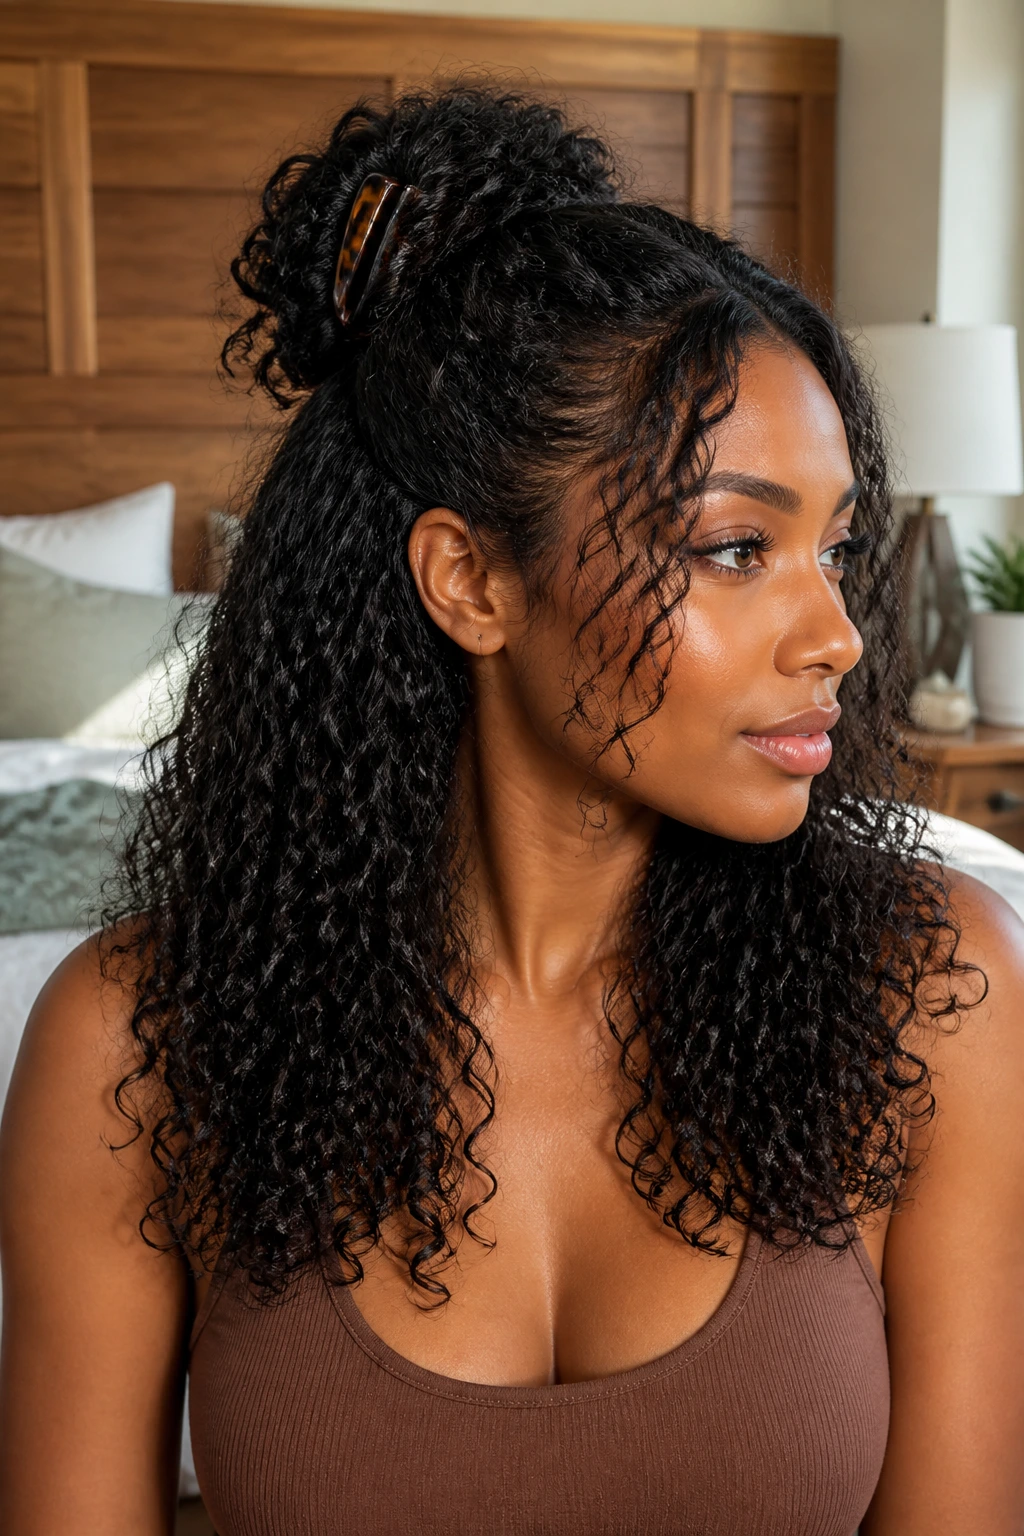
16. The Half-Up Style With Cascading Curls
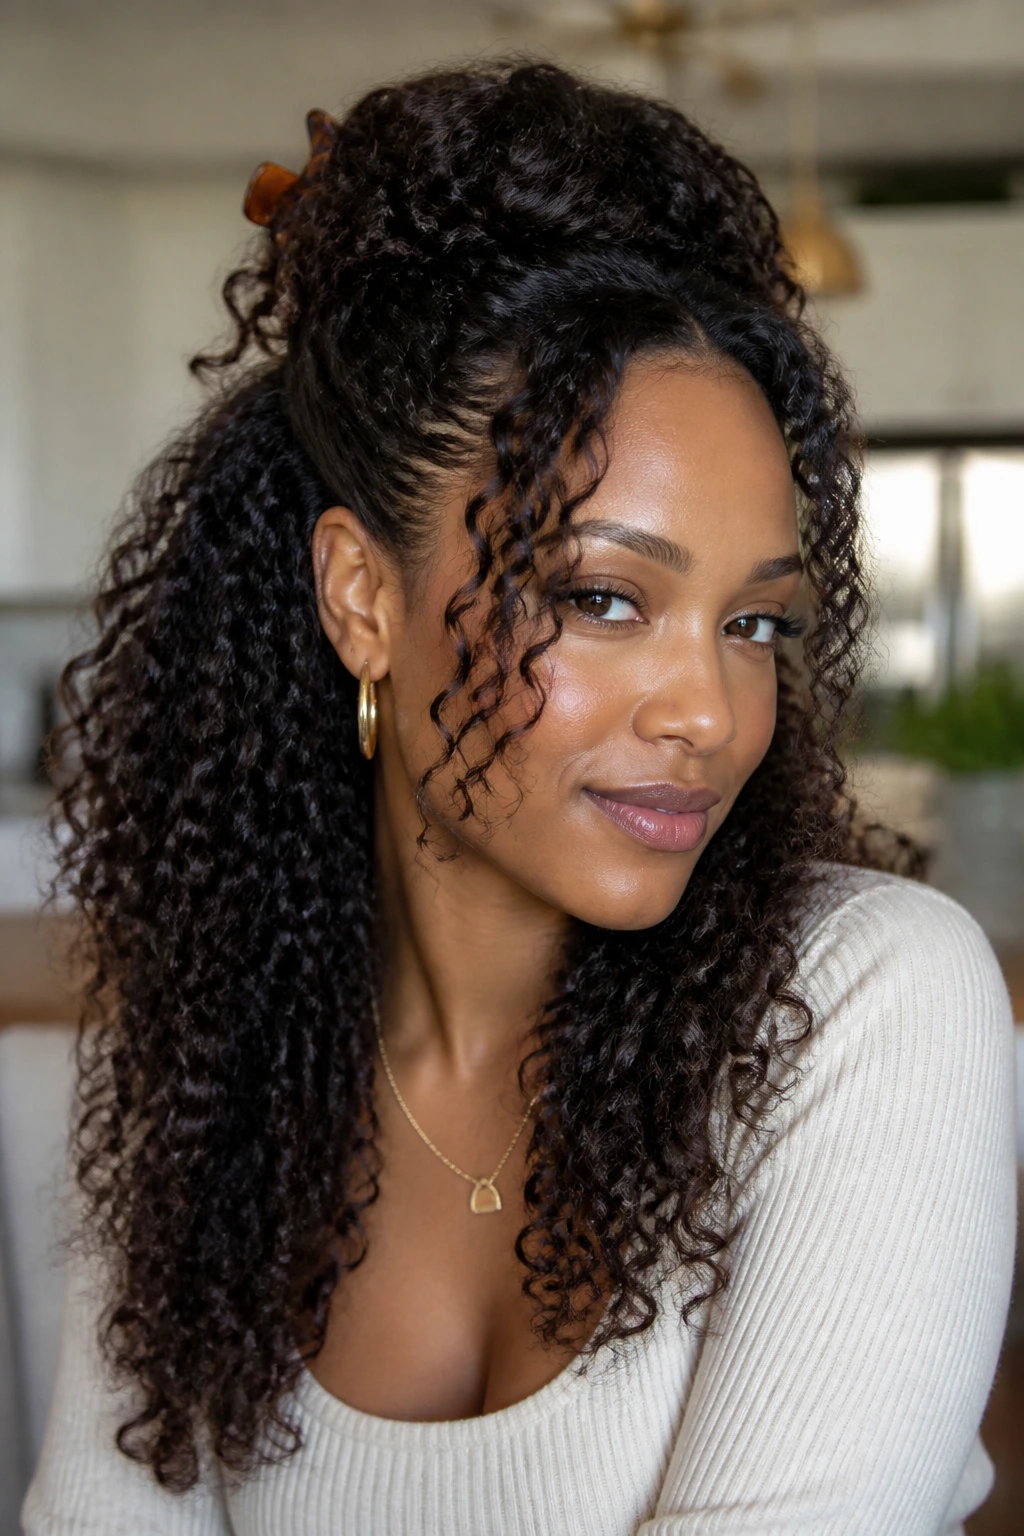
A half-up, half-down style becomes a layered hairstyle the moment the loose section has shape. The top pulls away from the face, the bottom drops in a cascade, and the layers keep the loose curls from stacking into one thick wall. It’s a simple styling idea, but the right cut makes it look deliberate instead of thrown together.
The front pieces matter most here. Keep them soft and a touch longer so they can skim the cheeks when the top is pulled back. A claw clip or satin tie works better than an overly tight elastic, because the style should lift, not pinch. If the back is long, a few longer layers around the shoulders keep the loose section from hanging like a weight.
This is the kind of style that saves a wash day when you need the hair out of your face but still want the texture to show. It works for brunch, work, or a night out without asking for a whole new plan.
17. The Feathered TWA
A feathered TWA is a tiny cut with a lot of personality. Instead of sitting in one compact shape, the layers lift and soften the top, which keeps the style from looking too flat against the head. On tightly coiled hair, that little bit of feathering can turn a simple cut into something elegant and sharp.
The best TWA layers are subtle. Too much shaping can expose the scalp in odd places or make the hairline look overly carved. A light hand gives you a soft halo effect around the temples and crown, which is usually the most flattering zone on a short cut.
Small details that make it work
- Finger-coil the front if you want more definition
- Keep the nape clean so the top reads taller
- Use a cream with slip, not a heavy butter
- Ask for the layers to be checked from the side as well as the front
A feathered TWA has a lovely honesty to it. There’s no hiding behind length. The shape has to carry the whole look.
18. The Flat-Twist Crown With Soft Framing
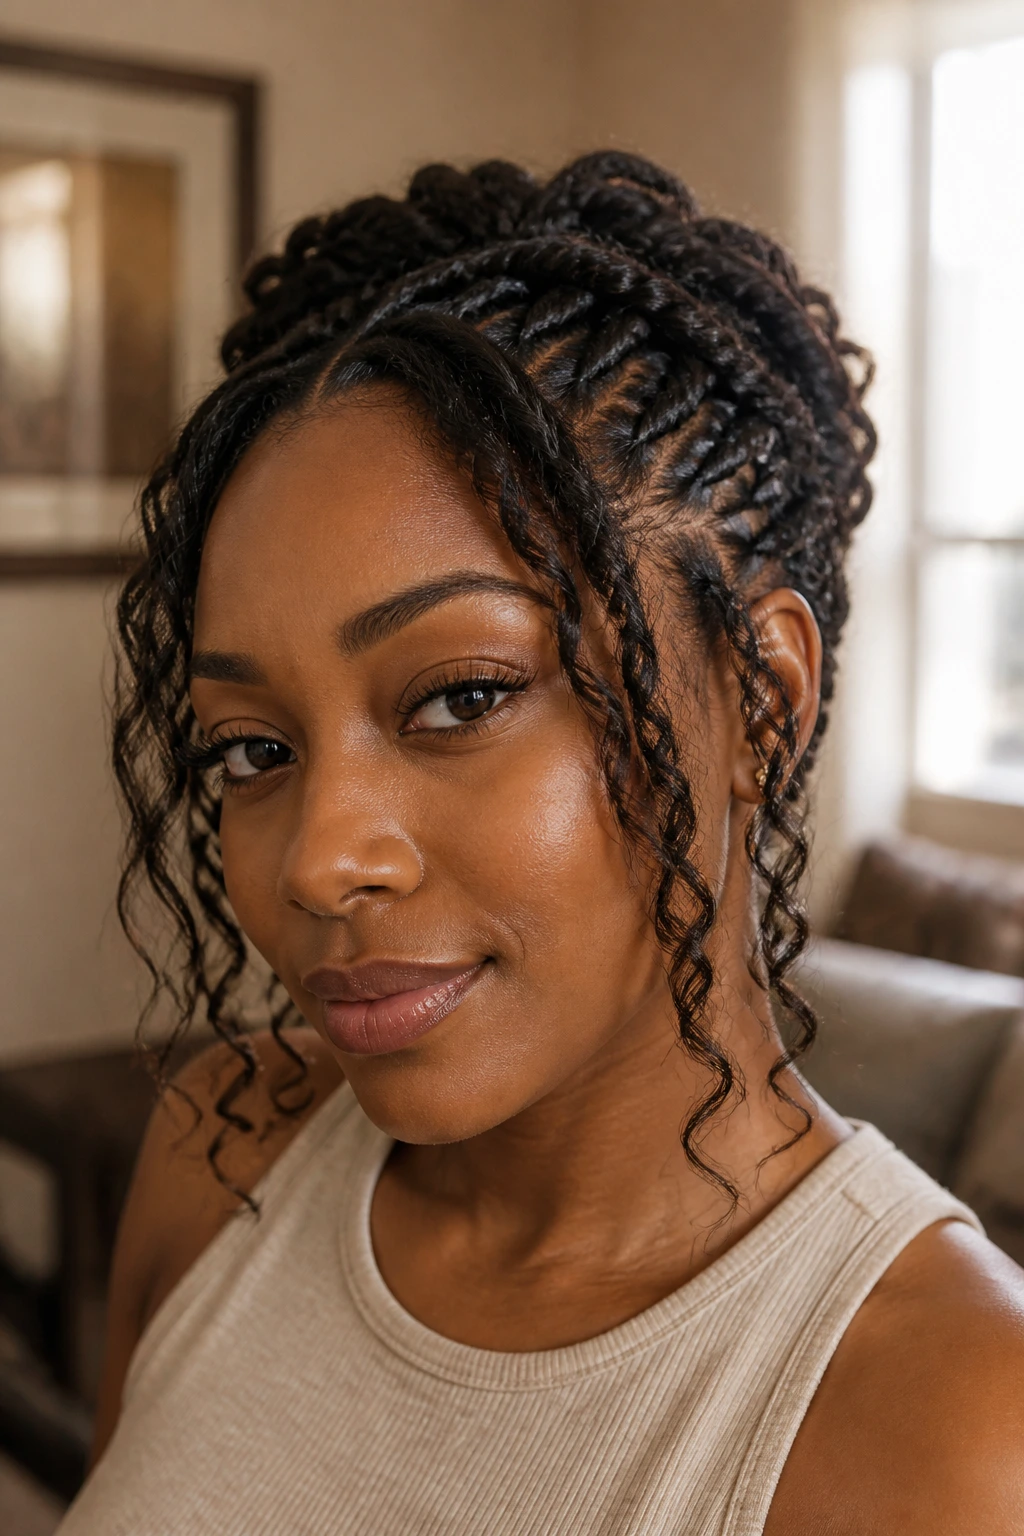
A flat-twist crown style gives you structure around the head and softness around the face, which is a good trade. The twists can run from the hairline toward the crown, then release into loose ends or be pinned into a tucked shape. The layered pieces in front make the style feel lighter and more flattering than a rigid pulled-back look.
This style works well for formal days, low-manipulation stretches, or any week when you need your hair to stay put. Because the twists sit close to the scalp, the style holds shape longer than a loose set. The face-framing pieces keep it from feeling severe.
A small amount of mousse before twisting helps the sections lie neatly, and a satin wrap at night keeps the part lines from frizzing up. It’s a quiet style, but not a boring one. There’s a difference.
19. The Bantu Knot-Out With Piecey Ends
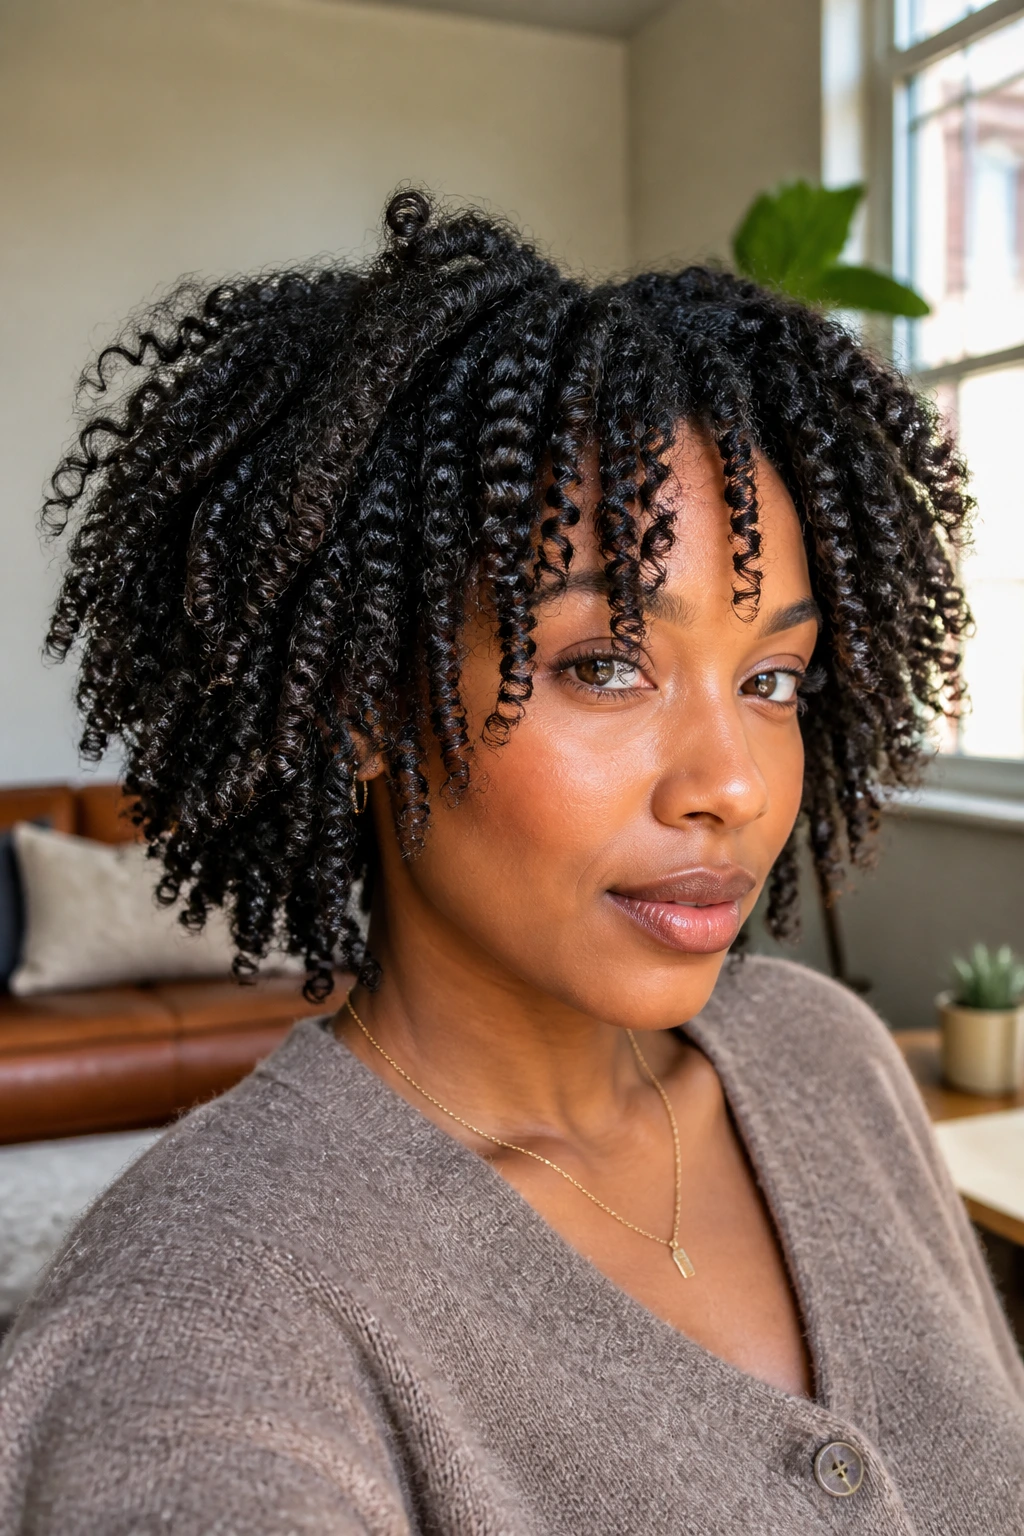
A Bantu knot-out with layers can look almost sculpted when it’s done right. The curls come down in different lengths, which gives the style its piecey movement. Around the face, that extra movement matters. It stops the style from forming one round mass and lets the curls sit with intent.
The sections should be even enough to set well, but the layers can vary in length underneath. That means the finished curls land in little arcs instead of one flat sweep. I like this style when the goal is definition first and volume second. It gives you both, but the definition is the part that reads first.
Do not rush the takedown. If the knots are still cool at the center, wait longer. A Bantu knot-out that comes down too early tends to frizz from the roots and lose the crisp curl pattern that makes the style worth doing in the first place.
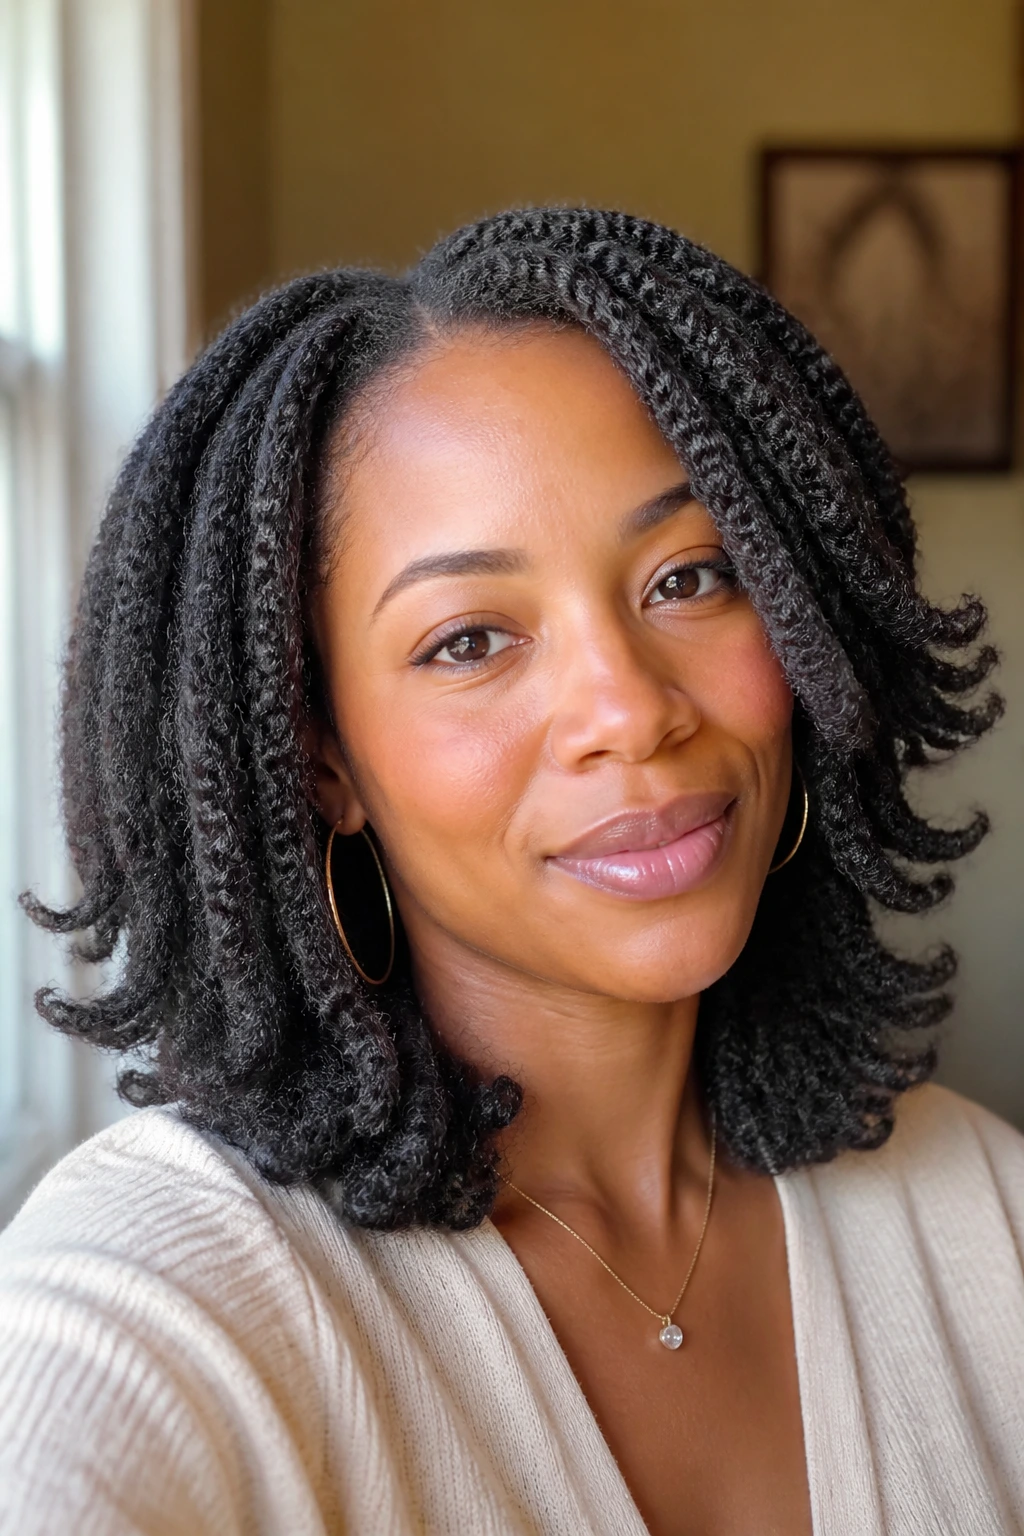
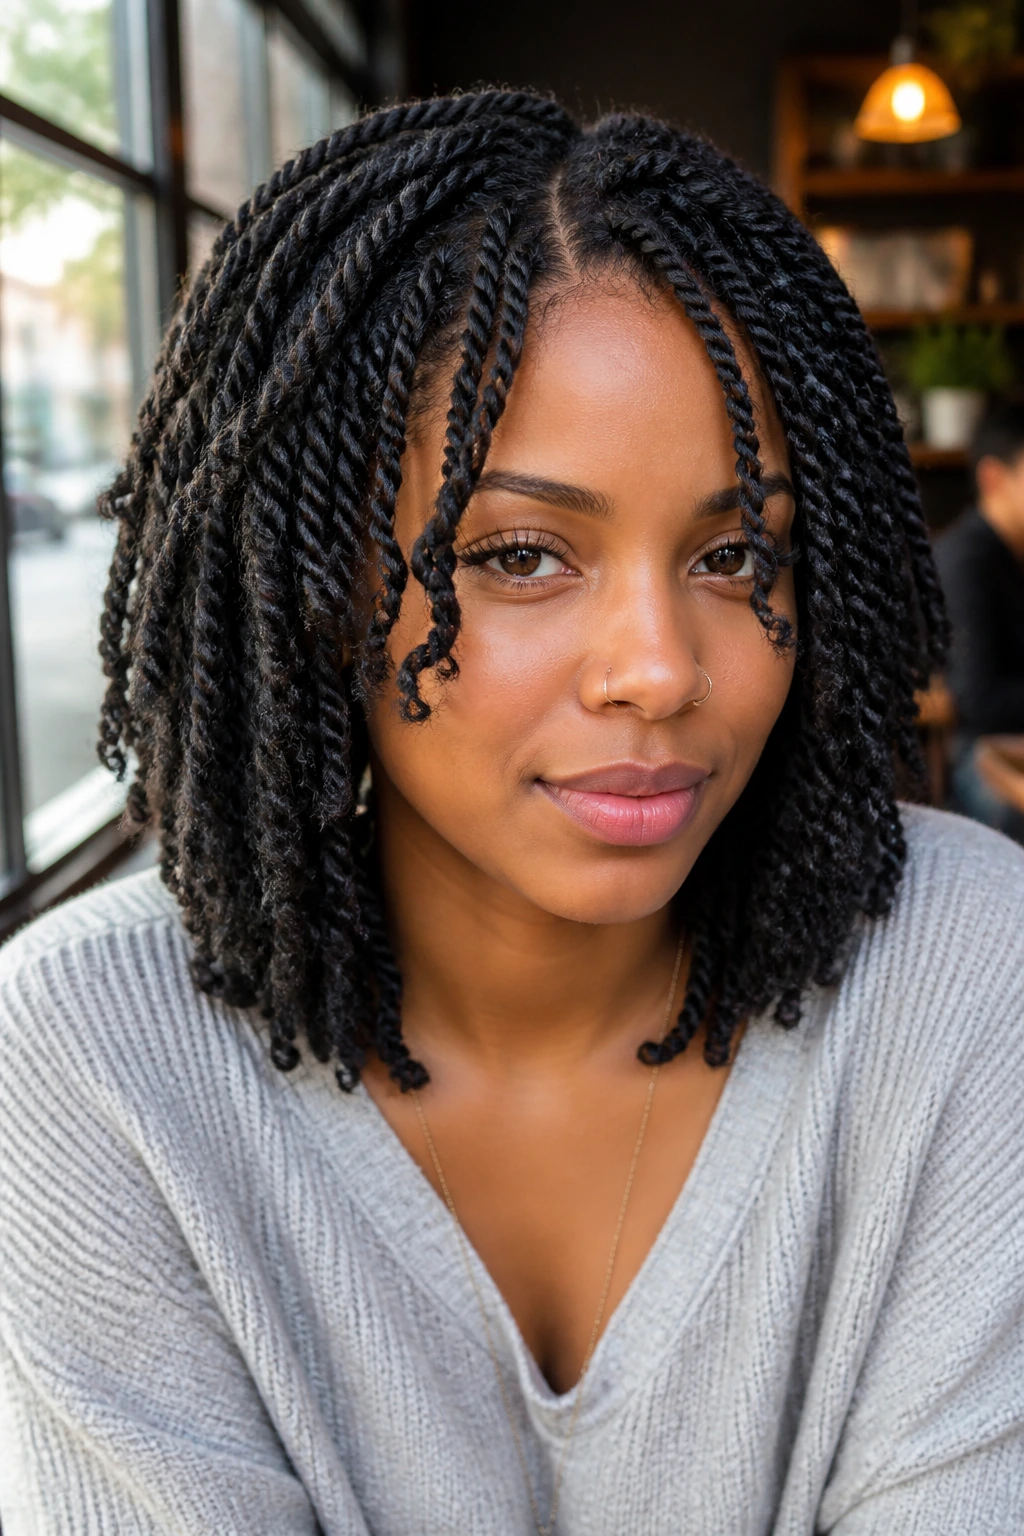
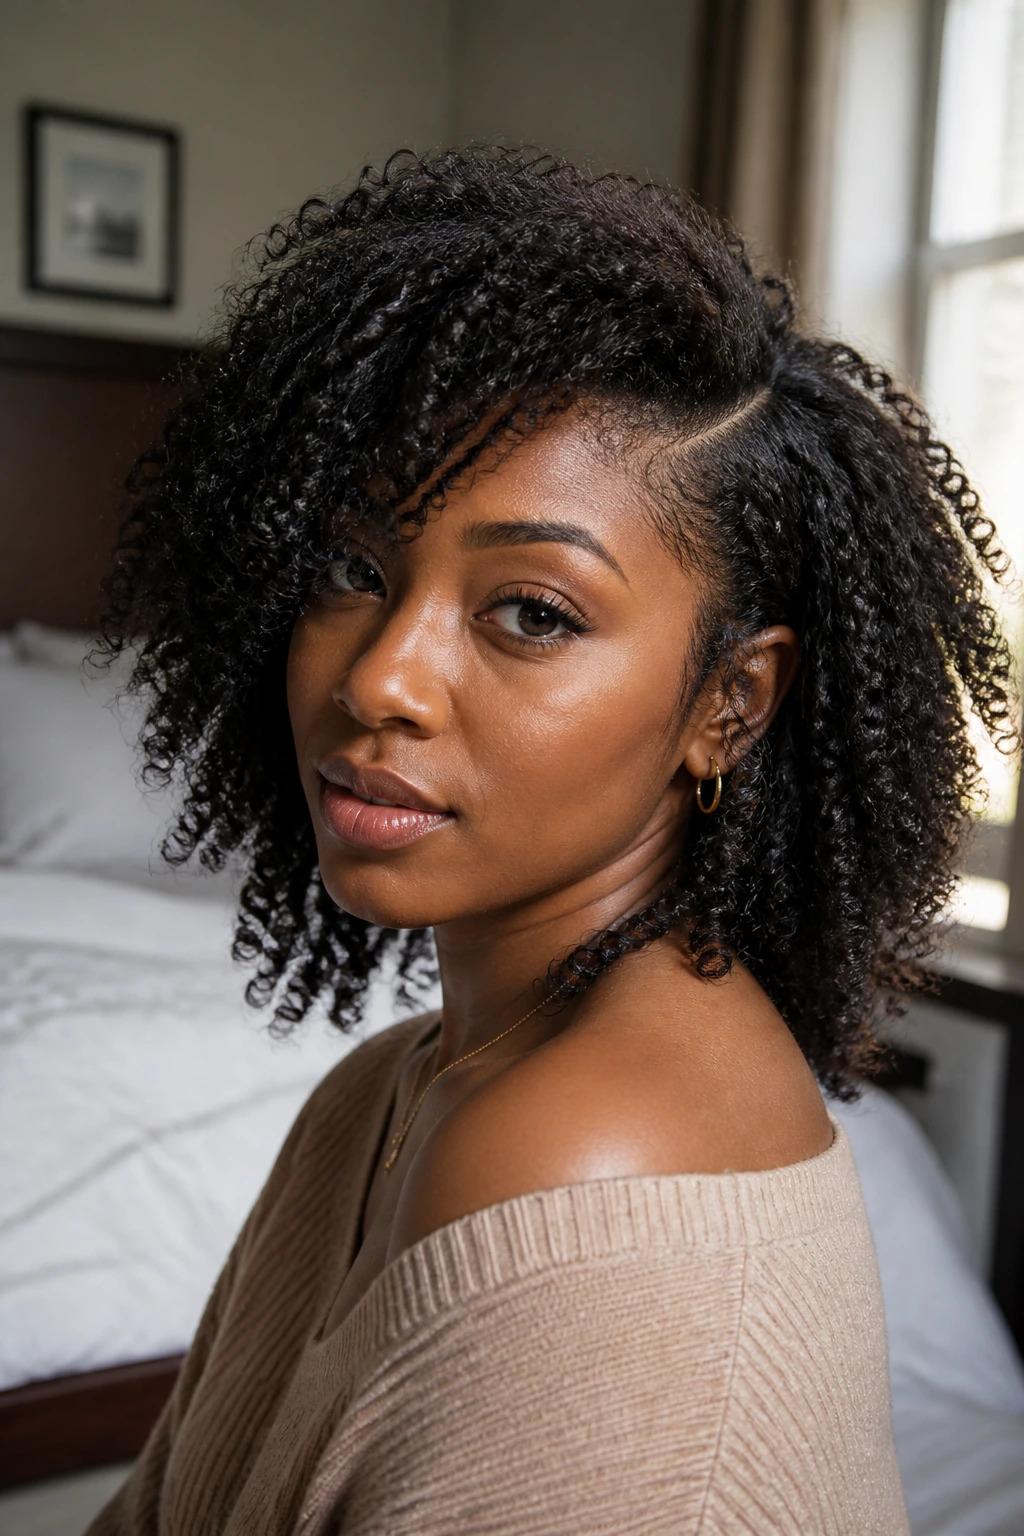
20. The Two-Strand Twist Set That Sits at the Shoulders
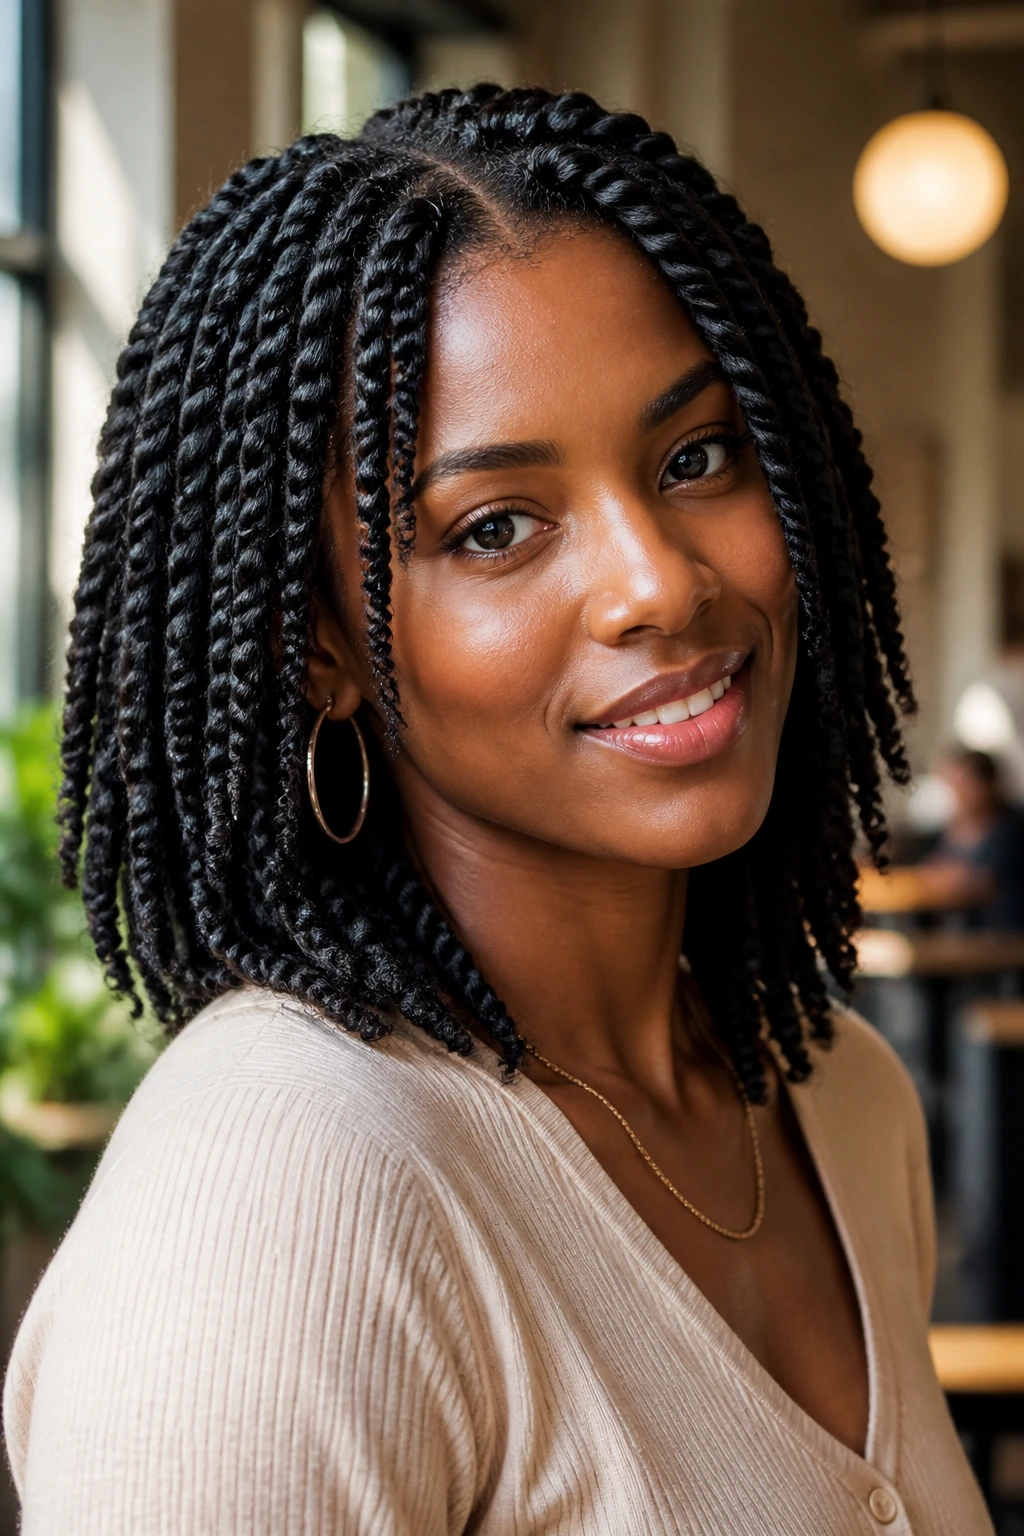
Two-strand twists are practical, but when the layers are placed well, they stop looking plain. A shoulder-length set with slightly shorter pieces near the face and crown keeps the whole style from hanging like a straight curtain. The twists still protect the hair, but the silhouette looks cleaner and more finished.
Why the shape works
The top can stay lighter, the sides can sweep forward, and the ends can sit at different points around the shoulders instead of all stopping in one line. That little shift changes the whole mood of the style. It feels softer and more wearable, especially if you plan to unravel the twists later for a twist-out.
This is a good choice if you want one style that can do double duty. Wear the twists for a few days, then take them down for a layered twist-out when you want more volume. Two styles. One set of prep. That’s a fair trade.
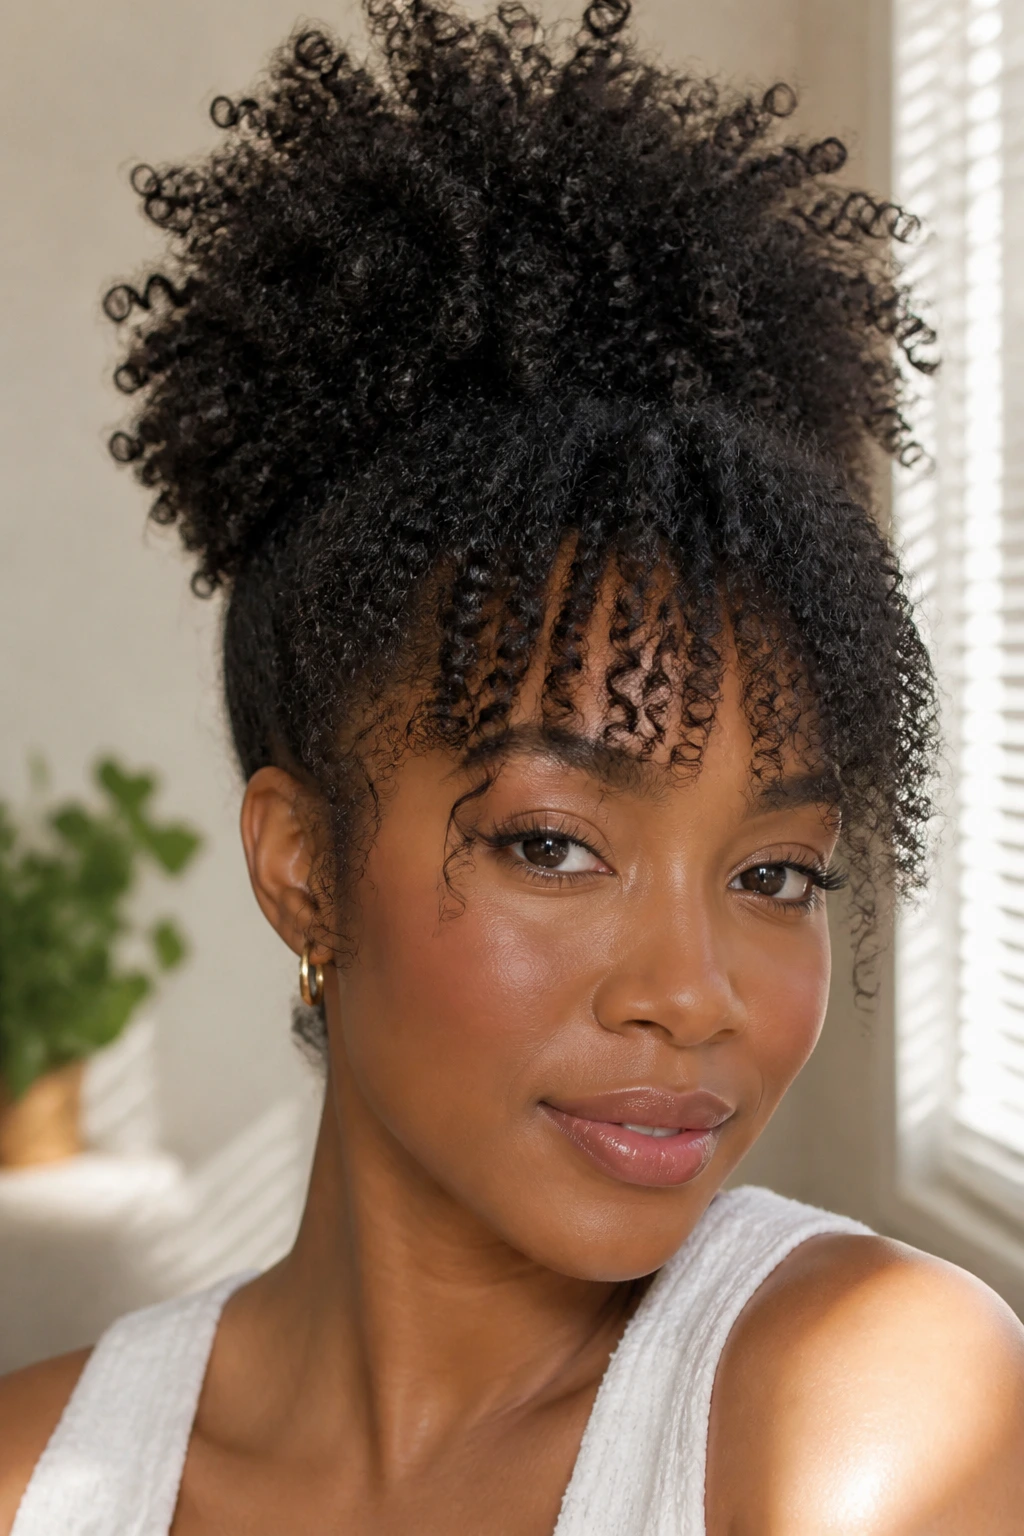
21. The Pineapple Puff With Bangs
A pineapple puff is normally a quick updo. Add layered bangs or front curls, and it becomes something that looks planned. The puff stays high, the face stays open, and the front pieces soften the shape so it does not feel like hair scraped straight back.
The best version uses a loose satin scrunchie or a stretchy band that gathers the curls without flattening the crown. The bangs can be curly, twisted, or stretched, depending on your texture and how much definition you want around the eyes. If your hairline is delicate, keep the front light and avoid pulling the puff too tight.
This style is a favorite for busy mornings because it works with stretched hair, old wash-and-go curls, or a twist-out that’s lost a little neatness. The layers give you something to frame the face even when the rest is gathered up.
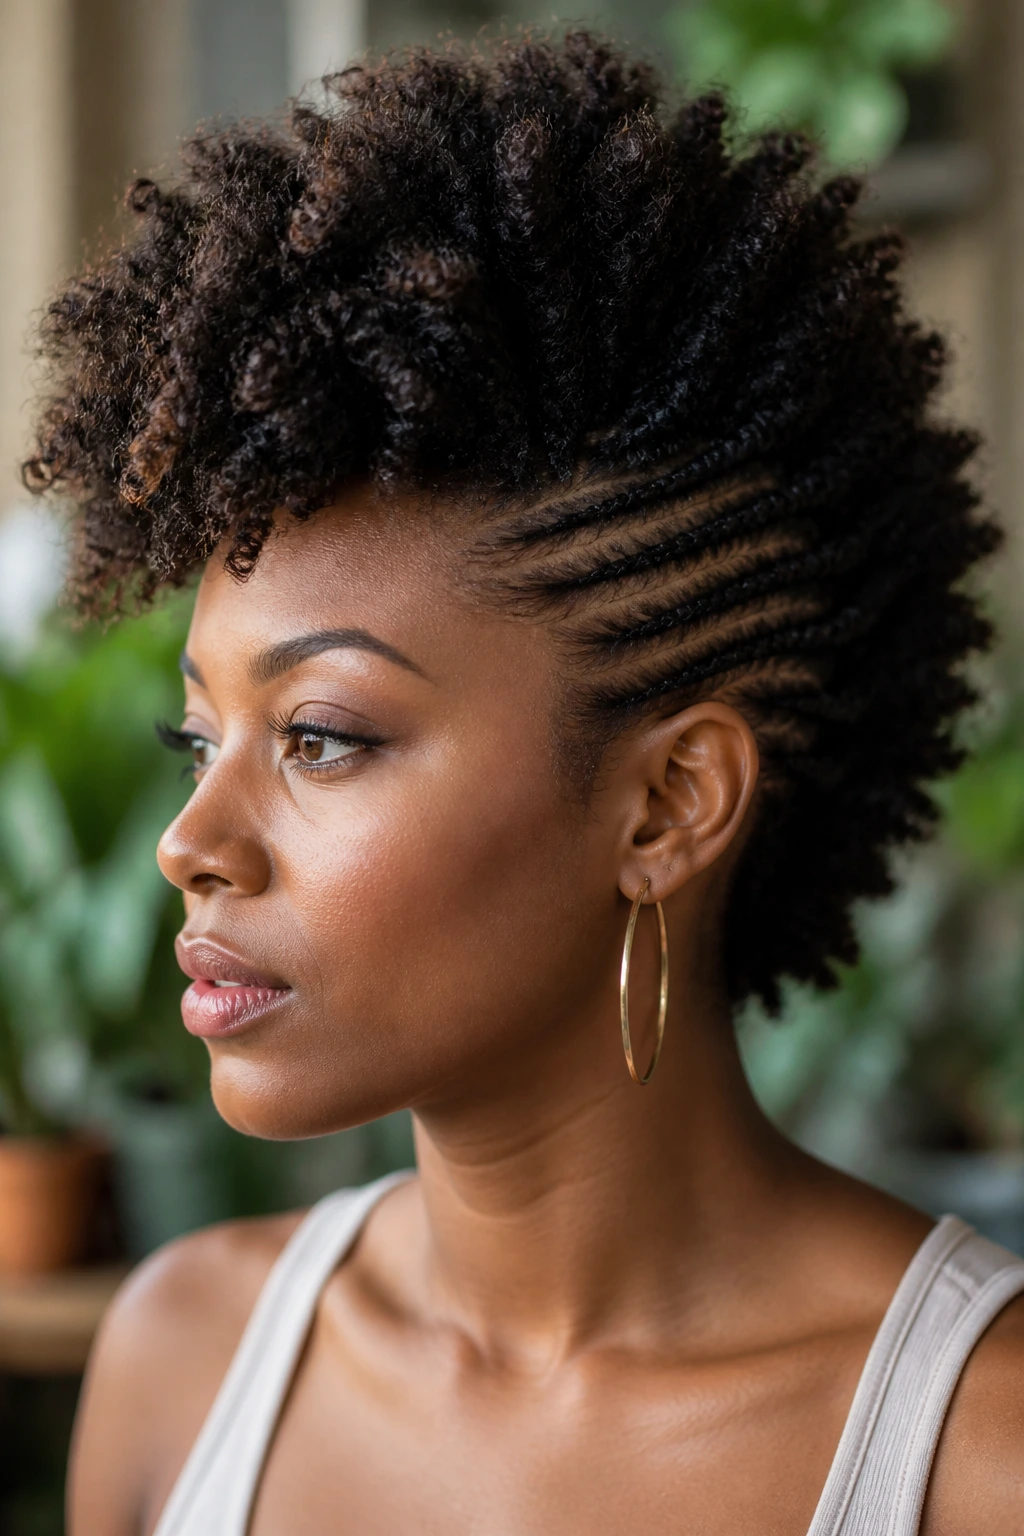
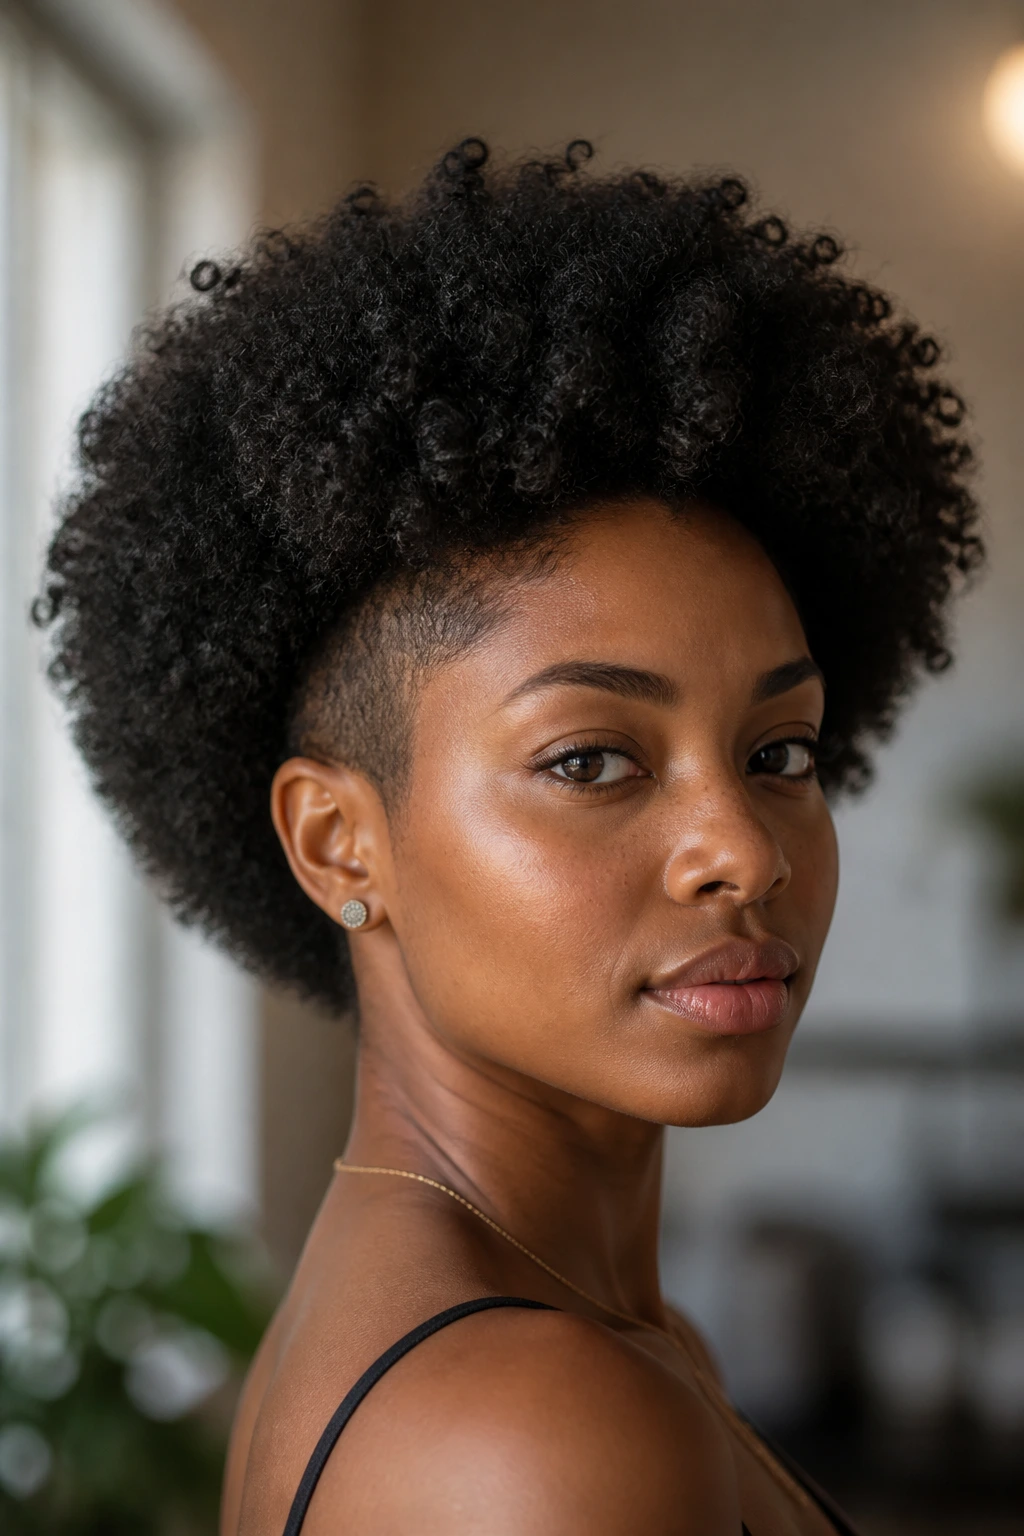
22. The Halo Fro With a Tapered Nape

A halo fro is one of the strongest shapes in natural hair, and a tapered nape keeps it from feeling too heavy at the neck. The layers lift the hair around the face and crown, then let the neckline stay cleaner and shorter. That contrast makes the fro read as round instead of bulky.
The best halo shape is full where it should be full and controlled where it needs to be controlled. Around the temples, the hair can soften the face. At the nape, the shorter length keeps the style from snagging collars and losing shape as fast. That little bit of contrast is what makes the style wearable, not just dramatic.
If you like volume, this is the one to study closely. It has presence. It also knows where to stop.
Why Layers Change the Whole Shape of Natural Hair
Natural hair does not obey the same rules as straight hair, and that is exactly why layers matter so much. Coils stack. Curls spring. The top of the head can hold extra bulk while the ends seem to retreat. One of the best things layers do is redistribute that weight so your hair sits in a cleaner outline instead of collecting all its volume in the wrong spots.
Shrinkage is the other half of the story. A layer that lands at the collarbone when stretched may sit at the jaw once dry, and that shift can make or break a face-framing cut. I would rather see a stylist cut a little longer, check the shape dry, and trim again than watch someone carve front pieces too short because they forgot the curl will bounce back.
Dry hair, stretched hair, or wet hair?
If you wear wash-and-gos most of the time, a dry or dry-to-damp trim usually gives you the clearest read on the final shape. If you wear stretched styles, a lightly stretched cut can make more sense, because you are shaping for the way the hair spends most of its life. Wet cutting can work, but it asks for more experience and more trust in shrinkage math.
Interior layers versus perimeter layers
Perimeter layers change the outer line. Interior layers remove weight inside the shape. On dense hair, interior layers are often the smarter move because they keep the silhouette full while reducing the blocky feel at the sides and crown. On finer coils, too many perimeter cuts can make the ends look thin faster than you want.
The face is part of the cut
That sounds obvious, but plenty of layered cuts ignore it. A front layer that lands at the cheekbone can sharpen the whole look. A layer that lands at the jaw can soften it. A layer that lands too high can create puff you did not ask for. The face is not an afterthought. It is half the haircut.
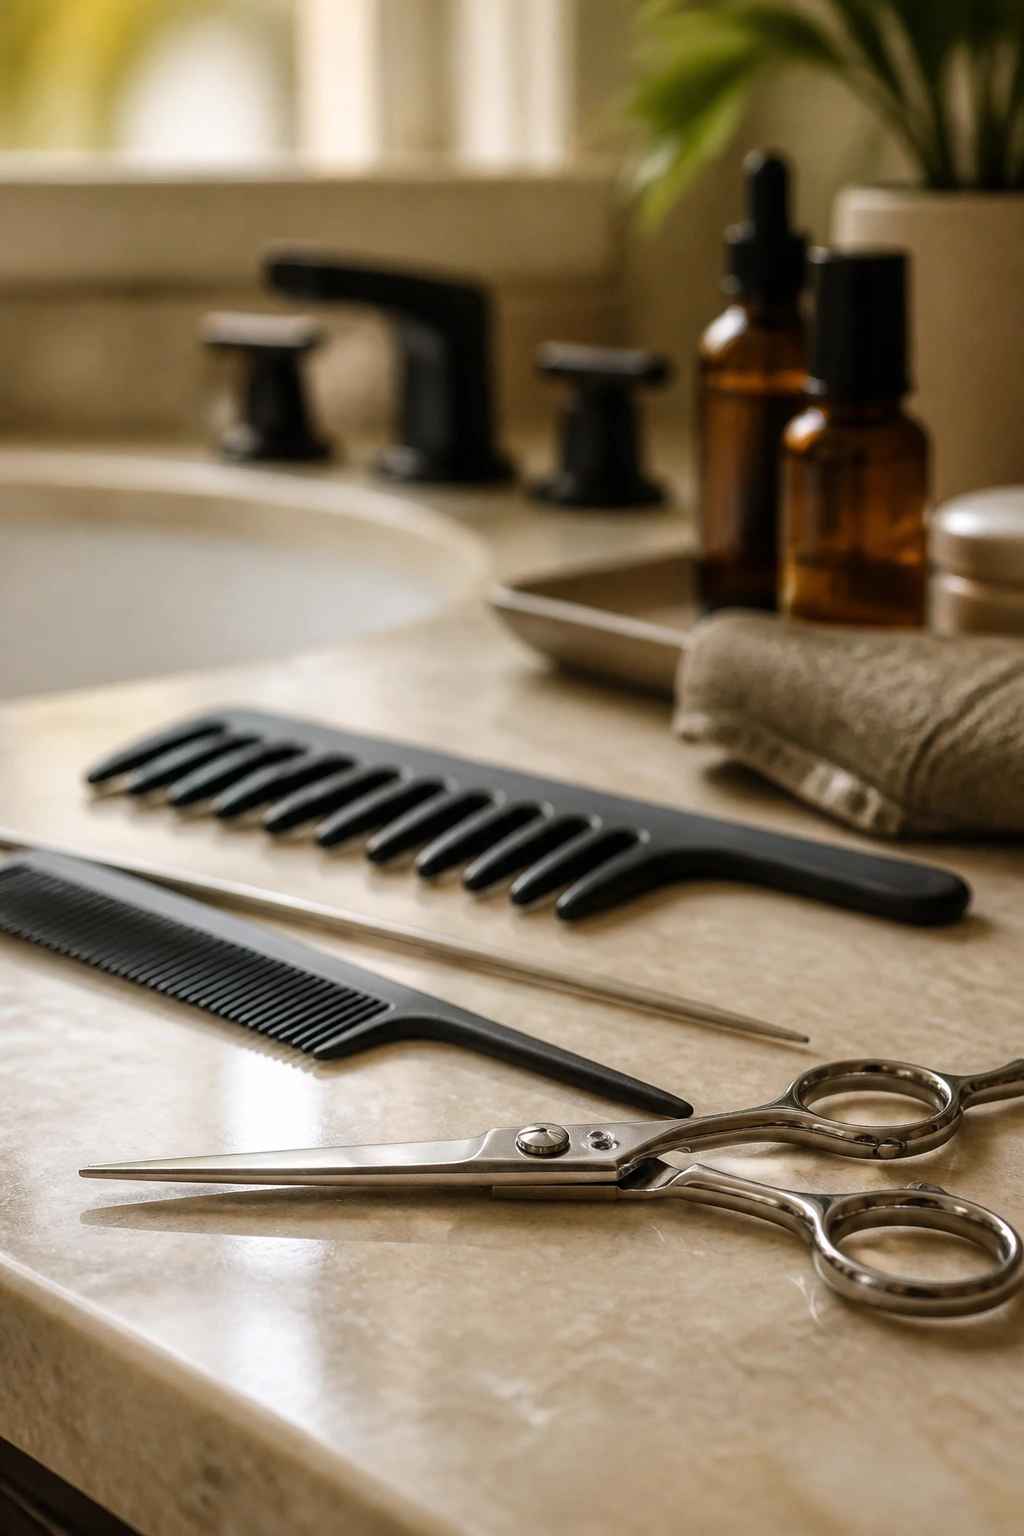
Essential Tools for Layered Cuts, Twist-Outs, and Wash-and-Gos
-
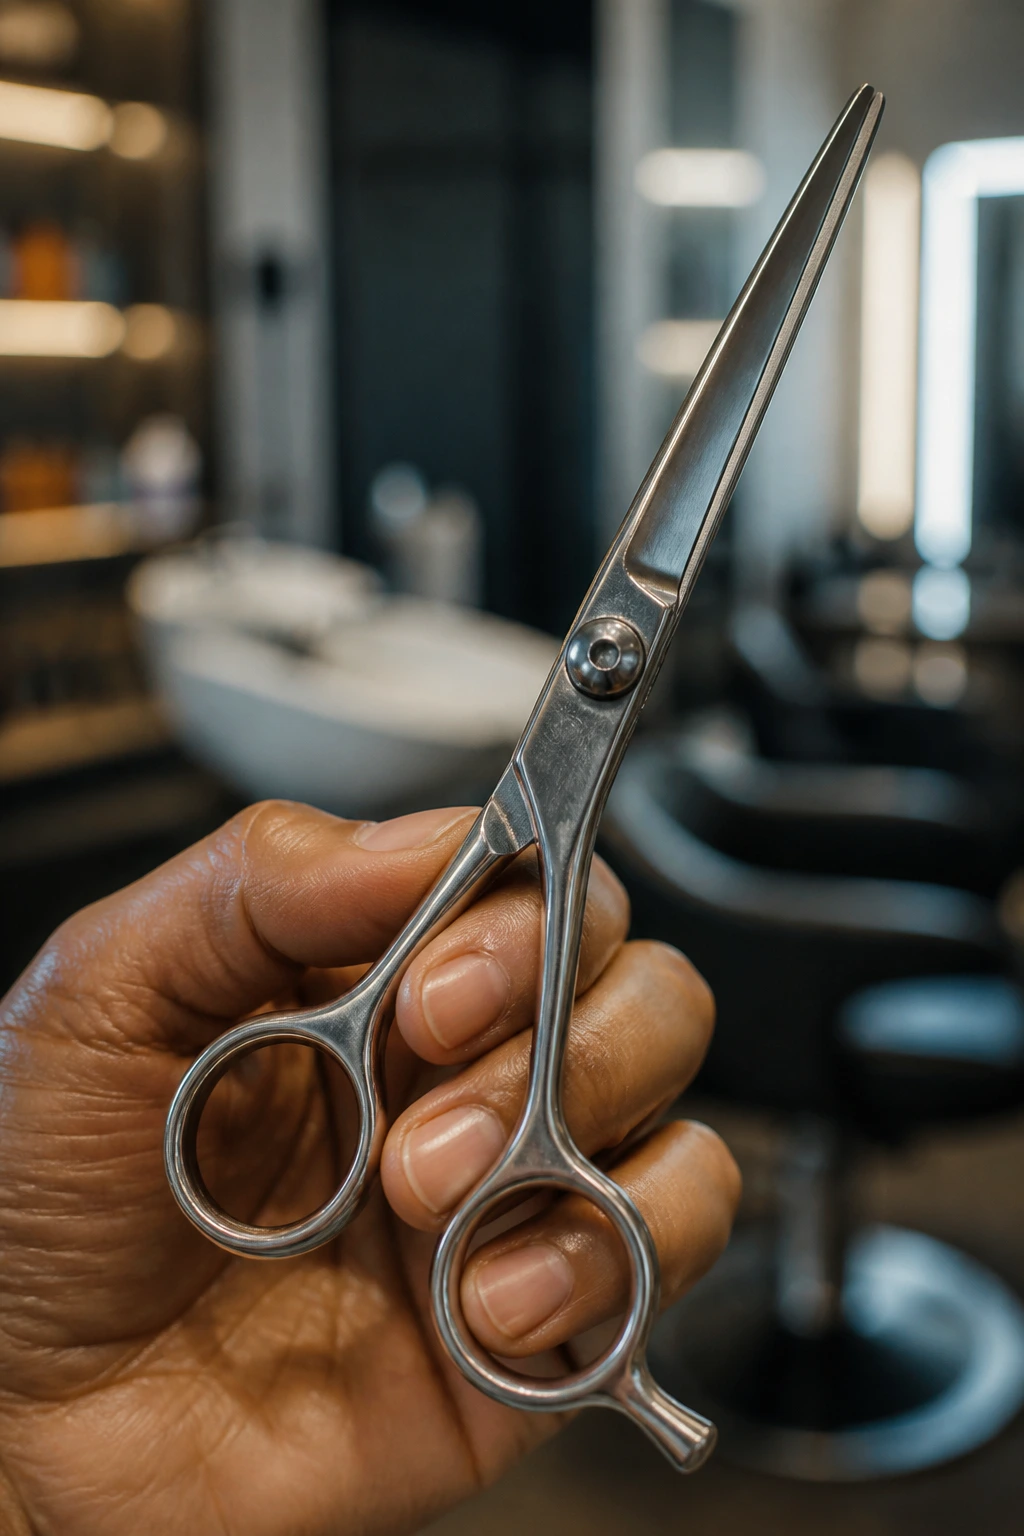
Sharp hair shears: Dull scissors chew the ends and leave layers looking ragged, especially on curl patterns that already fray easily.
-
Rat-tail comb: Useful for creating clean parts, separating sections, and checking whether a style sits evenly on both sides.
-
Wide-tooth comb: Helps detangle without ripping through knots, which matters before any layered cut or twist set.
-
Spray bottle: A simple water mist can wake up front layers, soften bangs, and help with reshaping on refresh days.
-
Leave-in conditioner: Gives slip and softness before styling so the layers do not dry out at the ends.
-
Curl cream or lotion: Good for soft definition and moisture, especially on twist-outs, braid-outs, and wash-and-gos that need movement.
-
Styling gel or foam: Useful when the layers need hold at the roots or around the face, particularly on bobs, puffs, and shags.
-
Diffuser attachment: Helps dry curls without blasting the layers out of shape; keep the heat on low or medium.
-
Duckbill clips: Handy for setting a part, clipping front layers back, or pinning down a frohawk shape while it dries.
-
Satin scarf or bonnet: Keeps layers from flattening overnight and helps preserve the outline between wash days.
-
Microfiber towel or cotton T-shirt: Better than rough bath towels for squeezing out water without disturbing curl clumps.
Smart Product Picks for Natural Layered Hairstyles for Black Women
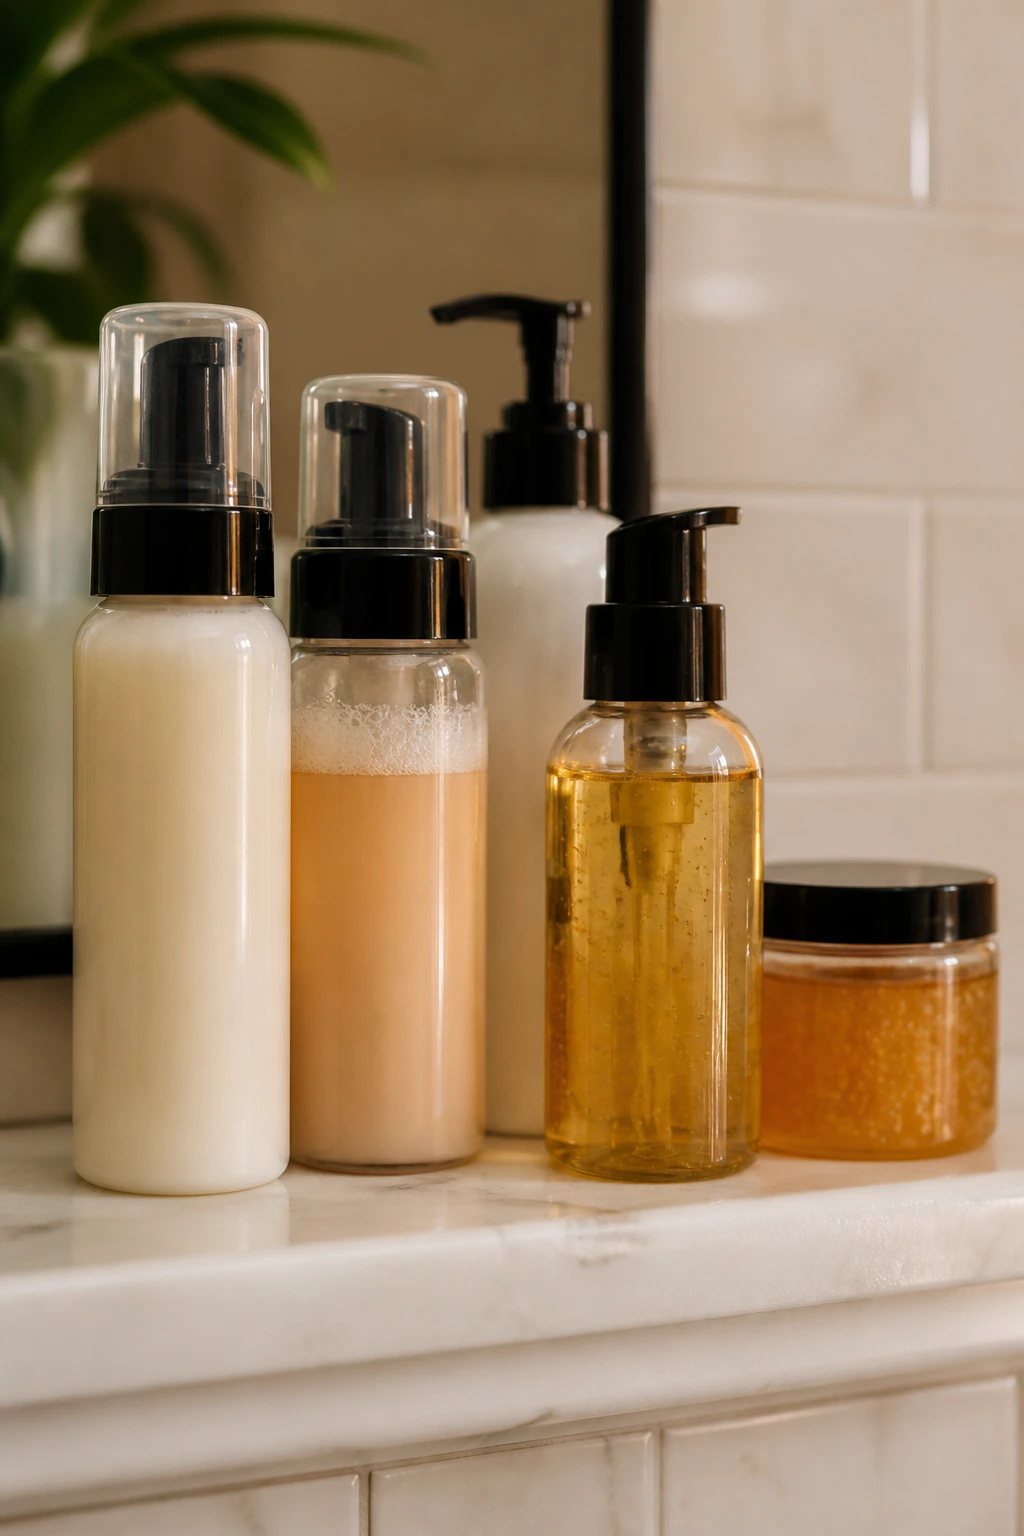
The product shelf matters more with layered hair than people like to admit. A layered shape can be ruined by one heavy cream too many, because weight pulls the shorter pieces down and makes the front look limp. If your hair is fine or medium-density, start lighter than you think you need. A leave-in, a foaming mousse, and a firm gel can do more for shape than a jar of thick butter that never really dries.
On denser 4A to 4C hair, the game changes a little. You may need a richer leave-in or cream to keep the layers soft, especially on twist-outs or braid-outs. Still, heavy is not the same as useful. If the product leaves a film on your fingers or takes forever to dry, it can flatten the crown and blur the face-framing pieces. I like products that coat the hair without turning it slick.
What to look for by style
- Wash-and-gos: Stronger gels or jelly formulas with clean hold, so the curl clumps stay readable.
- Twist-outs and braid-outs: Cream plus a light setting foam, which gives softness at the base and shape at the ends.
- Puffs and frohawks: Light edge control and a moisturizing spray, not a thick paste that cakes up near the hairline.
- Short cuts and TWAs: Creams and lotions with enough slip to define coils without weighing them down.
If you wear your hair in stretched styles, add a heat protectant before blow-drying with tension or a comb attachment. If you rarely use heat, you can skip that and focus on moisturizers that keep the layers bendable. Good products should support the cut. They should not bully it.
How to Wear These Styles Without Fighting Your Texture
Presentation: Let the shortest pieces do their job. Face-framing layers should land where the eye naturally goes — cheekbone, jaw, or collarbone — and not sit so high that they puff out like little shelves. A side part can make a layered cut look more relaxed, while a center part gives it a cleaner, more symmetrical feel.
Accessories: Small hoops, cuffs, satin headbands, claw clips, and narrow scarves all work well because they echo the shape instead of crowding it. A giant bow or a bulky clip can swallow a delicate bob, but a slim accessory can sharpen a frohawk or puff in one move.
Scale: Match the size of the layers to the size of your hair. Dense hair can handle shorter crown layers and wider shapes without looking thin. Finer hair usually does better with fewer, longer layers so the ends keep enough weight to look full. If your hair is long, a U or soft V shape gives movement without losing the sense of length.
Outfit Pairing: High necklines make face-framing layers stand out because the hair has room to move above the collar. Scoop necks, off-shoulder tops, and simple crewnecks do the same thing in a softer way. The style should feel balanced against the neckline, not fighting it for space.
Extra Shape Boosters That Keep Layers Looking Fresh
Flavor Enhancement: A tiny bit of mousse at the roots can wake up a layered bob, shag, or twist-out faster than re-wetting the whole head. It gives lift without saturating the ends, which is where layered styles lose their shape first.
Customization: If your face is rounder, keep the front pieces a little longer and let the part travel slightly off-center. If your face is more angular, a softer fringe or a rounded crown helps the layers feel less severe. Tiny changes matter more than dramatic chops.
Serving Suggestions: A side tuck, a half-pinned front section, or a few gold cuffs around the face can make the layers easier to read. These small moves are the hairstyle equivalent of good lighting. They do not change the cut, but they help the shape show up.
Make-It-Yours: For low-manipulation days, choose longer layers that still work in buns, puffs, and twists. For more volume, ask for shorter crown pieces and a slightly stronger side shape. For a softer look, keep the perimeter round. For a sharper look, keep the silhouette a little more angular. No need to copy a picture line by line when your hair already knows where it wants to live.
Night Care, Refresh Days, and Trim Timing
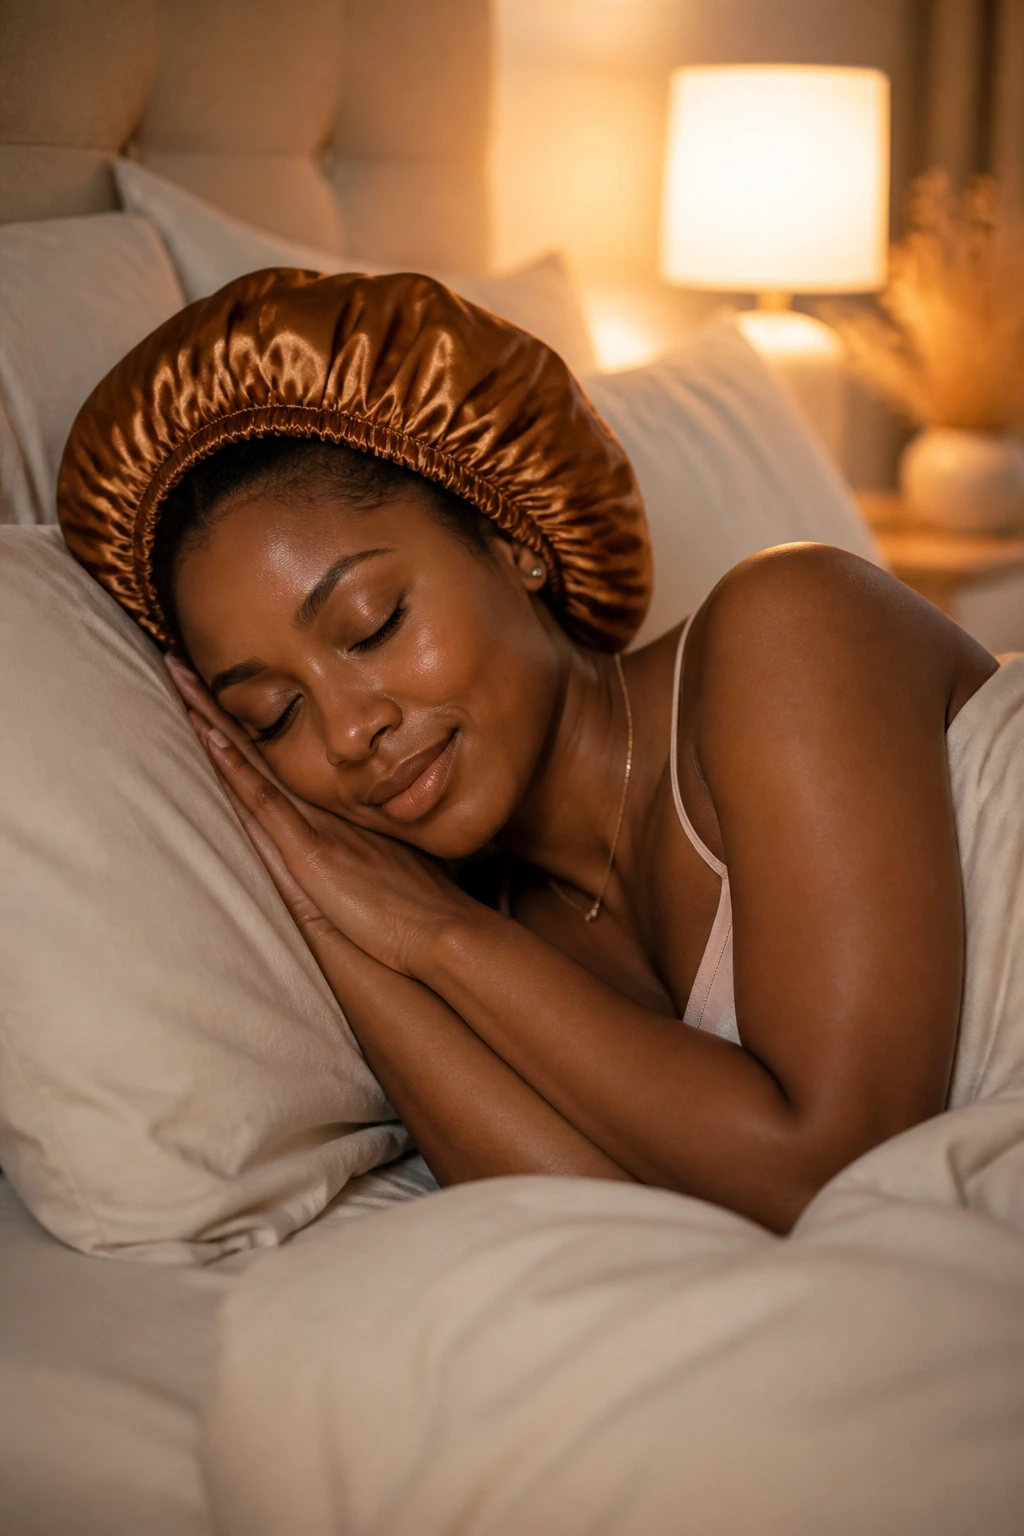
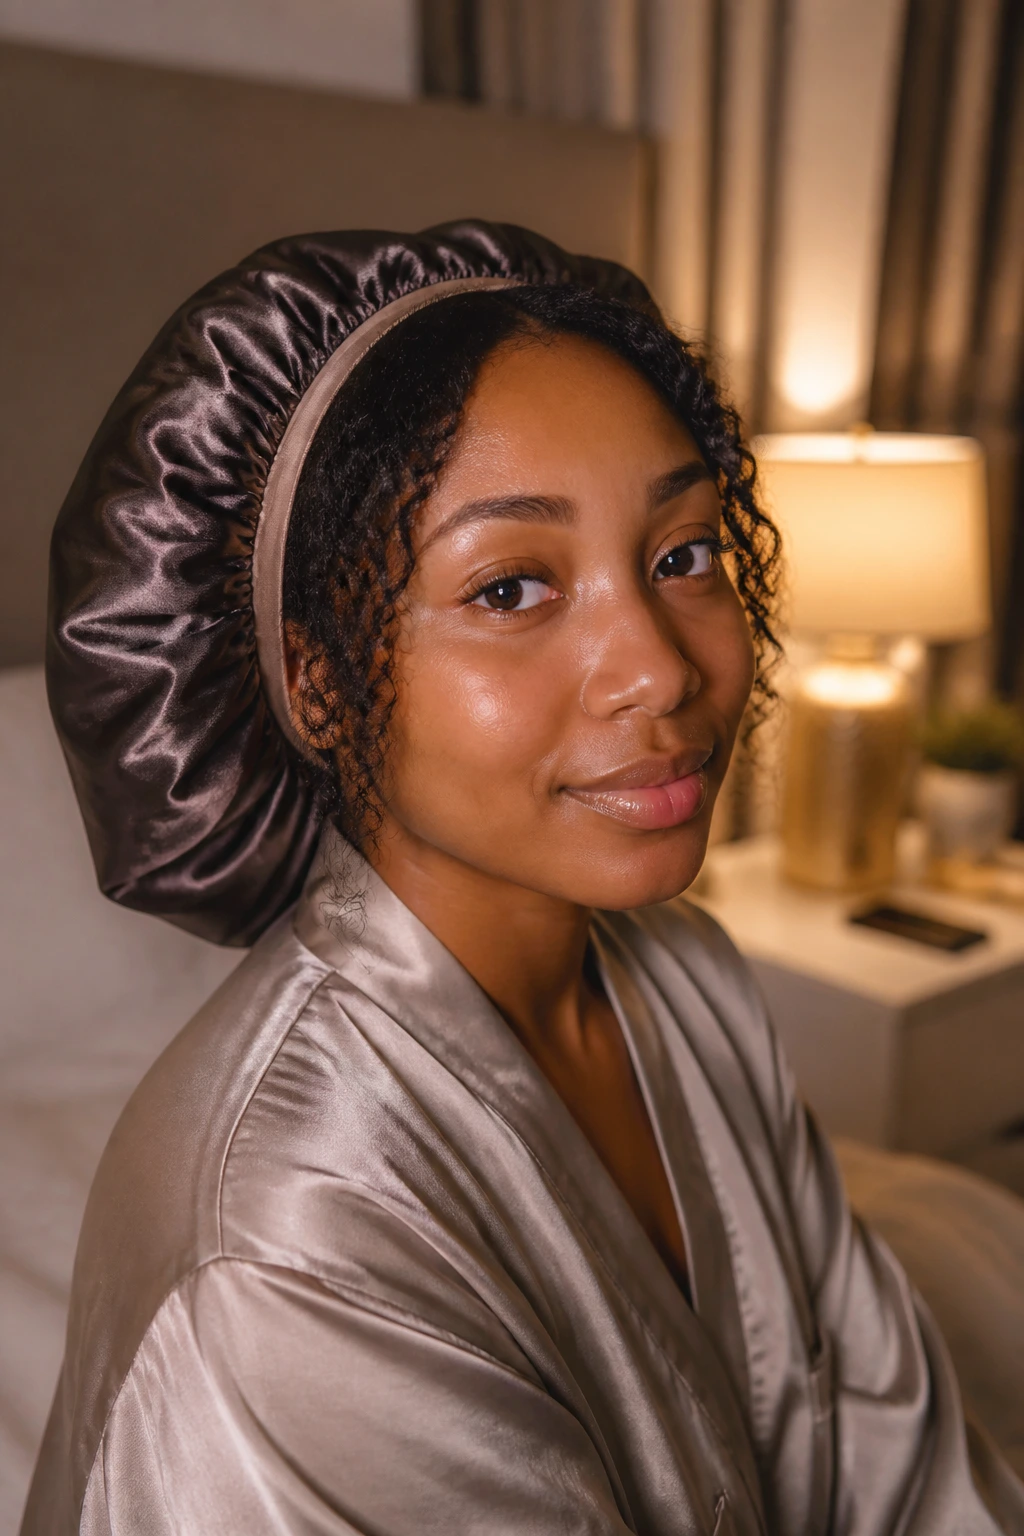
Layered natural hair stays sharp longer when you treat the shape like part of the routine, not an afterthought. At night, a satin bonnet or scarf helps the layers keep their direction, and a pineapple works well for puffed styles and loose curls. If the front pieces are short, I like to tuck them under the scarf or pin them loosely so they don’t stick straight up by morning.
For wash-and-gos, a light refresh with water and a little leave-in every 2 to 3 days keeps the curls from hardening into a frizzy shell. Twist-outs and braid-outs usually need less frequent wetting; too much water can make the layers swell unevenly. A small amount of mousse on the outer layer often brings the shape back without starting from zero.
Trim timing depends on the style. Short layered cuts and TWAs may need shaping every 4 to 6 weeks if you want the silhouette tight. Bobs, shags, and lob shapes usually hold up for 8 to 12 weeks before the front starts losing its line. Long U and V cuts can stretch longer between trims, but only if the ends stay healthy. Split ends creep up quietly, then all at once. They are rude like that.
If you wear protective styles, clean the scalp and moisturize the base regularly so the layers underneath do not dry out and swell in odd places when you take the style down. The shape is easier to keep when the hair is not fighting dryness from the inside.
Variations and Adaptations to Try
The Low-Drama Version: Keep the layers long, soft, and mostly internal if you want the shape to stay subtle. This works well for people who need their hair to tuck into buns, clips, and ponytails without giving up the cut.
The High-Volume Version: Ask for shorter crown layers and a rounded perimeter if you want your hair to lift away from the head. This is the move for dense curls that can handle shape without looking sparse.
The Heatless Definition Version: Build the style around twist-outs, braid-outs, or flexi-rod sets instead of heat. The layers show up as movement and separation, and the finished shape usually feels softer than a blow-dried look.
The Protective-Style Version: Adapt the cut into mini twists, flat twists, or layered loc styling. The front pieces can still frame the face, but the rest of the hair gets a break from daily styling.
The Short-Cut Version: Turn the same idea into a TWA, frohawk, or tapered cut. The layers move higher on the head, which keeps short natural hair from reading flat or round in the wrong place.
Common Mistakes With Natural Layered Hairstyles for Black Women
-
Cutting for wet hair instead of the way you actually wear it: A wet curl can hide two inches of shrinkage, which means the final cut may sit much shorter than you expected. Fix it by trimming in the same state you style most often.
-
Starting the front layers too high: If the shortest pieces sit above the cheekbone on a shrink-prone texture, they can puff up like tiny springs and overwhelm the face. Fix it by keeping the first visible layer a little longer, then adjusting after the hair dries.
-
Using heavy products that erase movement: Thick butters and dense creams can flatten a layered cut, especially around the crown and the face. Fix it with lighter moisture near the top and richer products only on the driest ends.
-
Skipping trims for too long: Split ends do not stay polite. They fray, then blur the shape, then make even a well-cut style look tired. Fix it with regular shaping before the outline starts to drift.
-
Forgetting that density changes the silhouette: A cut that looks balanced on fine curls can look too thin or too wide on thick coils. Fix it by choosing internal layers and a shape that matches your actual density, not the picture you saved on your phone.
Frequently Asked Questions
Should layered natural hair be cut dry or wet?
For most Black women with curls and coils, dry or lightly stretched cutting gives a clearer read on the final shape. Wet hair hides shrinkage, and shrinkage is where layered cuts either win or go sideways. If you mostly wear wash-and-gos, dry cutting is usually the safer call.
Do layers make natural hair look thinner?
They can, if too much weight is removed from fine or medium-density hair. The fix is to keep the longest perimeter strong and use interior layers instead of chopping the ends to pieces. On dense hair, layers usually do the opposite — they make the shape look lighter without reducing fullness.
Which face shapes work best with face-framing layers?
Round faces often benefit from layers that start a little below the chin, because that adds vertical length. Heart-shaped faces can handle more movement around the cheekbones, while square faces usually look softer with curved layers that fall around the jaw. Oval faces can wear almost any version, which is annoyingly convenient.
How often should I trim a layered natural haircut?
Short shapes and bobs usually need shaping every 4 to 8 weeks if you want the outline to stay crisp. Longer cuts can go 8 to 12 weeks, sometimes a bit more, depending on split ends and how much the hair grows at the perimeter. The shape should tell you when it’s time; once the front disappears, the cut is asking for help.
Can layered styles work on 4C hair?
Absolutely. In fact, 4C hair often benefits the most because the density and shrinkage can hide layers in a way that looks soft and full. The key is not to over-thin the ends. Keep the shape intentional, and let the coil pattern do the rest.
What if my layers look uneven after a wash-and-go?
Do not panic and do not keep touching them. Uneven layers usually settle after the hair dries and is fluffed at the roots. If one side still sits off, a side part, a twist at the front, or a light refresh with mousse can balance the silhouette without another full wash.
Can I wear layered natural hair in protective styles?
Yes, but the layers should be placed with the long-term style in mind. Mini twists, flat twists, layered locs, and twist-outs all carry shape well, especially if the front pieces are left a little softer. If the style needs to last, avoid cutting so aggressively that the protective style loses its hold.
What’s the easiest layered style to maintain between wash days?
A high puff, a tapered cut, or a shoulder-length twist set usually asks for the least daily work. Each one can be refreshed with a little water, a bit of mousse, and a satin wrap at night. If your schedule is packed, choose the shape that survives being touched less.
Layers That Move With You
Layered hair on Black women works best when it feels like it belongs to the texture, not in spite of it. Coils and curls need room to breathe, and a good cut gives them that room without stealing the fullness that makes natural hair beautiful in the first place. When the shape is right, the hair stops fighting your face and starts working with it.
The nicest part is that layered styles are not all one mood. Some are soft and rounded. Some are sharp. Some are tiny and neat. Some are full of swing and drama. Pick the shape that fits how you wear your hair most days, and you’ll notice the difference every time you turn your head.
1. The Curly Lob That Skims the Jaw
A curly lob with internal layers is one of those shapes that looks calm from the front and quietly clever from the side. The length usually lands somewhere between the chin and the collarbone, which gives your curls room to move without dragging the whole silhouette down. On dense natural hair, that extra bit of lift keeps the lob from turning into a square block.
The best version keeps the outer line soft while trimming some weight inside the shape. That way, your curls still look full, but they do not balloon at the sides every time humidity shows up with an attitude. A side part helps too. It breaks the symmetry, lets one side sweep forward, and makes the layers read as intentional instead of accidental.
If you want a practical shape that works for errands, work, and dinner without changing the whole routine, this is a smart starting point. Ask for the shortest front pieces to land around the jaw or just below it, then keep the back long enough to brush the collarbone. That little gap matters. It keeps the cut from riding too high once your curls dry and shrink.
2. The Rounded Afro With Soft Crown Layers
A rounded afro lives or dies by its crown. Without layers, the top can puff up while the sides hold too much width, and the result is the classic triangle shape people complain about but rarely know how to fix. Soft crown layers solve that by removing weight where the hair stacks up most.
The best rounded afro does not look carved with harsh edges. It looks full, even, and slightly lifted at the top, with the perimeter sitting in a clean curve around the face. That curve is what gives the style its polish. I like this shape especially on dense 4B and 4C hair, because the texture has enough body to hold the outline without looking sparse.
What to ask for at the salon
- Keep the perimeter rounded, not square.
- Trim the crown in small steps so the top rises without popping too wide.
- Leave enough length around the temples to soften the face.
- Cut on dry or stretched hair if you wear your fro in that state most of the time.
That last point matters more than people think. A wet trim can hide shrinkage and leave the final shape sitting much shorter than expected. Dry cutting takes more patience, but on a rounded afro, patience is usually the price of getting the shape right.
3. The Wash-and-Go Bob That Holds Its Shape
Why does a layered wash-and-go bob work so well? Because it gives curl definition a clear border. Instead of hair spreading outward in every direction, the bob keeps the outline close to the head while the layers stop the body from getting bulky in the wrong place. You get bounce without the helmet effect.
This shape is especially good if your curls clump easily and you like strong definition from gel or mousse. The shorter front pieces can skim the chin, while the back sits a little longer for balance. A diffuser helps, but air-drying works if you can leave the hair alone long enough. Leave it alone, though. Touching it too early ruins the curl clump and creates frizz at the crown.
The bob also makes shrinkage look purposeful instead of frustrating. When the curls spring upward, they still have a strong outline underneath, so the cut keeps its personality. That’s the difference between a style that looks edited and one that just looks short.
4. The Curly Shag With Real Attitude
A curly shag is for the woman who wants movement, not discipline. The whole point is unevenness done on purpose: shorter layers around the crown, longer pieces around the sides, and enough piecey texture around the face to keep the style from feeling heavy. It’s a little messy in the best way.
The shag works because it gives coily and curly hair places to collapse and places to lift. Hair that naturally wants volume can start to feel less like a block and more like a shape with air in it. If you want face-framing pieces, keep them longer than you think. Short fringe on tight curls can jump up fast and sit higher than expected once dry.
Best when you want:
- A softer shape around the cheeks and jaw
- More lift at the crown
- Less weight in the back
- A style that still looks good when it gets a little lived-in
A shag does not need perfection. It needs structure. That’s why it ages well over a few days, especially if you refresh the front with a little water and leave-in instead of trying to rebuild every curl from scratch.
5. The Tapered Cut With Lifted Crown
A tapered cut is one of the sharpest ways to let natural texture do the talking. The sides and nape stay short, while the top keeps enough length to show off curls, coils, or finger-coiled definition. Add layered crown pieces, and the whole style rises instead of sitting flat like a cap.
This shape is especially useful if you want low daily manipulation. You can finger-style the top, use a small amount of curl cream, and let the cut do most of the work. The shorter sides also make the face look more open, which is why this cut can feel both clean and bold at the same time.
The biggest mistake with a tapered cut is taking the sides too close before you know how much lift you actually want. Start a little longer if you’re unsure. Hair can always be trimmed shorter. It cannot grow back for the weekend.
6. The Twist-Out That Frames the Face
A layered twist-out has a kind of softness you can’t fake with product alone. The twists create a stretched base, and the layers keep the final release from looking like one flat sheet. When the front pieces are cut to land around the cheekbones, the whole style starts to frame the face instead of just sitting around it.
This style works best when the twists are set with enough consistency to clump well, but not so much product that they dry stiff. A creamy leave-in, a small amount of setting foam, and a light gel at the ends usually do the job. Too much oil on the first day will make the layers separate in a greasy way, not a pretty way.
If your hair is shoulder length or longer, a twist-out with face-framing layers can give you movement without heat. It’s also one of the easier ways to test whether you’re ready for a real layered cut, because you can see how the shape falls before committing to scissors.
7. The High Puff With Soft Bangs
A high puff can look plain if the front is left untouched. Add soft bangs or layered front pieces, though, and the whole thing changes. Suddenly the puff has a face, not just a crown. The layers around the hairline and temples keep the style from feeling like a quick fix.
The key is tension. Too tight, and the puff pulls the hairline back and looks severe. Too loose, and the puff drops by midday. I like a strong satin scrunchie or elastic that holds without cutting into the roots, plus a small bit of moisture on the front pieces so they sit with shape instead of floating away.
This is one of the best styles for second- or third-day hair. You can refresh the front, fluff the puff, and keep moving. The style does not ask for much. That is part of its charm.
8. The U-Cut for Long Natural Length
A U-cut is subtle, which is exactly why I like it on long natural hair. From the back, the hair drops in a gentle curve instead of a blunt shelf. That curve keeps the bottom from feeling heavy, but it does not remove so much length that the ends start looking thin and sorry.
The shape works especially well if you wear stretched styles, twist-outs, or braid-outs more than wash-and-gos. The U keeps the back soft and full while the front layers can still open around the face. On dense hair, it also helps reduce the drag that can make long styles feel thicker than they look.
Ask for this if you want:
- Length that still moves
- A softer back line
- Less bulk at the ends
- A cut that grows out cleanly between trims
A U-cut is not flashy. It is useful. And that matters more on long natural hair than people admit, because useful shapes are the ones you keep returning to.
9. The V-Cut for Dramatic Movement

A V-cut gives long natural hair a sharper finish than a U-cut. The longest point sits at the center back, which creates a subtle point and pulls the eye downward. On stretched coils, braid-outs, or rod sets, that shape looks especially clean because the layers fall in a visible cascade.
The danger is overdoing it. If the point is too aggressive, the ends can look sparse, especially on finer textures. I prefer a soft V rather than a hard one. It still gives drama, but it keeps the length believable and the perimeter strong.
This style is one of the best choices if you like long hair but hate the feeling of a heavy sheet hanging down your back. The layers give the hair a way to move when you walk, and that movement is the whole point. Long does not have to mean static.
10. The Braid-Out With Flipped Ends
A layered braid-out has more shape than the usual one-length braid set because the ends do not all stop in the same place. That matters. Once the braids come down and the curls start flipping outward, the layers create movement across the shoulders instead of one blunt line.
The trick is section size. If you use the same braid size everywhere, the result can look too uniform. I like smaller braids near the face and crown, then slightly larger sections lower down. It gives the braid-out a gentle shape shift from top to bottom, which looks more natural on textured hair.
Dry fully before unraveling. Fully. A braid-out that is even a little damp at the roots will swell into frizz the minute you separate it, and no amount of oil will save that. Use a small amount of oil on your fingers, separate once, fluff the roots, and stop there before you turn the whole thing into a halo of fuzz.
11. The Mini Twists With a Side Sweep
Mini twists are one of the quietest layered styles, and that is part of their appeal. They protect the hair, keep daily manipulation low, and can be arranged so the front section falls to one side for a soft face-framing effect. The layers are not loud, but they still matter.
This style works best when the twist lengths vary a little. Longer twists around the sides and front keep the shape from looking boxy, while a slightly shorter crown can add lift. If every twist lands at exactly the same place, the style starts to resemble a curtain. A little variation fixes that.
Mini twists are also practical for people who want a style that survives busy weeks without constant restyling. They can be worn down, pinned back, or gathered into a low puff. That flexibility makes them one of the easier ways to wear layers without needing heat or daily effort.
12. The Frohawk With Layered Sides
A frohawk is the style I reach for when I want natural hair to look unapologetically strong. The sides are shaped down or pinned flat, while the middle ridge keeps volume and lift. Add layers through the center, and the whole thing becomes more sculpted, less puffy.
This is not a style that benefits from too much product. The shape already does the heavy lifting. A little gel or styling cream at the sides keeps them close to the head, and the center can stay fluffy, defined, or stretched depending on your texture. If your hair is very dense, the frohawk can handle more height than you think.
The best thing about this shape is the contrast. Flat sides. Full center. Clean face framing. It has enough drama to feel special without needing extra hair or complicated prep.
13. The Chin-Length Coil Bob
A chin-length coil bob is small, sharp, and surprisingly versatile. Because the length sits around the jaw, the bob opens the face right where most people want lift, and the layers inside the shape keep coils from forming one thick block. On tight textures, that internal shaping is doing a lot of work.
What to ask for
- A perimeter that touches the chin or sits just below it
- Soft internal layers to reduce bulk
- Slightly longer pieces in front if you want a face-framing effect
- A dry or stretched trim if shrinkage is strong
This style looks especially good on hair that springs into clean coils or defined twist-outs. It has a neat outline, but it is not stiff. That balance matters. A bob that’s too blunt on coily hair can feel boxy fast, while a layered coil bob stays lively as it grows out.
14. The Asymmetrical Cut That Breaks the Box
An asymmetrical layered cut is for anyone tired of hair that sits politely and behaves like it’s waiting for permission. One side stays longer, the other side sits a little higher, and layers keep the difference from looking harsh. The result is shape with attitude.
This cut does a lovely job of redirecting attention. If one side of your face feels fuller, or if you like tucking hair behind one ear, asymmetry gives you a built-in reason for the movement. It also works well with side parts because the part and the cut can play off each other instead of fighting each other.
I like this cut on thick hair because it removes bulk in a way that still leaves the silhouette full. It grows out more gracefully than people expect too, provided the longer side is not cut too extreme. Keep it wearable. Wearable ages better than dramatic for the sake of drama.
15. The Loc Bob With Curved Layers
Locs can carry layers in a way that feels clean rather than choppy, especially when the length lands around the chin or shoulders. A layered loc bob gives the style more swing and keeps the ends from hanging in one solid line. If your locs are mature, the cut should be thoughtful. Locs do not forgive random scissors.
The most flattering versions keep some fullness around the cheeks and lift the hair away from the neck. That makes the jawline show up better and keeps the style from weighing the face down. Curved layers also help locs move when you turn your head, which sounds small until you notice how stiff locs can feel when every strand is the same length.
This is one of those styles where restraint pays off. A few carefully placed layers can do more than a heavy chop ever will.
16. The Half-Up Style With Cascading Curls
A half-up, half-down style becomes a layered hairstyle the moment the loose section has shape. The top pulls away from the face, the bottom drops in a cascade, and the layers keep the loose curls from stacking into one thick wall. It’s a simple styling idea, but the right cut makes it look deliberate instead of thrown together.
The front pieces matter most here. Keep them soft and a touch longer so they can skim the cheeks when the top is pulled back. A claw clip or satin tie works better than an overly tight elastic, because the style should lift, not pinch. If the back is long, a few longer layers around the shoulders keep the loose section from hanging like a weight.
This is the kind of style that saves a wash day when you need the hair out of your face but still want the texture to show. It works for brunch, work, or a night out without asking for a whole new plan.
17. The Feathered TWA
A feathered TWA is a tiny cut with a lot of personality. Instead of sitting in one compact shape, the layers lift and soften the top, which keeps the style from looking too flat against the head. On tightly coiled hair, that little bit of feathering can turn a simple cut into something elegant and sharp.
The best TWA layers are subtle. Too much shaping can expose the scalp in odd places or make the hairline look overly carved. A light hand gives you a soft halo effect around the temples and crown, which is usually the most flattering zone on a short cut.
Small details that make it work
- Finger-coil the front if you want more definition
- Keep the nape clean so the top reads taller
- Use a cream with slip, not a heavy butter
- Ask for the layers to be checked from the side as well as the front
A feathered TWA has a lovely honesty to it. There’s no hiding behind length. The shape has to carry the whole look.
18. The Flat-Twist Crown With Soft Framing
A flat-twist crown style gives you structure around the head and softness around the face, which is a good trade. The twists can run from the hairline toward the crown, then release into loose ends or be pinned into a tucked shape. The layered pieces in front make the style feel lighter and more flattering than a rigid pulled-back look.
This style works well for formal days, low-manipulation stretches, or any week when you need your hair to stay put. Because the twists sit close to the scalp, the style holds shape longer than a loose set. The face-framing pieces keep it from feeling severe.
A small amount of mousse before twisting helps the sections lie neatly, and a satin wrap at night keeps the part lines from frizzing up. It’s a quiet style, but not a boring one. There’s a difference.
19. The Bantu Knot-Out With Piecey Ends
A Bantu knot-out with layers can look almost sculpted when it’s done right. The curls come down in different lengths, which gives the style its piecey movement. Around the face, that extra movement matters. It stops the style from forming one round mass and lets the curls sit with intent.
The sections should be even enough to set well, but the layers can vary in length underneath. That means the finished curls land in little arcs instead of one flat sweep. I like this style when the goal is definition first and volume second. It gives you both, but the definition is the part that reads first.
Do not rush the takedown. If the knots are still cool at the center, wait longer. A Bantu knot-out that comes down too early tends to frizz from the roots and lose the crisp curl pattern that makes the style worth doing in the first place.
20. The Two-Strand Twist Set That Sits at the Shoulders
Two-strand twists are practical, but when the layers are placed well, they stop looking plain. A shoulder-length set with slightly shorter pieces near the face and crown keeps the whole style from hanging like a straight curtain. The twists still protect the hair, but the silhouette looks cleaner and more finished.
Why the shape works
The top can stay lighter, the sides can sweep forward, and the ends can sit at different points around the shoulders instead of all stopping in one line. That little shift changes the whole mood of the style. It feels softer and more wearable, especially if you plan to unravel the twists later for a twist-out.
This is a good choice if you want one style that can do double duty. Wear the twists for a few days, then take them down for a layered twist-out when you want more volume. Two styles. One set of prep. That’s a fair trade.
21. The Pineapple Puff With Bangs
A pineapple puff is normally a quick updo. Add layered bangs or front curls, and it becomes something that looks planned. The puff stays high, the face stays open, and the front pieces soften the shape so it does not feel like hair scraped straight back.
The best version uses a loose satin scrunchie or a stretchy band that gathers the curls without flattening the crown. The bangs can be curly, twisted, or stretched, depending on your texture and how much definition you want around the eyes. If your hairline is delicate, keep the front light and avoid pulling the puff too tight.
This style is a favorite for busy mornings because it works with stretched hair, old wash-and-go curls, or a twist-out that’s lost a little neatness. The layers give you something to frame the face even when the rest is gathered up.
22. The Halo Fro With a Tapered Nape
A halo fro is one of the strongest shapes in natural hair, and a tapered nape keeps it from feeling too heavy at the neck. The layers lift the hair around the face and crown, then let the neckline stay cleaner and shorter. That contrast makes the fro read as round instead of bulky.
The best halo shape is full where it should be full and controlled where it needs to be controlled. Around the temples, the hair can soften the face. At the nape, the shorter length keeps the style from snagging collars and losing shape as fast. That little bit of contrast is what makes the style wearable, not just dramatic.
If you like volume, this is the one to study closely. It has presence. It also knows where to stop.
Why Layers Change the Whole Shape of Natural Hair
Natural hair does not obey the same rules as straight hair, and that is exactly why layers matter so much. Coils stack. Curls spring. The top of the head can hold extra bulk while the ends seem to retreat. One of the best things layers do is redistribute that weight so your hair sits in a cleaner outline instead of collecting all its volume in the wrong spots.
Shrinkage is the other half of the story. A layer that lands at the collarbone when stretched may sit at the jaw once dry, and that shift can make or break a face-framing cut. I would rather see a stylist cut a little longer, check the shape dry, and trim again than watch someone carve front pieces too short because they forgot the curl will bounce back.
Dry hair, stretched hair, or wet hair?
If you wear wash-and-gos most of the time, a dry or dry-to-damp trim usually gives you the clearest read on the final shape. If you wear stretched styles, a lightly stretched cut can make more sense, because you are shaping for the way the hair spends most of its life. Wet cutting can work, but it asks for more experience and more trust in shrinkage math.
Interior layers versus perimeter layers
Perimeter layers change the outer line. Interior layers remove weight inside the shape. On dense hair, interior layers are often the smarter move because they keep the silhouette full while reducing the blocky feel at the sides and crown. On finer coils, too many perimeter cuts can make the ends look thin faster than you want.
The face is part of the cut
That sounds obvious, but plenty of layered cuts ignore it. A front layer that lands at the cheekbone can sharpen the whole look. A layer that lands at the jaw can soften it. A layer that lands too high can create puff you did not ask for. The face is not an afterthought. It is half the haircut.
Essential Tools for Layered Cuts, Twist-Outs, and Wash-and-Gos
-
Sharp hair shears: Dull scissors chew the ends and leave layers looking ragged, especially on curl patterns that already fray easily.
-
Rat-tail comb: Useful for creating clean parts, separating sections, and checking whether a style sits evenly on both sides.
-
Wide-tooth comb: Helps detangle without ripping through knots, which matters before any layered cut or twist set.
-
Spray bottle: A simple water mist can wake up front layers, soften bangs, and help with reshaping on refresh days.
-
Leave-in conditioner: Gives slip and softness before styling so the layers do not dry out at the ends.
-
Curl cream or lotion: Good for soft definition and moisture, especially on twist-outs, braid-outs, and wash-and-gos that need movement.
-
Styling gel or foam: Useful when the layers need hold at the roots or around the face, particularly on bobs, puffs, and shags.
-
Diffuser attachment: Helps dry curls without blasting the layers out of shape; keep the heat on low or medium.
-
Duckbill clips: Handy for setting a part, clipping front layers back, or pinning down a frohawk shape while it dries.
-
Satin scarf or bonnet: Keeps layers from flattening overnight and helps preserve the outline between wash days.
-
Microfiber towel or cotton T-shirt: Better than rough bath towels for squeezing out water without disturbing curl clumps.
Smart Product Picks for Natural Layered Hairstyles for Black Women
The product shelf matters more with layered hair than people like to admit. A layered shape can be ruined by one heavy cream too many, because weight pulls the shorter pieces down and makes the front look limp. If your hair is fine or medium-density, start lighter than you think you need. A leave-in, a foaming mousse, and a firm gel can do more for shape than a jar of thick butter that never really dries.
On denser 4A to 4C hair, the game changes a little. You may need a richer leave-in or cream to keep the layers soft, especially on twist-outs or braid-outs. Still, heavy is not the same as useful. If the product leaves a film on your fingers or takes forever to dry, it can flatten the crown and blur the face-framing pieces. I like products that coat the hair without turning it slick.
What to look for by style
- Wash-and-gos: Stronger gels or jelly formulas with clean hold, so the curl clumps stay readable.
- Twist-outs and braid-outs: Cream plus a light setting foam, which gives softness at the base and shape at the ends.
- Puffs and frohawks: Light edge control and a moisturizing spray, not a thick paste that cakes up near the hairline.
- Short cuts and TWAs: Creams and lotions with enough slip to define coils without weighing them down.
If you wear your hair in stretched styles, add a heat protectant before blow-drying with tension or a comb attachment. If you rarely use heat, you can skip that and focus on moisturizers that keep the layers bendable. Good products should support the cut. They should not bully it.
How to Wear These Styles Without Fighting Your Texture
Presentation: Let the shortest pieces do their job. Face-framing layers should land where the eye naturally goes — cheekbone, jaw, or collarbone — and not sit so high that they puff out like little shelves. A side part can make a layered cut look more relaxed, while a center part gives it a cleaner, more symmetrical feel.
Accessories: Small hoops, cuffs, satin headbands, claw clips, and narrow scarves all work well because they echo the shape instead of crowding it. A giant bow or a bulky clip can swallow a delicate bob, but a slim accessory can sharpen a frohawk or puff in one move.
Scale: Match the size of the layers to the size of your hair. Dense hair can handle shorter crown layers and wider shapes without looking thin. Finer hair usually does better with fewer, longer layers so the ends keep enough weight to look full. If your hair is long, a U or soft V shape gives movement without losing the sense of length.
Outfit Pairing: High necklines make face-framing layers stand out because the hair has room to move above the collar. Scoop necks, off-shoulder tops, and simple crewnecks do the same thing in a softer way. The style should feel balanced against the neckline, not fighting it for space.
Extra Shape Boosters That Keep Layers Looking Fresh
Flavor Enhancement: A tiny bit of mousse at the roots can wake up a layered bob, shag, or twist-out faster than re-wetting the whole head. It gives lift without saturating the ends, which is where layered styles lose their shape first.
Customization: If your face is rounder, keep the front pieces a little longer and let the part travel slightly off-center. If your face is more angular, a softer fringe or a rounded crown helps the layers feel less severe. Tiny changes matter more than dramatic chops.
Serving Suggestions: A side tuck, a half-pinned front section, or a few gold cuffs around the face can make the layers easier to read. These small moves are the hairstyle equivalent of good lighting. They do not change the cut, but they help the shape show up.
Make-It-Yours: For low-manipulation days, choose longer layers that still work in buns, puffs, and twists. For more volume, ask for shorter crown pieces and a slightly stronger side shape. For a softer look, keep the perimeter round. For a sharper look, keep the silhouette a little more angular. No need to copy a picture line by line when your hair already knows where it wants to live.
Night Care, Refresh Days, and Trim Timing
Layered natural hair stays sharp longer when you treat the shape like part of the routine, not an afterthought. At night, a satin bonnet or scarf helps the layers keep their direction, and a pineapple works well for puffed styles and loose curls. If the front pieces are short, I like to tuck them under the scarf or pin them loosely so they don’t stick straight up by morning.
For wash-and-gos, a light refresh with water and a little leave-in every 2 to 3 days keeps the curls from hardening into a frizzy shell. Twist-outs and braid-outs usually need less frequent wetting; too much water can make the layers swell unevenly. A small amount of mousse on the outer layer often brings the shape back without starting from zero.
Trim timing depends on the style. Short layered cuts and TWAs may need shaping every 4 to 6 weeks if you want the silhouette tight. Bobs, shags, and lob shapes usually hold up for 8 to 12 weeks before the front starts losing its line. Long U and V cuts can stretch longer between trims, but only if the ends stay healthy. Split ends creep up quietly, then all at once. They are rude like that.
If you wear protective styles, clean the scalp and moisturize the base regularly so the layers underneath do not dry out and swell in odd places when you take the style down. The shape is easier to keep when the hair is not fighting dryness from the inside.
Variations and Adaptations to Try
The Low-Drama Version: Keep the layers long, soft, and mostly internal if you want the shape to stay subtle. This works well for people who need their hair to tuck into buns, clips, and ponytails without giving up the cut.
The High-Volume Version: Ask for shorter crown layers and a rounded perimeter if you want your hair to lift away from the head. This is the move for dense curls that can handle shape without looking sparse.
The Heatless Definition Version: Build the style around twist-outs, braid-outs, or flexi-rod sets instead of heat. The layers show up as movement and separation, and the finished shape usually feels softer than a blow-dried look.
The Protective-Style Version: Adapt the cut into mini twists, flat twists, or layered loc styling. The front pieces can still frame the face, but the rest of the hair gets a break from daily styling.
The Short-Cut Version: Turn the same idea into a TWA, frohawk, or tapered cut. The layers move higher on the head, which keeps short natural hair from reading flat or round in the wrong place.
Common Mistakes With Natural Layered Hairstyles for Black Women
-
Cutting for wet hair instead of the way you actually wear it: A wet curl can hide two inches of shrinkage, which means the final cut may sit much shorter than you expected. Fix it by trimming in the same state you style most often.
-
Starting the front layers too high: If the shortest pieces sit above the cheekbone on a shrink-prone texture, they can puff up like tiny springs and overwhelm the face. Fix it by keeping the first visible layer a little longer, then adjusting after the hair dries.
-
Using heavy products that erase movement: Thick butters and dense creams can flatten a layered cut, especially around the crown and the face. Fix it with lighter moisture near the top and richer products only on the driest ends.
-
Skipping trims for too long: Split ends do not stay polite. They fray, then blur the shape, then make even a well-cut style look tired. Fix it with regular shaping before the outline starts to drift.
-
Forgetting that density changes the silhouette: A cut that looks balanced on fine curls can look too thin or too wide on thick coils. Fix it by choosing internal layers and a shape that matches your actual density, not the picture you saved on your phone.
Frequently Asked Questions
Should layered natural hair be cut dry or wet?
For most Black women with curls and coils, dry or lightly stretched cutting gives a clearer read on the final shape. Wet hair hides shrinkage, and shrinkage is where layered cuts either win or go sideways. If you mostly wear wash-and-gos, dry cutting is usually the safer call.
Do layers make natural hair look thinner?
They can, if too much weight is removed from fine or medium-density hair. The fix is to keep the longest perimeter strong and use interior layers instead of chopping the ends to pieces. On dense hair, layers usually do the opposite — they make the shape look lighter without reducing fullness.
Which face shapes work best with face-framing layers?
Round faces often benefit from layers that start a little below the chin, because that adds vertical length. Heart-shaped faces can handle more movement around the cheekbones, while square faces usually look softer with curved layers that fall around the jaw. Oval faces can wear almost any version, which is annoyingly convenient.
How often should I trim a layered natural haircut?
Short shapes and bobs usually need shaping every 4 to 8 weeks if you want the outline to stay crisp. Longer cuts can go 8 to 12 weeks, sometimes a bit more, depending on split ends and how much the hair grows at the perimeter. The shape should tell you when it’s time; once the front disappears, the cut is asking for help.
Can layered styles work on 4C hair?
Absolutely. In fact, 4C hair often benefits the most because the density and shrinkage can hide layers in a way that looks soft and full. The key is not to over-thin the ends. Keep the shape intentional, and let the coil pattern do the rest.
What if my layers look uneven after a wash-and-go?
Do not panic and do not keep touching them. Uneven layers usually settle after the hair dries and is fluffed at the roots. If one side still sits off, a side part, a twist at the front, or a light refresh with mousse can balance the silhouette without another full wash.
Can I wear layered natural hair in protective styles?
Yes, but the layers should be placed with the long-term style in mind. Mini twists, flat twists, layered locs, and twist-outs all carry shape well, especially if the front pieces are left a little softer. If the style needs to last, avoid cutting so aggressively that the protective style loses its hold.
What’s the easiest layered style to maintain between wash days?
A high puff, a tapered cut, or a shoulder-length twist set usually asks for the least daily work. Each one can be refreshed with a little water, a bit of mousse, and a satin wrap at night. If your schedule is packed, choose the shape that survives being touched less.
Soft Shape, Strong Texture
Layered hairstyles only work when they respect the hair they’re sitting on. That’s the part I care about most. Natural hair already has movement, shrinkage, and personality; good layers do not replace that. They shape it.
Pick the silhouette that fits how you live, not just how you want it to look in the chair. A bob that opens the face. A fro that keeps its roundness. A twist-out with front pieces that land where you want them. Those are the kinds of details that make a cut stay useful long after the first fresh style day has passed.
If you choose one shape and let it teach you what your hair likes, you’ll start noticing the differences faster than any inspiration board can show you.