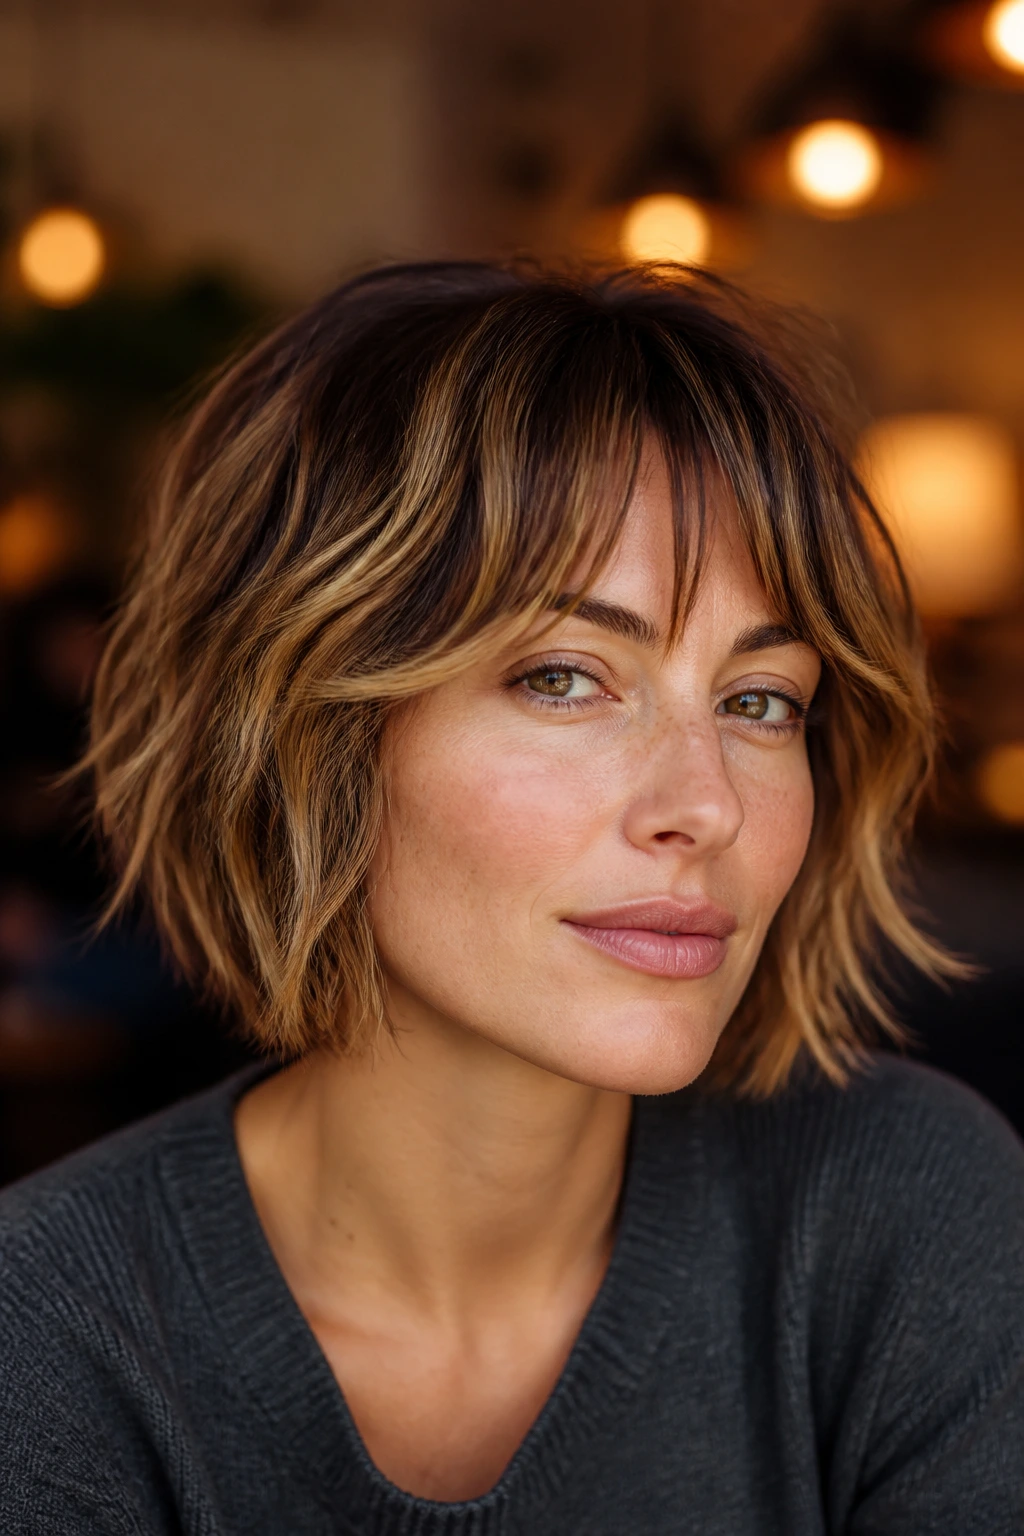
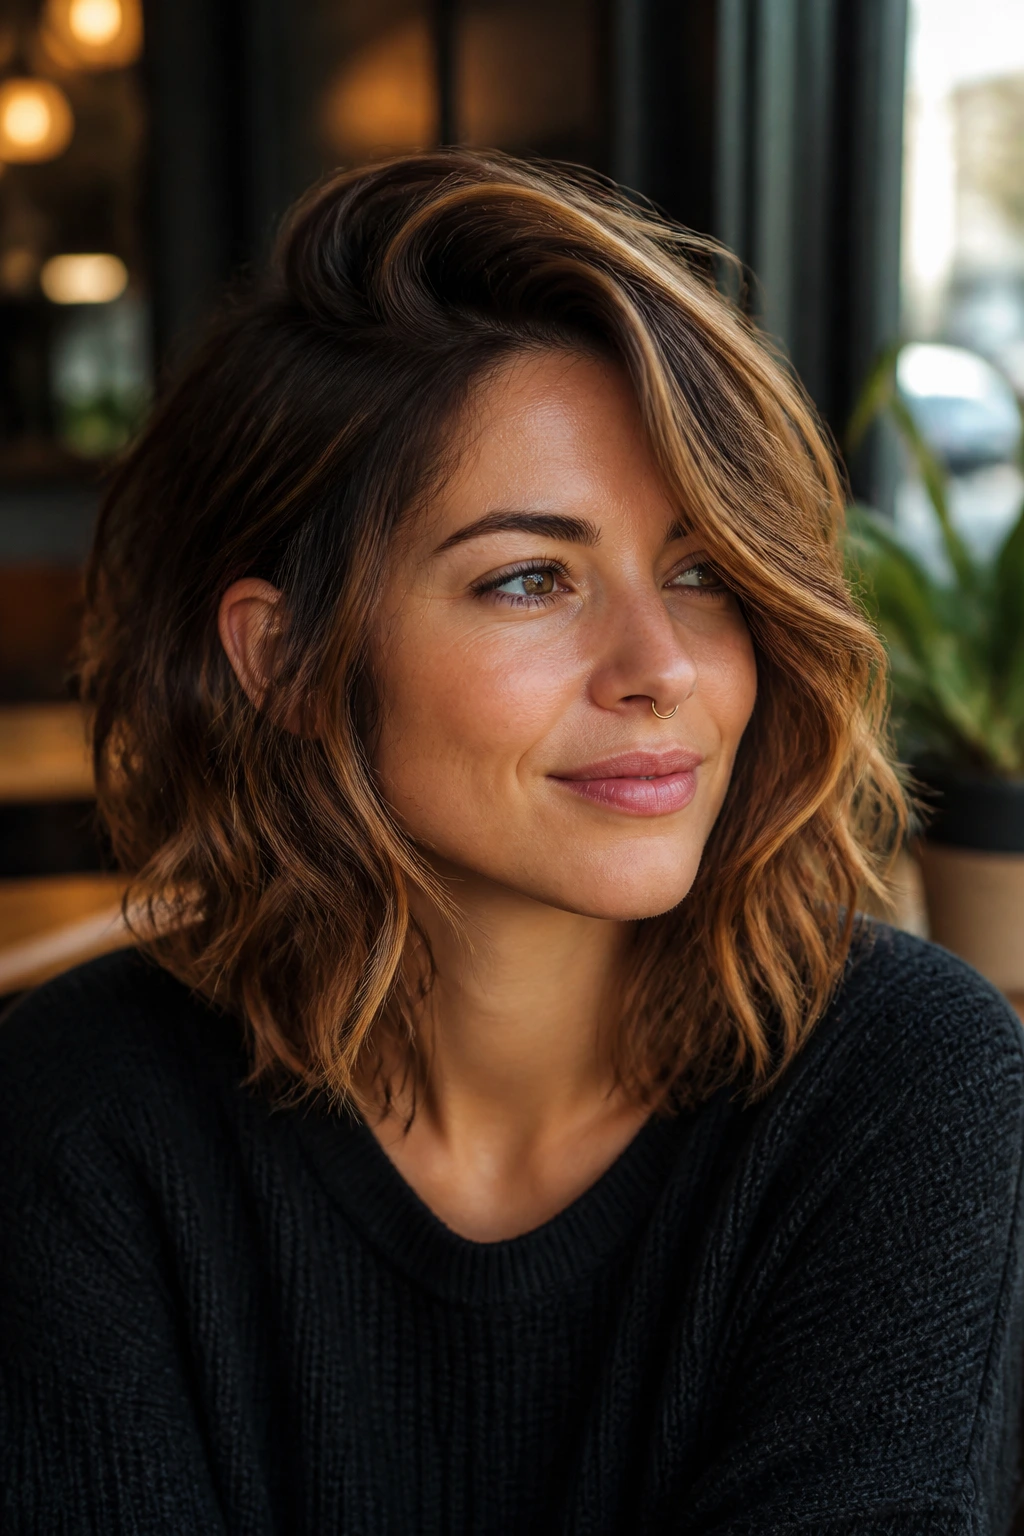
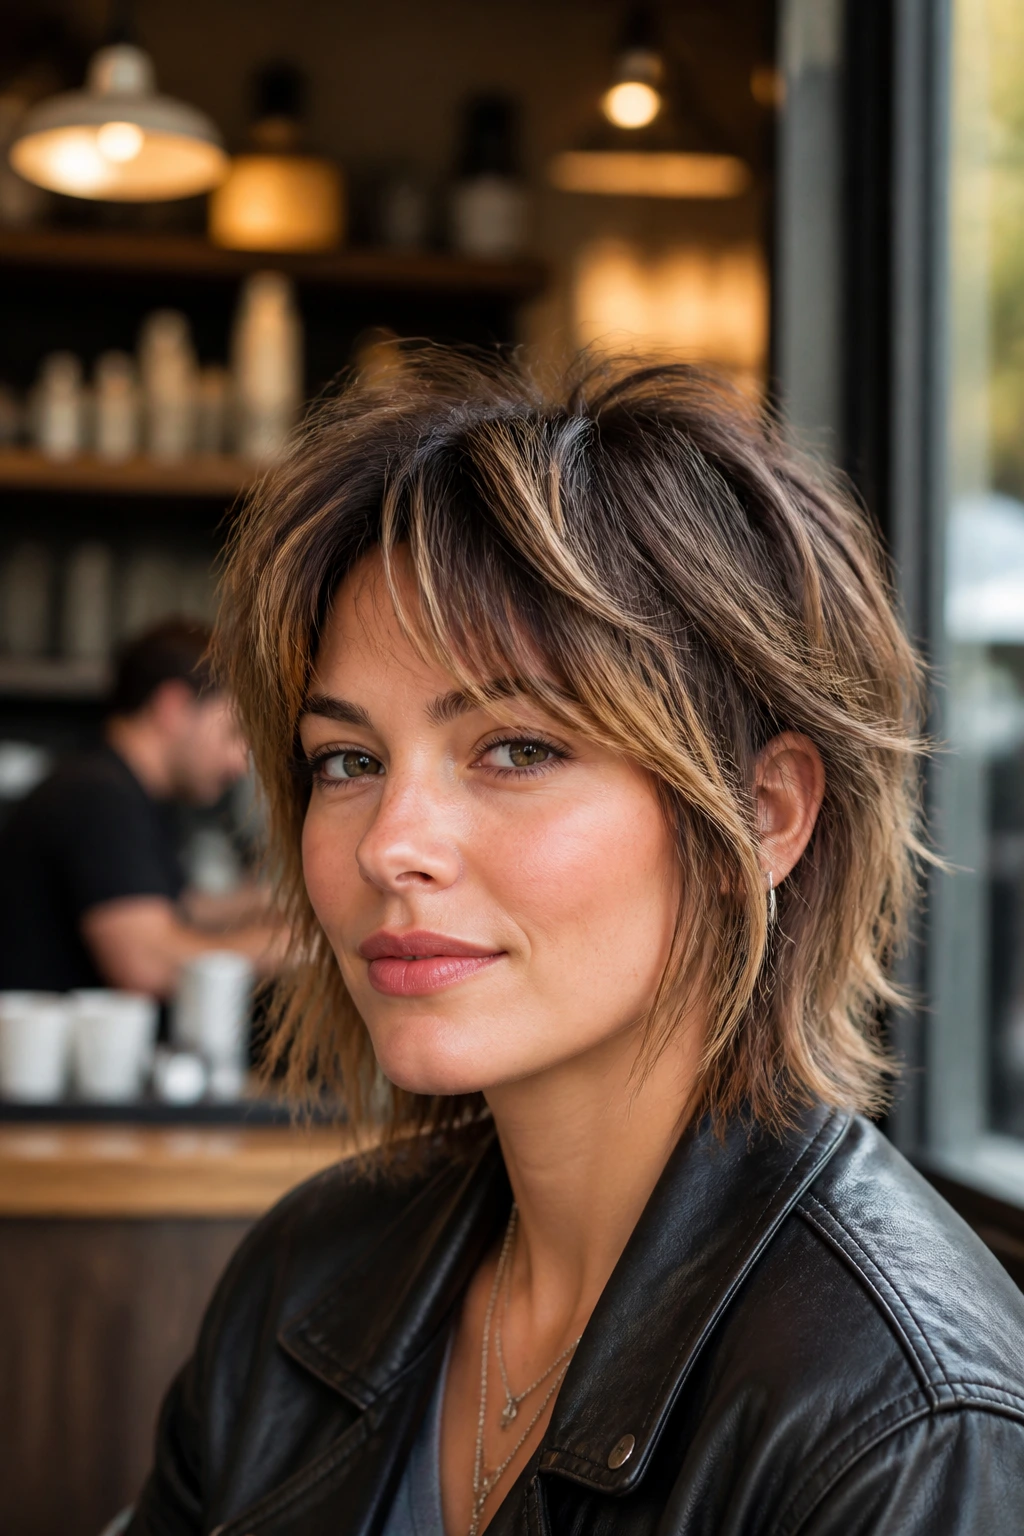
A mini shag on an oval face doesn’t have to do much to look right. The face shape already gives you balance; the haircut’s job is to add movement, break up the outline, and keep the ends from lying there like a helmet. Caramel highlights do a lot of that work before you even touch a brush. They catch on the fringe, separate the layers, and keep the cut from reading as one flat block of brown.
What people often miss is how delicate the line is between texture and mess. A mini shag that starts too high can puff out around the cheeks. One that’s too heavy at the perimeter turns into a bob with bad intentions. The best versions sit in that narrow zone where the crown has some lift, the ends flick, and the color shows off every bend in the hair.
Caramel is a smart tone here because it brings warmth without stealing the show. On dark brunettes, it can look like ribboned light. On lighter bases, it gives the layers enough contrast to stay visible once the hair settles. And on oval faces, that contrast can be placed almost anywhere except the wrong places — which, annoyingly, are easy to choose if the cut isn’t mapped well.
Why Mini Shag Haircuts for Oval Faces with Caramel Highlights Work So Well
Oval faces don’t need corrective geometry. That’s the big advantage. You’re not trying to shorten a long face or widen a narrow one, so the layers can focus on motion around the cheekbones, jaw, and fringe without overthinking balance.
Caramel highlights make the layers readable. A shag loses its point when the color is too solid. Soft caramel ribbons, especially when they’re feathered through the outer layer and around the face, show you where each bend starts and stops.
Mini length keeps the silhouette light. A shorter shag avoids the heavy triangle that can happen when longer layers drag on thick hair. Around chin to collarbone length, the shape feels airy without drifting into “grown-out mullet” territory.
The cut works with the hair you already have. Straight hair gets bend. Wavy hair gets structure. Curly hair gets shape without bulk. The same haircut can be adjusted, but the idea stays the same: movement first, weight control second.
The grow-out is less dramatic than people expect. Because the layers are shorter and the highlight placement is usually soft at the root, the shape can survive a few extra weeks. It won’t look pristine forever. That’s not the point. It will still look like a haircut.
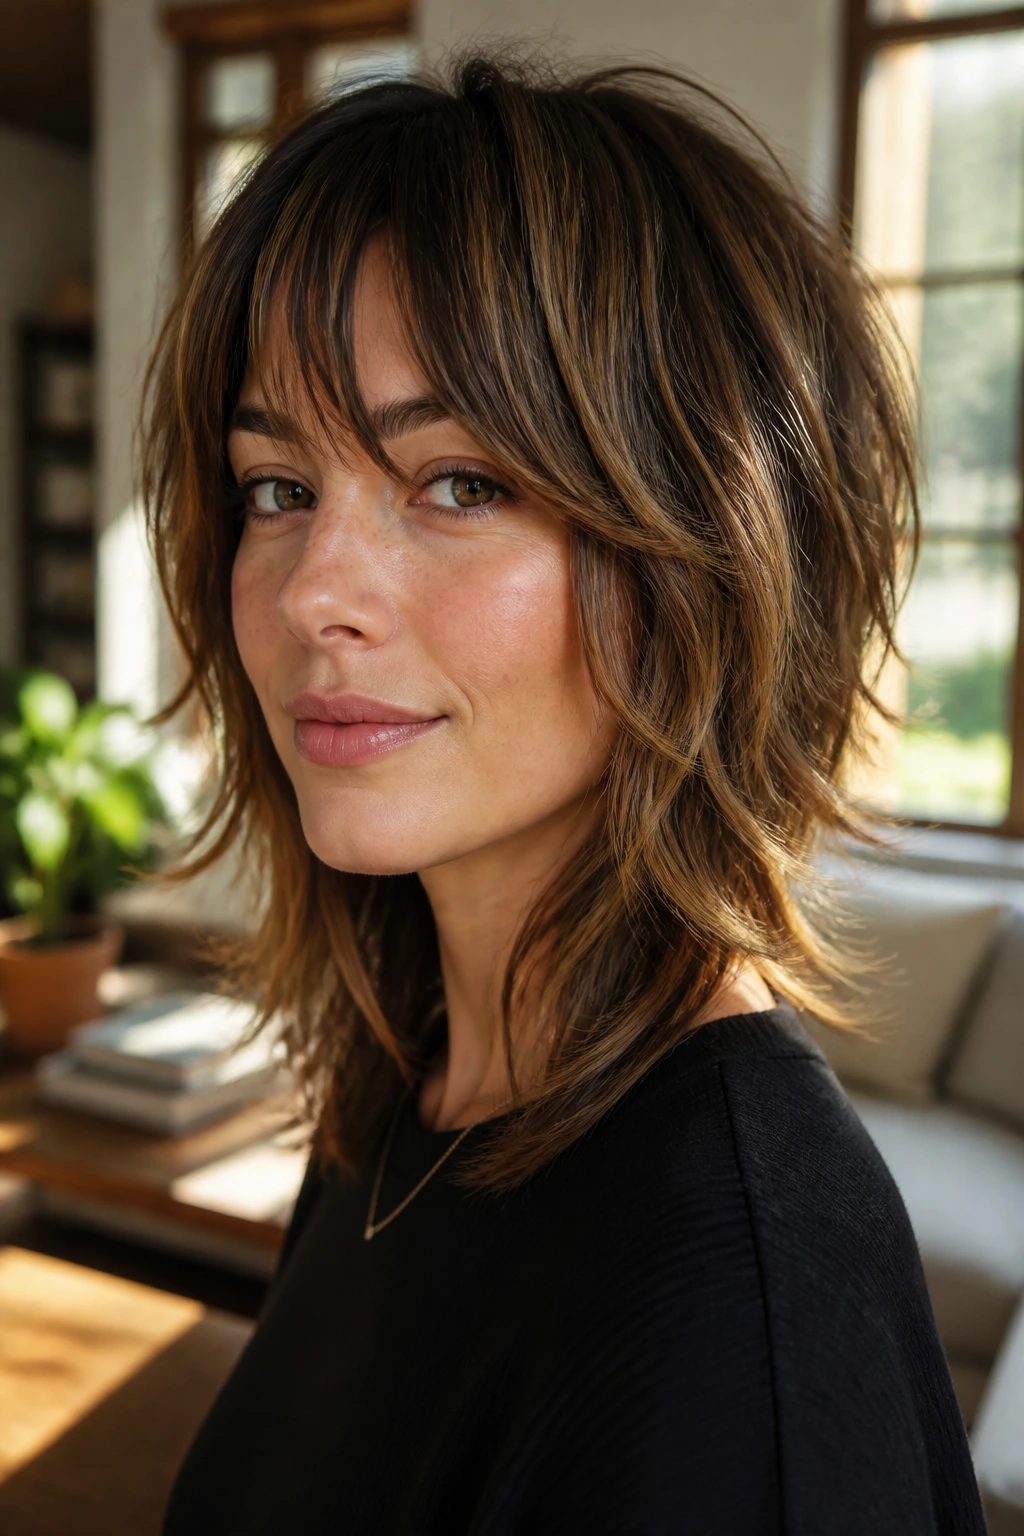
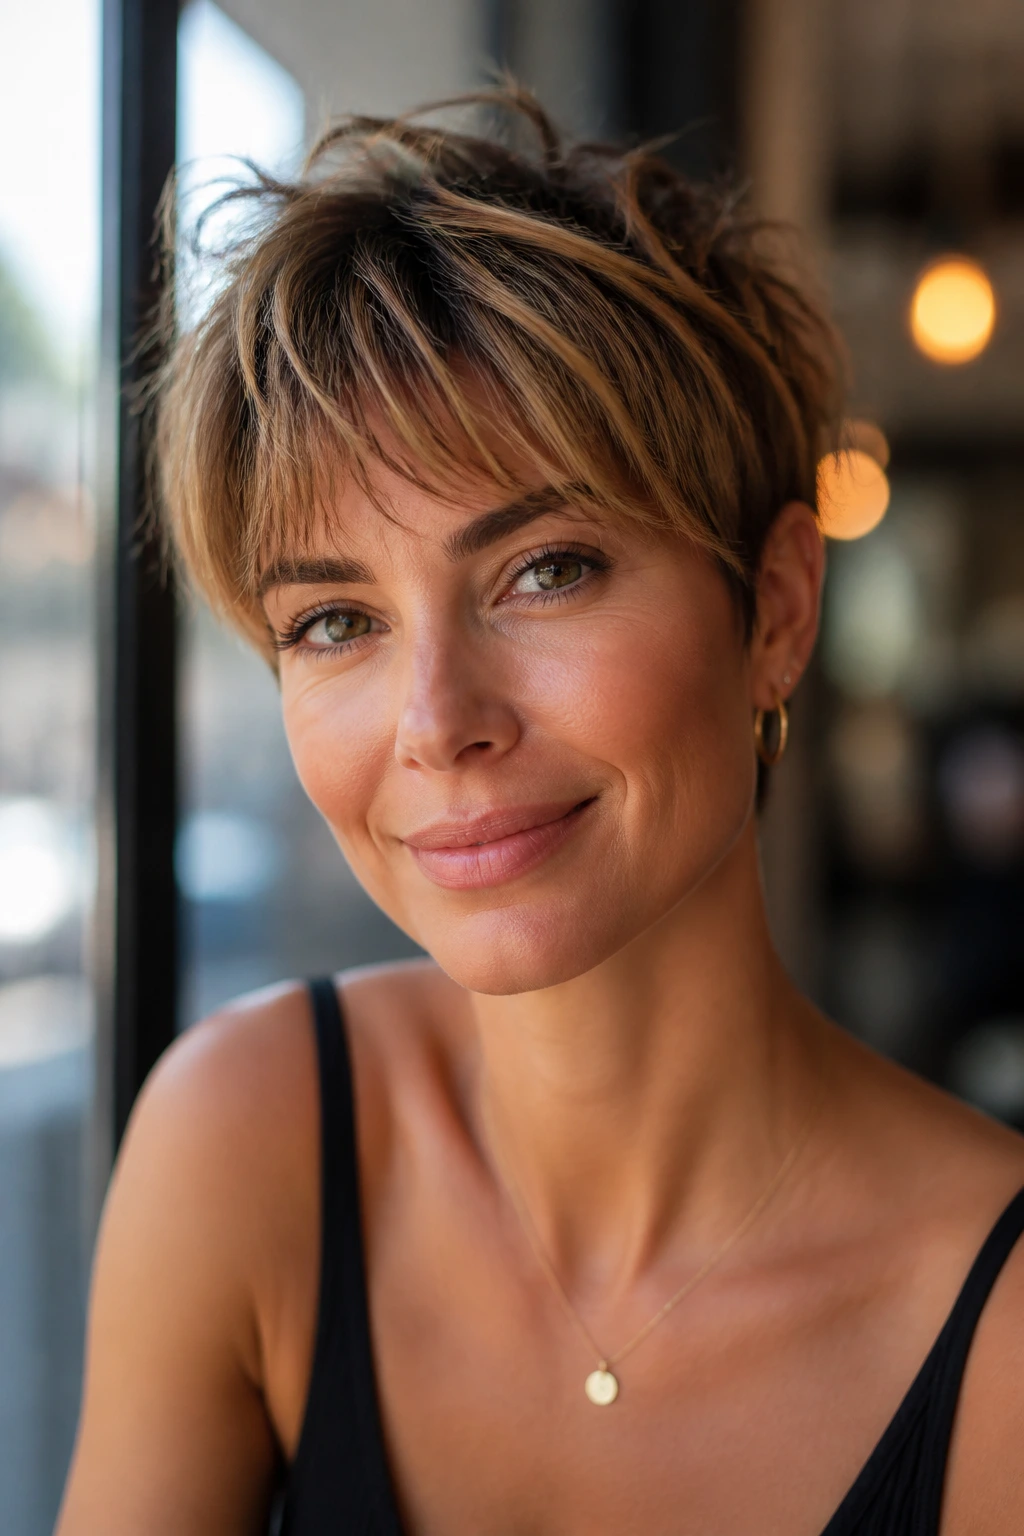
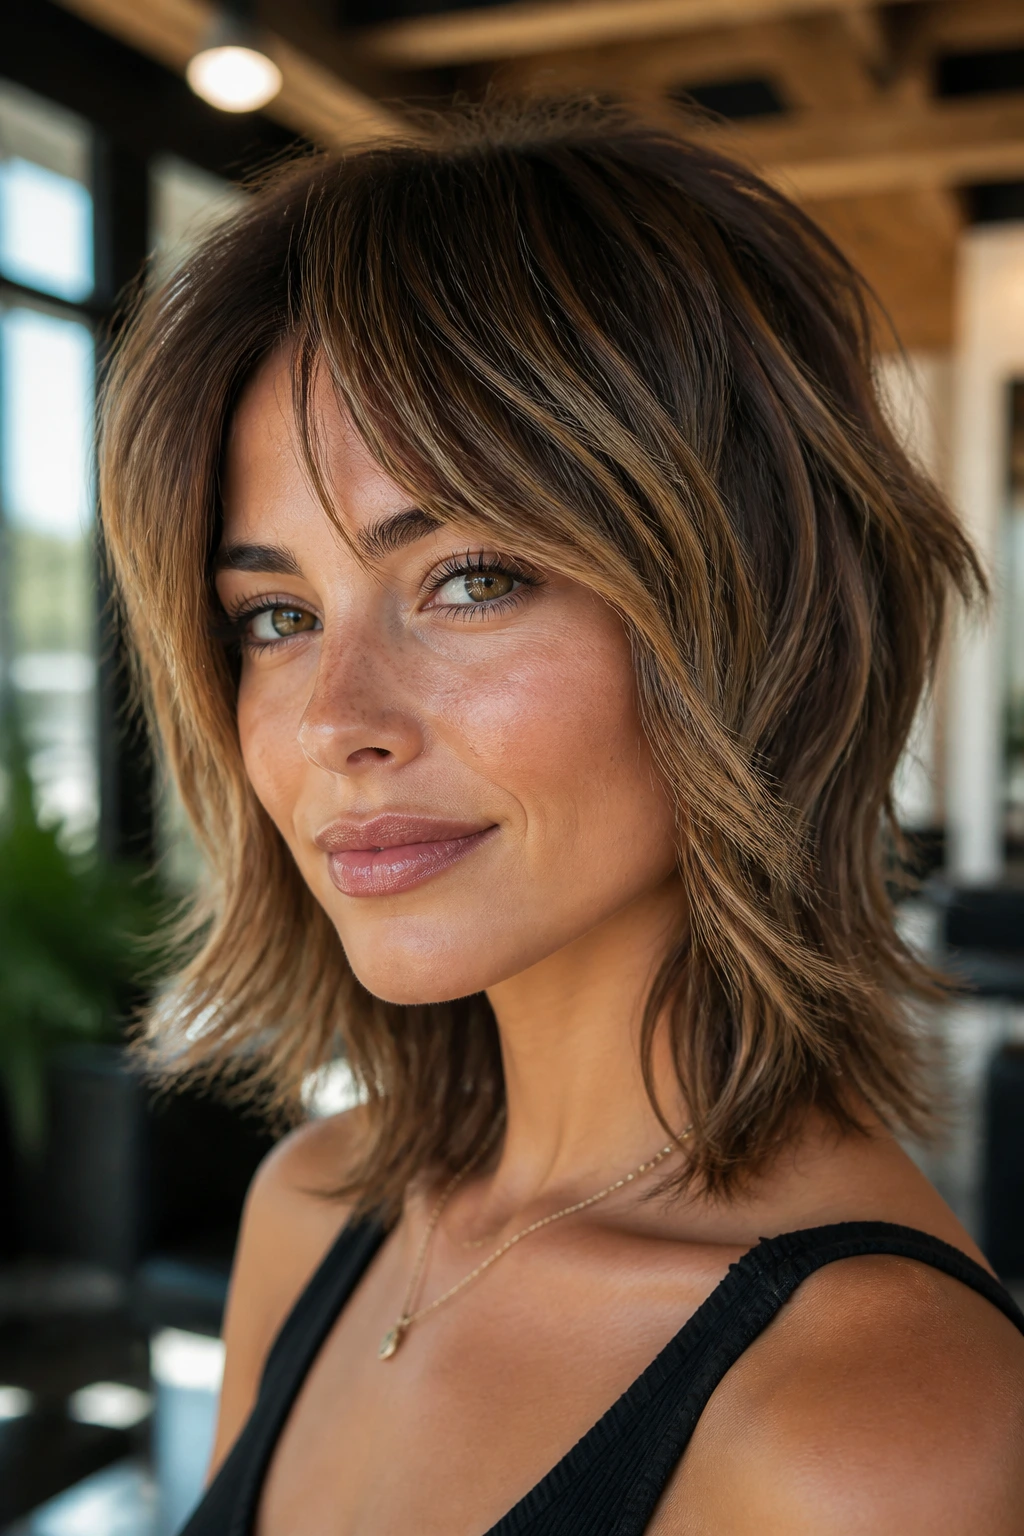
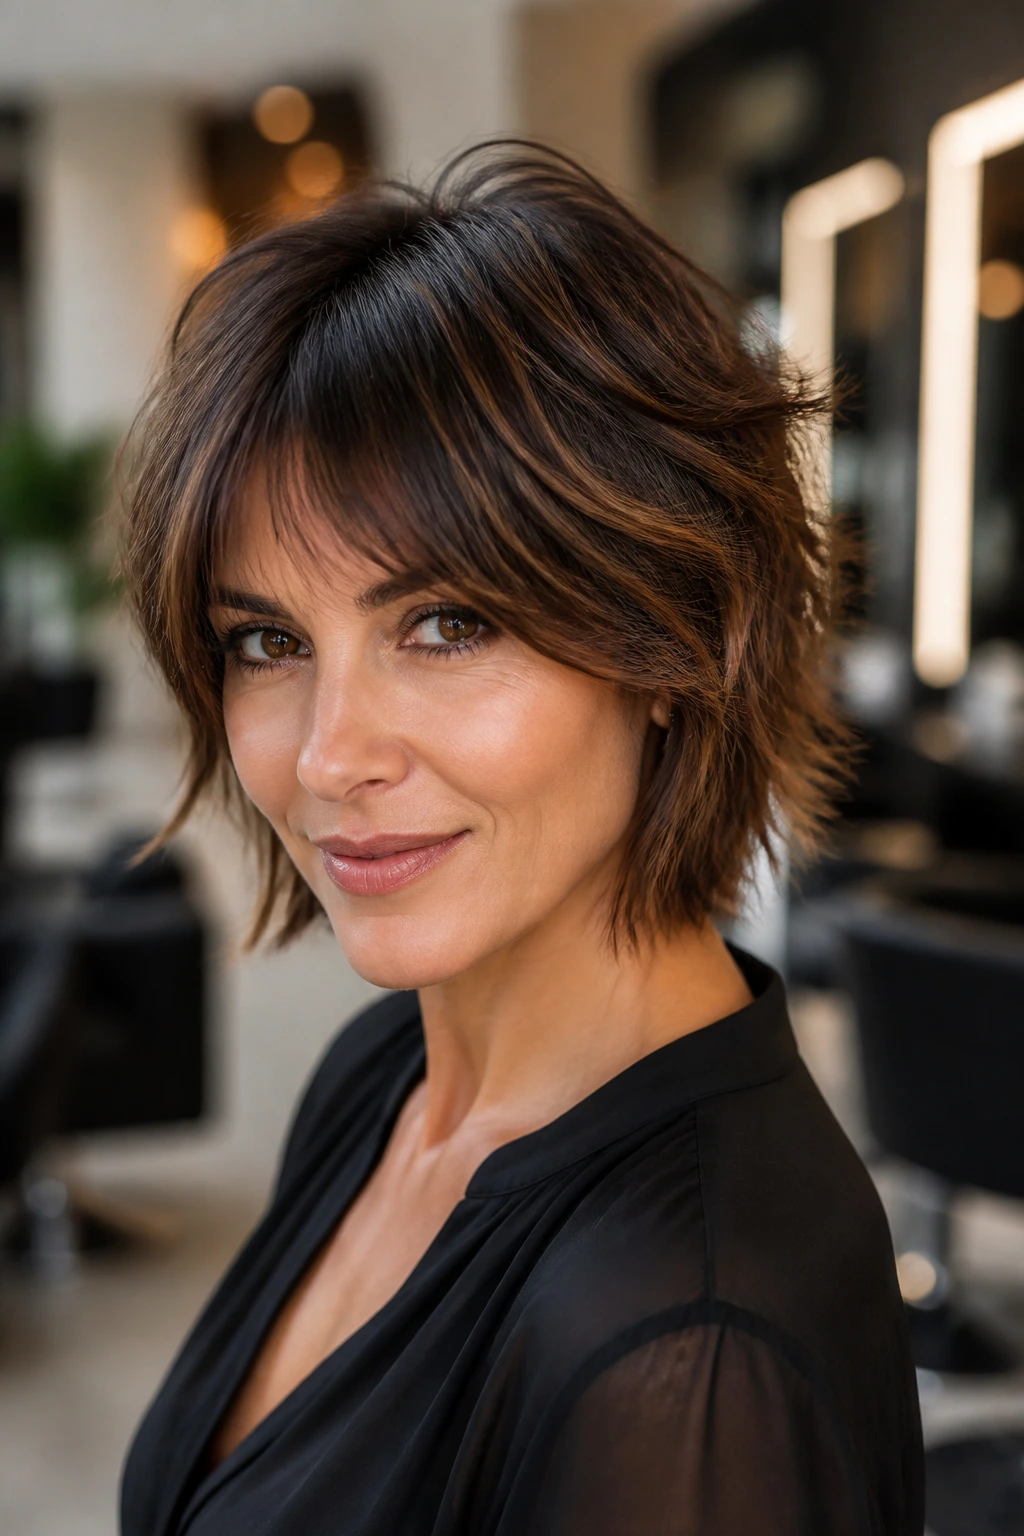
1. Jawline Flick Mini Shag With Curtain Bangs
The cleanest way to think about this cut is as a shag that knows when to stop. The layers skim the jaw, the fringe opens at the center, and the caramel highlights sit at the temples and through the outer ends so the whole cut bends toward the face instead of flaring out.
Why It Flatters Oval Faces
Oval faces can handle curtain bangs without getting swallowed by them, which is half the appeal here. Keep the shortest pieces around cheekbone level, not higher, and let the rest fall toward the jaw. That keeps the face open while still giving you a strong frame.
The caramel should be placed in thin, visible ribbons rather than thick bands. If the color is too chunky, the fringe can look disconnected from the rest of the cut. I like a softer beige-caramel tone on the fringe itself and a deeper toasted caramel through the ends.
- Best hair type: medium density, straight to loose wave
- Best face detail to emphasize: cheekbones and jawline
- Color note: ask for ribboned highlights, not blocky streaks
- Styling move: bend the fringe away from the face first, then flip it back with your fingers
Bold tip: keep the front pieces about half an inch longer than you think you need. They settle higher once dry.
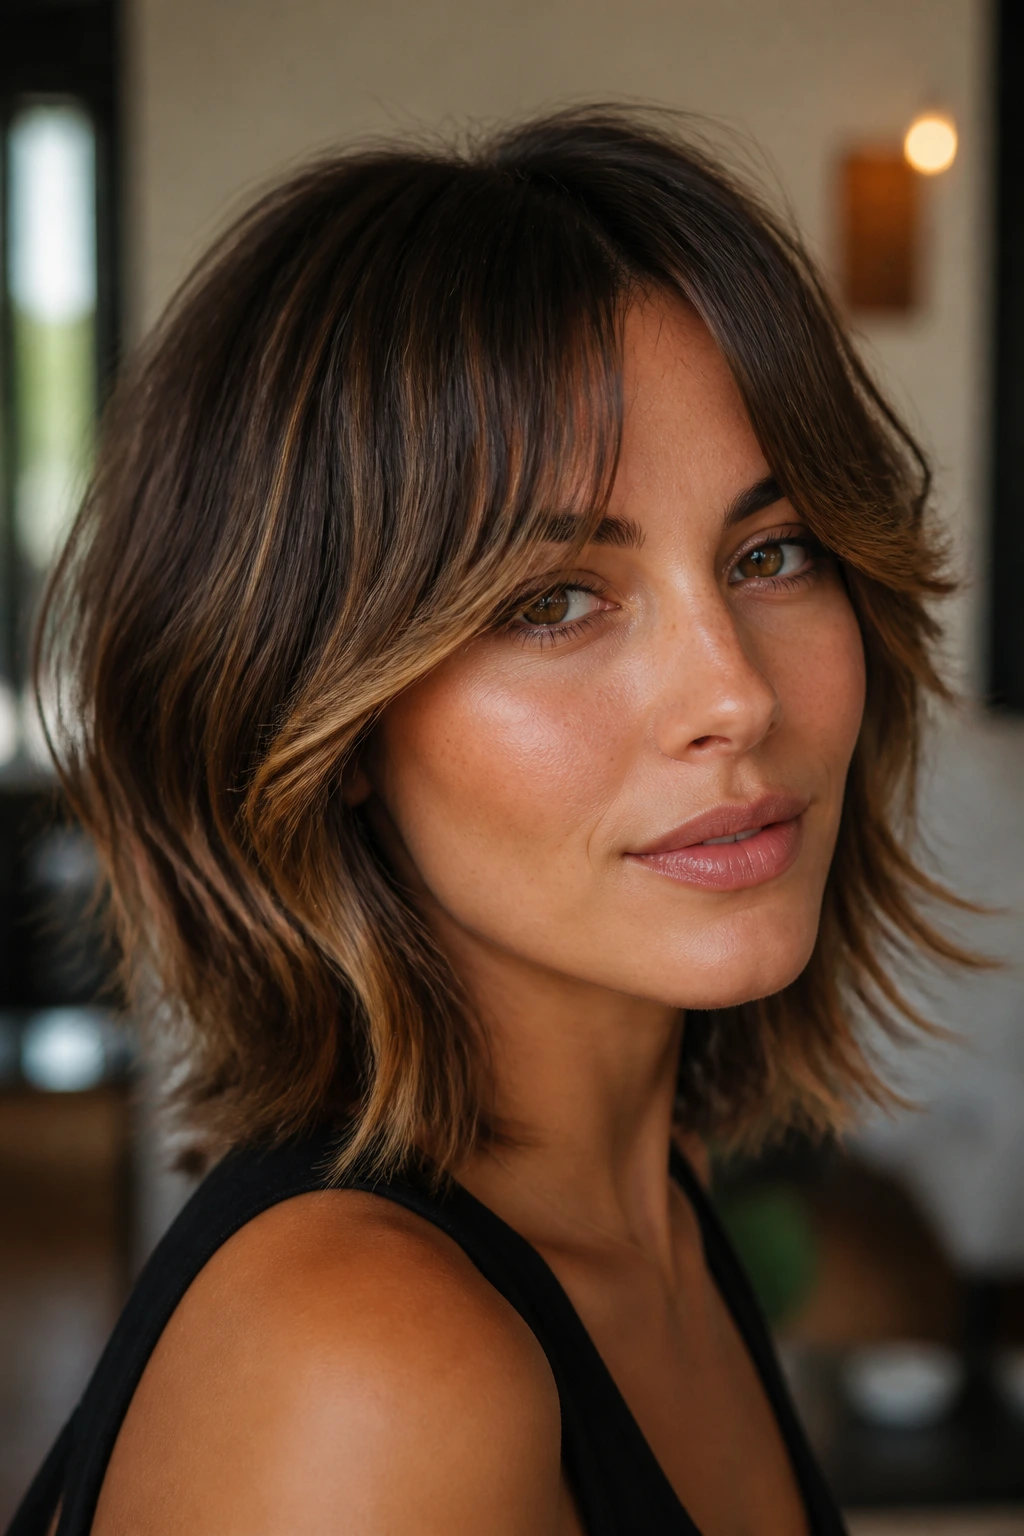
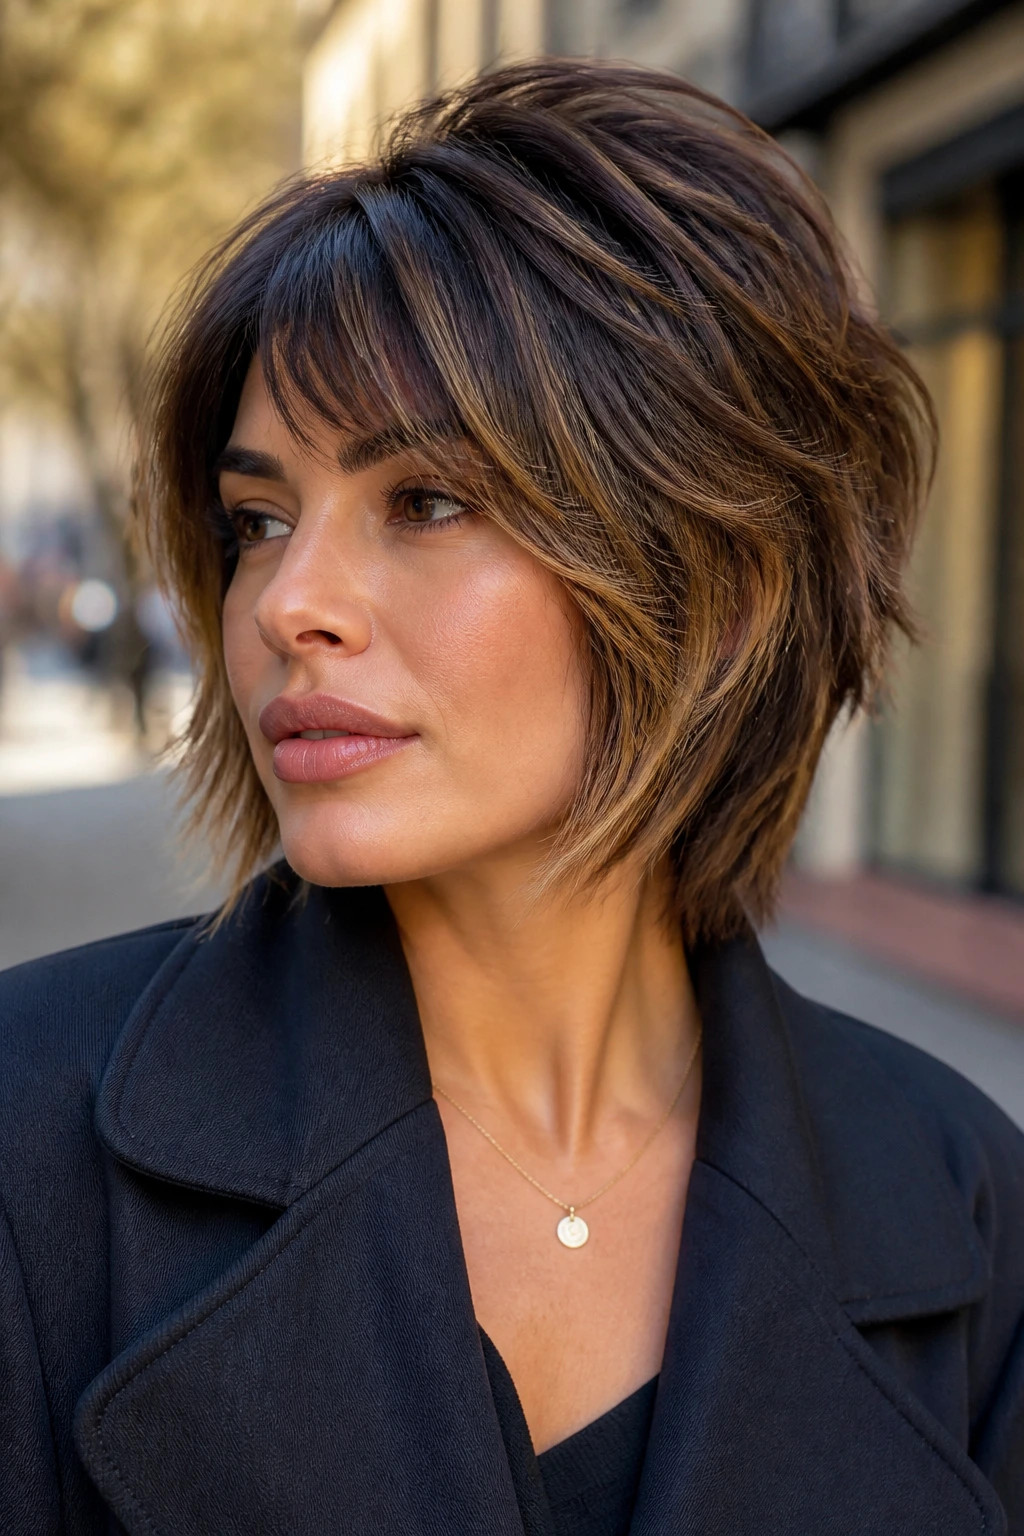
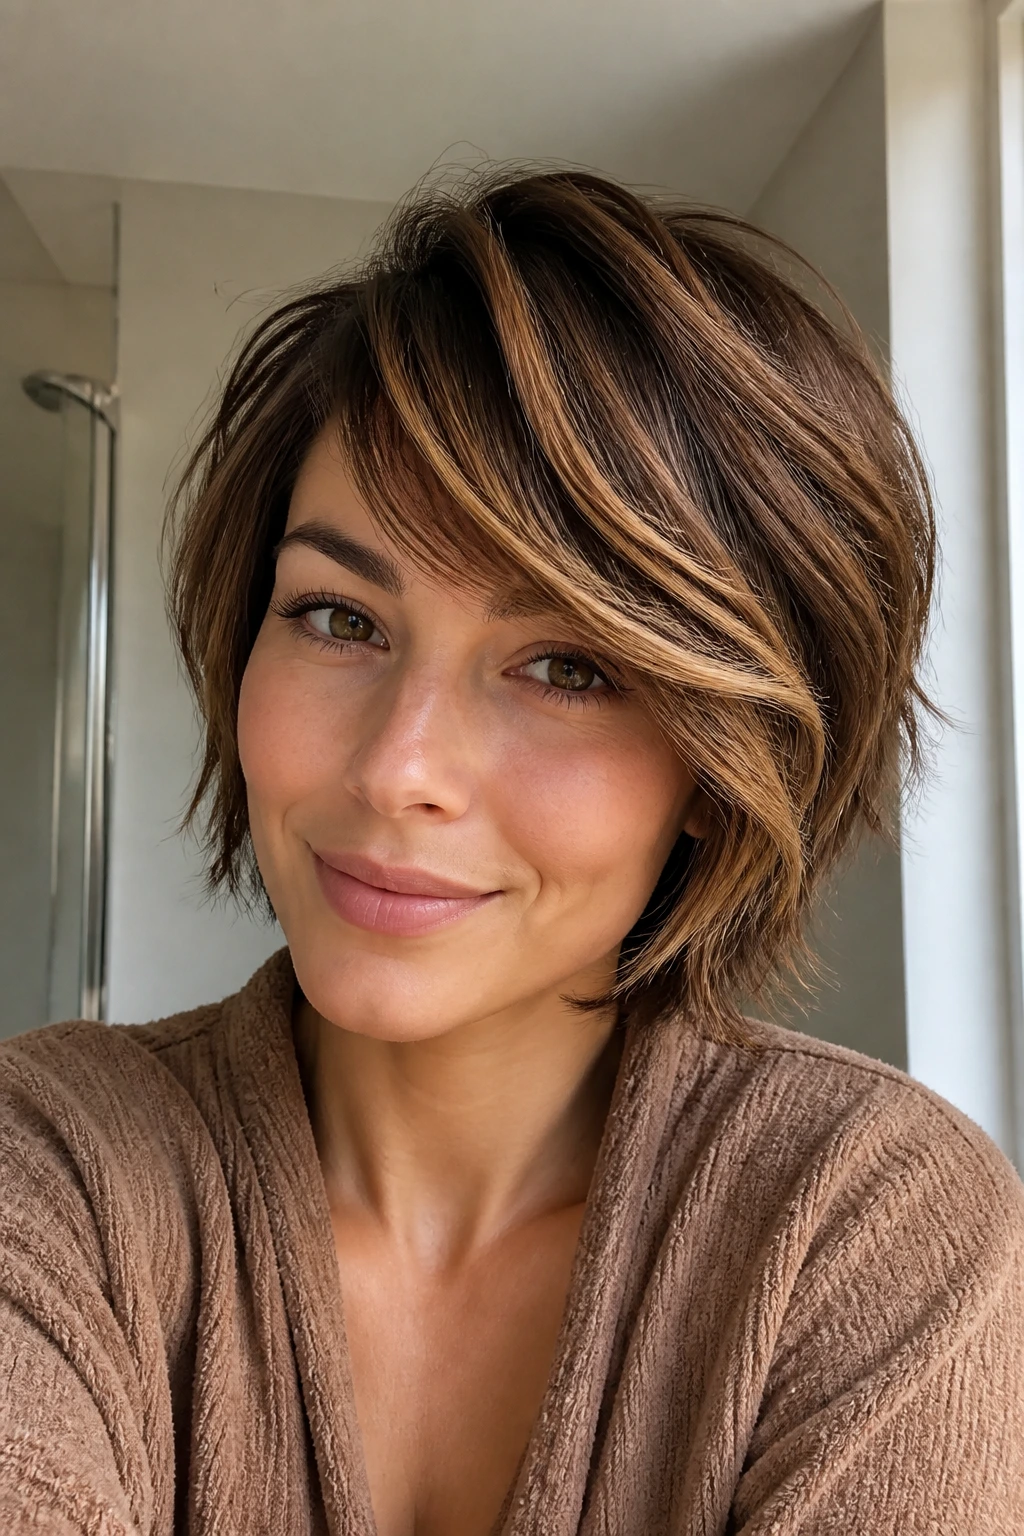
2. Razor-Soft Mini Shag Bob
If you want the shag to look neat rather than wild, this is the one. The perimeter stays bob-like, but the interior is razored just enough to stop the ends from sitting heavy. Caramel highlights work here because they trace the movement instead of fighting it.
A razor-soft version is especially good when your hair has density but not much natural bend. The razor removes bulk without making the outline look chopped to bits. The trick is restraint. Too much slicing, and the ends fray. Too little, and the cut turns into a plain bob that forgot to have a personality.
The color should be placed in fine, layered veils through the top half of the cut. On dark brown hair, I prefer a toasted caramel with a little gold in it — not orange, not brass, just warm enough to catch light near the cheekbones and under the ends.
This works well for office-friendly styling too. A quick round-brush pass and a little texture spray are enough. You don’t need to curl the whole head into submission.
3. Curly Mini Shag With Caramel Halo
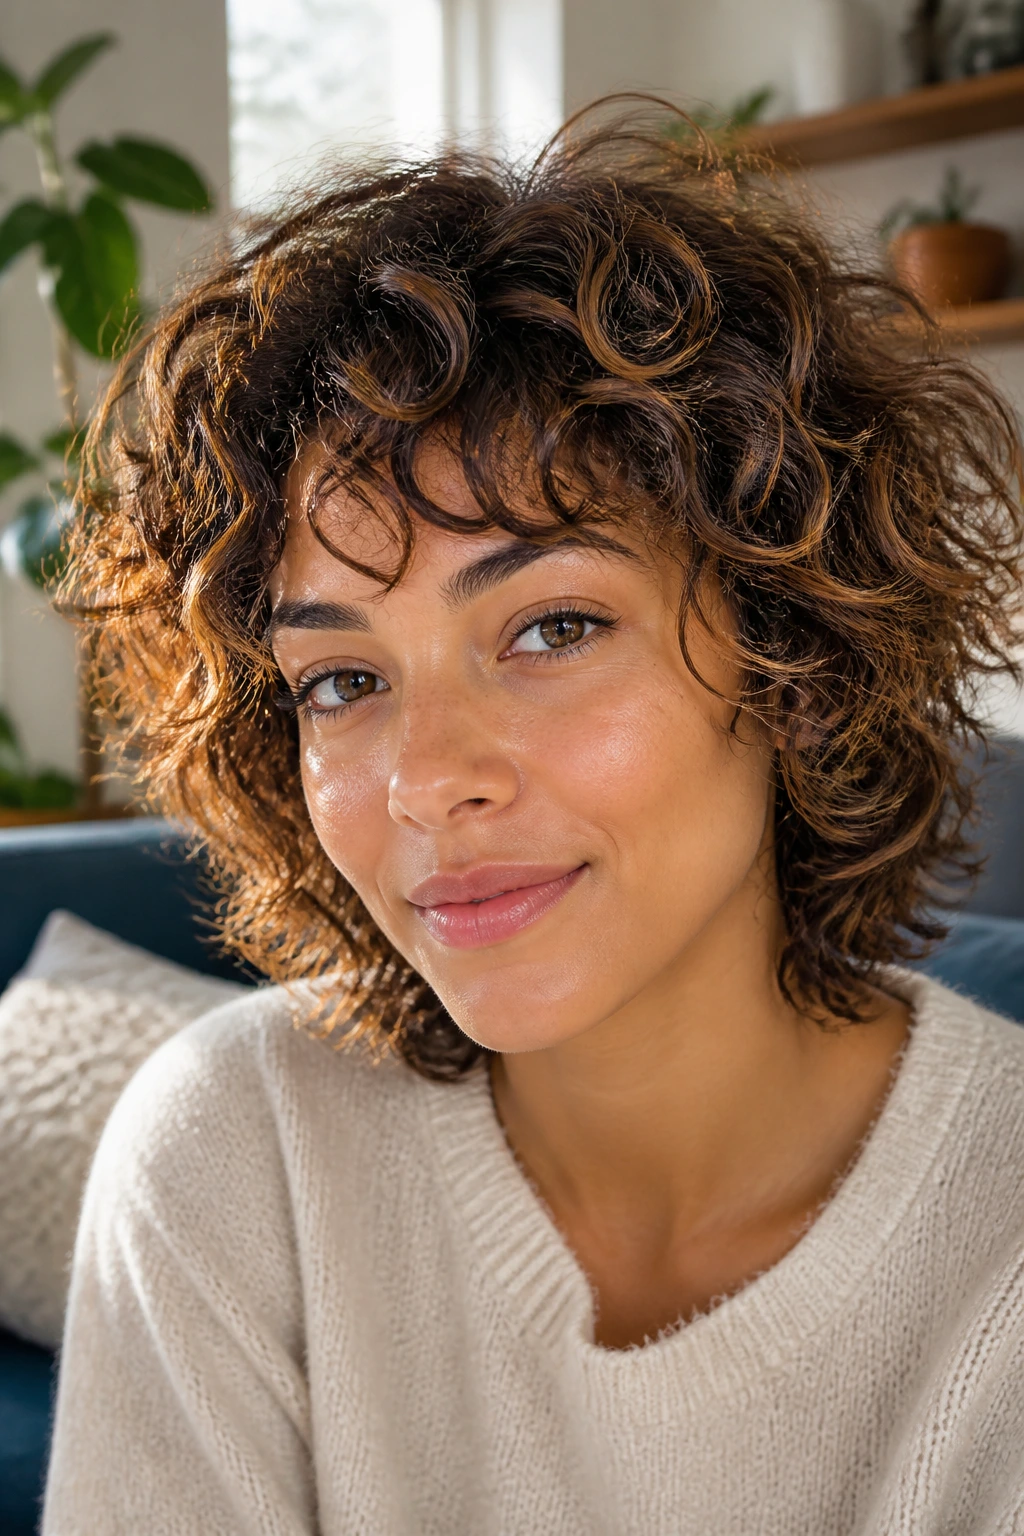
Can curly hair wear a mini shag without turning into a triangle? Yes, if the layers are planned with some discipline and the caramel sits where the curls actually move. The halo effect — brighter pieces around the crown and outer ring of curls — gives the cut shape without flattening the natural pattern.
How to Wear It
The shortest pieces should live high enough to encourage lift, but not so high that the curls spring into a shelf. Think cheekbone and temple, not scalp-to-ceiling. The ends need to remain light, and the front should be slightly longer so the face doesn’t disappear inside the cut.
After washing, use a leave-in and a light curl cream, then diffuse on low heat until the curls are about 80 percent dry. Stop touching them. Seriously. Once the caramel highlights dry into their own little bands, the hair looks richer if you leave the curl clumps alone.
- Best curl pattern: loose curls through tight ringlets
- Best color placement: halo at the crown and around the outer curls
- Best product pair: leave-in conditioner + light gel
- Watch out for: too much thinning at the bottom, which makes the silhouette puff
The best version of this cut has movement near the eyes and a little lift on top. That’s it. No drama required.
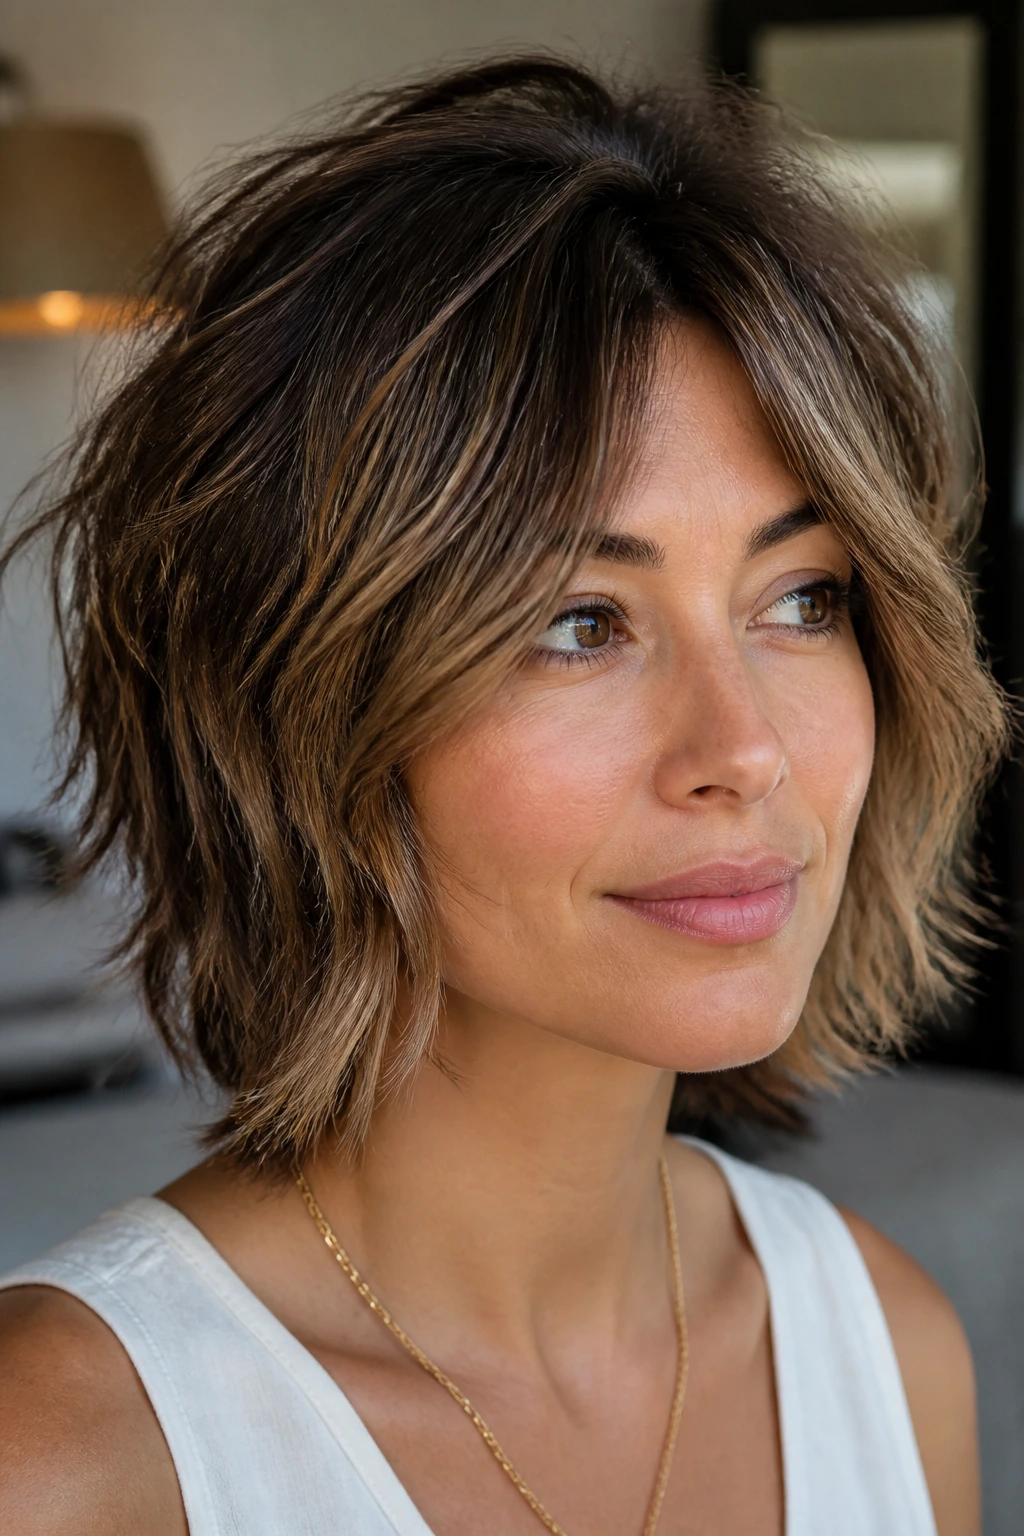
4. Micro Shag Pixie With Airy Fringe
This is for the person who wants the shag energy without committing to a lot of hair. The shape sits close to the head, the fringe is wispy, and the caramel highlights are placed like tiny flashes along the top and around the temples. It looks sharp when it’s cut right. It looks like a bad grow-out when it isn’t.
Why It Feels Fresh on Oval Faces
Oval faces can carry a short fringe better than most shapes because the proportions stay open. You can keep the sides short, bring a bit of lift through the crown, and still leave enough softness around the forehead so the cut doesn’t feel severe.
Caramel is important here because short cuts can go visually flat fast. A few well-placed ribbons in the top layer create separation between the fringe, crown, and side pieces. Don’t overload it. Two or three brighter panels are enough.
- Best for: fine to medium hair
- Highlight placement: top layer, fringe edge, and temple area
- Styling tool: small round brush or fingers plus a root-lifting spray
- Color note: keep the caramel soft and slightly warm so the short cut doesn’t look harsh
Pro move: have the shortest pieces feathered, not blunt. A hard line at the fringe makes this cut feel too severe for the shag idea.
5. Collarbone Shag With Face-Framing Ribbons

This is the version I reach for when someone says they want a shag but still needs to tuck hair behind the ear, clip it up, or pull it into a loose knot without fighting the shape. The length hits around the collarbone, the front pieces are the longest part of the cut, and the caramel highlights travel in ribbons from the cheekbones down through the ends.
The whole point is softness. Oval faces can take longer face-framing layers without looking bottom-heavy, so this cut lets the front fall with a little sweep. It gives the face a frame without cutting off the neck, which is a nice detail if you like earrings or open necklines.
Caramel works best here when it starts near the front and dissolves as it moves back. That keeps the color from looking like it was painted on in stripes. If the base is dark, a subtle root shadow helps the ribbons blend after the first few washes.
I like this cut for people who want movement on second-day hair. It usually looks better after a sleep cycle, a dry shampoo spray, and a quick shake at the roots. That’s not a bug. It’s part of the charm.
6. Bottleneck Bang Mini Shag
A bottleneck bang makes the front of the haircut feel more tailored than curtain bangs do. The middle is a little narrower, the sides open near the temples, and the overall effect is soft but deliberate. On an oval face, that shape can sharpen the eye line without crowding the cheeks.
Unlike curtain bangs, bottleneck fringe doesn’t split as much at the center once it starts growing out. That can be a plus if you hate babysitting your bangs every two weeks. The caramel should sit right along the fringe edges and just into the front layers so the bang shape stays visible even when the rest of the hair is tousled.
This cut suits people who want some edge but not a full shag haircut with big separation. It’s also a good choice if your forehead is a touch longer than average and you want to shorten the visual space a bit without hiding it. The fringe should be airy, not dense. Dense bangs on a mini shag usually look too heavy by day three.
If you want the cut to read well, ask for point-cut ends and a bit of bend through the front pieces. Straight, blunt fringe kills the whole point.
7. French-Girl Mini Shag With Piecey Ends

This version leans undone in a way that still looks edited. The layers are soft, the ends are separated, and the caramel highlights are scattered in a way that gives the cut that lightly sun-kissed, slept-in feel without turning it yellow. The best French-style shag never looks overworked. That’s the part people get wrong.
Why It Looks So Easy
Oval faces suit this shape because the cut doesn’t need to create fake symmetry. A loose center part or a soft off-center part both work. The hair can fall around the cheeks and jaw without competing with the face.
The highlight placement should feel scattered, not stamped. A few brighter pieces around the fringe, some softer ribbons through the mid-lengths, and a slightly deeper shade underneath make the texture more interesting. If the color is only on the surface, the shape flattens as soon as the hair moves.
- Best styling pattern: air-dry to 70 percent, then add bends with fingers
- Best finish: matte-to-satin texture, not glossy helmet hair
- Best tones: toasted caramel and honey-caramel, not copper
- Watch for: too much product at the roots, which makes the piecey ends collapse
The result should look like you ran out the door with good taste and a decent cut. That’s the goal.
8. Choppy Shag for Fine Hair
Fine hair needs a different kind of shag. Not more layers. Better layers. If you over-thin fine hair, the ends look see-through and the whole cut starts to fray. A choppy mini shag works because it creates separation without destroying the body.
Caramel highlights help in a sneaky way here. On fine hair, color contrast can create the illusion of density because each layer reads separately. A few micro-ribbons through the top and front make the hair look fuller than a single flat shade ever will. Keep the ribbons narrow. Wide highlights on fine hair can look like gaps.
This cut should stay close enough to the head that the perimeter still has shape. I like the shortest layers to live around the cheekbone, with the outer ends left blunt enough to give the hair a line. That line matters. Without it, the haircut can look wispy in a bad way.
For styling, use a mousse at the roots and a light spray through the mid-lengths. Heavy oils are the enemy here. They drag the hair down before lunch.
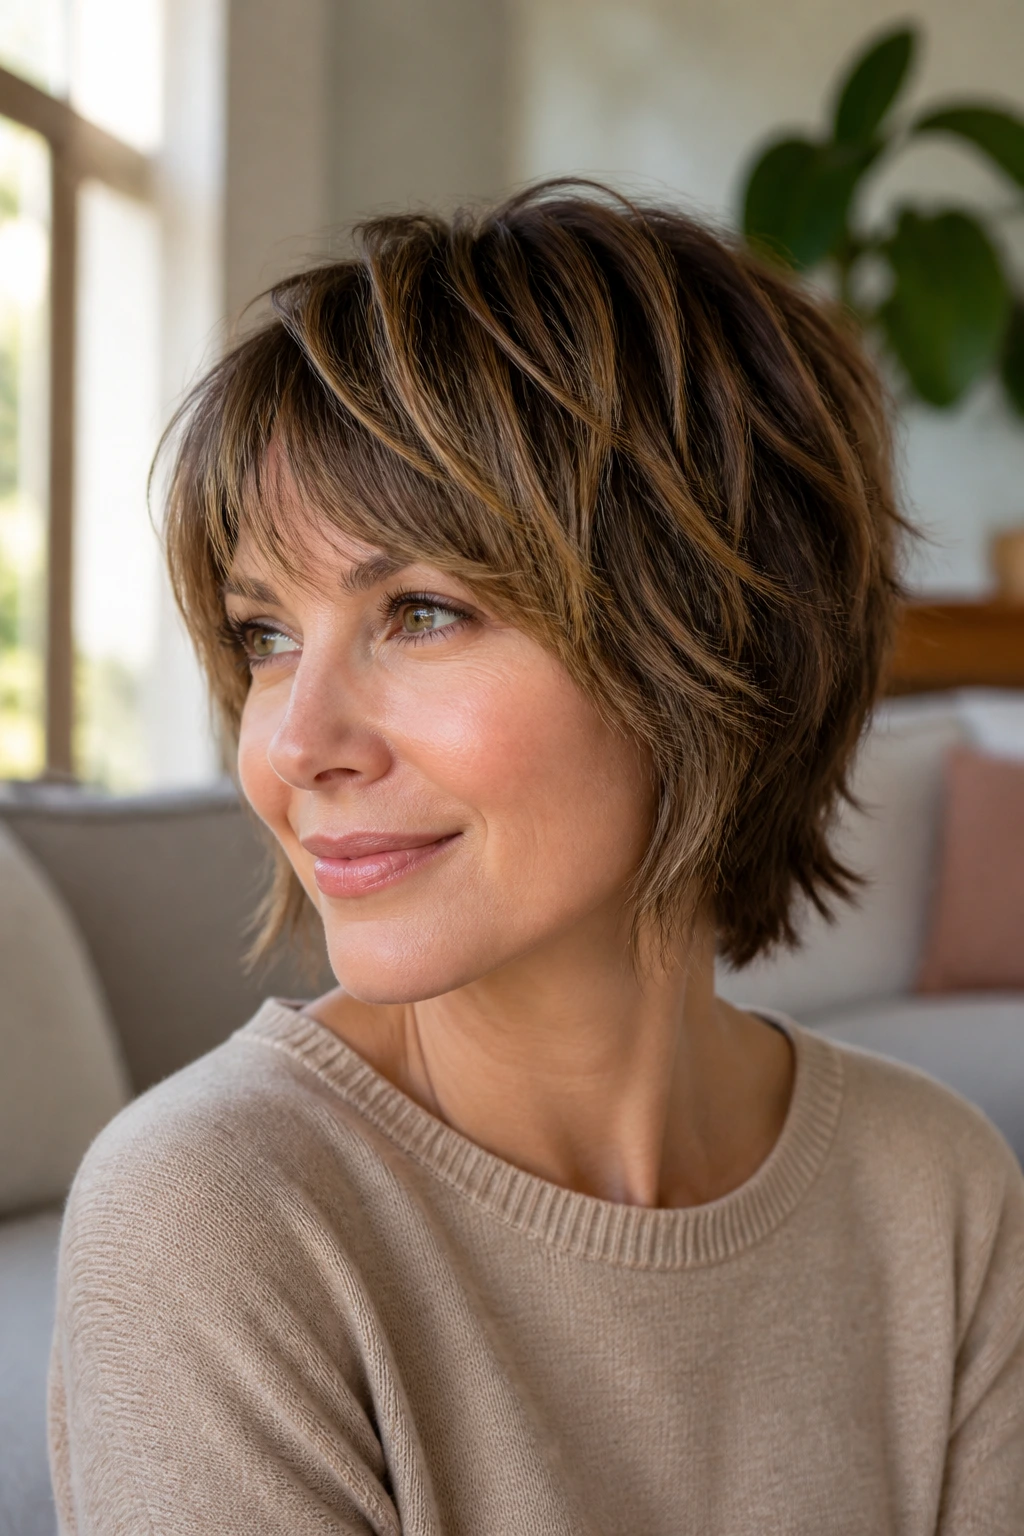
9. Layered Crop for Thick Hair
Can thick hair wear a mini shag without turning into a puffed triangle? Absolutely, but only if the layers are placed with a scalpel’s mood, not a hedge trimmer’s. The crown should have movement, the interior should lose weight, and the ends should keep enough presence to stop the cut from going stringy.
Caramel highlights are useful because they break up bulk visually. On thick hair, a few brighter ribbons near the outer layer and around the face keep the cut from looking like one big dark mass. I prefer a slightly deeper caramel under the top layer too — just enough lowlight to add shadow and avoid a chunky stripe effect.
This version looks best when the perimeter is still strong. Thick hair gets unpredictable when every inch is thinned. Better to remove weight in sections, then leave the outline intact so the hair falls in a controlled way. The result is softer, but not flimsy.
This is one of those cuts that feels better after the first wash. The hair settles, the layers separate, and the caramel catches on the bends instead of sitting on top of them.
10. Wavy Mini Shag With a Deep Side Part
A deep side part changes the whole mood of a mini shag. It pushes volume to one side, gives the fringe a little drama, and lets the caramel highlights flash differently depending on where the light hits. On an oval face, that asymmetry feels intentional instead of awkward.
What Makes It Different
A center part tends to make shag layers look balanced and casual. A side part gives the haircut a little tilt. If your waves naturally fall forward, this shape can keep them from drifting into your eyes while still showing the movement near the cheekbone and jaw.
The highlight placement should follow the bigger side of the part. Put a brighter ribbon through the front section and a few softer pieces underneath so the volume reads as depth, not fluff. On wavy hair, the caramel looks best when it lands on the bends rather than on straight sections. That means the waves catch light where they move.
- Best for: medium-density wavy hair
- Highlight rule: brighter on the heavy side, softer on the tucked side
- Styling trick: flip the part after blow-drying for a softer fall
- Good add-on: a small amount of texture cream at the ends
The deep side part keeps the shag from feeling too predictable. A little crookedness helps.
11. Wolf-Lite Mini Shag
This is the softer cousin of the wolf cut. You get the attitude, but the shape is cleaner and shorter. The crown has lift, the nape stays a touch longer, and the caramel highlights run through the top and the face frame so the layers don’t disappear into one another.
The reason this works on oval faces is simple: the face can handle both height and width if the cut is controlled. The wolf-lite shape gives you that slightly rebellious outline without putting too much bulk at the sides. Keep the top pieces textured, not shredded. A mini shag should still look like hair, not a dare.
Caramel is useful because it softens the harder edges of the shape. If you use a deeper brown base with a toasted caramel overlay, the difference between crown and ends becomes more visible. That matters on a cut like this. Otherwise the whole thing can look muddy.
I’d recommend this cut for someone who likes a bit of rock-and-roll but doesn’t want the maintenance of a stronger mullet shape. It’s less dramatic, easier to grow out, and far easier to style on a normal morning.
12. Inverted Mini Shag With Crown Lift
Unlike a flat bob, this version stacks a little in the back and keeps the front lighter. The shape gives the crown enough lift to stop the hair from lying there, and the caramel highlights are concentrated on the top third and around the front so the volume reads clearly.
This is a smart cut for straight hair that tends to collapse by midday. The inverted shape builds a line into the haircut, which helps the shag layers feel intentional rather than random. On an oval face, that line doesn’t fight the proportions. It just gives the silhouette a little structure.
If your crown is flat, ask for subtle elevation at the back rather than a dramatic angle. Too much inversion can look dated fast. Keep the ends tapered, and let the front graze the jaw or just below it. Caramel through the crown and front pieces creates a bit of visual lift, which is half the battle with shorter layered cuts.
A light mousse at the roots and a round brush are enough. No need to round-serve the whole head into a perfect shape.
13. Soft Mullet Mini Shag
This cut lives in a tricky space, and that’s why it works when the balance is right. The front stays lighter, the crown stays piecey, and the nape keeps a little extra length so the silhouette doesn’t feel chopped off. Caramel highlights make the shape readable without screaming “look at my haircut.”
Why It Needs a Gentle Hand
Oval faces can wear a soft mullet shape better than people think because the proportions stay even. The problem isn’t the shape itself. It’s when the fringe gets too short or the nape gets too long too fast. Then the cut stops feeling mini and starts feeling accidental.
The caramel should live on the top sections, the face frame, and a few lower pieces to keep the back from going dark and heavy. A little shadow underneath helps, too. That’s where lowlights can earn their keep, especially if your natural base is deep brown and you want the highlights to pop without turning stripey.
- Best styling product: light wax or pomade on the ends
- Best color placement: top, temples, and a few nape ribbons
- Good fit: people who like edge but still want movement
- Avoid: heavy, blunt fringe that fights the layered shape
The best soft mullet shags look almost innocent from the front. Then you turn the head and the shape wakes up. That’s the fun part.
14. Blunt-Base Shag With Tapered Ends
A blunt base gives the haircut a spine. The tapering at the ends keeps it from looking boxy. That combination is useful on oval faces because the shape can handle a defined line near the bottom without needing extra width around the cheeks.
Caramel highlights here should be placed with a little discipline. I like them closer to the perimeter and the face frame, with a softer, diffused placement through the interior. If you put too much brightness everywhere, the blunt base loses its clarity. The cut needs contrast between the clean bottom line and the feathered top.
This version suits someone who wants a little more polish than a full shag gives. It’s easier to wear straight, but it still bends well with a small brush or a flat iron wave. The beauty of it is in the contradiction: one part crisp, one part messy.
That’s also why it photographs well in real life — not in some glossy, impossible sense, just because the outline remains visible even after the hair has moved. And hair always moves.
15. Shag Bob With Chunky Highlights
Do chunky highlights belong in a mini shag? Sometimes, yes — if the cut itself is strong enough to carry them. This version uses thicker caramel ribbons, usually around the face and the outer top layers, to make the shag bob feel more graphic and less soft-focus.
The trick is to keep the chunks deliberate. If they’re too wide or too few, the hair looks striped. If they’re placed with a little overlap and softened with a gloss, they can create a strong, visible frame around an oval face. That can be useful if your features are delicate and you want the haircut to add some bite.
I’d choose this version for straight to wavy hair with enough density to hold shape. Fine hair can wear chunky highlights too, but only when the ribbons are narrow enough that they don’t show every separate section of hair underneath. That’s where a colorist with a steady hand matters.
This cut is less subtle than the others on the list. That’s the point. Some people want a shag that whispers. Some want one that has a little voice.
16. Long Fringe Shag for a High Forehead
A long fringe can change the whole balance of an oval face, especially if the forehead feels like the most prominent feature. The shag layers stay mini and soft, while the fringe drops a little lower — often between brow level and the top of the lashes — so the front carries more weight.
How It Works
The caramel should be woven through the fringe edges and the front layers, not dumped in the middle of the bang section. That keeps the fringe airy. If it gets too heavy, it can hang flat and lose the movement that makes the shag shape worth wearing in the first place.
- Best fringe shape: soft and separated, not blunt
- Best highlight zone: fringe edges, temples, and front layers
- Good for: medium to thick hair that can hold a defined front
- Styling move: dry the fringe side to side first, then split it where you want
The good version of this cut frames the eyes without boxing the face in. And because oval faces can handle a lot of fringe, you don’t need to hold back too much. Just keep the ends textured.
17. Side-Swept Mini Shag for Busy Mornings
This is the cut for people who want the shag idea but don’t want to wrestle their hair every day. The side-swept fringe falls into place faster than curtain bangs, the layers stay loose, and the caramel highlights give it enough dimension that you don’t need perfect styling to make it look finished.
A side-swept front also softens an oval face in a different way than a center-part shag does. It brings the eye across the face, then back into the jaw and cheekbone area. That small shift can make the whole cut feel more relaxed. I’d keep the caramel brighter on the sweep side and a little quieter on the other side to keep the shape from looking flat.
The length can sit anywhere from jaw to collarbone. What matters more is that the front pieces have enough room to move without collapsing into the eyes. If your morning routine is mostly dry shampoo, a brush, and a hoodie, this one won’t fight you.
It’s not fussy. That’s why it earns a place on the list.
18. Asymmetrical Shag Bob

If you want the haircut to look a bit sharper, this is the move. One side sits a touch longer, the other side lifts a little higher, and the shag layers keep the whole thing from feeling stiff. On an oval face, asymmetry can look crisp without needing much correction.
Unlike a symmetrical bob, this cut uses imbalance as the design. The caramel highlights should follow the longer side more heavily, then soften across the opposite side so the eye moves where you want it to. That makes the haircut feel designed instead of improvised.
The safest version keeps the longer side around the jaw, not the shoulder. Once it drops too far, the shag-bob balance gets muddy. The shorter side can still have a few wispy pieces around the cheekbone, but don’t overbuild it. A good asymmetrical shag should feel controlled, not gimmicky.
Choose this if you like a clean outline with a little edge. It’s a tidy cut with a sharpened corner.
19. Airy Mini Shag for Straight Hair
Straight hair can make a shag look flat if the layers are too long or too tidy. An airy version fixes that by using shorter internal layers, soft bends at the ends, and caramel highlights that break up the straight surface. The cut needs movement, even if the hair itself doesn’t naturally offer much.
What Makes It Work
The layers should be light enough to catch a bend from a round brush or flat iron, but not so short that the hair sticks out at the sides. That’s the annoying part with straight hair: a tiny change in length can make the silhouette go from sleek to awkward in a hurry.
Caramel highlights should be placed where the hair will bend — around the front, near the ends, and through the top layer. If the color sits only underneath, it disappears once the hair falls straight. The point is to give the surface some visual noise.
- Best styling method: quick blowout with a round brush or soft flat-iron bends
- Best color placement: top layer, front sweep, and outer ends
- Best finish: light gloss or shine serum on the ends only
- Avoid: heavy creams near the crown, which flatten the lift
This is one of those cuts that gets better when you stop trying to make it perfect. A little air in the shape is the whole game.
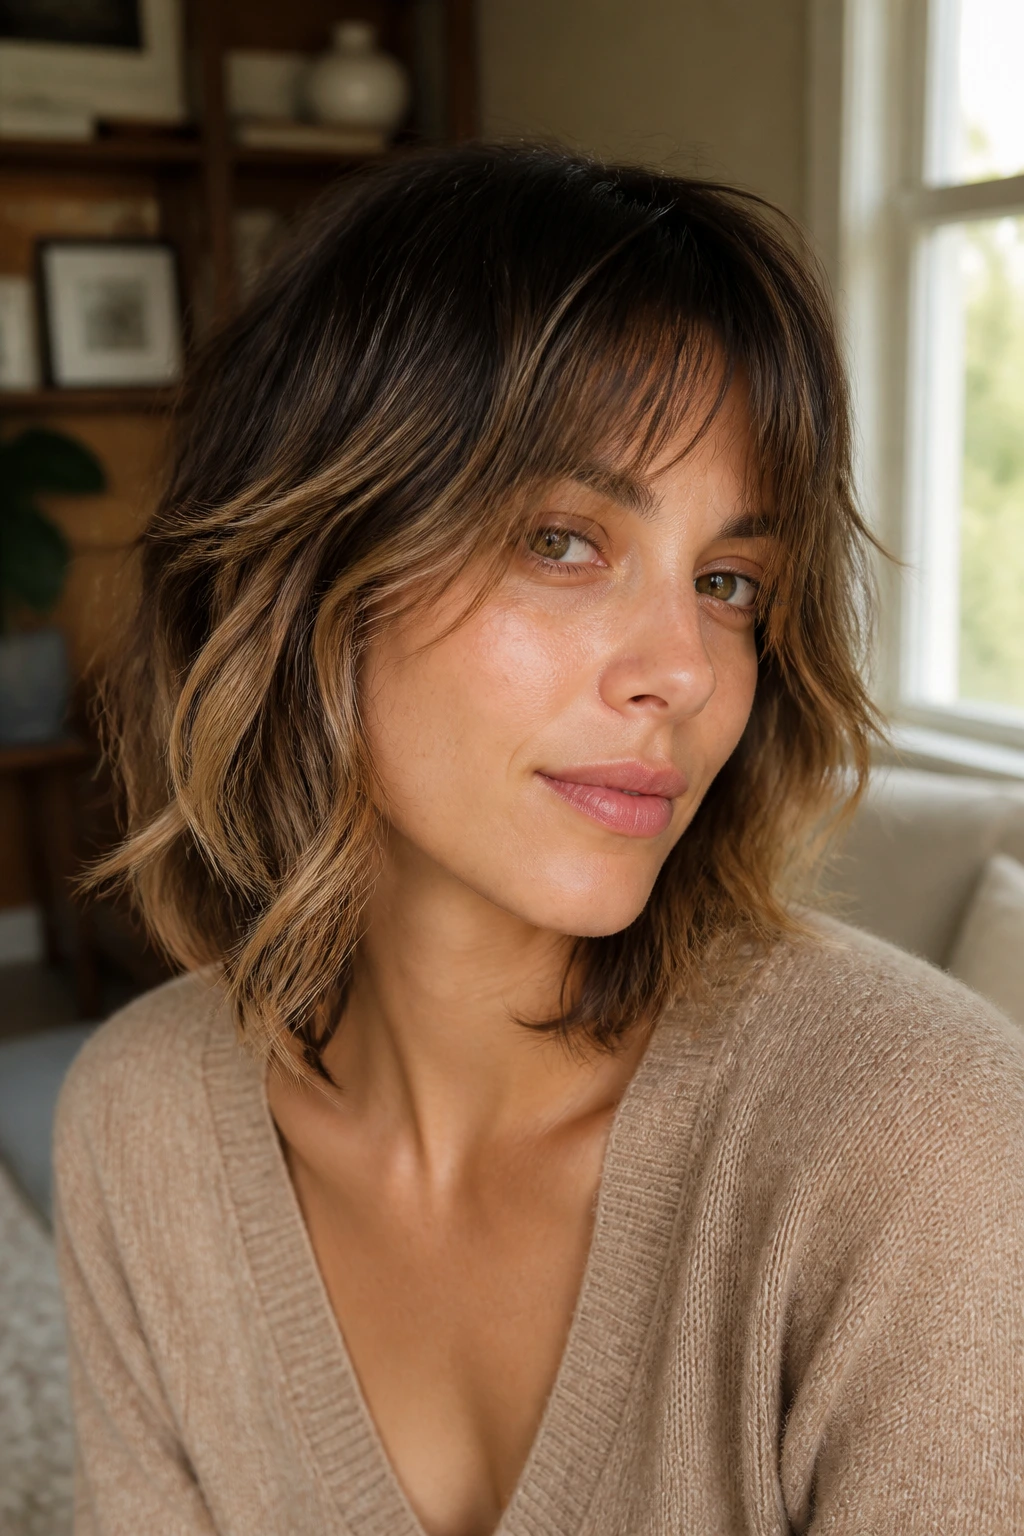
20. Tousled Mini Shag for Wavy Hair
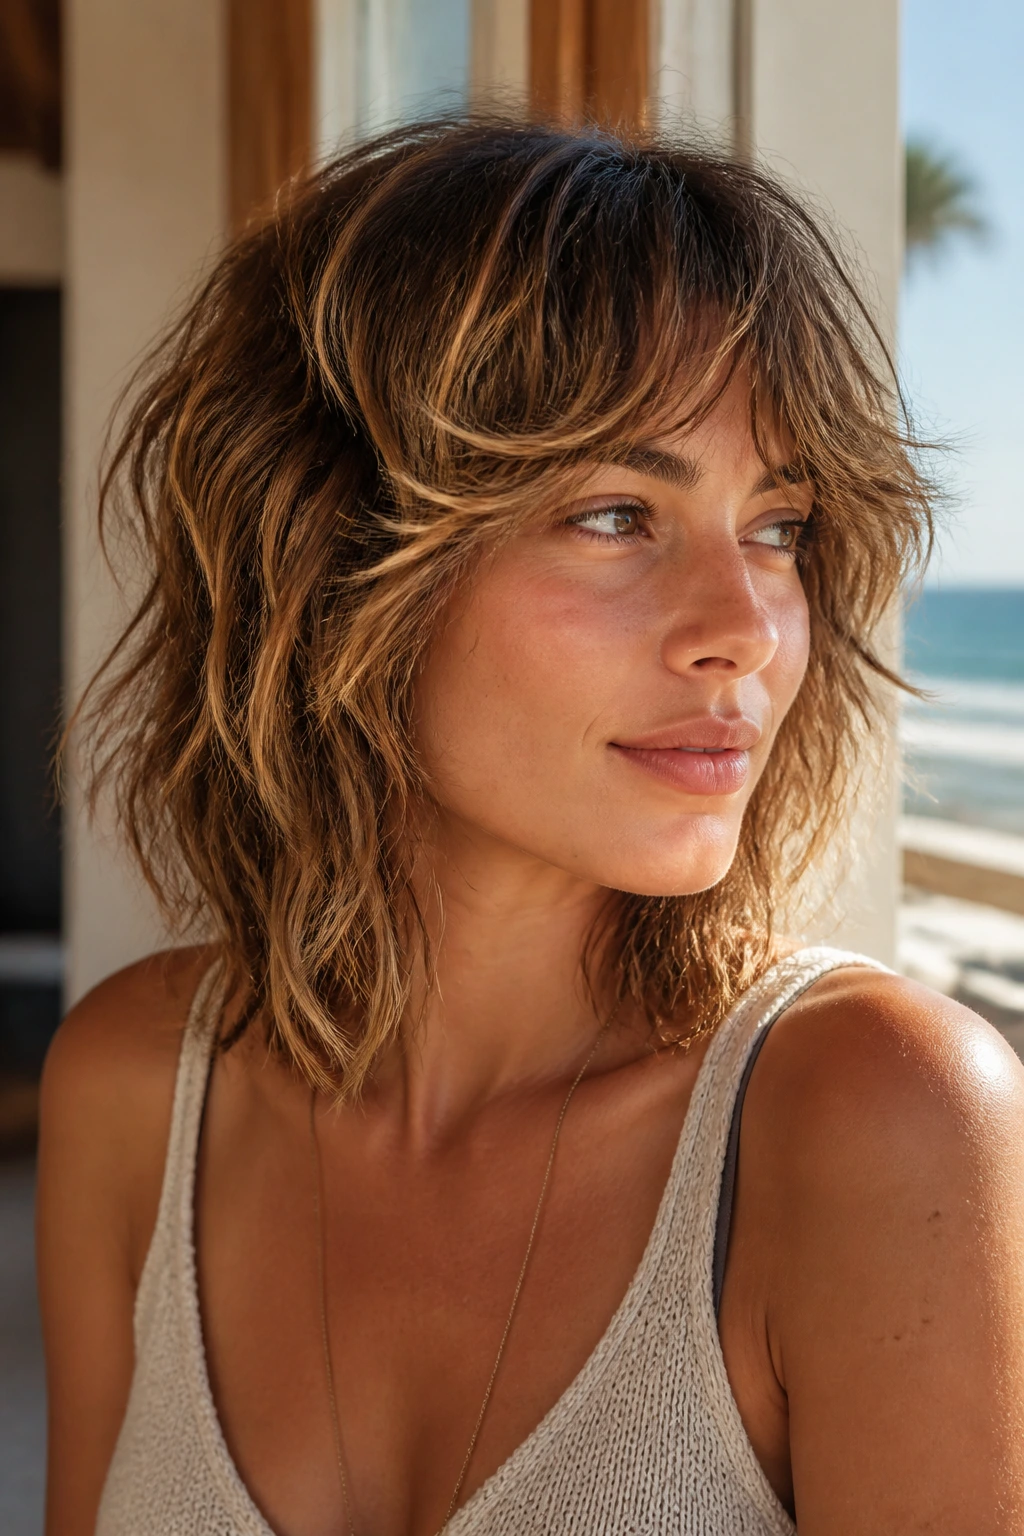
Wavy hair is where a mini shag starts to feel almost effortless. The natural bend gives the layers something to work with, and caramel highlights catch right where the waves crest and fold. If the cut is mapped well, the hair does half the styling for you.
The oval face helps here too, because the wave pattern can spread a little without throwing off balance. That means you can wear a fuller fringe, a deeper side part, or a looser front layer without the cut overwhelming your features. The caramel should be painted through the wave pattern, not just the top layer. That way the movement shows from every angle.
I like this version with a little salt spray and a lot of finger-drying. A brush can make wavy hair too neat too fast. Better to rough-dry, scrunch a few sections, and stop when the shape looks bouncy rather than polished. If the ends turn frizzy, a tiny bit of cream will settle them down.
This one tends to look better on day two. The wave loosens, the layers separate, and the caramel reads softer.
21. Glossy Mini Shag With Subtle Lowlights
Do caramel highlights need a little shadow to work on darker hair? Most of the time, yes. This is the version for people who like shine and depth more than obvious contrast. The caramel pieces stay fine and glossy, while a few understated lowlights under the crown and through the underside keep everything from blurring into one warm tone.
That shadow matters. Without it, caramel on dark brown hair can flatten out under indoor light and look a touch too one-note. A small lowlight panel creates depth, especially around the back of the head where highlights don’t always show in the same way they do at the front. On an oval face, that depth keeps the shape from looking too round or too smooth.
This cut suits anyone who wants a mini shag that can live in professional settings without feeling dull. The finish is cleaner, the texture is softer, and the movement comes from color contrast as much as from the layers themselves.
If your hair naturally reflects shine well, this version is a keeper. It looks calm, but not plain.
22. Grow-Out-Friendly Mini Shag
Some cuts fall apart when the trim gets delayed. This isn’t one of them, if it’s cut with enough softness at the ends and the highlights are blurred around the root. The grow-out-friendly mini shag is built to survive, which makes it a good choice for people who don’t want to chase a perfect salon schedule.
The shape should stay loose around the cheekbones and jaw, with the shortest layers not too aggressive. The caramel highlights work best when they start a little lower and fade upward into the root shadow. That lets the grow-out look intentional instead of patchy. If the base is dark, a soft glaze every so often keeps the warm tones from going brassy.
This is the one I’d recommend if you like the shag look but have real life to deal with. Commutes. Work. Kids. Sweat. Sleep. All of it. A cut that still looks like itself after a few weeks is worth more than a sharper style that collapses the minute you skip a styling day.
It’s not the flashiest option on the list. It may be the most useful.
How to Ask for the Cut and Color Without Getting the Wrong Version
A good salon result starts with a better sentence than “I want a shag.” That word means too many things now. Say where you want the shortest layers to start — cheekbone, jaw, or collarbone — and whether you want the ends to feel feathery, razored, or soft and blunt. Those three words change the whole haircut.
Bring one photo for the cut and one for the color. People mix those up all the time. A cut photo tells the stylist where the weight sits. A color photo shows whether you want toasted caramel, honey caramel, beige caramel, or something more amber. If you only bring one image, the haircut and the highlights can drift apart.
For the highlights, ask for ribbons that follow the face frame and the outer layer. If your base is dark, mention whether you want a root shadow or a few lowlights so the caramel doesn’t sit on top like stripes. On oval faces, the best placement is usually around the cheekbones, temples, and mid-lengths. That’s where the shape feels alive.
If your hair is thick, ask for internal debulking rather than aggressive thinning. If it’s fine, ask for light texturizing and a stronger perimeter. Those are not the same thing. And they should not be treated the same way.
Styling Tools That Earn Their Place on the Counter
-
Blow-dryer with a concentrator nozzle: Gives you more control at the roots and keeps the fringe from fanning out like a bad summer curtain.
-
1-inch to 1.25-inch round brush: Best for bending the ends under or away from the face without making the cut too round.
-
Small flat iron or medium curling iron: Handy for quick bends on the front pieces and a few loose waves through the top layer.
-
Diffuser attachment: Worth keeping if your hair is wavy or curly and you want the caramel pieces to show their shape instead of frizzing apart.
-
Heat protectant spray: Non-negotiable if you use hot tools, especially around the highlighted sections, which can dry out faster than the rest.
-
Light mousse or root lift spray: Helps the crown keep a little height so the mini shag doesn’t collapse by noon.
-
Texture spray or dry finishing spray: Good for piecey ends and second-day hair. Use a little, not a cloud.
-
Color-safe shampoo and conditioner: Helps the caramel stay warm instead of muddy, especially if you wash often.
-
Wide-tooth comb: Better than yanking through the layers with a brush when the hair is wet.
Styling Mini Shag Haircuts for Oval Faces with Caramel Highlights at Home
Parting matters more than people admit. A center part gives curtain bangs and bottleneck fringe room to open. A slight off-center part adds lift at the crown and can make the caramel ribbons flash more on one side. If you wear glasses, don’t force the fringe to sit exactly where the frame hits; give it a little room to move.
Texture should start before the hair is dry. Rough-dry the roots first. Then bend only the front pieces and the outer layer. If you curl every strand, the mini shag loses its shape and starts looking overly done. The goal is movement, not ringlets everywhere.
Face-framing needs a touch of intent. Tuck one side behind the ear, leave the other forward, and let a few caramel pieces fall at the cheekbone. That tiny asymmetry makes the cut look lived-in without making it sloppy. A small clip can work too, especially if you want the fringe off your face but still visible.
The finish changes the whole mood. Matte texture looks cooler and more piecey. A little shine serum on the ends makes the caramel read warmer. Both are fine. The mistake is coating the roots, which flattens the crown and makes even a good shag look tired.
Necklines and earrings matter. A mini shag sits close to the face, so open necklines, small hoops, and simple collars keep the shape visible. High turtlenecks can swallow the nape layers. That’s not a reason to avoid them forever. It’s just a heads-up if you’re dressing for the haircut instead of around it.
Practical Tips That Make the Cut Look Better for Longer
Cutting: Ask for point-cut ends or soft slide-cutting through the interior. A blunt chop at the wrong point can make a mini shag feel chunky instead of airy, especially on oval faces where the outline needs to move.
Color Placement: Keep caramel brightest where the hair bends — fringe edges, temple pieces, and the outer layer around the cheeks. If the highlights live only under the top layer, they disappear the minute the hair settles.
Time-Saver: If you’re short on styling time, dry the roots first and only heat-style the front six sections. That gives you enough shape to make the rest of the head look intentional. The back can stay a little rough.
Cost-Saver: A root shadow and a few well-placed ribbons last longer than full, bright highlight coverage. You spend less time maintaining the color, and the grow-out looks softer. That’s the version I’d choose if you hate obvious regrowth lines.
Pro Move: Mist the mid-lengths with texture spray, then scrunch or bend the ends with your fingers instead of brushing them through. Brushing after texturizing usually pulls the separation right out of the layers.
Mistakes That Flatten a Mini Shag Fast
-
Starting the shortest layers too high. The symptom is puffiness around the temple and cheek area. The fix is simple: keep the shortest movement around cheekbone or jaw level so the face stays open.
-
Choosing caramel that’s too orange or too pale. Orange can make the cut look brassy. Pale beige can disappear against dark hair. A toasted caramel tone usually sits better because it feels warm without looking washed out.
-
Over-thinning thick hair. The ends start to look see-through and the whole cut loses its shape. Ask for internal weight removal, not a lot of thinning shears on the perimeter.
-
Leaving fine hair too long between trims. The layers separate in a bad way, and the ends start to string out. Fine hair usually needs the neckline cleaned up sooner than dense hair does.
-
Styling every section the same way. A mini shag looks dead when the whole head is curled in identical bends. Leave some pieces straighter, bend others, and keep the fringe a little looser. That’s what makes it read as shaggy, not curled.
-
Using heavy oils at the roots. The crown drops, the fringe clumps, and the caramel loses its shine. Keep heavy products away from the top and use them only on the dry ends if you need them at all.
Variations and Alternatives Worth Trying
Honey Bronde Shag: Swap the stronger caramel for a softer honey-bronde blend if you want less contrast. It works well on medium brown hair and keeps the layers warm without looking bright.
Deep Cocoa With Caramel Ribbons: If your base is dark and you like visible dimension, keep the lowlights richer and the highlights a little more concentrated around the face. The effect is more dramatic, but still wearable.
Air-Dried Wave Shag: Ask for layers that support your natural wave pattern and leave the styling loose. This version is the easiest if you prefer a cut that works with your hair’s texture instead of against it.
Sharper Editorial Shag: Go shorter at the crown, keep the fringe more defined, and let the caramel pieces land in stronger ribbons. This one has more edge and needs a steadier styling routine.
Soft Grow-Out Shag: Use longer layers, blurred highlight placement, and a root shadow so the haircut stays readable as it grows. That’s the most forgiving option if salon visits are spaced out.
Maintenance, Trims, and Color Refreshes That Keep the Shape Honest
A mini shag looks best when the layers still have a little separation. That usually means a trim every 6 to 8 weeks if you want the outline crisp, or closer to 8 to 10 weeks if you’re fine with a softer grow-out. Fringe-heavy versions tend to need attention sooner because the front changes the whole balance first.
Caramel highlights hold up better when the color is warmed up with a gloss or glaze before it starts to look dull. For many hair types, that lands around every 4 to 6 weeks if you love shine, or a little less often if your hair holds tone well. If you wash often, use color-safe shampoo and keep the water lukewarm. Hot water strips warmth faster than most people expect.
Dry shampoo is useful here, but don’t pack it into the roots every day. A mini shag needs some movement at the crown, and too much product makes the top feel dusty and stiff. Brush it out at night if you use it. That sounds fussy, but it keeps the hair from getting a chalky patch around the part.
If your hair is curly or wavy, refresh the shape by rewetting the front pieces and reworking only the fringe and face frame. The back can usually be left alone. Straight hair benefits from a quick bend of the top pieces and a touch of shine serum on the ends. That’s enough to bring the highlights back to life without restyling the entire head.
Frequently Asked Questions
Will a mini shag make an oval face look longer?
Usually not, unless the layers are cut too high and the fringe is too thin. Oval faces have enough balance to carry a lot of fringe shapes, so the bigger issue is where the volume sits. Keep the fullness around the cheekbones and jaw, and the face stays open.
Are caramel highlights better than blonde for this haircut?
For most brunettes, yes. Caramel keeps the layers warm and visible without looking harsh against the shag’s texture. Blonde can work too, but if it’s too pale, the color can fight the softness of the cut and make the pieces look disconnected.
Can fine hair pull off a mini shag with highlights?
Absolutely, but the cut needs to stay controlled. Ask for light layering, a stronger outline, and narrow highlights that create dimension without showing every strand. Heavy texturizing on fine hair is where things go sideways.
What should I tell my stylist if I want this look?
Say you want a mini shag with layers that start around cheekbone or jaw level, plus caramel highlights placed through the face frame and outer layer. Bring photos for both the cut and the color. Those are separate jobs, and they need separate references.
Does this work on curly hair, or will it puff up?
It works on curly hair when the layers respect the curl pattern. The cut should remove bulk without taking away shape, and the caramel should sit where the curls move most. If the top is over-thinned, that’s when the puff problem starts.
How often do the caramel highlights need to be refreshed?
That depends on how warm or dimensional you want them to stay. Some people like a gloss every 4 to 6 weeks; others are fine stretching the color longer and letting the root shadow do its job. If the highlights start looking dull or muddy, a toning refresh usually fixes it.
Can I grow this into a longer shag or bob later?
Yes, and that’s one of the nicer parts of the cut. Because the layers are shorter and softer, they can blend into a bob or shoulder-length shag without a harsh line. A good grow-out plan keeps the face frame and trims the fringe first.
What if my bangs separate too much during the day?
That usually means the fringe is too short, too thin, or too product-heavy. A tiny mist of water and a finger re-shape can reset it, but the real fix is in the cut — longer, softer fringe tends to behave better than a dense, chopped one.
The Shape That Keeps Paying Off
A mini shag on an oval face isn’t about forcing drama where it doesn’t belong. It’s about letting the cut move, letting the caramel highlights show that movement, and keeping the outline light enough to stay useful after the first perfect blowout has faded. That’s why the style keeps showing up in so many versions: it can be soft, sharp, airy, piecey, glossy, or a little rebellious, and the face shape still holds it.
The best part is how much room there is to make it your own. You can lean into curtain bangs, keep the fringe long, add lowlights for depth, or go softer and air-dried. If the layers are placed with care and the caramel sits where the hair actually bends, the haircut keeps reading as a haircut — not a compromise.
When you sit down for it, ask for shape first, then color. The good version always starts there.