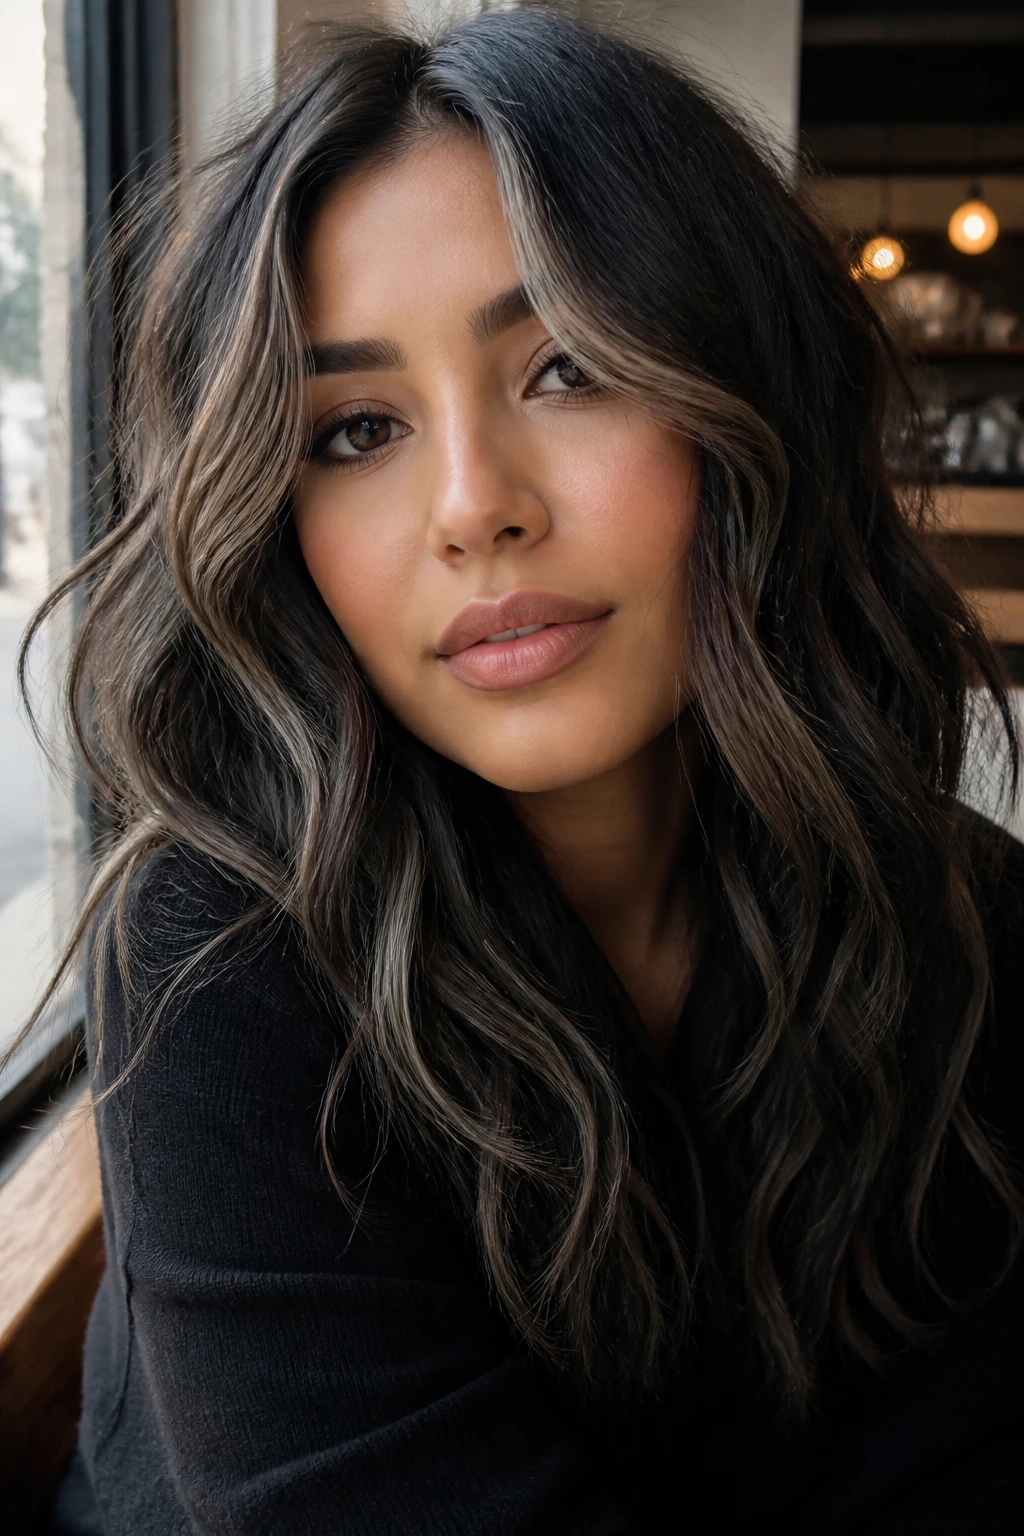
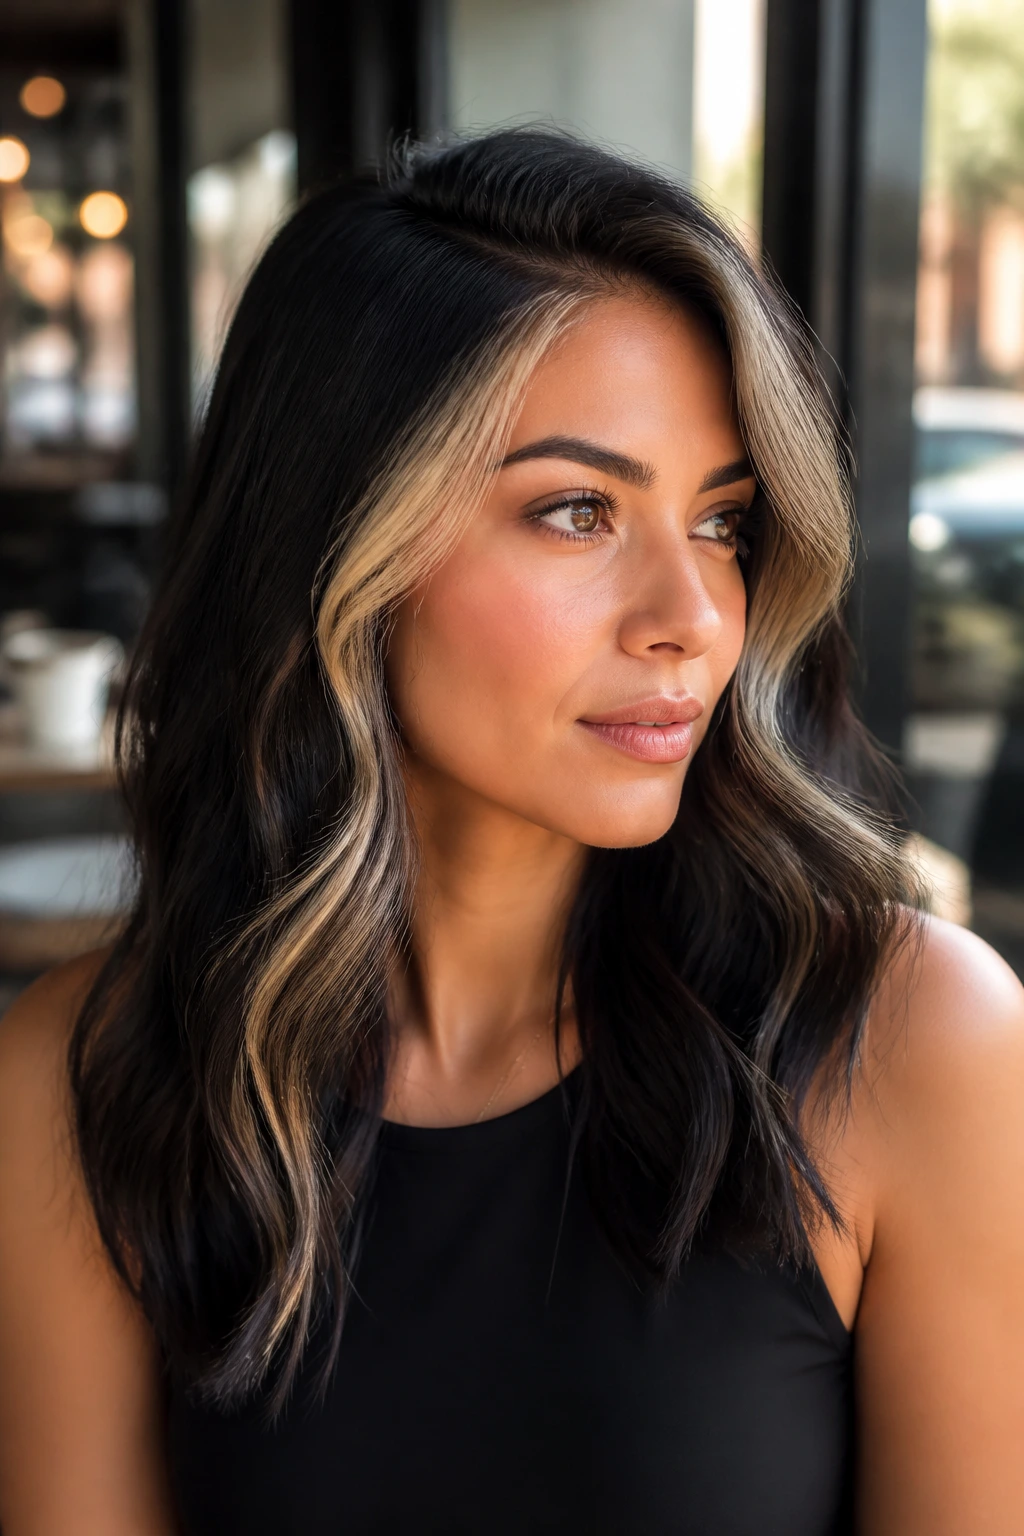
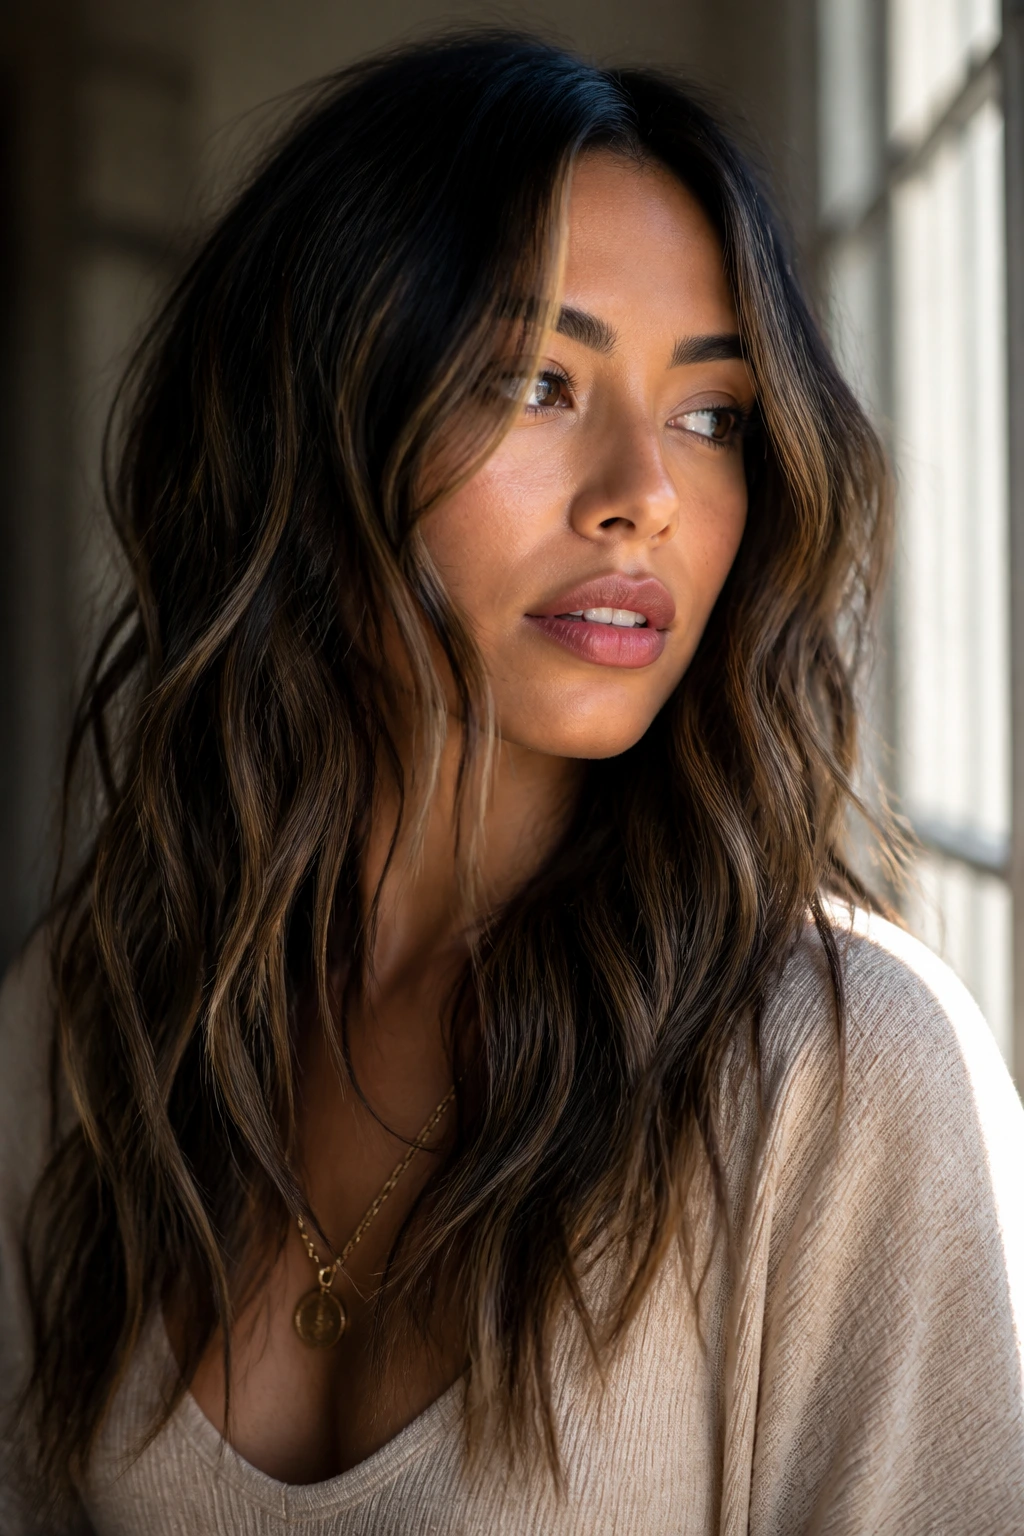
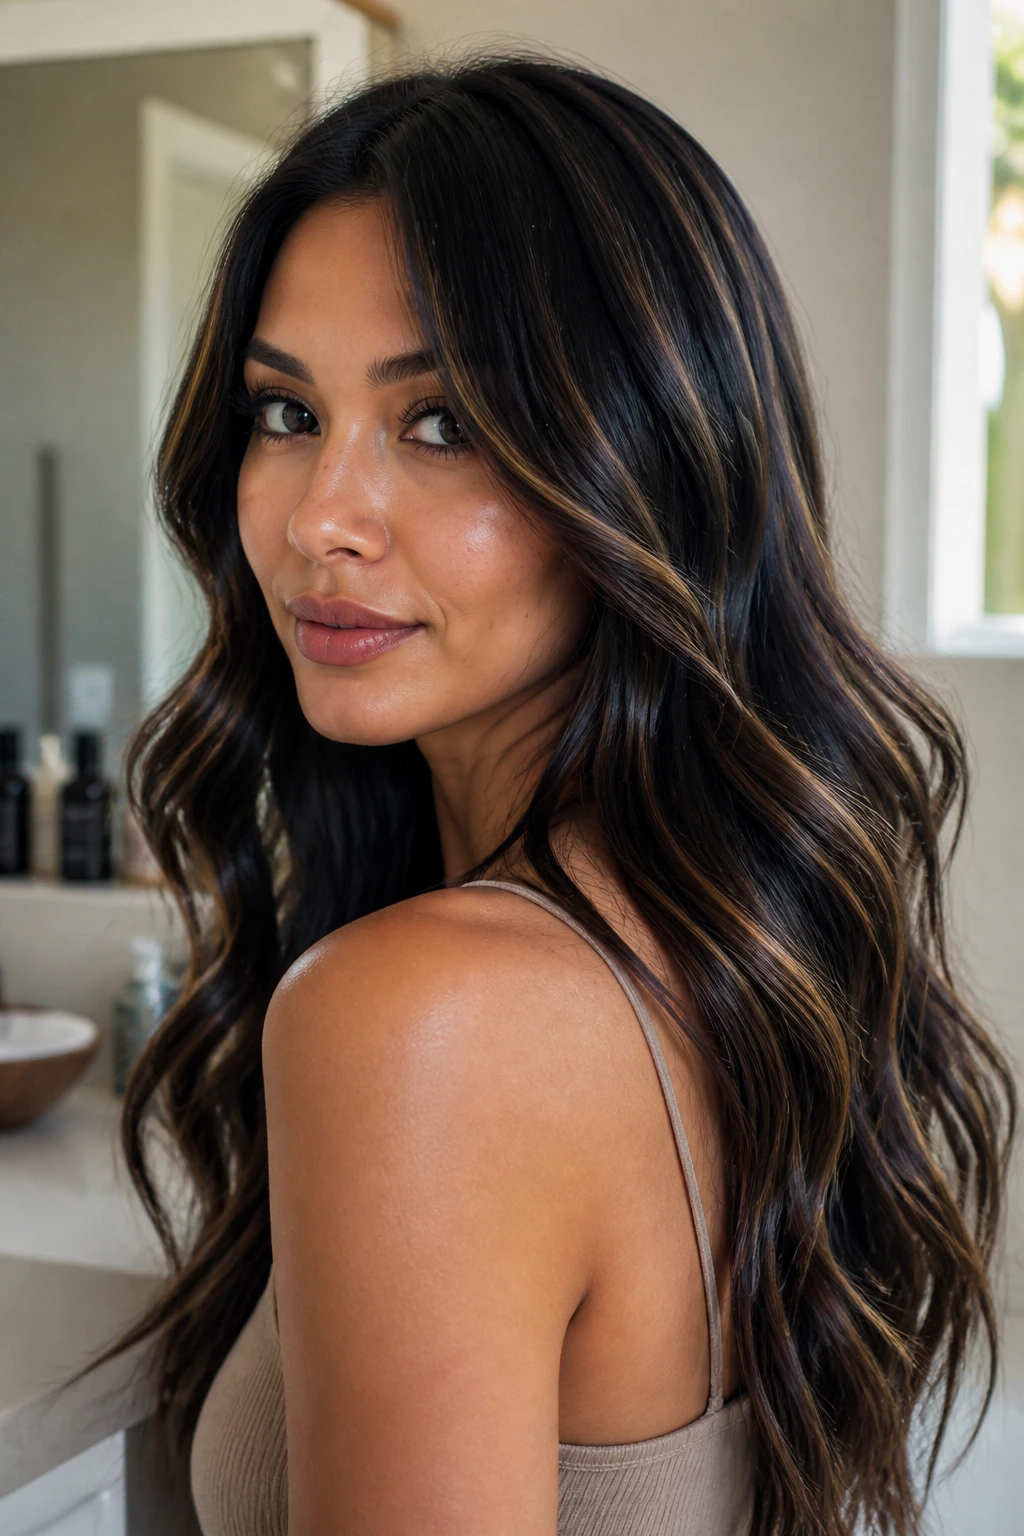
Beachy waves have a habit of going a little sleepy when the color underneath them is too polite. The texture is there, the bend is there, the cut might even be good, but the whole thing can still read flat if every strand sits at the same depth. Black lowlights fix that in a way a gloss never quite can. They carve the wave pattern into something you can actually see.
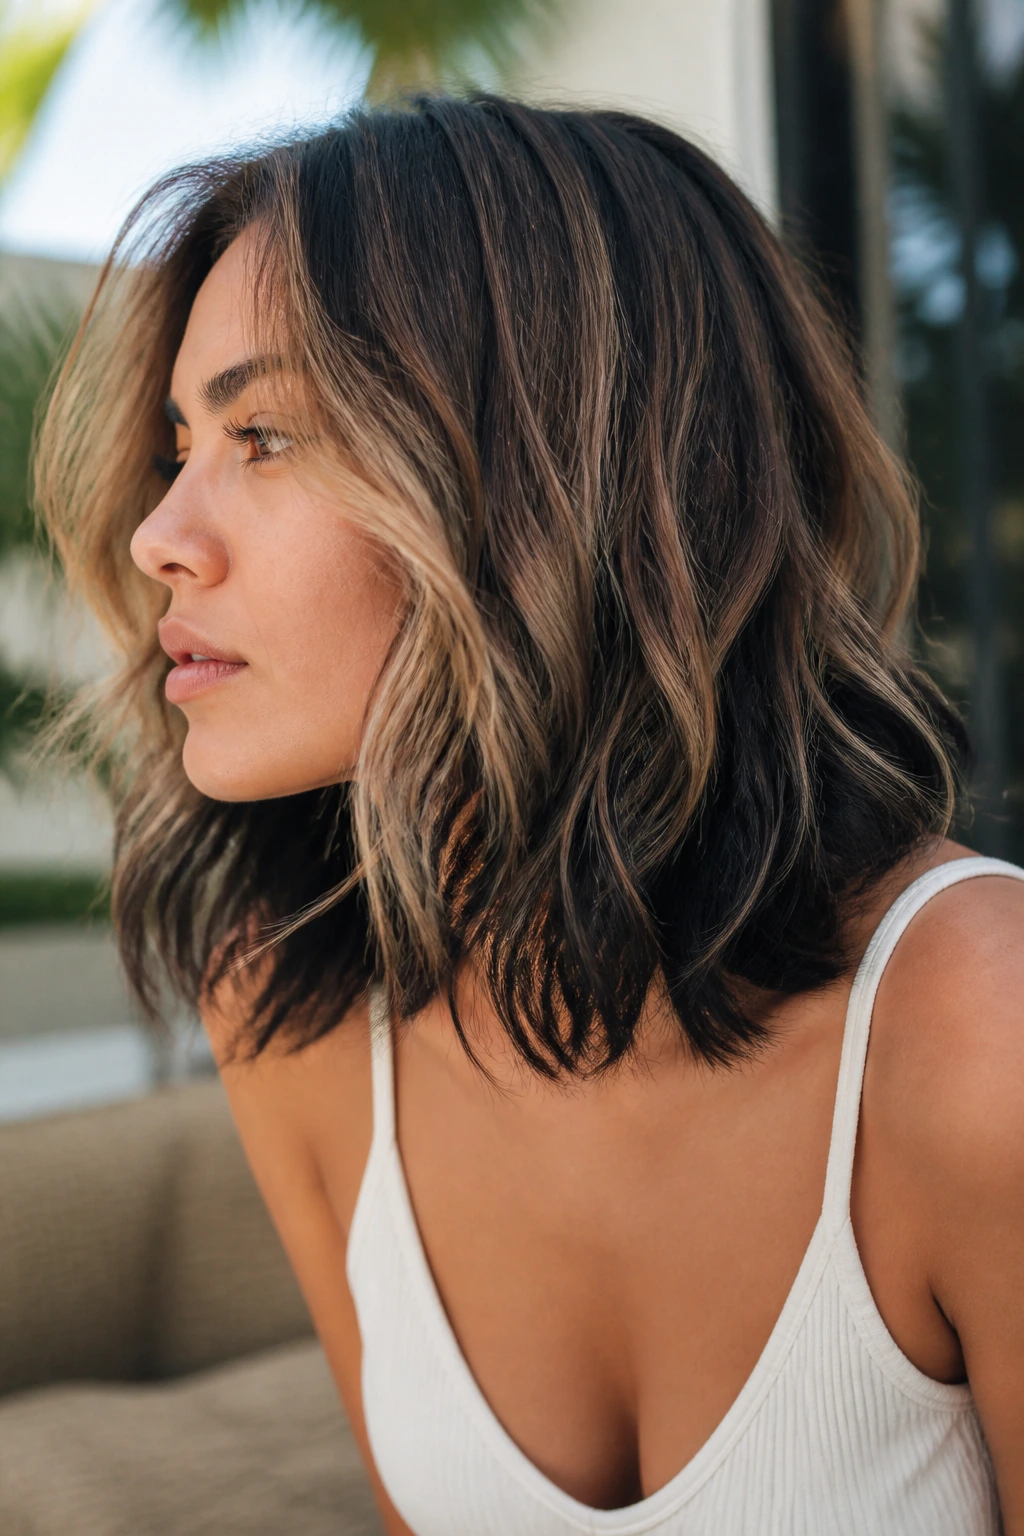
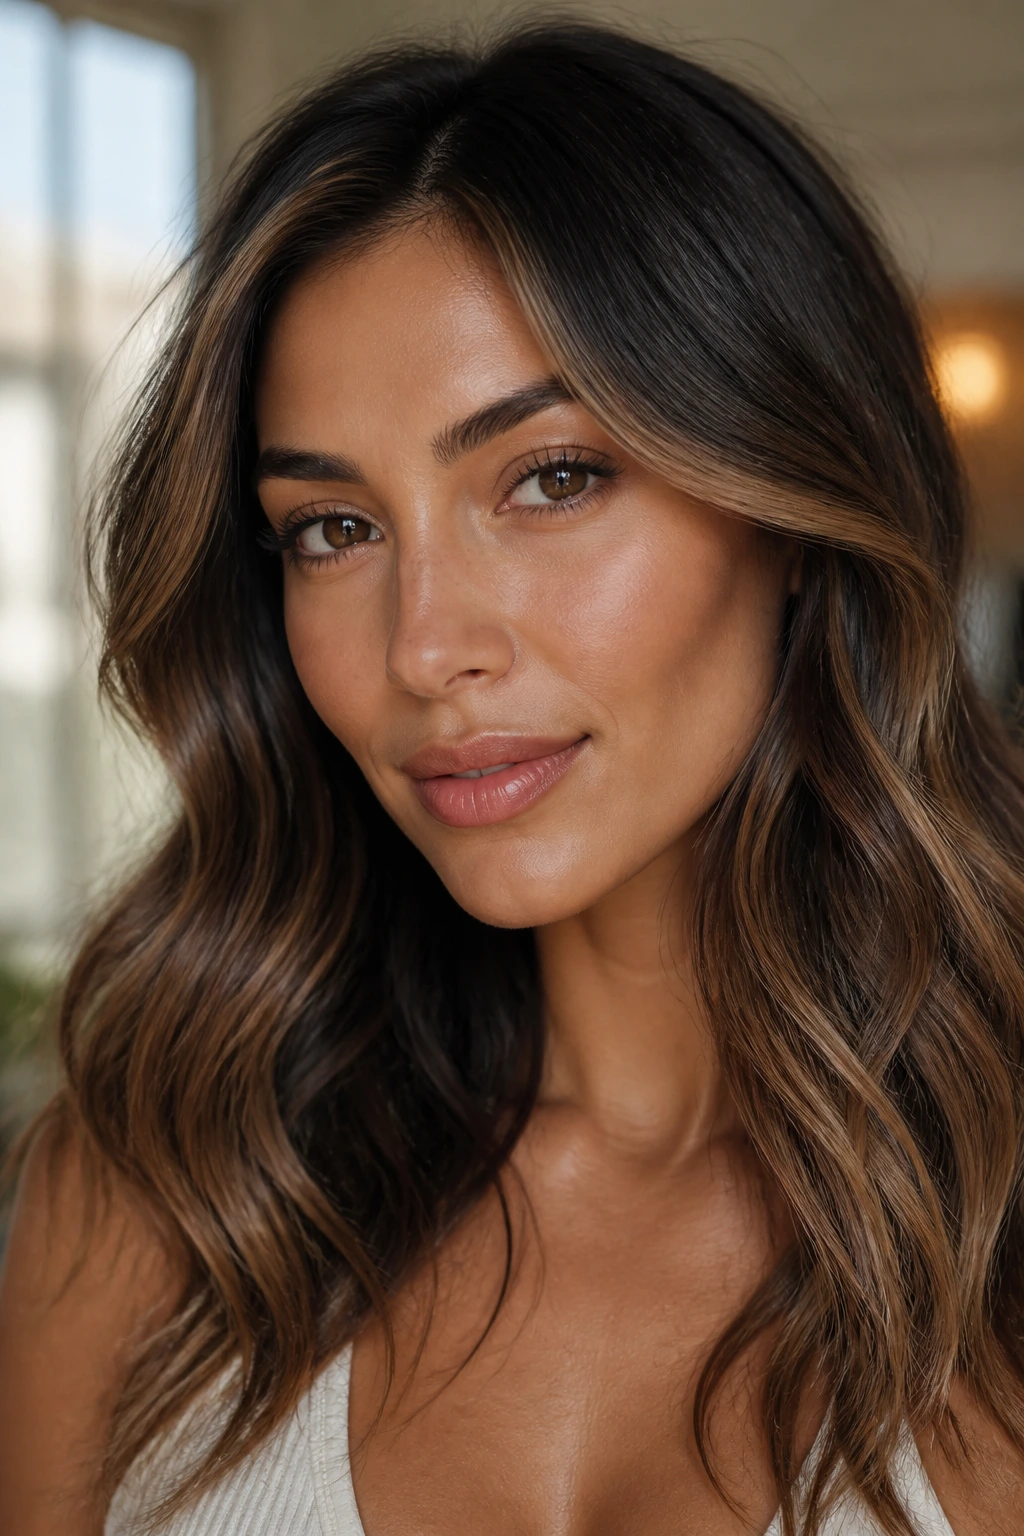
On medium skin tones, that deeper ribboning has a second job. It can sharpen the face, cool off brass, and make warm or olive undertones look richer instead of washed out. The trick is restraint. Too much true black near the hairline and the look turns hard; too little depth and you miss the point entirely.
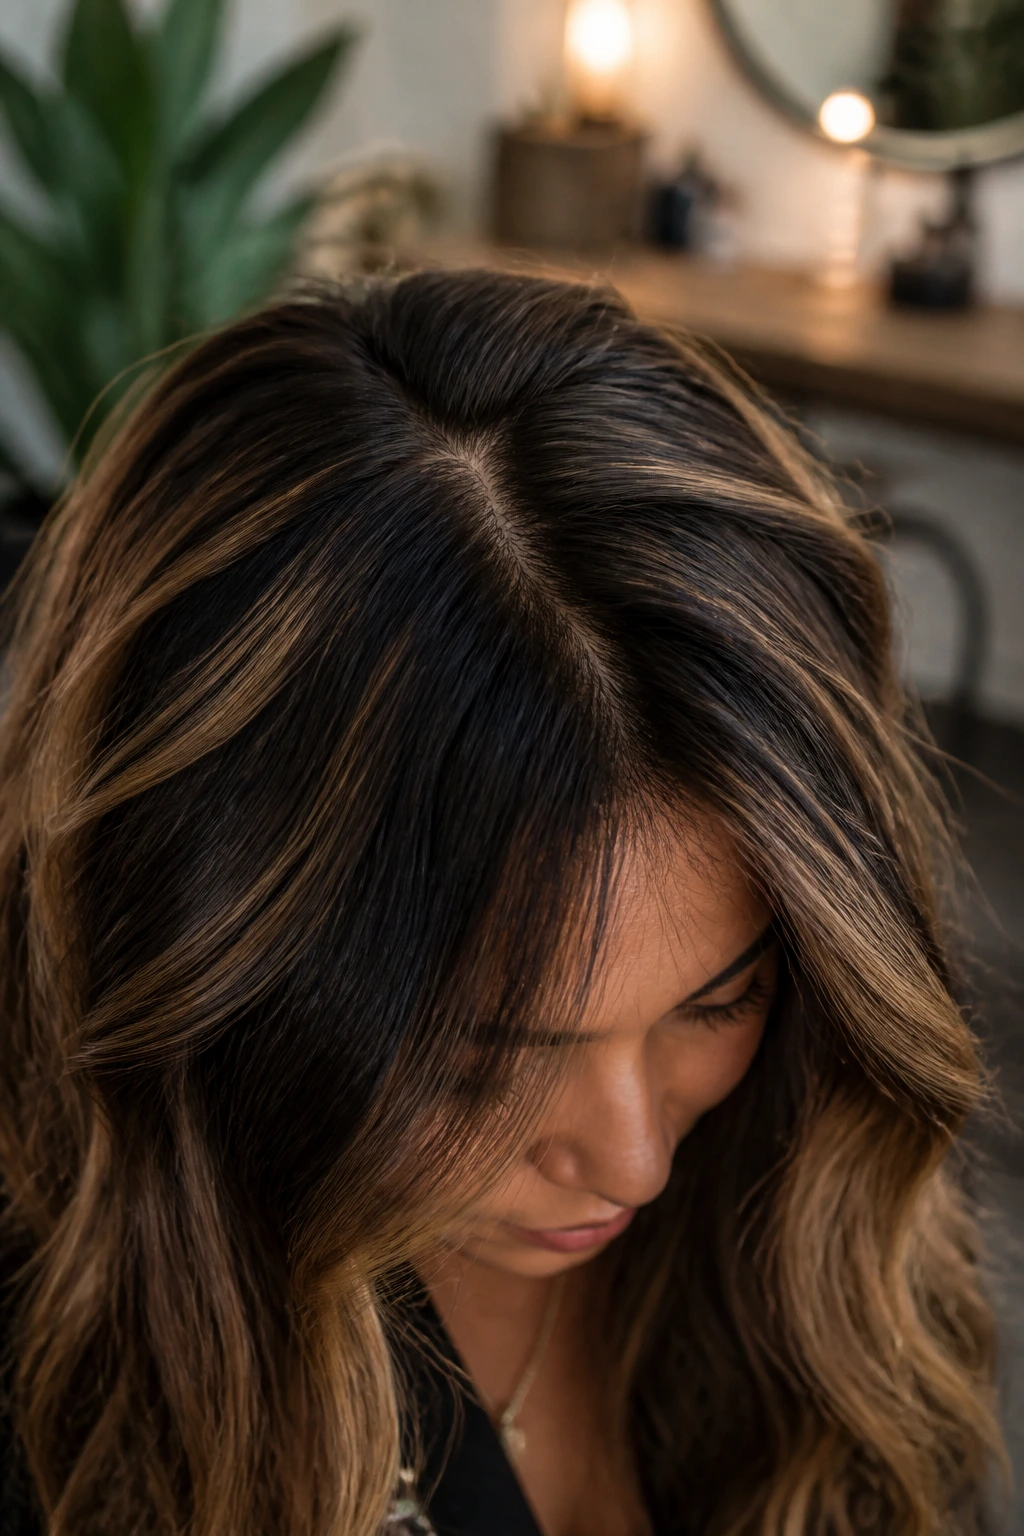
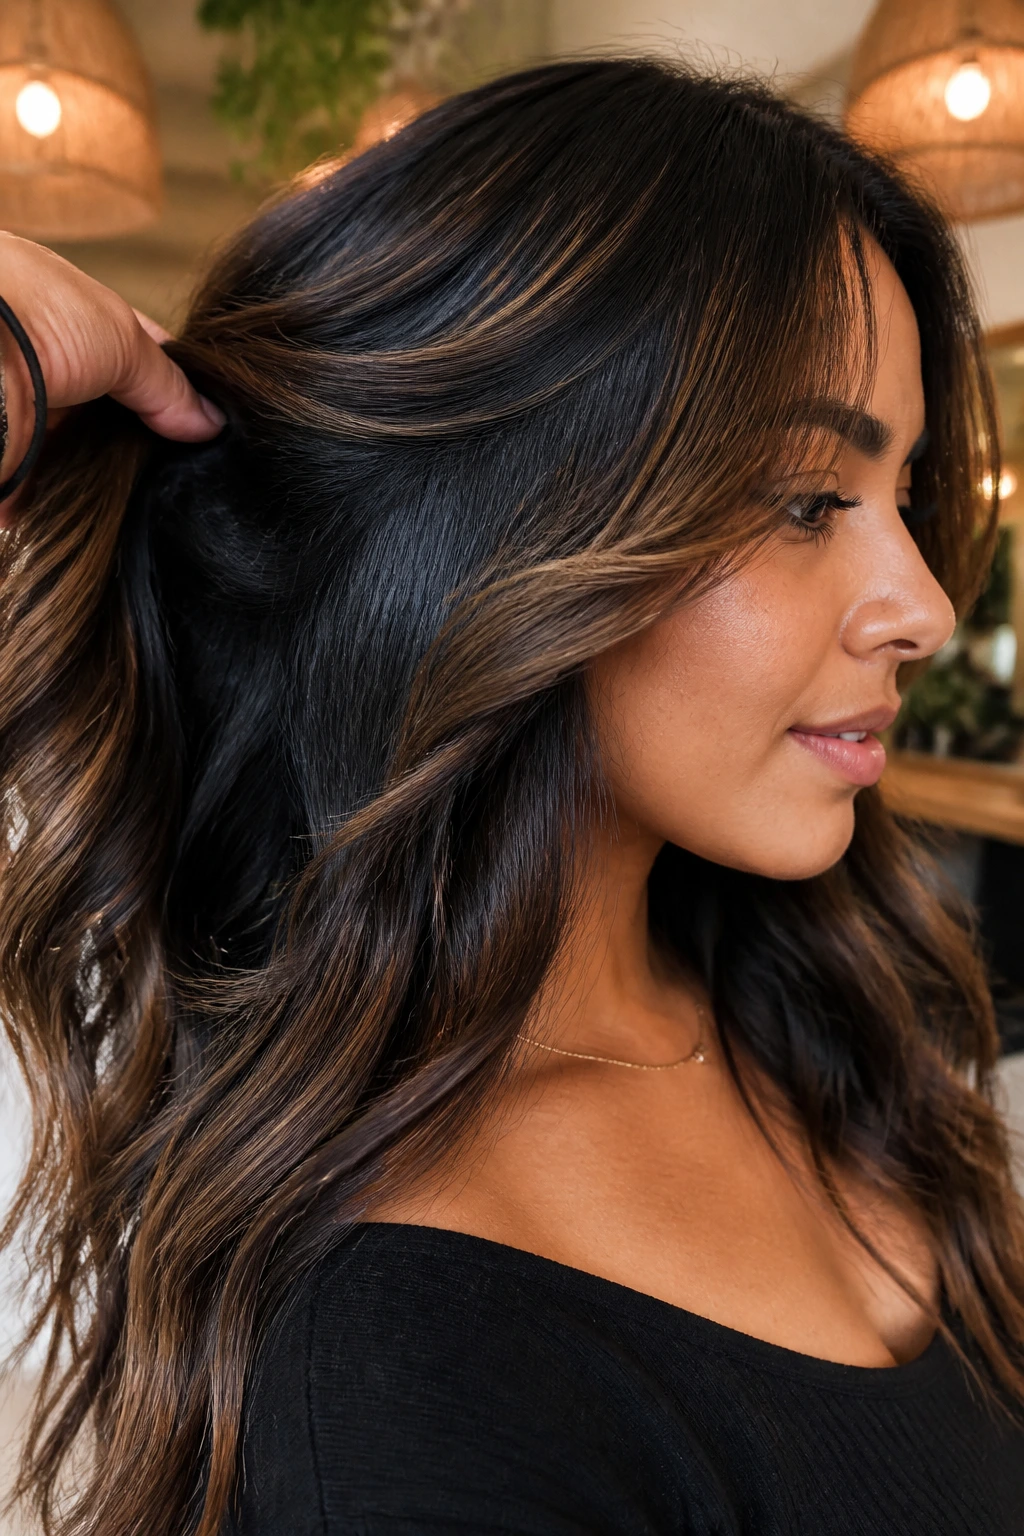
I’ve always liked black lowlights best when they behave like shadow, not ink spilled from a bottle. The good versions move. They peek out at the curve of the wave, disappear under the top layer, then show back up near the ends when the light hits from the side. That little bit of motion is what keeps beachy waves from looking staged.
Why These Lowlights Earn Their Place on Medium Skin
-
They build shape, not just darkness. Black lowlights cut through the bends in beachy waves, so the hair looks layered even when the cut is simple.
-
They suit medium skin without stealing the show. On golden, olive, and neutral medium skin, deep ribbons can sharpen cheekbones and jawlines without making the face look pale or flat.
-
They grow out with less drama. Lowlights sit below the surface color, so the grow-out line is softer than it would be with all-over black dye.
-
They make waves look fuller. A few deeper ribbons give the eye something to follow, which is a nice trick if the hair is fine or a little too one-note.
-
They can be soft or bold. A demi-permanent 1N, a natural 2N, or a blue-black glaze all create different moods, and that range is half the appeal.
-
They work with everyday styling. Air-dried bends, a 1-inch iron, or the old twist-and-pin method all show the dimension off without extra fuss.
How to Pick the Right Black Shade for Your Undertone

Warm and golden medium skin usually looks best with black that has a little softness in it. Think natural black, soft black, or a deep espresso-black that still lets a brown undertone breathe. Pure blue-black can work, but it needs balance elsewhere — a warmer face-framing piece, a honey gloss on the ends, or a cut with movement so the darkness doesn’t sit too close to the skin.
Olive medium skin can handle a darker, cooler register better than people think. In fact, olive tones often look richer when the black lowlights have a smoky edge, because the color echoes the natural shadow in the skin rather than fighting it. If your complexion leans green-gold in daylight, avoid anything that reads flat brown; it can make the whole head look muddy.
Neutral or slightly cool medium skin can wear the deepest versions without much trouble, but placement still matters. A black lowlight placed only underneath the top layer gives depth without making the hairline feel heavy. If you want a stronger look, ask for denser ribbons through the mid-lengths and leave the very front pieces one shade softer.
A quick salon note that saves bad outcomes: bring two photos, one in indoor light and one in daylight. Black reads differently in both, and beachy waves show that difference more than straight hair does. A stylist can match the tone faster when they can see whether you want charcoal, soft black, raven, or a glossy natural black.
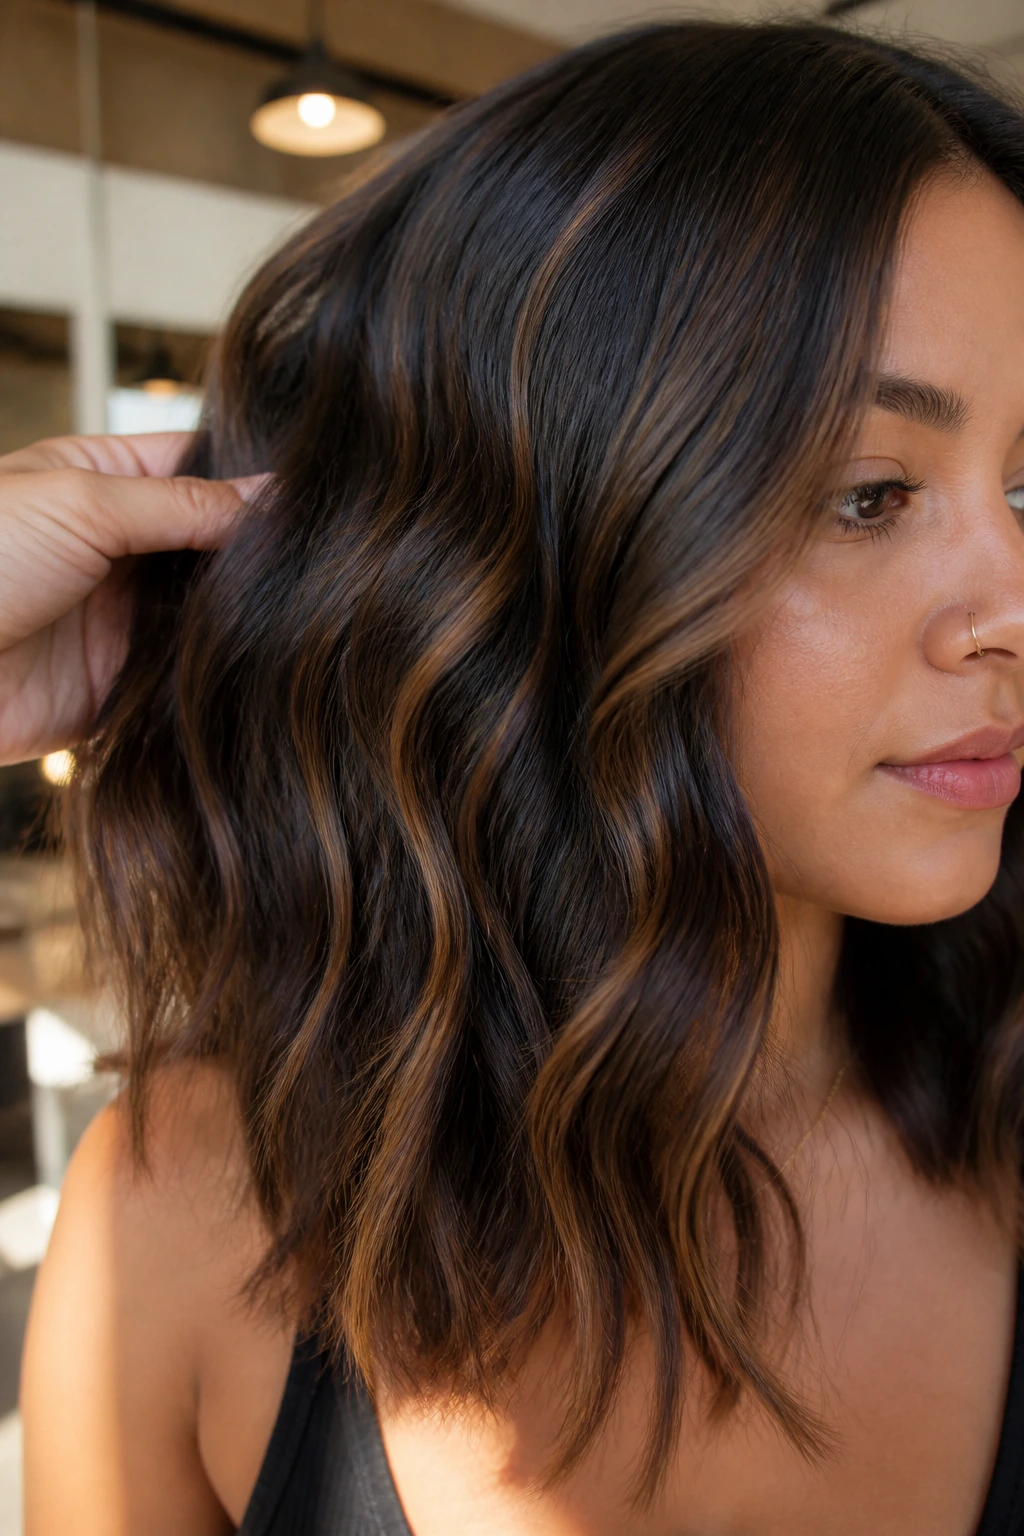
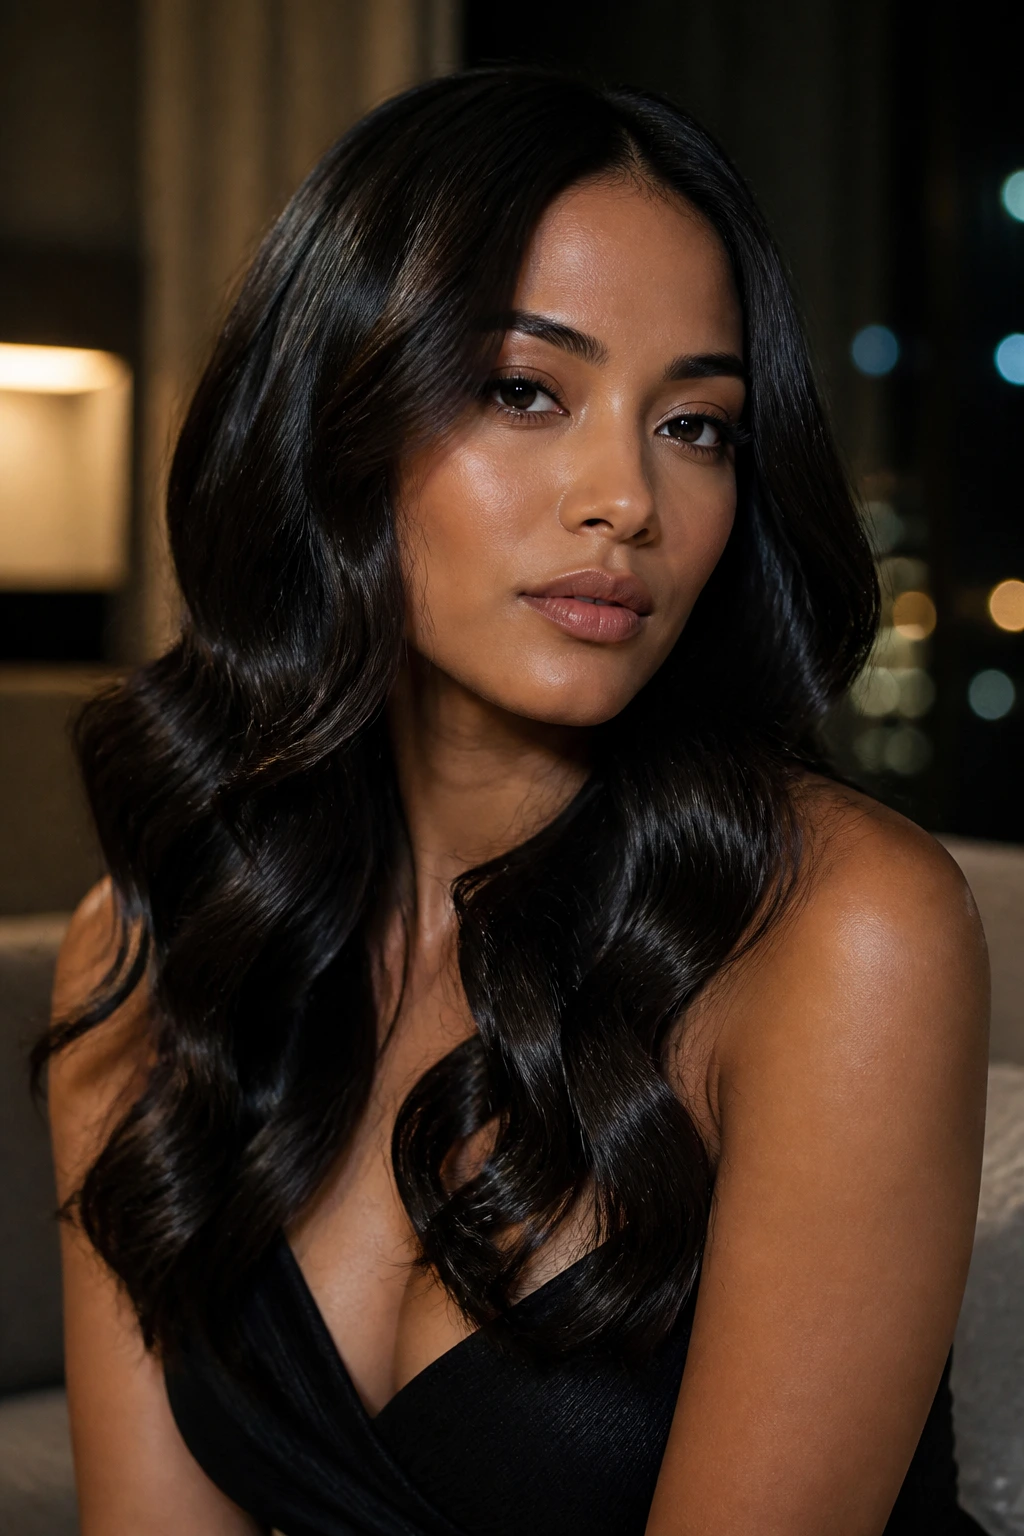
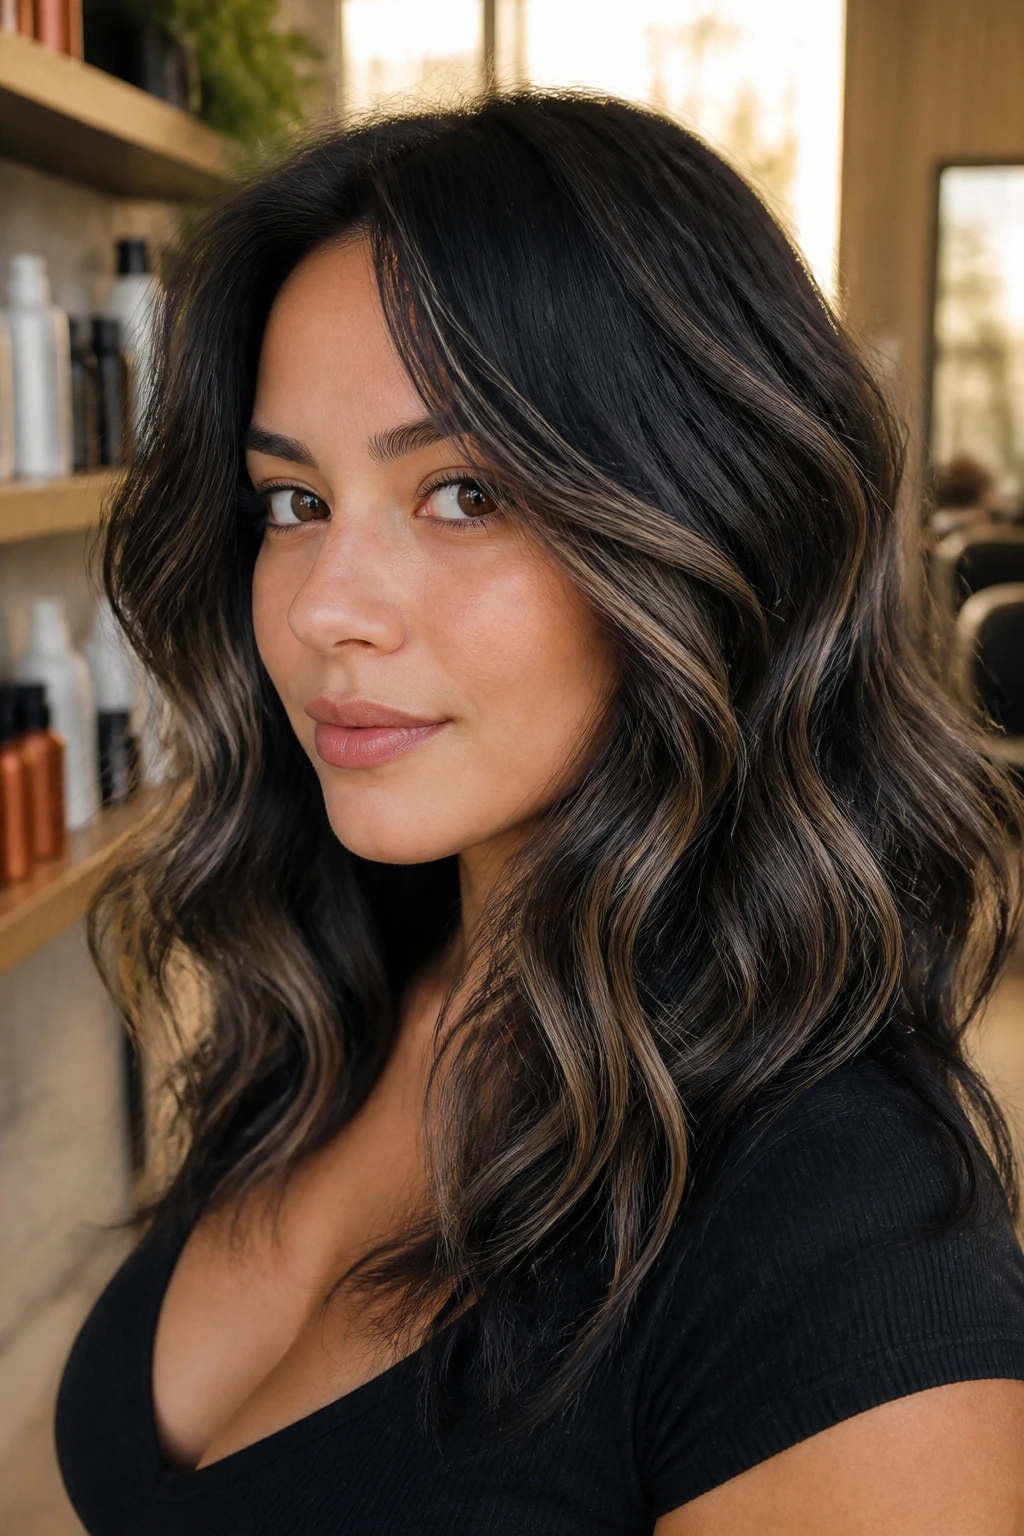
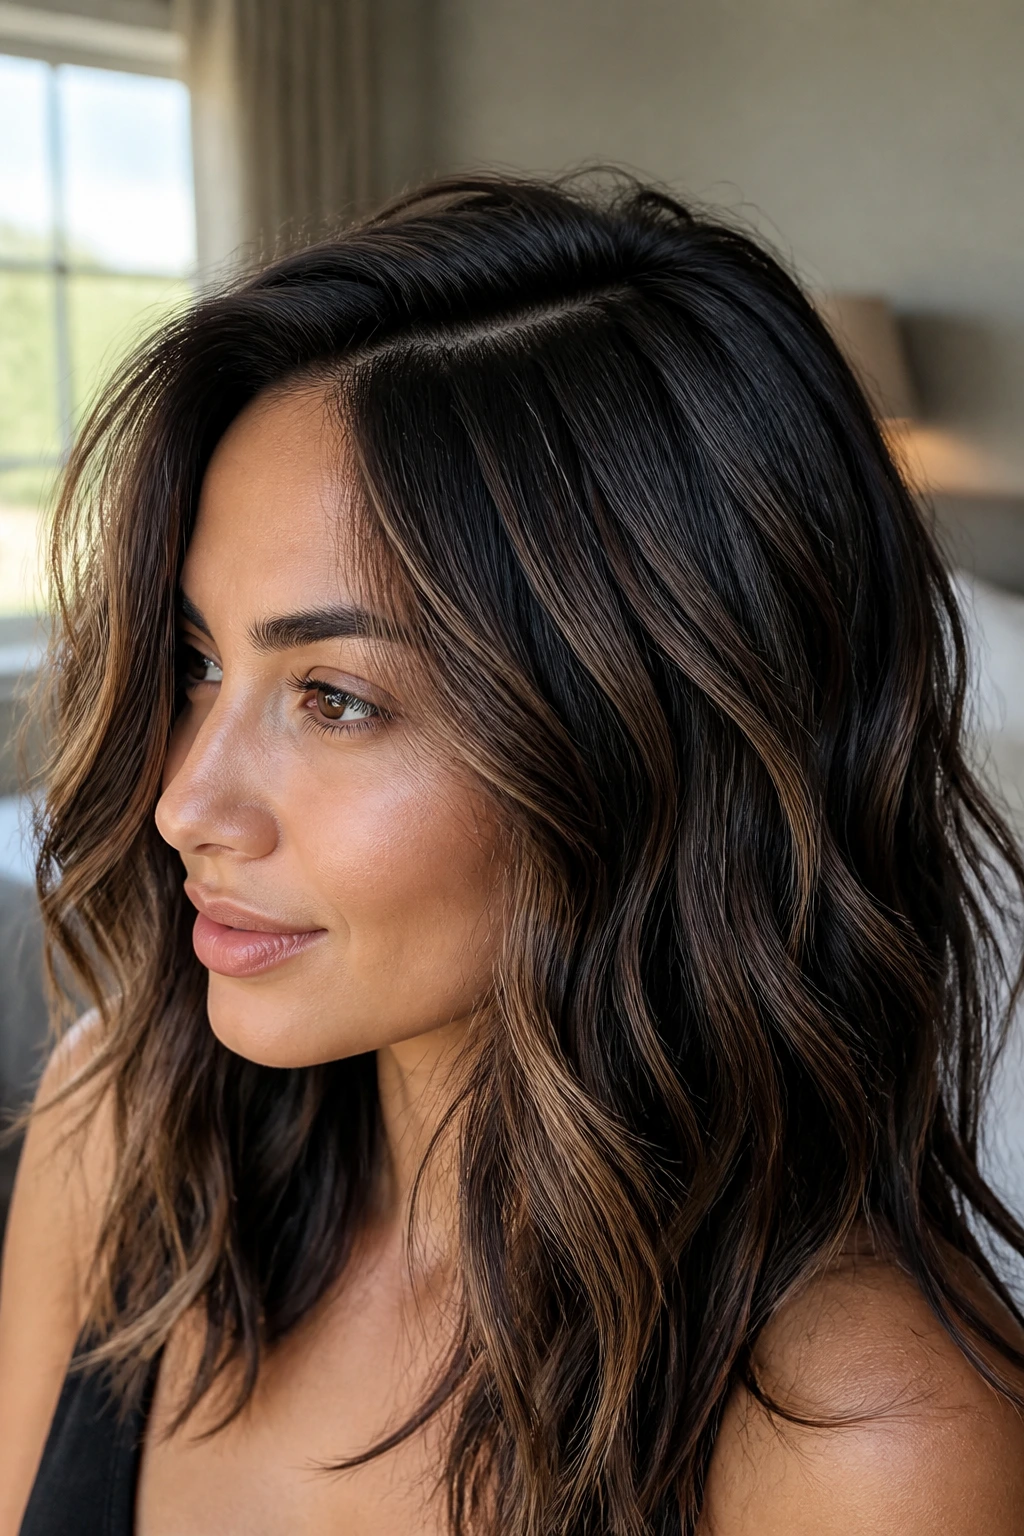
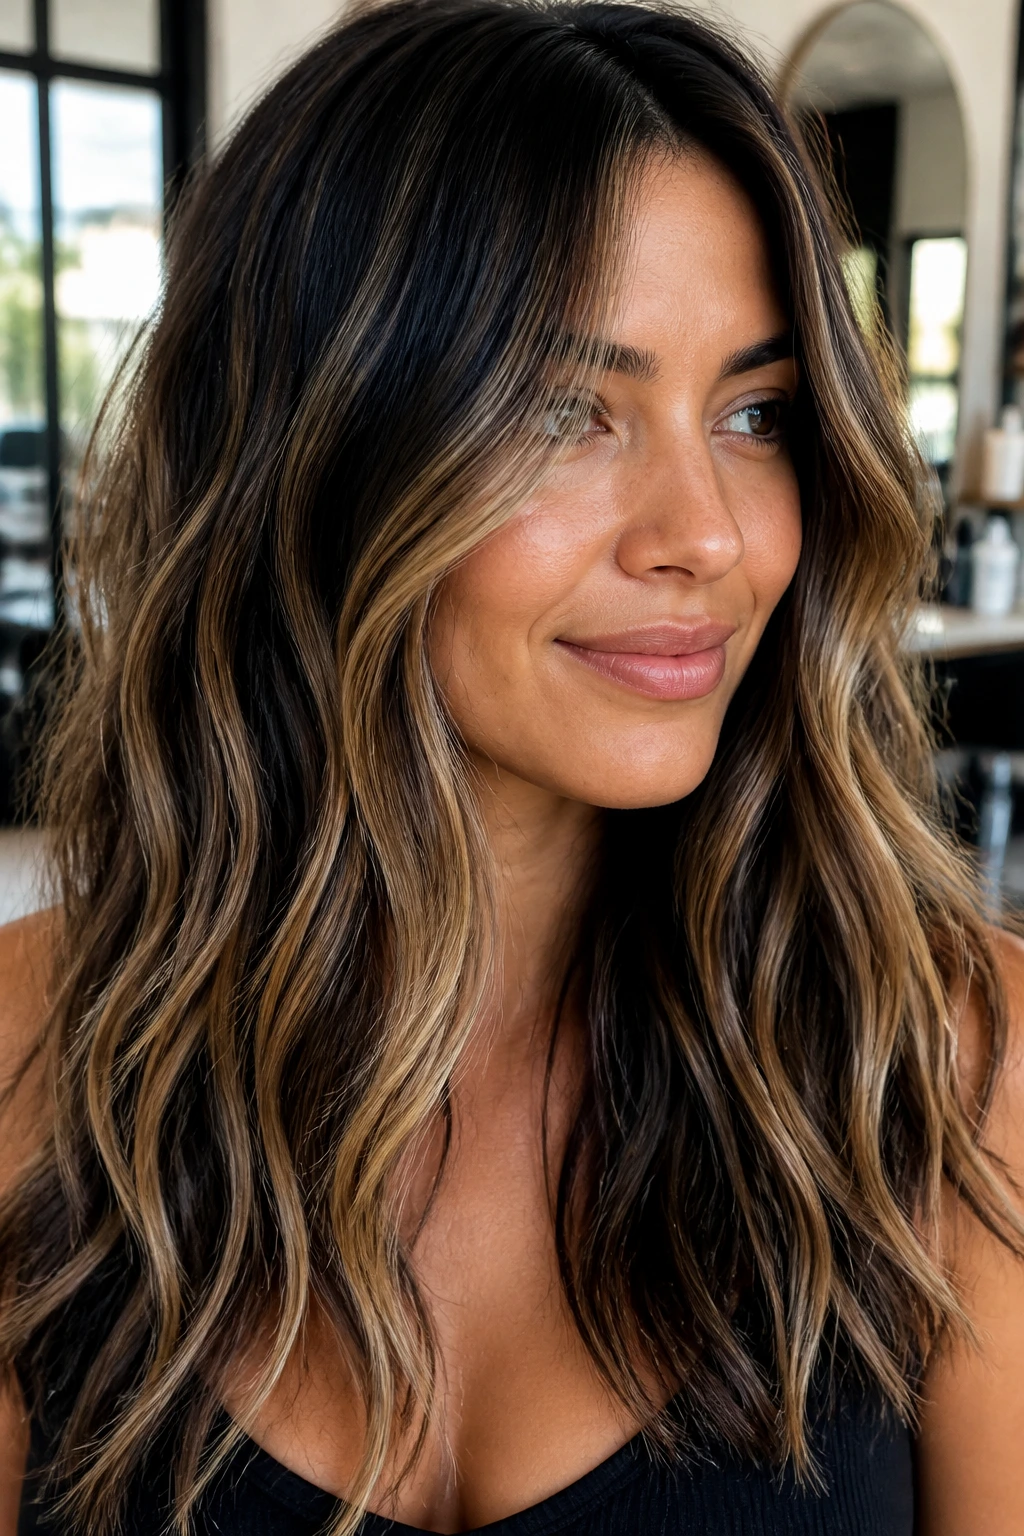
1. Soft Raven Ribbons Through Warm Brunette Waves
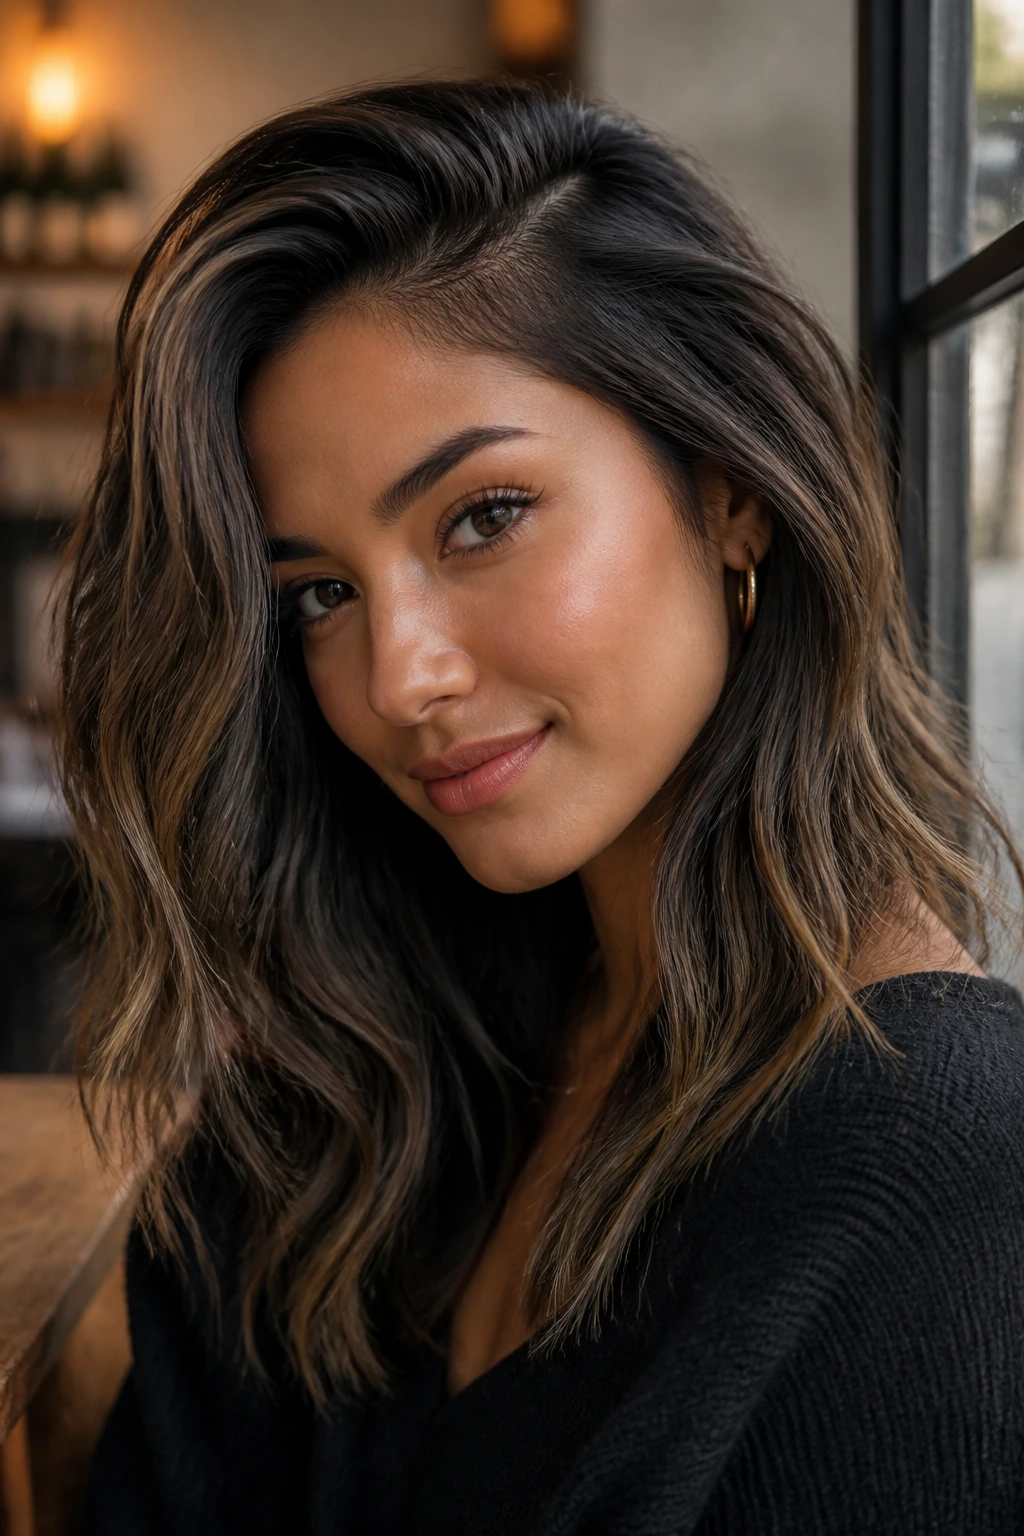
Soft raven ribbons are the version I reach for when someone says they want depth but not drama with a capital D. The black pieces are thin, tucked between warm brown sections, and placed so they show up only when the waves bend. On medium skin, that keeps the look rich without dragging the complexion down.
Why it works: The lighter brown base holds the warmth, while the black ribbons act like contour lines. You get contrast at the curve of the wave, not a hard stripe from root to tip. That matters more than people realize.
A stylist can place these as fine foils or a soft balayage over the mid-lengths and ends, keeping the front hairline a shade softer. The result is quiet but not shy. It looks like the hair has depth in it, not paint sitting on top.
The best version of this look is styled with loose, brushed-out S-waves. Tight curls hide the ribbons. Big bends show them.
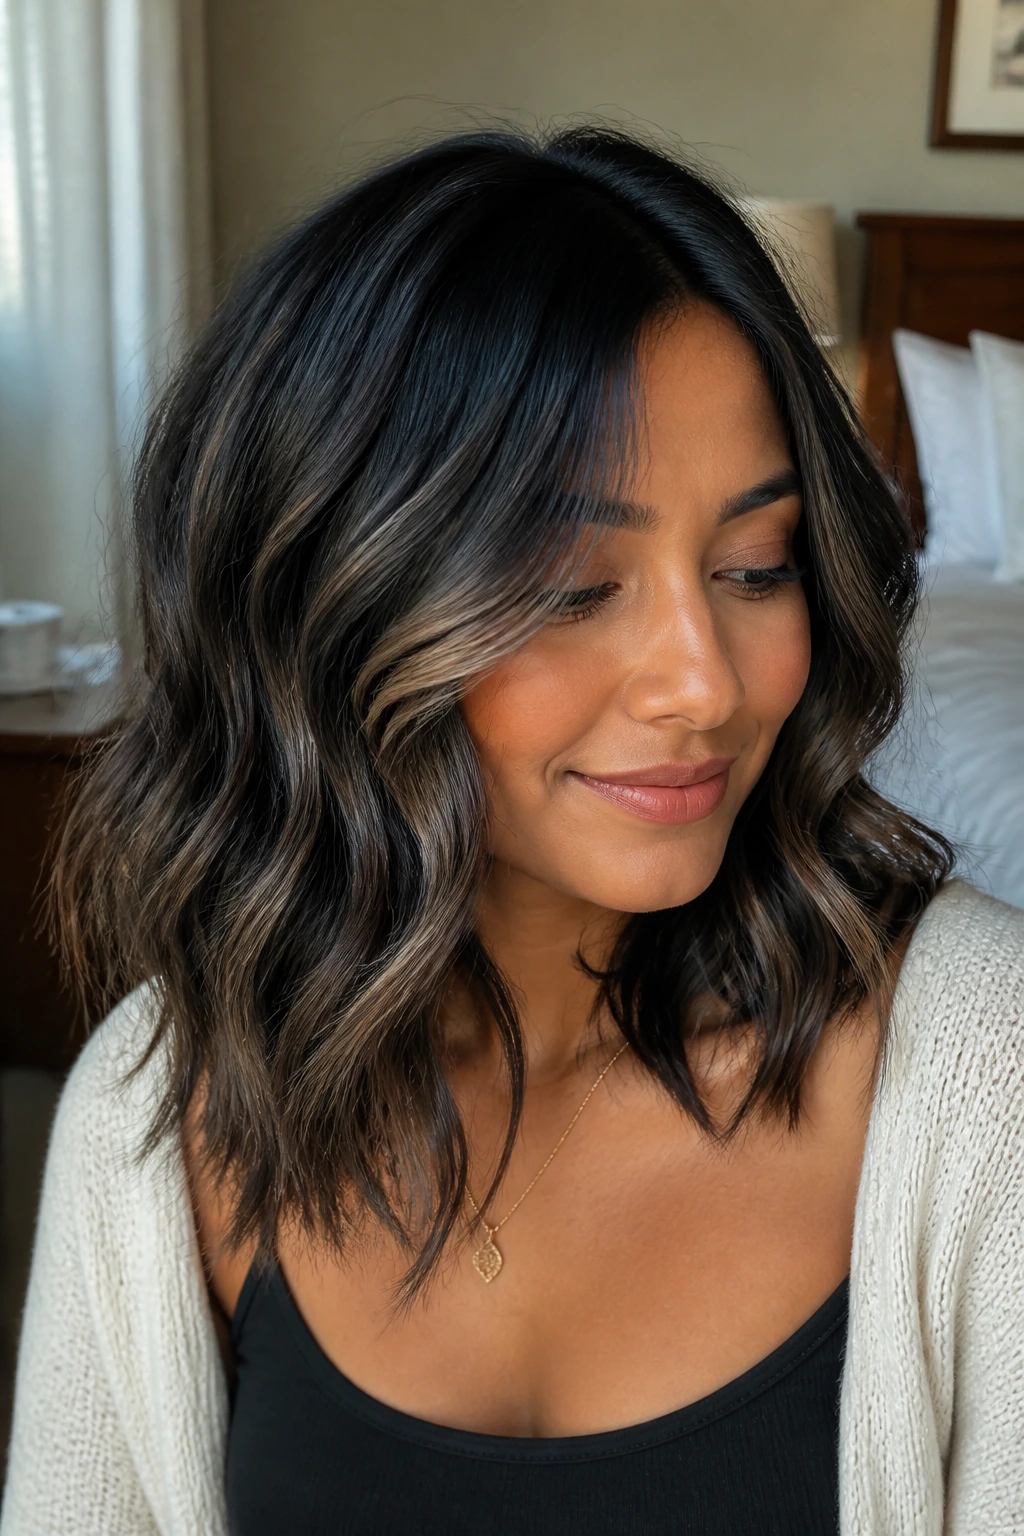
2. Face-Framing Raven Strips That Sharpen the Cheekbones
Want the fastest way to make medium skin pop? Put the black where the face actually frames. Thick raven strips around the cheekbone area draw the eye up and in, and on beachy waves they move enough to keep the result from feeling severe.
This is the look I like for layered cuts. The front pieces can sit one level darker than the interior lowlights, which gives you a subtle contour effect without needing makeup to do all the work. The darker pieces should start below the root area if the hairline needs softness; a hard black line right at the part can look too formal.
The waves matter here. With a side part, those face-framing strips fall in different places as you move, so the color shifts from bold to soft in a very natural way. That little swing is the whole point.
Use this one if you wear your hair half-tucked, over one shoulder, or swept behind one ear. The pieces need to move.
3. Hidden Underlayer Panels for a Fuller Swish
If your hair is medium-density or fine and you want more body without overloading the top layer, hidden underlayer panels are the smartest move in the whole batch. The black lives beneath the surface, so the waves above still catch light, while the lower layer gives the whole style a thicker, swingier base.
It’s a bit like building a shadow under watercolor. You don’t notice the lowlights first. You notice that the hair suddenly has weight and direction.
This placement works especially well on medium skin because the darker color sits away from the face line most of the time. When the wind lifts the top section or when the hair flips from one shoulder to the other, the black shows through and keeps the style from looking one-dimensional.
Ask for panels rather than scattered strands if you want this to read clearly. Thin ribbons vanish under a lot of movement. Panels keep their shape.
4. Shadow-Root Melt That Keeps the Top Soft
A shadow-root melt is for the person who likes the idea of black lowlights but doesn’t want the crown to look painted. The root area stays blurred and slightly deeper, then the black lowlights melt through the mid-lengths in a way that feels expensive without looking obvious.
The best part is the grow-out. This look ages better than a lot of color jobs because there isn’t a sharp break at the scalp. That softness flatters medium skin, especially if your undertone is warm or golden and you do not want a harsh dark band near the face.
Beachy waves make this placement even better. The darker root area gives the hair a little visual lift near the scalp, then the waves take over and break the depth into separate ribbons. You get volume and shadow in the same head of hair.
Keep the ends a little lighter than the crown if you want movement. If everything goes dark, the melt loses its sense of direction.
5. Feather-Thin Babylights in Soft Black
Feather-thin black babylights are not the loud cousin in this family. They’re the whisper. Barely there in straight hair, very visible once the hair bends, and excellent if you want your waves to look airy rather than dense.
This is one of the best choices for fine medium-textured hair because the color doesn’t eat the light. A handful of tiny lowlights can make the hair look fuller without turning the whole head into a dark block. On medium skin, that subtle darkness has enough contrast to define the features, but not so much that it competes with them.
I like this look on long layers, especially when the ends are soft and the wave pattern is loose. It keeps the hair from reading like a solid sheet. If you’ve ever looked at your own hair and thought, “There’s movement here, but the camera never catches it,” this is the fix.
It’s also the least fussy option on this list. Less color, less upkeep, less room for error.
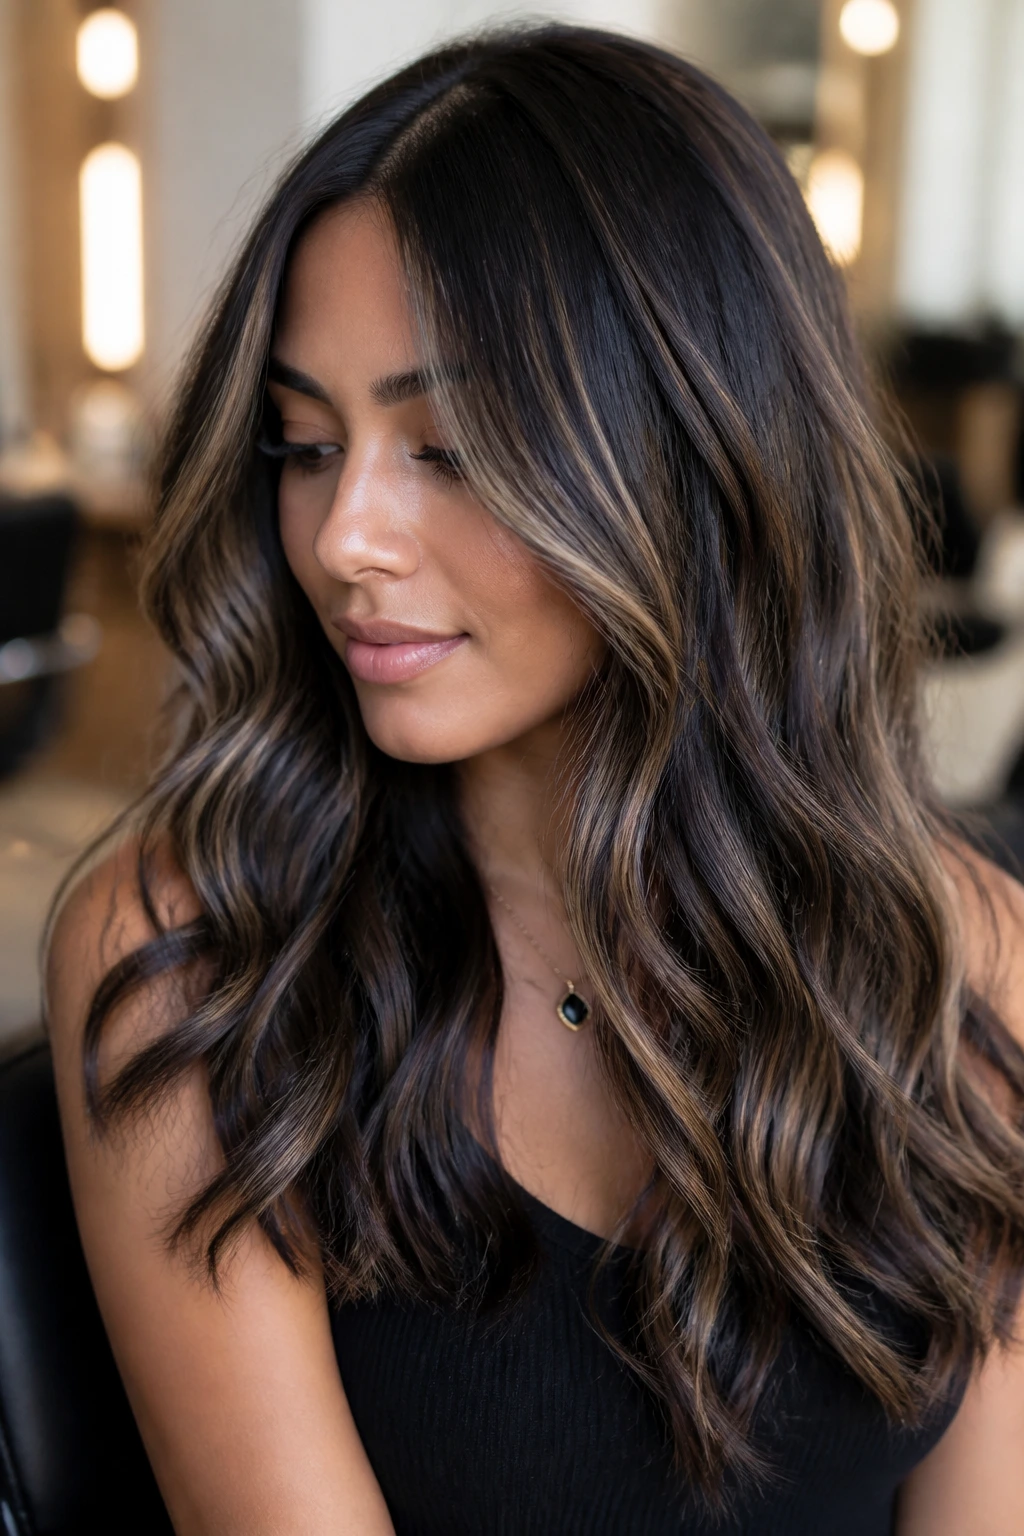
6. Chunky Midnight Foils for Thick Hair
Thick hair can swallow tiny lowlights whole. That’s why chunky midnight foils exist. Bigger sections of black give the waves actual contrast, which is what you need when the hair has a lot of density and a lot of natural volume.
The look lands best when the foils are spaced a little wider than people expect. Pack them too tightly and you get a dark helmet effect. Leave some warm brown between them and the whole thing breathes. Medium skin can take the contrast, especially if the base color stays in the chestnut or mocha range.
On beachy waves, chunky foils make each bend easy to see from a distance. The color reads as intentional instead of accidental. That is the difference between “nice hair” and “why does this look so full?”
Use this style if your hair takes forever to dry and has a lot of natural body. It’s built for volume.
7. Curtain-Bang Contour with Black Around the Face
Curtain bangs and black lowlights have a nice little argument going on, and the result is better for it. The bangs soften the forehead, while the darker pieces around the sides give the face structure. On medium skin, that pairing can look almost architectural in the best way.
The trick is not to bury the bangs in dark color. Leave enough warmth in the front so the fringe still feels airy. Put the black just behind and beneath the bangs, then let the beachy wave pattern bring it forward in flashes.
This works beautifully on shoulder-length cuts, especially when the layers are long enough to swing. The black pieces act like frame lines around the eyes and cheekbones, which can make the entire style feel sharper without making the hair itself look severe.
If you wear makeup, this look loves a strong brow and a soft bronzer. If you don’t, it still holds its own.
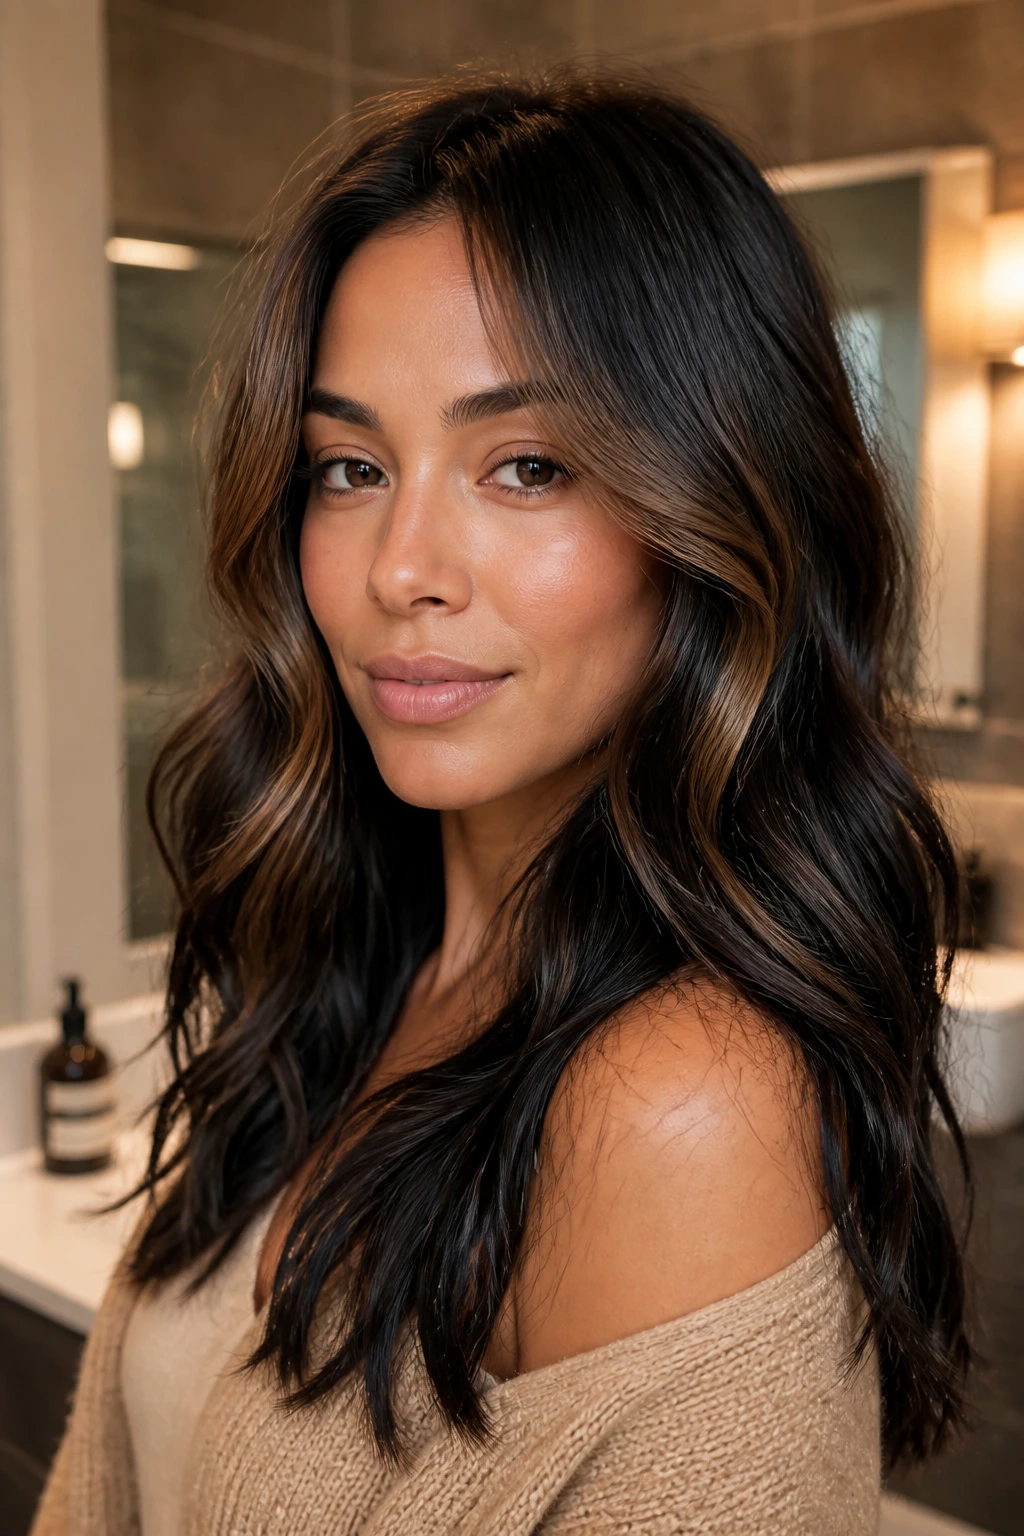
8. Espresso-to-Black Gradients for a Softer Dark Finish
A true black lowlight can be too abrupt if your base color is already deep brown. An espresso-to-black gradient solves that. The lowlights start in a rich brown-black zone and deepen toward the interior, so the shift feels smooth instead of stripey.
This is one of my favorite choices for medium skin with warm undertones. The brown keeps the color friendly. The black keeps it interesting. And because beachy waves open and close as they move, the gradient shows up as subtle shadow rather than a hard line.
You’ll want a colorist who can paint with a light hand here. This is not a job for chunky blocks or overly neat foils. A few diffused zones under the top layer go farther than people think. When the color is too controlled, the whole thing loses that lived-in feel.
Think of this as the polished option. Not stiff. Polished.
9. Peekaboo Underlights That Only Show in Motion
Peekaboo underlights are for people who like a little surprise. The black lowlights sit hidden beneath the top layer, so the hair looks lighter and softer from the front, then flashes dark when the waves swing or the wind catches the ends.
On medium skin, that hidden darkness can be a blessing. You get the contouring effect without putting a heavy color line near the face. If your undertone runs golden or honey, this is an easy way to keep the complexion bright while still adding depth where the hair needs it.
I like this style on lob-length beach waves. The shorter the cut, the more often those underlights peek through, which makes the color feel playful rather than hidden by accident. It’s also a good choice if you want to test darker depth before committing to an all-over deepening.
The underlayer should still be glossy. Dull black underlights can look dusty, and nobody wants that.
10. Cool Ash-Black Ribbons for Neutral Medium Skin
Cool ash-black ribbons are a clean, almost smoky version of the trend, and they suit neutral medium skin especially well. The color has less warmth than espresso-black, so it doesn’t fight skin that already leans beige or olive-neutral.
There’s a reason this one feels modern without trying too hard. The ash tone softens the contrast just enough that the black lowlights don’t look painted in. On beachy waves, they shimmer between gray-black and deep charcoal depending on the light, which is a nice effect if you want dimension without shine overload.
This is the look to pick if warm browns make your hair feel too orange. It cools the whole palette down. A stylist may tone the lowlights after coloring to keep the smoky edge in place, which is worth asking about if your hair tends to pull red.
Keep the styling loose. Ash tones can look flat when the wave is too tight.
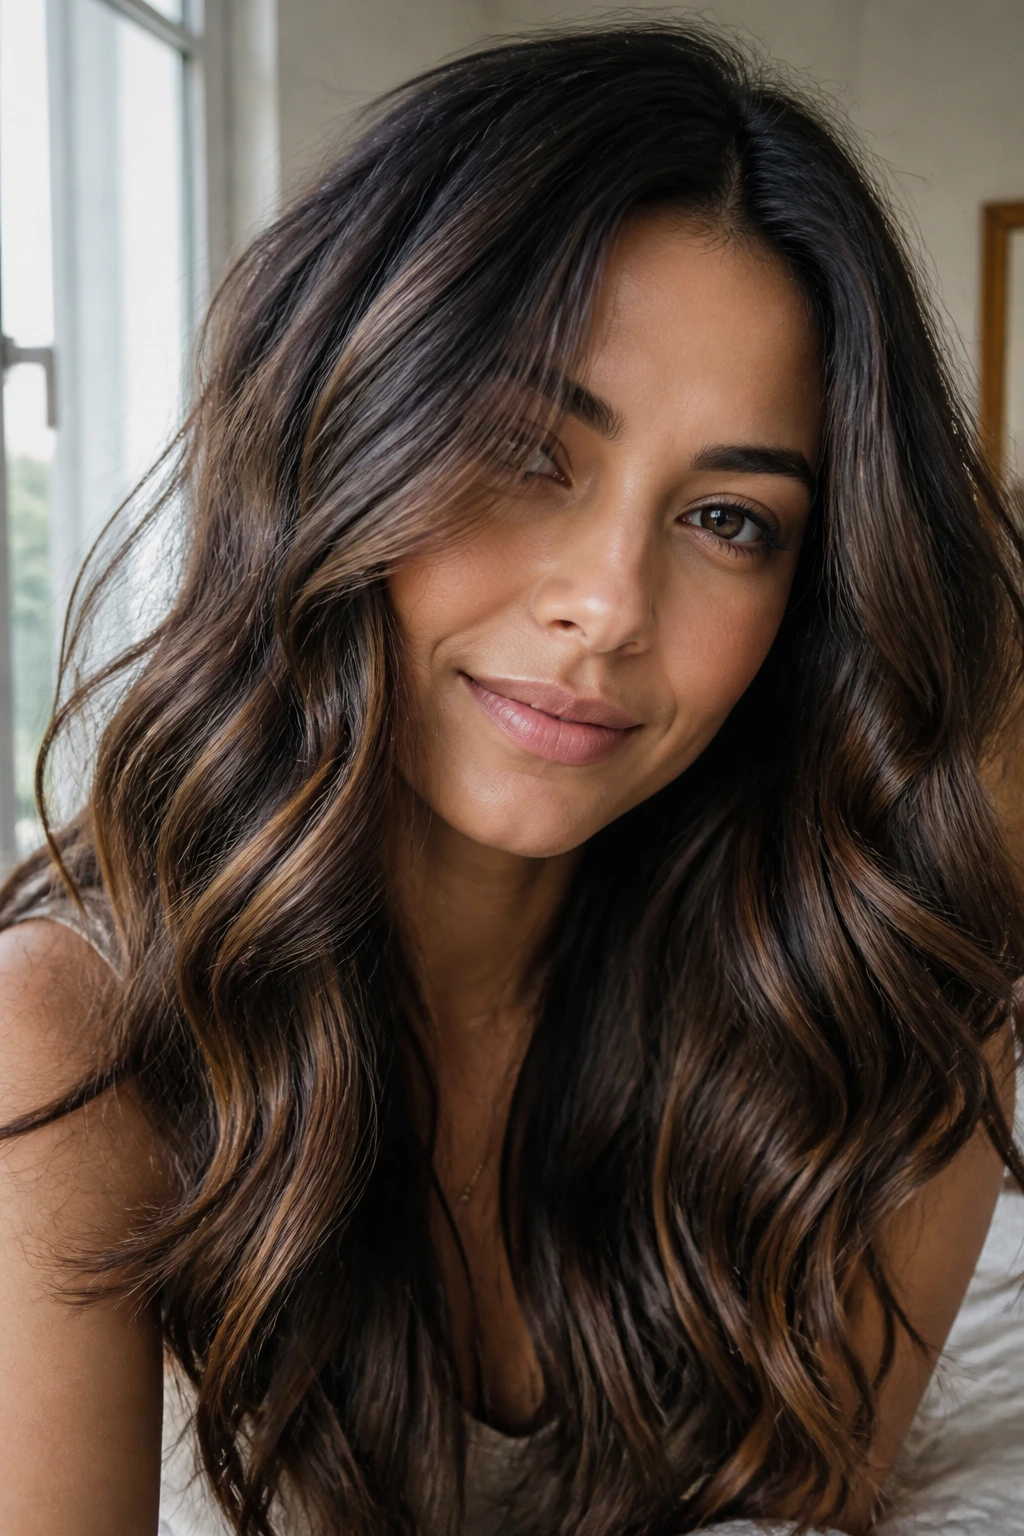
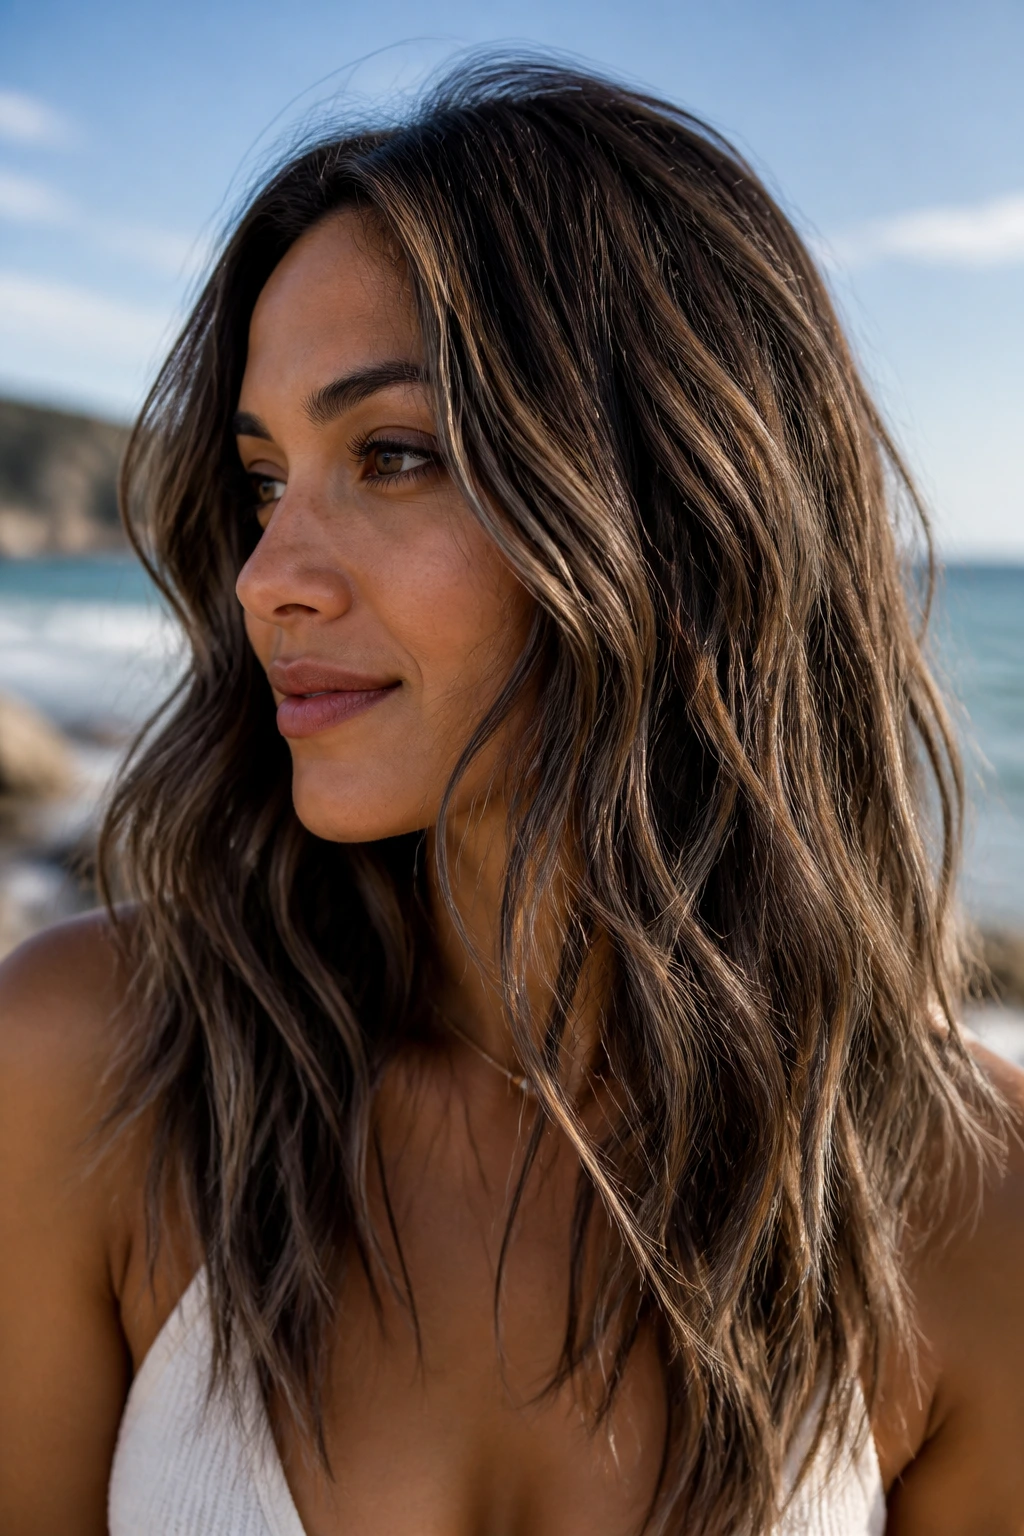
11. Natural Black Lowlights on Honey Skin
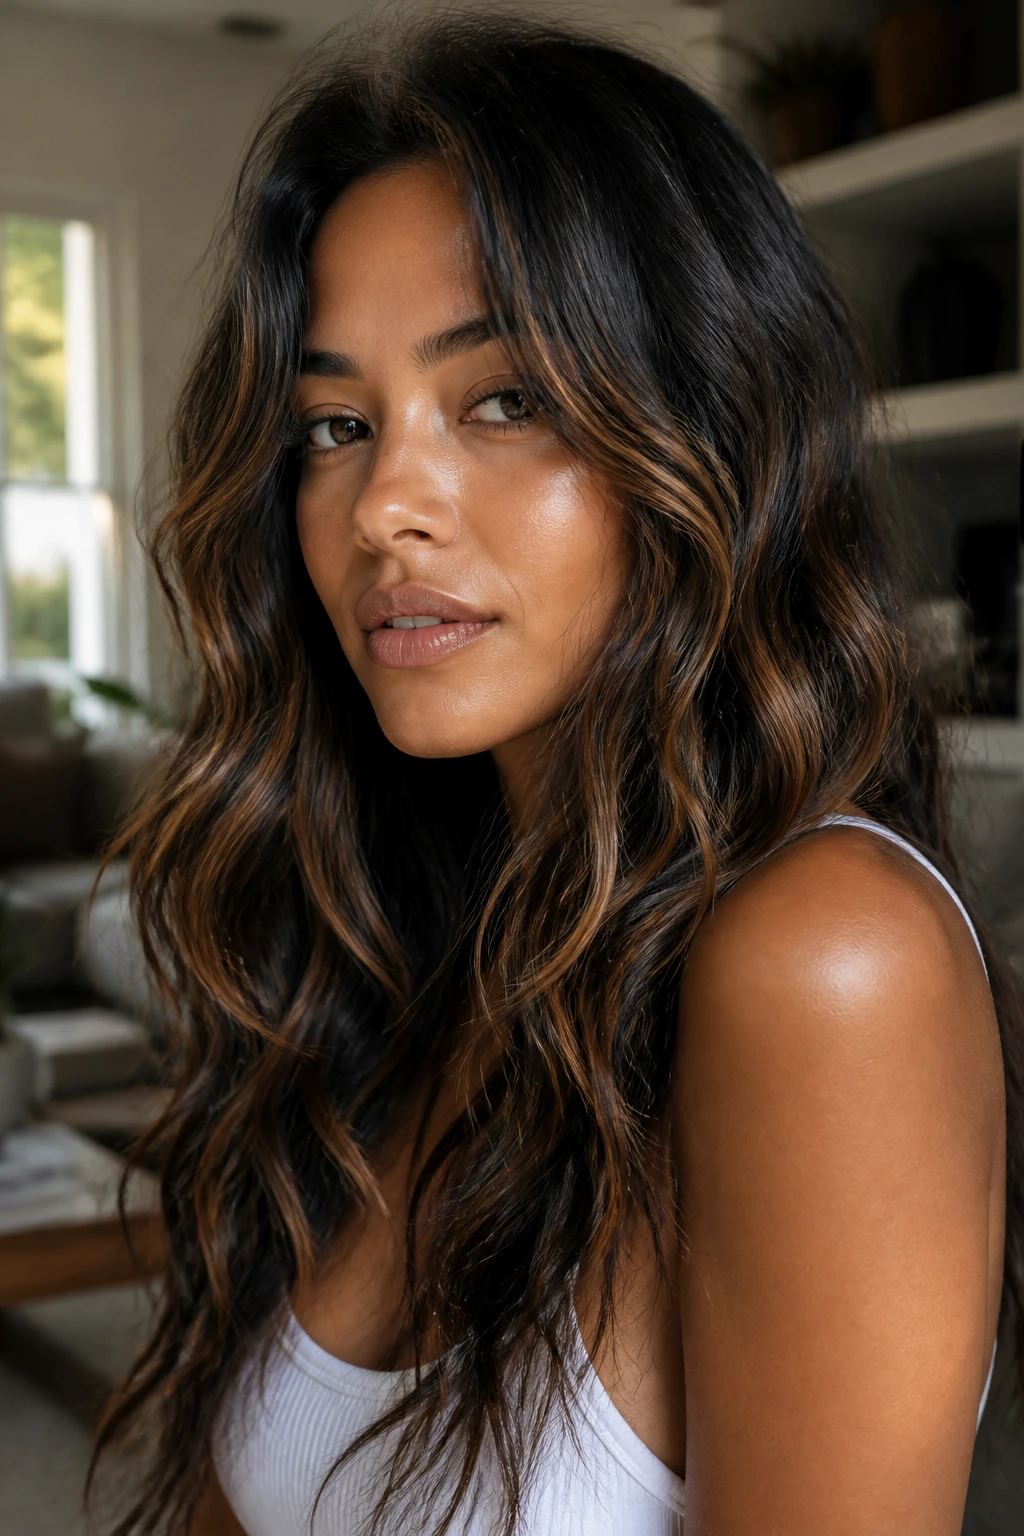
Natural black is the shade I prefer when the goal is depth, not drama. It sits between soft black and true jet black, so it reads darker than brown but doesn’t go to that inky place that can look a little severe on warm medium skin.
Honey-toned complexions tend to look especially good with this version because the warmth in the skin is still visible next to the dark ribbons. The contrast makes the complexion glow, but only if the black is placed with some air around it. Dense placement kills the effect.
Beachy waves help this shade more than straight hair does. As the bends open and close, the black catches in the low points, which gives the hair that rolling, glossy look that people usually try to fake with product. Here, the color does the work.
If you want one safe shade for a first darkening pass, this is the one I’d hand you first.
12. Broad Ink Panels for Dense Hair
Dense hair needs bigger color shapes. Broad ink panels give the lowlights room to matter instead of disappearing into all that texture. The result can be strong, but it’s strong in a good way — like a well-cut jacket, not a heavy coat.
This style is especially good if your beachy waves tend to collapse into a mass by midday. The black panels hold the eye in place and make the layers easier to read. On medium skin, that can be a gift if your face needs more definition around the jaw or chin.
The placement should be deliberate, not random. Put the panels where the waves naturally fold: under the outer bends, through the back half of the head, and a little behind the ears. That way the color shows up in motion instead of sitting there looking overly neat.
If you have a lot of hair, this is one of the few times bigger really is better.
13. Sable Side-Part Sweep for Extra Face Shape
A side part can change the whole mood of black lowlights. When the heavier side gets a few deeper ribbons through the front and mid-lengths, the face gets a little more angle, a little more shadow, and a lot more shape.
This works well on medium skin because the dark sweep travels diagonally across the face instead of boxing it in. The effect is especially nice if your cheekbones are strong and you want to play them up. The beachy waves help the part stay soft, so it never reads too severe.
I like this look on medium-length hair with long layers. Short layers can make the sweep too choppy. Long layers let the color trail from one side to the other, which keeps the entire cut flowing.
If you wear your part the same way every day, this is the kind of placement that rewards that habit. The lowlights fall exactly where the eye already wants to go.
14. Halo Depth Around the Crown
Halo depth is one of those placements that sounds fancier than it is. All it means is that the black lowlights sit around the crown and upper mid-lengths, leaving the outer surface a touch lighter. On beachy waves, that creates lift at the root and shadow through the top layer.
It’s a smart choice for medium skin when you want the color to shape the head rather than frame the face. The crown gets a little more texture, which helps the wave pattern appear fuller and more layered. If your hair tends to flatten at the top, this fixes that problem without requiring a full color overhaul.
The best version uses soft, broken ribbons rather than hard strips. You want movement when you turn your head, not a dark cap of color. A gloss over the top section helps the shift look seamless.
Honestly, this is one of the most underrated placements on the list. It does a lot without bragging about it.
15. Black Lowlights at the Ends for a Grounded Wave
Darkening the ends can be a smart move when the mid-lengths are already sun-lightened or warm. Black lowlights at the tips ground the wave pattern and make the hair feel heavier in a controlled way, which is nice if your ends tend to fly away or look wispy.
On medium skin, this style can sharpen the jawline and neck area because the eye follows the darker ends downward. It also works if you want to keep brightness near the face but still add depth to the overall shape. The contrast lives at the bottom, so the top stays lighter and easier to wear.
This is not a tiny-foil job. You need enough saturation at the ends to be visible after the waves are brushed out. If the color is too faint, it disappears into the texture and the whole effect collapses.
Use this one if your cut is long, layered, and a little beach-breezy already. The ends need room to move.
16. Sculpted Cheekbone Strips That Contour the Face
Cheekbone strips are more targeted than full face-framing pieces. They sit right where the wave bends around the face, which makes the contour effect feel almost custom. On medium skin, that can pull the features forward in a way that looks expensive without looking fussy.
I like this choice for people who don’t want dark color everywhere. It gives shape exactly where it’s needed and leaves the rest of the hair freer to stay brown, mocha, or caramel. The contrast is enough to create depth, but not so much that it dominates the style.
The strips should be painted with a soft edge. Hard lines at cheek level can feel blunt. A feathered transition lets the beach waves do their work, which is what makes the placement feel natural instead of “done.”
If you wear your hair tucked behind one ear a lot, this placement gets even better. One side opens up, the other side shadows in, and the face suddenly has more dimension.
17. Smoky Balayage Ribbons for a Lived-In Finish
Smoky balayage ribbons are for people who like the idea of black lowlights but don’t want anything that reads too graphic. The color is painted through the waves in sweeping sections, so the result feels melted rather than striped.
On medium skin, that softness matters. A smoky black ribbon against warm or olive undertones can look rich and flattering, while still leaving enough lightness in the mix to keep the skin alive. The beachy wave finish helps the smoky tones separate a little at the bends, which keeps them from turning into a single dark mass.
This is one of the easiest looks to maintain between appointments because the placement grows out softly. If you’re not the sort of person who enjoys a hard-root grow-out, balayage is usually the better lane than foils.
It’s a strong pick for anyone who likes hair that looks expensive after a simple air-dry and a few scrunches.
18. Velvet Noir Waves with a Glossy Finish
Velvet noir is the polished sibling in the family. The black lowlights are deeper, the finish is glossier, and the waves are usually brushed into broad bends instead of left rough and beachy. On medium skin, that sheen can make the complexion look cleaner and the hair look denser.
This look works best when the lowlights are placed with confidence. Too many micro-ribbons and you lose the velvet feel. You need broader sections, a deep gloss, and enough smoothness in the styling that the dark color reads as intentional. If the ends are dry or frayed, the whole effect falls apart fast.
I’d choose this for events, photos, or any time you want the hair to look more dressed up. It still fits the beachy-wave family, but it leans evening rather than casual afternoon. That’s not a flaw. It’s a lane.
Keep the makeup soft and skin-like with this one. The hair is already doing a lot.
19. Blue-Black Sheen Pieces for Cooler Medium Skin
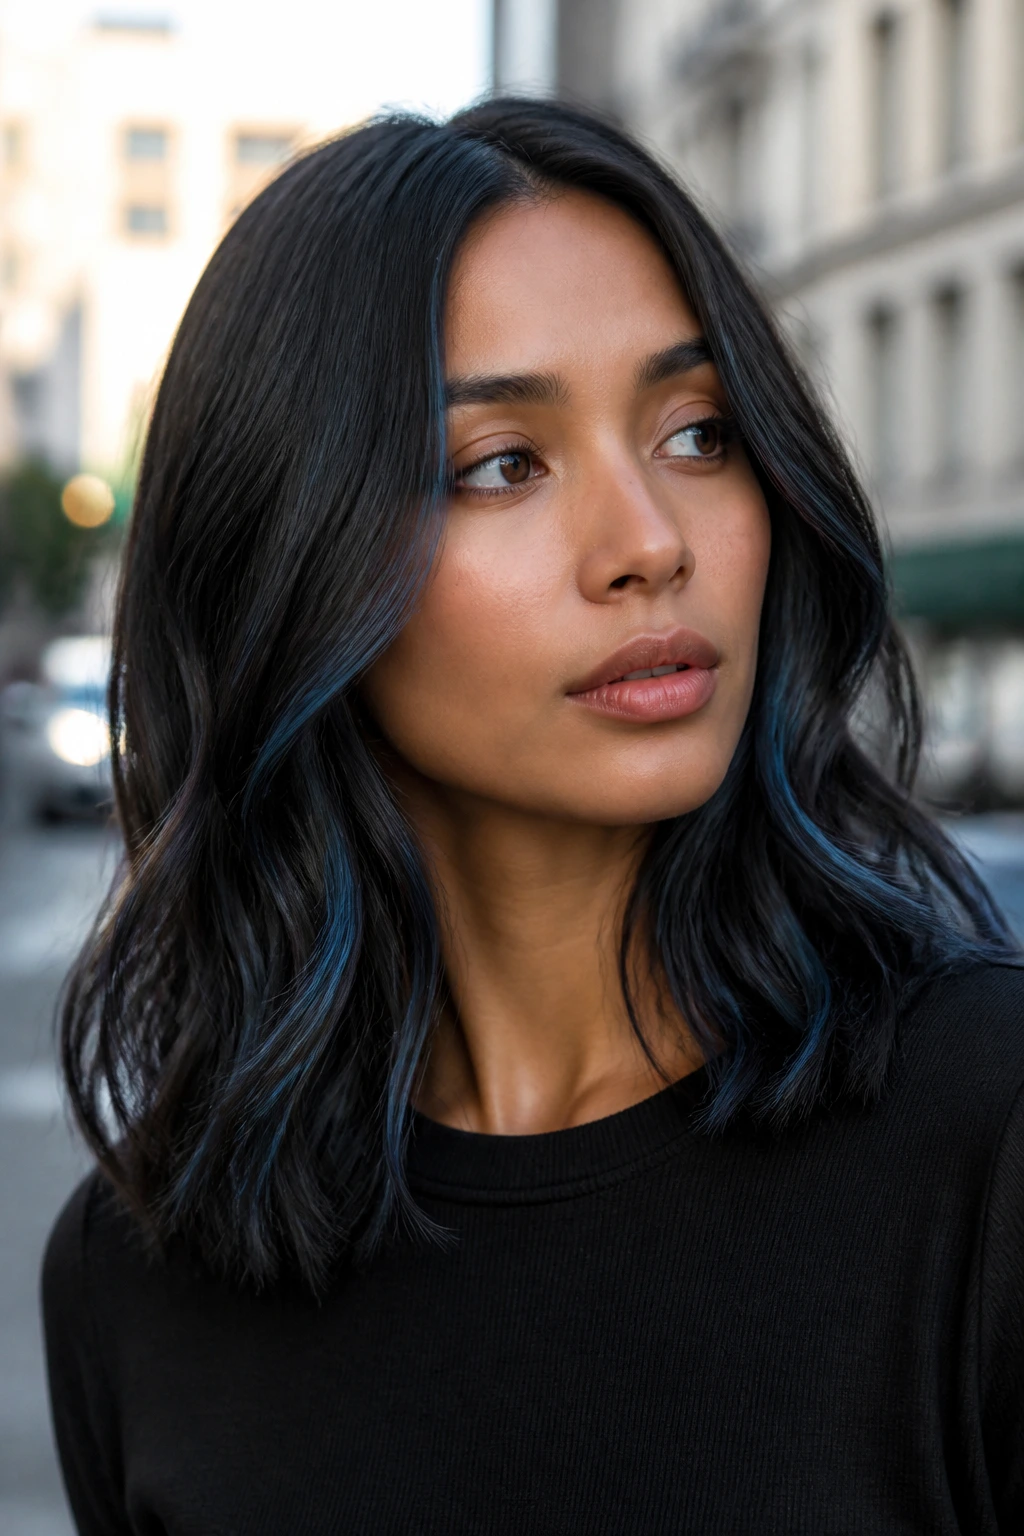
Blue-black can look stunning on the right medium skin tone, but I like it best in pieces, not everywhere. A few cool, glossy ribbons add a steel-like sheen that catches the light in a very different way from soft black. The result feels sharper, cooler, and a little more dramatic.
This is the place for neutral-cool or olive-cool skin that can carry the edge. If your undertones run warm, I’d be cautious. Blue-black can make the skin look flushed or overly yellow if the balance isn’t right. A good stylist will usually keep the placement around the mid-lengths and interior sections so the face still gets some softness.
Beachy waves make the sheen worth it. The color shifts from black to blue-black as the hair turns, which means the style has movement even when the curl pattern is loose. That dynamic quality is exactly why this version gets attention.
If you want something that reads a little more fashion than everyday, this is the dark lane.
20. Mocha-to-Black Melt for Warm Medium Skin
Mocha-to-black melt is one of the friendliest options for warm medium skin because it starts with a rich brown and deepens into black instead of jumping there all at once. The transition feels smooth, and the warmer part near the face keeps the complexion from looking drained.
I like this look on medium-length cuts with soft layers. The mocha section at the top gives the hair a bit of light, while the black lowlights live deeper in the wave pattern and under the outer layer. The contrast is there, but it doesn’t shout.
This is a good compromise if you want depth but you’re nervous about going too dark. It also plays nicely with caramel highlights that may already be in the hair. The melt gives those lighter pieces somewhere to land.
If you ask me, this is one of the easiest black lowlight looks to wear every day. It doesn’t demand much from the makeup or the outfit.
21. Scattered Smoke Stripes for a Piecey Finish
Scattered smoke stripes are exactly what they sound like: irregular, thin dark ribbons placed so the hair feels piecey and airy. Instead of a neat repeat pattern, you get a loose scatter of black through the waves, which keeps the overall color from reading too planned.
That looseness is why it flatters medium skin so well. The dark pieces don’t crowd the face. They drift through the hair and create a sense of depth that you notice most when the light shifts. On beachy waves, that scattered pattern keeps the texture lively.
This is the best choice for people who hate looking overly polished. It has a bit of a lived-in edge. Not messy. Just relaxed in a way that feels believable.
Ask for irregular spacing and soft root blur. If every stripe sits in the same place, the look loses its smoke.
22. Deep Side-Part Money Piece with Black Body
A lot of people think a money piece has to be light to work. It doesn’t. A deeper money-piece area — paired with black lowlights through the body — can create a striking frame on medium skin, especially when the side part is deep and the wave pattern is loose.
The front section stays a little brighter or softer than the interior dark pieces, which gives the face breathing room. Then the black body of the hair carries the rest of the shape. That combination keeps the look from turning heavy around the forehead.
I like this version for longer cuts because the contrast has space to travel. The front opens the face, the body adds depth, and the ends keep everything moving. If you have a strong brow or a pronounced cheekbone line, this setup can look excellent.
It’s a bolder frame without requiring the whole head to go dark. That balance is the reason it works.
23. Charcoal-Gloss Lowlights for a Softer Dark Edge
Charcoal is where black lowlights get a little air. It’s darker than brown, lighter than pure raven, and ideal when you want the contrast to whisper instead of speak. On medium skin, charcoal glossing can be especially kind because it keeps the complexion from getting boxed in.
This is a strong choice if your hair is porous or color-treated already. Pure black can sometimes look too flat on damaged ends; charcoal has enough softness to stay dimensional. Beachy waves help the shade move between smoky gray-brown and deep black, which keeps the finish from looking like a single shade plastered on top.
It’s also a nice lane if you want black lowlights but work in a setting where a very dark, high-contrast color would feel too intense. The charcoal edge is polished, but not rigid.
Use a clear or cool-toned gloss after coloring to keep the shade from turning dusty. That little step matters a lot here.
24. Hidden Black Lowlights Beneath Tousled Bends
This version is all about discovery. The black lowlights hide beneath tousled waves and only reveal themselves when the hair gets lifted, brushed back, or tossed over a shoulder. It’s subtle from the front, richer from the side, and a little playful when the hair moves.
On medium skin, hidden placement keeps the face bright while still giving the style enough depth to feel finished. That’s a nice compromise for people who don’t want to commit to black near the hairline but still want the wave pattern to show up better in photos and real life.
The tousled finish is part of the appeal. A slightly imperfect bend helps the hidden pieces peek through. If you make the wave too neat, the color gets buried. If you keep the styling loose, the whole thing feels natural.
This is the kind of look that makes people say, “Wait, there’s darker color in there?” That’s the point.
25. Full-Contrast Raven Dimension for Bold Wearers
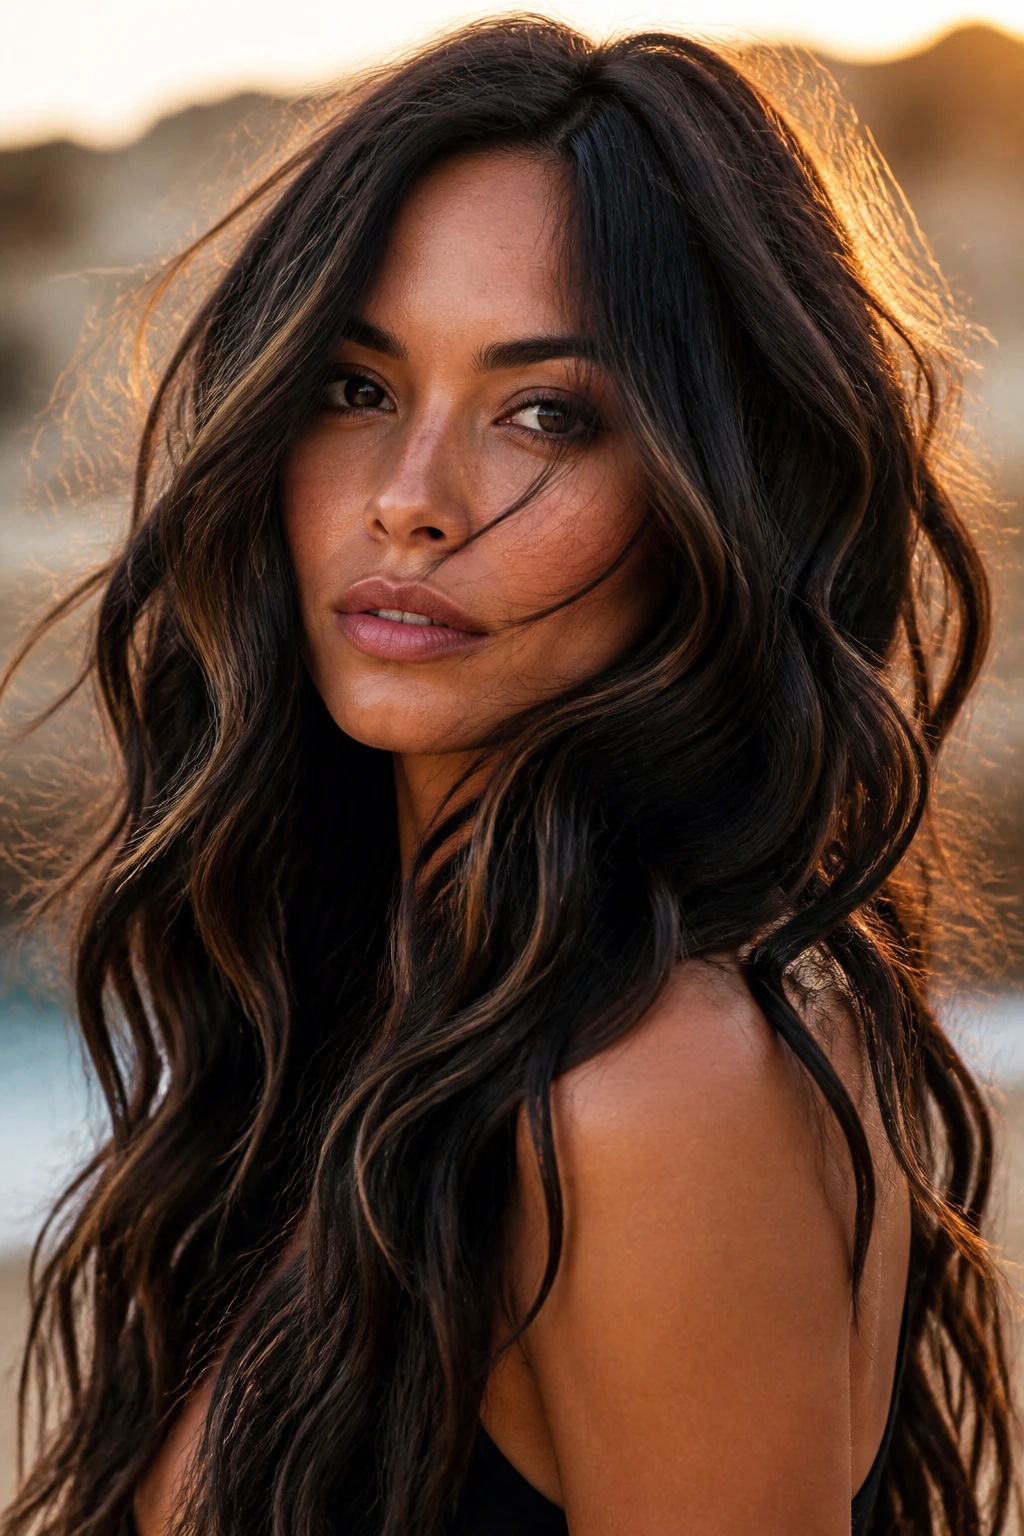
Full-contrast raven dimension is the strongest look in the set, and I’m not going to pretend it’s subtle. The black lowlights are visible, the contrast is high, and the beachy waves have to do a lot of the softening work. On the right medium skin tone, though, it can look sharp in a really satisfying way.
This works best when the hair has enough length and layer to break the darkness apart. The waves need room to move, because that motion stops the raven pieces from turning into a single dark block. If your skin leans warm, ask for a soft face frame or a slightly warmer base so the color doesn’t sit too close to the complexion.
I’d reserve this one for people who like their hair to have presence. It is not the quiet choice in the room. But when it’s cut well and glossed properly, it has a clean, high-contrast finish that still feels wearable.
Use a big, loose wave and a touch of shine spray. Not too much. Just enough.
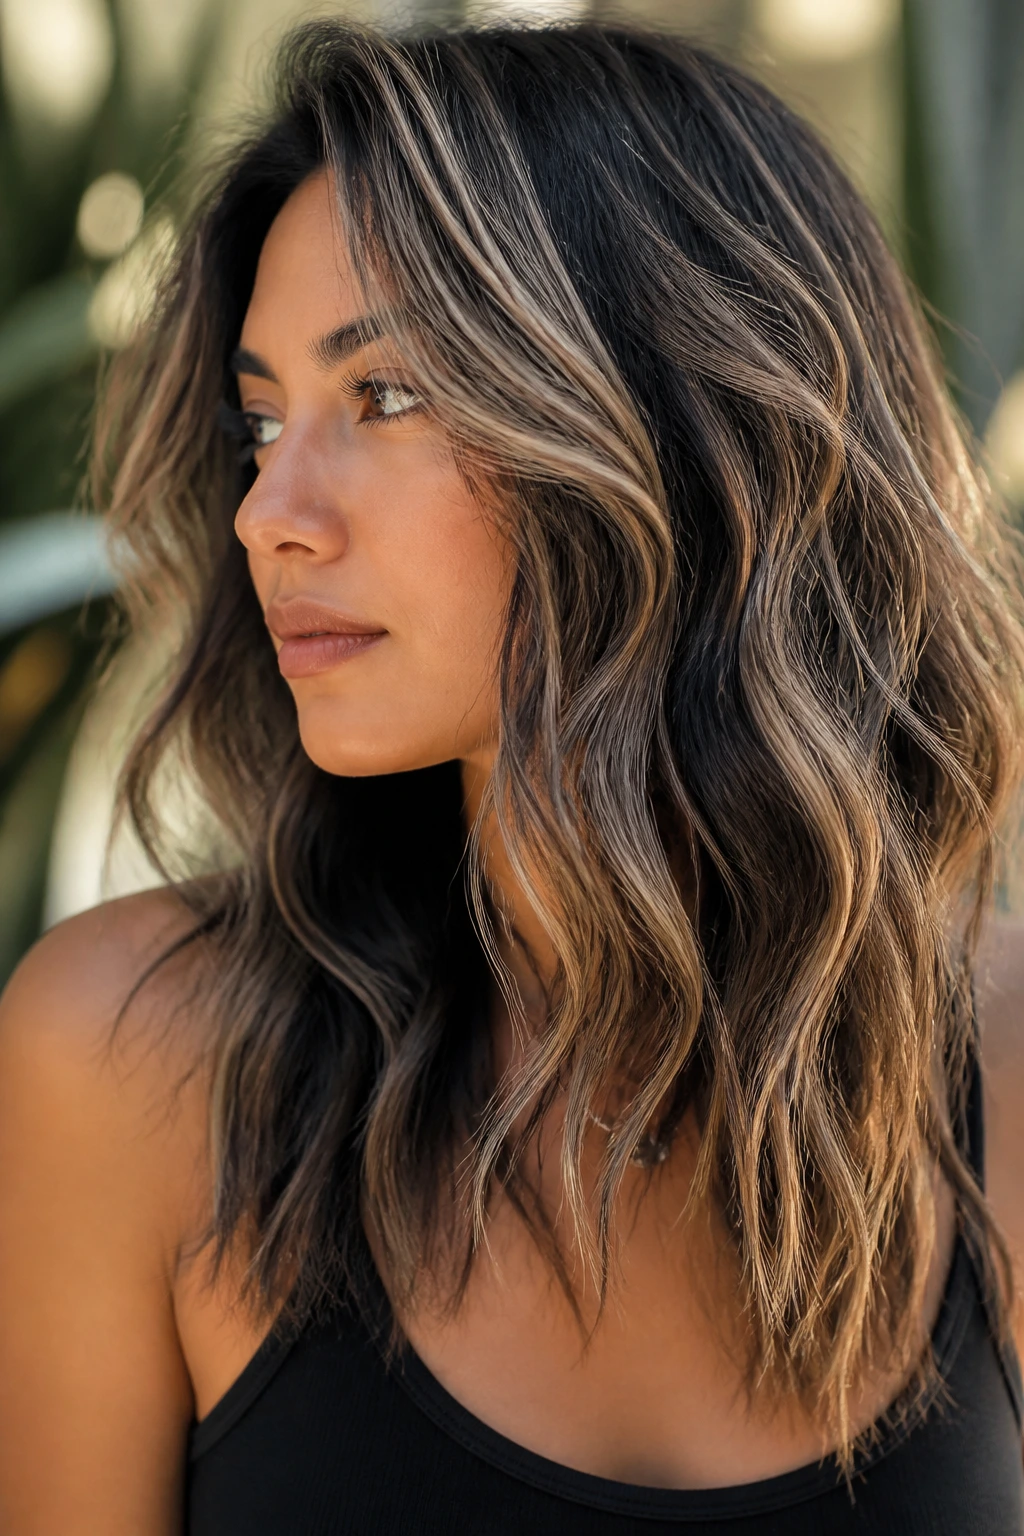
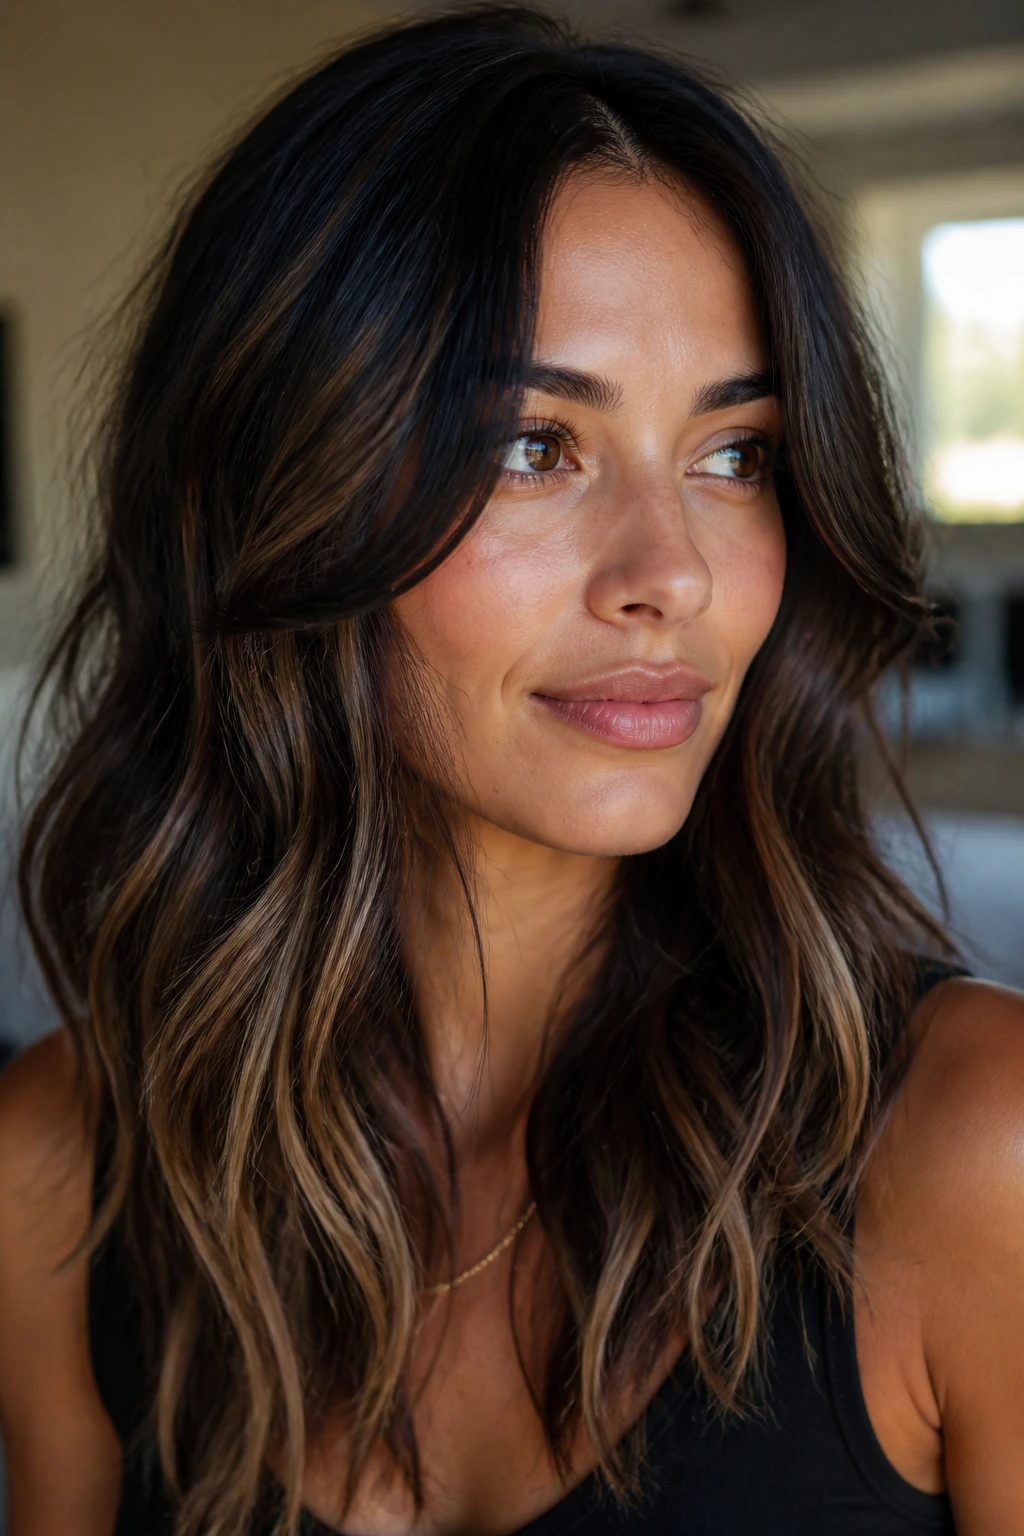
Why Black Lowlights and Beachy Waves Keep Each Other Interesting
Black lowlights do their best work when the hair isn’t perfectly still. That’s the part a lot of people miss. On straight hair, the ribbons can read like simple dark streaks. On beachy waves, they break apart and rejoin as the curve changes, which is why the same color job can look flat one day and expensive the next.
Medium skin gives this pairing a useful middle ground. There’s enough depth in the complexion to carry dark color, but there’s usually still enough warmth or softness in the skin to keep the hair from overpowering the face. The result is a kind of visual balancing act: the color sharpens the features while the wave pattern keeps everything from hardening.
I also like that this approach works across cuts. A lob, long layers, curtain bangs, or shoulder-length waves all can take black lowlights, but the placement changes how the whole thing reads. Put the darkness under the surface and you get movement. Put it at the face and you get contour. Put it through the ends and you get weight. Same color. Different personality.
Essential Tools for the Chair and the Bathroom Shelf
-
Tail comb: Lets you section clean, narrow pieces for foils or painted ribbons without grabbing too much hair.
-
Color brush and bowl: Useful for placing lowlights with a soft edge instead of dumping color on in one heavy pass.
-
Foils or balayage board: Foils give cleaner saturation; a board helps with hand-painted pieces and softer blends.
-
Sectioning clips: Keep the top layer out of the way so underlights and crown shadows don’t get muddy.
-
Demi-permanent dark color or gloss: A softer option than permanent black for many medium skin tones because it deposits depth without the same hard line.
-
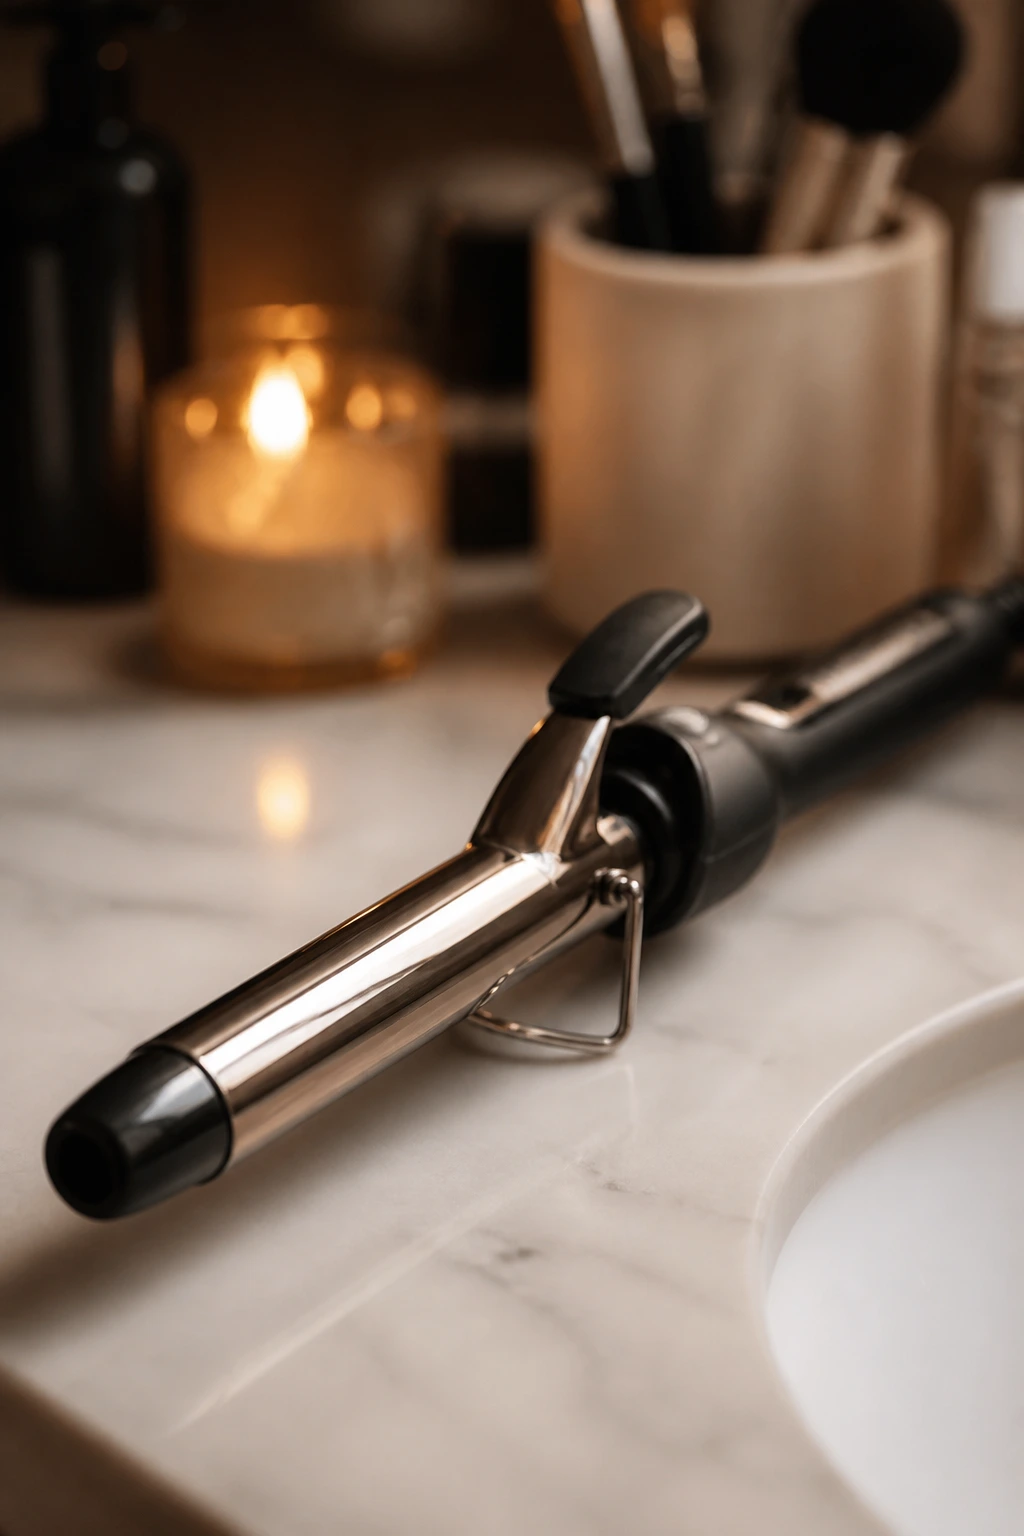
1-inch curling iron or wand: The sweet spot for beachy waves; anything much smaller can turn the look too curly.
-
Heat protectant spray: Keeps the wave pattern smooth and stops the ends from looking fried against the dark color.
-
Sulfate-free shampoo: Helps the black lowlights keep their tone longer and keeps the base from drying out.
-
Deep-conditioning mask: Especially useful if the hair was lightened before the lowlights went in.
-
Microfiber towel or T-shirt: Reduces frizz when you scrunch the hair dry, which matters because frizz can hide the lowlight placement.
Smart Shade Selection and Salon Notes

The biggest mistake people make is asking for “black” without naming the kind of black they want. Soft black, natural black, blue-black, charcoal black, and raven black all live in different places visually. If you hand a colorist a vague request, you may leave with hair that is technically dark but not at all what you pictured.
Bring photos that show the color in daylight and indoors. Hair color changes a lot between those two settings, and black lowlights are especially tricky because the shine can push them cooler or warmer than you expected. If the goal is subtle depth on medium skin, ask for lowlights that sit one to three levels deeper than your base rather than the darkest black available in the bowl.
A good consultation also covers placement. Around the face, softer placement usually works better. Underneath, deeper placement can be bolder. Through the ends, a slightly scattered hand keeps the color from looking like a blunt line. If you already have highlights, the black lowlights should interrupt the light pieces, not bury them.
One more thing. If your hair has been lightened, porosity matters. Porous ends grab dark color fast, sometimes darker than the root zone. A colorist may need to gloss the ends more lightly or stagger the processing time so the lowlights don’t turn ink-heavy where the hair is weakest.
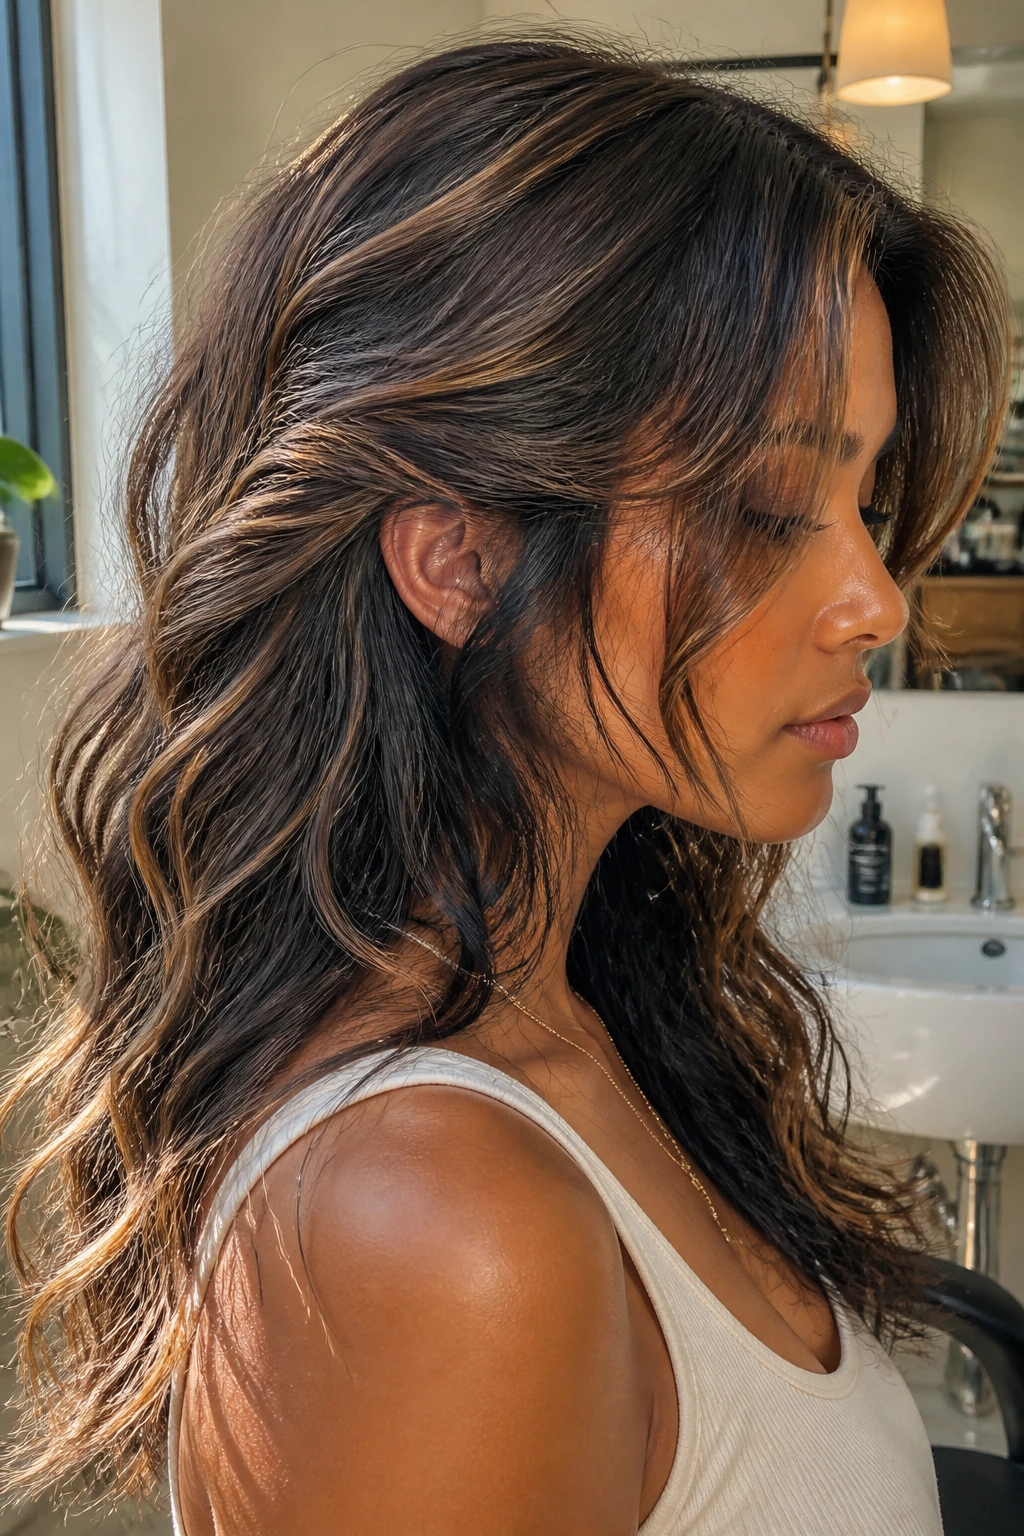
How to Wear the Look Without Losing the Wave Pattern
Parting: A half-inch shift in the part can expose more or less of the lowlights, which is a cheap trick with a big payoff. A deep side part will usually make the black ribbons read stronger; a soft center part keeps the face gentler.
Wave pattern: Use a 1-inch iron and leave the last inch of each section out if you want that loose beach finish. Alternate the curl direction every other section, then brush the waves out once they cool. That’s what makes the color separate into pieces instead of clumping.
Product finish: Lightweight mousse, texturizing spray, and a touch of shine mist are enough for most of these looks. Heavy creams and thick oils can blur the dark ribbons into the base color. That kills the whole point.
What to skip: Tight curls, wet-look gel, and too much root volume powder can hide the lowlights or make them look dusty. The color needs movement and some clean shine. Not a lot. Just enough.
Extra Tweaks That Change the Whole Mood
Depth Placement: Move the darkest ribbons lower if you want softness around the face, or higher if you want the crown to feel denser. That one change can turn the same color into two very different moods.
Gloss Choice: A clear gloss keeps the black lowlights shiny without changing the tone. A cool gloss leans smoky. A warm gloss softens the edge for golden or honey-toned skin. Pick the finish with the skin tone in mind, not just the hair.
Customization: If your hair is fine, ask for fewer but slightly thicker pieces. If your hair is thick, scatter the lowlights more broadly so the color doesn’t disappear. Curly and wavy hair usually needs less saturation than straight hair because the bends create their own depth.
Serving Suggestions: Tuck one side behind the ear, add a center part for symmetry, or keep the waves brushed out for a softer finish. A satin pillowcase, a lightweight hair oil on the very ends, and a spritz of UV-protectant spray all help the color look cleaner between washes.
Make-It-Yours: If you like a softer look, stay with soft black or charcoal. If you like a harder edge, go toward raven or blue-black. The right choice is the one that fits your face, your wardrobe, and how much contrast you actually want to live with.
Maintenance, Glossing, and Touch-Up Timing
Black lowlights usually hold up well, but they still need a bit of care if you want them to stay sharp instead of dull. A sulfate-free shampoo and cooler water go a long way. Hot water roughs up the cuticle and washes the shine right off the darker pieces, which is bad news when the whole look depends on contrast.
Most people can stretch salon refreshes to about 8 to 12 weeks, though face-framing pieces may need a gloss sooner if they’re exposed to heat and sun more often. If the lowlights were done with a demi-permanent color, a clear or toning gloss every 6 to 8 weeks can keep the black from drifting brown or dusty. That’s especially useful on porous hair.
If the waves are made with heat, always use protectant before curling. I’d keep the iron around 300°F to 350°F for most textures, with lower heat for fine hair. If the hair feels squeaky or rough after styling, the heat is too high or the product load is too heavy.
Sleeping on a satin or silk pillowcase helps the waves hold their shape and keeps the darker pieces from looking frayed at the ends. A loose braid or a soft clip at the nape can preserve the bend overnight. Not glamorous. Very useful.
Common Mistakes That Make Black Lowlights Look Too Hard
The first mistake is going too dark everywhere. If the base, the lowlights, the root shadow, and the ends all sink into the same near-black zone, the waves vanish. The fix is simple: leave some brown, mocha, or caramel between the dark pieces so the texture has room to breathe.
Another common problem is placing the darkest ribbons right at the hairline with no soft transition. On medium skin, that can make the face look harsher than the colorist meant. A better move is to blur the first inch or two around the front and let the deepest pieces start a little behind the face.
People also forget that heavy products flatten contrast. Thick oils, creamy leave-ins, and too much serum can make the black pieces look greasy or muddy. Use lighter styling products and save the rich stuff for the ends only, if at all.
There’s also the over-curling trap. Tight bends turn beachy waves into a uniform curl pattern, and then the lowlights get lost in the crowd. Loose, brushed-out waves are the point. If the hair starts looking too polished, break it up with fingers and a touch of texture spray.
Frequently Asked Questions
Will black lowlights look harsh on medium skin?
They can, if the shade is too true-black and the placement is too close to the face. Softer versions like natural black, soft black, or charcoal usually read richer and easier on medium skin, especially when the waves keep the color broken up.
What black shade is best: soft black, natural black, or blue-black?
Soft black is the safest all-around choice. Natural black works well when you want a deeper finish without a blue cast, while blue-black is best for cooler or neutral skin that can carry a sharper edge.
Can I get this look without bleaching my hair?
Yes, if your base is already medium brown or deeper. Black lowlights are deposit-only in many cases, so they can be added without lightening the hair first. If you have highlights already, a colorist may need to adjust the formula so the lighter pieces don’t swallow the dark color.
Do beachy waves hide black lowlights?
They hide them only if the wave is too tight or the product is too heavy. Loose bends, brushed-out texture, and a little shine are what make the dark ribbons show up. The waves are part of the color story here.
How often should I refresh black lowlights?
Most people need a salon gloss or tone every 6 to 8 weeks if they want the black to stay crisp. The actual placement can last longer, often 8 to 12 weeks, especially if the lowlights are tucked under the top layer.
What should I ask my colorist for?
Ask for the exact shade level — soft black, natural black, charcoal, raven, or blue-black — and say where you want the darkness concentrated. Front pieces, underlayers, crown shadows, and ends all create different effects, so be specific.
Will this work on fine hair?
Yes, but keep the ribbons thinner and the spacing a little wider. Too much black on fine hair can make it look flat, so the goal is a few deliberate shadows rather than dense coverage.
How do I keep the lowlights from turning muddy?
Use sulfate-free shampoo, avoid heavy styling cream, and don’t overdo heat. A clear gloss or a quick salon glaze helps the dark pieces stay shiny instead of dusty, which is the real danger once the color starts to fade.
The Contrast That Does the Heavy Lifting
Black lowlights are one of those color moves that look simple from a distance and smart up close. On medium skin, they can sharpen the face, give beachy waves a better shape, and add depth without dragging everything into a heavy, overprocessed place. That balance is why they keep showing up in salons and why they still make sense when the hair is supposed to feel relaxed.
My honest preference? I like the versions that leave some brown or mocha visible. They age better, move better, and let the skin stay the star instead of turning the hair into one solid dark curtain. But if you want drama, there’s room for that too. The key is knowing whether you want shadow, contour, or full contrast before you sit in the chair.
Bring a daylight photo, know your undertone, and be precise about where you want the dark pieces to live. That’s usually enough to get the right result, and once the waves start moving, the whole thing tends to take care of itself.