Thin hair can look cooperative right up until it grows past the shoulders. Then the ends start whispering the truth: a little see-through here, a little flat there, and a highlight pattern that looked soft in the salon suddenly feels louder than the hair itself. Long sleek hairstyles for thin hair with babylights solve that problem with less drama than people expect. The sleek line gives the length a firm edge, and the babylights break up the surface so the whole head reads fuller, not thinner.
That’s the part most people miss. A chunky highlight can split fine hair into obvious stripes. Babylights do the opposite. They act like tiny flashes of light woven through the hair, which means the eye sees movement and depth even when the style is pin-straight or pulled smooth against the head. On long hair, that matters more than volume spray ever will.
The cut still has to do some heavy lifting. A blunt perimeter, a shallow U-shape, a clean side part, or a low ponytail with a wrapped base all change the way thin hair sits and moves. Get that part wrong and no amount of shine serum can fix it. Get it right, and the babylights start doing exactly what they’re supposed to do: catching light where the hair needs a little more presence.
Why These Looks Earn Their Keep

- Babylights add visual texture: Ultra-fine ribbons of color interrupt a flat surface, which keeps long thin hair from looking like one solid sheet.
- Sleek shapes protect the outline: A clean hemline or smooth finish makes the ends look deliberate instead of wispy.
- The styles work with real haircuts: Blunt cuts, U-shapes, side parts, and face-framing layers all give thin hair a better frame than aggressive thinning ever could.
- You can wear them up or down: A polished ponytail, low knot, or straight glass finish still feels put together without needing a huge amount of hair.
- Babylights are flexible: Beige, honey, pearl, caramel, and cool ash tones all behave differently, which gives you room to shape the look around your base color.
- Small changes make a big difference: Moving the part half an inch, adding a money piece, or wrapping the ponytail base can change the whole read of the style.
Why Long Sleek Hairstyles for Thin Hair with Babylights Work So Well
The best thing about this pairing is that it solves two problems at once. Thin hair often needs a stronger outline, and sleek styling gives you exactly that. Babylights then keep the surface from going dead flat. The result is less about raw volume and more about perceived density, which is a much more useful goal for long hair that tends to collapse under its own weight.
There’s also a neat trick hiding in the color placement. Babylights near the part, temples, and upper mid-lengths make the top of the head read busier in the right way. Add a few lowlights underneath, and the brighter pieces don’t float in space; they sit against shadow, which gives the whole style more depth. That contrast is what stops long hair from looking washed out.
For fine strands, the cut matters more than the curl. A blunt hemline holds the eye at the bottom edge. A shallow U-shape softens that edge without breaking it apart. Long layers can work too, but only when they’re hidden enough to keep the perimeter full. The whole point is to keep the hair looking intentional from root to end. Nothing fussy. Nothing shredded.
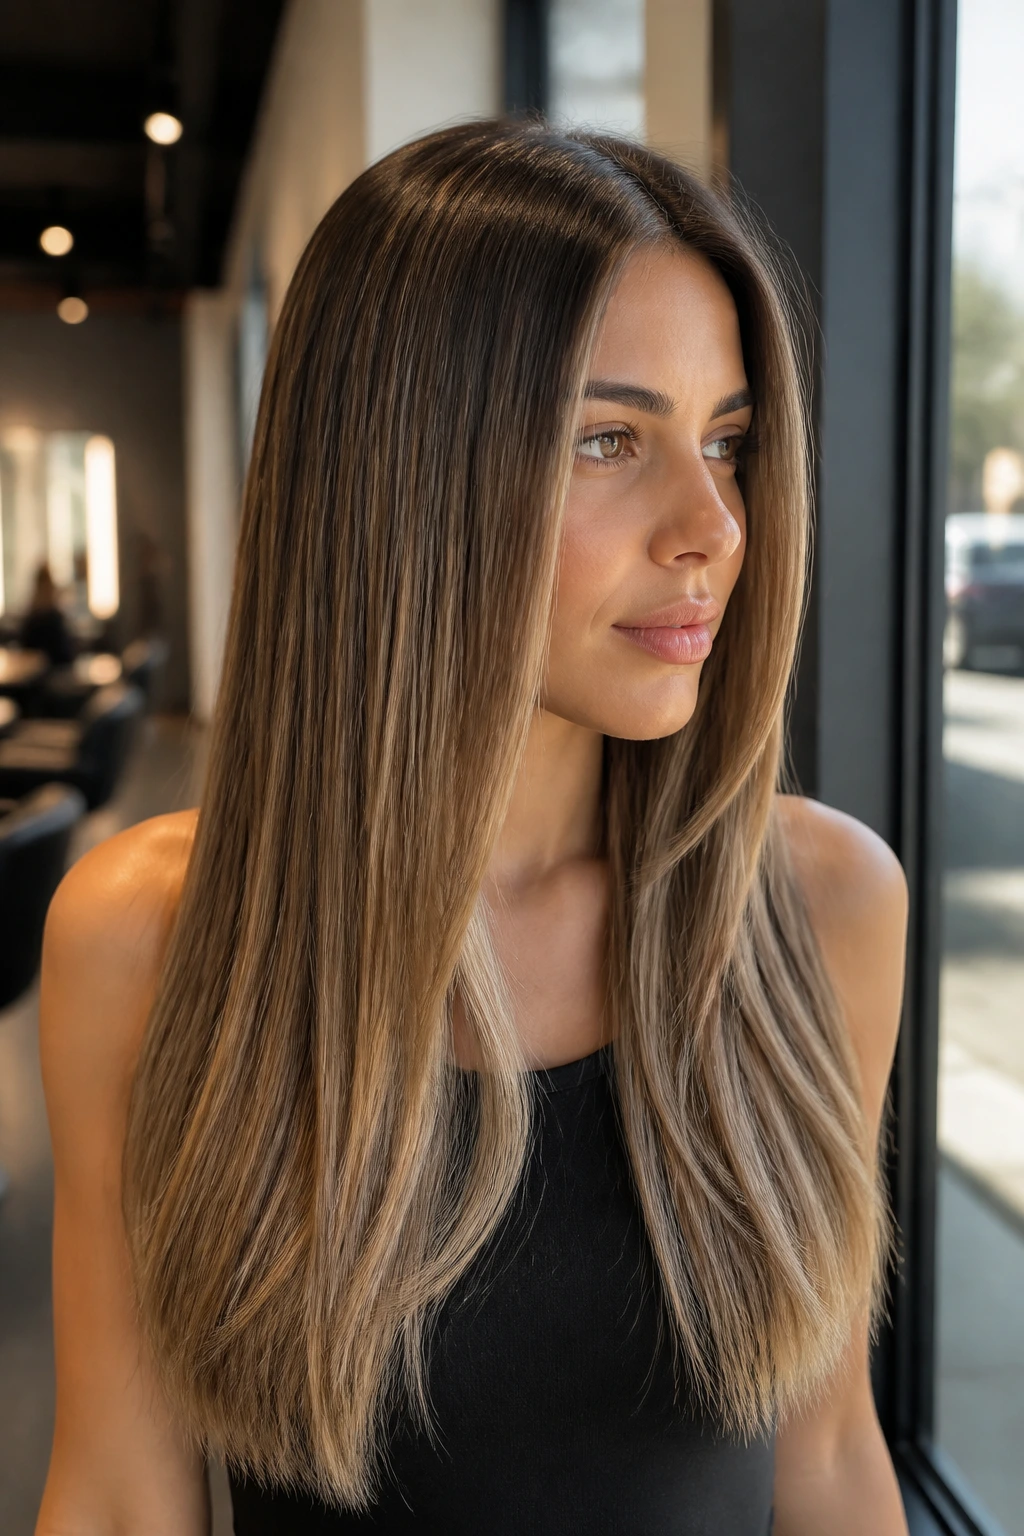
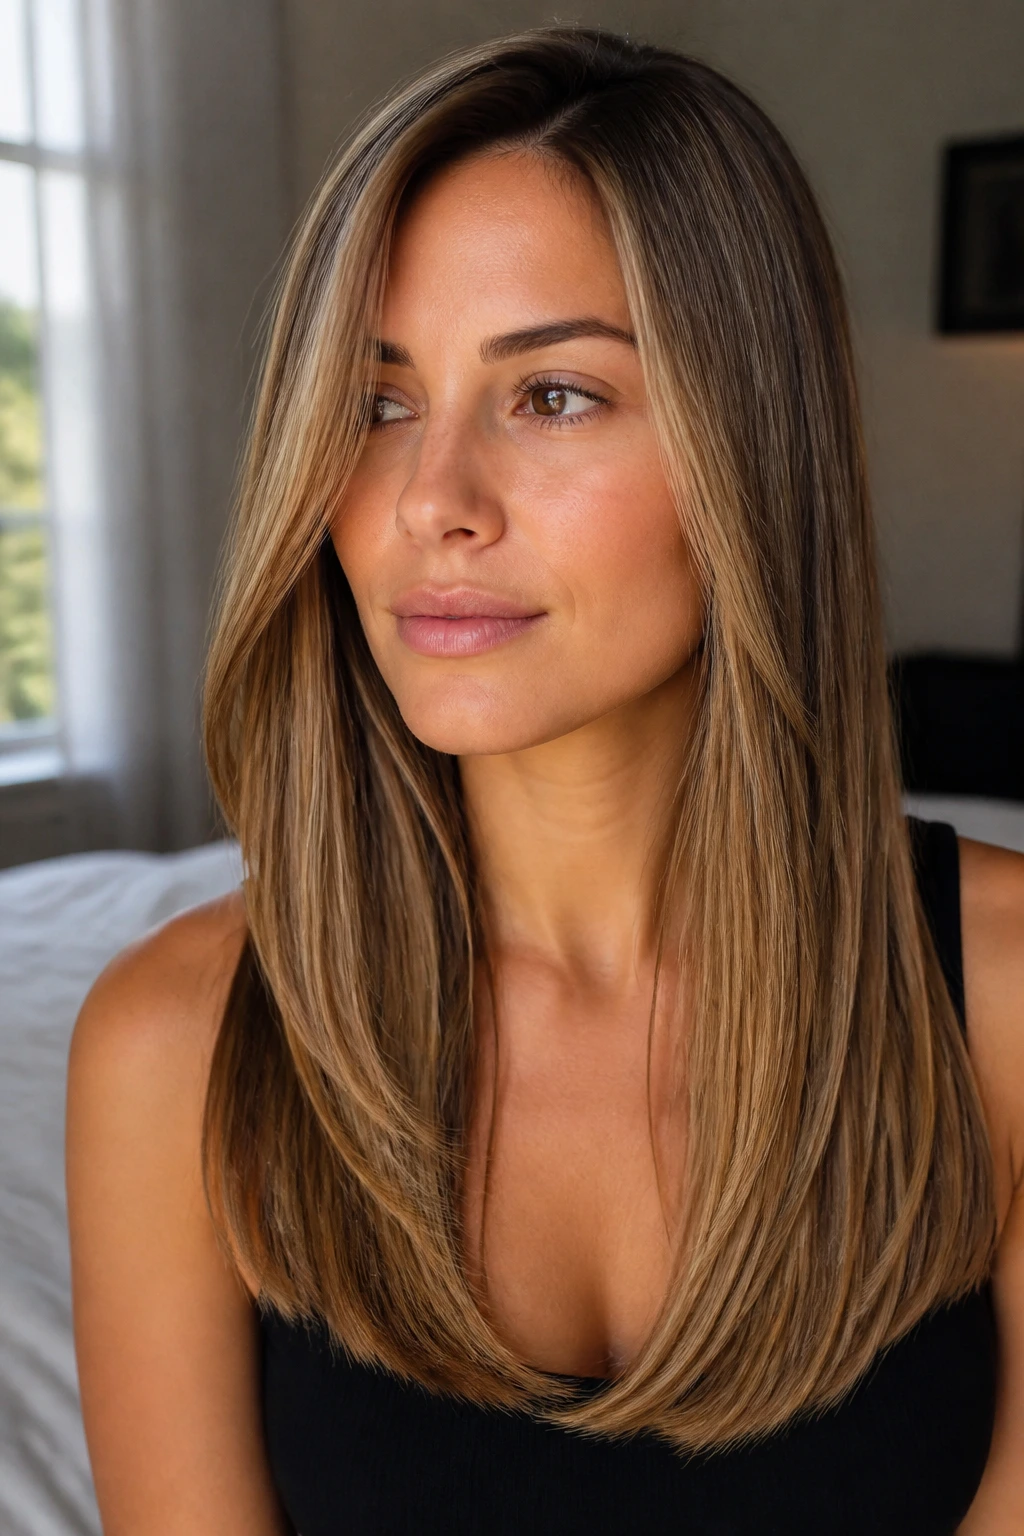
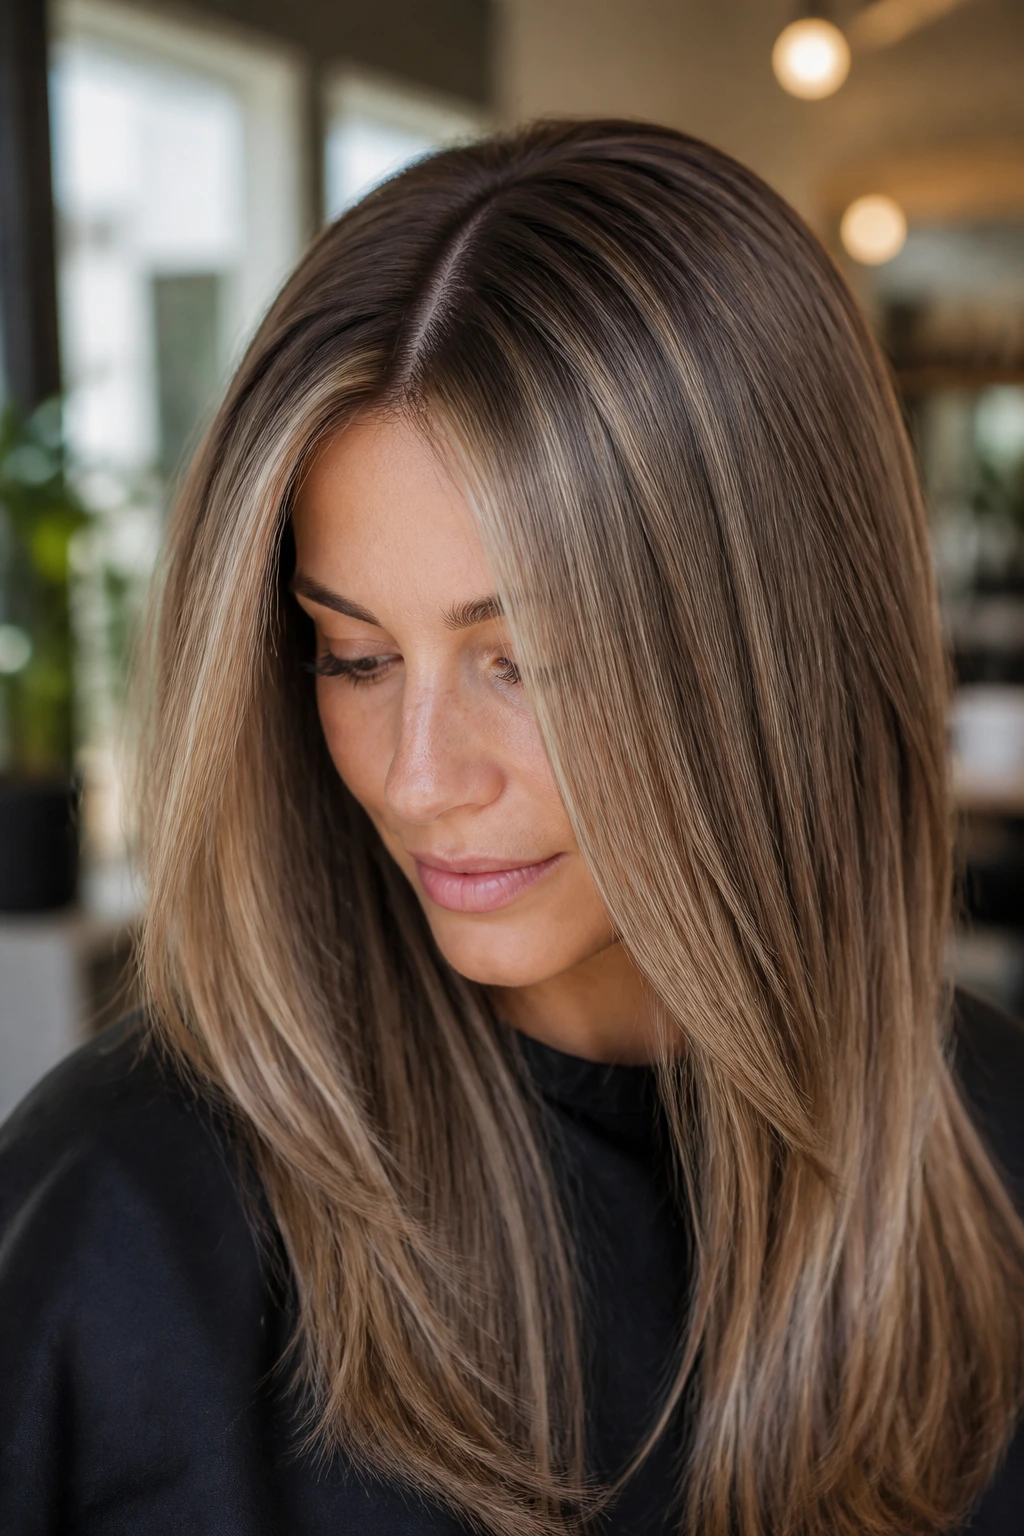
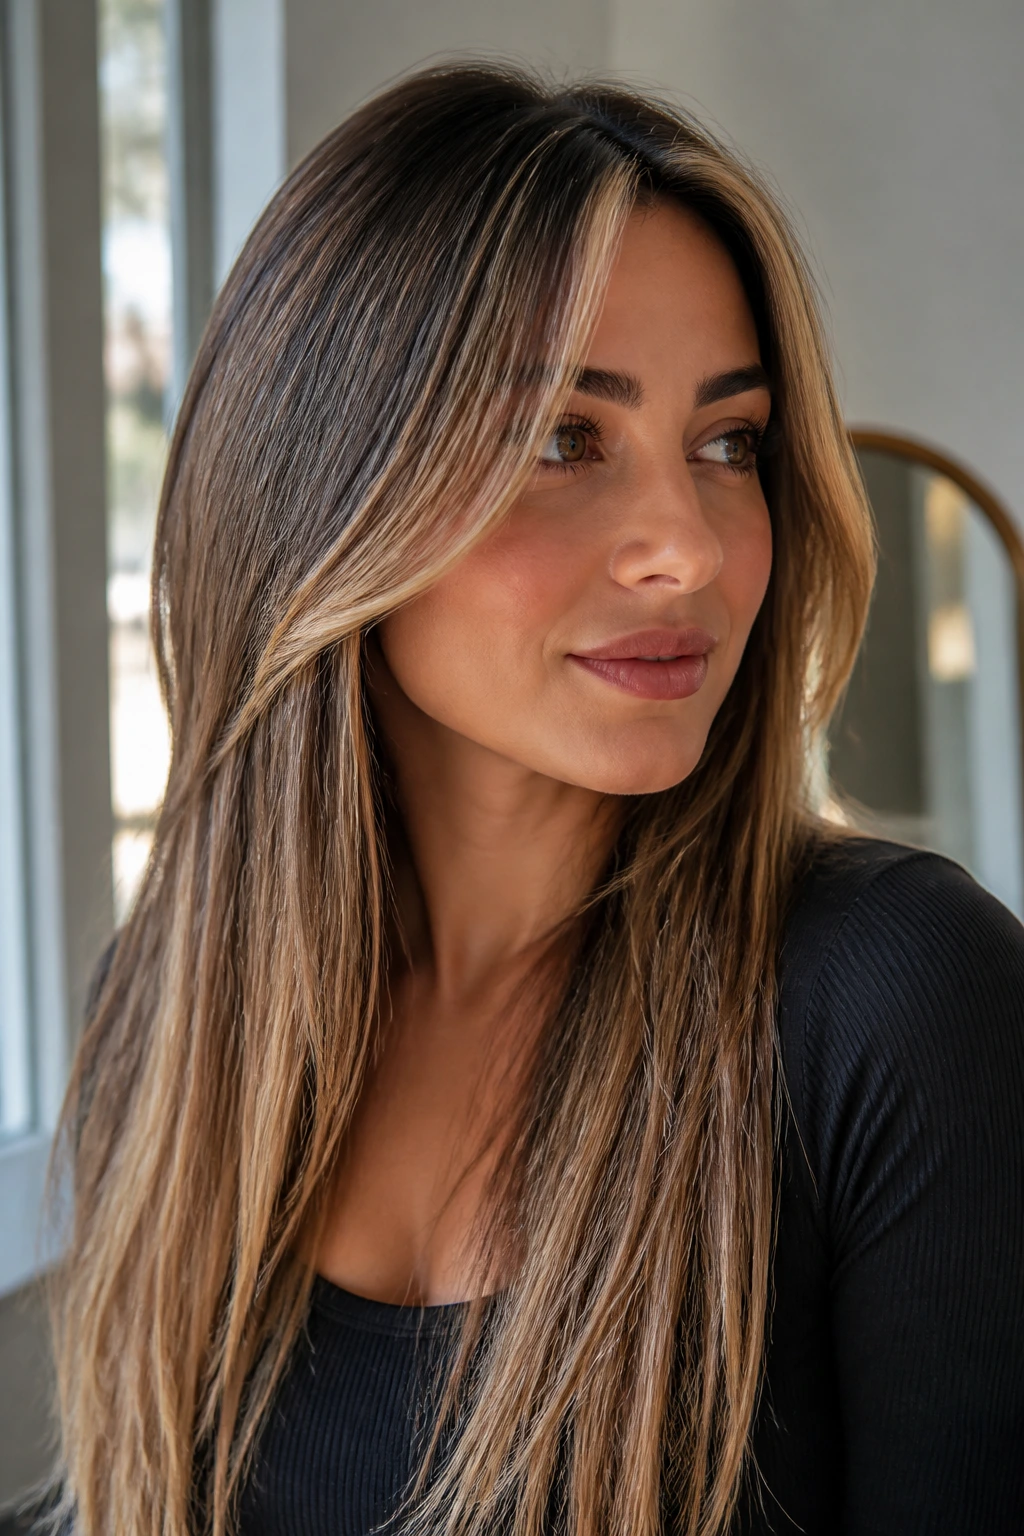
1. Center-Part Glass Straight Hair
This is the cleanest version of the look, and it’s the one I reach for when the hair itself is healthy enough to deserve a sharp finish. The center part puts both sides in balance, while the glassy straight surface lets the babylights flash in narrow ribbons instead of broad stripes. On thin hair, that matters. A messy finish can turn the ends invisible. A polished one gives them shape.
Why it flatters thin hair
The center part creates two equal panels, which makes the overall silhouette feel calmer and more deliberate. Babylights placed through the top layer and around the part break up the scalp area without turning the color patchy. If your ends are blunt, even better. The line at the bottom helps the length feel thicker than it is.
A flat iron pass at 300°F to 320°F is enough for fine hair in most cases. Higher heat usually buys you less smoothness than you think and more dry ends than you want.
Best on: straight or lightly wavy hair that already likes to lie down.
Ask for: micro-fine babylights through the crown and face frame, with a blunt perimeter.
Skip if: the ends are fried or transparent; you’ll need a trim before the style can do its job.
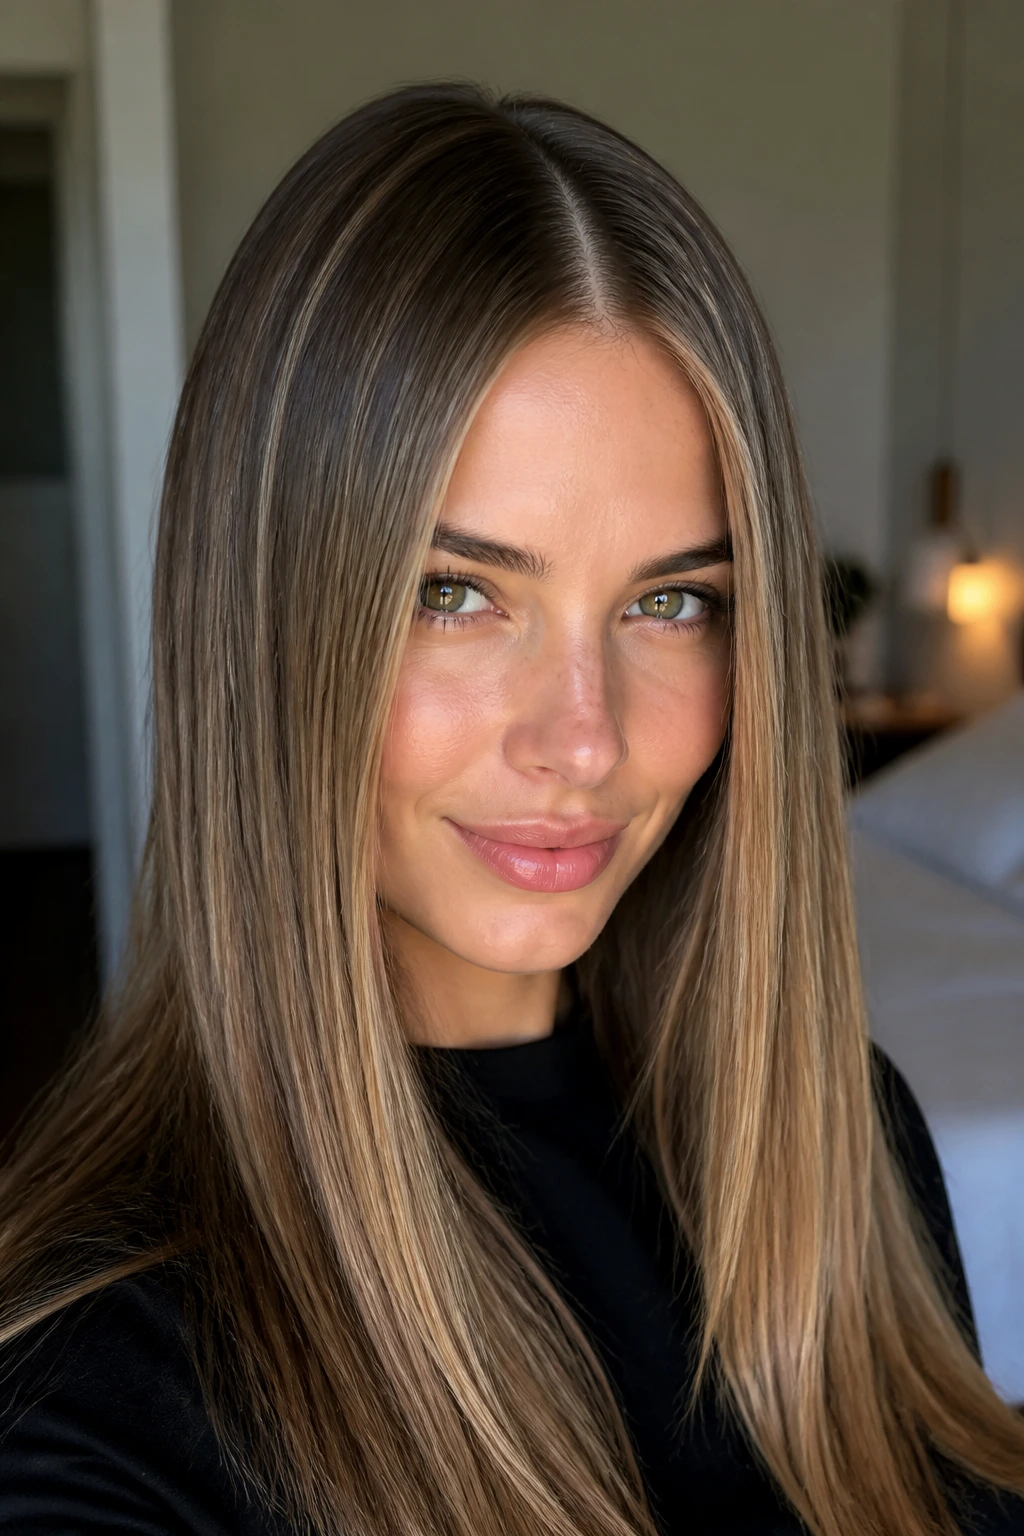
2. Blunt One-Length Hair with Soft Honey Babylights

A blunt cut is the blunt answer. It keeps the eye from wandering down into thin, wispy ends, and that alone makes long hair look stronger. Add honey babylights, and the whole thing gets warmer and softer without losing that clean edge. I like this on brunettes and dark blondes because the contrast stays gentle; it doesn’t scream for attention.
The real magic is in the perimeter. One length gives the illusion of bulk because the ends land on the same line. That’s especially useful if your hair has gotten a little sparse from heat, coloring, or too many aggressive layers. Honey babylights woven through the mids prevent the style from looking too solid, which can happen fast on very straight hair.
If you want this to feel expensive rather than flat, keep the lightest pieces around the face and upper canopy. Leave the underneath a touch deeper. That little bit of shadow makes the blond pieces read brighter.
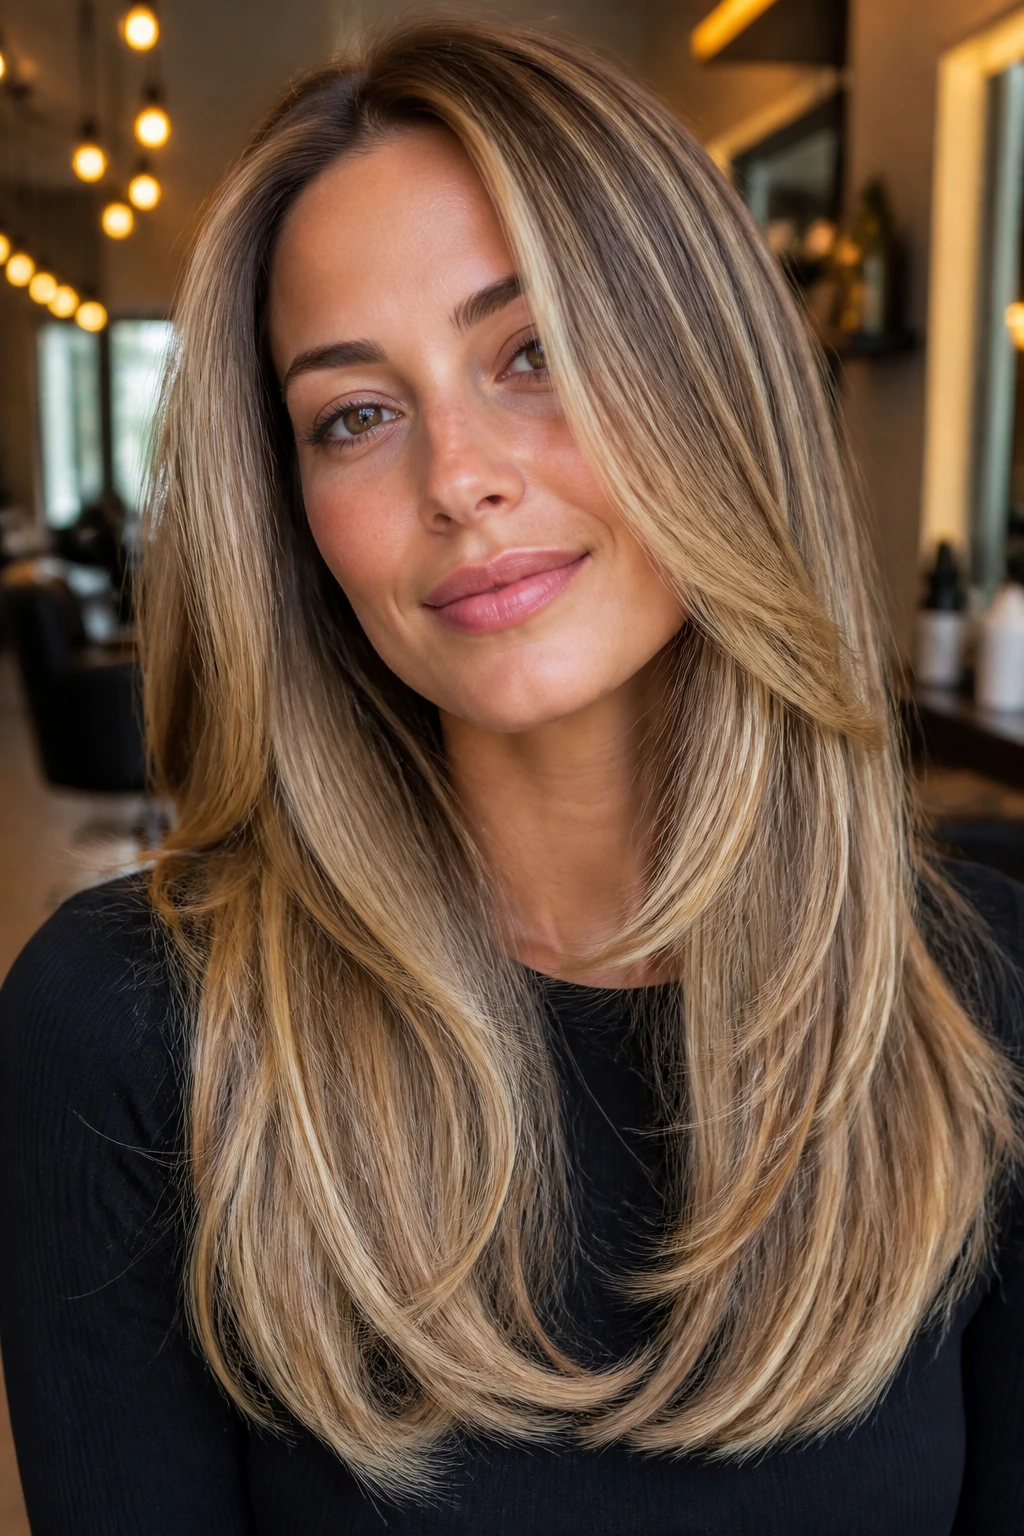
3. Long U-Shape with Face-Framing Ribbons

A soft U-shape is one of the safest cuts for thin hair that still wants movement. The hem curves slightly instead of dropping straight across, so the length feels long and graceful without getting dragged into a heavy curtain. Face-framing babylights sharpen the whole thing. They pull the eye forward, which helps if the rest of the length is subtle.
Styling note
Keep the curve shallow. A deep U on thin hair can expose the ends too much, and then you’re spending all your time trying to hide the fact that the hair tapers. A gentle arc is enough. It gives the back some shape while letting the front stay full.
The face frame should start around the cheekbone or collarbone, not at the chin if the hair is sparse. Too-short face pieces can split the line and make the rest of the hair feel thinner. Babylights in this section should be a touch brighter than the rest of the head, because this is where the light lands first.
It’s a quiet cut. That’s the point. Nothing about it shouts. It just holds together better than most long layers do.
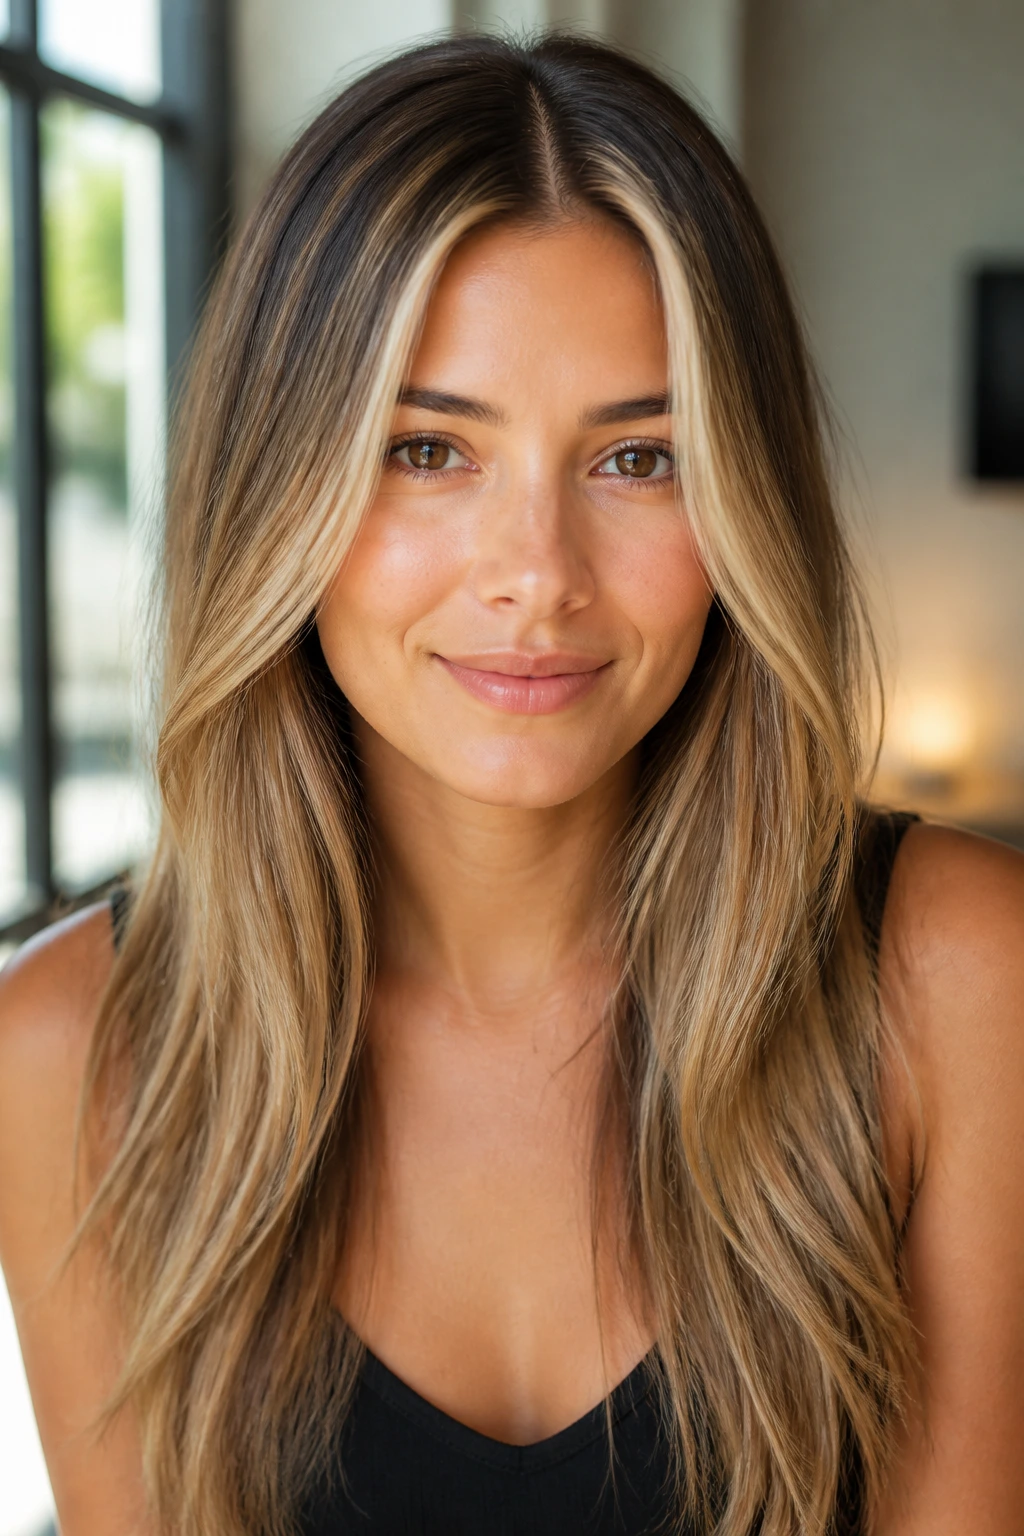
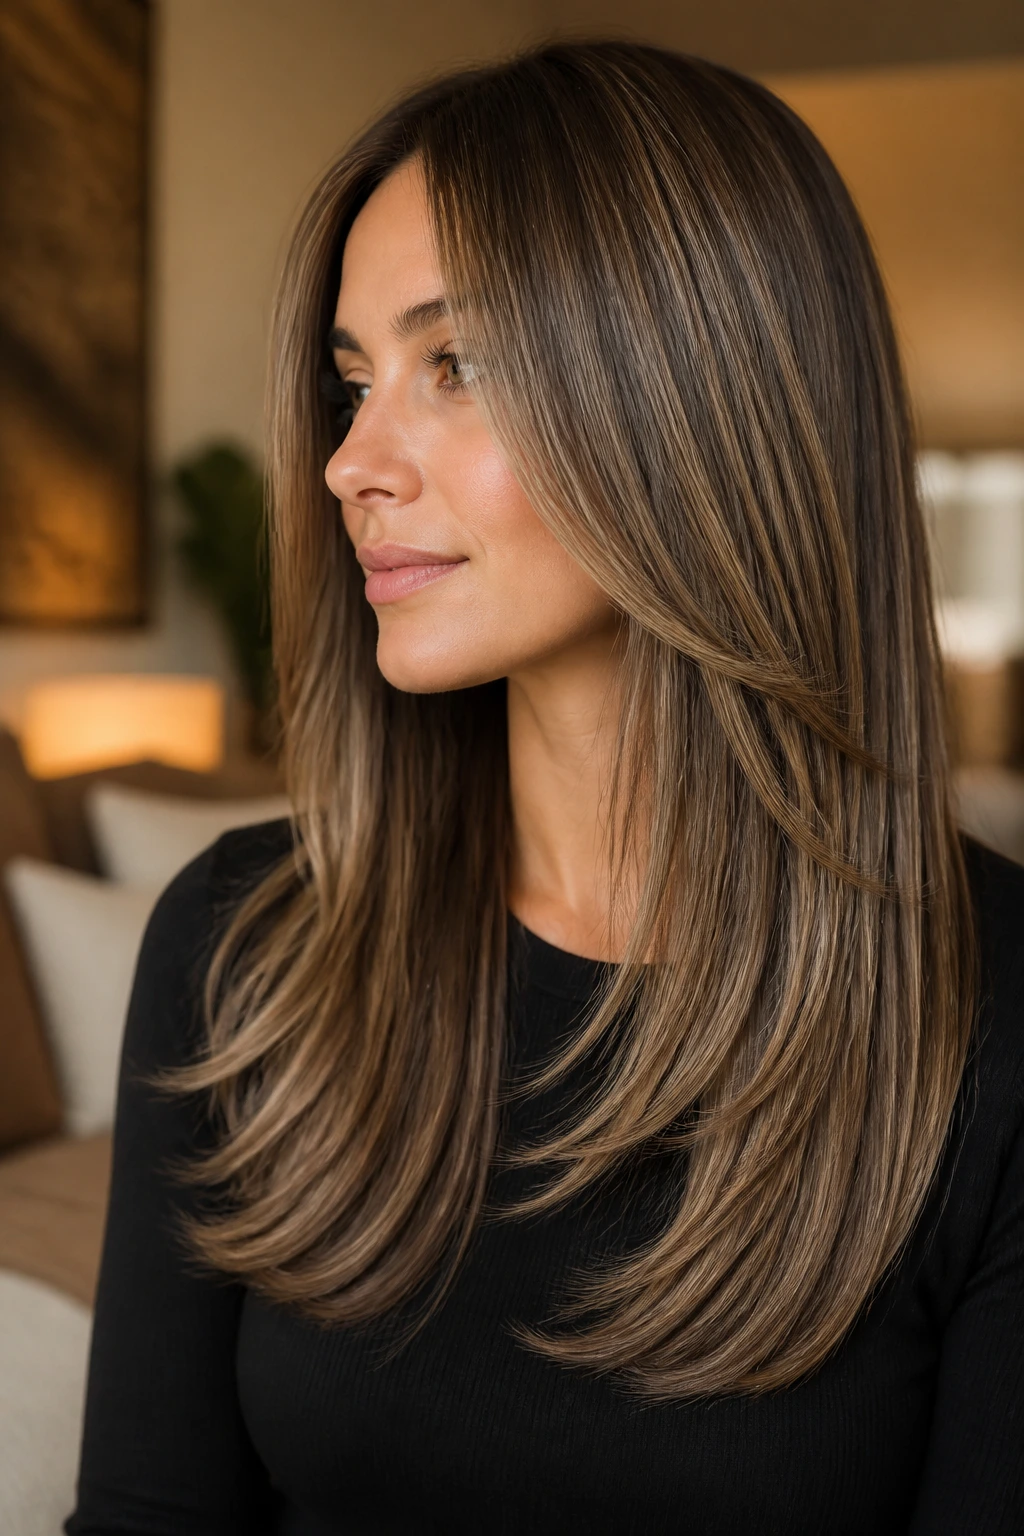
4. Invisible Layers and a Smooth Blowout
This is the option for people who want movement without visible choppiness. Invisible layers are tucked inside the shape, so the perimeter still looks full while the interior gets a little relief from bulk. On thin hair, that’s a useful trick. You keep the outline and lose the helmet effect.
The blowout does the rest. Use a 1.5-inch round brush, keep the nozzle pointed down the hair shaft, and finish each section with a cool shot before moving on. That small detail helps the babylights stay glossy instead of fuzzy. If your hair dries too quickly before you shape it, mist the mids lightly with water and keep going. Don’t soak it.
This look works best when the babylights sit on the top layer and just under the surface. That placement gives the hair lift from the outside without making the inside look see-through. It’s a smarter version of volume. Less puff. More structure.
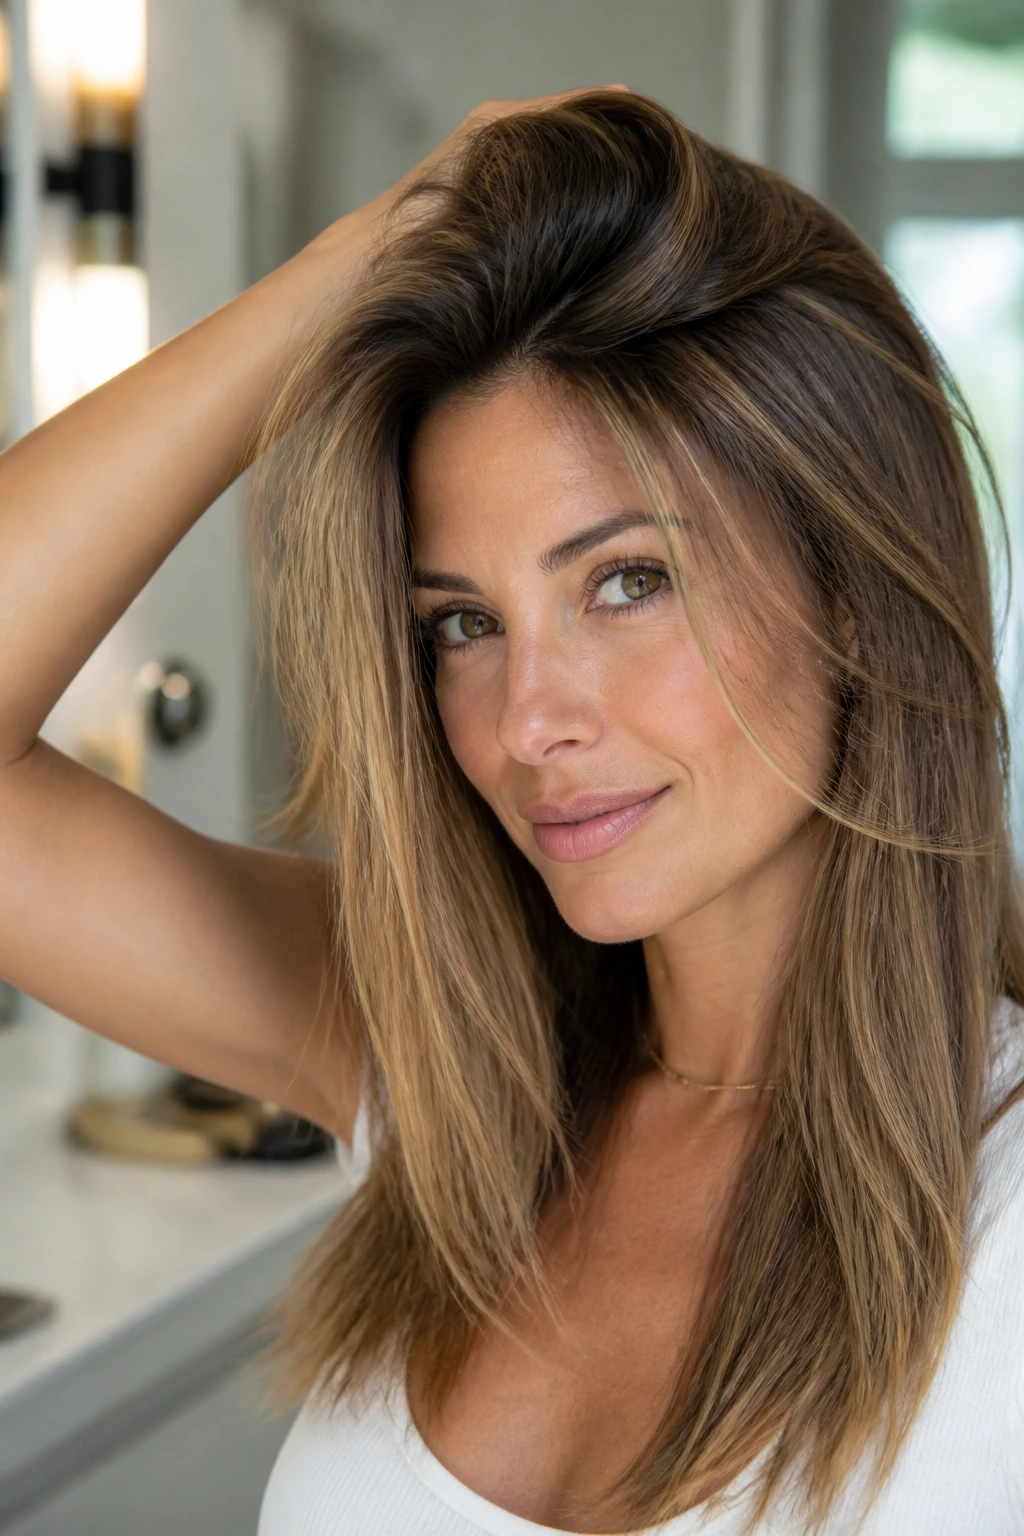
5. Deep Side Part with a Fuller Front Sweep
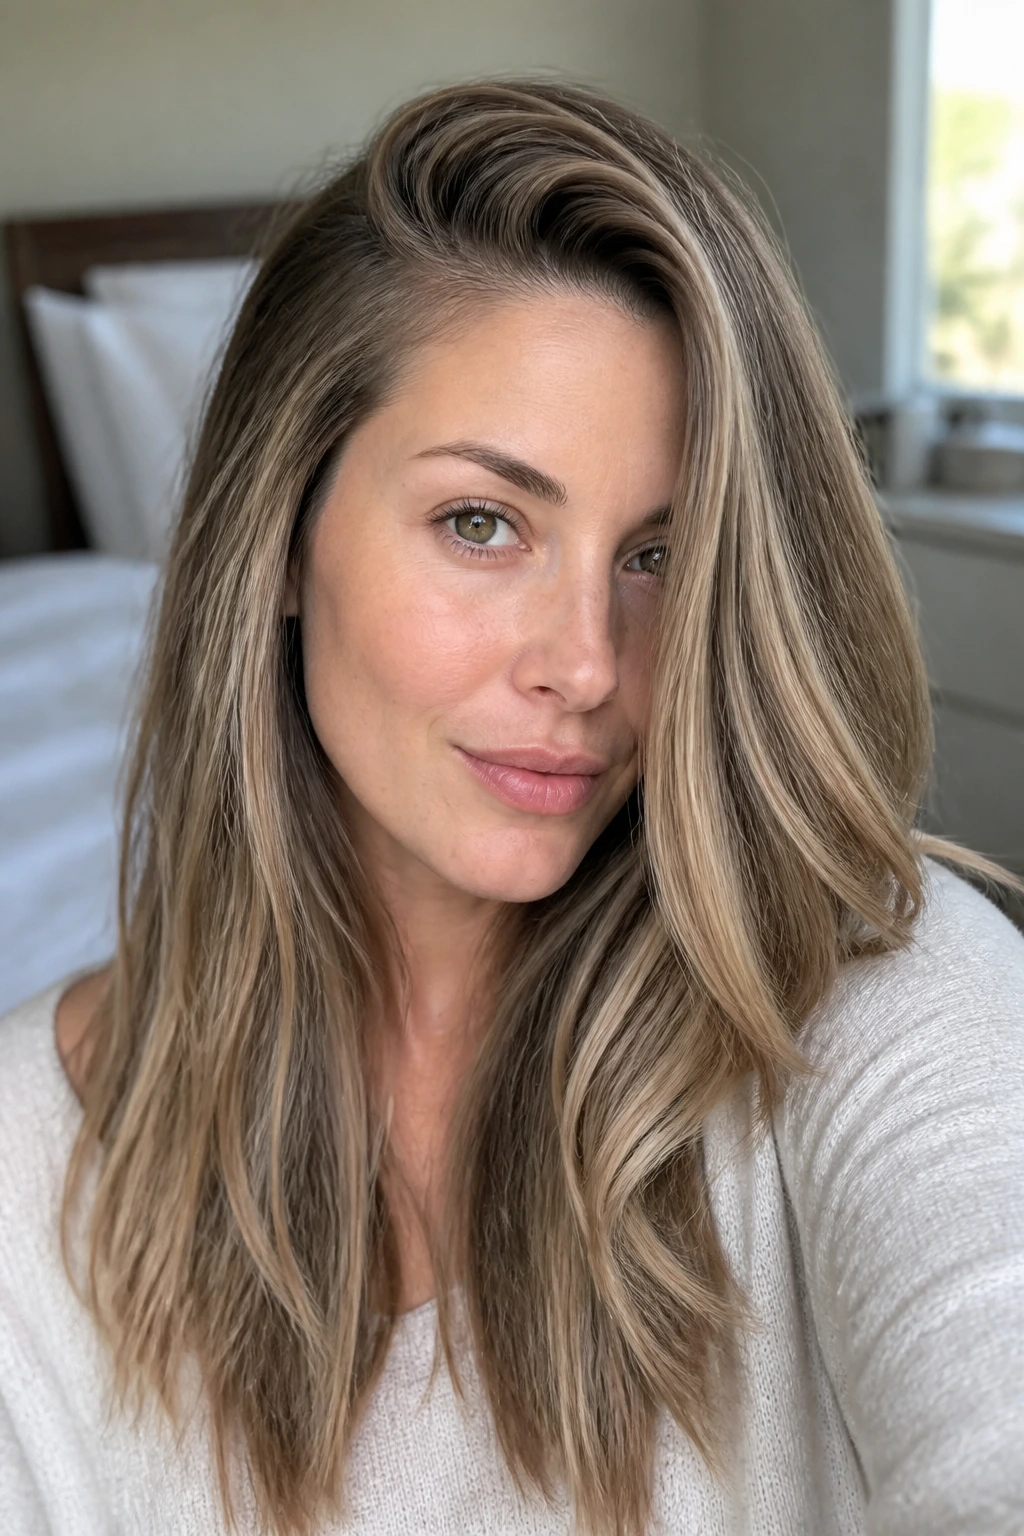
A deep side part can rescue hair that insists on lying too close to the scalp. It creates an instant lift at the root and gives one side of the face a fuller sweep of hair, which is handy when the crown is flat or the hairline is sparse. The babylights do a lot of work here too, especially if they’re concentrated on the heavier side and through the front sweep.
The best version of this style is not dramatic for the sake of drama. You’re not trying to make the part look theatrical. You’re trying to move the weight a little off center so the roots can stand up and the face frame can do its job. That tiny shift often gives thin hair more body than another round of teasing ever will.
If your part tends to slip back to the middle, set it while the roots are warm from the blow dryer and pin the heavier side for five minutes. That keeps the root direction from immediately folding back in on itself.
6. Wrapped Low Ponytail with Sleek Length
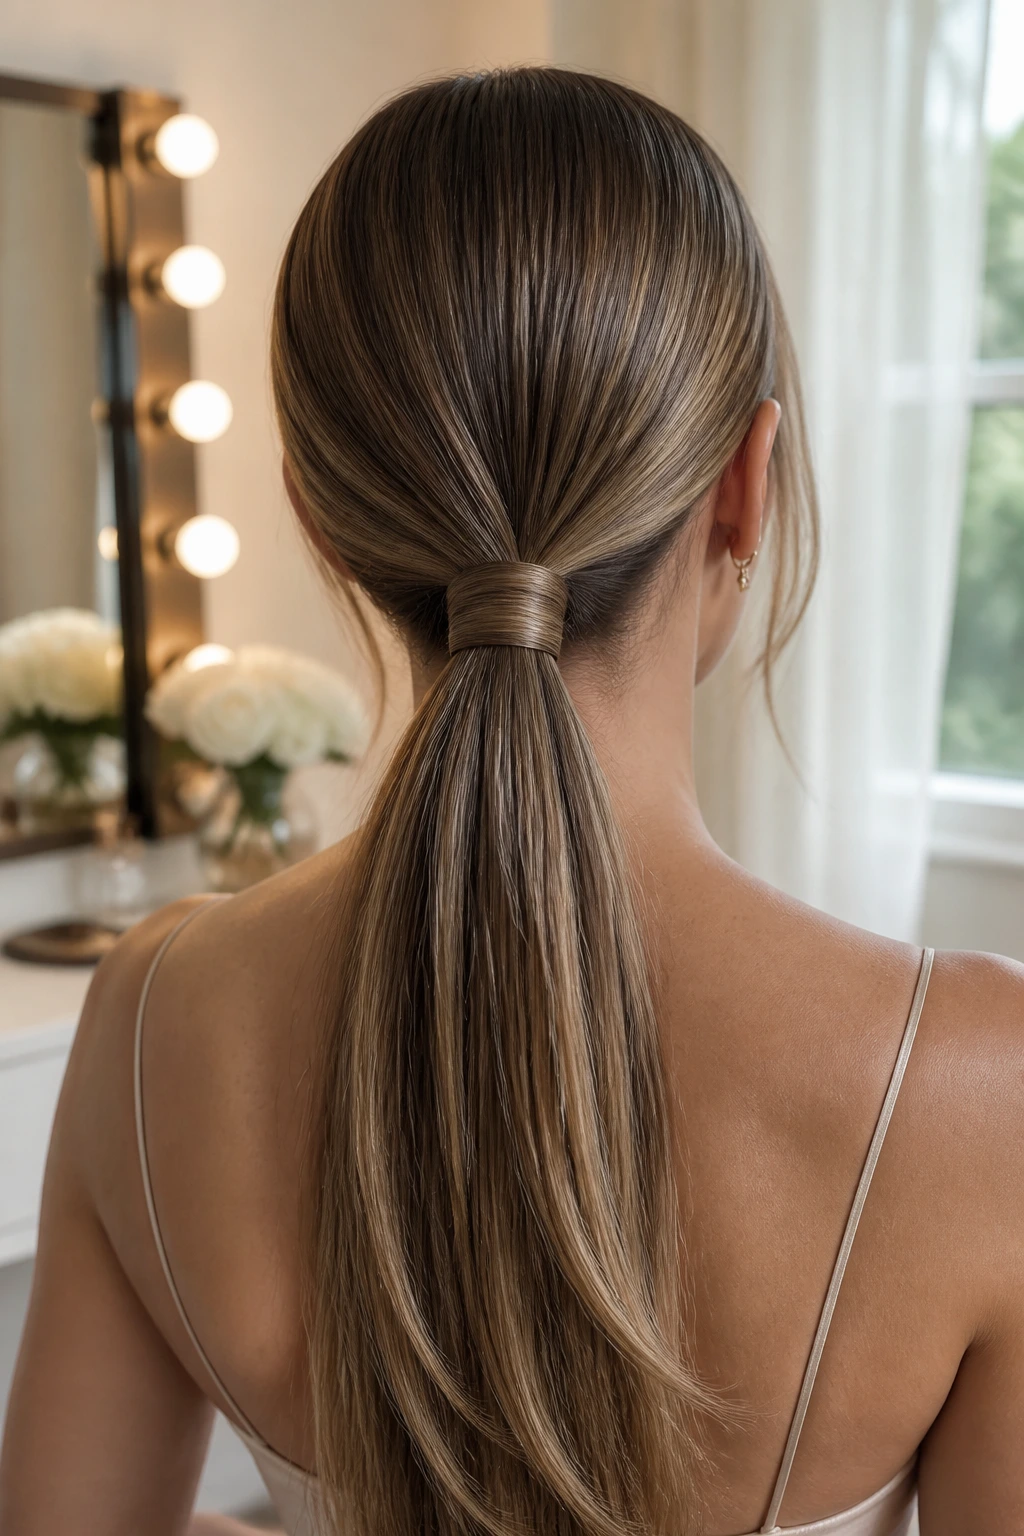
A low ponytail is honest. If the hair is thin, you can’t fake much. But you can make the shape cleaner, and that helps more than people admit. A wrapped base hides the elastic, while the babylights running through the tail keep the style from looking like one flat rope. The tail moves. The light changes. That’s the whole point.
Use a boar-bristle or mixed-bristle brush to smooth the top, then gather the hair low at the nape and secure it with a clear elastic. Take a small section from underneath, wrap it around the base, and pin the end beneath the pony. That one move makes a cheap ponytail look finished.
The key is not to over-iron the length before tying it back. A little bend at the ends is fine. Even better, sometimes. Dead-straight ponytails can look severe on fine hair, while a soft straight finish reads more natural. Babylights along the tail catch the light every time the pony swings.
7. Half-Up Twist with Loose Straight Ends
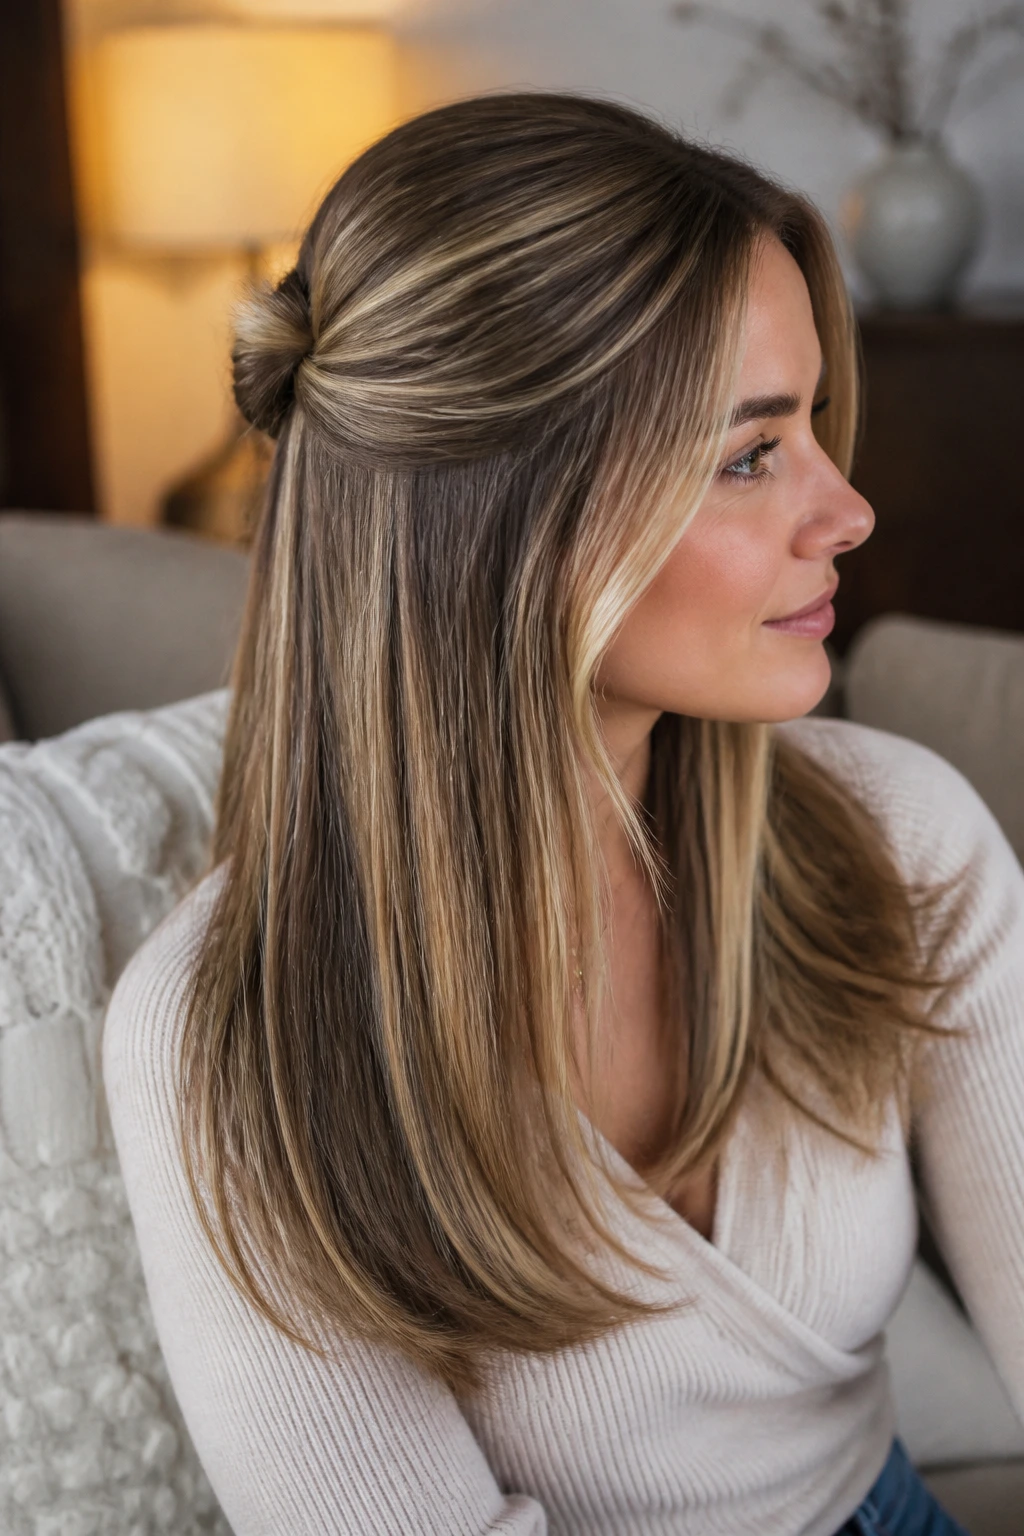
Half-up styles are good to thin hair when you want the illusion of more structure at the crown without sacrificing length. A small twist from each side, pinned or tied at the back, lifts the top section and leaves the lower half to do the sleek work. Babylights show up nicely in the twist because the color bends over itself and creates little flashes.
The mistake here is pulling back too much hair. If the half-up section gets too big, the remaining length can look patchy and the top starts to feel stretched. Keep it modest. Gather from the temples and just behind the ears, not from the back of the head all the way down.
I like this with a slight bend on the bottom half. Not curls. Just a soft curve at the ends. That keeps the whole thing from going too severe and gives the babylights something to sit against.
8. Tucked-Behind-Ears Lengths with a Clean Hairline
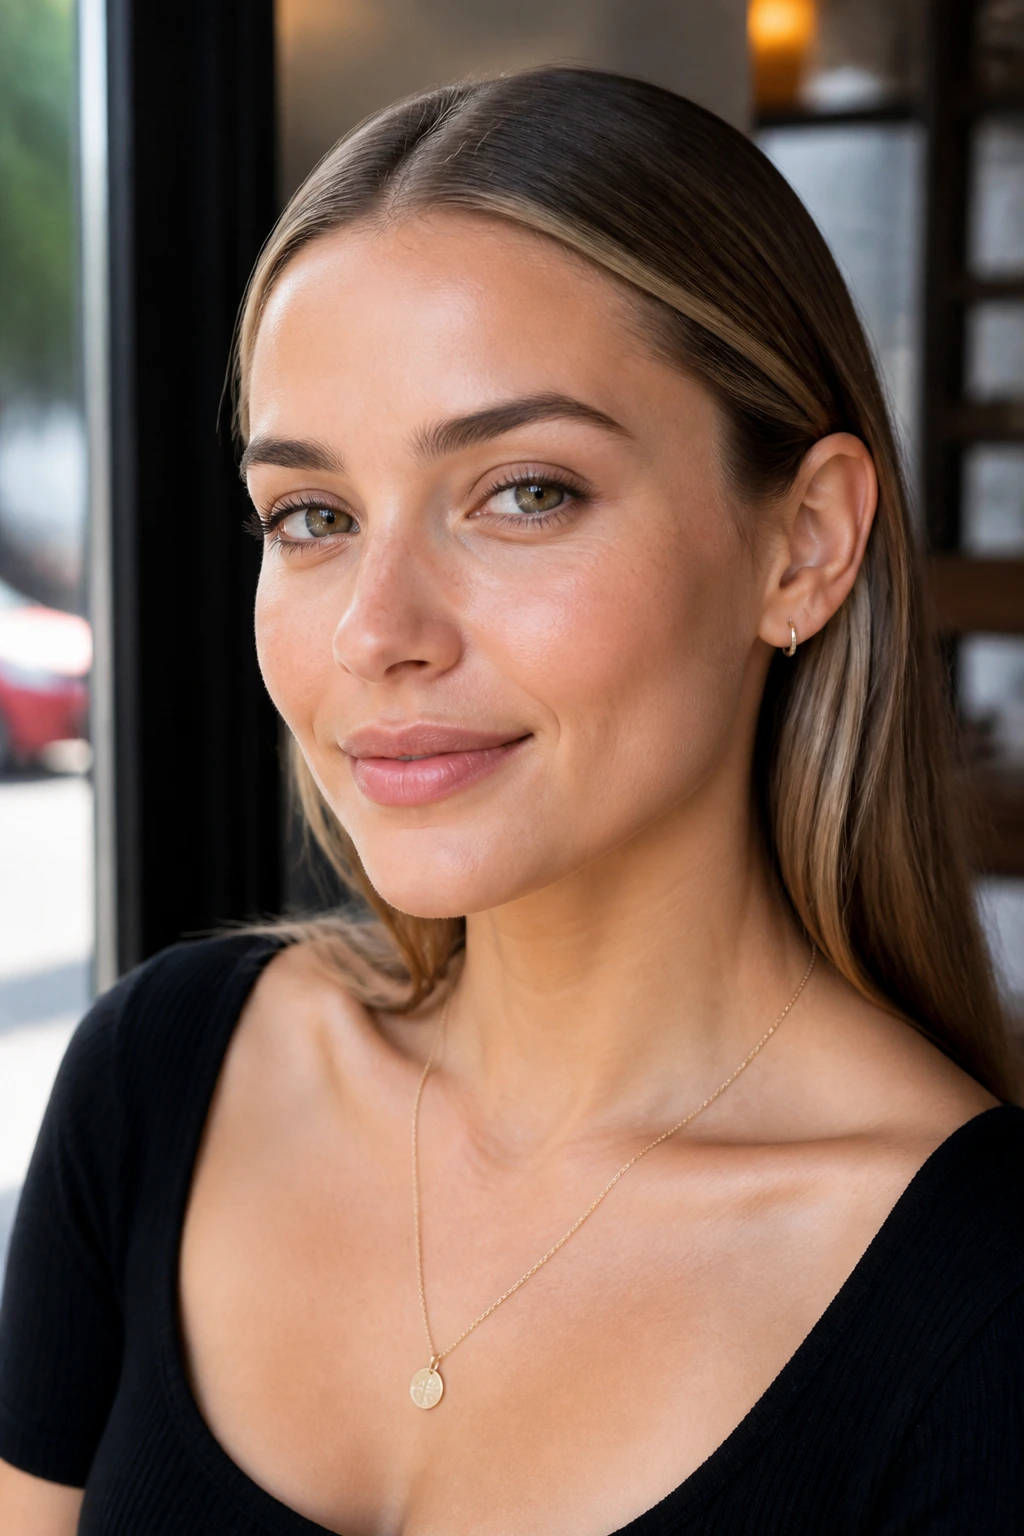
This one sounds almost too simple, which is why it works. Hair tucked behind the ears opens the face, shows the jawline, and puts the babylights right where people actually look: the temples, the front edges, and the part. On thin hair, you want the front to behave. This style makes the front behave.
The trick is to smooth the hairline without flattening the whole head. A tiny touch of serum or cream at the temples is enough. Too much and the hair sticks in strings, which is exactly the opposite of what you want. Keep the root area light. Keep the ends polished.
It’s a good style for earrings, collars, and sharp necklines. It also works on day-old hair better than you’d think, because the slight grit at the roots can help the tuck hold in place. Clean but not slippery. That’s the sweet spot.
9. Long V-Cut with Cool-Tone Dimension
A shallow V-cut gives long hair a little drama at the back without chopping the outline into pieces. On thin hair, the V should stay soft. If it gets too steep, the ends can look stringy. But done well, the point in the back makes the length feel longer and the babylights look more deliberate, especially in cool tones like ash, pearl, or soft beige.
What to watch for
Cool babylights can look sharp in the wrong cut and flat in the wrong light. The V-shape helps because it creates a directional finish; the eye follows the taper instead of getting lost in a straight wall of hair. That makes even fine strands feel more dimensional.
Ask for a gentle graduation, not a dramatic point. The back should still hold enough density to look like hair, not a ribbon. I’d keep the lightest pieces on the surface and around the face, then let the underside stay a shade deeper. That contrast keeps the cut from going transparent when it moves.
10. Bubble Ponytail with Polished Sections

If regular ponytails make your hair look smaller, bubbles are your friend. Each section gets a tiny puff, which tricks the eye into seeing more body than the ponytail actually has. Babylights help a lot here because they catch on every elastic break and make the sections look more textured.
Use clear elastics every 2 to 3 inches, depending on length. Gently tug each bubble outward with your fingers until it rounds out. Do not yank from the sides near the scalp. That’s how you end up with flyaways and a sagging crown. Keep the top smooth and the bubbles soft.
This style works best on medium-to-long lengths with a sleek top section. If your hair is very fine, a tiny bit of root lift at the crown makes the whole ponytail feel more secure. The finish is playful, but the base should still be clean.
11. Low Knot with Long Face Pieces
The low knot is a neat answer when you want the hair off your neck but don’t want to lose the illusion of length. A small knot at the nape keeps the shape controlled, while long face pieces soften the front. Babylights on those front strands make the style look lighter and less severe.
You want the knot to sit low and flat, almost oval in shape. A big messy knot on thin hair can look like the hair ran out before it got to the bun. Smaller and cleaner is better here. Use pins instead of trying to force it all into one elastic twist.
The face pieces should be long enough to skim the cheekbones or jaw. If they’re too short, they read as escape pieces instead of part of the style. Babylights on those pieces bring a little brightness to the front, which helps if the rest of the hair is a deeper shade.
12. Inward-Flipped Ends
A slight inward flip at the ends is one of the easiest ways to stop long thin hair from looking too stringy. It gives the perimeter a little curl under, which visually thickens the bottom edge. Babylights catch that bend and make the finish look smoother, almost like polished ribbon.
This is a better choice than a hard bend or a tight curl. Too much shape at the end can look dated fast, and on fine hair it can make the length feel shorter than it is. Keep it gentle. A round brush or flat iron pass with a tiny wrist turn is enough.
I like this on hair that’s been cut blunt or softly U-shaped. The flipped end gives the cut a little weight without stealing its line. And if the hair is color-treated, the babylights look richer when the ends turn slightly under. The shine sits along the edge instead of scattering.
13. Center Part with a Bright Money Piece
This is the high-impact version for people who want the front to do the talking. A center part keeps the frame balanced, while a brighter money piece around the face gives the style a clear focal point. On thin hair, that’s useful because you’re not relying on a thick, heavy mass for drama. You’re using placement.
The money piece should be brighter, yes, but not chunky. A few soft babylights around the face are enough to make the front read lighter and more open. The rest of the head can stay quieter. That contrast keeps the style from feeling overprocessed.
A blunt cut works especially well with this. The sharp hemline grounds the brighter front, and the whole thing looks edited rather than busy. If your face frame tends to separate from the rest of your hair, this is the version that keeps it all connected.
14. Braided Crown into Straight Lengths
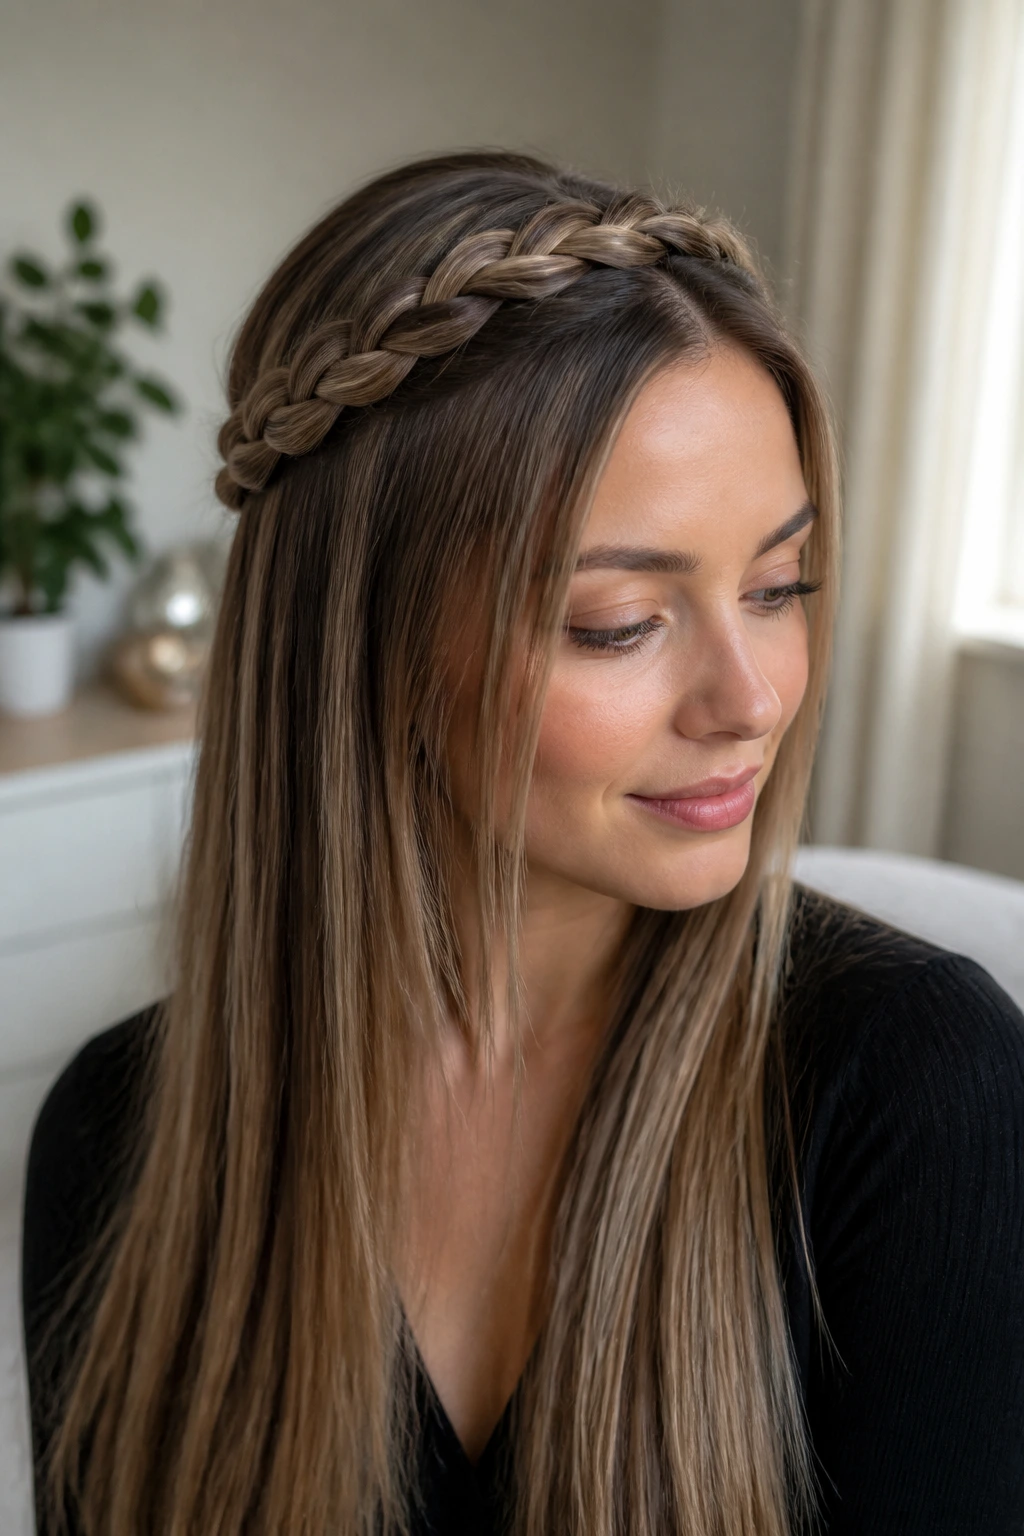
A narrow braid along the crown or hairline gives thin hair a little structure right where it needs it. The braid adds texture at the top, while the rest of the hair stays straight and sleek. Babylights peek in and out of the braid, which makes the color look more complex than it does when the hair hangs flat.
Keep the braid slim. If it gets wide, it can steal too much density from the top and leave the rest of the hair feeling sparse. A thin braid or even a small braided accent is enough. You’re adding detail, not building a helmet.
This style is especially good on second-day hair or on hair that refuses to hold volume at the crown. The braid disguises flat roots, and the straight length keeps the whole thing from feeling fussy. It’s tidy, but not stiff.
15. Wet-Look Lengths with a Mirror Finish
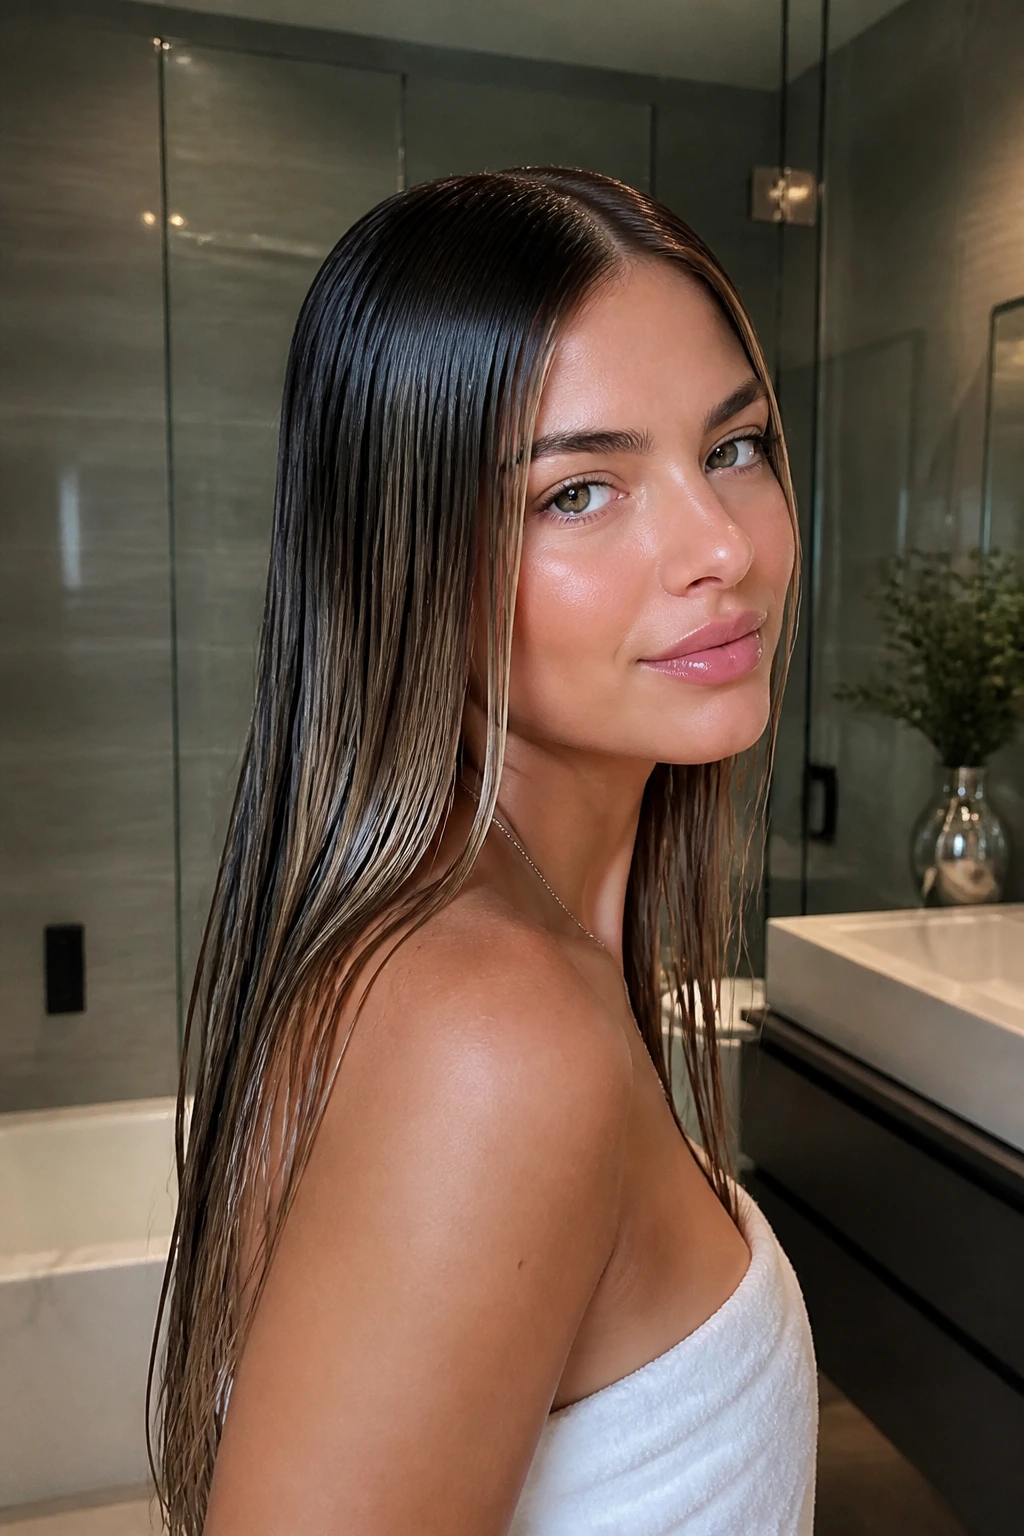
This look is not shy. It works because it leans into shine instead of pretending the hair has more lift than it does. A wet finish can make thin hair look intentional, especially when the babylights are fine and well placed. The light bounces off the surface and turns the color into something sleek and glossy rather than piecey.
Use a light gel or styling cream, then brush the hair into place with a wide-tooth comb or soft brush. Don’t drown the hair in product. That’s the fastest route to stringy ends and a greasy crown. The goal is a controlled sheen, not a drenched helmet.
This style looks strongest on blunt or softly layered lengths. If the ends are already fragile, trim them first. Wet shine has nowhere to hide. The good news is that it also hides nothing bad when the cut is clean.
16. Scarf-Tied Ponytail
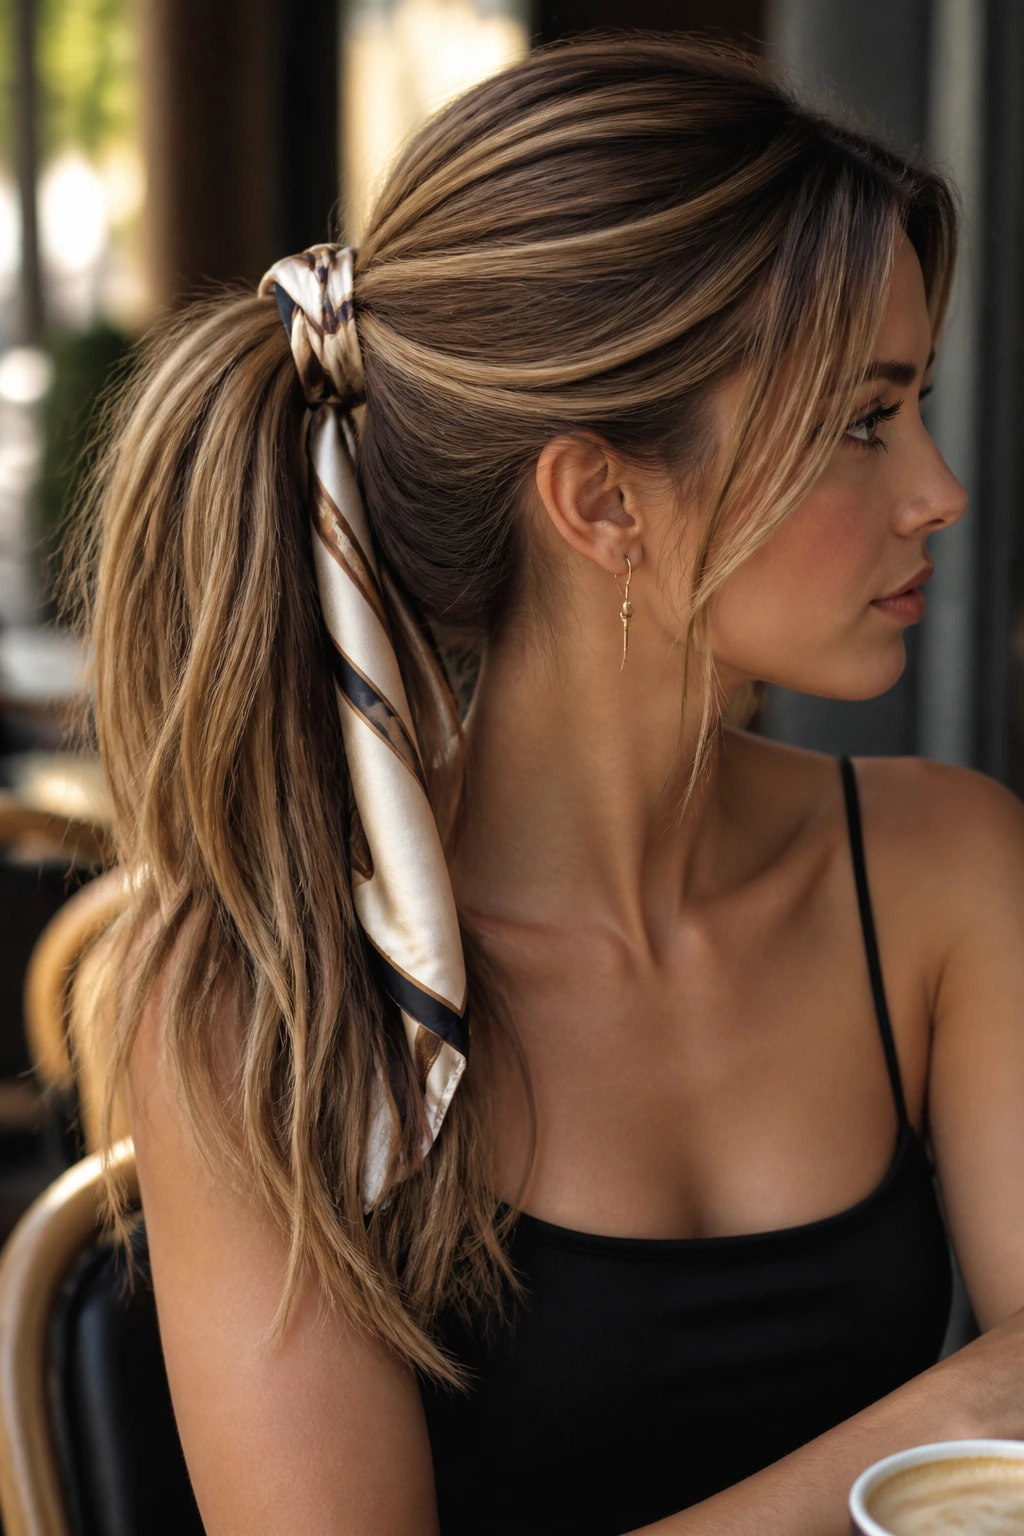
A scarf-tied ponytail is one of those styles that makes thin hair feel dressed on purpose. The scarf gives the ponytail a visual anchor, which is useful when the elastic alone would make the style feel too small. Babylights show along the tail and around the knot or wrap, where the fabric shifts and the color peeks through.
A silk or satin scarf is the cleanest choice. It slides less, causes less friction, and looks more controlled than a stiff cotton square. Tie it low and let the ends drape, or wrap it once around the base and knot it to one side. Both work.
This style is also kind to color. The scarf protects the length from rubbing against coats, collars, and bag straps. On long hair with babylights, that matters more than people think. The smooth surface gets scratched up fast if you wear it loose against rough fabric all day.
17. Half-Up Claw Clip Roll
The claw clip is back for a reason. A half-up roll gives the crown a little lift and leaves the lower length visible, which is exactly what thin hair needs if you want some structure without sacrificing the sleek look. The babylights on the top half show off the twist, while the bottom half keeps the line long.
Use a small to medium clip if your hair is fine. Oversized clips can swallow the hair and make the style feel loose in the wrong way. Twist the top half once, fold it up, and secure it low so the twist still shows. You don’t need a perfect roll. You need a secure one.
This style is forgiving on busy days because it doesn’t demand a fresh blowout. Slightly lived-in hair actually helps it hold. A little root texture gives the clip something to grab, and the babylights keep the top section from disappearing into the base color.
18. Feather-Soft U-Shape with Shadow Roots
This is the version for people who want softness without losing the sense of a full edge. A feather-soft U-shape gives the length a gentle curve, while a shadow root keeps the top darker enough that the babylights don’t wash out. That deeper root is a good thing on fine hair. It creates a frame for the lighter pieces instead of letting them float.
The underside of the hair should stay a touch deeper, too. That little bit of shadow under the surface gives the style depth when the hair moves. If everything is lifted all the way to the ends, thin hair can start looking transparent. A rooted look avoids that.
This cut grows out well, which matters if you do not want to trim every few weeks. The shape stays readable even when the edges soften. And because the babylights aren’t fighting a harsh root line, the color looks more expensive than busy.
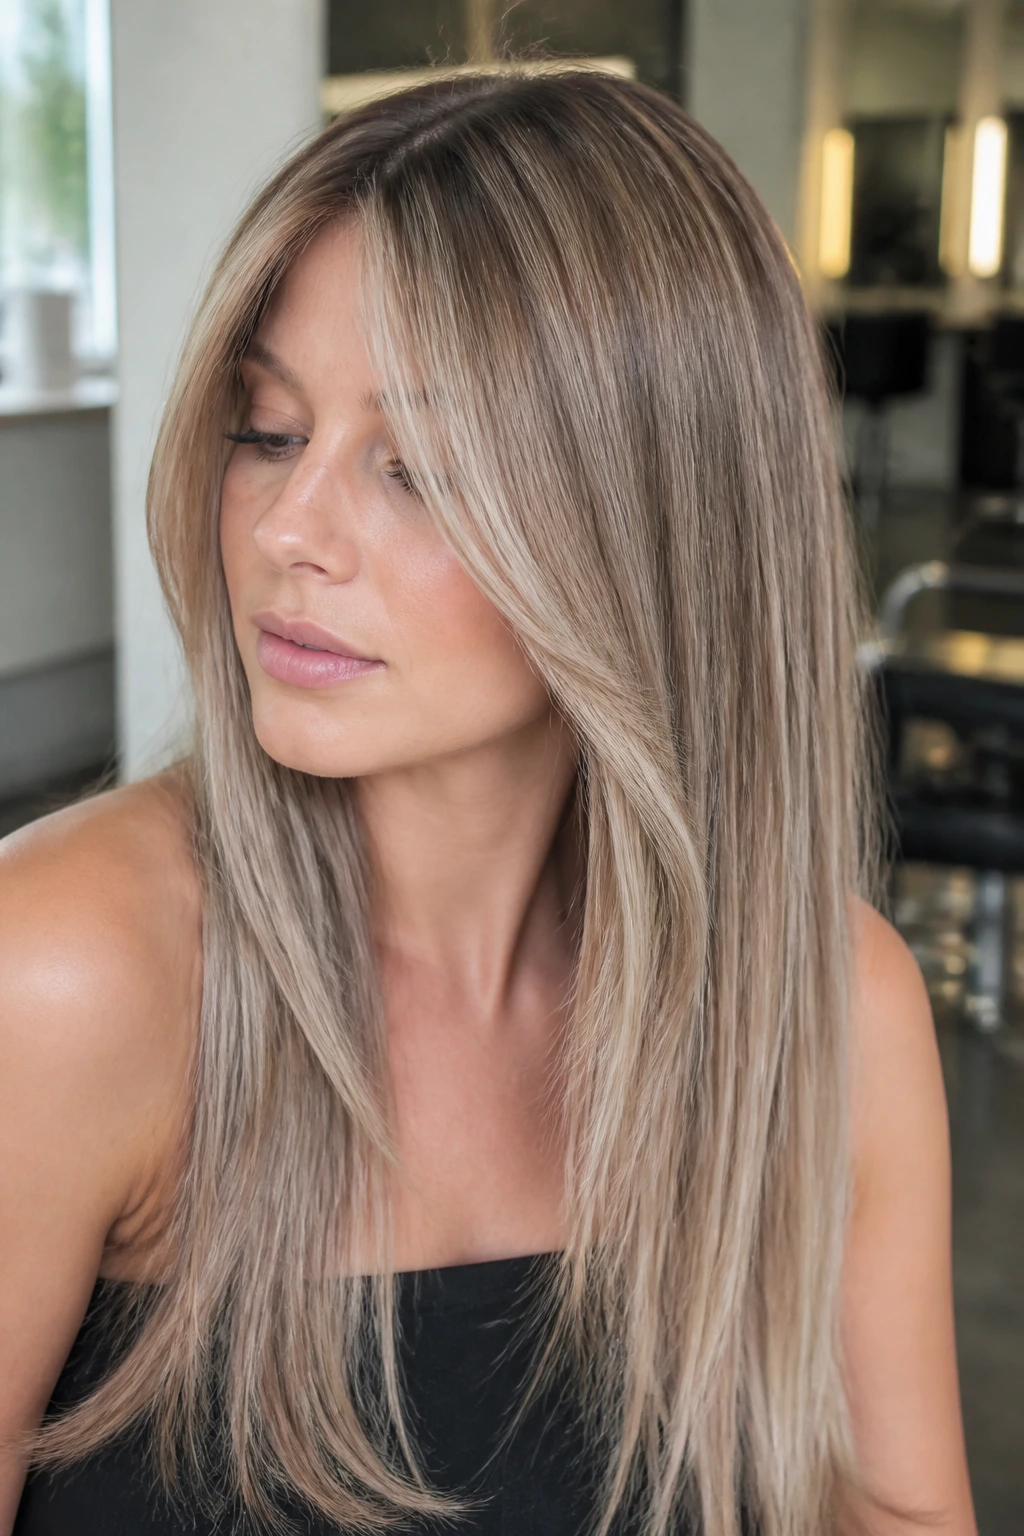
19. Curtain Bangs and Sleek Lengths
Curtain bangs can work on thin hair, but only if they’re kept airy and long enough to blend into the rest of the cut. Short blunt bangs can pull too much density from the front. Curtain bangs, on the other hand, give you movement around the eyes and cheekbones without stealing from the length.
The babylights should live through the fringe and face frame, where the hair splits and falls. That brightens the front and keeps the bangs from feeling heavy. The rest of the hair can stay sleek and quiet. The contrast is the whole story.
This is a good choice if your face needs a little softness around the forehead or if a center part feels too exposed. Curtain bangs break up the line just enough. Keep the ends of the bangs blended, though. Crisp bangs on thin hair can look chopped if they’re too blunt.
20. Side Ponytail with a Wrapped Base
A side ponytail shifts the whole look over one shoulder, which gives thin hair a sense of movement that a low center pony sometimes misses. The wrapped base keeps the elastic hidden, and the babylights sweep across the front so you can actually see the color instead of just knowing it’s there.
What I like here is the asymmetry. It gives the hair a bit more personality without needing extra volume. A slight lift at the crown, a smooth sweep to one side, and a neat wrap at the base are enough. Don’t over-tease. That just makes the crown rough.
This style is especially useful with collars, off-shoulder tops, or sharp necklines because it leaves the face open and the length obvious. If the hair is too straight and stiff, add a whisper of bend through the tail. It helps the babylights move.
21. Tapered Ends with a Glossy Finish
A tapered finish can work on thin hair if the taper is gentle. Too much taper and the ends disappear. Too little, and the style loses movement. The middle ground is a soft, neat narrowing that keeps the length sleek but not blocky. Babylights through the mid-lengths and ends help the taper look intentional instead of thin.
How to get the balance right
Ask for a conservative taper, not a dramatic point. The perimeter should still look full when the hair is straight. What you’re after is a soft finish that moves easily and doesn’t look heavy at the bottom. A gloss spray or a pea-sized serum at the ends can help the babylights catch the light without coating the whole head.
This is a good option if your hair holds shape well but gets bulky at the ends. The taper cleans that up while the gloss keeps the color visible. It’s subtle. It’s tidy. It doesn’t ask for much.
22. Minimalist Low Bun with Long Face Pieces

The last look is the quiet one, and sometimes that’s the smartest move. A minimalist low bun keeps the hair secure and sleek, while long face pieces prevent the style from feeling too severe. Babylights on the face pieces and around the bun’s outer edge keep the whole shape from disappearing into one dark knot.
Pin the bun flat and low at the nape. If you twist it too tightly, it shrinks. A small oval shape looks better on thin hair than a tight round one, because it gives the eye a little more surface to read. The face pieces should be smooth, not curled into little tendrils unless that’s the point of the rest of your styling.
This is a good style when you need polish without a lot of effort. It works with office clothes, evening clothes, and the “I need my hair off my neck” mood. The babylights are subtle here, but that’s exactly why the style holds together.
What Makes the Color Look Thicker, Not Just Lighter
Babylights on thin hair need a smarter map than chunky highlights ever did. The goal is not brightness everywhere. It’s movement in the places people notice first. Around the part. Across the front. Through the upper mid-lengths. That placement gives the illusion of more hair because the eye keeps finding new points to rest on.
A few lowlights can help too, especially if the base is very pale or the hair has been lightened a little too far. I like them underneath the surface, not over the top. They give the lighter strands something to sit against. Without that shadow, babylights can look airy in the wrong way and the whole style starts to feel washed out.
Cut and color should work as a pair. A blunt line holds the edge; babylights soften the surface. A U-shape bends the silhouette; lighter ribbons keep it from turning heavy. If one side of that equation is off, the other one has to work too hard. That’s where thin hair starts looking tired.
Essential Tools for These Looks
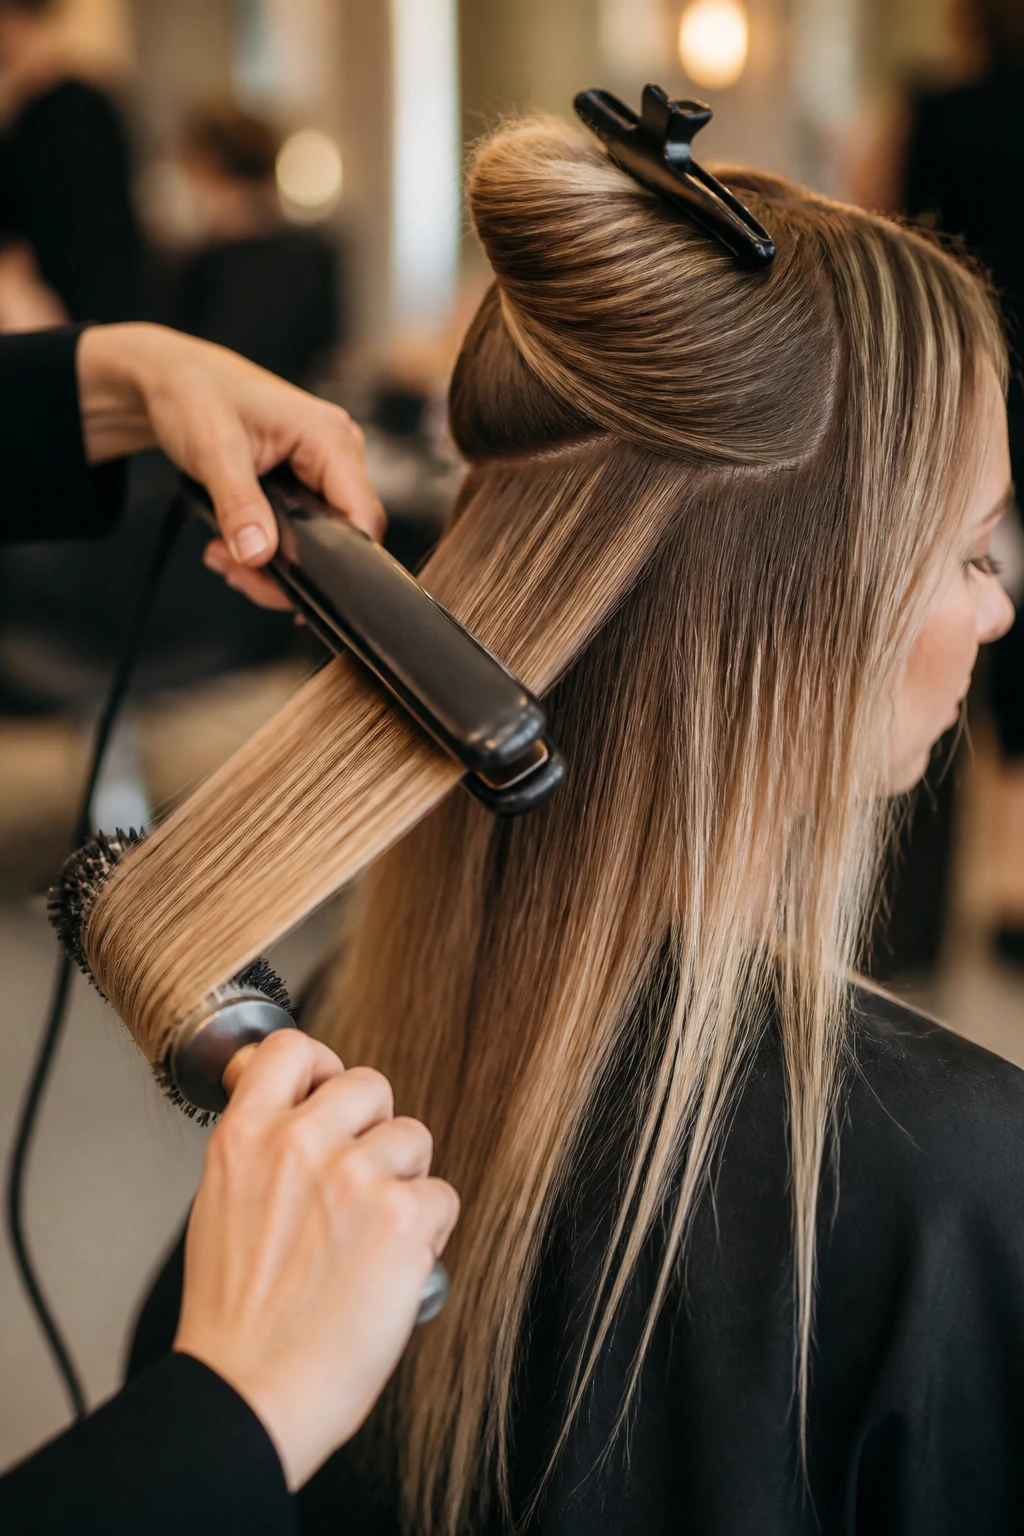
- Flat iron with adjustable heat: Keep it around 300°F to 320°F for fine hair; higher heat is usually overkill.
- Blow dryer with a concentrator nozzle: Helps stretch the roots smooth without blasting the cuticle in every direction.
- 1.5-inch round brush: Good for a polished bend at the ends and a little lift at the crown.
- Tail comb: Useful for clean parts and neat sectioning, especially on center-part and side-part styles.
- Sectioning clips: Keep the hair organized while you blow-dry or flat-iron.
- Lightweight heat protectant: Fine hair needs protection, but not a heavy cream that leaves residue.
- Mousse or root-lift spray: Best applied at the crown before blow-drying, where thin hair usually needs the most help.
- Boar-bristle or mixed-bristle brush: Smooths the top without pulling too much oil down the length.
- Clear elastics: Ideal for ponytails, bubble sections, and wrapped bases.
- Bobby pins: Small pins are better than giant clips when you’re building low buns or twists.
- Medium-hold hairspray: A light mist holds the shape without making the hair stiff.
- Silk scarf or satin scrunchie: Helps with ponytails and overnight protection.
How to Choose the Right Version for Your Hairline and Density
A good cut on thin hair starts with honesty. If your strands are fine but you have a decent amount of them, you can usually handle more movement through the mids. If your hair is fine and sparse, go blunter, keep the shape cleaner, and let the babylights do the visual work. Those are not the same hair type, and they should not be styled the same way.
If your crown lies flat
Reach for a deep side part, a half-up twist, or a low pony with a little root lift. The crown needs air, not weight. Avoid heavy creams near the top. They drag everything down by lunch.
If your ends are see-through
Choose blunt one-length hair, a soft U-shape, or a low knot with face pieces. The point is to keep the bottom edge readable. A sharp line at the hem can do more for fullness than another layer ever will.
If your face frame needs help
Money pieces, curtain bangs, and tucked-behind-ear styles all bring light to the front without requiring more hair. That front zone matters. It’s where babylights can look bright without taking over the whole head.
If your color is too light already
Ask for a rooted finish or a few lowlights underneath. Thin hair often looks better with some shadow in the mix. Too much light from root to tip can make the surface look floaty instead of full.
Practical Moves for More Lift, Shine, and Hold
- Start at the root, not the ends: Mousse or root spray belongs at the crown and along the part, because that’s where thin hair collapses first.
- Dry the hair in the direction you want it to sit: If you want a side part to hold, blow-dry the roots that way and clip them while they cool.
- Use less oil than you think: One drop of serum can be enough for fine hair. More than that and the babylights start to look greasy instead of glossy.
- Keep heat moderate: Fine hair usually looks smoother at 300°F than it does at a scorching setting that leaves the cuticle rough.
- Refresh the part every few days: Shifting it a half inch keeps the roots from flattening into one groove.
- Trim before the ends go ragged: A clean edge always reads thicker than a damaged one.
And one blunt truth: long thin hair does not need more product. It needs more shape. That’s the difference between hair that sits there and hair that looks finished.
Common Mistakes That Make Thin Hair Look Thinner
- Over-thinning the perimeter: If the ends are sliced to pieces, the whole length turns see-through. Ask for a blunt hem or a very soft U-shape instead.
- Using babylights that are too chunky: Thick highlight panels can expose the scalp and make fine hair look patchy. Micro-fine placement keeps the color soft.
- Drowning the hair in serum: Too much oil turns sleek hair into limp hair fast. Use a tiny amount on mids and ends only.
- Slicking the crown too hard: A too-tight flat style exposes the scalp and flattens the root. Keep a little lift at the crown, even in a ponytail.
- Ignoring the underneath: If the top is bright but the underlayers are all light too, the style can go hollow. A little shadow underneath helps a lot.
- Skipping trims because the length is precious: A ragged, transparent end makes long hair look thinner than a fresh shorter edge ever will.
The fix is rarely complicated. Usually it’s a cleaner cut, a softer highlight map, and a bit less product than your hand wants to use.
Variations and Adaptations to Try
Honey Ribbon Blend
This version leans warm, with honey and beige babylights layered over brunette or dark blonde hair. It works well if cool tones make your skin look washed out or if you want the hair to feel softer around the face. Keep the roots a touch deeper so the light pieces have some contrast to sit against.
Cool Pearl Sheen
Pearl, ash, and soft beige babylights give the hair a crisp, cool finish that reads clean in straight styles. It’s a good match for blunt cuts and center parts because the color itself brings the polish. Use a glossing serum sparingly so the cool tone stays crisp, not oily.
Shadow-Root Save
If your hair is already lightened, a shadow root can rescue the fullness. The darker base near the scalp keeps babylights from floating and gives thin hair a stronger top line. This is the version I’d pick for people who want lower maintenance between salon visits.
Office-Ready Sleek
This one is about restraint. A low pony, tucked-behind-ear length, or minimalist low bun keeps the shape neat and easy to wear with sharper clothes. Keep the finish smooth, but do not chase absolute perfection; a little softness around the face keeps the style from feeling stiff.
Editorial Wet Finish
For nights out or fashion-forward moments, go with a wet-look length, side part, or low bun with shine. The babylights show through the gloss and give the hair a more expensive surface. Use this when you want the style to feel deliberate rather than casual.
Keeping Babylights Fresh and Hair Smooth Between Washes
Babylights stay prettier when the hair underneath them is cared for like fine fabric. That means fewer rough washes, fewer hot passes, and a little more restraint with heavy products. If your scalp gets oily fast, wash every 2 to 3 days and use dry shampoo at the roots on day two, not on the mids where it can leave a chalky haze.
For color, a gloss or toner refresh every 6 to 8 weeks keeps the babylights from looking brassy or dull. If the root shadow is part of the look, you can usually stretch the salon visit longer. A trim every 8 to 10 weeks helps the ends stay blunt or softly shaped, which matters a lot more on thin hair than people think.
Night care is simple. Sleep on a silk pillowcase, or tie the hair in a loose silk scrunchie so the lengths don’t rub against each other. If you wore a blowout, a soft low twist or a loose pony before bed keeps the crown smoother for the next morning. When you reheat the hair, keep the iron moving and stay near 300°F unless your hair is unusually coarse. Fine hair burns down fast. It doesn’t need much.
Frequently Asked Questions
Do babylights really make thin hair look thicker?
They can, if the placement is smart. Babylights add fine points of light and shadow, which makes the eye see more texture across the head. They work best when the cut keeps the perimeter full instead of shredded.
Is a blunt cut better than layers for long thin hair?
Most of the time, yes. A blunt edge gives the hair a stronger line, while too many layers can make the ends look sparse. If you want movement, a shallow U-shape or hidden internal layers are safer than obvious face-framing chops.
Should I ask for lowlights too?
If your hair is very light or heavily highlighted, a few lowlights can help. They add shadow under the babylights and stop the style from looking washed out. On darker hair, you may not need them at all.
What if my center part shows too much scalp?
Shift the part a little off-center, add root-lift spray before blow-drying, and clip the roots while they cool. A center part only looks harsh when the top is too flat. A little lift changes the whole thing.
Can these styles work on naturally wavy hair?
Yes, but the finish matters. Blow-dry the roots smooth first, then decide whether you want a glass finish, a soft bend, or a ponytail. Wavy hair often looks best when the top is sleek and the ends are only lightly shaped.
How often should I trim long thin hair with babylights?
Every 8 to 10 weeks is a good target if you want the ends to stay full. If the hair grows fast and the perimeter starts to look see-through sooner, trim sooner. Thin hair shows wear faster than thick hair does.
Are extensions necessary to pull off these looks?
No. In fact, many of these styles look better on real thin hair than on badly matched extensions. If you do add pieces, they need to be placed and colored carefully or the contrast will give the whole game away.
What’s the easiest style here if my hair goes flat fast?
The low ponytail with a wrapped base, the half-up twist, and the side ponytail are the most forgiving. They create structure at the root and keep the length neat without asking the crown to do all the work.
The Shape That Thin Hair Likes Best
Thin hair does not need to be bullied into looking bigger. It needs a line it can hold and color that gives the eye something to follow. Babylights are useful because they add motion without obvious stripes, and sleek styling is useful because it gives the ends a shape they can keep.
Pick the version that respects your density. If the ends are fragile, go blunt. If the crown is flat, move the part. If the face needs brightness, bring the babylights forward. Small decisions. Big difference.
And if you only try one thing, make it this: choose the cut first, then ask for babylights that support it rather than fight it. That’s the version of long sleek hair that keeps its nerve all day.