Caramel highlights on natural hair can look like sunlight caught inside a coil pattern. They can also look muddy, orange, or oddly stripey if the placement is off by even a little. That’s the part people underestimate. The color itself is only half the story; the other half is how it sits on shrinkage, porosity, and the way curls stack on top of each other.
Natural hair with caramel highlights works best when the shade respects the base instead of fighting it. A deep espresso coil doesn’t need pale blonde ribboning to feel lighter. It needs warmth with enough depth to keep the curl definition intact, and enough contrast that the color still shows when the hair dries and tightens up. That sweet spot is narrower than it looks, which is why some caramel looks read rich and others read brassy.
The ideas below move from subtle to bold, from twist-outs and wash-and-gos to puffs, locs, and braids. Some are for people who want one bright front section and a quiet back. Others lean into chunky streaks, rooted melts, or barely-there glow. Different personalities. Same core rule: the best caramel always looks like it belongs there.
Why This Collection Feels Different
- Shrinkage matters here: A highlight that looks dramatic on blown-out hair can disappear into tight coils, so these ideas are built around how natural hair actually moves and contracts.
- Warmth gets more flexible than blonde: Caramel sits between gold and brown, which means it can flatter dark bases without forcing the whole head lighter than it needs to be.
- Placement changes the whole mood: A front money piece, a halo, and an ombré end treatment are all caramel, but they read like different hairstyles once the curls dry.
- Low-maintenance options are included: Not every caramel look has to involve a full-head bleach session; some of the prettiest versions rely on ribbons, peekaboo panels, or color added to extension hair.
- There’s room for texture, not just color: These ideas are chosen because they work with twist-outs, braid-outs, puffs, locs, coils, and silk presses instead of flattening everything into one look.
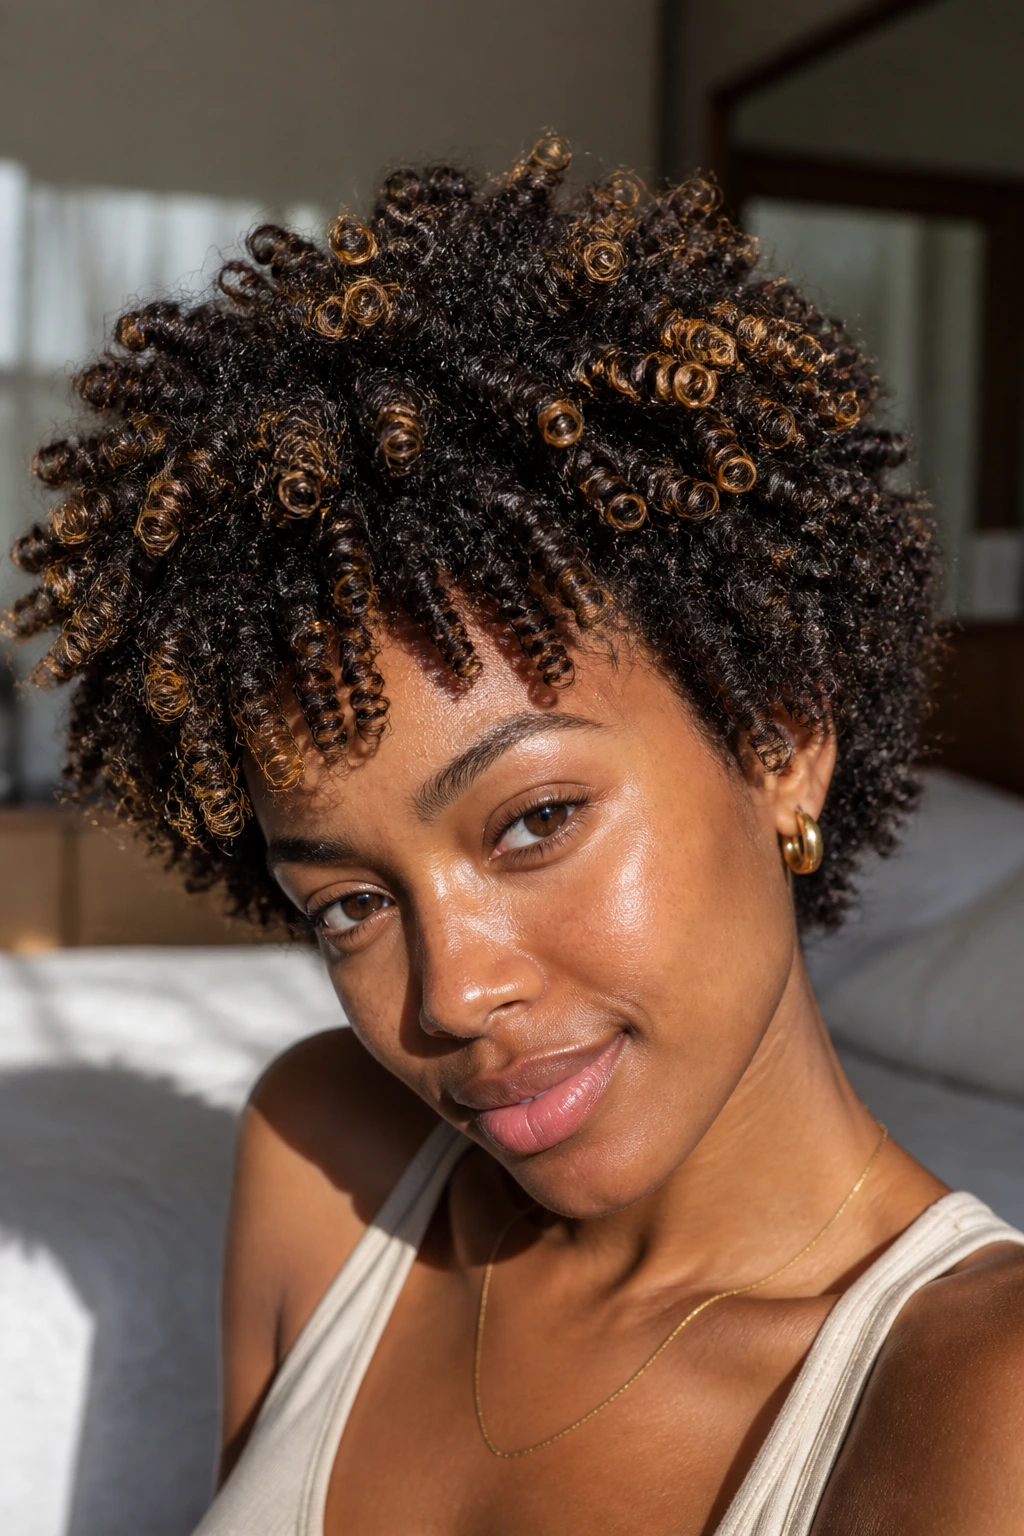
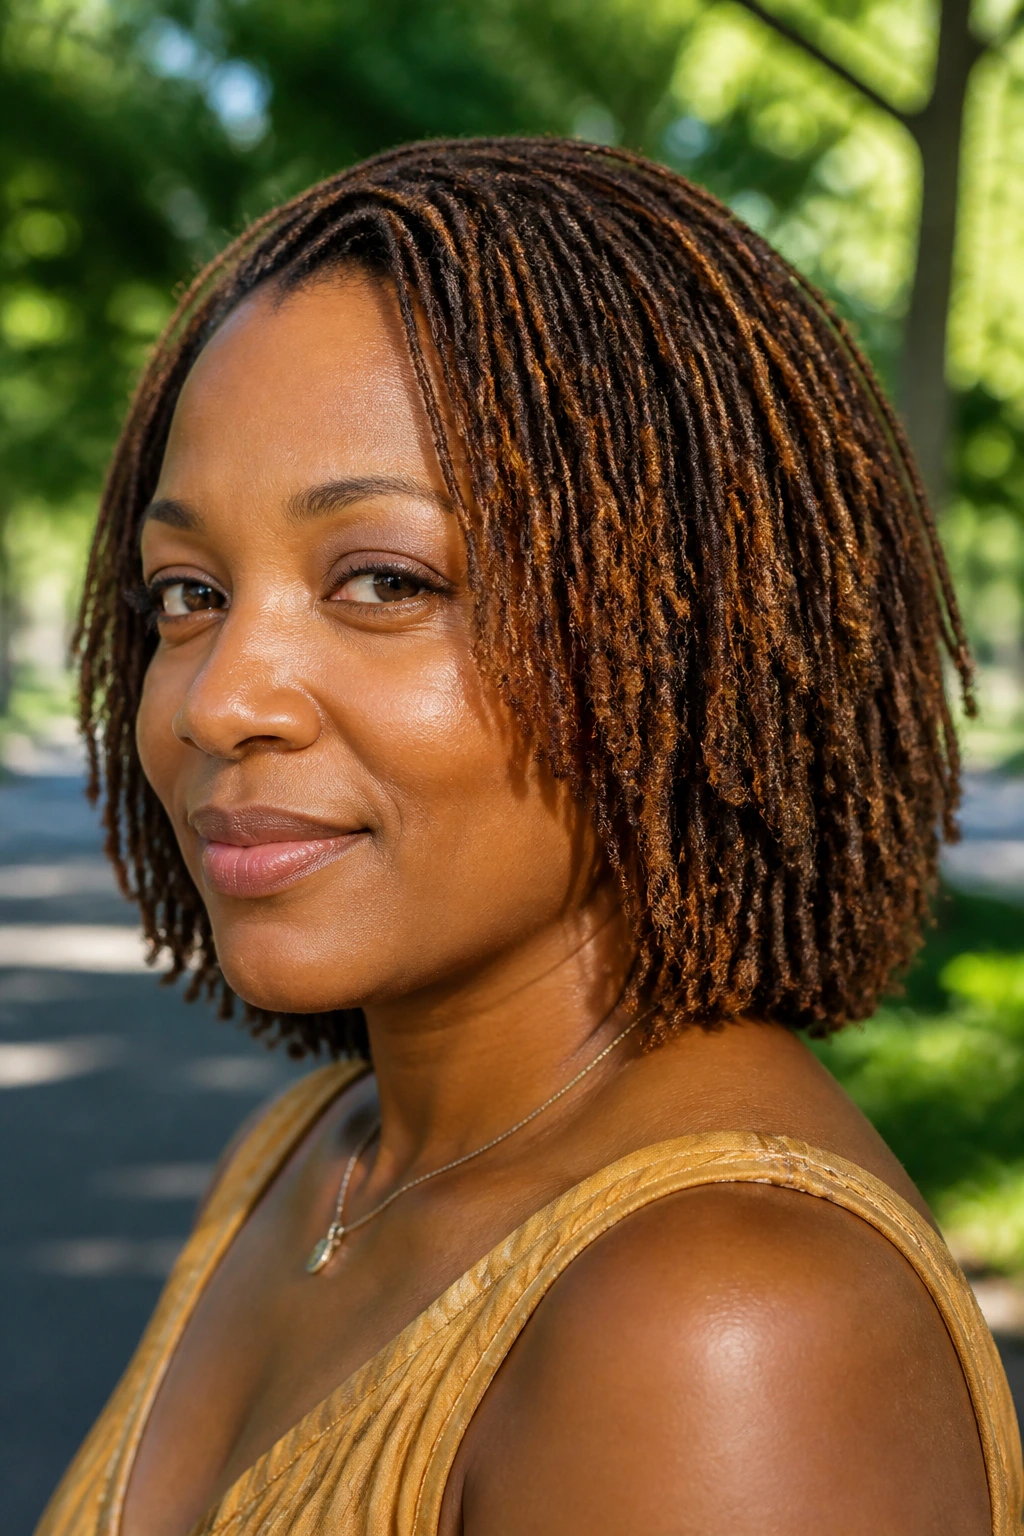
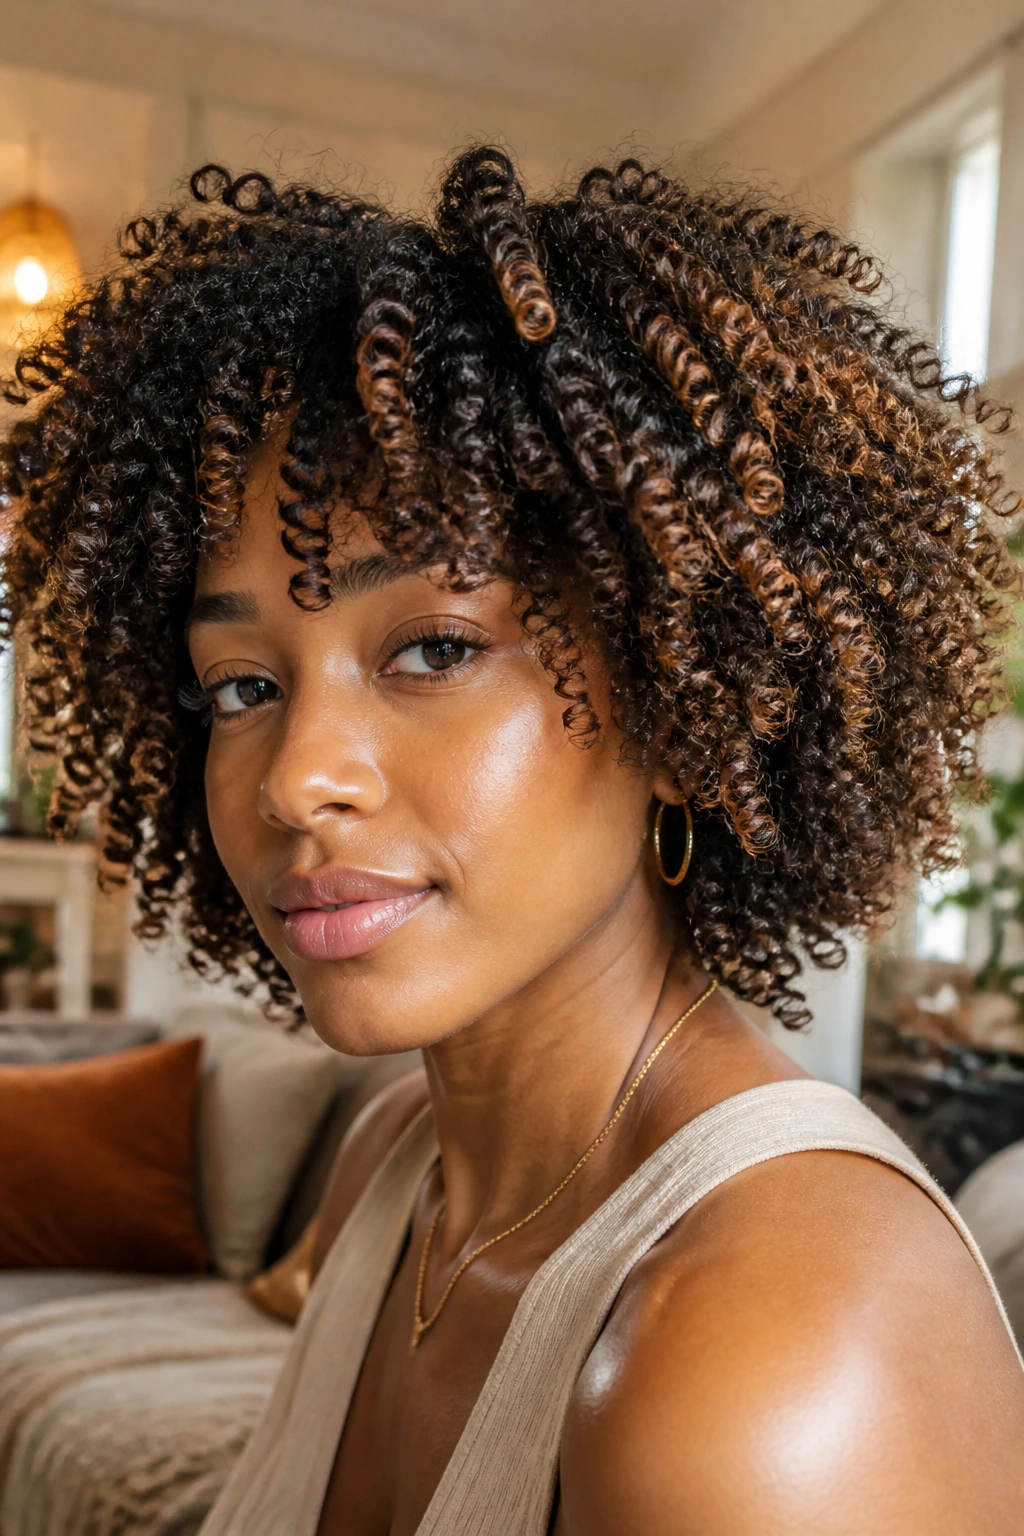
1. Soft Caramel Ribbons on a Twist-Out
Soft ribbons work because a twist-out already breaks the hair into defined ropes, and caramel only needs a few visible paths to do its job. Keep the highlights thin and scattered through the outer layers, especially around the crown and temples, where the color catches when the hair moves. If the ribbons are too wide, they stop looking airy and start looking like stripes.
My bias: this is one of the best starter looks for natural hair with caramel highlights. It gives movement without asking you to commit to a loud color story, and it still shows up after the twist-out settles for day two and day three. Ask for hand-painted pieces one to two levels lighter than your base, not a full blonde lift. The result should feel warm, soft, and a little sun-touched.
Best on: shoulder-length twist-outs with layers.
Avoid: placing every ribbon at the exact same distance apart.
2. Face-Framing Money Pieces on Coils
If you want brightness near your face and nothing else, this is the cleanest move. The front sections carry the whole look, so a few caramel pieces around the hairline, temples, and front curl line can change the feel of the entire style. On tight coils, that front contrast reads fast.
What I like here is the simplicity. You don’t need a lot of color to get a real shift in the way the face is framed. Keep the back darker and let the front pieces do the talking, especially if your hair already has good density. It’s also one of the easier placements to grow out quietly, which matters when you’re trying to avoid constant upkeep.
3. Caramel Balayage on a Blowout
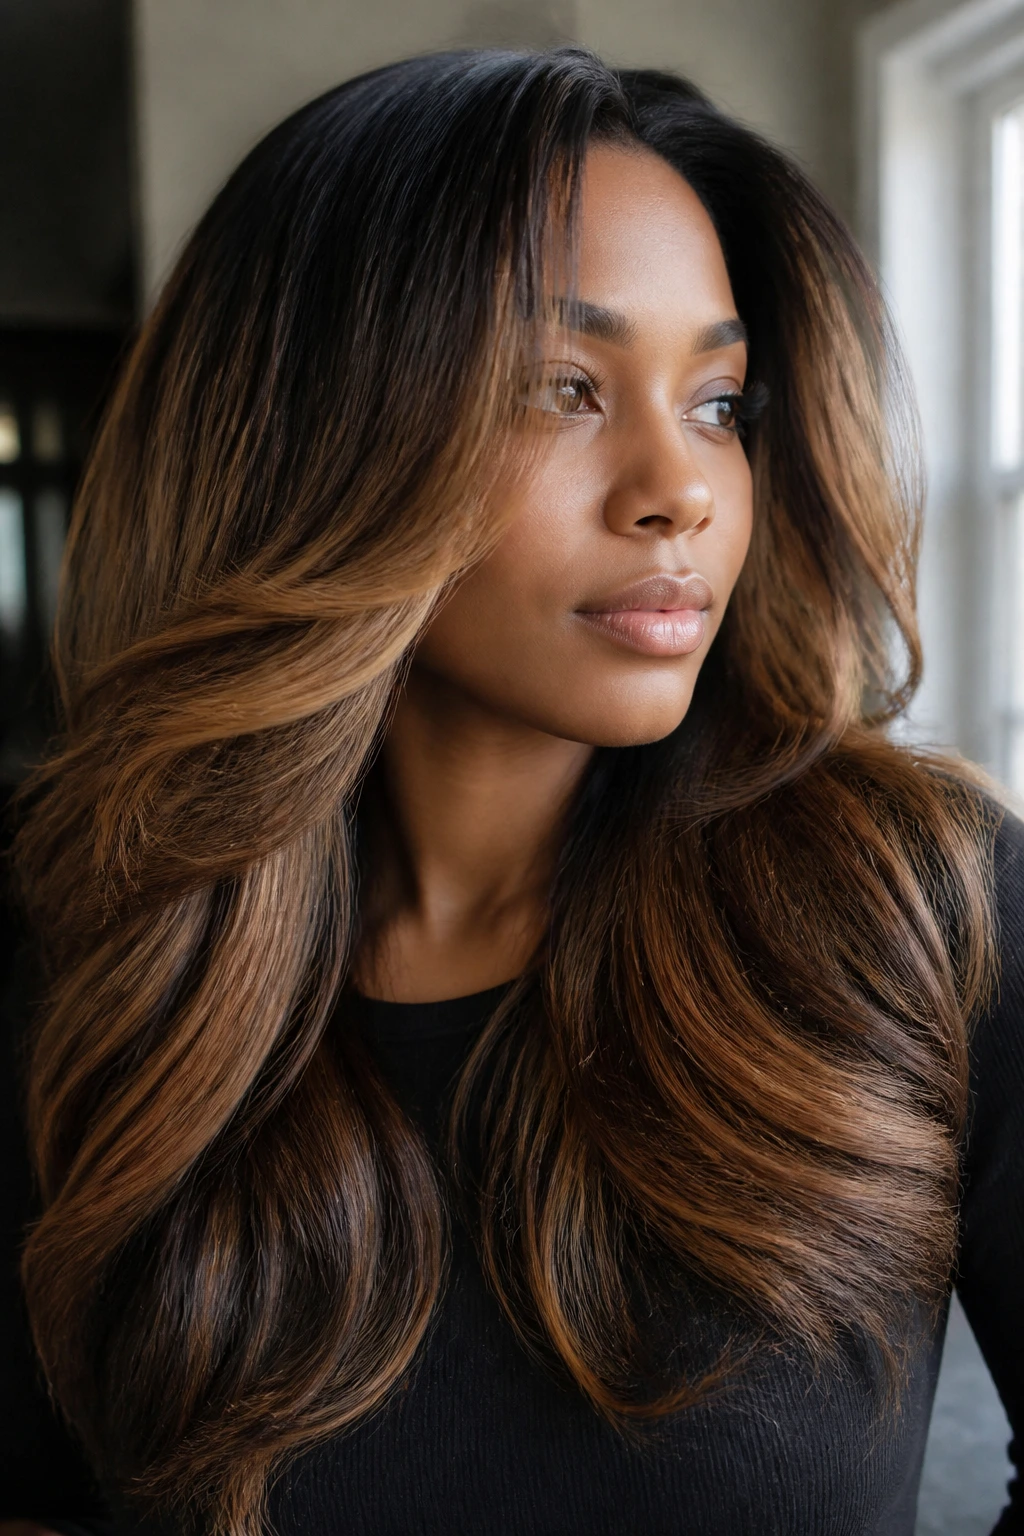
Blowout hair gives caramel more surface area, so the hand-painted pieces can drift through the lengths instead of hiding inside a curl clump. That’s why balayage on natural hair often looks more expensive after a good stretch or silk press than it does on wet hair. The color sits on the curve of the hair instead of getting swallowed by shrinkage.
This is the look for someone who wears their hair both stretched and curly. When the hair is blown out, the ribbons show in long strokes. When it’s washed and set back into coils, the same color turns softer and more blended. Ask for a rooted balayage with the brightest pieces starting below the cheekbone so the regrowth line stays gentle.
4. Toffee Ombré Ends on a Wash-and-Go
Why does ombré work so well on curls? Because the bottom third of the hair is already where the eye lands first. A wash-and-go with toffee ends keeps the roots rich and dark, then lets the color open up toward the bottom like the hair is catching late-afternoon light.
This is one of those looks that makes sense on dense curls, especially when the curl pattern is tight enough that the color breaks up naturally. You don’t need to lighten the whole head to get dimension. Just let the ends carry the warmth. It’s also a good choice if you like wearing your hair down most of the time, because the color becomes more visible with movement than with a static part.
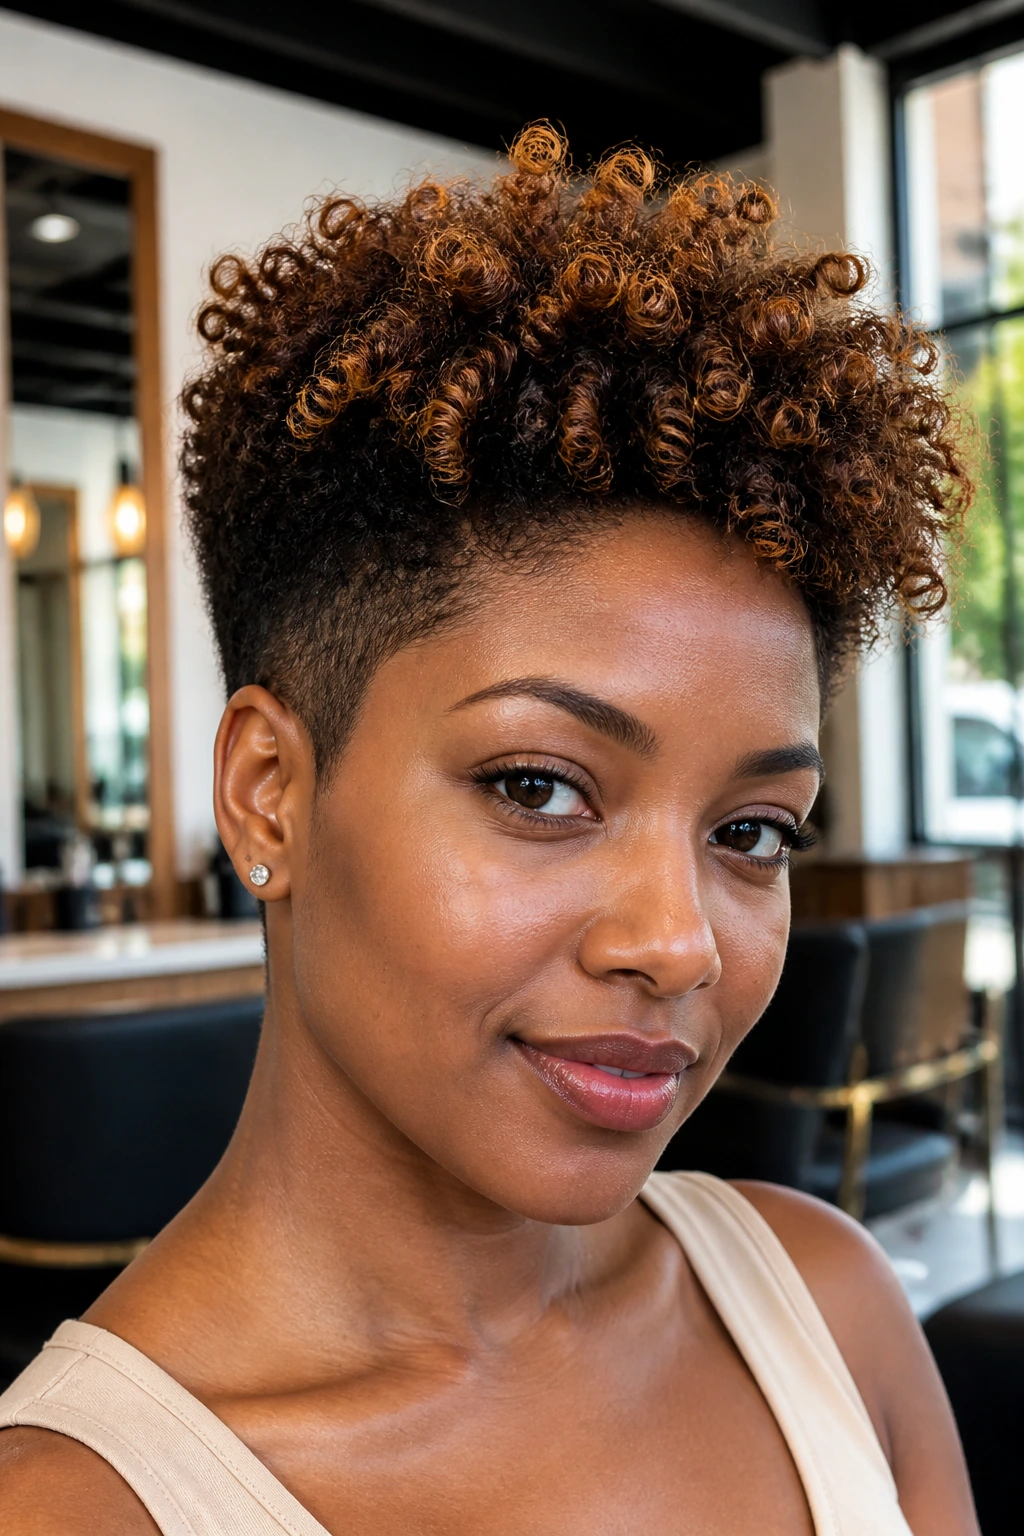
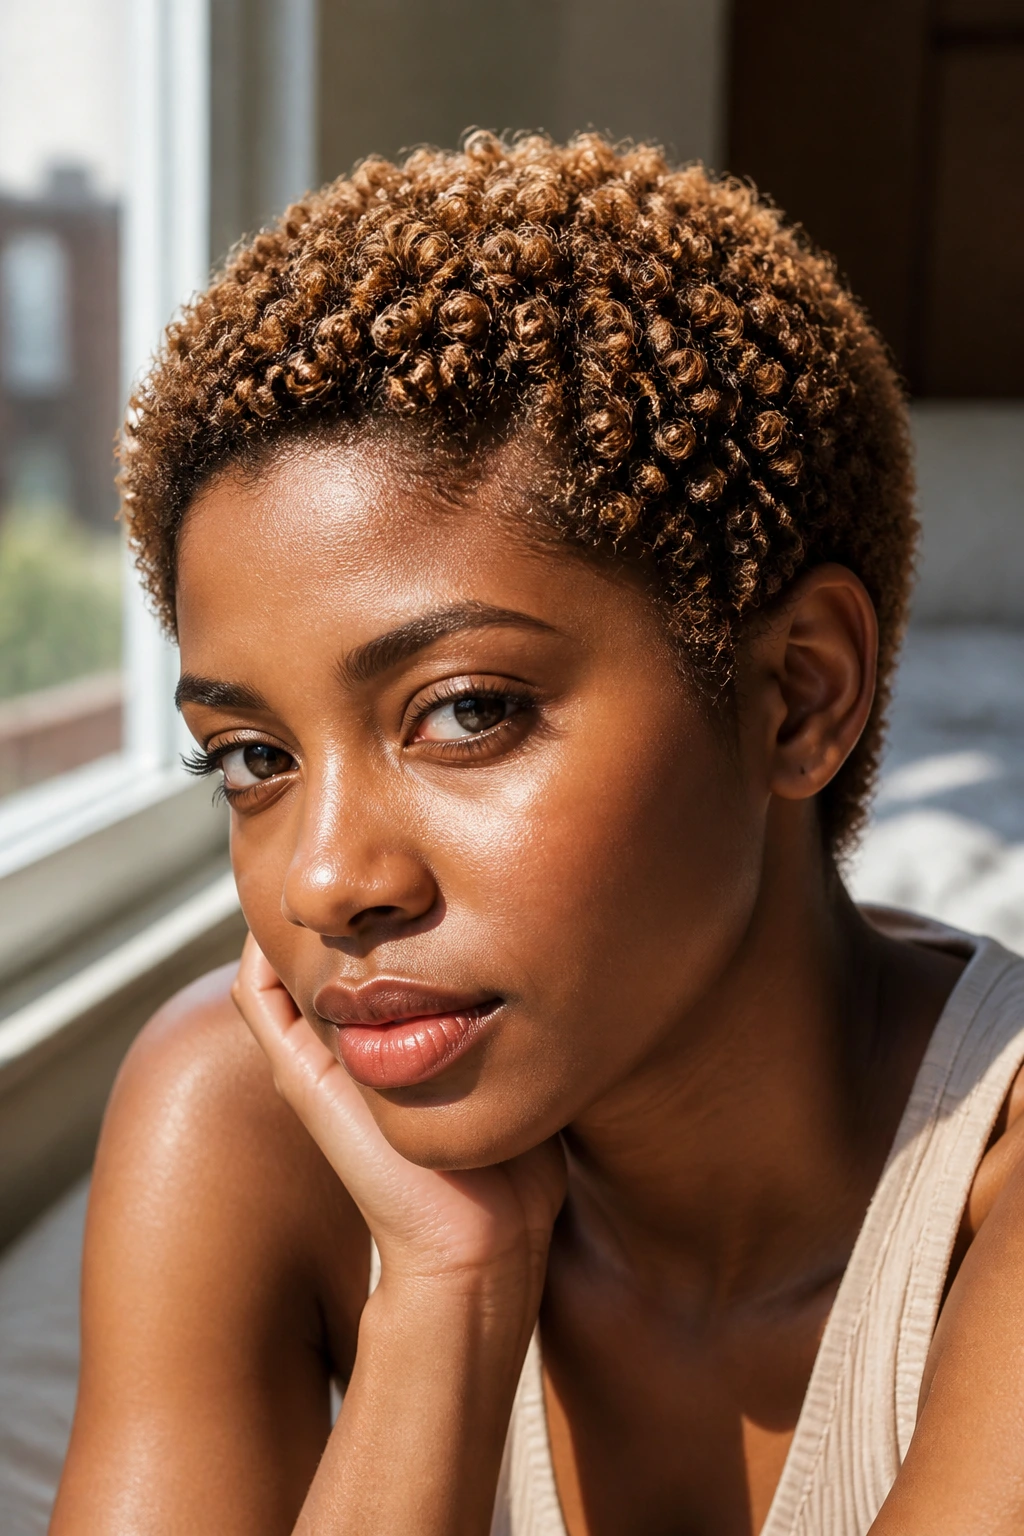
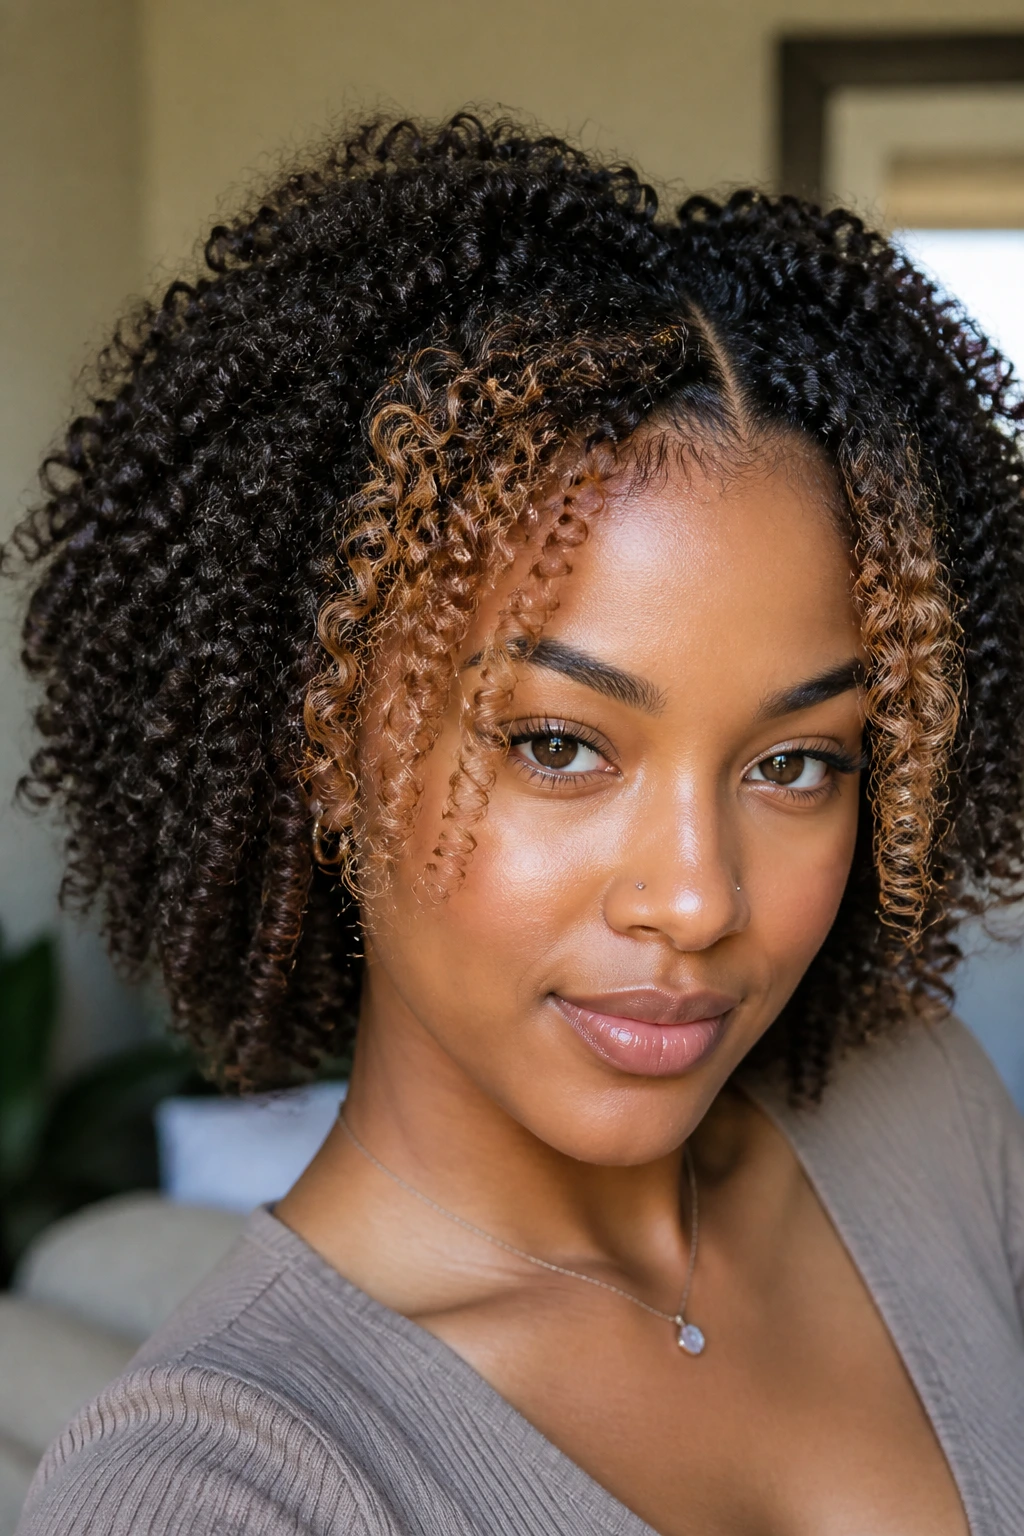
5. Cinnamon-Caramel Highlights on a TWA
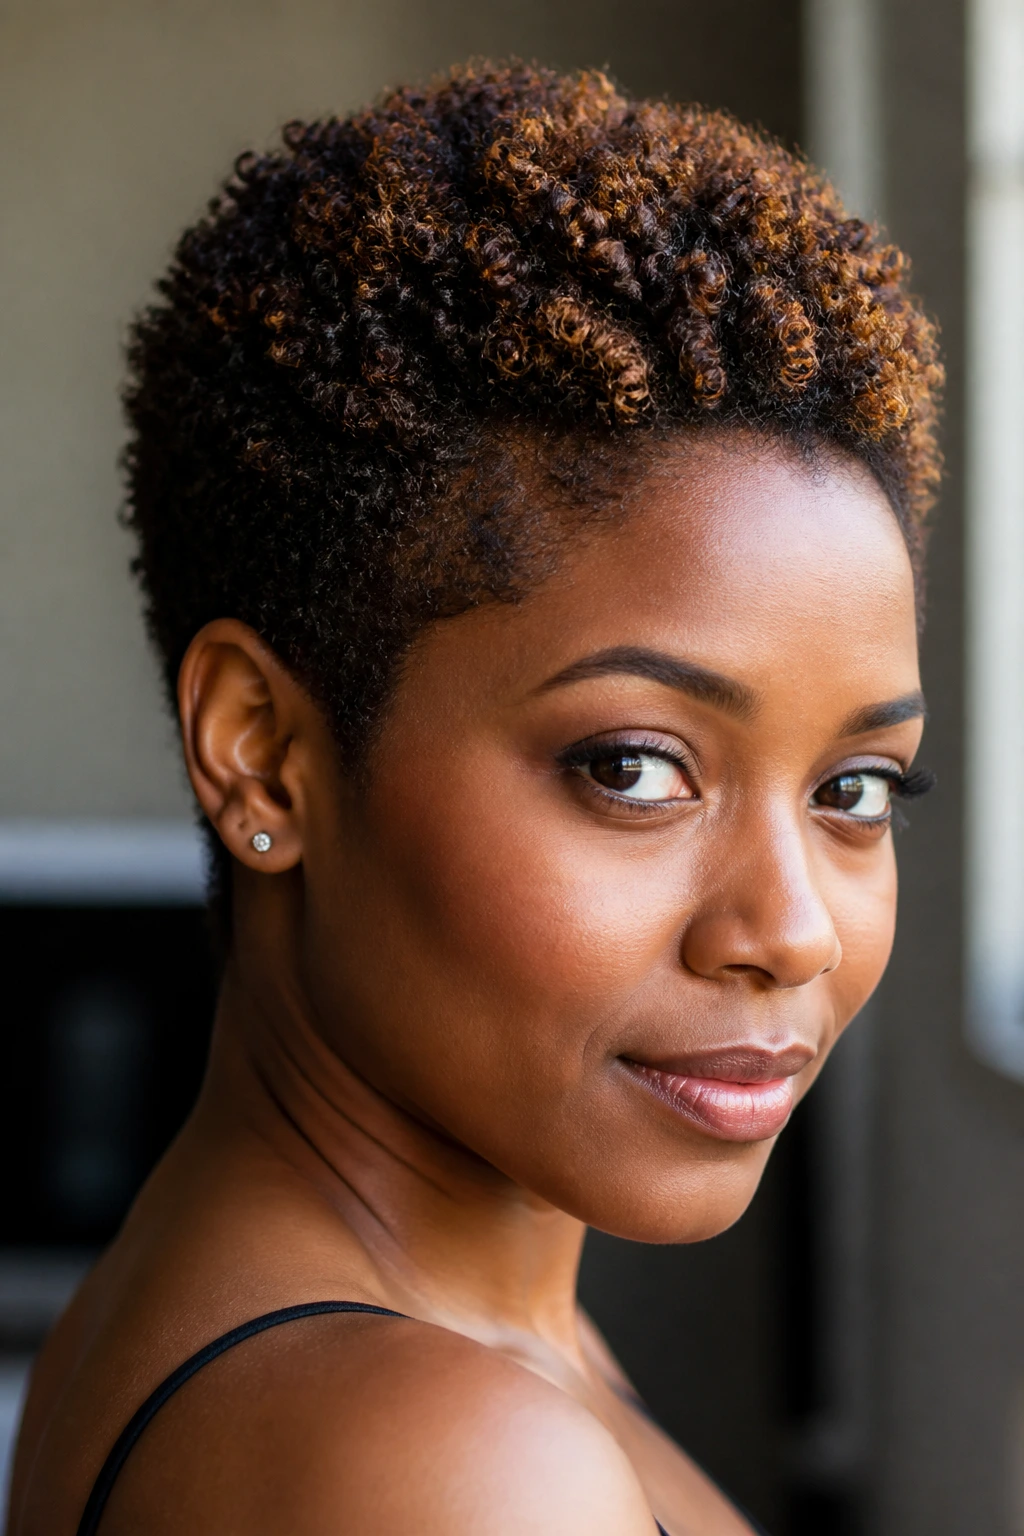
Short hair needs precision. There’s nowhere to hide a bad highlight on a TWA, which is exactly why cinnamon-caramel pieces can look so clean when they’re placed well. The warmth should sit close to the crown and around the front edge, where the shape of the cut gives it definition.
On very short natural hair, I prefer fewer pieces with a slightly richer tone. Too many light streaks can make the haircut look fuzzy instead of intentional. Cinnamon caramel keeps the look warm and dimensional without washing out the texture. If you have a sharp line-up or tapered edges, this color adds a little softness without dulling the cut.
6. Chunky Caramel Streaks on a 4C Puff
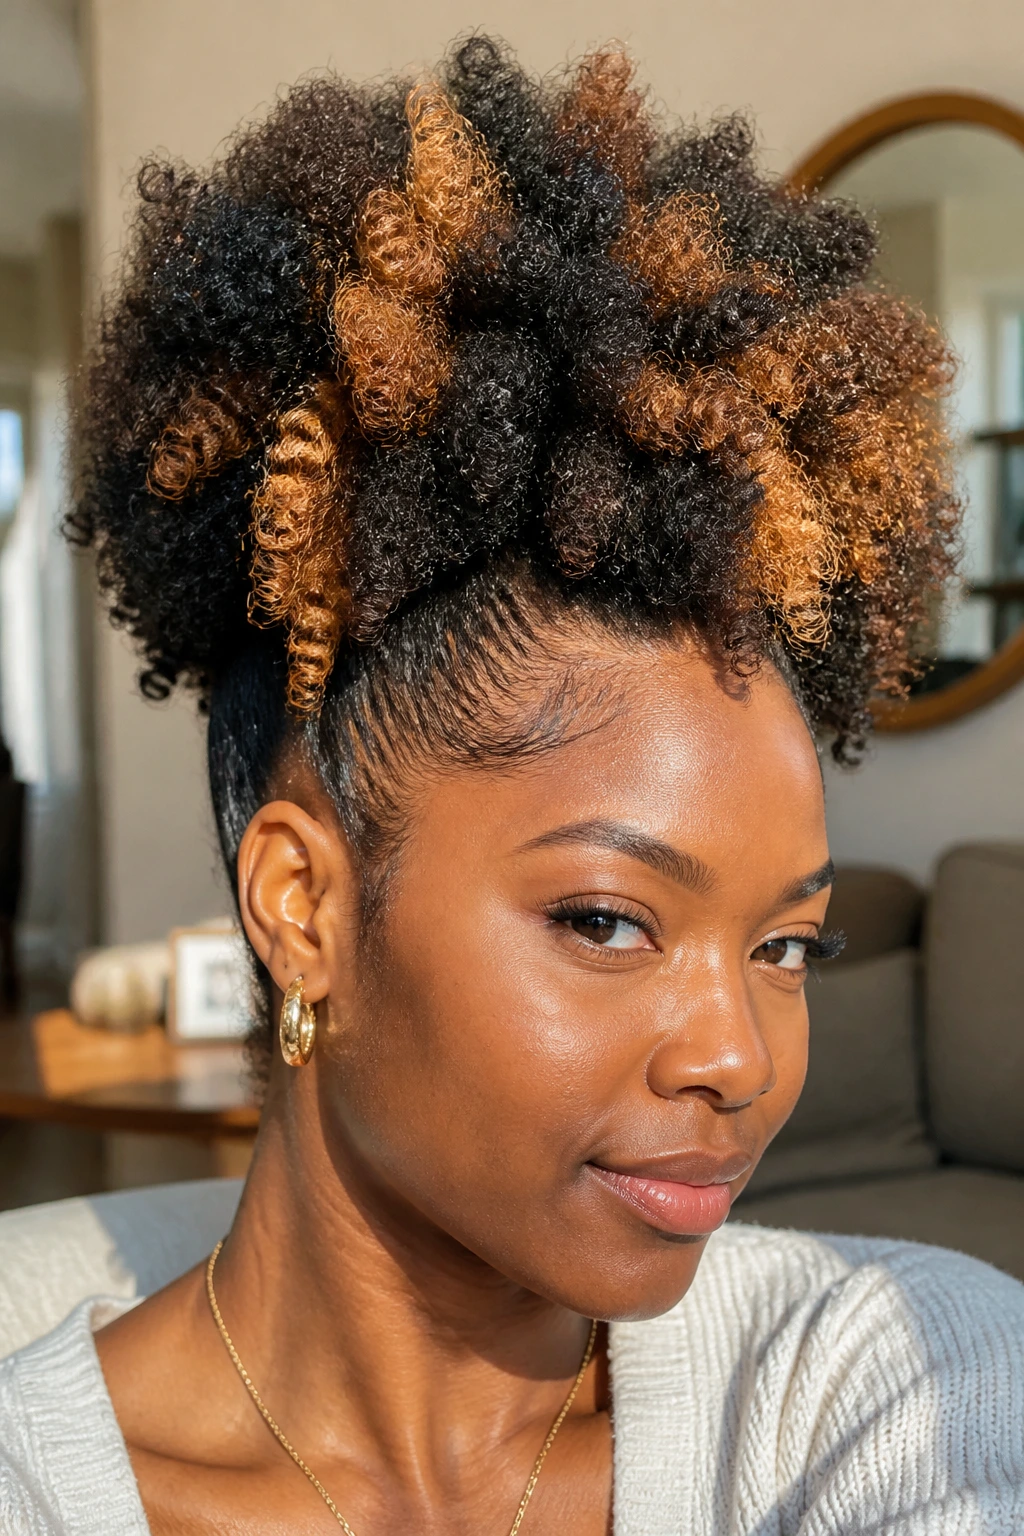
Chunky caramel streaks are not shy, and that’s the point. A puff already gives you a rounded silhouette, so larger streaks can work because the style itself keeps the shape soft. If the sections are wide enough to be seen but not so wide that they create a zebra effect, the result has real punch.
This look is for someone who wants the color to read from across the room. The puff lifts the hair away from the face, which makes caramel show up on every side, not just the front. Keep the base dark and the lightened pieces deliberate. Random streaking is where this style goes wrong; careful sectioning is what keeps it sharp.
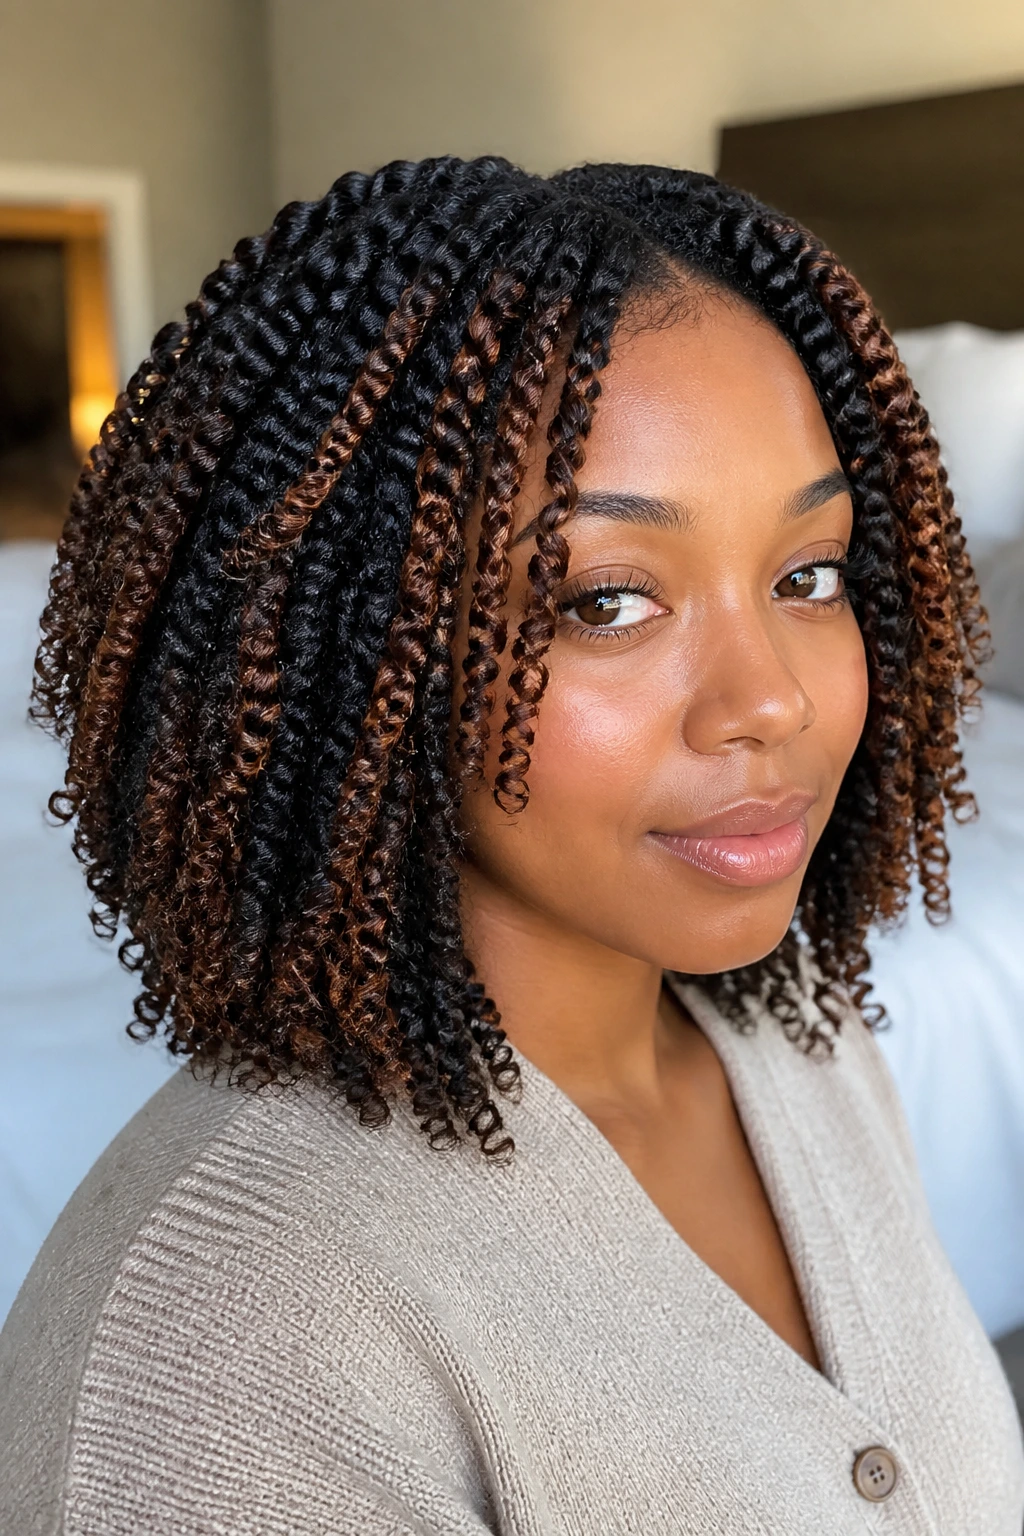
7. Honey Babylights on a Braid-Out
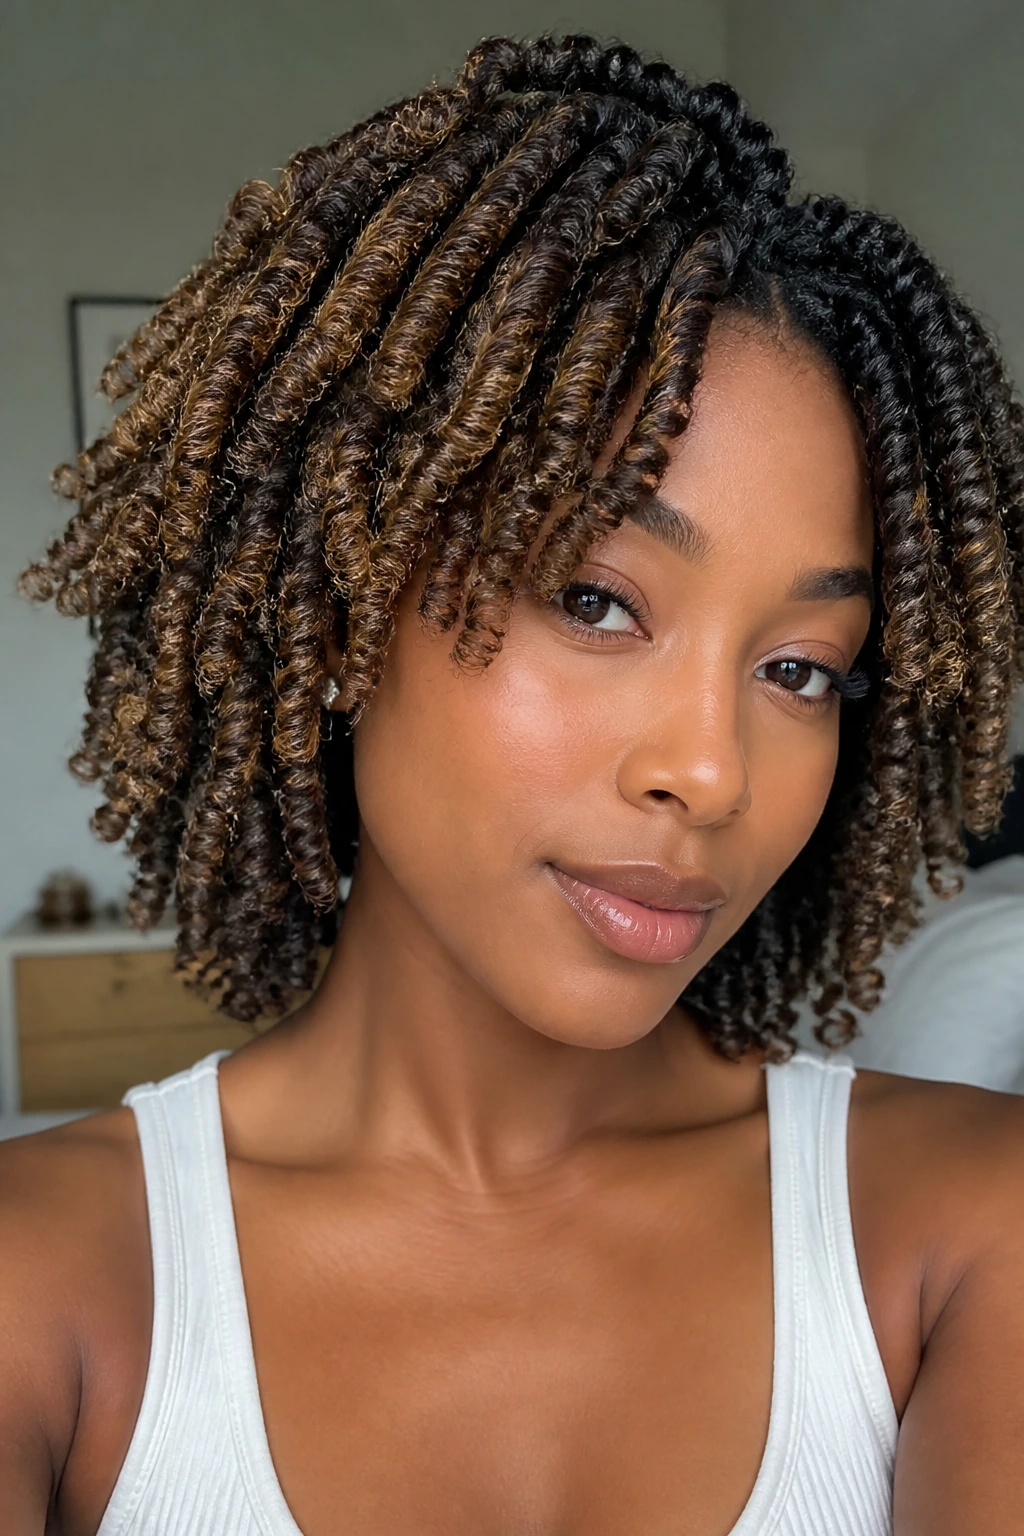
Babylights are the quietest way to do caramel. They’re so fine that the color looks woven into the braid-out instead of painted on top of it. When the braids unravel, the hair has that narrow, almost shimmering dimension that reads as glow more than highlight.
I like this on people who do not want to think about their color every day. The fine pieces grow out softly, and because braid-outs already create tiny ridges in the hair, the color finds those ridges and settles in. If your base is very dark, lean honey instead of pale gold. Honey holds warmth better and keeps the hair from looking flat under indoor light.
8. Peekaboo Caramel Under a Deep Side Part
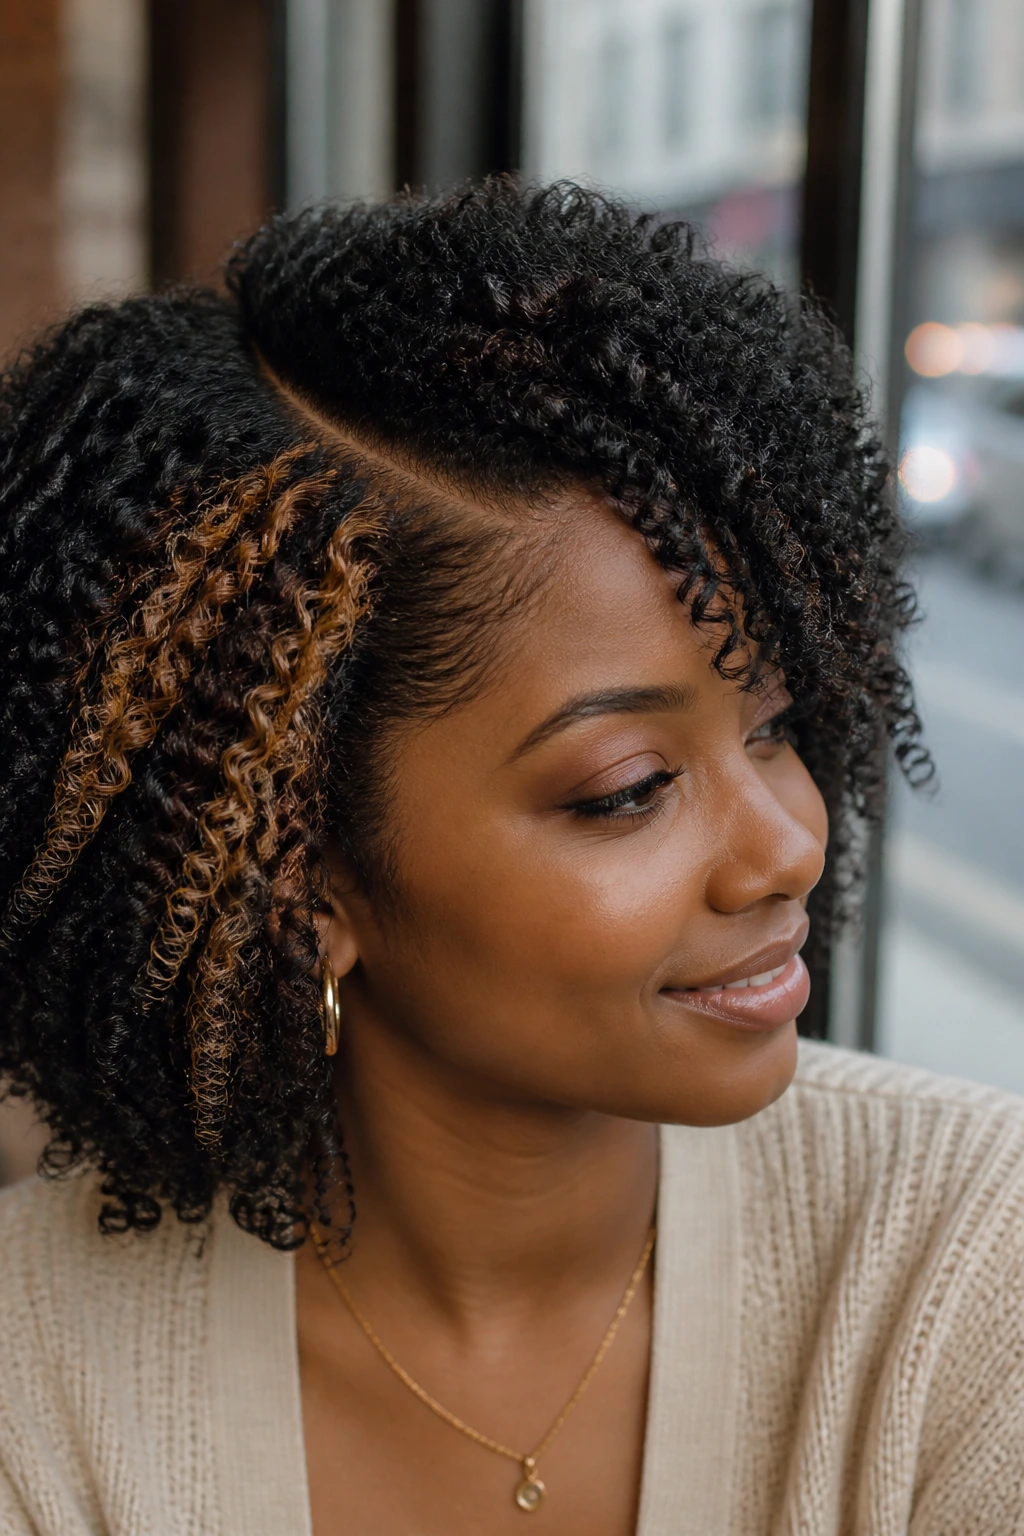
Peekaboo color is the introvert of this whole bunch. You only see it when the hair shifts, parts, or gets tucked behind one ear. That makes it excellent for people who want a little color without broadcasting it all the time. A deep side part gives the hidden caramel a chance to flash in the underlayer.
This works especially well on curly hair that’s worn in side-swept styles or big rounded shapes. The top stays dark, which keeps the look grounded, while the hidden panels bring in movement. If you like buns, half-up styles, or big side parts, this one pays off every time you move your head.
9. Rooted Caramel Melt from Espresso to Almond
A rooted melt is all about the handoff. The root stays espresso or near-black, then the color slides through warm brown, toffee, and finally almond at the ends. The cleaner the fade, the richer it looks. Messy transitions show up fast on dark hair.
Unlike chunkier highlight patterns, this one leans into softness. It works because there’s no hard line where the lightened hair begins. That matters on natural hair, where each curl bends in a different direction and can expose a harsh seam if the blend is sloppy. Ask for a shadow root and a gradual lift through the mid-lengths so the grow-out stays gentle.
10. Sunlit Caramel Glow on Locs
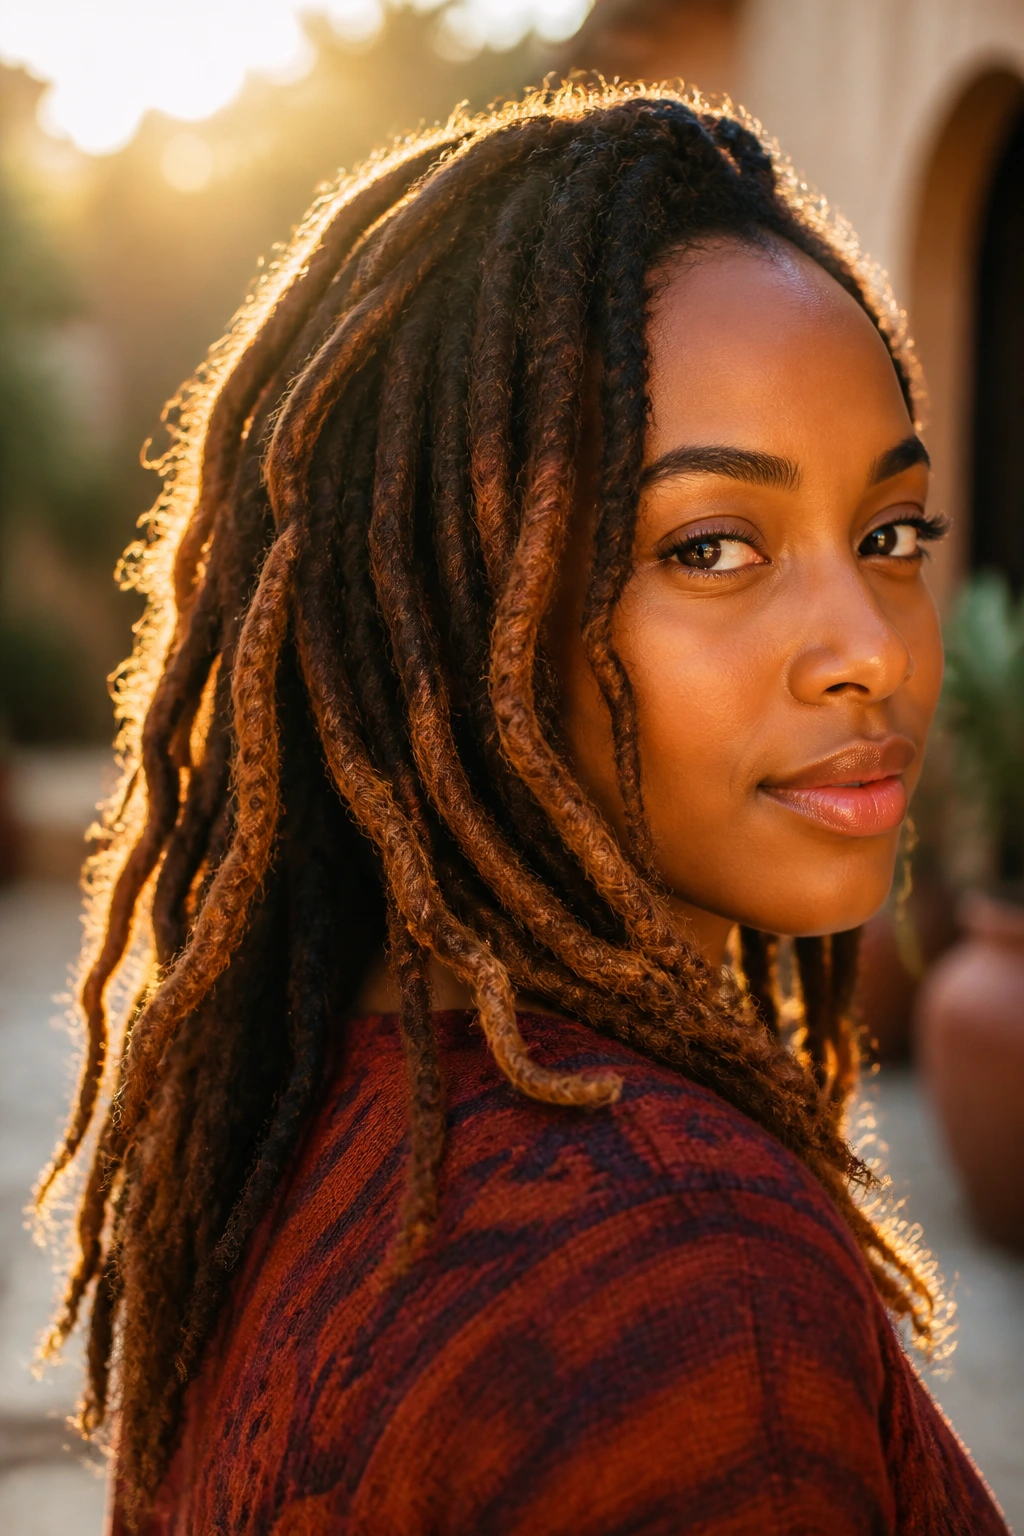
Locs and caramel can be a gorgeous pair, but they need restraint. A little warmth goes a long way on locked hair because the texture already carries so much visual detail. Color the outer pieces, the tips, or selected locs around the face, and let the rest stay deep and dark.
The trick is not to overload the hair with lightness. On locs, too much color can make the strands look dry even when they’re well cared for. Sunlit caramel works because it catches on the twists and ridges without flattening the shape. If you want more brightness, spread it in small clusters instead of one heavy block of color.
11. Caramel with Auburn Lowlights
Caramel gets richer when it has a darker companion. Auburn lowlights sit under or between the lighter pieces and keep the overall tone from going too yellow. That little bit of red-brown shadow gives the highlights somewhere to land.
This is a smart move if your skin has warm undertones or if plain gold tends to look a little flat against your base. The auburn pieces also help the style hold up under changing light; caramel can swing pale in direct sun, but auburn adds weight. The whole look ends up deeper, less sugary, more grown-in.
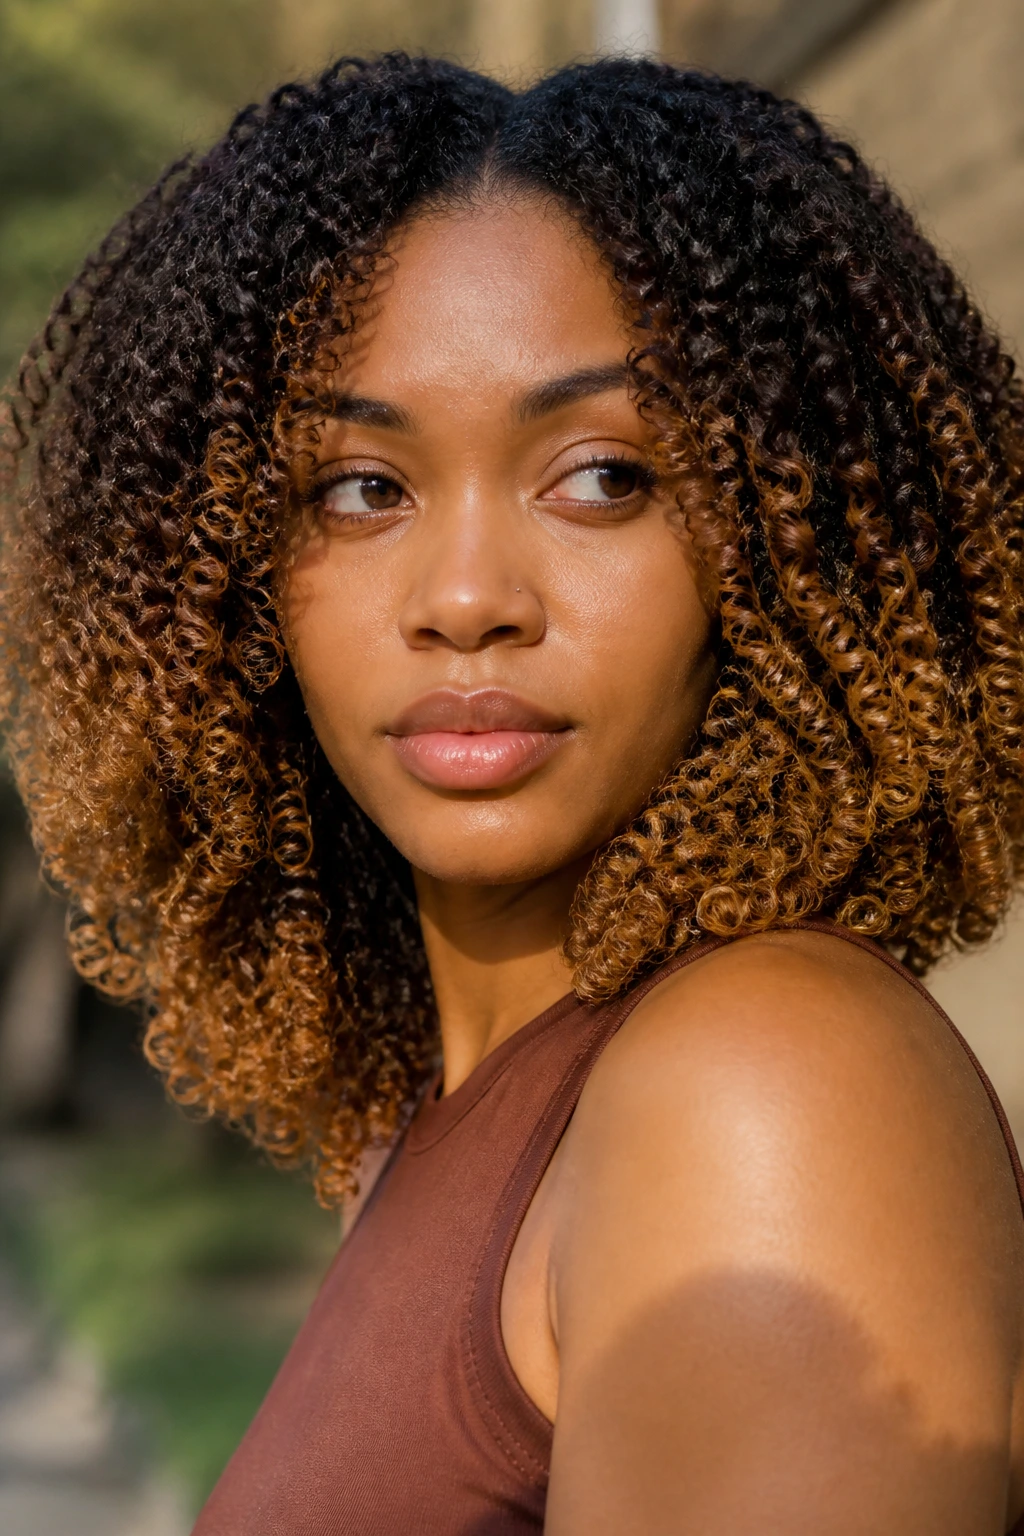
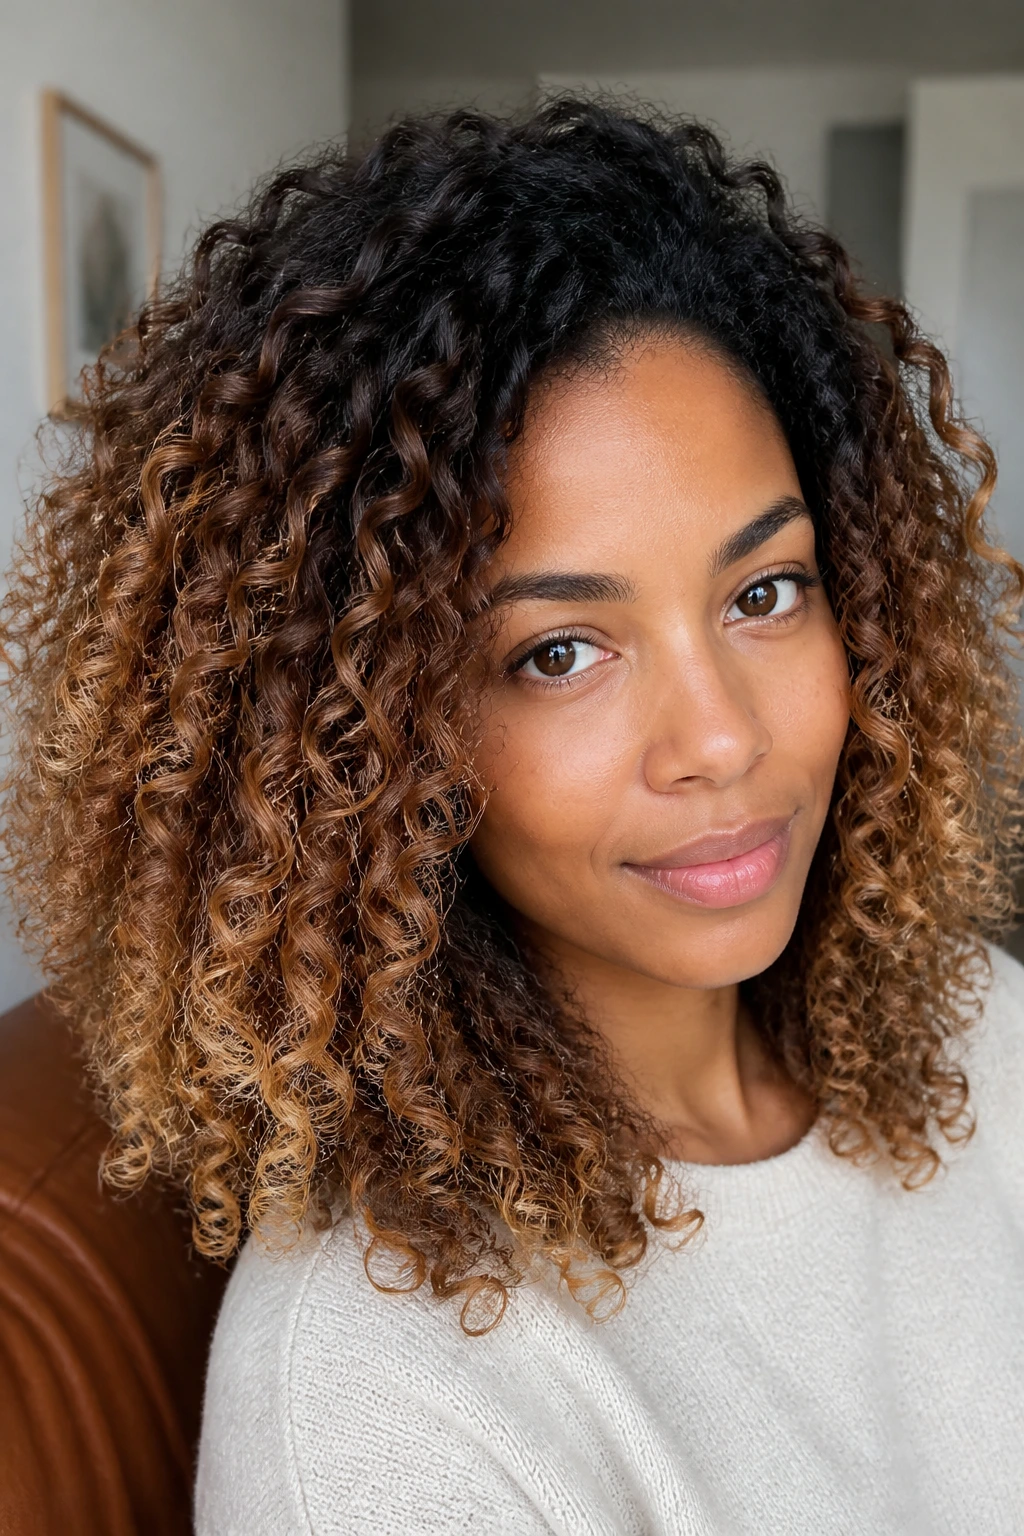
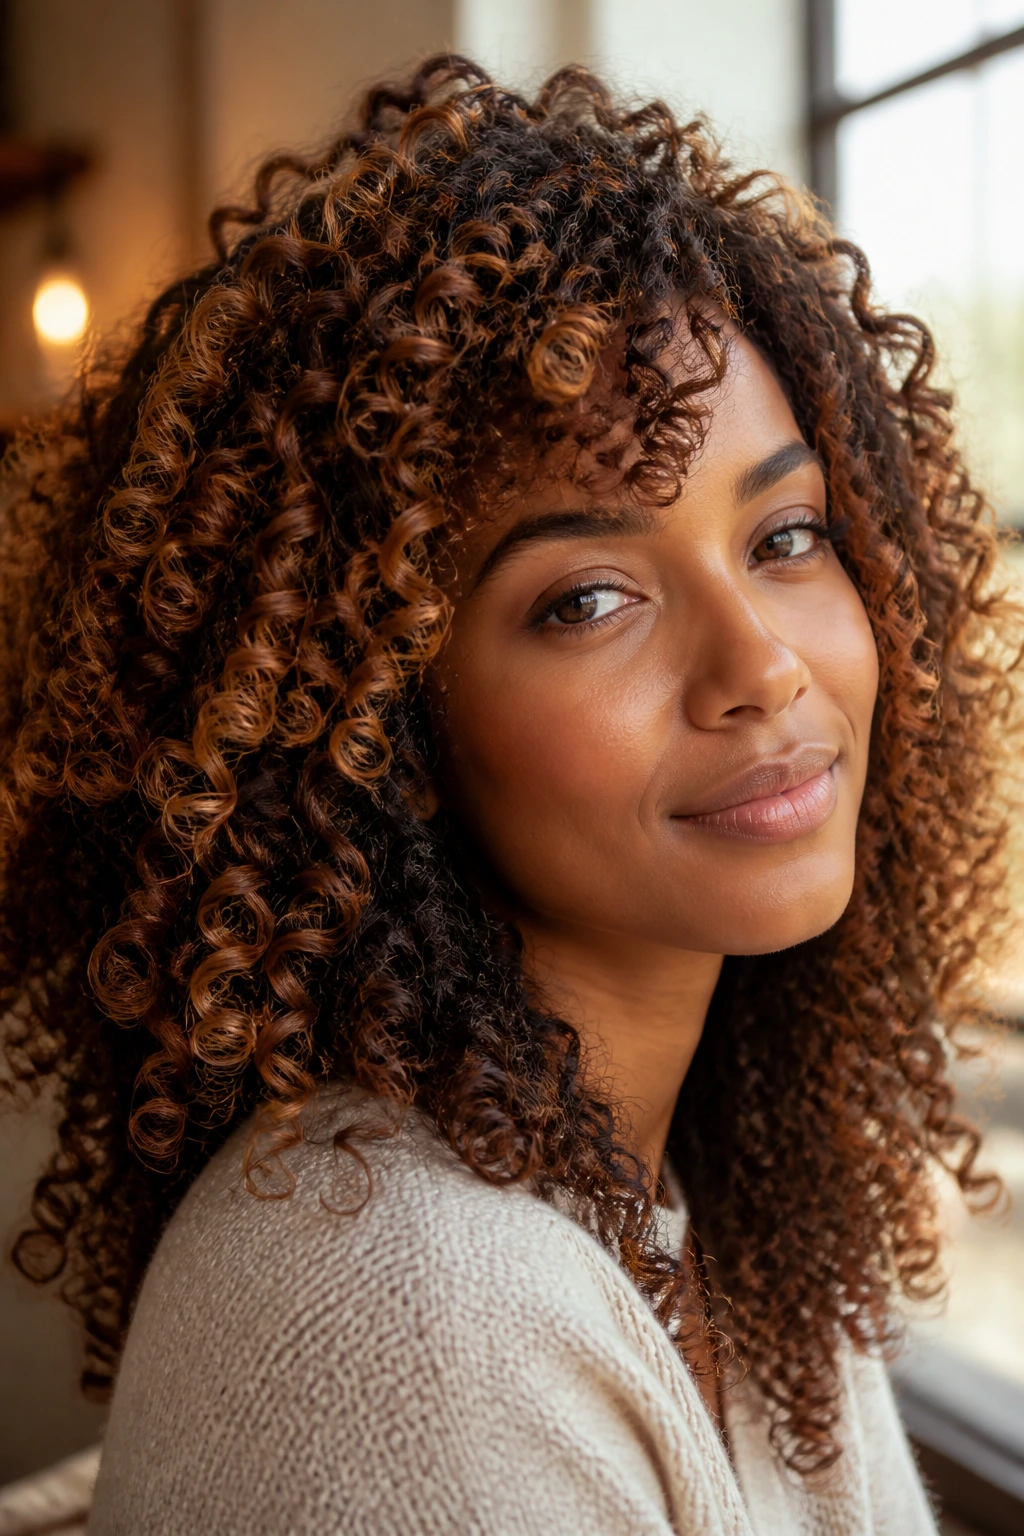
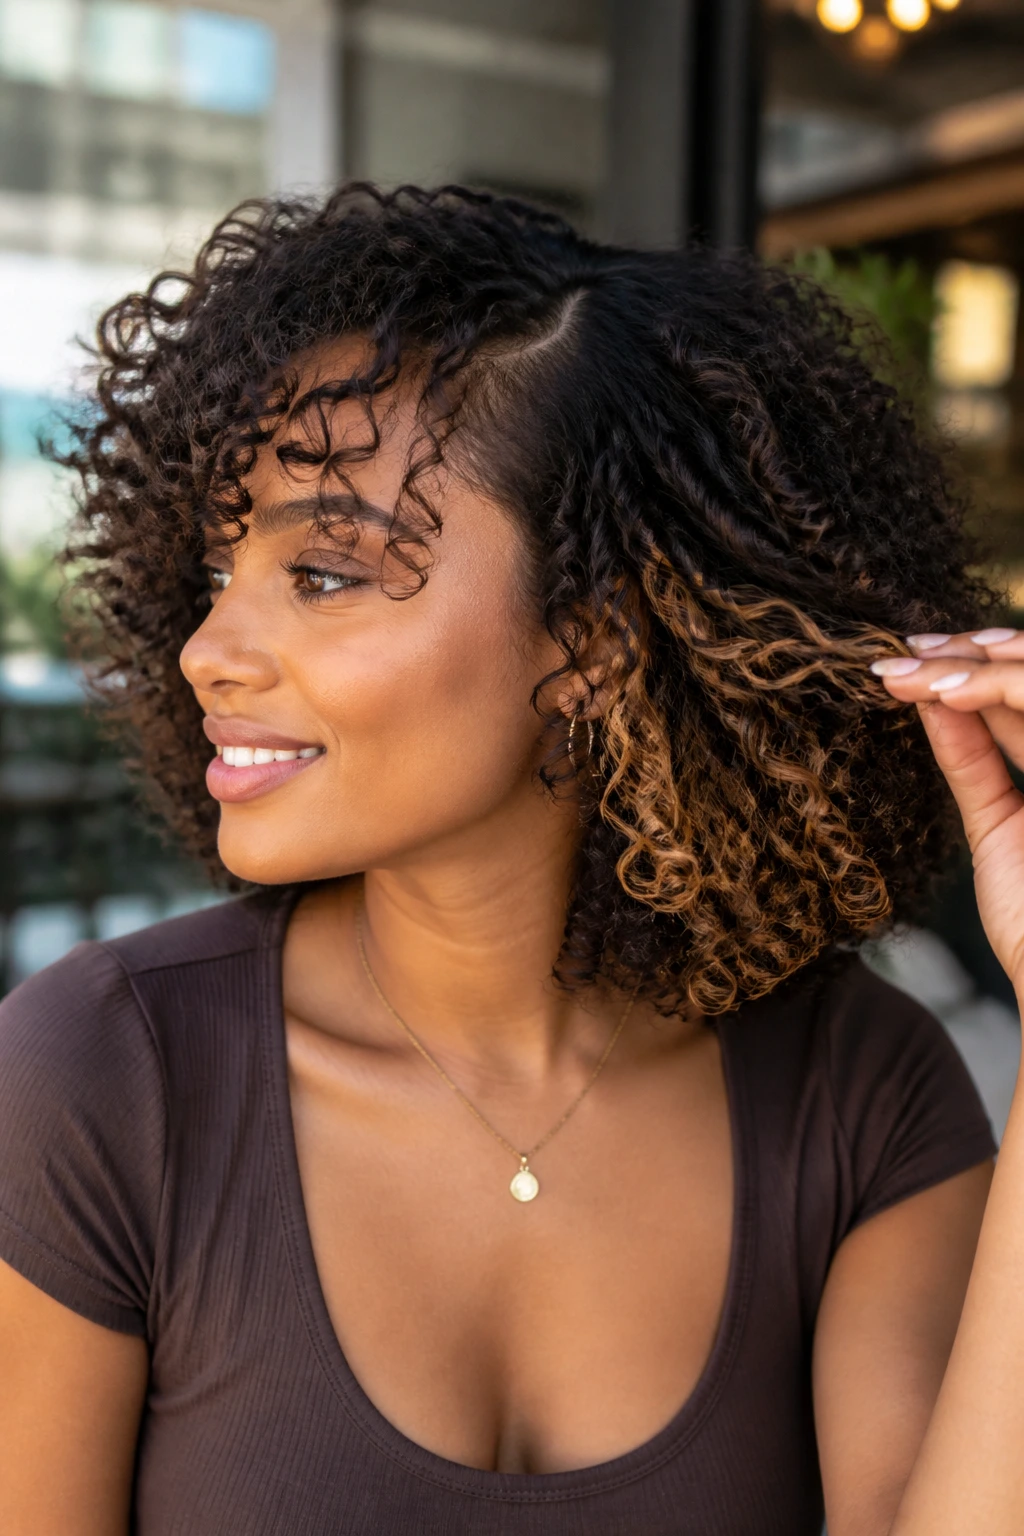
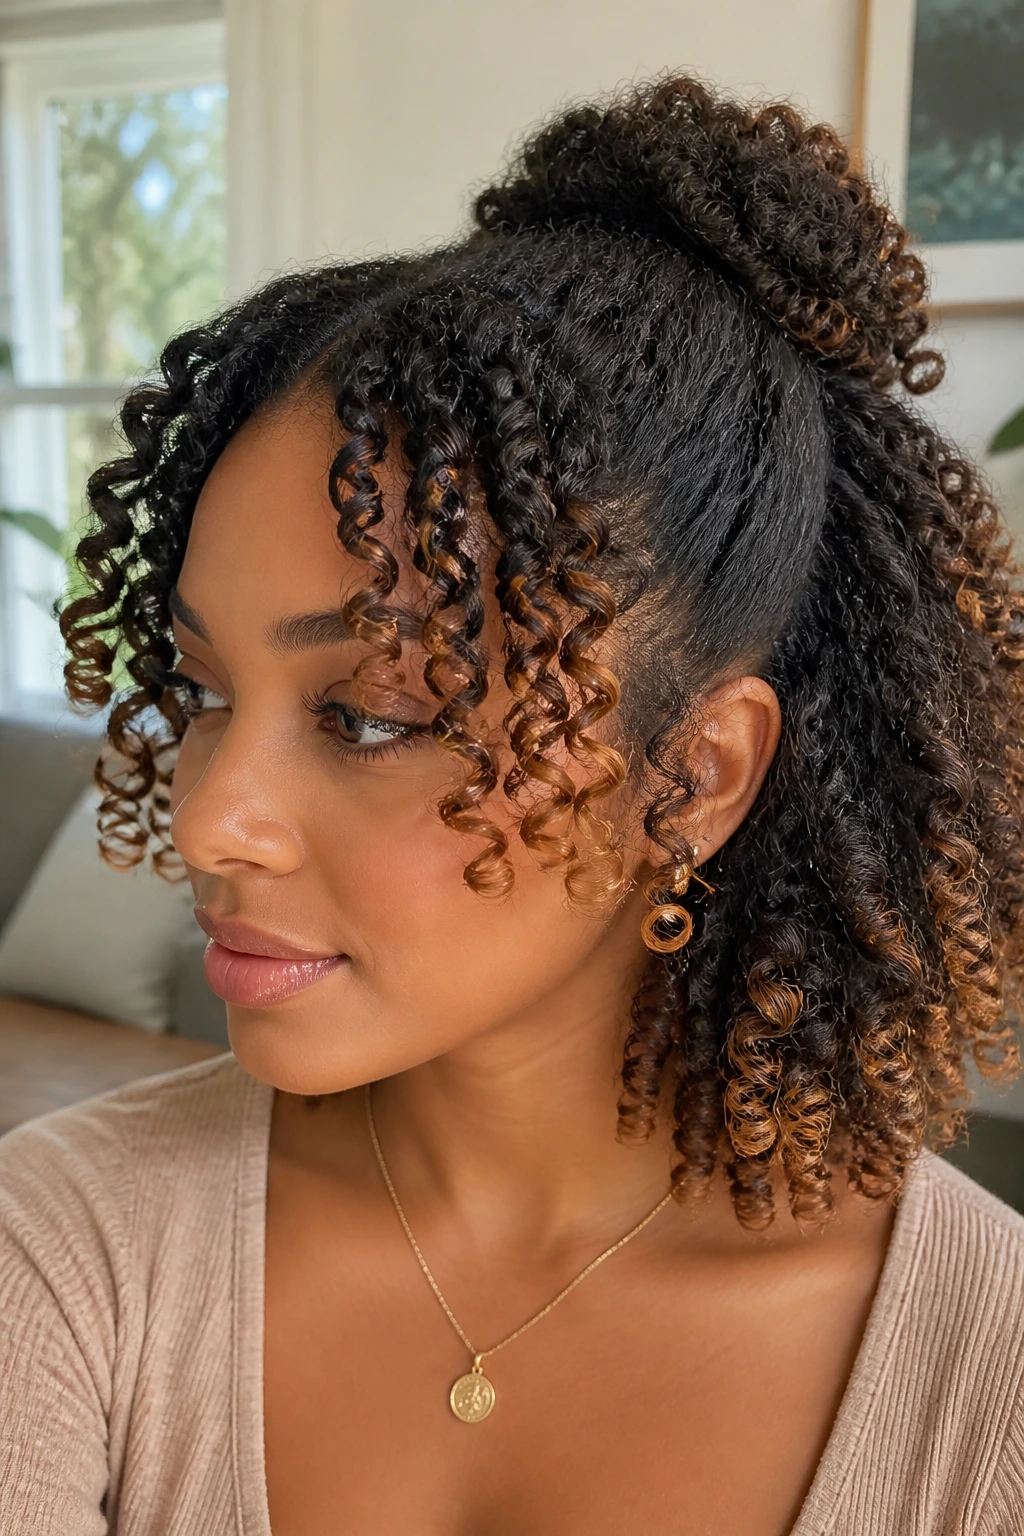
12. Golden Ribbon Highlights on Layered Curls
Layers and highlights are old friends. When curls are cut in tiers, the light pieces can sit on the upper layers and peek through the lower ones, which creates natural depth without needing a heavy color job. Golden caramel gives the edges enough shine to separate each curl tier.
This is one of the prettiest options for medium to long natural hair because the cut and color work together. If the layers are soft, keep the highlight placement soft too. The eye should move through the hair in arcs, not stop at one painted streak. I’d ask for a combination of fine ribbons and a few slightly thicker swaths around the longest layers.
13. Smoky Caramel on a High Puff
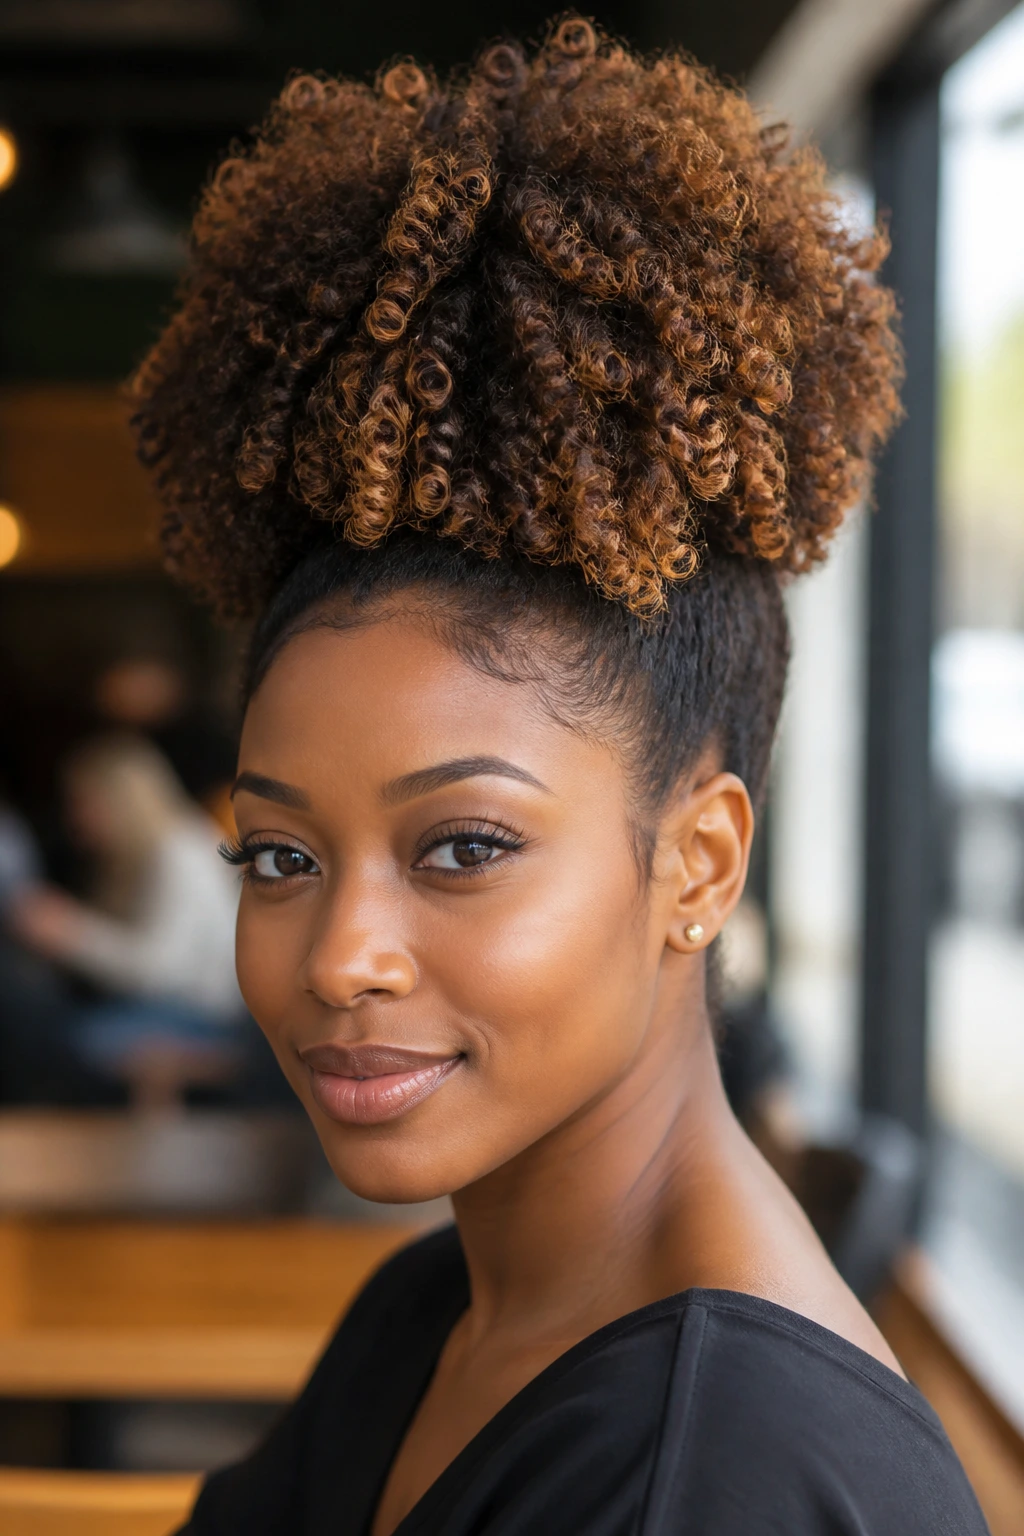
Smoky caramel is what happens when you want warmth, but not candy-bright warmth. Think muted honey with a little brown in it. On a high puff, that restrained tone sits beautifully because the style already pulls the eye upward and gives the color a lifted shape.
This works especially well when the goal is softness around the face. A high puff can make bright highlights look loud if the tone is too yellow, but smoky caramel keeps the whole thing elegant without getting fussy. It’s a good middle path if you want a noticeable change that still feels easy to wear with a sweatshirt, hoops, or a bare face.
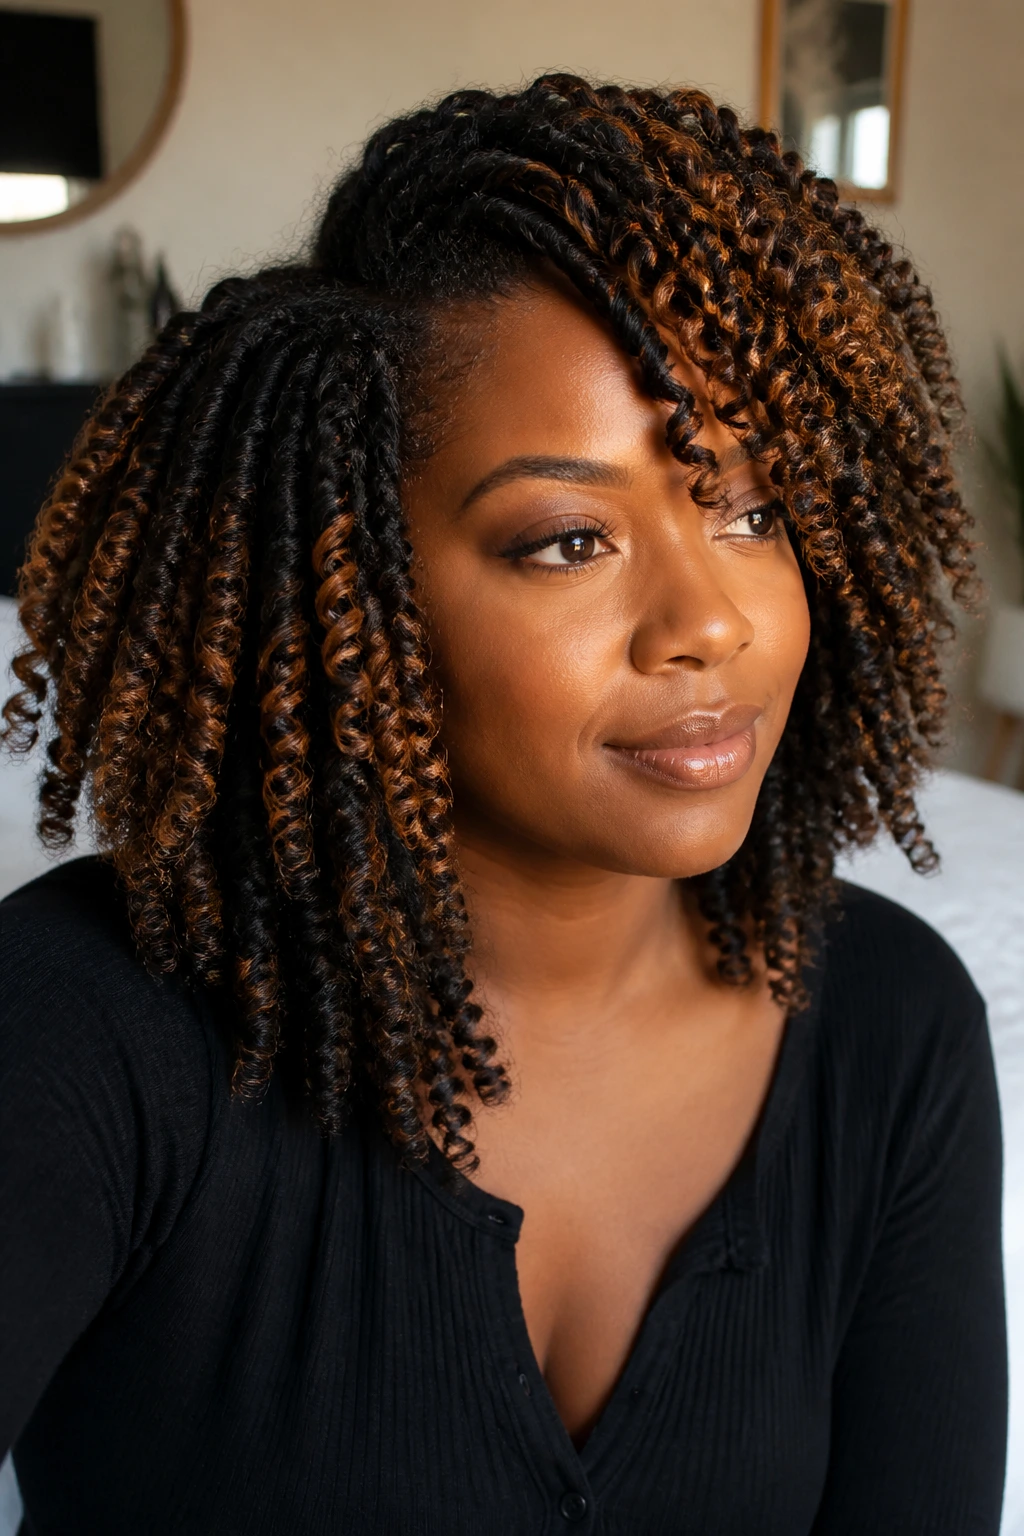
14. Caramel Accent Pieces in Knotless Braids
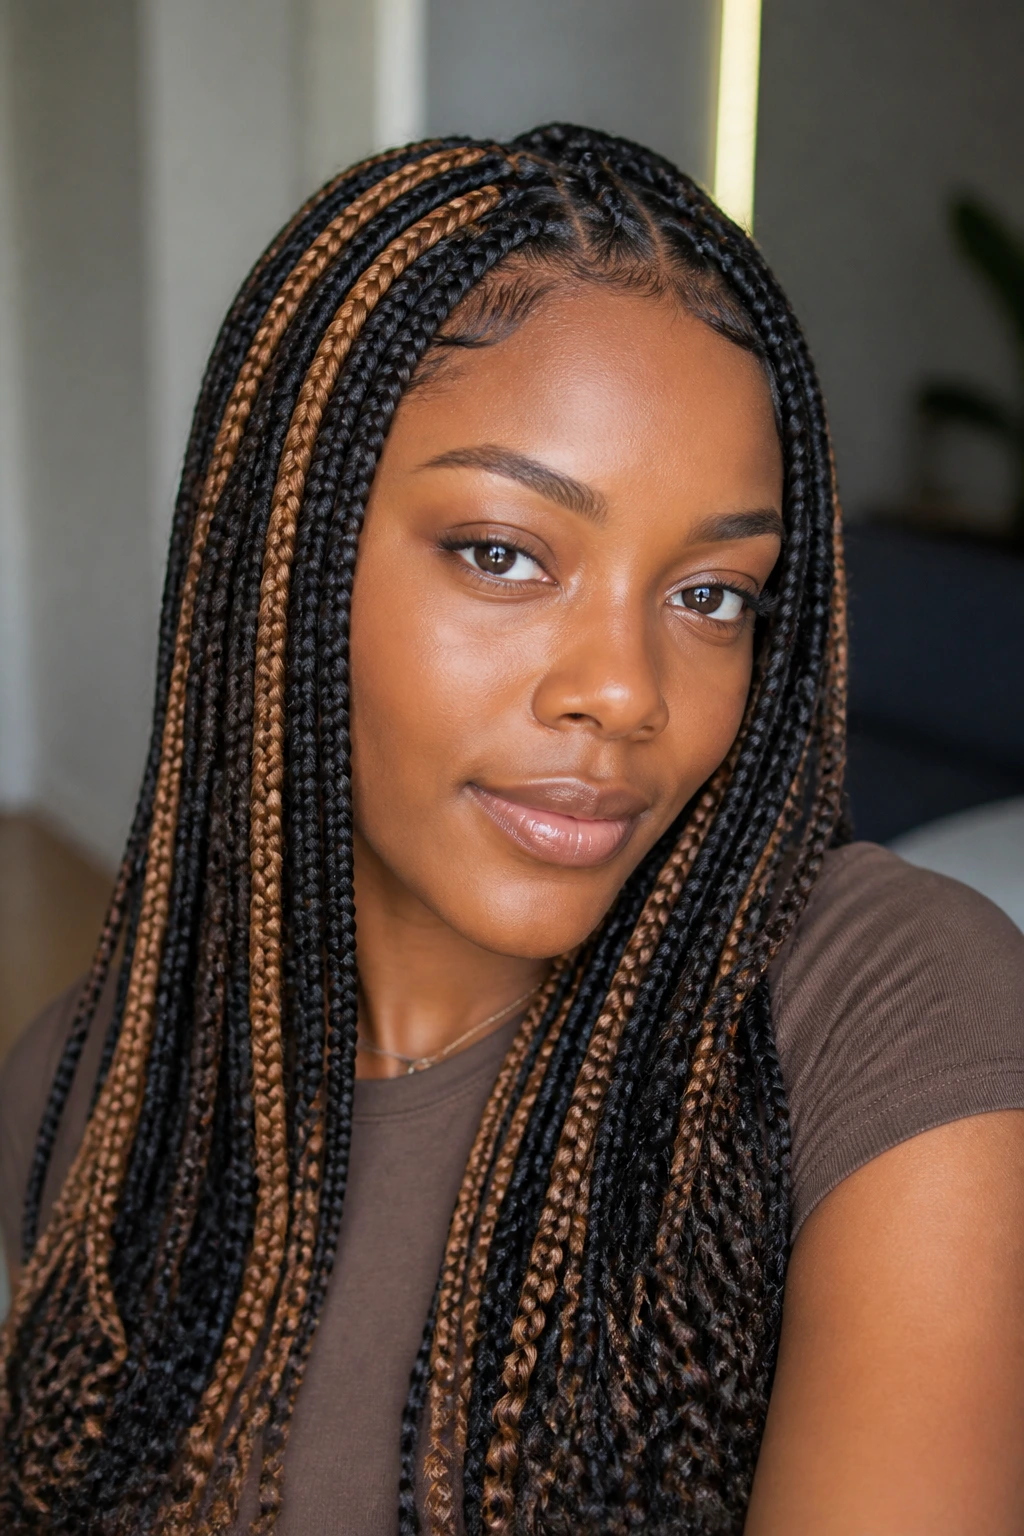
Not every caramel look has to come from dye on your own hair. Knotless braids with caramel accent pieces let you play with warm color while keeping your natural strands tucked away. Add a few highlighted braiding-hair sections near the front, the ends, or throughout the braid pattern.
This is a smart option if you want the look without the chemical process. The color shows up in clean lines, and the knotless base keeps everything light at the root. I prefer this version when someone wants dimension for an event, a trip, or just a break from wearing all-dark braids. The finish is neat, warm, and easy to read from across the room.
15. Buttered Caramel Halo on a Silk Press
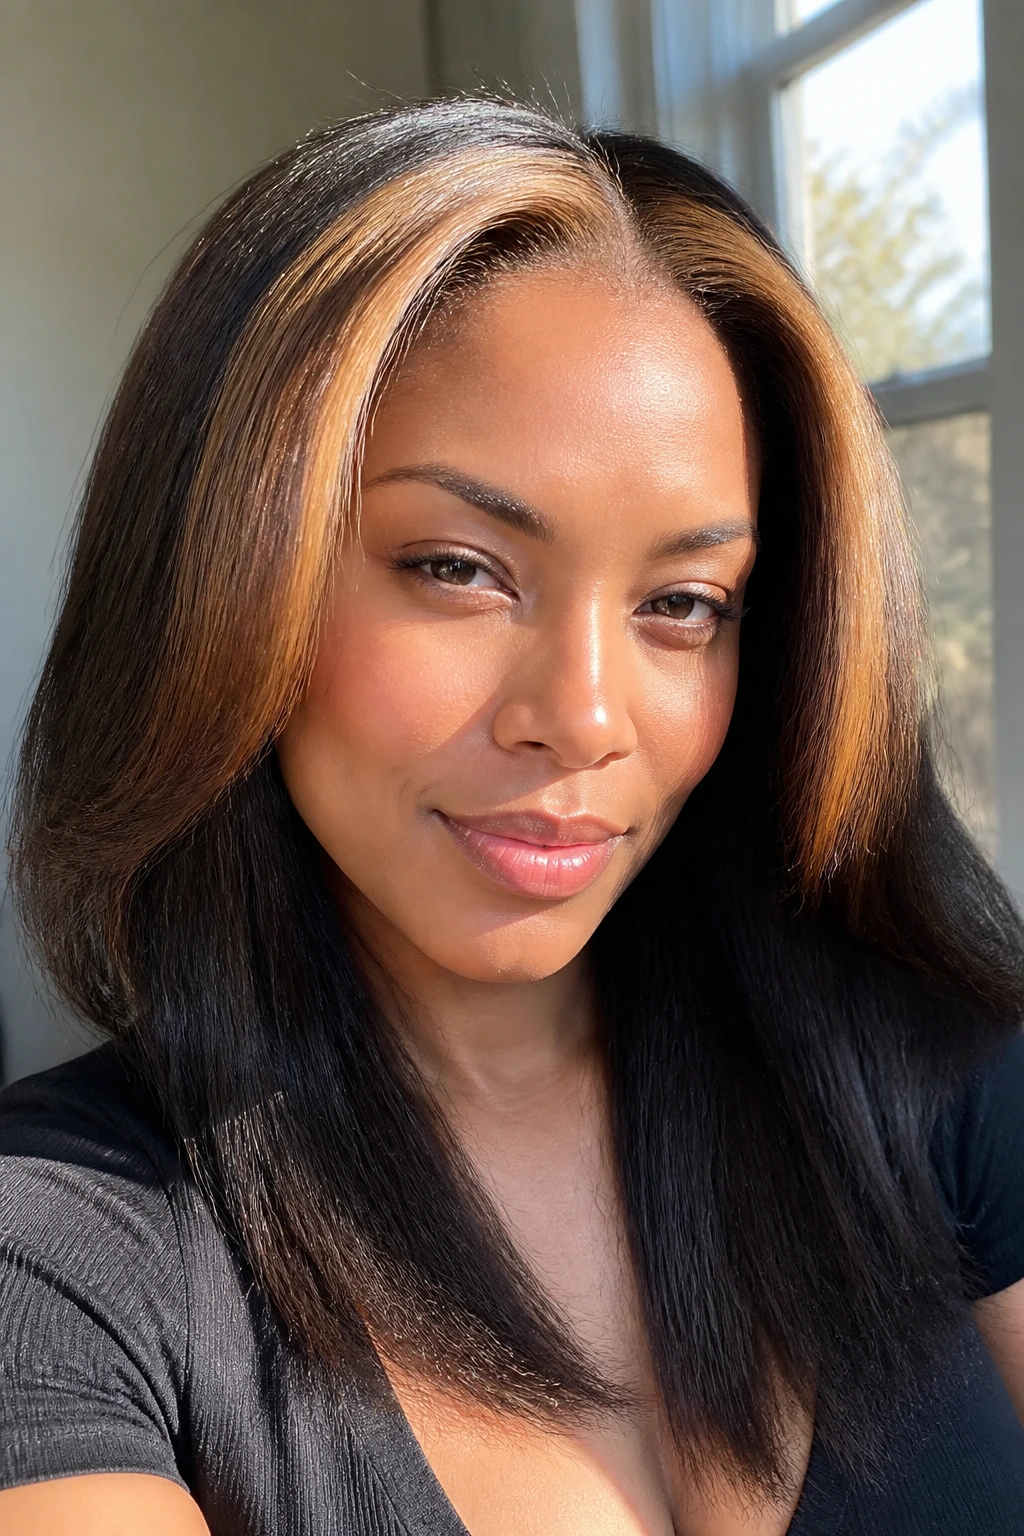
A silk press changes the whole conversation because the color gets to sit on a smooth surface. Buttered caramel around the crown and front half of the head creates a halo effect that looks polished without turning icy or flat. On straightened natural hair, this color reads faster and brighter than it does on coils.
The key is keeping the halo soft, not boxing it in. You want a ring of warmth, not a hard stripe. This look is especially nice if you love a center part and don’t mind a little shine. The press makes the caramel catch the light in long clean lines, which is why it feels different from highlight patterns designed for curls.
16. Peekaboo Panels in a Curly Bob
A bob has swing, and swing is where peekaboo color shines. Hidden caramel panels underneath a curly bob appear when the hair flips, bends, or tucks behind the jawline. On a cropped shape, that movement matters more than people think.
I like this because it gives the haircut a surprise factor without overwhelming the shape. The top layer can stay deep and rich while the underlayer does the flashing. If the bob is blunt, keep the panels narrow and clean. If it’s layered, you can widen them a little so the color catches more often.
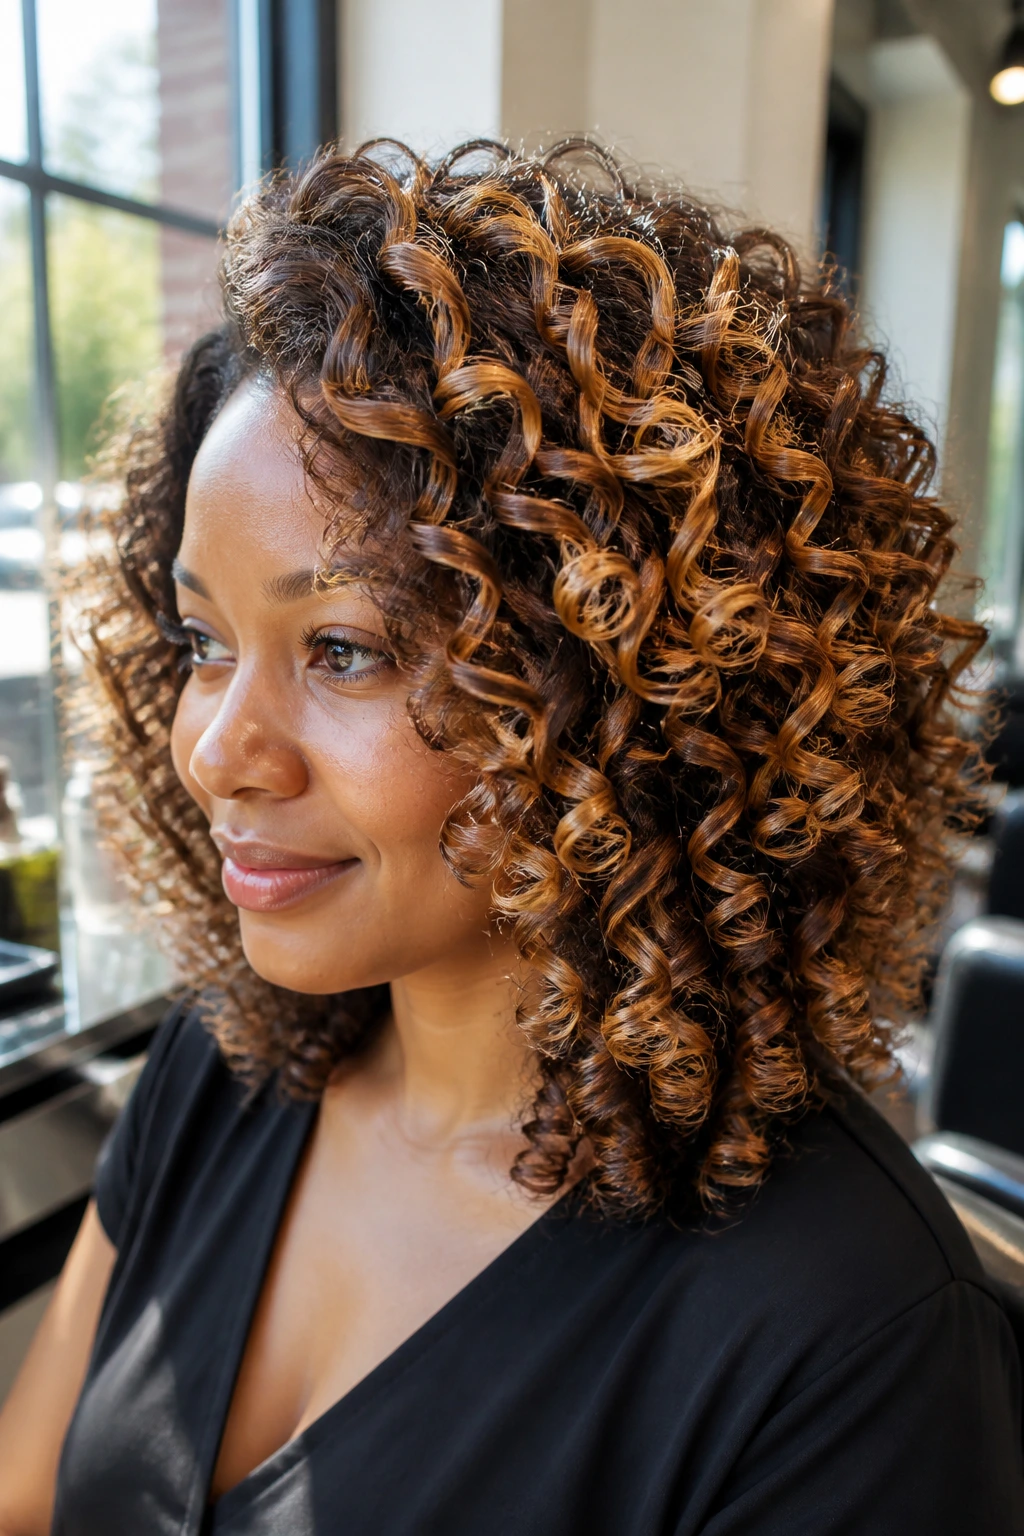
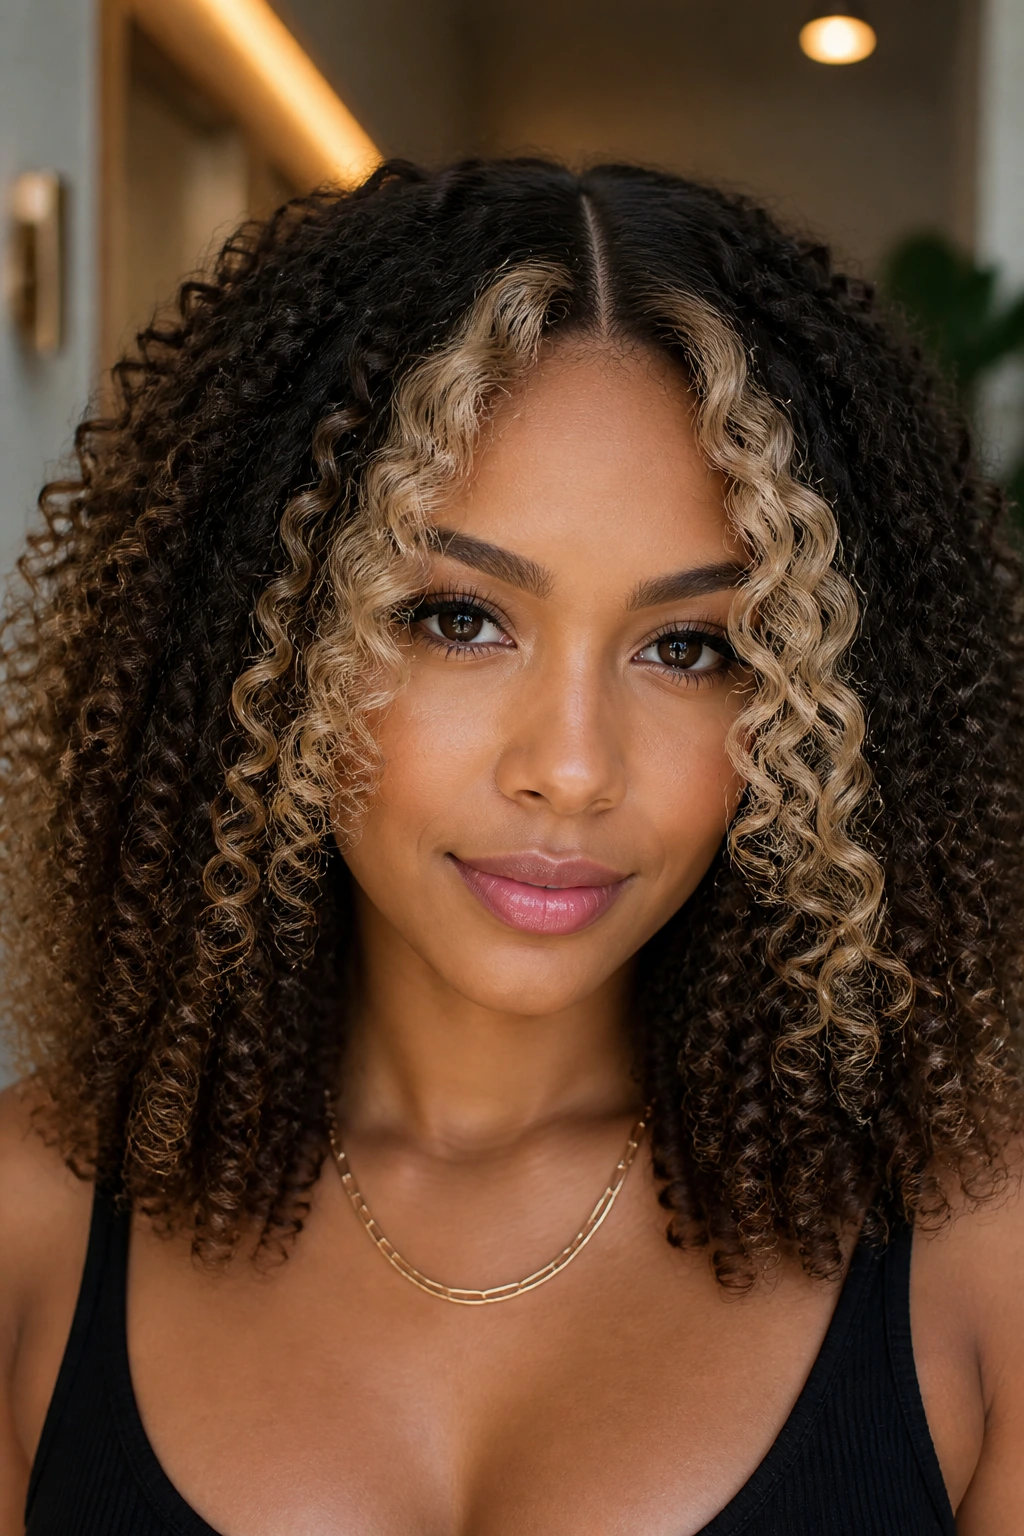
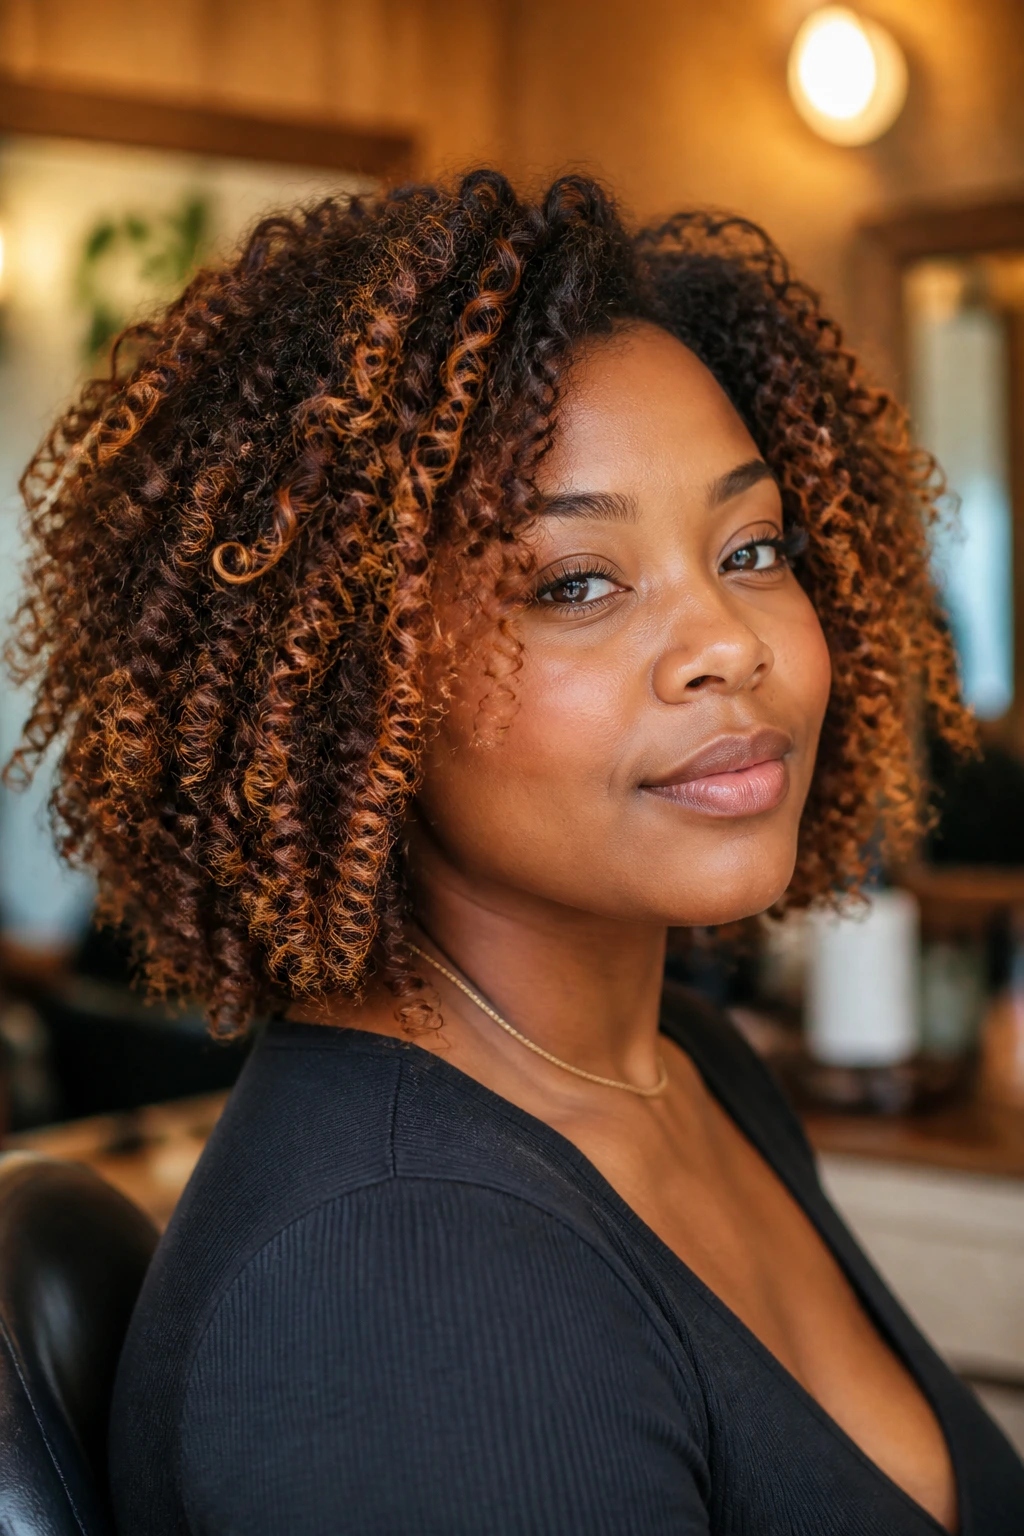
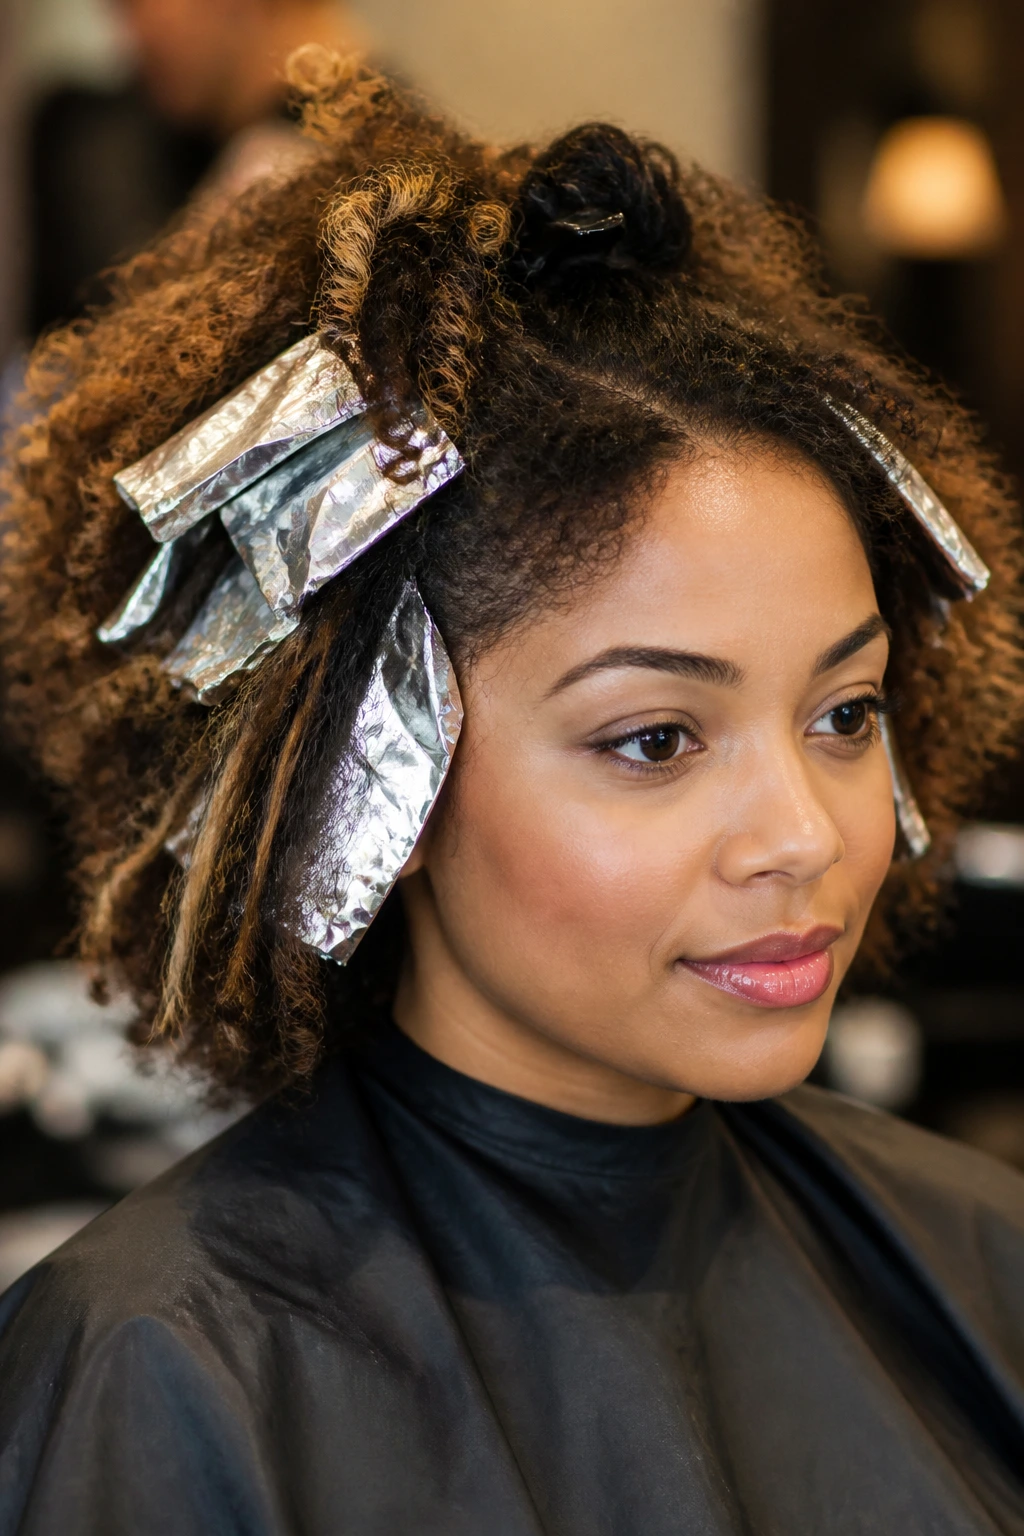
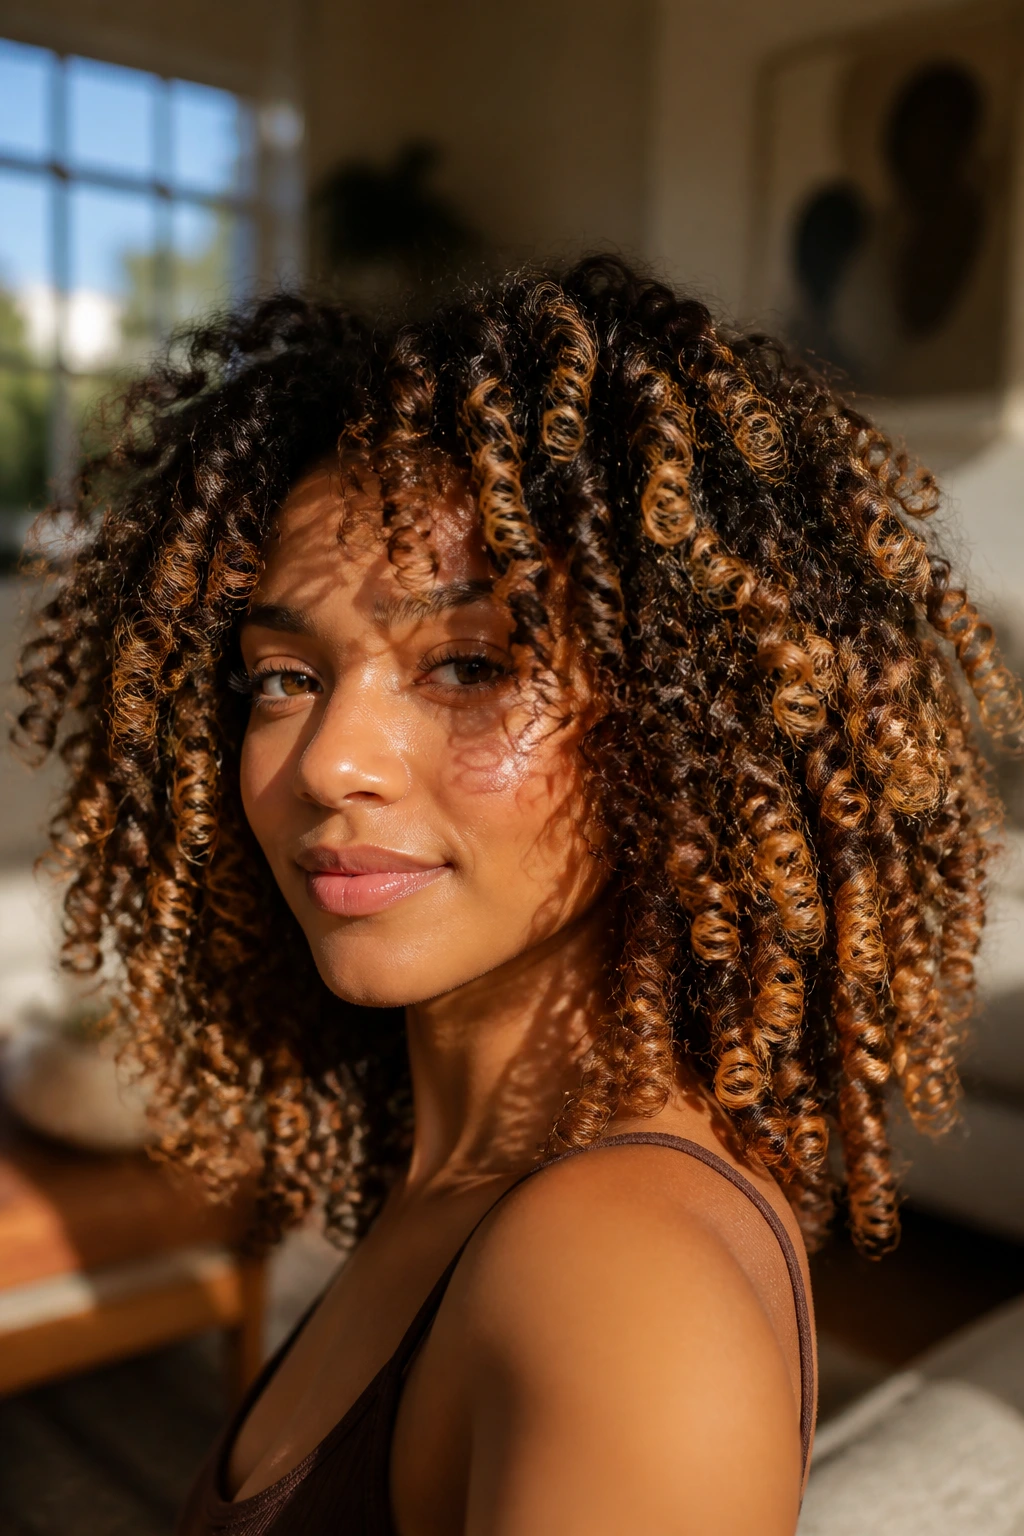
17. Warm Foilayage on 3C Ringlets
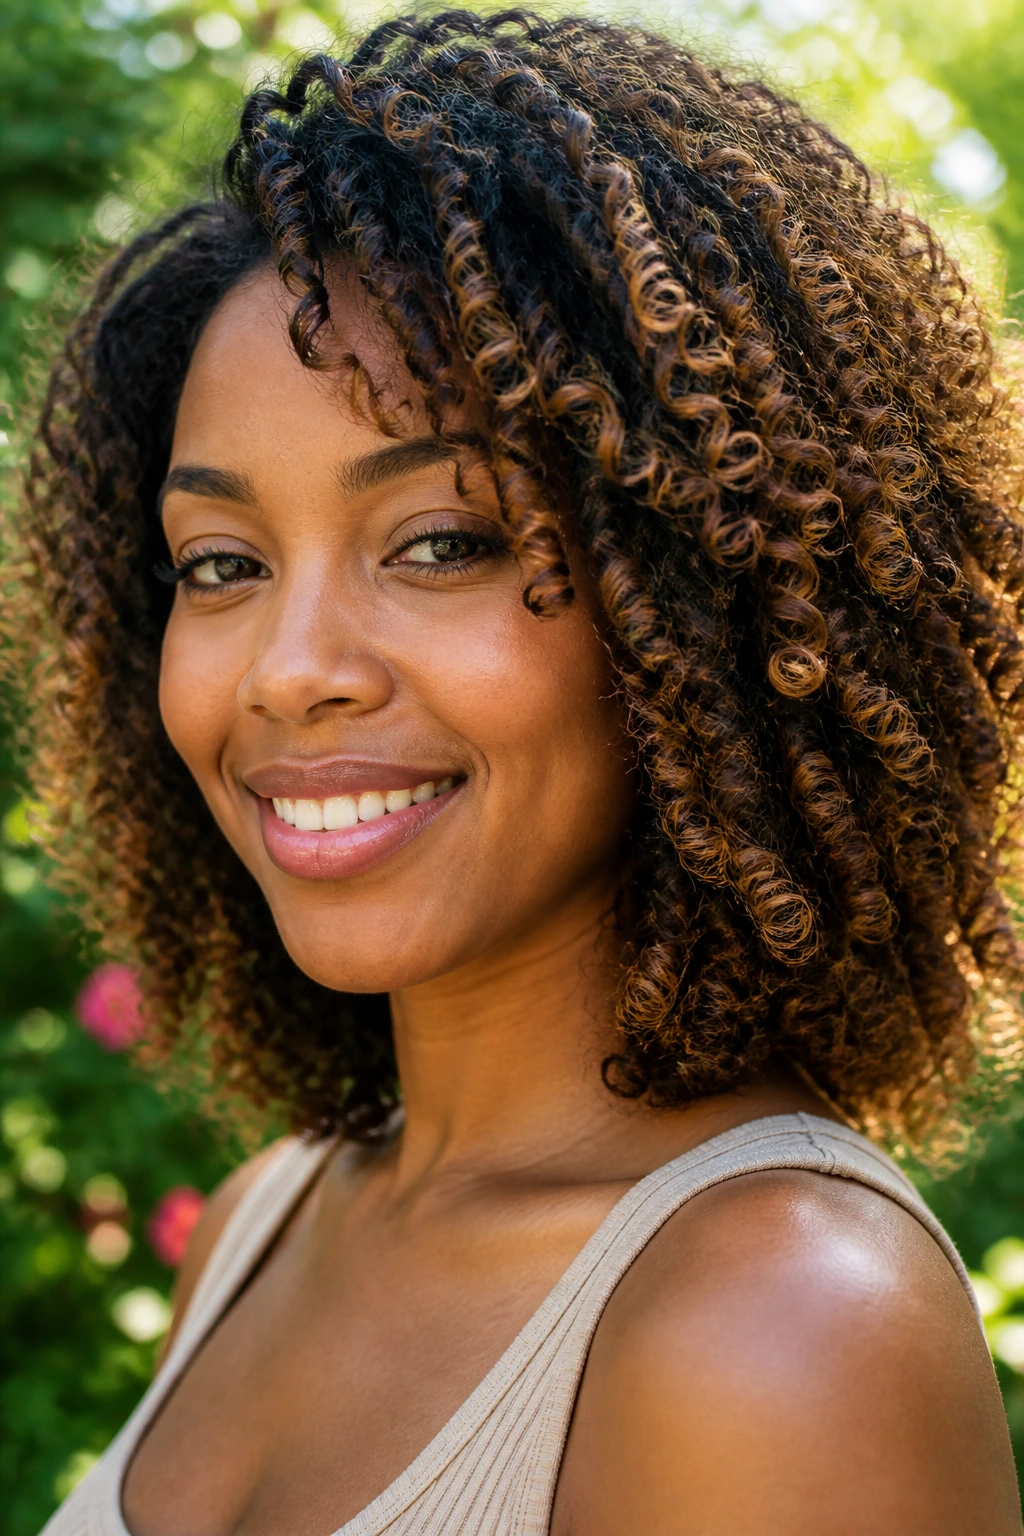
Foilayage gives you a little more lift than freehand painting, which can matter on darker natural hair. With 3C ringlets, the curls have enough definition that the caramel can disappear if the lift is too modest. Foils help the color reach a brighter level while the hand-painted placement keeps it from looking boxy.
That balance is what makes this look strong. It’s not about making the whole head lighter. It’s about giving certain ringlets a warmer edge so they separate visually when the hair moves. If your curls are prone to frizz at the ends, ask for the lightest pieces to stay away from the most porous spots.
18. Espresso-and-Caramel Dimension on a Tapered Cut
A tapered cut already has built-in shape, which means color can follow the architecture instead of trying to create one. Espresso roots keep the haircut grounded, while caramel pieces on the longer top layers give the style lift and movement. That contrast works especially well when the back and sides are very short.
There’s a nice honesty to this look. Nothing is pretending to be longer than it is. The caramel sits where the hair naturally swells and curves, so the dimension feels deliberate rather than decorated. If you like sharp edges and a clean neckline, this is one of the smartest ways to add warmth without losing the cut’s structure.
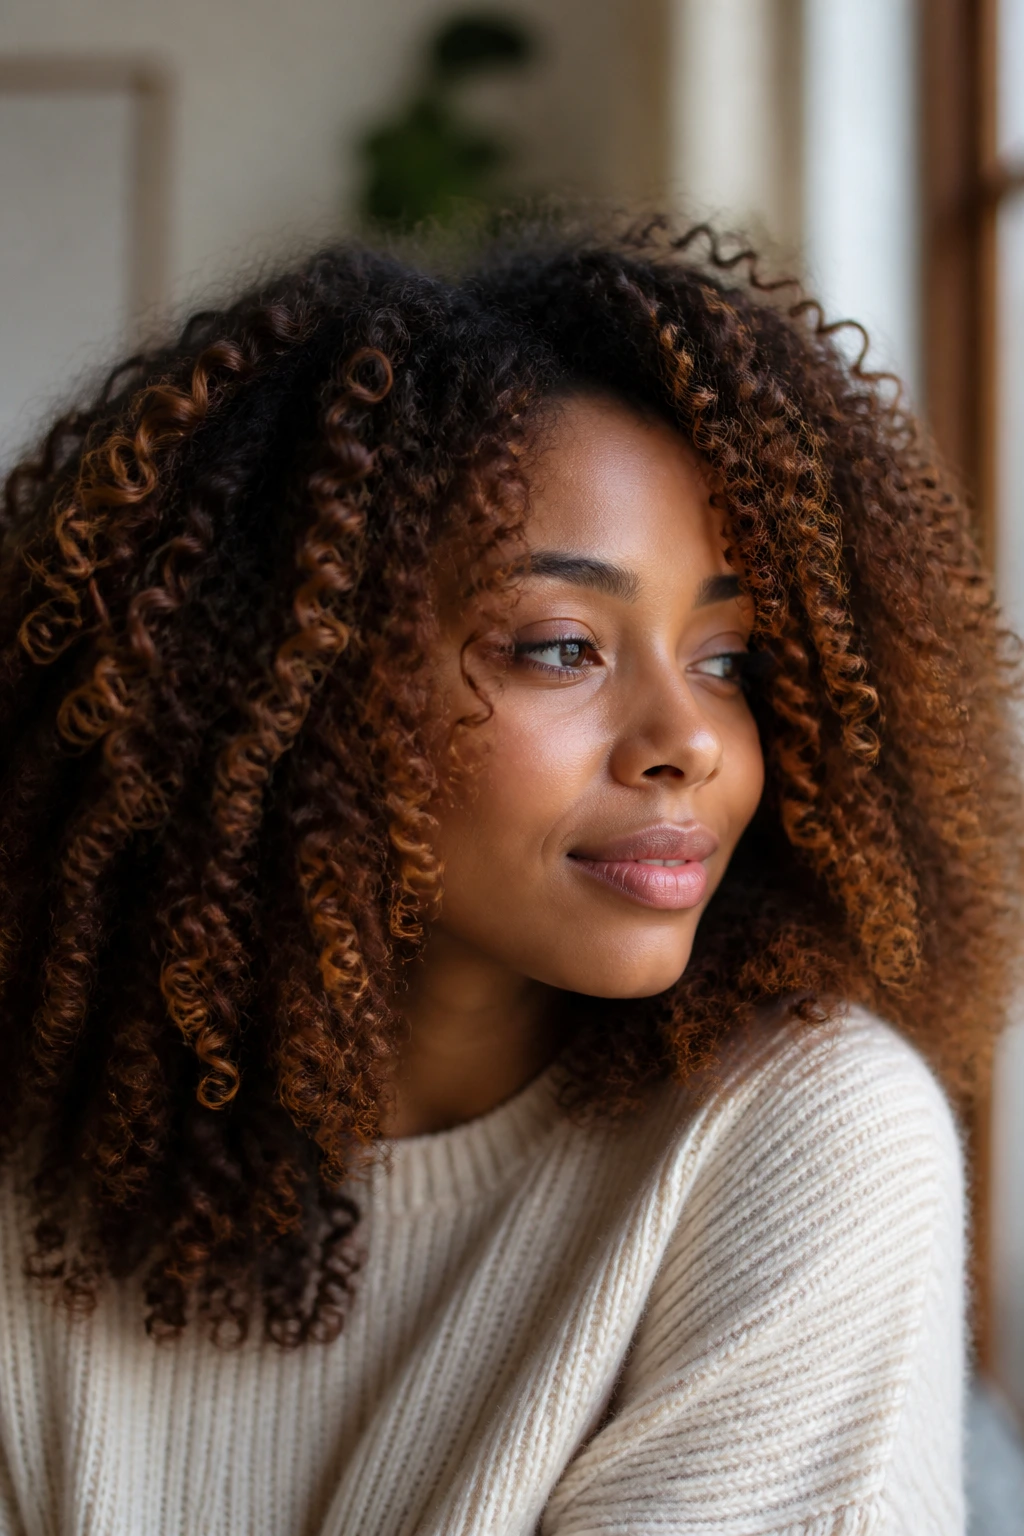
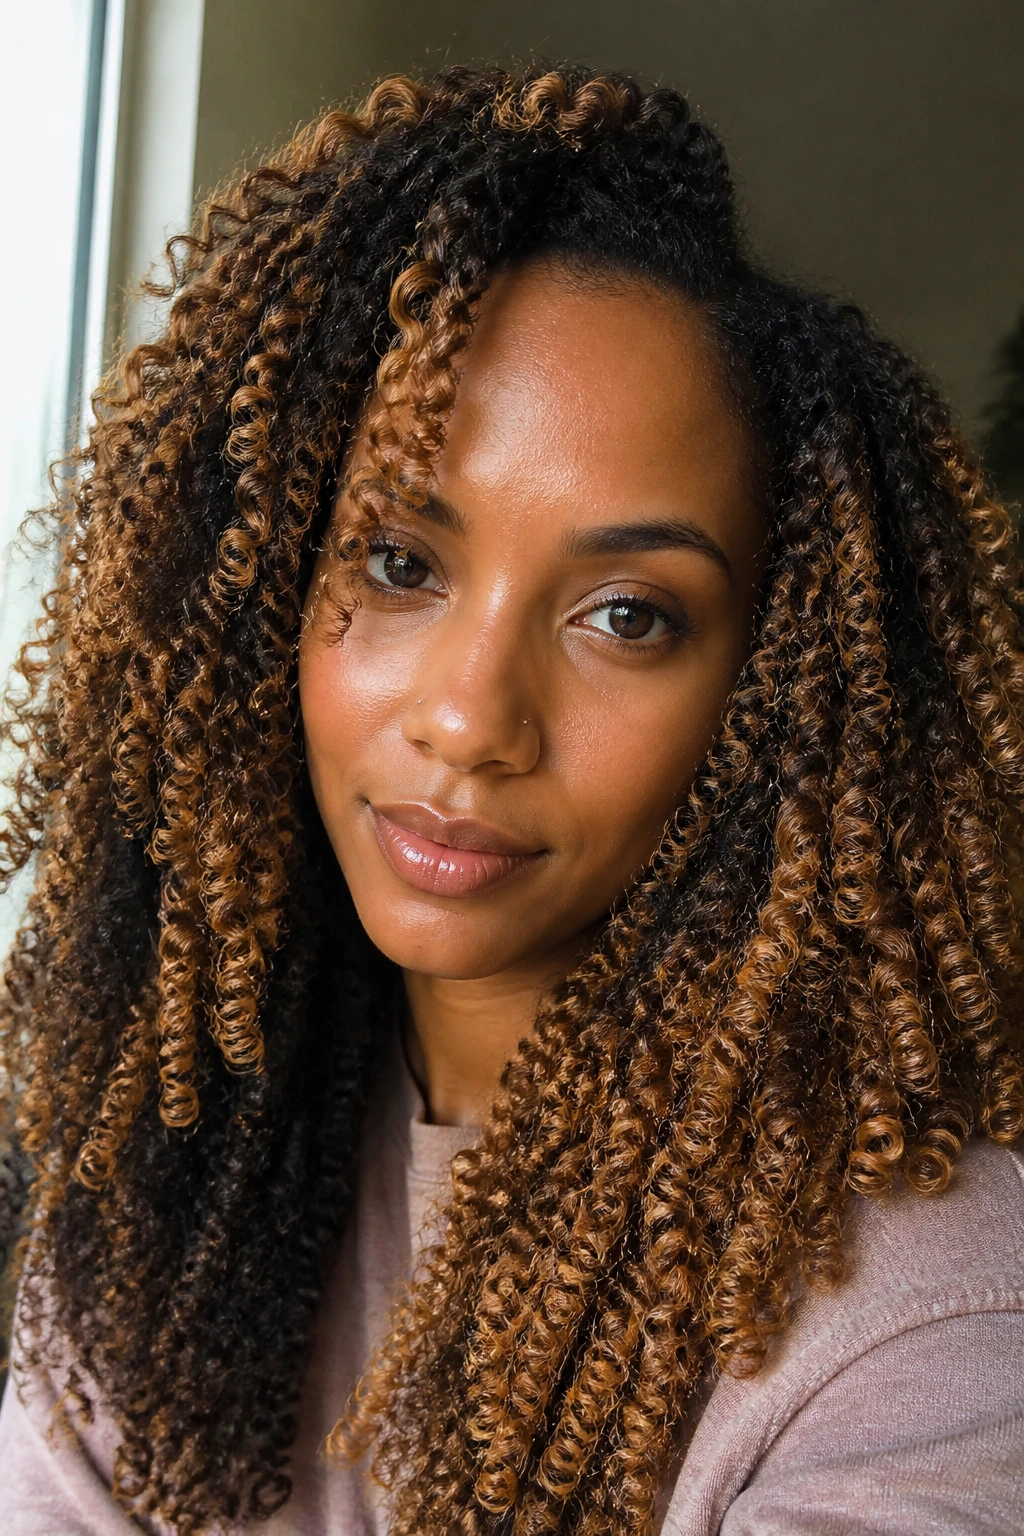
19. Chestnut-Caramel Blend on Long Coils
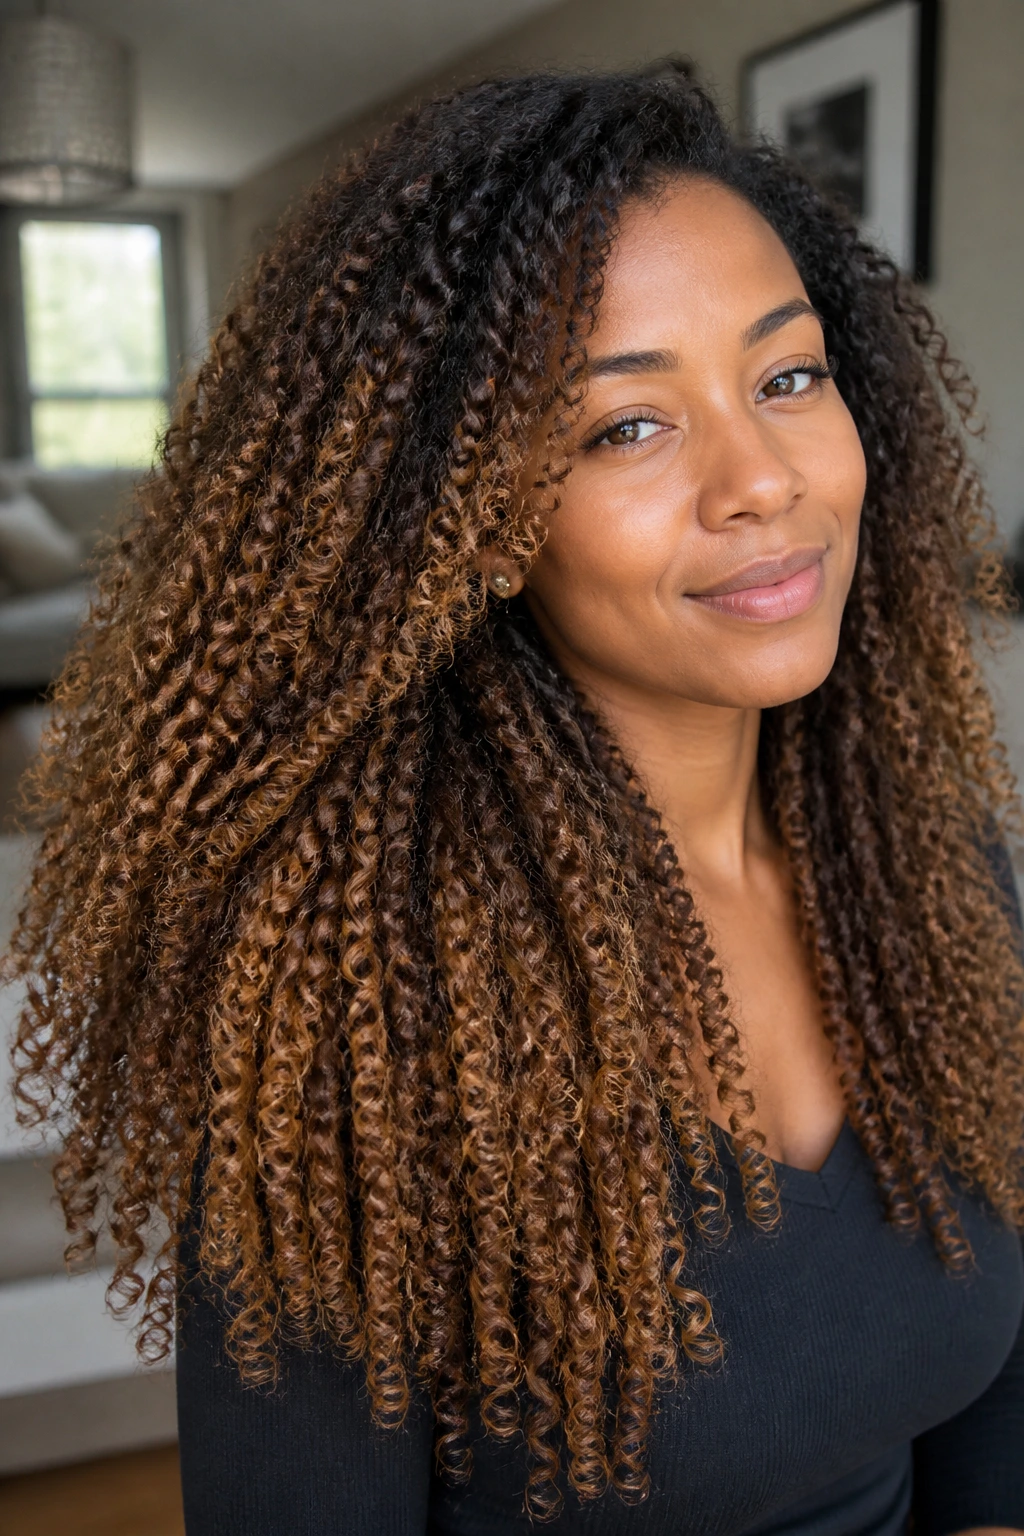
Chestnut is the quieter cousin of gold. Blend it with caramel and the result stays rich instead of bright, which is ideal for long coils that need depth more than drama. The longer the hair, the more room you have for the tone to shift from darker brown near the roots to soft caramel through the ends.
This is a look I reach for when someone wants warmth that doesn’t fight their natural color. It’s especially nice on dense hair because the coils themselves create enough texture. The color doesn’t have to do every bit of the work. Chestnut and caramel together make the hair look fuller, not lighter for the sake of it.
20. Money Piece with Shadow Root
A money piece with a shadow root is the bluntest brightening trick in the whole set. Keep the front section lighter, but preserve a darker root so the color doesn’t look pasted on. That darker root also makes the front pieces feel more intentional and less disconnected from the rest of the head.
This is a strong choice if you part your hair in the middle or wear it pulled back often. The front color frames the face immediately, and the shadow root stops it from looking harsh when the hair grows. If you want the lift without the maintenance of all-over highlights, this is the one that gives the biggest return for the least visual clutter.
21. Toasted Ends on a Frohawk
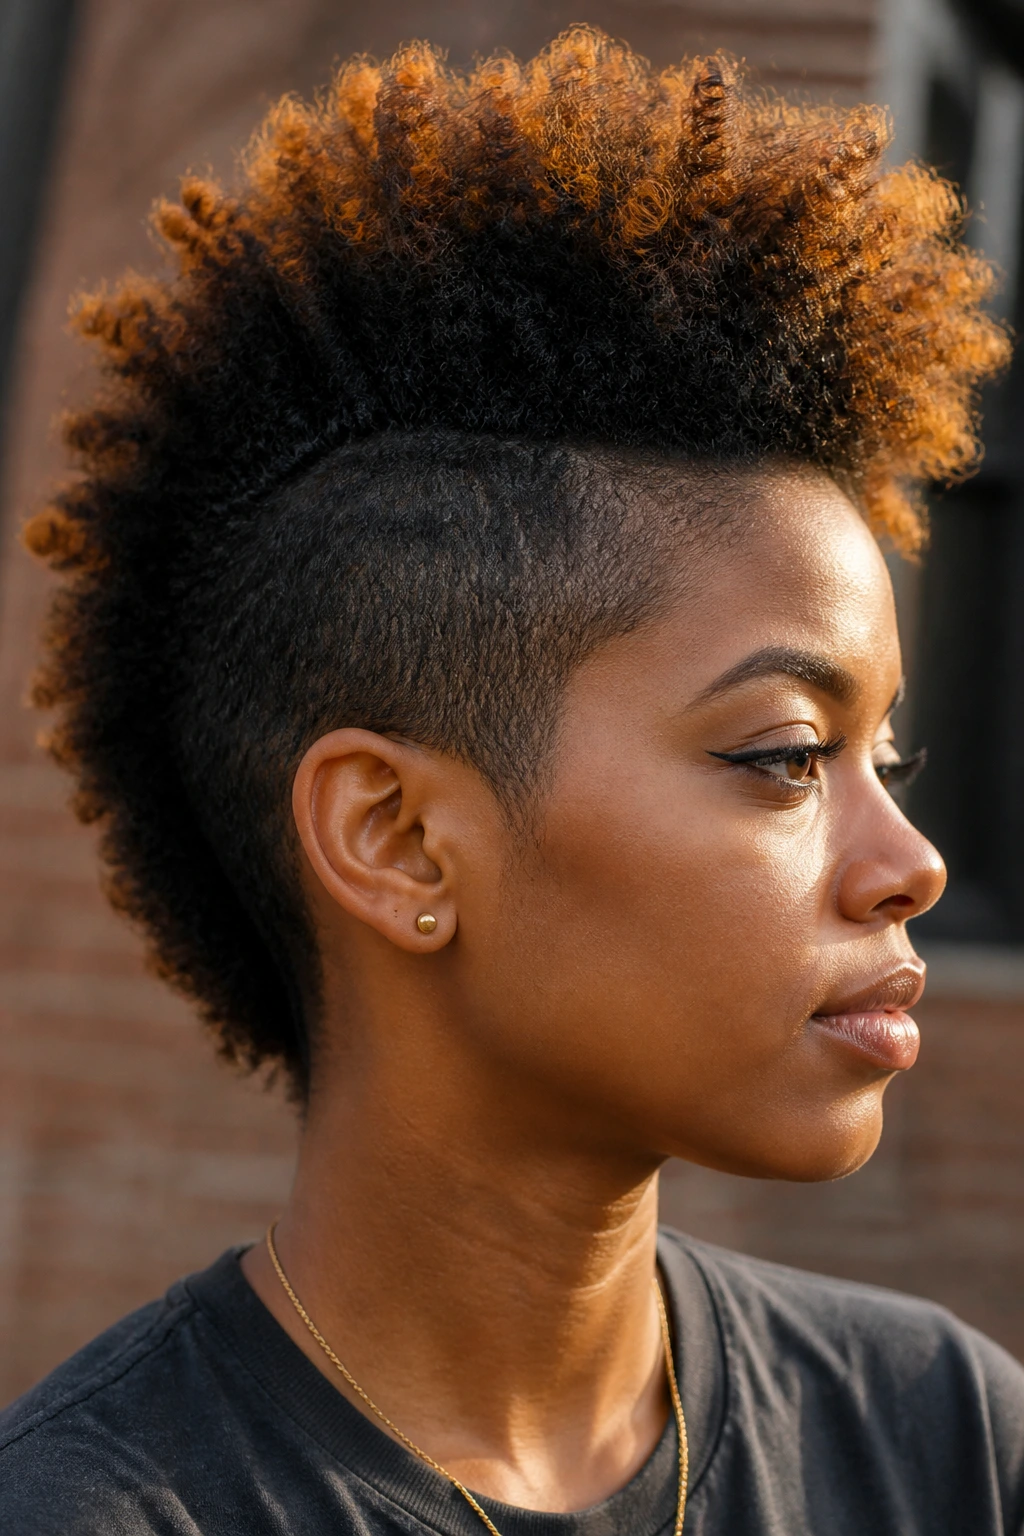
A frohawk already has attitude, so the color can be a little louder too. Toasted caramel ends give the hawk shape a tapering effect, with the darkest color near the sides and the warmest pieces near the top ridge and outer ends. That makes the silhouette feel sharper.
What I like most is how practical it is. You can keep the roots dark, color only the visible parts, and still get a whole new read on the style. The ends carry enough brightness to pop in photos and under daylight, but the cut still does the heavy lifting. If you like bold shape more than bold color, this is a smart compromise.
22. Bronze-Caramel on Sisterlocks
Sisterlocks need a delicate hand. Their small size means even a subtle tone shift can change the whole look, so bronze-caramel is better than something pale or icy. The color should feel like a warm wash across the locks, not a series of bright spots.
This style works because the interlocking pattern already gives the hair detail. Bronze caramel just adds a little glow to that detail. If you want to keep the integrity of the locks, go for a tone that lifts the surface rather than pushing the hair into a very light blonde family. The final effect is soft, tidy, and a little luminous.
23. Swirl Tips on a Half-Up Style
Half-up styling gives you two zones to play with: the lifted top section and the loose lower section. Swirl tips put caramel at the ends and the most visible bends, so the color shows up when the hair is gathered, twisted, or pinned. The effect is less about a full highlight and more about motion.
This is one of those ideas that looks simple until you see it in motion. The tips flick in and out of view, and the caramel makes that movement obvious. It’s especially good for long dense hair, where the lower section can get heavy and a little color helps break up the mass. Keep the roots dark and let the ends do the work.
24. Spiced Caramel Highlights for Ginger-Adjacent Warmth
Spiced caramel leans warmer than classic honey. It has more copper in it, which makes it a great bridge if you like ginger tones but don’t want the full red story. On natural hair, that warmer warmth can look especially rich against deep skin and dark eyes.
This is a louder caramel, and I mean that in a good way. It brings energy. If your wardrobe lives in neutrals, the hair becomes the statement. If you already wear warm makeup or gold jewelry, the whole look lines up fast. The only caution: the toner has to stay controlled so the shade doesn’t drift into orange in harsh light.
25. Creamy Caramel Veil on Short Coils
A creamy veil is the most understated version here, and it may be the prettiest on very short coils. Instead of obvious streaks, the color sits lightly across the surface, changing the way the hair reflects light as a whole. The result is more glow than highlight.
This works best when you want your hair to stay looking like your hair, only warmer and softer. On cropped coils, a veil like this can make the cut look denser and more finished without turning it into a color-first style. It’s subtle. Not boring. Subtle in the good way.
Why Caramel and Natural Texture Keep Working Together
Caramel works on natural hair because the shade is warm enough to flatter deep bases without fighting them, and soft enough to bend with curl shrinkage instead of shouting over it. A tight curl pattern doesn’t reflect light the way straight hair does. The color has to be placed where the eye will actually catch it: on the outer bend of curls, around the face, across the crown, or at the ends where movement shows.
Porosity matters too. Highly porous ends grab color fast and can go lighter than expected, while healthier mid-lengths may resist and stay richer. That’s why a good caramel job on natural hair rarely looks perfectly uniform. It shouldn’t. A little variation is what makes the hair look alive instead of painted.
What to Tell Your Colorist Before the Foils Go In
Start with your curl pattern, not the shade chart. Tell the stylist whether your hair lives mostly in twist-outs, wash-and-gos, puffs, silk presses, or protective styles, because that changes where the color needs to sit. A highlight map for a blown-out style is not the same as a map for shrunken coils.
Then be plain about upkeep. If you can only manage low-maintenance touch-ups, say so. Ask for a strand test, ask how far the lightener will lift, and ask whether the chosen caramel tone will need toner every time it’s refreshed. That conversation saves a lot of disappointment, especially when a warm brown base is lifted too far and starts reading copper instead of caramel.
Essential Tools for Caramel Highlights and Aftercare

- Tint brush and color bowl: Essential for clean section work when painting or glossing pieces.
- Sectioning clips: Keep curls separated so the highlight map doesn’t blur into a mess.
- Tail comb: Helpful for making narrow parts and isolating fine babylights.
- Foils or meche strips: Useful when you want more lift and less color bleed.
- Gloves: Non-negotiable if you’re applying any lightener or toner.
- Wide-tooth comb: Safer than a brush for detangling colored natural hair.
- Color-safe shampoo: Helps keep the tone from washing out too fast.
- Deep conditioner: Needed after any lightening, even if the lift is mild.
- Protein treatment: Helpful if the hair feels stretchy or weak after coloring.
- Satin bonnet or pillowcase: Cuts down on friction that roughs up the cuticle and dulls the shade.
How to Choose the Right Caramel Tone for Your Base
The base color decides whether caramel reads as honey, toffee, bronze, or amber. On deep black hair, a pale caramel can jump too hard and look disconnected, so a richer toffee shade usually blends better. On medium brown bases, you can push the warmth lighter and still keep the color believable.
Red-leaning bases are a different animal. They already carry warmth, so caramel should be chosen carefully or the whole head can tilt copper. If your hair has old color on it, do a strand test first; old pigment changes how the new shade behaves, and it changes fast. Gray strands also need thought. They can take on caramel beautifully, but they may need more than one formula if you want the tone to look even across the whole head.
How to Style Caramel Highlights So They Show Up
Twist-outs: Use medium hold and let a few highlighted pieces sit on the outer layer rather than tucking everything under a denser section. The color shows better when the curls separate.
Wash-and-gos: Keep the front part visible and avoid overloading the hair with heavy cream that dulls the shine. A lighter leave-in often lets the caramel reflect more cleanly.
Stretch styles and silk presses: Use a heat protectant every time, then wear the hair in a clean part or soft bends so the lighter pieces read as strokes instead of static stripes. Straight hair exposes every color decision, for better or worse.
Protective styles: If your own hair is tucked away, use highlighted extensions, accent braids, or caramel-colored accessories so the warmth still shows up at the edges, face frame, or ends.
Common Mistakes That Make Caramel Look Harsh or Dry
The first mistake is lifting too far. Caramel is warm brown with gold in it; it is not pale blonde by default. If the highlight gets pushed past the right level, it can turn straw-like and lose the rich tone that makes the whole look work.
Another common problem is ignoring porosity. Porous ends soak up lightener fast, so they can go lighter and drier than the rest of the head. The fix is simple: keep the lightener off the oldest ends longer, and let the root-to-mid section do more of the color work.
Uniform placement is a sneaky one. If every highlight sits in the same spot, the hair looks patterned instead of dimensional. Break the sections up. Let some pieces hide under layers and let others sit on top.
Finally, don’t skip moisture after coloring. Caramel on healthy curls looks glossy; caramel on thirsty curls looks dusty. A weekly deep condition and a gentle cleanse schedule make a bigger difference than most people think.
Caramel Variations to Try When You Want a Different Mood
Honey-Drip Caramel: This version leans lighter and sweeter, with more golden warmth than brown. It’s a good fit for people who want the brightest possible caramel without crossing into blonde territory.
Toasted Toffee Blend: Darker, richer, and a little earthier. It works well on very dark bases because it keeps the contrast controlled and the regrowth softer.
Bronze-Copper Caramel: Add a little red-brown into the mix if you want more fire. This one looks best when you already wear warm makeup tones or gold jewelry, because the whole look leans spicy.
Low-Key Espresso Caramel: Keep the base nearly untouched and tuck just a few warm pieces into the mid-lengths and ends. It’s the quietest option, and one of the easiest to maintain.
High-Contrast Money-Piece Caramel: Bright around the face, dark everywhere else. If you want a sharper, more noticeable style change, this is the one that gives you the most visual payoff.
Keeping the Color Soft Between Touch-Ups
Colored natural hair needs a calm routine. Wash with a sulfate-free shampoo when possible, and if the hair feels coated, use a clarifying wash about once a month before your deep conditioner. Caramel can look dull fast if product buildup sits on the cuticle.
Deep condition weekly, especially if bleach was involved. If the hair feels weak, stretchy, or rough, add a protein treatment every few weeks instead of loading on more oil. Oil helps the surface feel smooth, but it does not fix internal weakness. Sleep in satin or silk, and try to keep heat styling limited to the days that actually need it.
Touch-up timing depends on how bright the pieces are and how fast your roots grow, but most caramel looks benefit from a refresh every 8 to 12 weeks. If the color starts leaning orange, a toner or gloss can pull it back without redoing the whole head.
Questions People Ask About Caramel Highlights on Natural Hair
Can natural hair keep its curl pattern after caramel highlights?
Yes, if the lightening is controlled and the hair is treated well afterward. Curl pattern changes usually come from too much lift, too much heat, or weak aftercare, not from caramel itself.
Do caramel highlights work on 4C hair?
Absolutely, but placement matters more than on looser textures. Thin ribbons, face-framing pieces, or soft halo color usually show up better than wide streaks that disappear into shrinkage.
Can you get caramel highlights without bleach?
Sometimes, if the base is already brown enough or if you’re using a high-lift gloss on lighter hair. On very dark hair, though, true caramel usually needs some lifting to show.
What if my highlights turn orange?
That usually means the lift was warm but not fully refined. A toner, gloss, or a softer brown-caramel overlay can calm it down. The fix is usually color correction, not starting over.
Are balayage and foil highlights the same on natural hair?
No. Balayage is painted for a softer sweep, while foils trap heat and push more lift. On darker natural hair, foils often give more brightness; balayage gives more softness.
How often do caramel highlights need to be refreshed?
The root area can often go 8 to 12 weeks before needing attention, but the tone may need a gloss sooner if it starts to fade or get brassy. The amount of washing and heat styling matters a lot.
Will these colors show on a wash-and-go?
Yes, but usually not as dramatically as they do on stretched hair. The curl clumps can hide some of the lighter pieces, which is why face-framing sections and outer-layer ribbons work so well.
Can I keep the color if I wear protective styles often?
Yes, and some people actually prefer it that way. Extension braids, twist styles, or wigs can protect the hair between color moments, as long as the base hair stays moisturized and the scalp is kept clean.
The Shade That Sits Exactly Where It Should
Caramel highlights are at their best when they don’t look like they’re trying too hard. On natural hair, that usually means a warm tone with enough depth to sit inside the curl pattern instead of sitting on top of it like a sticker. The prettiest versions in this collection do one of two things: they brighten the face, or they build movement through the lengths without forcing the whole head lighter.
That’s the part I keep coming back to. Caramel is not about making natural hair look blond. It’s about giving the hair enough warmth and dimension that the texture reads even richer than before. Pick the placement that fits the way you wear your hair, keep the tone honest, and leave room for the curls to do their own work.