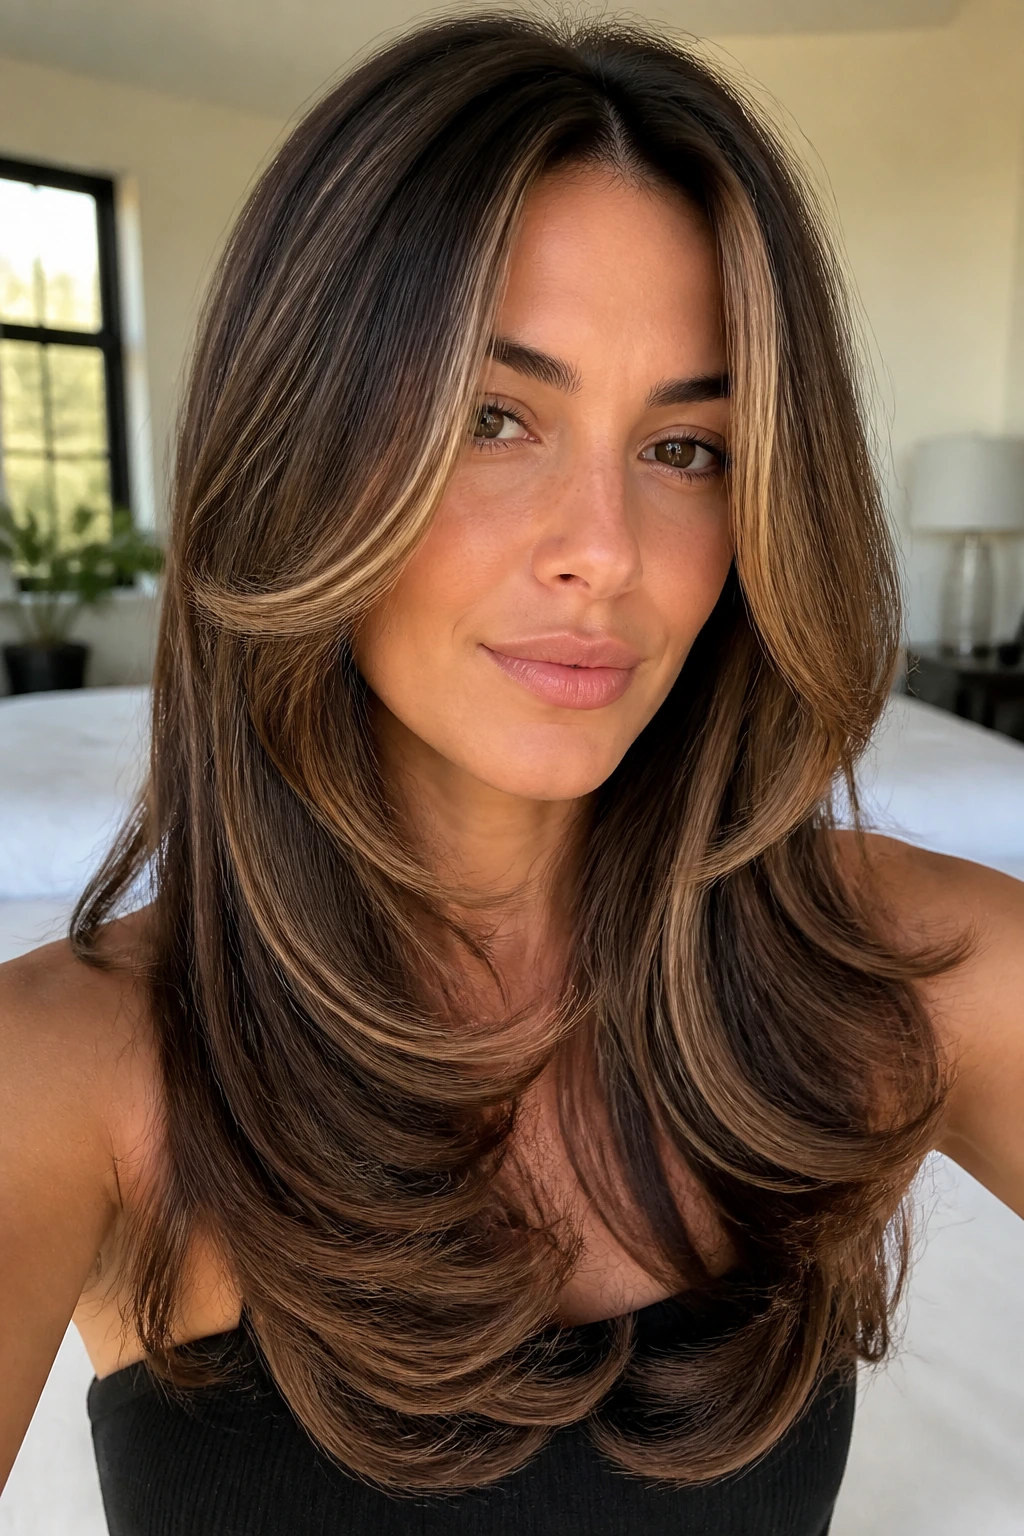
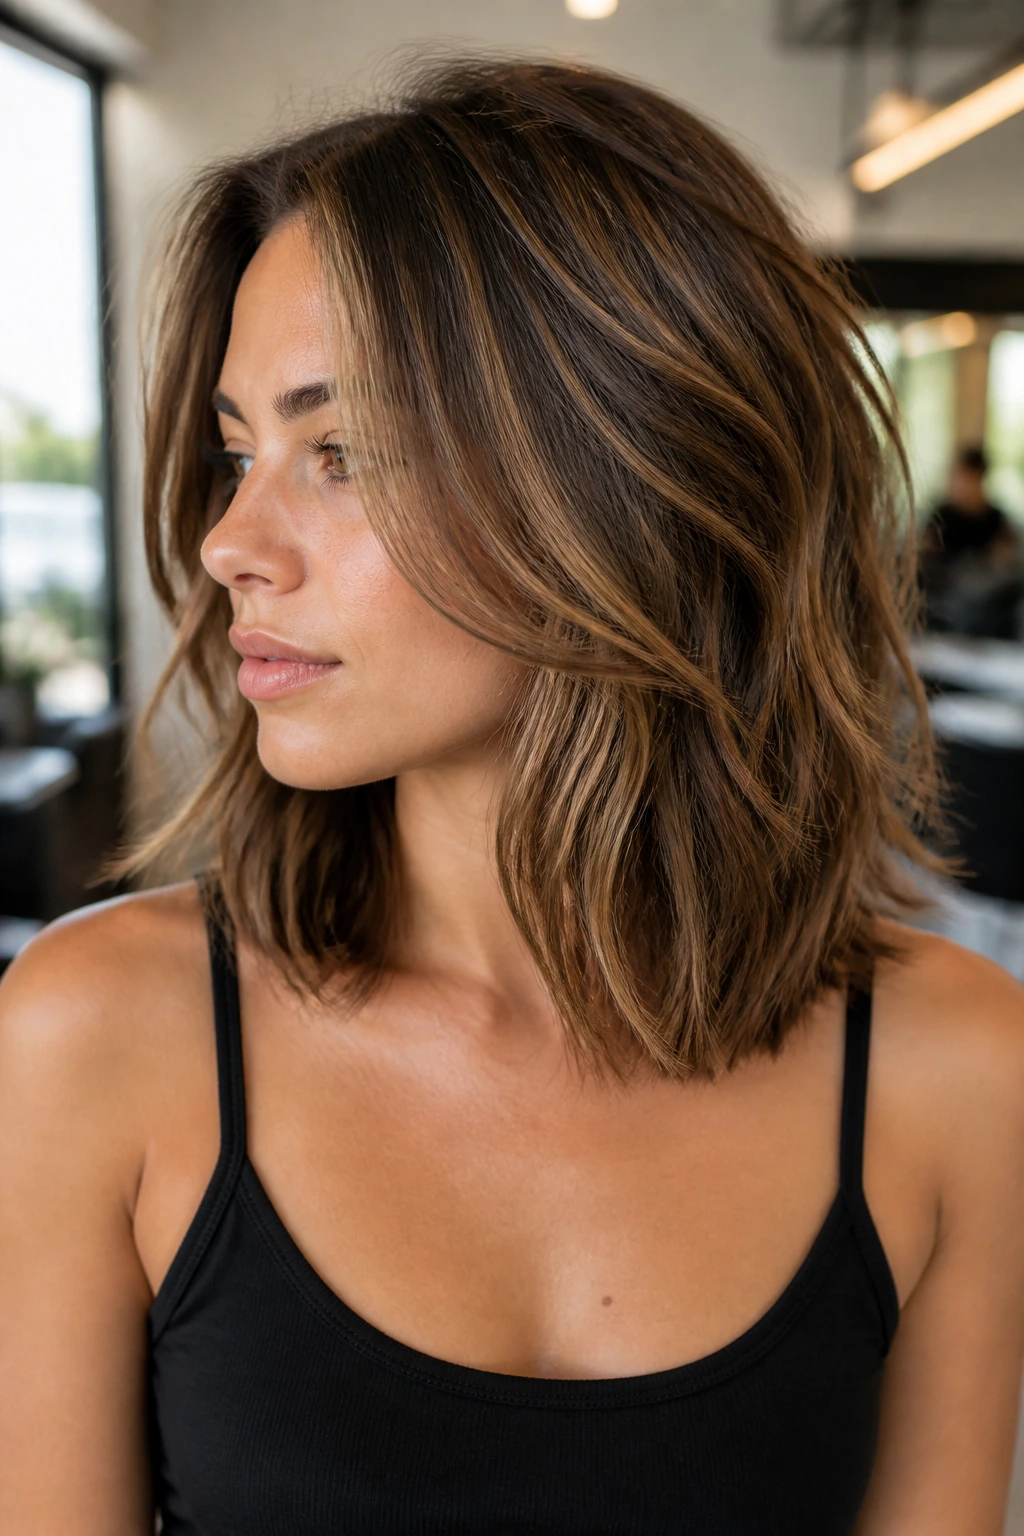
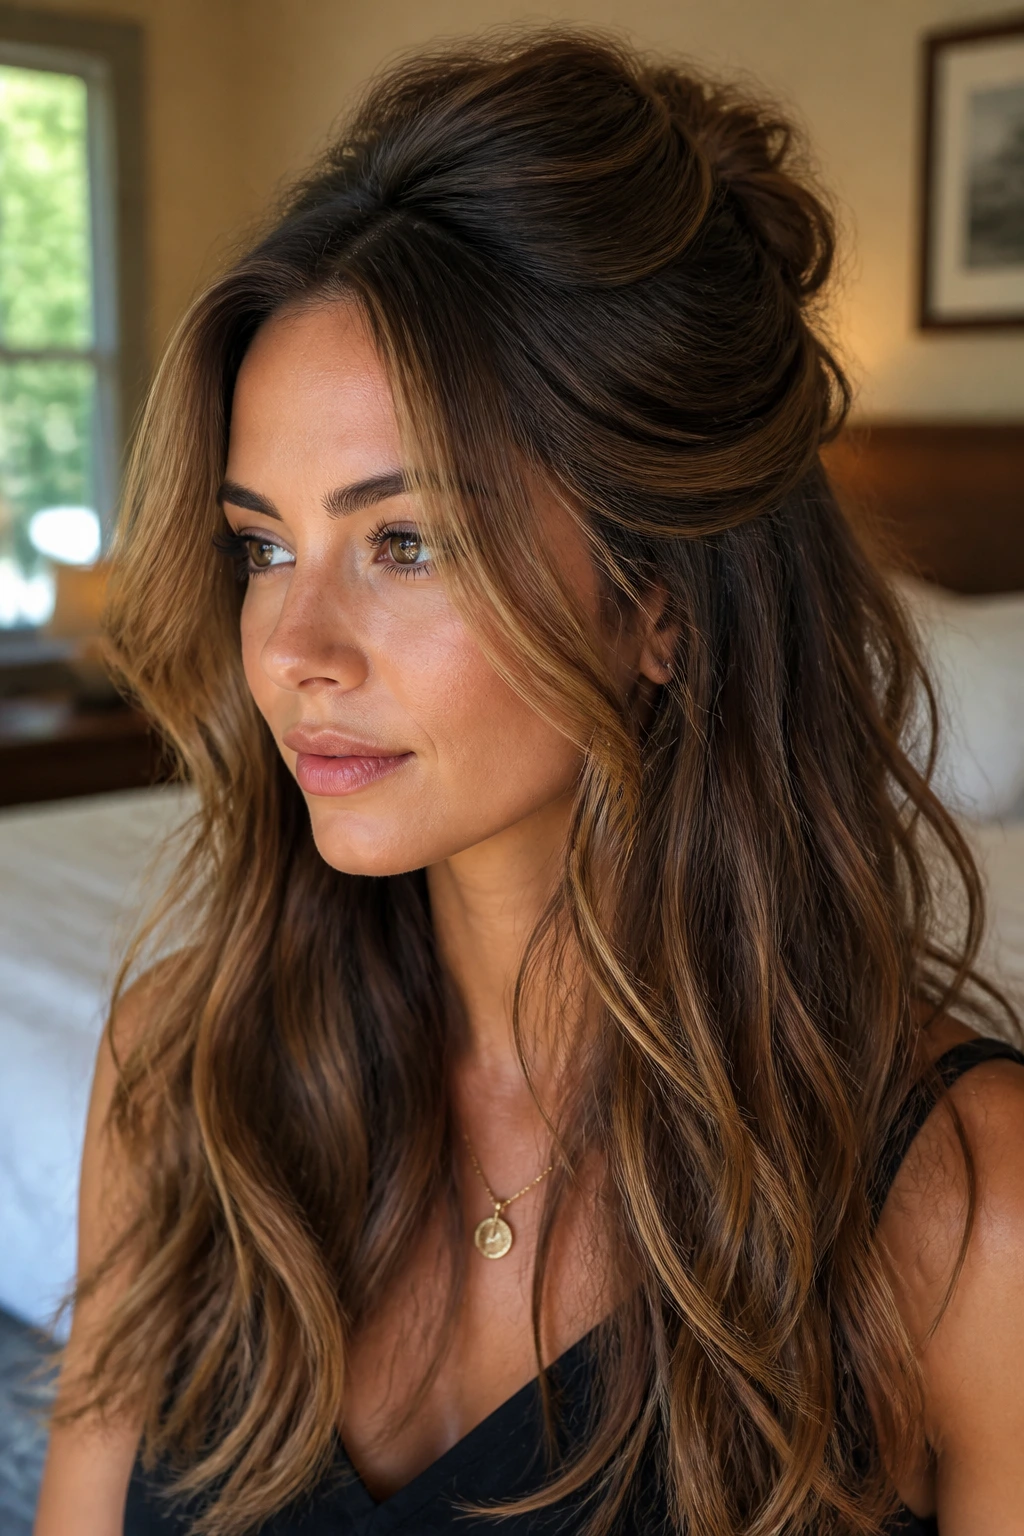
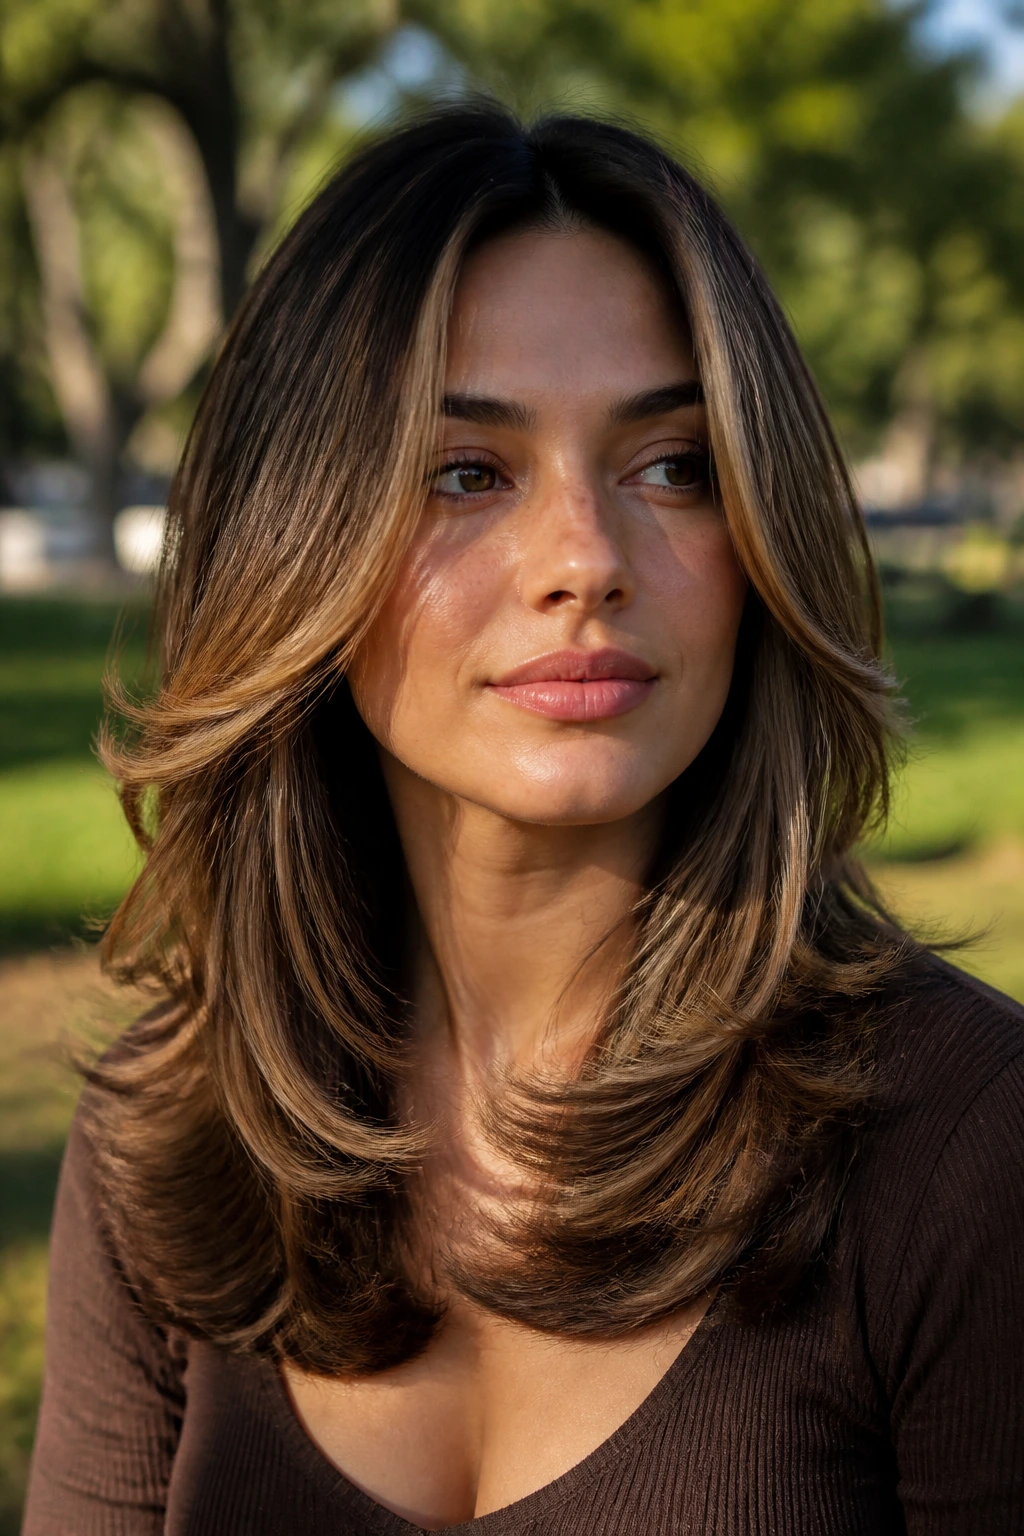
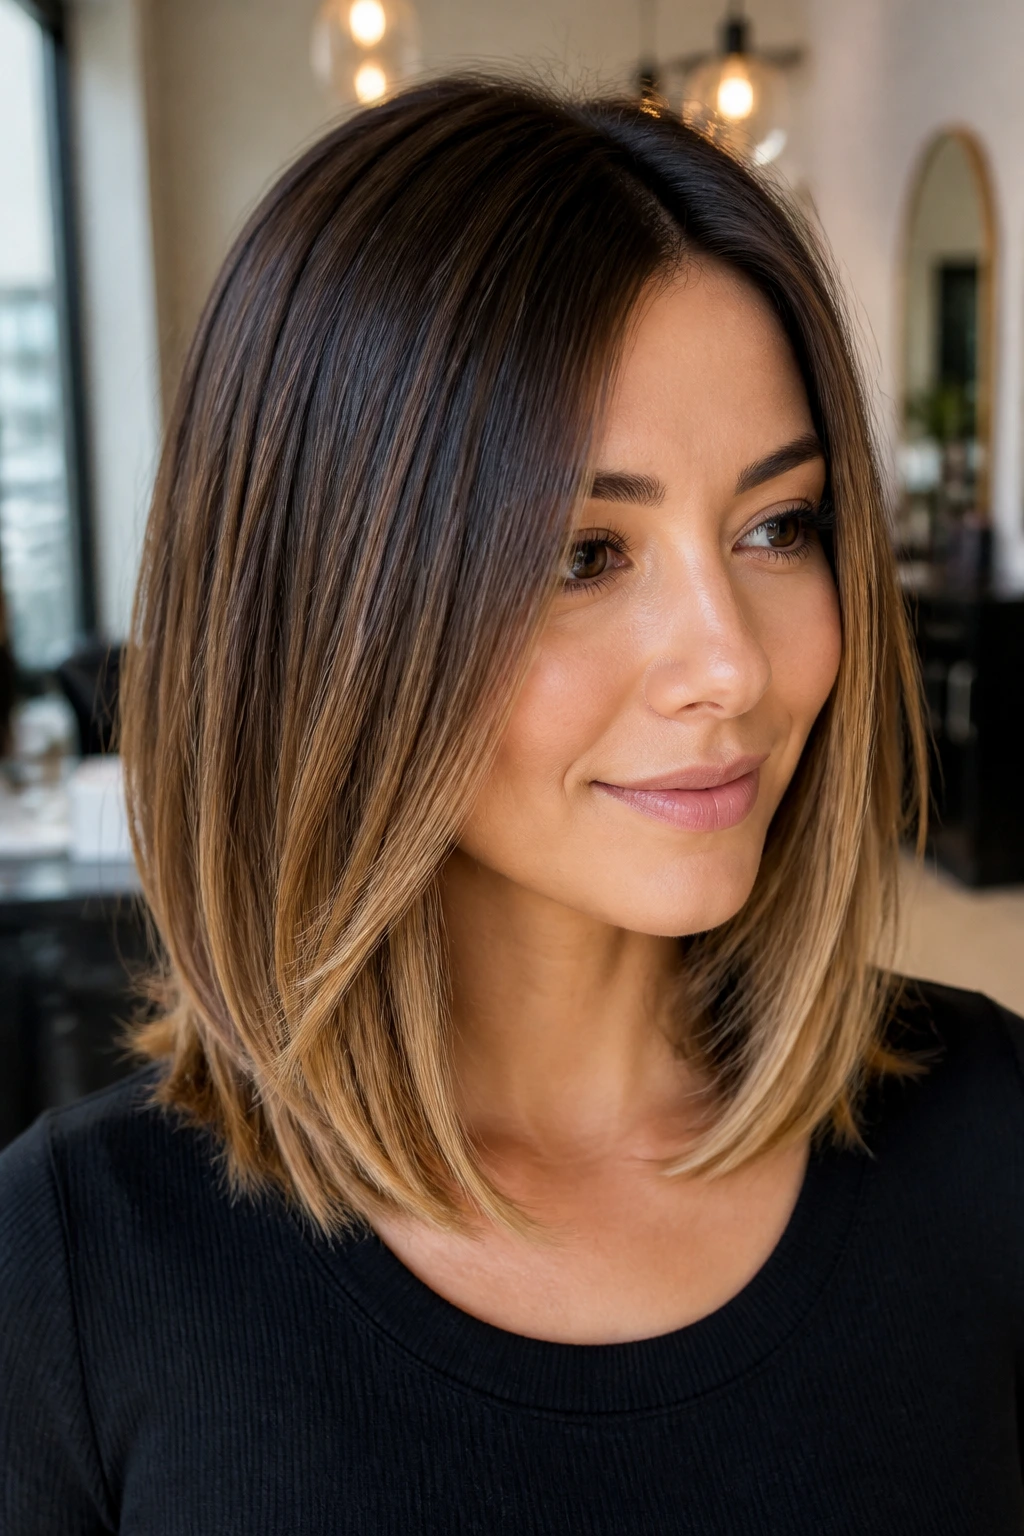
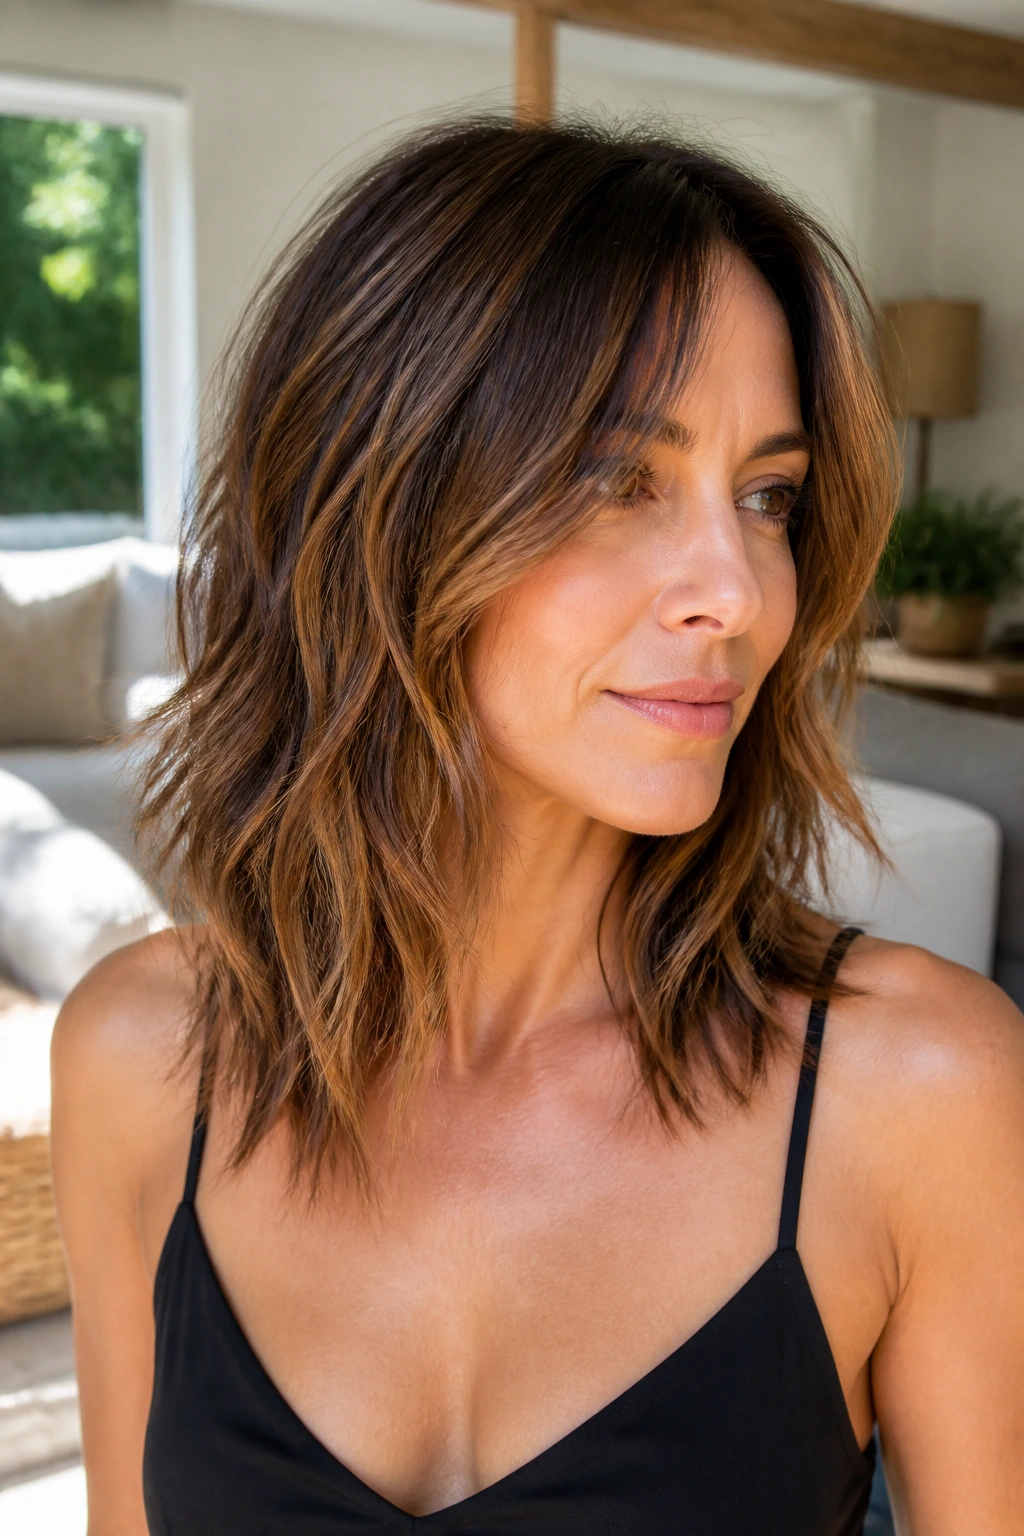
Thick hair has a habit of hiding its best features when the cut is too blunt. You get that heavy, curtain-like effect at the ends, and all the shine in the world can’t rescue it. Caramel highlights change the equation fast. They break up the density, catch on the bends and layers, and make the cut look deliberate instead of bulky.
That’s why layered hairstyles for thick hair with caramel highlights work so well together. The layers create movement; the caramel adds a second layer of movement, if that makes sense. Not motion, exactly. More like visual rhythm. A good caramel placement doesn’t sit on top of the haircut — it follows the haircut, so the shape shows itself every time the hair swings, flips, or gets tucked behind an ear.
And with thick hair, the details matter. A few extra inches on a face-framing layer can change the whole mood. A blunt line too high can make the hair puff. Put the caramel in the wrong place and the color looks stripey. Put it in the right place and suddenly the whole thing feels lighter, softer, and more expensive-looking without turning the hair flat.
Why This Collection Feels Worth Saving
-
Thickness Becomes Shape: These cuts use layering to remove bulk where it’s needed most, so the hair stops forming a heavy block at the bottom.
-
Caramel Adds Depth, Not Noise: The highlight placement is meant to follow the layers, which keeps thick hair from looking streaky or overworked.
-
Most Looks Are Salon-Friendly: These are styles you can actually ask for with clear terms like “face-framing layers,” “internal weight removal,” or “a caramel money piece.”
-
They Work on More Than One Texture: Straight, wavy, and curly thick hair all benefit here, but the styling method changes a little from one to the next.
-
They Grow Out Better Than Blunt Cuts: Layers plus dimensional color tend to look softer between appointments, especially when the caramel is blended through the mid-lengths and ends.
-
There’s Room to Make It Yours: You can go subtle, glam, shaggy, sleek, or curly without losing the thick-hair payoff.
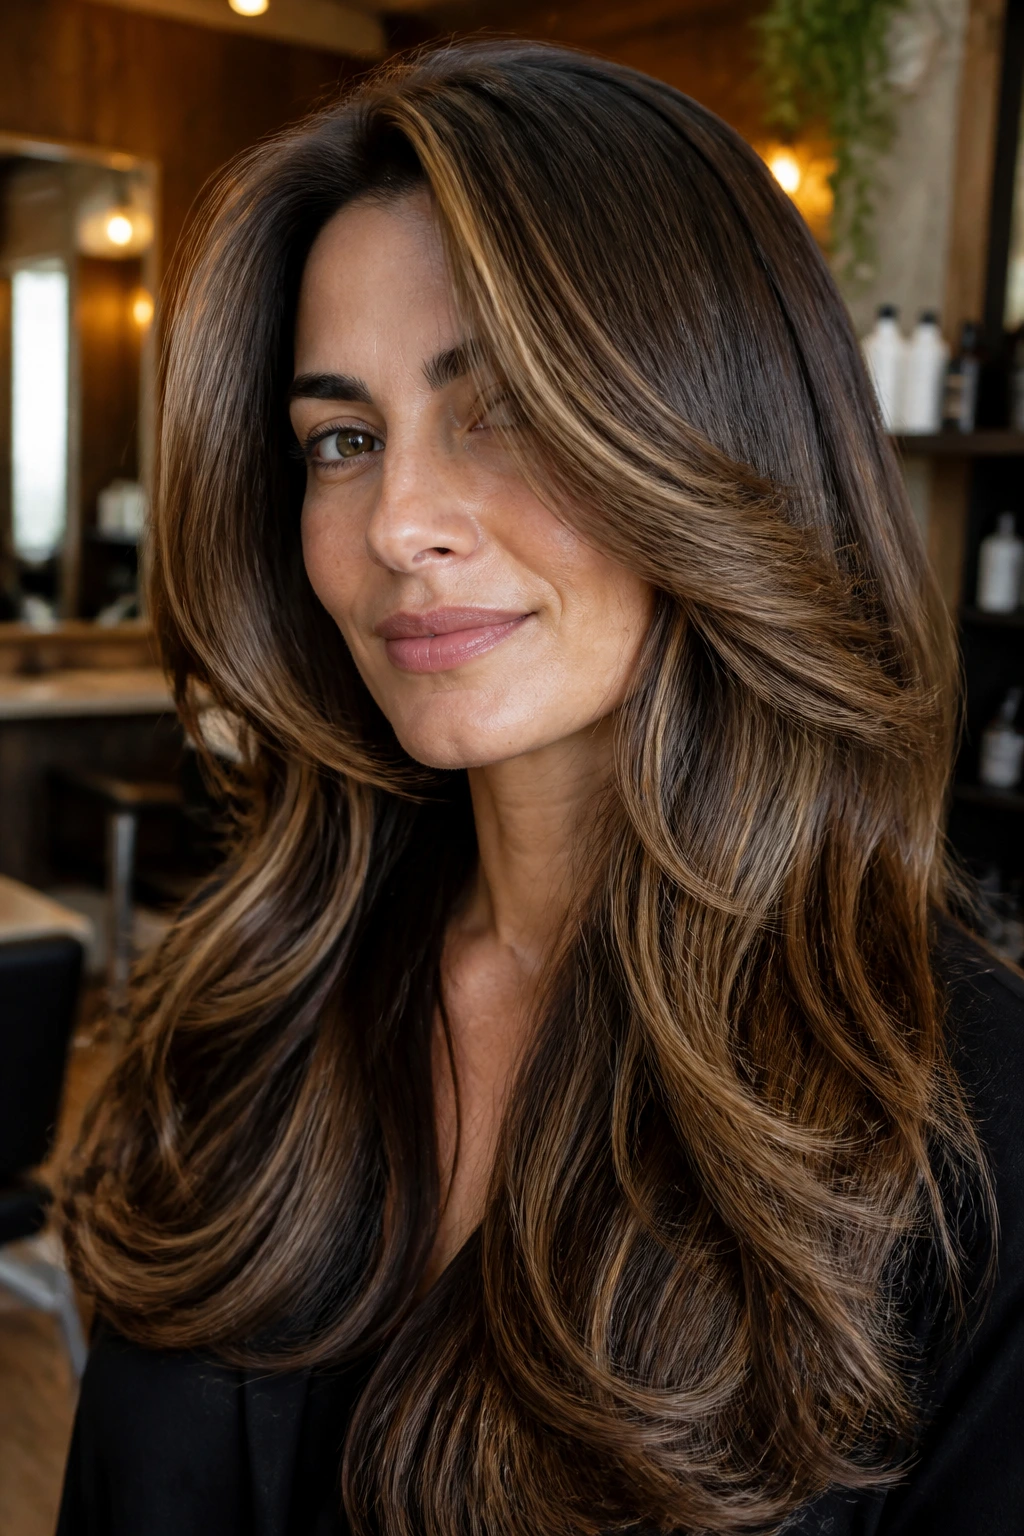
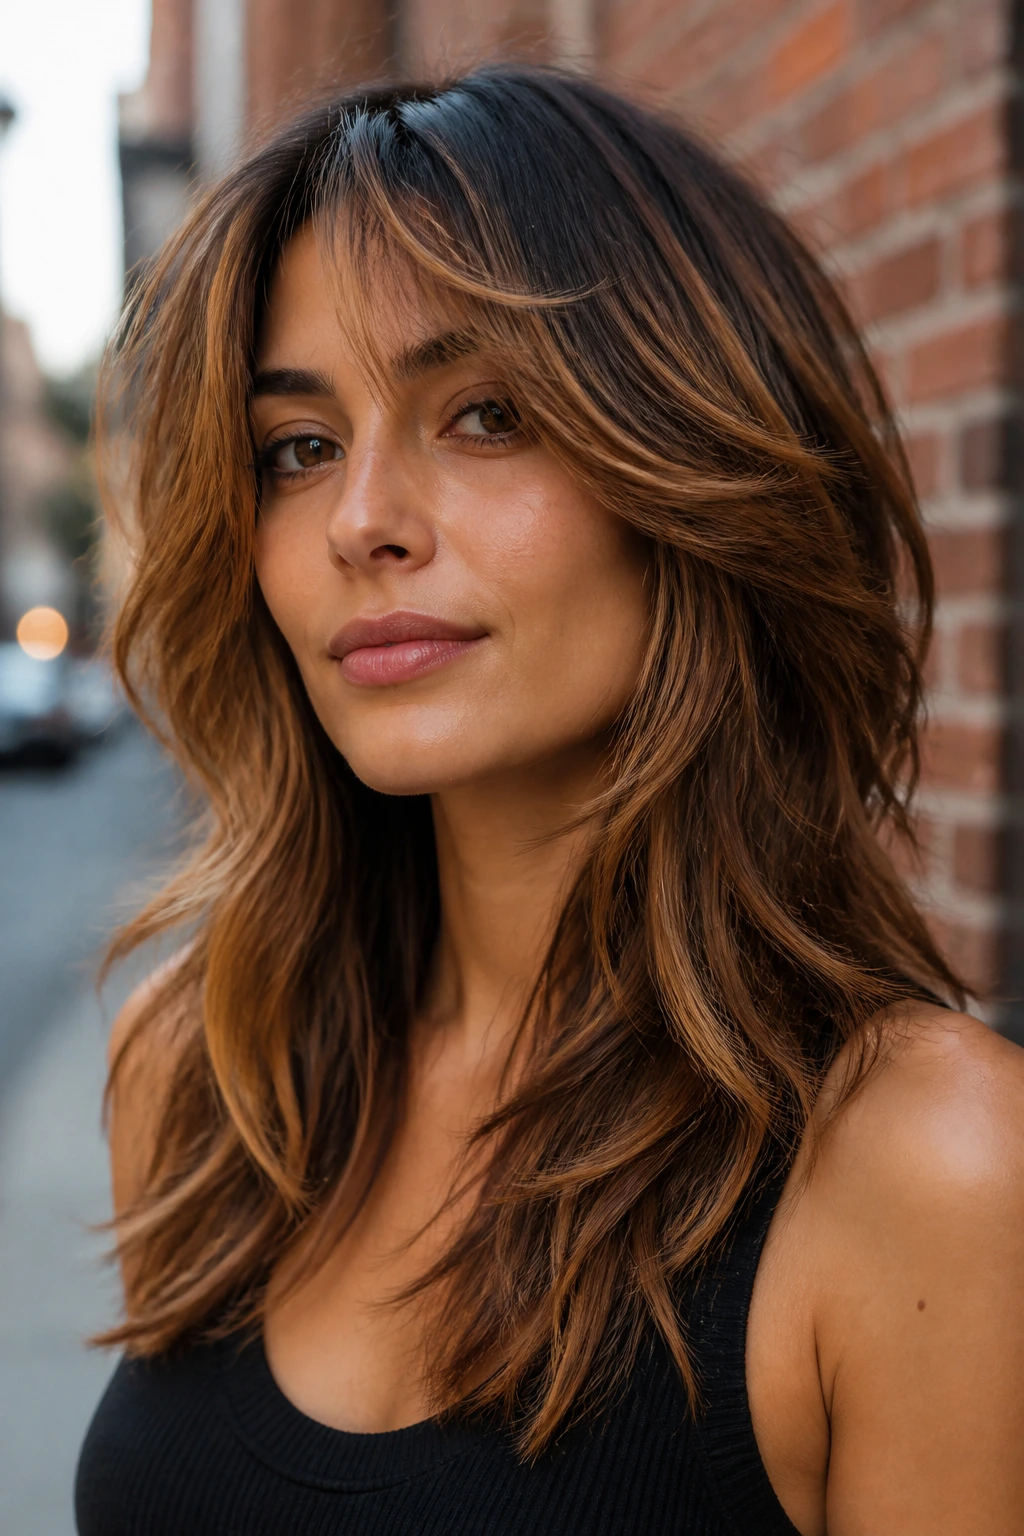
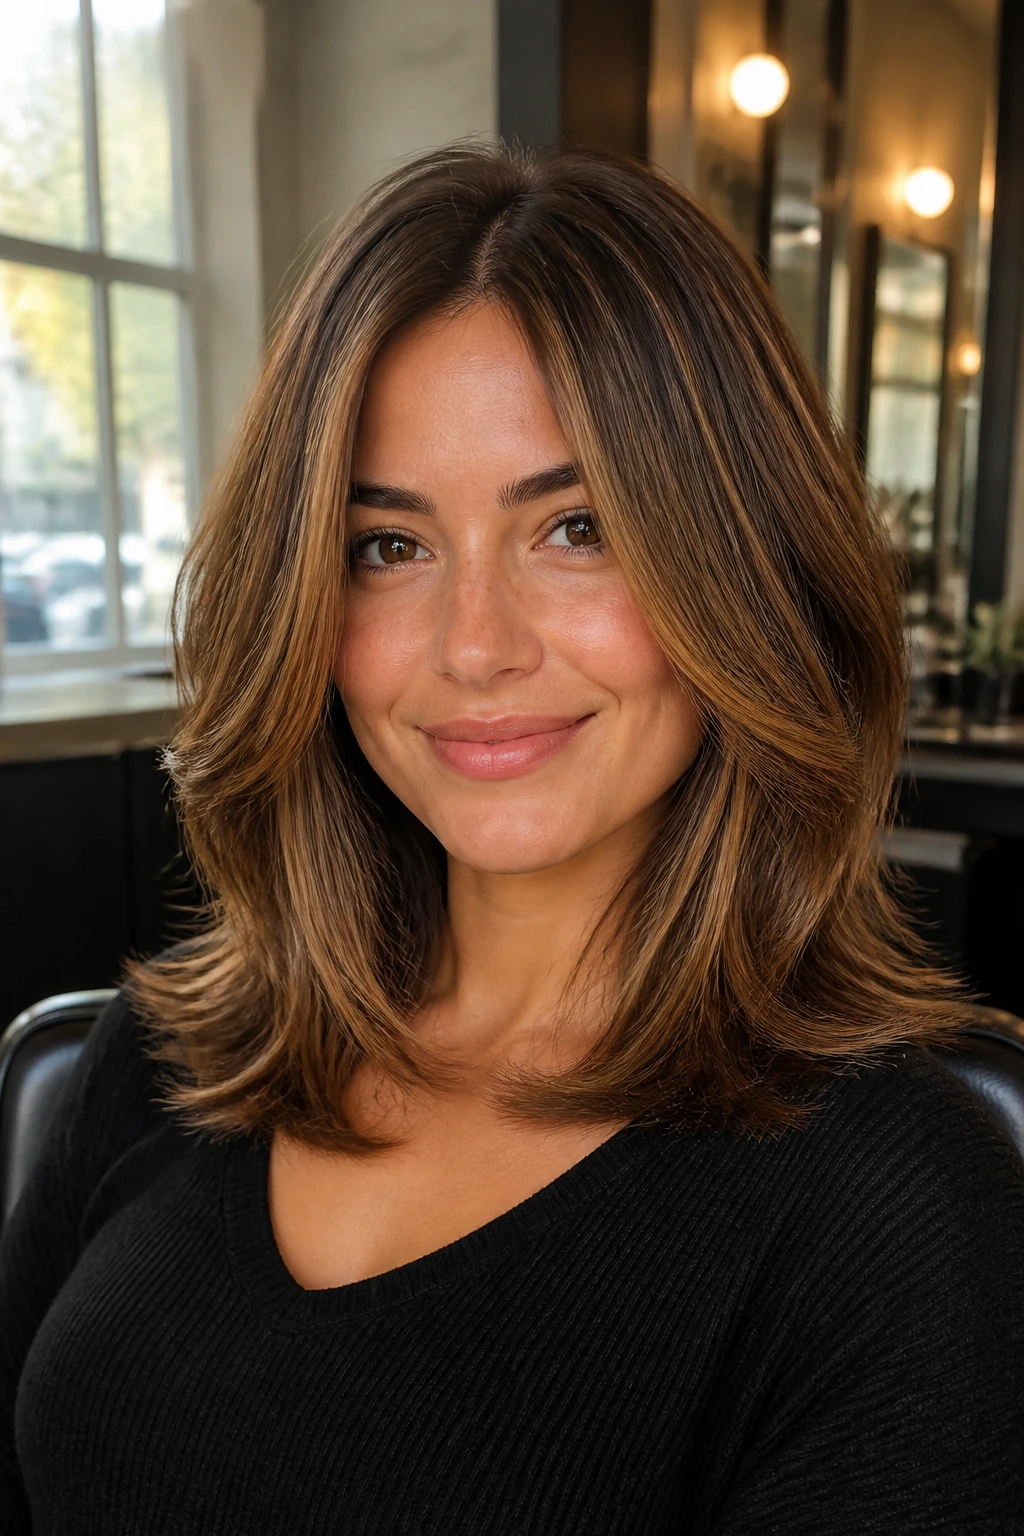
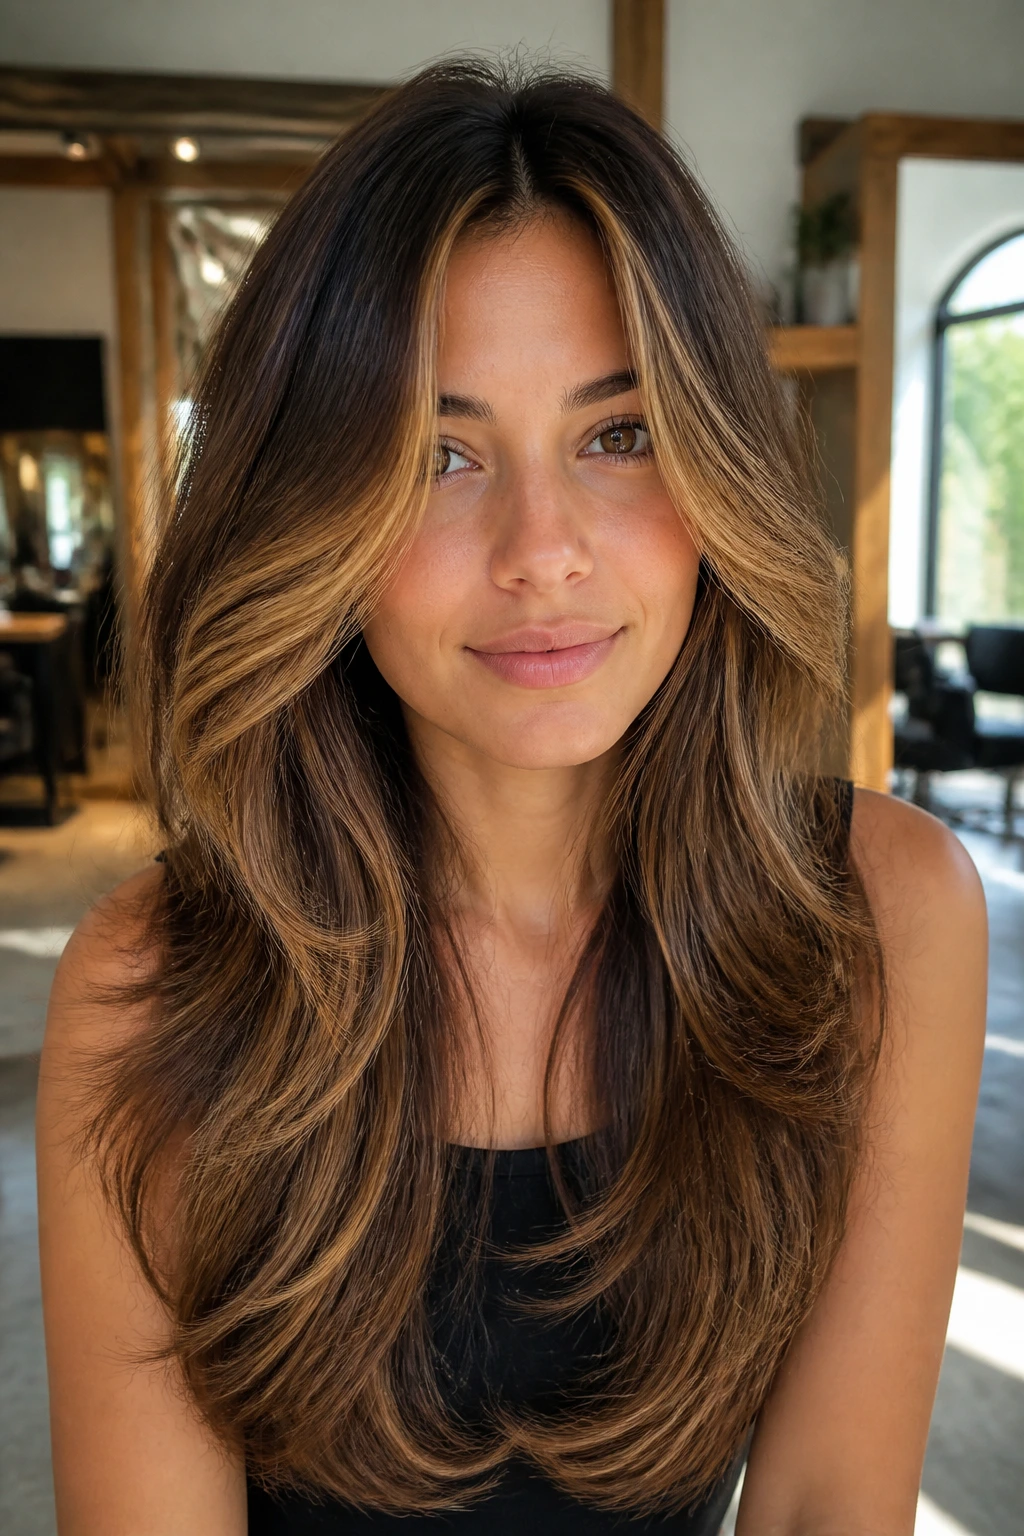
1. Long Feathered Layers with Caramel Face Framing
This is the style I reach for when thick hair needs movement without looking choppy. The long feathered layers soften the perimeter, and the caramel face-framing pieces pull the eye inward instead of letting the hair sit as one heavy curtain. The whole effect is light at the edges and full through the body, which is exactly where thick hair usually behaves best.
Why It Works for Thick Hair
- Start the shortest face-framing layer around the cheekbone or just below it.
- Keep the caramel brighter near the front and softer through the lengths.
- Blow-dry with a round brush so the ends turn under instead of flaring out.
Best for: medium-to-long hair that feels dense around the jaw and collarbone.
Stylist note: ask for feathering, not thinning shears all over. There’s a difference, and it matters.
2. Collarbone Butterfly Layers and Ribbon Highlights
Butterfly layers love thick hair because they create that airy top section while leaving enough length underneath to keep the shape grounded. Add caramel ribbon highlights and the cut starts to look almost layered in color, not just in shape. That’s the part I like most. It moves when you walk.
These layers are strongest when the shortest pieces sit around the chin and collarbone, then drop into longer lengths below. The caramel shouldn’t be packed in like stripes; it should flow in ribbons through the mid-lengths and ends so the layer breaks are visible. If your hair feels too triangular when it air-dries, this cut is one of the better fixes.
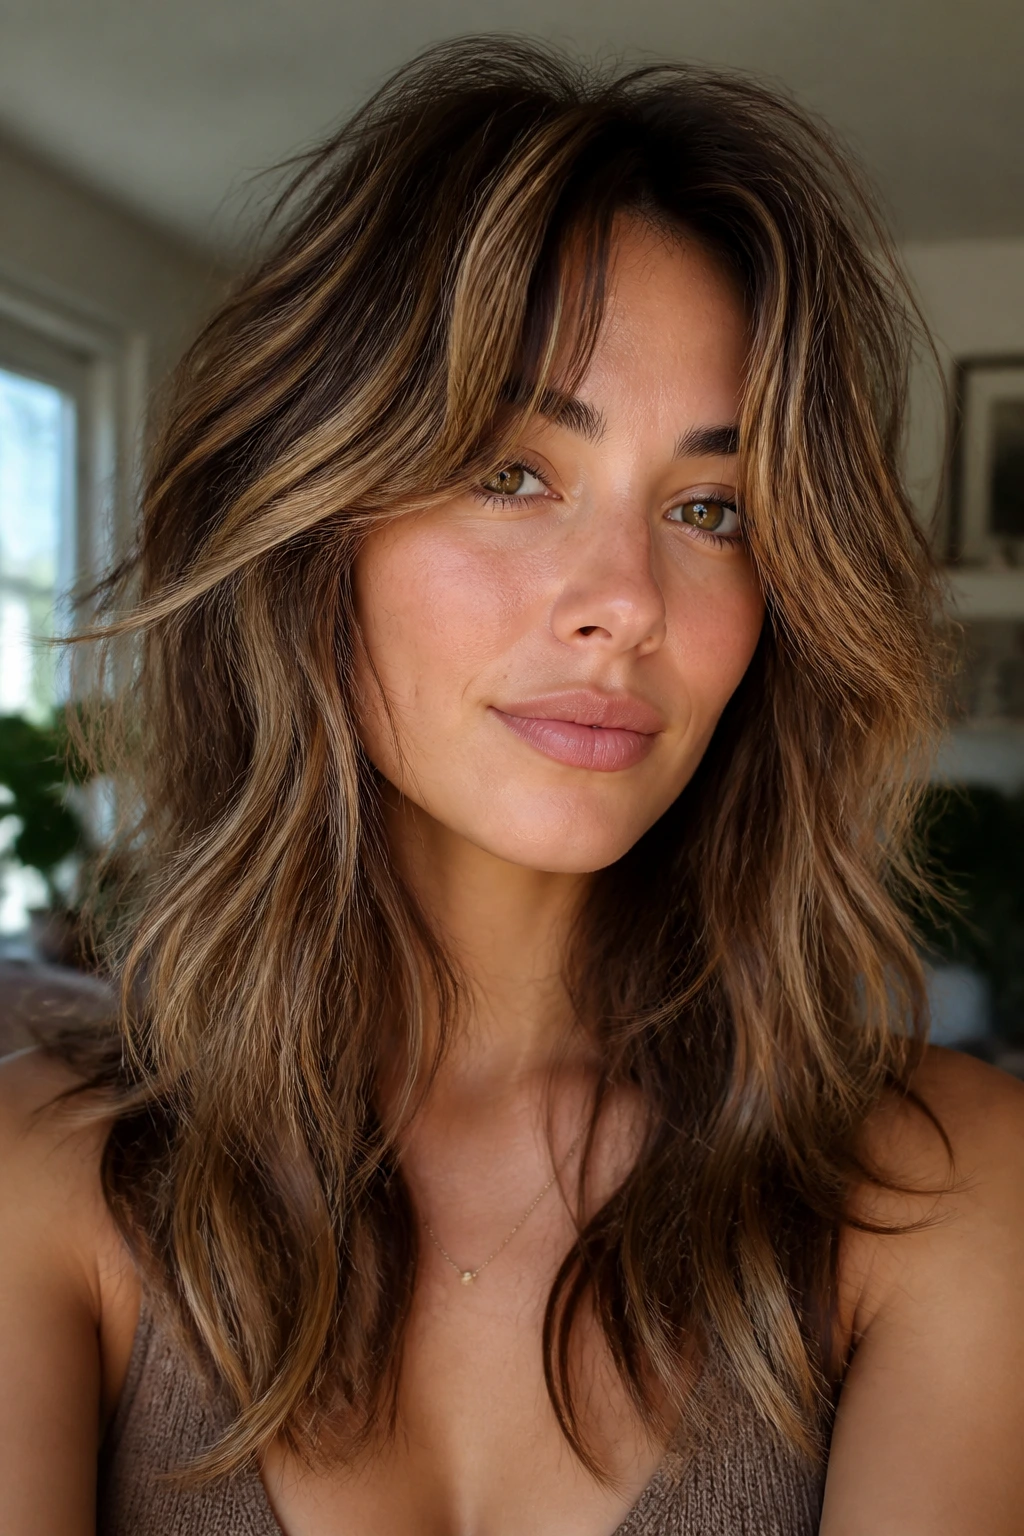
3. Tousled Shag Layers with Sunlit Caramel Pieces
Why does a shag work on thick hair when other layered cuts can turn puffy? Because the shag is built to look a little undone. The texture is part of the point, and caramel highlights make that texture readable instead of random.
How to Wear It
A thick-haired shag looks best when the layers are cut with some grit, not polished to death. Use a diffuser, a little mousse, and a rough dry, then twist a few face pieces around your fingers while they’re still damp. The caramel pieces near the crown and around the temples keep the whole cut from collapsing into one dark mass. Skip heavy oils at the roots. They make this style drop fast.
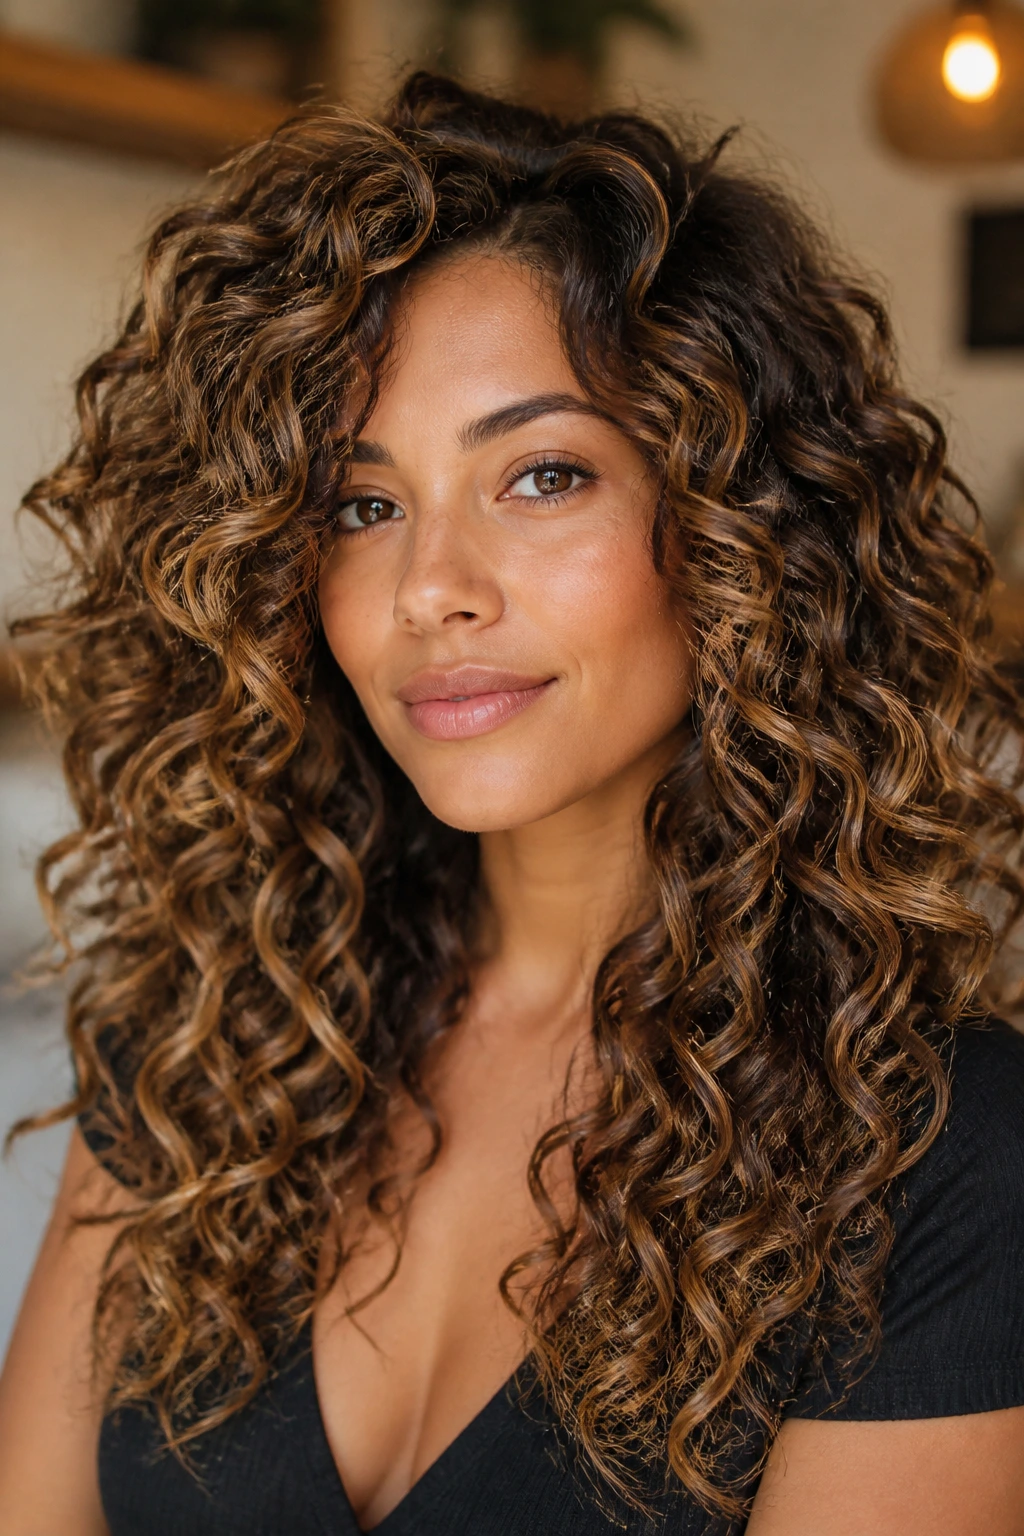
4. Curly Cascading Layers with Honey-Caramel Dimension
I’ve seen too many curly cuts leave thick hair triangle-shaped, and it’s a shame because curls can handle serious layering when the shape is controlled. Cascading layers let the curl pattern stack softly instead of building outward like a pyramid. Honey-caramel dimension makes each curl clump easier to see.
A good curl-focused layer cut should follow the curl, not fight it. The color helps too, especially when the caramel is painted onto the outside of the curl group and a little under the top layer. That catches light from more than one angle. If your curls are dense and heavy at the bottom, this is one of the cleanest ways to open them up.
5. Sleek Layered Lob with Soft Balayage Ends
A layered lob can be a lifesaver when thick hair needs shape but not length loss. The trick is to keep the line clean around the shoulders and use soft, internal layers so the lob doesn’t balloon out. Caramel balayage on the ends gives the cut a brushed-out finish even when you wear it smooth.
This one is for people who like polish. The layers are understated, the highlights are diffused, and the silhouette stays neat. If you air-dry thick hair and it ends up wide at the sides, a lob like this pulls the shape back in. It also grows out beautifully, which is useful because a clean lob loses its charm fast when the ends get uneven.
6. U-Shaped Length Layers with a Warm Caramel Veil
Unlike a blunt U-cut, this version keeps the bottom line soft and lets the layers whisper instead of shout. Thick hair keeps its weight in the back, but the U-shape prevents that boxy feeling you get with one-length long hair. A warm caramel veil through the mid-lengths adds just enough contrast to show the cut.
This is a good choice if you like long hair and refuse to give it up. The layers should begin low, around the bust or ribcage depending on length, so the shape stays long and feminine. The caramel works best when it looks like it was painted into the hair’s natural fall, not placed in chunky panels. It’s a quieter look, but not a boring one.
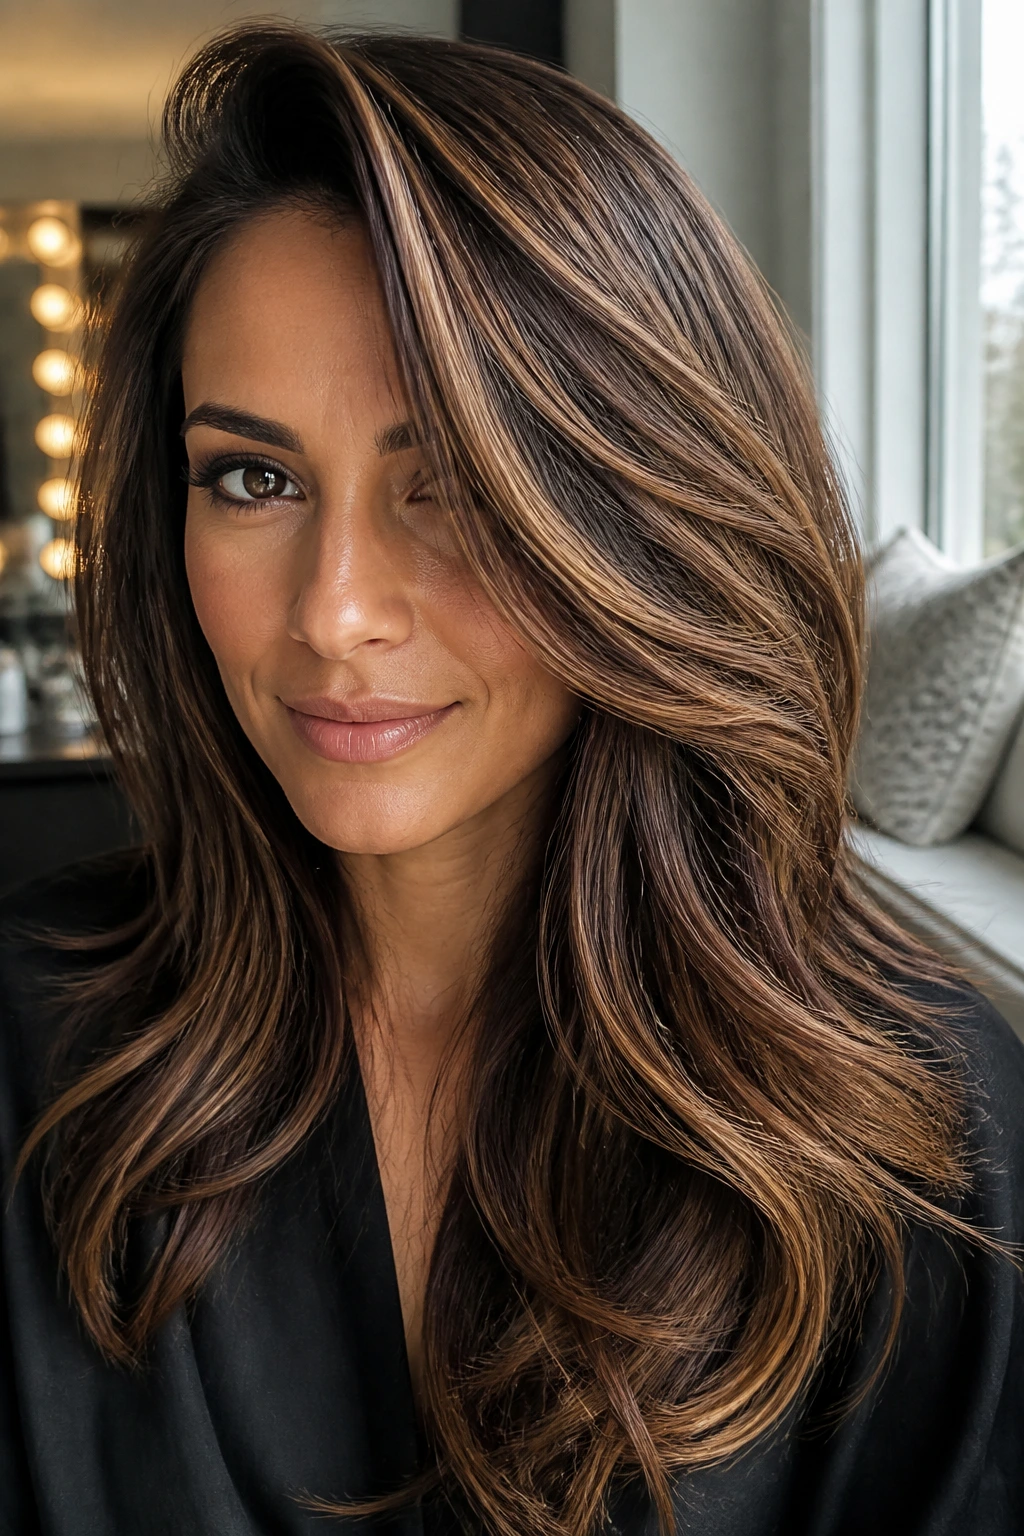
7. Deep Side-Part Layers with Swept-Over Caramel Streaks
A deep side part changes thick hair faster than people expect. It gives the layers somewhere to fall, and it lets the caramel streaks move across the front instead of hiding in the back. The shape ends up more dramatic with almost no extra effort.
Why It Reads So Well on Thick Hair
- The side part breaks up the width at the crown.
- Swept-over highlights show off the layer movement.
- The front side can carry more brightness; the heavier side stays deeper for contrast.
If your face feels overwhelmed by width, this style gives you a cleaner line without cutting off much length. I like it with a blowout or a large-barrel wave, not pin-straight hair. Straight hair can make the part feel severe. A little bend softens everything.
8. Curtain Bang Layers with a Bright Caramel Money Piece
This one is flashy in the right way. Curtain bangs can tame thick hair around the face, and the bright caramel money piece opens the whole cut up without bleaching the life out of it. The fringe blends into the layers so the front doesn’t feel chopped off.
The best curtain bangs on thick hair are a little longer than people expect. They should skim the cheekbones or chin, not sit like a shelf above the eyes. With caramel highlights, the trick is keeping the lightness concentrated where the fringe parts and where the hair brushes the face. That’s what makes the style look intentional rather than patchy.
9. Choppy Mid-Length Layers with Piecey Ends
Do you want thick hair to look lighter without losing its shape? Choppy mid-length layers do that well, especially when the ends are finished piecey instead of blunt. The caramel highlights help each broken section read clearly, which keeps the cut from looking accidental.
This works best on hair that holds a wave or can take a quick pass with a flat iron or wand. The caramel should live mostly in the outer layers and toward the ends, where the movement happens. If the highlights climb too high, the cut can start to look overdrawn. Keep the color a little softer near the roots and it stays wearable.
10. V-Cut Layers for Heavy Hair
A V-cut is one of those shapes that makes thick hair feel long but not weighty. The point in the back narrows the silhouette, and the layers on the sides keep the bulk from spreading outward. Add caramel through the lower sections and the V starts to show even when the hair hangs straight.
The Shape Breakdown
The back should be the longest point, with side layers drifting down in a soft slope. Ask your stylist to avoid over-shortening the upper crown unless you want a more dramatic, almost sporty finish. The caramel looks best a shade or two lighter than your base, not too pale. Too much contrast makes the V line look harsh, and this cut works better when the color blends.
11. Face-Framing Layers with a Polished Blowout
There’s a reason this look keeps coming back. Thick hair loves a blowout, and face-framing layers give the front enough lift that the style doesn’t collapse into a wall of hair by noon. Caramel highlights around the front panels make the movement impossible to miss.
This is the haircut I’d suggest for anyone who wears their hair down most of the time. It looks finished with a round brush, a dryer nozzle, and a few clips while the top section sets. If your hair is coarse, keep the shortest front pieces around the jawline so they bend instead of sticking out. The caramel should brighten the edges, not chase every strand.
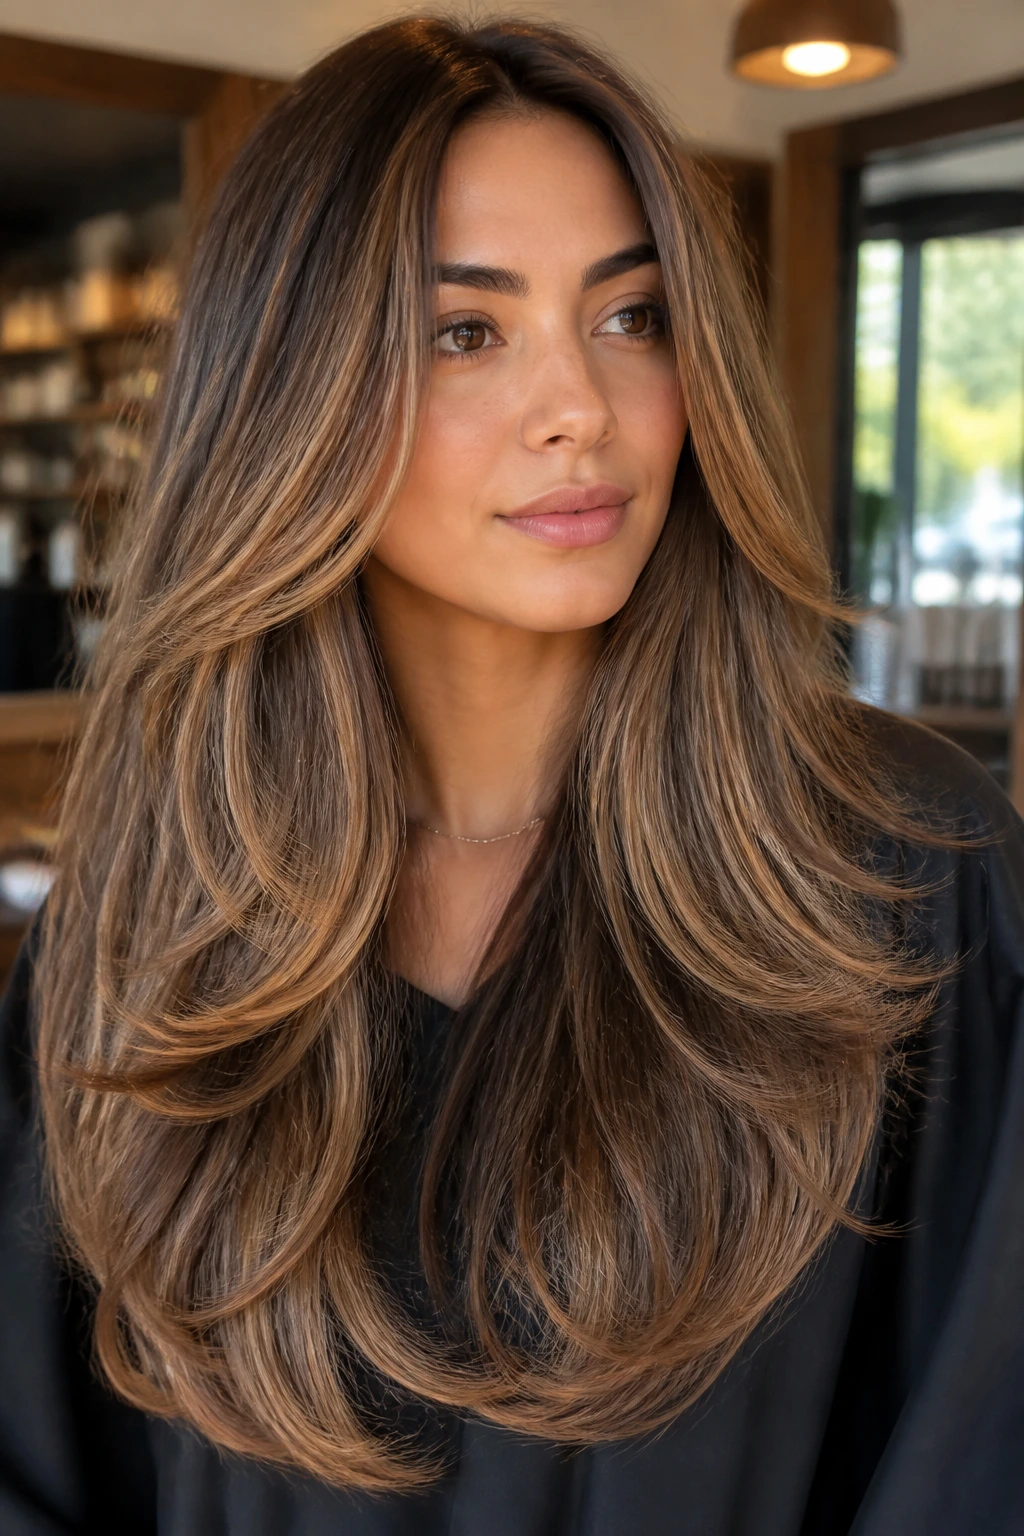
12. Wavy Mid-Back Layers with Toffee Ribbons
Wavy thick hair behaves differently from straight thick hair, and it deserves a cut that respects the wave pattern. Mid-back layers keep the length glamorous, but the toffee ribbons break up the shape so the hair doesn’t read as one dense sheet. There’s a nice softness to it.
This style is a favorite for people who like a little boho messiness without losing polish. The best highlights sit where the wave turns, usually through the mid-lengths and around the face. If the color is placed only on the top layer, the waves can look flat underneath. You want the lightness to move through the hair, not hover on top of it.
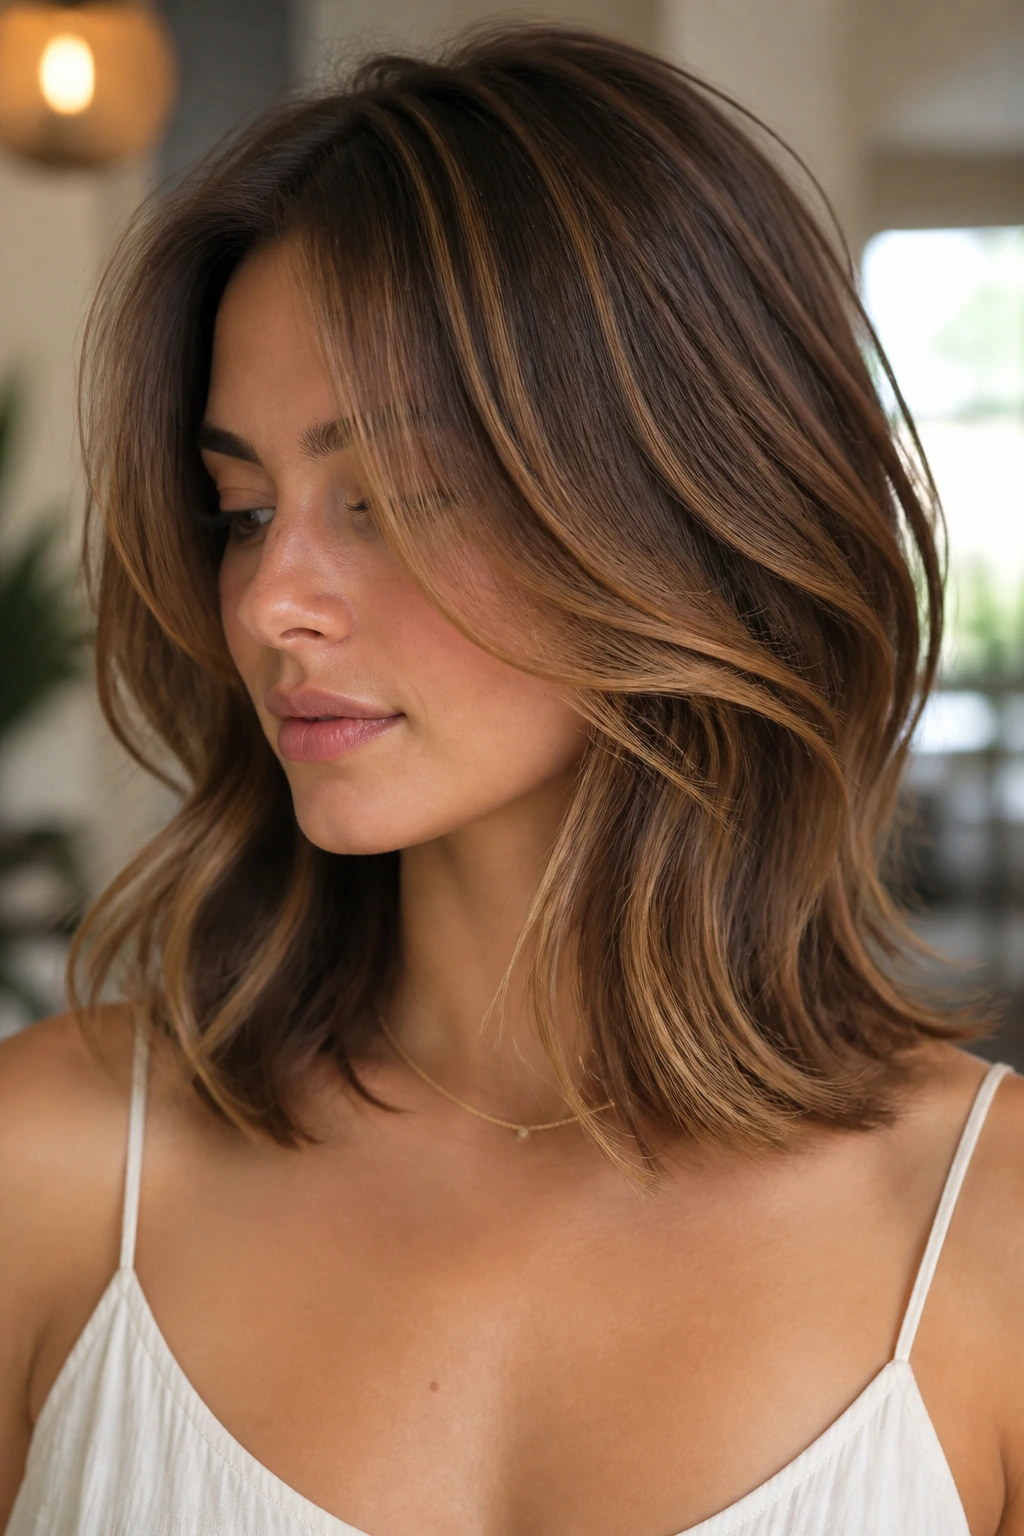
13. Shoulder-Length Layers with Internal Weight Removal
Shorter thick hair can turn into a triangle if you cut it wrong. Internal weight removal fixes that. The outer shape stays shoulder-length and solid, while the inside loses enough mass to let the layers fall instead of pushing outward.
Ask Your Stylist For
- Shoulder-length perimeter with invisible or internal layers.
- Caramel highlights concentrated around the top and mid-lengths.
- Softer ends so the hair doesn’t feel too thick at the hemline.
This cut is practical without being plain. It dries faster than longer styles, and the caramel gives it dimension that shows up even when you tie it back. If you hate spending forever on your hair, this is one of the smarter options on the list.
14. Long Wolf Cut with Caramel Frosting
The wolf cut has a reputation for being wild, but on thick hair it can actually be the most controlled kind of mess. The shorter crown layers create lift, and the longer length underneath keeps the whole thing from feeling too shaggy. Caramel frosting through the top pieces gives it a lived-in edge.
I like this cut when the hair has natural wave or a little bend. Straight thick hair can make it look heavier than intended unless you style it with texture spray or a diffuser. The caramel should stay diffuse, almost dusted through the raised layers. Too much brightness at the ends and the shape loses its punky charm.
15. Rounded Layers with Bouncy Volume
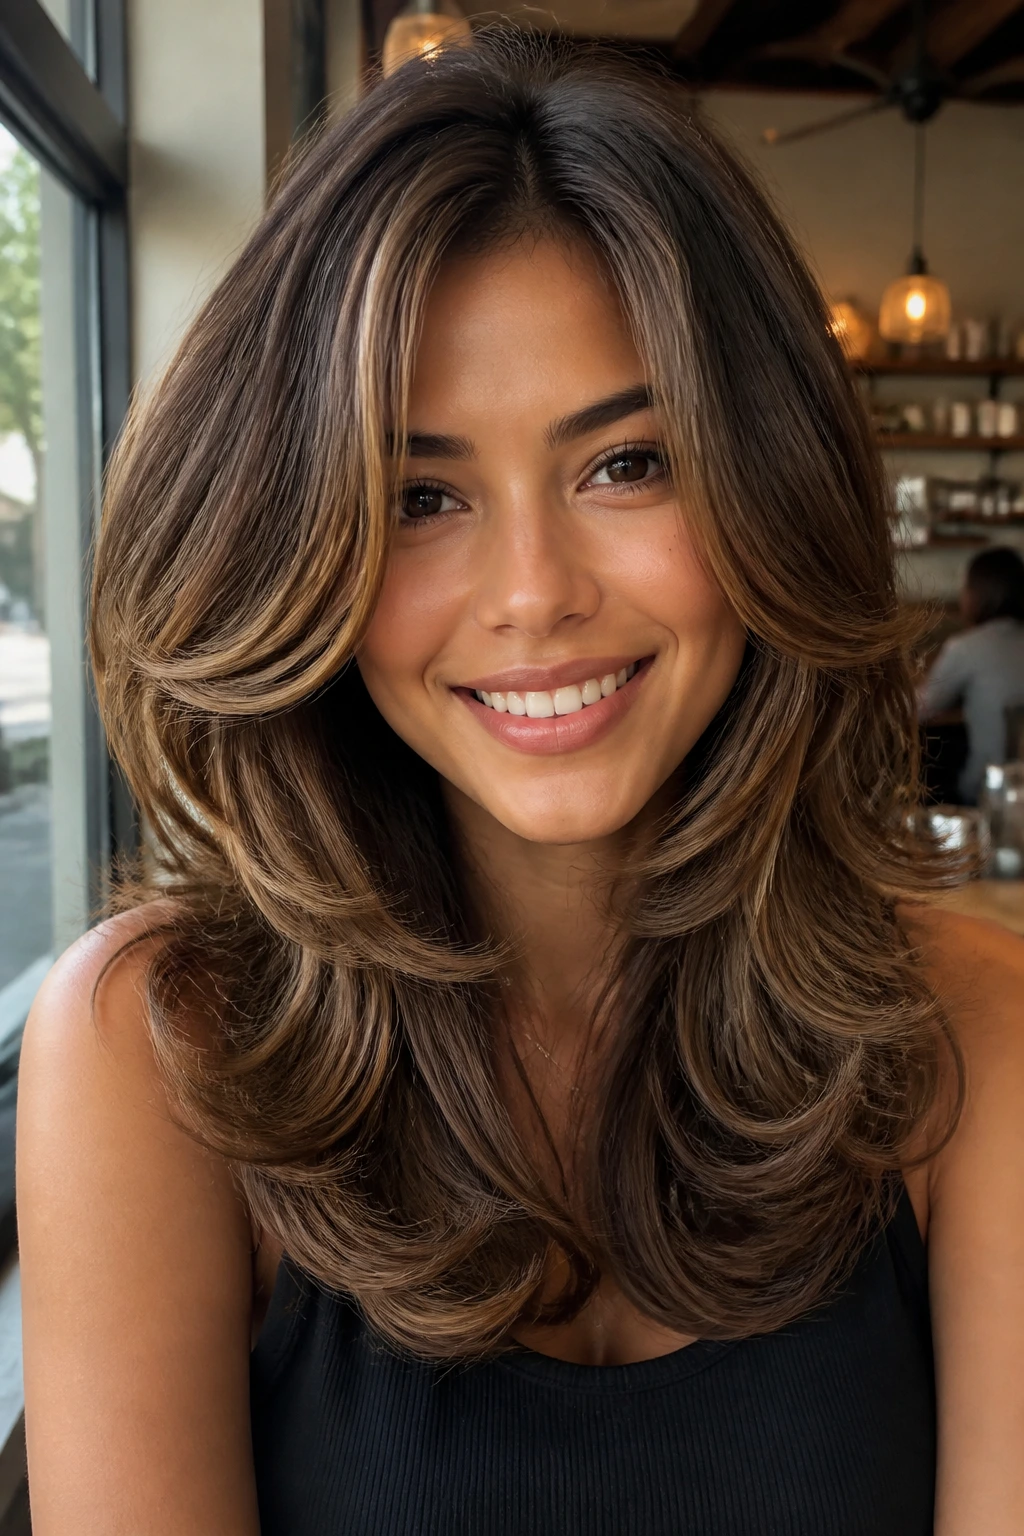
Rounded layers are underrated. They keep thick hair from going boxy at the ends and give it that soft dome shape that moves well when you turn your head. Caramel highlights add brightness right where the hair curves, which is where the eye goes first.
This cut works especially well for people who want volume up top and a smoother outline at the sides. The round shape can be subtle or obvious depending on how high the shortest layers start. If your hair tends to puff at the cheekbones, ask for a gentler curve there and more action lower down. It’s a small change, but it matters.
16. Razor-Textured Layers with Light, Airy Ends

Razor cutting can be tricky on thick hair, and I wouldn’t use it everywhere. But when it’s done with restraint, it creates a softer, more airy edge than scissors alone. Caramel highlights help the texture show up without making the cut look frayed.
What to Watch For
The ends should feel feathered, not shredded. That’s the whole line between chic and overworked. Ask for razor texture mainly through the mid-lengths and leave the perimeter a little cleaner if your hair is coarse. The caramel should follow the texturing, especially around the face and the lower outer layers, or the haircut can look disconnected.
17. Layered Pixie Bob with Caramel Crown Lights
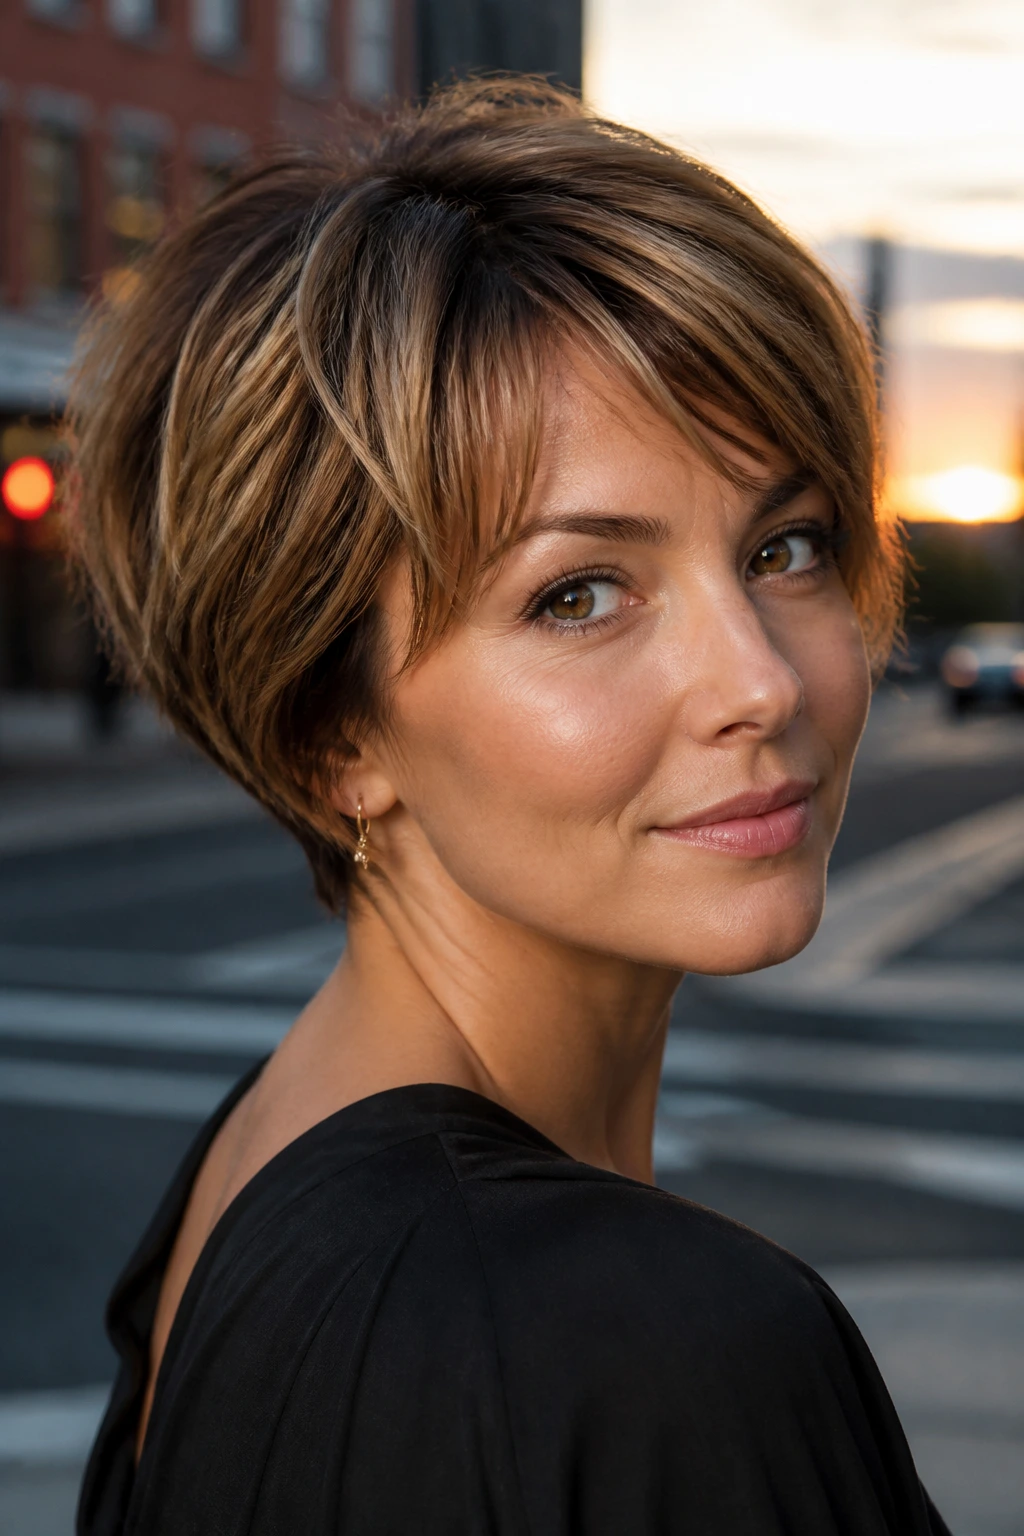
This is for thick hair that wants shortness without puffing out like a triangle. A layered pixie bob keeps the nape neat, adds shape through the crown, and lets the caramel live where the light naturally hits first. The crown lights are a smart touch because they give depth without making the whole head look lighter.
You do have to commit to regular shaping with this one. Short thick hair grows out with opinions. That said, if you like a cut that opens the neck and ears while still giving you enough hair to play with, this is one of the best-balanced choices. It’s especially good if you want a lighter daily routine.
18. Half-Up Layered Style with Loose Face Pieces
Sometimes the “hairstyle” is really the way you wear the haircut. Thick layered hair looks gorgeous half-up when the face pieces are left loose and the caramel highlights are visible around the temples. The top section gets lifted, the bottom section keeps its movement, and the whole thing feels casual but not messy.
This is a useful option if your thick hair gets overwhelming on busy days. A small claw clip or a soft elastic is enough; don’t yank the hair tight unless you want the layers to lose their shape. The loose pieces near the face are the whole point. They should feel deliberate, almost like you forgot to pin them back — in a good way.
19. Glamour Layers with Barrel-Curled Finish
A barrel curl changes thick hair fast. The layers stack in a glossy wave, and caramel highlights catch on every bend. If you want your hair to look dressed up without an elaborate updo, this is the move.
Styling It Cleanly
Use a 1¼-inch or 1½-inch barrel, depending on length, and curl away from the face for that soft, old-Hollywood shape. Let the curls cool before brushing them out. That step matters. The caramel should be placed so it shows up on the top of the curl and inside the turn, which gives the color a richer look than a flat stripe ever could. Finish with a light serum on the ends only.
20. Braided Layers with Highlight Pop
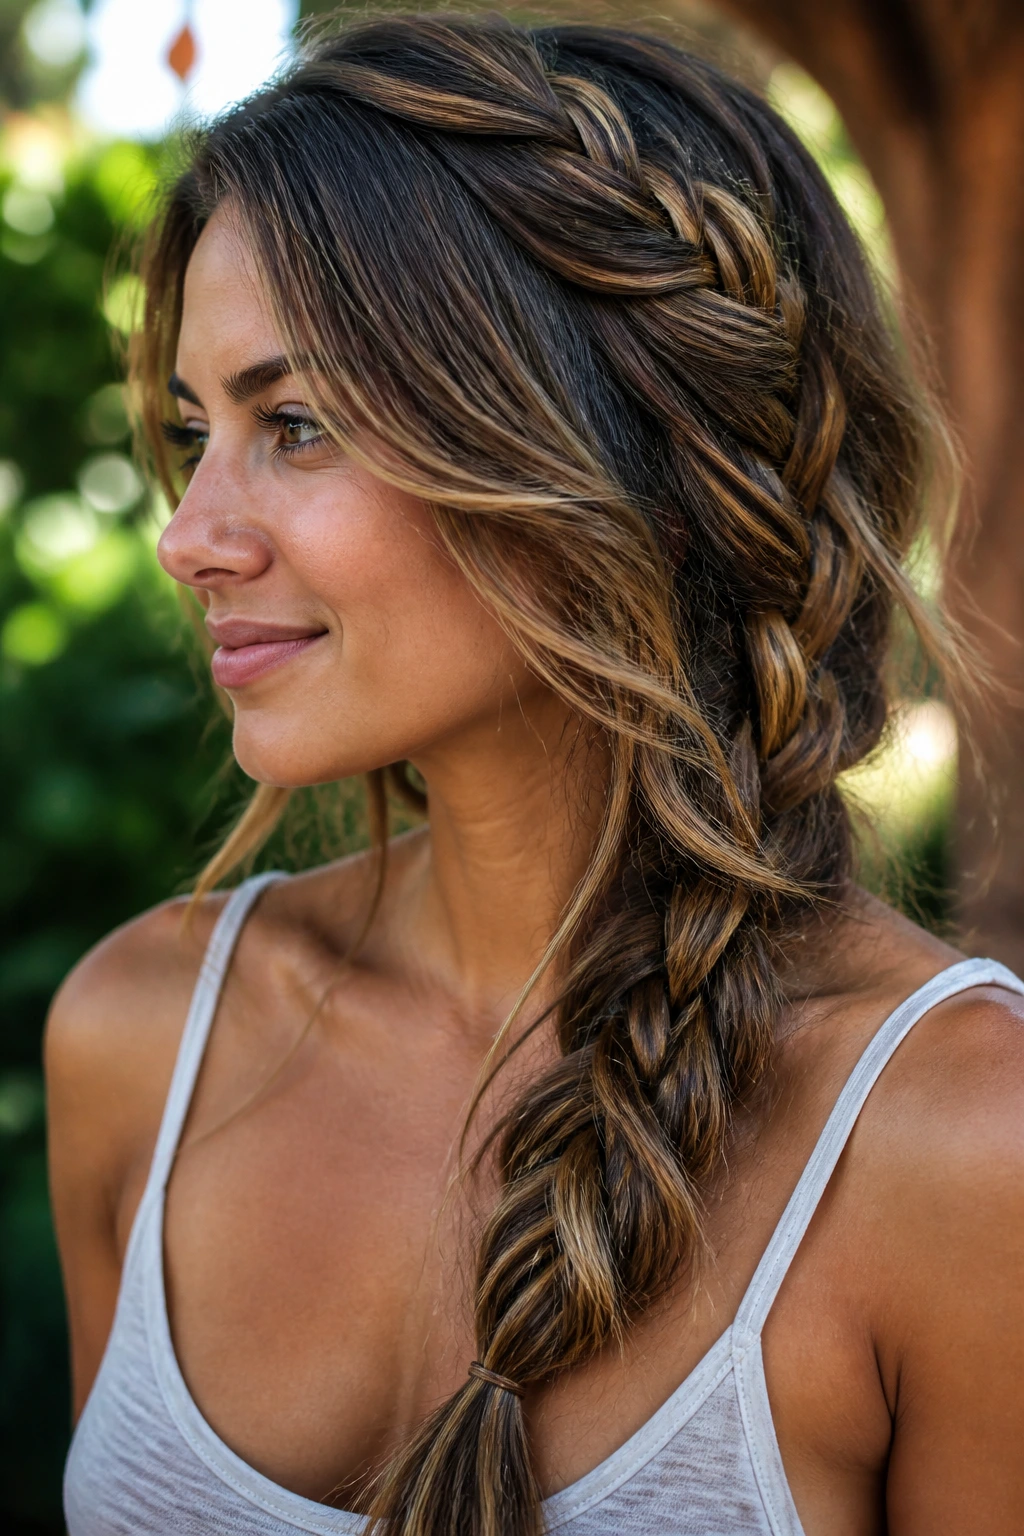
Braids are a cheat code for layered thick hair because they show off the dimension in the strands immediately. Caramel highlights pop between the plaits, especially if you braid loosely enough for a little texture to show. Tight braids can crush the movement; softer braids keep it.
This style isn’t only for festivals or long weekends. A side braid, a low braid, or even two loose braids can make thick layered hair behave on a day when you do not want to wrestle it. The highlights should be visible in the sections that fold over the top, which is where caramel looks richest. If the braid is too perfect, the color looks flatter. Keep it a little lived-in.
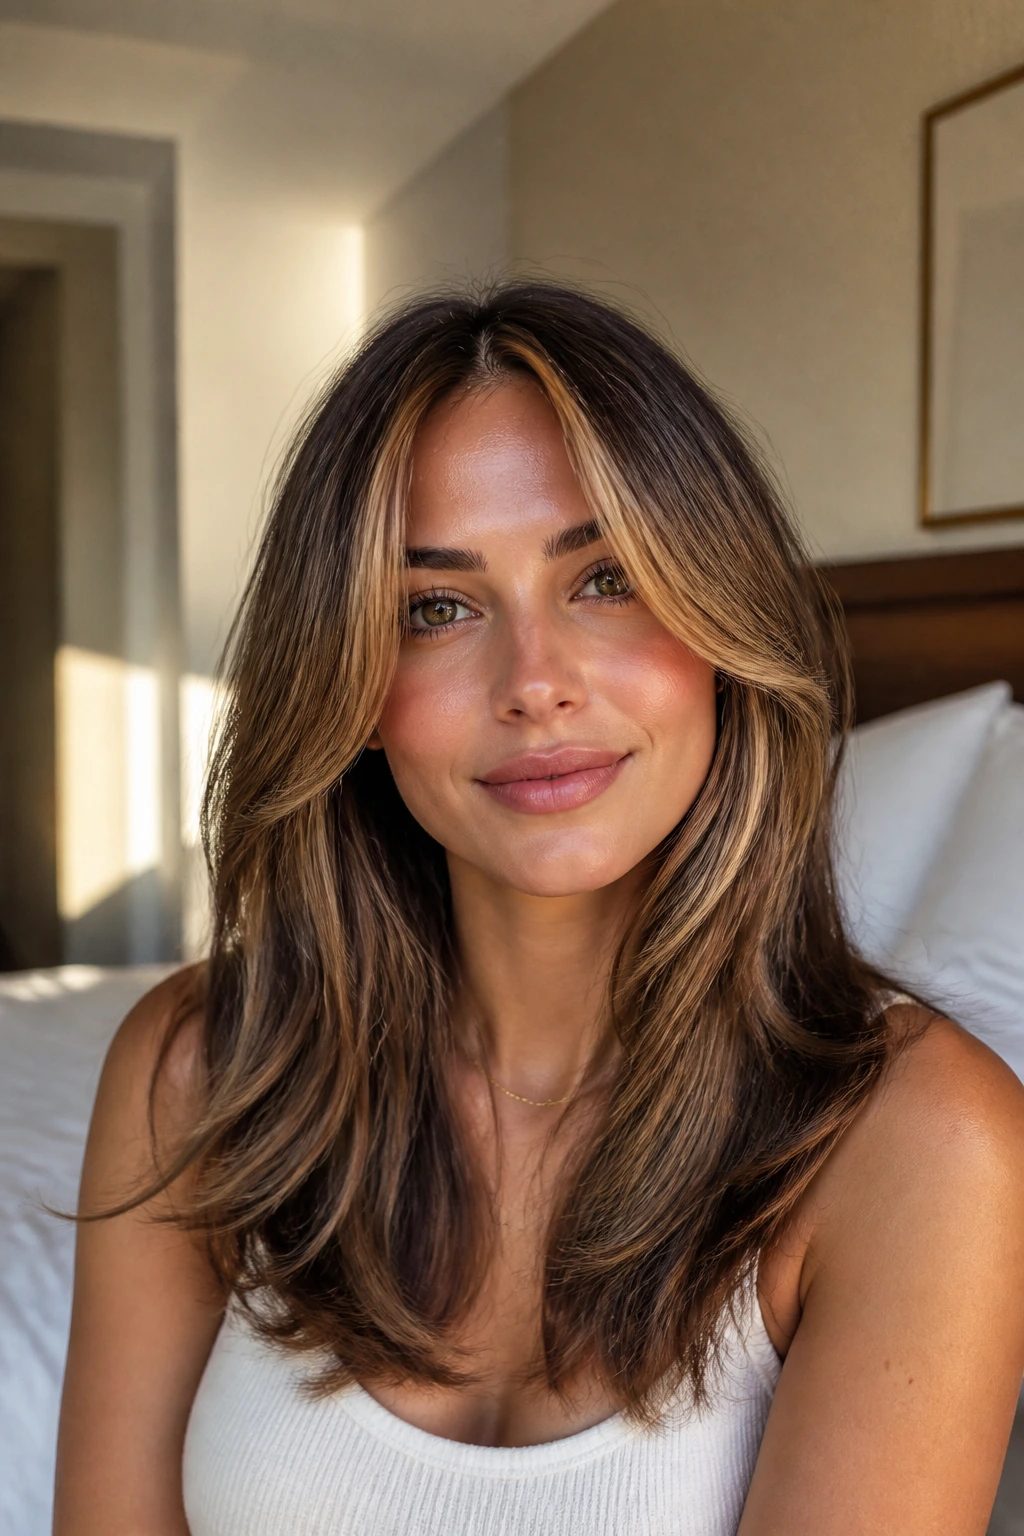
21. Wispy Layers with Feather-Light Ends

Wispy layers are not the same as over-thinned hair. That’s the mistake people make. On thick hair, wispy layering means the outer shape stays full while the ends and top pieces feel lighter, softer, and less blunt. Caramel highlights keep the wisps from disappearing into the darker base.
This cut works best if your hair is naturally bulky at the bottom and you want more swing when you move. The ends should brush the shoulders or collarbone with a soft finish, not a hard line. I’d keep the caramel a touch lighter around the front and leave the interior a little deeper for contrast. That mix keeps the style from looking washed out.
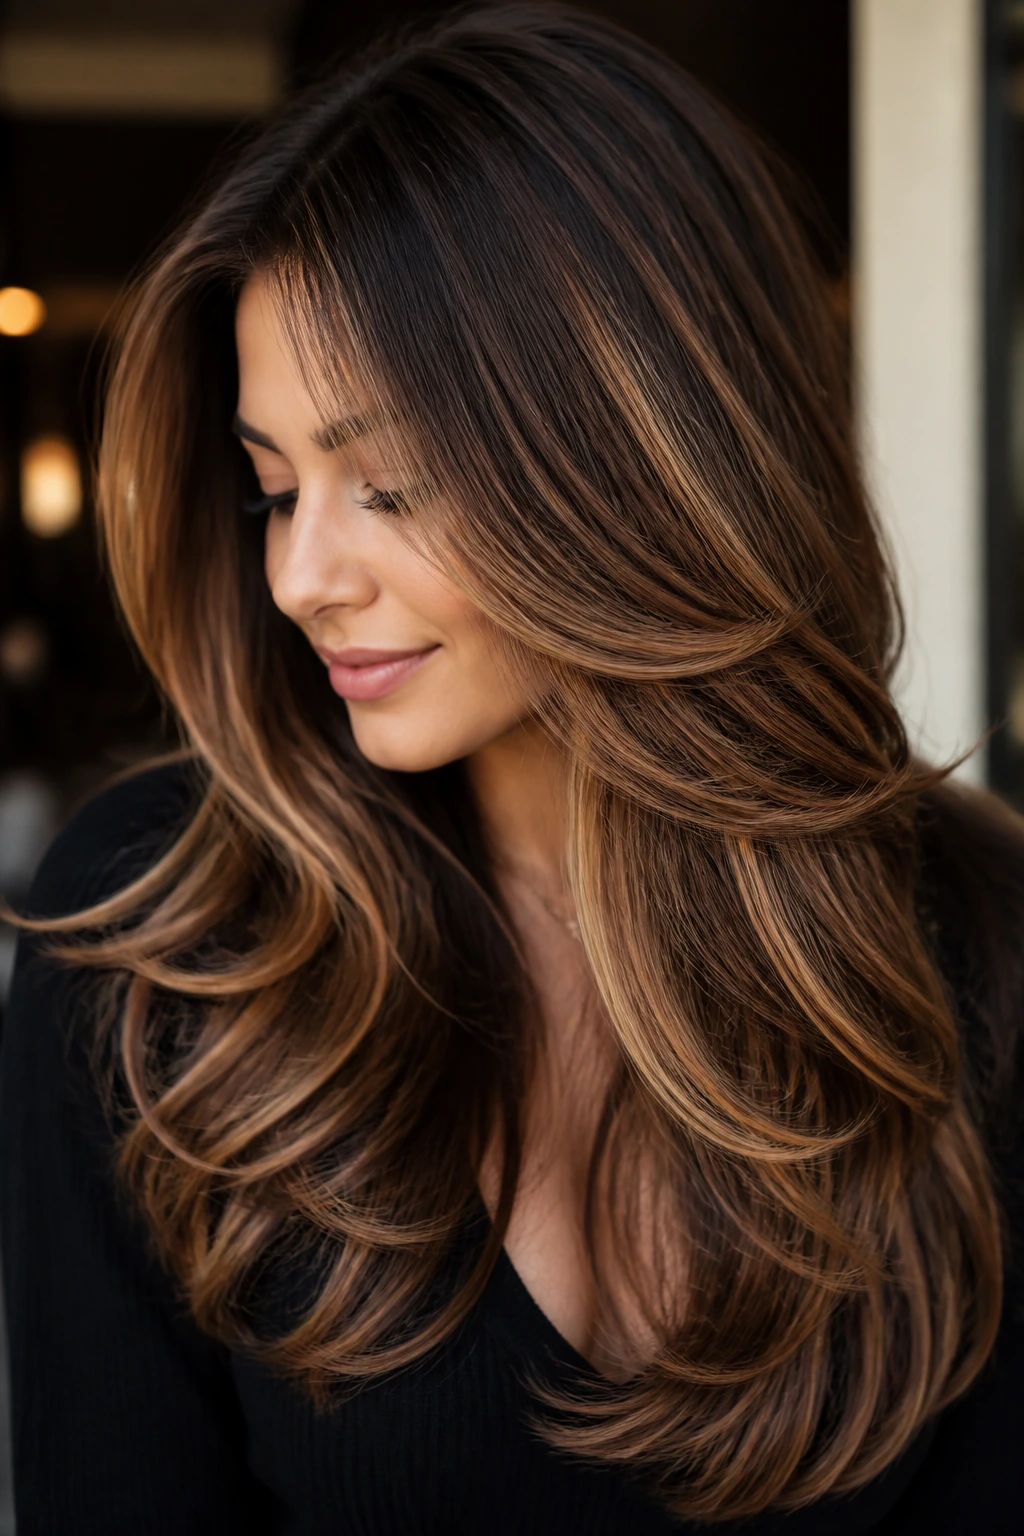
22. Dimensional Layers with Caramel and Chestnut Lowlights
When thick hair needs depth more than brightness, pairing caramel highlights with chestnut lowlights is the right answer. The layers suddenly have two jobs: they lighten the movement on top and hold shadow underneath so the shape doesn’t flatten out. It’s richer. Smarter, too.
The Color Logic
- Caramel should live where light naturally lands: around the face, crown, and outer bends.
- Chestnut lowlights should sit inside the layers to keep the base from looking one-note.
- The cut needs enough separation that the color reads clearly, especially on wavy hair.
This look is the grown-up version of “more dimension.” It’s not loud, but it doesn’t disappear. If your natural hair color is dark brown and you want caramel without that overly bright salon stripe effect, this is the most elegant route.
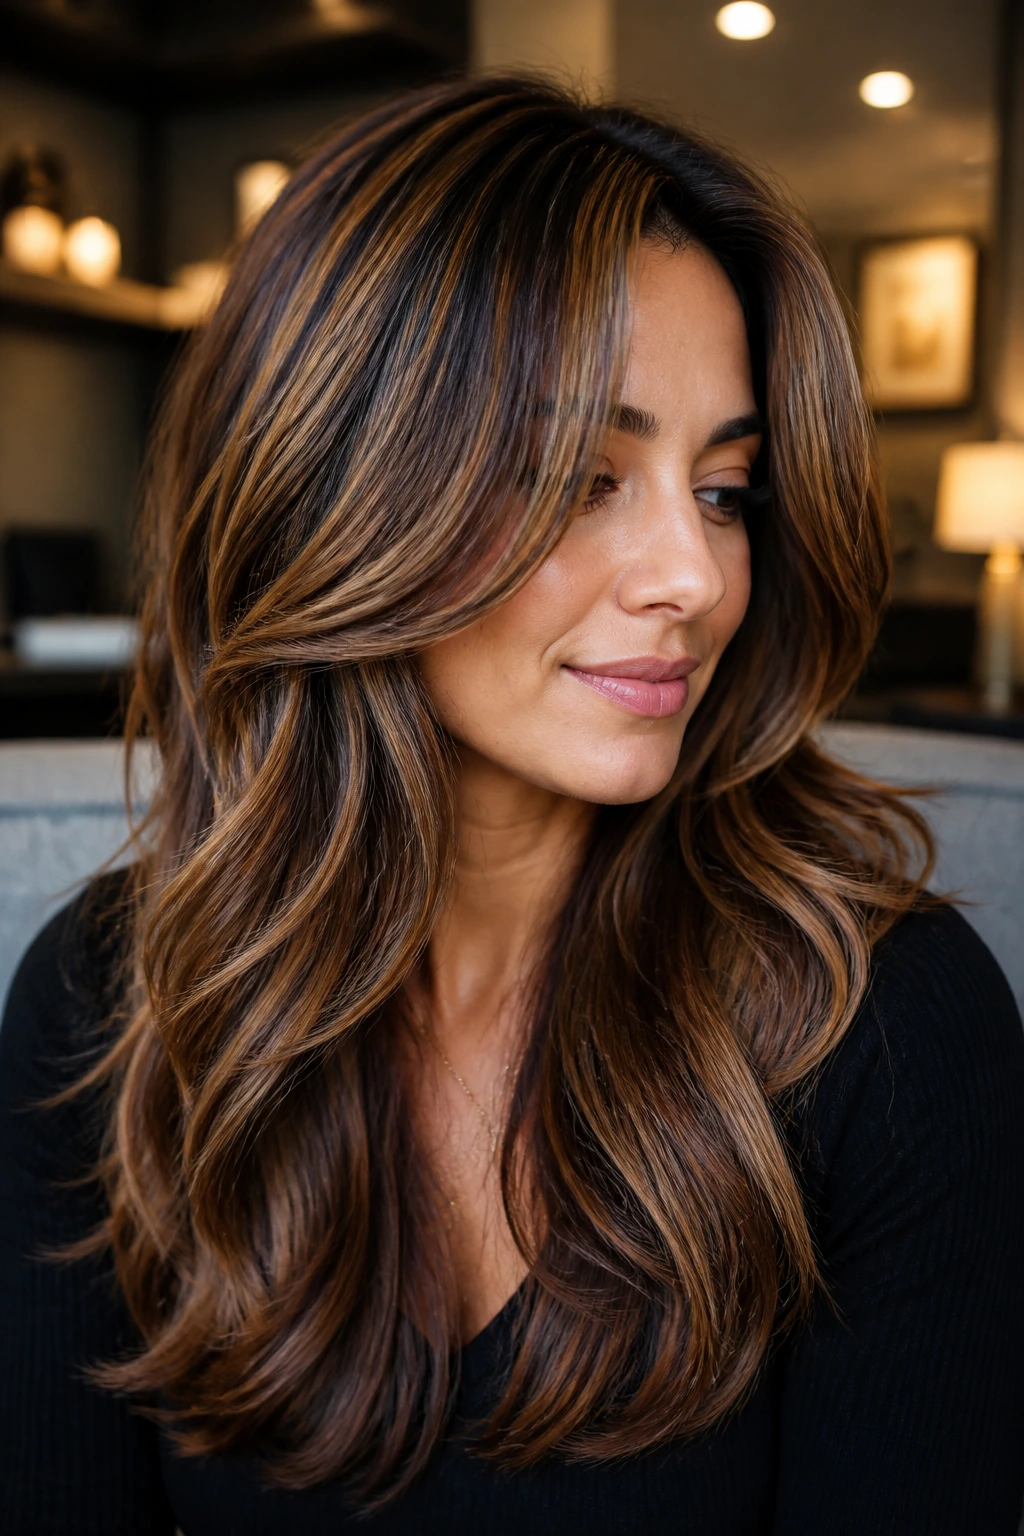
23. Cascading Flip Layers with Soft Ends
Flip layers have a little attitude, and thick hair carries them well. The ends turn out instead of under, which gives the style a soft swing. Caramel highlights make those flips obvious, especially around the bottom third of the hair where the movement shows most.
I like this style on medium-long hair because the flip feels playful rather than dated when the layers are cut with enough softness. The key is keeping the ends clean so they flick instead of fuzz. A large round brush or a brush-and-dryer combo will get you there fast. Don’t overload the roots with product. The style needs lift, not grit.
24. Shoulder-Grazing Layers with Tapered Outline
Shoulder-grazing cuts can be the hardest thick-hair haircut to get right because the shape sits right at a tricky length. Too blunt, and it balloons. Too many short layers, and it fuzzes out. A tapered outline fixes both problems by keeping the perimeter smooth while the internal shape loses weight.
This is a very practical haircut if you wear thick hair to work, to dinner, and everywhere in between. Caramel highlights help the outline read as intentional, especially when they run through the ends and front layers. If you want a haircut that still looks polished on day three after a wash, this one is worth serious attention.
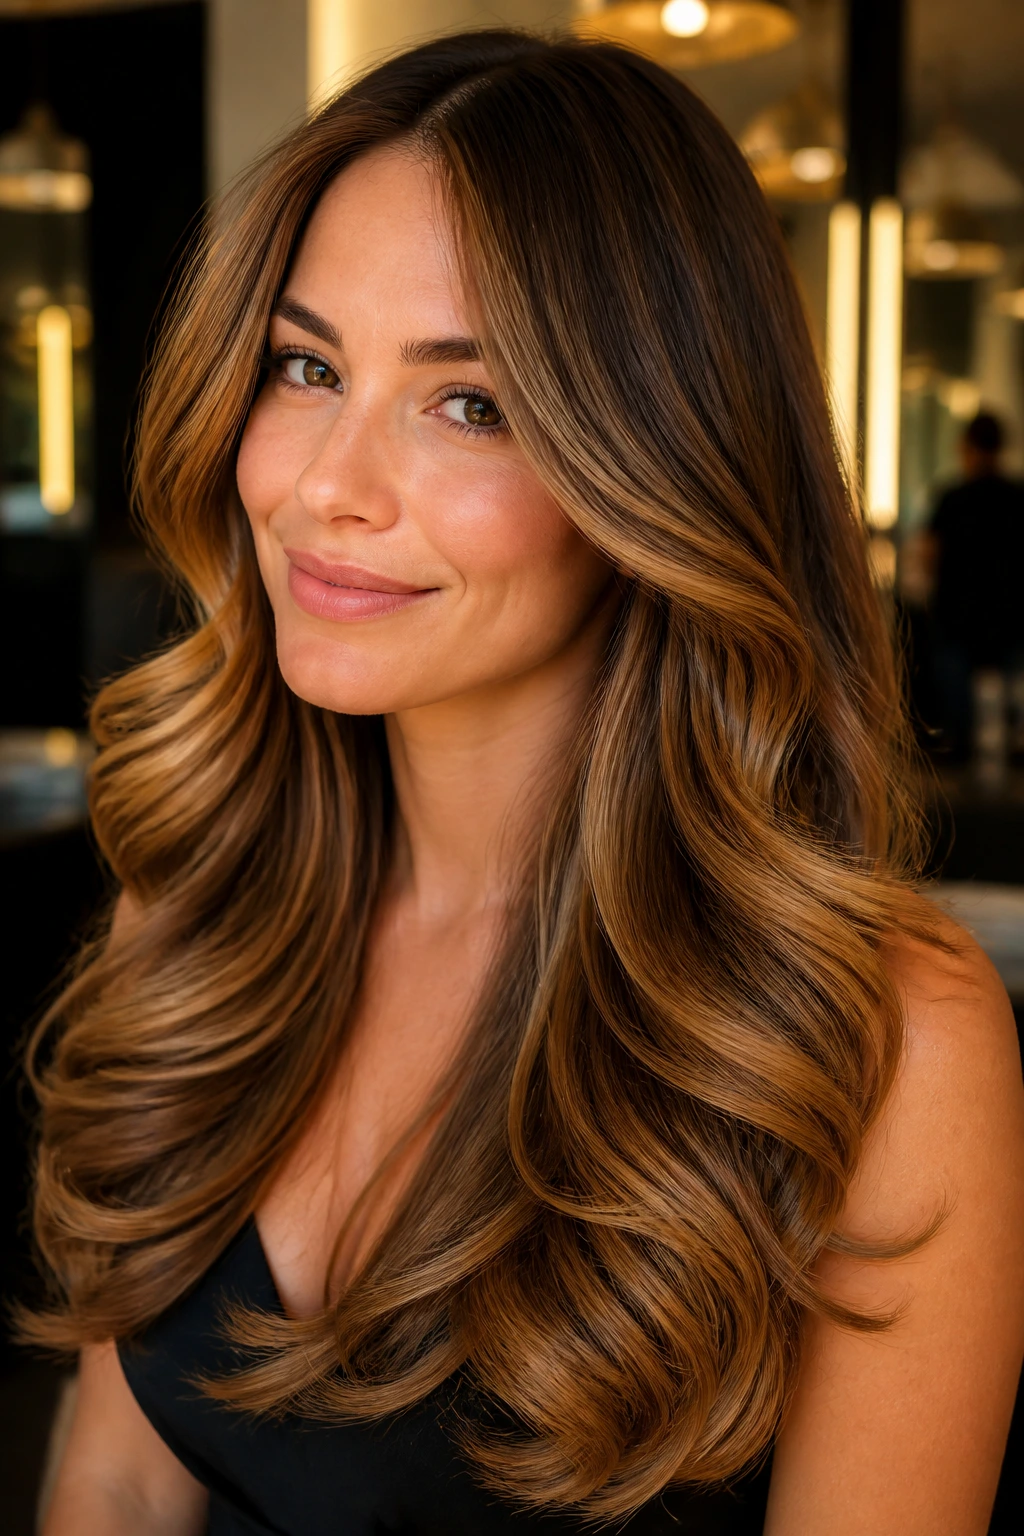
25. Luxe Blowout Layers with Caramel Side Panels
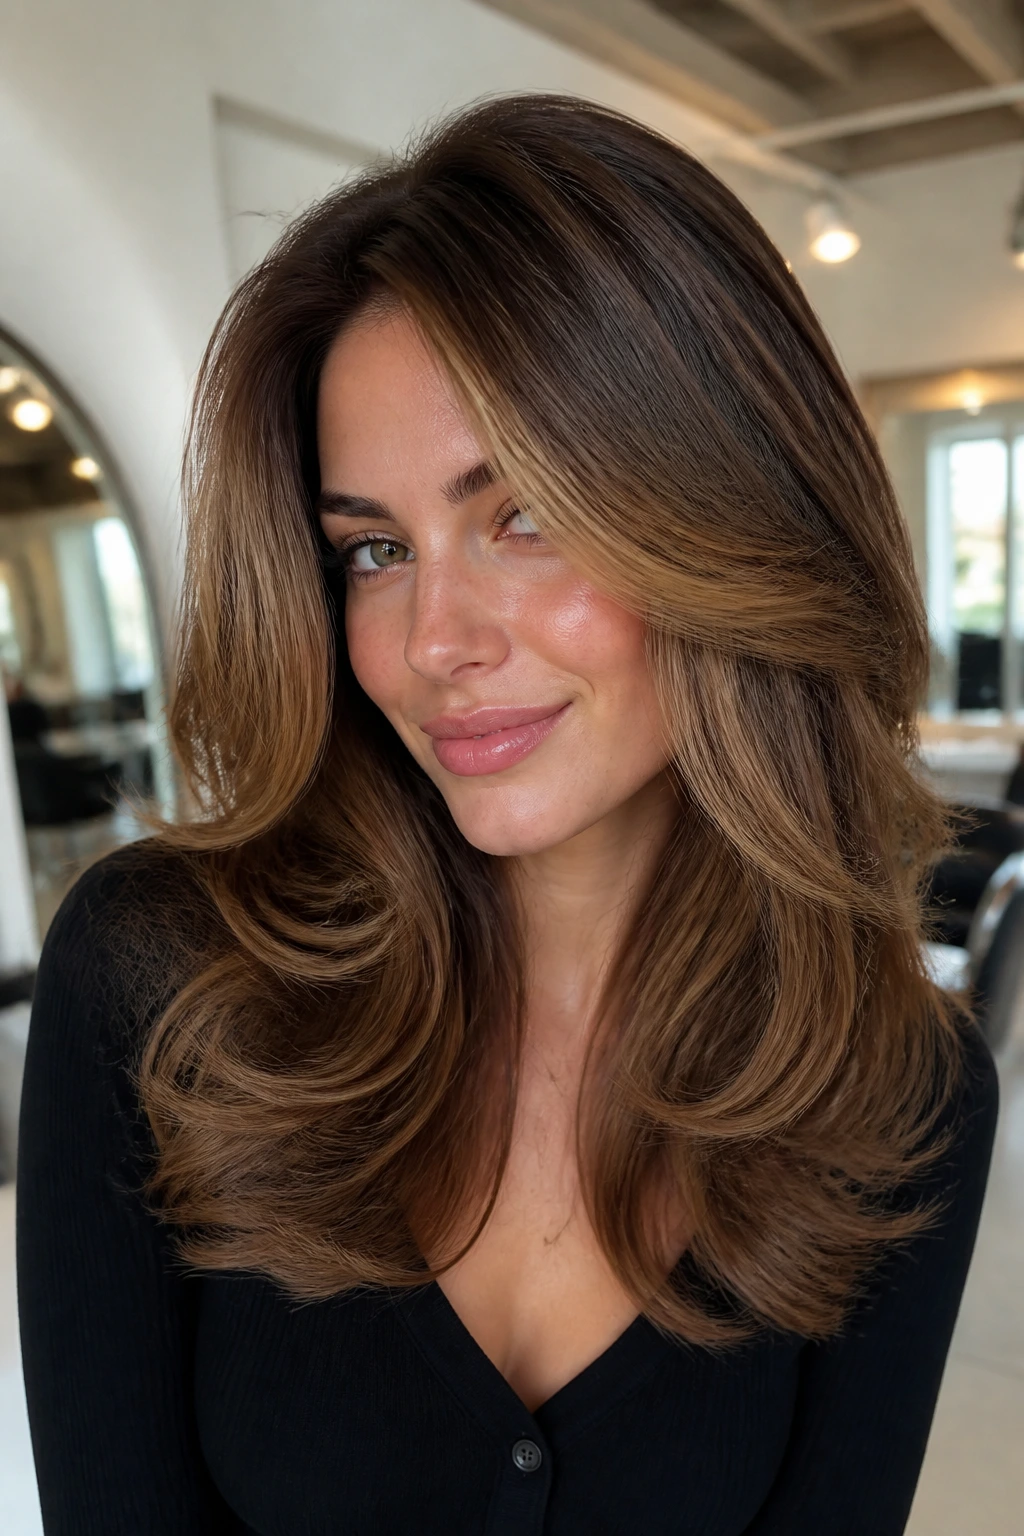
This is the one if you want thick hair to look expensive in the old-fashioned sense: glossy, controlled, and full of movement. The side panels are the star here. Caramel highlights sweep through them so the blowout has brightness where people actually notice it — around the face, through the sides, and into the top layer.
Why It Feels So Strong
A luxe blowout depends on layers that support the shape instead of fighting it. The crown gets lift, the mid-lengths stay soft, and the ends curve neatly rather than flaring. If your hair is dense enough to hold a style for days, this cut makes the most of that strength. If it’s stubborn and needs more effort, this is still worth it. The payoff is obvious the second the brush comes out.
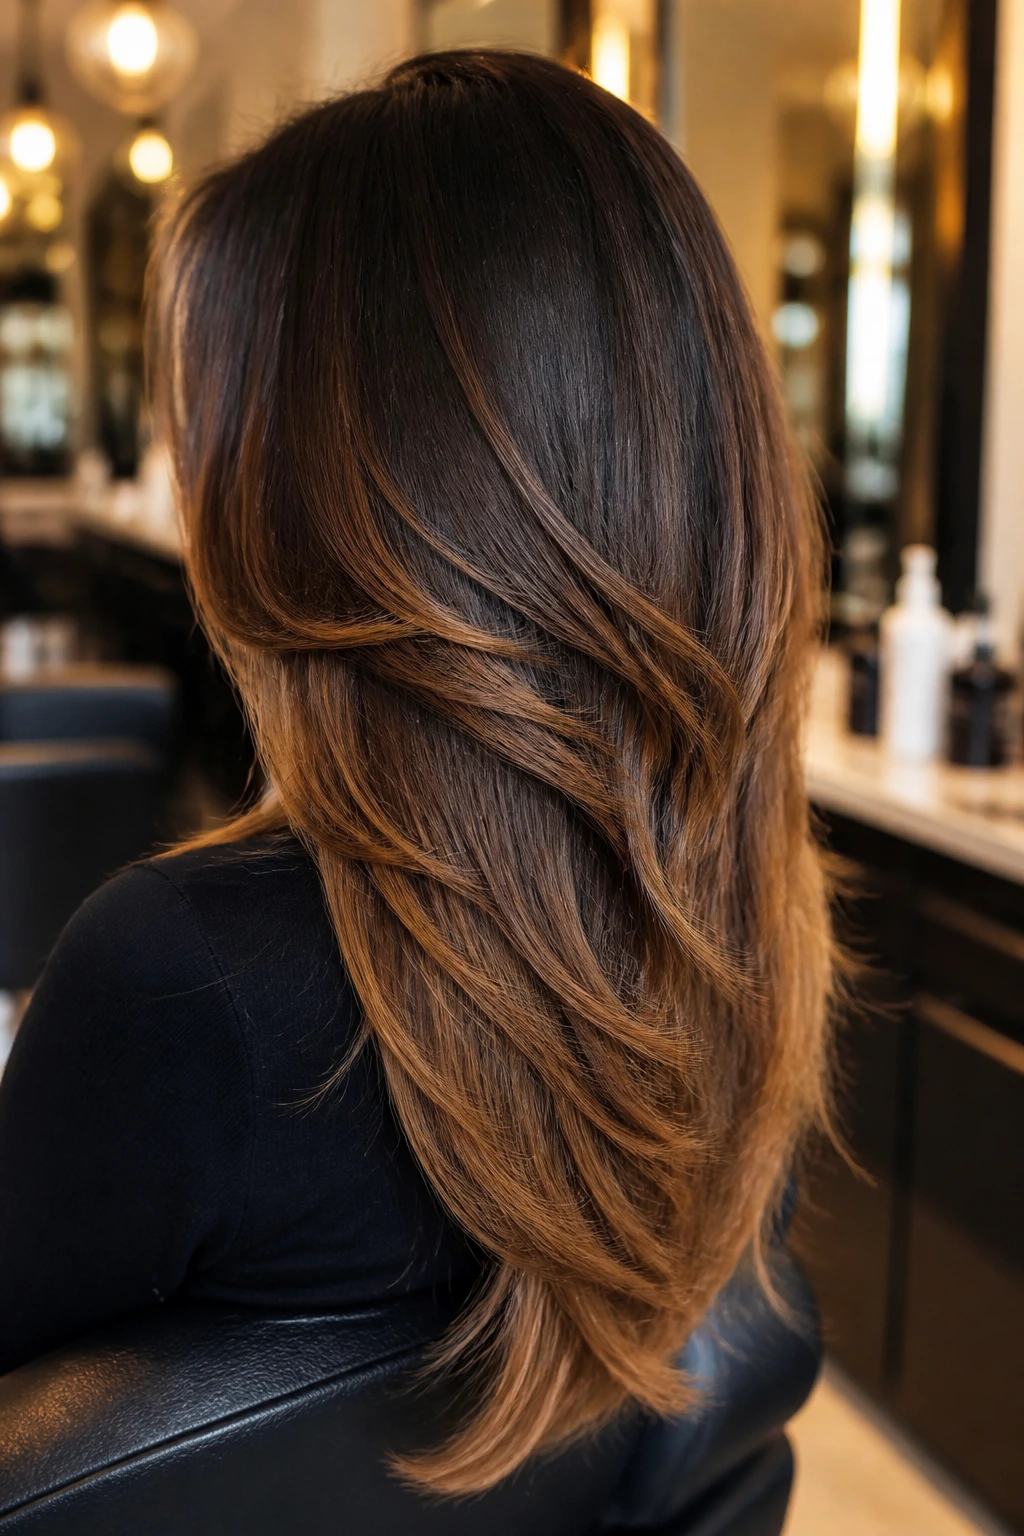
Why Caramel Highlights Wake Up Thick Layers
Thick hair has a lot of surface area, which sounds glamorous until all that surface turns one shade of brown and the cut disappears. Caramel highlights solve that by creating contrast that isn’t harsh. They sit in the warm middle ground between blonde and brown, so the hair keeps depth but gains visible edges.
The smartest placement follows movement. Around the face. On the outer layers. Through the bends and the ends. That’s where light hits when thick hair swings, and that’s where the color earns its keep. If you stack all the brightness at the top, the underside looks heavy. If you spread it too evenly, the whole thing gets flat. Balance matters here, a lot.
A little lowlight can help, too. Not because more is always better — it isn’t — but because thick hair often needs shadow to keep the caramel from reading like a single flat wash. The best dimensional color jobs use both light and dark to show the haircut, not cover it up.
Tools That Make These Styles Easier to Wear
-
Blow dryer with a nozzle attachment: Directs airflow so thick hair dries smoother and the layers don’t puff sideways.
-
Round brush, 1¼ to 2 inches: Best for feathered ends, face-framing bends, and a clean blowout.
-
Large-barrel curling iron or wand: Use this for soft waves and glamour styles; bigger barrels usually suit thick hair better than tiny ones.
-
Diffuser: Essential if your thick hair is curly or wavy and you want the layers to keep their shape without frizz.
-
Heat protectant spray or cream: Thick hair can take heat, but repeated styling without protection makes the ends rough fast.
-
Sectioning clips: Not glamorous, but they make a layered blowout much easier because thick hair needs smaller sections.
-
Wide-tooth comb and tail comb: One for detangling, one for clean part lines and controlled sectioning.
-
Light serum or glossing cream: Use this only on the ends and surface layers so the caramel stays shiny instead of greasy.
How to Choose the Right Cut and Caramel Tone
Ask for the haircut first, then the color. People often do the reverse and end up with highlights that fight the shape of the hair. On thick hair, a good stylist will talk about where the bulk sits — crown, sides, ends, or all three — before they talk about lightness. That’s the part to pay attention to.
If your base color is deep brown, caramel can go warm and rich without looking orange. If your hair already leans golden, ask for a softer beige-caramel or toasted-caramel tone so it doesn’t turn brassy. Face-framing pieces should usually be a touch brighter than the rest. That’s what gives the style its lift without making the whole head look striped.
Layer placement matters just as much. Shorter layers near the crown create body. Longer face-framing pieces soften a strong jawline and show off movement. Internal layers remove weight without leaving obvious steps. If you’re not sure which camp you’re in, bring a photo of the silhouette you want, not just the color. That saves time in the chair.
How to Wear These Styles in Real Life
Presentation: Let the shape do the work. A deep side part, a center part, or a soft tuck behind one ear will show the caramel ribbons differently, so pick the part that lets the brightest pieces sit closest to the face. For blowout styles, keep the crown lifted; for curly looks, let the layer breaks stay visible.
Accompaniments: Thick layered hair looks best with earrings, necklines, and makeup that don’t compete with it. Soft hoops, a collarbone neckline, or a clean lip color work better than a crowded outfit around the face. If the cut has bright caramel money pieces, keep the rest of the look simple and let the hair do the talking.
Portions: If your hair is extra thick, don’t ask for all the layers to start high. That can create a fluffy triangle. Ask for a controlled first layer, then build in movement lower down. The amount of layering should match the amount of hair. More hair usually needs smarter layers, not more layers.
Beverage Pairing: A neat blowout and warm caramel color feel right with something easy and polished — coffee, iced tea, sparkling water with citrus. For a more dressed-up wave or curl, a glass of wine or a cocktail fits the mood. Hair and drink pairing is a silly little detail, maybe, but it does change how the whole look lands.
Additional Styling Tips and Shine Boosters
Flavor Enhancement: A small amount of glossing serum on the mid-lengths makes caramel highlights look deeper, not slicker. The difference shows most on day two hair, when the cut still has shape but needs a little shine.
Customization: If your hair is very dense, ask for internal layers under the top veil so the surface stays smooth. If it’s dense and coarse, keep the ends a touch heavier so they don’t frizz apart the second humidity shows up.
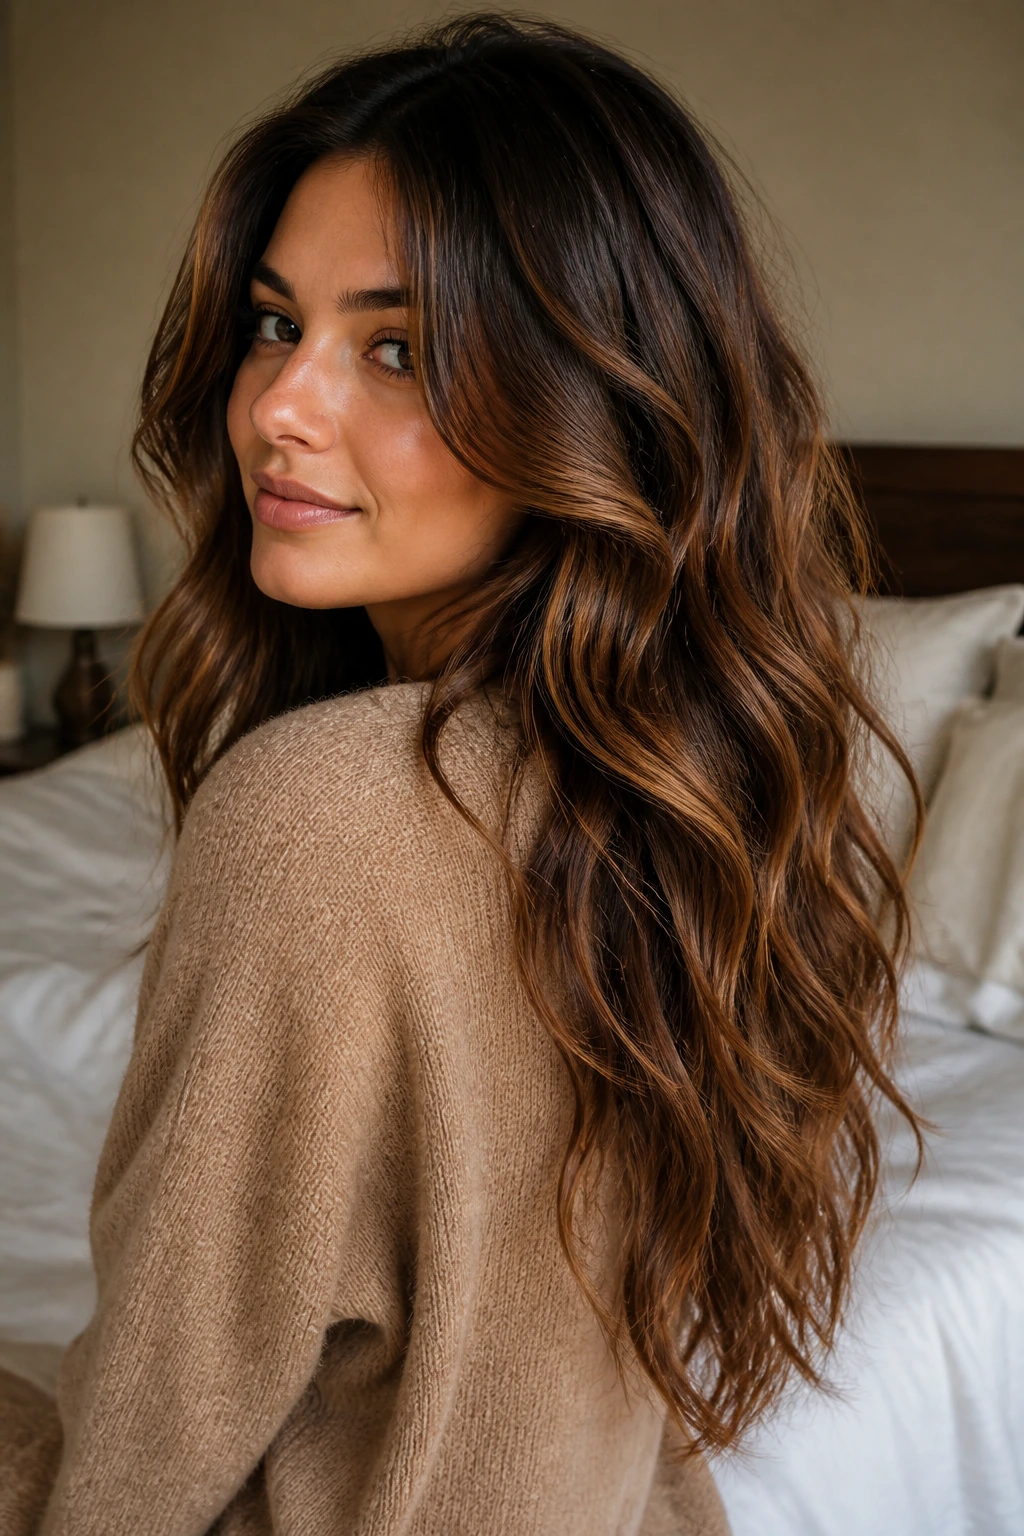
Serving Suggestions: Loose waves, soft bends, or a clean blowout show off the highlight placement far better than pin-straight hair. If you want the caramel to read more clearly, use a large barrel and brush it out only after the curl cools.
Make-It-Yours: For curly hair, ask for curl-by-curl shaping and place the caramel where curls separate naturally. For straighter hair, the same cut needs more rounding at the ends or it can look too severe. For very long hair, keep the face-framing pieces brighter and the lower lengths softer.
The Mistakes That Make Thick Layers Look Puffy or Patchy
The biggest mistake is cutting too much short layer into the crown. Thick hair springs up, and if the top is too short, the shape can go mushroom-fast. Keep the crown controlled unless you want a shag or wolf cut on purpose.
Another problem is putting caramel highlights only in the topmost layer. That makes the surface bright but leaves the underside heavy, which looks patchy when the hair moves. Ask for color placement through the visible outer panels and some underlayers too. Not everywhere. Just enough to keep the dimension honest.
Over-thinning is another one. Thinning shears can save a dense haircut, but they can also make the ends fray and puff. If your hair is coarse, you usually want weight removal in the right places, not a blanket attack on the whole head.
One more: skipping styling support. Thick layered hair often needs a blow-dry, diffuser, or wave pattern to show the cut. Air-dried alone can flatten the layers or make them sit in weird little shelves. The cut is part of the story, not the whole story.
Ways to Adapt the Look Without Losing the Movement
Soft Grow-Out Version: Keep the layers longer and the caramel lower, so the shape softens beautifully between trims. This works well if you want to visit the salon less often and still keep the hair looking expensive.
High-Contrast Version: Brighten the money piece and the top layers a shade more than the rest. It gives thick hair a bolder edge, especially on long waves or a blowout.
Curly-First Version: Shape the cut around your curl pattern, then place the caramel on the curls that fall closest to the face and the outer halo. The color should help define the shape, not cover every curl equally.
Shorter, Sharper Version: Move the length to a lob or shoulder-grazing cut and keep the layers tighter around the perimeter. It removes more visual bulk and gives the caramel a cleaner canvas.
Low-Maintenance Version: Ask for balayage instead of a full foil pattern and keep the layer transitions soft. The grow-out is gentler, and thick hair hides the regrowth line better than fine hair does.
Keeping Caramel Highlights Bright Between Salon Visits
Thick hair usually holds color longer than fine hair, but caramel still needs a little care or it turns flat and muddy. Use a color-safe shampoo, and if your hair is dry, alternate it with a moisturizing cleanser so the layers don’t get rough at the ends. Over-washing strips shine faster than people expect.
Heat matters here. A heat protectant every time is non-negotiable if you blow-dry or curl often. Keep hot tools in the 300–375°F range for most hair types unless your stylist tells you otherwise. Higher heat can make caramel highlights look dull by roughing up the cuticle.
For maintenance, trims every 8 to 12 weeks keep the layers crisp. Glosses or toners can stretch the color a bit longer when the caramel starts to lean brassy. If your hair pulls warm fast, a blue-toned gloss can help; if it just looks faded, a clear gloss is enough. Sleep on a silk pillowcase or wrap the hair loosely so the surface doesn’t get crushed flat overnight.
Questions People Actually Ask About Layered Thick Hair With Caramel Highlights
Do caramel highlights work on very dark thick hair?
Yes, but the shade matters. On deep brunette hair, caramel usually looks best when it stays warm and dimensional instead of trying to pass for blonde. A few face-framing pieces and some mid-length ribbons often look better than an all-over lightening job.
Will layers make my thick hair frizzy?
Not if the layering is controlled. Frizz usually shows up when the ends are thinned too aggressively or the cut has too many short pieces at the crown. Ask for weight removal where the hair feels heavy, not random slicing everywhere.
Are balayage highlights better than foils for thick hair?
Balayage usually gives a softer grow-out and blends well with layers. Foils can be better if you want stronger contrast or a brighter money piece. Thick hair can handle either; the choice comes down to how visible you want the caramel to be.
How often should I trim a layered thick haircut?
Every 8 to 12 weeks is a solid range for keeping the shape from turning fuzzy or uneven. If you wear a sharper lob or pixie bob, you may want the shorter end of that range. Longer styles can stretch a little farther if the ends stay healthy.
Can I air-dry these styles, or do they need heat?
Some can air-dry well, especially shaggy, wavy, or curly cuts. Sleeker looks usually need a blow-dry or at least a few passes with a round brush to show the layers cleanly. Thick hair often needs a little direction, even when you want it to look effortless.
What if my caramel highlights turn too brassy?
Use a color-safe cleanser and ask for a gloss at the salon. Don’t reach for purple shampoo unless the issue is actually too yellow; caramel often goes orange, not yellow, and blue-toned care is sometimes the better fix. If the tone is far off, a color refresh is smarter than layering on more product.
How do I ask for the right layers at the salon?
Describe where the hair feels too heavy — crown, sides, ends — and bring a photo of the silhouette you want. Say whether you want the layers to be obvious or soft, and point out if you want the caramel brightest at the front or spread more evenly. That language gives the stylist something useful to work with.
Is this better for straight, wavy, or curly hair?
All three can work. Straight hair shows the cut line most clearly, wavy hair shows movement fastest, and curly hair gives the richest-looking dimension when the shape is done curl by curl. The trick is not to force the same styling routine onto every texture.
The Shape That Makes the Color Worth It
Thick hair doesn’t need to be tamed into boredom. It needs a shape that respects its weight and a color plan that shows that shape off instead of hiding it. Caramel highlights are especially good at that because they warm the hair without flattening it, and they move with the layers instead of sitting in one rigid block.
The best versions of these cuts aren’t the ones that try to erase thickness. They use it. They give the hair swing, softness, and enough dimension that you can see the haircut from across the room, which is the whole point. If you choose the layer placement carefully and keep the caramel in the right places, the style starts doing half the work for you.