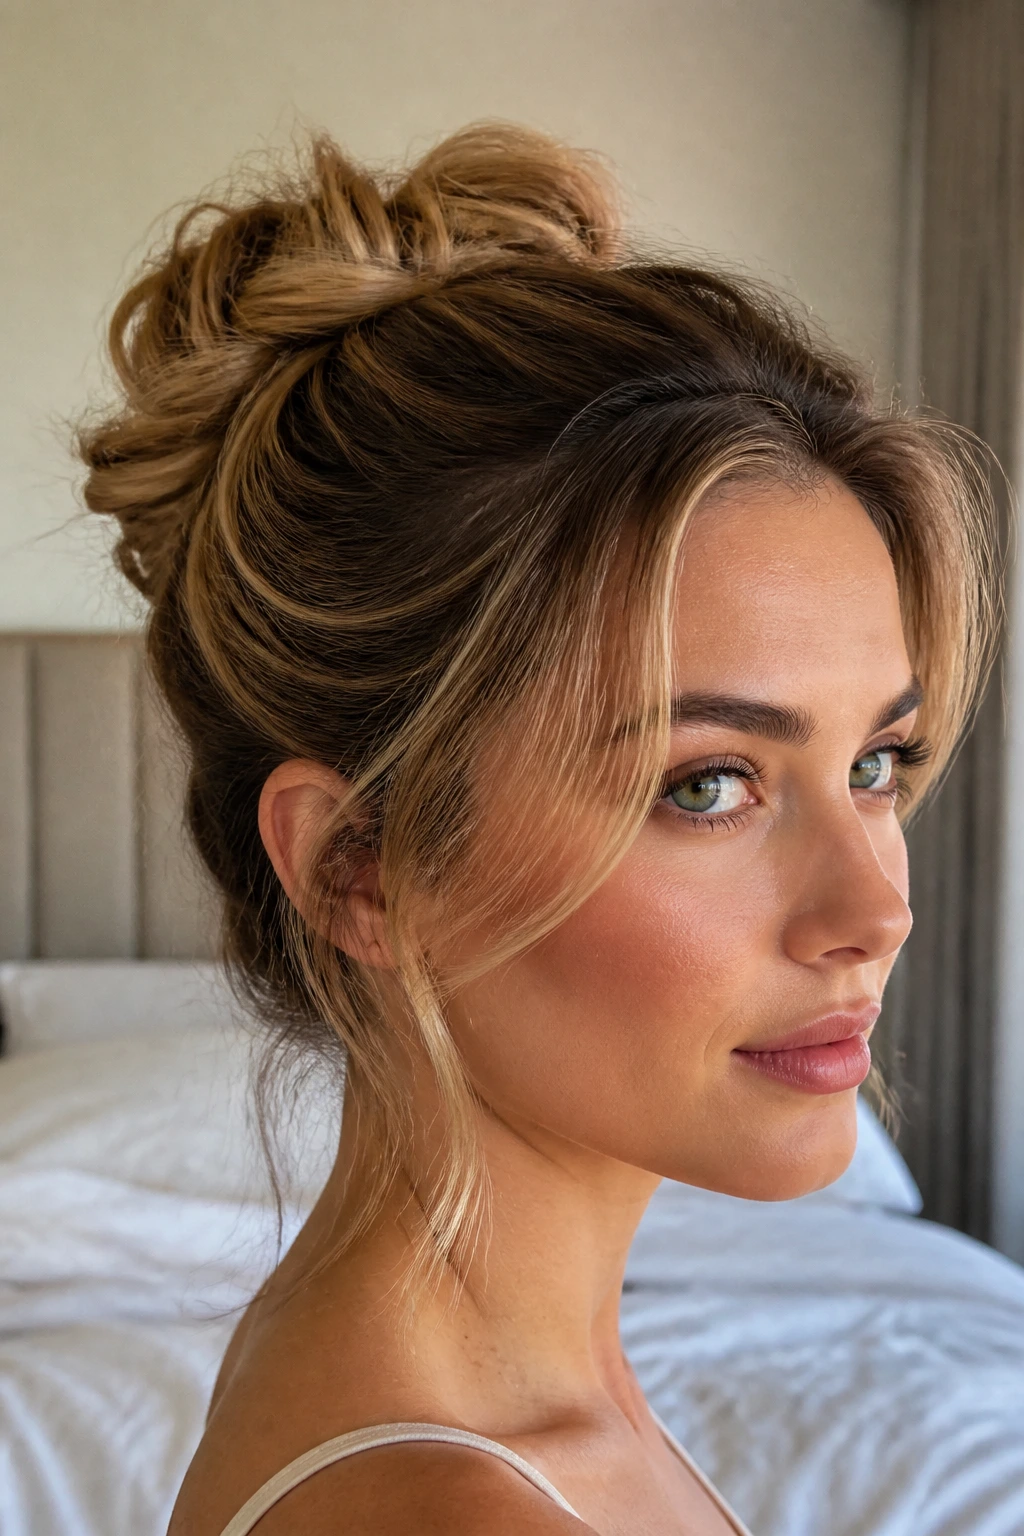
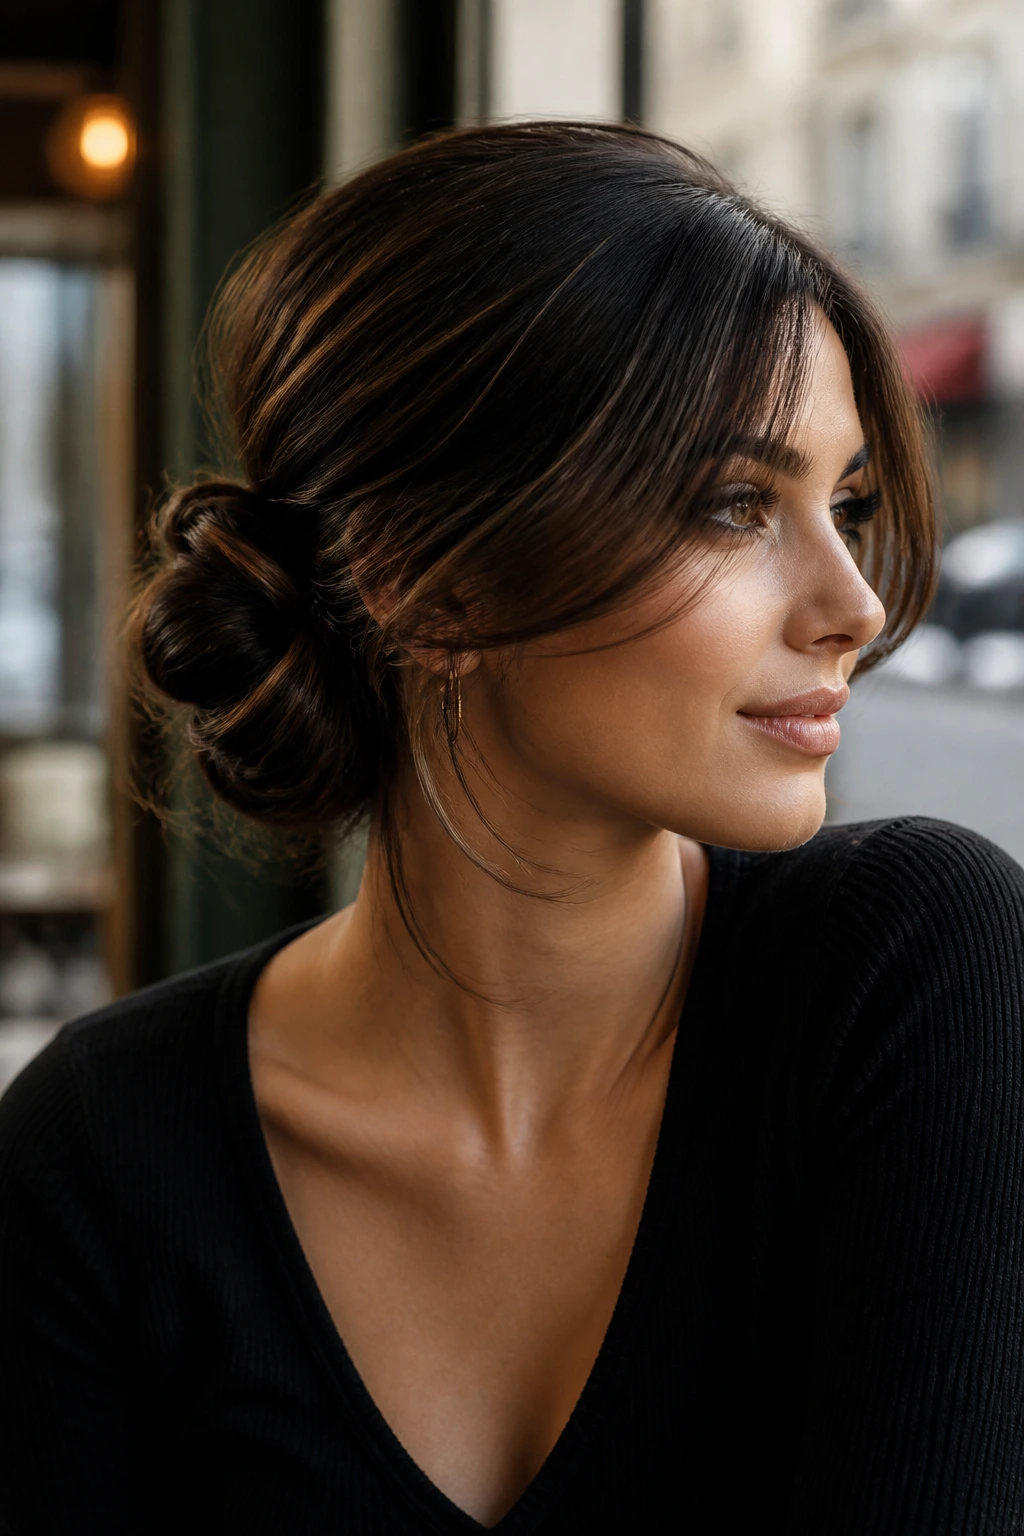
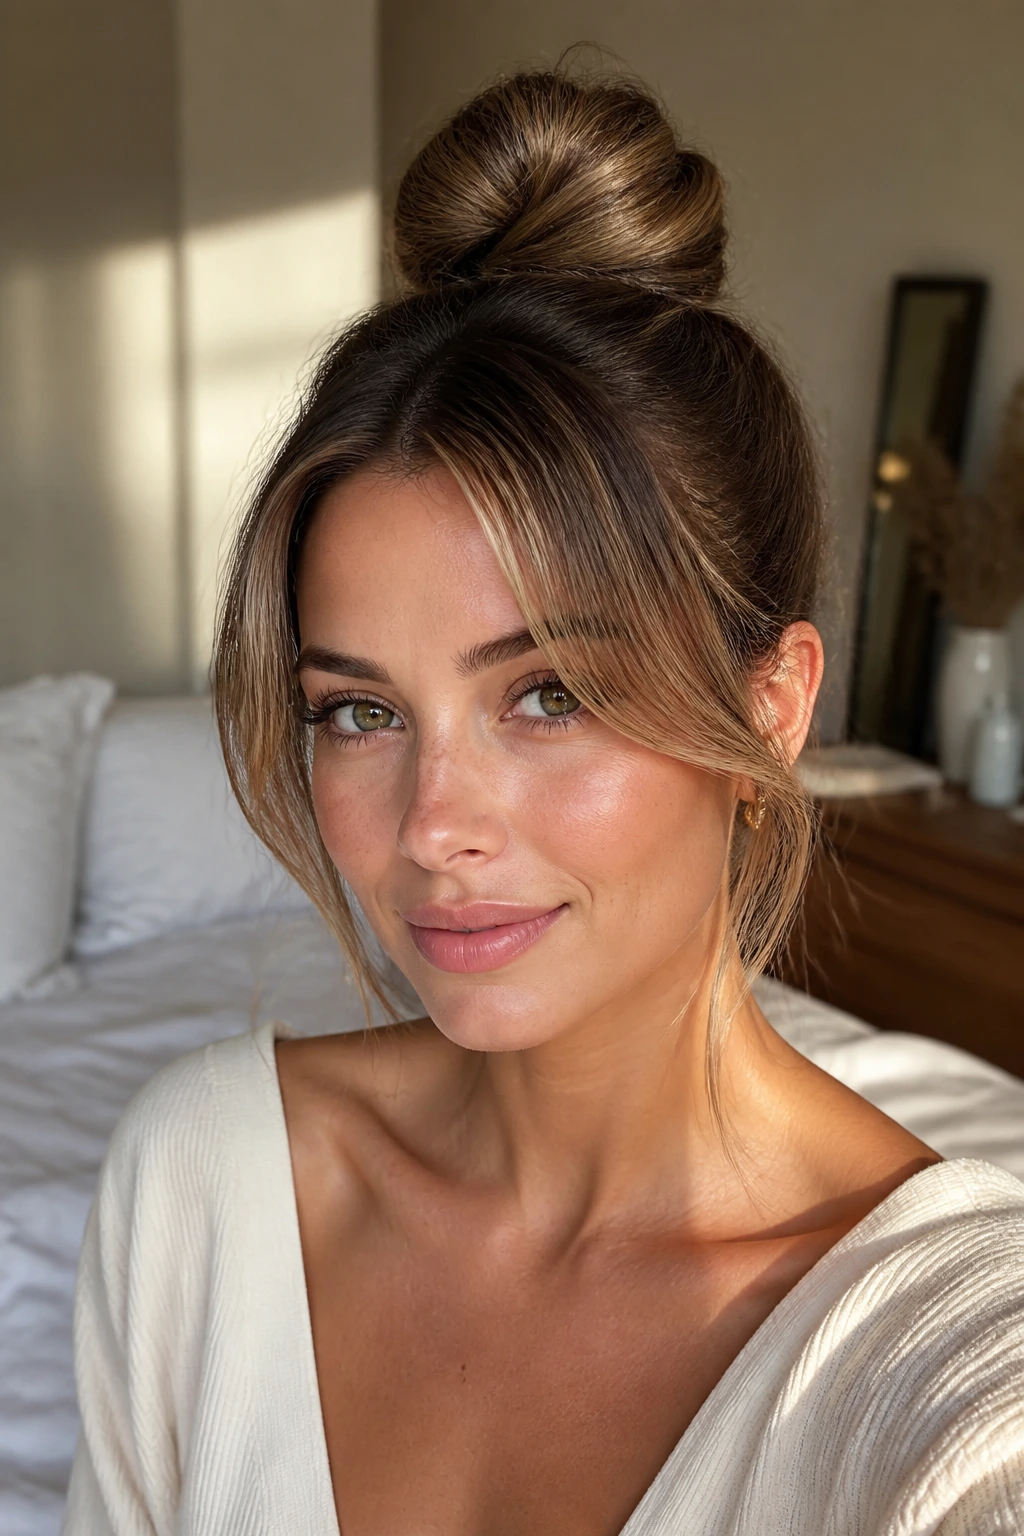
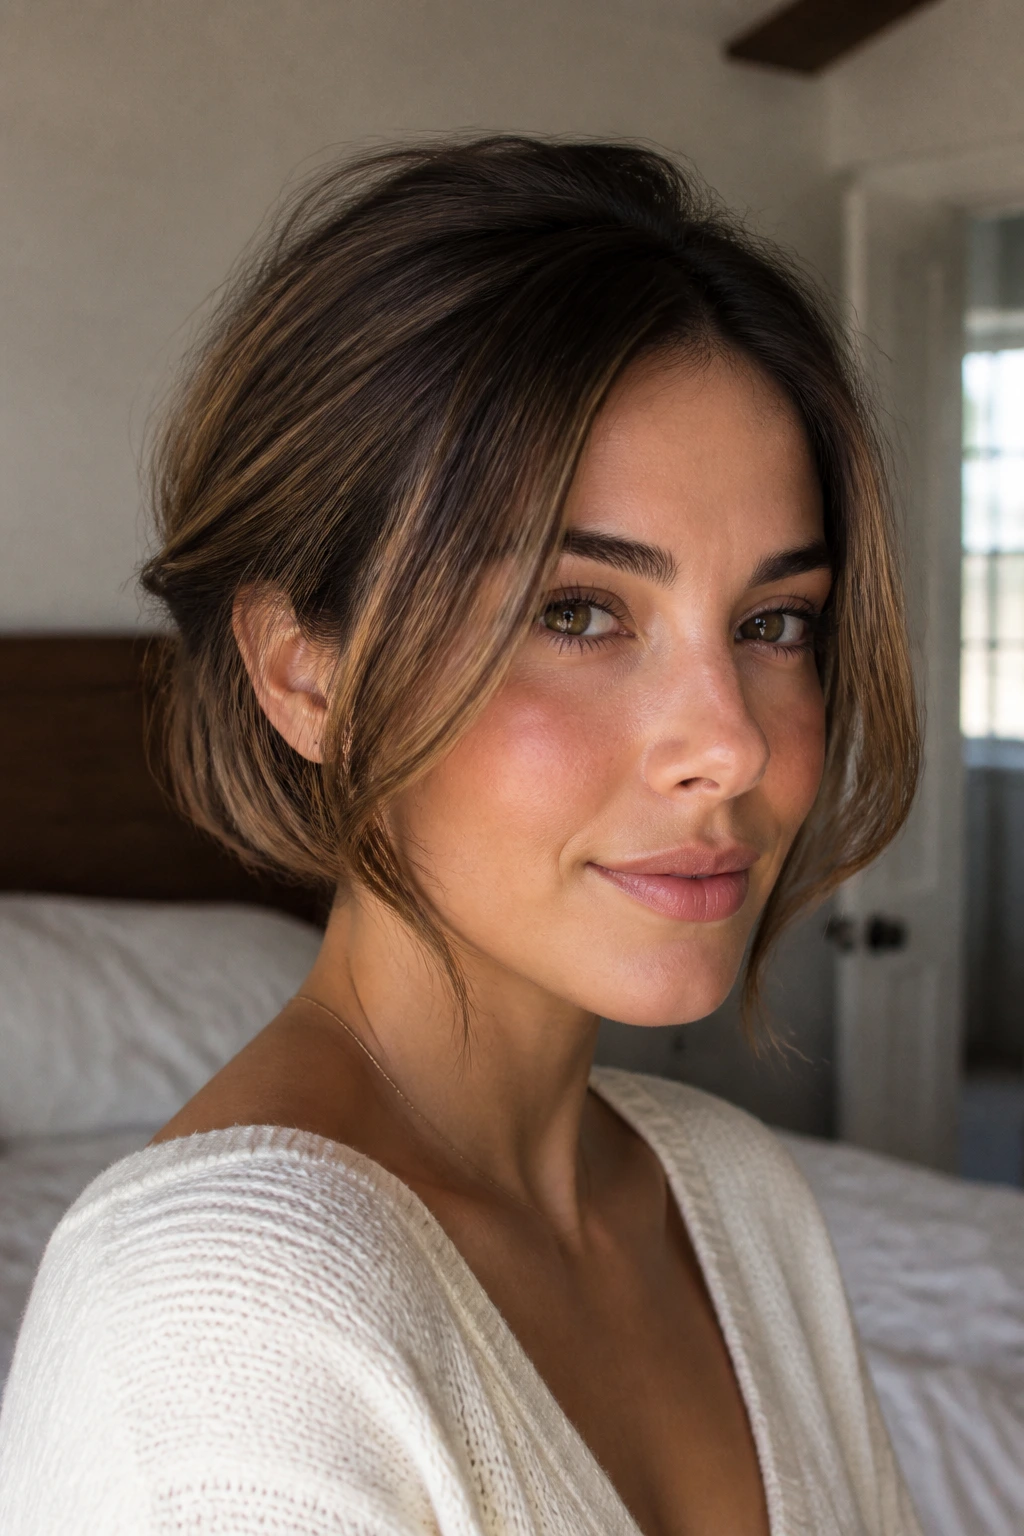
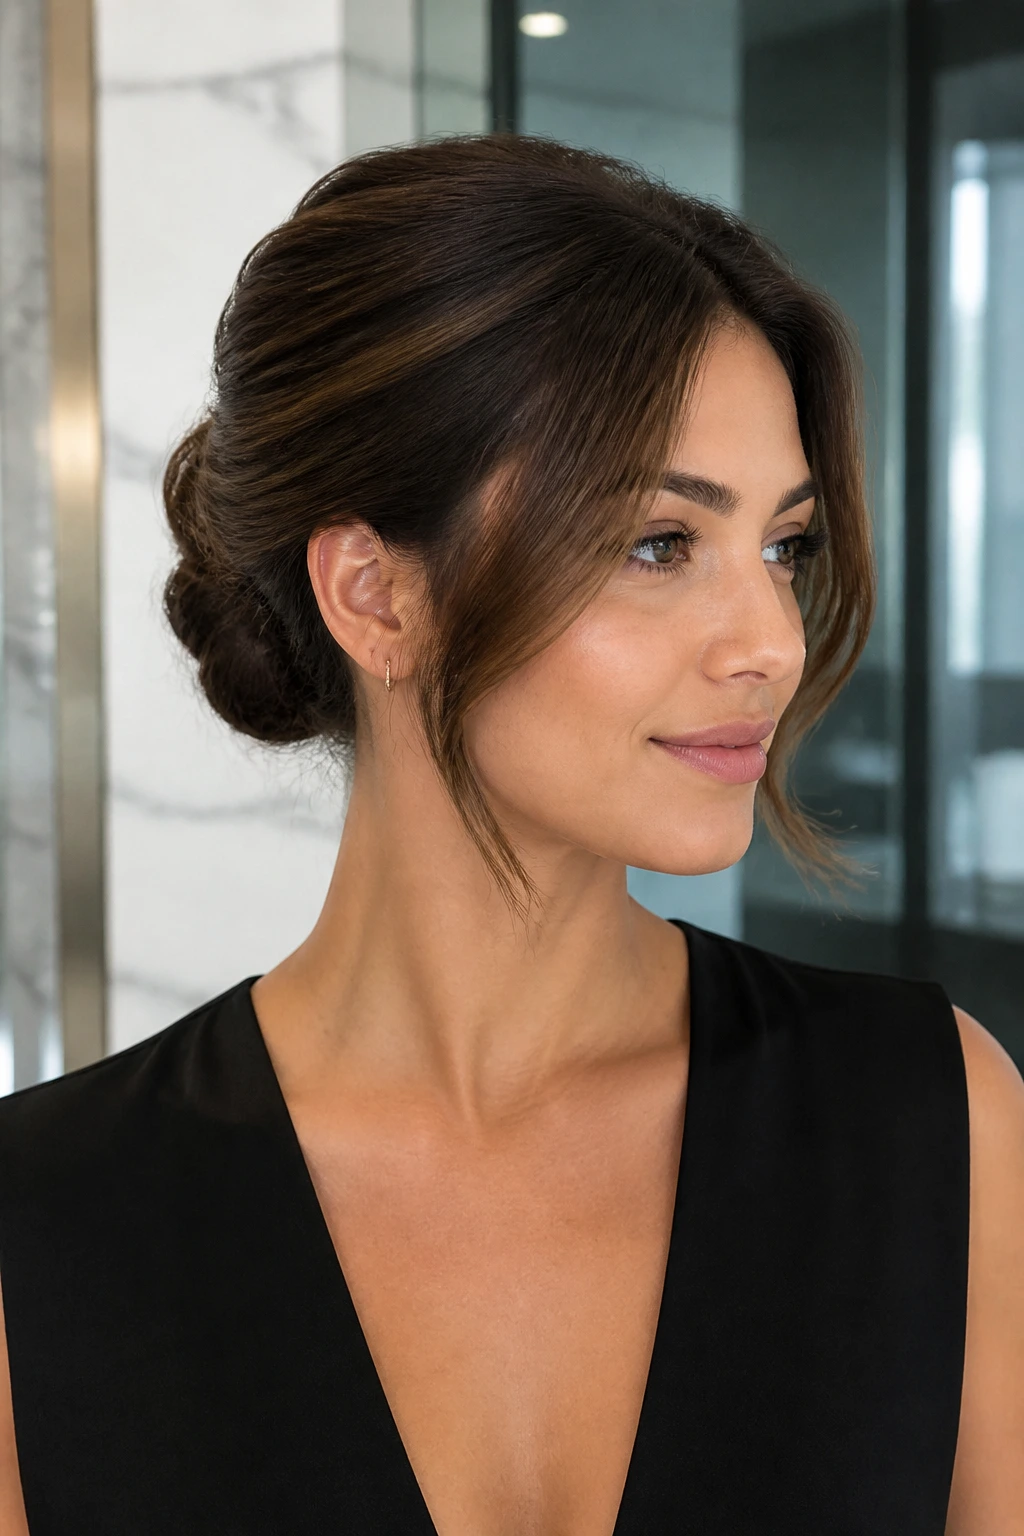
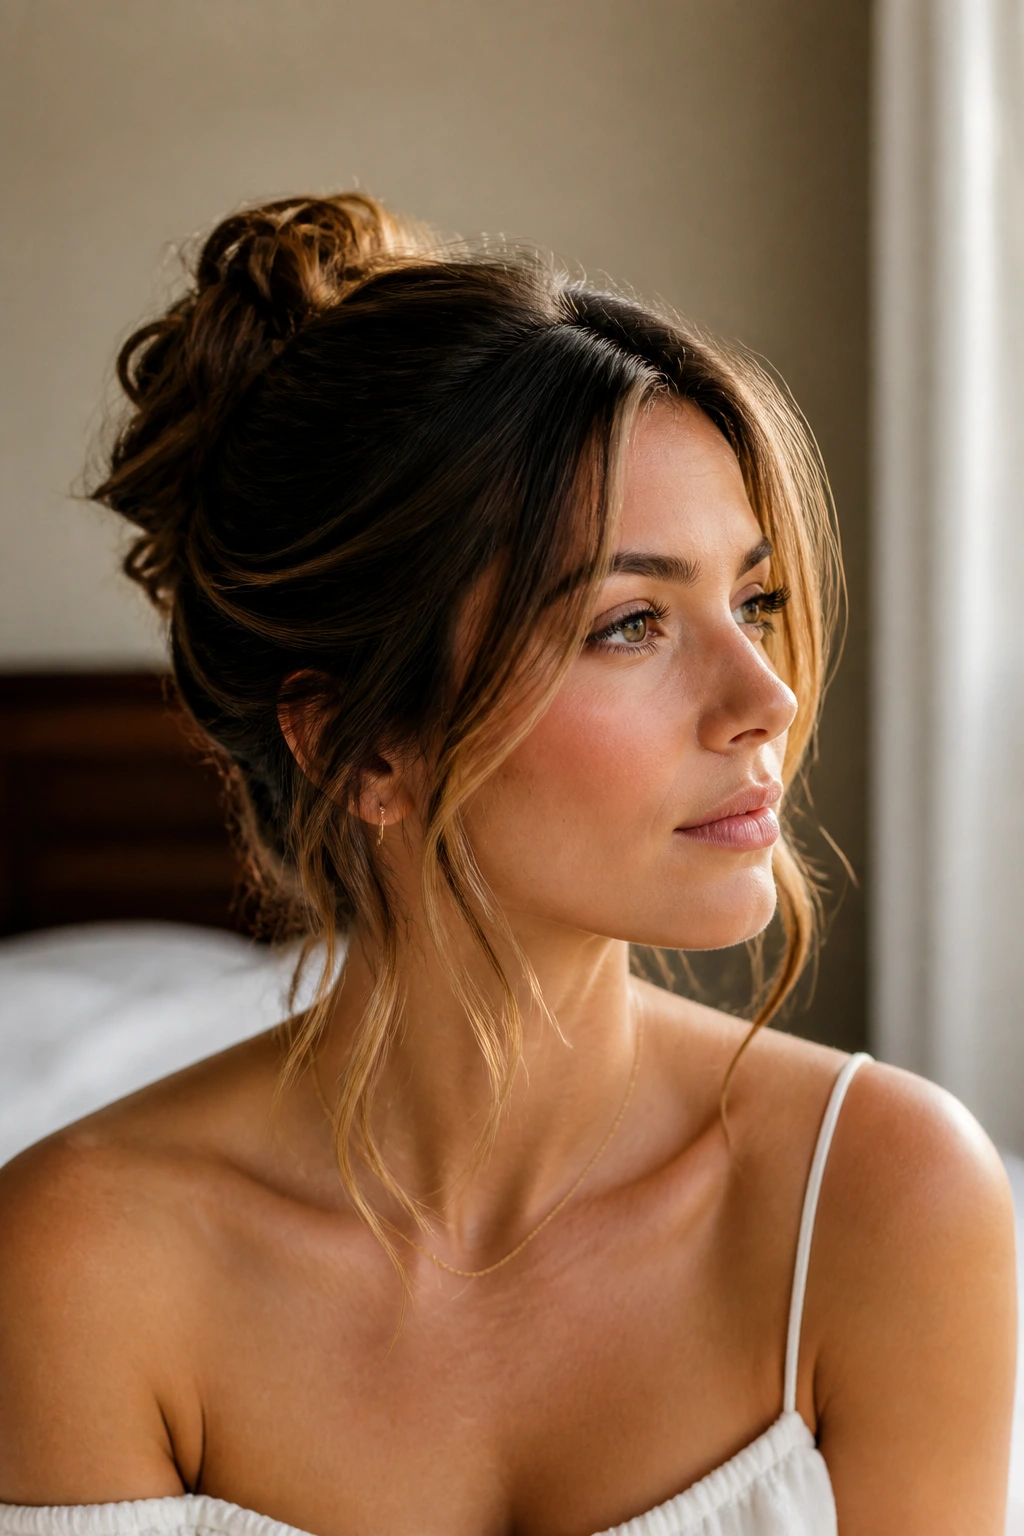
The fastest way to make an updo look intentional is to stop pulling every strand away from your face. That’s the whole trick with elegant updos for busy mornings with face-framing layers: the soft pieces near your temples, cheekbones, and jaw do the polishing for you, even when the bun or twist underneath is built in a hurry.
A blunt all-back style can look severe. It can also expose every uneven pin and every awkward cowlick at the hairline. Face-framing layers fix that. They break up the outline, give movement to the front, and make a simple knot or twist read as styled instead of scraped together.
That matters most on rushed mornings, because rushed hair usually wants to collapse in two directions at once: too flat at the crown, too fuzzy at the edges. The best styles below solve both problems without asking for a curling set, twenty pins, or a full mirror session. Some rely on a clean part and two loose pieces. Some need a braid, a clip, or one well-placed bobby pin. All of them are built for real life.
Why These 22 Updos Earn Their Keep
-
They work with layers instead of against them: The shorter front pieces are left out on purpose, which keeps the style from looking too tight or too formal.
-
They hide a rushed start: A low bun or twist with soft face pieces can look deliberate even when you only had six minutes and one mirror.
-
They need less precision than you’d think: Most of these styles look better when the crown is a little imperfect and the front is softly bent, not frozen in place.
-
They scale with hair length: Shoulder-length cuts, long layers, and thicker hair each get a different route in here, so you are not forced into one cookie-cutter bun.
-
They survive the day better than a fully slicked-back look: Leaving a few pieces free gives the style somewhere to “move” without breaking apart.
-
They still read as elegant: That’s the part people miss. Soft does not mean sloppy. A clean part, controlled nape, and one good finishing spray change everything.
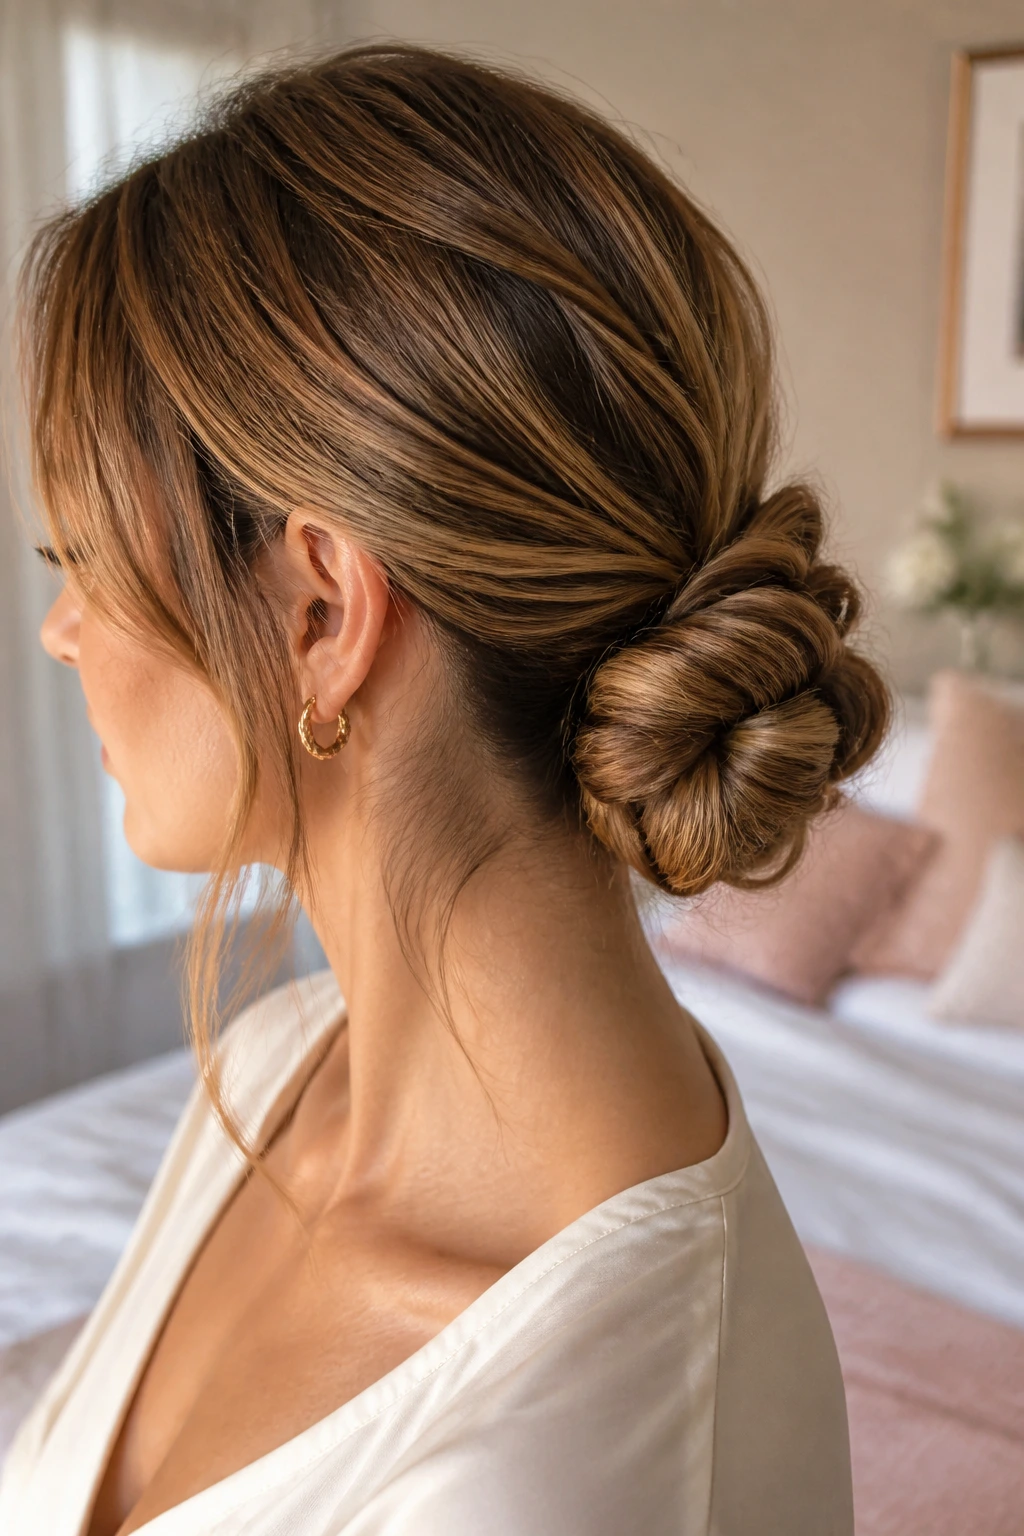
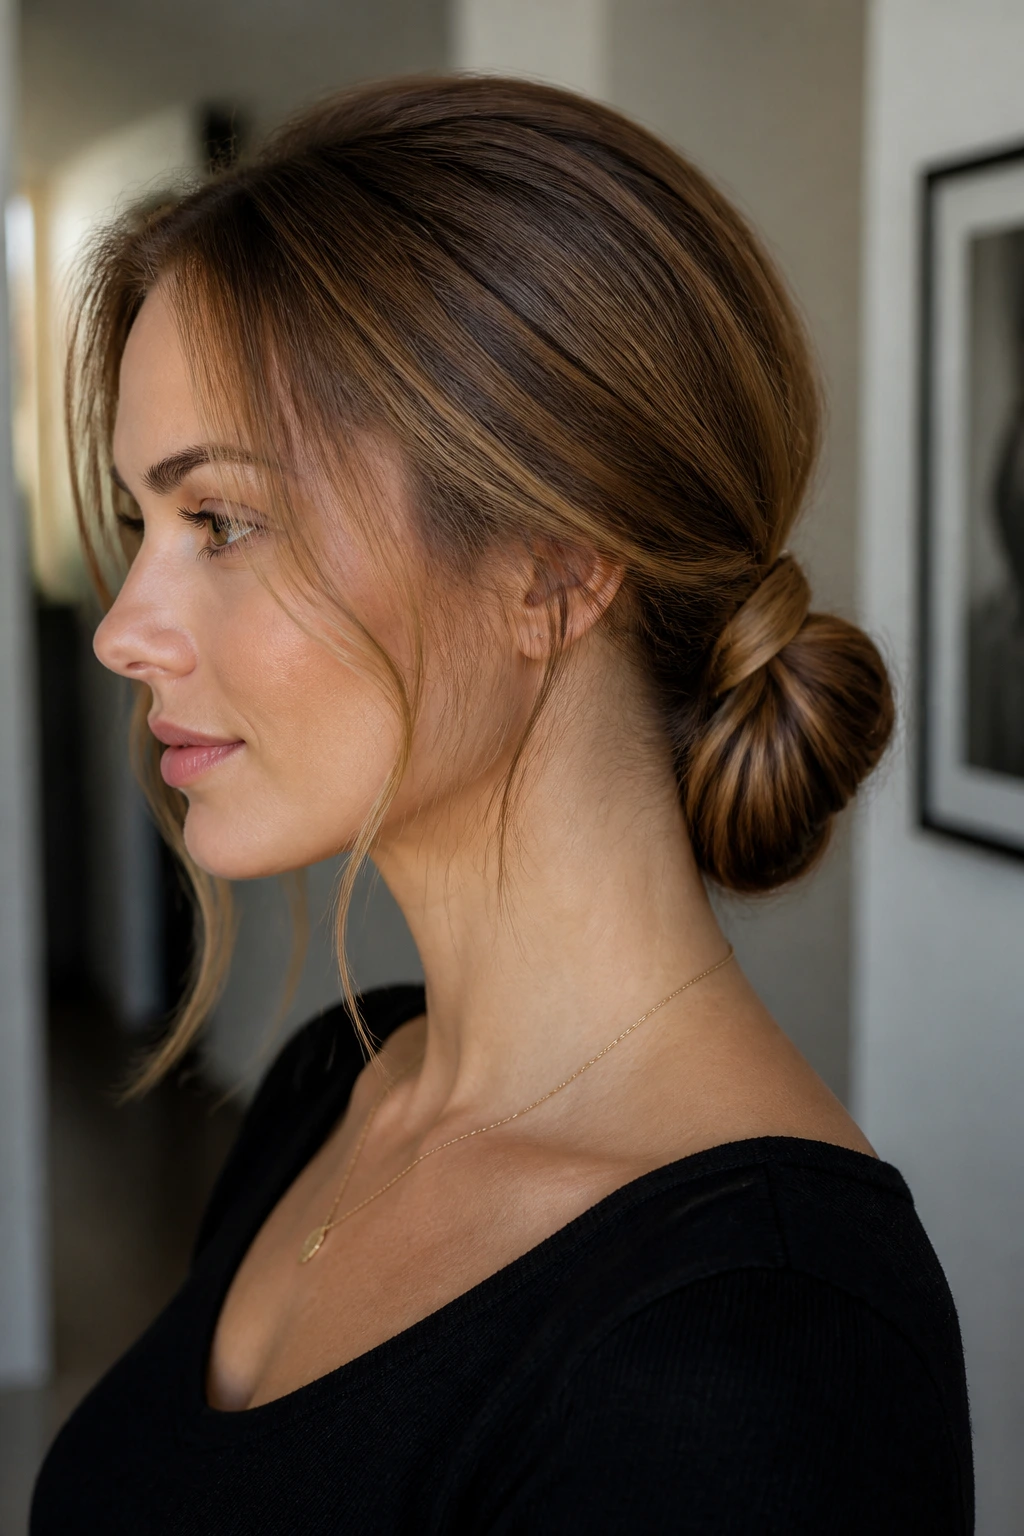
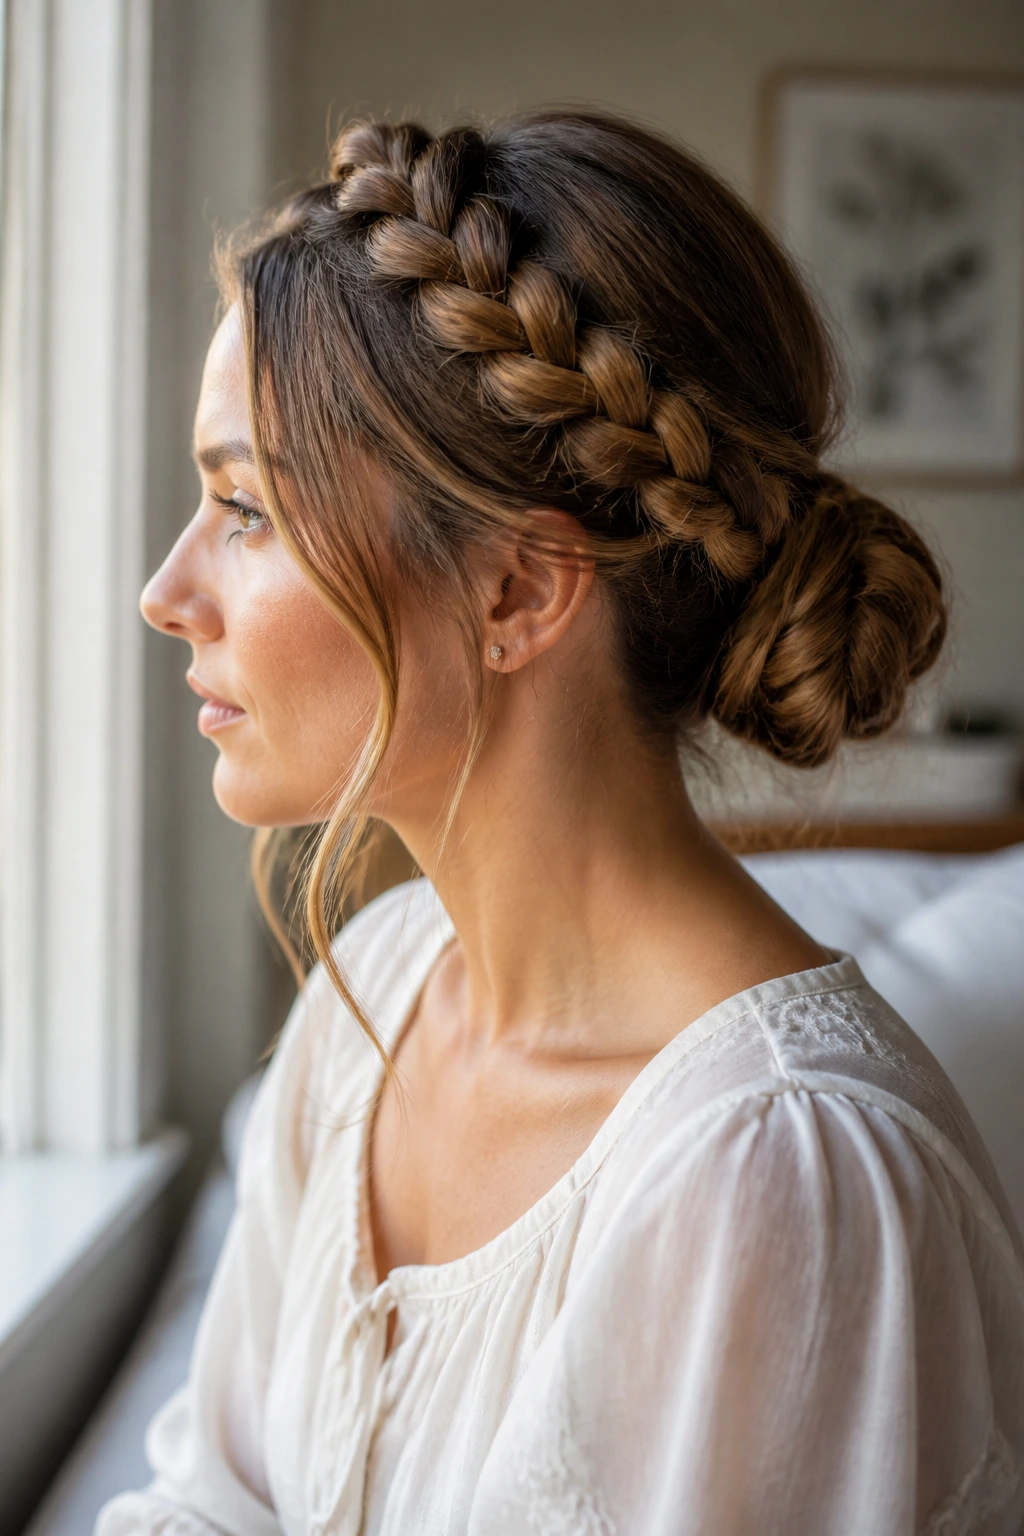
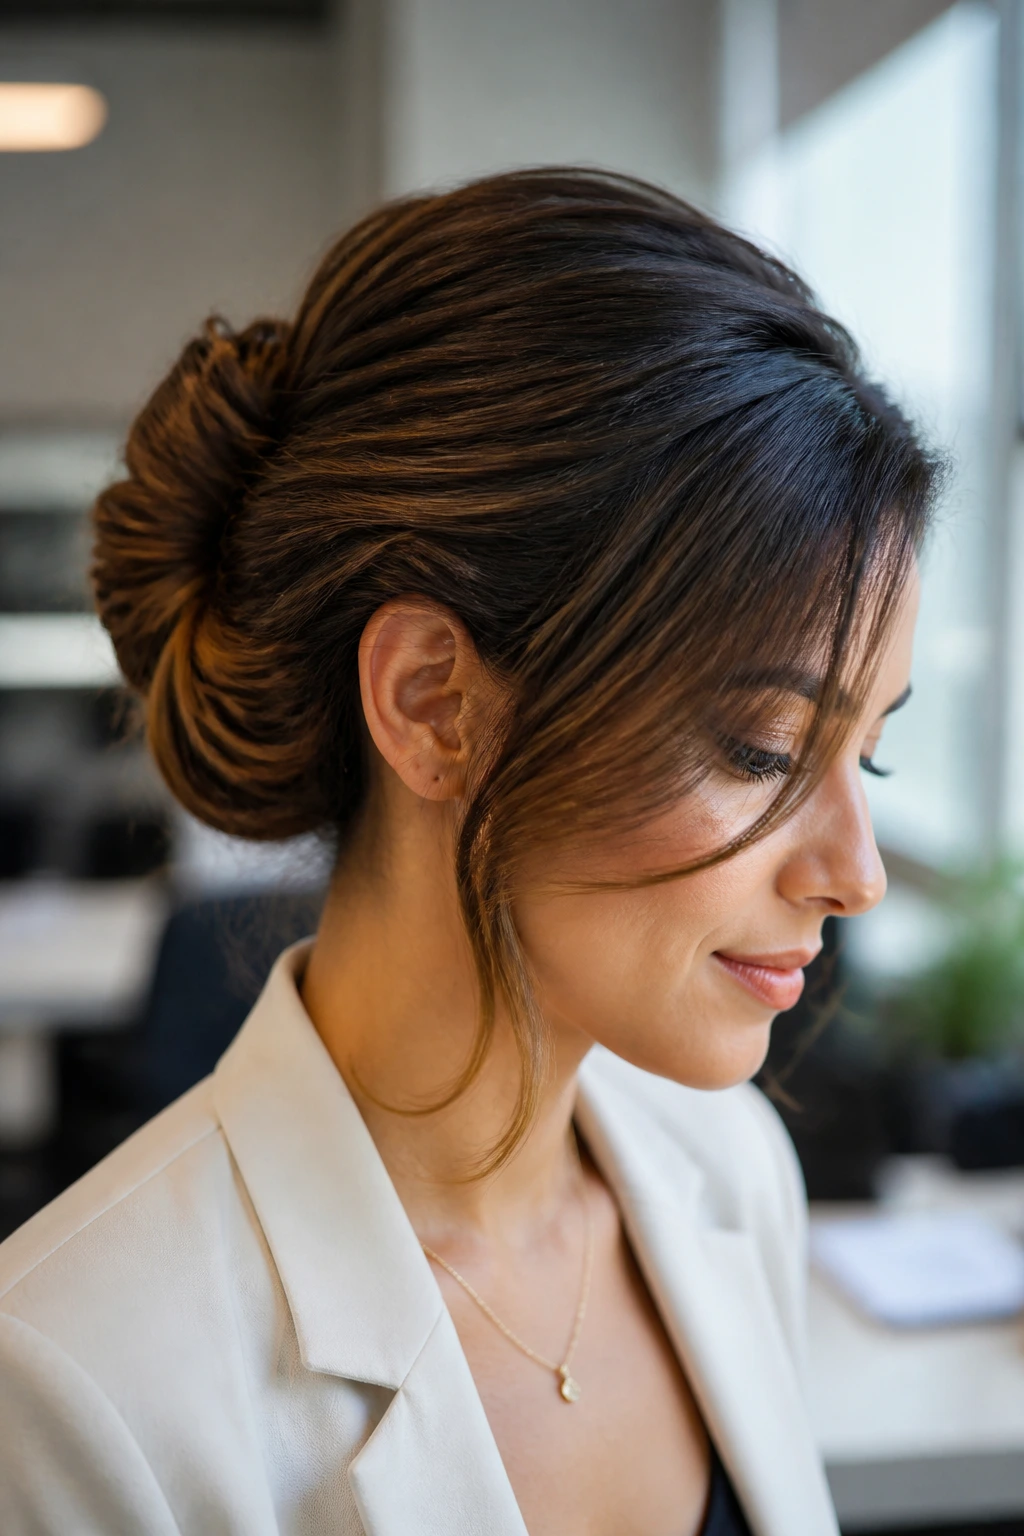
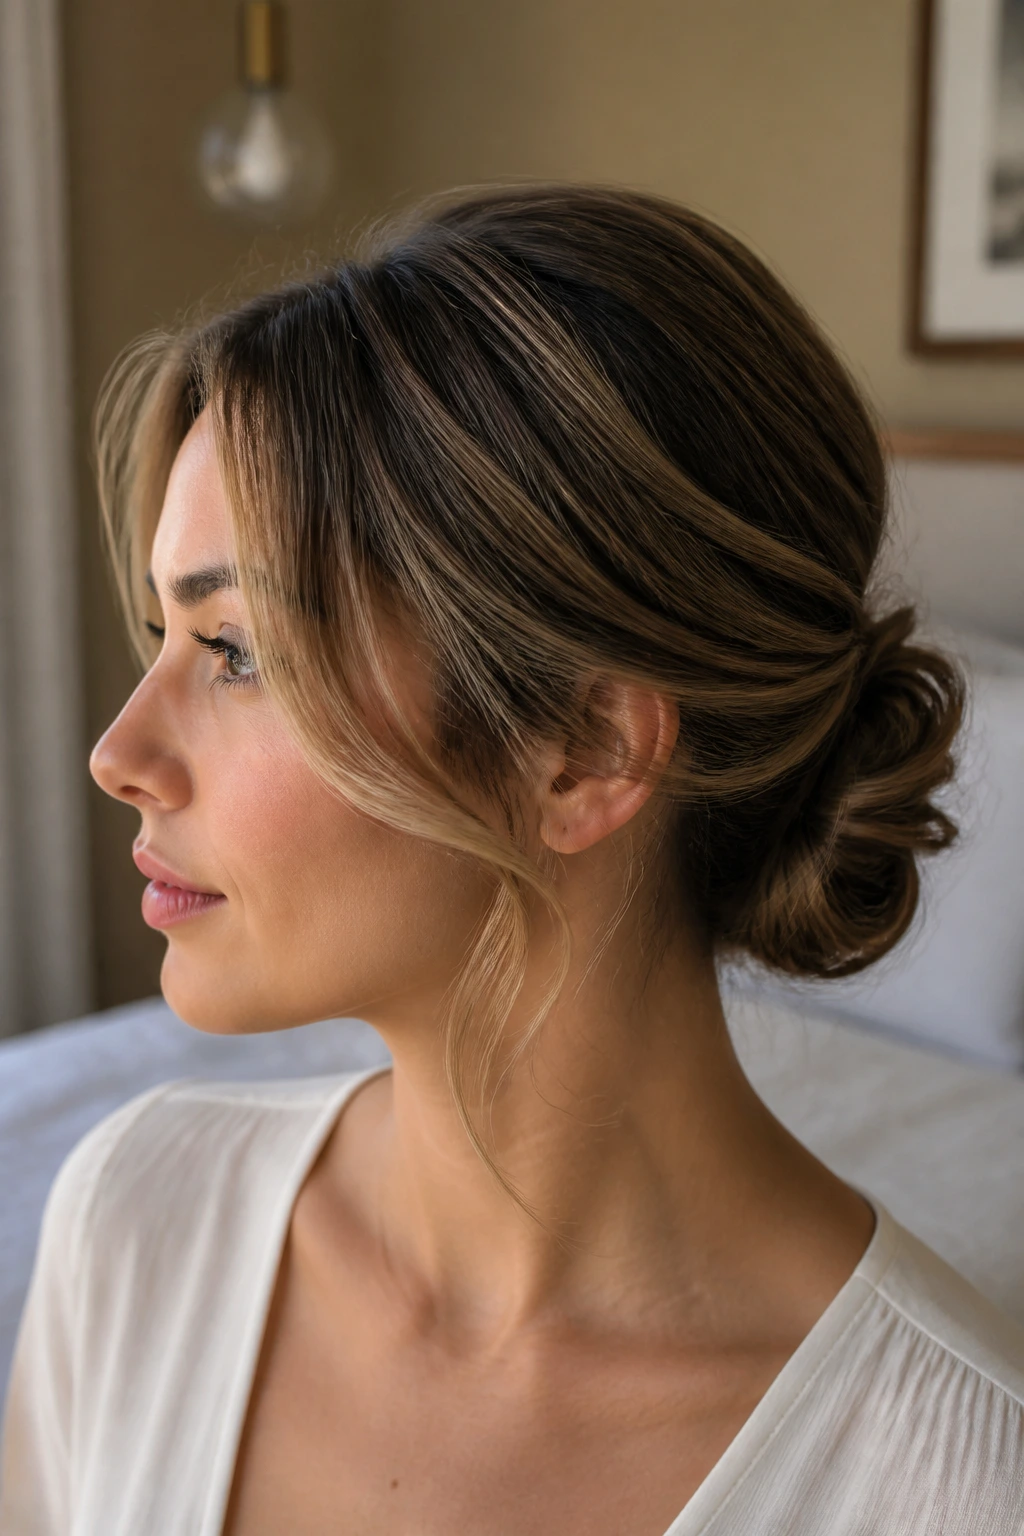
1. The Low Twisted Chignon That Keeps the Front Soft
A low twisted chignon is the style I reach for when the morning is moving faster than my hands are. It looks refined because the shape sits close to the nape, but the two front pieces keep it from going severe. Leave the front layers out first, twist the rest of the hair back into a low coil, then pin it flat against the head so the bun sits tucked and tidy.
Why it works: The low placement gives the style weight, which helps layered hair hold its shape without puffing at the crown. The face-framing pieces should be bent away from the face with a flat iron or 1-inch iron, not curled into perfect spirals. That softer bend lets them skim the cheek instead of sticking out like antennae.
Quick shape note: If your layers stop around the chin, pin the bun a little lower than you think you should. A bun placed too high makes the front pieces feel accidental. A bun set at the nape makes them feel designed.
Best for: Medium to long hair, especially hair that slips out of higher buns by lunchtime.
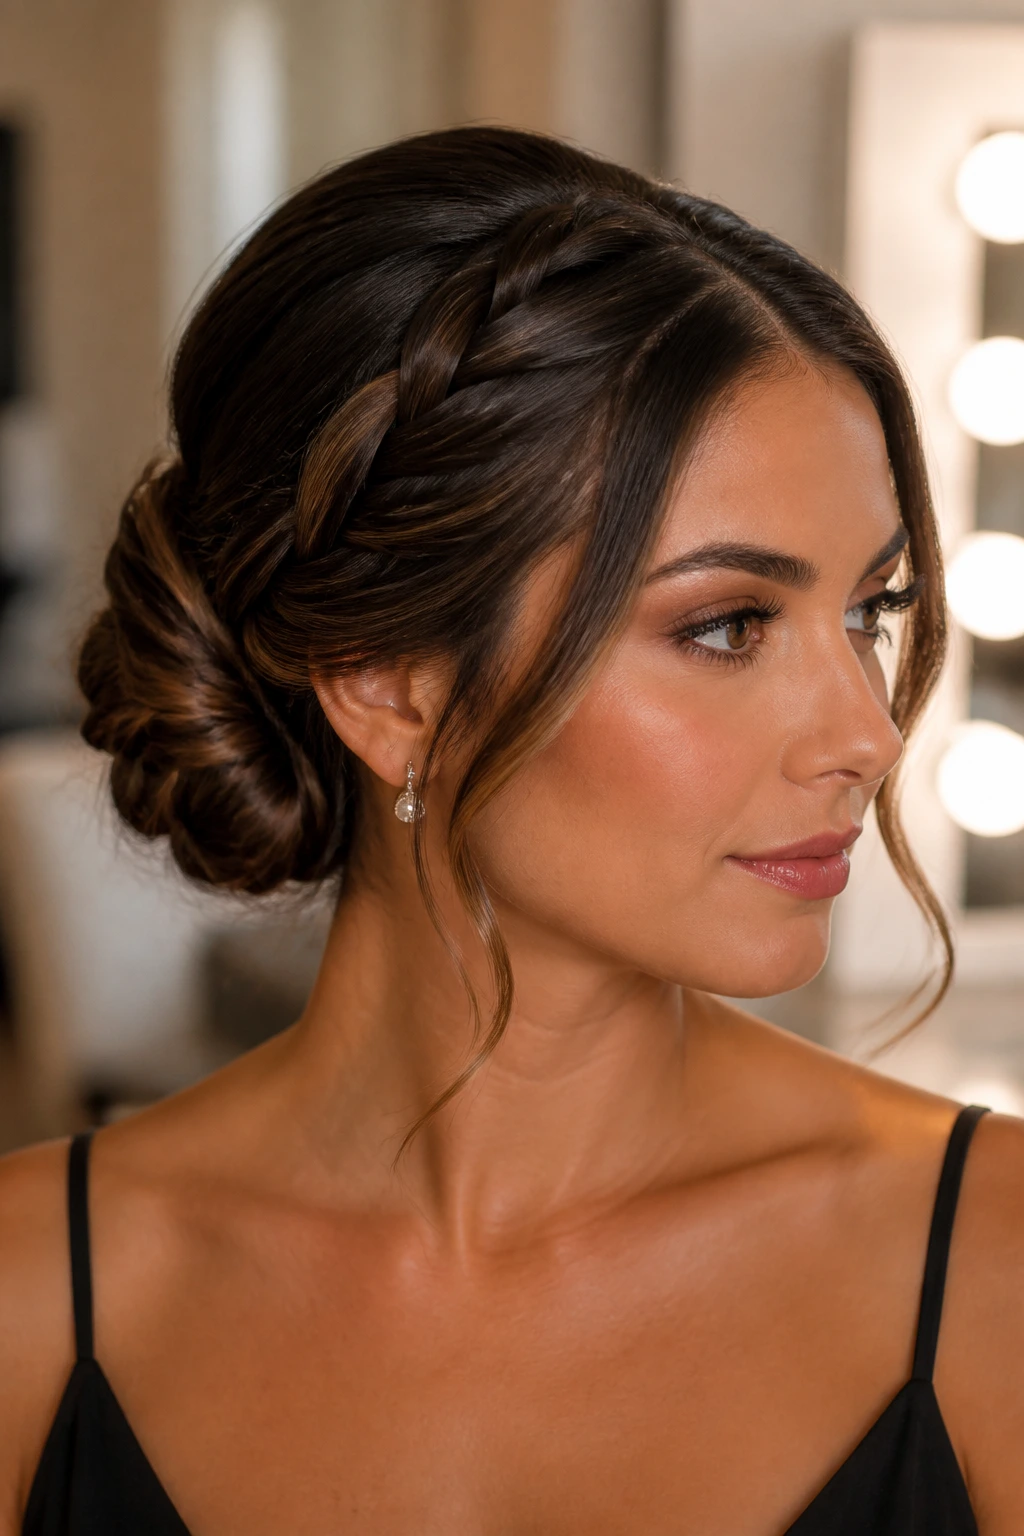
2. A Sleek Braided Bun With Bent Front Layers
Sleek does not have to mean stiff. This style starts with a clean side or center part, a small braid along one side, and a low bun wrapped from the remaining hair. The braid gives you structure; the loose layers at the front give you softness.
Why it stays neat
The braid acts like a rail. It keeps the top section controlled, which matters when layers around the face want to slide loose before you’ve even found your shoes. I like this one on second-day hair because the texture gives the braid grip, and a little dry shampoo at the roots keeps the crown from going shiny.
The front pieces should be curved away from the face in one smooth pass. Don’t over-curl them. One bend near the cheekbone is enough. If you curl them into tiny ringlets, the whole thing starts looking overworked.
A small touch of shine serum on the ends of the bun—not the roots—finishes it without flattening the braid.
3. The Claw-Clip French Twist for Shorter Layers
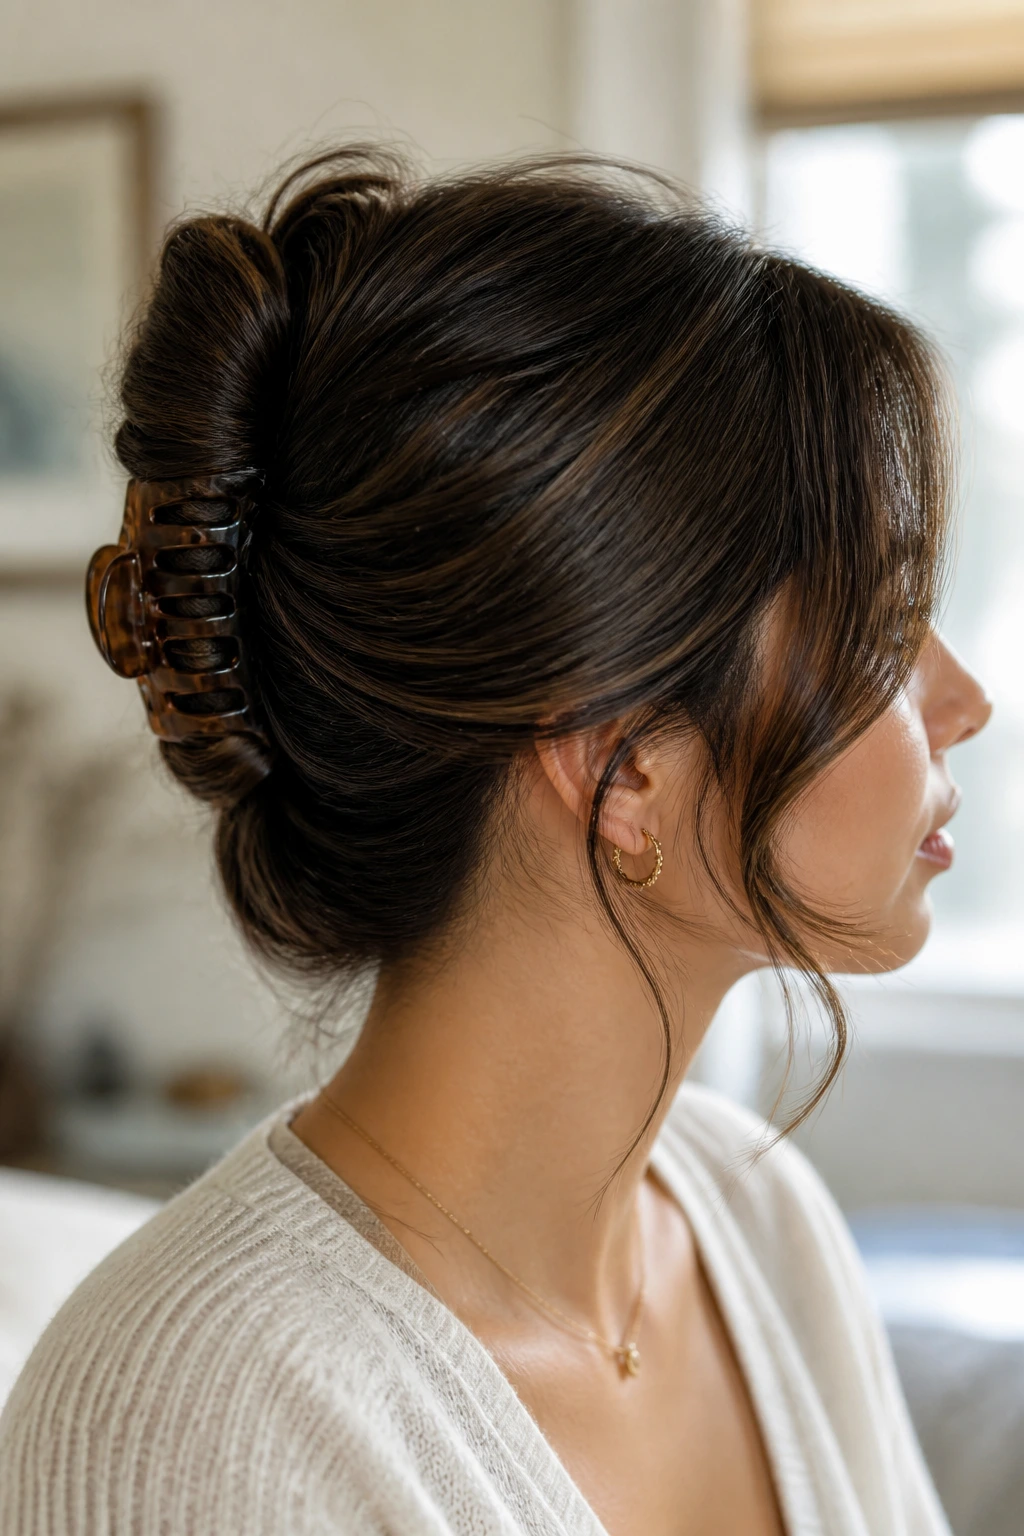
Need a style that takes under five minutes? This one does. Gather the hair at the back as if you’re making a low ponytail, twist it upward, fold the length inward, and clamp it with a medium claw clip. Then pull out the shortest front layers so they fall in thin, soft lines around the face.
The trick is not to chase perfection. A French twist with layered front pieces looks best when the shell of the twist is clean but not glued down. If your hair is medium thickness, use one clip with strong teeth. Fine hair usually needs a pair of crossed bobby pins under the clip for backup.
I prefer this style when I want polish without the shine of a slick bun. The front pieces should curve around the jaw, not sit flat against the cheeks. If they feel too sharp, wrap them around a round brush for thirty seconds with low heat and let them cool before dropping them free.
4. The Rope-Braid Low Ponytail That Folds Into Itself
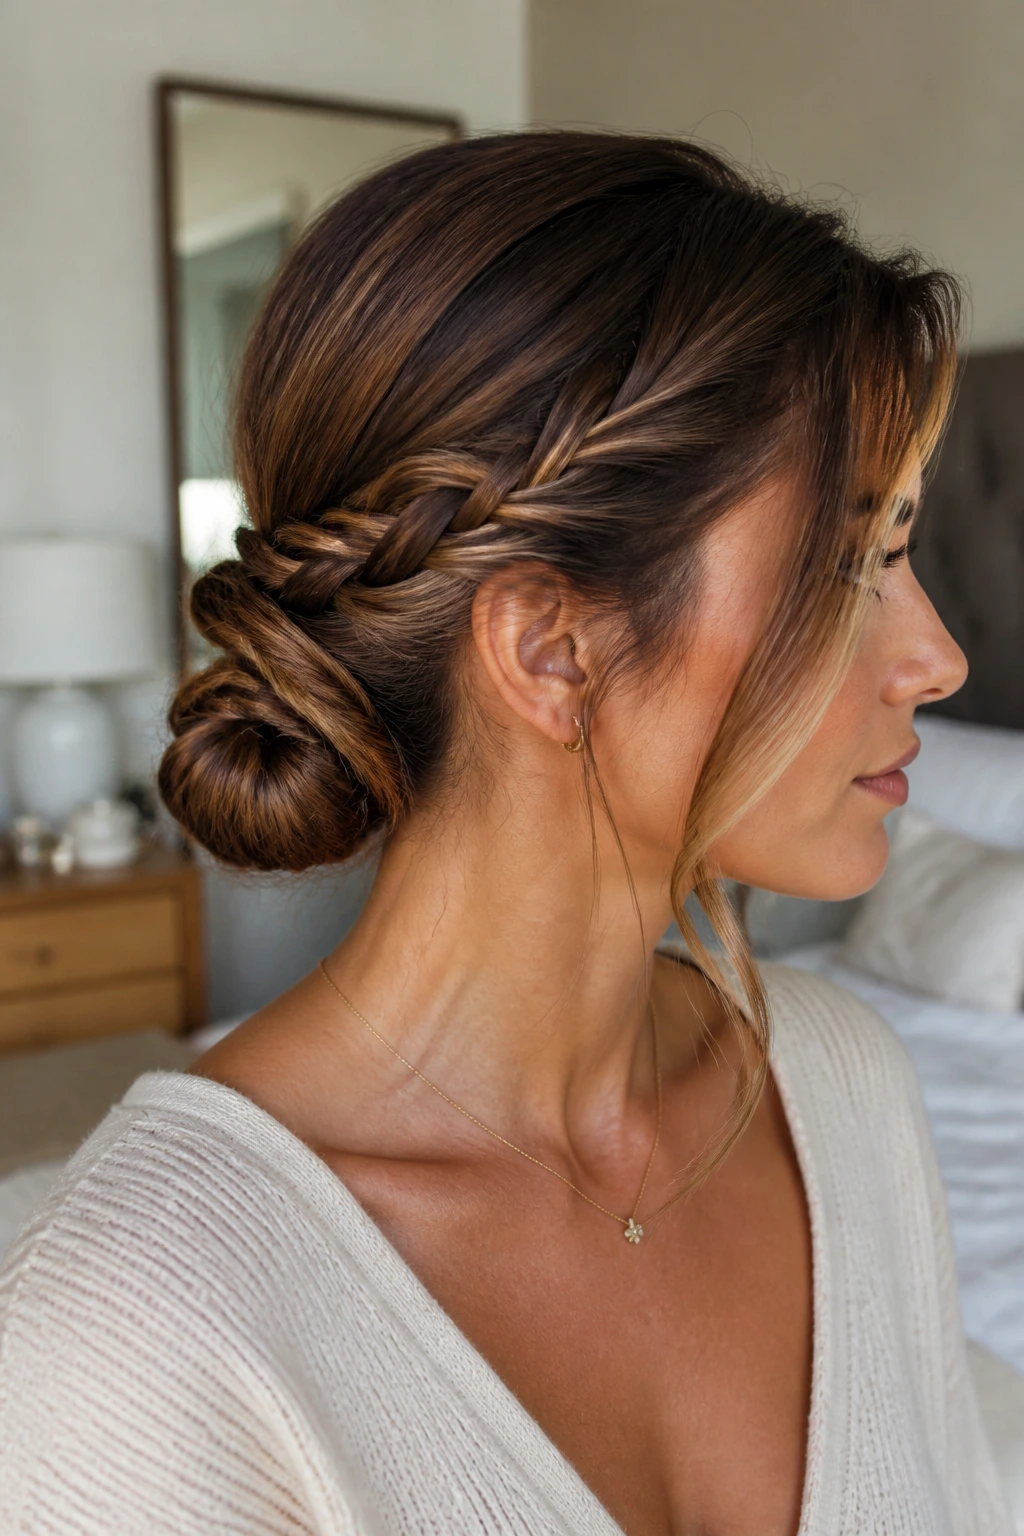
A rope braid gives plain hair enough texture to look finished. Split the ponytail into two sections, twist each section clockwise, then twist the two together counterclockwise. Once the rope braid hangs tight, coil it into a low bun and pin the end under the fold.
This one is especially good for layered hair that refuses to stay in a regular braid. The rope structure grips better, and because it’s built from two strands instead of three, it looks neater when the front pieces are left out. Those pieces should be kept narrow—about the width of a pencil on each side—so they frame the face rather than crowd it.
If your hair is fine, mist the mid-lengths with texturizing spray before you start. If it’s thick, smooth the top with a soft brush and keep the braid taut. Either way, the finished shape sits low and clean, and the front layers soften the outline just enough.
5. The Soft Crown Braid Into a Low Bun
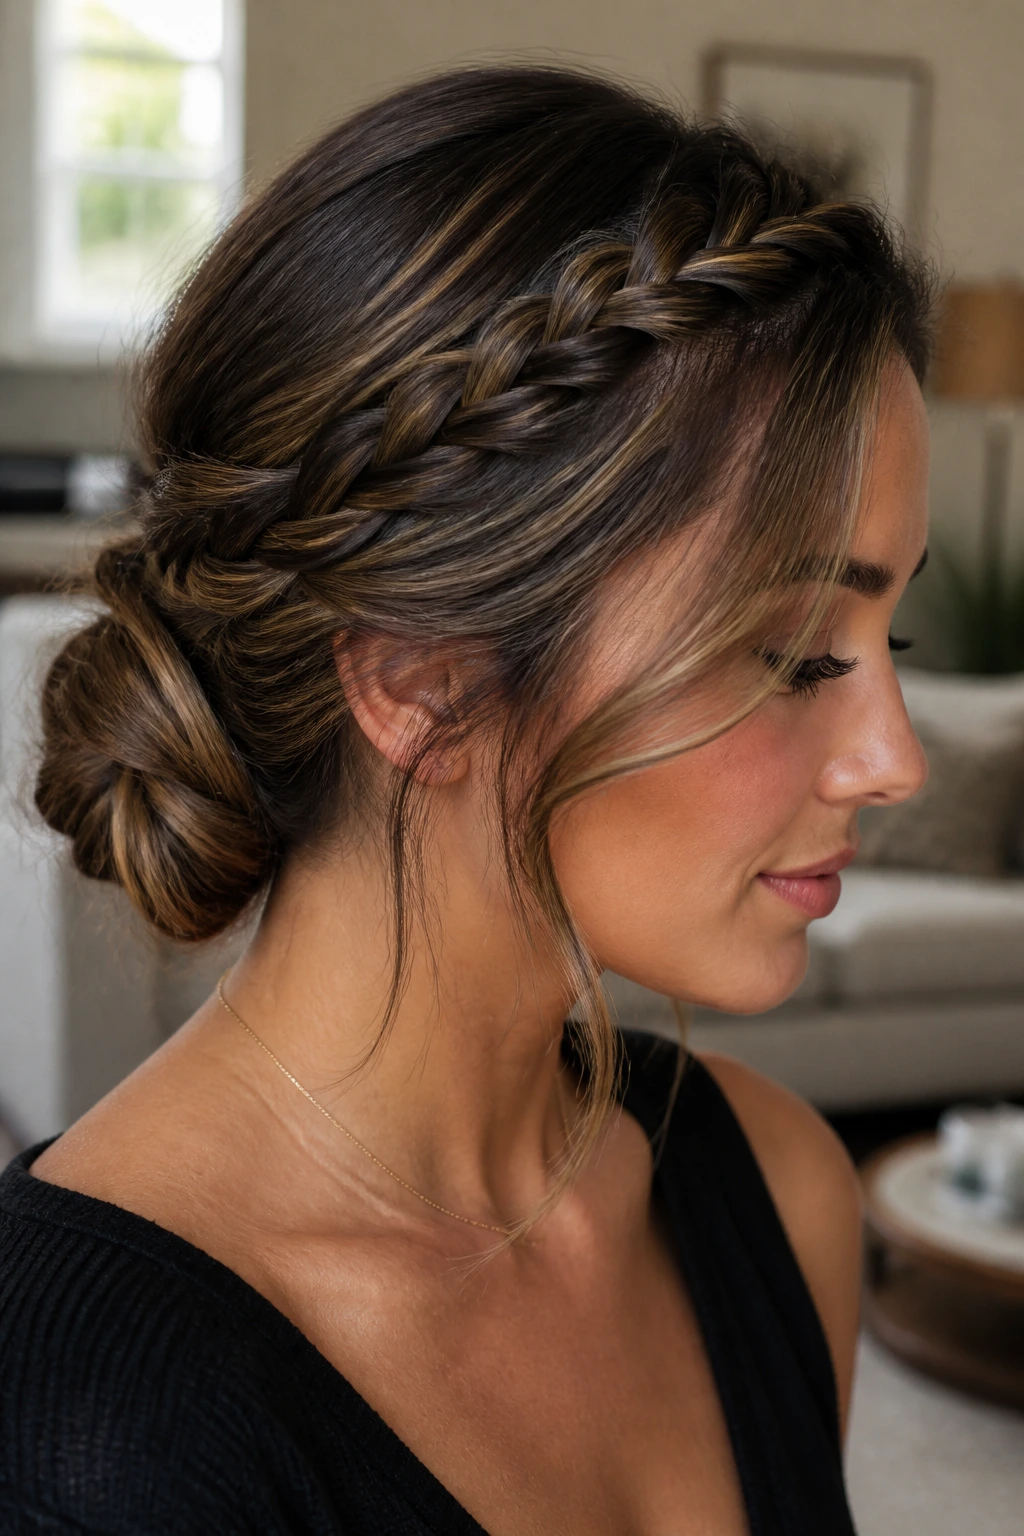
This is the style for anyone who likes a little detail near the hairline. Braid a section from one temple across the top of the head, then gather the rest into a low bun and pin the braid into the bun base. The braid creates a curved line that works especially well with curtain layers.
Why I like it: it gives you interest up top without demanding perfect symmetry. If one side of your face-framing layers is shorter than the other, the crown braid balances that out. The side with the shorter pieces can stay looser; the longer side can be tucked a little more firmly behind the ear.
A soft braid also covers the part where layered hair usually gets fuzzy—the top half-inch along the hairline. That fuzzy zone is where rushed styles betray you. Here, it disappears into the braid and looks intentional.
6. The Bubble Ponytail Turned Into a Coiled Bun
A bubble ponytail is not just for school runs and weekend errands. Wrapped into a bun, it looks sharp in a way that catches people off guard. Secure a low ponytail, add small elastics every 2 to 3 inches down the length, then gently tug each section to create rounded bubbles. Coil the bubbles into a bun and pin them in place.
The face-framing layers should stay loose and curved toward the cheekbones. A center part makes this style feel more modern; a deep side part makes it softer. Either way, the bubbles give thickness and shape to hair that might otherwise fall flat in a plain bun.
This one is especially useful for long layered hair, because the elastics stop shorter pieces from slipping out. You still want a little movement at the front, though. Without that, the style turns into a sculpture. And nobody wants their morning hair to look like it needs a pedestal.
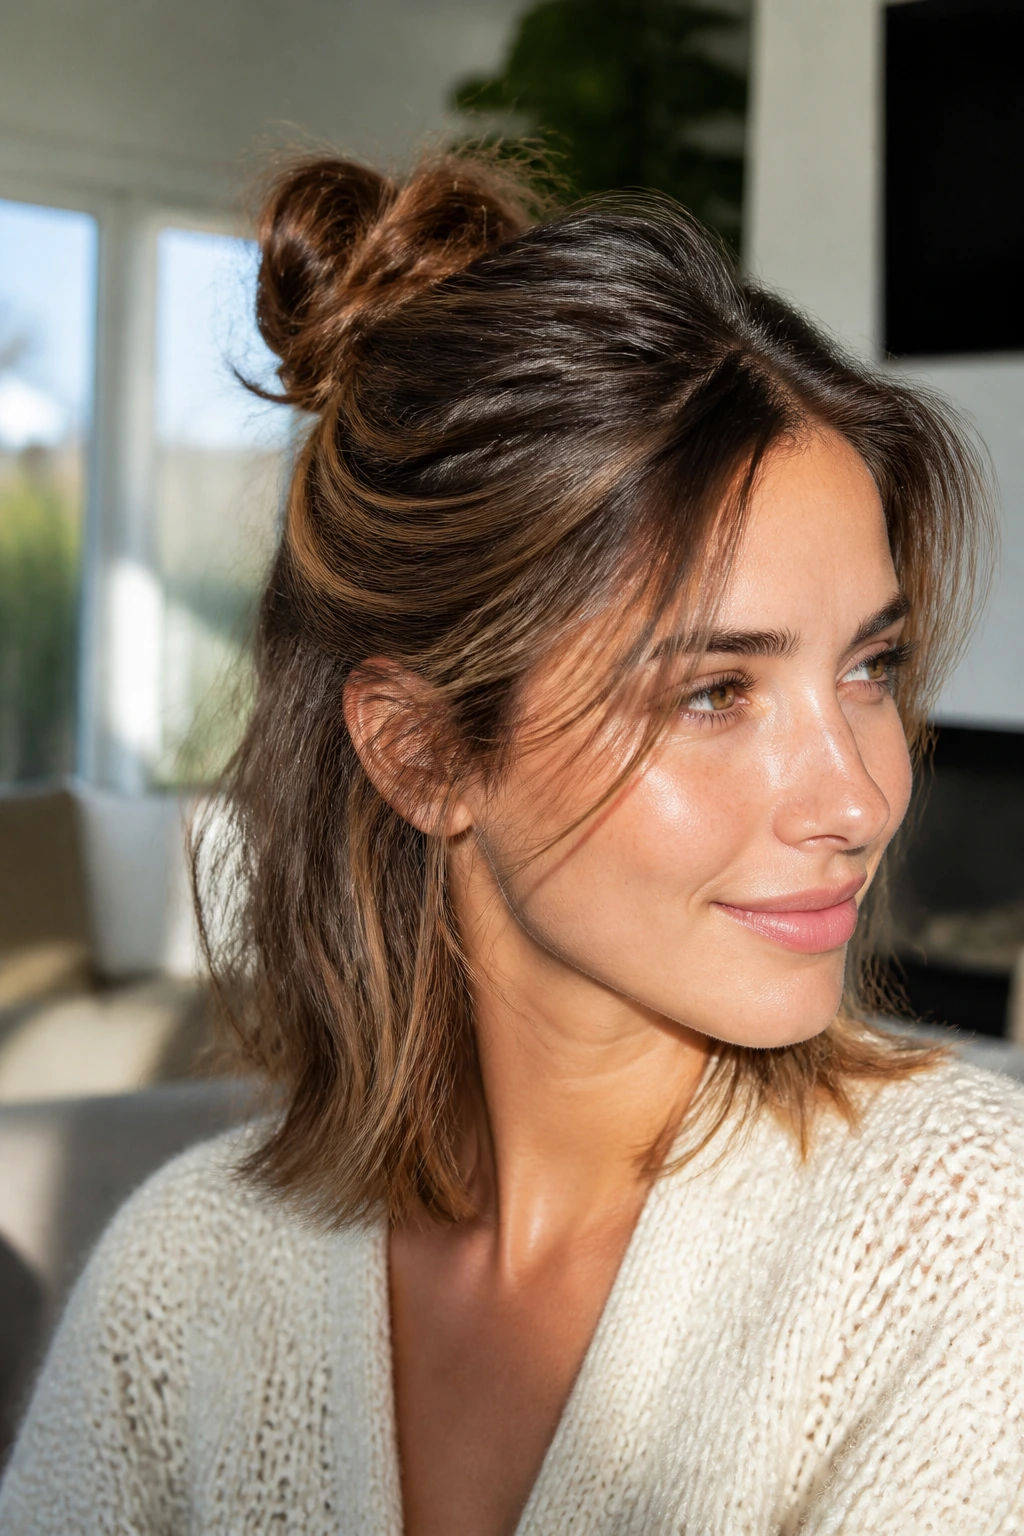
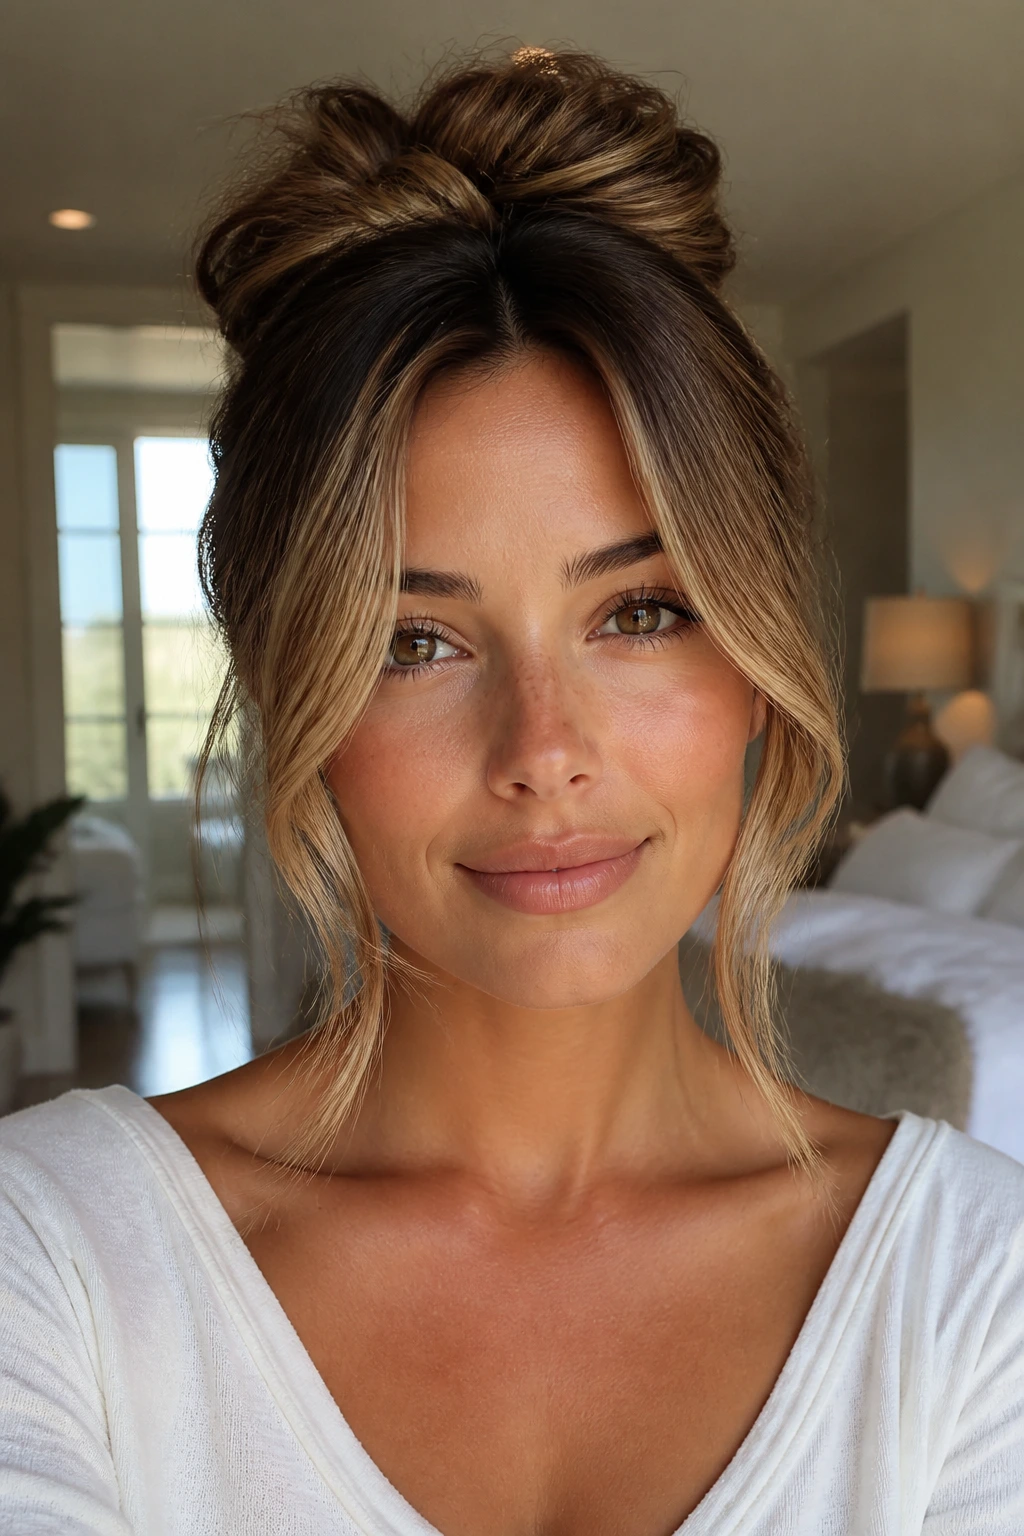
7. The Half-Up Top Knot With Curved Tendrils
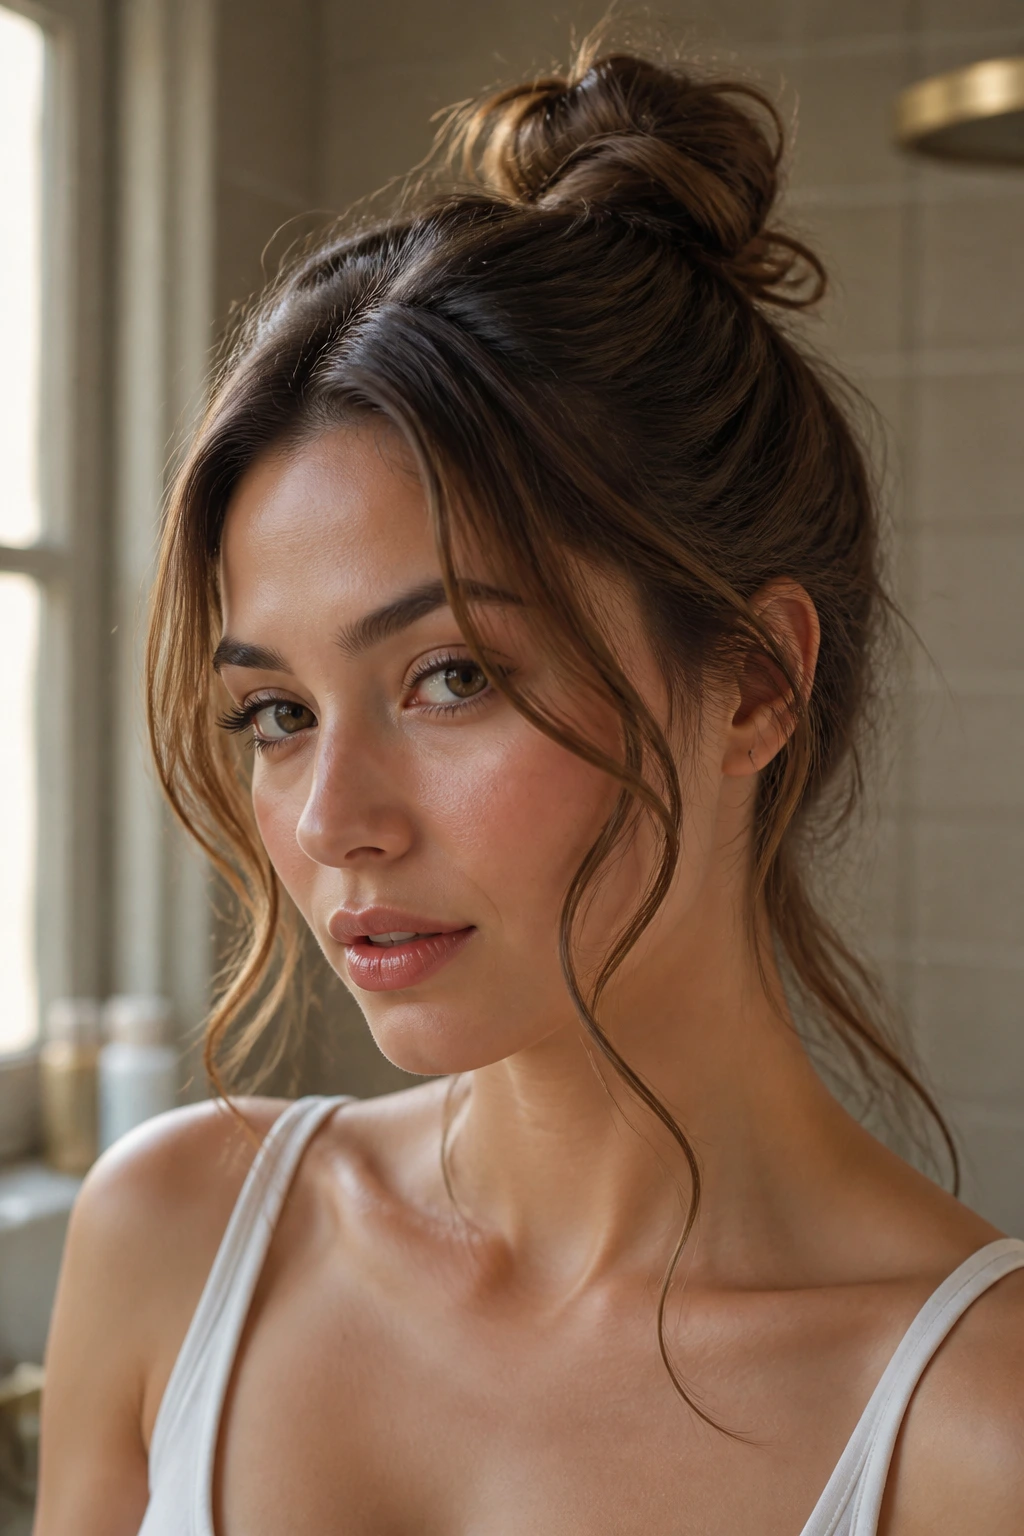
Half-up styles often get overlooked when people talk about elegant hair, which is silly. A half-up top knot with face-framing layers can look cleaner than a full bun, especially when you want your length visible but your top half out of the way. Pull the crown section up, twist it into a compact knot, and leave the rest of the hair down with the front layers curled away from the face.
This style is excellent for layered cuts that are too short for a full bun. The loose front pieces blend into the hair below, so the transition looks softer. If the front layers are extra short, pin them back just above the ear and let the ends fall forward. That tiny adjustment keeps them from poking out in weird directions.
I’d call this the best “I have ten minutes and need to look awake” style in the bunch. It’s quick. It’s forgiving. And it works whether your hair is smooth, wavy, or a little slept-on.
8. The Side-Part Knot Bun That Feels More Intentional
A center part is not the only path to polish. A deep side part gives the face-framing layers a natural sweep, and that sweep is half the styling job. Gather the hair low on the side opposite the part, twist it into a knot bun, and pin the bun where the neck starts to curve.
The front pieces should be directed with the part, not fought against. One side can tuck back behind the ear; the other can fall in a longer arc along the cheek. That asymmetry is the point. It makes the style look like it belongs to your face shape rather than to a template.
If your layers are thick, this is a good one to set with a little smoothing cream before you gather the hair. Too much product will flatten the roots. Too little, and the side sweep turns frizzy. A pea-size amount worked through the mid-lengths is usually enough.
9. The Gibson Tuck That Softens Strong Layers
The Gibson tuck has a lovely old-fashioned shape, but it does not feel fussy when you do it right. Create a low ponytail, split the hair above the elastic, and tuck the length up into the pocket you’ve made. Pin the roll flat across the nape. Leave the front layers out so they curve around the face and collarbone.
This style works because the tuck gives the hair a neat, continuous line from crown to nape. On layered hair, that line matters. Without it, shorter pieces can stick out under the roll. With it, they disappear into the fold and the whole thing looks smooth.
A small bend in the front pieces keeps the style from reading matronly. That’s the real danger here. The Gibson tuck can go straight from elegant to old-school hairnet energy if the face framing is too severe. Keep it soft. Keep it a little loose at the temples. Done right, it’s one of the most graceful styles in the set.
10. The Polished Side Bun With a Curved Fringe
The side bun is underrated because people often make it too tight. Leave the front layers loose, sweep the hair over one shoulder, and build a bun just behind the ear on the opposite side of the part. Pin it low and flat so it doesn’t balloon outward.
What makes this one special is the line it creates across the face. The layers fall in a curved path that follows the cheek and jaw, which is flattering on a lot of face shapes. If you have curtain bangs, you can leave them split and brushed outward. If you don’t, pull out two slim sections near the temples and bend them gently with heat.
A side bun also pairs well with earrings because it clears one side of the neck. That’s a small thing, but it changes the whole feel of the style. The hair stops competing with the rest of the outfit. It becomes part of the shape instead of the whole show.
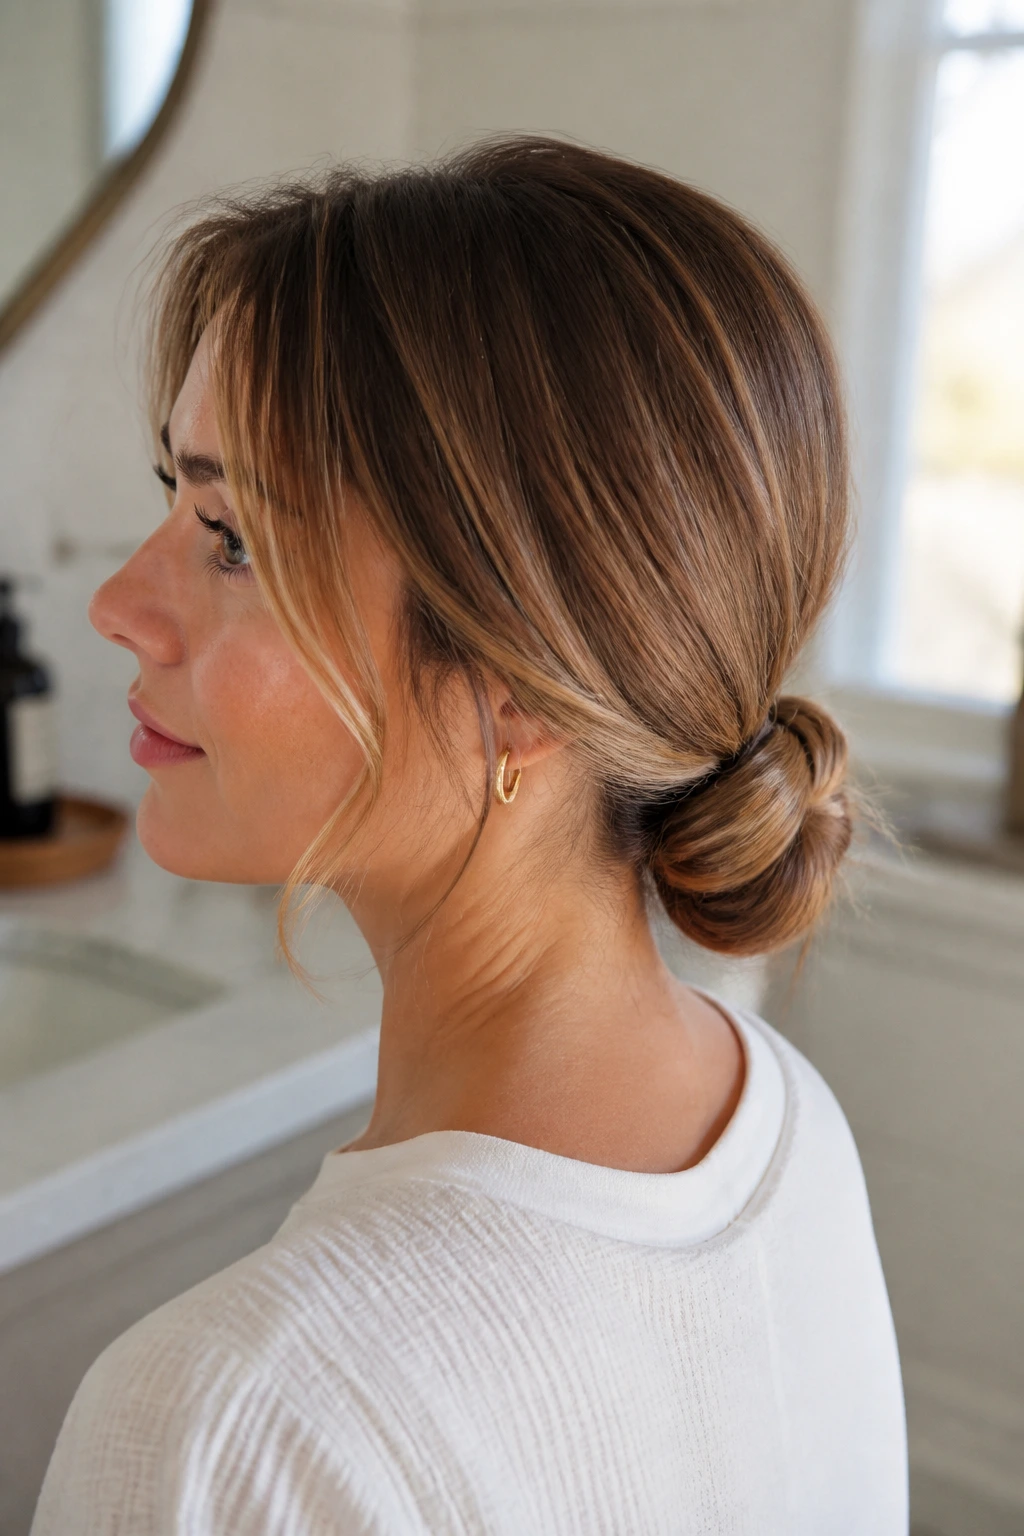
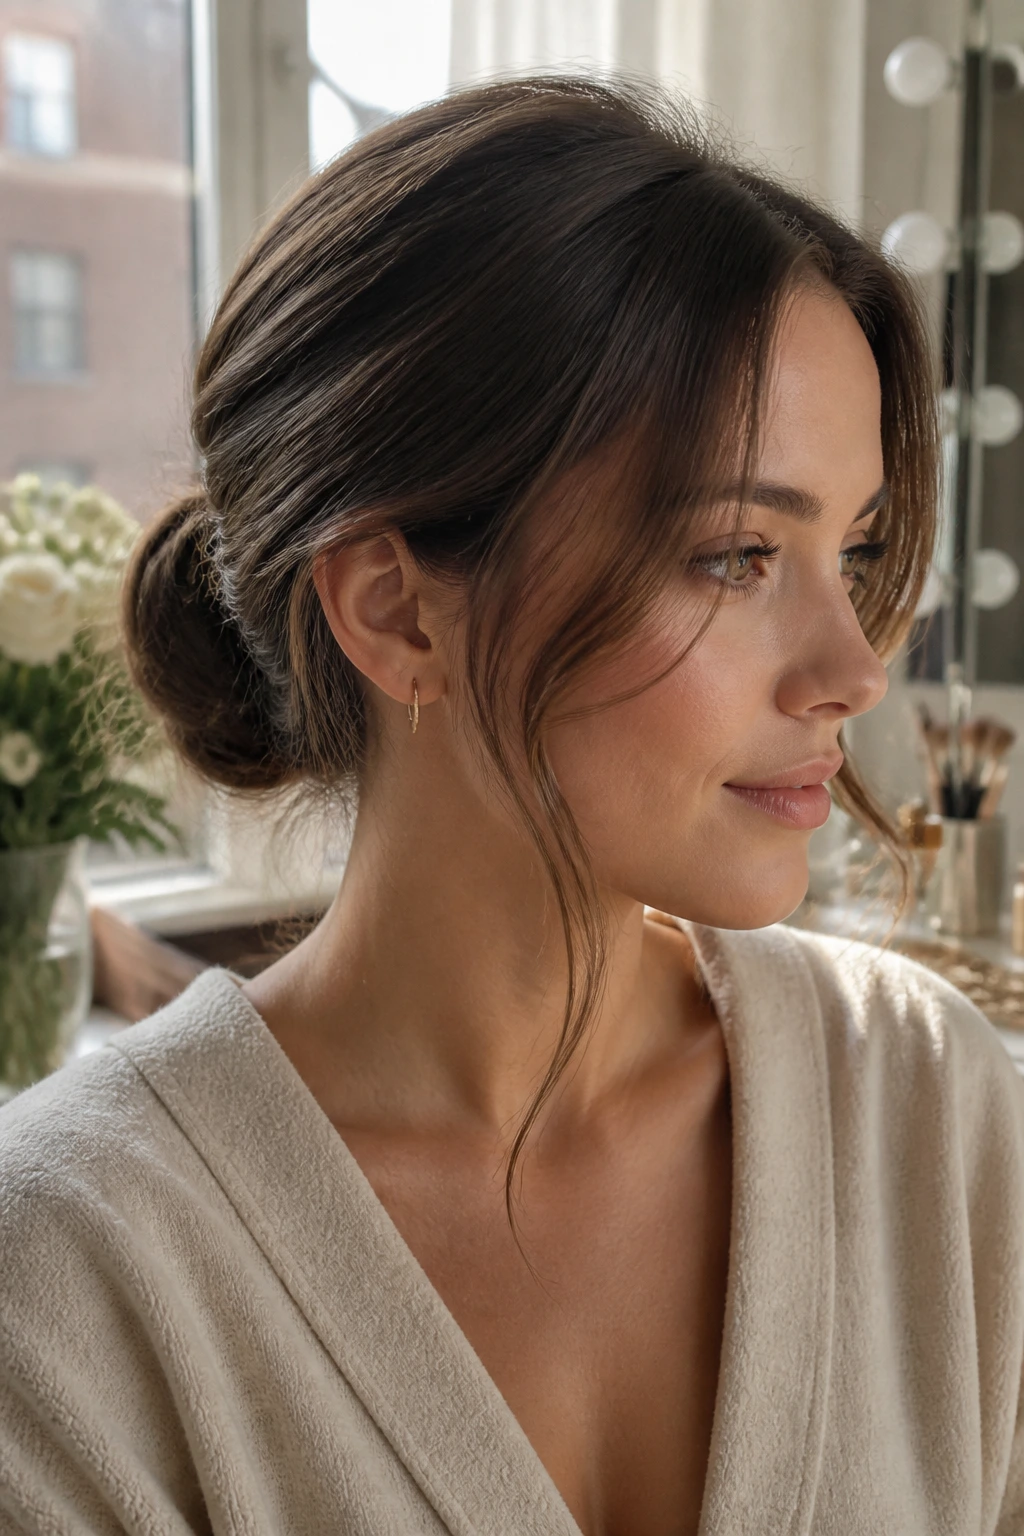
11. The Wrapped Ponytail Chignon
This is the polished cousin of the low ponytail. Make a low ponytail, separate a small section, wrap it around the elastic, and pin the end underneath. Then split the remaining tail in two, fold each side under, and pin those folds into a compact chignon.
The face-framing layers should be bent away from the face and left free to move a little. Because the base is so tidy, the front pieces do all the softening. They also stop the ponytail from reading too severe, which matters if your layers are shorter than the rest of your hair.
Use this style when you need something that can go from desk to dinner without a reset. It sits close to the head, so it’s less likely to collapse if you bend over or change clothes. And because the wrapped elastic hides the practical part, the finished shape looks cleaner than the time it actually took.
12. The Double-Twist Nape Bun
Two twists are easier to control than one long coil, especially if your hair is thick or layered. Part the hair down the middle, twist each side back toward the nape, and pin the twists together into a low bun. Leave the front layers loose and brushed into a soft frame.
This is a good style when your hair has some bend already. Wavy and lightly textured hair tends to hold the twists with less pinning. Fine hair can do it too, but a little dry shampoo at the roots gives the twists something to grip.
The result feels tidy without looking stiff. That’s the charm. The front layers stay light, the twists stay close, and the back looks more complex than it actually is. It’s one of those styles people assume took longer than it did, which is always nice on a rushed morning.
13. The Scarf-Tied Low Bun That Adds Shape Fast
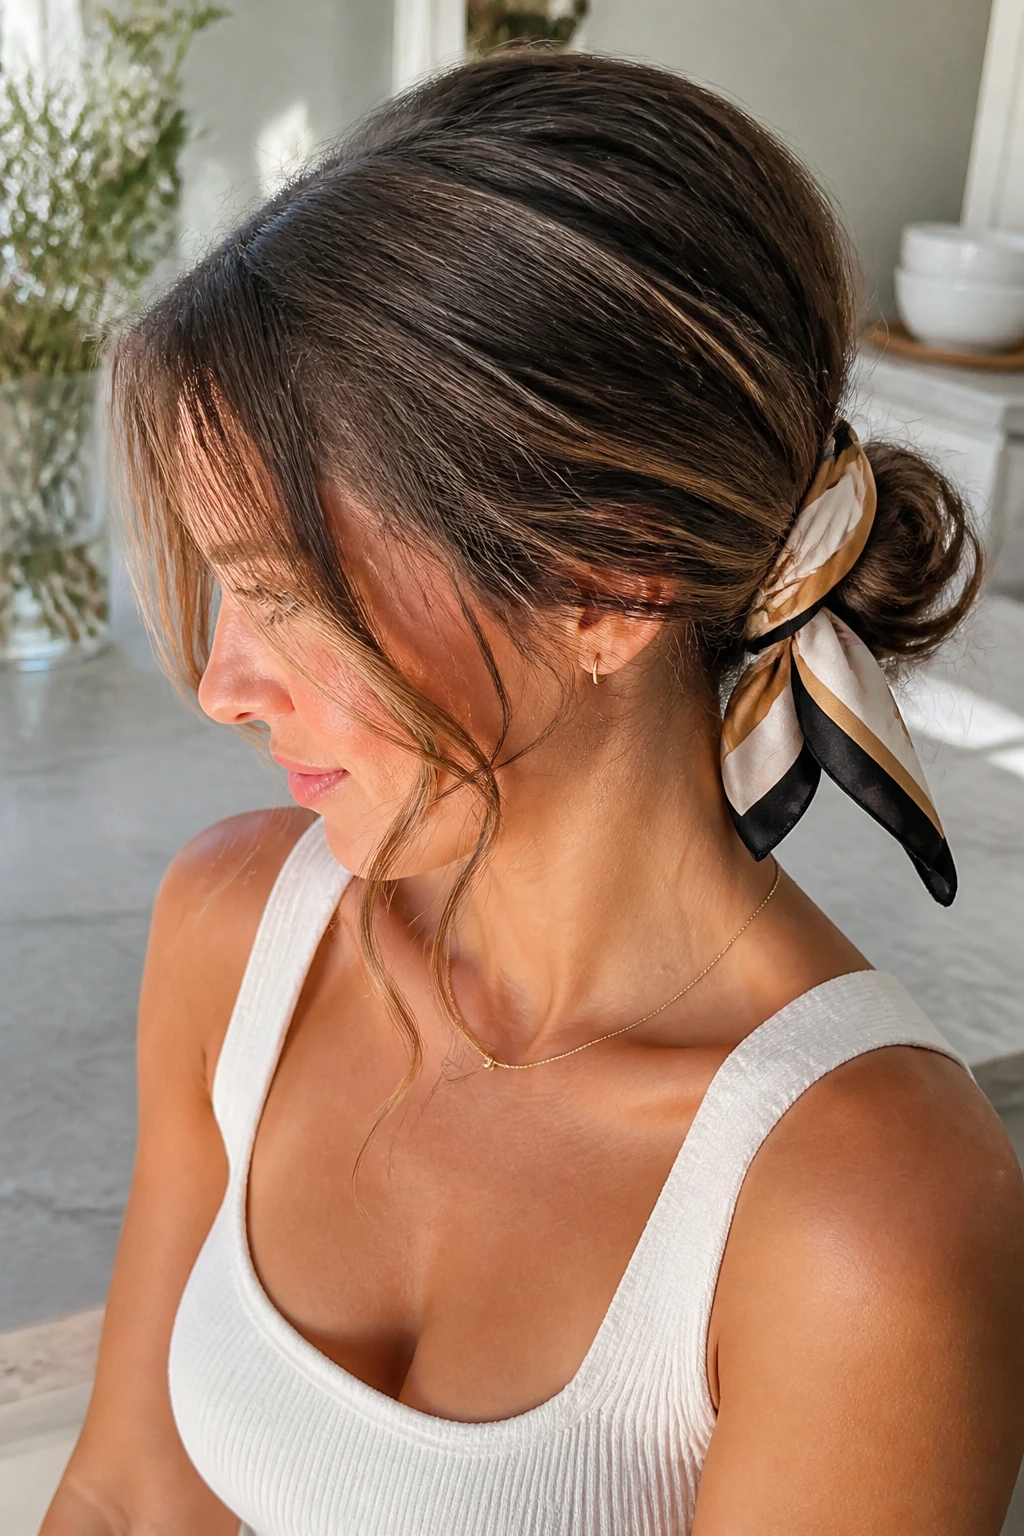
A silk or satin scarf can rescue a plain bun in about thirty seconds. Build a low bun, tie the scarf around the base, and let the tails hang or tuck them under one side. The scarf gives the style a focal point, while the face-framing layers keep the front from feeling too dressed up.
I like this one for layered cuts because the scarf covers the spot where shorter nape pieces try to escape. That’s the weak point in a lot of low buns. Here, it becomes part of the design.
Choose a scarf with enough body to hold a knot, not one that slides around like ribbon on glass. A 2-inch or 3-inch wide scarf is easier to control than a skinny one. If your front layers are very short, bend them slightly and pin the very ends behind the ears so they stay in the frame without falling into your eyes.
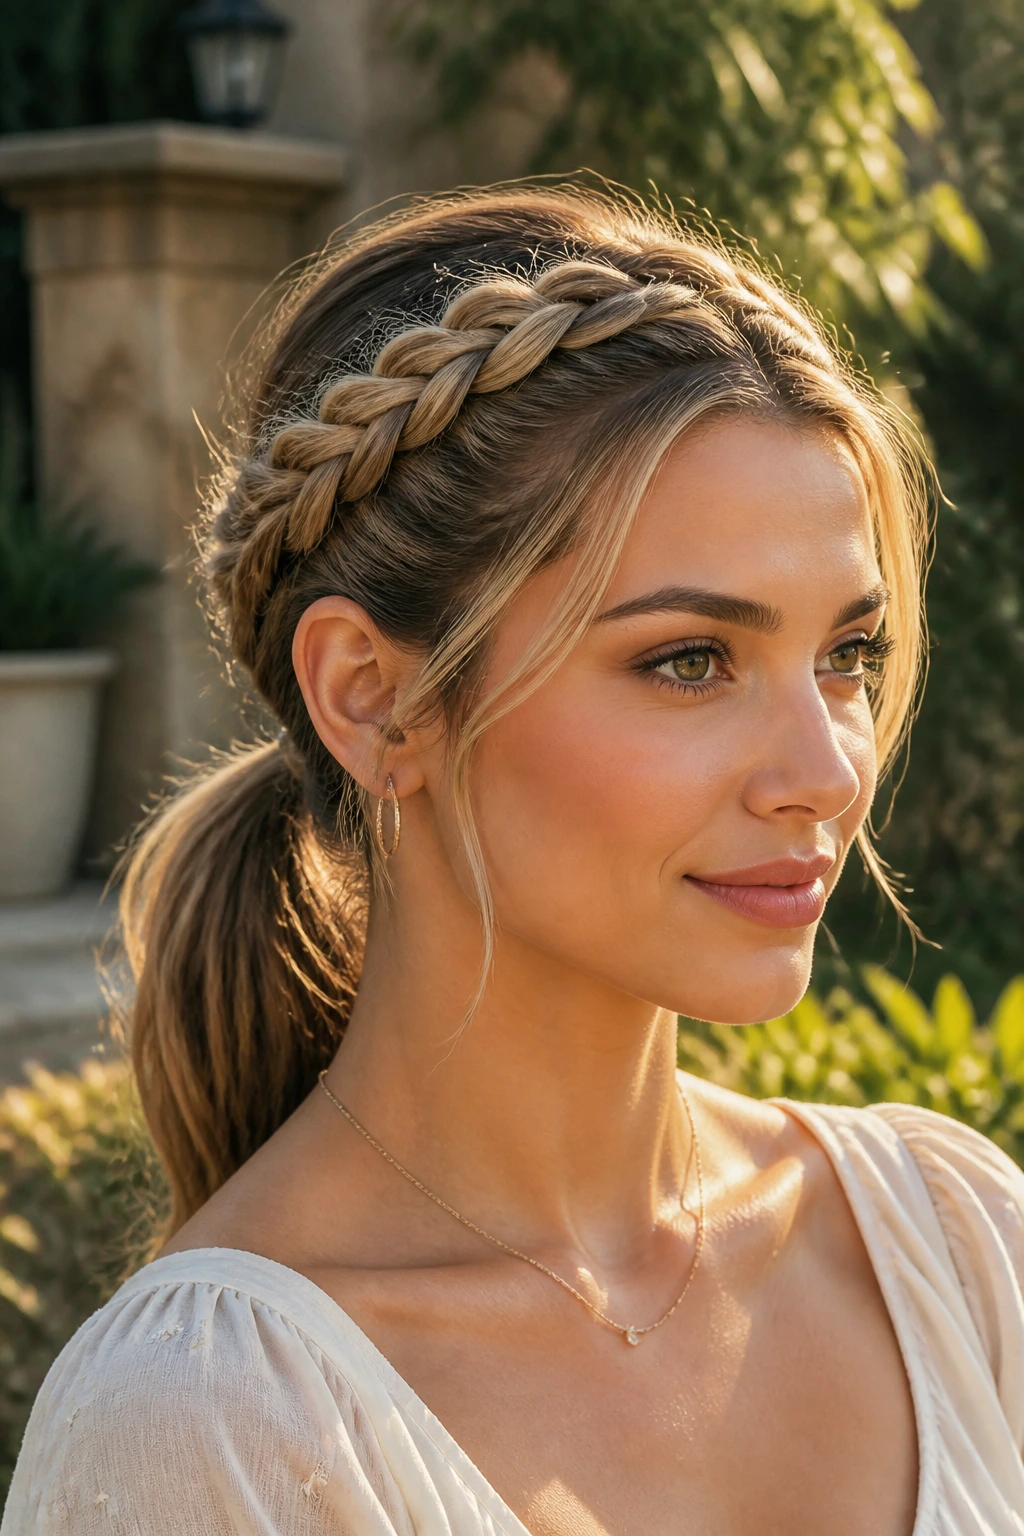
14. The Dutch Braid Halo That Feeds Into a Bun
A Dutch braid around the crown gives layered hair something to cling to. Braid from one side of the hairline across the top, continue around the head, then gather the remaining length into a low bun or tucked coil. The front layers can stay loose, but the braid keeps the crown secure.
This is one of the better choices when your hair is slippery or freshly washed. The braid creates texture and anchor points before the bun even happens. That means fewer flyaways and fewer pins fighting gravity by noon.
The face-framing layers should be shaped, not forced. If they’re long enough, tuck one side behind the ear and leave the other side free. If they’re shorter, let them sit outside the braid and curve toward the temples. That asymmetry gives the whole style a more natural rhythm.
15. The French Pin Twist With a Clean Crown
A French pin is one of those tools people avoid until they realize how fast it is. Gather the hair into a twist at the back, fold it up, and slide the pin through the shell so it locks the twist in place. Leave the front layers free and smooth them with a soft brush or a light mist of spray.
This style is elegant because the shape is narrow and vertical instead of wide and bulky. It works especially well on medium-length hair that doesn’t quite want to make a big bun. The twist sits neatly against the head, and the front pieces create the softness you’d normally have to fake with curling.
A good French pin twist should feel secure without being cemented. If the crown is pulled too tight, the face-framing layers become the only soft thing left, and that contrast can look harsh. Keep a little lift at the roots. Not much. Just enough.
16. The High Knot With Curtain Fringe
A high knot can still feel refined if the front is handled carefully. Pull the hair into a high ponytail, twist it into a compact knot, and keep the crown smooth. Then let the curtain fringe or front layers split and fall on either side of the face.
This style is a useful one for long layers because it takes the weight off the nape and keeps the shoulders clear. The high position also creates a cleaner profile from the side. What saves it from looking too sporty is the front softness.
If your layers are prone to sticking up around the temples, warm them lightly with a blow-dryer and a round brush before you pin the knot. That tiny bend helps them settle. I would also keep the knot compact. A giant top knot plus loose layers can go messy fast. Tight shape above, soft pieces in front. That’s the balance.
17. The Hidden-Elastic Low Knot
This one looks harder than it is. Make a low ponytail, split it into two sections, tie them into a loose knot, and secure the ends underneath with pins. Wrap a tiny section around the elastic if you want the base to disappear. The face-framing layers should stay soft and a little curved.
The beauty of a knot is that it gives a different texture from a braid or bun. It feels more relaxed, but still deliberate. It’s also a solid choice for layered hair because the knot holds the length together without requiring every strand to behave at once.
If the ends are too slippery, mist them with texturizing spray before knotting. If they’re too short to knot cleanly, twist each section first, then tie the twists together. The result is compact, neat, and quick enough for a morning when your coffee is cooling beside the sink.
18. The Pinned-Back Faux Bob
A faux bob is for the mornings when you want the shape of short hair without cutting anything. Curl the ends under, fold the length upward, and pin the tucked sections at the nape and under the crown layers. Leave the face-framing pieces out so they skim the cheeks and make the whole thing look softer.
This style is especially nice on layered medium-length hair, because the shorter pieces help disguise the tuck. You are not fighting the haircut. You’re letting it help. That’s why it reads so well.
It takes a little more mirror work than a bun, but not much. The important part is keeping the fold smooth and the front pieces loose enough to move. If you pin the sides too tightly, the faux bob loses the lightness that makes it charming in the first place.
19. The Braided Crown Ponytail
A braided crown into a ponytail gives you a cleaner front line than a loose braid ever will. Braid along the hairline from temple to temple, gather the remaining hair into a low or mid ponytail, and wrap a section around the elastic. Leave the front layers near the temples free or lightly tucked.
This style is good when the face-framing layers are long enough to blend into the braid but short enough to need help staying put. The braid controls the top. The ponytail handles the length. The loose front pieces keep the whole thing from looking too rigid.
I like this one with wavy hair because the braid texture and the free front layers play off each other. Straight hair can do it too, but a touch of dry texture at the roots helps the braid stay defined. Without that grip, the crown can loosen before lunch.
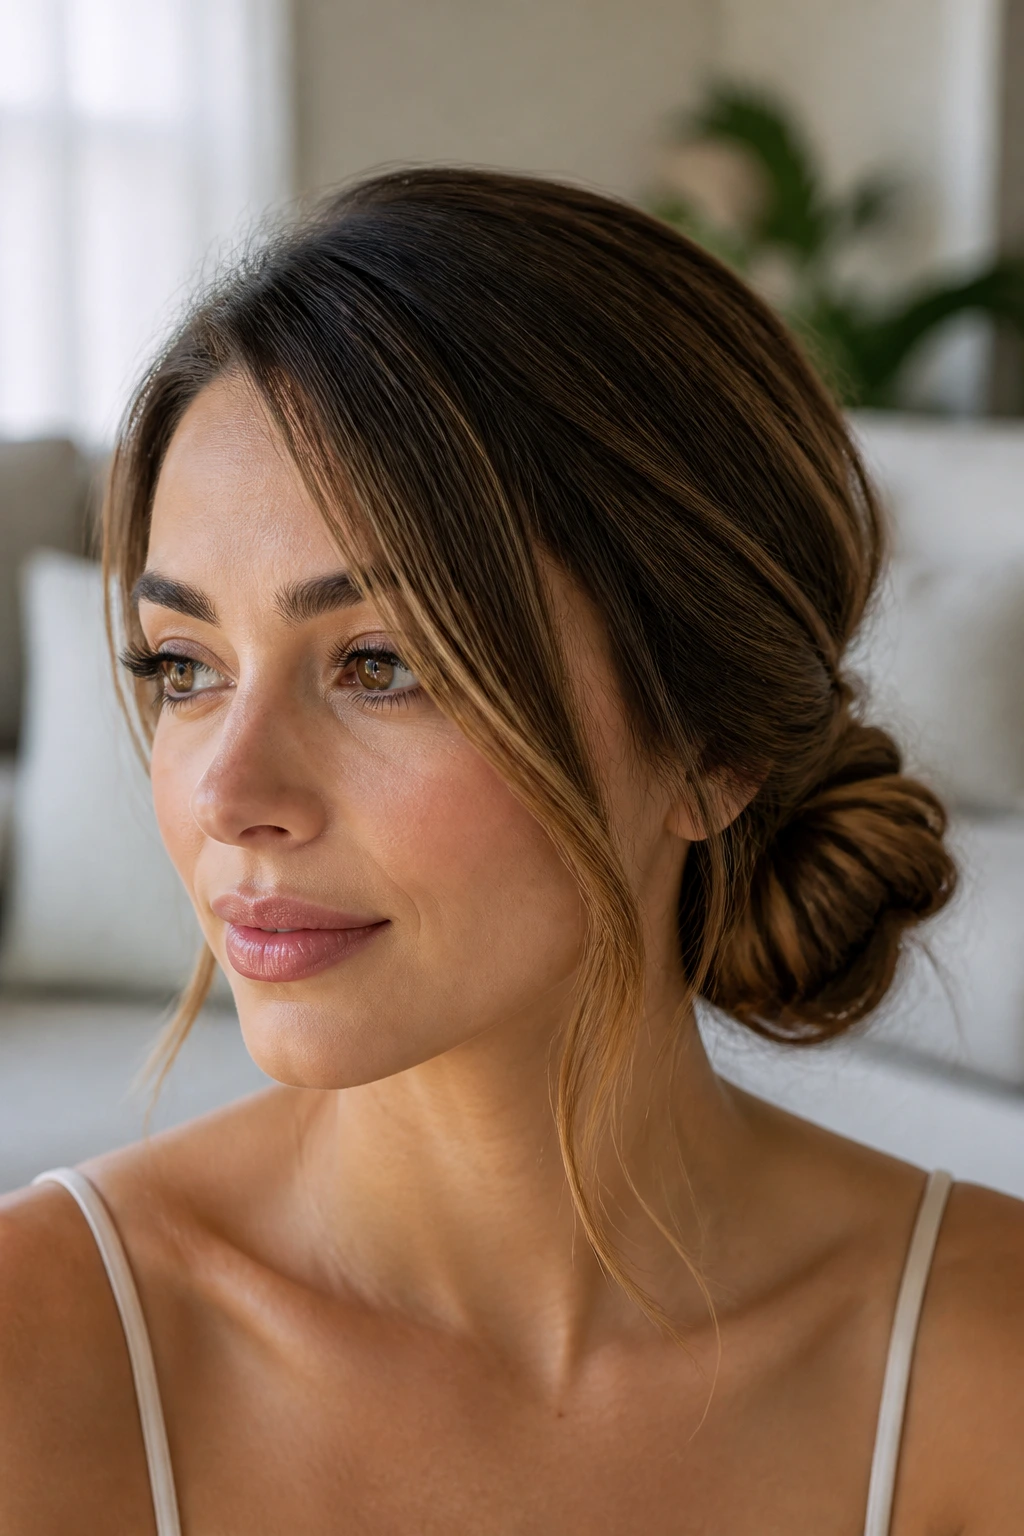
20. The Loose Ballet Bun With Softened Edges
A ballet bun does not have to be severe. Make a low ponytail, twist the length into a bun, and pin it in a flat circle at the nape. Then tug the front layers forward just enough to soften the edge around the hairline.
That is the whole game here. A neat bun with softly bent front pieces can look more elegant than a fussy braided style, especially with a collar that sits close to the neck. The bun gives order. The front pieces give motion.
If your layers are fine, keep the bun small so the front isn’t competing with a bulky shape. If your hair is thick, split the bun into two pinned sections so it lies flatter. Either way, a single pass of flexible spray keeps the surface smooth without killing the movement around the face.
21. The Twisted Half-Up Bun for Short Layers
Short layers can be annoying in a full updo. They don’t always reach the bun, and they don’t always stay tucked. A twisted half-up bun avoids that fight. Twist back the top section, knot it into a small bun, and leave the bottom hair loose. Pull the face-framing pieces forward so they sit beside the cheekbones.
This style is one of the best answers for shoulder-length hair. It keeps the hair off the face, but it doesn’t demand enough length to turn into a wrestling match. The loose layers in front soften the top knot, which can otherwise look a little youthful or casual.
The trick is placement. If you make the bun too high, the short layers around the temples will stick up. If you place it just above the crown, the whole thing settles better. Add a couple of bobby pins in crossed formation, and it usually holds without much drama.
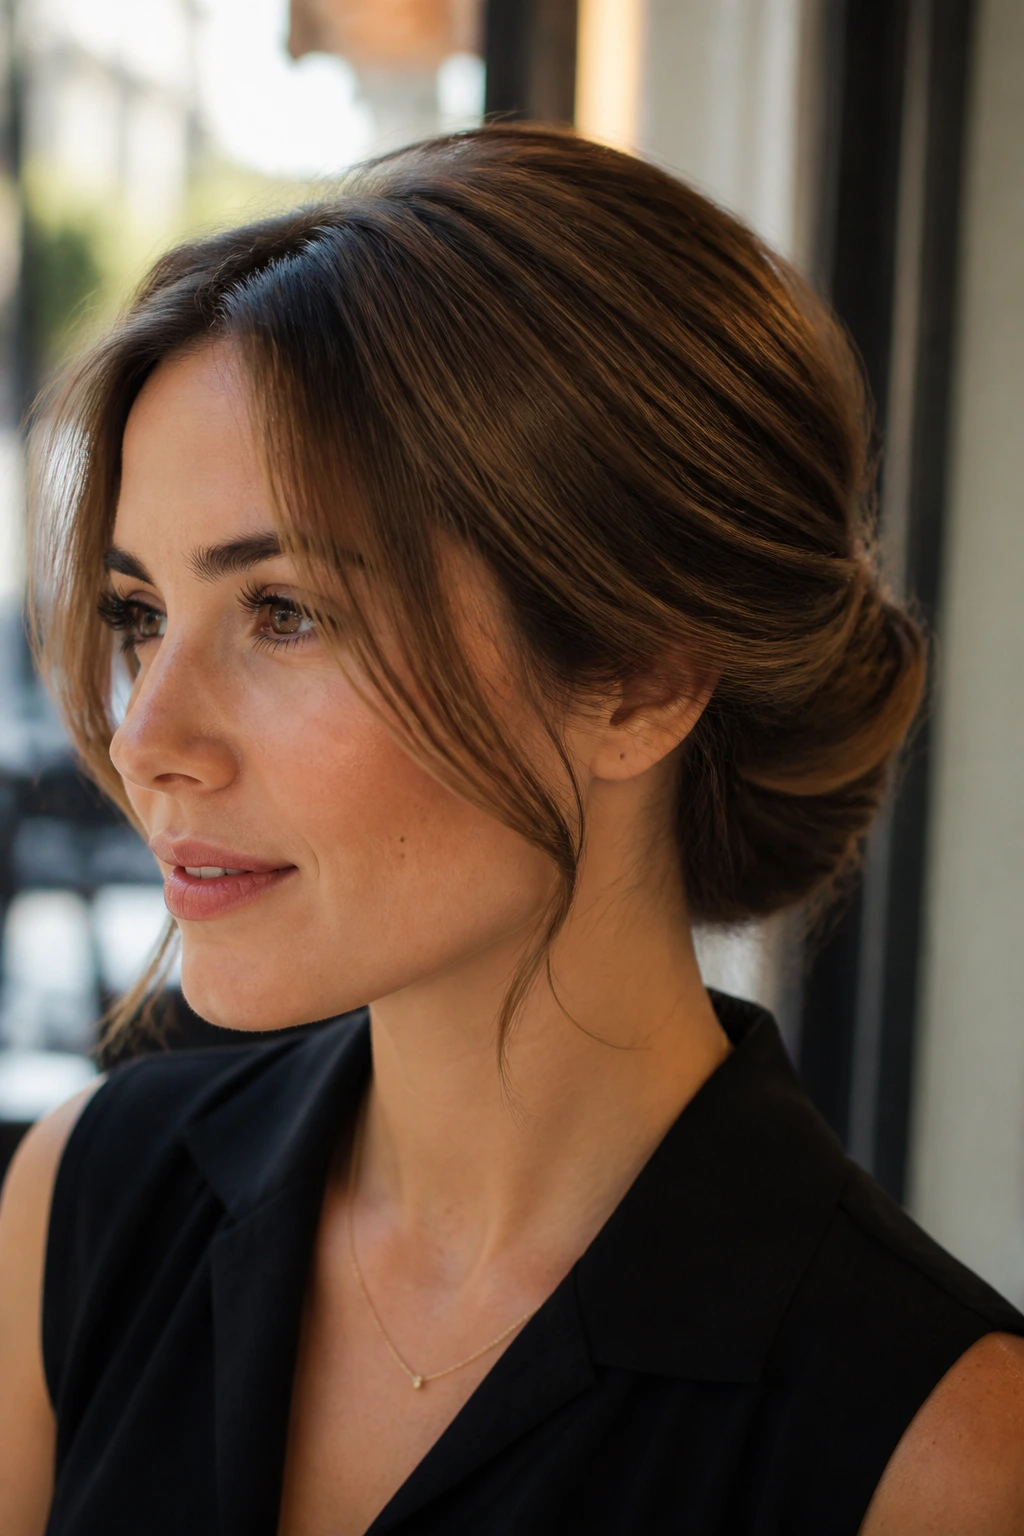
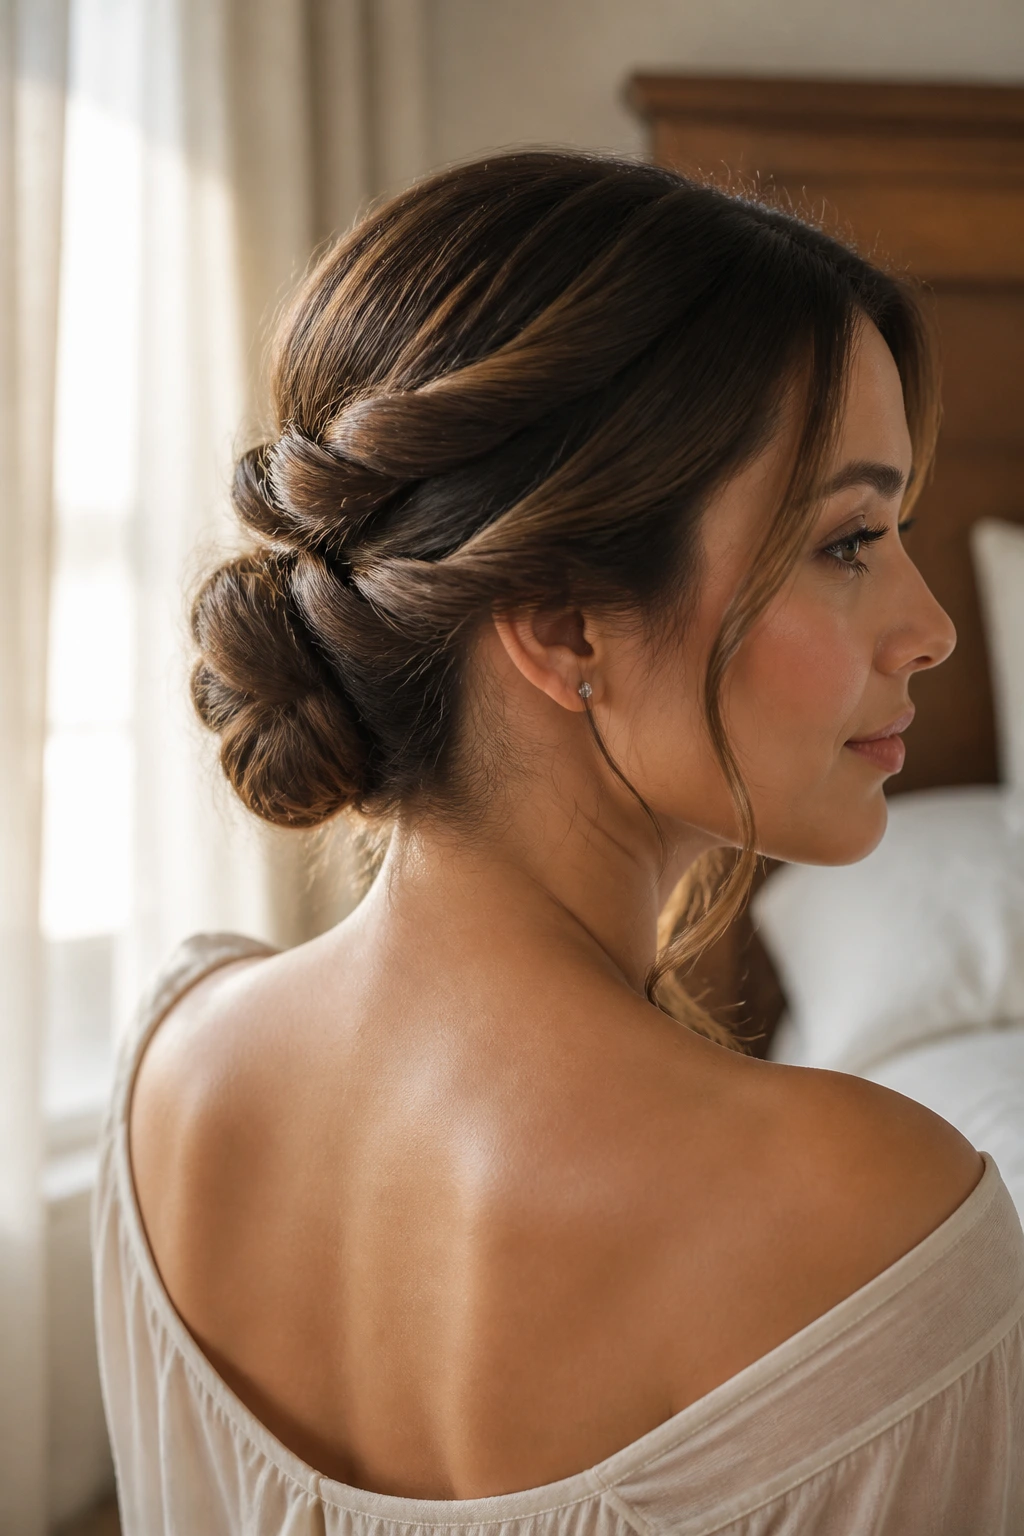
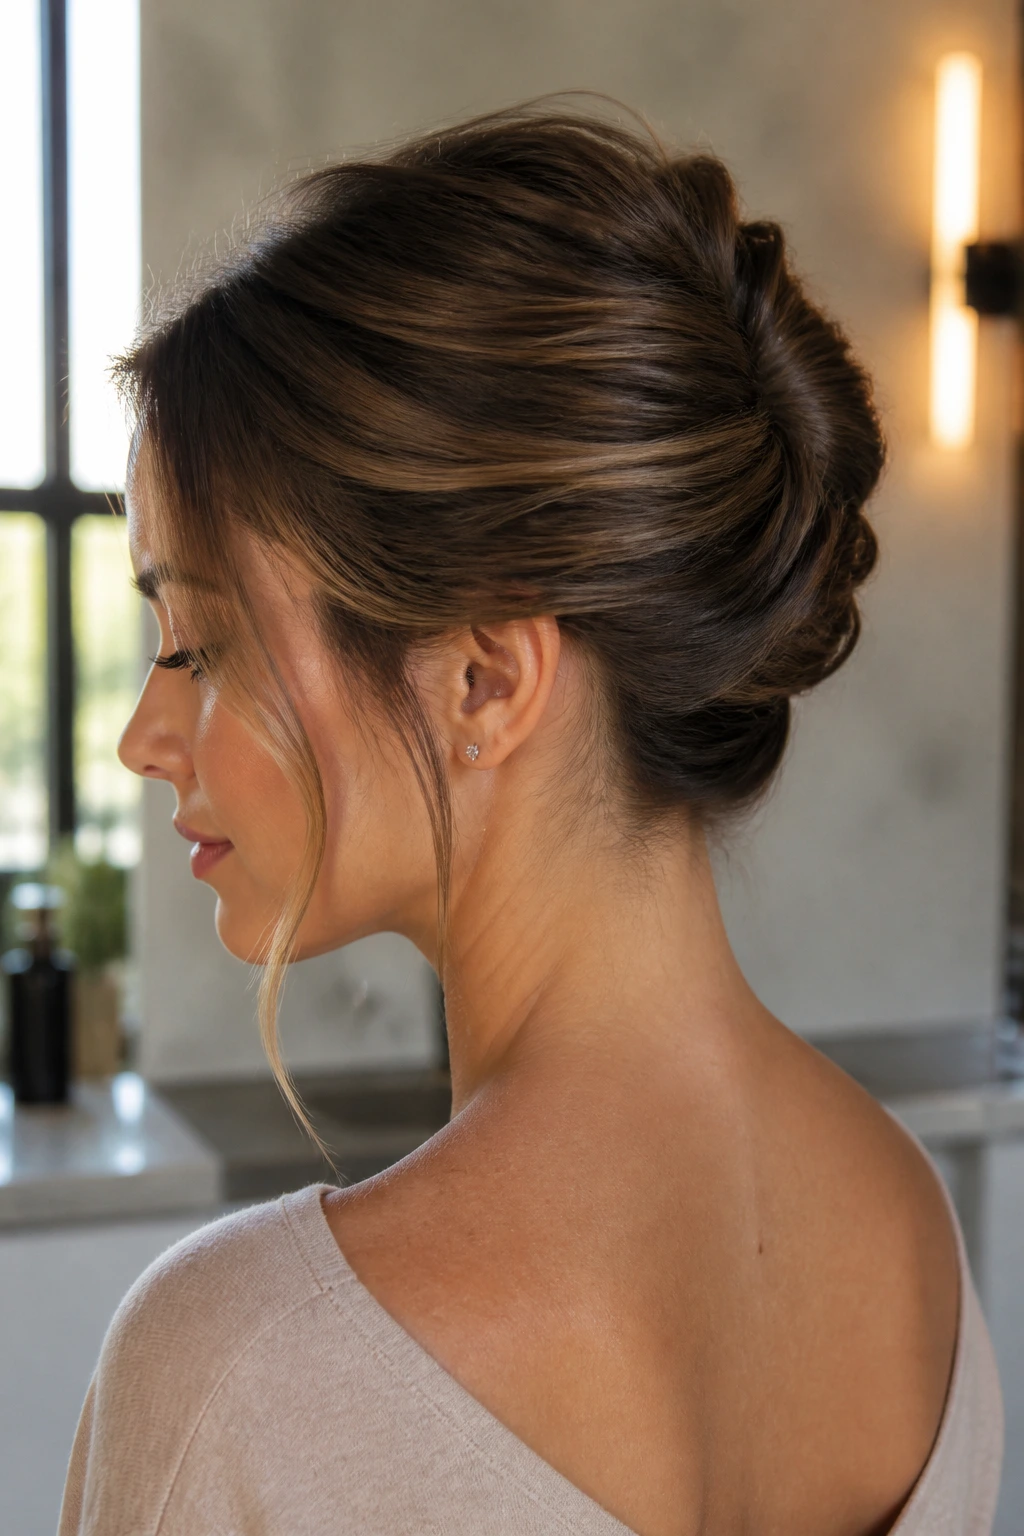
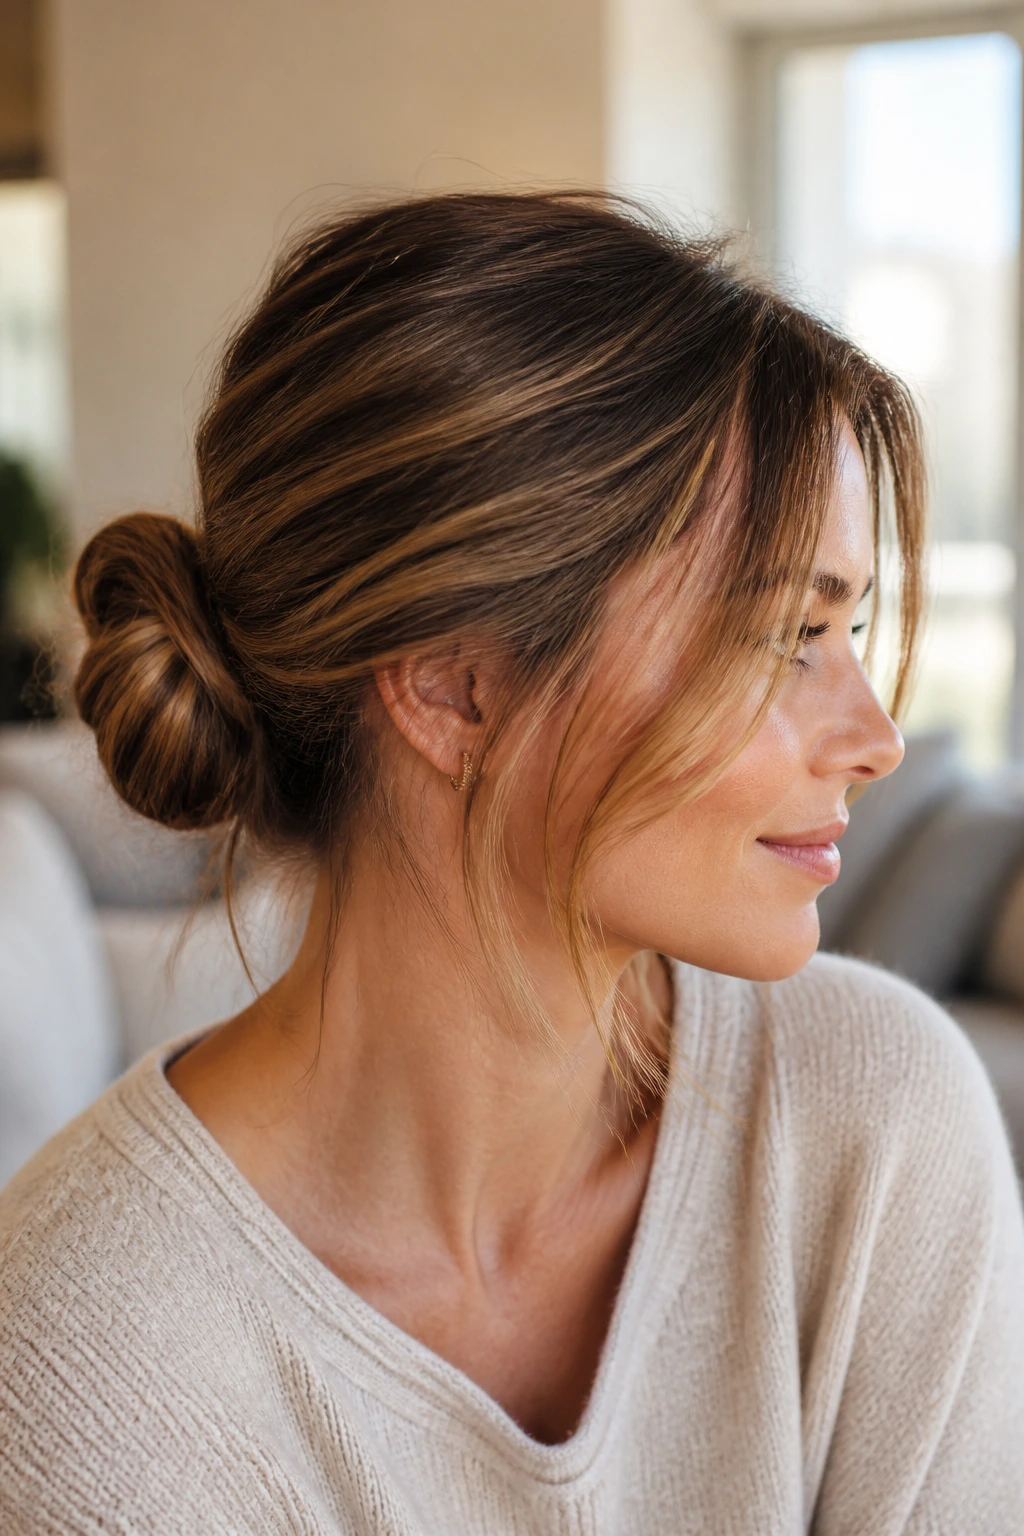
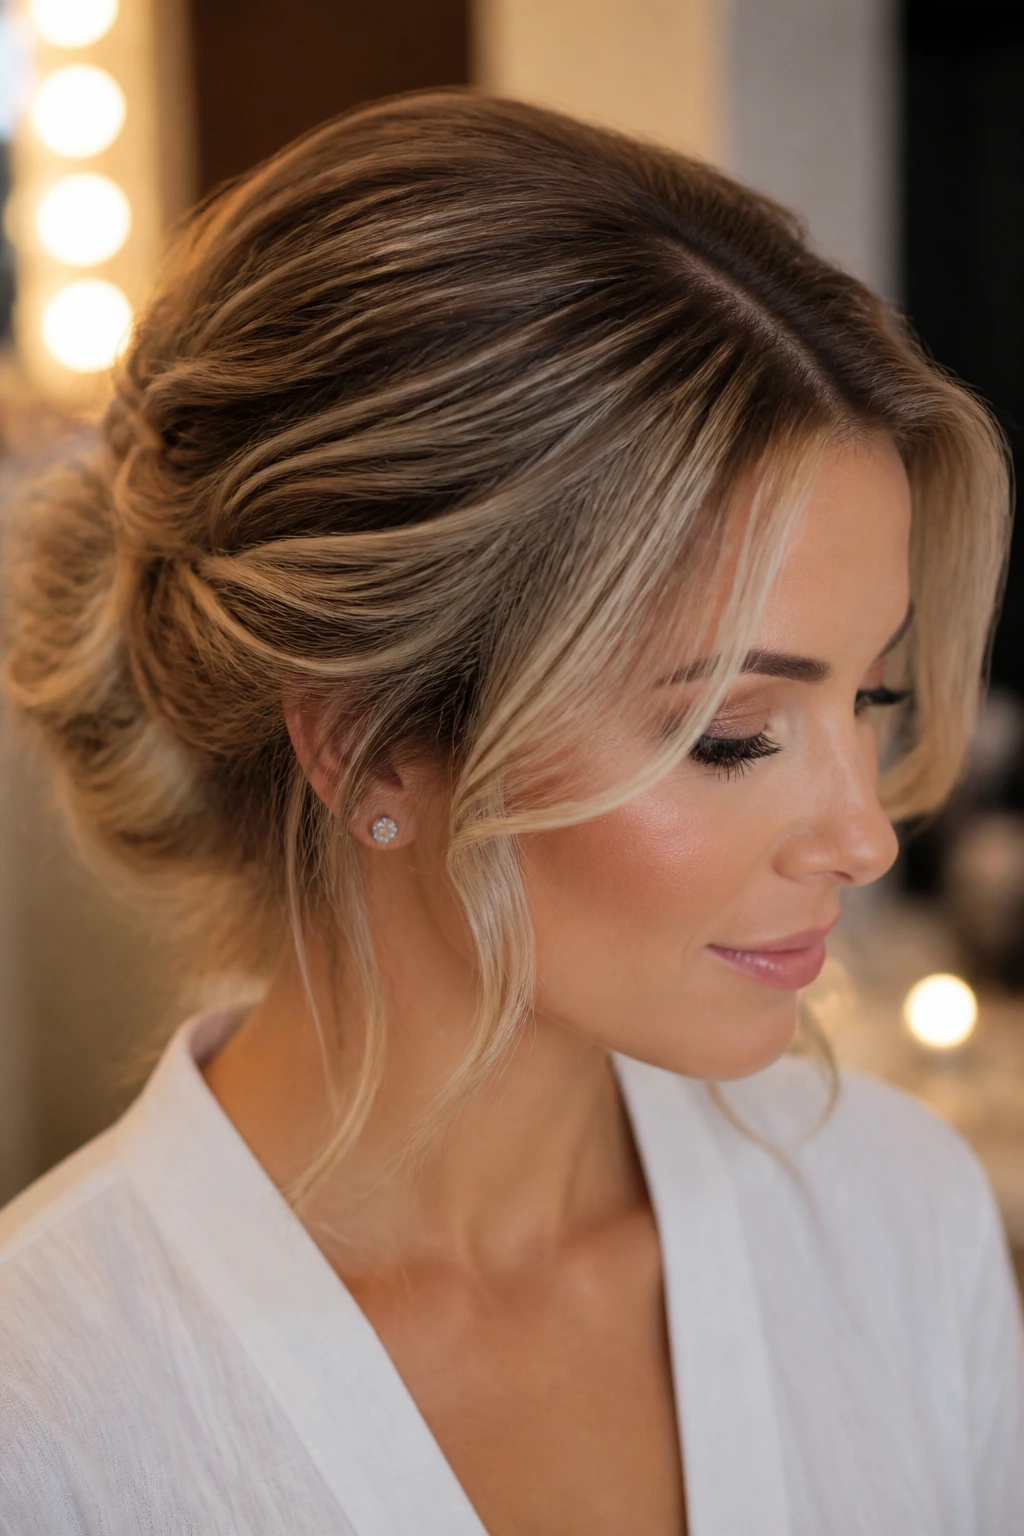
22. The Sleek Roll-Up Chignon
The last style is the one I use when I want the hair to look polished from every angle. Smooth the hair back, roll it upward from the nape into a tight chignon, and pin the roll flat against the head. Keep the front layers out and shape them with a soft bend so they follow the cheek and jaw line.
This version is cleaner than a messy bun and less formal than a French twist. That middle ground is why it works on rushed mornings. It also handles layered hair better than people expect, because the roll traps the loose ends inside the fold instead of asking them to cooperate one by one.
I’d save this for days when you want the front of the hair to do most of the talking. The bun itself should almost disappear from the front. What you notice is the line of the part, the curve of the layers, and the way the roll sits low and smooth at the back of the head. That’s the elegance.
Why Face-Framing Layers Make These Updos Look Finished
Face-framing layers do more than “soften” a style, which is the word people love to use when they mean almost nothing. They change the silhouette. A clean bun with no front pieces can look like you pulled your hair back to scrub the sink. Add two well-placed layers near the cheeks, and the same bun suddenly reads as styled, balanced, and a little more expensive-looking.
The reason is simple: the eye needs a place to rest. Hair that’s swept tightly away from the face creates a hard perimeter. Layers break that line, especially when they’re bent with a brush, iron, or even a finger twist while the hair is still warm. That break in the outline makes the whole head shape feel less boxy.
There’s also a practical side. Face-framing pieces hide tiny imperfections at the temples, a slightly crooked part, or a pin that refuses to disappear. I like that honesty. A good updo should not look airbrushed. It should look like you knew exactly where to leave a little softness and where to make the rest of the hair behave.
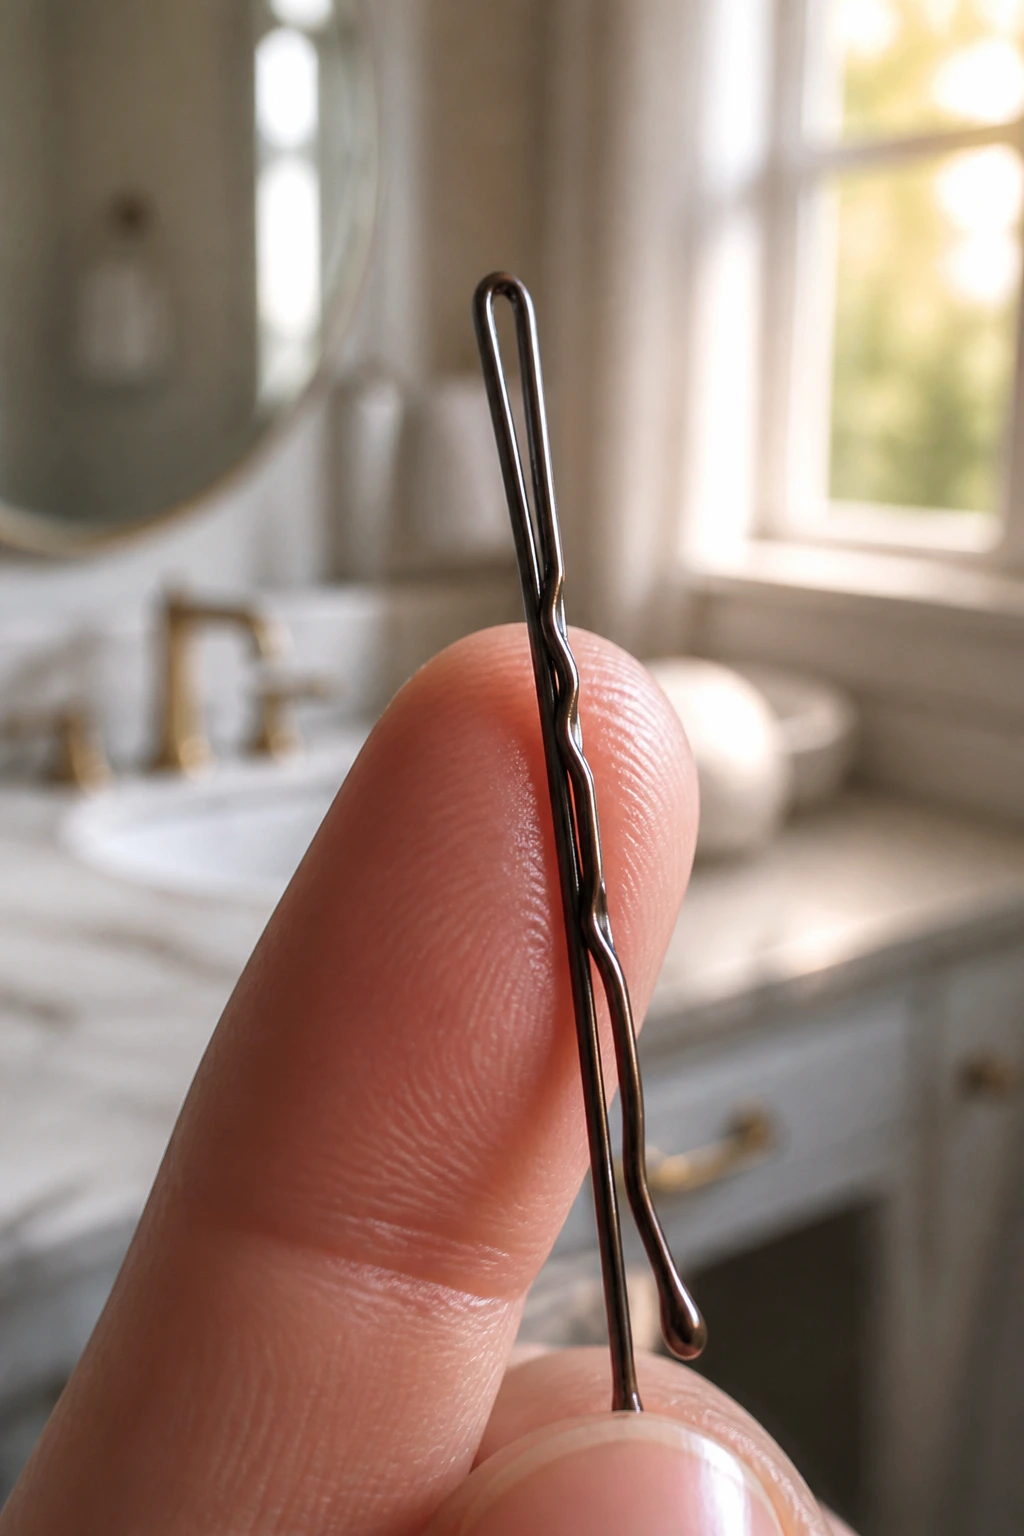
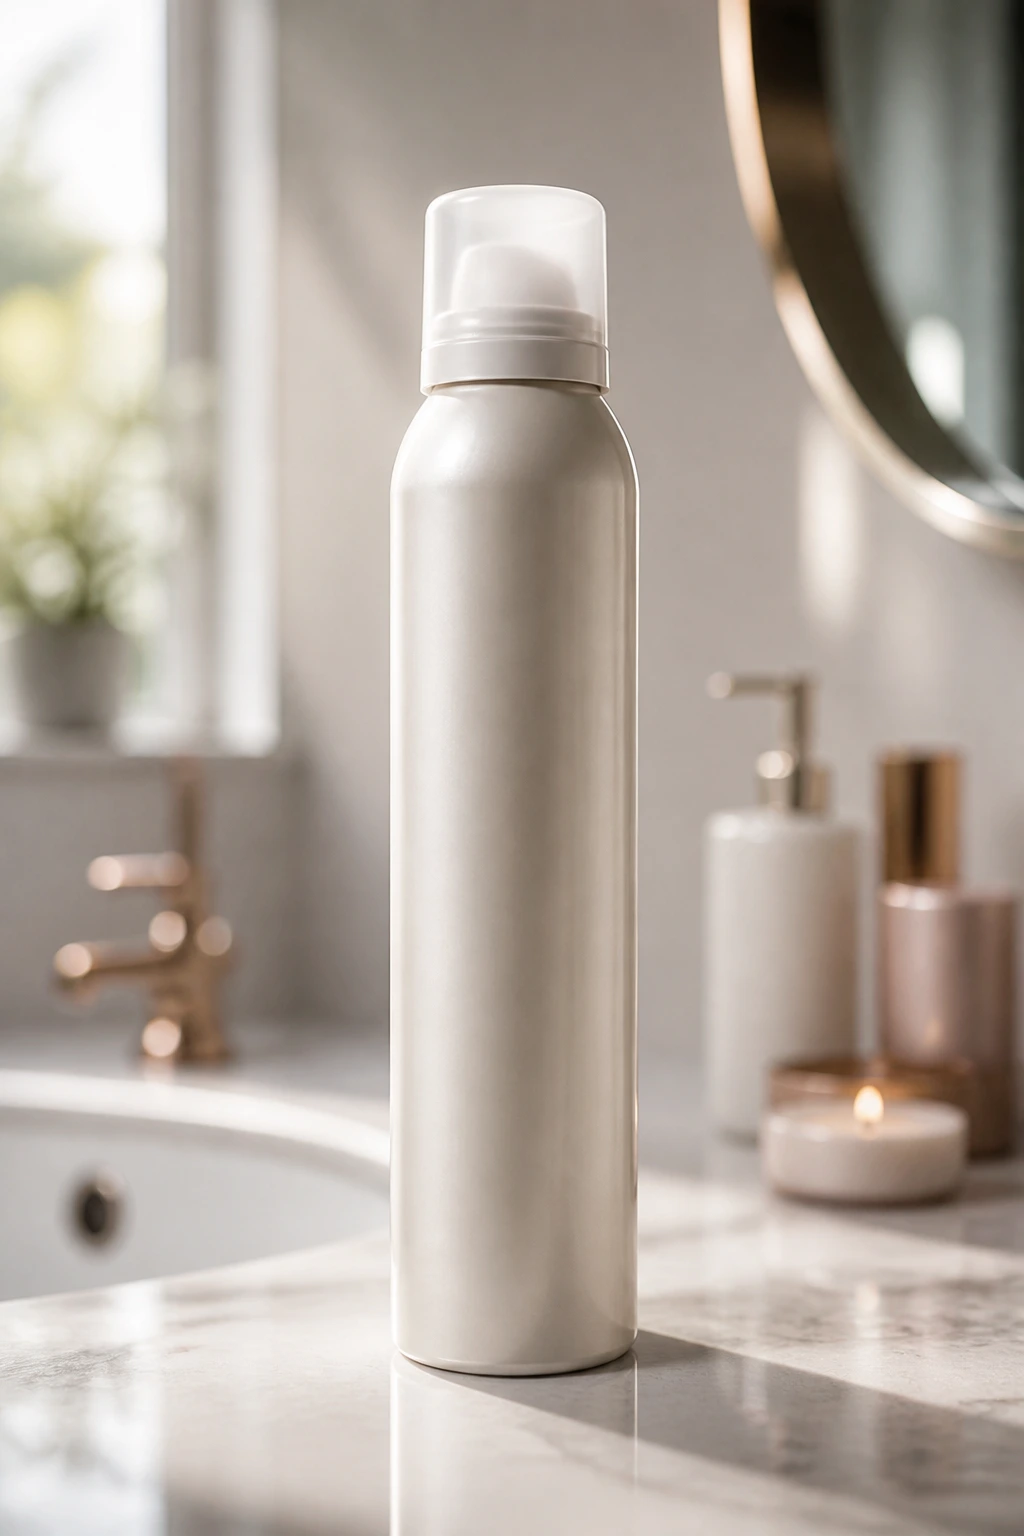
Essential Tools for Fast, Clean Styling
-
Bobby pins in two sizes: Standard pins handle most of the work, while shorter pins keep small layers from springing free at the temples.
-
Clear elastics: These are the quiet workhorses for ponytails, half-up styles, and wrapped bases that need to stay invisible.
-
1-inch curling iron or flat iron: Use whichever tool you can move fastest with; both help bend the face-framing layers away from the face.
-
Boar-bristle brush: This gives you a smoother crown than a regular plastic brush, especially on sleek buns and twists.
-
Tail comb: A clean part makes even a messy bun look thought through.
-
Medium claw clip: Worth keeping nearby for French twists, lazy rolls, and the styles that need to go up in one pass.
-
Flexible-hold hairspray: You want hold without shellacking the front pieces into helmets.
-
Texturizing spray or dry shampoo: These give fine or slippery hair some grit so pins and braids don’t slide out by noon.
-
Silk or satin scarf: Optional, but useful for scarf buns, overnight protection, or smoothing the hairline while you get dressed.
Smart Product Picks and Hair Prep
Freshly washed hair and elegant updos have a complicated relationship. Clean hair can be too slippery for braids and twists, especially if your layers are fine. If that sounds familiar, use a little dry shampoo at the roots and through the mid-lengths, then wait a minute before brushing it through. That extra grip matters more than most people think.
For thick or frizz-prone hair, a pea-size amount of smoothing cream on the outer layer is usually enough. Too much product near the roots weighs the shape down. Keep it on the mid-lengths and ends, where it helps the layers lie flat without turning the whole head greasy. Curly hair usually does best with leave-in conditioner and a light gel or cream combo so the face-framing pieces stay defined, not puffed.
A medium-hold hairspray is the sweet spot for most of these styles. Heavy spray can freeze the front layers into one hard curve. Light spray gives them movement. If you need extra hold, spray the pins instead of drenching the whole hairstyle. That keeps the crown and the face pieces softer, which is the point here.
How to Wear the Finished Look
Front Pieces: Leave out thin sections at the temples, not giant chunks. A piece about the width of your pinky is usually enough to frame the face without swallowing it.
Best Necklines: These updos sit especially well with crew necks, scoop necks, open collars, and anything that shows the line of the neck. The bun or twist clears the top of the outfit, so the whole shape reads cleanly.
Accessory Match: Small hoops, drop earrings, or a slim barrette near one ear work better than oversized pieces that fight the softness of the layers.
Finish Level: If you want polished, keep the crown smooth and the front pieces softly bent. If you want a little ease, loosen the face-framing layers after pinning the back and let them move a bit.
Best Time Saver: Build the back first, then shape the front last. That keeps you from overworking the pieces that matter most to the final look.
Extra Polish and Personalization
Texture Boost: If your hair feels too clean, mist the roots with dry shampoo before you start pinning. A little texture at the crown keeps buns from sliding and gives braids something to hold.
Smoothing Trick: Run a soft toothbrush or edge brush with a tiny touch of hairspray over baby hairs and flyaways near the part. Use a light hand. The goal is calm, not lacquer.
Volume Move: If the crown goes flat after you pin the updo, lift the top section with the tip of a tail comb and spray underneath, not on top. That gives the style height without making the front pieces puff up.
Make-It-Yours: For a softer look, curl the face-framing layers away from the face and leave the ends loose. For a sharper look, bend them with a flat iron and tuck one side behind the ear.
Fast Finish: A single bobby pin hidden under the bun or twist often does more than three pins scattered around the outside. Hide the hold where the eye can’t follow it.
Keeping the Style Fresh Through the Day
Most of these styles will hold for 8 to 12 hours if you prep the hair well and do not keep touching the front pieces. That’s the first rule. The second is to pin the base before you perfect the face framing. If you keep reworking the loose layers, they lose shape fast and the rest of the style starts to sag.
If you plan to wear the updo overnight, choose a low bun, low twist, or scarf-tied style rather than a high knot. Sleep on a silk pillowcase if you have one, or wrap the hair with a satin scarf to keep the surface from roughing up. A high style flattens awkwardly under sleep pressure. A low style usually survives in better shape.
For next-day refresh, loosen the front pieces with damp fingers, mist the bun or twist lightly with water, and re-pin anything that drifted out. A tiny drop of serum on the ends can calm frizz without making the style look wet. If the crown has collapsed, remove one or two pins, lift the top with a comb, and pin it back a little higher. That small reset often does more than starting over.
Variations and Adaptations to Try
The Fine-Hair Fix: Add a texturizing mist at the roots and use smaller sections when twisting or braiding. Fine hair holds better when the style is compact and the pins cross in an X.
The Thick-Hair Shortcut: Split the hair into two or three sections before you build the bun. Thick hair stays flatter when it is folded in smaller panels instead of forced into one big coil.
The Curly-Hair Version: Leave the front layers curly and defined, then gather the rest into a low puff, bun, or tuck. Curl pattern gives the style shape, so do not brush it into a puffball unless that is the look you want.
The Heat-Free Route: Twist the front pieces around your fingers while the hair is slightly damp, pin them back loosely, and let them air-set while you do makeup or get dressed. It is slower than hot tools, but it keeps the ends softer.
The Office-to-Evening Swap: Start sleek for the day, then pull one front piece free and add a barrette or scarf for later. The underlying style stays the same; only the framing changes.
Common Mistakes That Flatten the Shape
-
Pulling every front layer back: The style can end up looking too hard around the face. Leave a few temple pieces out on purpose, even if they feel fussy at first.
-
Using fresh, slippery hair with no grip: If the pins slide and the bun loosens fast, the hair needs dry shampoo, texture spray, or a little product before styling.
-
Curling the front pieces into tiny ringlets: That tends to make the style look older than it is. A soft bend or smooth curve usually looks cleaner.
-
Pinning the bun too high: High placement can fight the natural fall of layered pieces. Lowering the base by even an inch often fixes the shape.
-
Spraying too early: If you coat the hair before you’ve placed the pins, the surface gets sticky and hard to reshape. Pin first, spray last.
Frequently Asked Questions
Can these updos work on shoulder-length hair?
Yes, especially the half-up knot, Gibson tuck, low twists, and clipped French twist. Shoulder-length hair usually needs the back section folded more tightly, but the front layers can still do the softening work.
What if my face-framing layers are very short?
Leave them out, curl them slightly away from the face, and pin only the ends if they keep falling into your eyes. Short layers look better when they sit lightly at the temples instead of being forced behind the ears.
Do these styles hold better on second-day hair?
Usually, yes. Day-old hair has a little natural grip, which helps pins, braids, and twists stay put. If your hair is freshly washed, dry shampoo at the roots gives you a similar effect.
How do I keep the front pieces from getting greasy by midday?
Keep product away from the hairline and focus it on the mid-lengths and bun. If the front layers start to separate, smooth them with clean fingers rather than adding more serum.
Can curly hair wear these styles without straightening first?
Absolutely. Curly hair often looks best when the face-framing layers are left in their natural pattern and the back is gathered into a bun, tuck, or puff. Straightening only the front pieces can look uneven unless you keep the rest of the style sleek too.
Which styles are the fastest when I’m running late?
The claw-clip French twist, low knot, hidden-elastic bun, and half-up top knot are the quickest. They need fewer sections and less mirror time than braided styles.
What if my bun keeps falling apart?
Check two things first: grip and pin direction. Slippery hair needs texture spray or dry shampoo, and bobby pins hold better when inserted in crossed directions rather than straight in and out.
How do I make the style look polished instead of messy?
Keep the crown smooth, secure the base tightly, and leave the face-framing layers intentionally shaped. A clean part and one well-placed pin matter more than piling on extra hairspray.
The Styles That Make a Busy Morning Easier
The nicest thing about these updos is that they do not ask for perfect hair. They ask for a clean part, a few pins, and a little judgment about what to leave loose. That’s where the face-framing layers earn their keep. They give the style a soft edge, which means the rest of it can be practical without looking plain.
Pick the version that matches your hair length, texture, and mood. Some mornings want a claw clip and a side part. Others need a braided bun that can hold through a long day. Either way, the front pieces should feel like part of the design, not an accident you forgot to pin down.
The best shortcut is the one you can repeat without thinking too hard. Find two or three of these, practice them once when you are not in a rush, and the next busy morning gets a little easier.