Half up buns for short hair and oval faces work best when they stop pretending to be full updos. A chin-length bob doesn’t have the weight for a giant knot, and that’s fine; the smartest versions use the haircut’s own shape, then steal a little height at the crown and a little softness at the temples.
Oval faces can wear a lot of shapes, which is helpful right up until a style goes too high and starts stretching the face visually. Push the bun up toward the hairline and the whole thing can feel long; keep it too low and the style loses the lift that makes short hair look intentional. The sweet spot is usually just above the crown ridge, with enough looseness around the front that the face still breathes.
I like half-up buns on short hair when they hold their own after coffee, a jacket collar, and one annoying gust of wind. The versions below range from polished to messy, because short hair behaves differently depending on texture, layers, and how much grip you can actually get at the root. Some need a comb. Some need fingers and a little grit. One or two need you to stop fussing and leave the ends alone.
Why These Half-Up Buns Earn Their Keep
-
Short-length friendly: These styles keep the wrapped section small enough to fit a bob, lob, or layered crop without turning into a floppy knot that falls apart by lunch.
-
Oval-face balance: The best placements add a little crown height or cheekbone softness, which keeps the face open instead of making it look longer than it is.
-
Low-tool setup: Most of these need only a tail comb, mini elastics, 4 to 8 bobby pins, and a dry texture product.
-
Day-to-night range: The same base can read clean for work or more relaxed for dinner by changing the part, the finish, or the amount of face-framing hair you leave out.
-
Layer-proof tricks: Twist, braid, double-loop, or tuck-in methods hide short pieces better than a straight ponytail ever will.
-
Fast refreshes: If the bun loosens, you can usually tighten it in under two minutes without starting over from scratch.
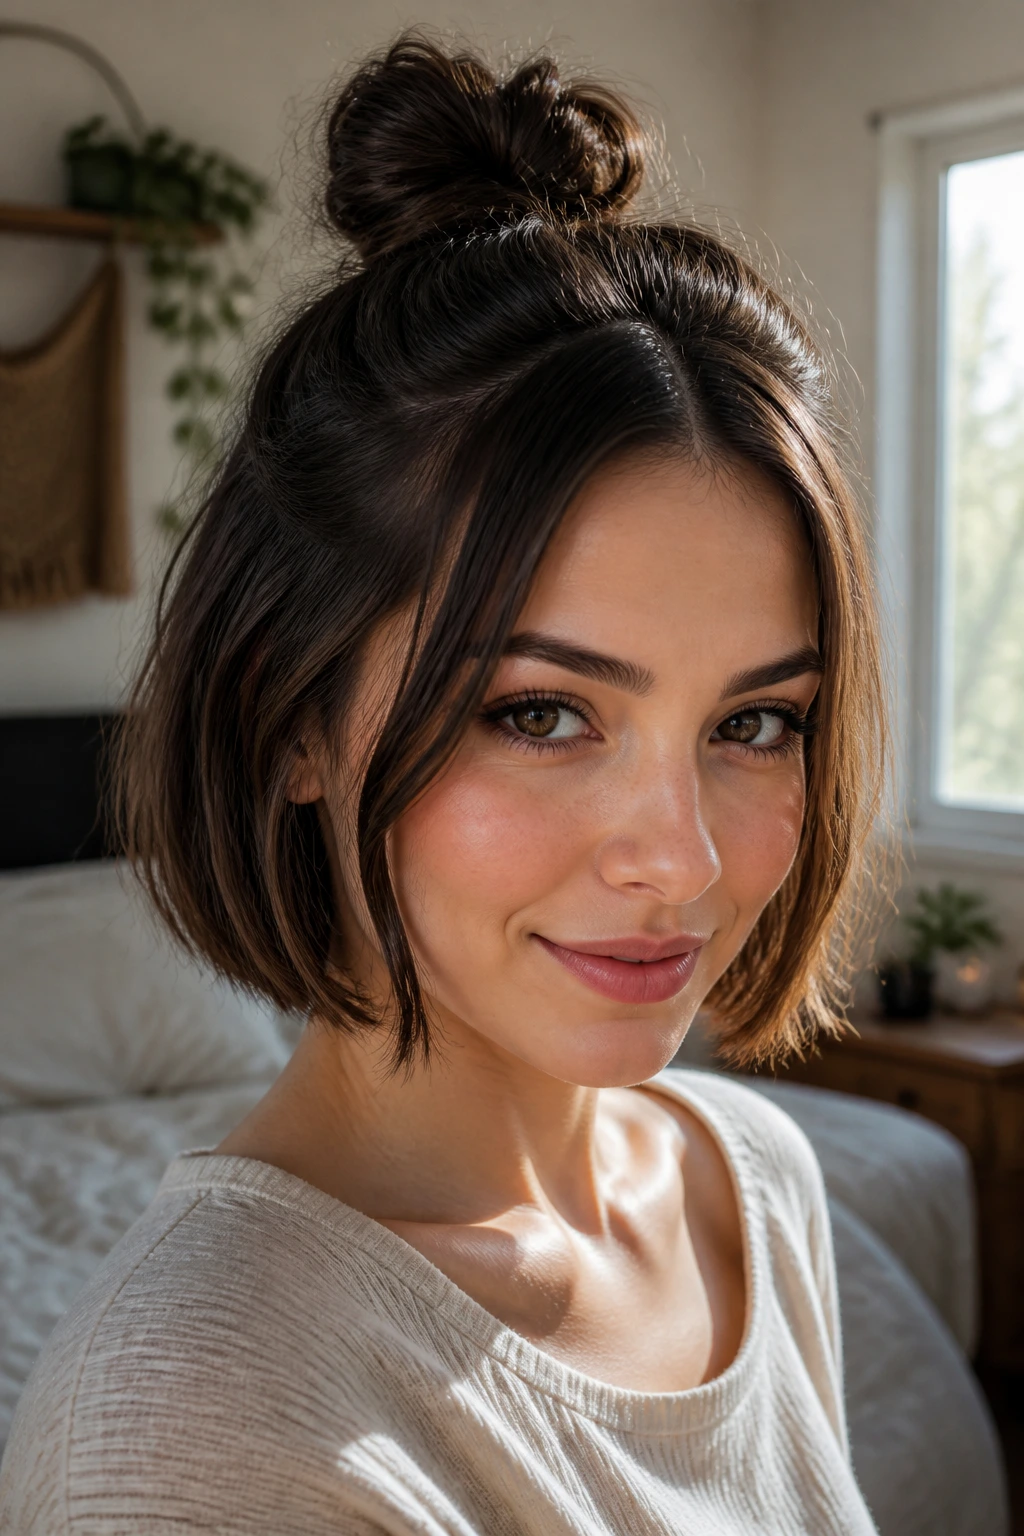
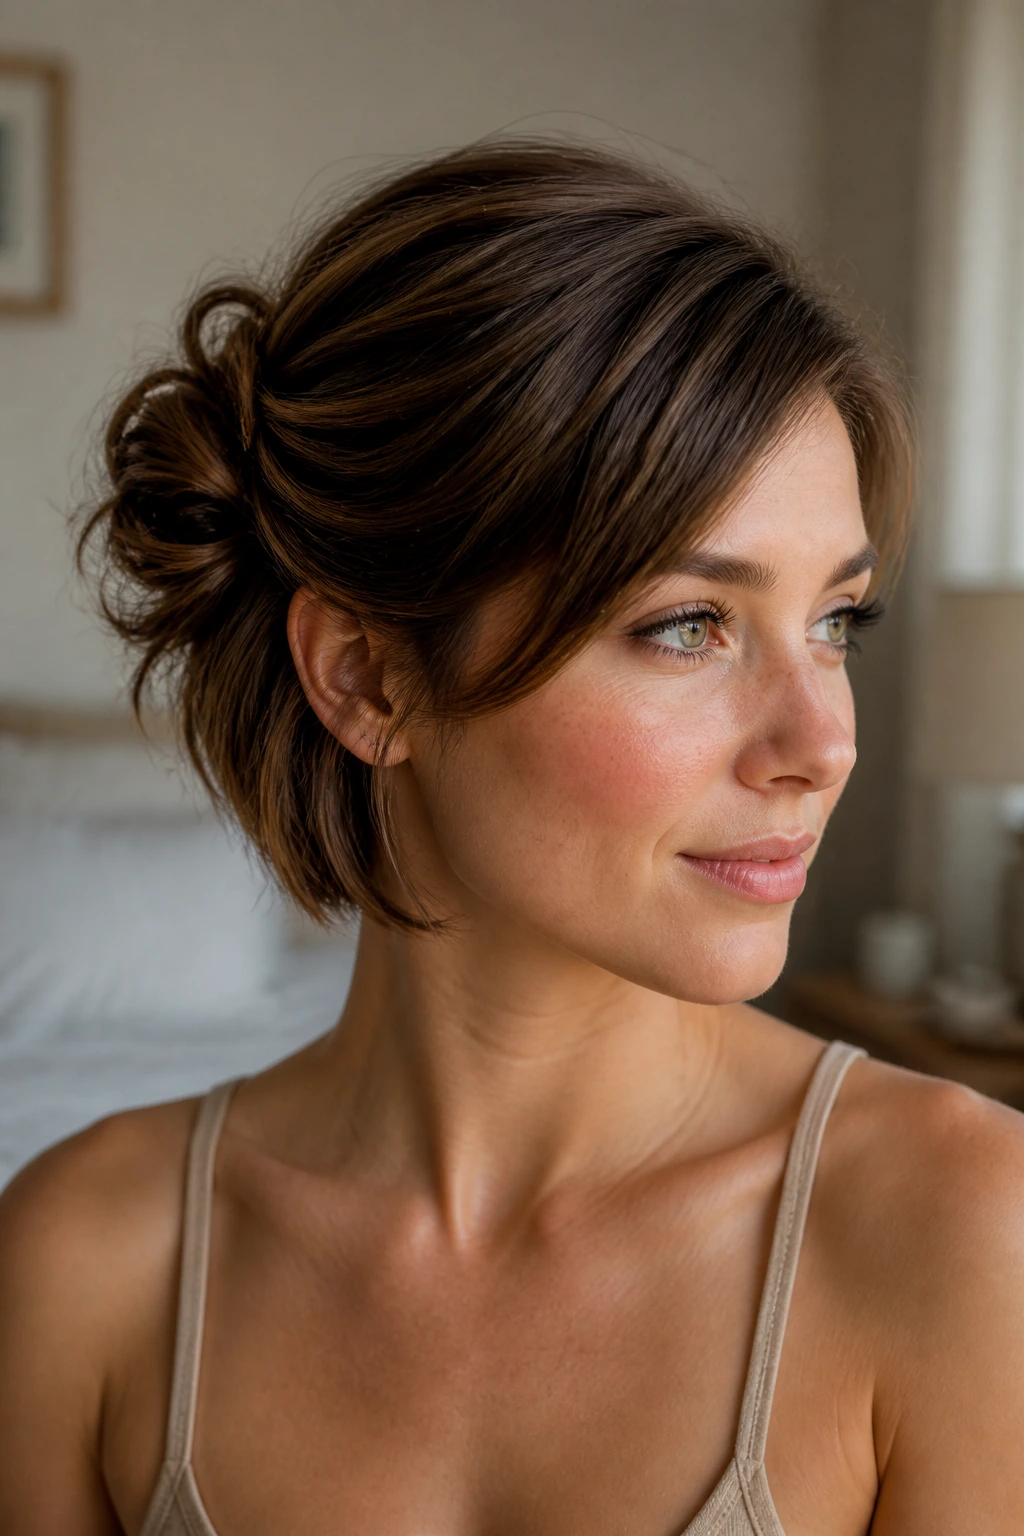
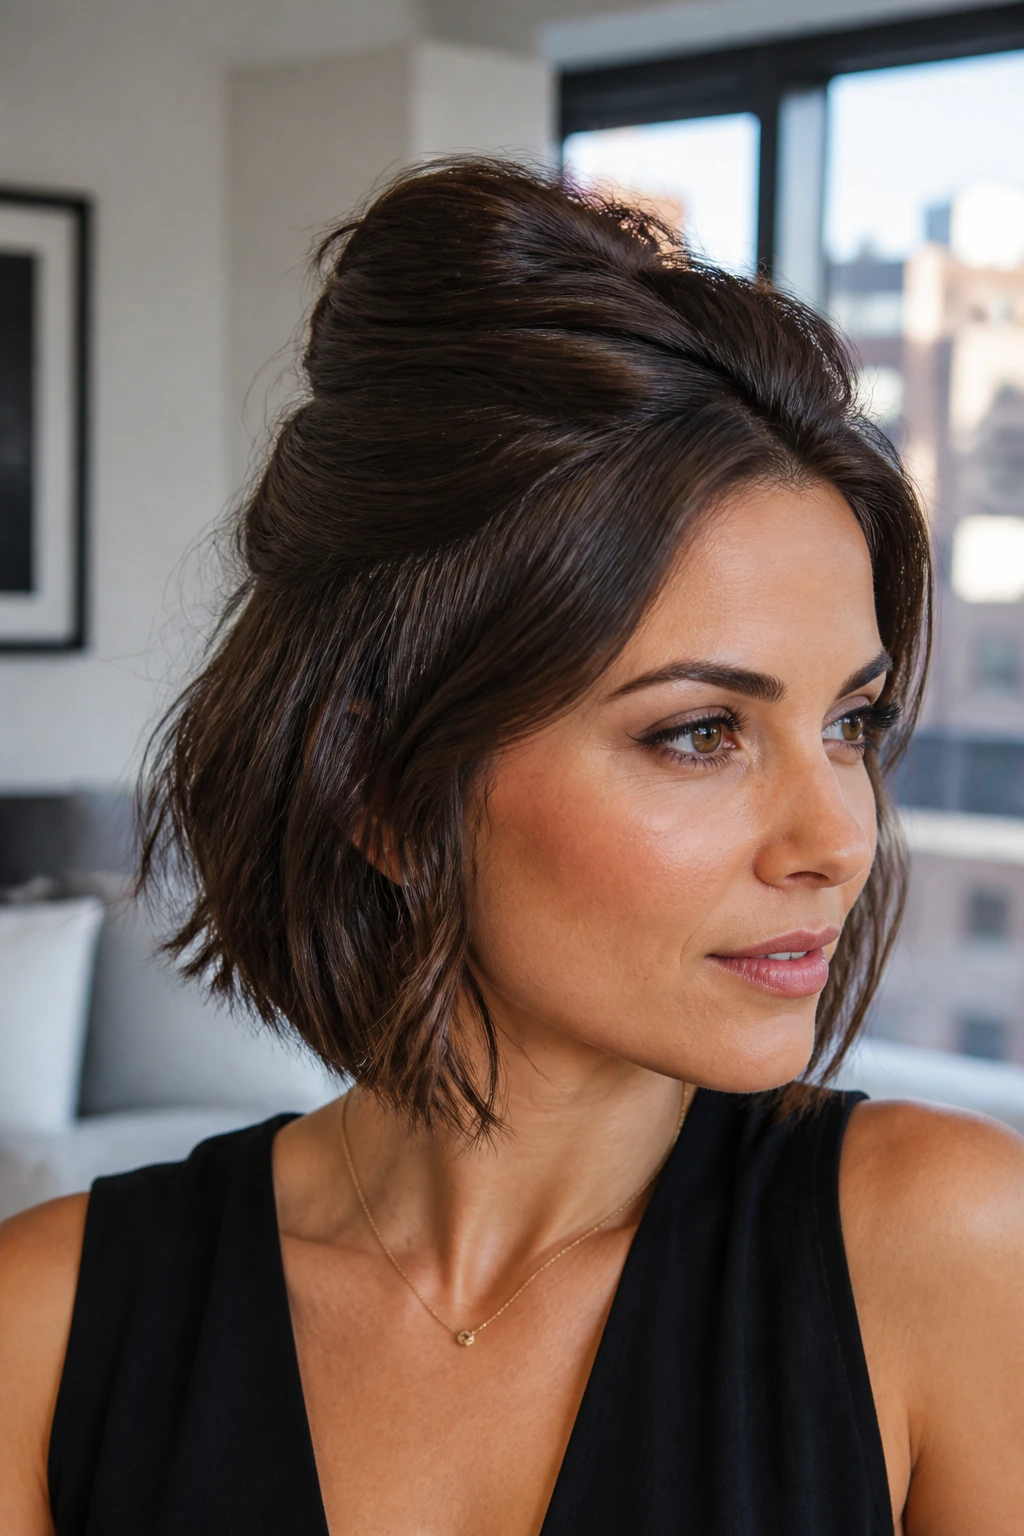
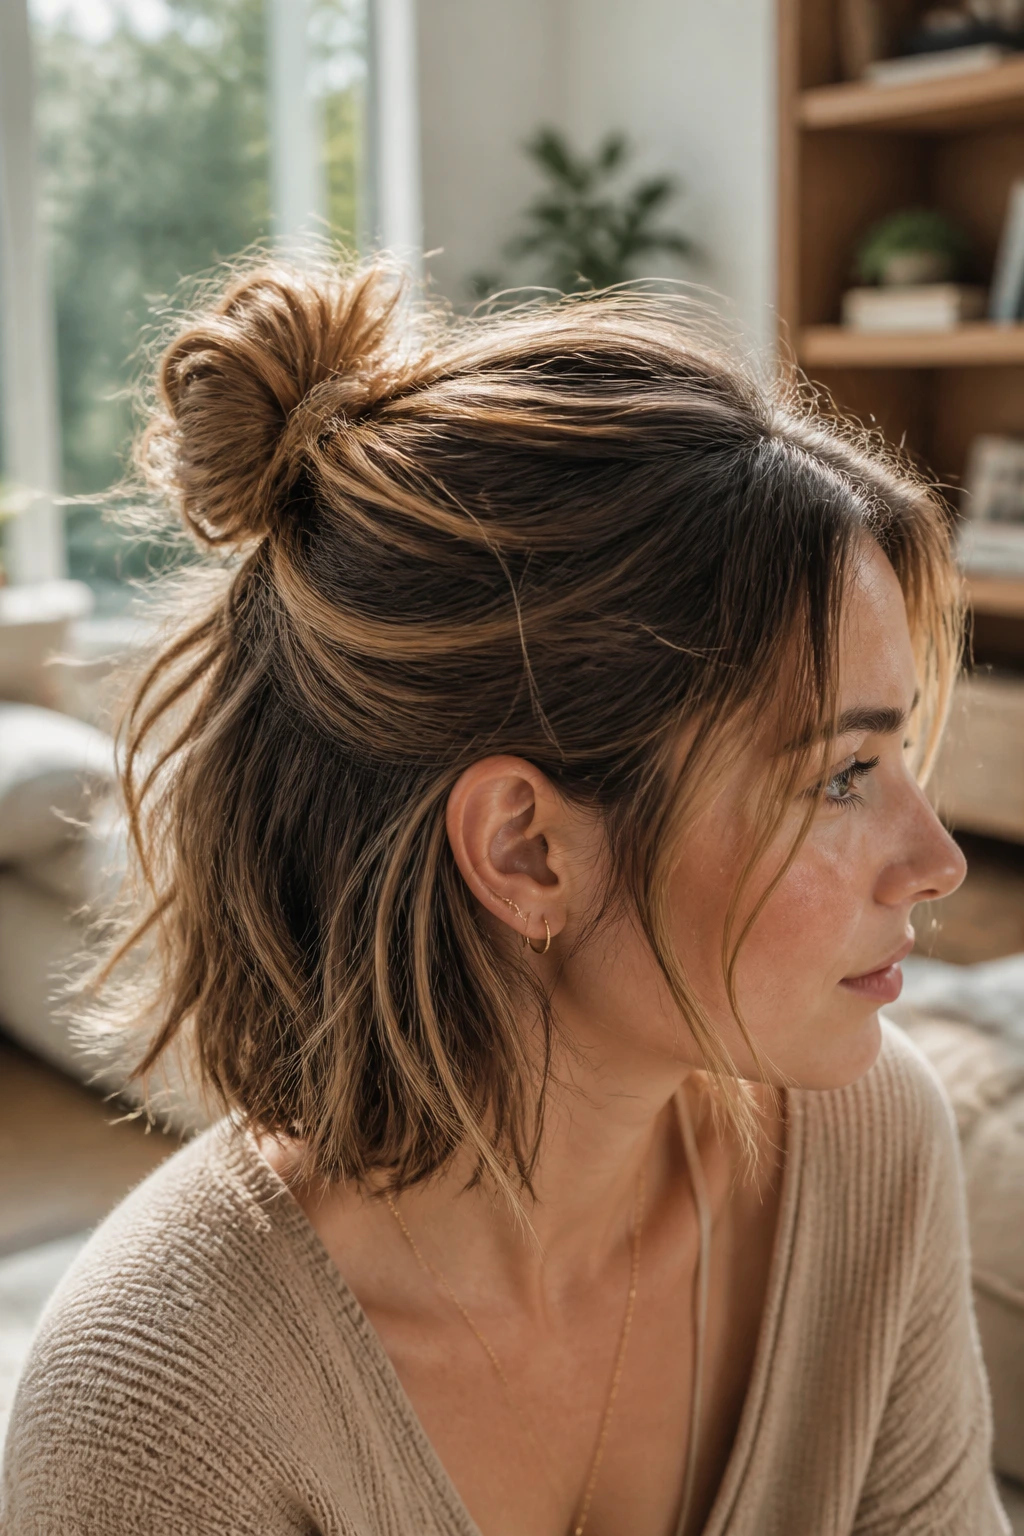
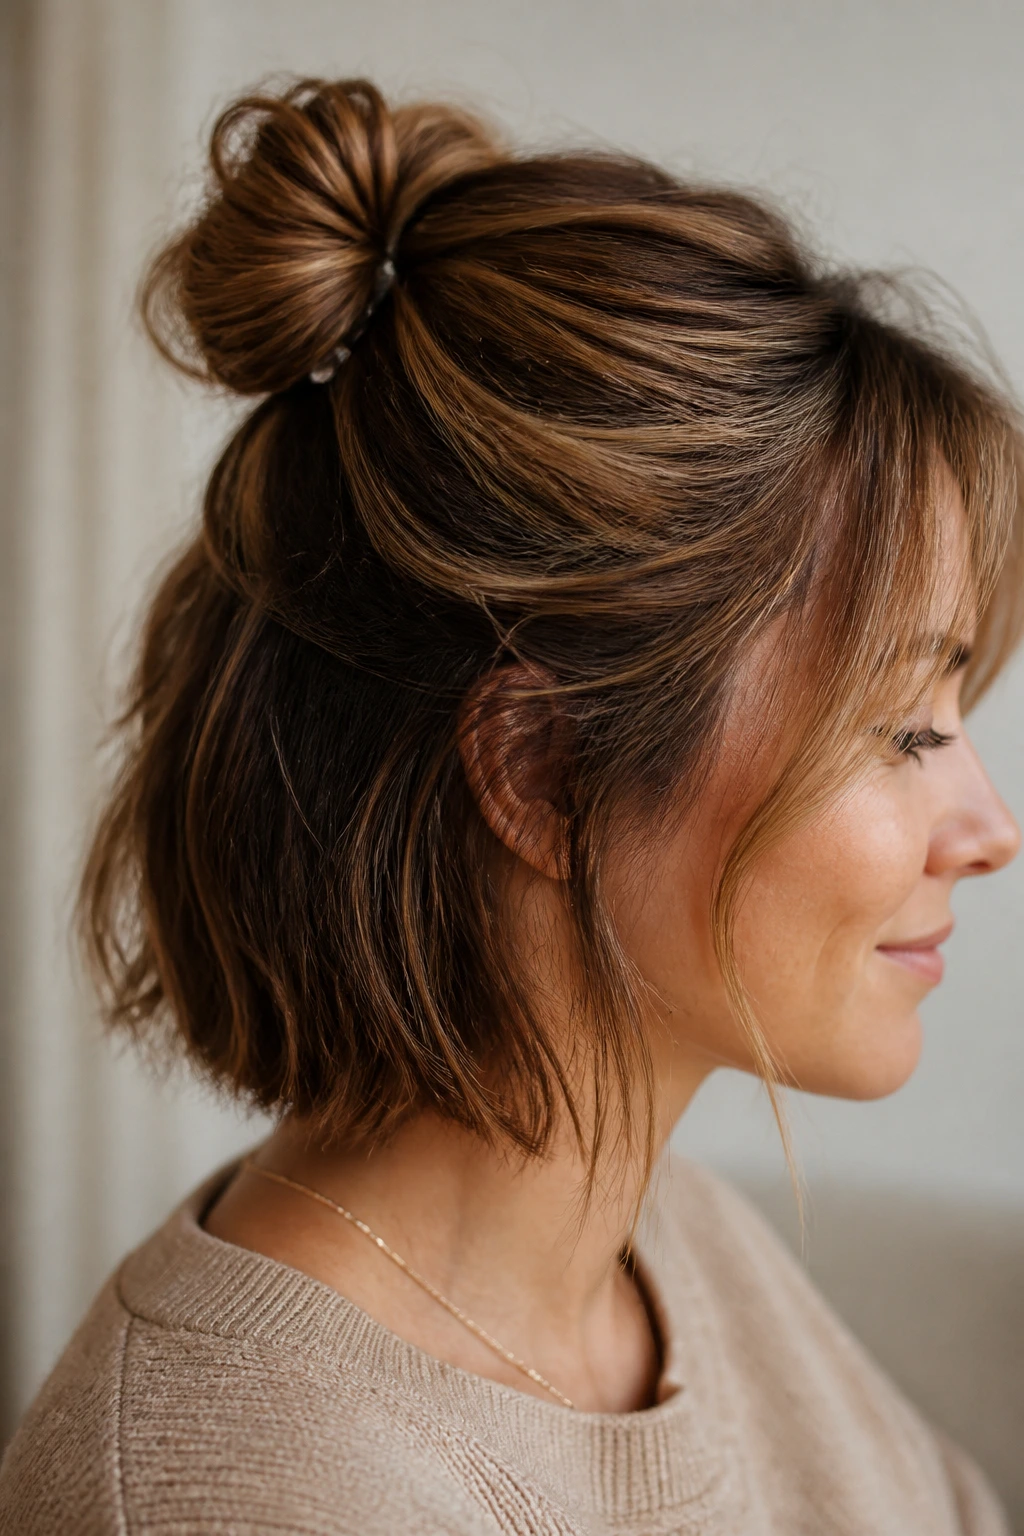
1. The Crown Knot Mini Bun
This is the half-up bun I reach for first on the shortest hair in the group. It sits right where the head starts to curve, so the style reads deliberate even when the bun itself is tiny. On a short bob, that matters. A little knot near the crown looks like a choice; a knot that droops too low can look like your hair gave up halfway through.
Why the height matters
A crown knot is especially kind to oval faces because it adds lift without dragging the eye straight up. The face keeps its balance, and the bun gives just enough shape to keep the top section from disappearing into the rest of the haircut.
- Best on chin-length bobs through collarbone lobs
- Works well on day-two texture or soft waves
- Needs 2 mini elastics and 4 to 6 bobby pins
- Keep the bun about the size of a walnut, not a grapefruit
Pro tip: Twist the ponytail before coiling it. A loose wrap collapses fast on short ends, and the twist gives the pins something to bite into.
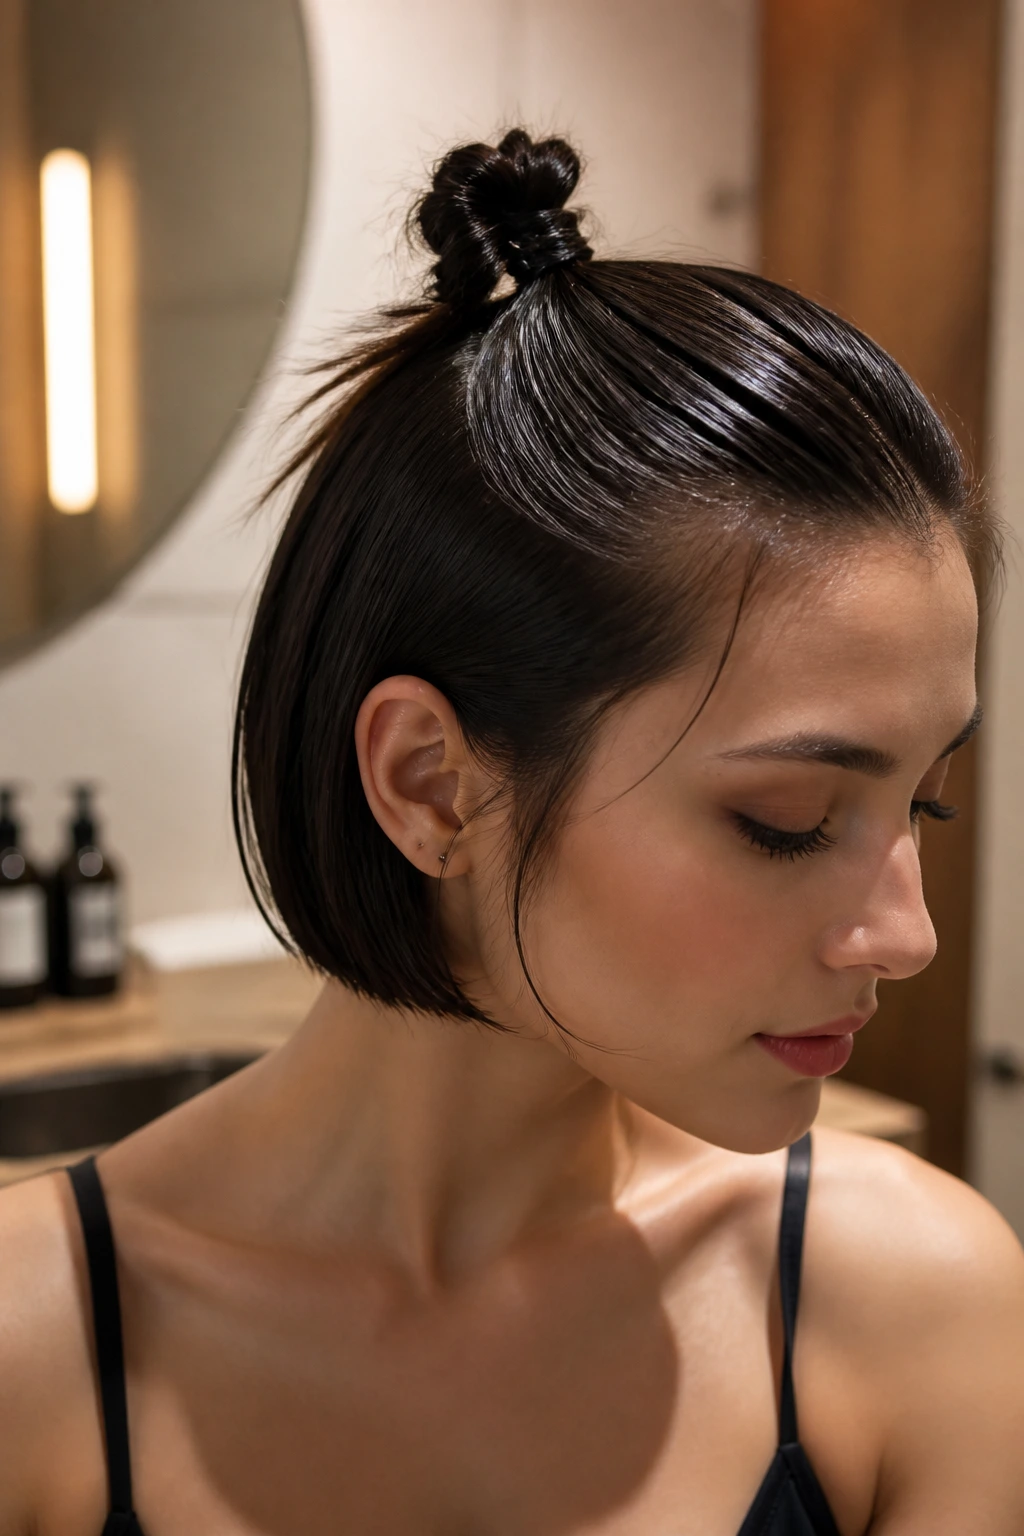
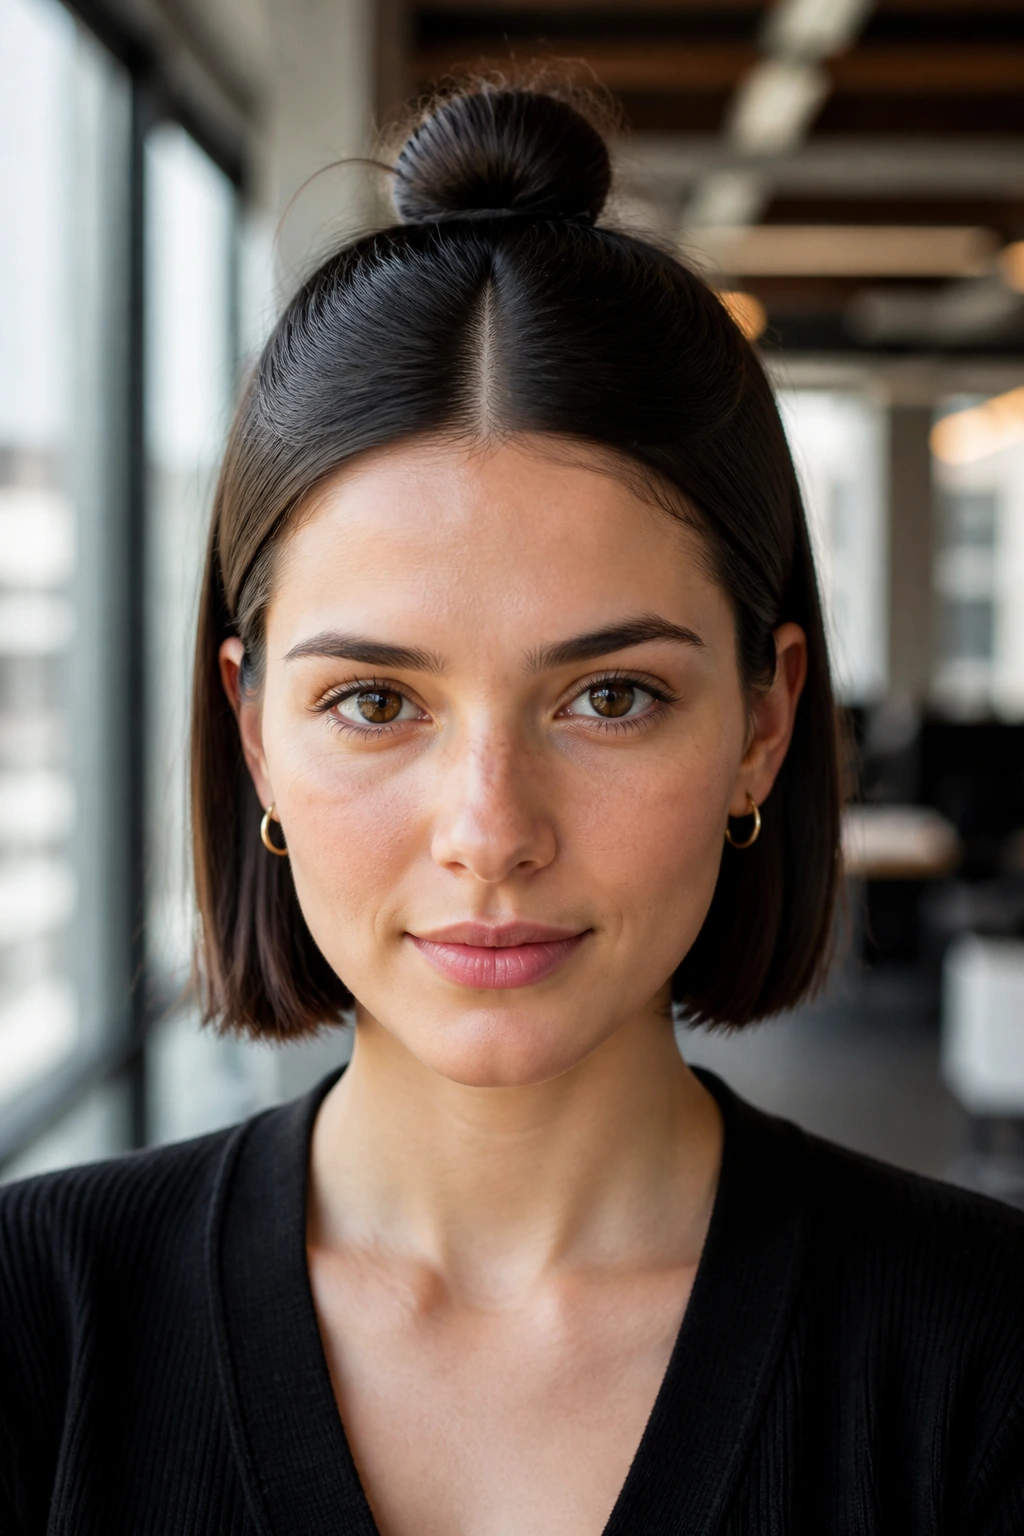
2. The Sleek Center-Part Knot
A clean middle part makes a short half bun look sharper than a fluffy one ever will. There’s something about the straight line through the front that keeps the style from getting precious. On oval faces, the symmetry feels calm and balanced, which is useful when the bun itself is small and you need the rest of the style to do some work.
Use a fine-tooth comb, not your fingers, if you want this one to look neat. A pea-sized amount of smoothing cream through the top section tames flyaways, but don’t drown the roots in product or the bun will slide. The actual knot should sit just above the crown ridge, and the loose ends should be tucked under rather than left sticking out.
I like this version on straight or gently bent hair, especially when the haircut has blunt ends. It turns a simple half-up shape into something that feels deliberate, even slightly severe, which is a nice contrast on shorter lengths. If your part is a little off-center, you can still do it. It just won’t look quite as crisp.
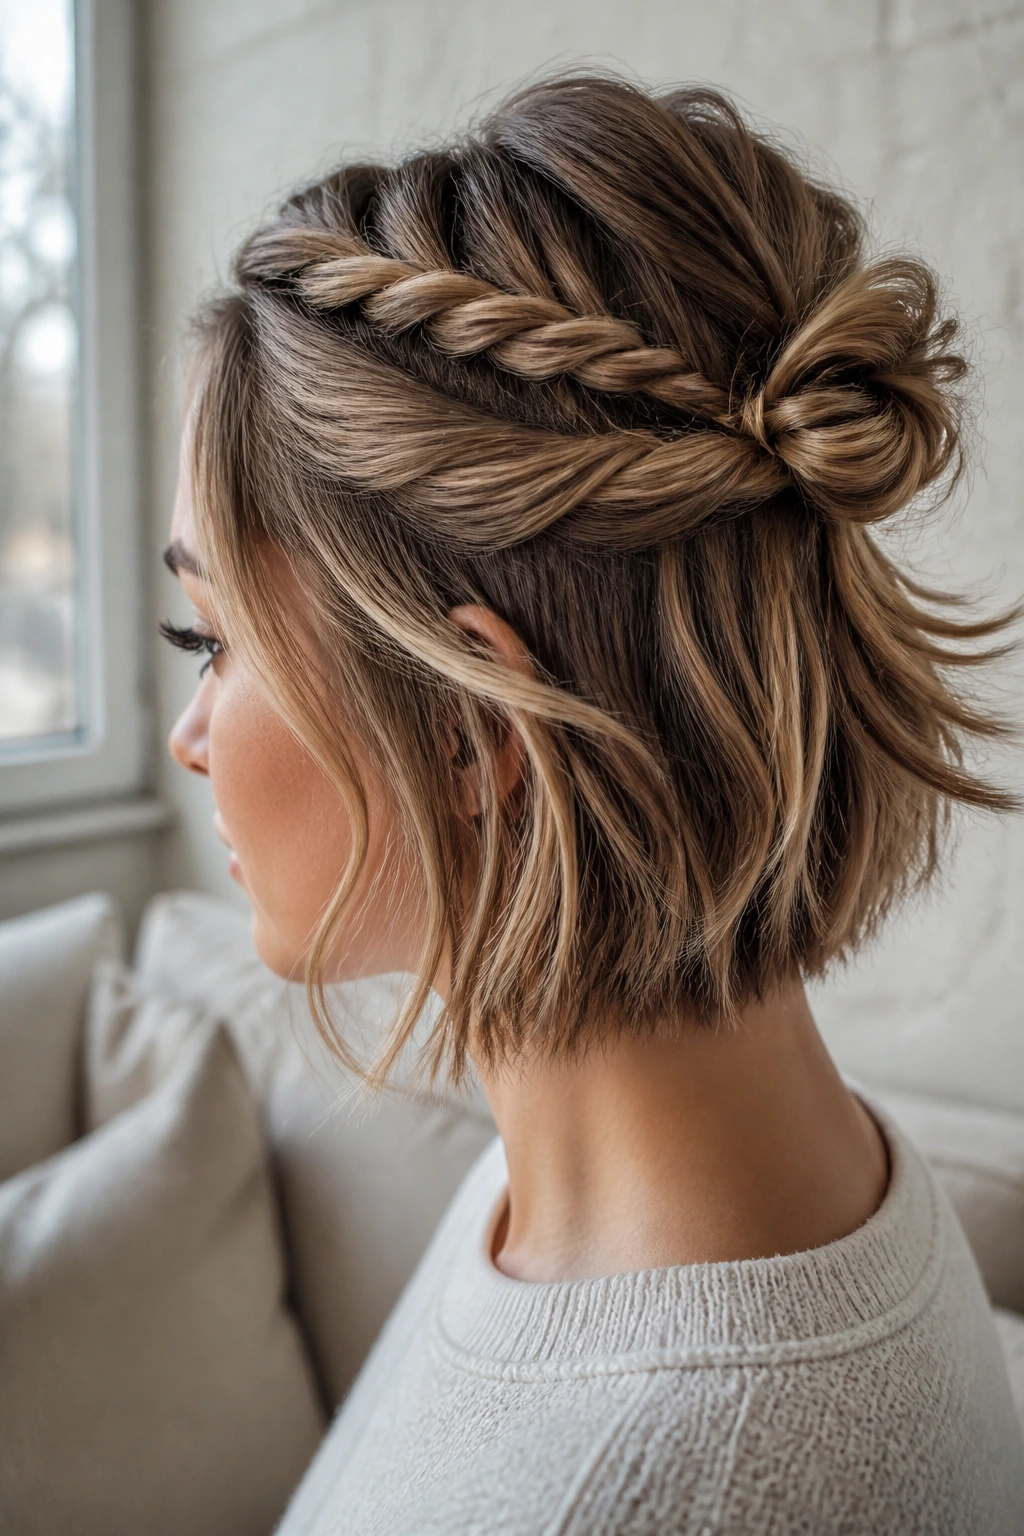
3. The Soft Twisted Loop
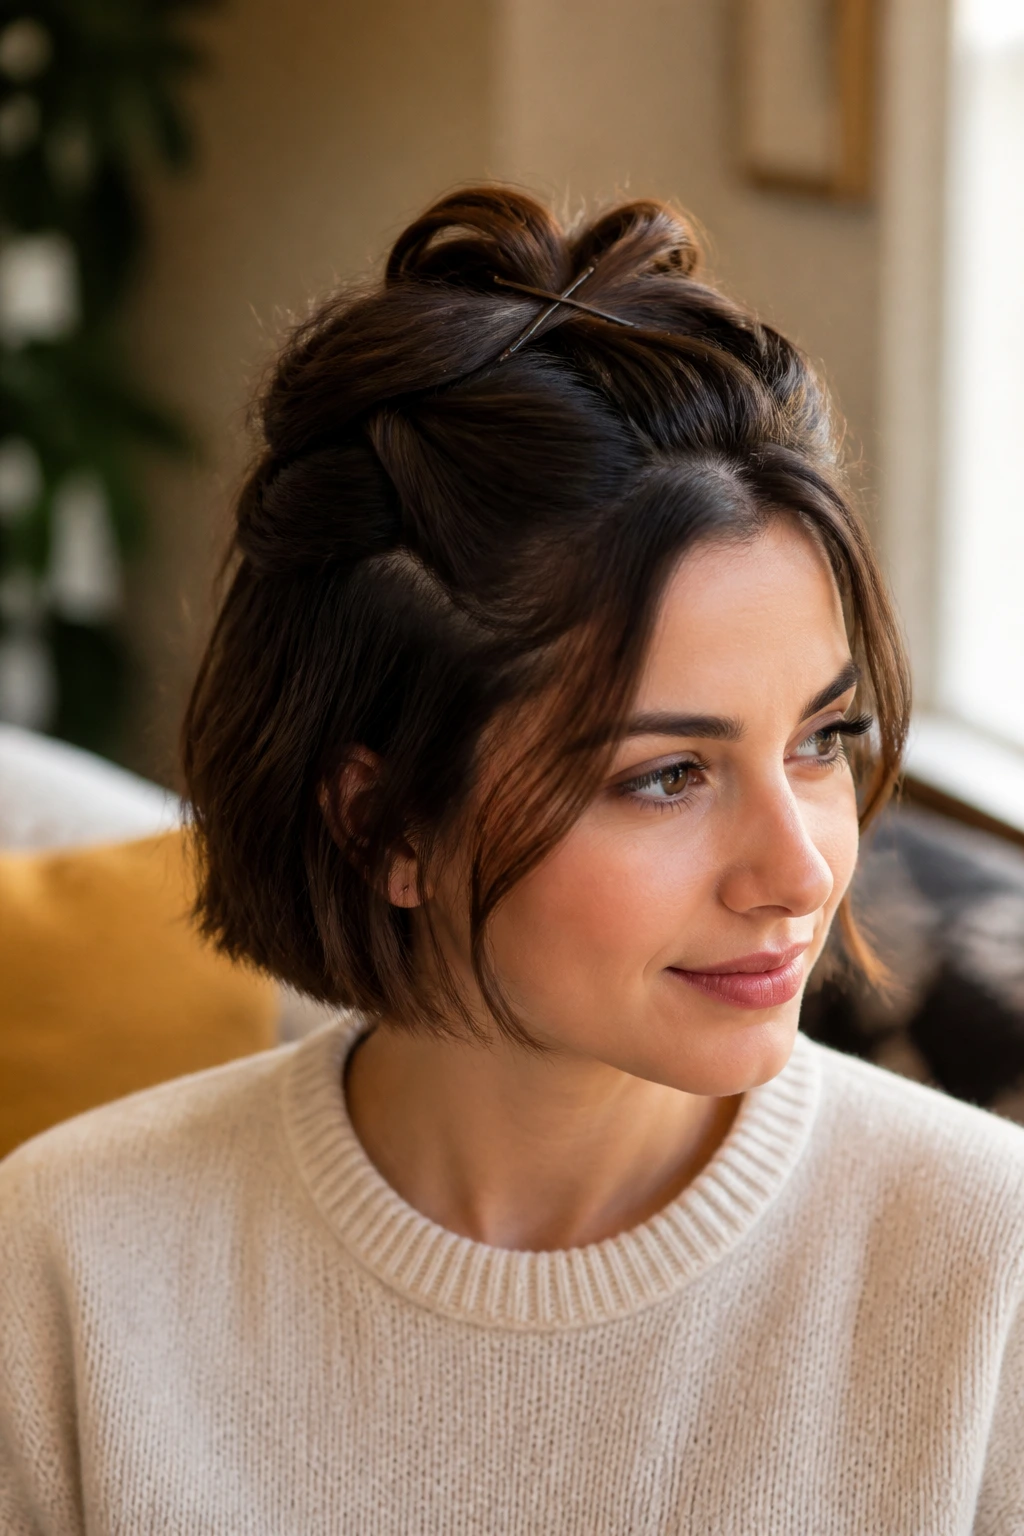
Why does a twist hold better than a knot on short hair? Because a twist compresses the layers and gives the pins a longer surface to catch. A tiny knot can slide around if the hair is freshly washed or too silky. A twist grabs the hair together before you ever start pinning.
How to use it
Take the top half of the hair from temple to temple, split it into two pieces, and twist them away from the face. Once the twist reaches the crown, coil the tail into a small loop and pin it at the base with two bobby pins crossed in an X. That cross-pin move matters. It keeps the loop from rolling sideways.
This style flatters oval faces because it adds texture without adding too much width. It also leaves the front softer than a sleek knot, which helps if your face already has strong symmetry and you want a bit of movement around it. On short layers, the twist hides broken ends better than a braid sometimes does. Oddly enough, the messier the haircut, the better this version can look.
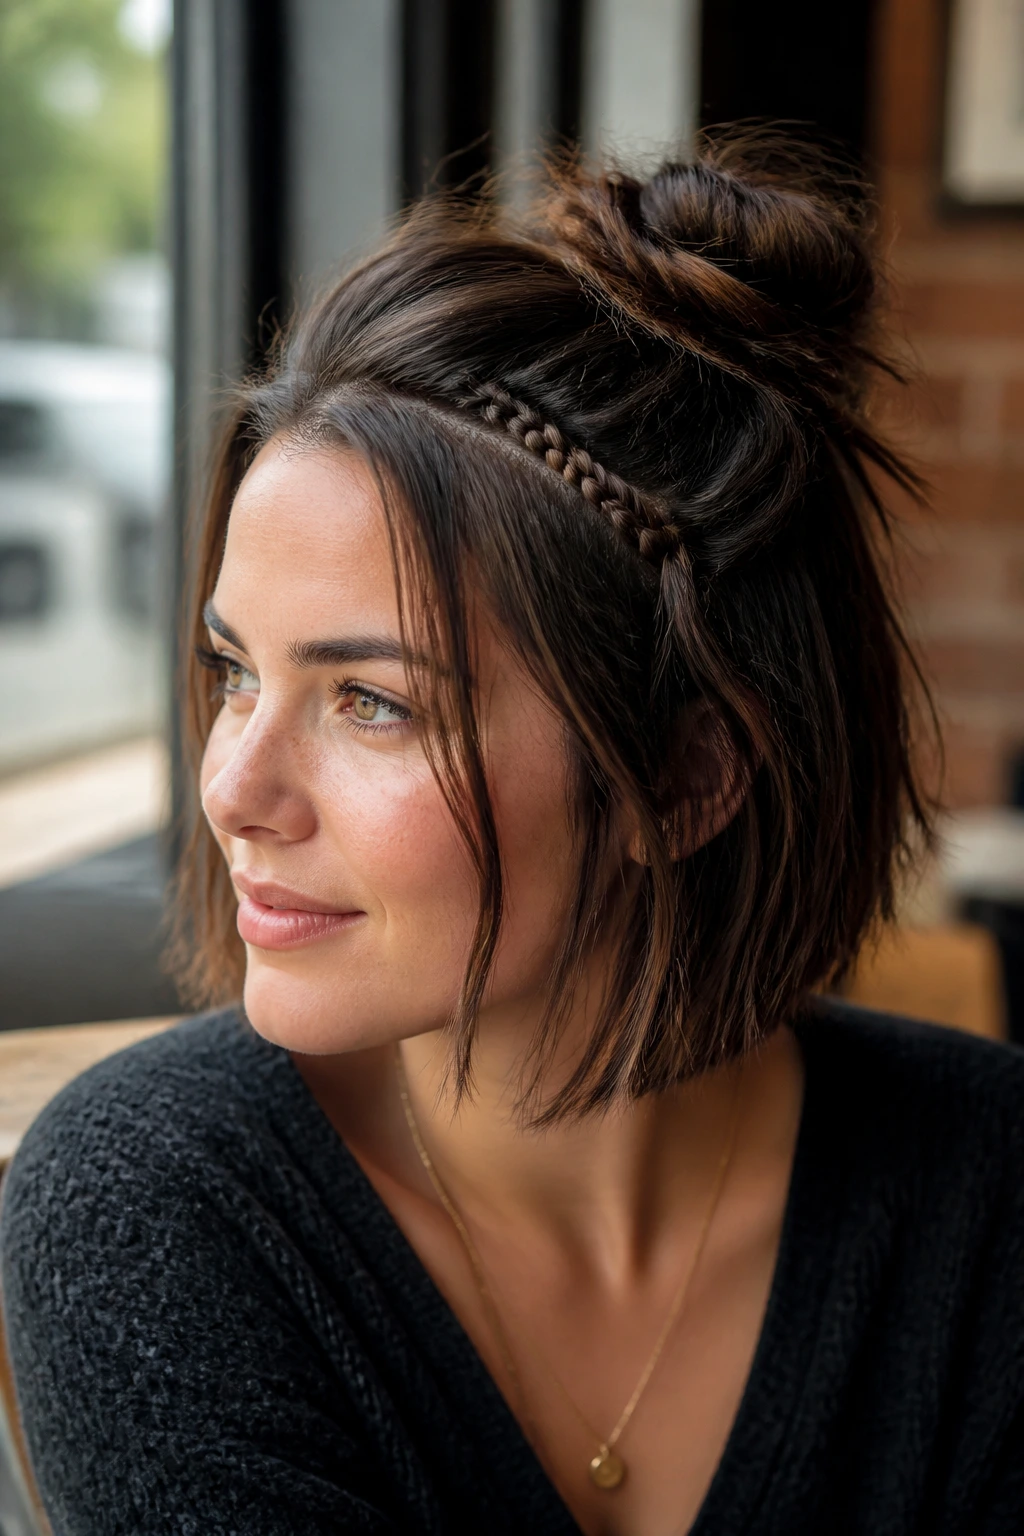
4. The Braided Half Bun
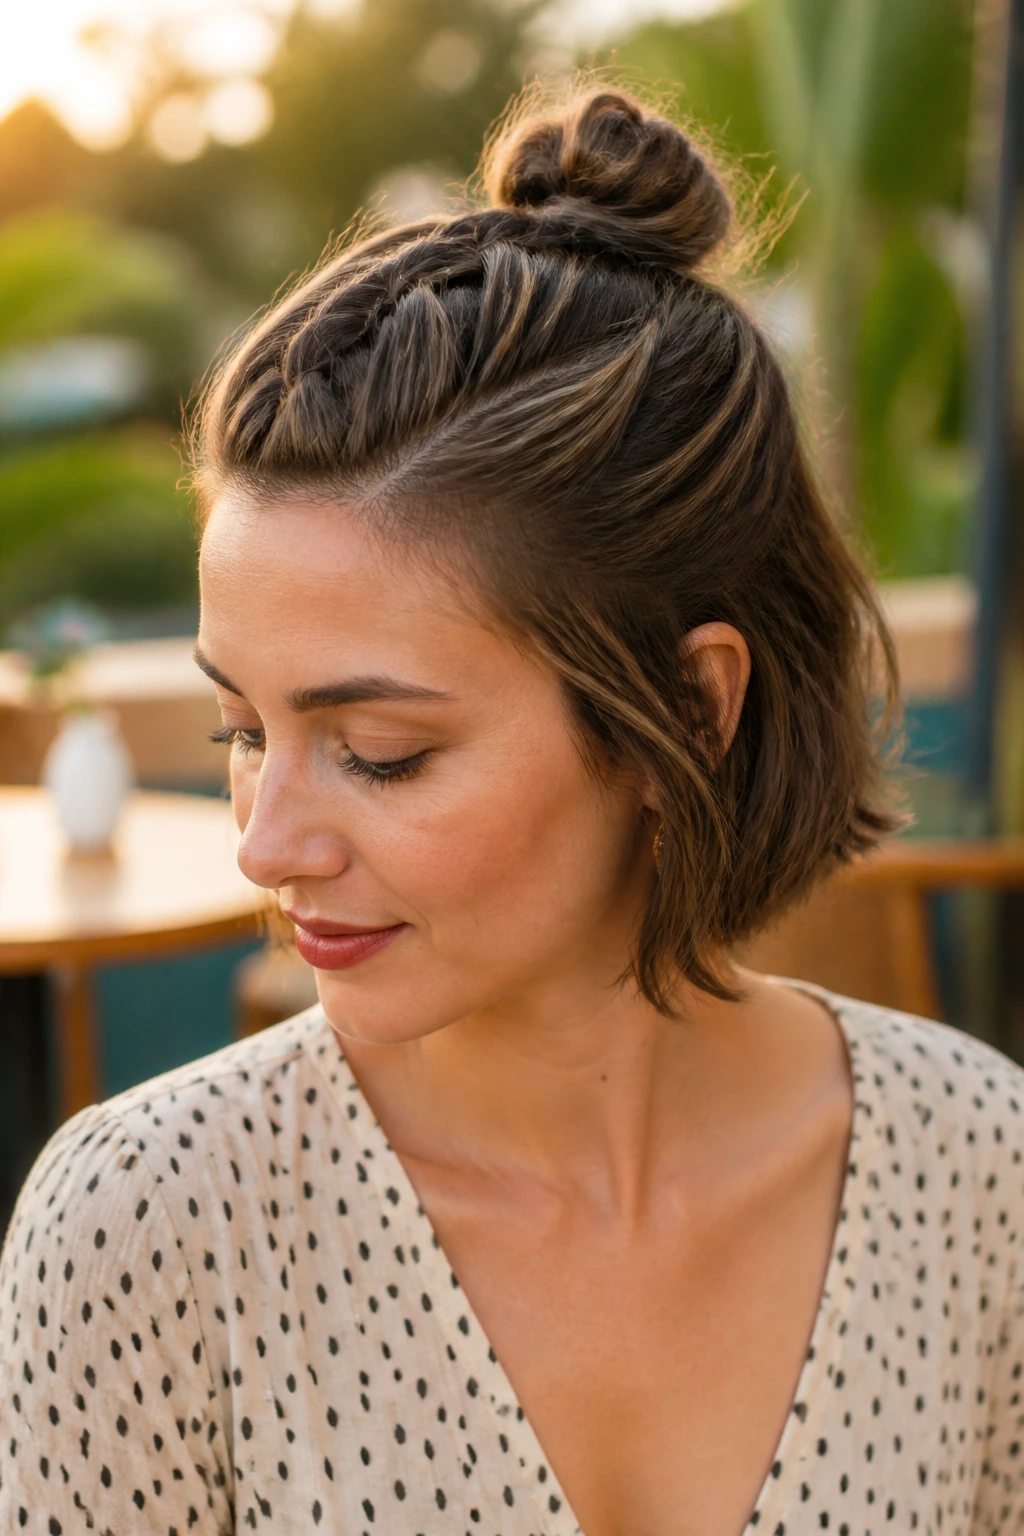
If your short hair slips out of everything by noon, braid the top first. That’s the whole trick. A braid creates enough texture to hold pins, and on short lengths it gives the illusion of more hair without forcing the bun to be huge. I prefer this one when the haircut has layers or a slightly shaggy edge.
Start the braid just behind the hairline or a little farther back if you want the crown to stay lifted. A loose three-strand braid is enough; you do not need anything fancy. Once you reach the crown, wrap the braid into a small bun and pin the tail underneath so the end disappears. If you have extra short pieces near the temples, leave them out on purpose rather than trying to wrestle them into the braid.
A few details that make it work
- Braid on dry hair, not slick damp hair
- Pancake the braid edges gently so it looks fuller
- Use a texture spray before braiding if your hair is very smooth
- Keep the bun compact so it doesn’t tilt backward
The braid adds just enough width for oval faces without exaggerating length. It’s tidy, but not stiff. That’s the sweet spot.
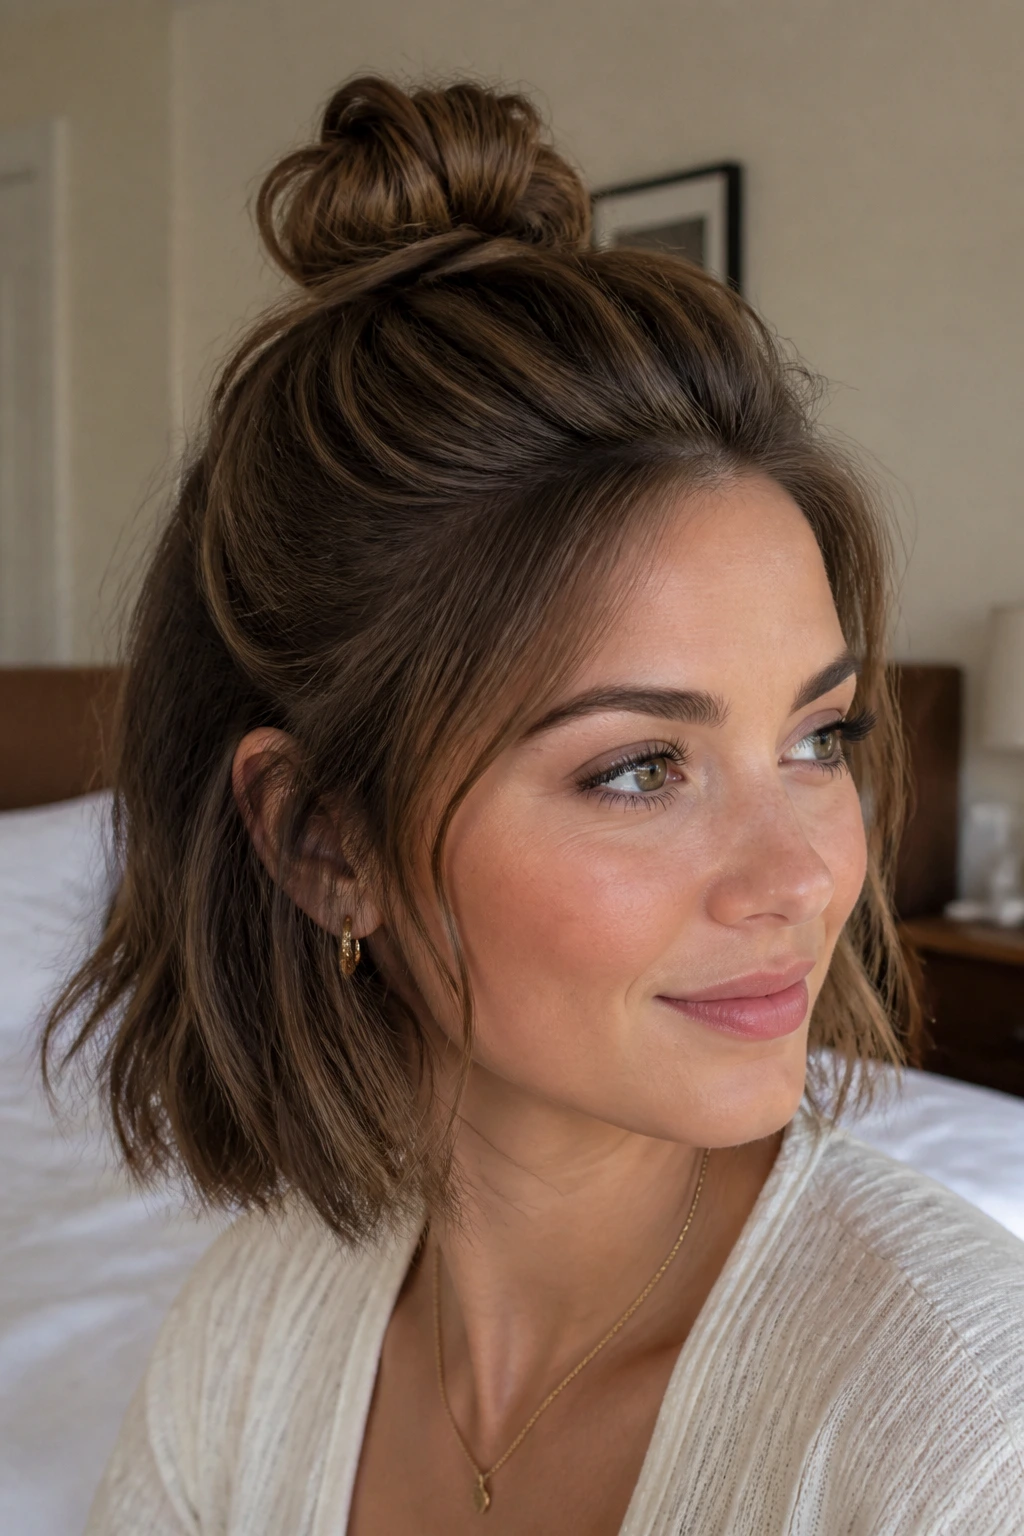
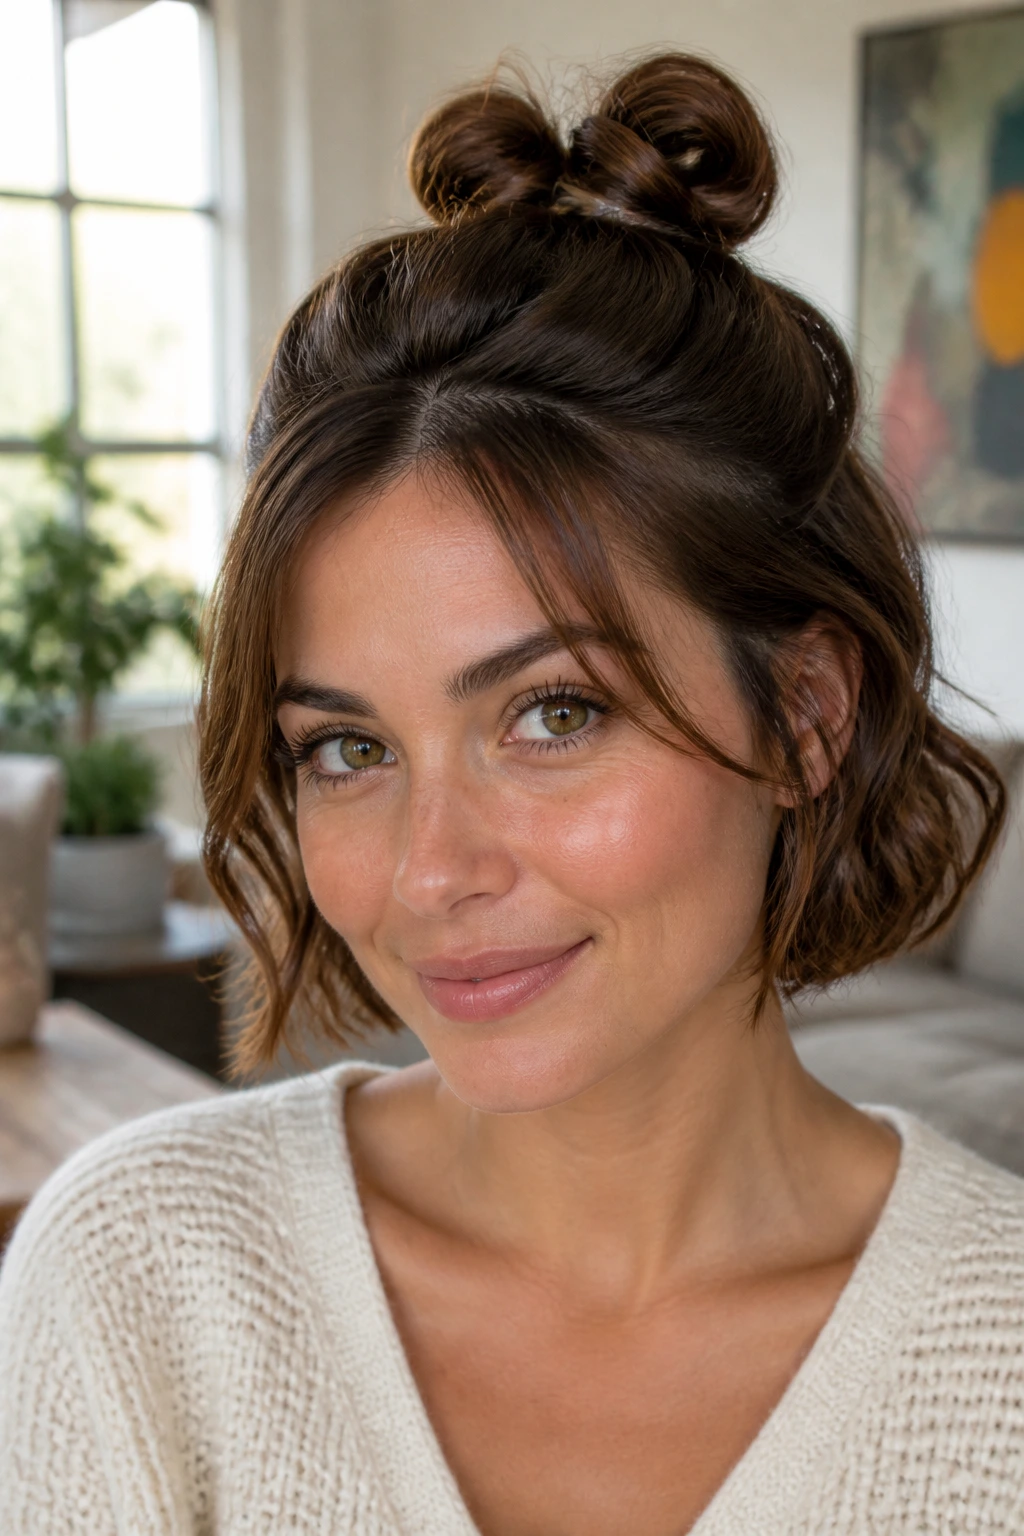
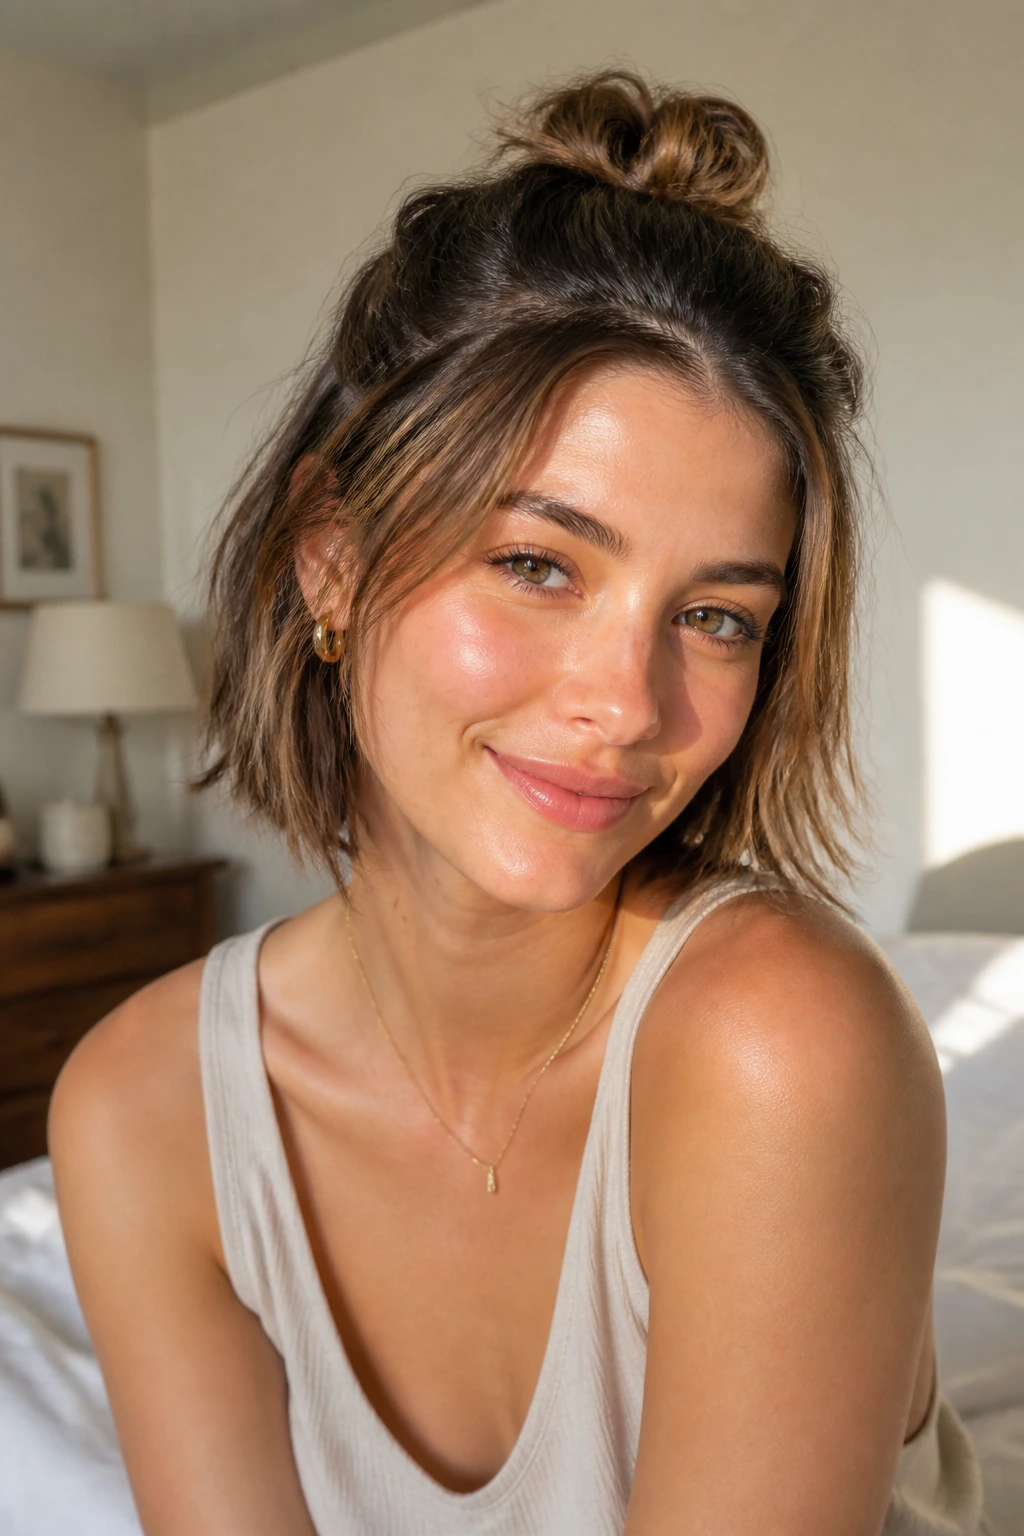
5. The Airy Messy Puff
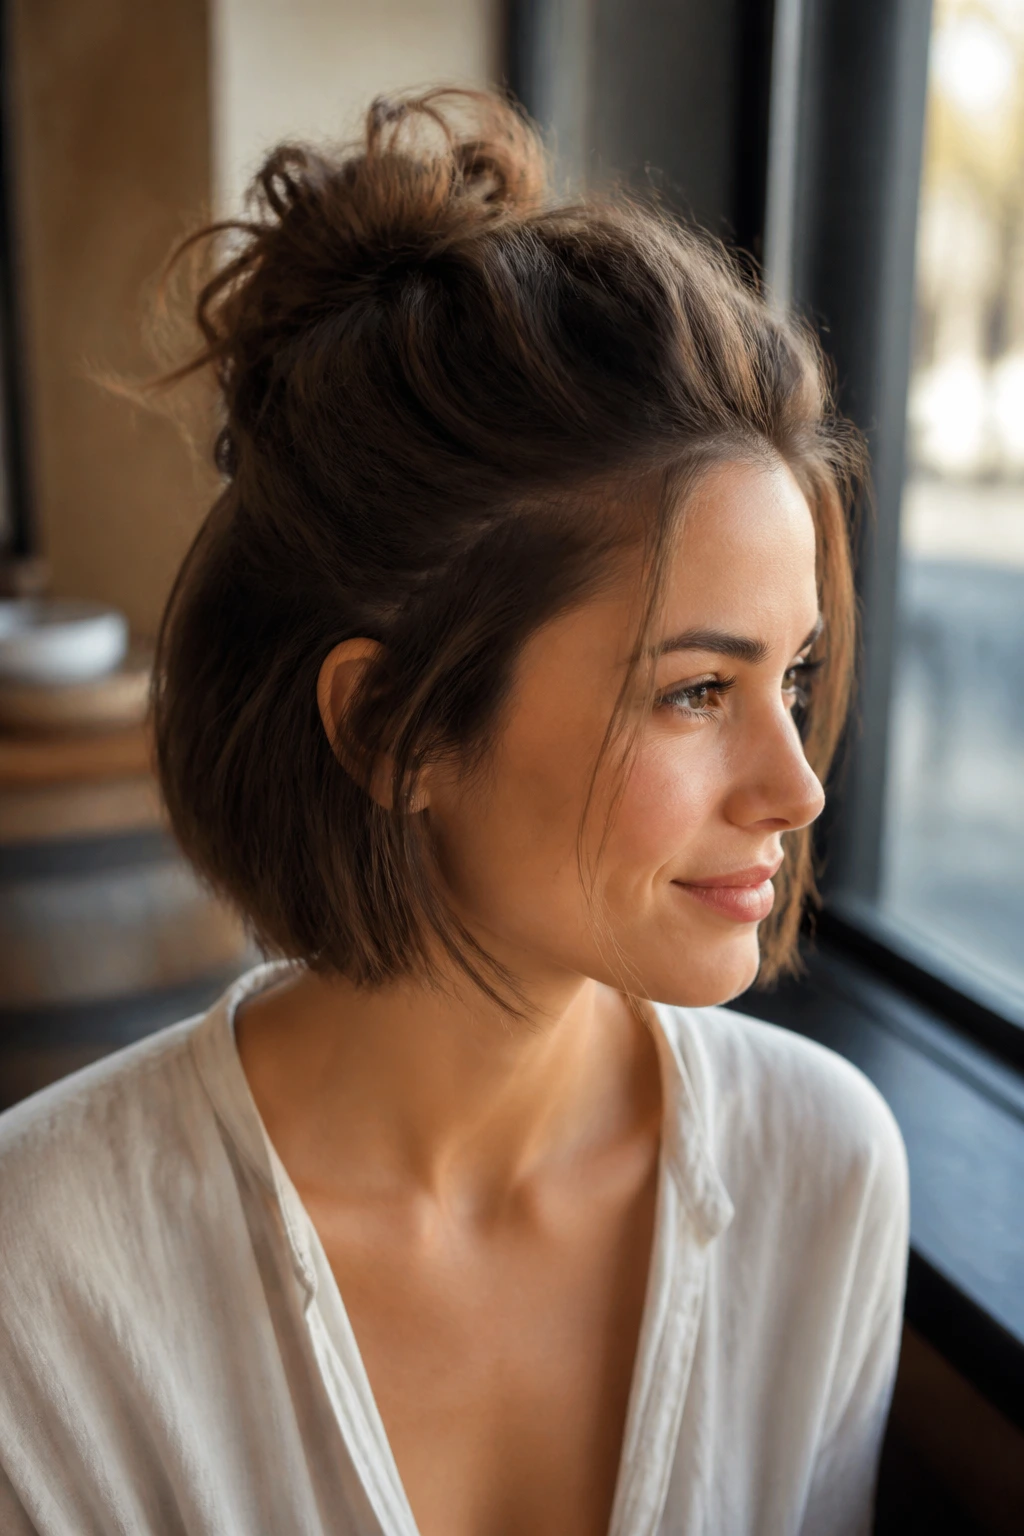
A messy half bun on short hair can be lovely, but only if you don’t try to make it huge. Short hair gets cartoonish fast when people keep tugging at the crown. The better version is airy, a little lifted, and small enough that the haircut still looks like itself.
I like to rough up the roots with dry shampoo, then gather the top section with my fingers instead of a brush. A brush makes the front too polished for the back, and the mismatch is what causes that overworked look. The bun should feel like a little puff sitting above the rest of the hair, not a top-heavy blob.
Oval faces handle this shape well because the softness at the crown balances the jaw and cheek area. Leave a few face-framing pieces loose, especially if the haircut is blunt around the perimeter. The goal isn’t to erase the shortness. It’s to make the shortness look relaxed.
A flexible-hold spray, used lightly, keeps the surface from frizzing without freezing the ends into place. That matters on layered bobs. It always matters on layered bobs.
6. The Side-Swept Asymmetric Bun
A side-swept half bun is the one I choose when a center part feels too neat and a straight-up top knot feels too stiff. Pull the top section slightly to one side before you twist it into place, and the whole style suddenly has movement. On oval faces, that diagonal line softens the symmetry in a good way.
This version is especially handy if your face feels long in profile or your forehead takes up more visual space than you want to emphasize. A side part plus a bun placed just off-center pulls the eye across the face instead of straight up and down. That small shift changes the whole read of the style.
Keep the bun small and anchor it behind the heavier side of the part. Leave the lighter side with a few loose strands near the cheekbone. The contrast gives the haircut shape without needing much length. It’s a smarter use of short hair than trying to fake a big knot ever would.
If your hair is very fine, mist the roots with texture spray first. The diagonal sectioning gives the style grip. Tiny detail, big difference.
7. The Claw-Clip Loop Bun
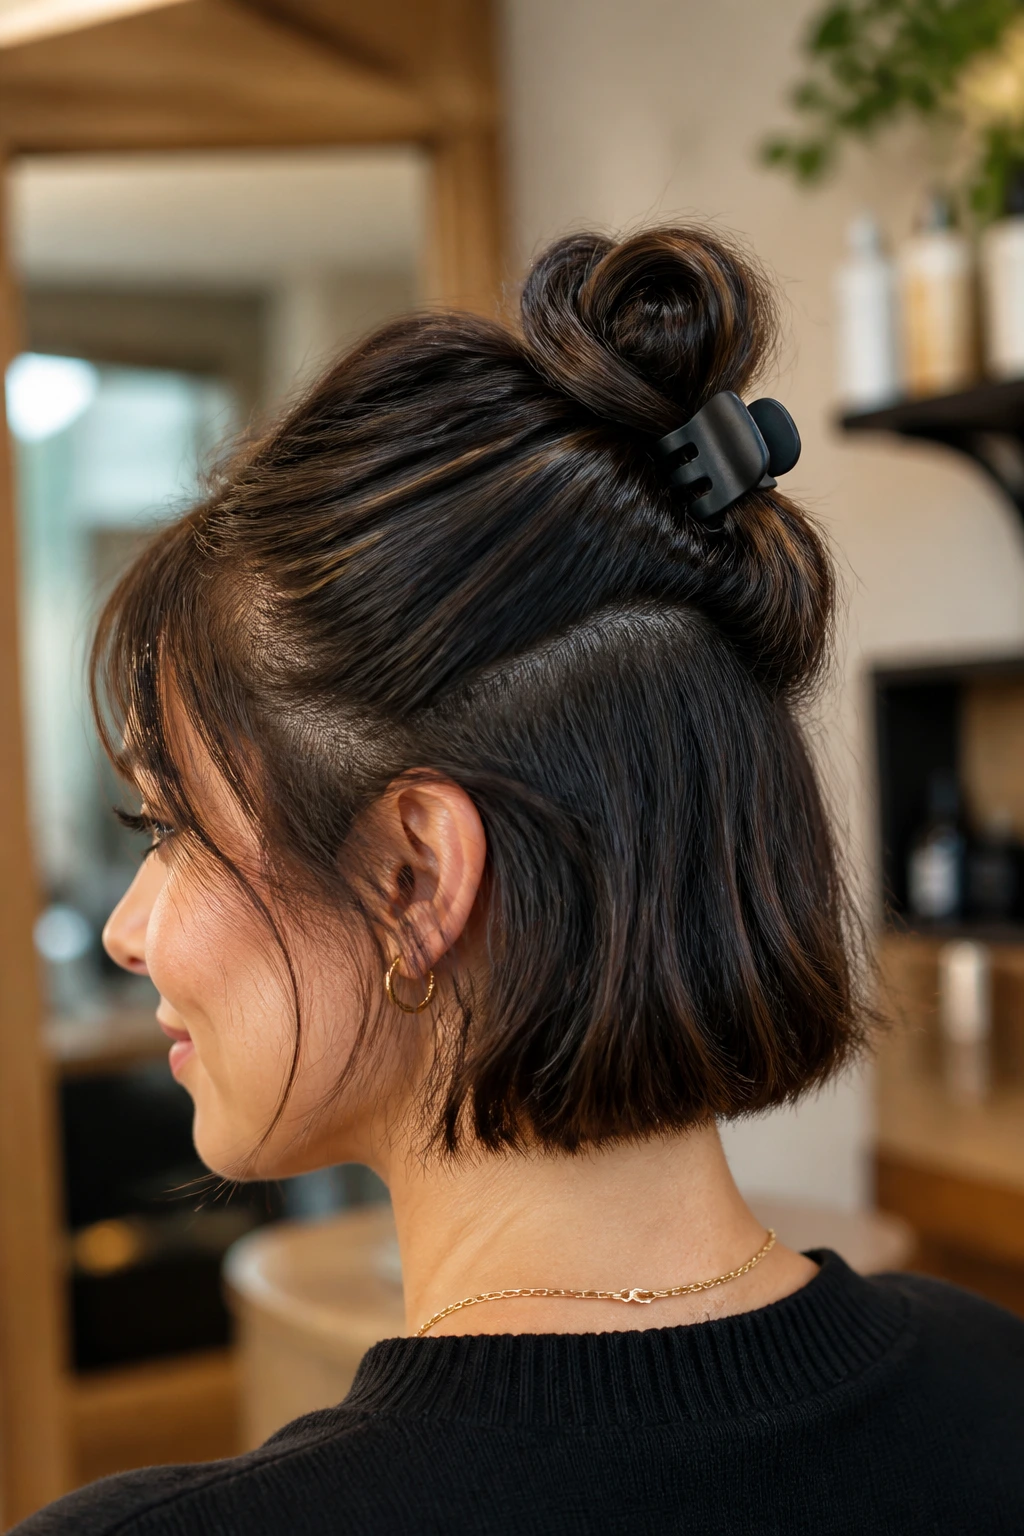
A small claw clip can save a short half bun from falling apart. That’s the blunt truth. When hair is too short to wrap cleanly, or too thick to stay put with pins alone, a clip gives the style a mechanical hold that bobby pins can’t always manage.
Use a 2- to 3-inch clip, not one of those oversized clips that swallow half your head. Gather the top section into a small loop, twist once, and clip it in place so the teeth catch both the twisted base and the looped tail. If you want a little more security, add one hidden pin under the clip.
This works nicely on oval faces because the clip sits like a neat bracket at the crown rather than a bulky crown itself. It doesn’t push the face longer. It just adds a bit of height and keeps the rest of the hair soft. On thick or slippery hair, that’s worth a lot.
I prefer clips with a matte finish for this look. They grip a little better, and they don’t flash as much if the hair moves.
8. The Bubble-Elastic Half Bun
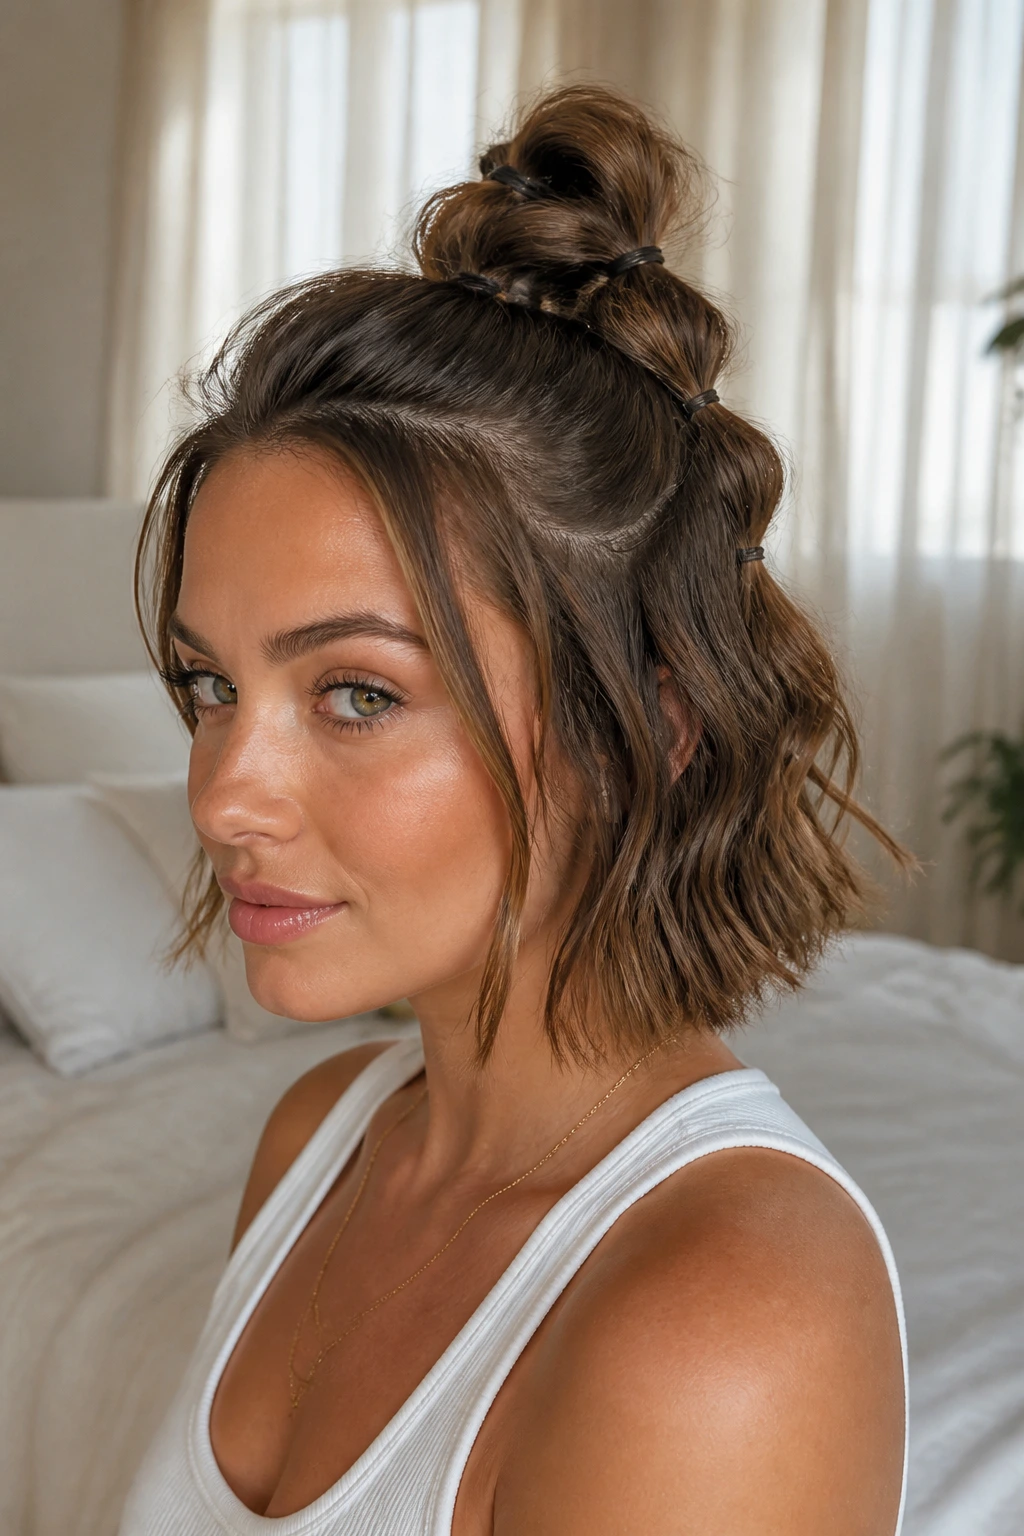
A bubble half bun gives short hair more presence than a plain knot, which is why I keep it in the mix. Instead of wrapping all the hair into one coil, you build the bun in little sections with mini elastics, then puff each segment slightly. The shape ends up fuller, rounder, and much easier to control.
Start with the half-up ponytail, then add two or three clear elastics every three-quarters of an inch down the tail. Gently tug each section outward so it rounds into a bubble. Fold the tail back up and pin it under the base so the bubbles sit above the rest of the hair.
On short hair, the spacing matters. Too close together and the style looks cramped. Too far apart and the tail gets flimsy. The bubbles should look like a single shape with subtle divisions, not a child’s craft project. No one wants that.
Oval faces can wear the bubble shape well because it adds width around the crown and a touch of playfulness without building too much height. It feels youthful, but not silly, if the bubbles stay small and the front stays smooth.
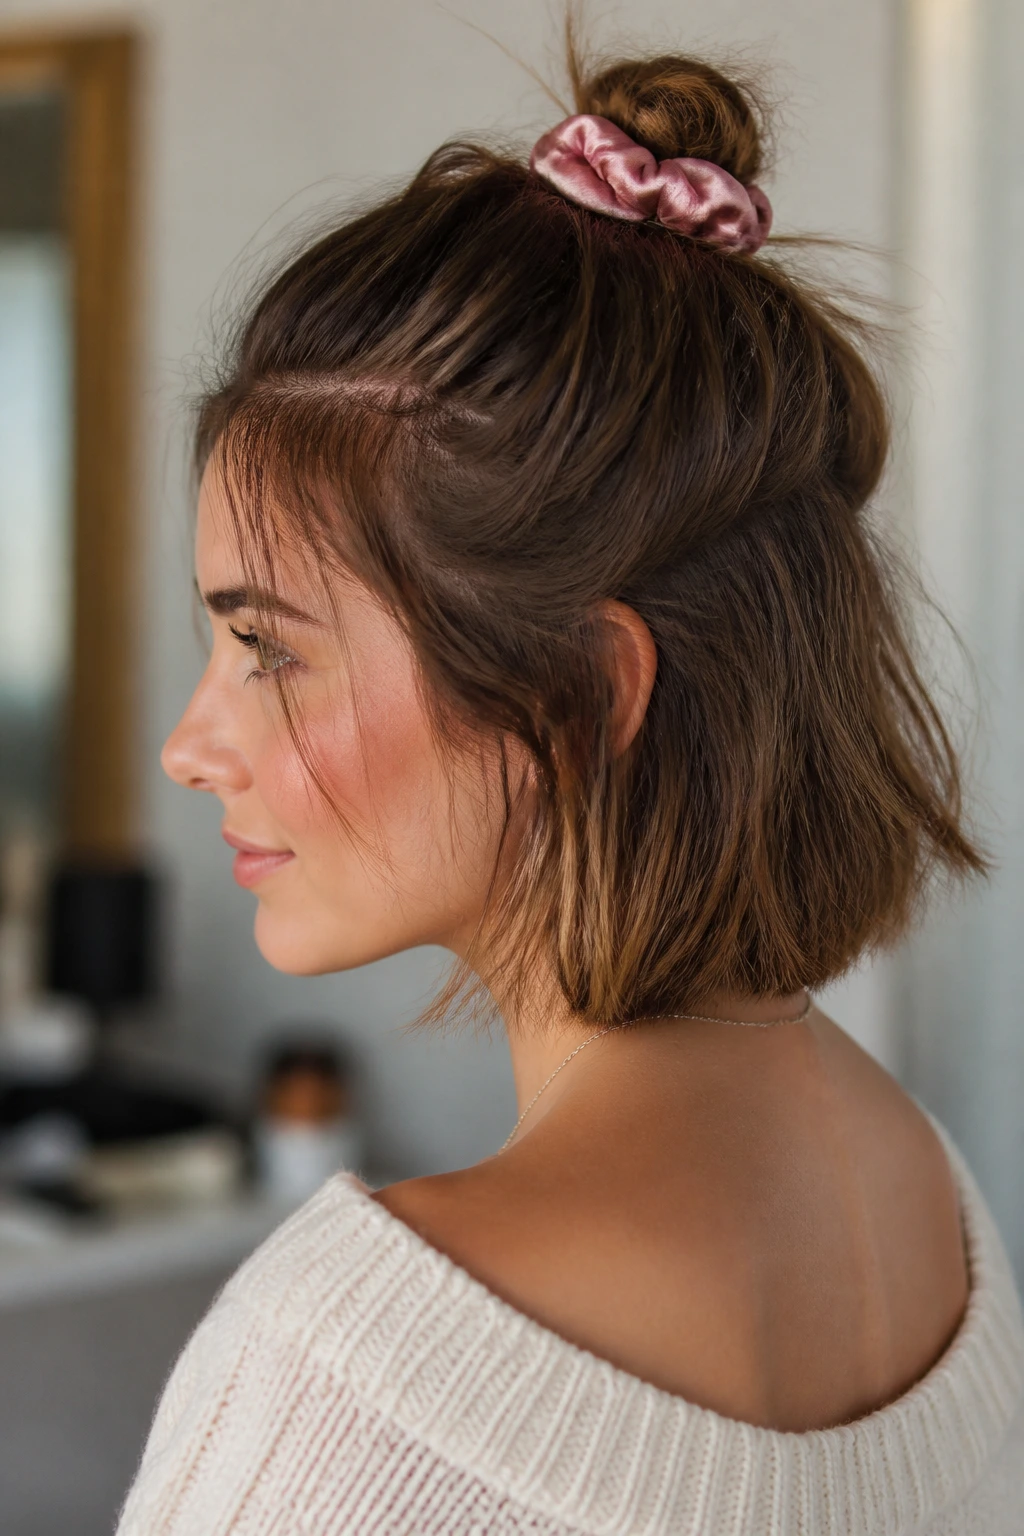
9. The Curly Halo Knot
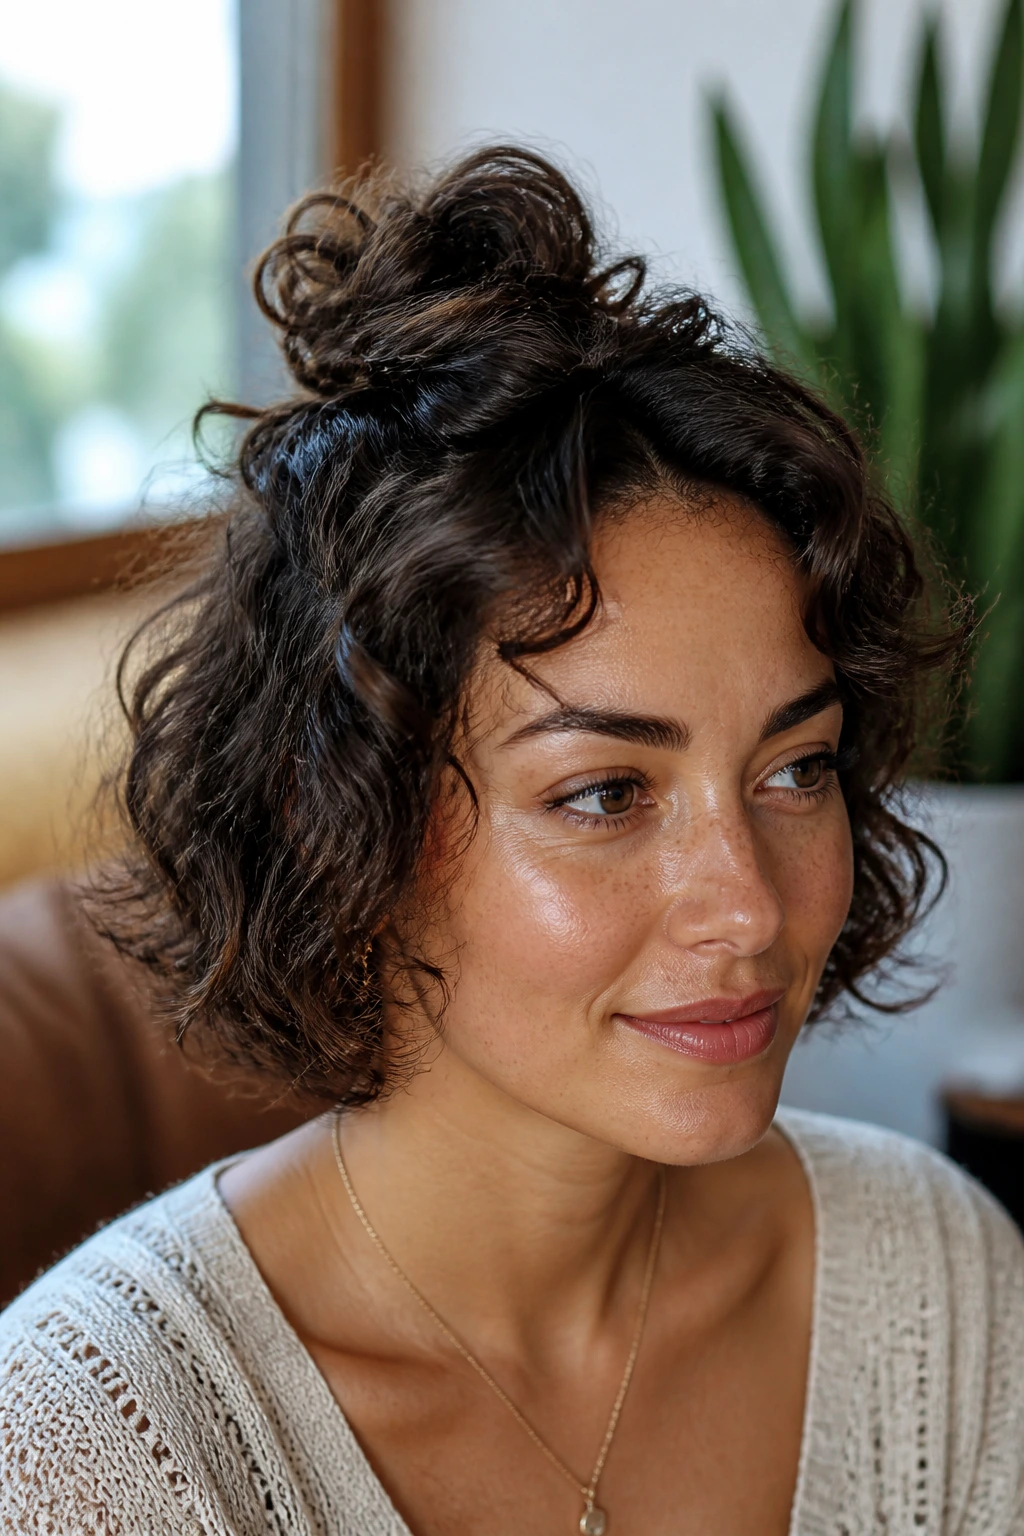
Can you do a half-up bun without wrecking the curl pattern? Yes, if you leave your hands out of the curls as much as possible. Curly short hair actually gives this style a gift: volume that looks intentional without needing a ton of teasing or product.
Gather only the top third of the hair, and do it with fingers, not a brush. That keeps the curl clumps intact. Twist the gathered section once, coil it loosely, and pin it so the bun sits like a small halo at the crown. The rest of the curls should spill around the sides and back with their shape left alone.
This works beautifully on oval faces because curls add softness near the temples and jawline. The top knot lifts the eye, but the curls keep the style from feeling too severe or too long. If your curls shrink a lot, leave the bun a touch larger than you think you need; it will settle.
A satin scrunchie can be better than a small elastic here. It protects the curl pattern and gives the base a little more grip. That’s one of those details people skip until they realize the bun has stayed up all day because of it.
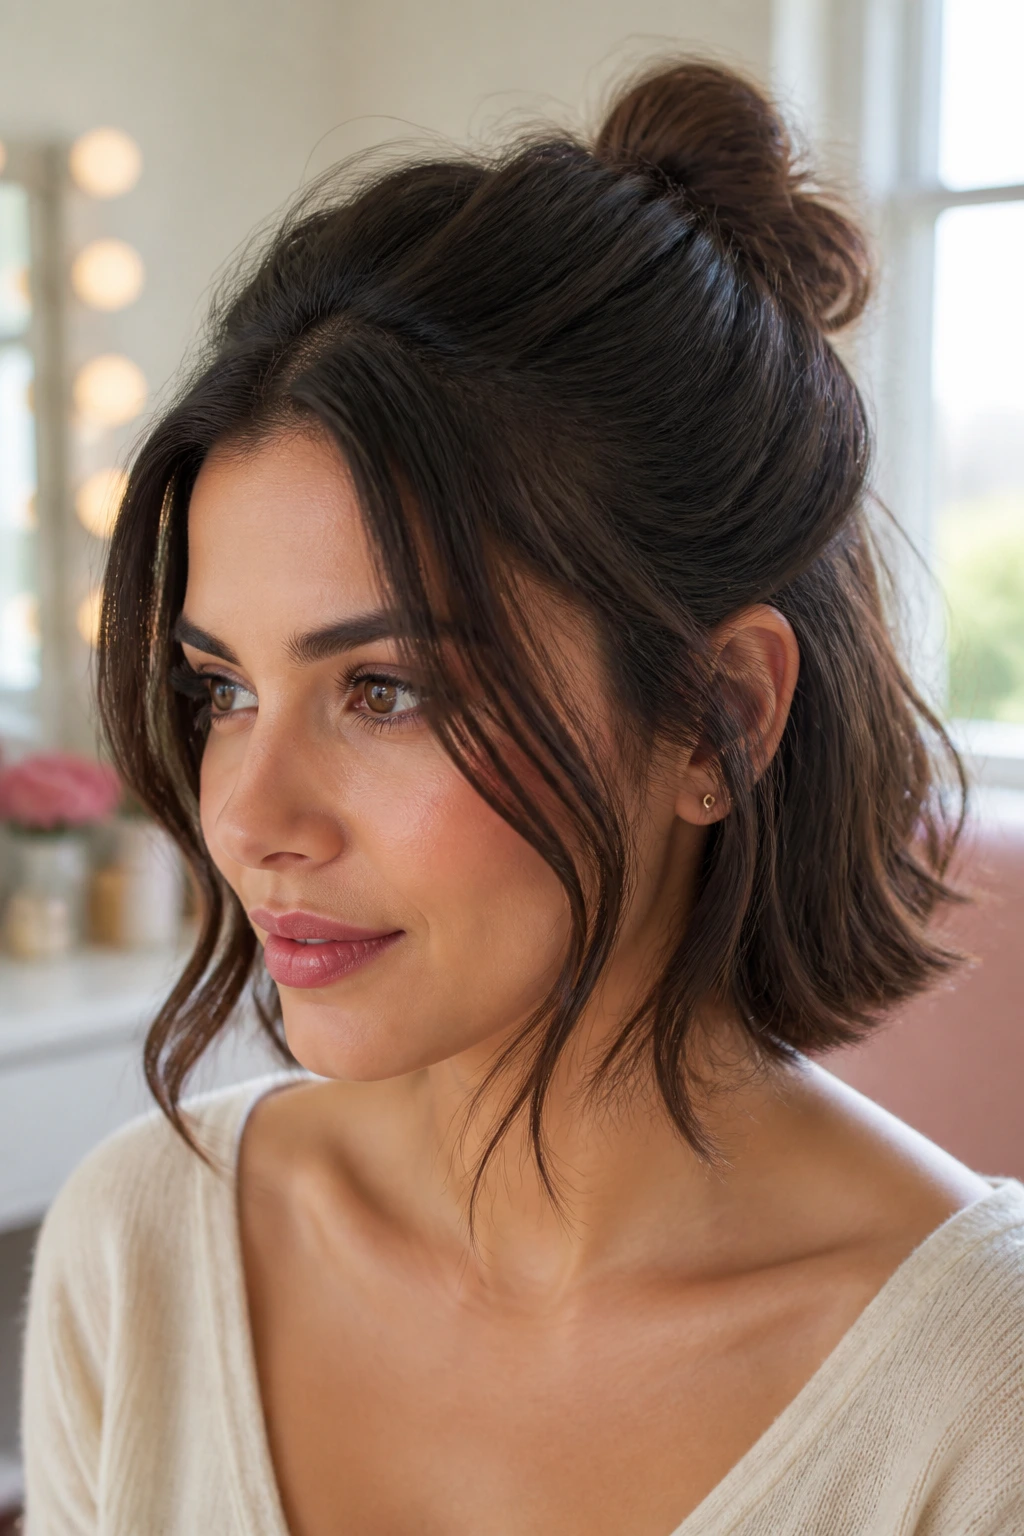
10. The Tucked-In French Twist Half Bun
This one sits somewhere between a bun and a twist, which is why I like it for short hair that needs a cleaner finish. You bring the top section back, fold the ends inward, and tuck them under rather than wrapping them around and around. The shape is slimmer, more upright, and less likely to wobble.
It’s a good choice for oval faces when you want lift without a lot of width. The vertical line of the tucked twist draws the eye up, but because the style stays narrow, it doesn’t make the face feel stretched. That’s the part a lot of people get wrong with short-hair updos. They add height, but forget the shape needs restraint too.
Use 4 to 6 bobby pins, depending on how layered the cut is. Pin vertically along the seam of the twist and then one pin horizontally at the base if the ends are stubborn. If the hair is freshly washed, add texture spray before you start. Clean hair makes this style slippery.
The finished look is tidy without looking severe. That’s a harder balance than it sounds.
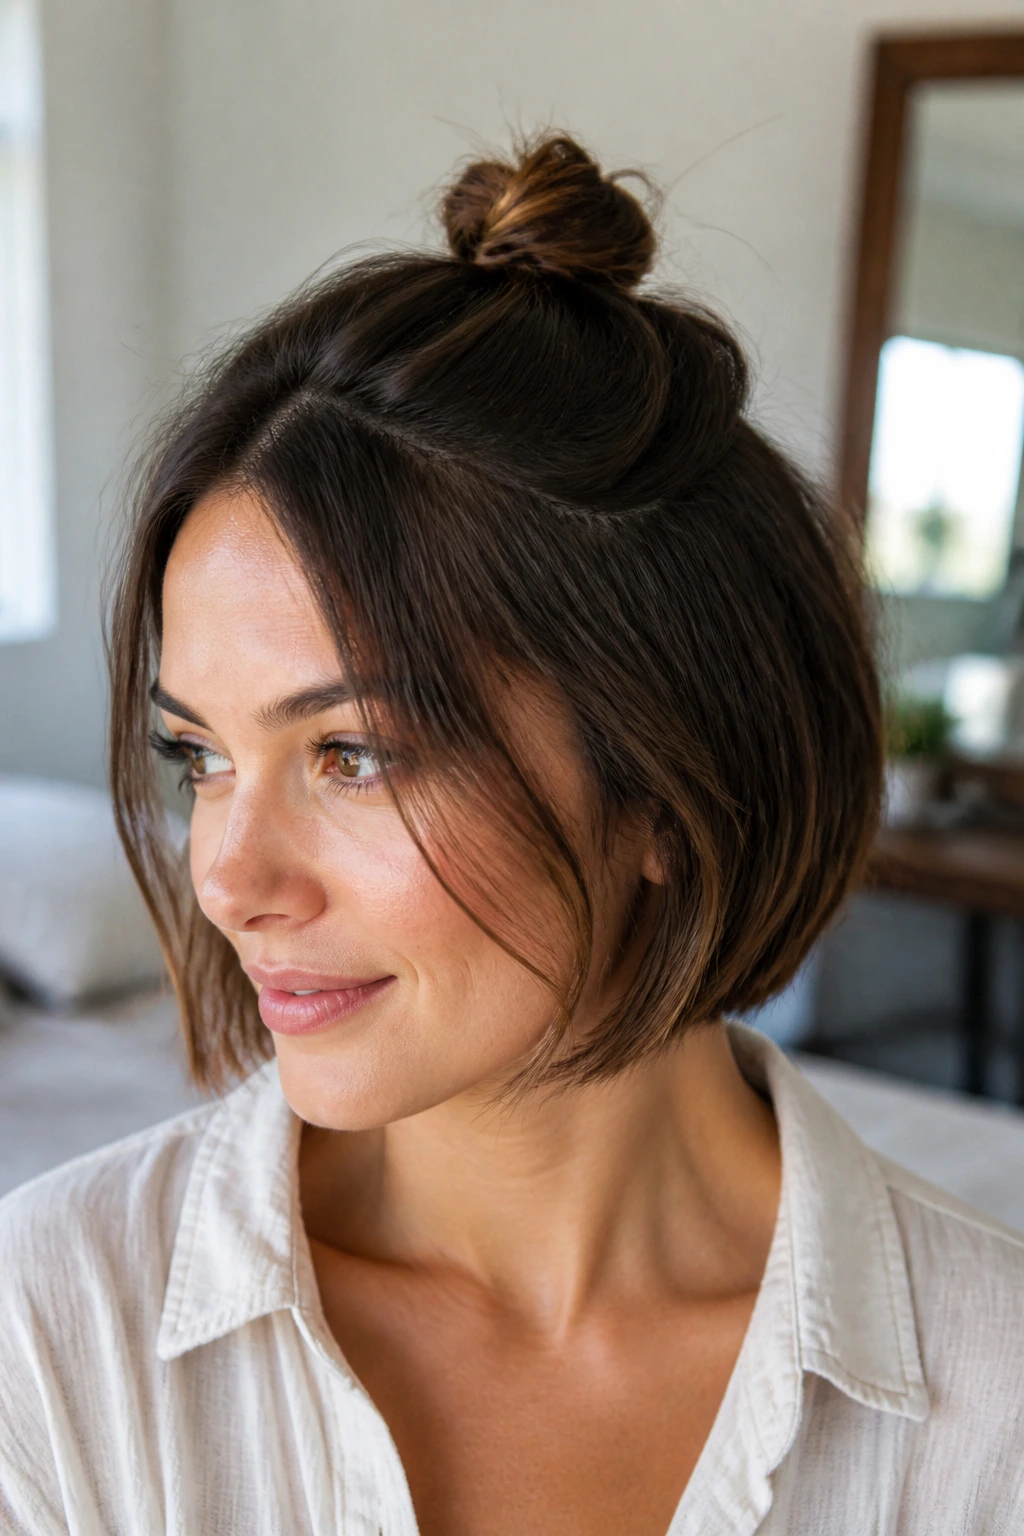
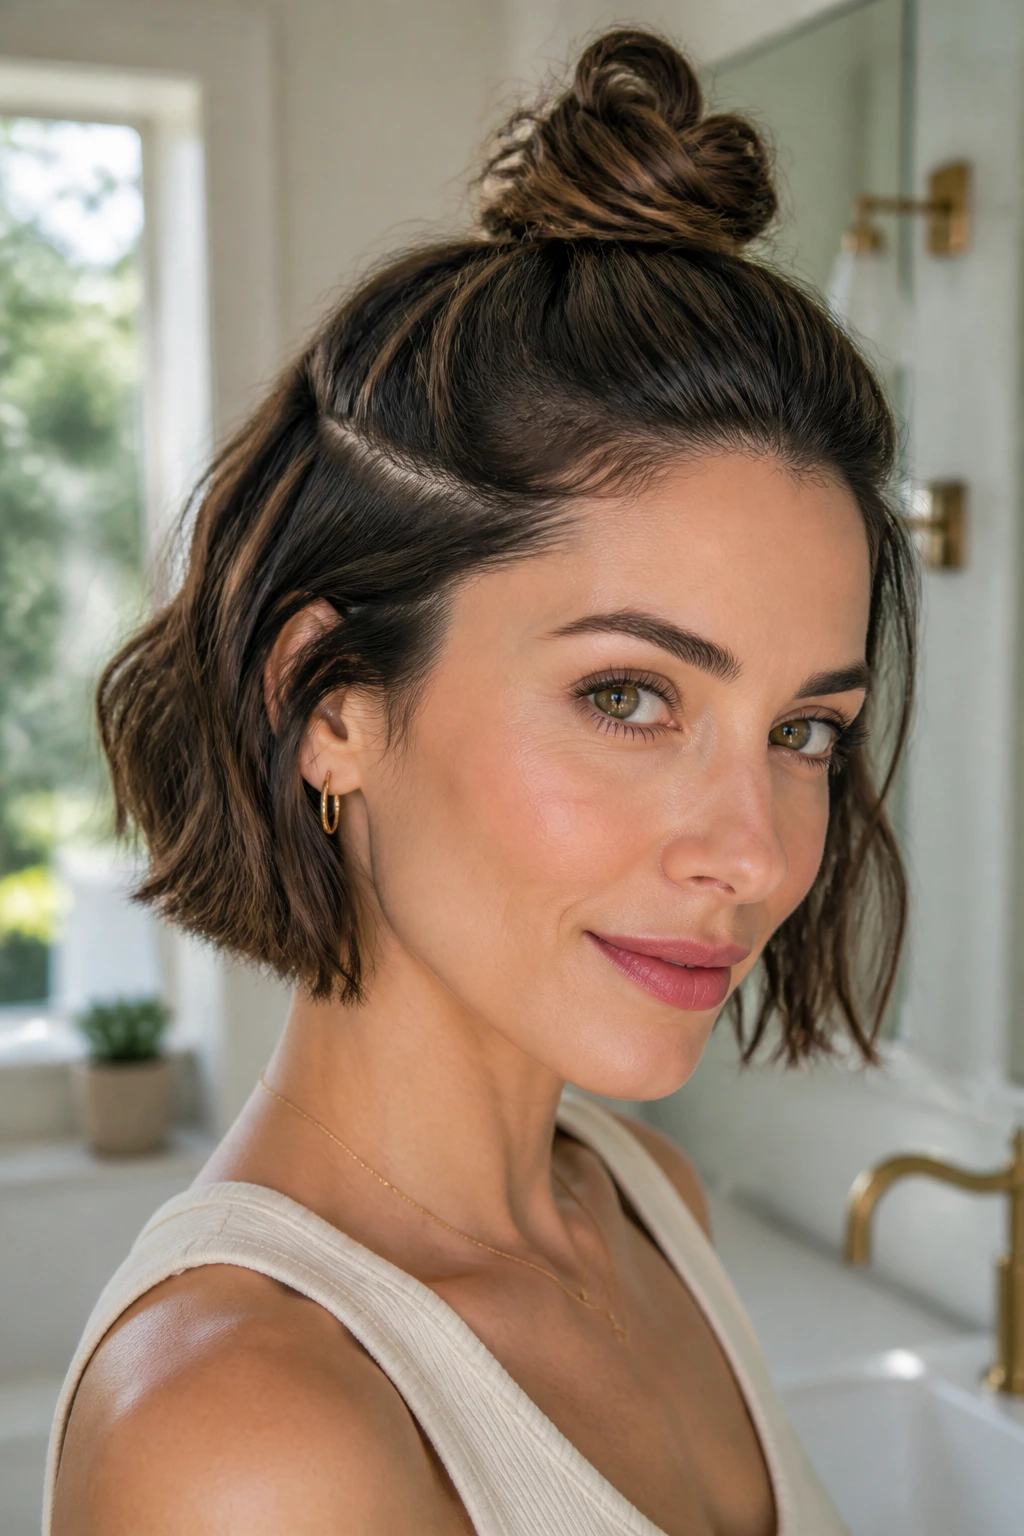
11. The Teased Crown Knot
Fine short hair needs lift at the root more than it needs more hair. That’s why a teased crown knot can look better than a carefully smoothed one. A little backcombing under the top section gives the bun something to sit on, and the extra height keeps the style from collapsing flat against the head.
Tease only the underside of the top section, not the whole surface. Smooth the top layer back over the teased area with a brush or your fingers, then gather the ponytail and twist it into a small bun. The result should look full at the crown, not rough all the way through. There’s a difference, and it’s not subtle.
For oval faces, this kind of root lift works well if the bun itself stays modest. The height at the crown adds structure, but too much volume can stretch the face. A walnut-sized knot is usually enough. If you’re staring at the mirror thinking, “Maybe a little more,” that’s usually your cue to stop.
Dry shampoo helps here, especially at the roots. It gives the hair tooth and keeps the teasing from slipping flat ten minutes later.
12. The Scarf-Wrapped Mini Bun
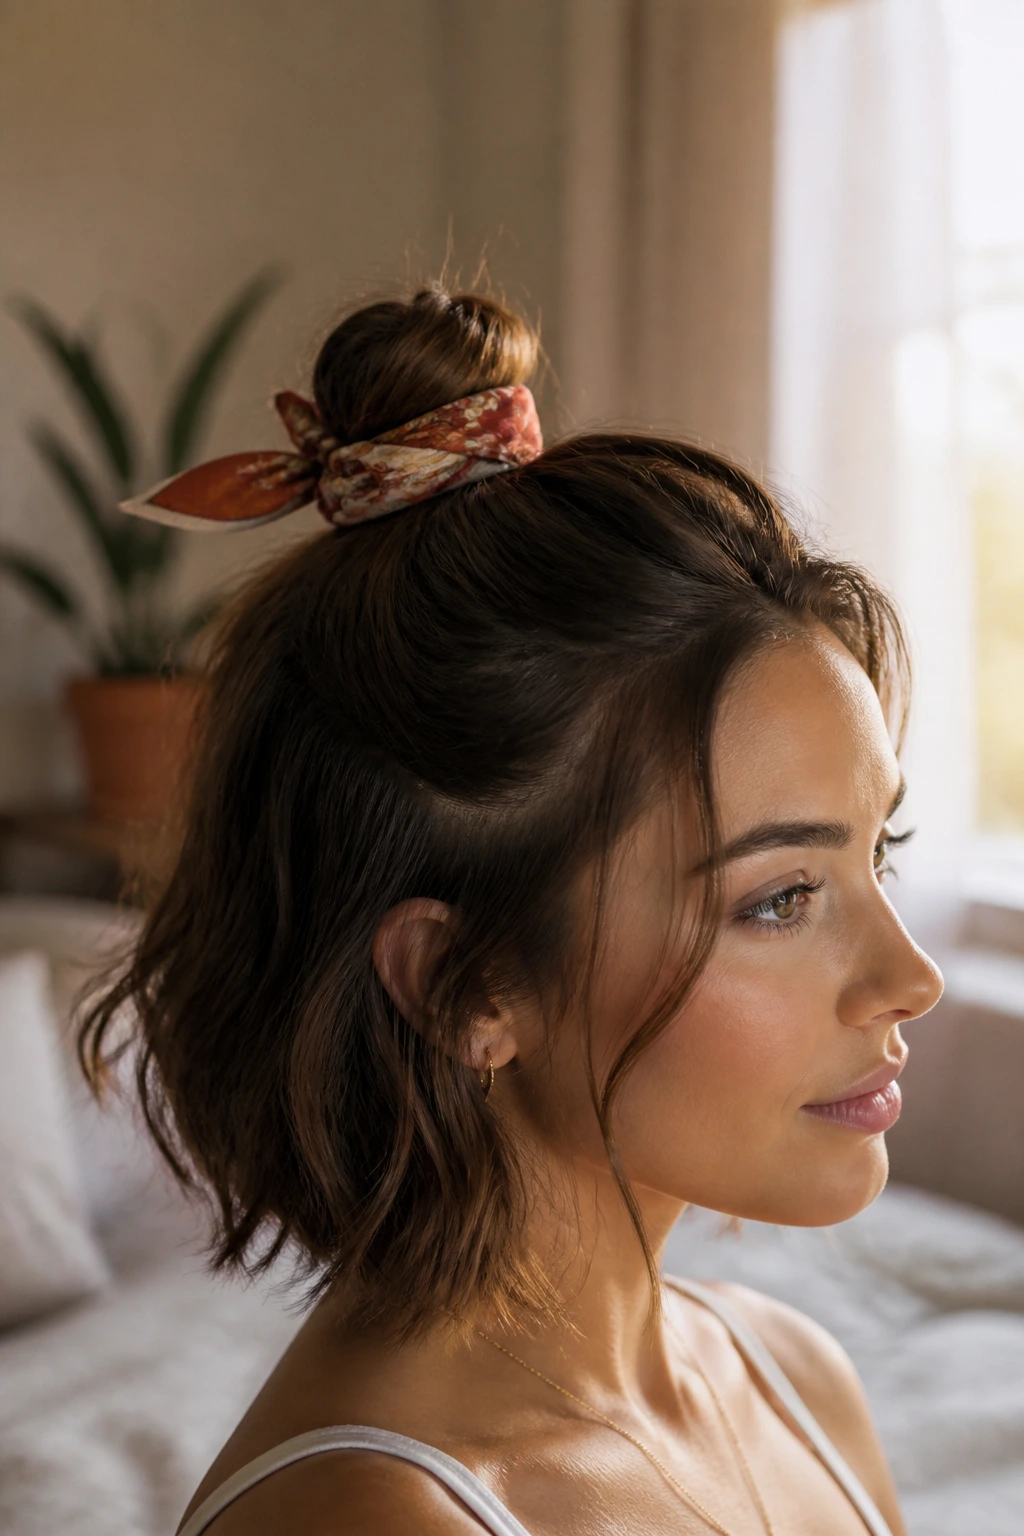
A scarf does two jobs at once: it hides short ends and gives the bun a little color. That’s why I reach for this version on days when the hair isn’t cooperating, or when I want a plain half bun to feel finished without adding more pins.
Use a narrow scarf, ideally around 1 inch wide once folded. Tie the half-up section first, then wrap the scarf around the base of the bun and knot it off to one side. If the hair is short enough that the tail won’t wrap cleanly, let the scarf become the visual finish instead of trying to force more hair into the shape.
This is especially good on oval faces because the scarf breaks up the vertical line of the style. It adds a little width near the crown and a touch of softness near the neck. The bun itself can stay tiny. It doesn’t need to be big when the accessory is doing some of the visual work.
Silk slides more than cotton, but silk looks smoother. Cotton grips better, which is probably the more honest choice if your hair is fine or freshly washed.
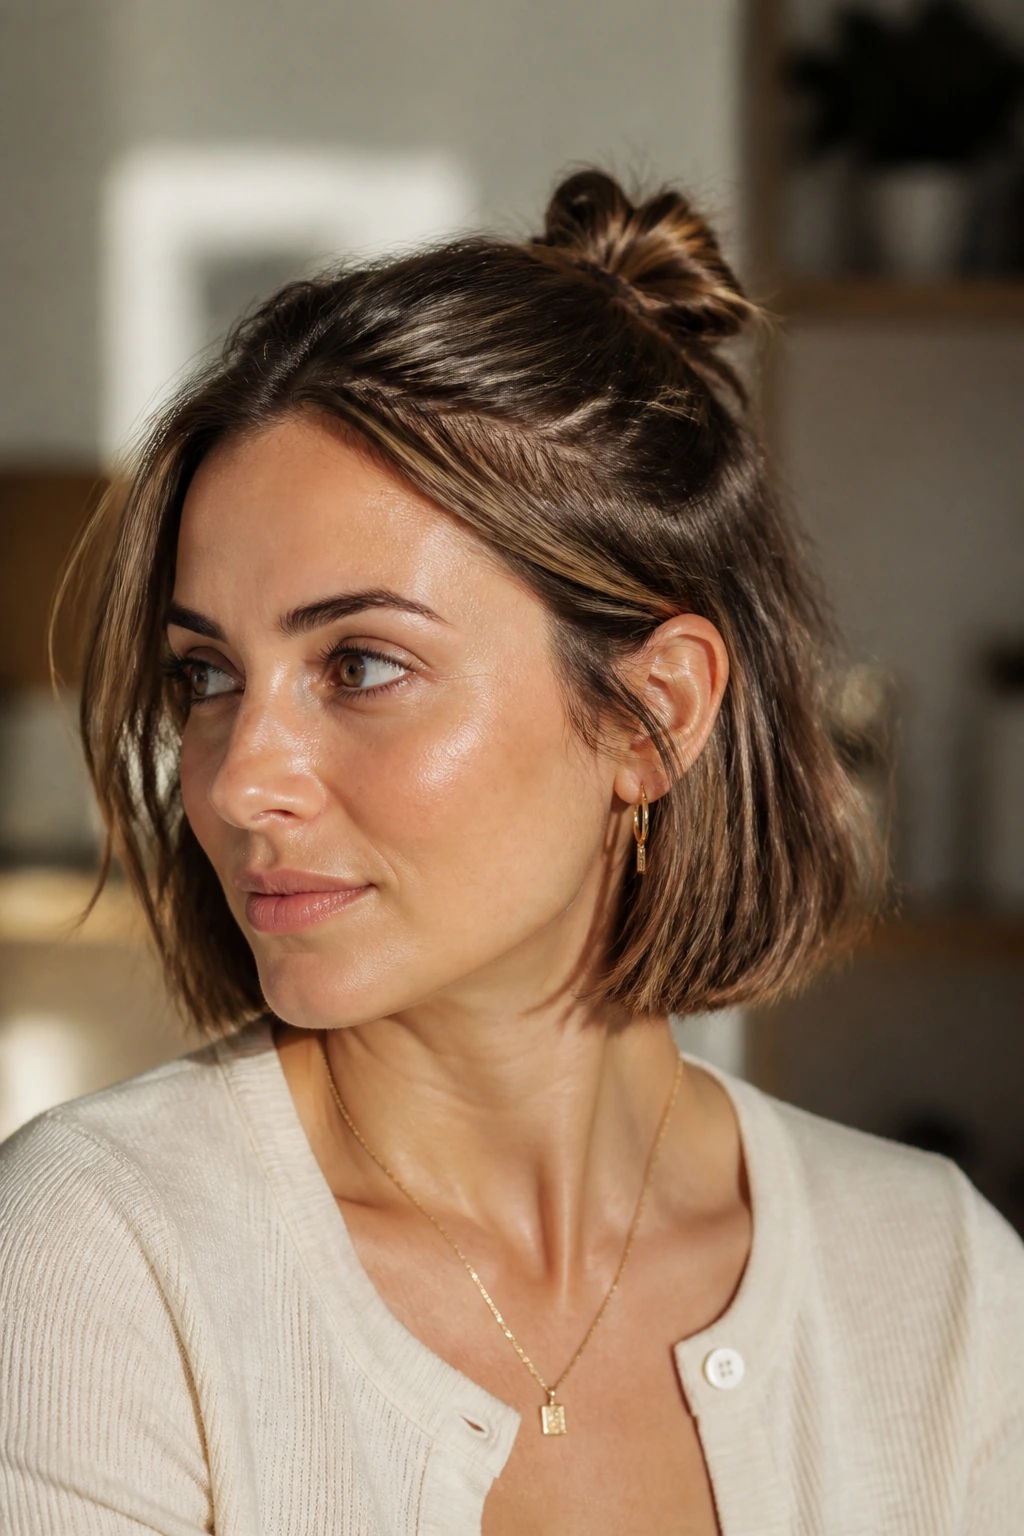
13. The Face-Frame Half Bun
What if the bun is fine, but the face needs softness? That’s where this version comes in. The bun itself stays small and tidy, but the front pieces are left longer and shaped around the cheekbones instead of being yanked back into the knot.
This is one of the best half-up buns for oval faces because it keeps the face open without making the proportions too stark. Oval faces can wear almost any front shape, but straight back-pulled hair can start to feel a little severe if the rest of the style is tight. A few curved pieces at the front break that up.
I like to leave the shortest face-framing layers alone and then bend the longer pieces with a flat iron or a 1-inch curling iron. Just one pass. Not a full curl. You want the hair to skim the jawline and move a little when you turn your head.
The bun itself should sit slightly back from the hairline, not at the very top of the forehead. That keeps the softness where it belongs. If the front is doing its job, the bun can stay quiet.
14. The Rope-Twist Half Bun
Two-strand rope twists are my favorite when short layers refuse to behave. They hold better than a loose braid in some hair types, and they tighten as you twist, which makes them handy on slippery textures. The shape is a little more polished than a messy knot, but less formal than a tucked twist.
Split the top section into two equal parts, twist each piece away from the face, then twist those two ropes around each other before coiling the tail into a bun. The rope twist naturally pulls the hair together, so it handles shorter ends better than a flat three-strand braid might. That matters if your layers are blunt at the front and choppy at the back.
Oval faces can wear this style easily because the ropes add visual detail without building a giant silhouette. The bun stays compact, but the twisted texture gives it enough presence that the style doesn’t vanish. It’s a nice middle ground.
If you have thick hair, keep the twist loose at the start and tighter at the end. If your hair is fine, prep with texture spray first so the ropes don’t unravel while you’re pinning.
15. The Pin-Cushion Spiky Bun
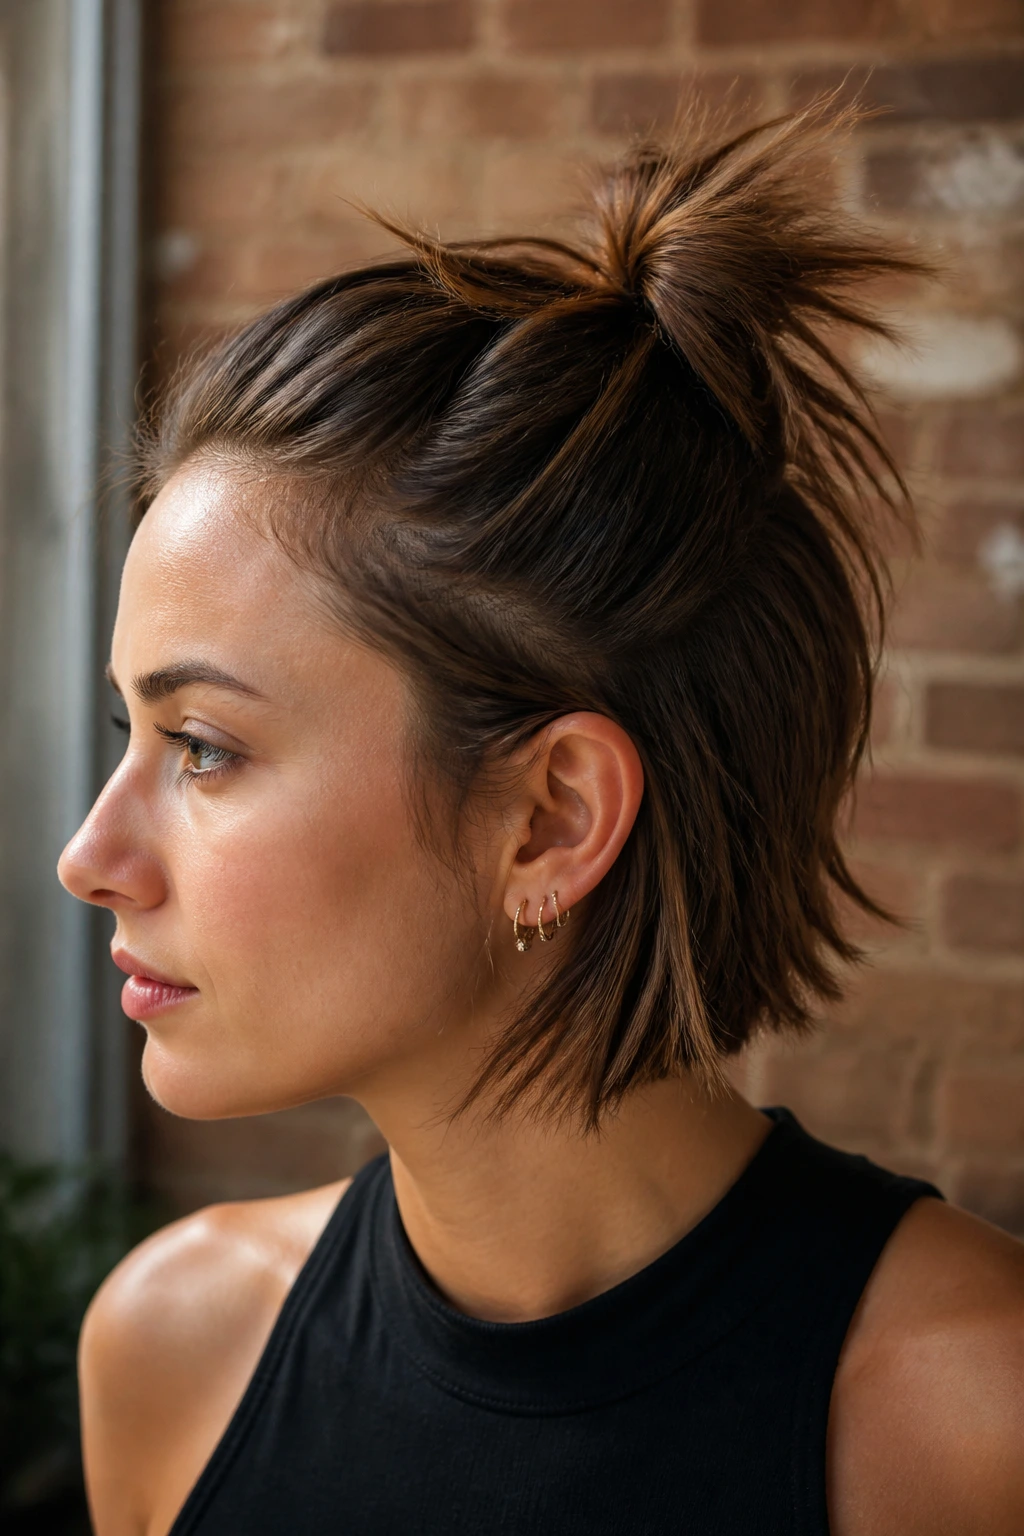
If you like a little edge, let the ends stick out on purpose. That’s the whole idea here. The bun becomes a small, textured spike of a shape instead of a smooth coil, and on short hair that can be the difference between a style that looks deliberate and one that looks overworked.
This works especially well on choppy cuts and pixies that have grown out into awkward-but-interesting territory. Gather the top half, twist lightly, and pin it without trying to bury every last end. A few tips should stick out. A few should bend. The unevenness is the point. It gives the bun a jagged outline that reads modern rather than sweet.
Oval faces handle this shape well because the spiky texture adds width at the crown without dragging the style down. It can balance a longish forehead or a narrow chin line, and it looks especially good when the rest of the hair is kept fairly close to the head.
A tiny bit of texturizing powder at the roots helps the whole thing stay a little gritty. Too much, and it turns dusty. Use less than you think.
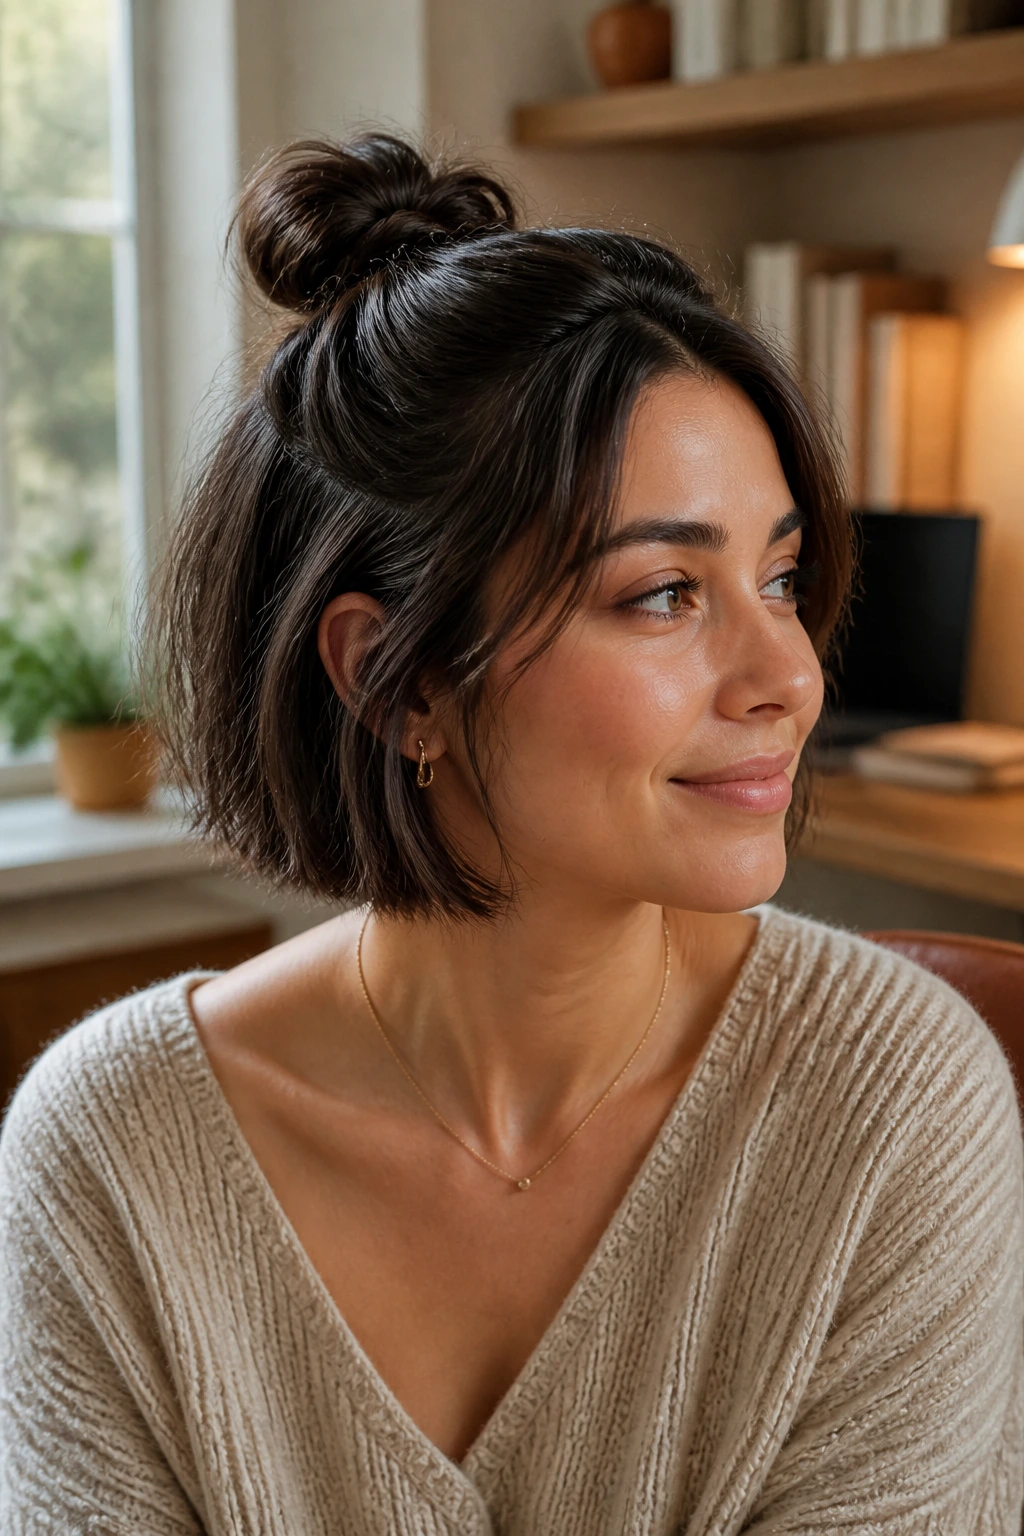
16. The Low Nest Bun
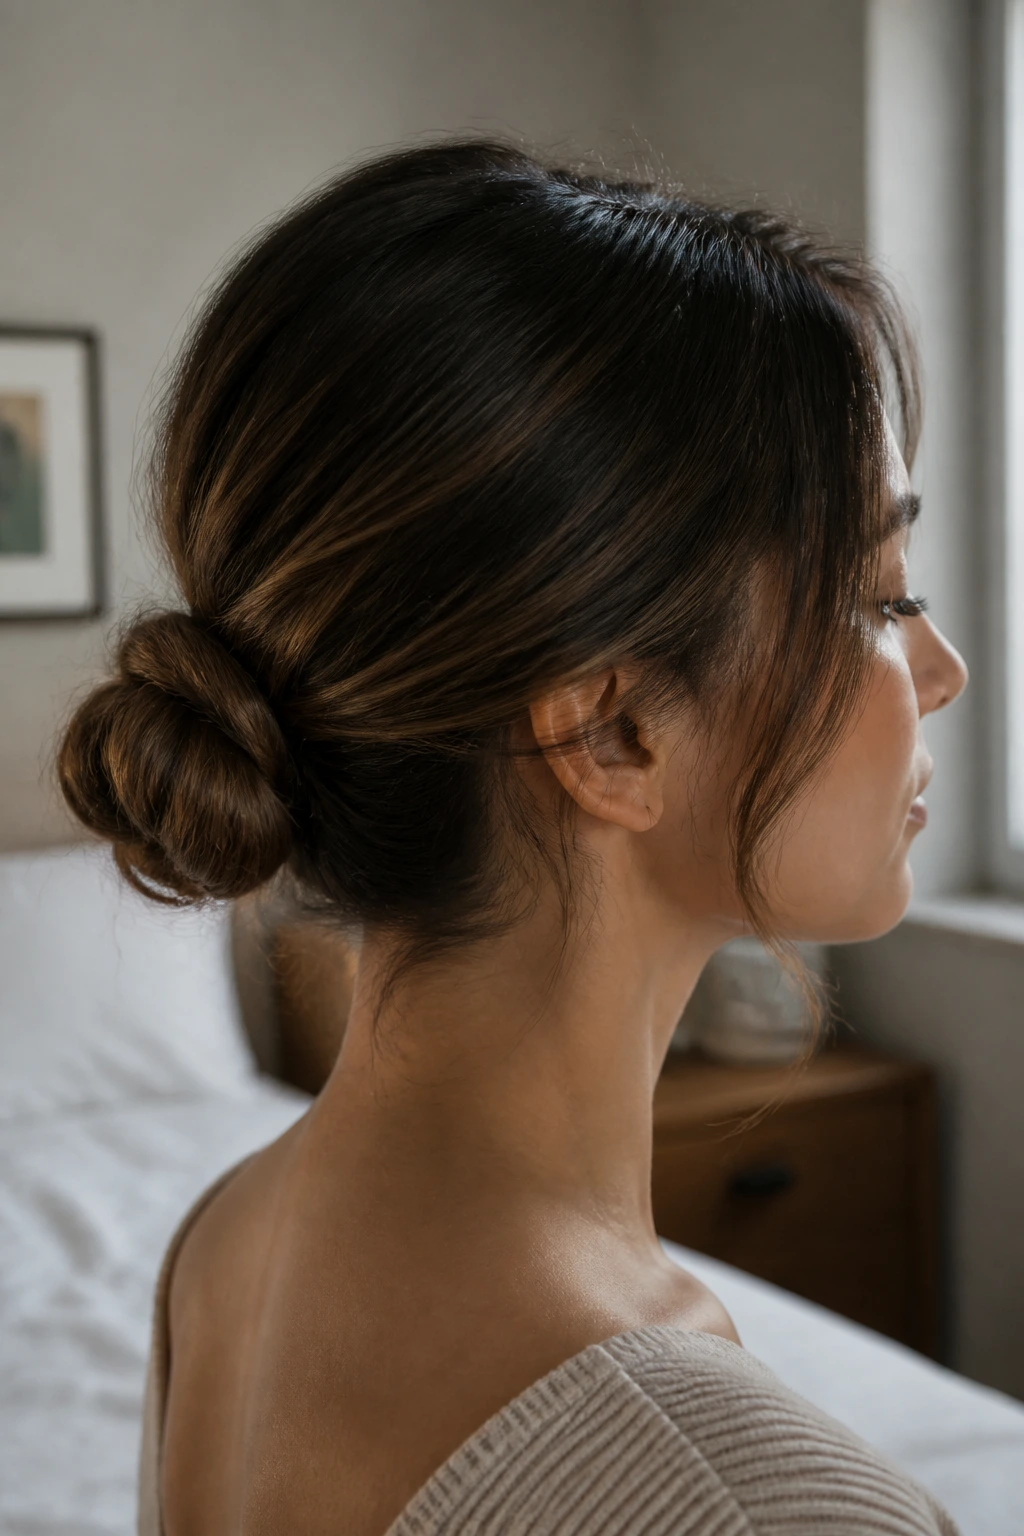
Not every half-up bun should fight for crown height. Some of the nicest ones sit a little lower, almost like a nest tucked into the back of the head. This is the version I’d choose if the haircut is short, blunt, or stubbornly flat at the top.
A lower bun is easier to anchor because it works with gravity instead of against it. You still pull the top half back, but you place the knot closer to the upper back of the head rather than right at the crown. That makes the style feel calmer and a bit more modern. It also survives wind better, which is not nothing.
On oval faces, a low nest bun is useful when you want to avoid extra vertical length. The style keeps the face open without stretching the top line. If your face already has a lot of height visually — maybe from a tall forehead or a long neck — this placement is often the cleaner choice.
I like this one with a slightly bent part and a few loose pieces near the ears. It softens the shift from sleek front to tiny bun in the back. Very small detail. Big payoff.
17. The Bow-Back Bun
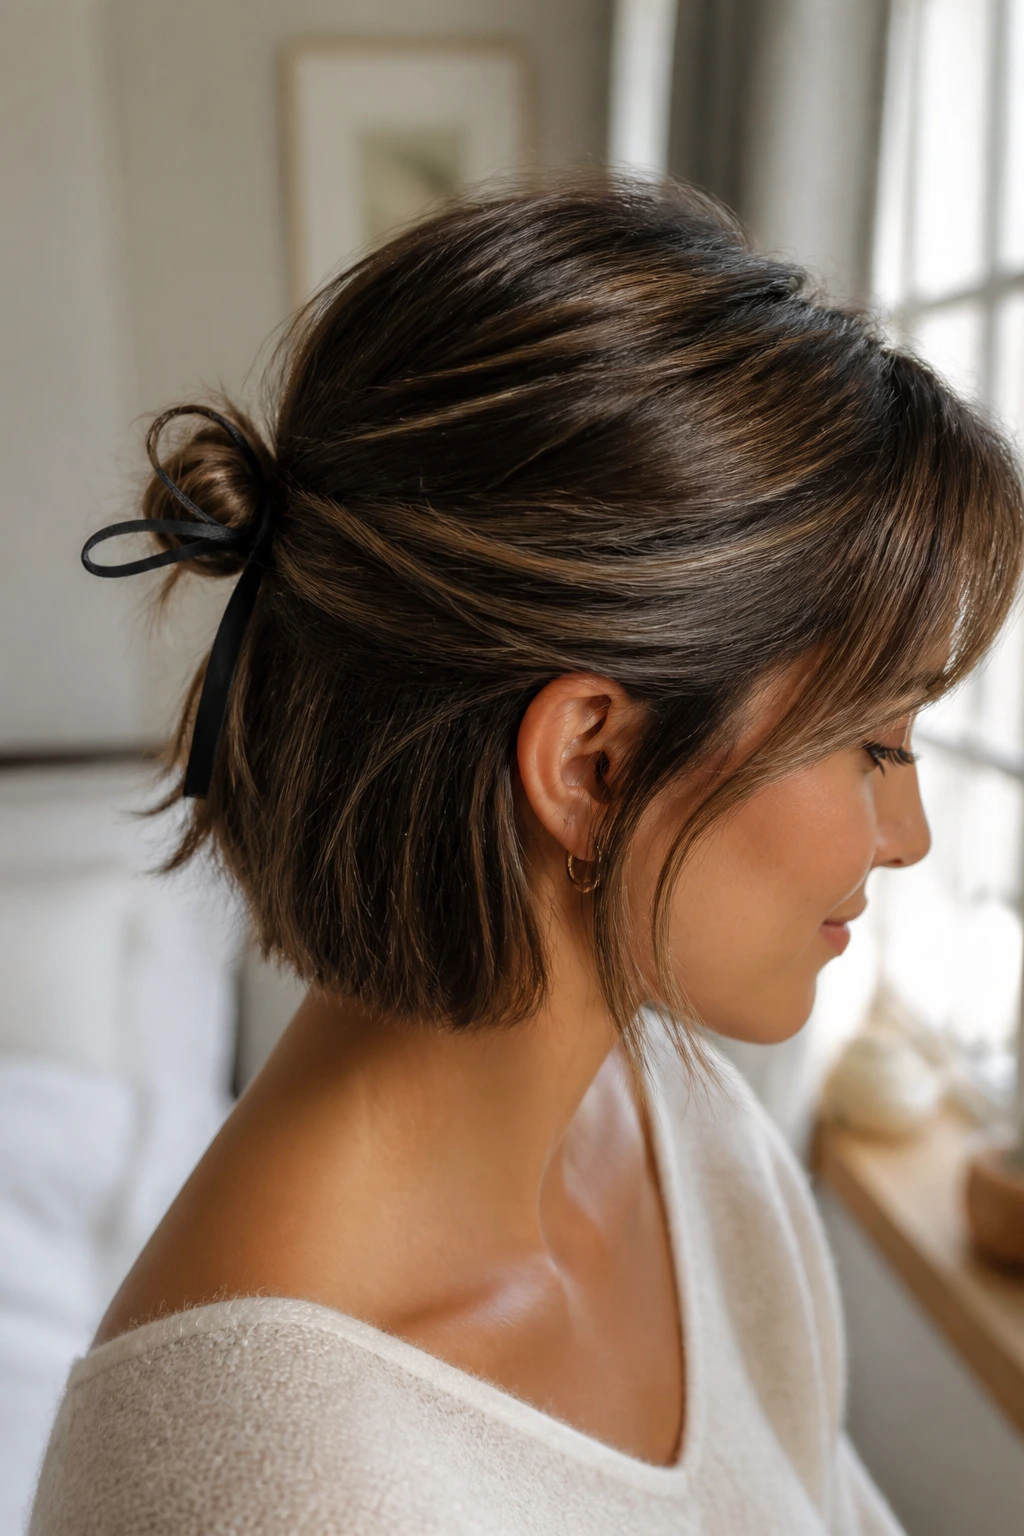
This is the one I reach for when I want the hair to look styled even if the length is barely cooperating. A small half bun wrapped with a narrow ribbon or tied so it suggests a bow gives the back of the style a focal point. It’s a clever fix for short hair that won’t make a substantial knot.
If you’re using a ribbon, keep it narrow and matte so it doesn’t slide all over the place. Wrap it around the base after the bun is pinned, then let the tails hang or tuck one tail under the knot. If you’re shaping the hair itself into a bow, keep the loops tiny. Big loops collapse fast on short hair and look theatrical in the wrong way.
Oval faces can carry this well because the bow pulls attention toward the center of the head, not the width of the face. It’s sweet, but not sugary if the rest of the hair stays soft and a little undone. That balance matters.
I’d skip this on hair that’s freshly layered at the ends unless you’re willing to pin the short pieces under the base. Otherwise the back becomes a little messy in a way that’s hard to control.
18. The Wet-Look Mini Knot
Can short hair handle a gelled half bun without looking helmeted? Yes, if you keep the bun small and slick only the sides and roots. The trick is to separate the polished front from the textured bun, instead of trying to make the whole head glossy from end to end.
Start with a pea- to nickel-sized amount of gel or smoothing cream, depending on density. Comb the top section back, keeping the part clean, and gather it into a tight mini knot. Leave the bun itself a touch looser so it doesn’t look plastic. The front should be smooth; the bun should still look like hair.
This style is good on oval faces because it clears the face completely and shows the bone structure without adding width. The wet look can feel sharp on its own, so the small bun keeps it from going too severe. It’s a neat trick for evenings or warmer weather, though I’m careful with the amount of gel because flaking is ugly and not worth pretending otherwise.
If your hair is curly, use a curl cream rather than a strong gel unless you want a firmer finish. The shape should still feel soft at the bun.
19. The Micro-Braid Accent Bun
A tiny braid can change the whole mood of a half-up bun. It adds one narrow line of texture, and on short hair that small detail makes the style look more layered and less like a rushed ponytail. I like this on blunt bobs that need a little movement.
Braid a small section from one side of the front, or braid both sides if you want a more symmetrical finish. Then gather the braid into the half-up section and form the bun as usual. The braid doesn’t need to be prominent. It just needs to be there, because it helps the bun hold and gives the eye something to follow.
Oval faces do well with this because the braid draws attention across the face rather than straight up. It works even better if you leave one or two shorter pieces around the temples. The contrast between the braid and the softness keeps the look from getting too tidy.
If your hair is very short near the front, braid only the longest section and let the shorter ends stay out. Forced braids always look forced. No need for that.
20. The Double-Loop Half Bun
A double loop is faster than a full knot and often stays neater, which is why I trust it on short hair. You pull the half-up section into a ponytail, then only partially pull the ends through twice, creating two soft loops instead of one wrapped coil. The shape is compact, smooth, and less likely to unravel.
This style works especially well on thicker hair because the loops compress the volume without making the bun enormous. On fine hair, it’s good too, but the loops need to stay small or they’ll look limp. The sweet spot is a shape that reads rounded from the front and slightly sculpted from the side.
Oval faces get a nice result here because the loops add width at the crown without pushing the face longer. The style feels balanced and calm. If you want something a little more polished than a messy knot but less strict than a tucked twist, this is the one.
Pin the loops from underneath so the bobby pins disappear. Visible pins can work for an edgy look, but this style is better when the shape does the talking.
21. The Curtain-Piece Puff
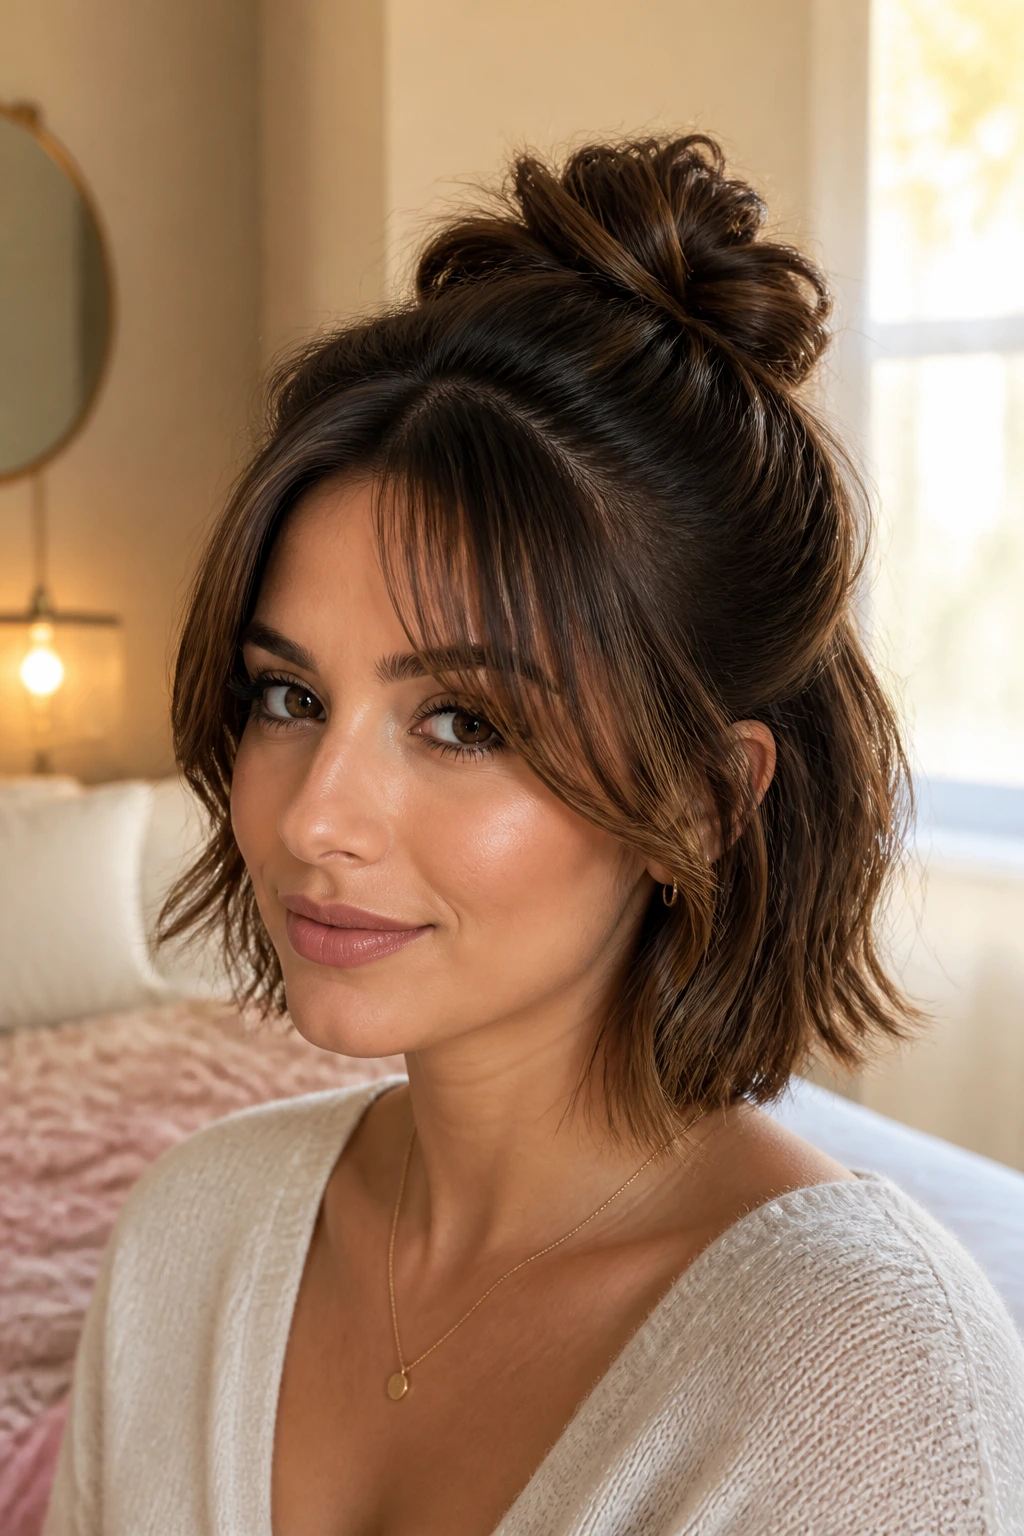
If you wear curtain bangs, don’t fight them. Let them fall open while the bun sits back, and the whole style becomes softer and easier to wear on short hair. The puff at the crown gives the top section lift, while the bangs frame the face and keep the look from going too severe.
This one flatters oval faces because curtain pieces shorten the visual length of the face just enough. They break up the forehead area and keep the bun from being the only thing the eye sees. The result is balanced, not busy.
A round brush or flat iron can give the curtain pieces a slight bend away from the cheeks. Nothing dramatic. You just want the front to curve, not curl. Then gather the rest of the top section into a small puff or knot and pin it just behind the crown.
If the bangs are very short, leave them alone and let the bun stay secondary. The face-framing pieces are the point here, not a giant knot that competes with them.
22. The Almost-Undone Weekend Bun
This is the half-up bun for the days when you want your hair to look lived-in instead of staged. It works beautifully on second-day texture, especially if the ends have a little bend from sleeping on them. Gather the top section with your fingers, twist once, pin it loosely, and stop before you start polishing the life out of it.
Short hair loves this kind of restraint. If you keep tugging and smoothing, the style gets smaller, then looser, then somehow worse. Leave a few pieces out around the ears, let the bun stay tiny, and accept that the appeal is in the ease. A perfect circle would ruin it.
Oval faces suit this version because the softness keeps the style from looking severe. The undone texture adds width where the face can handle it, while the small bun keeps some lift near the crown. It’s casual, but not sloppy if the base is secure.
I like this one with a light mist of flexible spray and no more than four pins. If it needs more than that, the shape is probably too ambitious for the length.
Why Half-Up Buns Make Sense on Short Hair
Short hair changes the rules. A full top knot wants mass, and short lengths rarely have enough of it to build a stable one without a lot of tricks. A half-up bun solves that problem by asking less of the hair. You’re only lifting the top section, so the weight stays manageable, and the rest of the cut still does its job around the neck and jawline.
That’s the main reason these styles work so well on a bob or lob. They keep the style anchored close to the head. When the bun sits just above the crown ridge, it gives shape without turning into a wobbling tower. If you’ve ever spent twenty minutes making a bun that looked fine in the mirror and collapsed in the car, you already know why this matters.
Oval faces are easy to flatter, but they’re also easy to overcorrect. Too much height can stretch the face visually. Too much width can make the proportions feel heavy. The better half-up buns play right in the middle: crown lift, soft temples, and a bun size that matches the actual amount of hair you have. That’s the part people often skip. They chase size instead of shape.
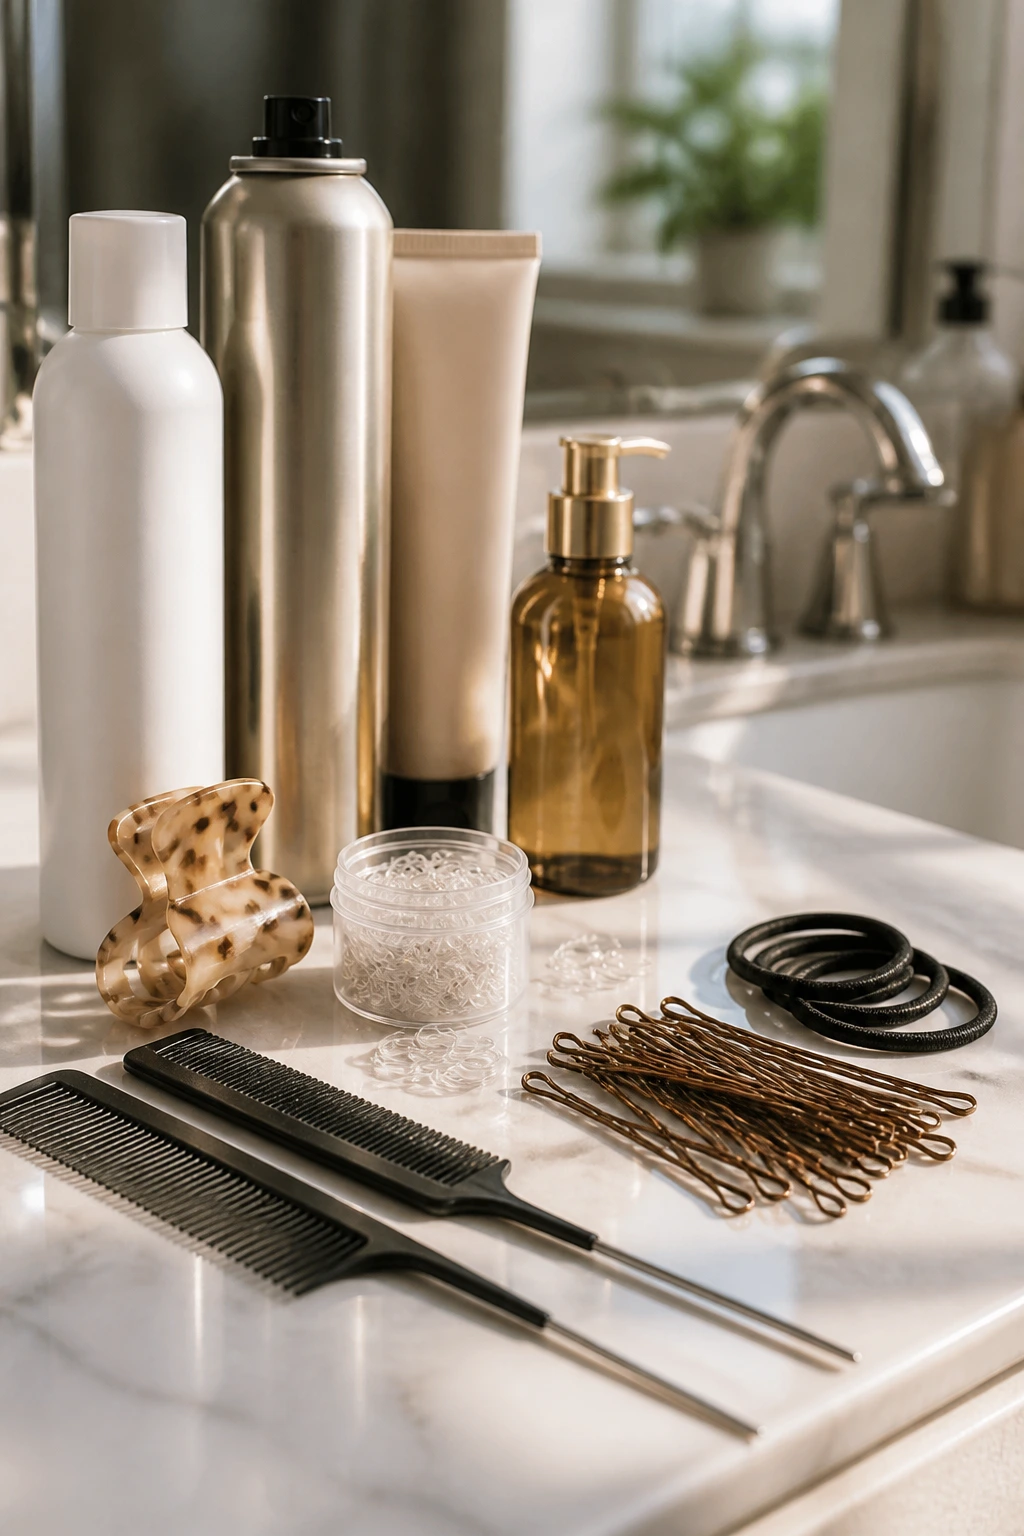
Essential Tools for a Clean Half-Bun Setup
-
Rat-tail comb: Best for clean parts and neat sectioning, especially if you want center or side part precision.
-
Mini clear elastics: Useful for tiny ponytails, double-loop styles, and braids on short hair that won’t hold a big tie.
-
Bobby pins in two sizes: Short pins grab the base; longer pins hold heavier twists or tucked ends. I keep both.
-
Small claw clip: Handy for loop buns and quick versions that need extra support without more pinning.
-
Dry shampoo or texture spray: Gives clean hair enough grit to stay put. This matters more than people admit.
-
Flexible-hold hairspray: Helps the surface stay smooth without locking the style into a crunchy shell.
-
Smoothing cream or light serum: Best for sleek looks and for taming the ends after pinning.
-
1-inch curling iron or flat iron: Optional, but useful for bending face-framing pieces or waking up flat ends.
-
Hand mirror: Not glamorous, but it helps with the back placement, which is where these styles usually succeed or fail.
Smart Product and Length Tips for Short Hair and Oval Faces
Short hair needs grip before it needs shine. If the roots are too clean, too soft, or too slippery, the bun will slide. I usually reach for dry shampoo or a light texturizing spray before I even think about sectioning. It gives the hair a slightly rough surface so pins can catch instead of skating across the strands.
Hair length changes the game too. Chin-length bobs usually do best with the smallest versions: loops, twists, mini knots, and tucked buns. Lobs can handle a little more wrap and a little more width. If your layers are very short near the nape, don’t fight them into the bun. Pin them flat under the gathered section and move on. Short pieces that refuse to stay should be treated like decoration, not failure.
Oval faces are forgiving, but the placement still matters. Bun too high and the face can look taller; bun too low and the style loses lift. I like to think in inches here, not vibes: usually one to two inches above the crown ridge is enough for lift, while a lower nest at the back suits faces that already carry plenty of vertical line. Tiny adjustment. Big payoff.
Product choice should follow the hair’s mood. Fine hair likes powder or dry shampoo first, then light pins. Thick hair likes smoothing cream on the ends and stronger elastics at the base. Curly hair usually needs less manipulation and more respect. Straight hair needs more grip. That’s the whole puzzle, really.
How to Wear These Styles With Different Outfits

Presentation: Keep the bun where it can balance the face, not fight it. A compact knot just above the crown reads clean, while a lower nest or side-swept version feels softer. If the bun is tiny, let the front pieces do a little work so the style doesn’t disappear against your head.
Pairings: Small hoops, studs, square necklines, crew neck tees, and turtlenecks are easy matches because they don’t compete with the hair. Oversized earrings can work too, but only when the bun stays small and neat. Glasses also look better with these styles when the temple pieces are left a touch softer.
Scale: Use less hair than you think. On a short bob, the top third is often enough. On a lob, you can take half the hair if the ends still hide cleanly inside the bun. If you have thick hair, the bun can sit larger; if you have fine hair, smaller usually looks better and holds longer.
Occasion: Sleek versions fit workdays and dinners. Braided, scarf-wrapped, or bubble versions feel more playful. The messy puff and almost-undone bun are strongest on casual days, when the goal is movement instead of polish.
Additional Tips and Texture Boosters
Texture Enhancement: Dry shampoo at the roots gives the pins something to grab, but use it before the hair gets too slick with serum. If you need a little extra hold, mist the top section, wait thirty seconds, then work it through with your fingertips.
Customization: A single braid on one side, a small scarf, or a matte barrette can change the mood of the whole style. You do not need to add three accessories. One well-placed piece usually says more than a pile of extras.
Serving Suggestions: Leave two loose tendrils at the temples for softness, or bend the front pieces with a flat iron so they curve toward the cheekbones. That small move makes almost every half-up bun on short hair look more finished.
Make-It-Yours: Fine hair likes smaller buns and stronger root grip. Thick hair likes tighter elastics and a smaller wrapped section. Curly hair usually looks best when you disturb the curl pattern as little as possible. Straight hair benefits from a quick wave or bend before styling, because the bun holds shape better.
Make-Ahead, Longevity, and Refreshing
Half-up buns on short hair usually look best the same day they’re made, but some of them hold surprisingly well through an entire workday. Sleek versions can stay neat for six to eight hours if the base is pinned properly. Textured versions often hold longer because the rougher finish gives the pins more bite. The tiny buns are usually the least likely to collapse, which is one reason I keep coming back to them.
If you want to prep ahead, set the hair the night before. A rough blow-dry, a little wave, or even sleeping in loose braids can give the front section enough texture for the next day. I would not try to sleep in a finished half-up bun unless it’s very loose and secured with a silk scrunchie. Otherwise you wake up with bends in the wrong places and a crown that looks flat from being pressed against a pillow.
Refreshing is easier than rebuilding. A light mist of water or texture spray at the roots, a quick pinch of the bun, and one or two fresh pins usually fixes the shape. If the front pieces have gone limp, re-bend them with a flat iron for about five seconds per section. That’s usually enough.
For overnight care, clip the bun out, shake the hair loose, and store the style in its parts, not as one rigid shape. A satin pillowcase helps more than people think. It keeps the short pieces from frizzing into little hooks at the back.
Variations and Adaptations to Try
Fine-Hair Lift Kit: Start with dry shampoo at the roots, a tiny tease under the top section, and a compact knot. This version is built to create the illusion of density without asking the hair to hold more volume than it has.
Thick-Hair Anchor Plan: Use a stronger elastic, then cross-pin the bun with longer bobby pins. Thick hair looks best when the bun stays small and the base is locked down hard enough to survive movement.
Curly-First Version: Keep the curl clumps intact, gather only the top third, and use a satin scrunchie instead of a tight elastic. The bun should sit like an accent, not a reset button for the whole curl pattern.
Bang-Friendly Fix: Let curtain bangs, wisps, or a fringe stay loose while the bun sits back a little farther on the head. That keeps the forehead area soft and stops the style from looking overpulled.
Dress-Up Swap: Replace one pin with a slim barrette, a ribbon, or a small claw clip in a metal finish. The hairstyle stays the same, but the finish shifts from everyday to event-ready in one move.
Lazy-Day Shortcut: Twist the top half once, clip it, and leave the ends a little imperfect. The shape is looser, but on short hair that casual edge often looks better than a polished knot with too many pins.
Common Mistakes That Flatten the Shape
The most common mistake is making the bun too big for the hair you actually have. The symptom is obvious: short ends pop out, the base wobbles, and the style starts sinking before you leave the house. The fix is to make the bun smaller and tighter at the base, then use pins to support shape instead of trying to fake more volume.
Another one is pulling too much hair from the front. That makes the face look longer and strips away the softness that half-up buns are supposed to give. Leave a little at the temples or around the cheekbones. Even half an inch changes the balance.
Freshly washed hair is another trap. It feels clean, but it’s often too slippery for short styles. Add dry shampoo, texture spray, or a little root powder first. You want grip, not silk.
Using the wrong pins can sabotage the whole thing. One pin dropped in from the outside often won’t hold. Cross two pins at the base. It’s not fancy, but it works.
And then there’s overworking the finish. Too much teasing, too much spray, too much smoothing. That’s how short hair ends up frizzy and stiff at the same time, which is a terrible combination. Stop while the hair still looks like hair.
Frequently Asked Questions About Half-Up Buns for Short Hair
What length do you need for a half-up bun on short hair?
Chin-length bobs can do mini knots, loops, and twists if the top section has enough reach. Lobs are easier because they give you more tail to work with, but even shorter cuts can manage with clips or very small buns.
Do oval faces look better with high or low half-up buns?
Both can work, but the placement changes the mood. Higher buns add lift and energy, while lower buns keep the face from feeling stretched. If your face already looks long, a slightly lower placement is usually kinder.
How do you keep the style from slipping on fine hair?
Use texture spray or dry shampoo before styling, then cross-pin the base with two bobby pins. A tiny amount of backcombing at the roots can help too, but don’t rough up the surface more than needed.
Can I do these styles on curly or wavy short hair?
Yes, and some of them look better on textured hair than on straight hair. The curly halo knot, messy puff, and almost-undone bun are especially good because they work with the curl pattern instead of fighting it.
What if my bob has lots of layers?
Choose twist, braid, or tucked styles. Layers slide out of plain knots more easily, so you want a shape that traps the shorter pieces under pressure instead of relying on one elastic to do all the work.
Can I wear a half-up bun with bangs?
Absolutely. Curtain bangs, side bangs, and short fringe all work, but they change where the eye lands. Keep the bun a little smaller and let the bangs frame the front instead of competing with it.
How can I make the bun look fuller without extensions?
Pancake a braid, gently tug the loops wider, or use a texturizing spray before you wrap the knot. You can also let a few ends show on purpose. That often makes short hair look fuller than a tightly hidden bun.
Is a claw clip better than bobby pins?
For some hair types, yes. Thick or slippery hair often stays put better with a small claw clip at the base, while fine hair usually does better with pins because the clip can slide around.
The Small Bun That Does the Most
The best half-up buns for short hair and oval faces don’t try to look bigger than they are. They sit where the hair can support them, they leave enough softness around the face, and they use texture instead of brute force. That’s why the tiny versions often end up looking the most intentional.
If one of these styles falls flat on the first try, shrink it a little and move it an inch. That’s usually the fix. Short hair likes honesty, and oval faces reward balance more than drama. Keep the bun compact, keep the base secure, and let the haircut do the rest.
Once you find the version that holds your texture without a fight, it becomes a fast, repeatable move — the kind you can do half-asleep and still walk out the door looking put together.