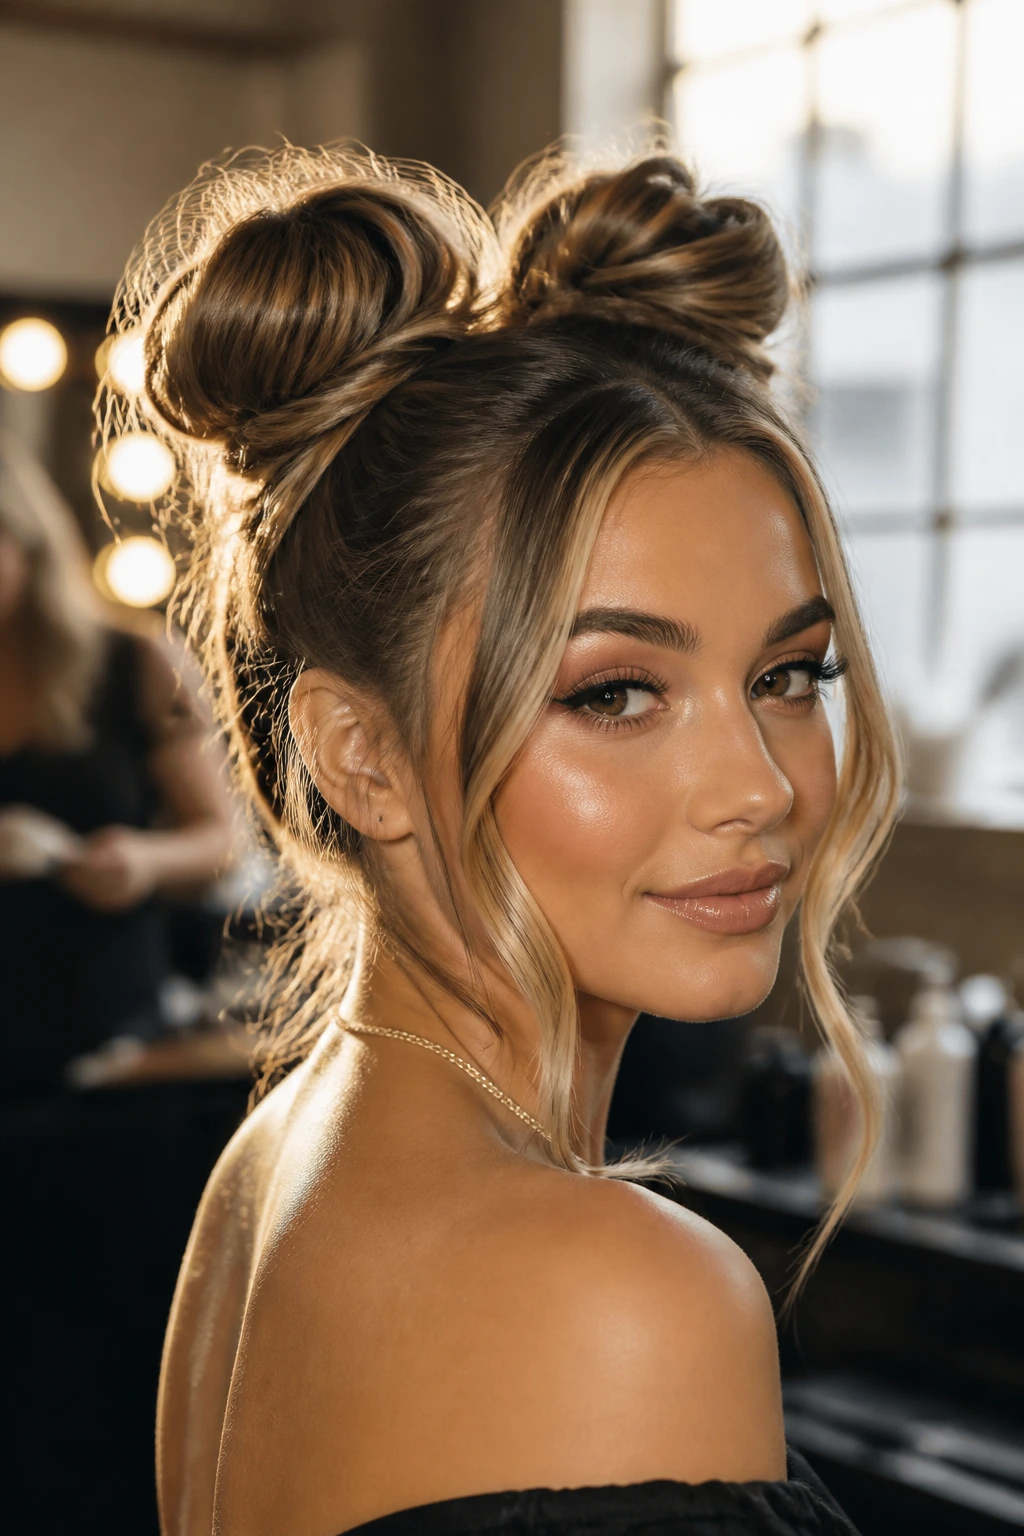
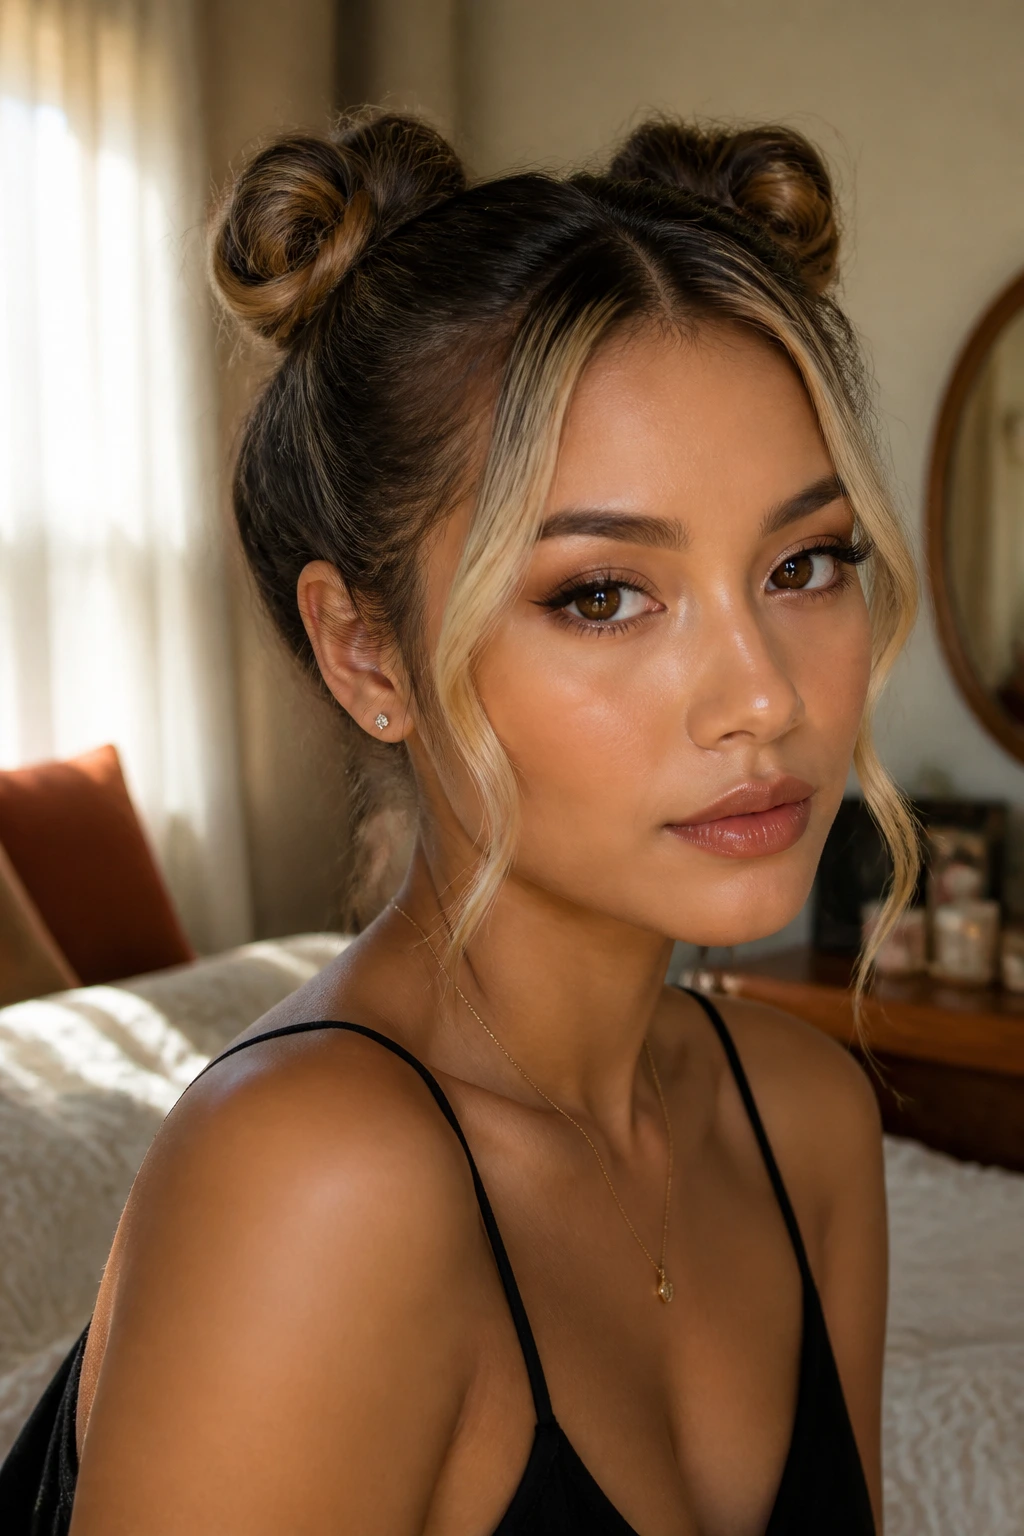
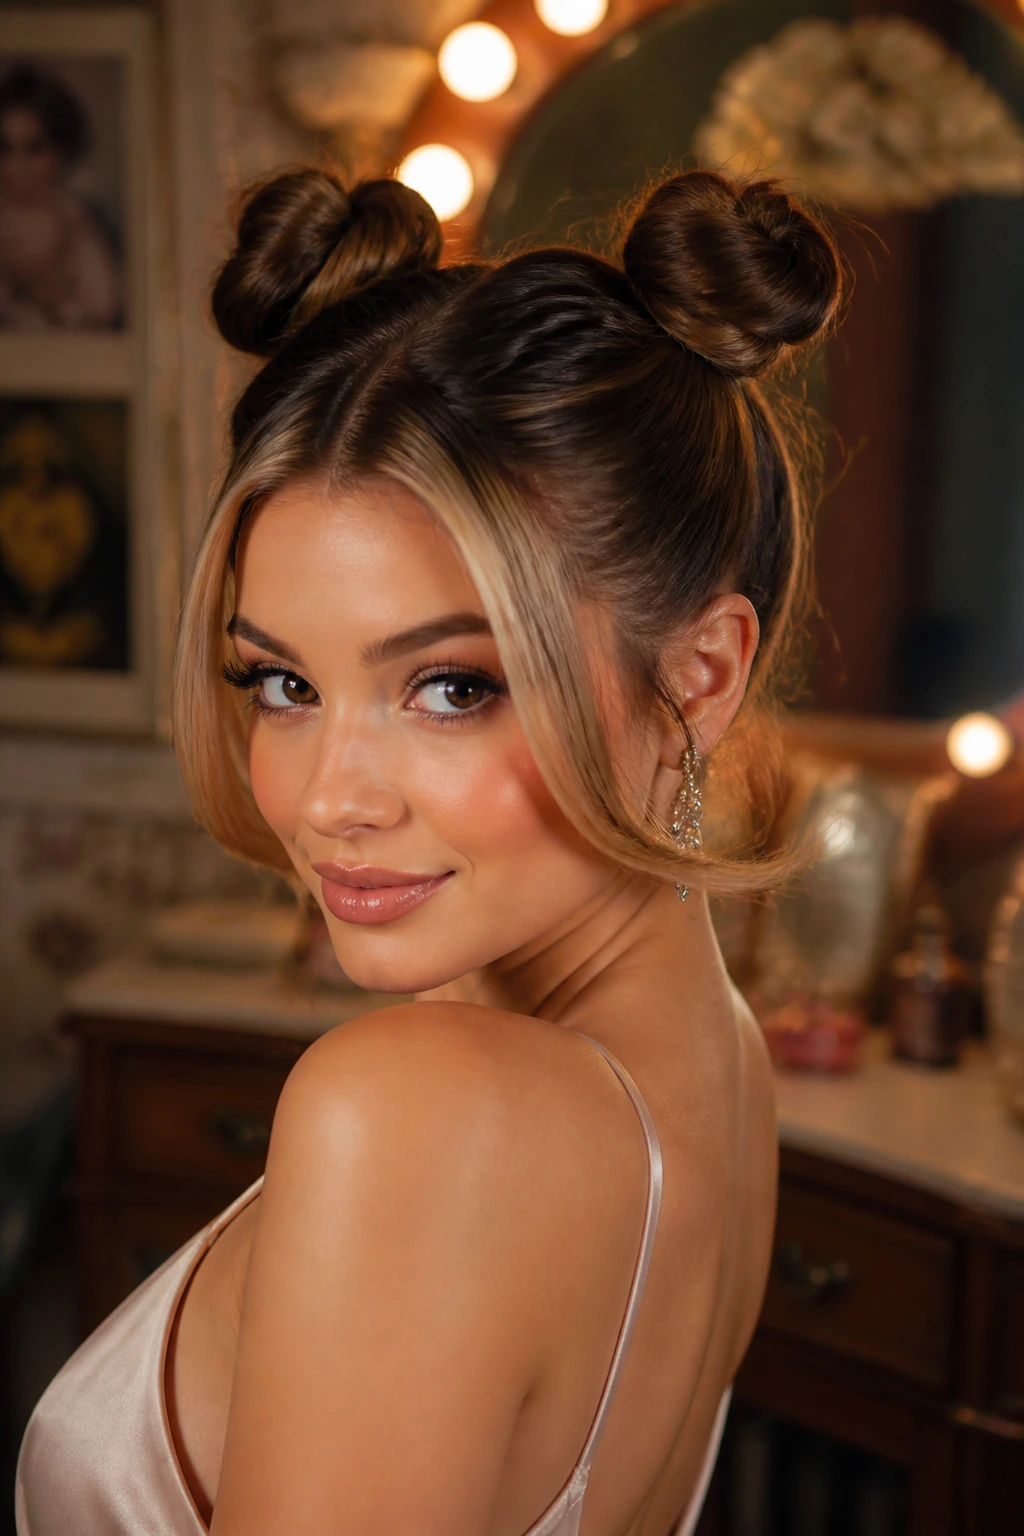
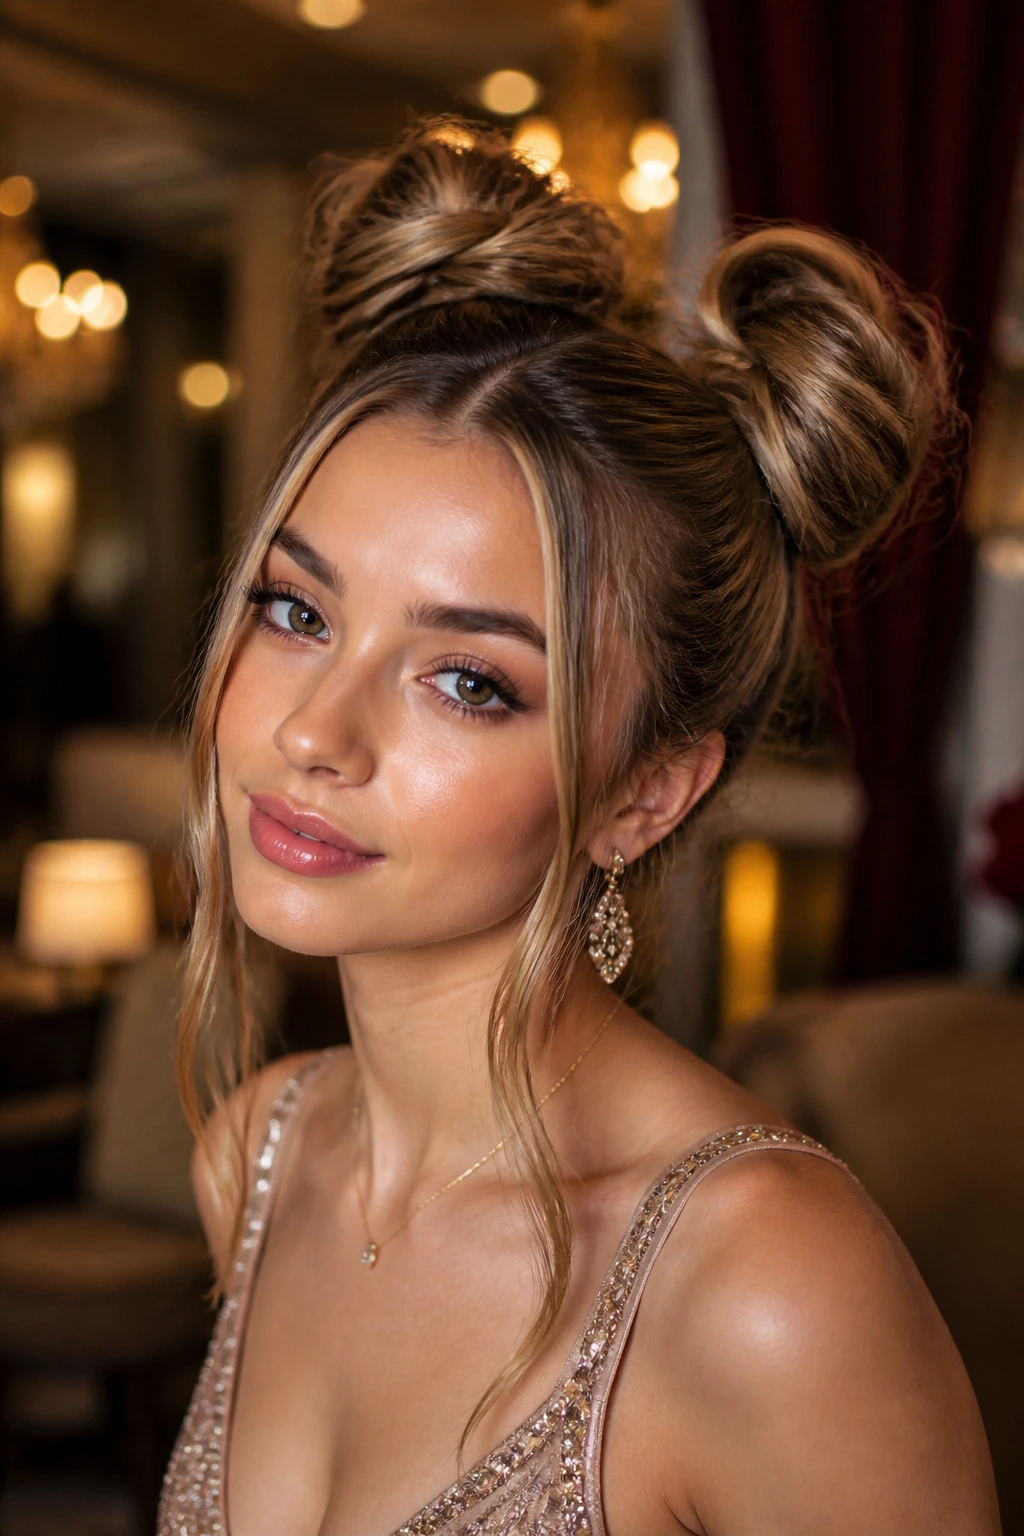
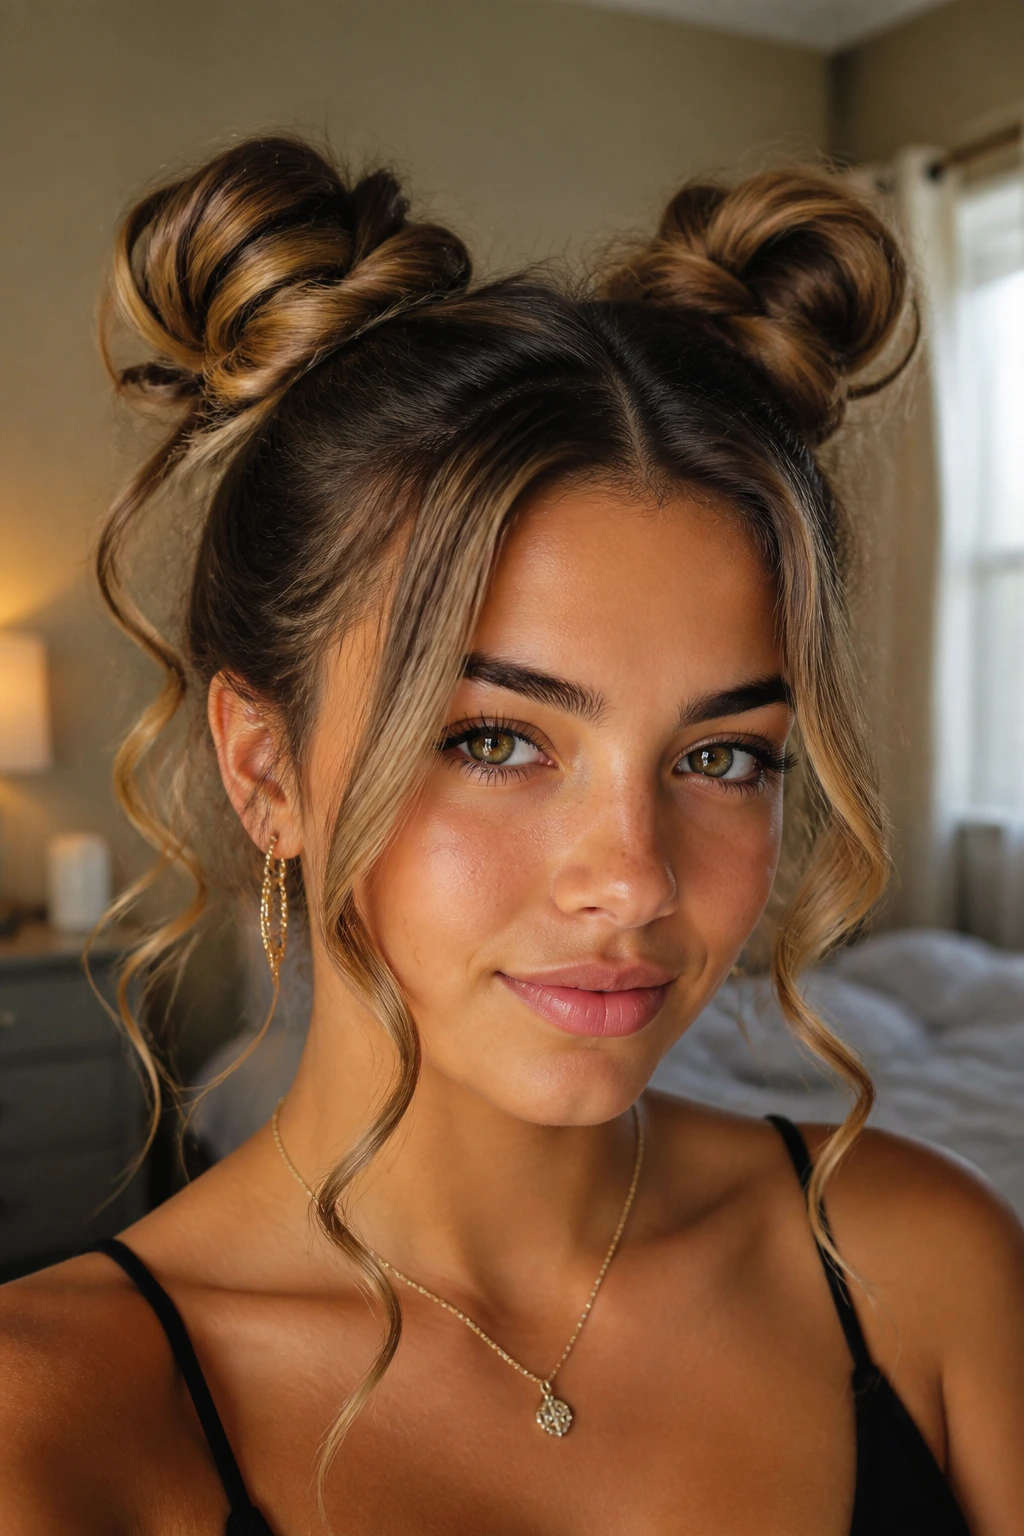
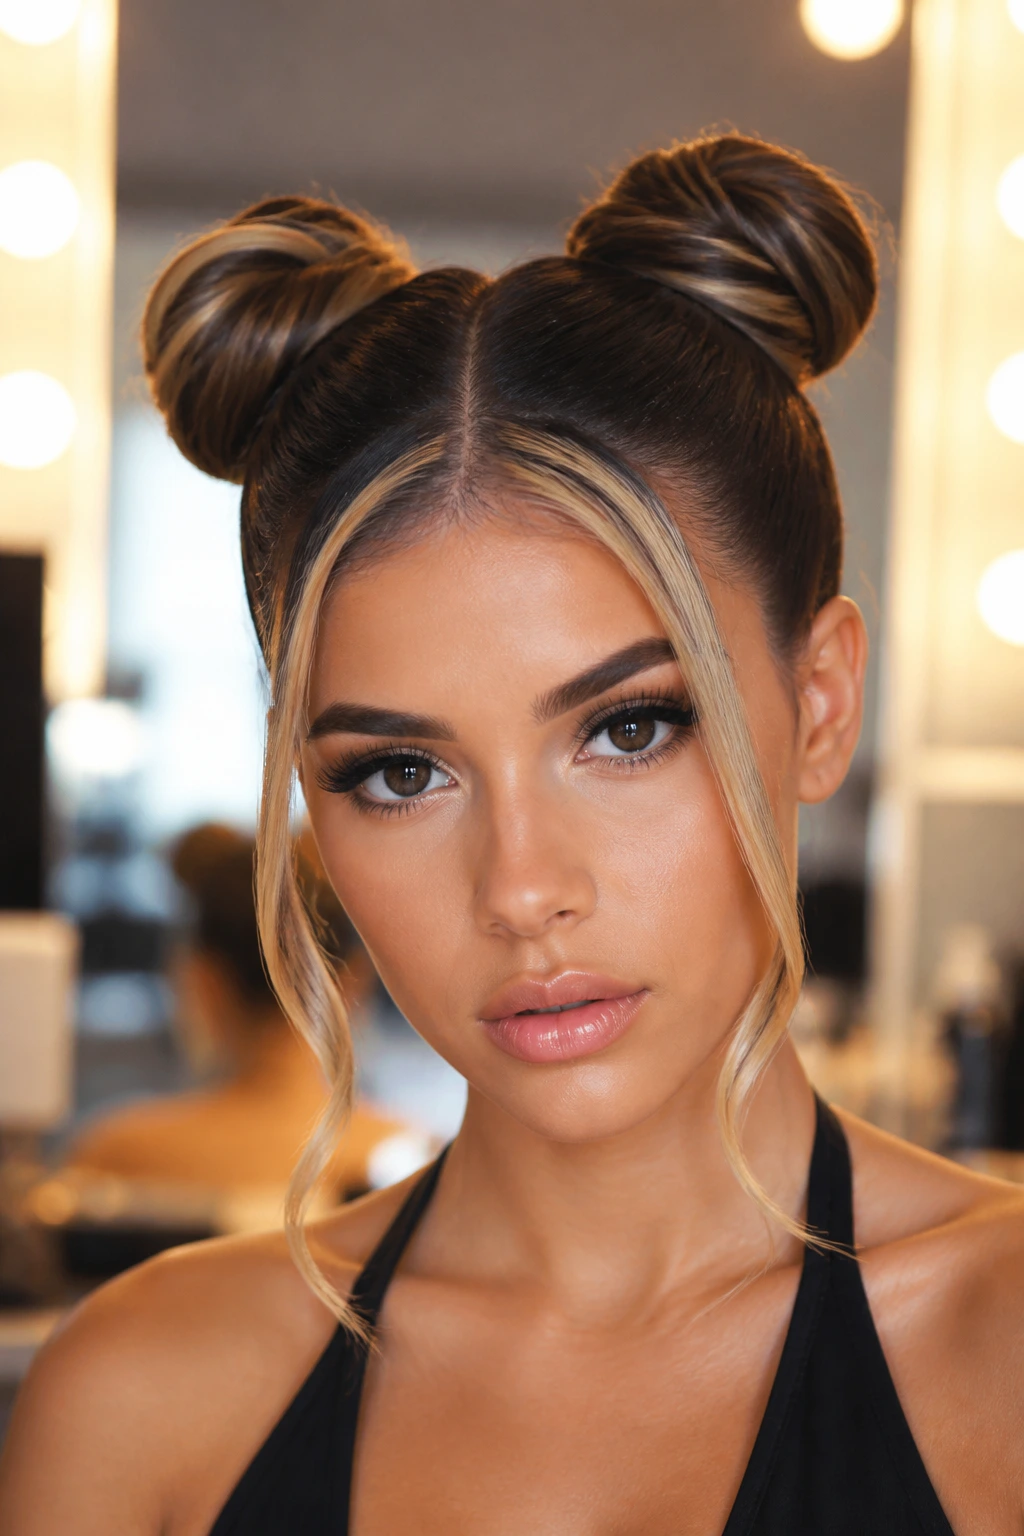
Double buns for prom night with money piece highlights can go glam fast, but only if the front pieces are handled with some care. Leave them too thick and the style turns blocky. Smooth them too flat and the whole look loses the soft frame that makes the buns feel polished instead of precious.
The combo works because it gives you two things at once: lift at the crown and brightness around the face. A narrow money piece catches flash the second you turn your head, and double buns keep the back neat enough to survive hours of dancing, photos, and the inevitable car ride where someone ends up fixing a collar in the rearview mirror.
What makes the look interesting is how much the silhouette changes with small moves. A bun that sits an inch higher reads playful; one tucked closer to the nape feels refined; a face-framing section curled away from the cheek opens the face in a way straight pieces never quite do. That’s the fun of it. The details decide whether the look feels sweet, edgy, or expensive.
Why This Collection Feels Different
-
Face frame first: The money pieces keep the style from reading like two dark knots glued to the head; even a narrow bright strip changes the whole outline.
-
Dress-friendly shapes: High, low, side-swept, braided, and half-up versions clear everything from strapless bodices to high necklines without fighting the dress.
-
Built for movement: Double buns hold up better than loose curls once you’re hugging friends, taking photos, and spinning around on a crowded floor.
-
Works with real hair: Straight, wavy, curly, thick, and fine hair all have a version here if you adjust pinning, texture, and bun size.
-
Easy to personalize: One ribbon, a pearl pin, or a tiny braid at the hairline changes the mood fast without needing a full redo.
-
Photo logic matters: The highlights near the face catch light where people actually look, which is the whole point when flash photography is involved.
What Money Piece Highlights Do for the Whole Shape
Money piece highlights do more than brighten the front. They break up the shape of the hairstyle so the double buns don’t look like one heavy block from the front. That matters a lot with prom hair, because the camera usually sees you head-on before it ever sees the back.
The width changes the read. A slim slice, about half an inch to an inch, looks refined and clean. Wider face-framing pieces, closer to an inch and a half or two inches, feel bolder and more obvious in photos. Neither is wrong, but the front strands should match the dress and the makeup, not fight them.
Curl direction changes the mood too. Bend the money pieces away from the face if you want lift and a little opening around the cheekbones. Bend them toward the face if you want softness and a more romantic line. Straightening them is the sharpest option, but I’d still give the ends a tiny bevel so they don’t hang like flat ribbons.
Picking the Right Height Before You Start
High buns, mid buns, and low buns all solve different problems. The trick is not chasing what looks cute on a mood board. It’s matching the shape to your neckline, your face, and how much neck you want to show.
High buns for open necklines
A higher placement, usually just above the ears and a little behind the crown, works best with strapless or sweetheart dresses. It opens the collarbone and keeps the whole look lively. If your face is round or short, a higher bun also adds vertical line without needing a dramatic tease.
Mid-height buns for balance
Mid-height double buns sit around the upper back of the head and play nicely with square necklines, corset bodices, and dresses with straps. They’re the least fussy version. You get structure without losing softness, and the buns don’t compete with earrings.
Low buns for covered necklines
Low double buns are the calm choice for high necks, one-shoulder dresses, and detailed bodices. They keep the silhouette sleek and let the dress do some talking. If the money pieces are soft and curved, the whole look feels expensive without trying too hard.
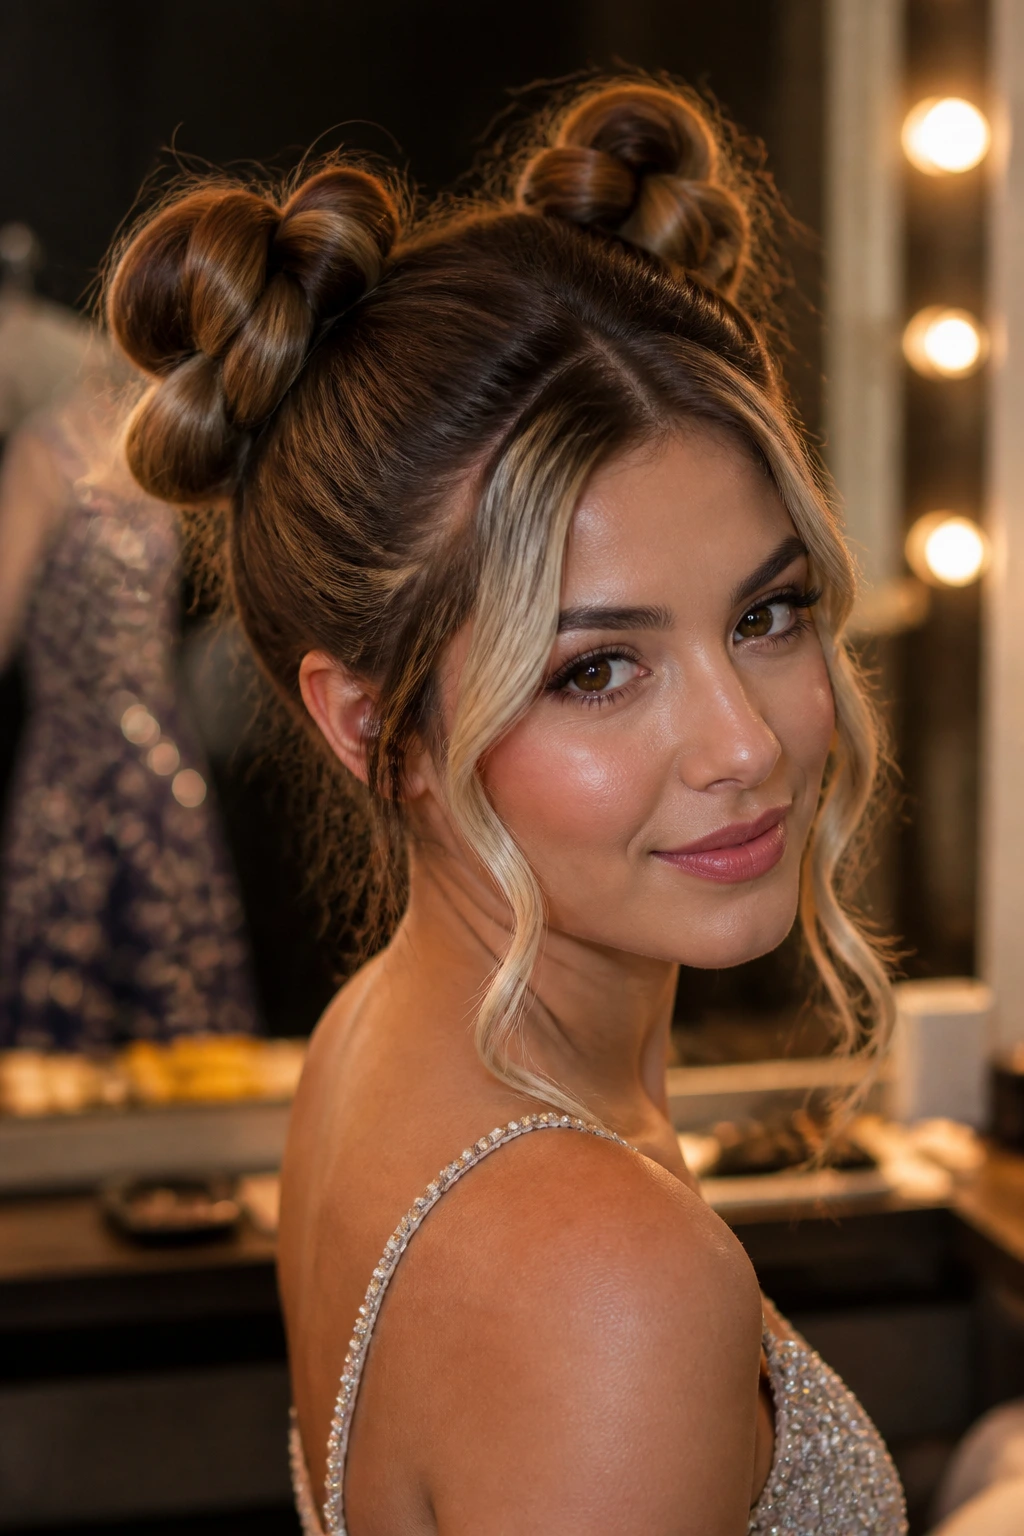
1. Sleek Center-Part Double Buns with Bright Money Pieces
A clean middle part gives this style its backbone. The buns sit high enough to lift the face, but not so high that the look tips into costume territory. I like this version when the dress has structure, because the sharp lines of the hair echo a fitted bodice in a way that feels intentional.
The money pieces should be ironed smooth and bent inward just at the ends with a 1-inch flat iron. That tiny curve keeps the front from hanging stiff. Use gel or edge control at the hairline, then smooth everything with a boar-bristle brush before you pin the buns. The finish should look glossy, not wet.
Best with:
- strapless or square necklines
- straight or slightly wavy hair
- cool blonde, caramel, or beige money pieces
2. Soft Low Double Buns with Curved Face-Framing Highlights
This one feels calmer and a little more romantic. The buns sit closer to the nape, which gives the style a softer profile from the side. The money pieces are curled away from the face so the front opens gently instead of cutting across the cheeks.
I like this when the dress already has drama. Lace, shimmer, beading, a deep neckline — those things can get crowded fast, and a low bun keeps the top half of the look from competing. Leave the buns slightly looser at the outer edge, with a few pinned loops instead of a perfect knot. The effect is softer, but not messy.
How to style it:
- curl the money pieces with a 1-inch wand
- pin the buns just above the nape
- leave one or two tiny tendrils near the temples if the face wants softness
3. Dutch-Braided Double Buns with Clean Front Strips
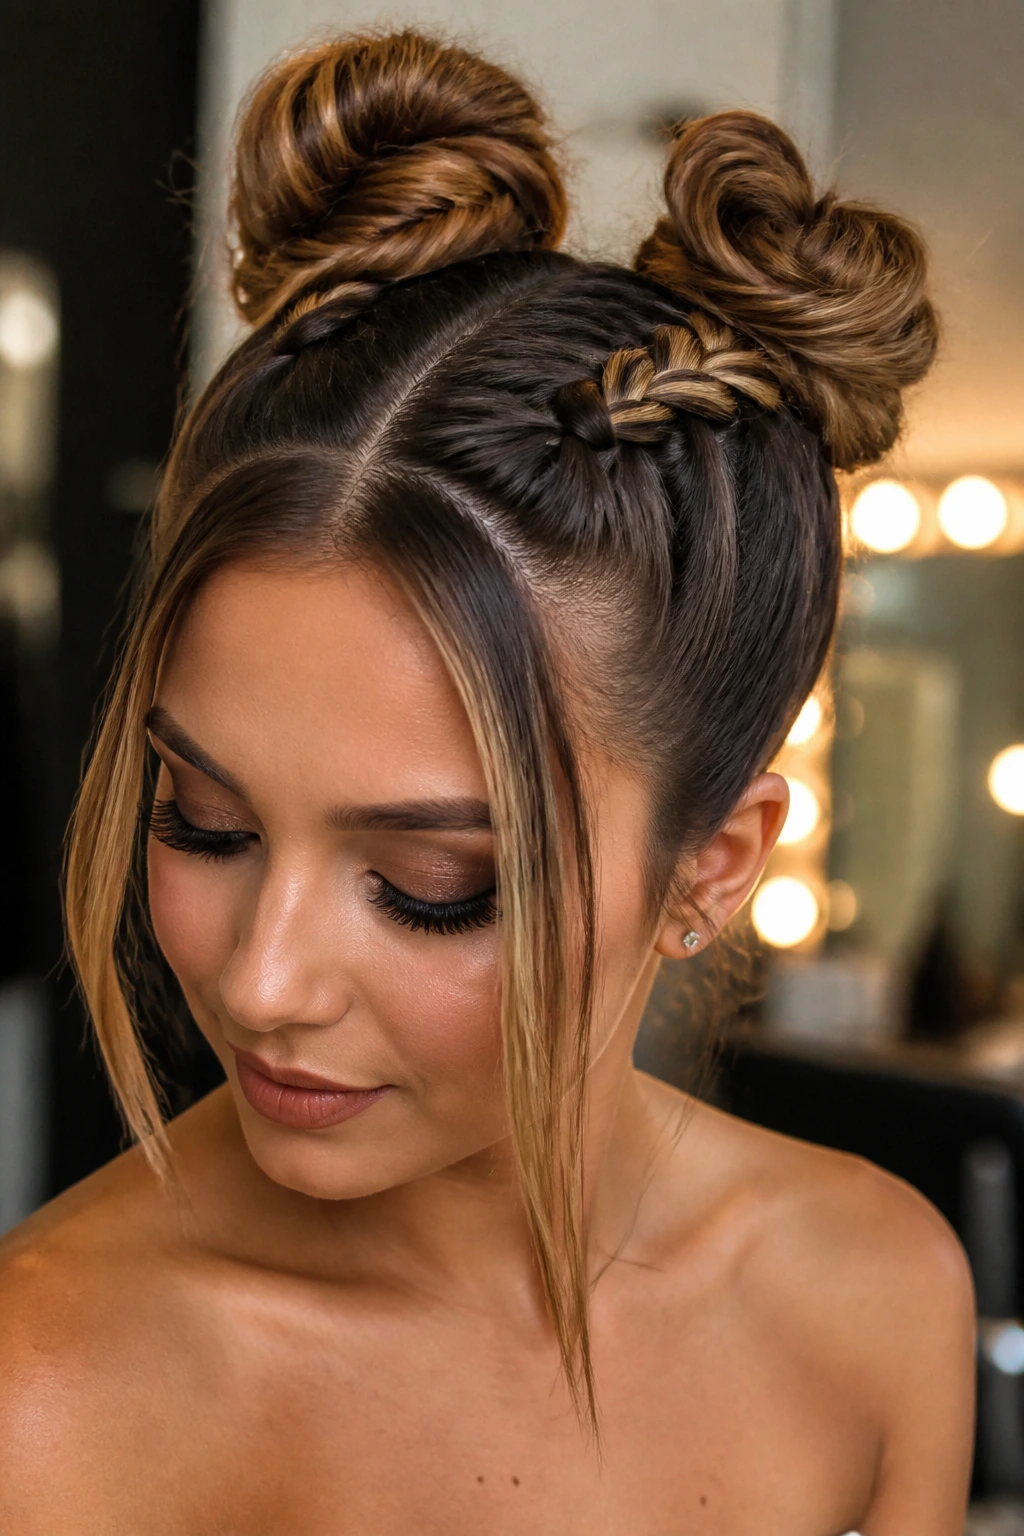
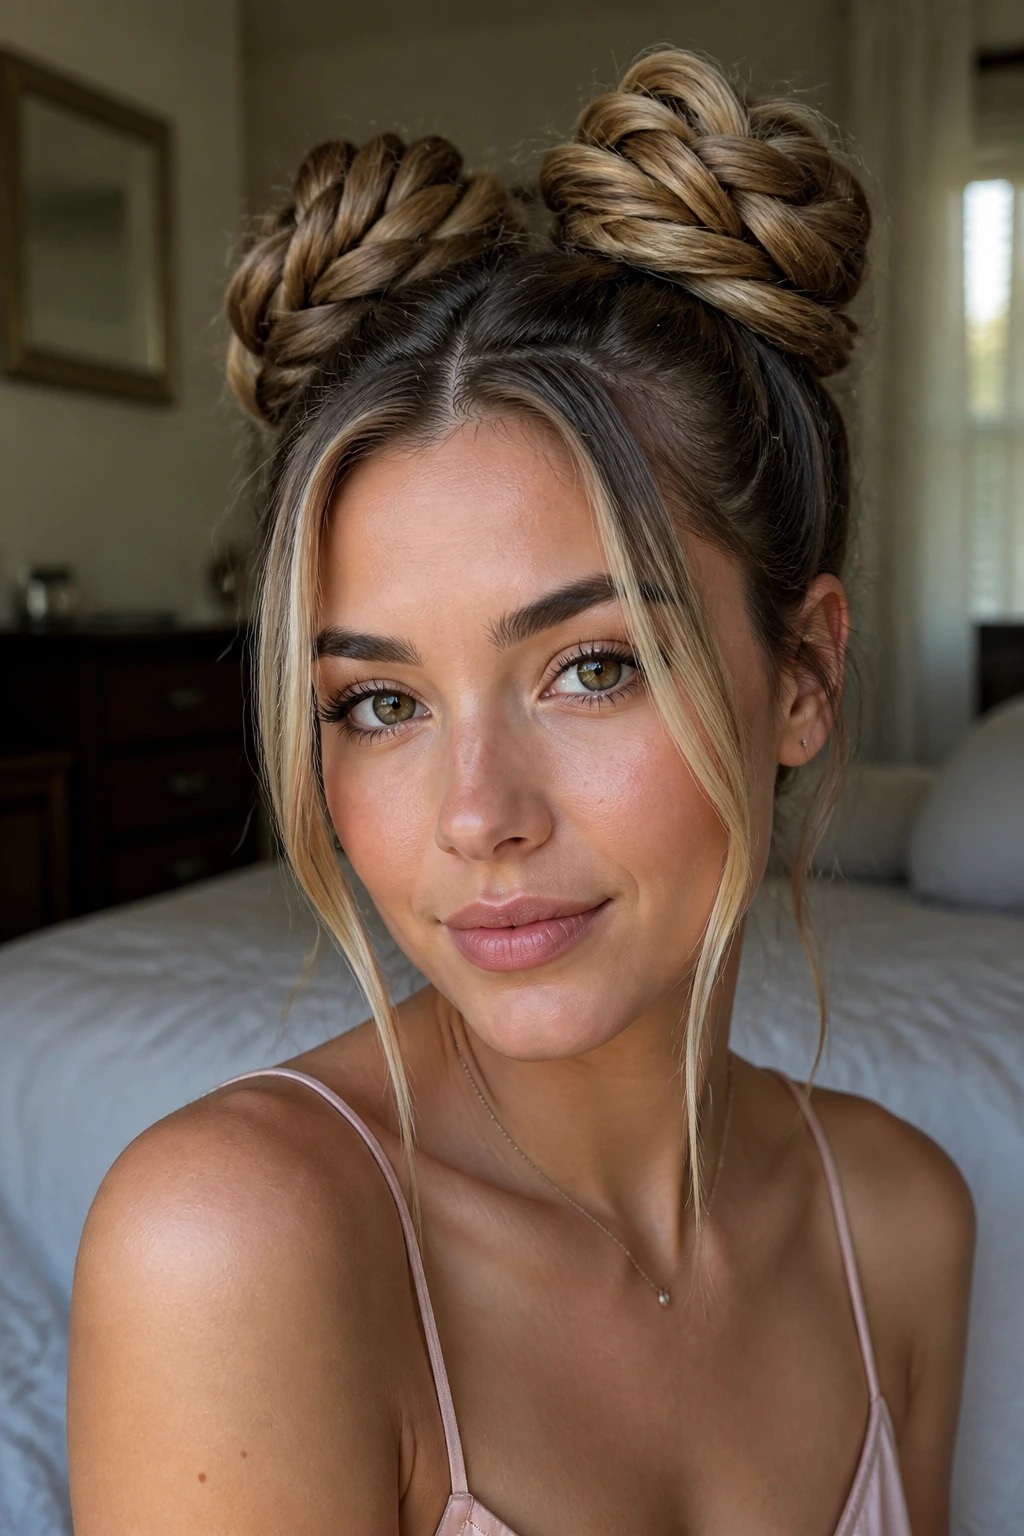
Braids are the fastest way to make double buns look built, not improvised. Feed a Dutch braid from the front hairline back toward each bun, then wrap the ends into small coils. The braid gives the style a ribbed texture that holds well and survives humidity better than a smooth twist.
The money pieces can stay straight here. That contrast is the point. Braided texture in the back, clean vertical lines in the front, and suddenly the hairstyle has a little architecture. If your hair is thick, this is one of the safest choices because the braid helps distribute bulk before you pin anything.
Small detail that matters:
- keep the braid tight at the scalp
- loosen only the outer edges if you want volume
- use pins that match your hair color so the braid reads clean
4. Curly Double Buns with Airy Tendrils
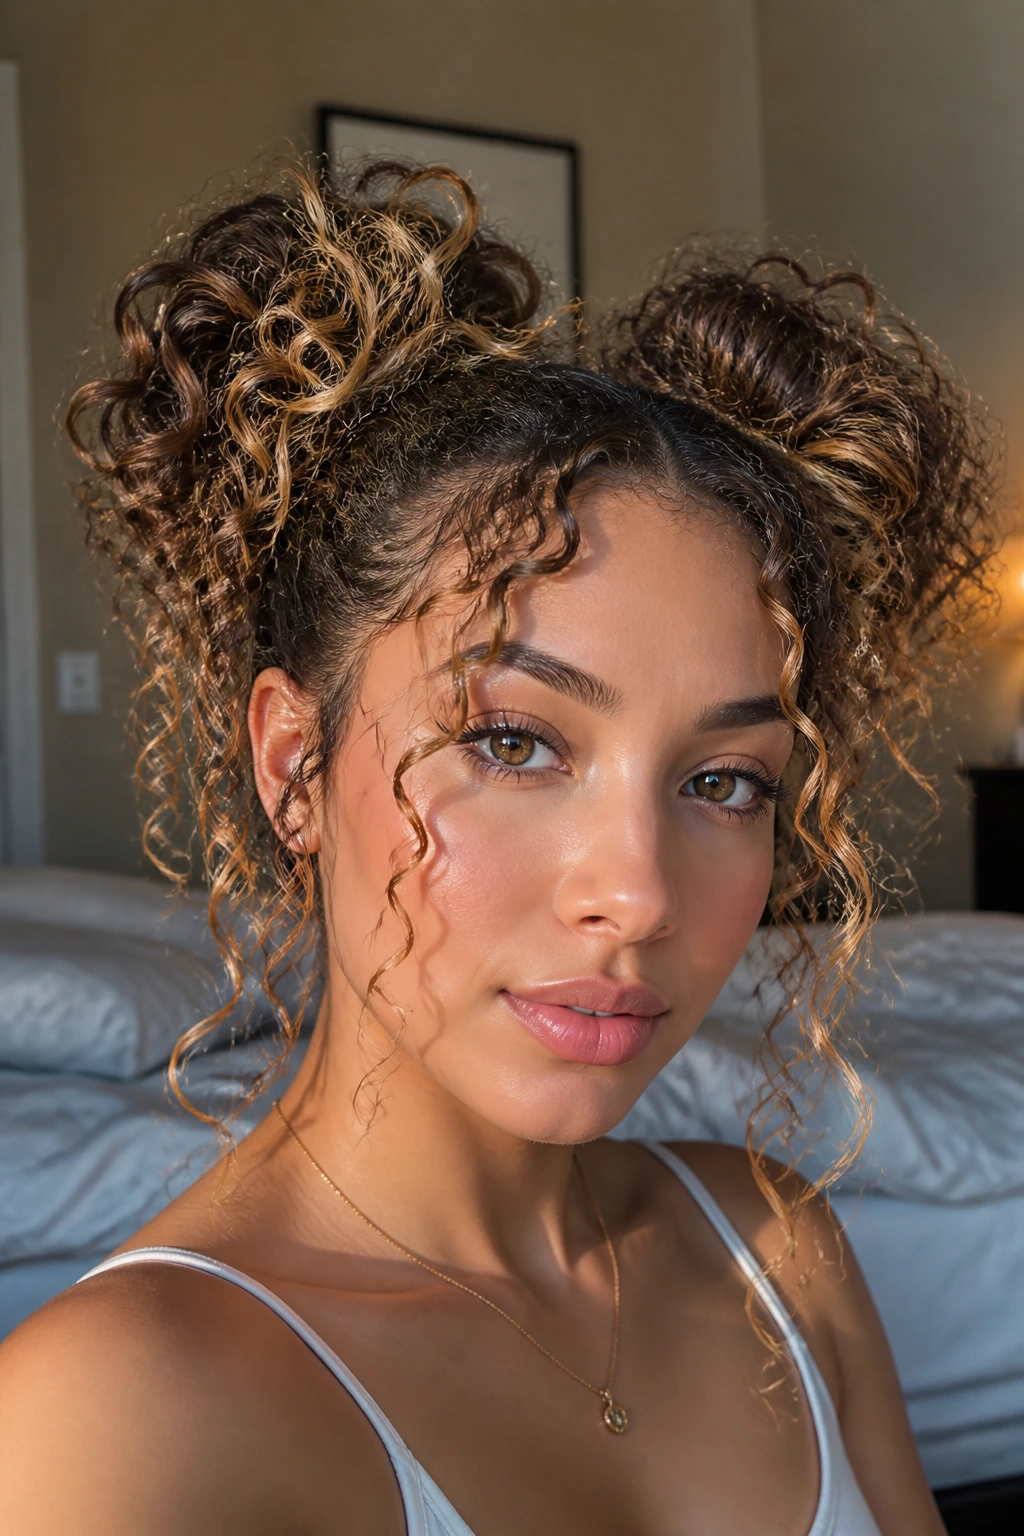
Curly hair looks especially good in double buns because the shape already has movement. Don’t fight that. Let the buns keep some volume and let the money pieces fall in defined spirals or soft tendrils around the cheekbones.
The key is control, not flattening. Set the curls with cream or mousse, diffuse until about 80 percent dry, then gather the hair into two sections without brushing the texture out. If your front pieces are highlighted, they’ll catch light in a way that straight hair can’t mimic. That front brightness, plus the soft halo around each bun, makes the style feel alive.
Best for:
- natural curls and coils
- softer dresses with movement
- anyone who wants the hairstyle to look textured, not shellacked
5. Glitter-Part Space Buns with Glossy Edges
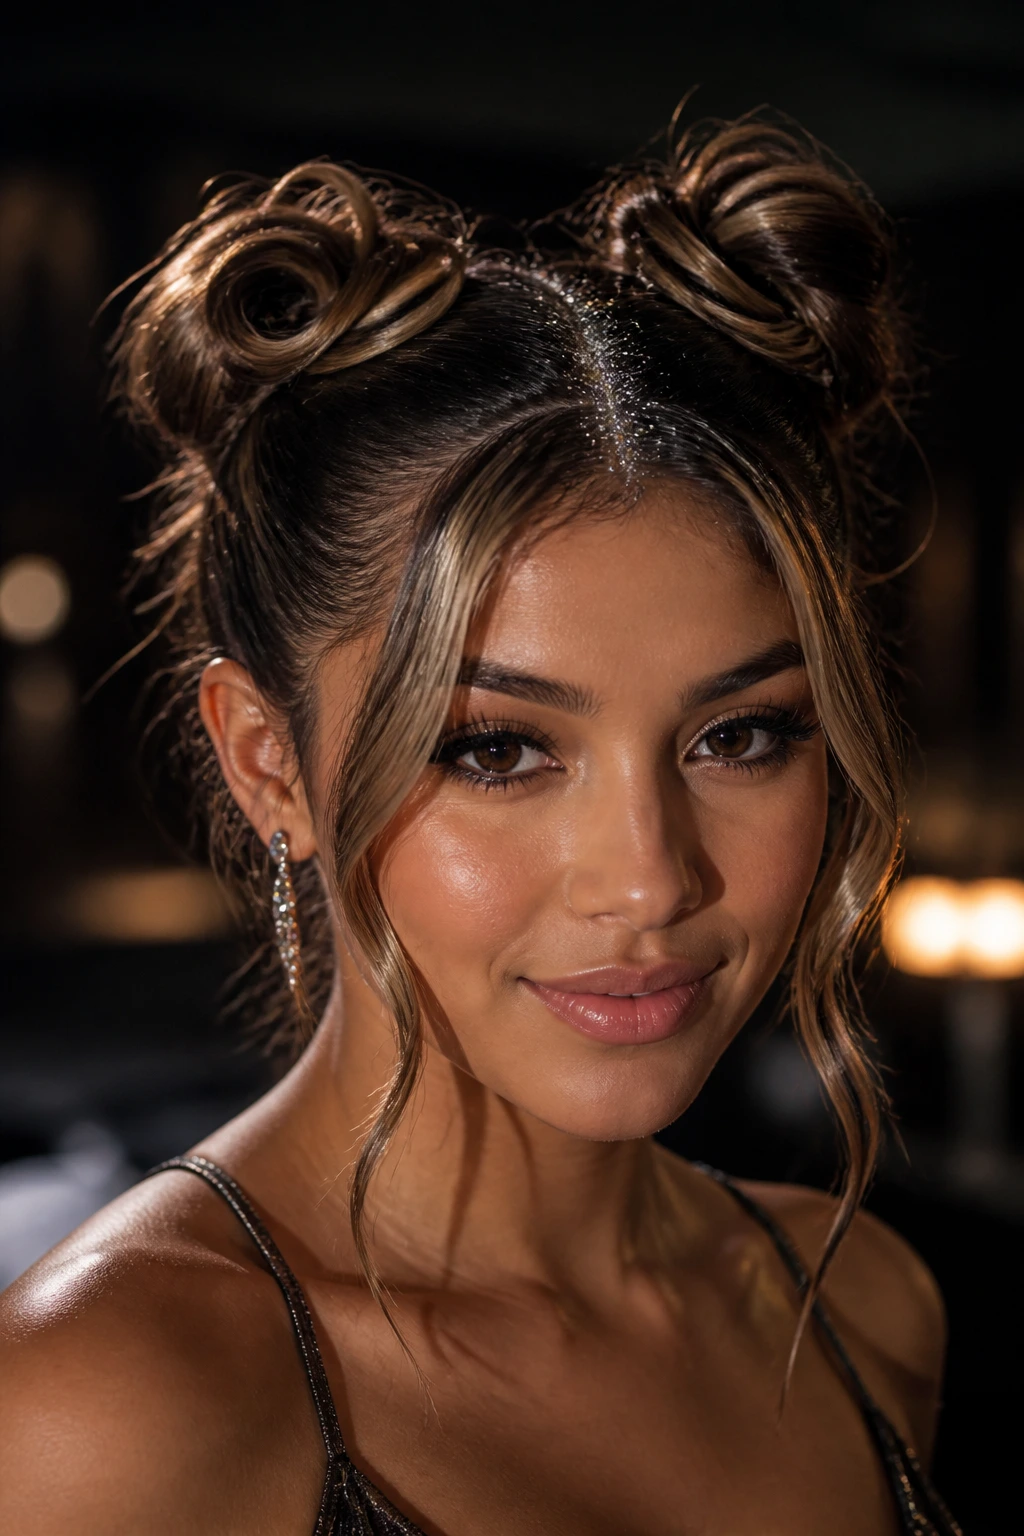
A glitter part changes the tone instantly. One thin line of shimmer down the center or in a zigzag part makes the double buns feel more party-ready without adding bulk. Keep the buns themselves smooth and slightly rounded so the glitter gets the attention.
The money pieces should be polished and bent into a soft S-shape. Straight front pieces can look harsh next to a sparkly part. If you’re using hair glitter or a shimmer gel, stop before it starts dusting onto the face. That stuff can read cheap fast if it’s piled on.
Works best when:
- the dress is simple and you want the hair to do more
- earrings are small or skipped entirely
- the room lighting is dim and flash photography will do the rest
6. Side-Swept Double Buns with One-Shoulder Energy
A side part changes the whole attitude. One bun sits a touch higher than the other, and the money piece on the heavier side sweeps across the face before curving away at the jaw. It feels less centered, more editorial, and a bit more grown-up than a straight middle-part version.
This is a smart move with asymmetrical dresses. One-shoulder necklines and diagonal bodices like a little imbalance in the hair too. Keep the side part clean, then soften the front by pinning just enough of the hairline to show the shape without making it stiff. The style should look deliberate from every angle.
What I like here:
- a slightly deeper side part, not a tiny shift
- one brighter front section for contrast
- buns set low enough that the dress still stays visible
7. Half-Up Double Buns with Long Money Pieces
This one is a good answer if you don’t want to give up your length. The top section gets pulled into two small buns, while the bottom hair stays down and swings around the shoulders. It gives you the lift of double buns without losing the swish of long hair.
The money pieces can do more work here. Let them stay longer, maybe grazing the jaw or even the collarbone, so they bridge the top and bottom sections. That keeps the style from feeling chopped up. If your hair is extra long, this version is also easier on your scalp. No need to anchor every strand.
Best for:
- long hair that still wants movement
- dresses with open backs
- anyone who likes a soft front with a fuller silhouette
8. Petite Double Buns for Shorter Hair
Short hair can do double buns. It just needs smaller proportions. Keep the buns compact, place them closer together, and use a couple of hidden pins or a tiny bun maker if the ends don’t quite reach. The result looks cleaner than forcing big buns onto hair that wants to stay small.
Money pieces matter even more here because they keep the front from disappearing. With shorter hair, bright face-framing sections help the style read as intentional instead of accidental. Pull the front pieces forward, then curve them slightly under the cheekbone. That gives the cut shape without making it look childish.
A few smart moves:
- use a strong texturizing spray before pinning
- keep the buns no wider than the palm of your hand
- pin inward, not outward, so the shape hugs the head
9. Bubble-Pull Double Buns with Soft Texture
Bubble sections give the style a little movement before the bun even starts. Divide each side ponytail into two or three small sections with clear elastics, tug each section gently to puff it out, then coil the tail into a bun. The result has built-in volume and a slightly playful finish.
The money pieces can be left smooth or lightly curled, depending on how soft you want the front to feel. I like this version for dresses that already have texture — pleats, fringe, sequins, or beading — because the bubbles echo that visual rhythm. Too much polish here would flatten the idea.
Keep an eye on:
- elastics spaced evenly
- each bubble tugged to the same size
- the last wrap hidden under the bun so the style doesn’t feel busy
10. Rope-Twist Double Buns for Fine Hair
Fine hair often slips out of braids, but rope twists hold better than people expect. Twist two sections around each other, then twist that rope into a bun. The texture gives the hair something to grip, and the bun looks fuller than a plain coil.
The front pieces should stay sleek, especially if your hair is fine. A side of the style with too much puff can make the whole thing feel thin. Let the money pieces frame the face with a soft bend, and use a small amount of dry shampoo at the roots before you start. That helps the hair keep its shape without turning powdery.
Best when:
- your hair is silky or slippery
- you want a polished shape without teasing the whole head
- the dress is simple and the hair needs to carry the look
11. Bow-Wrapped Double Buns with Sweet Detail
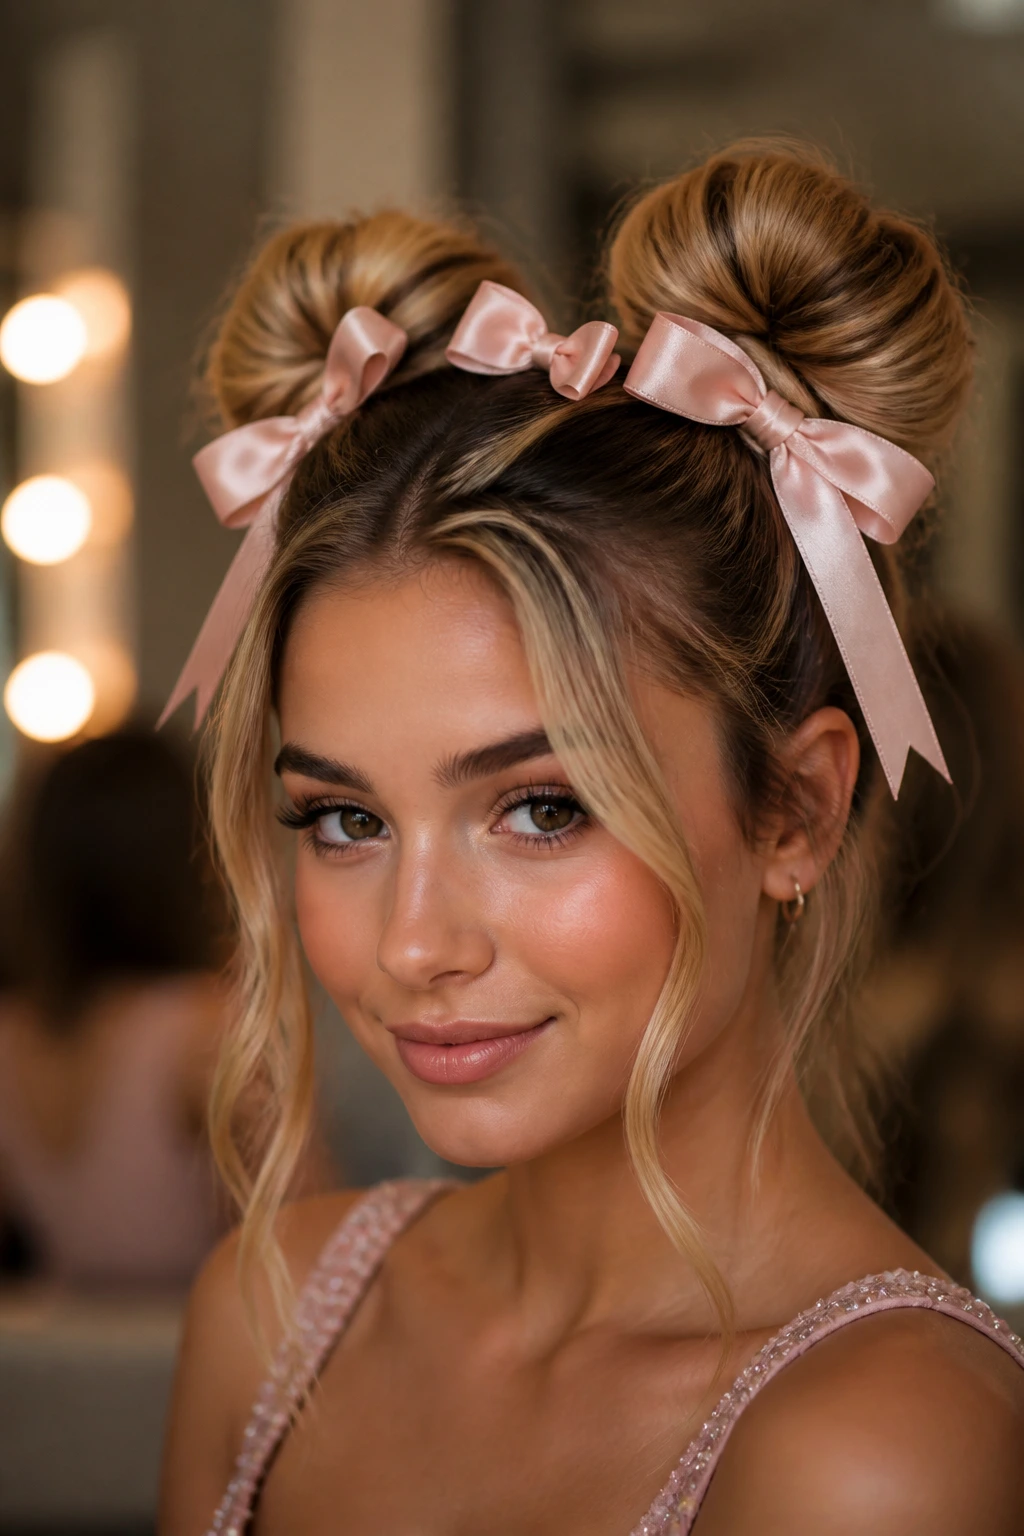
A ribbon changes the whole temperature of the hairstyle. Wrap a satin bow around the base of each bun, or tie one smaller bow between the two buns if you want the focus in the center. It softens the shape fast and gives the style a little romance without making it precious.
The money pieces should stay controlled here. Think smooth and softly curved, not big and fluffy. Otherwise the ribbon, the front pieces, and the buns all start competing. A pale ribbon looks pretty against darker hair; a deeper tone, like black or burgundy, feels richer and a little sharper.
Good pairing:
- dresses with tulle or satin
- soft pink, ivory, or navy ribbons
- minimal jewelry, so the hair detail stays the star
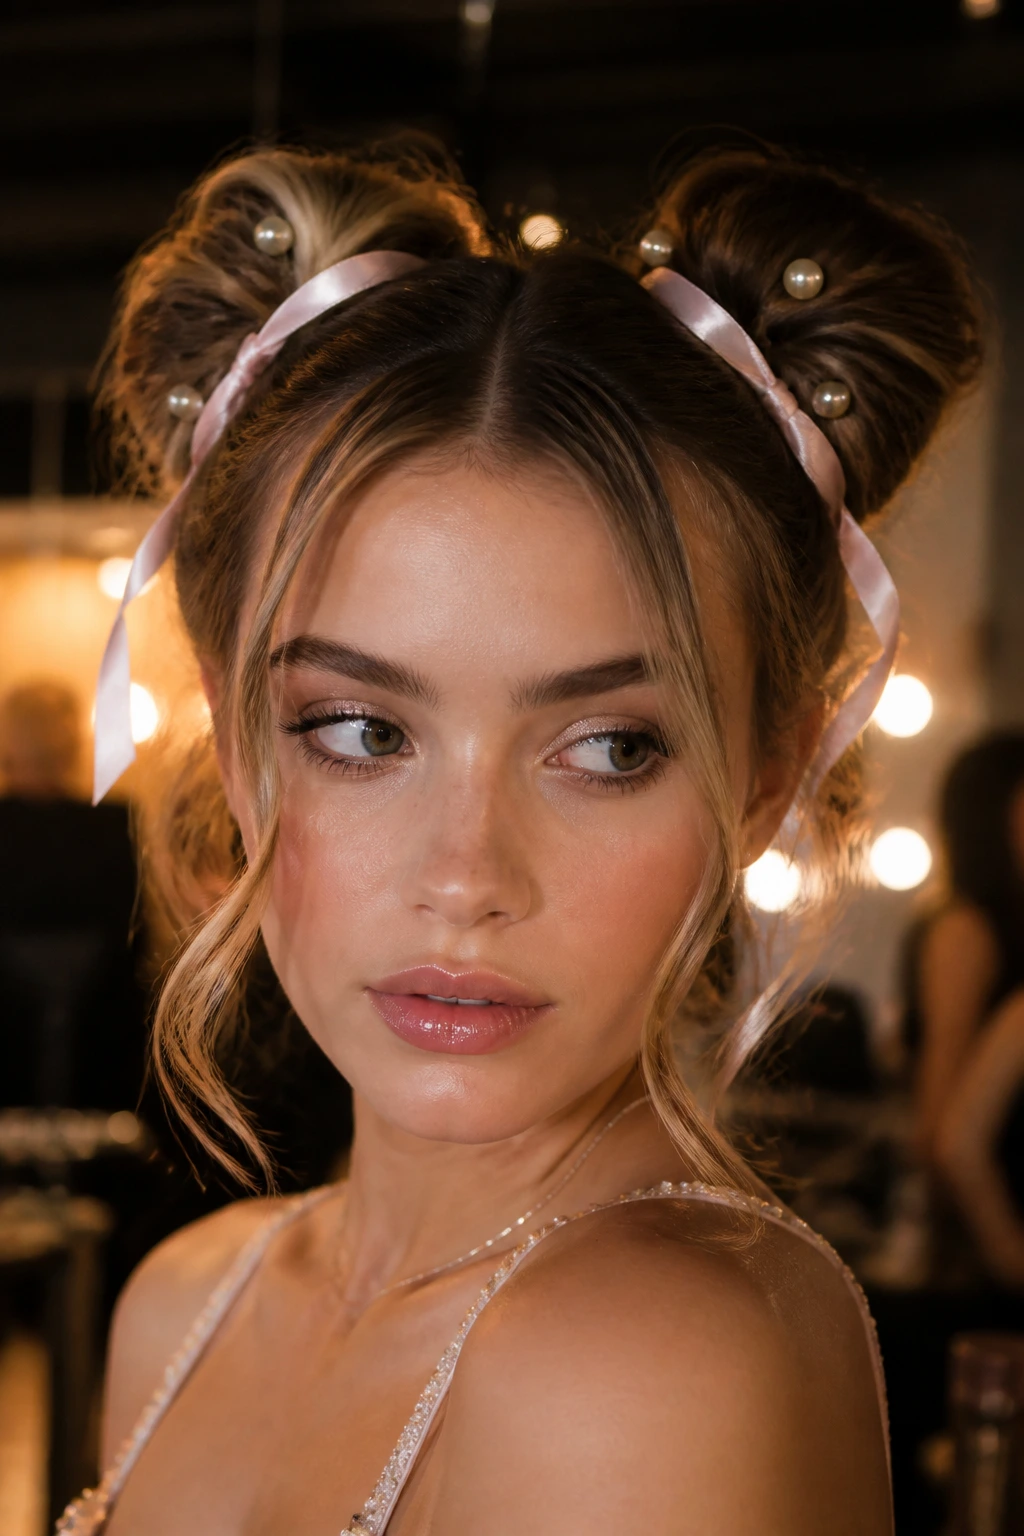
12. Pearl-Pinned Double Buns with Polished Shine
Pearls belong in hair more often than they get credit for. A few pins dotted around the outer edge of each bun can look refined, especially when the buns are small and smooth. Don’t scatter them everywhere. Three to five pins total usually does more than a whole packet.
The money pieces should be brushed clean and left glossy. I’d avoid super-textured front strands here because pearls already bring a soft, reflective quality. If the dress has beading, this is one of the easiest ways to echo it without looking matched too hard. The overall feel is tidy, expensive, and a little old-school in the good way.
Best with:
- satin or crepe dresses
- center parts
- soft nude, champagne, or silver hair accessories
13. Wet-Look Double Buns with Razor-Defined Parts
Wet look sounds intense, and it is. But when the buns stay small and the parting is sharp, the style reads sleek rather than greasy. Use gel at the roots, brush the hair back until every line is clean, and stop before the moisture runs down the hair shaft.
The money pieces need a crisp finish here. Straighten them, then tuck the ends slightly under so they don’t stick out. This version looks strongest with modern dresses, bold makeup, or strong earrings. If the dress is very soft and floaty, the contrast can feel off. If the dress has structure, though, the style lands hard.
A blunt opinion:
This is not the look for someone who wants airy, romantic hair. It is for the person who likes shine, control, and a little edge.
14. Teased Crown Double Buns with Extra Lift
A little teasing at the crown goes a long way. Backcomb just the root area at the top of the head, smooth the outer layer over it, and build the two buns slightly above that lift. The goal is height, not helmet hair.
Money pieces can soften the shape if the crown feels too strong. Curl them away from the face and keep them medium width, not huge. That balance matters. Too much teasing plus too much front volume can make the head look bigger than the dress. A little lift, though, is beautiful in photos and from the side.
Where this shines:
- round or square faces that want a bit more vertical line
- dresses with open shoulders
- thicker hair that needs controlled volume
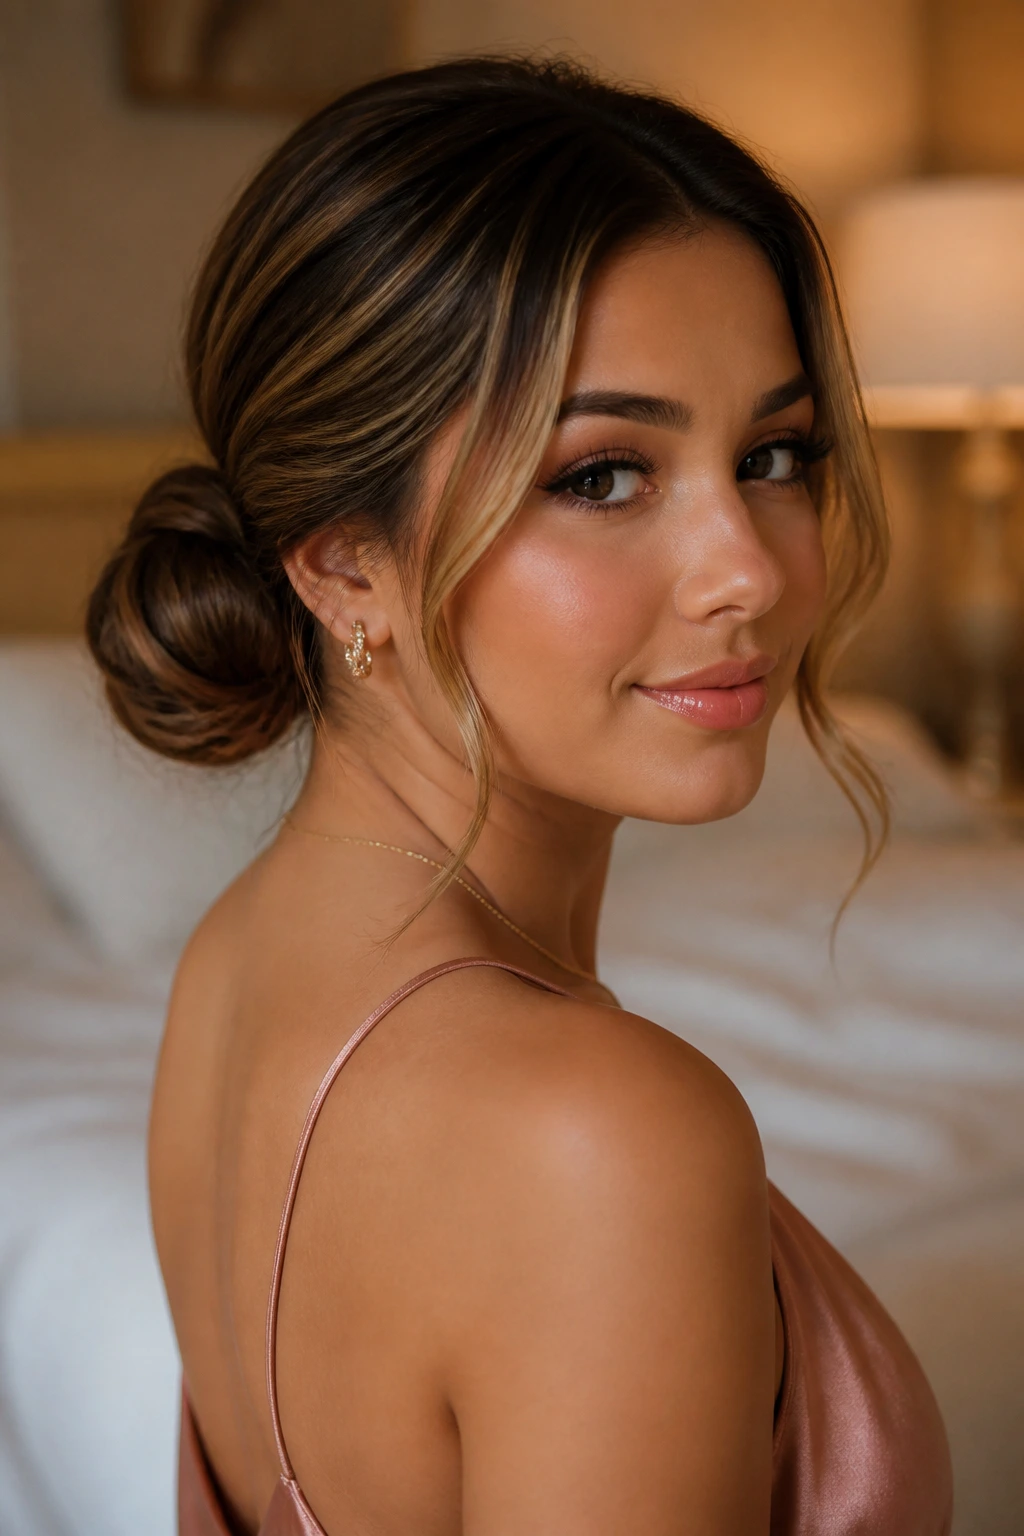
15. Low Wrapped Buns with Loose Money Pieces
Low wrapped buns feel calm in the best way. Instead of twisting the hair into tight little balls, wrap the ends around a base and leave the outer edge slightly soft. The look lands somewhere between formal and relaxed, which is a nice place to be when the dress already has drama.
The money pieces should move. Not wildly, just enough to bend around the jaw or collarbone. If they’re too stiff, the softness of the low bun disappears. I prefer this version with a middle part and a dress that shows a little shoulder. It keeps the style grown-up without going severe.
A tiny detail:
- secure the bun with pins hidden underneath, not only on top
- mist hairspray on the palms first, then smooth the front pieces
- let one small curve near the cheek stay loose if the face wants it
16. Crisscross-Fed Double Buns with Built-In Shape

This one looks more complicated than it is. Split each side section into two smaller pieces, cross them over each other, and feed them into the bun base. The overlap gives the style built-in texture and a bit of tension, which makes the buns look sculpted even before pins go in.
Money pieces can stay sleek or become small ribbons of light on either side of the face. I like them best straight here, because the crisscrossing already adds enough movement. The style suits people who want the hair to feel architectural, not soft and fluffy. It’s a good answer if you hate the idea of a plain twist.
Works well with:
- satin dresses
- geometric necklines
- statement earrings that want some breathing room
17. Halo-Braided Double Buns with Face-Framing Pieces

A halo braid around the front hairline turns the whole hairstyle into a design, not just a bun choice. Braid from one temple to the other, then split the remaining hair into two buns at the back. The front pieces can be left out or threaded into the braid if you want a cleaner finish.
The money pieces should frame the braid rather than fight it. A narrow highlight strip on each side is enough. If the braid is thick, too much brightness near the face starts to look busy. Keep the braid edges softly pancaked for width, but not so loose that the whole thing slides down after an hour.
Best for:
- thicker hair
- boho-inspired dresses
- anyone who wants the front to look finished from every angle
18. Flipped-Out Double Buns with Retro Ends
There’s a little retro wink in this one, and I like that. The buns sit in the usual place, but the front pieces or the ends around them are flipped outward with a flat iron so the shape feels playful. It keeps the style from becoming too sweet.
Money pieces look sharp here when the ends curve away from the face. If you go too soft, the flip loses the point. This version is especially good with shorter layers, because those little ends become part of the design rather than something you need to hide. Think polished throwback, not costume.
A useful note:
- keep flips small and controlled
- use a touch of shine serum only on the ends
- pair with a liner-heavy makeup look if you want the whole vibe to feel deliberate
19. Faux Loc Double Buns with Sculpted Texture
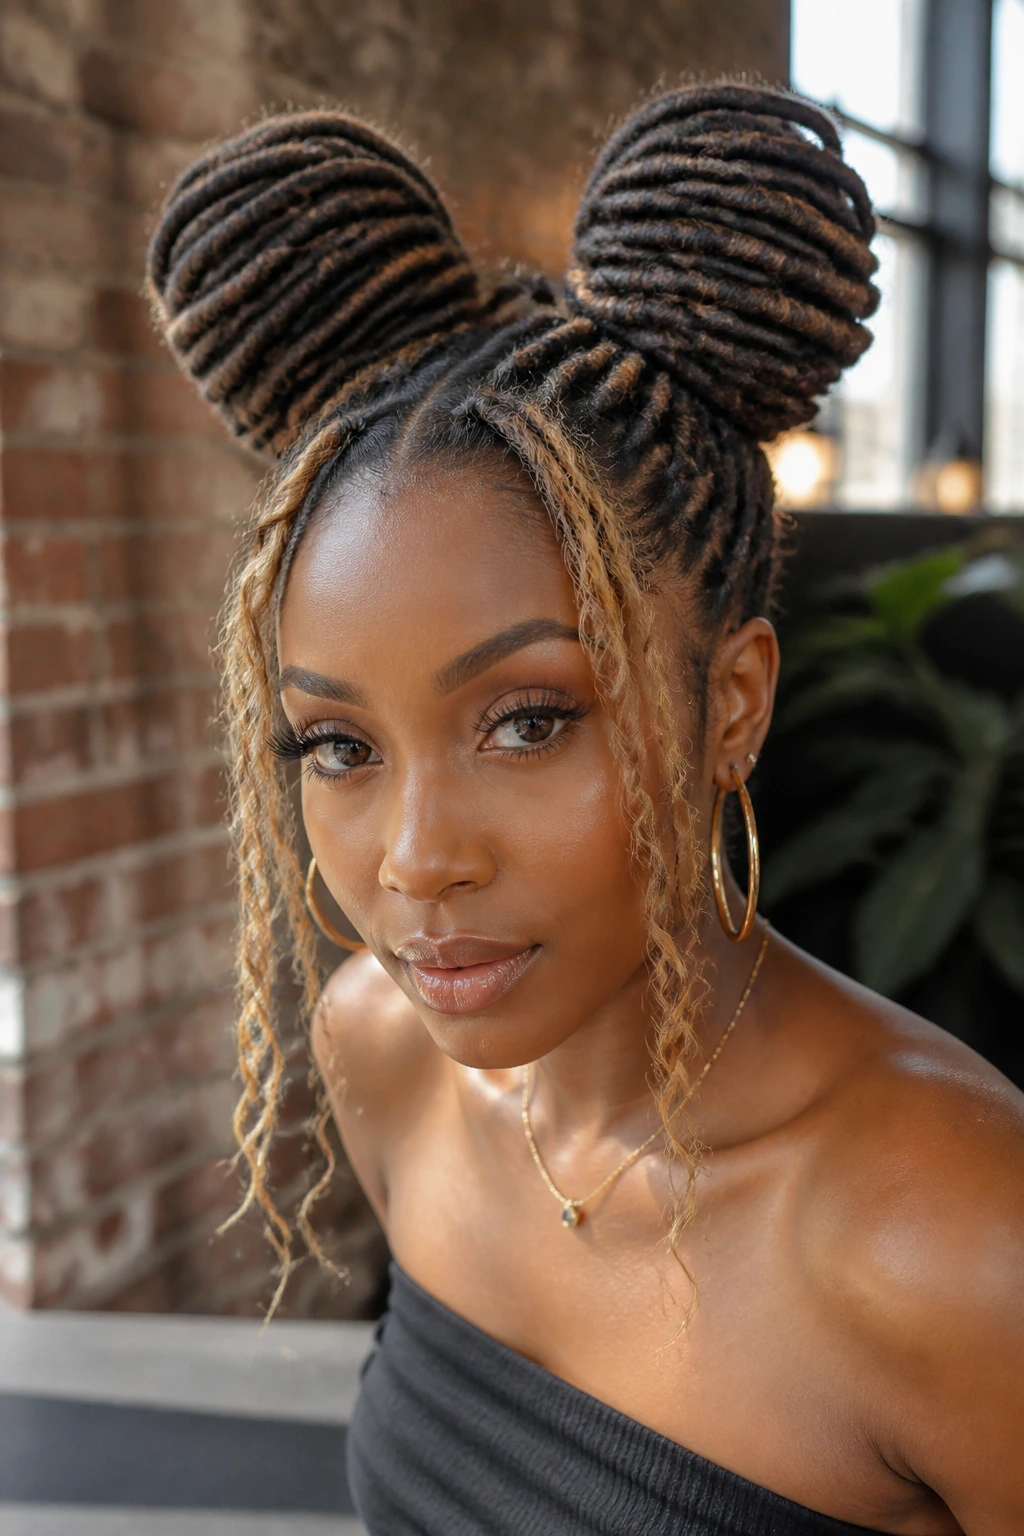
Faux locs, twists, or rope-like extensions give the buns real presence. Wrap each side into a coil that shows off the texture instead of hiding it. The style looks strong, and the money pieces can be lighter or brighter locs at the front if that’s how the hair is set up.
The best part is how well this version handles volume. There’s no need to force the hair flat. Let the texture sit where it wants, then pin the bun base low and tight enough that it won’t rotate while you move. It’s a gorgeous option for anyone who wants the hairstyle to have substance from across the room.
Best with:
- textured extension sets
- bold jewelry
- dresses with clean lines that let the hair be the statement
20. High Crown Double Buns with Long Side Pieces
High crown buns make a face look longer and a neckline look cleaner. The buns sit closer to the top of the head, and the side pieces stay longer so they fall just below the cheekbones. It’s a strong silhouette, especially if the dress has a lower neckline.
The money pieces should be long enough to show shape, not just color. If they stop too high on the face, they can make the bun line feel crowded. I prefer this version for people who want a little drama but don’t want the buns to look tiny. The height gives the hairstyle presence without making it fussy.
Good for:
- tall necklines or open shoulders
- rounder faces that want more lift
- thick hair that can support a higher center
21. Knotted Double Buns with Soft Spiral Ends
Knots create a different texture than twists, and that’s what makes this one interesting. Instead of winding the hair around itself in a neat circle, tie each side into a loose knot, then pin the ends under so a bit of spiral shape still shows.
The money pieces should be softly curled, not ironed pin-straight. The little spiral around the face echoes the knot in the bun and keeps the style from feeling too rigid. This is a good middle ground if you want something more relaxed than a sleek bun, but cleaner than a full messy version.
Tiny but helpful:
- don’t pull the knots too tight
- leave enough length to show the twist of the hair
- use 4 to 6 extra pins if your hair is slippery
22. Satin-Smooth Double Buns with Sculpted Money Pieces
This is the polished ending, the version that looks crisp in a mirror and even better in flash. The hair is smoothed almost to the scalp, the buns are rounded and neat, and the money pieces are shaped like deliberate frames rather than leftover strands. It’s a strong look, especially if your dress already has shine.
I’d call this the most photograph-friendly of the bunch when the hairline is clean. Use a fine-tooth comb and a little gel to flatten flyaways, then shape the front pieces with a flat iron so they sweep just off the cheek. The style reads formal without becoming stiff, and the money pieces keep it from feeling severe.
Best with:
- satin, crepe, or mikado dresses
- bold lipstick or liner
- anyone who wants the hair to look expensive from the front and back
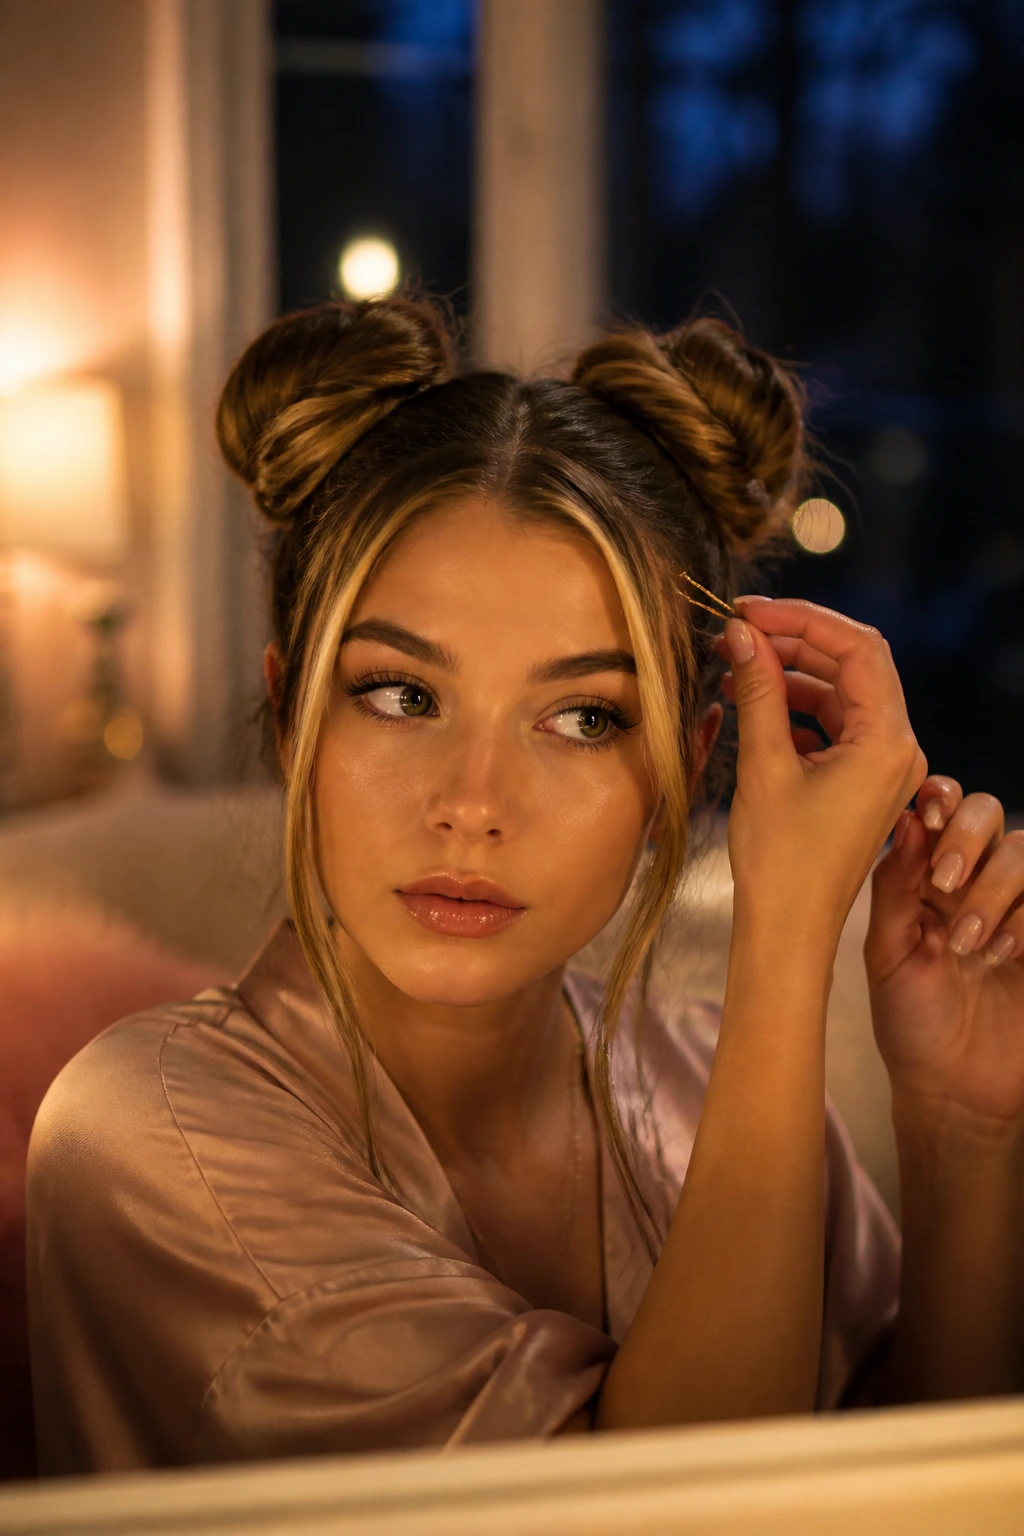
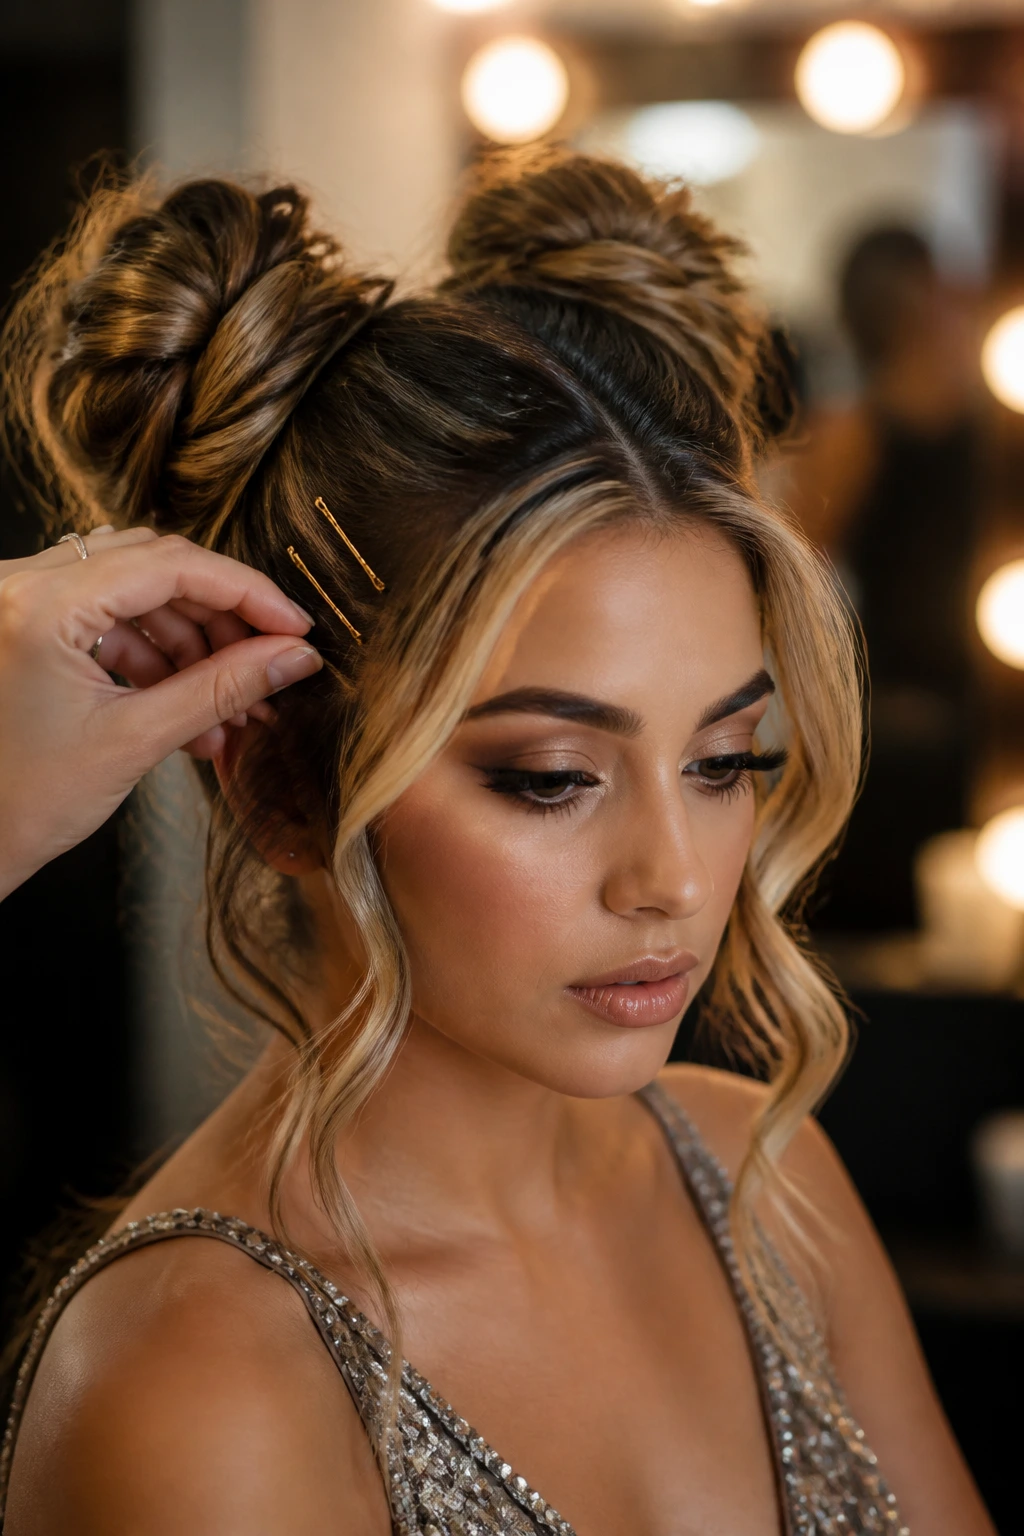
How to Prep Hair So the Style Lasts From Photos to After-Party
Dirty hair is not the goal. Controlled hair is. A little grit helps, though, and that’s why many stylists prefer hair that’s been washed the day before or lightly misted with dry shampoo at the roots. Clean hair can slide right out of pins if you don’t give it some texture.
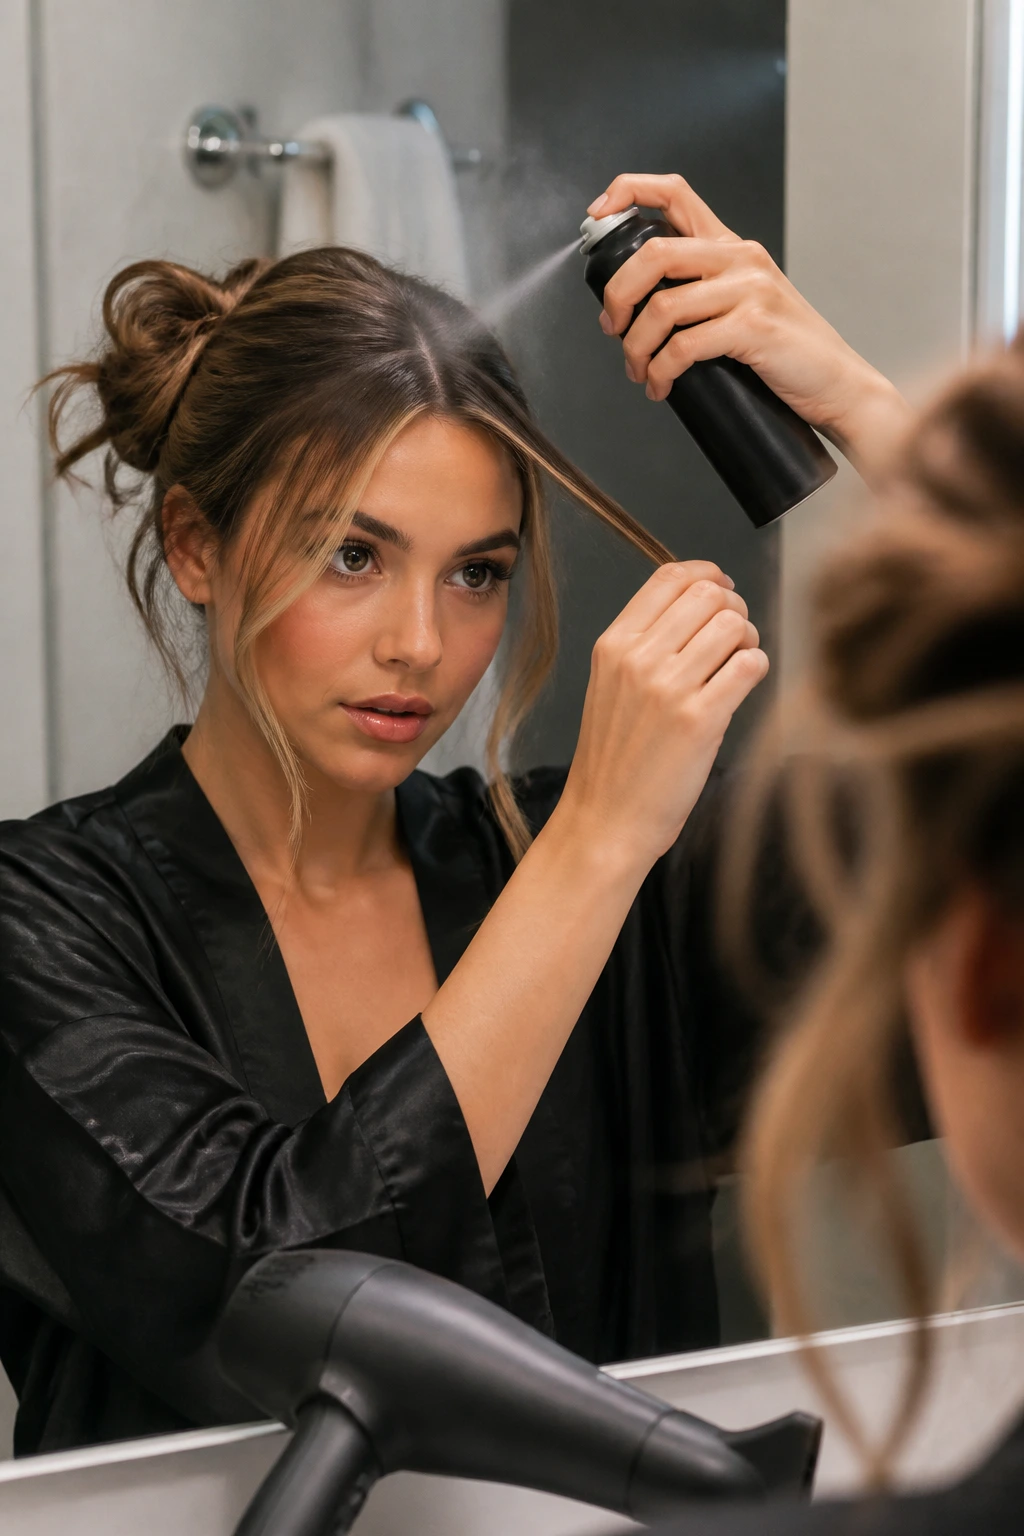
Start by drying the hair completely. Damp roots are the fastest way to get a sagging bun halfway through the evening. If you’re straightening or curling the money pieces, do that first so the heat sets the face-framing shape before the rest of the hair gets pulled back.
Sectioning matters more than people think. Clip the front pieces away before you gather the back, and decide where the buns will sit before you start pinning. A two-minute check in the mirror saves a twenty-minute redo later. And yes, take a photo with flash once the shape is set. Flash tells the truth.
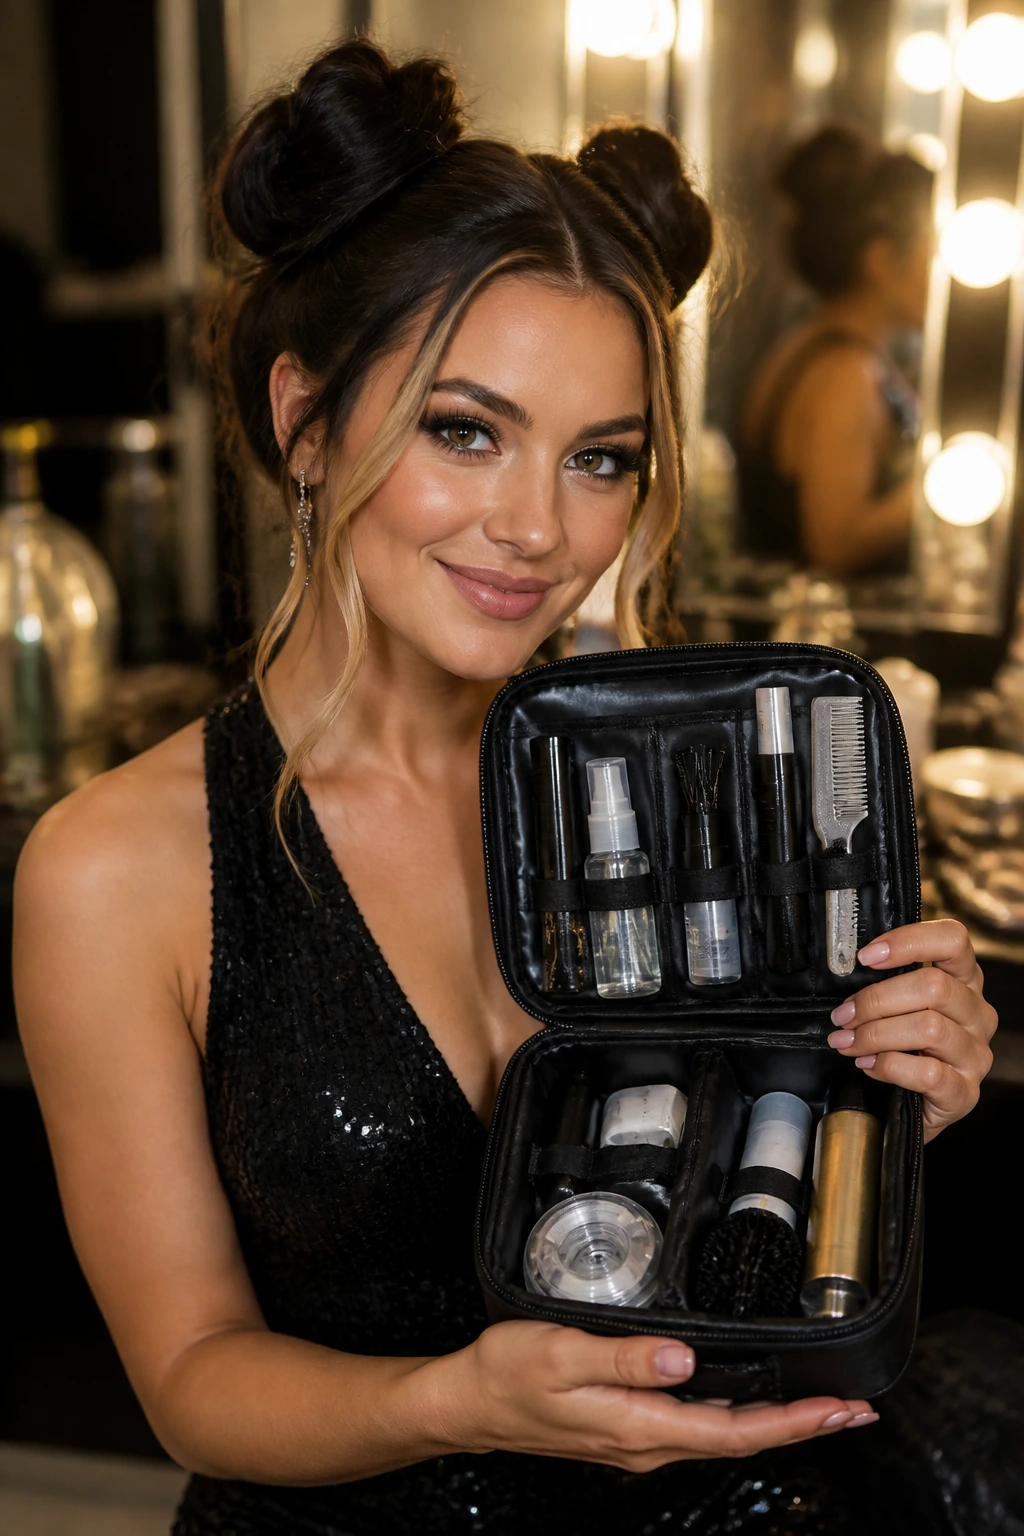
The Vanity Kit That Saves the Night
-
Rat-tail comb: For clean parting and tiny adjustments at the hairline.
-
Sectioning clips: Keep the front pieces separate while you build the base.
-
Snag-free elastics: Clear or hair-matched bands hold pigtails without adding bulk.
-
Bobby pins in your hair color: These hide better and keep the buns from looking dotted with metal.
-
U-pins: Handy for looser buns or textured hair that needs a softer anchor.
-
Texture spray or dry shampoo: Adds grip at the roots and helps the style hold.
-
Strong-hold hairspray: The finishing lock, not the first product you reach for.
-
Heat protectant: Necessary if you’re flat-ironing or curling the money pieces.
-
1-inch flat iron or curling wand: The exact tool depends on whether you want a bend or a wave.
-
Edge brush or soft toothbrush: Useful for smoothing the hairline without flattening everything else.
-
Optional bun maker or padding: Helpful for short, fine, or layered hair that needs a bit of body.
Smart Product Moves for Better Hold
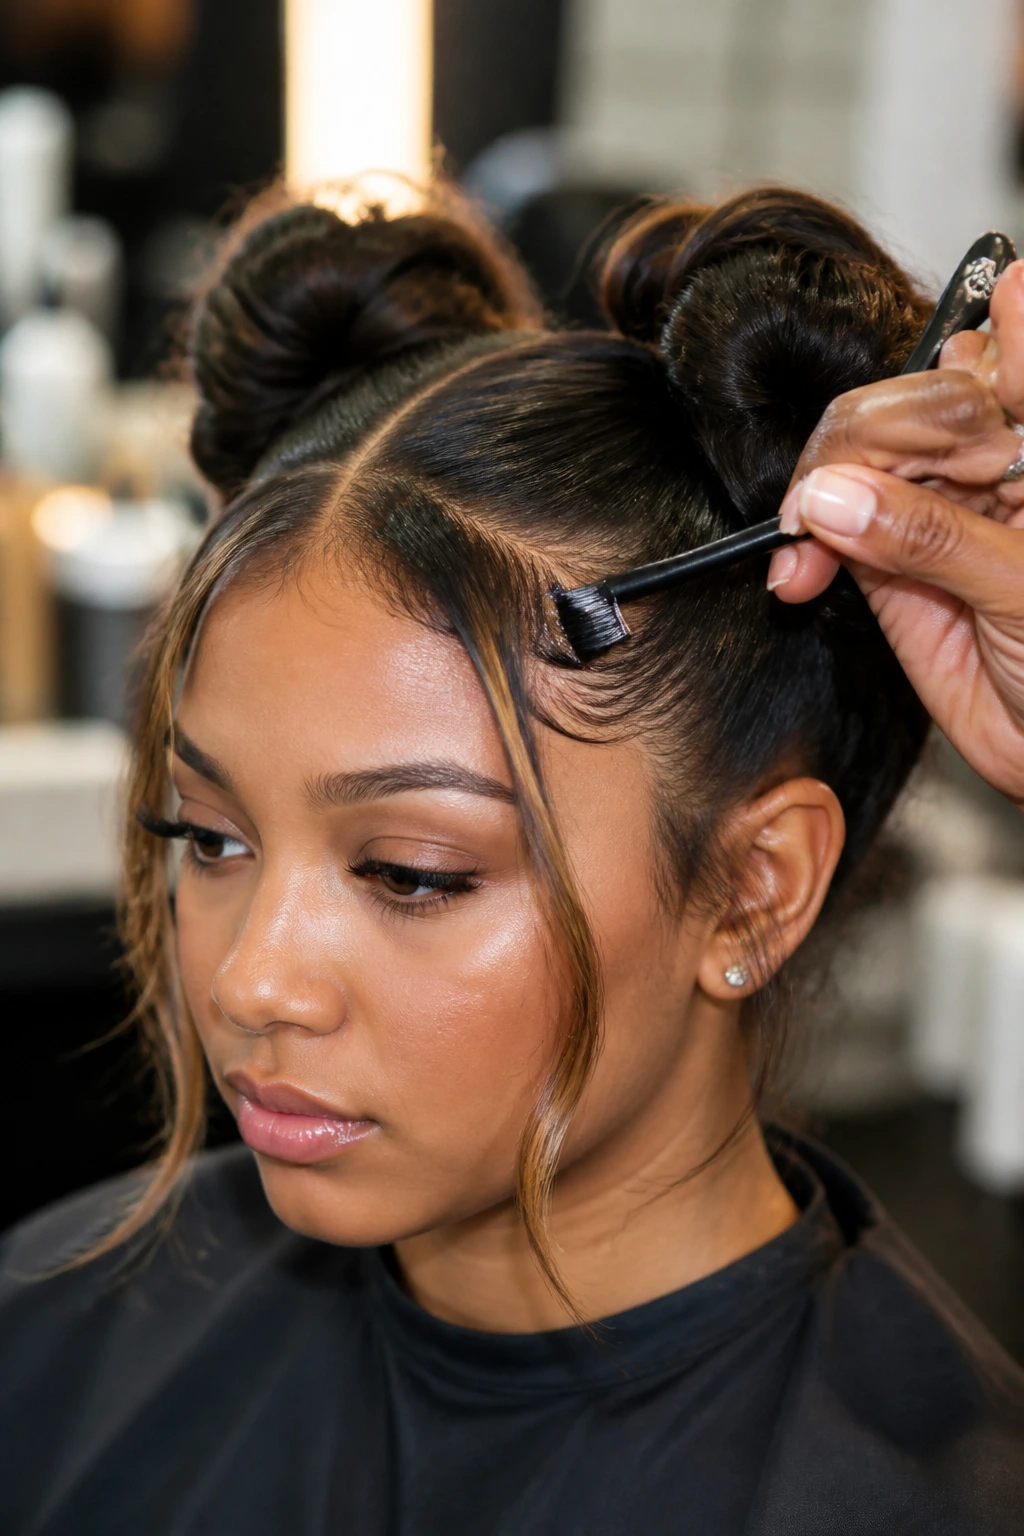
Root Grip: Spray dry shampoo or texture spray at the roots before you gather the hair. If the hair is freshly washed, give it a minute to settle first; you want the texture product to grab, not sit wet on top.
Front-Piece Control: Shape the money pieces before you pin the buns. A 1-inch flat iron is enough for a soft bend, and a curling wand gives more movement. Don’t drown those pieces in oil. One drop too many and they collapse.
Smoothing Without Slip: Put a tiny amount of gel or pomade on a toothbrush or edge brush, then brush only the hairline. That keeps the style neat without turning the whole head shiny in an unhelpful way.
Finish Order: Build the buns, pin them, mist hairspray from about 10 inches away, then press the outer layer with your palms for a second. If you spray before the pins go in, the hair gets hard in the wrong places.
Common Mistakes That Make Double Buns Look Flat

-
Placing both buns too high: The hairstyle starts to feel top-heavy, and the face pieces lose their job. Fix it by dropping the buns a little closer to the ear line or the nape.
-
Making the money pieces too thick: Chunky front sections can swallow the face and make the style look dated. Keep the bright pieces narrow enough that you still see cheekbone and jawline.
-
Using too much serum near the roots: Shine is good. Slipping is not. Put serum only on the ends or the very last inch of the front pieces.
-
Pinning in one direction only: Pins that all point the same way don’t hold as well. Cross them in an X or slide them in against the twist so they grip each other.
-
Skipping the flash check: A bun can look lovely in a bathroom mirror and washed out in photos. Take one quick picture before you leave. It will show you if the front pieces are too flat or if one bun needs a pinch more height.
-
Overworking the hairline: Too much brushing at the front makes the look fuzzy and worn before the night even starts. Smooth once, set once, and stop fussing.
Variations and Add-Ons to Try
Ribbon Loop Romance: Thread a narrow satin ribbon through the base of each bun and leave short tails hanging. This works best when the dress is simple and you want one soft detail instead of heavy ornament.
Pearl Dust Finish: Add three to five pearl pins around each bun or cluster them on one side only. It looks cleaner than scattering pearls across the whole head, and it plays nicely with beaded earrings.
Braided Crown Upgrade: Add a small braid from the temple into each bun. That extra line gives the style more structure and helps if your hair is layered or slippery.
Curly Halo Version: Leave the money pieces and a few outer strands curly while smoothing the top. This is the move for people who want softness without losing shape.
Clip-In Volume Boost: If your buns look small against a big dress or a broad neckline, tuck in a pair of clip-ins at the base before you twist. Use them sparingly. You want fullness, not a heavy knot that pulls on the scalp.
Keeping the Style Fresh Through the Night
Double buns hold up well, but they still need a little care. Carry four extra bobby pins, one spare elastic, and a travel-size hairspray if the night is long. That tiny kit can save you from a drooping bun after dinner or a slippery front piece after a warm dance floor session.
If the hair starts to frizz, smooth only the outer surface. Don’t rebuild the whole style unless something has actually come loose. A dab of serum on your fingertips is enough for the ends of the money pieces. The roots should stay dry so the buns keep their shape.
Want it to last into the next morning? Loosen the pins before bed, cover the hair with a silk scarf, and re-pin it the next day instead of sleeping in the original tight set. The front pieces will usually need a quick flat iron pass, but the basic shape can survive a second outing if you were careful with the first setup.
Questions People Actually Ask About Double Buns and Money Piece Highlights
Can double buns look formal enough for prom?
Yes, if the finish is clean and the proportions make sense. Sleek parts, controlled front pieces, and a polished shine push the style into formal territory fast. Add pearl pins or a ribbon if the dress needs a little more refinement.
How wide should the money pieces be?
Start with narrow sections if you’re unsure. A half-inch to one-inch strip gives soft framing without swallowing the face, while a wider panel creates more contrast and shows up more in photos. The best width usually matches the rest of your color placement.
Will this style work on curly hair?
It works beautifully on curly hair if you respect the texture instead of flattening it. Smooth only the root area, define the front pieces, and let the curls build the buns with their own shape. The style often looks fuller on curls than it does on straight hair.
What if my buns keep slipping?
Your hair probably needs more grip. Use dry shampoo at the roots, build the bun over a tight elastic, and cross your pins instead of placing them in parallel. Silky hair usually needs a little more texture product than people expect.
Can I do this on short hair?
Yes, but the buns need to be smaller and tighter. Short layers may need a bun maker, a few hidden pins, or a small clip-in piece to reach the anchor point. The money pieces matter more on short hair because they keep the style from looking too tiny.
How do I keep the front pieces from looking frizzy?
Shape them with heat, then stop touching them. A flat iron gives the cleanest line, and a tiny bit of anti-frizz serum on the ends helps keep the bend smooth. Don’t spray too much product on the front before you leave, or the pieces can puff back up.
What if one bun ends up bigger than the other?
Open the smaller one and borrow a little hair from the fuller side before you re-pin. It’s easier to rebalance while the elastic is still loose than after everything is locked in with hairspray. A second mirror helps here because symmetry is hard to judge from one angle.
Do I need extensions for this look?
Not always. Extensions help if your hair is thin, short, or heavily layered, but many of these styles work fine without them. If you do add clip-ins, place them close to the bun base so they disappear into the shape.
Last Pins Before the Dance Floor
The best version of this look is the one that matches the dress before it tries to impress anybody else. That sounds obvious, but it’s where people get tripped up. A sharp slick bun with bright money pieces makes sense next to a structured gown. A softer, lower pair of buns feels better with a dress that already has sparkle, lace, or volume.
What keeps the whole thing from looking childish is intention. Clean parting. Front pieces that bend on purpose. Buns placed where the silhouette needs them, not where the mirror happened to look cute for a second. Get those details right, and the style stops being just a bun look. It becomes the frame around the whole night.
If you’re torn between two versions, pin the first side, step back, and look again before you touch the second. That tiny pause usually tells you which way the hairstyle wants to go.