Wavy hair has a built-in swagger that straight hair spends half an hour trying to fake. The bend is already there. The movement is already there. What usually gets lost is the shape — and that’s where the right hairstyles for women with wavy hair earn their keep, especially if you want something with a little rockstar edge instead of a helmet of smoothness.
The best styles for this texture don’t bully it into submission. They keep the crown alive, let the ends move, and leave enough slack for the wave pattern to do its thing. That matters more than people think. A style can look polished in the mirror and collapse into a flat, fuzzy mess by lunch if it’s too tight at the roots or overloaded with cream.
Rockstar hair doesn’t have to mean stage makeup and concert lights. Sometimes it’s a deep side part that flips dramatically across one cheekbone. Sometimes it’s a claw-clip twist with a few rebellious pieces escaping by design. Sometimes it’s a cut that does the heavy lifting for you, which is honestly the smartest kind of style there is.
Why This Collection Feels Different for Wavy Hair
- Wave-Friendly Shapes: These styles keep the S-bend visible instead of stretching it into a straight blur.
- Low-Fuss Movement: Most of them look better with a little piece-y texture than with glossy perfection.
- Rockstar Without the Costume: The edge comes from placement, parting, and volume — not from trying too hard.
- Works on Day-Old Hair: A few of these look even better once the roots have a little grit.
- Easy to Adjust: If your waves are loose, coarse, fine, or thick, there’s something here that won’t fight your texture.
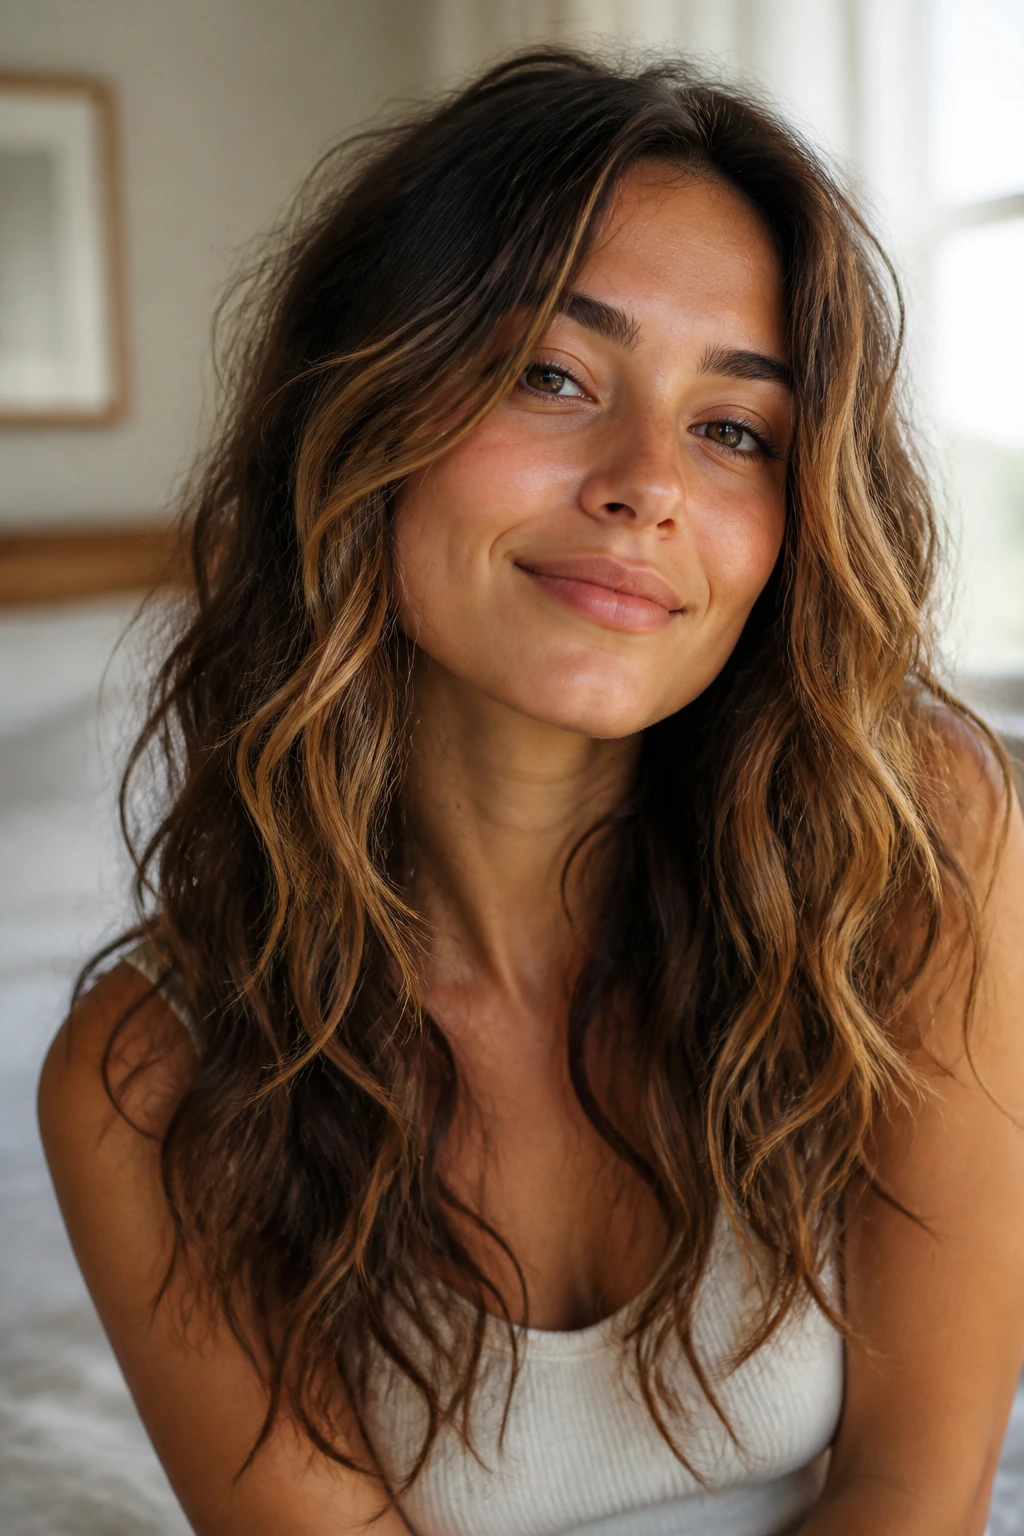
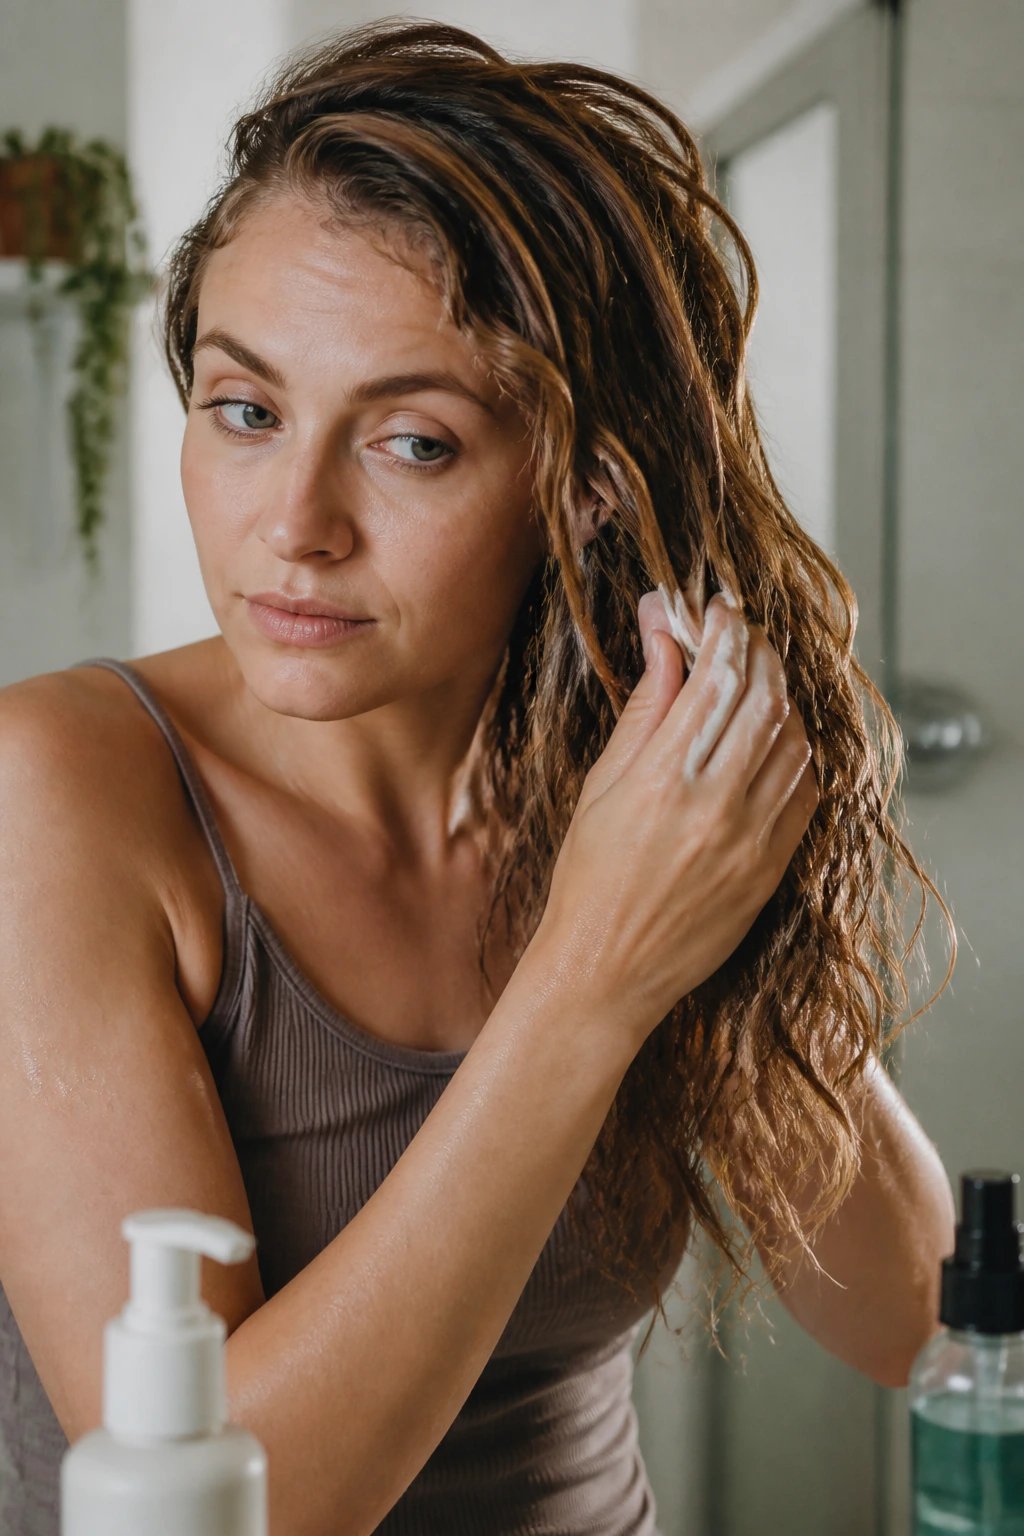
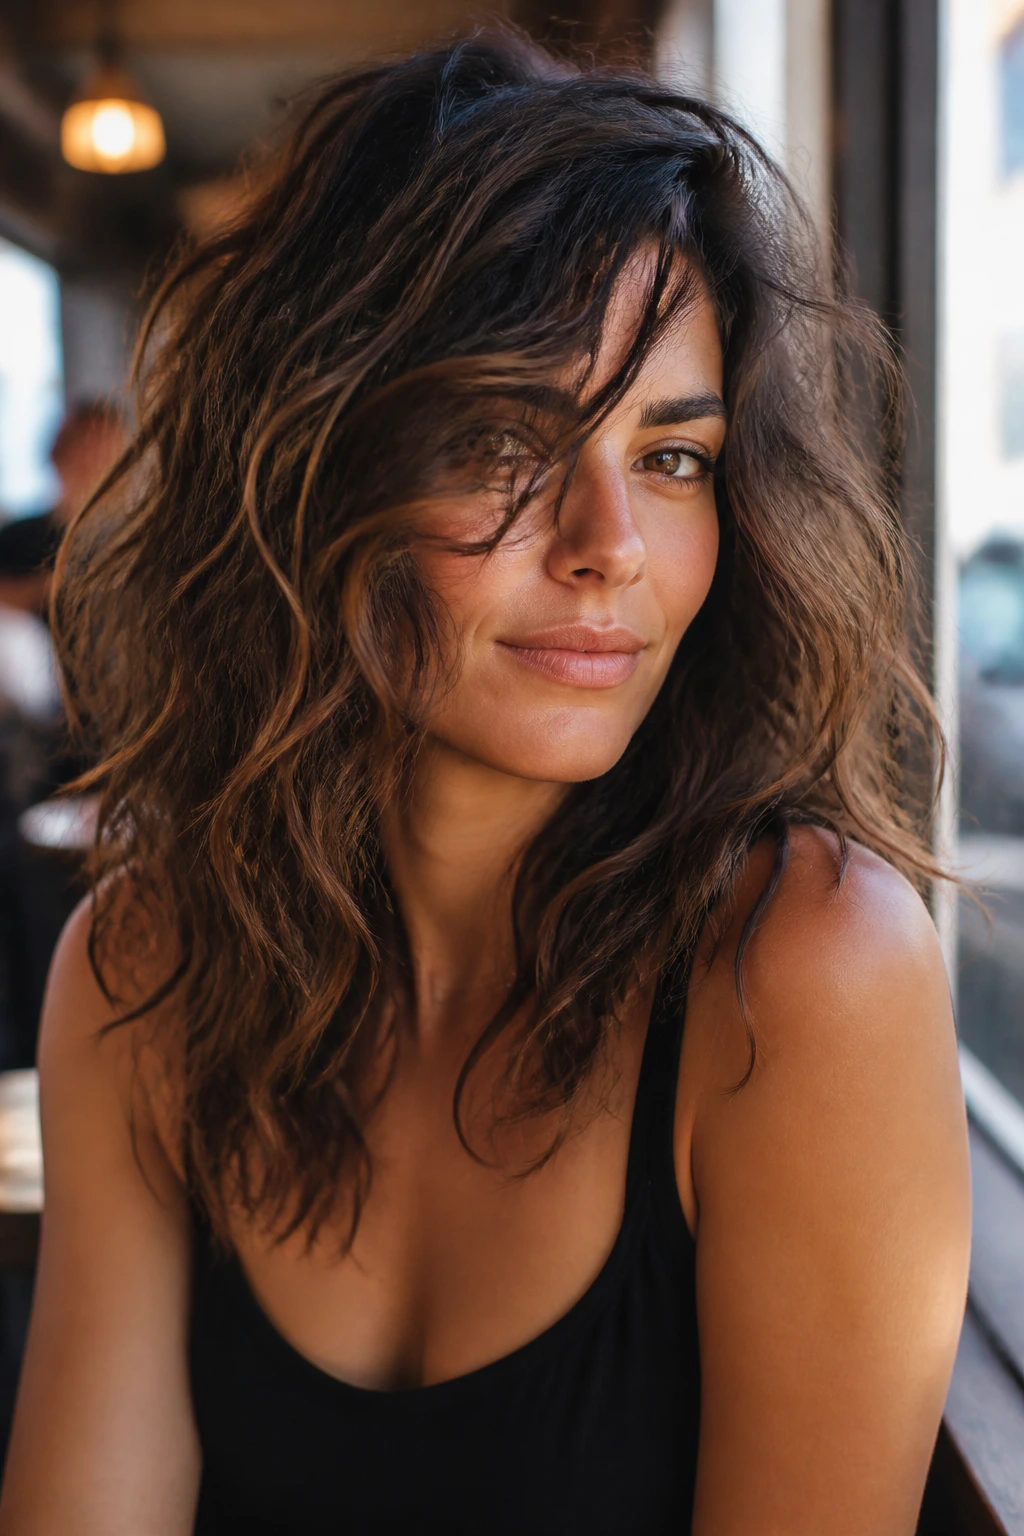
1. The Air-Dried Shag
The shag is the haircut that stops wavy hair from puffing out into a triangle and starts letting it act like itself. The layers remove weight, the ends stay airy, and the whole shape gets that loose, slightly untamed rockstar feel without a lot of handholding. If your waves tend to lie flat at the crown and spring hard at the bottom, this cut fixes the math.
Why It Works: The shorter layers lift the top without needing heavy teasing, and the longer pieces keep the length from looking chopped off. A light mousse at the roots helps the shape hold once the hair dries. It’s the kind of style that looks better with a bend in it than with a perfect curl.
What You Need:
- Lightweight shampoo and conditioner
- Leave-in conditioner, 1 to 2 pumps
- Volumizing mousse or foam
- Curl cream or wave spray, optional
- Microfiber towel or cotton T-shirt
Quick Steps:
- Wash and condition, keeping conditioner off the roots if your hair gets limp fast.
- Scrunch in leave-in and a golf-ball-size amount of mousse on damp hair.
- Part your hair loosely and let the waves fall where they want.
- Air-dry or diffuse on low until about 80 percent dry.
- Break the cast with clean hands and pinch a few front pieces for shape.
Tools: Wide-tooth comb, diffuser, and a few duckbill clips for root lift.
How to Wear It: This one looks best with earrings that don’t compete with the haircut — small hoops, thin chains, or nothing at all. The shag already does the talking.
Pro Tips:
- Lift the crown with clips while the hair is drying.
- Don’t overload the ends with cream or they’ll string out.
- Ask for face-framing layers that start around the cheekbones, not the chin.
Variations:
- Long Shag: Keeps more length and feels softer around the shoulders.
- Curtain Fringe Shag: Adds a split fringe for more movement around the face.
- Polished Shag: Smooth the top with a round brush and leave the mid-lengths wavy.
Common Mistakes:
- Cutting the layers too short can make waves spring outward in a weird halo. Keep the shortest pieces long enough to bend, not spike.
- Brushing it dry turns the whole cut into fluff. Use fingers or a wide-tooth comb when it’s damp.
2. Deep Side Part Volume Sweep
A deep side part is one of the easiest ways to make wavy hair look more deliberate in under two minutes. It creates instant drama, gives the roots somewhere to lift, and lets one side fall across the face in that slightly moody, off-duty-guitarist way. Simple. But effective.
Why It Works: Wavy hair usually has a stronger bend on one side of the head anyway, so shifting the part can wake up the roots without much product. The asymmetry also helps if one side of your hair is flatter than the other — which happens all the time, and no one talks about it enough.
Core Products:
- Root-lifting spray
- Light-hold mousse
- Flexible hairspray
- A touch of shine serum for the ends
How to Style It:
- Flip your part well past the usual center line while your hair is damp.
- Work root spray into the top inch of hair.
- Blow-dry the roots in the opposite direction for 30 seconds if you want extra lift.
- Tuck the smaller side behind one ear and mist the crown lightly.
- Let the front sweep fall naturally instead of forcing it to stay still.
Tools: Rat-tail comb, blow dryer, and one flat clip if you want the part to set.
How to Wear It: This looks sharp with a blazer, a leather jacket, or a simple tank and strong brows. The shape is the accessory.
Best Tweaks: If your waves are fine, keep the product light. If they’re thick, add a little root clip at the part line while you finish your makeup.
Watch-Outs:
- Parting too close to the temple can make the style look lopsided in a bad way. Go deep, but not extreme.
- Too much oil at the roots kills the lift fast.
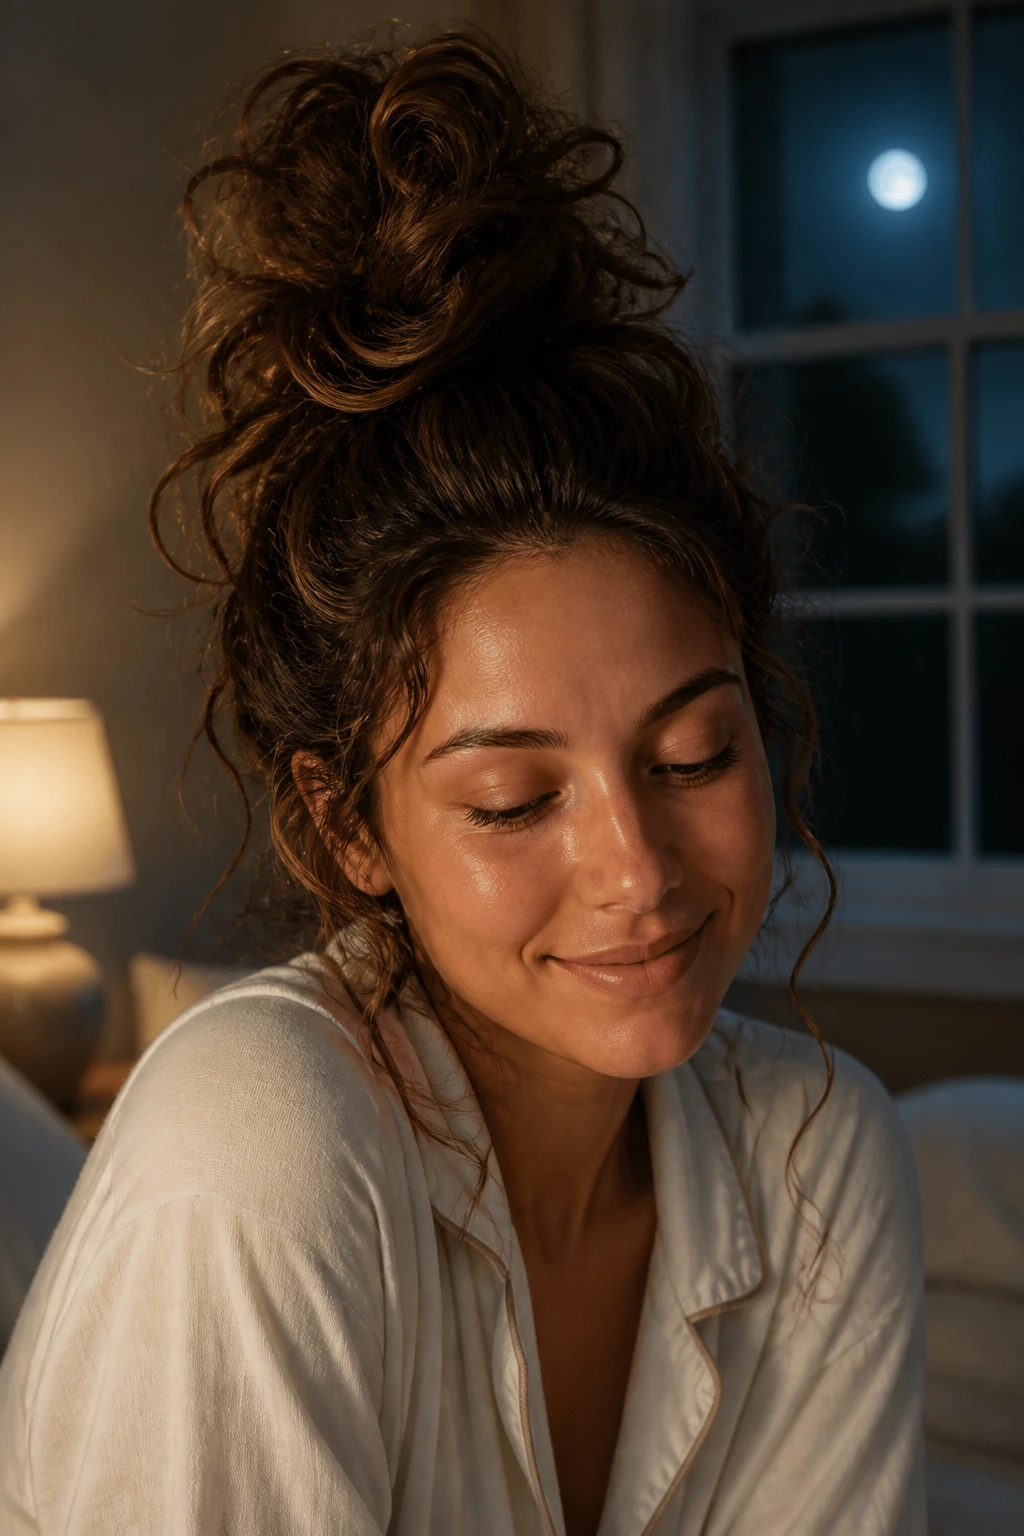
3. The Half-Up Knot With Loose Tendrils
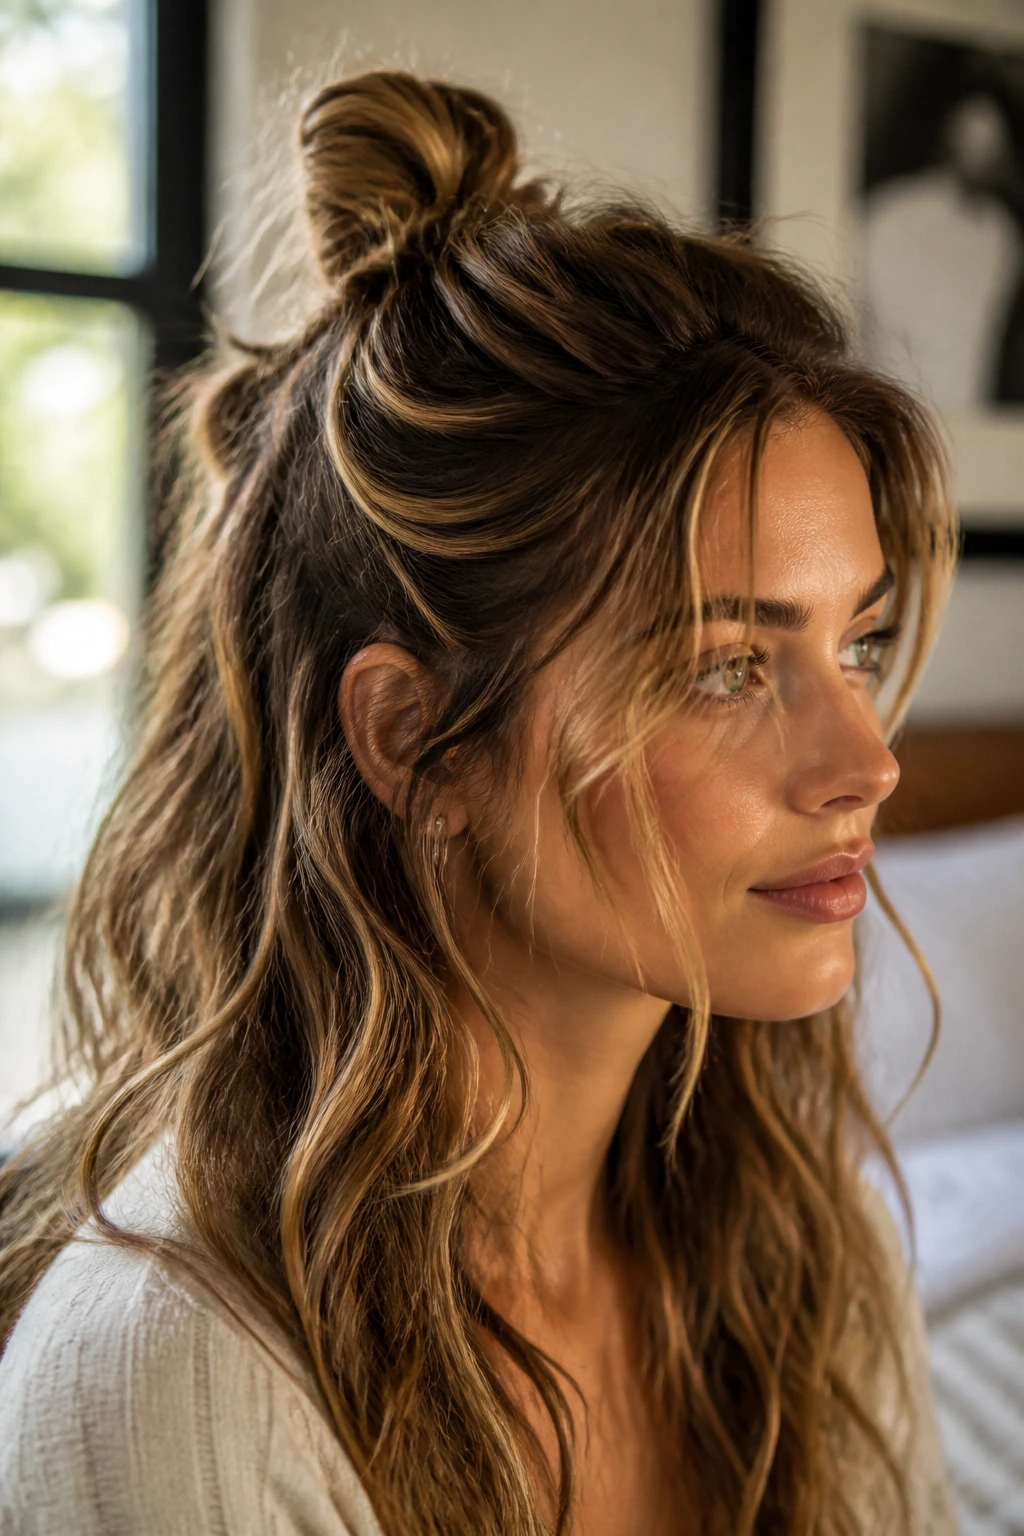
This is the kind of style that looks casual until you notice how well it frames the face. A small knot at the crown lifts the top half, while the loose waves underneath keep the texture visible. It’s relaxed, a little flirty, and much better than a tight half-up ponytail that drags the whole mood down.
Why It Works: Wavy hair already has enough movement to make a half-up knot look fuller than it does on straight hair. The trick is leaving enough hair down so the style doesn’t feel severe. If you want a rockstar edge without a full updo, this one is a good place to start.
What You Need:
- Small elastic
- Two bobby pins
- Texture spray or dry shampoo
- A pea-size bit of styling cream for the ends
Quick Steps:
- Take the top section from temple to temple and gather it loosely at the crown.
- Twist it once or twice, then knot it into a small bun.
- Pin the bun flat against the head so it doesn’t sit too high.
- Pull two face-framing pieces out before tightening the elastic.
- Mist the loose lengths with texture spray and scrunch gently.
Tools: Tail comb, bobby pins, and a mirror that lets you check the back.
How to Wear It: Wear this with soft makeup and a collar that shows the neck a bit — crew necks can make the whole thing feel heavier than it should.
Pro Tips:
- Leave the knot loose. A tight knot on wavy hair looks stiff.
- If your front pieces are too thick, split them into two finer strands.
- Use matte pins, not shiny ones, if you want the style to stay invisible.
Variations:
- Braided Knot: Braid the top section before twisting it up for extra texture.
- Mini Crown Knot: Place the knot slightly higher for a sharper look.
- Low Half-Up Twist: Set the knot closer to the back of the head for a softer line.
Common Mistakes:
- Pulling the knot too tight flattens the crown and makes waves at the bottom look disconnected.
- Skipping texture spray can make the loose hair fall limp by the second hour.
4. The Claw-Clip French Twist
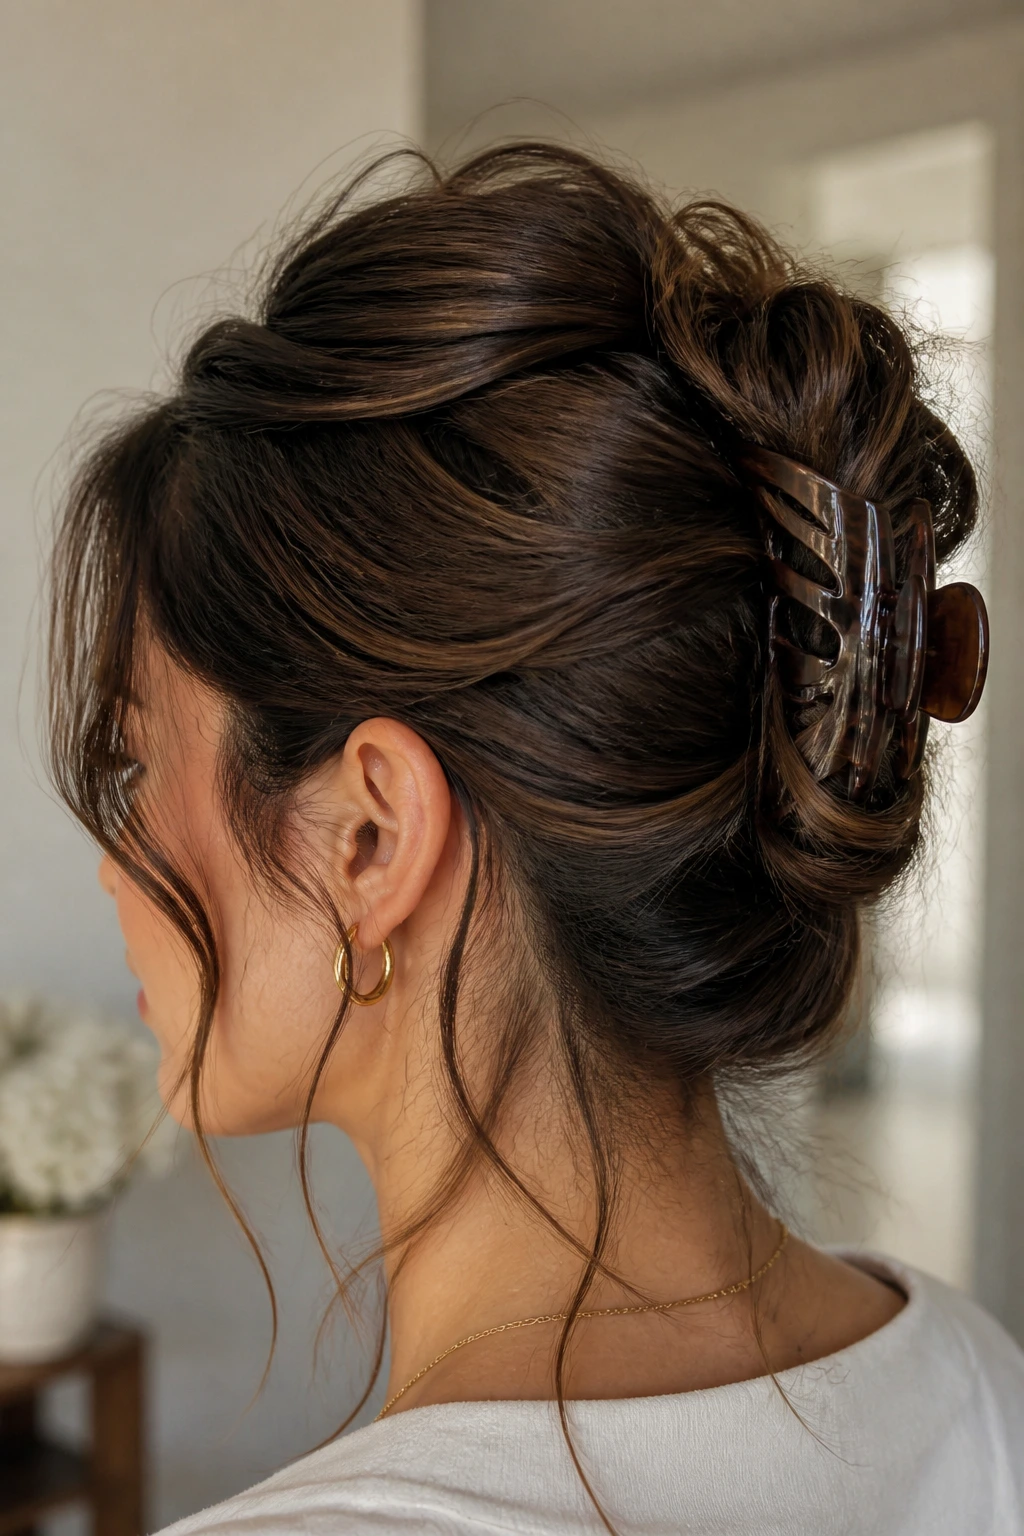
The claw clip has earned its place back because it solves a real problem: you want your hair up, but you do not want the old-school stiffness that comes with a formal twist. On wavy hair, a French twist made with a clip gives you height at the crown and those nice little spill-outs at the nape that make the whole thing feel current.
Why It Works: Wavy texture gives the twist some built-in grip, so you don’t need a ton of pins. The claw clip holds the bulk while the length folds softly into itself instead of smoothing into one hard roll. It’s fast, and that matters on busy mornings.
What You Need:
- Medium or large claw clip
- Light texturizing spray
- 3 to 5 bobby pins, optional
- A smoothing cream for the front hairline
How to Style It:
- Gather your hair low at the back with one hand.
- Twist it upward once, letting the ends fold under.
- Slide the claw clip over the twist so it grips the center.
- Tug the crown slightly to create a little lift.
- Pull out a few soft pieces around the ears if you want it less severe.
Tools: One strong clip and a tail comb.
How to Wear It: This works with denim, satin, silk, you name it. It can read casual or dressed up depending on how tidy you make the front.
Pro Tips:
- If your hair is slippery, rough up the roots with dry shampoo first.
- A medium clip often holds better than an oversized one that sits too high.
- Don’t hide every strand; a few ends sticking out make the twist look better.
Variations:
- Low French Twist: Keep the roll lower for a softer profile.
- Messy Clip Twist: Leave the ends more visible for a looser finish.
- Pinned Twist: Use pins instead of a clip if your hair is fine and the clip slips.
Common Mistakes:
- Using a clip that’s too small leads to constant slipping.
- Twisting the hair too neatly removes the wave texture that gives this style its charm.
5. The Braided Crown With Open Ends
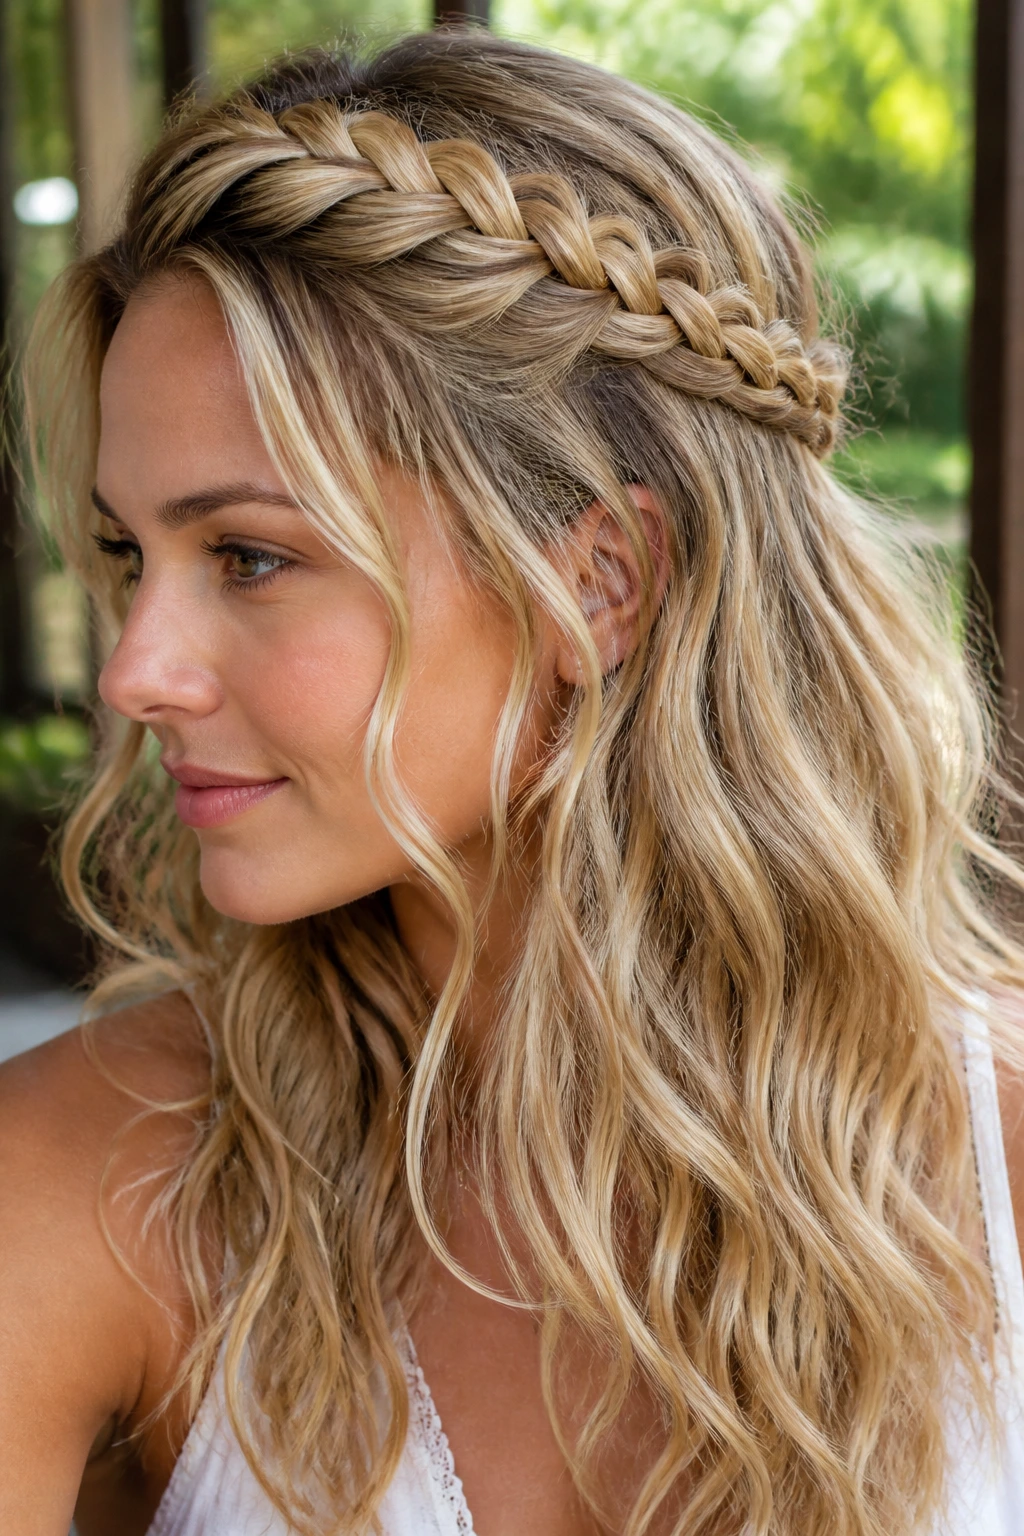
A braided crown is one of those styles that looks more intricate than it actually is. On wavy hair, the braid gives structure near the hairline while the rest of the length stays loose and textured. That contrast is where the style gets its edge.
Why It Works: The braid keeps shorter pieces from hanging in your face, which is useful if your waves have a stubborn front layer. Meanwhile, leaving the back open means the overall shape still reads soft and feminine instead of formal. It’s a smart compromise.
What You Need:
- Small clear elastics
- Lightweight hairspray
- A little styling paste for flyaways
- A rat-tail comb for clean sectioning
Quick Steps:
- Part off a section from one temple and braid along the hairline.
- Continue the braid around the head until it reaches the other side.
- Secure the end under a top layer or with a small elastic.
- Leave the rest of the hair down in its natural wave pattern.
- Loosen the braid gently with your fingers so it doesn’t look too strict.
Tools: Bobby pins, tail comb, and a small mirror for the back.
How to Wear It: This one works with sleeveless tops and open collars because the braided shape sits close to the head and doesn’t fight your neckline.
Pro Tips:
- Start with second-day hair if your waves are soft; the braid will hold better.
- Keep the braid low and wide, not tight and skinny.
- A tiny dab of paste on the ends helps the braid look deliberate.
Variations:
- Double Crown Braid: Add a second braid parallel to the first for more texture.
- Side Crown Braid: Braid just one side and let the rest fall over the opposite shoulder.
- Loose Halo Twist: Use rope twists instead of braids if your hands get tired.
Common Mistakes:
- Braiding too tightly flattens the top and can create a headache by noon.
- Leaving the braid too polished makes the open lengths look like an afterthought. Loosen the braid a bit so the two parts belong together.
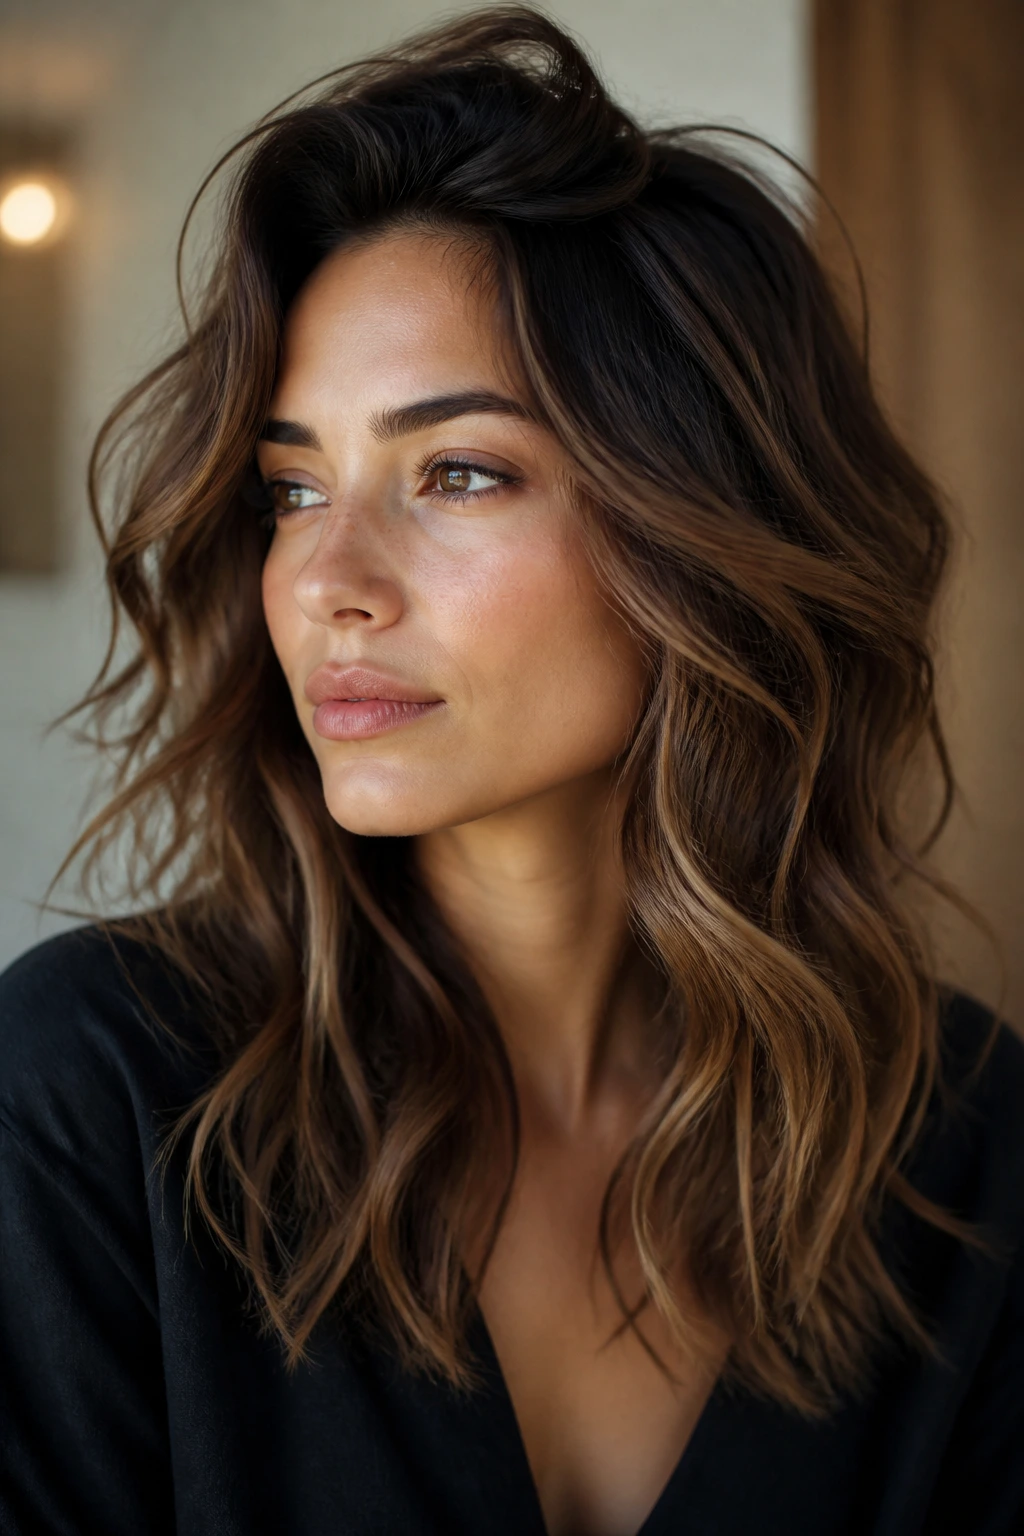
6. Sleek Roots, Wavy Ends
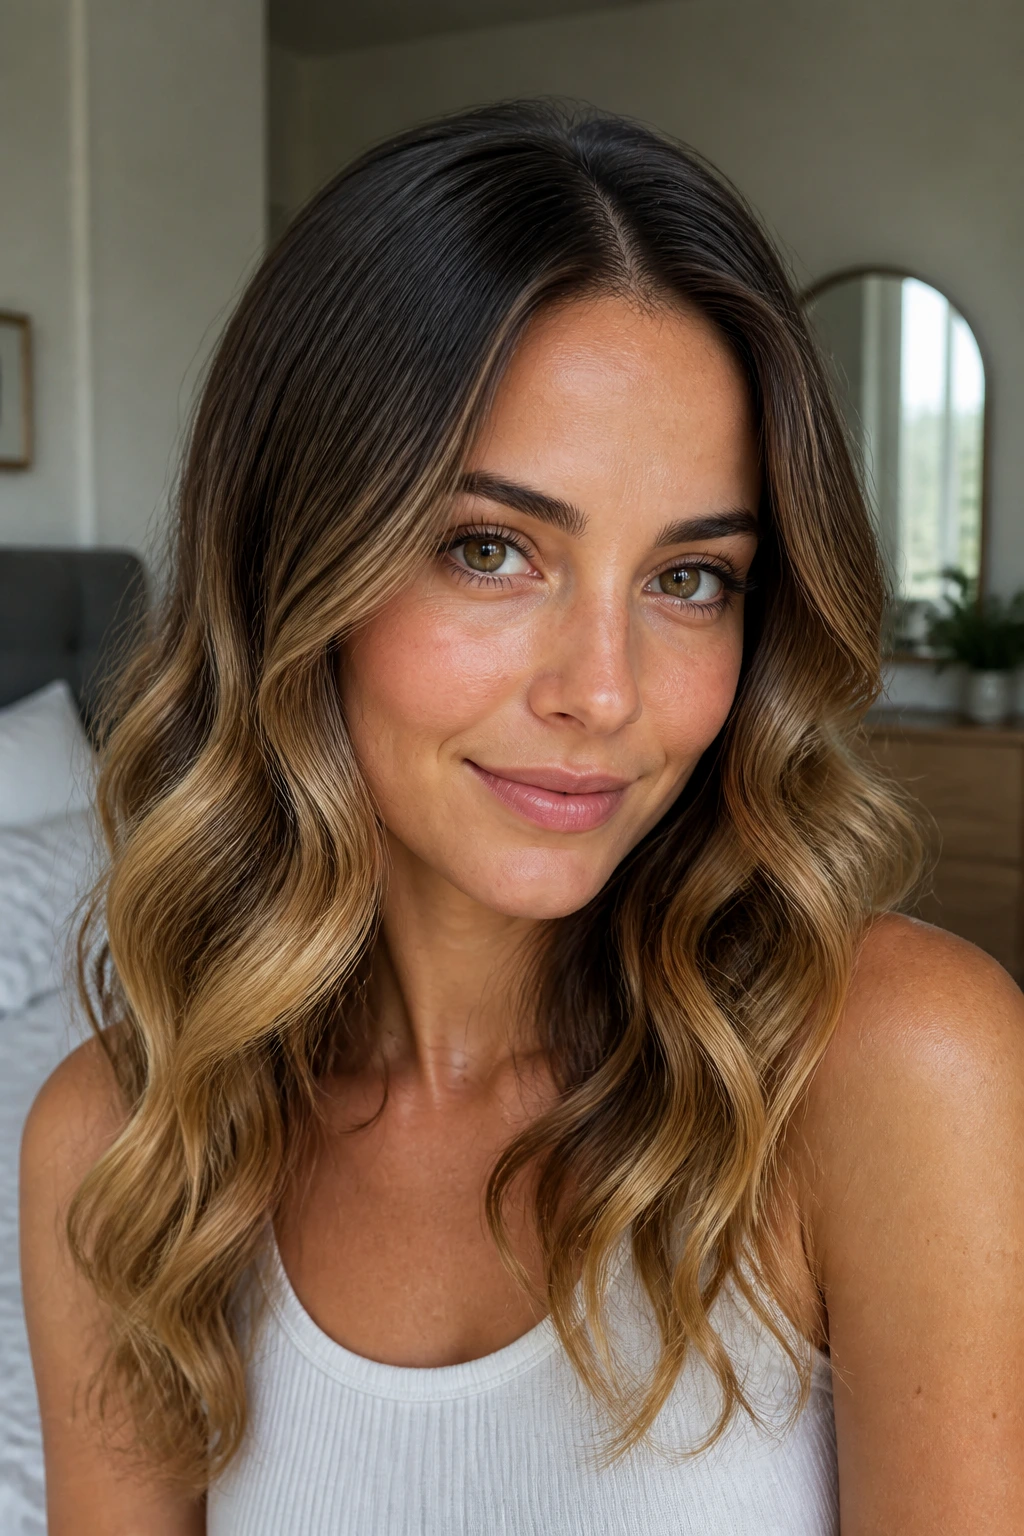
This one is a favorite because it respects the wave without making the whole head look overly casual. The roots stay smooth and controlled, then the length opens up into soft bends around the cheekbones and below. The contrast feels polished, but not stiff.
Why It Works: Wavy hair often looks best when the top section is guided and the lower section is left alone. A smooth crown makes the face look more lifted, while the ends keep the movement that straight hair has to fake with a curler. There’s a little attitude in that contrast.
What You Need:
- Smoothing cream
- Heat protectant
- Flat brush
- Optional 1-inch curling iron for a few front pieces
How to Style It:
- Apply smoothing cream only from the hairline to the ears.
- Blow-dry the roots down and back with a flat brush.
- Leave the mid-lengths and ends alone if your waves already bend well.
- Touch up just the front pieces with a curling iron if they need shape.
- Finish with a light spray so the crown stays neat.
Tools: Blow dryer with nozzle, flat brush, and heat protectant.
How to Wear It: This is the hairstyle I’d pick for a meeting, a dinner, or anywhere you want to look like you made an effort without looking shellacked.
Best Tweaks: Fine waves need less cream. Thick waves can handle a little more smoothing product, especially near the temples.
Watch-Outs:
- Spreading product through the ends makes them go stringy.
- Overusing the iron on the front pieces can make the whole style look too uniform.
7. The Bubble Ponytail
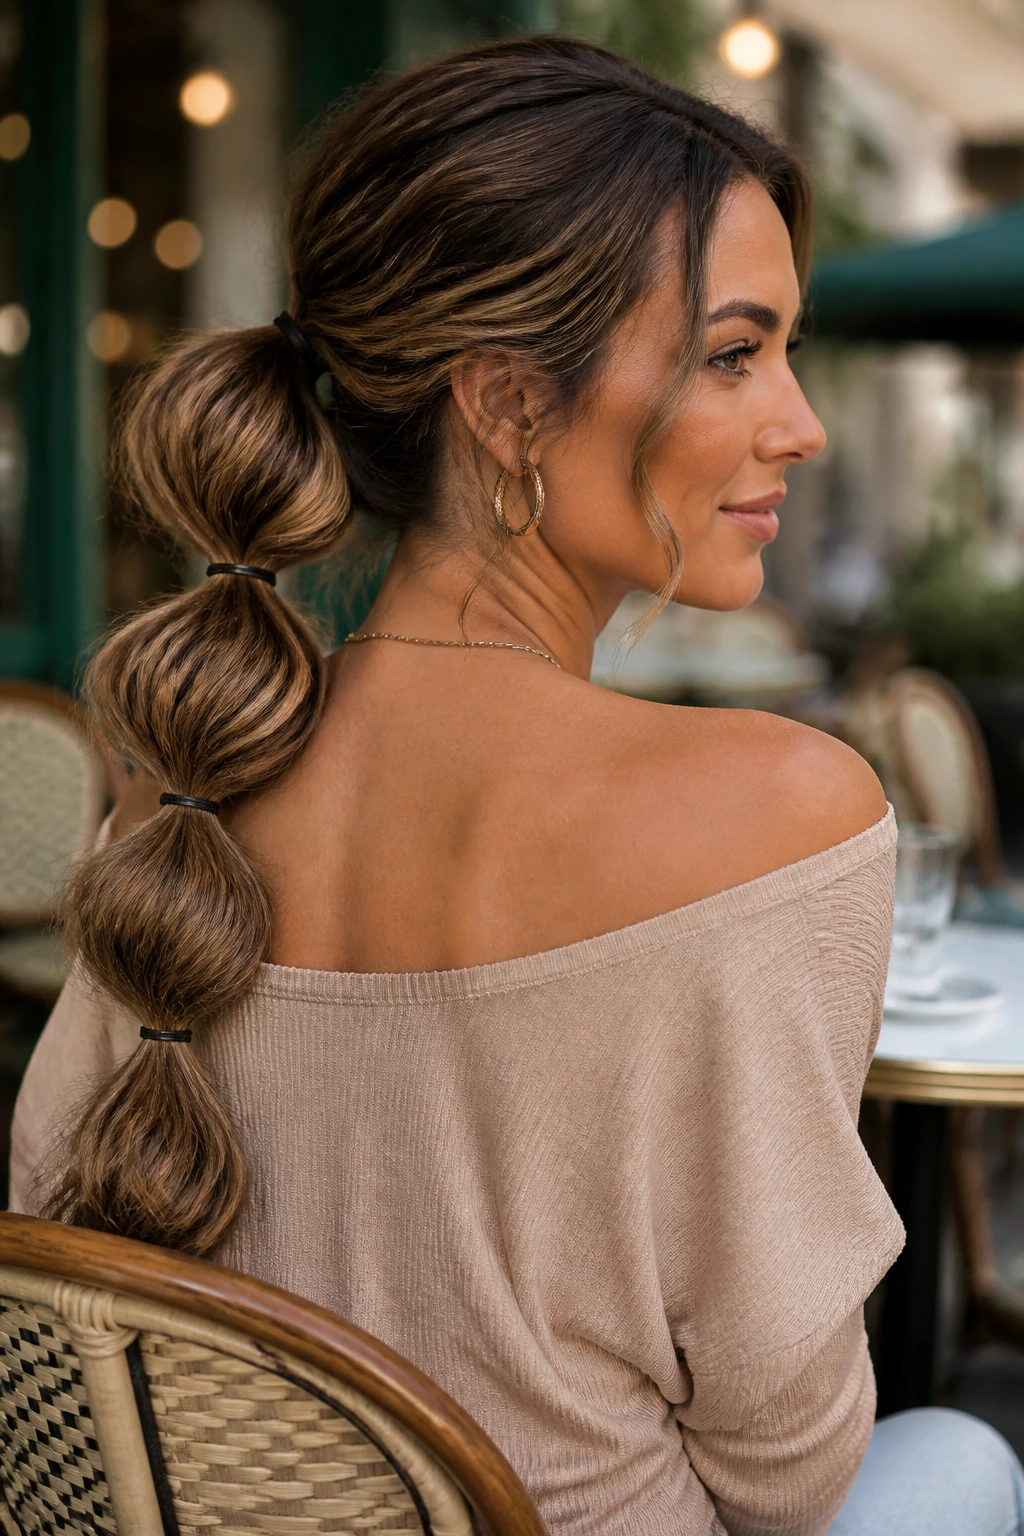
The bubble ponytail has enough playfulness to keep things from feeling plain, but it still reads clean and intentional. On wavy hair, each section between elastics gets a little puff and bend, which gives the whole ponytail more body than a regular tie-back. It’s an easy way to make ordinary hair feel styled.
Why It Works: The bubbles create shape at regular intervals, so the ponytail looks fuller without a lot of teasing. Wavy hair gives each bubble some natural width, which is a small but useful advantage. It’s also comfortable. That matters more than people admit.
What You Need:
- 4 to 6 small clear elastics
- Light-hold hairspray
- Texture spray
- A few bobby pins if the crown needs help
Quick Steps:
- Gather hair into a low, mid, or high ponytail and secure it.
- Place another elastic about 2 inches down the tail.
- Gently tug the hair between elastics to puff out each section.
- Repeat every 2 inches until you run out of length.
- Mist lightly and smooth the hairline with your fingers.
Tools: Tail comb and small elastics that don’t snag.
How to Wear It: Mid-height looks sporty. Low looks more grown-up. High reads a little louder, which fits the rockstar brief nicely.
Pro Tips:
- Use matching elastics if you want the bubbles to feel sleek.
- Pull the sections out evenly or the ponytail looks lopsided fast.
- If your hair is thick, leave more space between elastics.
Variations:
- Side Bubble Pony: Move the ponytail to one side for extra asymmetry.
- Half-Up Bubble Tail: Use only the top half for a softer version.
- Mini Bubble Tail: Use closer elastics for shorter hair.
Common Mistakes:
- Tightening each elastic too much flattens the wave and creates dents.
- Skipping root texture can make the ponytail slide down by midday.
8. The Messy Low Chignon
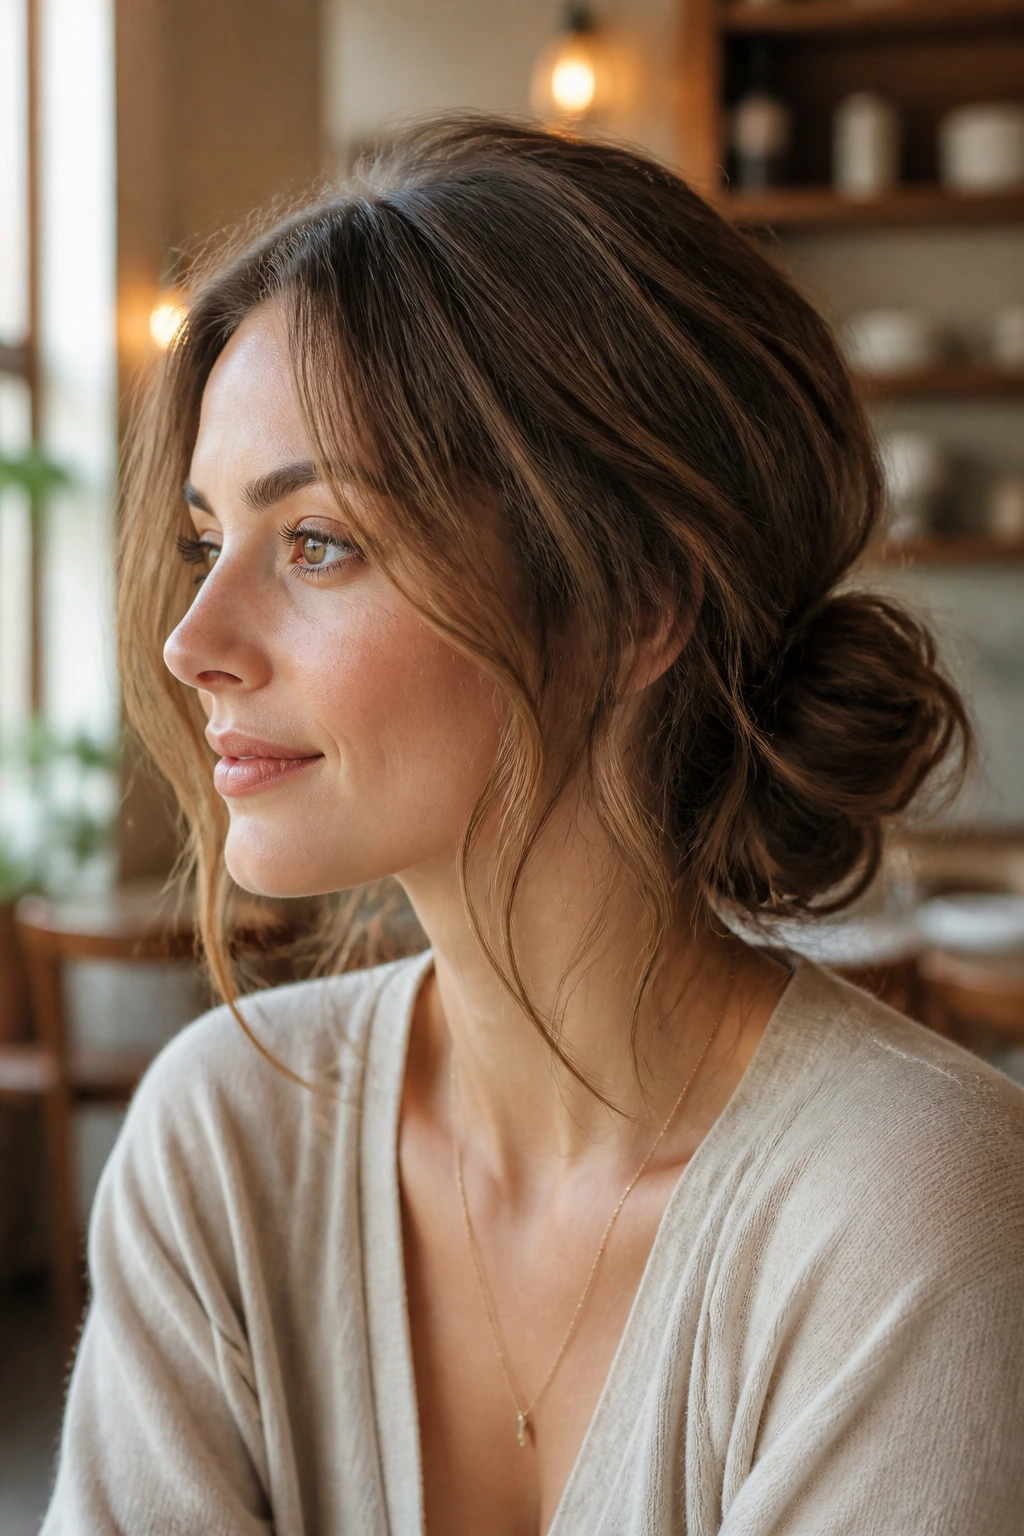
A low chignon sounds formal until you loosen it a little and let the waves spill out around the nape. Then it becomes something better: soft, practical, and slightly undone in a way that feels deliberate. This is a good style when you want your hair off your neck without looking severe.
Why It Works: Wavy hair creates texture inside the bun without needing a lot of twisting. That means the chignon can stay compact at the base and still look full. If your hair is medium to thick, this style will hold better than most people expect.
What You Need:
- Two bobby pins or a U-pin
- Small elastic, optional
- Light pomade or smoothing cream
- Strong-hold hairspray, used lightly
How to Style It:
- Gather hair at the nape and twist it loosely upward.
- Coil the twist into a soft bun rather than a tight knot.
- Pin the bun at two points so it feels secure but not rigid.
- Pull a few face-framing pieces free.
- Spray the top lightly and smooth with your fingertips.
Tools: Bobby pins, tail comb, and a mirror for the back.
How to Wear It: This looks sharp with a square neckline or an open shirt collar. It also works if you want earrings to be the loudest thing in the picture.
Pro Tips:
- Leave a little bend in the ends instead of tucking everything under.
- If the bun is too round, pinch one side flatter for a less precious look.
- A few shorter pieces at the nape make the style feel softer.
Variations:
- Low Knot Chignon: Twist tighter for a cleaner line.
- Side Chignon: Place it behind one ear for more attitude.
- Braided Chignon: Braid the ponytail first for extra grip.
Common Mistakes:
- Making the bun too neat can erase the wave texture completely.
- Using too many pins often makes the bun sit awkwardly high instead of lying close to the head.
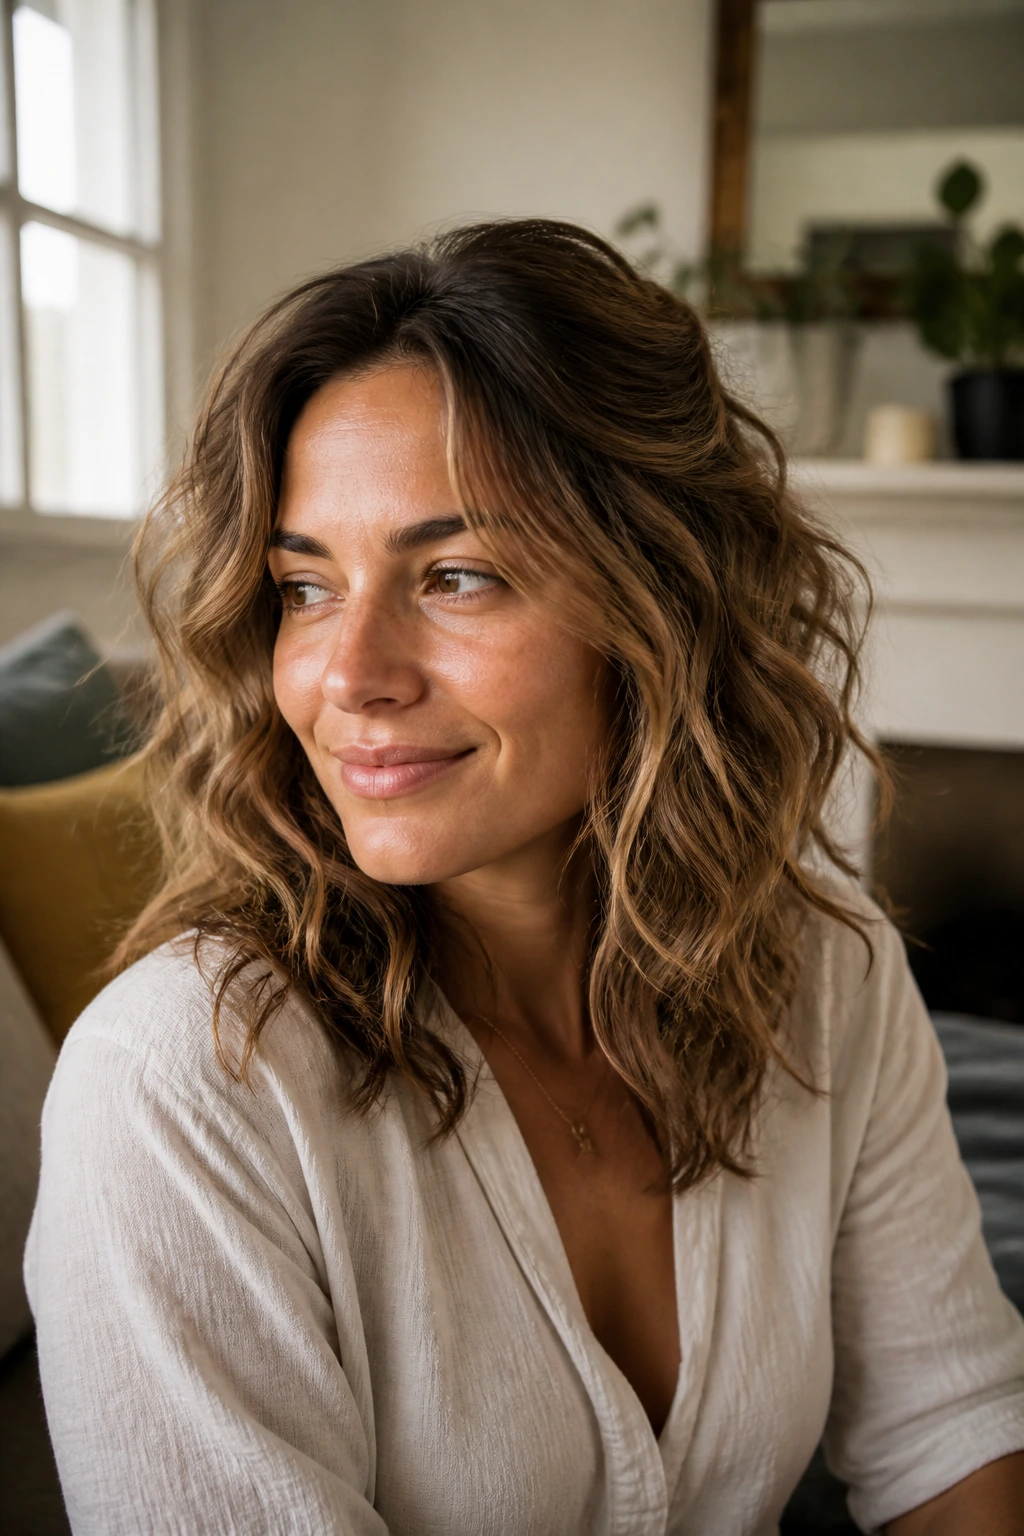
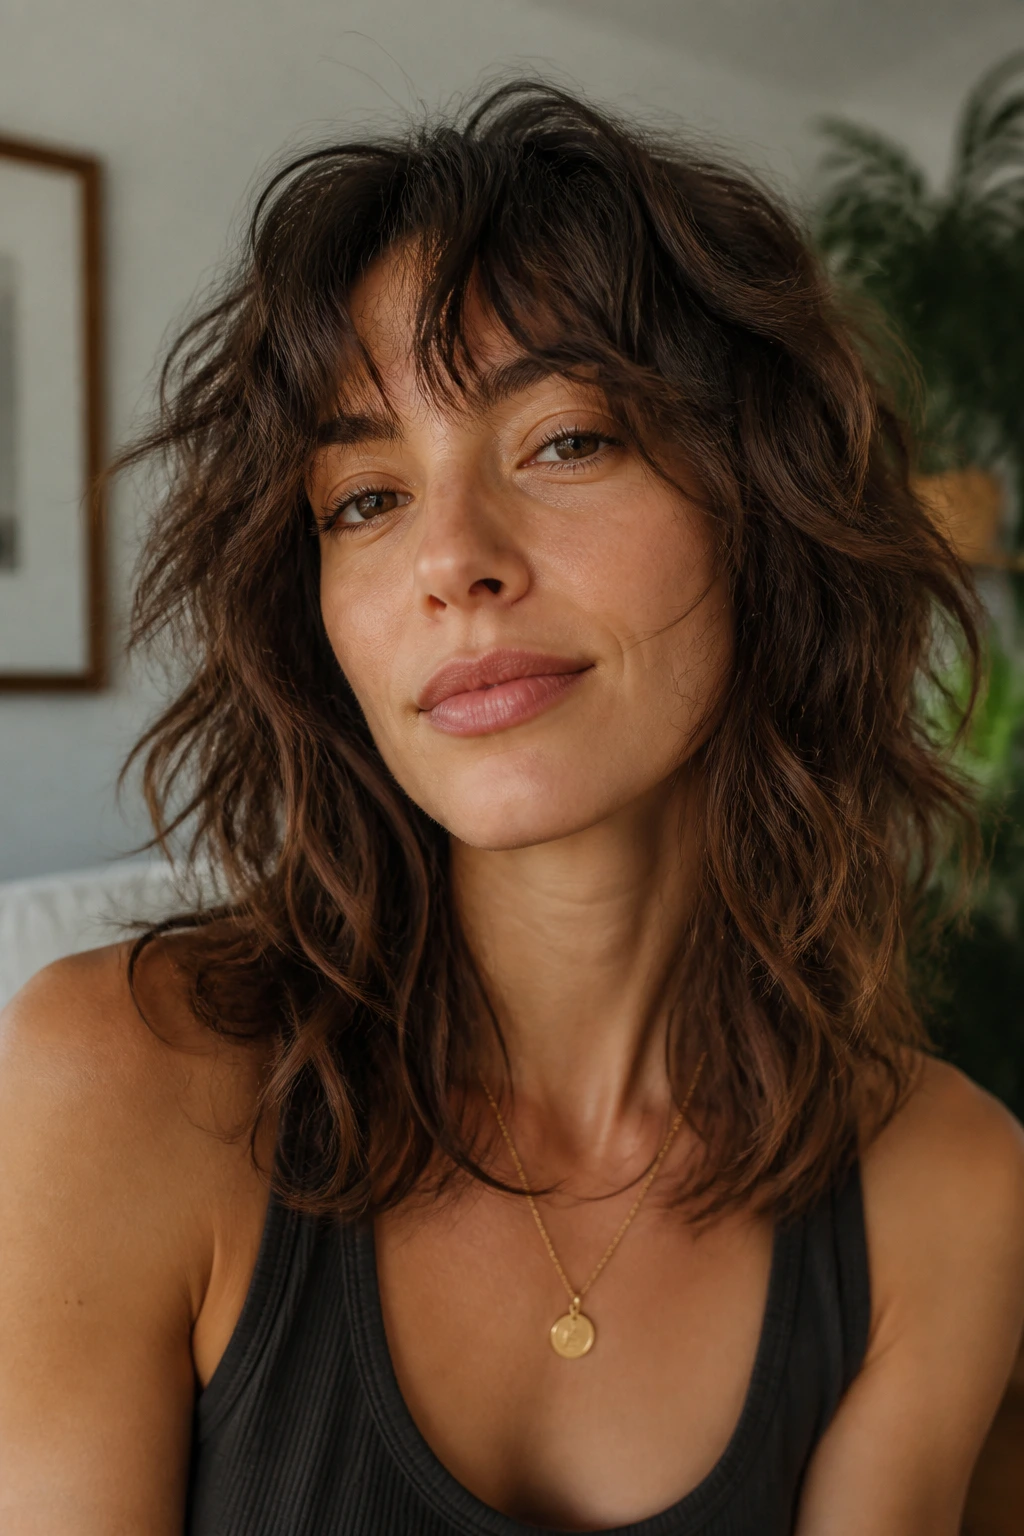
9. Curtain Bangs With a Center Part
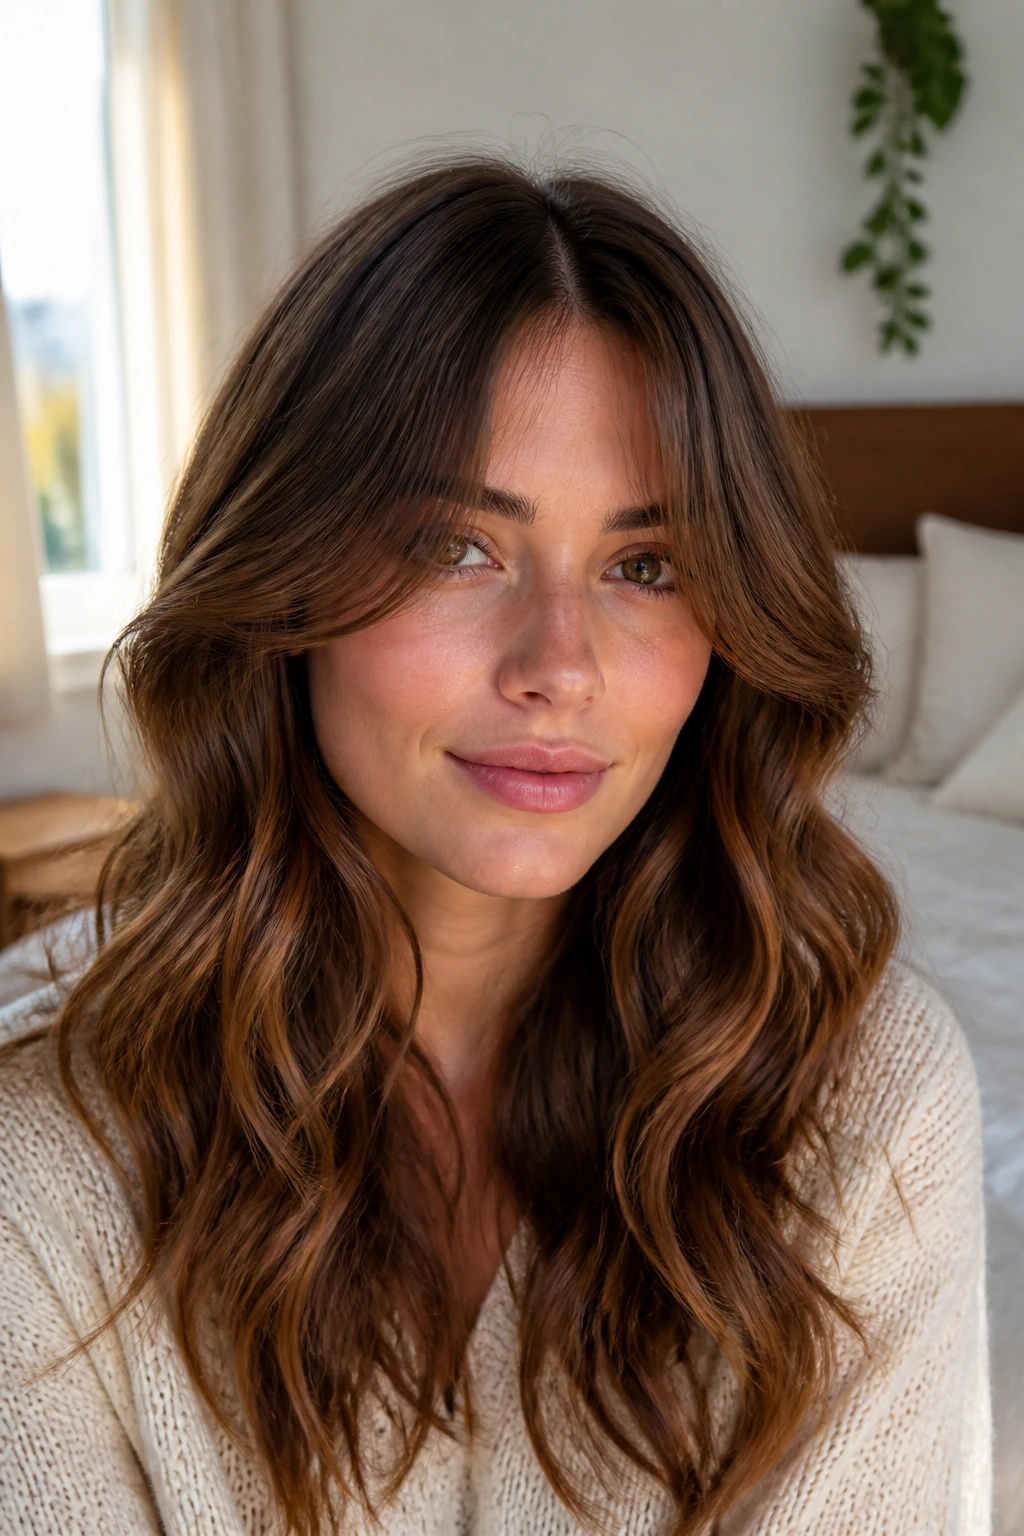
Curtain bangs are almost unfair on wavy hair because they already want to fall in that soft, face-framing sweep. Add a center part and you get movement around the eyes without having to style the whole head into submission. It’s a strong look, but not a loud one.
Why It Works: The split fringe opens the face, while the longer sides can blend into the rest of the wave pattern. That means the bangs never look pasted on. They look like they belong there, which is half the battle with fringe.
What You Need:
- Round brush or blow-dry brush
- Heat protectant
- Lightweight mousse
- Small clip for setting the fringe
How to Style It:
- Blow-dry the bangs forward first, then sweep each side away from the center.
- Roll the ends under just a little with a brush or dryer.
- Let the rest of the hair air-dry in a center part.
- Pin the bangs in place for a few minutes while they cool if needed.
- Break up the front pieces with your fingers so they don’t sit in one solid sheet.
Tools: Round brush, dryer nozzle, and a clip.
How to Wear It: This looks best with softer necklines and casual layers. It gives even a plain T-shirt a little more shape.
Pro Tips:
- Keep the fringe light; heavy bangs on wavy hair can split in weird directions.
- A tiny bit of mousse is enough. Too much and the bangs clump.
- Trim the sides so they hit the cheekbones, not the jaw.
Variations:
- Long Curtain Fringe: Easier to grow out and easier to pin back.
- Swept-Back Fringe: Use a clip to push the bangs away from the face for a cleaner finish.
- Textured Fringe: Let them air-dry for a rougher, more piecey effect.
Common Mistakes:
- Cutting the bangs too short can make them spring up in the morning and shrink even more in humidity.
- Trying to flatten them straight defeats the point of wavy hair.
10. Space Buns With Free-Length Waves
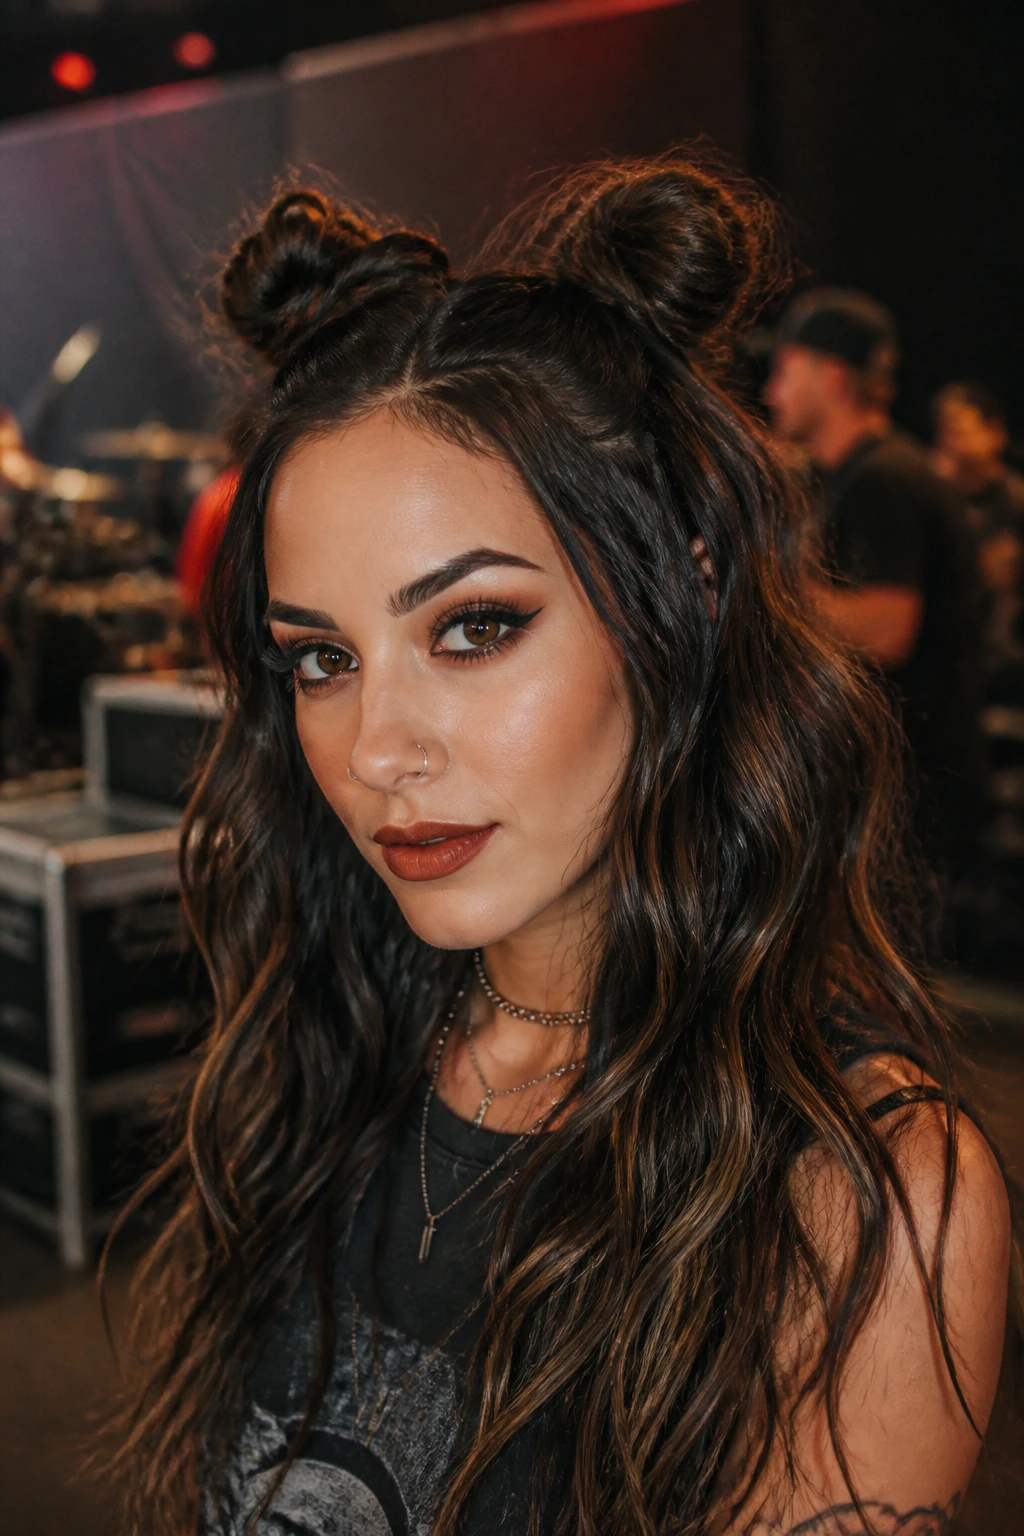
Space buns are playful, but they’re not childish if you keep the rest of the hair loose and textured. On wavy hair, the contrast between the two small buns and the open length underneath gives the style a little edge. It’s fun without looking like you borrowed it from a costume rack.
Why It Works: The buns keep the top under control, while the lower waves stay visible and soft. That balance matters. If all your hair goes up, the style can feel too tight; if none of it does, the buns lose the point. The split between the two is what makes it work.
What You Need:
- 2 small elastics
- 4 to 6 bobby pins
- Texture spray
- Smoothing gel for the front edges if desired
Quick Steps:
- Part hair down the middle.
- Section off the top half and split it into two high puffs.
- Twist each side into a small bun and secure with pins.
- Leave the bottom half down in loose waves.
- Tug the buns slightly so they look rounded, not tight.
Tools: Tail comb, bobby pins, and small elastics.
How to Wear It: This is a solid choice for concerts, weekends, or any day you want your hair to make a point before you say a word.
Pro Tips:
- Keep the buns small if your hair is thick; oversized buns can feel top-heavy.
- Don’t slick the sides too hard unless you want a sharper look.
- Let a few face pieces fall free or the style can feel too cartoonish.
Variations:
- Low Space Buns: Move the buns lower for a softer shape.
- Braided Space Buns: Braid each section before twisting for more texture.
- Half-Up Buns: Leave more length down if you want less commitment.
Common Mistakes:
- Pulling the top half too tight can cause the bottom waves to lose volume.
- Uneven buns look accidental instead of cool. Check them from the front before you leave.
11. The Side Braid Into a Cascade
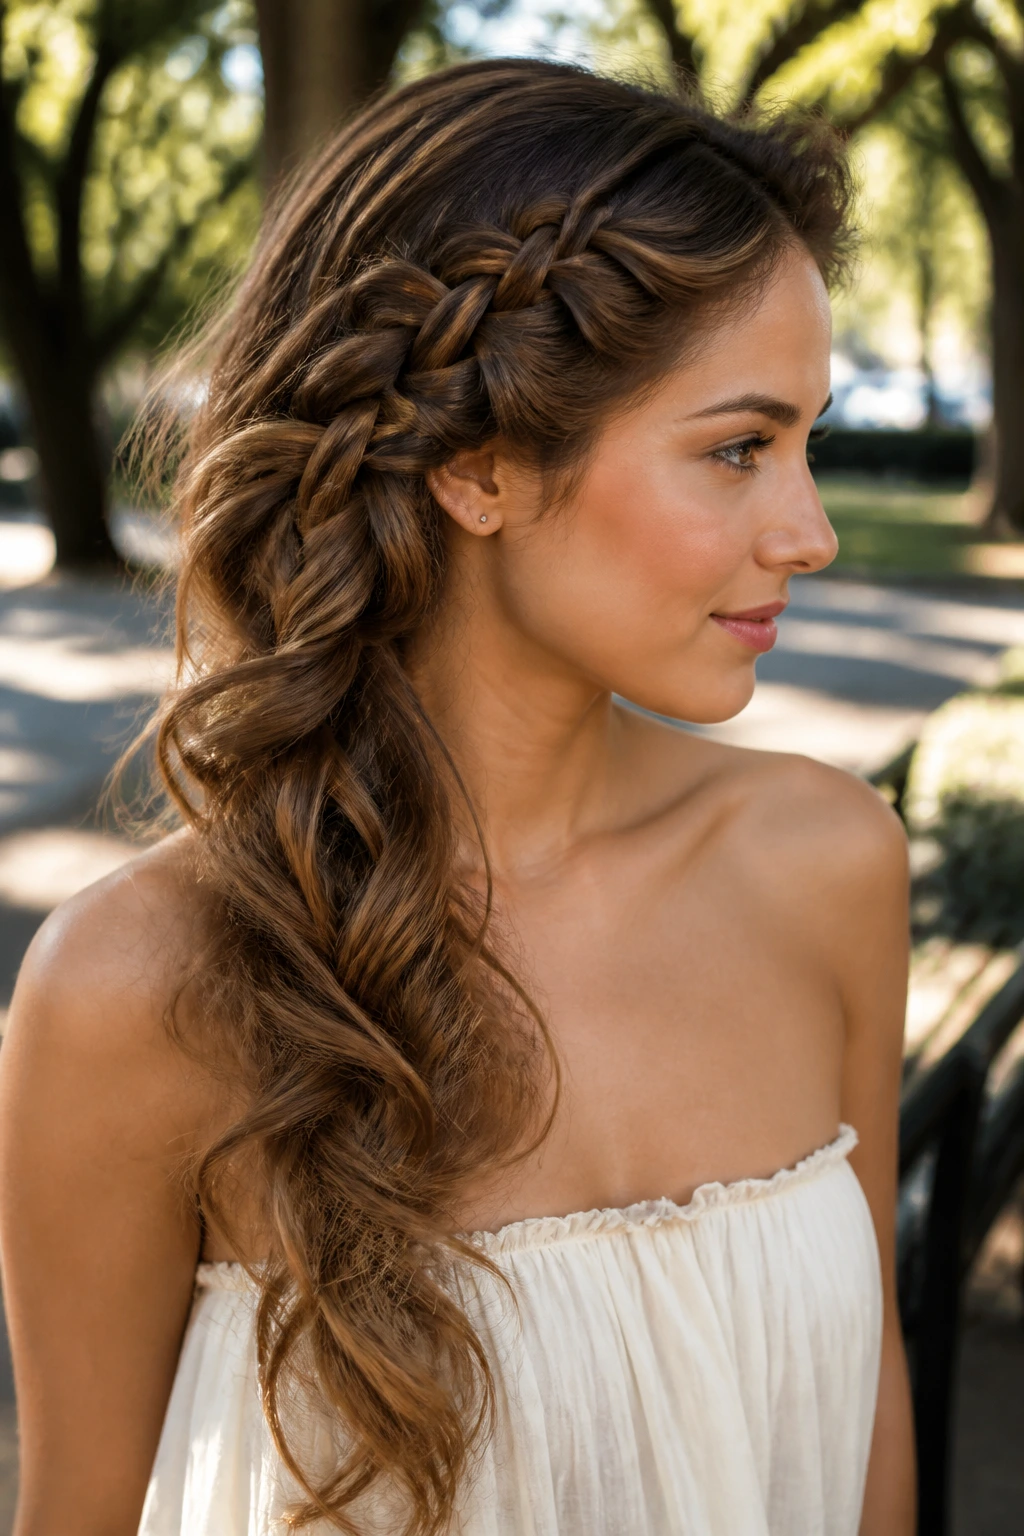
A side braid gives wavy hair a place to go when you want some of it contained but still want the length on display. The braid creates a strong line from the temple or crown, and the rest of the hair falls in loose bends over one shoulder. It has a little romance in it, but the side placement keeps it from feeling sweet in a boring way.
Why It Works: The braid adds grip where waves tend to frizz first — around the front and top. The loose side gives the eye somewhere to land, which makes the whole look feel deliberate. On second-day hair, this style often looks better than on freshly washed hair.
What You Need:
- Small elastic
- Texture spray
- Light shine mist
- Bobby pin or two for stray pieces
How to Style It:
- Sweep hair to one side.
- Braid from the front hairline or just behind the temple.
- Stop the braid around ear level and secure it.
- Leave the rest of the hair loose and brush only the ends with your fingers.
- Mist the braid lightly and pull the edges apart a little for softness.
Tools: Rat-tail comb and a small mirror.
How to Wear It: This looks good with shoulder-baring tops because the braid frames the neckline instead of hiding it.
Pro Tips:
- A loose braid always looks better here than a tight one.
- If the front layers are short, pin them into the braid instead of forcing them to stay put.
- A little wave spray on the loose lengths helps the cascade hold shape.
Variations:
- Dutch Side Braid: Gives a chunkier, more visible line.
- Rope Side Braid: Faster and cleaner if your fingers get tangled.
- Double Side Braid: Add a second thin braid for extra edge.
Common Mistakes:
- Braid tension that is too tight flattens the front and makes the loose side look sparse.
- Not loosening the braid at the end leaves it looking harsh against the rest of the hair.
12. The Wet-Look Back Sweep
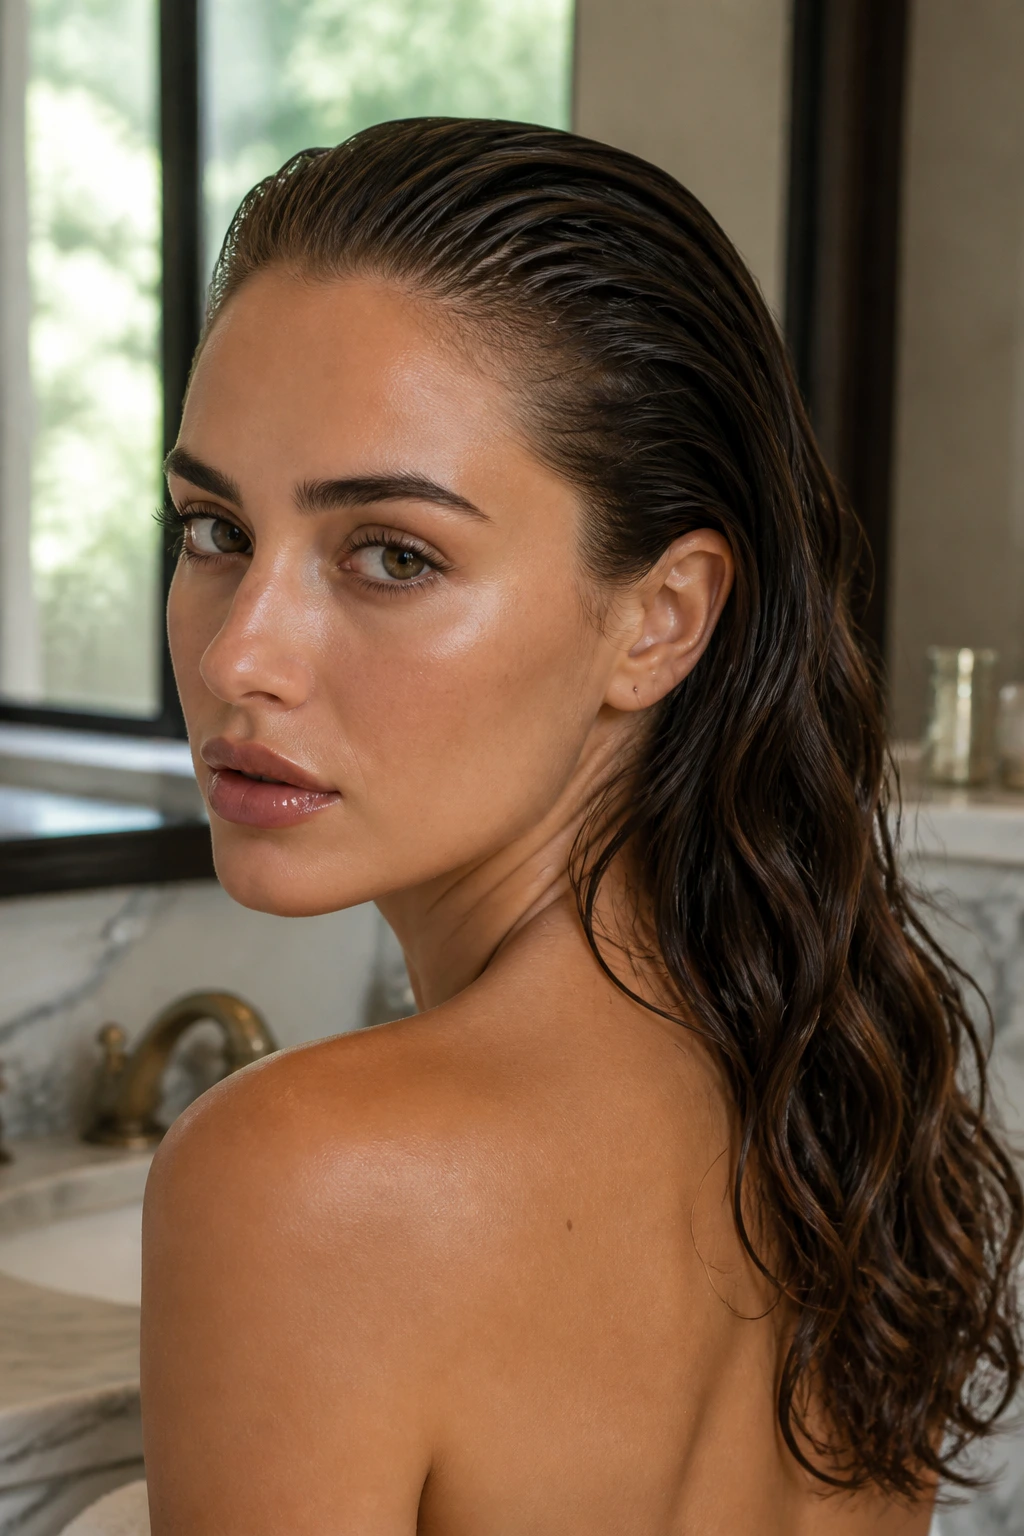
Wet-look hair sounds dramatic because it is. On wavy hair, a slicked-back crown with textured lengths creates a sharp contrast that feels editorial without being impossible to wear. The key is keeping the product where it belongs: at the top and sides, not smeared through every bend.
Why It Works: Wavy hair gives the lower section a natural broken line, so the style doesn’t look like a single smooth sheet. The top stays controlled, the back stays glossy, and the whole thing gets a strong profile. It’s one of the few styles here that actually gets better when you want the front very neat.
What You Need:
- Strong-hold gel or styling cream
- Wide-tooth comb
- Shine serum
- Optional clips to set the sides
Quick Steps:
- Work gel through the front and sides on damp hair.
- Comb the top back or into a deep side sweep.
- Keep the lengths wavy and free unless you want a full slick look.
- Press the sides close to the head with your palms.
- Finish the ends with a small amount of shine serum.
Tools: Comb, clips, and a soft brush.
How to Wear It: Pair this with bold earrings, bare shoulders, or a simple fitted top. The hair already supplies the drama.
Pro Tips:
- Use less gel than you think. Too much turns the roots crunchy.
- Keep a clean line near the part so the style reads intentional.
- If the waves in back are too fuzzy, smooth only the outer layer.
Variations:
- Full Wet Look: Carry the product farther down for a more glossy finish.
- Side-Swept Wet Look: Easier to wear if a middle sweep feels too severe.
- Textured Ends Version: Leave the length mostly natural for a softer effect.
Common Mistakes:
- Applying product all the way through the waves makes them lose their shape.
- Forgetting to set the part can leave the look messy instead of sharp.
13. The Wrapped Low Ponytail
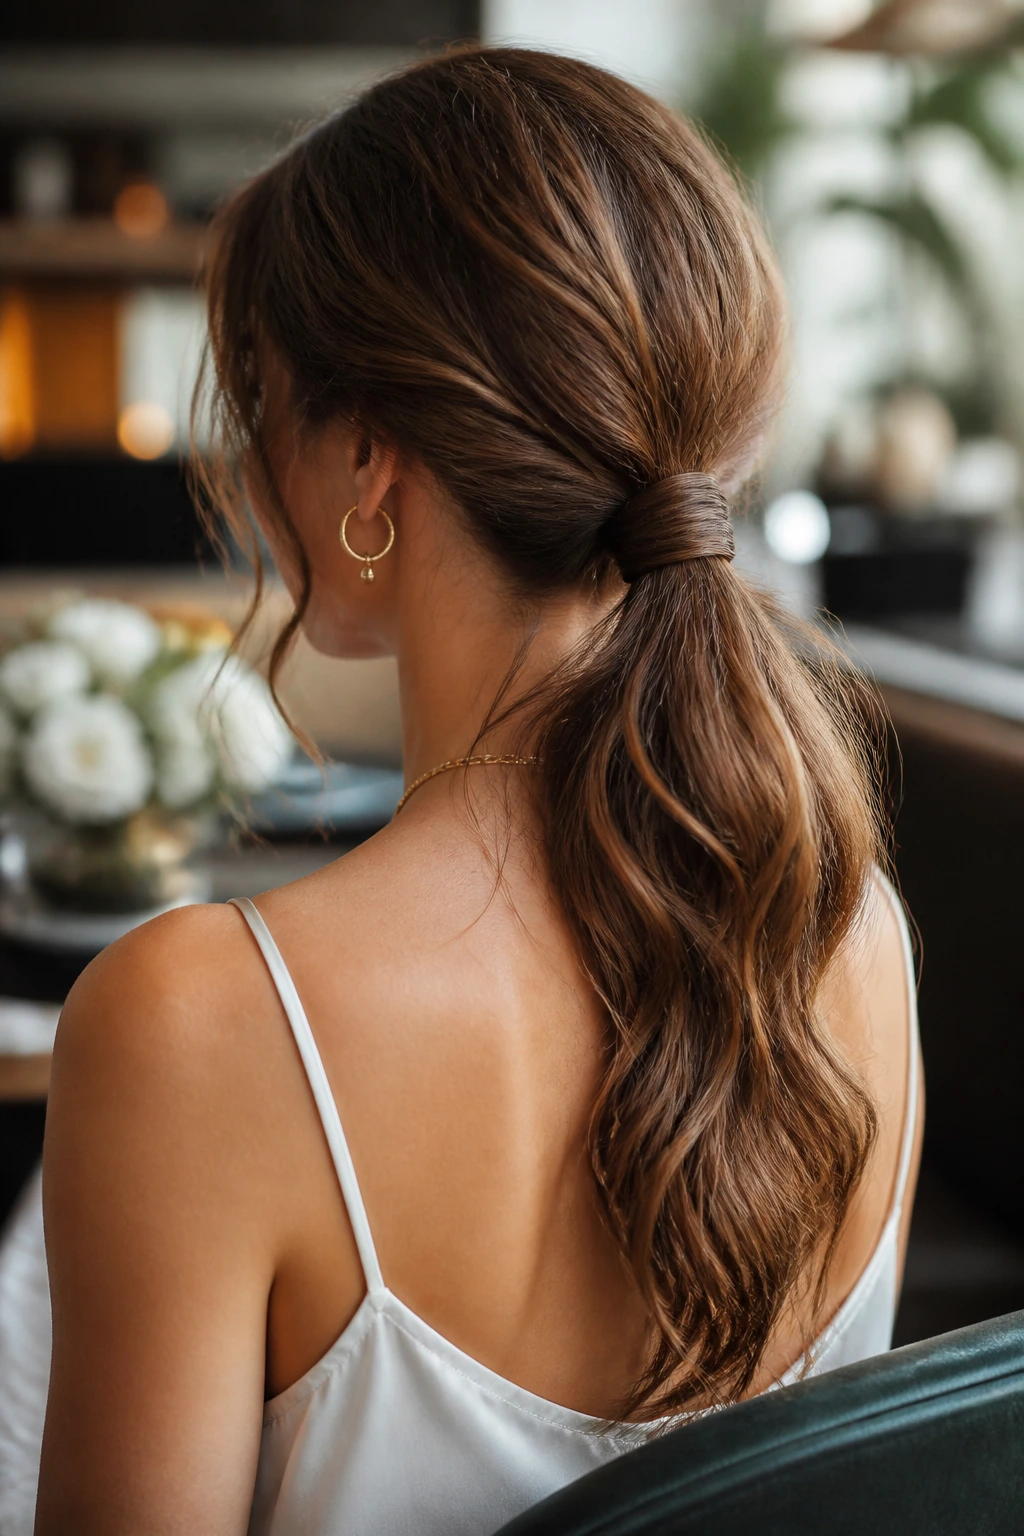
A wrapped low ponytail is the answer when you want clean lines but still want the ponytail to feel dressed up. Wavy hair gives the tail a little body, and the wrapped base hides the elastic, which instantly makes the style look more finished. It’s a small detail. It matters.
Why It Works: The wave pattern keeps the ponytail from lying flat against the back. Wrapping a section of hair around the elastic removes the gym-class feeling and gives the style a stronger silhouette. If your waves are thick, this one holds especially well.
What You Need:
- Small elastic
- One bobby pin
- Smoothing cream
- A touch of texturizing spray for the tail
How to Style It:
- Smooth the top into a low ponytail at the nape.
- Take a small strand from the underside and wrap it around the elastic.
- Pin the end underneath with a bobby pin.
- Curl or finger-shape the tail if the ends need more bend.
- Pull a tiny bit at the crown for a softer finish.
Tools: Tail comb and one strong elastic.
How to Wear It: This looks sharp with a collarbone-baring top and works for office days when you want your hair out of the way but not invisible.
Pro Tips:
- Wrap the base before you pull the ponytail tight so the elastic sits cleanly.
- If your hair is slippery, mist the wrap strand with hairspray first.
- Leave the tail slightly imperfect; too much smoothing kills the wave.
Variations:
- Low Side Pony: Shift the ponytail behind one ear.
- Bubble Wrapped Pony: Add elastics down the tail for more shape.
- Half-Back Wrapped Pony: Take only the top layer back for a softer version.
Common Mistakes:
- Leaving the wrap strand too short makes it pop free by lunchtime.
- Over-smoothing the length takes away the bend that makes the ponytail look alive.
14. The Textured Lob With Statement Clips

A textured lob is one of the safest places to land if you want easy, everyday hair with a little bite. The cut sits above the shoulders, the waves have room to move, and a strong clip on one side gives the whole thing a deliberate finish. It’s not trying to be precious. That’s part of why it works.
Why It Works: A lob lets waves stack instead of getting dragged down by too much length. The shorter shape keeps the ends visible, and a statement clip gives you one clean focal point. If your hair tends to go limp, this cut plus a clip can feel like a reset.
What You Need:
- Wave spray or mousse
- Statement clip or barrette
- Heat protectant if styling with tools
- Light serum for the ends
Quick Steps:
- Scrunch mousse into damp hair and let it dry in loose bends.
- Part the hair where the wave sits best.
- Clip one side back just above the ear.
- Touch the front ends with a curling wand if they need direction.
- Add a tiny bit of serum to the bottom inch only.
Tools: Diffuser optional, plus a medium clip that holds weight.
How to Wear It: This is the easiest style in the bunch to wear to work, dinner, or a weekend lunch because it never looks overdone.
Pro Tips:
- Choose a clip with enough grip to handle the wave texture.
- Keep the waves piecey around the face rather than combed into one sheet.
- A side clip looks stronger than a centered one on a lob.
Variations:
- Double-Clip Lob: Stack two clips for a sharper look.
- Side-Tucked Lob: Tuck one side behind the ear without a clip.
- Curled Lob: Add a few defined bends with a 1-inch iron for more polish.
Common Mistakes:
- Putting clips on wet hair often leaves dents in the wrong place.
- Using too much serum makes the lob look limp instead of textured.
15. The Bandana-Wrapped Waves
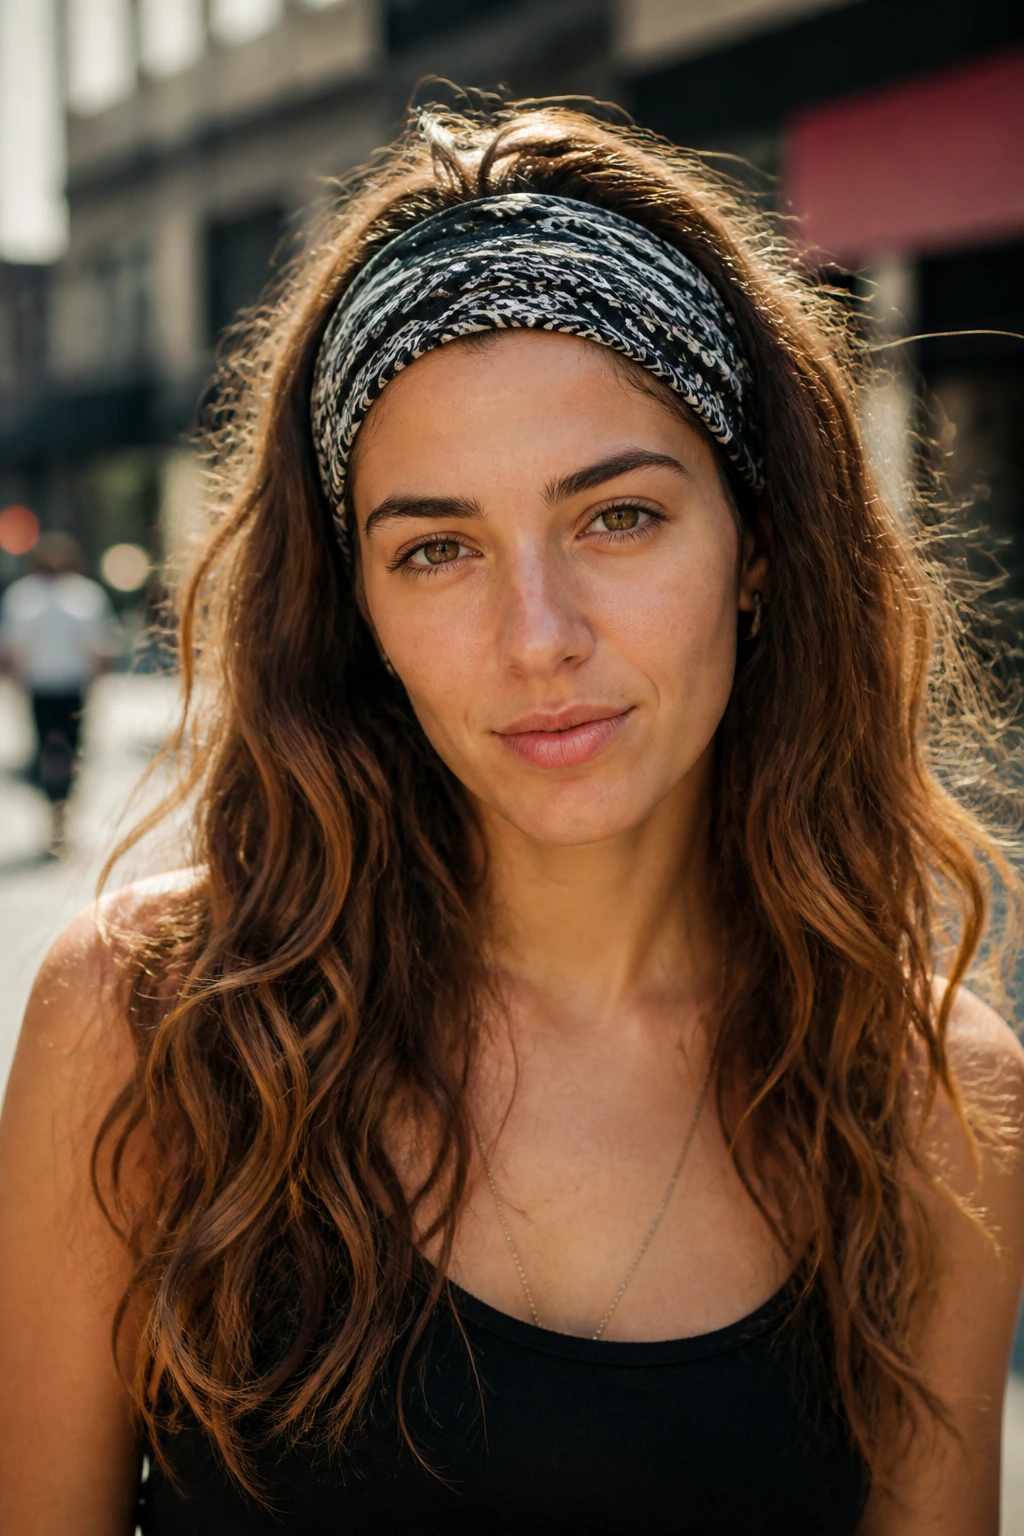
A bandana is not just a fallback for a bad hair day. On wavy hair, it can frame the face, tame the top, and keep the whole style looking intentional with almost no effort. Fold it narrow, tie it close to the hairline, and the rest of the hair can do what it does best.
Why It Works: The bandana controls the front section, which is usually where frizz shows first. It also creates a clear shape around the face, so the waves underneath feel more deliberate. The result is casual in a strong, not sloppy, way.
What You Need:
- Cotton bandana or silk scarf
- Dry shampoo or texture spray
- Small bobby pins if needed
- A little wave cream on the ends
How to Style It:
- Fold the bandana into a narrow strip.
- Place it across the hairline or just behind it.
- Tie it at the nape or slightly off-center.
- Let the waves fall loose around the shoulders.
- Pull out a few front pieces if you want a softer finish.
Tools: Brush only if you need to smooth the top before placing the bandana.
How to Wear It: This works well with denim, tanks, or anything with a clean neckline. It gives off a relaxed, road-trip kind of energy.
Pro Tips:
- Cotton looks more casual; silk feels smoother and sits flatter.
- Keep the knot small so it doesn’t become the center of attention.
- If your hair is thick, pin the bandana under the top layer for grip.
Variations:
- Full Head Wrap: Cover more of the top for a stronger statement.
- Headband Style: Place the bandana like a wide headband.
- Scarf Tie Back: Tie it under the hair for a softer look.
Common Mistakes:
- Tying the bandana too tight creates a headache and flattens the crown.
- Choosing a slippery fabric without pins can make it slide all day.
16. The Faux Hawk Half-Up
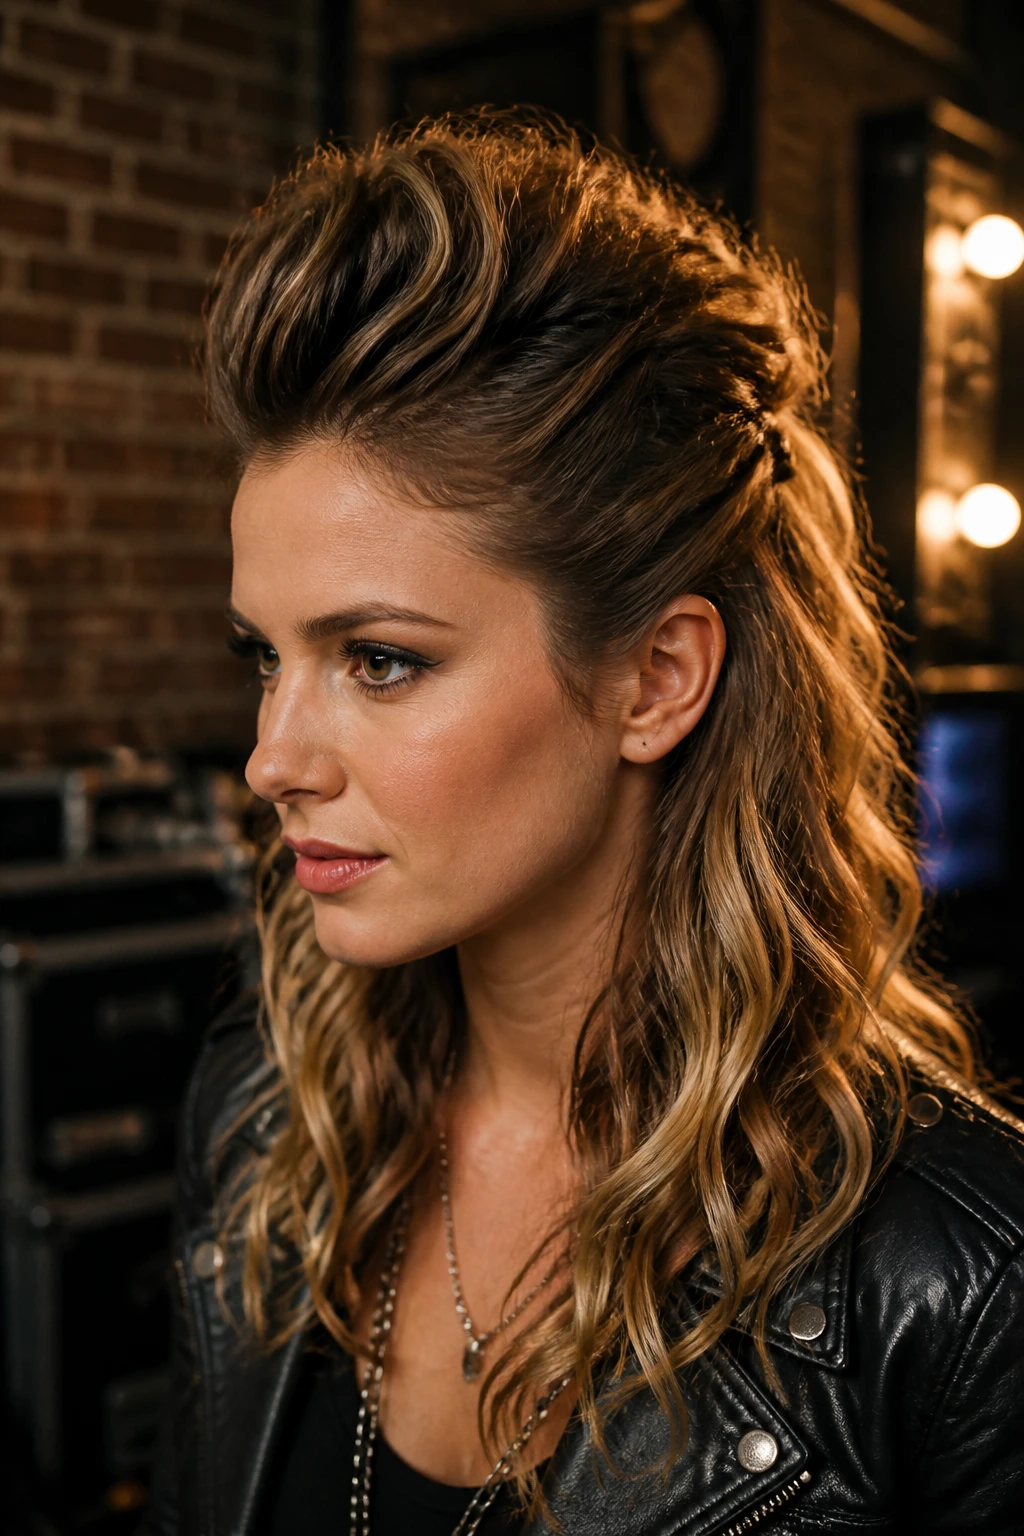
The faux hawk half-up is pure rockstar energy without the commitment of a shaved side or a full mohawk. The sides stay pinned close, the middle lifts, and the waves along the center line get to look bigger than they really are. It’s bold, but still wearable.
Why It Works: Wavy hair gives the center section enough body to stand up once it’s pinned and lightly teased. The sides, when smoothed back, create a strong contrast that makes the middle look taller. That visual trick does most of the work.
What You Need:
- Teasing comb or brush
- 4 to 6 bobby pins
- Flexible hairspray
- Texture powder or dry shampoo
Quick Steps:
- Section off the top center from forehead to crown.
- Tease the roots lightly at the crown.
- Pull the sides back tightly and pin them flat.
- Lift the center section and secure it so it stands up slightly.
- Mist the shape lightly without soaking it down.
Tools: Tail comb, bobby pins, and a mirror with a clear back view.
How to Wear It: This one shines with boots, leather, denim, or anything that can handle a little edge.
Pro Tips:
- Tease only the roots, not the entire strand.
- Keep the crown high but not helmet-like.
- Leave the ends loose so the style still feels like wavy hair, not a costume.
Variations:
- Braided Faux Hawk: Braid the center strip before pinning the sides back.
- Low Faux Hawk: Keep the lift subtler for everyday wear.
- Puffed Crown Version: Add more volume at the crown for extra height.
Common Mistakes:
- Pinning the sides too tightly can make the face look harsh.
- Too much teasing turns the crown into a tangled knot that’s hard to brush out later.
17. The Rope-Braid Halo

A rope-braid halo has the same “kept together but still soft” energy as a crown braid, only with a looser, twistier feel that suits wavy hair especially well. It wraps the face, keeps the front controlled, and lets the length stay visible. That’s a useful balance.
Why It Works: Rope twists sit flatter than many braids, so they’re easier to wear if your waves are thick or if your hair is only medium length. They also show off texture better than a tight braid because the strands stay a little separated. A little mess helps here.
What You Need:
- Two small elastics
- Bobby pins
- Texture spray
- Light styling cream
How to Style It:
- Split off two front sections, one from each side.
- Twist each section in the same direction, then wrap them around each other.
- Guide the twists along the hairline toward the back.
- Pin the ends underneath the crown.
- Leave the back loose in natural waves.
Tools: Tail comb and several bobby pins.
How to Wear It: This style works well with soft dresses, sweaters, or simple tops with a round neckline. It gives structure without swallowing your face.
Pro Tips:
- Keep the twists loose and slightly uneven for a better finish.
- If the rope twists slip, rough them up with dry shampoo first.
- Pin under another section so the back view looks clean.
Variations:
- Double Rope Halo: Add a second twist below the first.
- Side Rope Crown: Twist only one side and pin it across the back.
- Mini Rope Fronts: Use small front pieces instead of full sections for a lighter look.
Common Mistakes:
- Twisting too tightly makes the hair spring out instead of lying smooth.
- Forgetting to secure the ends underneath leaves pins showing from every angle.
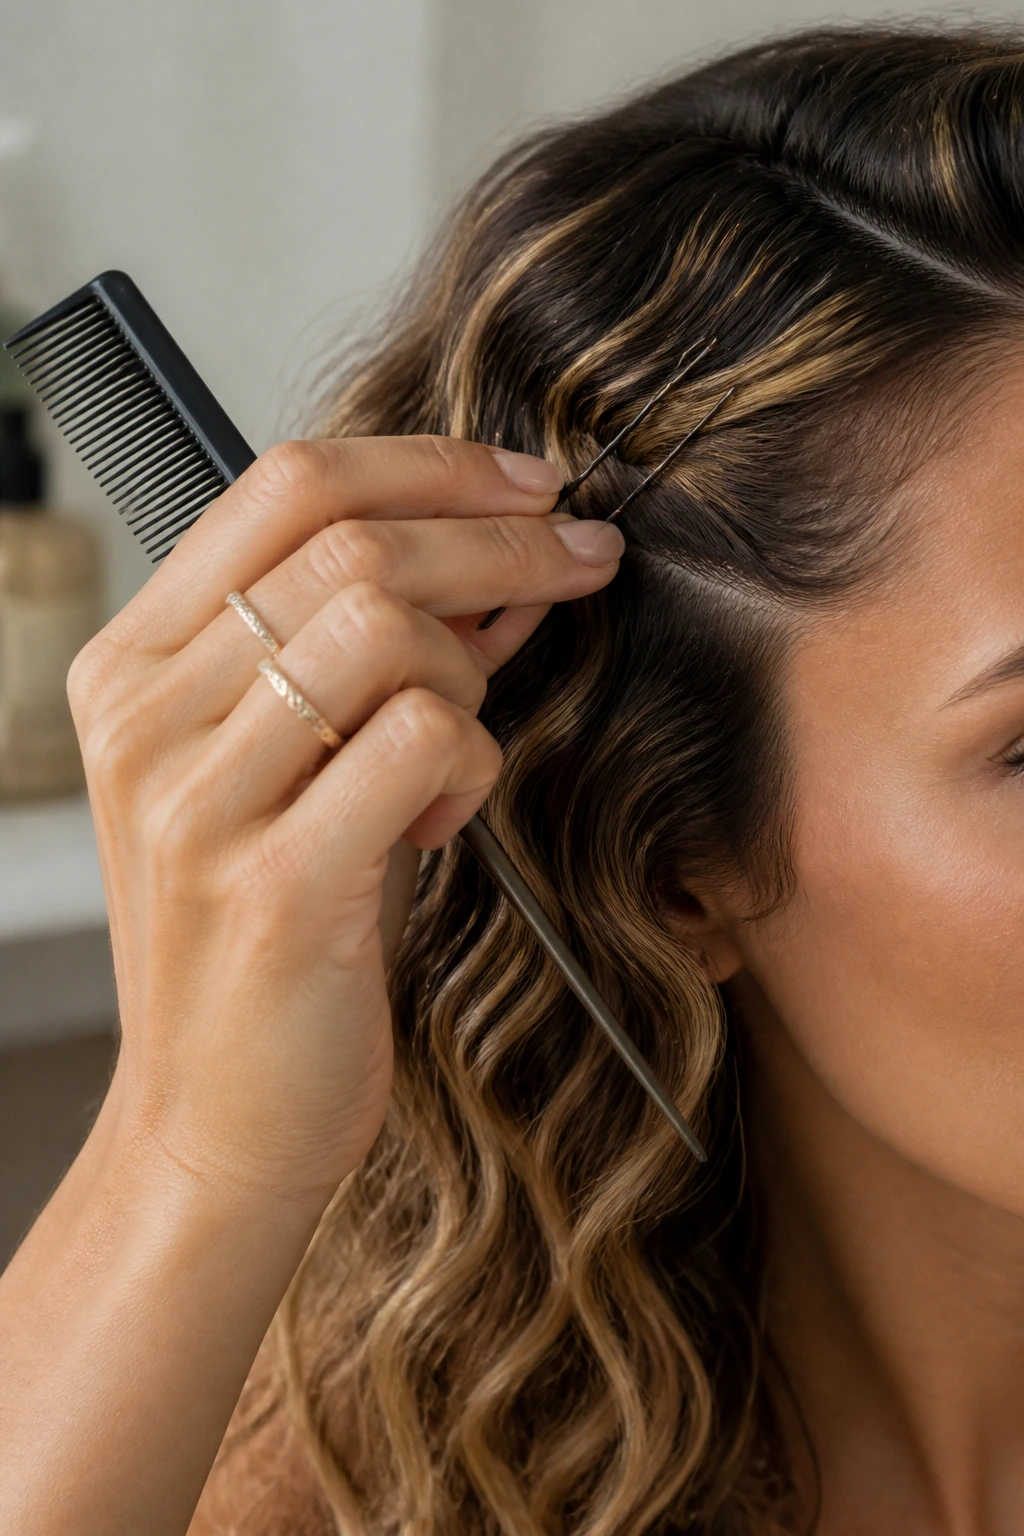
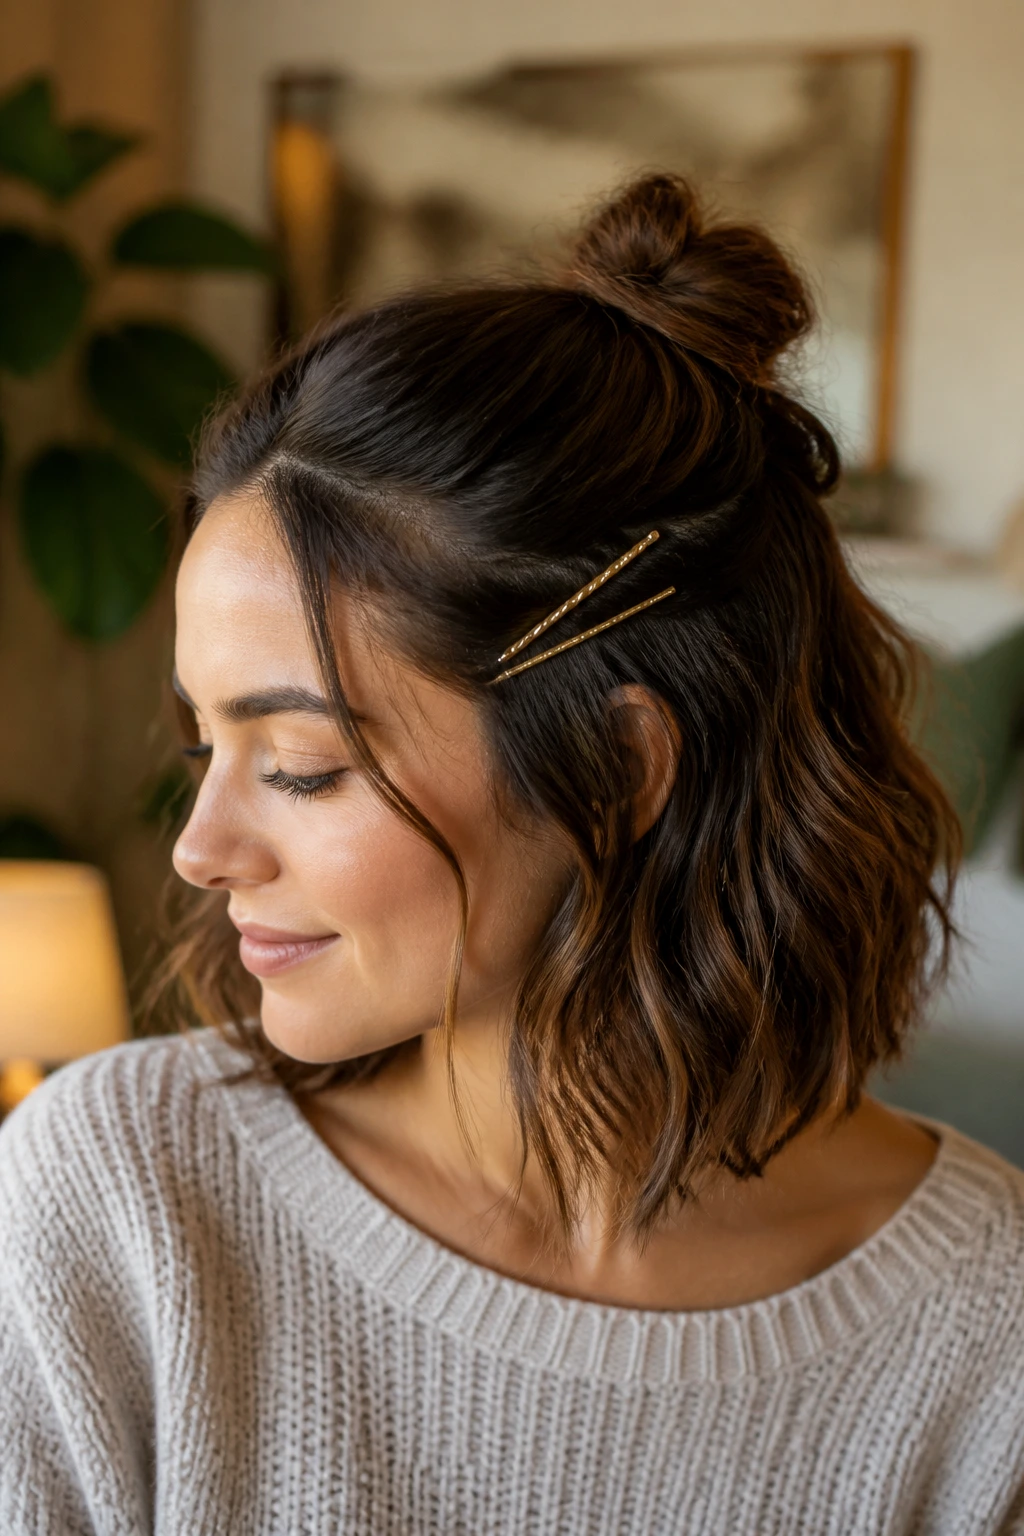
18. Pinned-Back Temple Waves
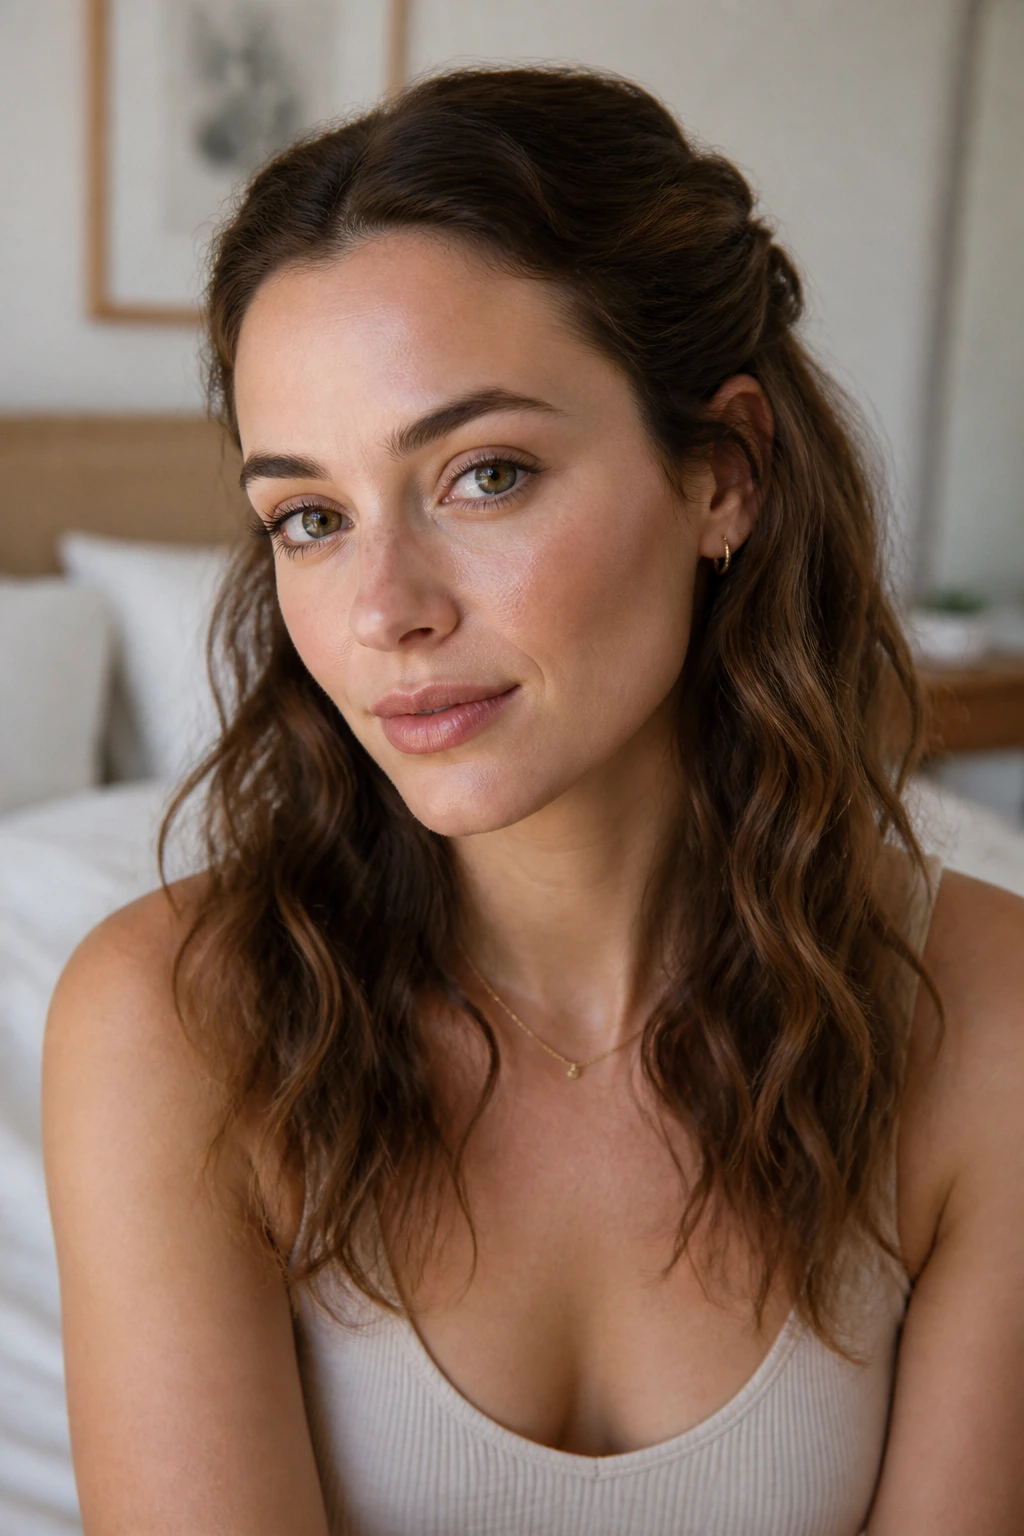
This is the minimalist option, and I mean that in the best way. Pull back just the temple sections, pin them behind the ears, and let the rest of the wave pattern stay loose. It takes almost no time, but the result looks cleaner than wearing everything fully down.
Why It Works: The temple area is where waves often puff or frizz first, so pinning that part back instantly calms the shape. Leaving the rest alone keeps the style from looking overworked. It’s a tiny move that changes the whole balance of the head.
What You Need:
- 2 decorative pins or bobby pins
- Smoothing cream or light gel
- Shine spray, optional
- Tail comb
Quick Steps:
- Create a center or slight side part.
- Take small sections from each temple.
- Smooth them back and pin them behind the ears.
- Leave the rest of the hair loose and untouched.
- Mist the front lightly if flyaways keep popping up.
Tools: Two pins and a comb.
How to Wear It: This looks clean with glasses, earrings, or a strong lip. The rest of the hair gets to be messy in the right places.
Pro Tips:
- Use pins that match your hair color if you want the look to disappear.
- Cross the pins in an X if your hair is slippery.
- Pull the pinned sections back softly, not flat to the scalp.
Variations:
- Double-Temple Pin Back: Add a second row of pins for more hold.
- Twisted Temple Back: Twist each section before pinning.
- Clipped Temple Sweep: Swap pins for small clips when you want a visible accessory.
Common Mistakes:
- Making the pinned sections too wide can flatten the sides in a blunt way.
- Over-spraying the front makes the hair look crunchy instead of clean.
19. The Big Round-Brush Wave Blowout
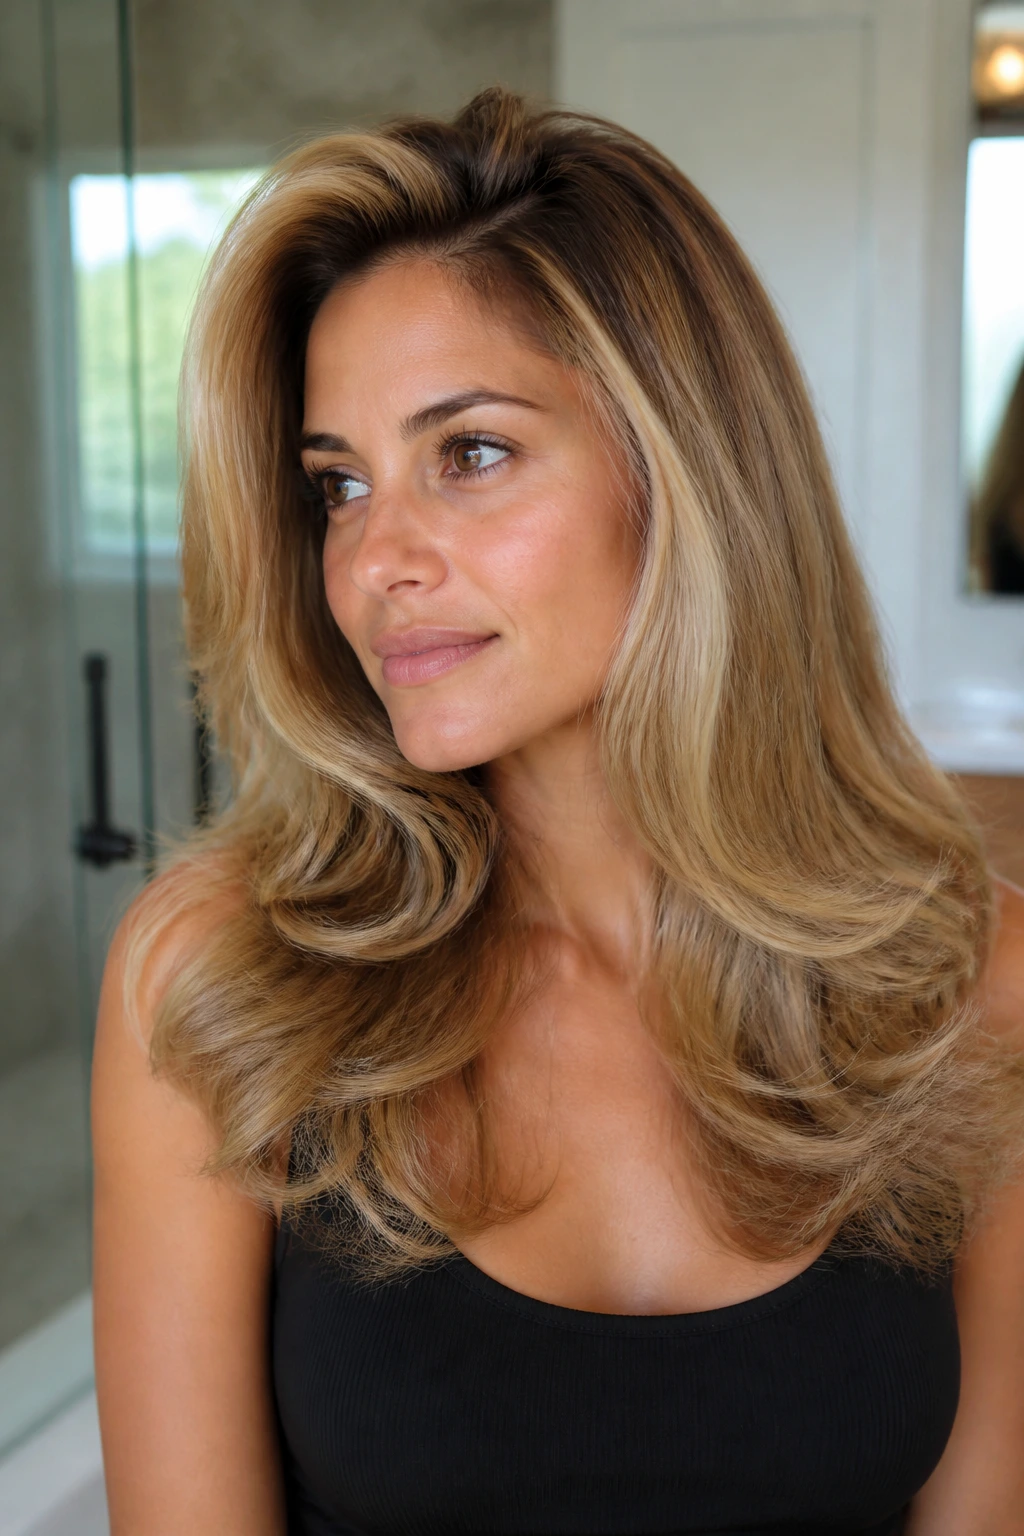
If you want wavy hair to look polished without losing its body, a round-brush blowout is the move. Not the flat, blown-straight kind. The bouncy kind, with lift at the roots and a soft bend at the ends that still remembers the wave pattern underneath. That memory is the whole point.
Why It Works: The brush adds direction, while the natural wave keeps the ends from going pin-straight and lifeless. This gives you smoother roots and fuller lengths without erasing texture. It also photographs better under real light, which matters when the room is not full of flattering bulbs.
What You Need:
- Heat protectant
- Medium or large round brush
- Blow dryer with nozzle
- Light serum or finishing cream
How to Style It:
- Start with damp hair and apply heat protectant.
- Blow-dry the roots first, lifting them with the brush.
- Wrap only the mid-lengths and ends around the brush for 5 to 8 seconds.
- Release and let the bend cool before touching it.
- Separate the waves with your fingers and finish with a tiny bit of serum.
Tools: Round brush, dryer, clips for sectioning.
How to Wear It: This is the version you want when you need your hair to look expensive without looking frozen in place.
Pro Tips:
- Use a brush that fits your length; too small creates overcurled ends.
- Do not chase every bend flat. Let some texture stay.
- Finish with a cool shot to lock the lift at the root.
Variations:
- Side-Part Blowout: Adds more glamour and a stronger sweep.
- Flipped-End Blowout: Turn the ends slightly outward for a rocker feel.
- Loose Blowout Waves: Use the brush only at the crown and leave more natural texture in the lengths.
Common Mistakes:
- Pulling the brush too hard can straighten the wave away.
- Styling without heat protectant is a fast way to get dry, frayed ends.
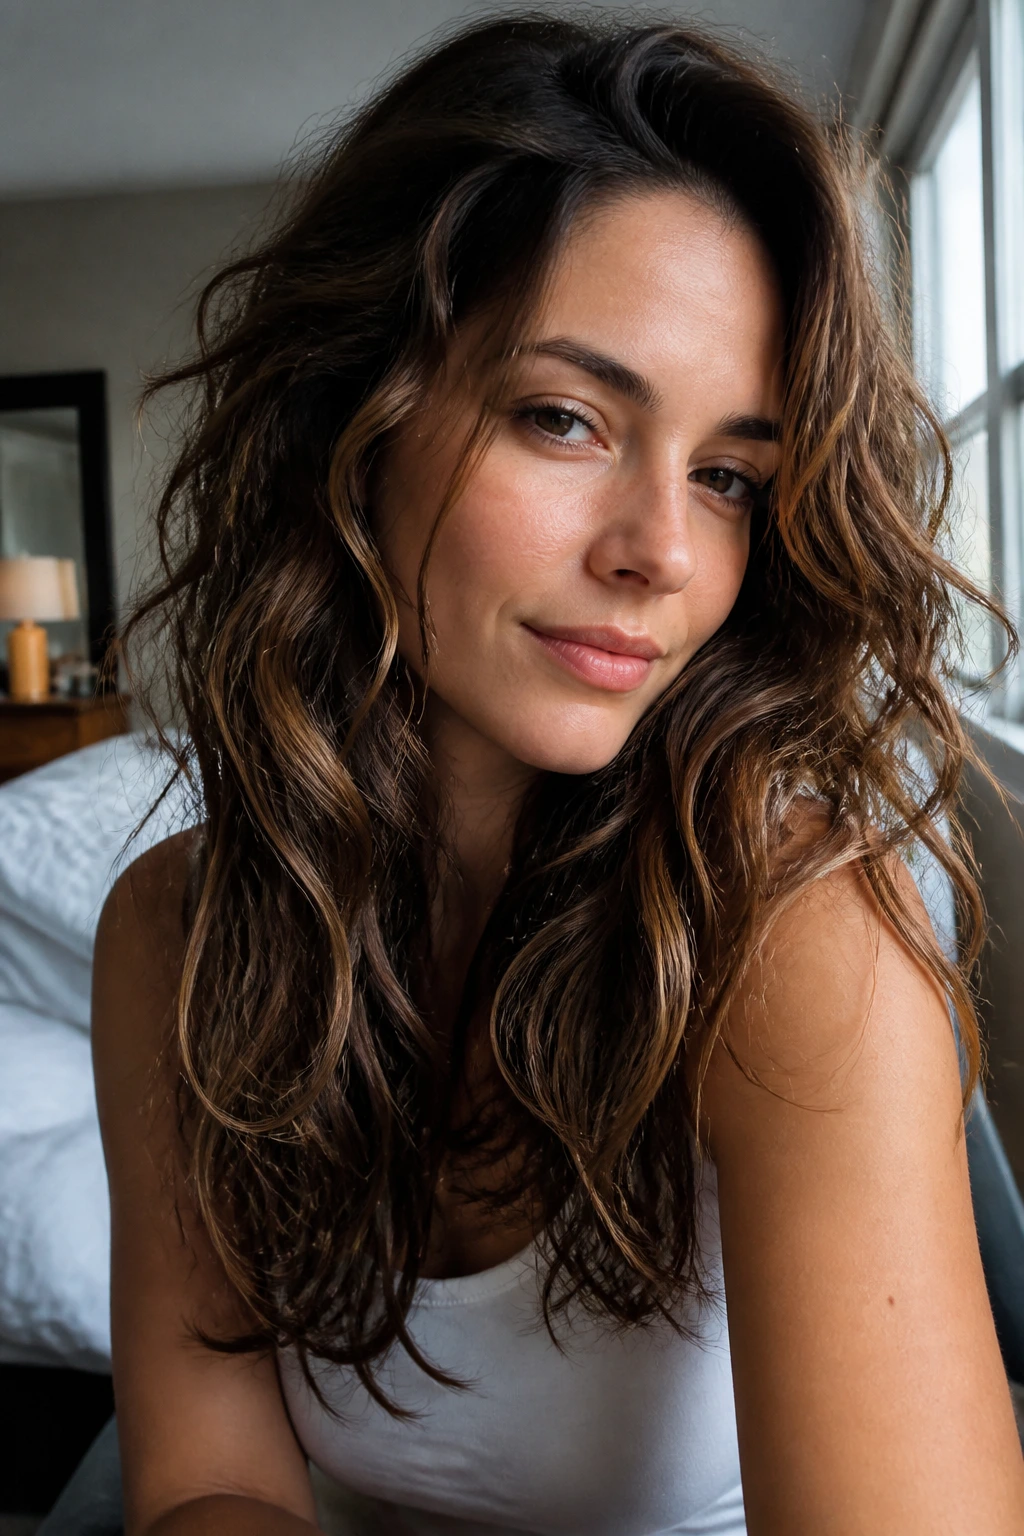
20. The Piecey Wolf Cut
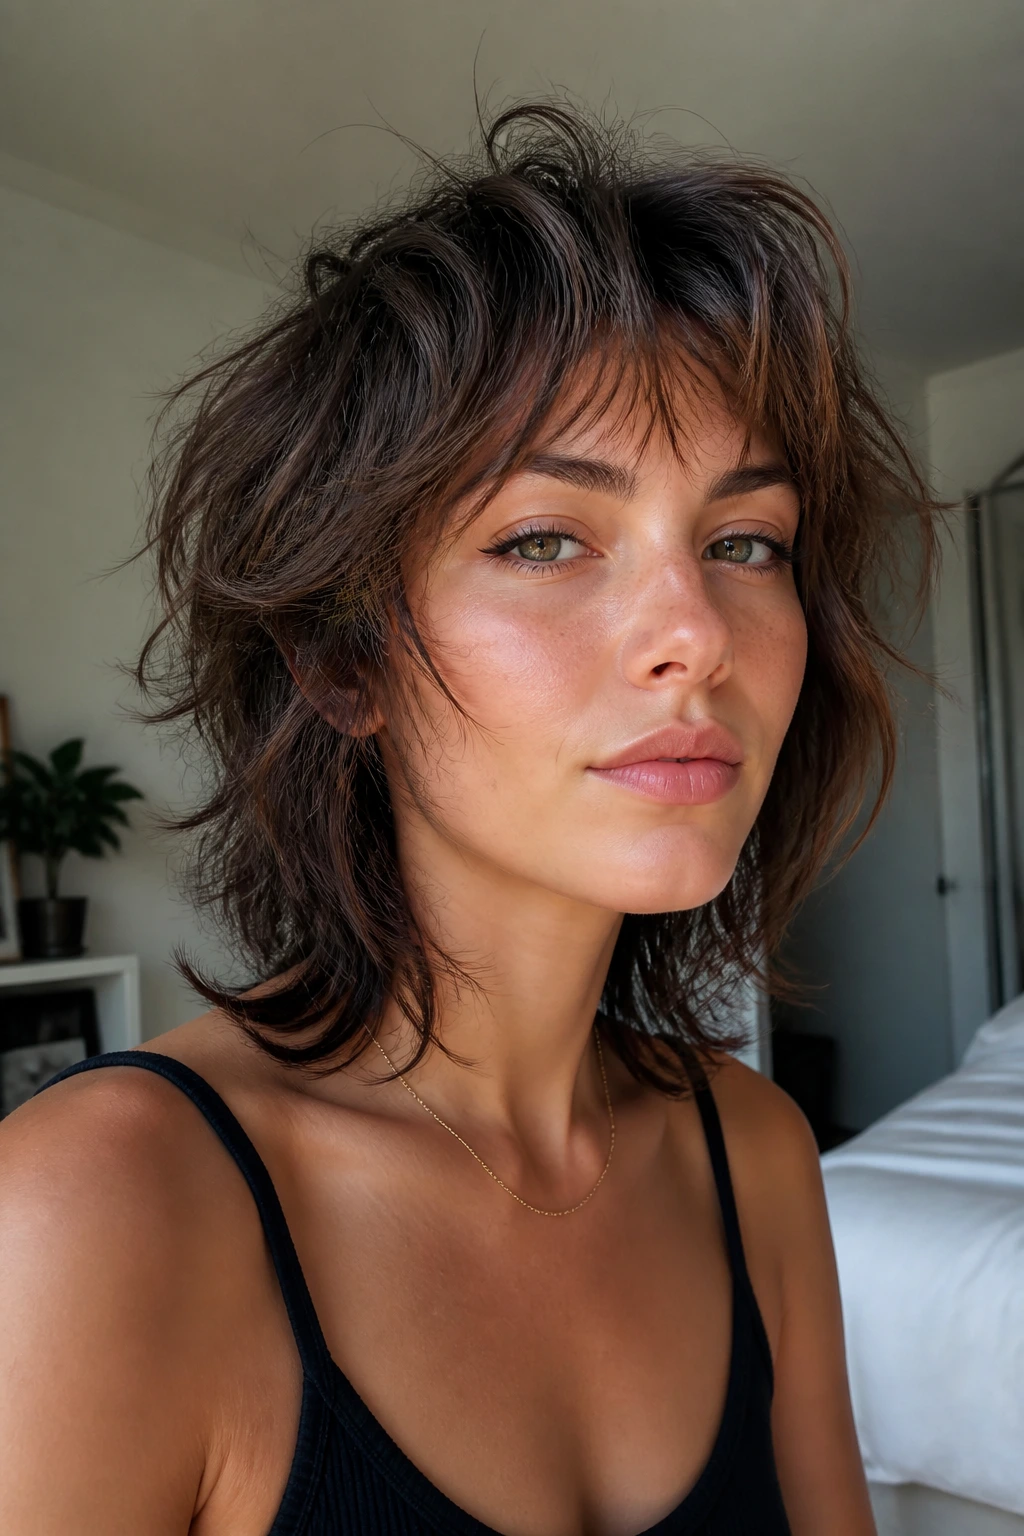
The wolf cut is where wavy hair gets to be loud without being fussy. It sits between a shag and a mullet, which sounds weird on paper and looks excellent on the right head. The short layers give lift, the long ends keep some length, and the whole shape has that slightly wild, rockstar mood baked in.
Why It Works: Wavy hair gives the wolf cut its shape without much convincing. The layers stack naturally, and the piecey finish means you can let the hair dry rough and still look intentional. It’s one of the few cuts that can look more interesting when it is not over-styled.
What You Need:
- Texture paste or styling cream
- Mousse for the roots
- Leave-in conditioner
- A diffuser, if you want more lift
How to Style It:
- Work mousse into damp roots and leave-in through the ends.
- Scrunch the hair upward to encourage the layers.
- Diffuse or air-dry until the shape is set.
- Rub a tiny bit of paste between your palms and pinch random pieces.
- Leave some flyaways alone; they belong here.
Tools: Diffuser, wide-tooth comb, and fingertips. That’s enough.
How to Wear It: The wolf cut likes graphic eyeliner, band tees, leather jackets, and anything that can keep up with its texture.
Pro Tips:
- Ask for soft perimeter layers so the cut doesn’t get too choppy.
- Use less product than you think; the style needs separation, not grease.
- If the crown collapses, clip it up while it dries.
Variations:
- Soft Wolf Cut: Keeps the layers longer and easier to grow out.
- Short Wolf Cut: Works well if you like more lift around the jaw.
- Grown-Out Wolf Cut: Let the layers blend more for a less aggressive finish.
Common Mistakes:
- Heavy creams can make the layers stick together and kill the shape.
- Cutting the top too short can make wavy hair puff outward in a way you probably won’t love.
Why Wavy Hair Loves Shapes That Keep the Bend
Wavy hair does not need to be “fixed.” It needs to be guided. That is a different job, and once you stop fighting the natural bend, the styling options open up fast. The crown usually wants a little lift, the mid-lengths want room, and the ends need enough freedom to keep moving.
The biggest win is usually balance. A smooth root with loose lengths can look cleaner than trying to smooth every inch. A little asymmetry — a side part, one pinned-back temple, one braid on one side — often gives more shape than a lot of product ever will. That’s why these styles feel wearable rather than costume-like.
Humidity matters too. So does hair density. Fine waves tend to collapse if you overload them, while thick waves can handle more structure and stronger pins. The trick is not to copy a style blindly. It’s to ask what part of your wave pattern needs control and what part needs to be left alone.
Essential Tools for These Hairstyles
- Rat-tail comb: Best for parts, clean sections, and precise placement.
- Wide-tooth comb: Gentle enough for damp wavy hair without pulling the pattern apart.
- Microfiber towel or T-shirt: Cuts down on rough frizz after washing.
- Bobby pins in two colors: Dark and light pins disappear better against different hair shades.
- Small clear elastics: Useful for bubble ponytails, braids, and half-up styles.
- Claw clip: A medium or large one handles thicker waves better than the flimsy drugstore kind.
- Heat protectant: Use this anytime a blow dryer, wand, or brush heat comes near the hair.
- Diffuser: Handy if you want the wave pattern to hold without blasting it flat.
- Texture spray or dry shampoo: Gives grip to braids, buns, and pinned styles.
- Flexible-hold hairspray: Keeps movement without that helmet feeling.
- Shine serum or cream: Use a tiny amount only on the last inch or two.
Product and Prep Notes That Matter More Than You Think
The right product mix depends on how your waves behave when they air-dry. Fine waves usually like mousse or foam better than heavy cream because mousse builds support without dragging the roots down. Thick or coarse waves often need a little more slip, especially on the ends, so a light cream or leave-in can make the style easier to shape.
Wash day matters, but not every style needs fresh hair. Some of the best-looking rockstar styles for wavy hair actually start on day two or three, when the roots have a bit of grit and the lengths are less slippery. If your hair gets too soft right after washing, try styling on slightly damp second-day hair with a mist bottle and a touch of texture spray.
One more thing: products are easier to judge when you keep them in the right place. Root lift belongs near the scalp. Smoothing cream belongs from the ears down. Shine serum belongs mostly on the ends. If you spread everything everywhere, the style tends to blur, and wavy hair hates being blurred.
How to Wear These Styles in Real Life
Presentation: If you want the look to feel rockstar rather than random, leave one or two pieces out on purpose — a side sweep, a face-framing tendril, or a slightly loosened braid edge. That tiny bit of movement is what keeps the style from looking pasted on.
Best Matches: Strong-neckline tops, simple tees, cropped jackets, and open collars work best with these styles because they give the hair room. Heavy turtlenecks and high collars can crowd the shape unless the hair is firmly pinned up.
Commitment: The easiest looks here take about 3 to 5 minutes. The more sculpted ones — the faux hawk, wet look, and blowout — need closer to 15 minutes if you want them clean. Pick based on how much time you actually have, not the fantasy version of your morning.
Accessory Pairing: Small hoops, one strong clip, a scarf, or a single barrette usually looks better than stacking every accessory you own. Let the hairstyle do the loud part.
Extra Texture, Hold, and Finish Ideas
Texture Boost: If the hair feels too soft, spray dry shampoo at the roots and massage it in with your fingertips. That gives braids, buns, and clipped styles something to grab.
Humidity Shield: A light anti-frizz serum on the outer layer can help, but keep it off the roots or the style will flatten. I prefer using less product and refreshing the front pieces halfway through the day.
Finish Line: A tiny drop of oil on the ends can make waves look cleaner, especially on a layered cut. A tiny drop. Not a squeeze. The difference is huge.
Make-It-Yours: If you like a softer look, leave more length down. If you want sharper edges, tighten the part, smooth the crown, and use more structure at the front.
Common Mistakes That Flatten Wavy Hair
The first mistake is brushing dry waves until they look “smooth.” They usually don’t. They puff. The fix is simple: use a wide-tooth comb on damp hair and finger-shape the style once it’s dry.
The second mistake is piling product into every inch of hair. Wavy hair is expressive, not greedy. Give the roots support, the mids a little direction, and the ends only what they need.
Tight elastics are another one. They leave dents, pull waves out of shape, and often make the whole style look smaller than it should. Use softer ties or wrap a strand around the base when you can.
And then there’s the over-finished problem. If every pin is invisible, every flyaway is flattened, and every wave is forced to match, the style can lose the very texture that made it interesting in the first place. Leave some movement. That’s the point.
Variations and Adaptations to Try
Fine-Wave Fix: Use mousse, not cream, and keep the crown lifted with clips while drying. Fine waves need support more than softness.
Thick-Hair Control: Add stronger pins, section smaller pieces, and keep braids and buns slightly looser so they don’t fight the bulk.
Short-Length Adaptation: Use temple pins, mini braids, half-up knots, and tucked styles. Short waves look best when you don’t try to force a full updo.
Humidity-Heavy Day Version: Go for pinned-back temples, the wrapped ponytail, or the bandana wrap. These keep the front controlled when the air feels heavy.
Heat-Free Routine: The shag, wolf cut, crown braid, rope halo, and claw-clip twist all work well with no hot tools at all. That’s a real advantage if your hair dries nicely on its own.
Keeping the Style Fresh Overnight
Wavy hair does not always need a full reset in the morning. In a lot of cases, the fastest move is to protect the shape you already built. A loose pineapple on top of the head works for longer styles, while a silk pillowcase helps reduce the friction that turns the ends fuzzy by morning.
For braids, buns, and clipped styles, remove the hardware before sleeping and secure the hair loosely with a soft scrunchie if you need to. In the morning, mist the front lightly with water, add a touch of mousse or texture spray, and reshape only the sections that lost definition. You do not need to start from zero every day.
Dry shampoo is useful here, but only if you use it at the roots and let it sit for a minute before rubbing it in. If the style feels heavy or the crown has gone flat, tilt your head, shake the roots free, and pin one side back again. Small rescue moves beat a full wash far more often than people think.
Questions Women With Wavy Hair Ask All the Time

Can I wear these styles if my waves are very loose?
Yes. Loose waves usually do well with clipped styles, side parts, and blowouts that create shape at the crown. Just avoid drowning the hair in cream, because looser waves can go flat fast.
What if my waves are thick and hard to pin?
Use smaller sections, stronger pins, and a little texture spray before you start. Thick wavy hair often holds braids and twists better on second-day hair than fresh-washed hair.
Do these styles work on shoulder-length hair?
Most of them do, especially the half-up knot, claw-clip twist, pinned temple waves, and textured lob. Very long braids and full faux hawks work better once the hair has enough length to hold shape.
How do I stop my crown from flattening?
Clip the roots up while the hair dries, avoid heavy product near the scalp, and change your part once in a while. The crown is usually the first place to go limp.
Can I use a curling iron if my waves already look good?
Yes, but use it like a detail tool, not a full-head correction. Hit only the front pieces or the ends that need a bit more direction.
Which styles are fastest on a busy morning?
The deep side part, pinned temple waves, wrapped ponytail, and claw-clip French twist win on speed. They look finished without requiring a lot of sectioning.
How do I keep a braid or twist from slipping out?
Start with a little dry shampoo or texture spray at the roots, keep the sections small, and cross your pins rather than placing them straight in. Slippery waves need grip more than extra force.
What if my hair frizzes the second I step outside?
Choose styles that keep the front controlled — bandanas, pinned sides, smooth roots, or a deep side sweep. Then leave the lengths a little softer instead of trying to freeze every strand.
Wear the Texture Again Tomorrow
Wavy hair looks best when the style has room to breathe. That’s the thread running through all twenty looks here: enough structure to make the shape clear, enough looseness to let the wave pattern stay visible, and just enough attitude to keep things from feeling safe.
Pick the version that matches your morning, not the one that sounds nicest in theory. Some days that means a claw clip. Some days it means a faux hawk with pins you can barely see. Some days it means letting the haircut do the work and walking out the door before the mirror can talk you into changing it.
The good styles are the ones you reach for again without thinking too hard. That’s usually the sign you’ve found the right one.