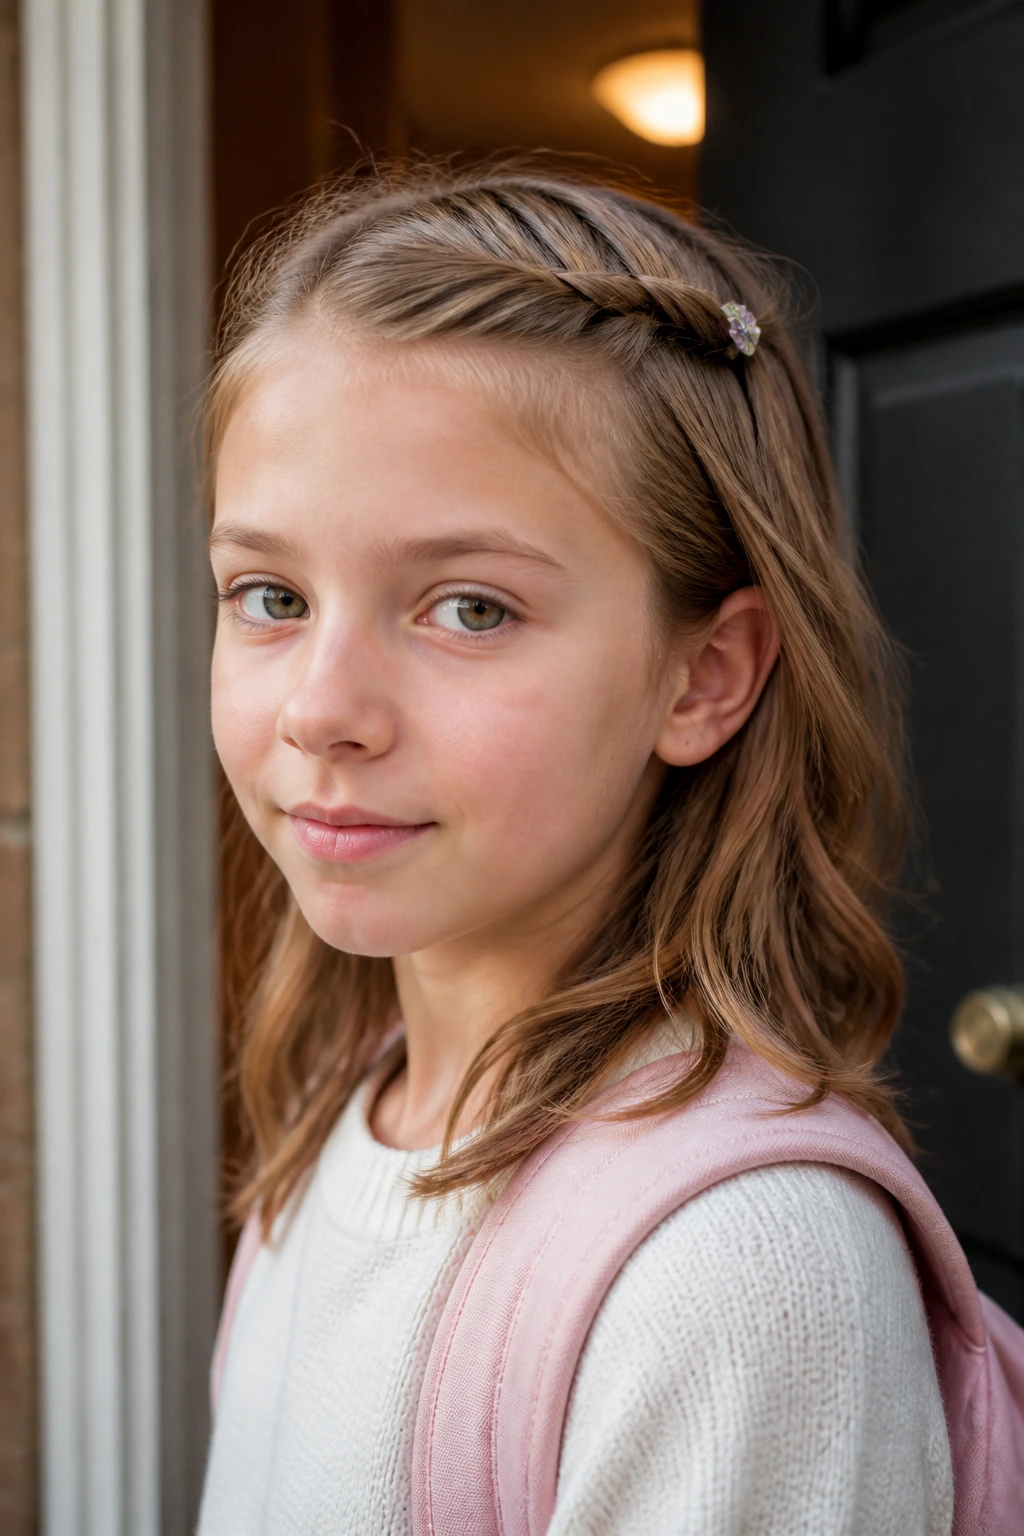
Fine hair tells on a rushed morning fast. A ponytail that looked neat at the mirror can slump by the time the backpack hits your shoulders, and a braid can go from tidy to wispy in the gap between breakfast and the front door.
That’s why school hairstyles for busy mornings with fine hair need a different rulebook. The styles that hold are usually the ones built with small sections, light tension, and a little grip at the roots — not the giant buns and oversized clips that look cute on thicker hair but slide flat before first bell.
Fine hair isn’t the same thing as thin hair, and that distinction matters. Fine means each strand is small in diameter; thin usually means less overall density. You can have a full head of fine hair and still spend every school morning fighting the same problem: the style looks done for about twelve minutes, then gravity starts winning.
So the smart move is to stop asking fine hair to do heavy work. Give it shape it can actually carry. Tiny elastics. Small braids. Mini clips. Half-up styles that lift the crown without dragging the whole head down. The looks below are the ones that stay readable by homeroom, even when you’ve had to get shoes on, sign a permission slip, and hunt for a missing water bottle all before the cereal bowl was washed.
Why These Styles Earn Their Spot by the Front Door
-
They use small anchor points: A quarter-inch braid or a mini claw clip grips fine hair better than a huge twist that barely has anything to hold onto.
-
They make the crown look fuller: Several of these styles push the weight lower or split it into sections, which keeps the top from going limp by second period.
-
They survive clean-hair slip: Fine hair gets slick after washing, and the best styles here either add texture on purpose or hide the flatness with shape.
-
They fit a short window: Most of these can be done in under five minutes once your hands know the pattern, which matters when the bus is already outside.
-
They can be dressed up or down: A ribbon, a tiny clip, or one neat side part can take the same basic style from plain to polished without adding time.
Why Fine Hair Needs a Different Morning Playbook
Fine hair has a small strand diameter, so it bends easily and slips out of things easily. That sounds simple. It becomes annoying in practice. A big ponytail tie can feel secure in the mirror, then drift lower the second you put a coat on or tuck hair behind one ear. The hair itself isn’t “bad” at holding; it just needs a different kind of support.
The Root Problem Is Weight
A style that relies on bulk can collapse because there isn’t much bulk there to begin with. Fine hair doesn’t usually like a heavy bun sitting high on the crown unless you build in support with pins, texture spray, or a small donut. The same goes for huge clips. If the accessory is larger than the amount of hair it’s holding, it can slide around like it’s bored.
Clean Hair Is Not Always Your Friend
Freshly washed fine hair often feels silky and smooth, which sounds nice until you try to braid it. Then it behaves like a bar of soap. A little dry shampoo, a bit of mousse at the roots, or even just letting hair sit for a few hours after washing can give it enough grit to stay put. Too much product is its own trap, though. Fine hair can go from airy to greasy-looking in one spray too many.
Small Sections Beat Big, Fancy Moves
The more precise the sectioning, the better the hold. Tiny braids, narrow twists, and short, anchored loops keep the style close to the scalp where fine hair can actually support it. That’s the general rule I trust. If a style asks for a dramatic chunk of hair to hold a lot of weight, I look for a smaller version of the same idea instead.
1. Half-Up Mini Clip Twist
This is the first style I reach for when hair has gone flat overnight and nobody has time to negotiate with it. A half-up mini clip twist lifts the crown, keeps the front out of the face, and leaves the length down so the whole thing still looks soft. It takes a single clip, not a whole rack of accessories.
Take a small triangle of hair from the crown, twist it twice toward the back, and secure it with a mini claw clip sitting horizontally. If the twist looks too narrow, gently pinch the top of it once the clip is in place. That little pull changes the shape fast.
The reason this works on fine hair is simple: it keeps the stress close to the scalp. The clip isn’t trying to hold all the hair on your head, only a tidy top section. If your hair is extra slippery, mist the crown with dry shampoo first and wait about 20 seconds before twisting.
Best for straight or slightly wavy hair. Best for kids who hate tight ponytails. Best, honestly, for mornings when you need something that looks deliberate even if you woke up feeling like a pile of laundry.
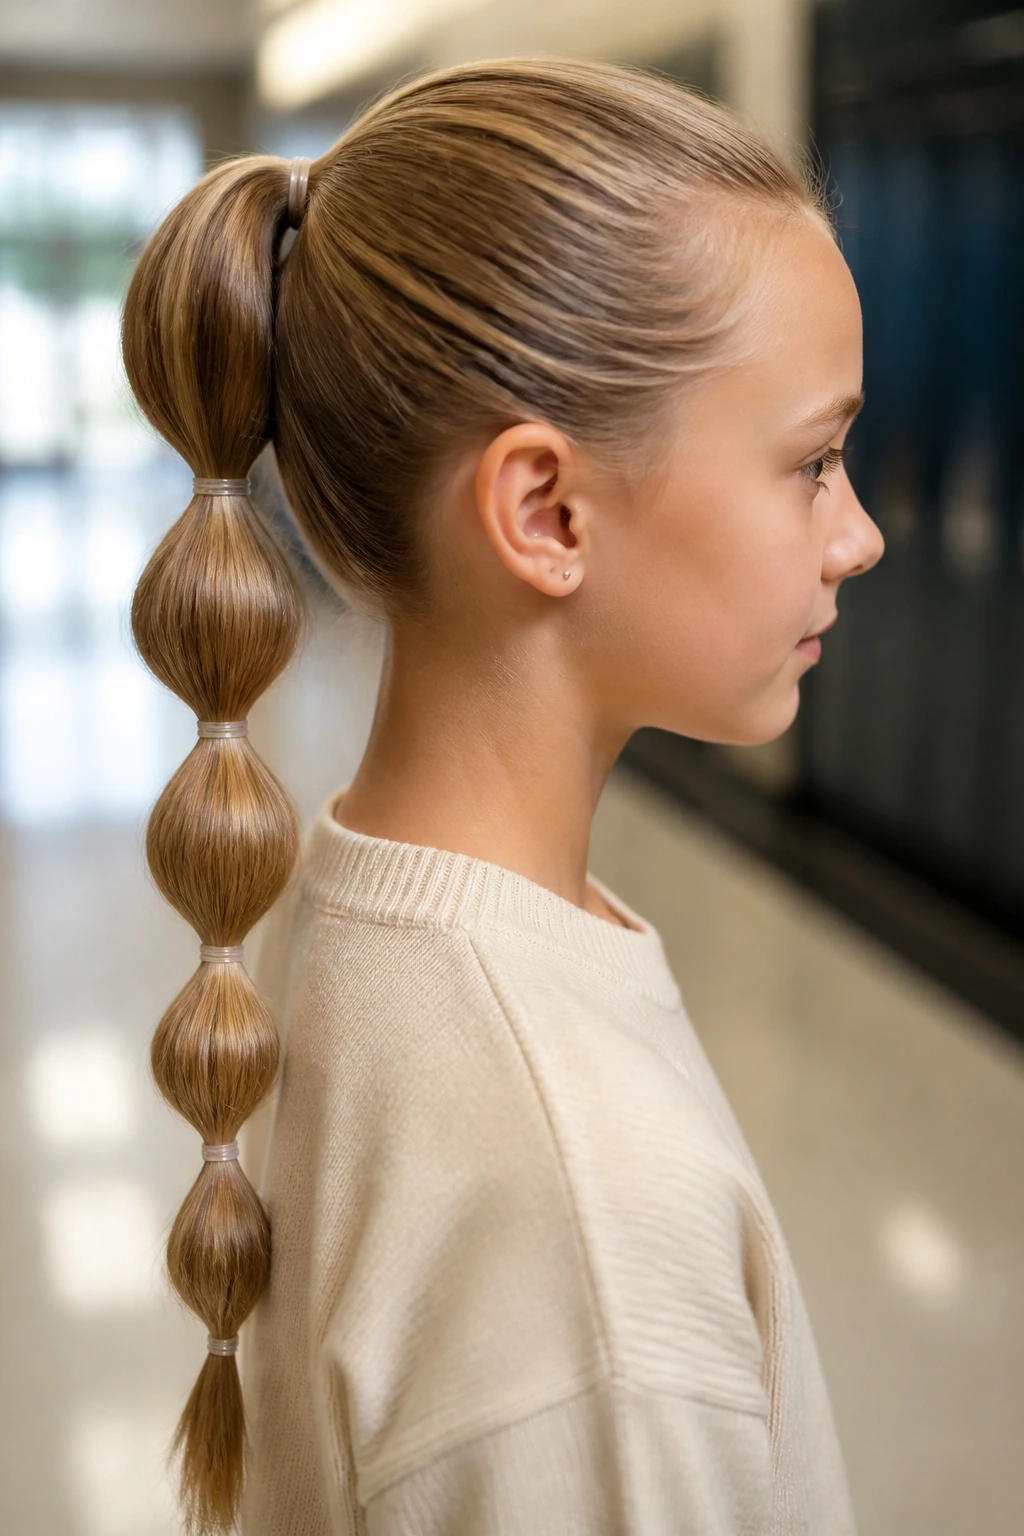
2. Bubble Ponytail That Fakes More Hair
A bubble ponytail is the easiest way to make fine hair look fuller without teasing it into a nest. It’s basically a ponytail broken into soft, rounded sections, and each bubble gives the eye a little more to look at. The trick is spacing, not volume.
The Tiny-Elastic Trick
Start with a low, mid, or high ponytail and secure it with a snug elastic. Then add another elastic about 2 inches down, and another after that, depending on your length. Once the segments are in place, tug the sides of each bubble outward with your fingertips until they look round instead of flat.
Use clear elastics or slim hair ties. Thick gym bands tend to eat fine hair alive. If the base feels loose, stack a second elastic over the first one before you start building the bubbles. That single move keeps the whole style from sliding.
I like this one on hair that’s been washed the day before. Freshly washed hair can be too slick for bubbles to stay defined, and by lunchtime the sections can collapse into one long tail. A light dusting of dry shampoo near the base makes a surprising difference.
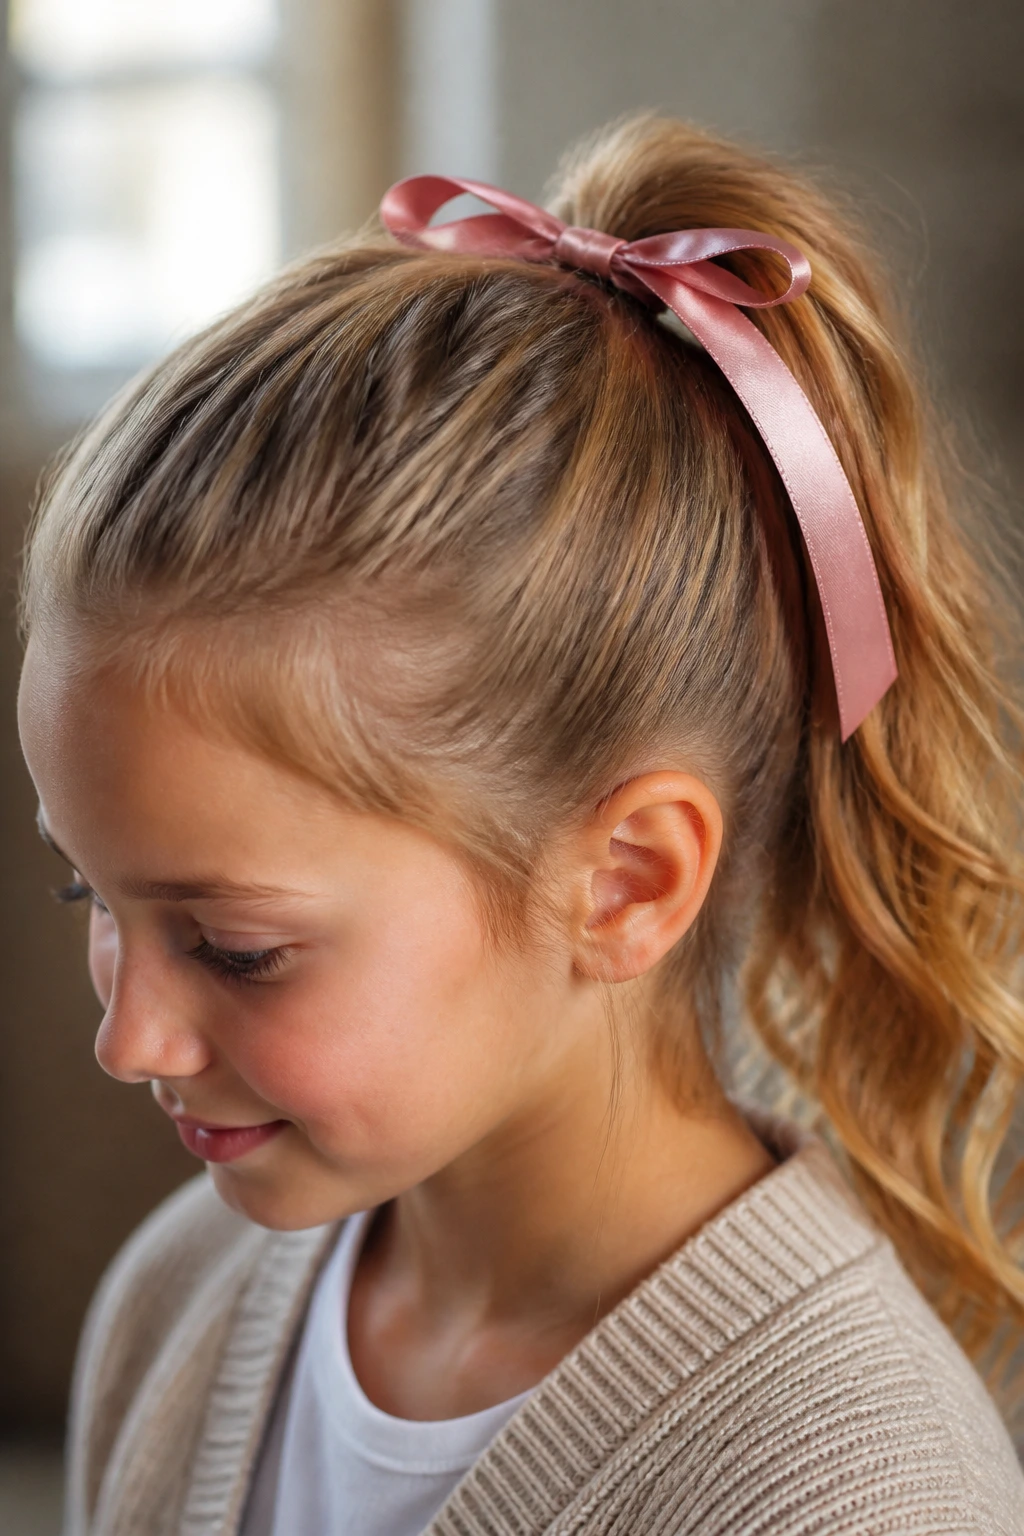
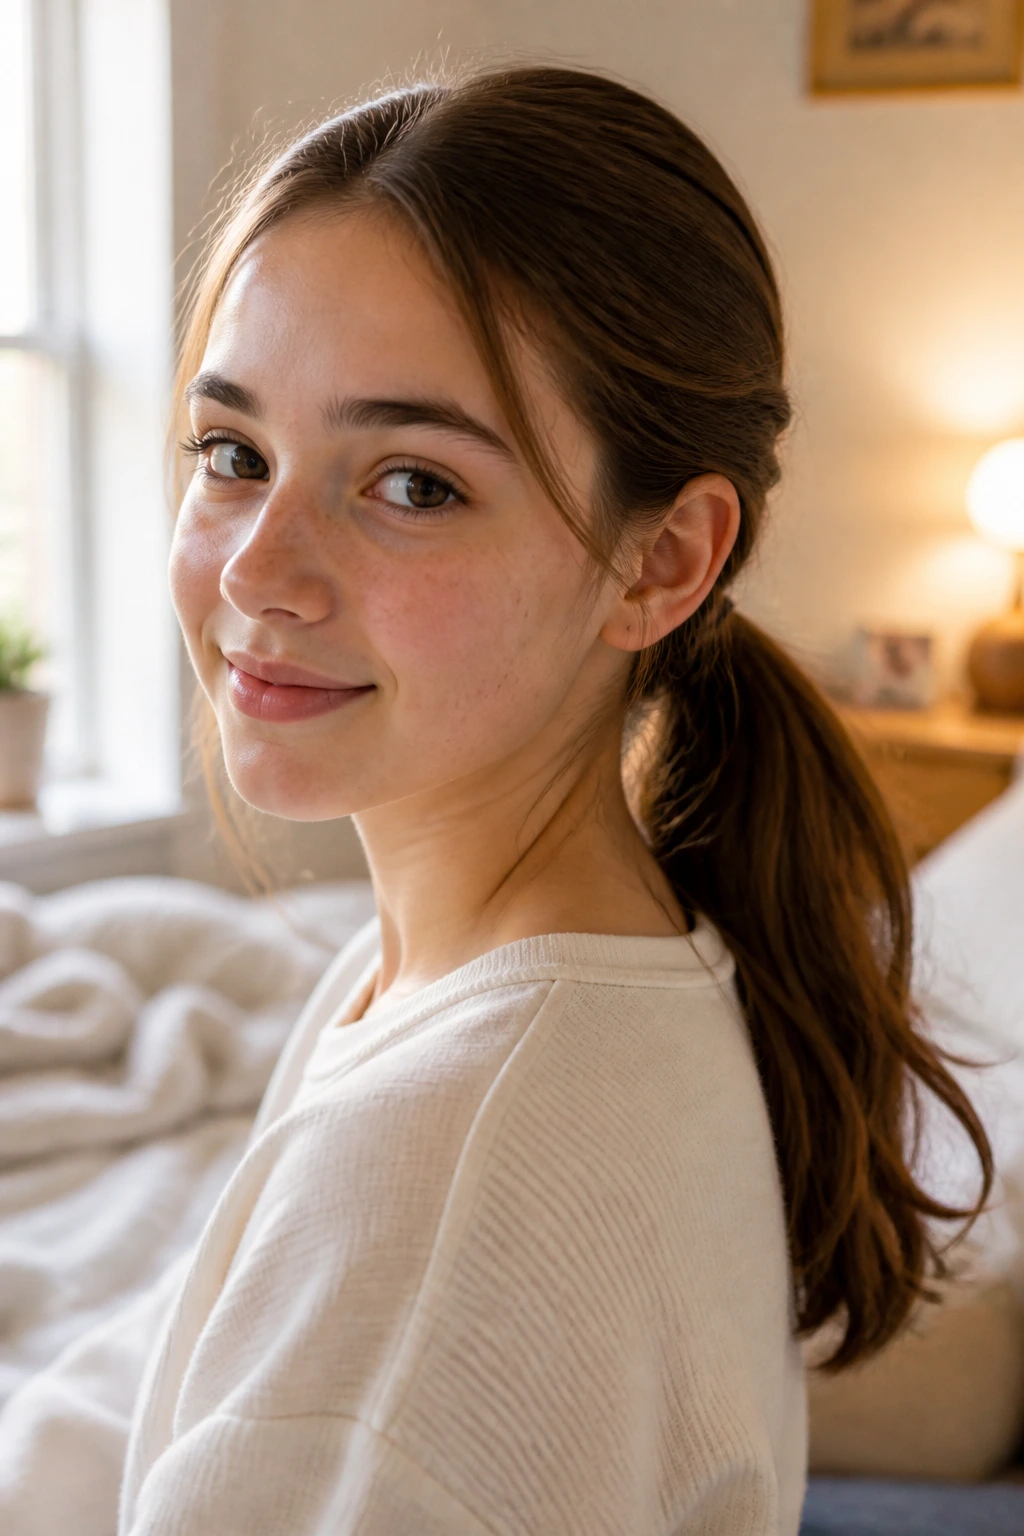
3. Low Ponytail With a Hidden Ribbon
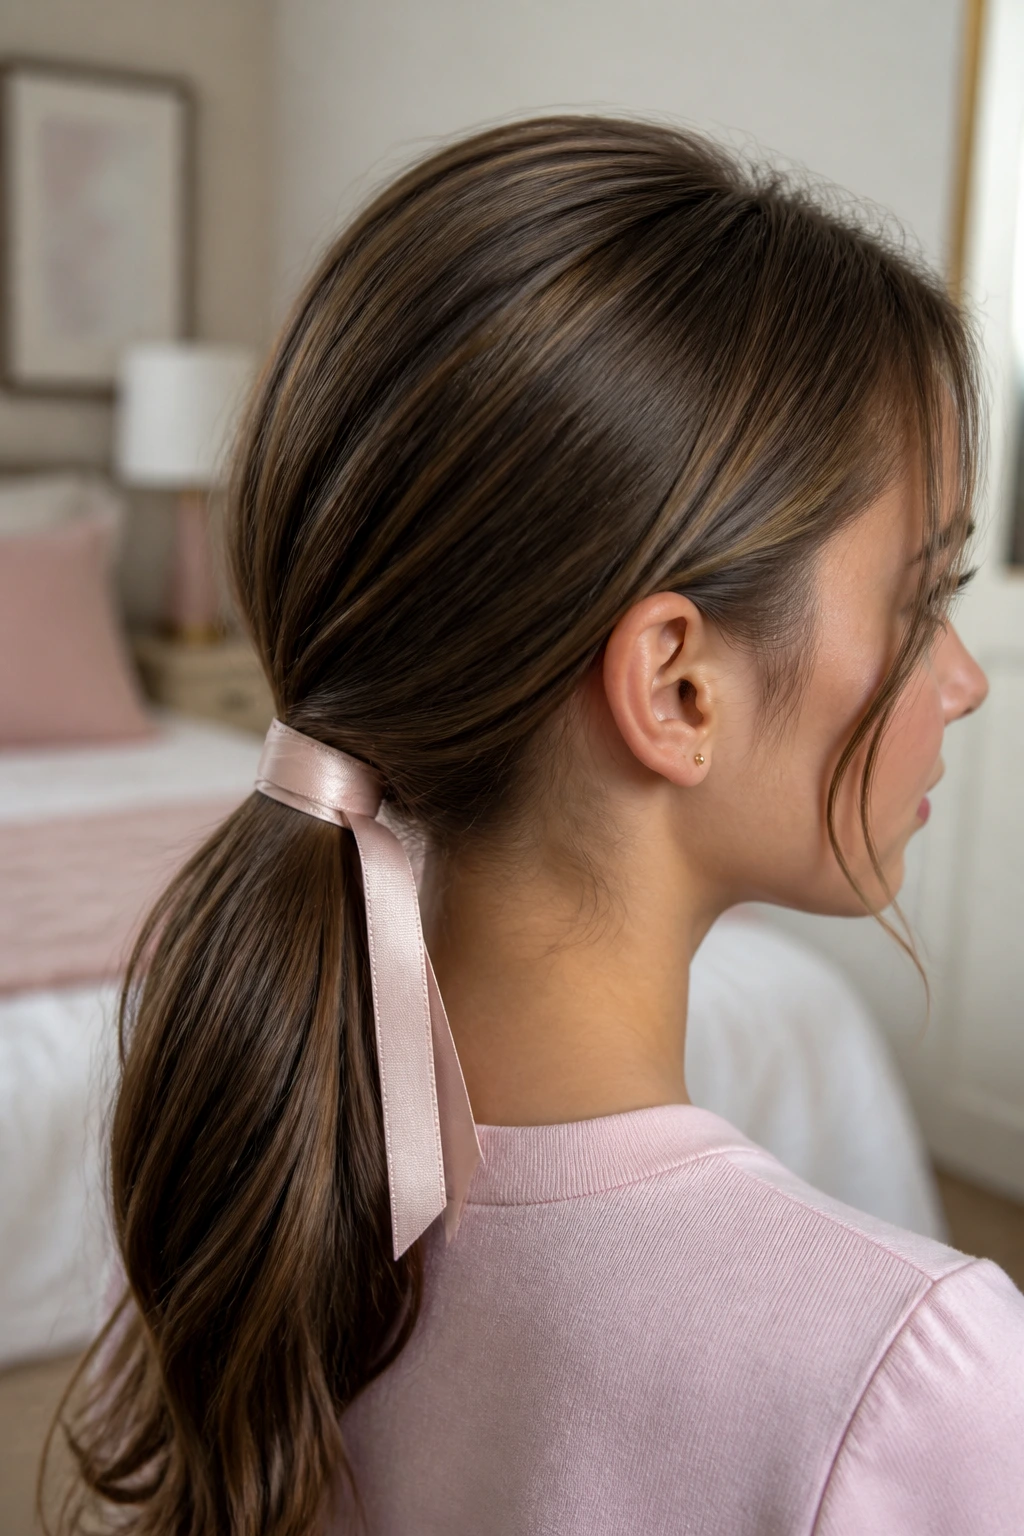
A low ponytail can look plain on fine hair unless you give it one clean detail that does the heavy lifting. A ribbon does that job better than a giant bow, because it adds shape without adding bulk. It also hides the skinny elastic, which is doing more work than it gets credit for.
Part the hair in the middle or a soft side part, gather it at the nape, and secure it with a small elastic. Then tie a 1-inch ribbon around the base and knot it under the ponytail so the ends hang down neatly. Grosgrain ribbon holds its shape better than slippery satin if you’re going to be moving around all day.
This style is nice when the ends of fine hair look a little see-through. The ribbon distracts the eye from that thin tail and turns the whole thing into a deliberate choice. If the pony is too low and starts poking at a hoodie collar, move it up half an inch. That tiny adjustment changes how it sits against the neck.
Keep the ribbon tails short if your backpack straps tend to catch on everything. Long loose ends look cute for about five minutes, then they start living a hard life.
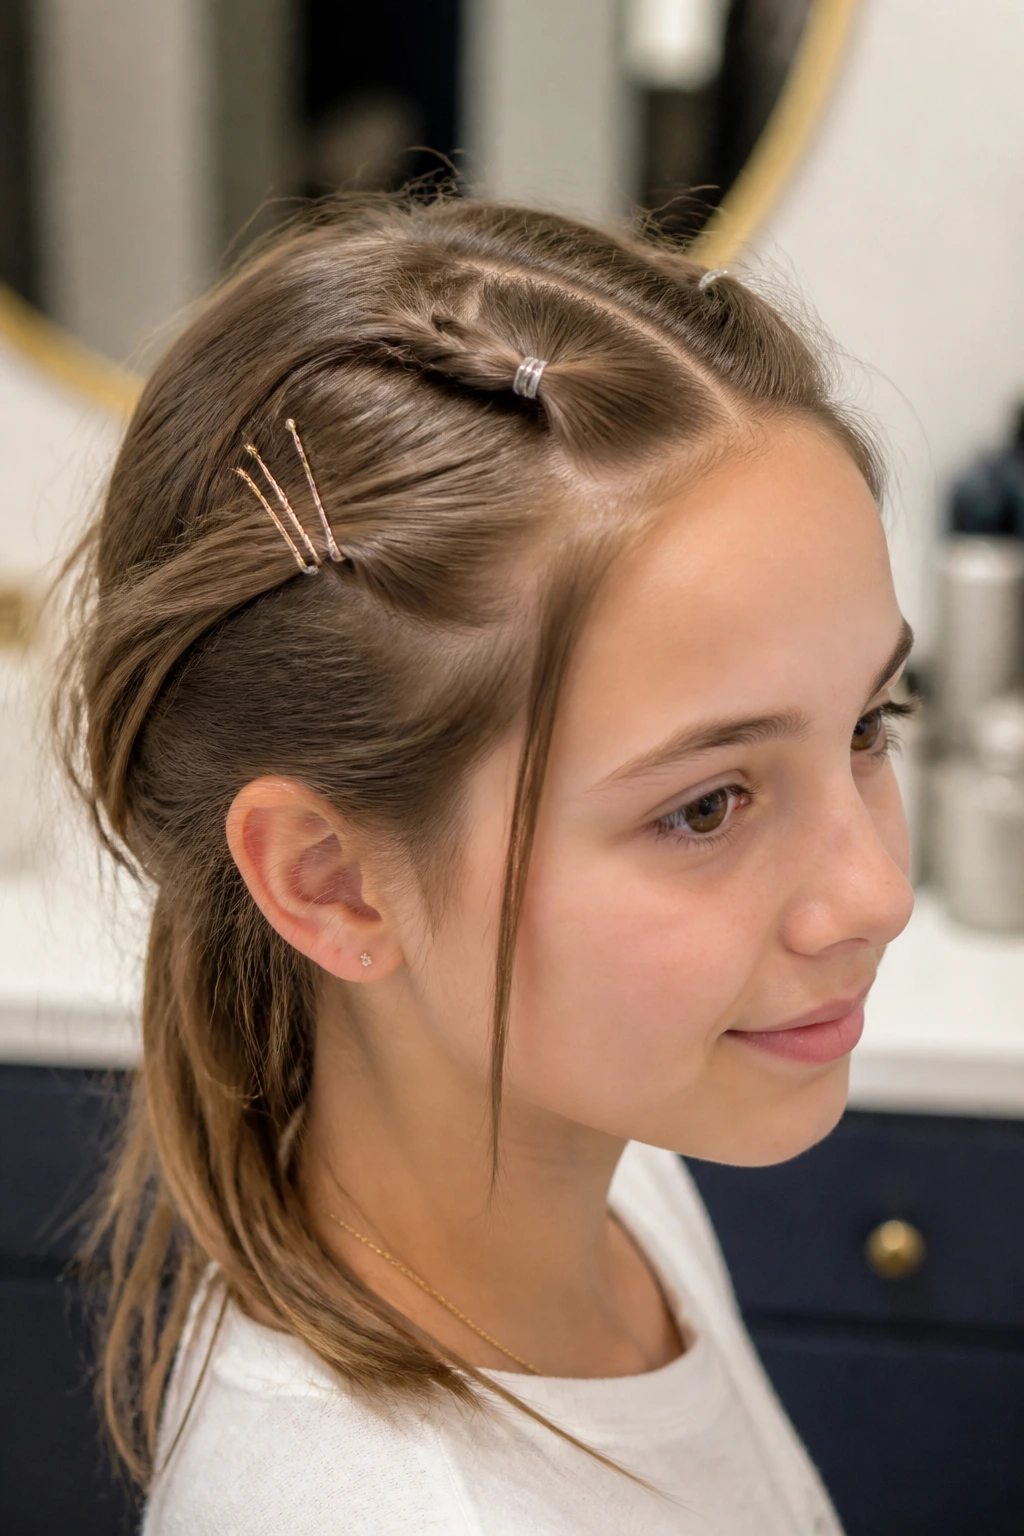
4. Sleek Side Part and Tucked Behind Ears
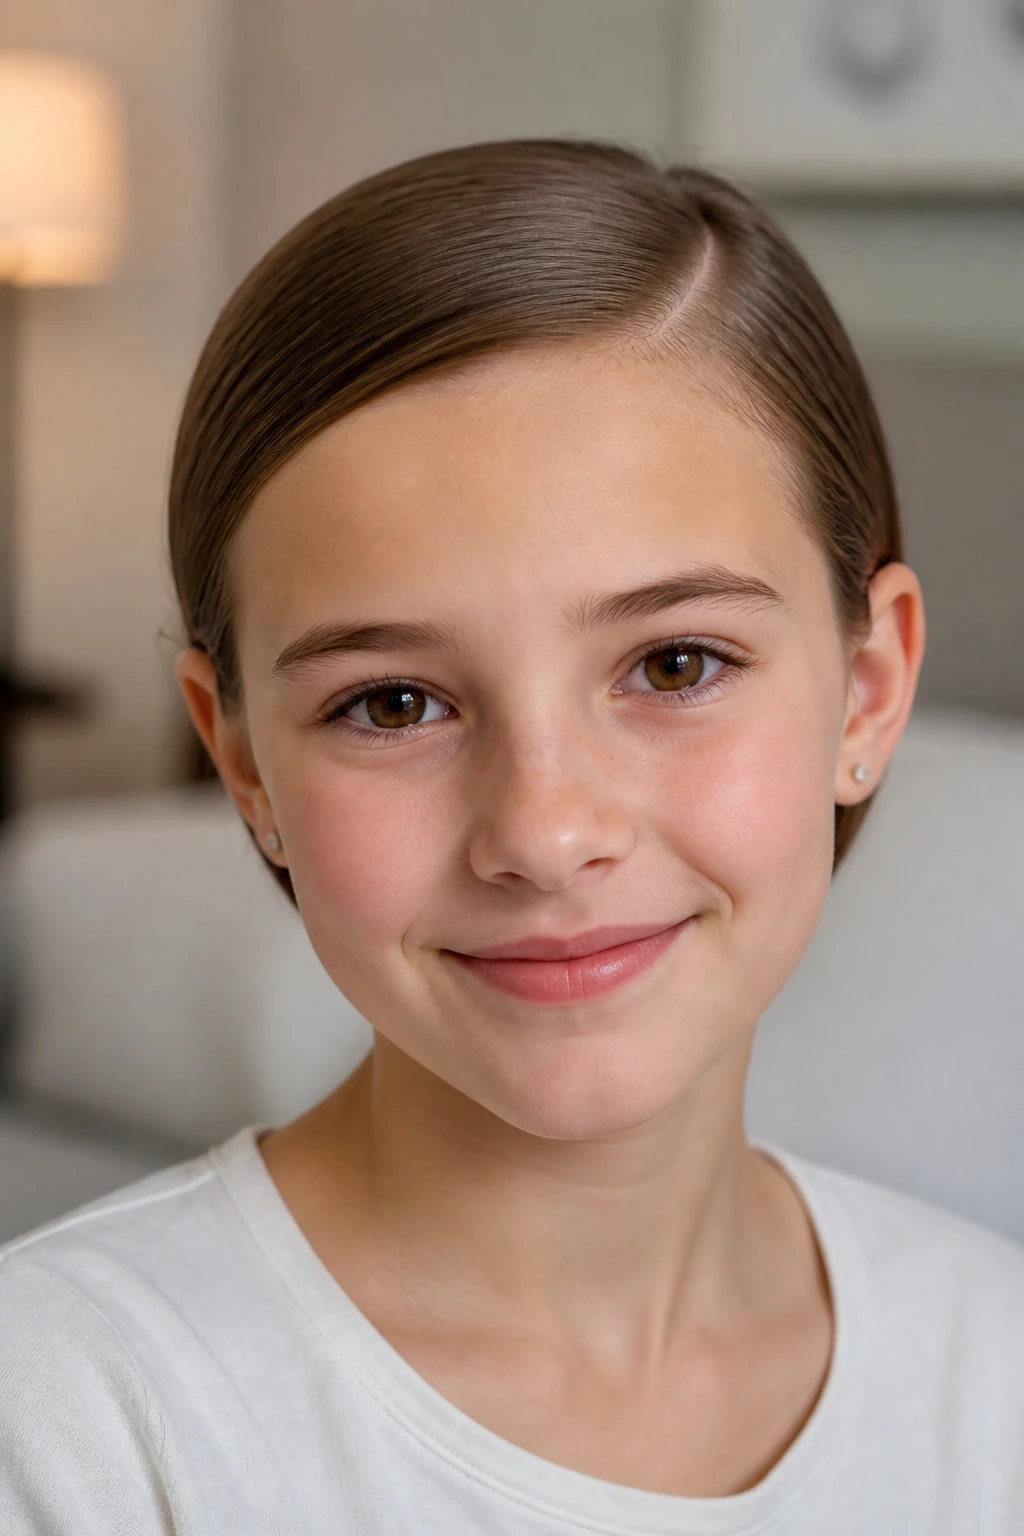
Sometimes the fastest school hairstyle is not a real style at all. It’s a sharp part, a little smoothing at the crown, and hair tucked neatly behind both ears so it stops falling into everything. On fine hair, that restraint can look more polished than a fancy braid.
Use a tail comb to make a clean side part, then smooth the top layer with a pea-size bit of lightweight cream or a tiny mist of shine spray on your hands. Tuck the front sections behind your ears and secure each side with one slim bobby pin if the hair keeps escaping. The pins should sit flat and almost disappear.
This works because it relies on shape instead of mass. You’re not building height. You’re creating lines. Fine hair usually behaves better when the style is simple enough to keep its edges.
I’ll be blunt: this is one of the most underrated looks on school mornings. It’s quick. It stays neat. And when the rest of the day gets chaotic, the hair still looks intentional. That matters more than people admit.
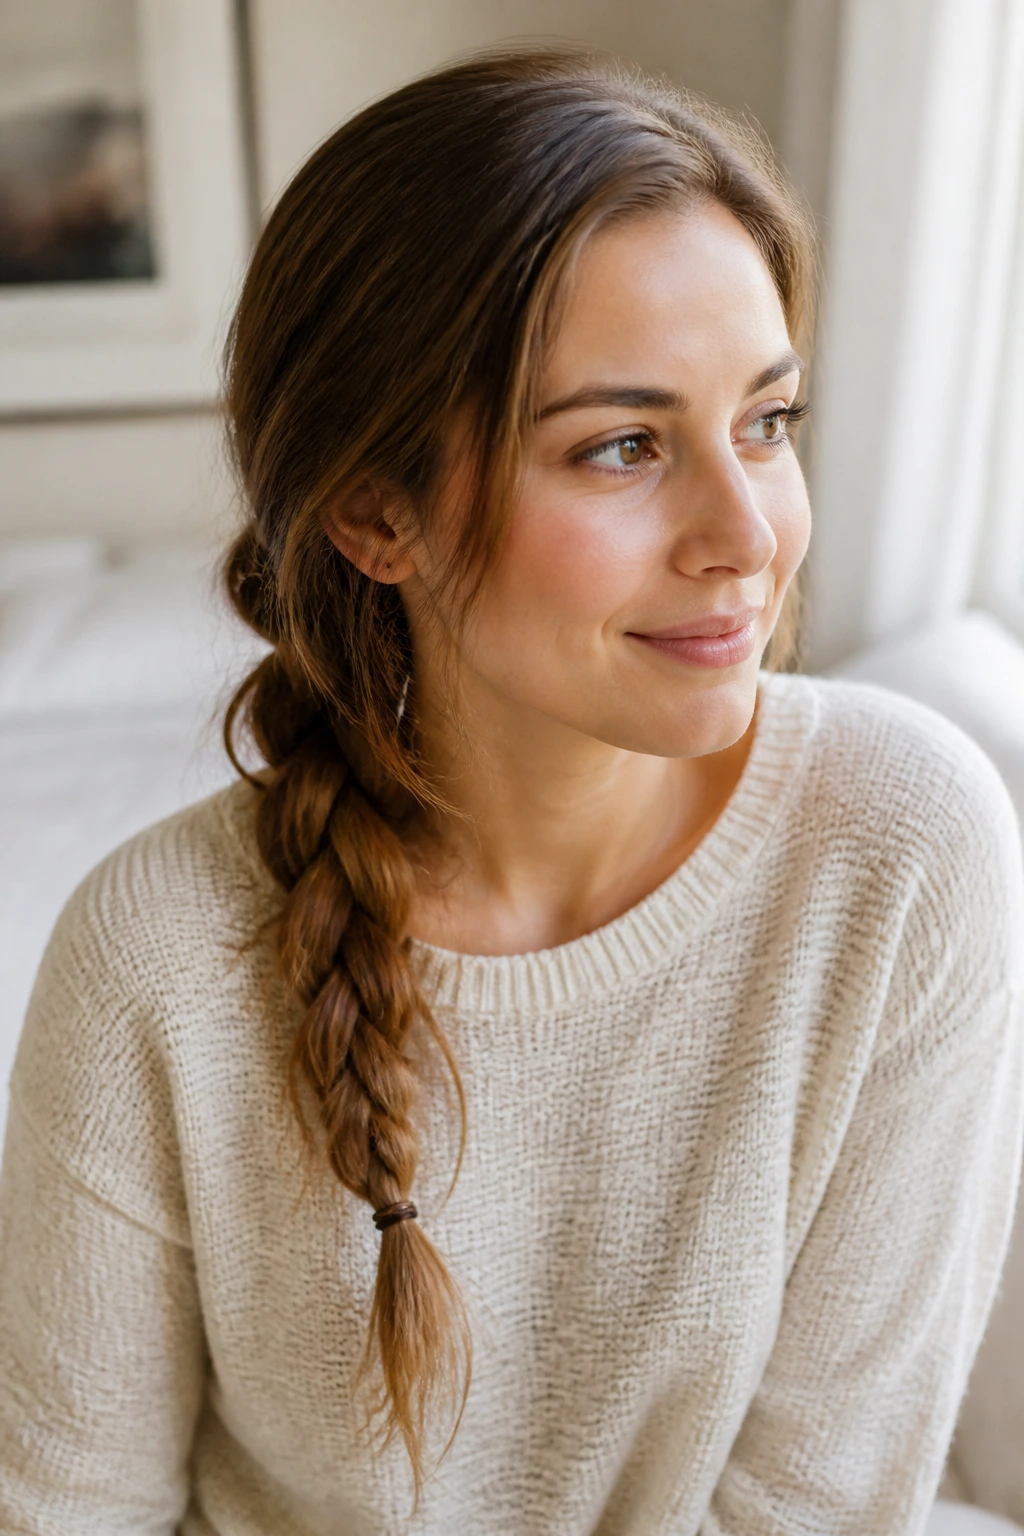
5. Dutch Braid Into a Low Pony
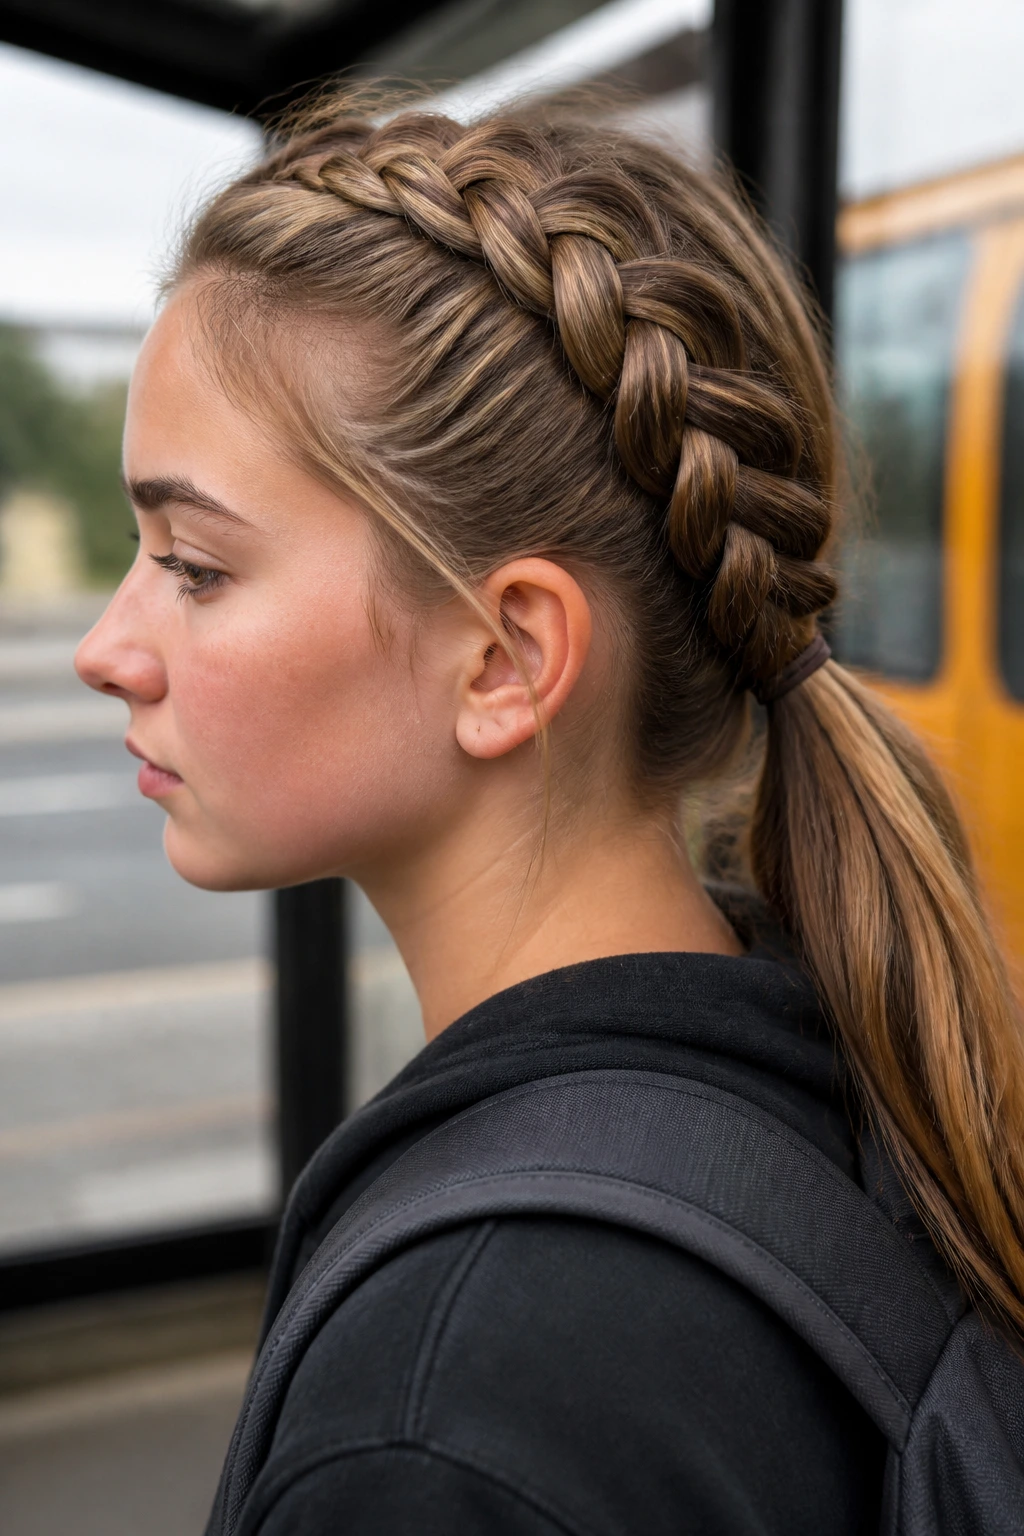
A Dutch braid into a low pony gives fine hair a stronger outline than a regular loose ponytail ever will. The braid starts on the scalp and pushes outward a little, so the top half looks fuller before the pony even begins. It’s one of those styles that makes thin-looking hair appear organized instead of flat.
Begin with a small front section near the part and braid under, not over, feeding in tiny pieces as you move toward the nape. Stop once you reach the point where you want the ponytail to sit, then tie the rest into a low pony. If you want more texture, gently widen the outer braid loops after it’s secured.
Small sections are the whole game here. Big sections make the braid look chunky and uneven, and fine hair tends to lose its grip fast when the braid is loose. Keep the first inch near the hairline snug, then relax the lower part a touch so it doesn’t look tight or stiff.
This is the style I’d pick for a windy bus stop or a day when you’ll be outside after school. It keeps the front controlled without forcing the entire head into a tight updo.
6. Crown Braid for the Front Pieces
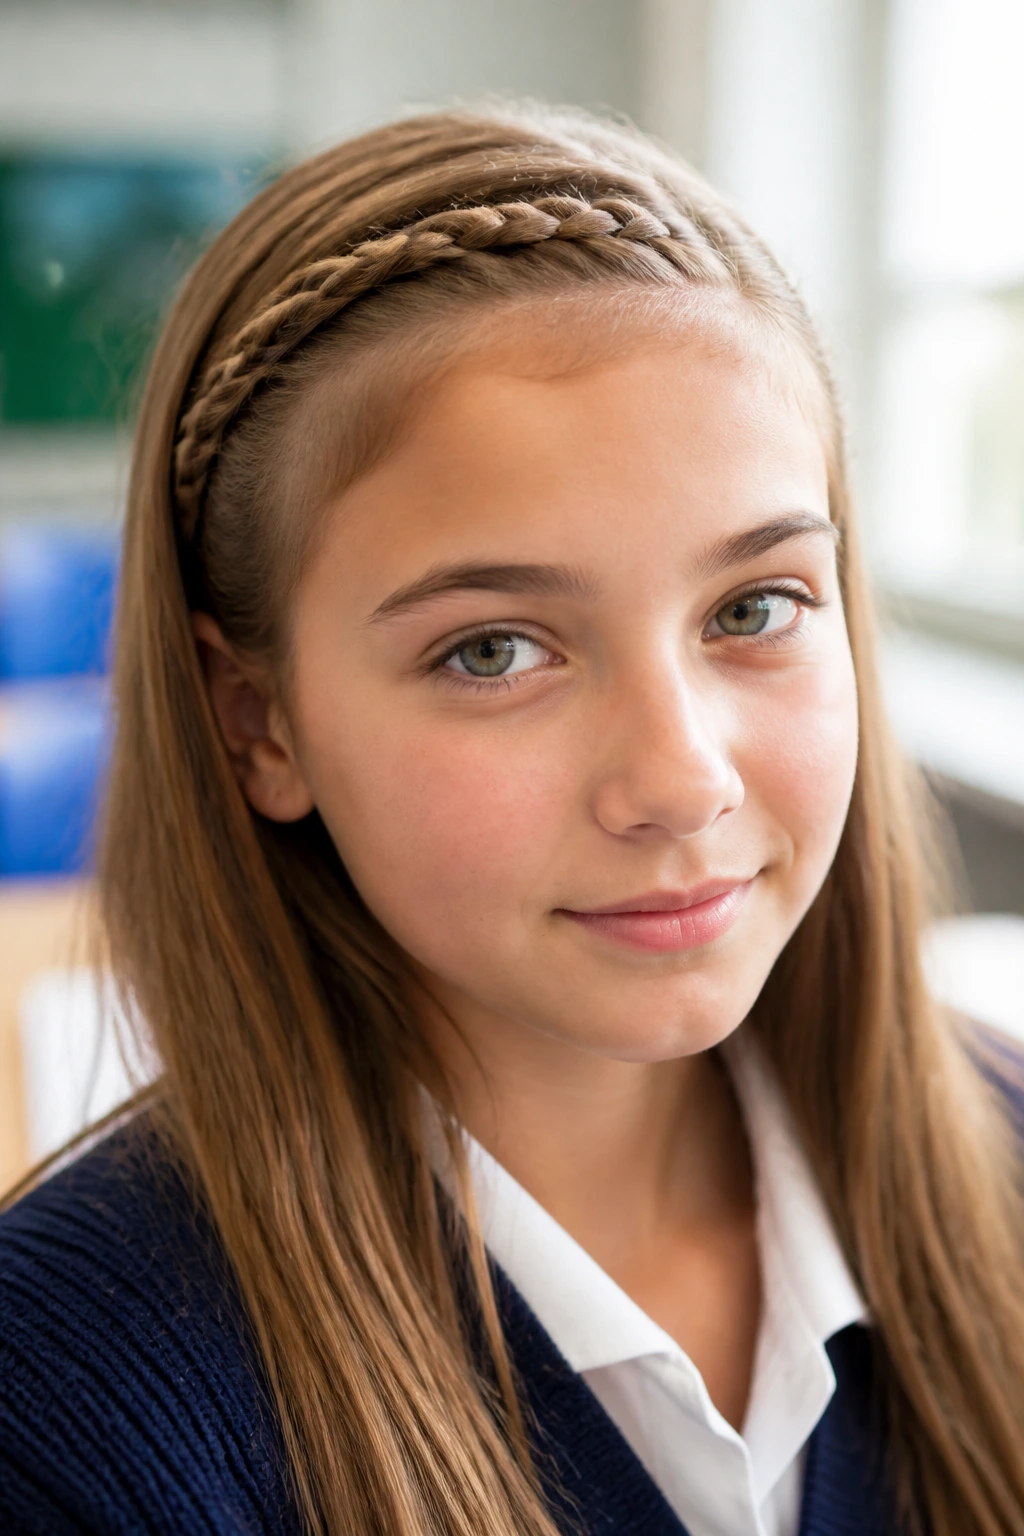
You do not need a full halo braid to get the same effect. A narrow braid across the front pieces can be enough. That’s the part most fine-haired people overlook. A tiny braid near the hairline gives the illusion of effort without asking the whole head to cooperate.
Take a small section from one temple, braid it across the front hairline, and pin it behind the opposite ear. If the braid is too short to cross the whole forehead, make two short braids and meet them in the back with a pin. Either version keeps flyaways under control and leaves the rest of the hair down.
What Makes It Hold Better
The braid should sit close to the scalp and use narrow sections. If you start too wide, it loosens before lunch. A dab of dry shampoo at the roots helps the braid grab, but don’t soak it. One or two sprays are plenty.
This style is especially nice for growing-out bangs or those pieces that always fall into the eyes during class. Fine hair often looks better with a controlled front and softer length behind it. That contrast reads as tidy, not fussy.
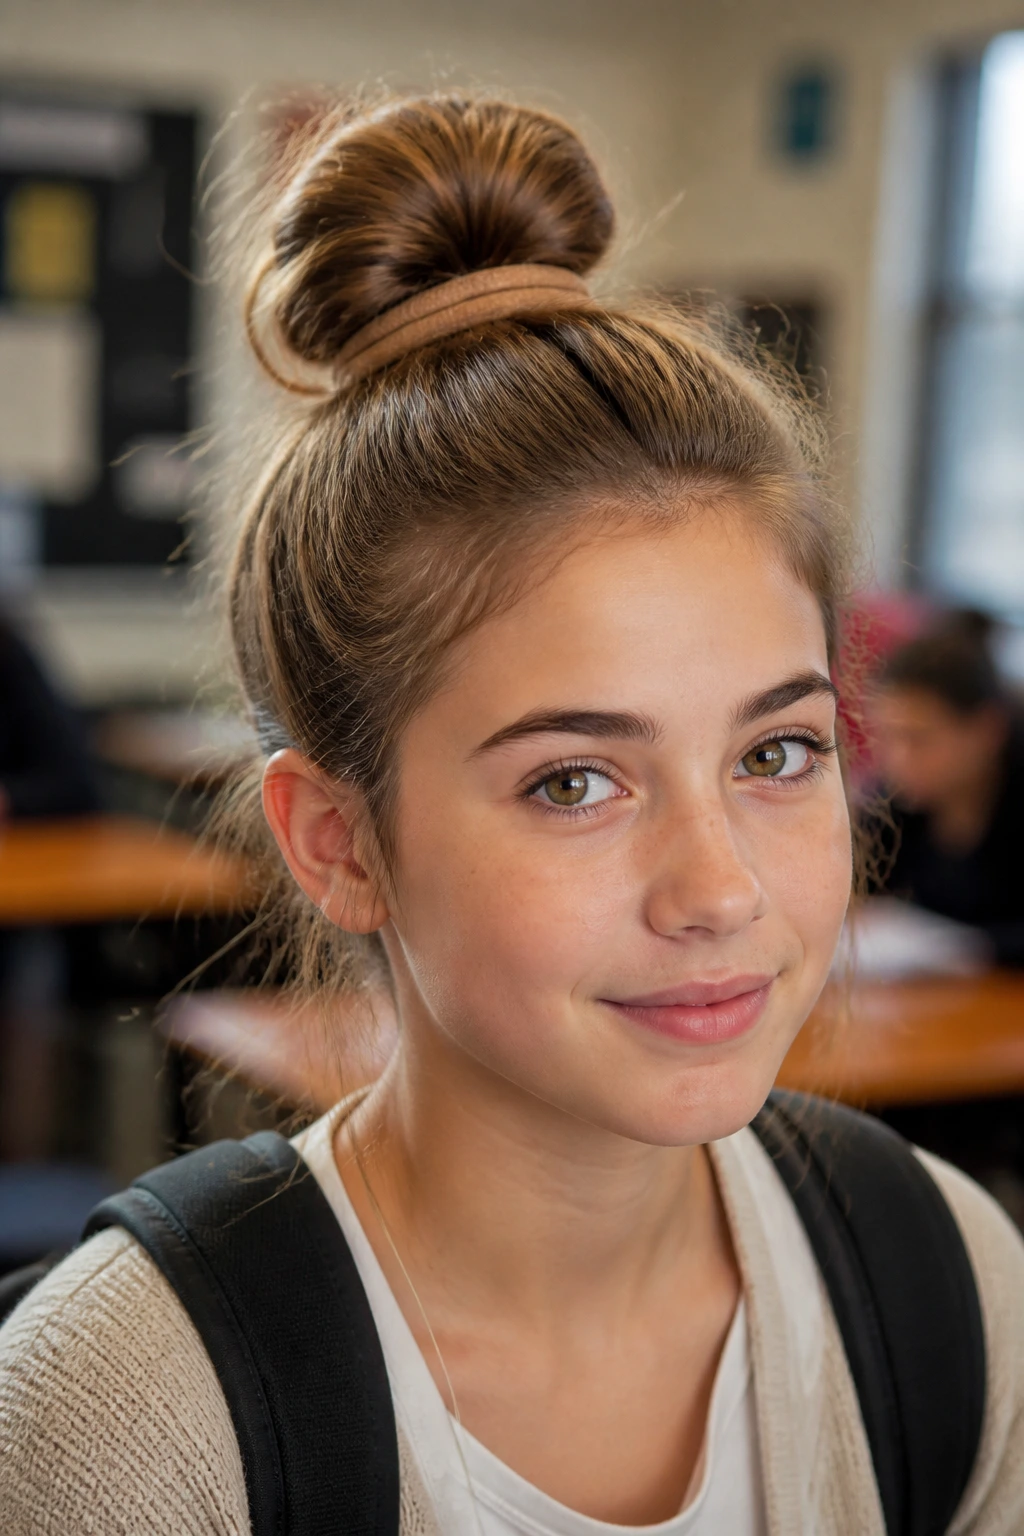
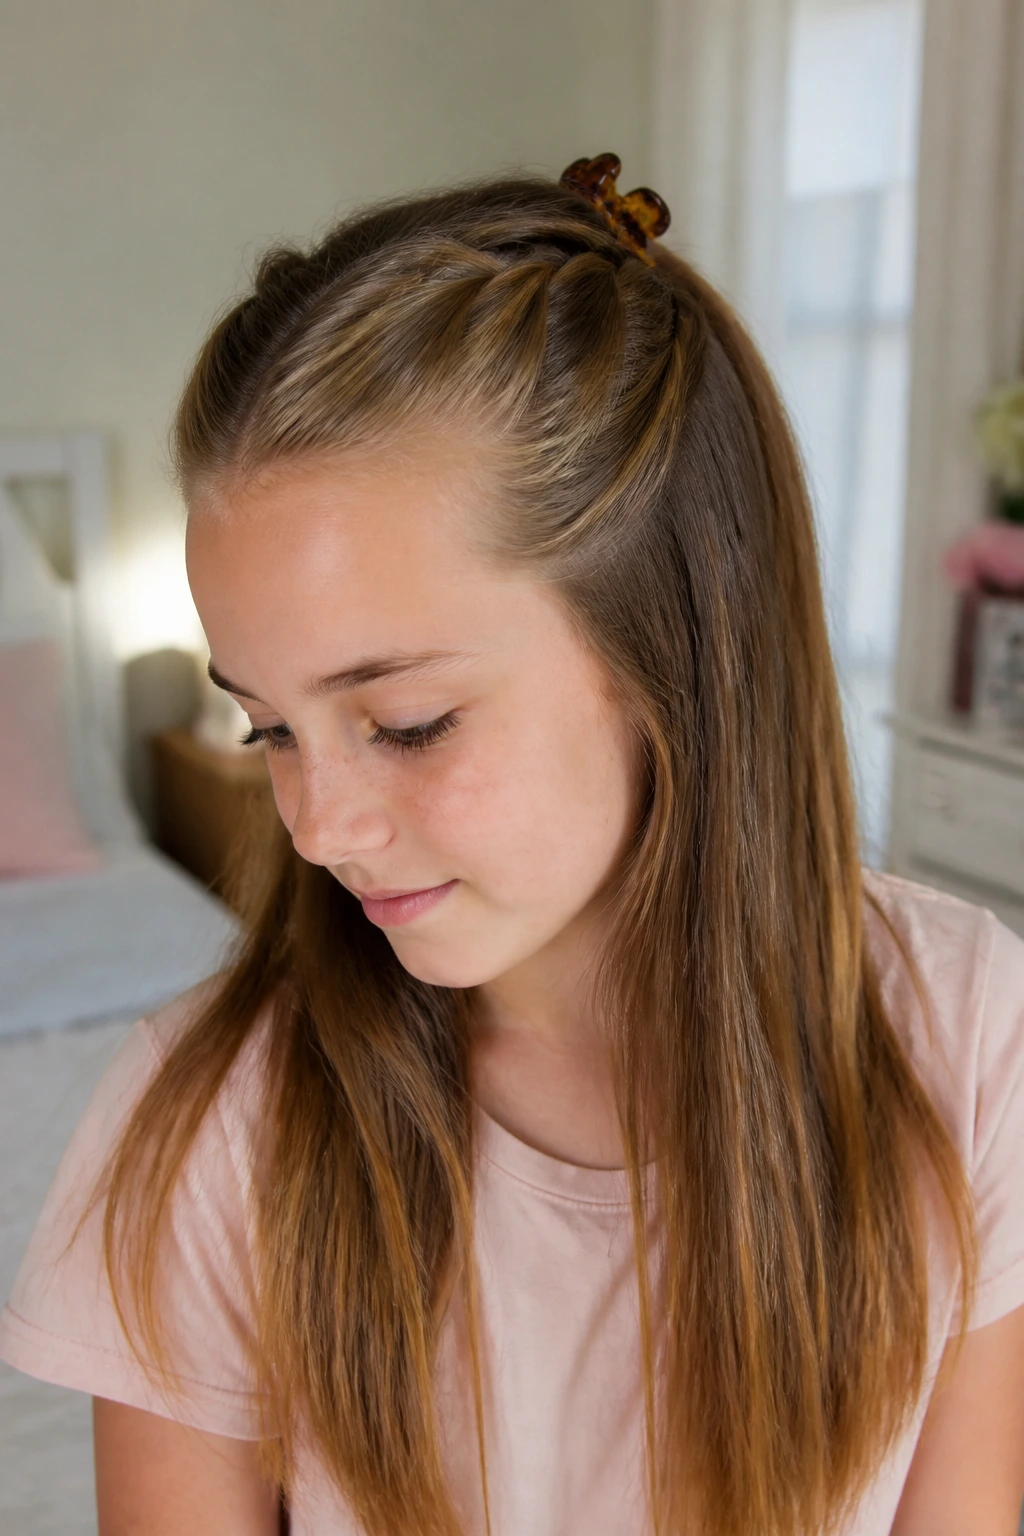
7. Mini Claw Clip French Twist
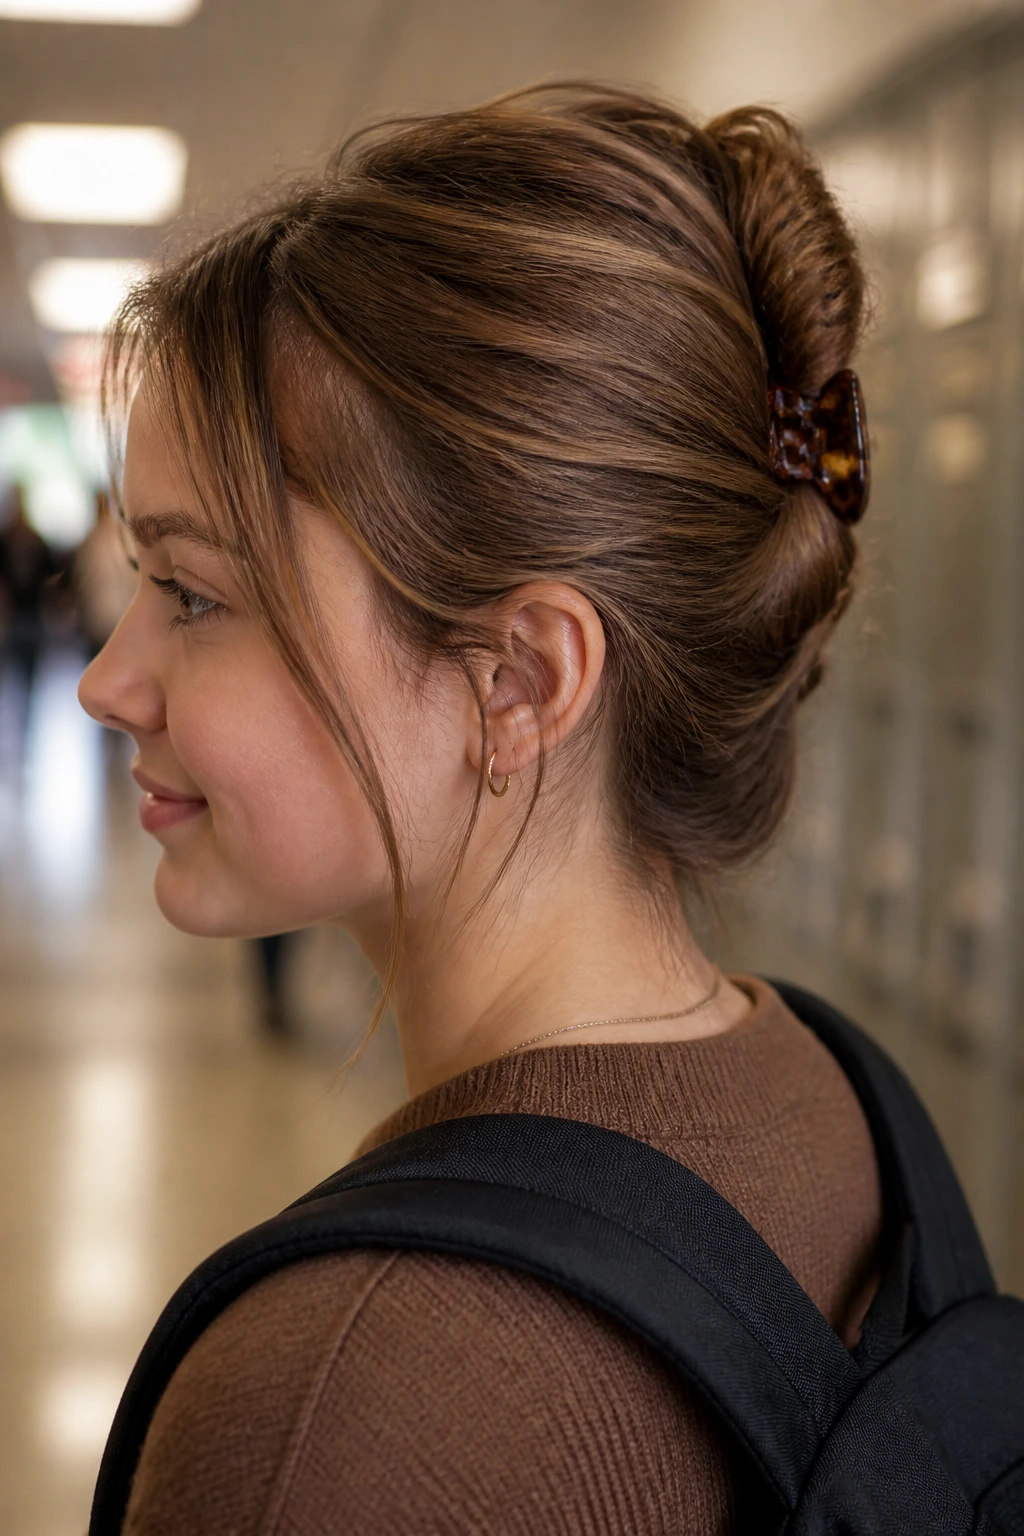
A mini claw clip French twist is one of my favorite tricks for shoulder-length fine hair. It looks like you spent time on it. You didn’t. You just used the right size clip and kept the twist small enough for the hair to support itself.
Pull the hair back as if you’re making a low ponytail, twist upward, fold the lengths under once, and clip the twist close to the scalp. The best clip is the one that fits the amount of hair you actually have. Oversized claw clips can slide around or leave the twist looking loose and droopy.
Fine hair benefits from this style because the weight is distributed vertically instead of hanging from one elastic point. That means less pull on the roots. If your hair is silky, add a little texture spray at the crown before twisting so the clip can grab.
I like the slightly undone version better than a severe, polished twist. Let one or two small ends peek out if they have to. School hair should stay in place, yes, but it doesn’t need to look like it was installed by a machine.
8. Double Braided Pigtails
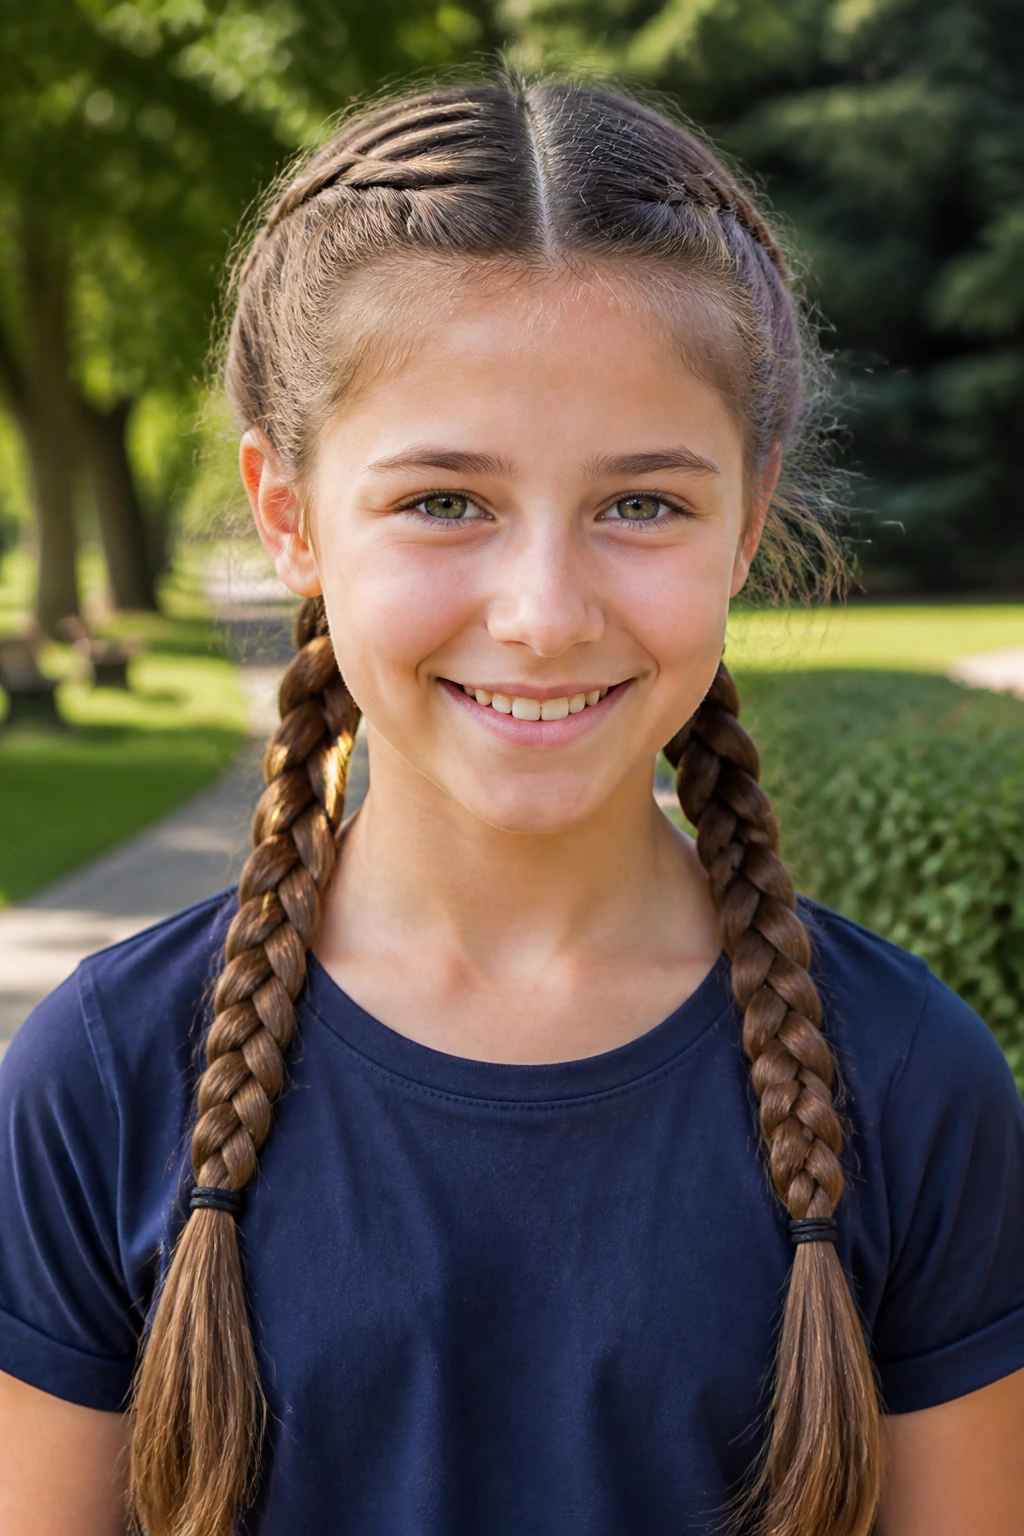
Double braids are practical in a way that plain ponytails never quite are. They keep the hair off the neck, they hide the fact that the hair is fine, and they stay orderly through a long day. On children especially, they’re hard to beat.
Part the hair down the middle and make two low braids, one on each side. Start each braid with small sections so the shape is close to the head. After tying the ends, gently tug the outer edges of each braid with your fingertips to widen them a little. That little widening trick gives the illusion of more thickness without making the braid fall apart.
This style is at its best when the hair has some natural grit. Day-two hair or hair with a touch of dry shampoo tends to braid more cleanly than freshly washed hair. If the ends are wispy, use small elastics that match the hair color so the finish doesn’t look interrupted.
Double braids have a sort of no-nonsense charm. They’re not delicate. They’re not high-maintenance. They just do the job.
9. Messy Bun With a Thin Hair Donut
A bun on fine hair needs support, and a small donut gives it that support without looking bulky. The point is not to make a giant crown on your head. The point is to give the hair something to sit around so the bun has shape.
Make a ponytail where you want the bun to sit, slide a mini hair donut over it, and spread the hair around the donut evenly. Then wrap the ends around the base and pin them under with bobby pins. If the bun looks too thin, lightly pull at the outer edge to widen it before pinning the last section.
The size of the donut matters more than people think. If it’s too large, fine hair won’t cover it, and the donut ends up visible through the bun. Choose one that matches the amount of hair you actually have. Small is better here. Really.
I’d use this for a day when hair has to stay off the neck, like a warm classroom or a long rehearsal. It’s neat, it’s quick, and when done right, it looks like a soft knot rather than a puffed-up afterthought.
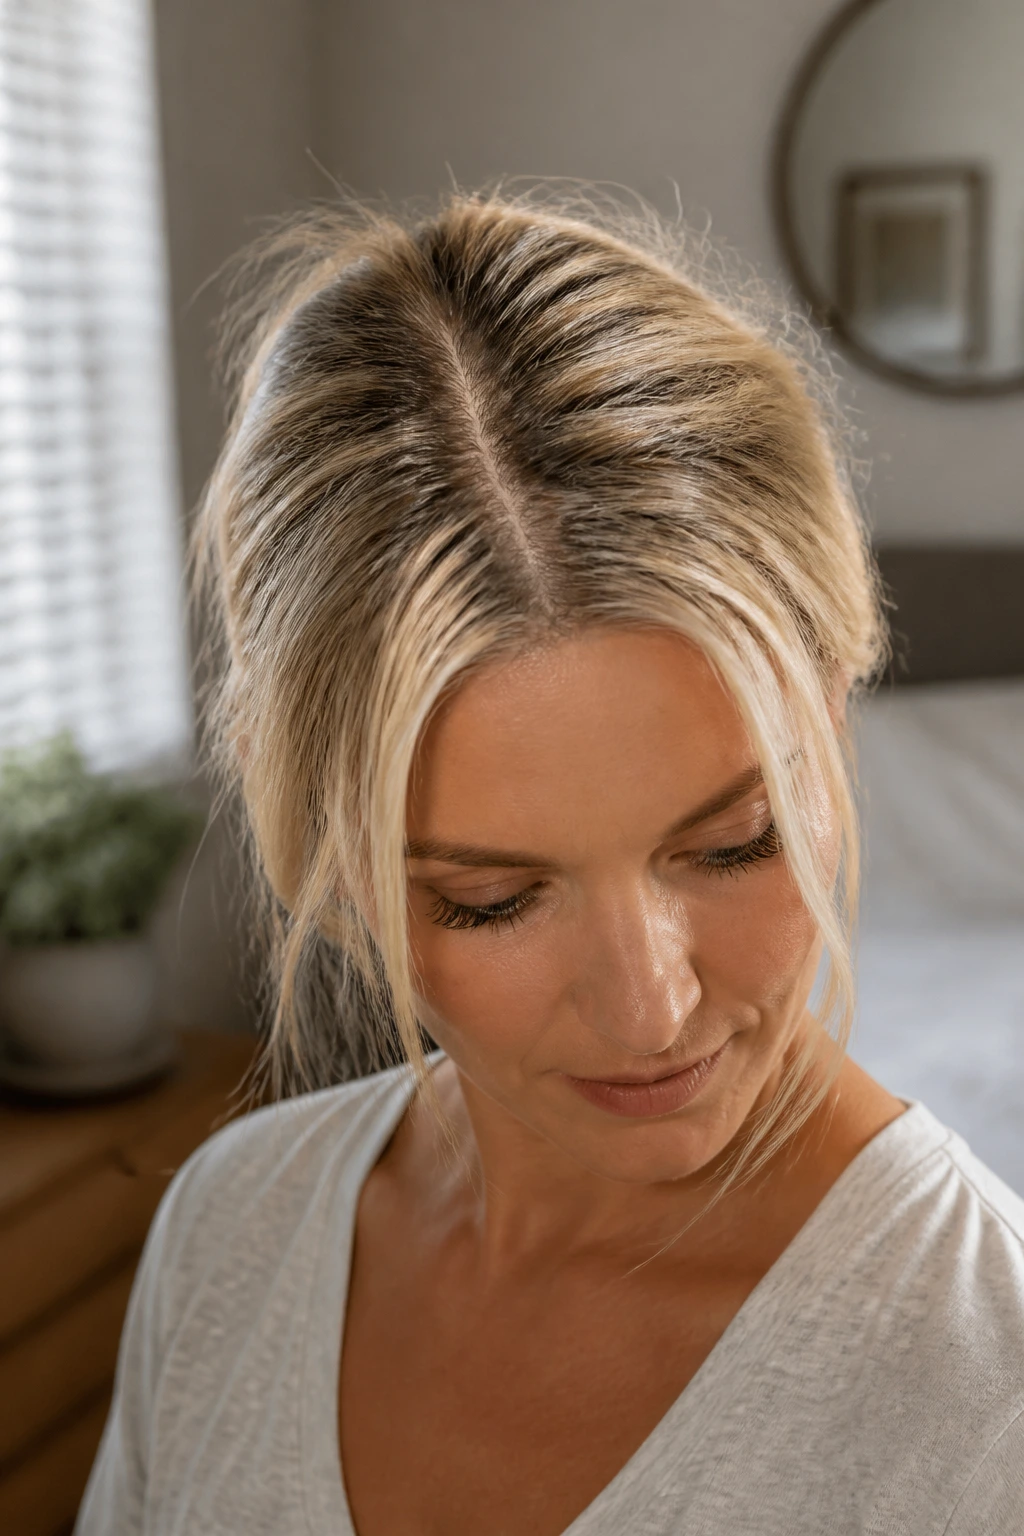
10. Sleek High Pony With a Wrapped Base
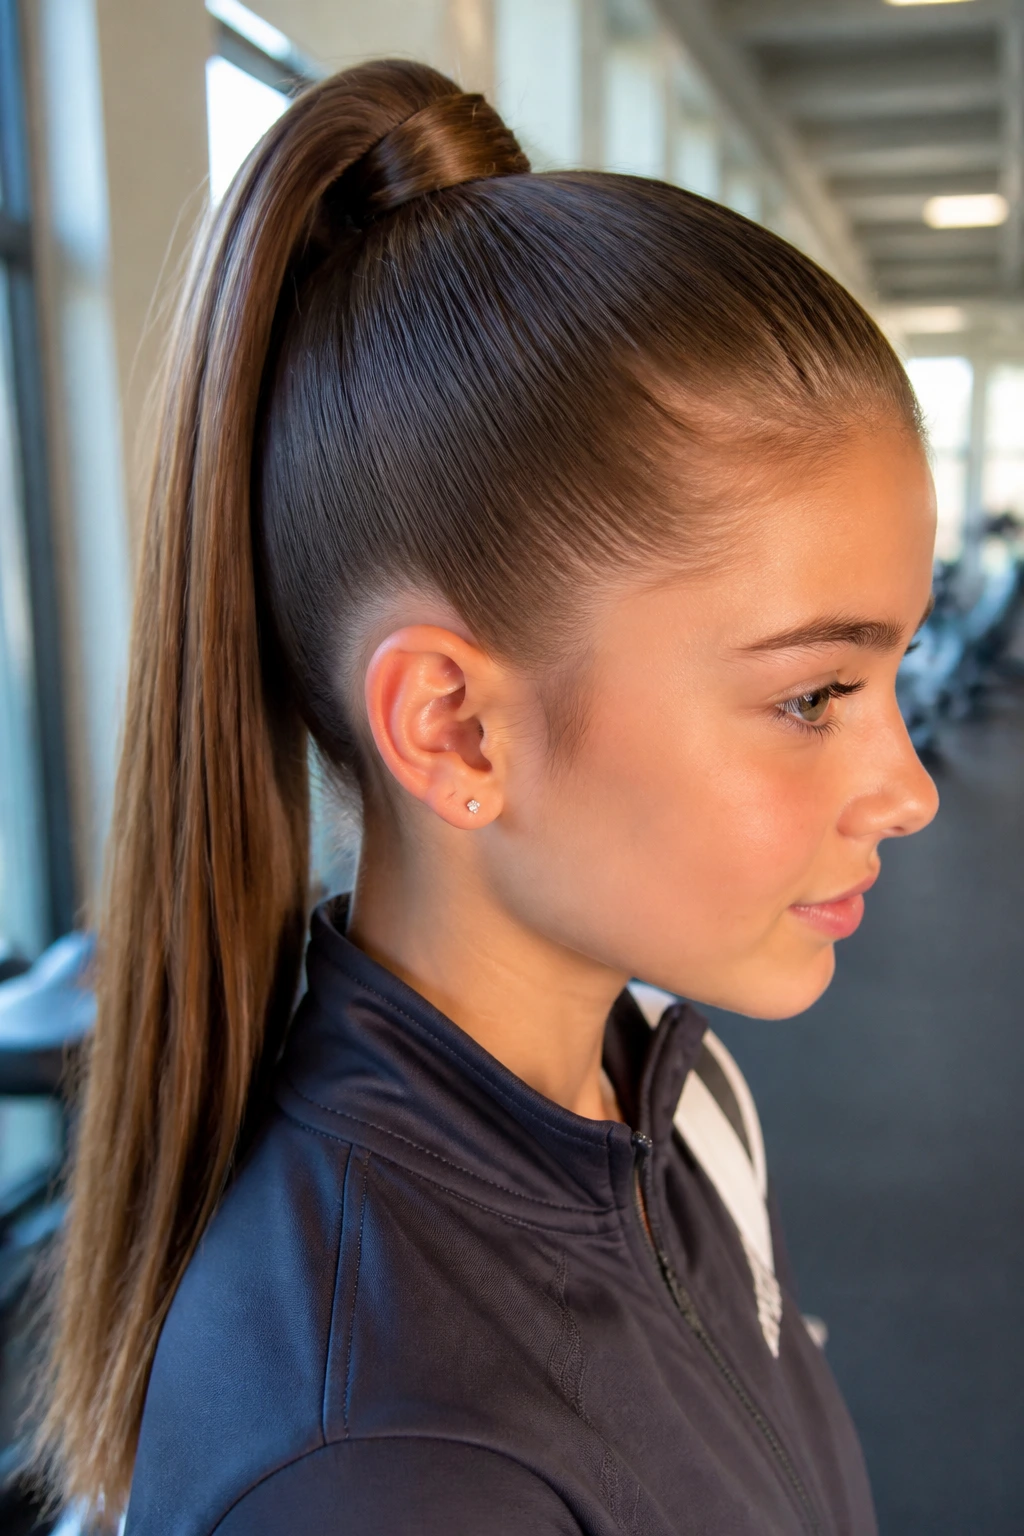
A high ponytail can make fine hair look longer and a little more lifted, as long as the base is secure. The version that works best starts with a bit of root lift and ends with one wrapped section hiding the elastic. That wrapped base is doing more visual work than most people realize.
Brush the hair upward toward the crown, gathering it higher than you would for a low pony. Secure it with a tight elastic, then pull out a thin strand from underneath, wrap it around the base, and pin the end below the pony. If the pony feels soft, add a second elastic right above the first one before wrapping.
Why I Prefer It Over a Flat Pony
A high pony sits where the hair can naturally fall and swing, which gives fine strands more presence. A low pony can look spare and tucked. A high one gets to move. That movement helps the hair read fuller.
Use dry shampoo at the roots first if the hair is freshly washed. Brush it through, wait a minute, then lift. That pause matters. If you rush the product, it can clump and make the crown look patchy.
11. Waterfall Half-Up Braid
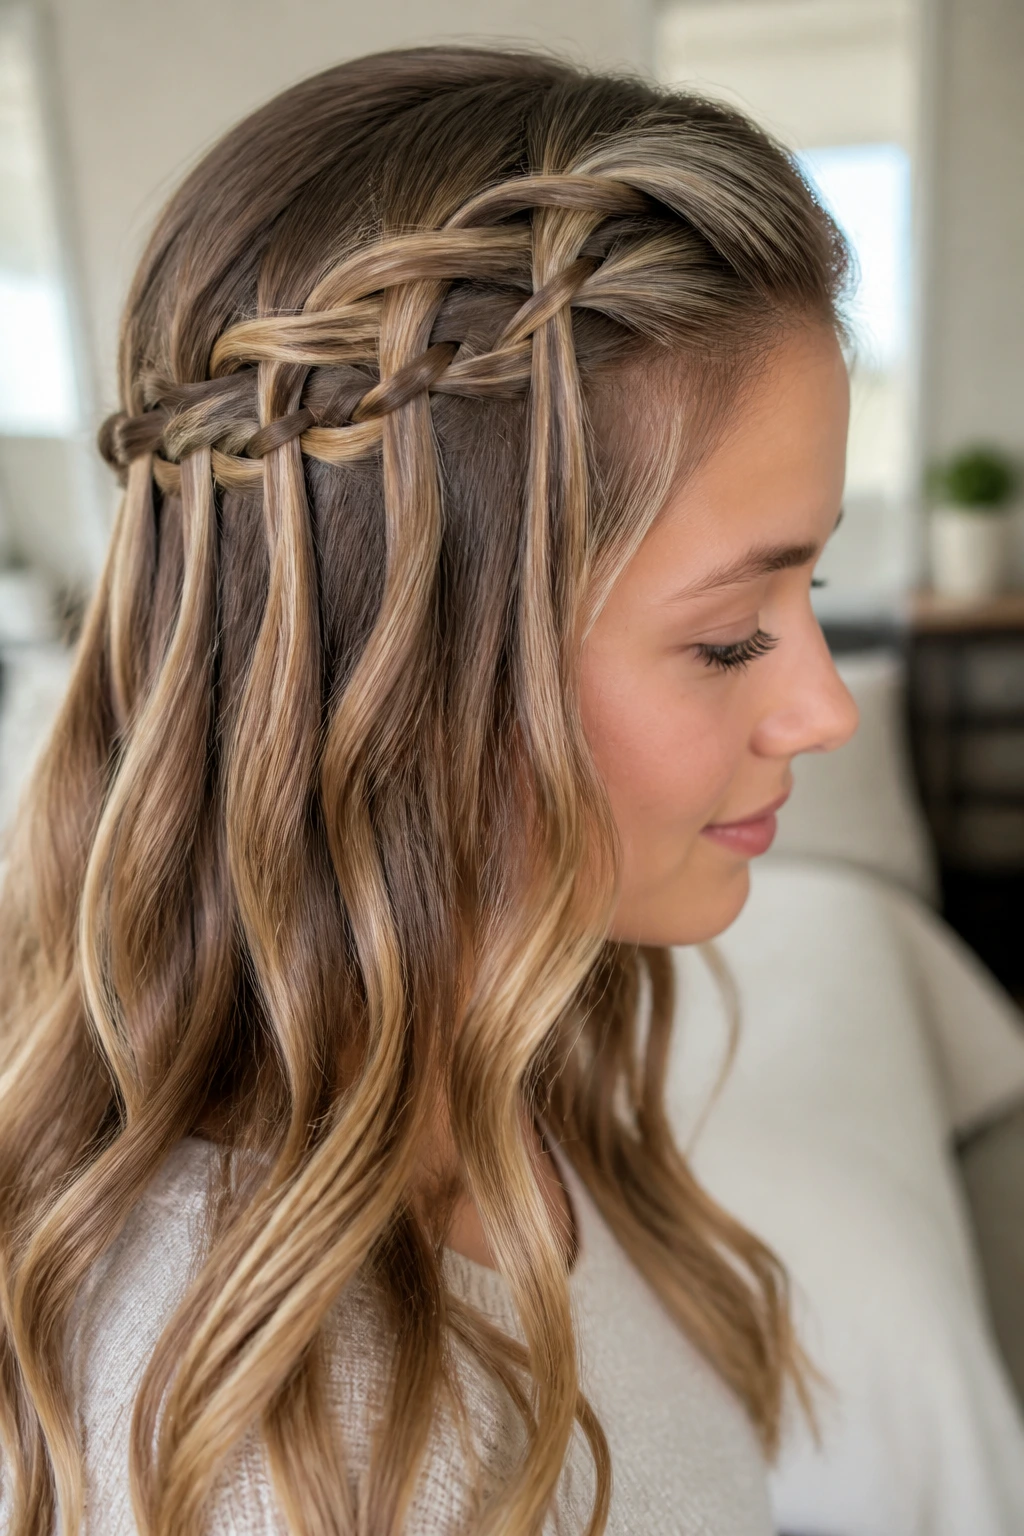
This is one of the prettiest school hairstyles in the set, and yes, it takes a few more minutes than the others. But on fine hair, the waterfall braid can be worth the effort because it keeps the front soft while giving the whole style a little visual structure.
Start at one side with a small braid and drop a lower strand through each step of the weave, feeding in new sections as you move across the head. The loose dropped pieces make the braid look lighter and more open, which suits fine hair better than a heavy ropey braid. Secure the end behind the opposite ear with a pin or small elastic.
It looks especially good on hair that’s a little wavy or has a bend from braiding the night before. Straight fine hair can work too, but the braid will look cleaner if you spray the front pieces lightly with texture spray first. No need to soak them.
This isn’t the style for a morning when you’re trying to catch the bus with one shoe on. It is, however, a very good choice for picture day, presentations, or any day when you want the front of your hair to look more finished than the rest.
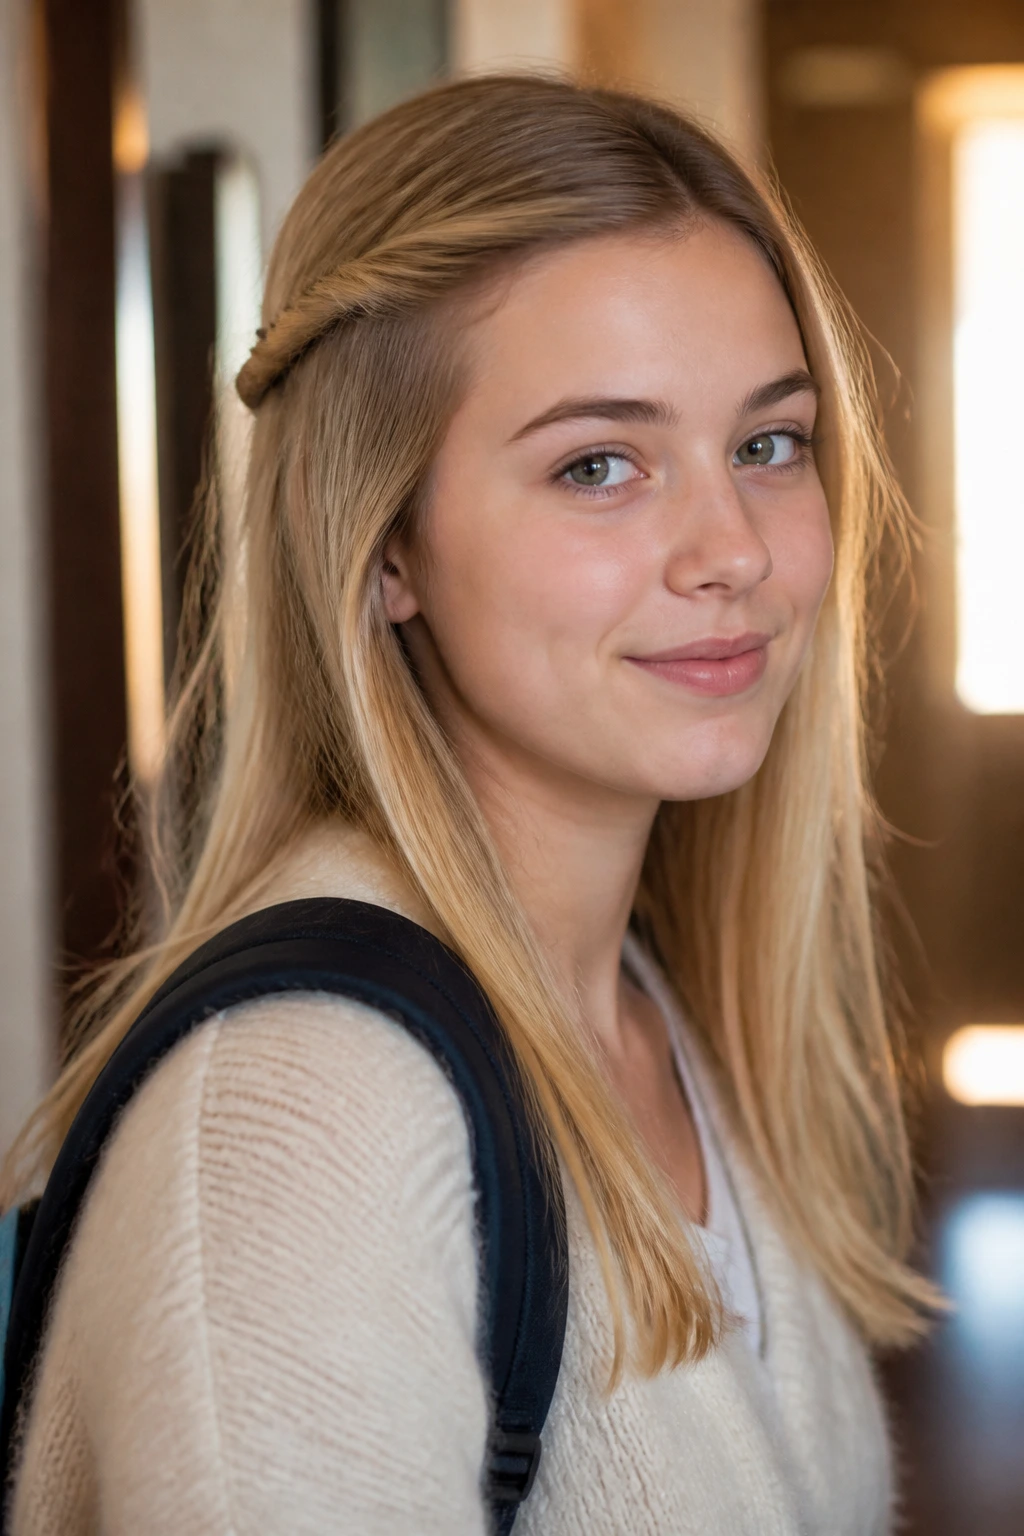
12. Twisted Half-Up Pony
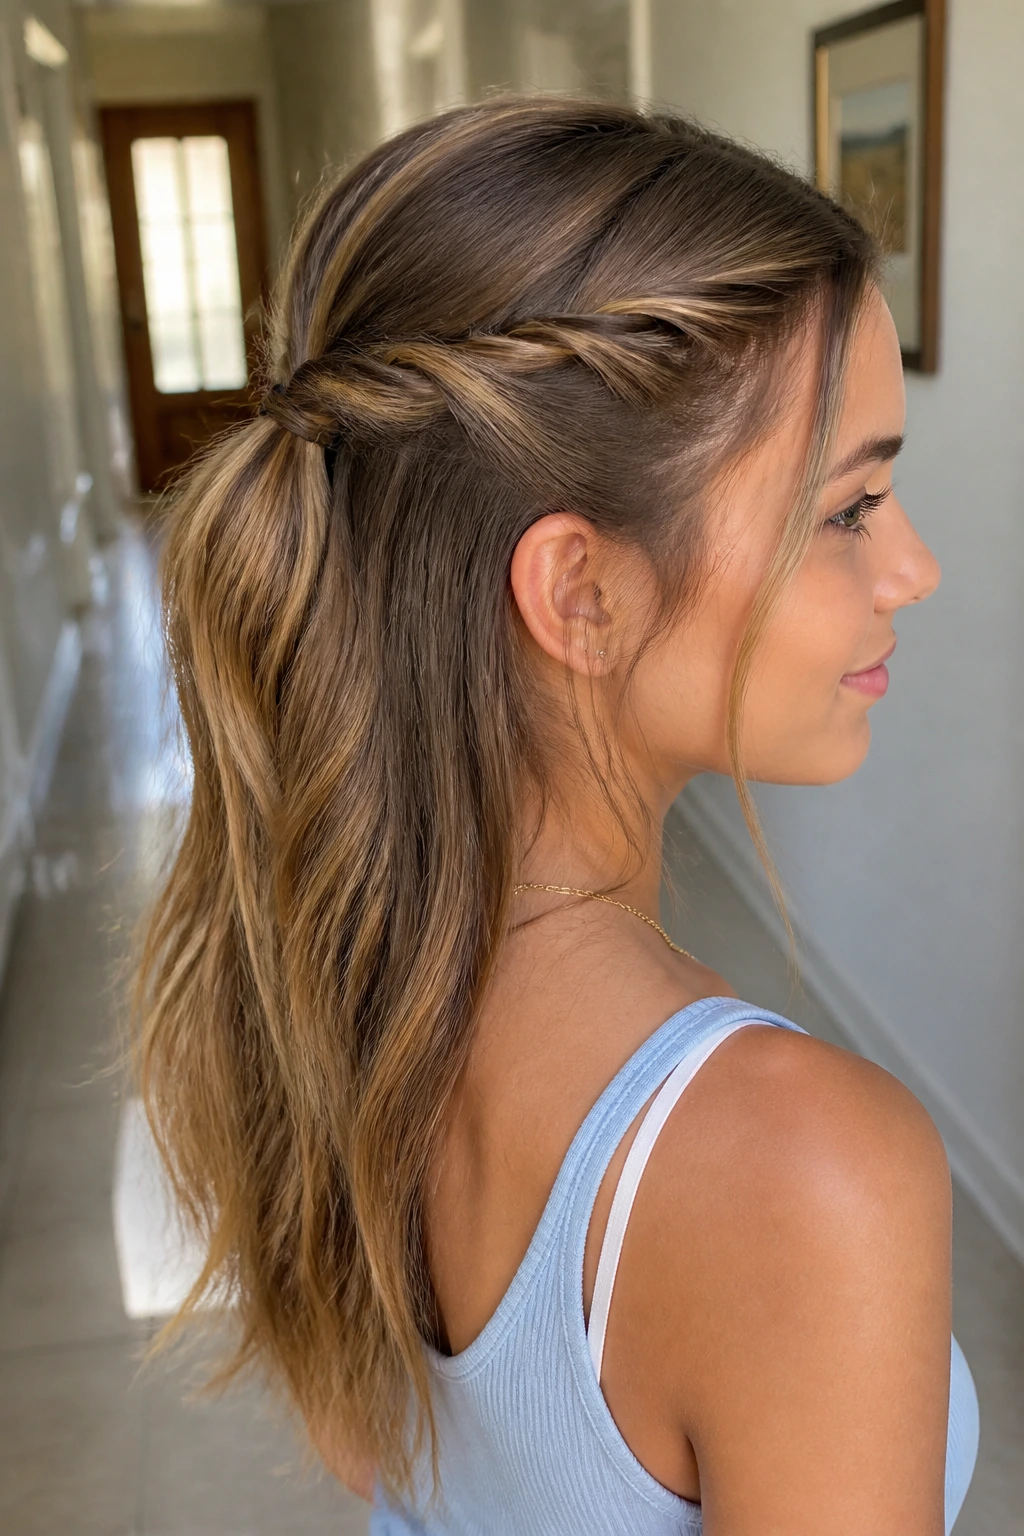
Two twists and one elastic. That’s the whole idea, and it’s why this style survives so many rushed mornings. It gives the face-framing pieces somewhere to go without needing a braid or a brush-and-pray moment.
Take a section from each temple, twist them back toward the center, and tie them together at the back of the head with a small elastic. If the twists want to unwind, twist each section backward once more before joining them. That extra turn keeps the shape cleaner on fine hair.
This style is one of the safest bets for layered cuts. Layers can slip out of braids and make them look fuzzy. A twist handles that mess better because it doesn’t depend on perfect tension all the way through.
I also like it because it’s easy to adjust. Want it a little softer? Pull the twists apart a touch. Want it neater? Smooth the crown and tighten the tie. It changes with the mood of the morning, which is rare and useful.
13. Space Buns for Fine Hair

Space buns on fine hair should be small, low, and close to the head. Giant floating buns tend to sag and expose every pin. Tiny ones look charming, stay put, and don’t feel like they’re pulling the scalp sideways.
Part the hair down the middle, make two small pigtails high or mid-height, twist each tail into a little coil, and pin it into a bun. If the buns are too flat, gently tug the coil outward before pinning the last bit. Keep them compact. That’s the whole trick.
This style is good for active days because the hair is out of the way and the sections are anchored separately, which helps if one side of the hair is finer than the other. It also gives a little lift around the crown, which can help if the top is sparse or flat.
I would not do this with huge sections. Fine hair simply won’t support oversized buns for long. Small is cuter anyway.
14. Four Mini Ponytail Chain
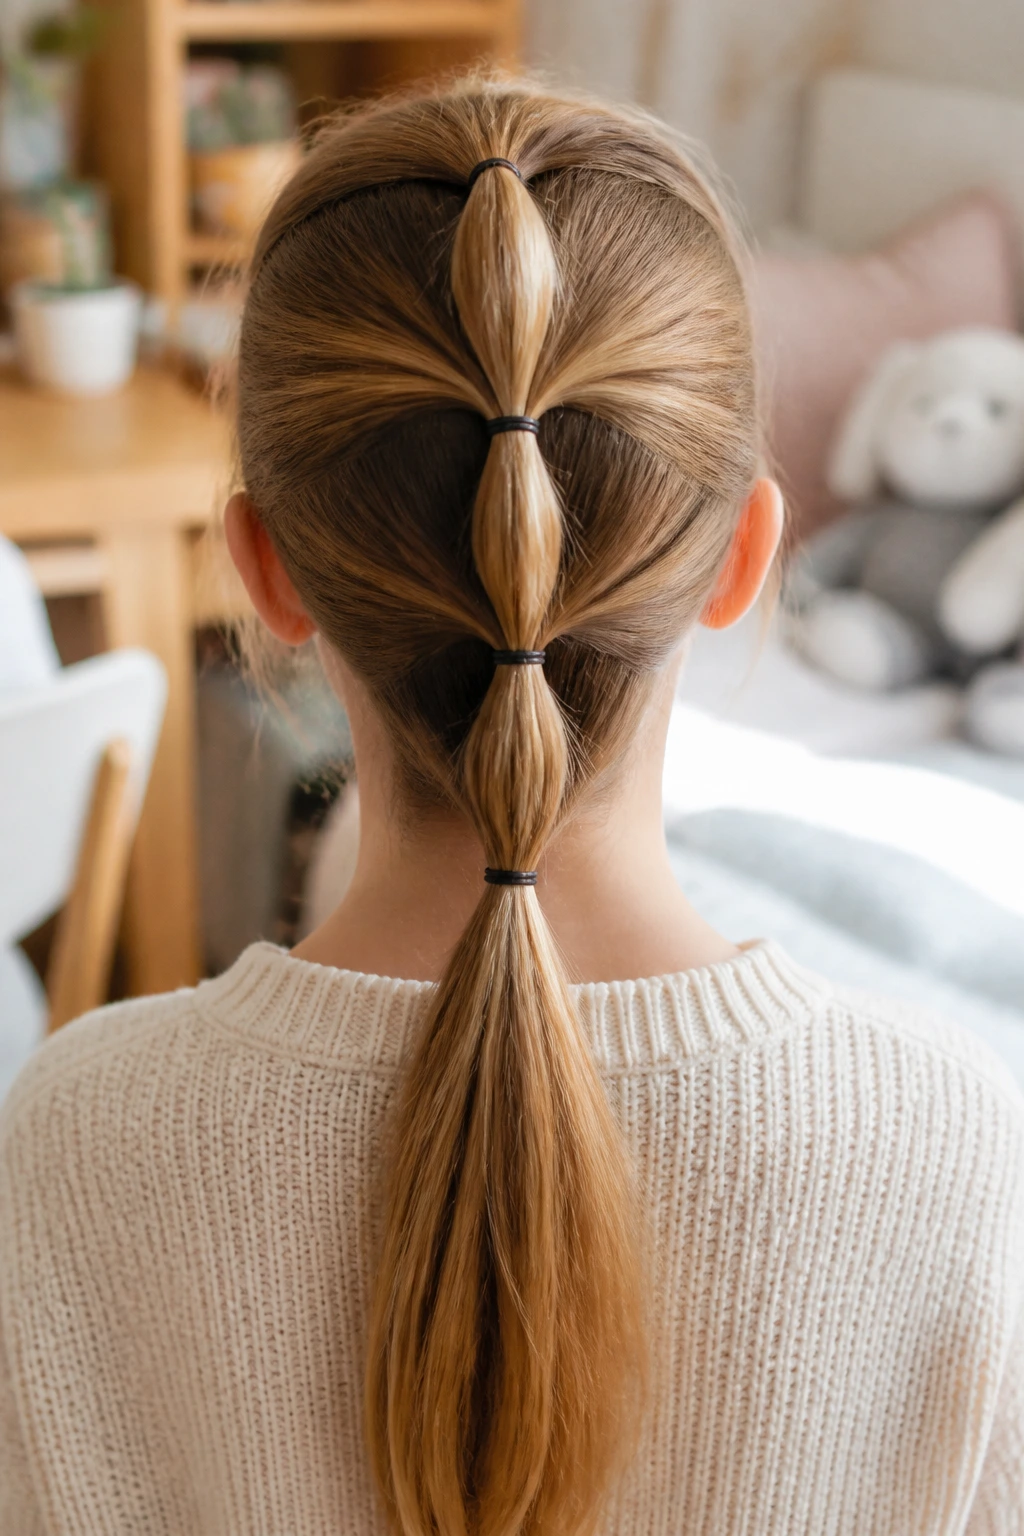
This one looks more complicated than it is. A four-section ponytail chain gives the illusion of a thicker style by stacking small ponytails down the back and connecting them with short elastics. Fine hair loves this because every section gets its own support.
Divide the hair into four horizontal sections from crown to nape. Secure the top section, then add the next section underneath, and keep going until the whole length is linked. After the elastics are in, gently tug each section outward so the chain looks fuller. The effect is part braid, part structured ponytail, and part magic trick.
The Best Use Case
I’d pick this for long hair that falls flat in a single braid. The chain breaks up the length and makes the hair look denser from a distance. It also stays organized when the day gets busy, which is more useful than it sounds if the hair keeps slipping out of braids.
If your hair is very layered, keep the sections small. Big chunks on layered fine hair can make the ends stick out in odd places. Small sections give you a cleaner line.
15. Headband Tuck-Under Style
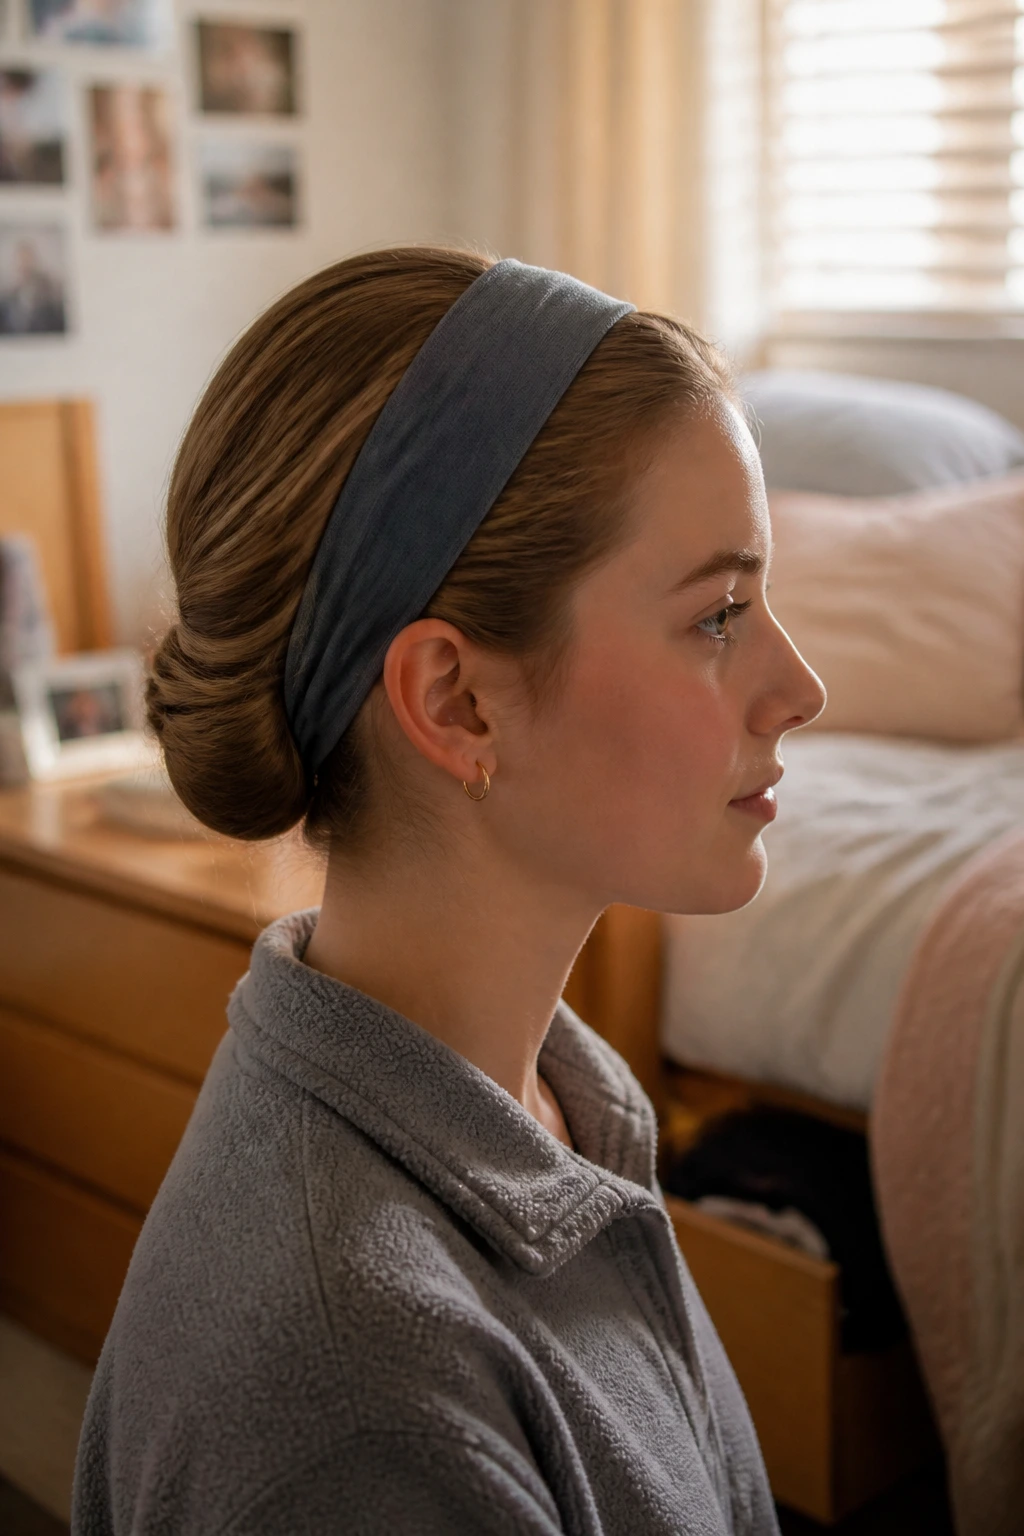
A soft headband and a few tuck-under motions can save a morning. This style has old-school charm, but on fine hair it has a real job to do: it keeps the front smooth and hides the lengths in a shape that looks intentional instead of hurried.
Put on a stretchy headband, then tuck the hair up and under the band in sections until it forms a rolled shape at the nape. If the length is long enough, the ends can fold neatly underneath. If the hair is shorter, pin the tucked pieces into the band so they stay put.
Fine hair is good at this style because it doesn’t create too much bulk under the band. A heavy head of hair can feel lumpy here. Fine hair tends to sit flatter and cleaner, which is exactly what you want.
Choose a headband with a bit of grip on the inside, not a slippery decorative one that slides upward all day. The style should feel secure from the first minute, not after an hour of adjusting.
16. Low Braided Bun
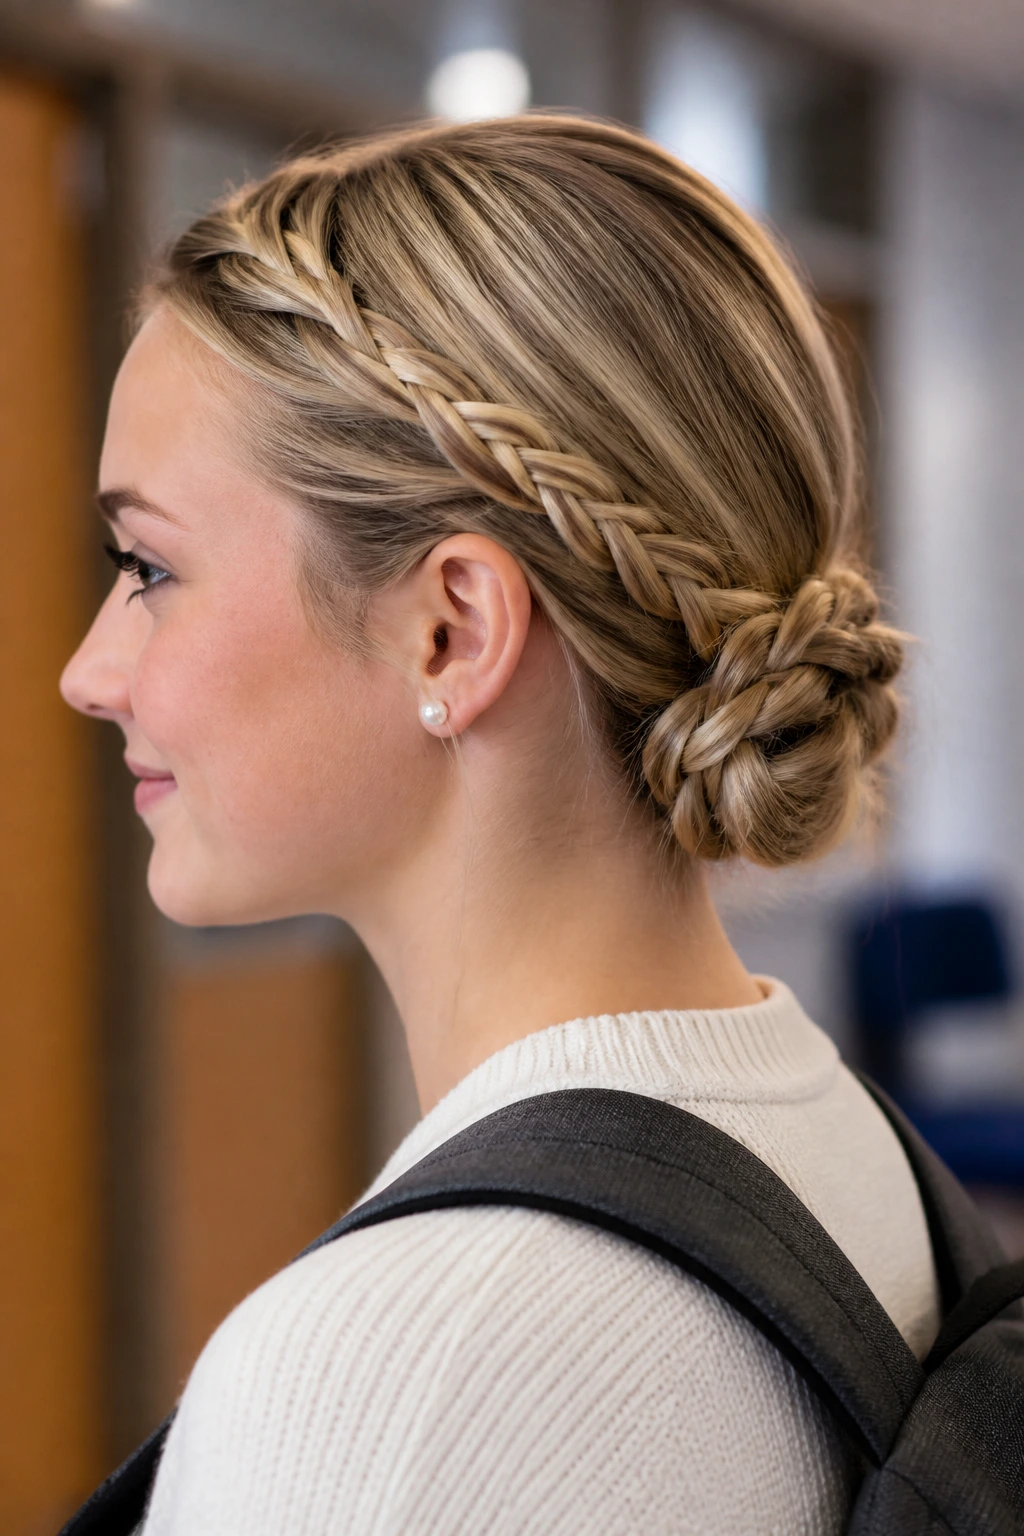
A low braided bun is one of the most useful school hairstyles because it stays neat while still looking thoughtful. It starts as a braid, which gives fine hair texture, and ends as a bun, which keeps the length from flying around.
Make a low ponytail, braid it, then coil the braid around the base and pin it in place. Use three or four bobby pins, and if the hair is extra slippery, cross two pins over each other in an X where the bun meets the scalp. That tiny cross-lock helps more than people expect.
This is the style I’d pick for music class, sports practice, or any day when you know the hair has to stay contained for hours. The braid gives the bun something to grip, so it doesn’t unravel as quickly as a simple twist bun.
If the bun looks too severe, tug a few outer braid loops before coiling it. That softens the shape and gives fine hair a little more presence without making it messy.
17. Pull-Through Braid for Fine Hair
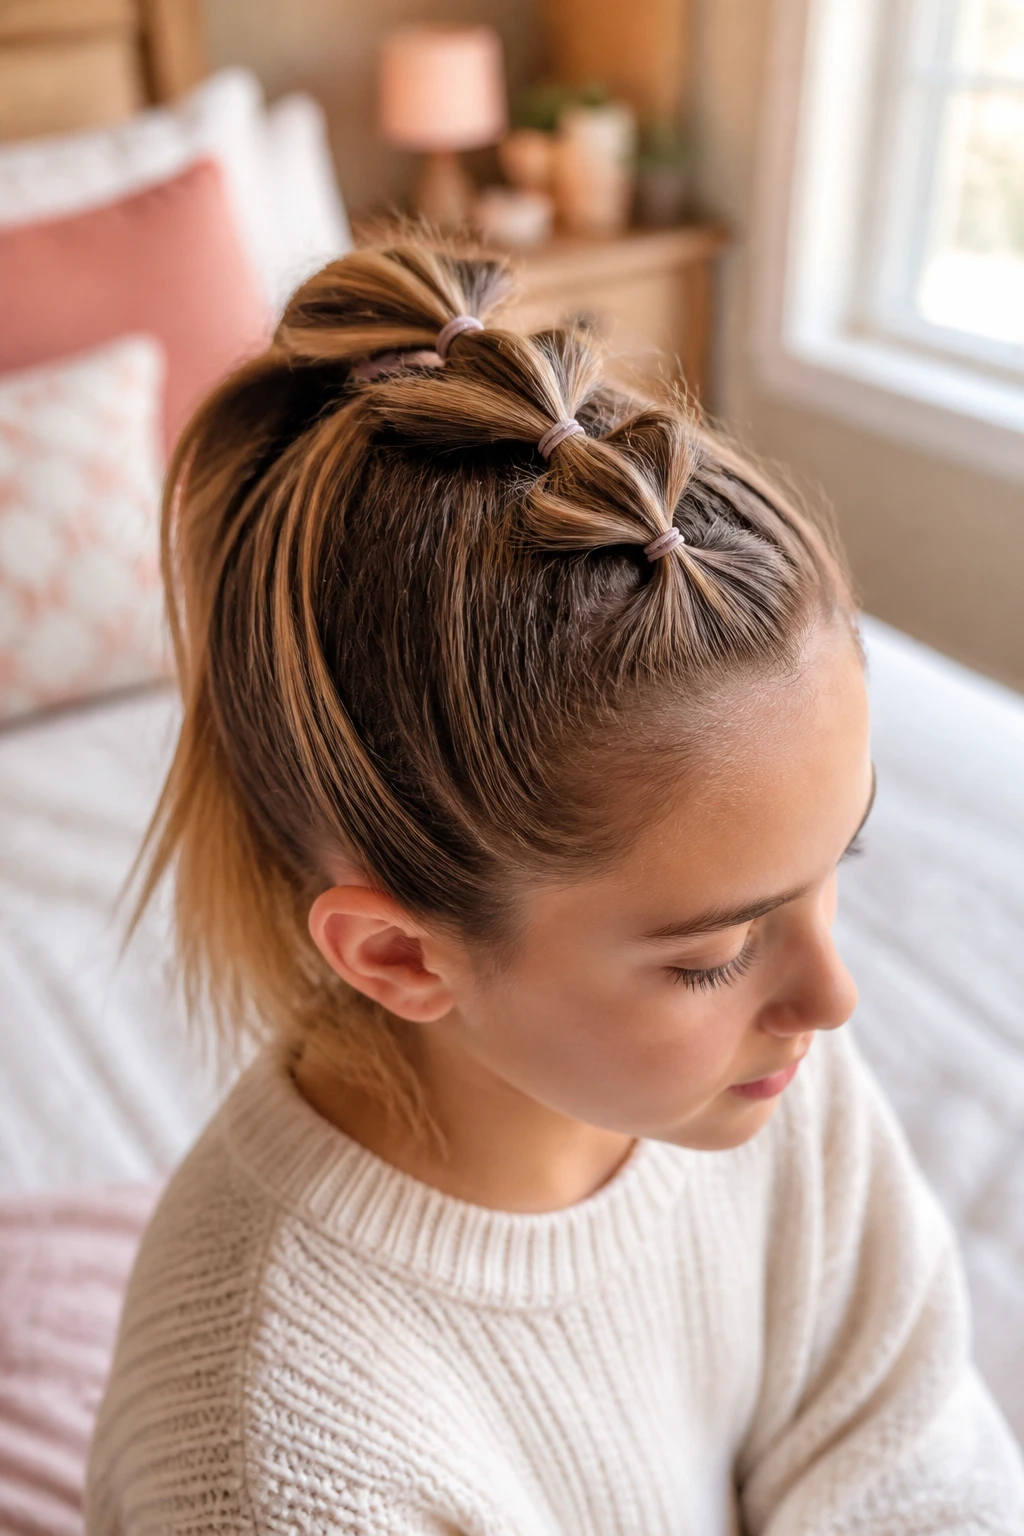
If you want fine hair to look fuller without teasing, a pull-through braid is the cleanest trick in the book. It uses a series of mini ponytails to build what looks like a thick braid, even though the hair itself is still fine.
Start with a small top ponytail, then add another ponytail just below it, split the top pony, and pull the lower one through the gap. Keep going down the head with small elastics. Once the chain is complete, gently fan each section outward so the braid looks rounded instead of narrow.
The style works because it stacks shape instead of relying on one big woven pattern. That makes it especially good for long fine hair that tends to go stringy in a normal braid. And if you need to stop halfway through because the bell is about to ring, it still looks finished.
Use clear elastics or ones that match the hair color closely. A pull-through braid shows every tie if you choose the wrong color. That’s the one downside. The upside is that it looks much denser than the hair probably feels.
18. Side Braid With Loose Ends
A side braid is one of those styles that can look soft and polished at the same time, which is useful on mornings when you want hair controlled but not stiff. On fine hair, it works especially well if you keep the braid loose and let the last inch or so stay soft.
Sweep the hair to one side, braid it loosely, and tie it off with a small elastic. You can leave the braid over one shoulder or pin it behind the ear if your school day is extra active. A tiny bit of smoothing cream on the ends can keep the wispy pieces from puffing up.
I prefer this braid slightly undone rather than pulled tight to the scalp. Tight braids on fine hair can look sparse and expose every section line. A softer braid reads better and feels less severe.
If your layers fall out of the braid, that’s not a failure. It’s part of the look. Fine hair does not need to be forced into precision to look neat.
19. Scarf-Wrapped Ponytail
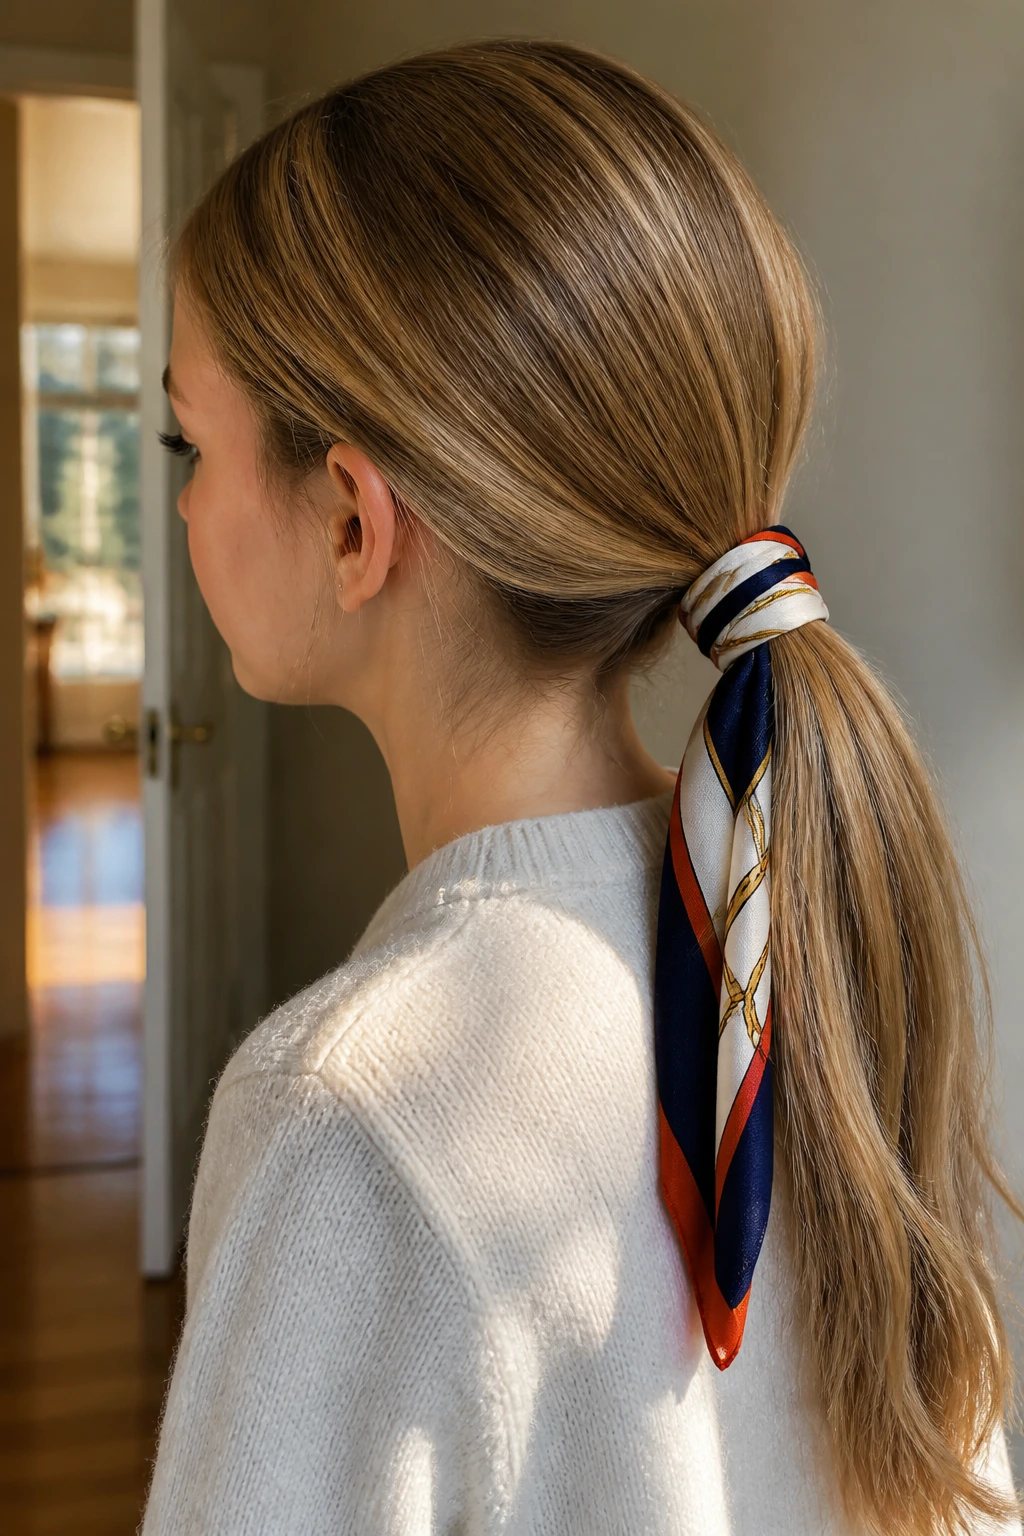
A scarf-wrapped ponytail gives fine hair one job: sit still while the scarf handles the interest. That’s a good division of labor. A plain ponytail can look a little sparse on finer strands, but the scarf adds shape at the base and distracts from the thinness of the tail.
Make a low or mid ponytail, then wrap a narrow scarf around the elastic and tie it in a knot or short bow. Cotton or cotton-blend scarves grip better than slippery fabric if you want the wrap to stay put. If the scarf is long, keep the tails short enough that they don’t catch on jacket zippers or backpack straps.
This is a nice option when the hair itself doesn’t want to look like the star. Let the scarf do the talking. The ponytail just needs to be clean and secure underneath.
I’d call this one a smart choice for uniform days or simple outfits. It adds a little color without demanding extra time, which is exactly the sort of trade I like on a school morning.
20. Pinned-Back Front Pieces With a Clean Part
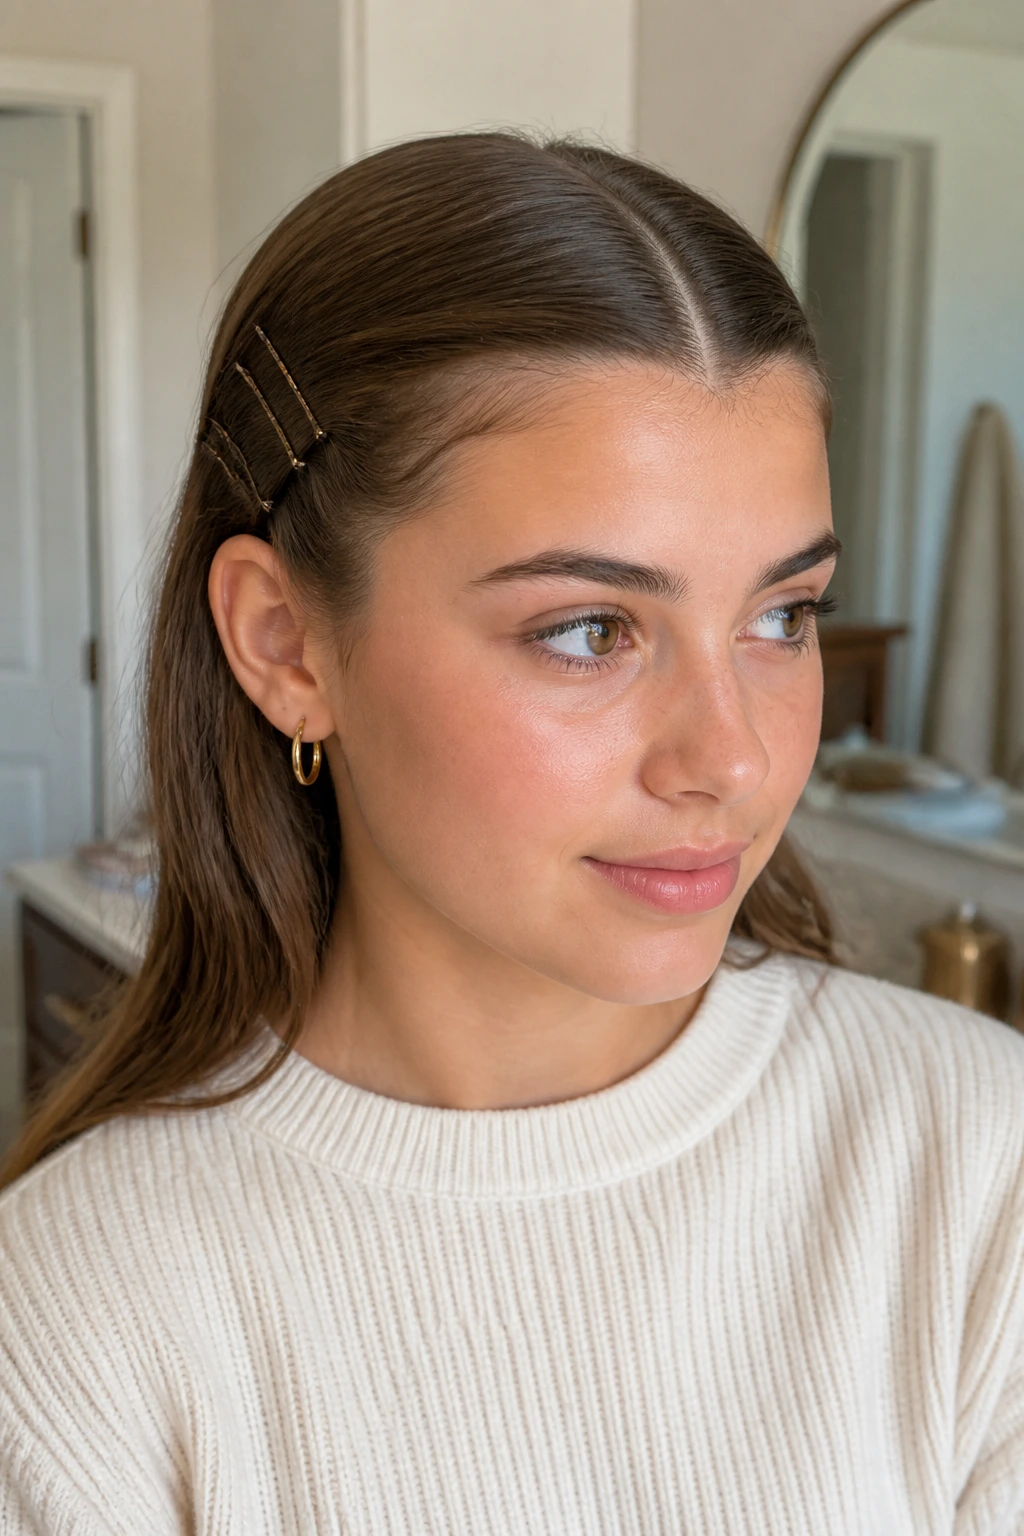
Sometimes the best answer is the least dramatic one. A clean part and a couple of well-placed pins can tame fine hair in about ninety seconds, and that is enough. The goal here isn’t volume. It’s order.
Make a center part or a soft side part, smooth the front pieces back, and pin them just behind the ears with two small barrettes or bobby pins on each side. Leave the lengths down, or gather them loosely into a low pony if you want a touch more control. If the scalp is showing more than you want, zigzag the part slightly before pinning.
This style works because it frames the face without trying to add fake bulk where there isn’t any. Fine hair often looks best when the front is neat and the rest is left alone. Not every morning needs a full updo.
I keep coming back to this one because it’s the cleanest emergency option in the set. When the clock is mean and the bus is loud and the hair wants none of it, pinned-back front pieces still look like someone had a plan.
The Two-Minute Window: What to Do When You’re Late
A rushed morning is not the moment to experiment with a brand-new braid pattern. Pick a style that uses one anchor point, one part, or one accessory. That’s the real shortcut. A mini clip twist, a side part with tucked ears, or pinned-back front pieces are the safest bets when you have almost no time.
Start With Texture, Not Shine
Fine hair often behaves better when it isn’t squeaky clean. A little dry shampoo at the roots, a bit of mousse through the crown, or even just waiting until the hair is fully dry before styling can give the strands more grip. Use less product than you think you need. Fine hair shows buildup fast, and a heavy hand makes the roots collapse instead of lift.
Keep the Sections Smaller Than You Think
A braid or twist made from tiny sections usually lasts longer than one made from big chunks. Big sections look faster, but they slip sooner. Small sections feel fussy for thirty seconds and save you from redoing everything at lunch. That trade is worth it.
Keep a Backup Kit by the Door
A small pouch with six mini elastics, four bobby pins, and one spare clip solves a lot of school-morning problems. If a braid falls loose after the bus ride, you can fix it in the car line without panic. I also like keeping one travel-size dry shampoo nearby. It keeps day-two hair from going limp after the morning is already gone.
The Small Tools That Make These Styles Behave
-
Mini clear elastics: They work for bubbles, pull-through braids, and small ponytails without adding bulky knots.
-
No-slip hair ties: Choose slim ties with a grippy finish; the thick gym bands are too heavy for fine hair and often slide.
-
Mini claw clips: A 1.5- to 2-inch clip usually grips fine hair better than an oversized one that has too much space inside.
-
Bobby pins with a ridged side: The wavy edge should face the scalp; that side holds better than the smooth side.
-
Tail comb: Useful for clean parts, sectioning, and sliding out precise triangles for twists and braids.
-
Soft-bristle brush: Good for smoothing the top without ripping through knots or flattening the whole crown.
-
Dry shampoo: Best for root grit on clean hair or to revive a flat style halfway through the day.
-
Texturizing spray: Gives braid sections something to hold onto; use it lightly or the hair will feel sticky.
-
Small hair donut: Helpful for buns that need support without looking huge.
-
Ribbon, scarf, or slim headband: These add shape and hide sparse ends when the hair itself needs a little help.
-
Travel spray bottle: Handy for a tiny mist when you need to smooth a stubborn flyaway or reactivate a braid’s texture.
What to Buy Once So You Stop Fighting Your Hair Every Morning

If fine hair is part of the picture every day, the accessory drawer should be built for it. Size matters. Weight matters. Grip matters. A beautiful clip that slides off in ten seconds is a waste of space, no matter how cute it looks hanging on the mirror.
Look for elastics that are slim and snug, not bulky and stretchy in a gym-class way. Fine hair usually does better with smaller ties because they clamp the section without creating a thick knot at the base. The same logic applies to claw clips: matte finishes and springy hinges tend to grip better than shiny plastic that slips the second hair moves.
Products should be light. A dry shampoo with a fine mist is easier to control than a heavy powder that lands in one chalky spot. Texture spray should feel dry when it lands, not sticky. If the hair starts looking stringy after one use, the product is too heavy for this job. Mousse can help, too, but only if you use a small amount at the roots and keep it away from the lengths.
For accessories, I’m a fan of black, brown, or clear pieces for school mornings because they disappear into the hair and don’t compete with uniforms or busy outfits. Bright colors are fun, but neutral clips and elastics are the ones you reach for again and again. If your hair is very silky, choose accessories with a little matte texture or a soft grip insert. Smooth, shiny surfaces are where fine hair goes to escape.
How to Keep the Style in Place Until the Last Bell

Hair that looks good at 7:15 and looks tired by lunch usually needs one thing: better anchoring. Fine hair doesn’t need more drama. It needs better contact points. That means the style should grab close to the scalp, not just hang on by the ends.
At the Roots
Use dry shampoo or a light texture spray before styling, not after the style has already collapsed. Let it sit for 20 to 30 seconds, then massage it in with your fingertips. That tiny pause helps the product grab instead of disappearing.
At the Pins
Bobby pins hold better when they’re inserted with the wavy side down and pushed in against the direction the hair wants to move. If a style keeps slipping, add a second pin crossed over the first one. The X shape works better than one lone pin flopping around.
At the Ends
Tie off braids and ponies with a small elastic that matches the hair. One extra clear elastic can save a style that would otherwise unravel by recess. If the ends look frayed, a light touch of smoothing cream on the very tips is enough. Don’t coat the roots. That just makes the style heavier.
Midday Reset
If the style starts loosening, don’t rebuild the whole thing unless you have to. Pin the stray side, twist the front piece back, or retie the base. Small fixes hold better than a full redo when you’re working between classes.
Upgrades, Add-Ins, and Fast Personal Touches
Volume Boost: Flip the head upside down for five seconds before gathering a ponytail, then lift the roots at the crown with your fingertips before you secure the elastic. That quick lift helps fine hair look less pasted-down.
Flavor, Hair-Version: A tiny ribbon, a narrow scarf, or one slim barrette can turn the same base style into something that feels finished. I prefer one strong detail over five little ones. Too many pieces can make fine hair look busy instead of styled.
Customization: If the hair has layers, choose twists, side braids, or pinned-back front sections. If it’s one length, bubble ponies and pull-through braids usually read better because the shape stays even from top to bottom.
Softer Finish: Use your fingers, not a brush, to loosen braid edges after the style is in place. A brush can flatten everything out. Fingers let you widen the braid just enough to create shape without wrecking the hold.
Make-It-Yours: Neutral clips for a clean school look. Bright ribbon for a little personality. A satin scrunchie for a softer ponytail. You can keep the base style the same and still change the feel.
Common Mistakes That Flatten Fine Hair
The first mistake is using sections that are too big. It feels faster in the moment, but a chunky braid or twist usually falls apart faster on fine hair because the sections don’t have enough grip. Smaller sections take a few extra seconds and hold better.
The second mistake is loading the hair with too much oil or cream. Fine hair does not forgive this. A little too much product and the roots look heavy, the braid goes soft, and the style stops holding shape. Keep heavier products off the scalp and use the smallest amount that smooths the ends.
Oversized accessories cause trouble too. Big clips, thick scrunchies, and broad buns can overwhelm fine hair. The result is usually a style that slides or droops because the accessory is doing too much work for too little hair. Choose pieces that fit the amount of hair you actually have.
Another mistake is pulling the hair too tight. Tight styles can look neat for about ten minutes, then create sore spots around the temples and nape. They also make fine hair look stringier by stretching it flat. Snug is enough.
Finally, some people brush out every bump until the style becomes lifeless. A little texture is not a problem on fine hair. It’s part of the structure. Smooth the surface where needed, but leave a bit of softness in the braid, twist, or ponytail so the style doesn’t go limp.
Variations for Short Cuts, Curls, Gym Days, and Picture Day

Short Bob Rescue: If the hair barely reaches the shoulders, use mini clips, pinned-back front pieces, and the headband tuck-under style. Braids can still work, but they need to stay narrow and close to the scalp or they’ll stick out instead of lying flat.
Curly-Fine Texture: Fine curls need less brushing and more shape protection. Try a soft half-up twist, a low braid, or a scarf-wrapped ponytail on hair that’s been lightly dampened with leave-in. Don’t brush curls into submission. That just makes them puff and frizz.
Gym Day Secure: Go for double braids, a low braided bun, or a high pony with a wrapped base. These stay put when you’re moving around, and they keep the ends from tangling under hoodies or in a locker room rush.
Picture Day Polish: Choose the waterfall braid, a smooth side part with tucked ears, or a ribboned low ponytail. These styles read more finished without needing heavy volume. Fine hair usually looks best in photos when it has a clean front line and one thoughtful detail.
No-Wash Morning Fix: If the hair is too silky and too flat, use dry shampoo at the roots and choose a style that builds texture into the shape, like the bubble ponytail or pull-through braid. Those styles hide the fact that the hair needs a little help, which is exactly the point.
Night-Before Prep and Next-Morning Resets
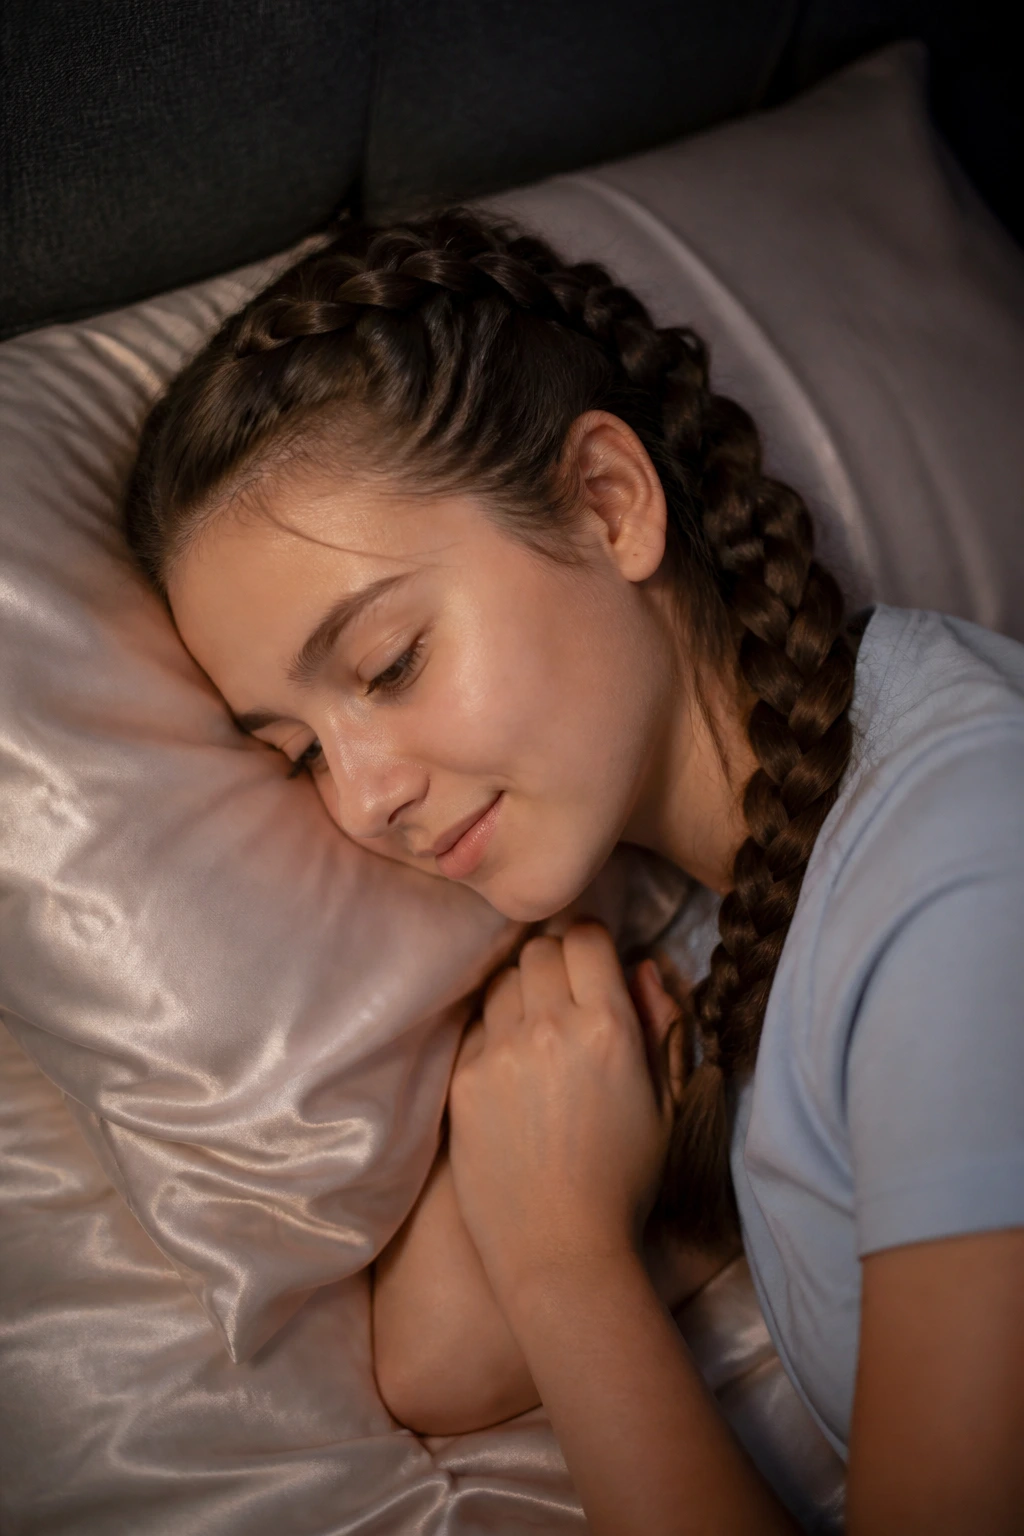
The easiest way to save morning time is to do a little of the work the night before. Brush the hair before bed so you are not wrestling knots at 7 a.m. If the hair tangles while sleeping, a loose braid or low ponytail can keep it calmer overnight. A satin pillowcase helps, too, because it reduces friction and keeps the ends from waking up rough.
Keep the day’s tools together in one place. One small basket by the sink with elastics, pins, a comb, and a clip sounds boring. It is also the difference between a style you can do in two minutes and a style you have to hunt for. I like to put the extras where my hand lands automatically. That saves mental energy before coffee.
If the hair gets oily fast, schedule the sleek looks for the morning after a wash and the braids for day two. If it’s freshly washed and slippery, start with dry shampoo at the roots and wait a minute before styling. That tiny pause gives the strands enough grip to behave.
For mornings that start badly, don’t reset the whole head. Pin the front back, retie the base, or switch from down to half-up. A smaller rescue is faster and usually looks better than a complete redo done in a panic.
Questions Parents and Students Ask All the Time
Are these styles better on clean hair or second-day hair?
Second-day hair usually holds better because it has a little natural grit. Freshly washed fine hair can be too slippery, especially for braids and twists. If you do style clean hair, use a light dry shampoo or texturizing spray at the roots first.
How do I make fine hair look thicker without teasing it to death?
Use small sections, then gently pull the braid or ponytail apart at the edges once it’s secured. Bubble ponies, pull-through braids, and wrapped bases also create the illusion of more hair without roughing up the whole head. The shape does the work, not backcombing.
Can a claw clip actually stay in fine hair?
Yes, if the clip is small enough and grips well. Mini claw clips are usually better than oversized ones because they can close around the amount of hair you have. If the clip slides, the problem is usually size, not the idea of the style.
What’s the fastest style when I only have two minutes?
Pinned-back front pieces, a side part with tucked ears, or a mini clip twist. Those three can be done fast and still look finished. They’re the styles I’d trust when the morning has already gone off-script.
Why does my braid fall apart by lunch?
The sections may be too large, or the hair may be too smooth to hold the weave. Start with smaller sections, use dry shampoo at the roots, and tie the end with a tiny elastic that fits snugly. If the braid is still loosening, pancake only the outer edges, not the whole thing.
Is dry shampoo bad for fine hair?
Not when it’s used lightly. Spray it from a few inches away, let it sit, and massage it in with your fingertips. If the roots feel chalky or stiff, you used too much and need to brush it through or start over with less.
Can these work if my hair has layers?
Yes, but twists, clips, and half-up styles are often easier than very structured braids. Layers can slip out of a tight braid and make the ends fuzzy. Keep the sections smaller and choose styles that let a few pieces fall naturally.
What if my child hates hair pulling?
Go for lower tension styles: side parts, tucked-back front pieces, loose braids, or a scarf-wrapped ponytail. Pulling hard at the roots is usually what causes complaints. Gentle hold is enough for school.
A Calm Start Wins the Morning
The real trick with fine hair is not forcing it into the biggest style in the room. It’s choosing a shape the hair can actually support, then tightening the right places and leaving the rest alone. That’s why the best school hairstyles for busy mornings with fine hair are usually the ones that look smaller up close and stronger from a distance.
Some days will call for a braid. Some days will call for one clip and a part. Some days will be pure survival. Fine hair can handle all three if you stop asking it to carry too much weight at once.
Keep the mini elastics where you can find them, keep the clip that fits your hair instead of the one that looks dramatic, and let the morning be easier than the mirror expects. That is usually enough.