Short hair grows out in stages that can feel rude. One week the shape is crisp, the next week the back flips out, the sides puff up, and your fringe starts behaving like it has somewhere else to be. Grow out hairstyles for short hair are what make that middle stretch look deliberate instead of like you missed a trim by six weeks.
The trick is not to fake long hair. That usually fails. A good in-between style works with the pieces you already have: a longer crown, a stubborn nape, a fringe that’s hanging on for dear life, maybe a side that tucks better than the other side. Once you stop trying to flatten everything into one neat shape, short hair gets much easier to manage.
And honestly, this is where short cuts can be more interesting than long ones. A few pins, a deep part, a ribbon, a little texture at the root — suddenly the cut looks styled, not apologetic. The awkward stage still shows up. You just give it a better costume.
Why These Grow-Out Styles Are Worth Having in Rotation
They use the length you already have: Instead of chasing a fake ponytail, these looks build around the pieces that are longest right now — usually the crown, sides, or fringe.
They hide the uneven parts on purpose: Short hair grows in layers, and that unevenness is the whole problem. These styles tuck, twist, or redirect those pieces so they stop looking accidental.
They work with low effort: A deep part, two bobby pins, or one slim headband can change the whole shape fast. That matters on the mornings when your hair refuses to cooperate before coffee.
They suit different textures: Sleek, wavy, curly, fine, thick — there’s room here for all of it. The best grow-out styles don’t fight texture; they use it as part of the shape.
They buy you time between trims: A good transitional style can carry you through a few more weeks without making the cut look neglected. That’s the real payoff. Not magic. Just smarter styling.
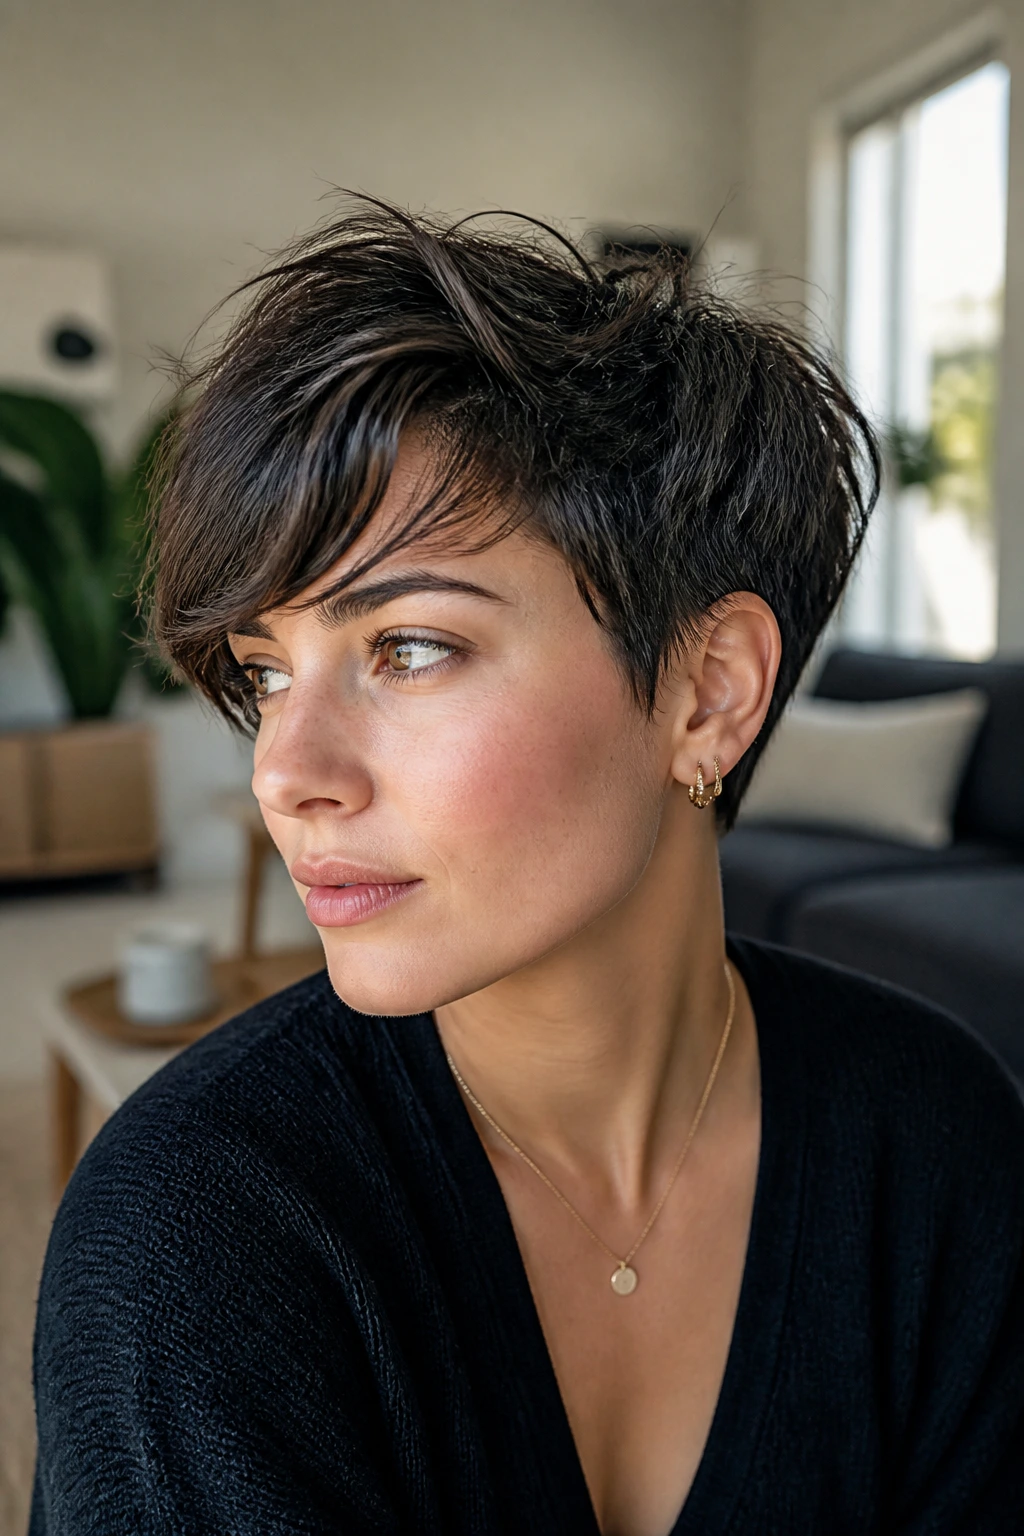
1. The Deep Side Part and Tuck
A deep side part is the easiest way to make short hair look intentional when the fringe is too long to behave and too short to ignore. It shifts the weight of the style to one side, which hides uneven growth and gives the shape a clear direction. On a pixie or a grown-out bob, it can look sharper than a full blowout.
The useful part is the tuck. Push the smaller side behind the ear, then let the longer top layer fall over the tucked section. That overlap covers the shorter bits near the temple and makes the style look clean instead of pinched.
A little smoothing cream on the front and a mist of flexible hairspray keep the side from fluffing out by noon. If the tuck keeps slipping, cross two bobby pins just behind the ear. Hidden pins beat constant readjusting every time.
Best for: side-swept bangs, choppy pixies, and bobs that flip at the jaw.
Avoid if: your hair is so fine that a heavy cream makes it look stringy. Use a lighter serum or just dry shampoo at the root.
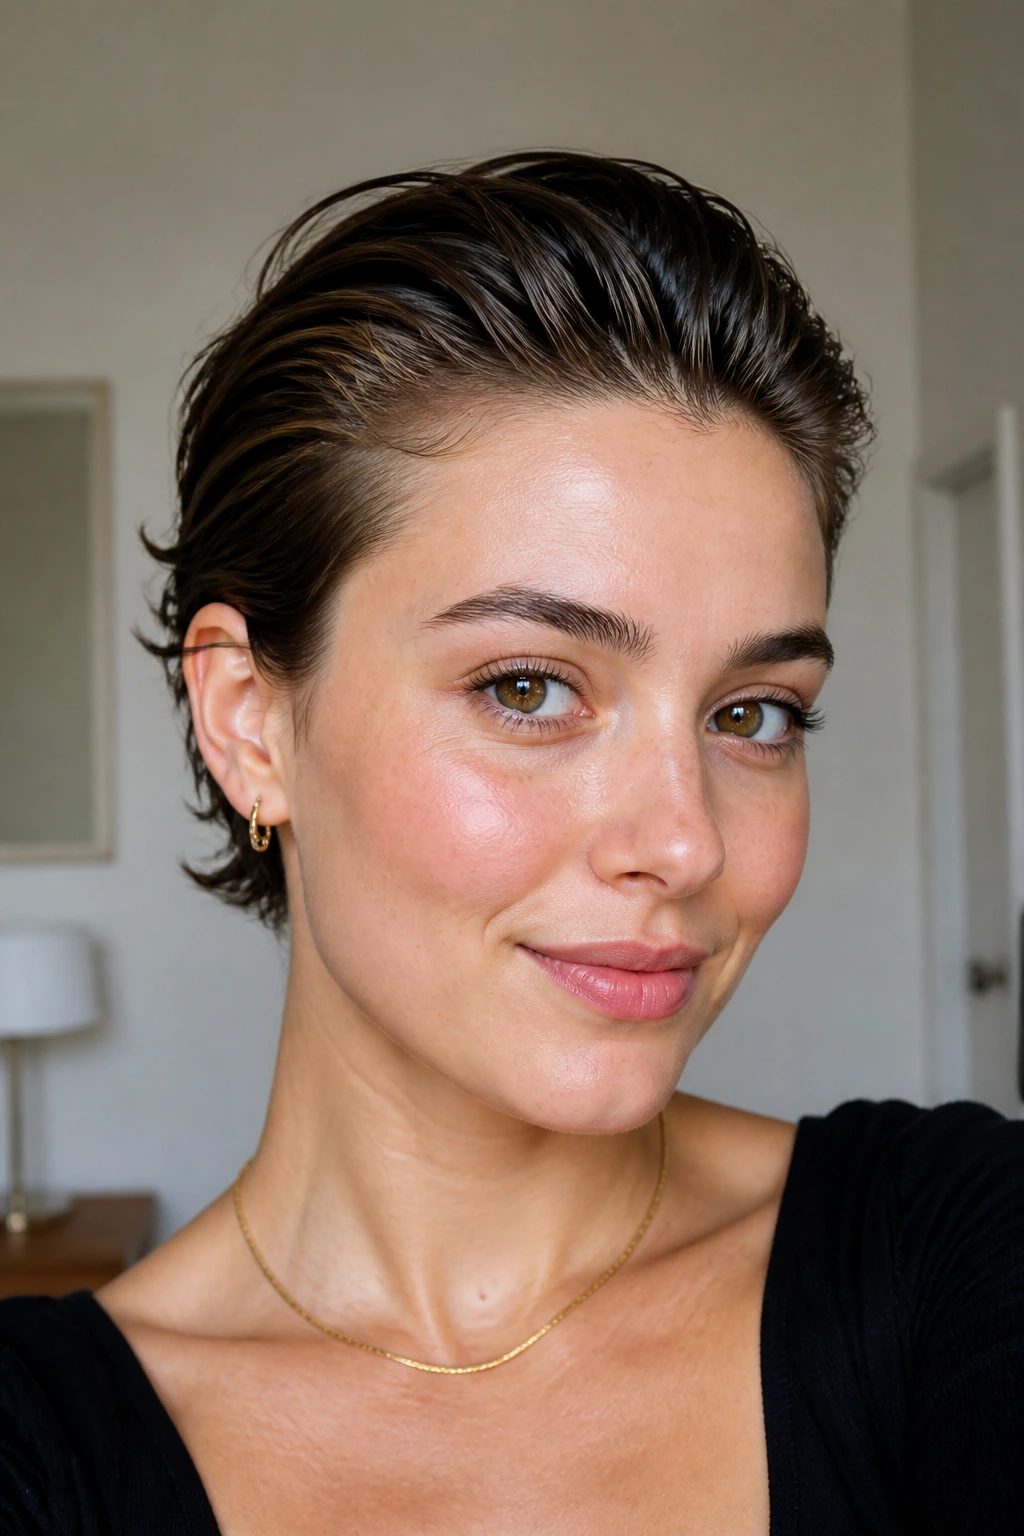
2. The Sleek Back Sweep
Why does the slick-back look work so well on short hair? Because it turns awkward length into shape. When the front pieces are too short to curl neatly or too long to leave alone, brushing them back clears the face and makes the cut look on purpose.
Start with damp hair. Smooth a pea-sized amount of gel through the top and sides, then comb everything straight back with a fine-tooth comb. Don’t overload the ends. You want shine at the roots and control through the front, not a helmet that feels sticky by lunch.
How to keep it looking clean
- Use more gel at the hairline and less through the crown.
- Let the hair dry undisturbed for 10 to 15 minutes.
- Press down any flying pieces with the flat side of a comb.
- Finish with a light mist of hairspray only where the frizz shows.
This is especially good when the back is still too short for a ponytail but the top has enough length to stay put. If your hair has a natural wave, that wave will soften the look. Straight hair will give you the sharpest finish.
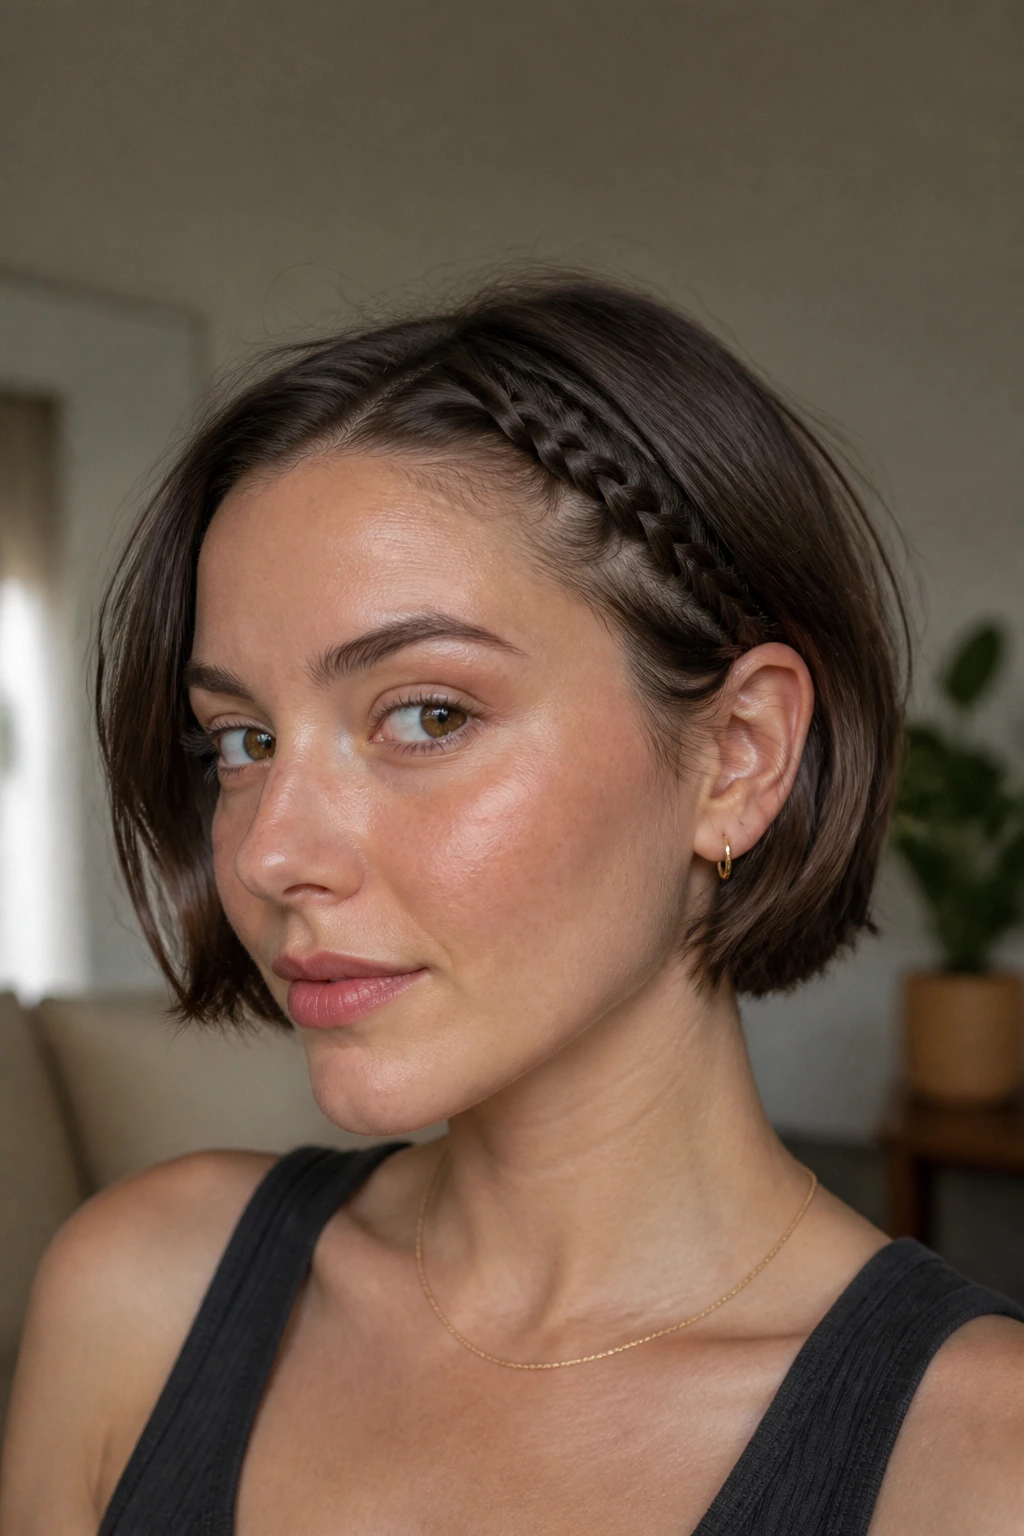
3. The Mini Hairline Braid
A tiny braid along the hairline is one of the smartest ways to handle bangs that are growing out at the wrong speed. It keeps the front pieces contained without pulling everything back off your face. And because the braid sits close to the scalp, it needs less length than a full side braid would.
This style works best on the longer front sections — the part near the temple, the bit that keeps landing in your lashes, the stuff you keep tucking behind your ear and losing again. Braid that section only, then pin the end flat near the ear or under a layer of hair.
Why it helps
A small braid gives the front a finished edge. It also breaks up a blunt fringe line, which can look harsh when short hair is growing out in stages. If your part is uneven or your layers are lopsided, the braid hides that too.
A tiny clear elastic is worth using at the end. It keeps the braid neat without making the shape bulky. If you want a little more polish, rub a dot of pomade between your fingertips and smooth it over the braid after it’s secured.
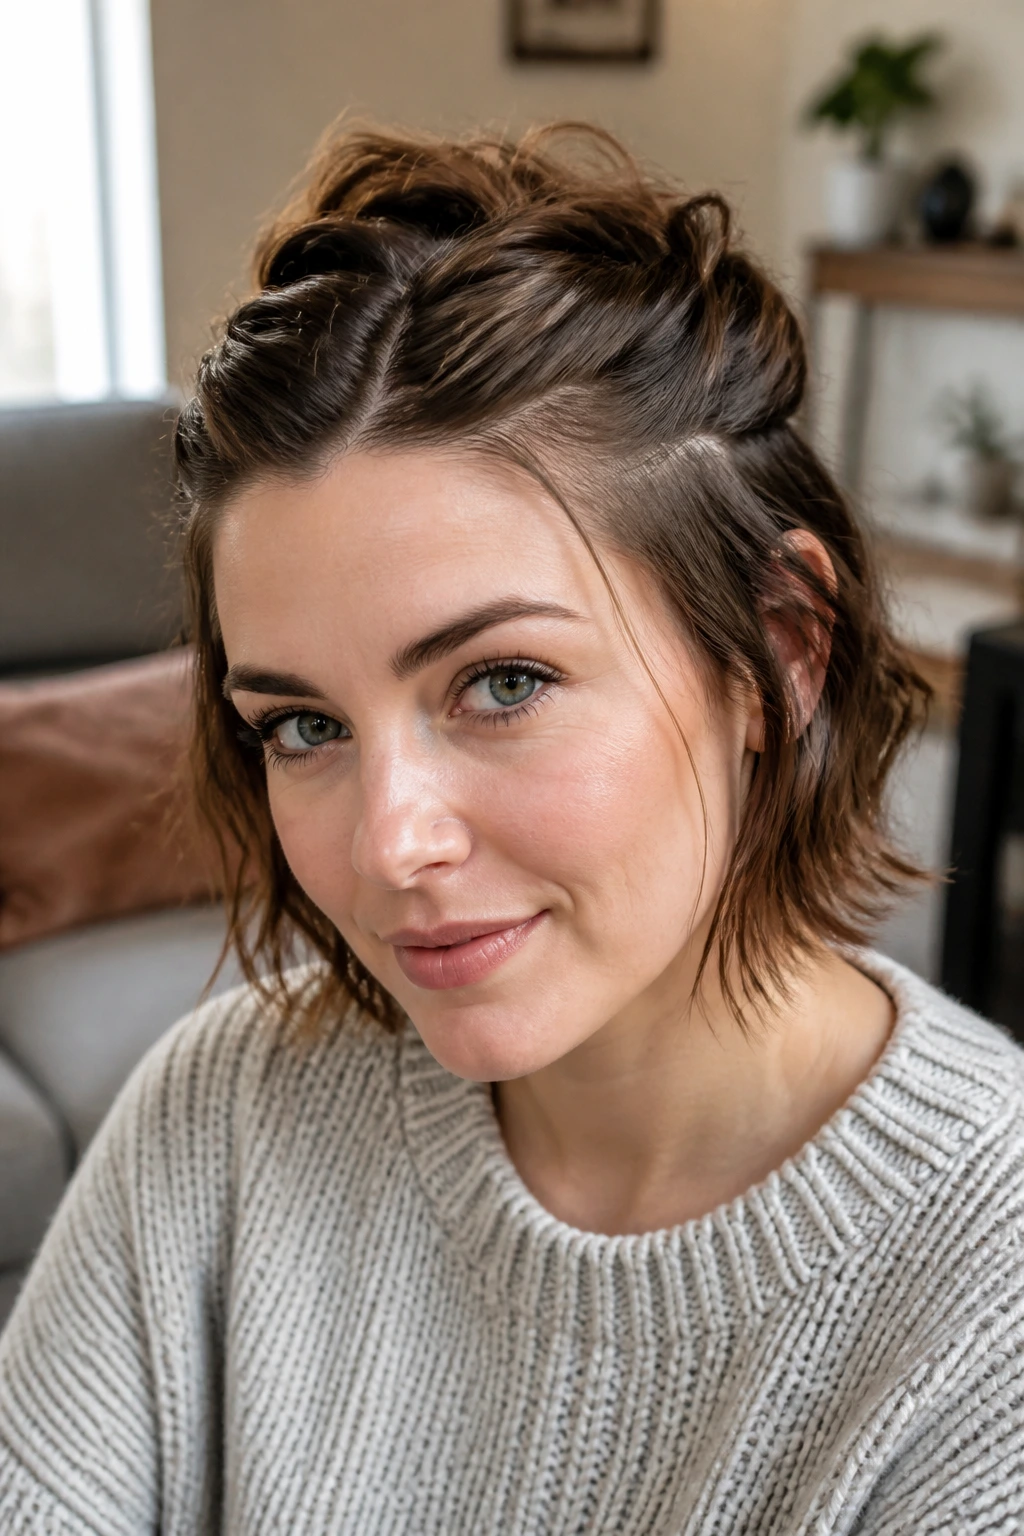
4. The Half-Up Twist Crown
If you’ve got enough hair at the crown to grab but not enough to make a proper bun, the half-up twist is your friend. Twist each side back from the temple, meet them at the crown, and pin the twists together. The rest of the hair can hang loose, which is the part that makes this style work on short cuts.
It buys shape without demanding length. That’s the whole appeal. On a bob, it keeps the front out of the face. On a pixie that’s grown a bit on top, it stops the crown from puffing into a triangle.
Use two pins per side if your hair is slippery. Slide the first pin in against the twist, then cross the second one over it. That little X stops the twist from sliding out halfway through the day.
This looks especially good with a touch of texture spray through the ends. Too sleek, and the twists can feel stiff. Too messy, and the style loses its shape.
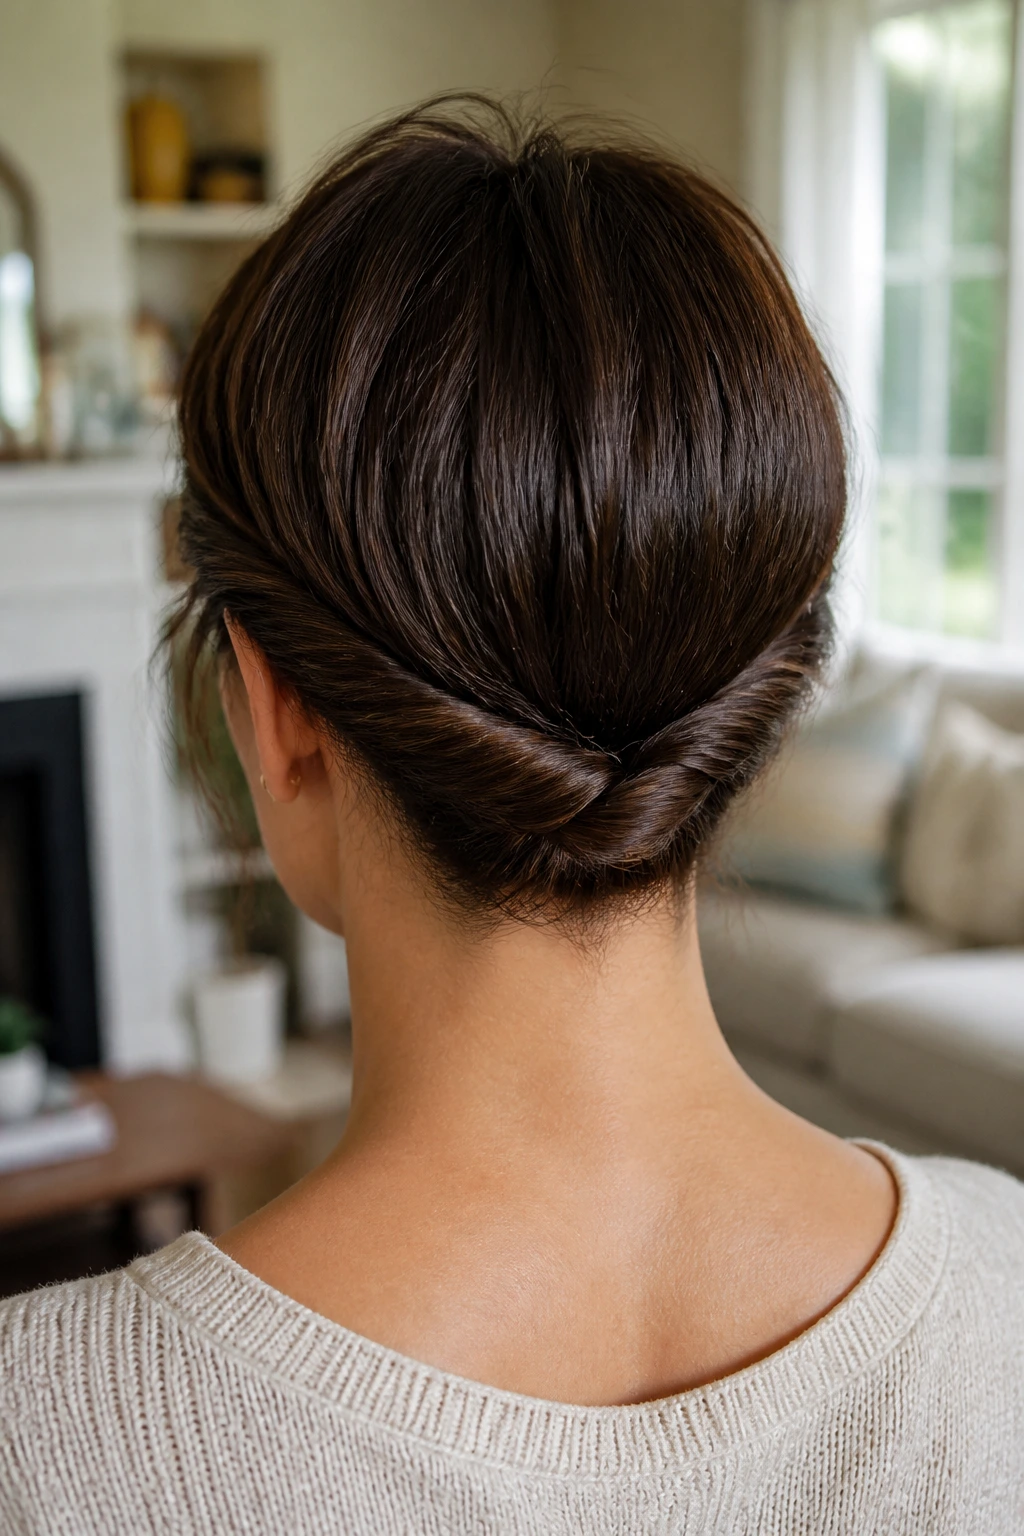
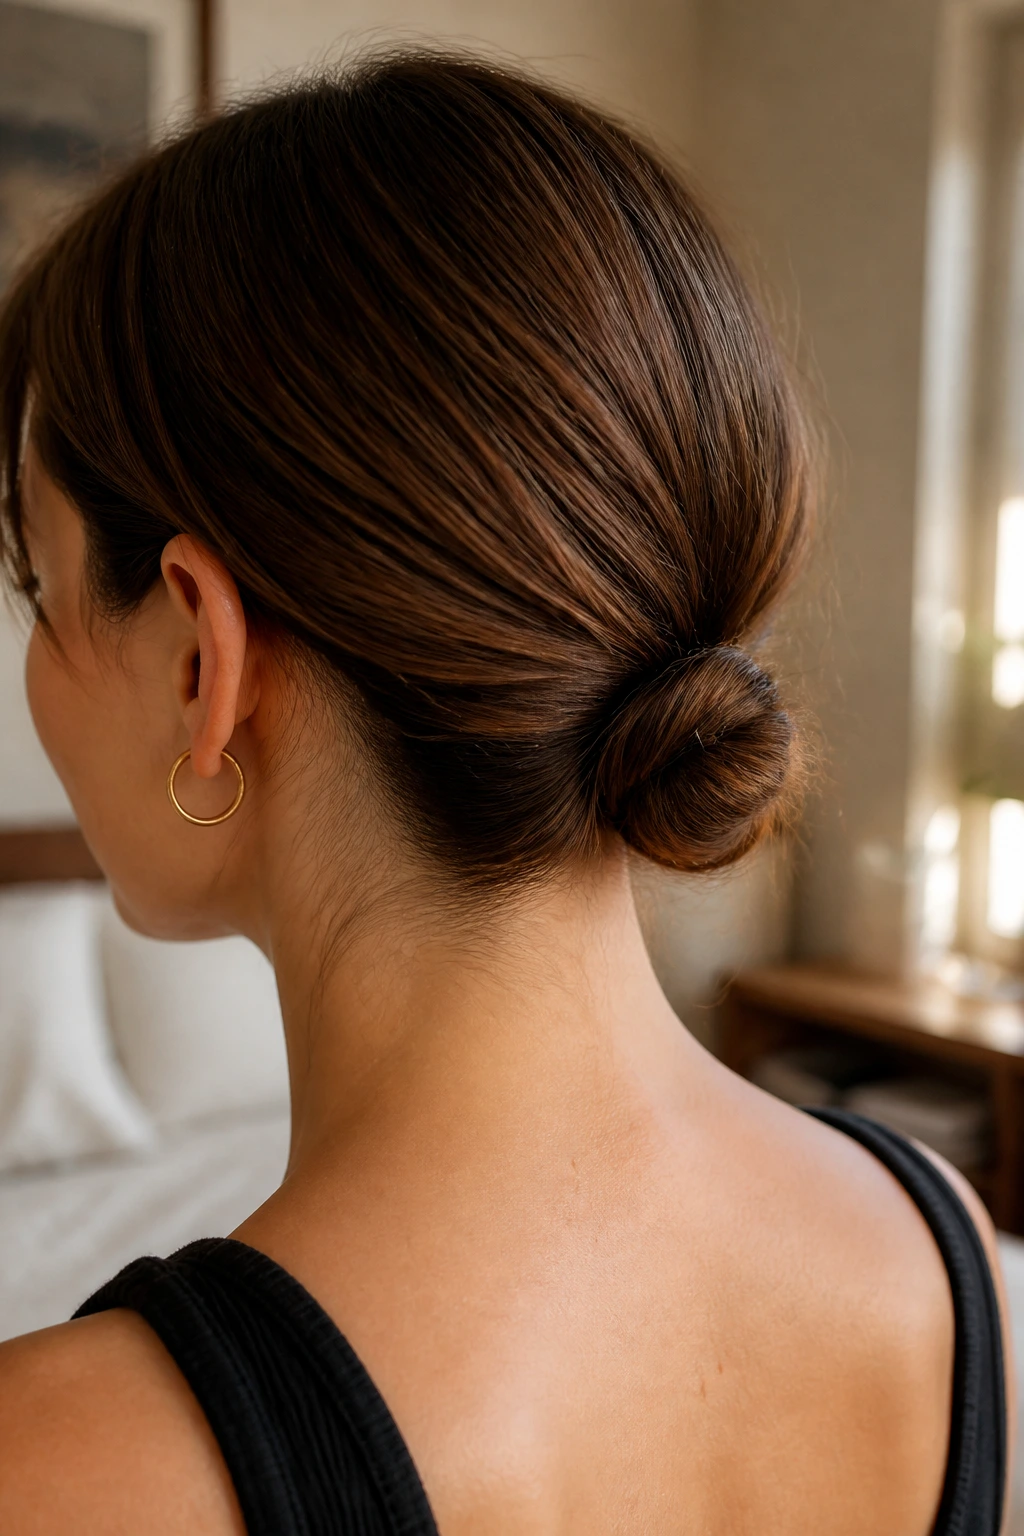
5. The Low Nape Knot
A low knot at the nape sounds ambitious for short hair, but on a chin-length bob or a long pixie with some back length, it’s absolutely doable. The trick is not to aim for a full bun. Gather just enough hair to form a tiny knot at the base of the neck, then pin the ends flat.
That tiny size is the point. A bulky knot on short hair tends to sprawl. A compact one reads as chic and tidy, especially if the front stays loose and softly tucked.
If the back is too short for a knot, split the hair into two twisted rolls instead. Pin each side toward the center of the nape and let the ends disappear underneath. It gives the same lifted feel without the fight.
A satin-finish pomade can help tame the shorter hairs at the neck, which are usually the first to escape. Use very little. The nape is where too much product shows fastest.
6. The Textured Clip-Back Waves
This is one of those styles that looks more complicated than it is. Add a little bend to the hair, clip one side back, and leave the rest loose. That’s it. But on short hair, that simple move is enough to make the whole cut look cleaner.
The waves do the heavy lifting. You don’t need a full curling pattern. A flat iron or small wand can bend the front pieces away from the face in 1-inch sections, just enough to give them movement. Then use a barrette or two bobby pins on one side to hold the lifted section back.
This is good for growing-out bobs because it hides the bluntness at the ends. It also works when the layers around the face are different lengths, which is usually the part that makes short hair feel messy. The clip gives the style one obvious focal point.
A matte barrette looks better here than something oversized. If the clip is too heavy, it’ll drag the side down and make the bend collapse.
7. The Headband Push-Back
Do not underestimate a good headband. On short hair, a narrow one can act like structure where you don’t yet have enough length. It pushes the front back, keeps bangs off the face, and creates a cleaner line around the hairline.
The best version of this look starts with a little root texture. Dry shampoo or texturizing spray helps the headband grip instead of sliding through smooth hair. Place it about half an inch behind the hairline, then nudge the front pieces forward a little so they don’t look smashed flat.
A cloth headband or a slim padded one tends to sit better than a thick, stiff band. Thick bands can overpower a pixie or a tiny bob. You want the accessory to frame the face, not take over the whole thing.
If you wear glasses, this is one of the easiest styles to pair with them. The band keeps the fringe off the frames, which matters more than people think.
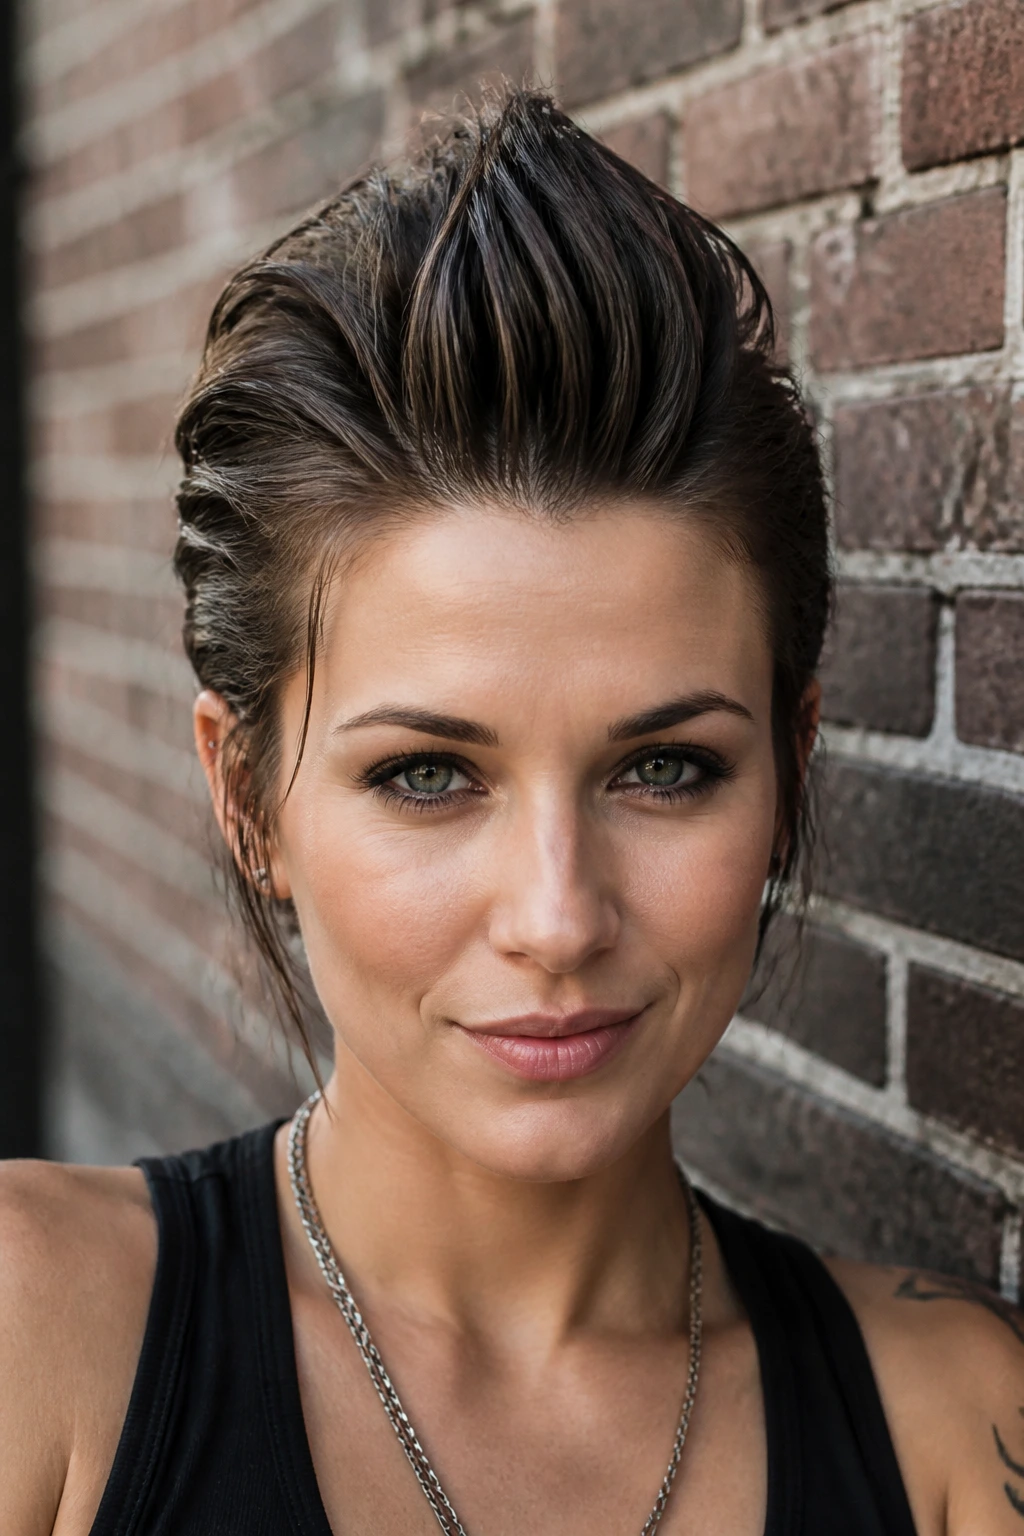
8. The Faux Hawk Pin-Up
A faux hawk looks dramatic, sure, but on short hair it’s also practical. It gathers attention in the center of the head, which lets the sides stay neat and the growing layers feel intentional. When the back is too short for a ponytail and the top has some lift, this style makes sense fast.
What makes it work
The center ridge gives the cut structure. The side sections get pinned or slicked close to the head, which stretches the silhouette and keeps the shape from spreading out sideways. That’s useful if your hair is thick, or if it tends to balloon near the ears.
- Start with a rough blow-dry or a little mousse for grip.
- Lift the center section from forehead to crown and clip it loosely.
- Smooth the sides back with gel or cream.
- Pin the center ridge up in small sections, not one giant chunk.
It does not need to be spiky. A softer version looks better for daily wear, especially if you leave a few wisps around the temples. Those little pieces keep it from looking severe.
9. The Silk Scarf Wrap
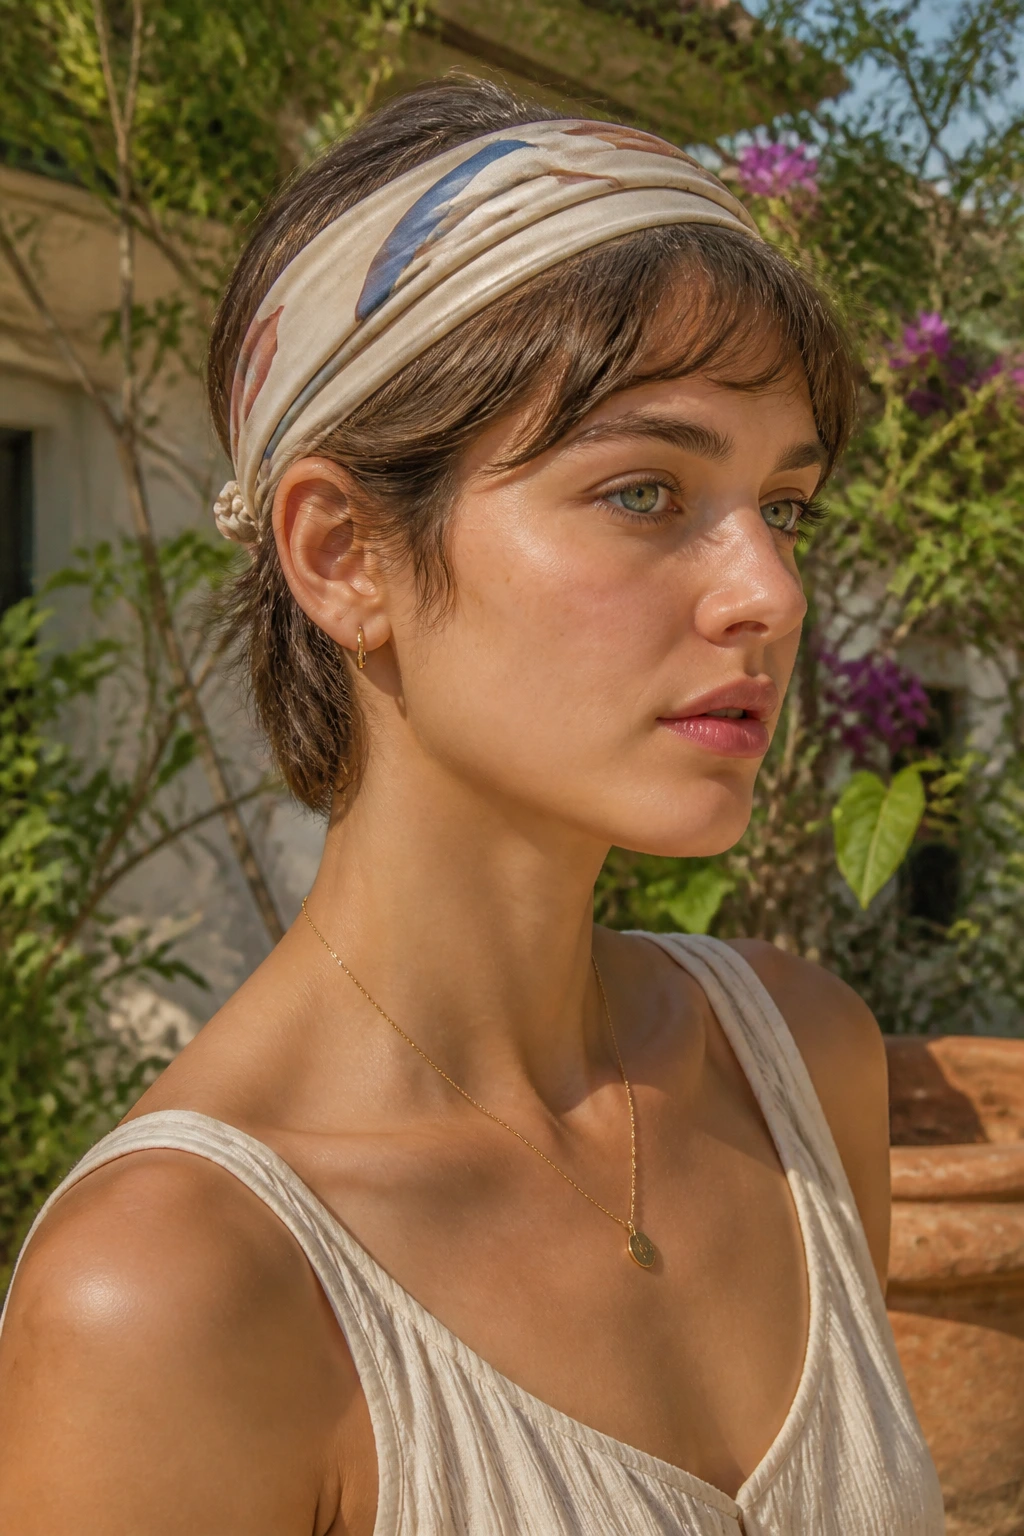
A scarf can rescue short hair that has entered that awkward middle zone where nothing sits neatly. Wrap it around the head, tie it at the nape or off to one side, and let the hair peek out beneath. It works because it stops the eye from measuring every uneven strand.
The best scarves for this are slim enough to sit close to the head. A heavy square silk scarf can be folded into a long band first. Keep the knot small and flat, or it will feel lumpy against the scalp.
This style is good when the roots are oily, the fringe is puffy, or the back has gone a little wild. It buys shape without needing to restyle the whole head. A little face-framing piece left out in front keeps the wrap from feeling too covered.
If you have curls, leave the texture visible at the temples and nape. That bit of softness looks better than forcing every strand under the fabric.
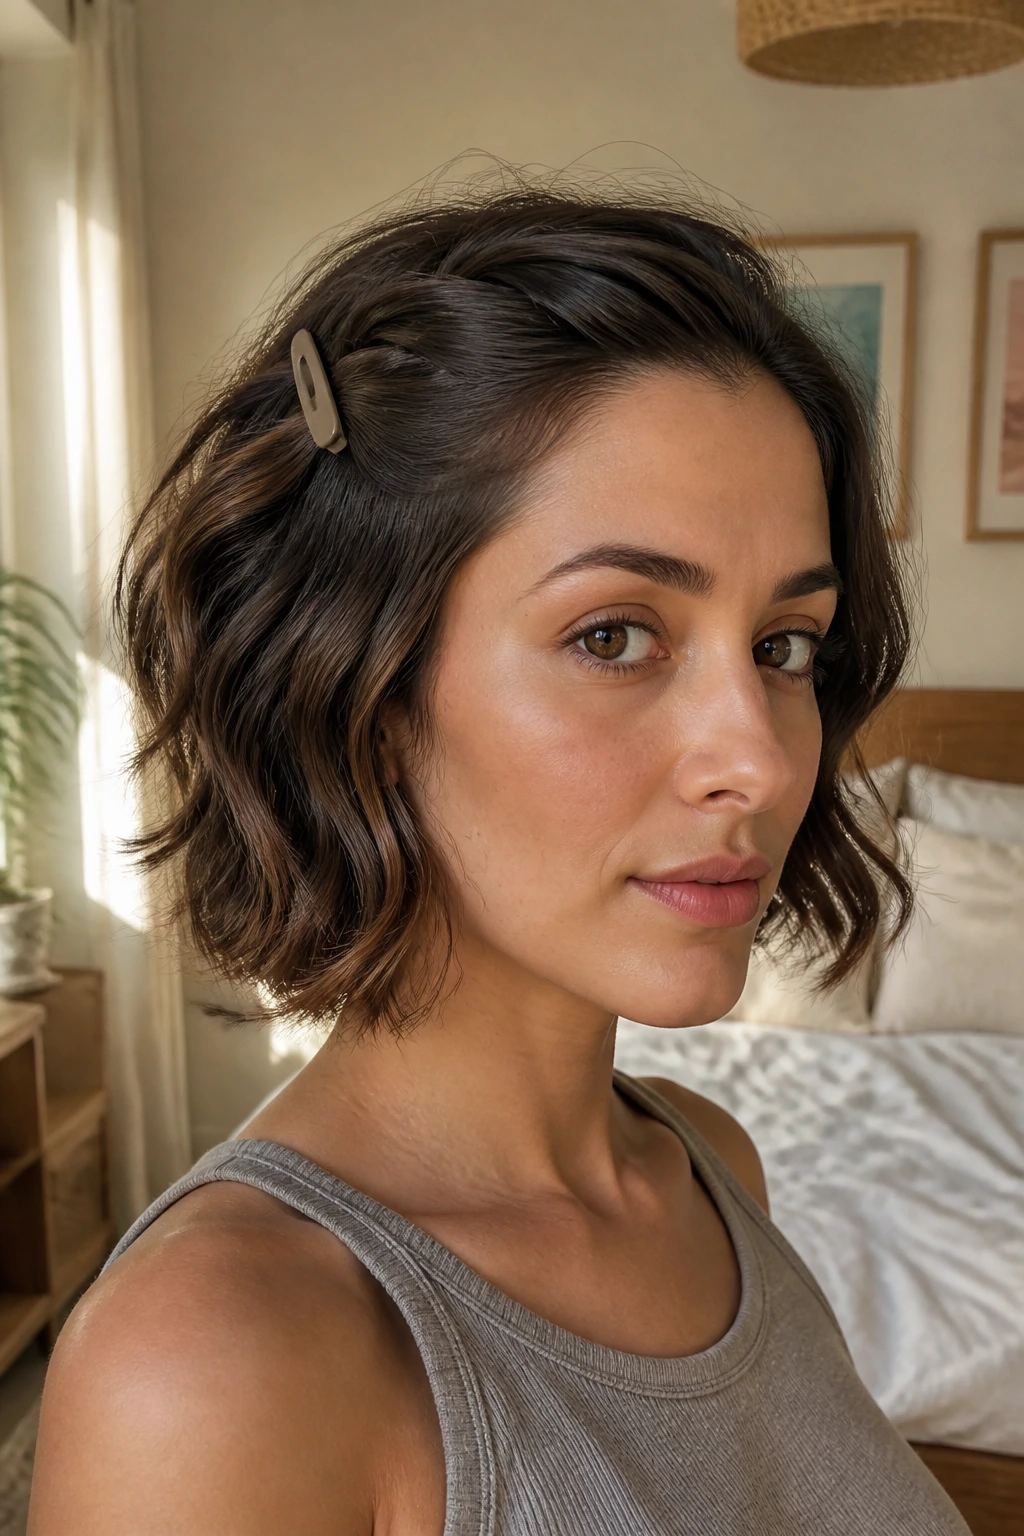
10. The Claw-Clip Half-Up Twist
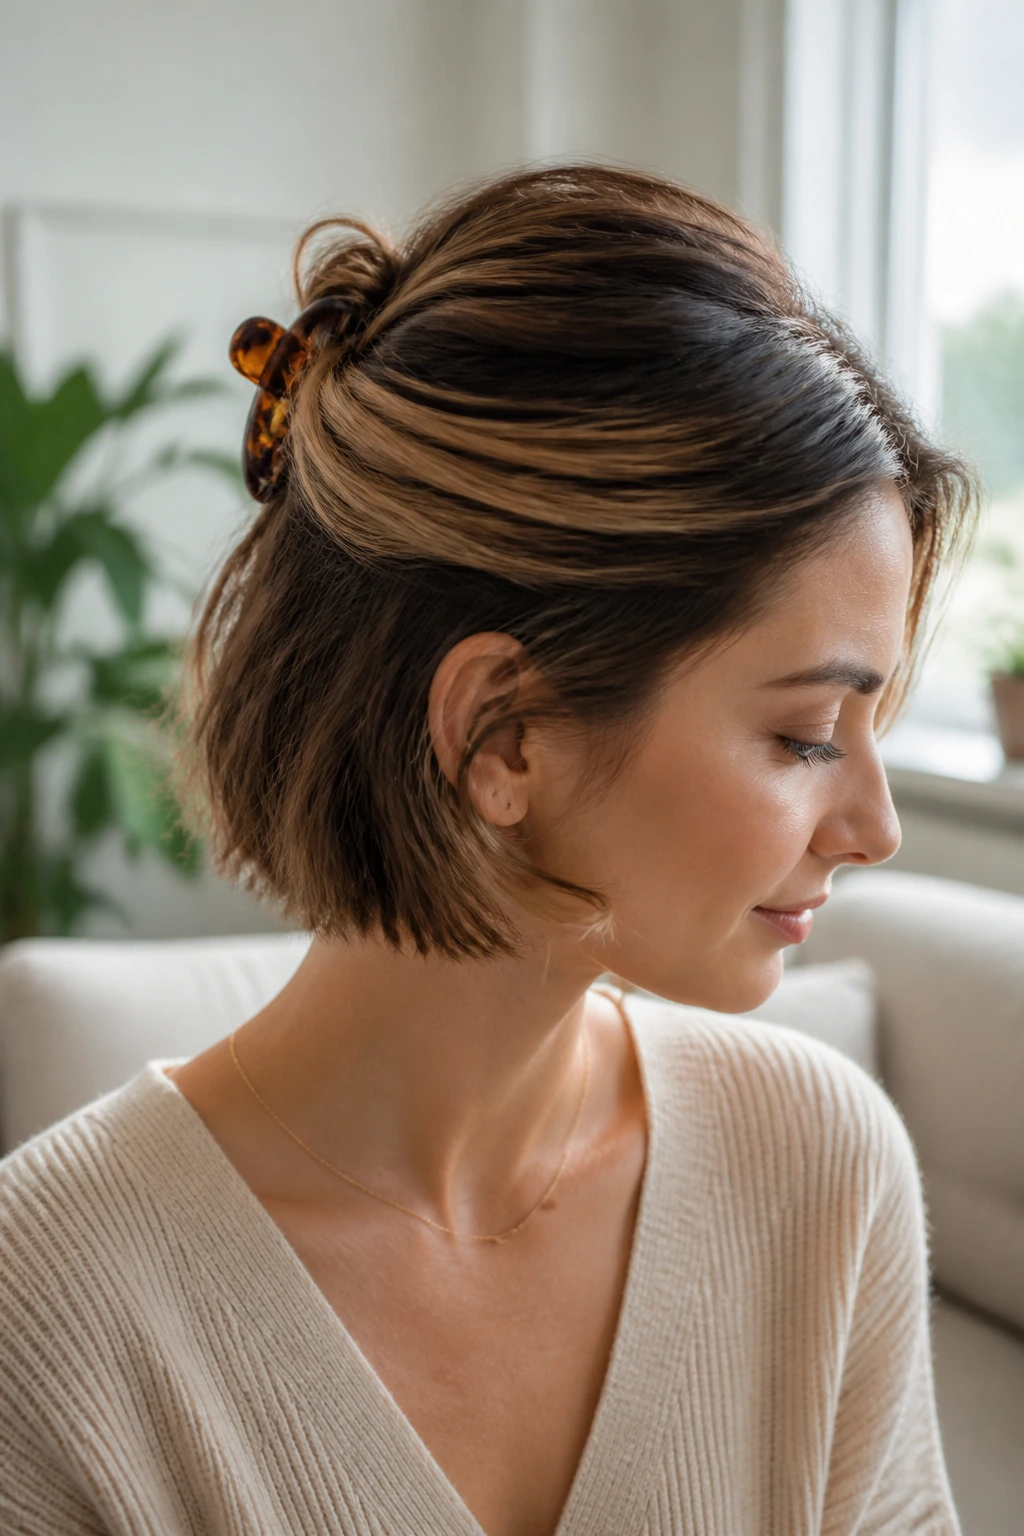
Can short hair really use a claw clip? Yes, if you stop trying to make a full French twist and start with a smaller section. Pull the top half of the hair back, twist it once or twice, then clip it so the ends fan out slightly. The lower layer stays loose.
This works especially well on a bob that’s almost long enough for a clip but not quite. The trick is sizing. A medium clip often swallows short hair; a smaller one grips better and looks less bulky.
The twist lifts the crown and keeps the front pieces off the face. It also creates a little height, which is useful when the ends are kicking outward. If the twist feels too loose, anchor it with one bobby pin under the clip.
This look can be polished or messy. Sleek it for a cleaner finish. Leave a few face pieces loose if you want it softer.
11. The Face-Framing Pin Sweep
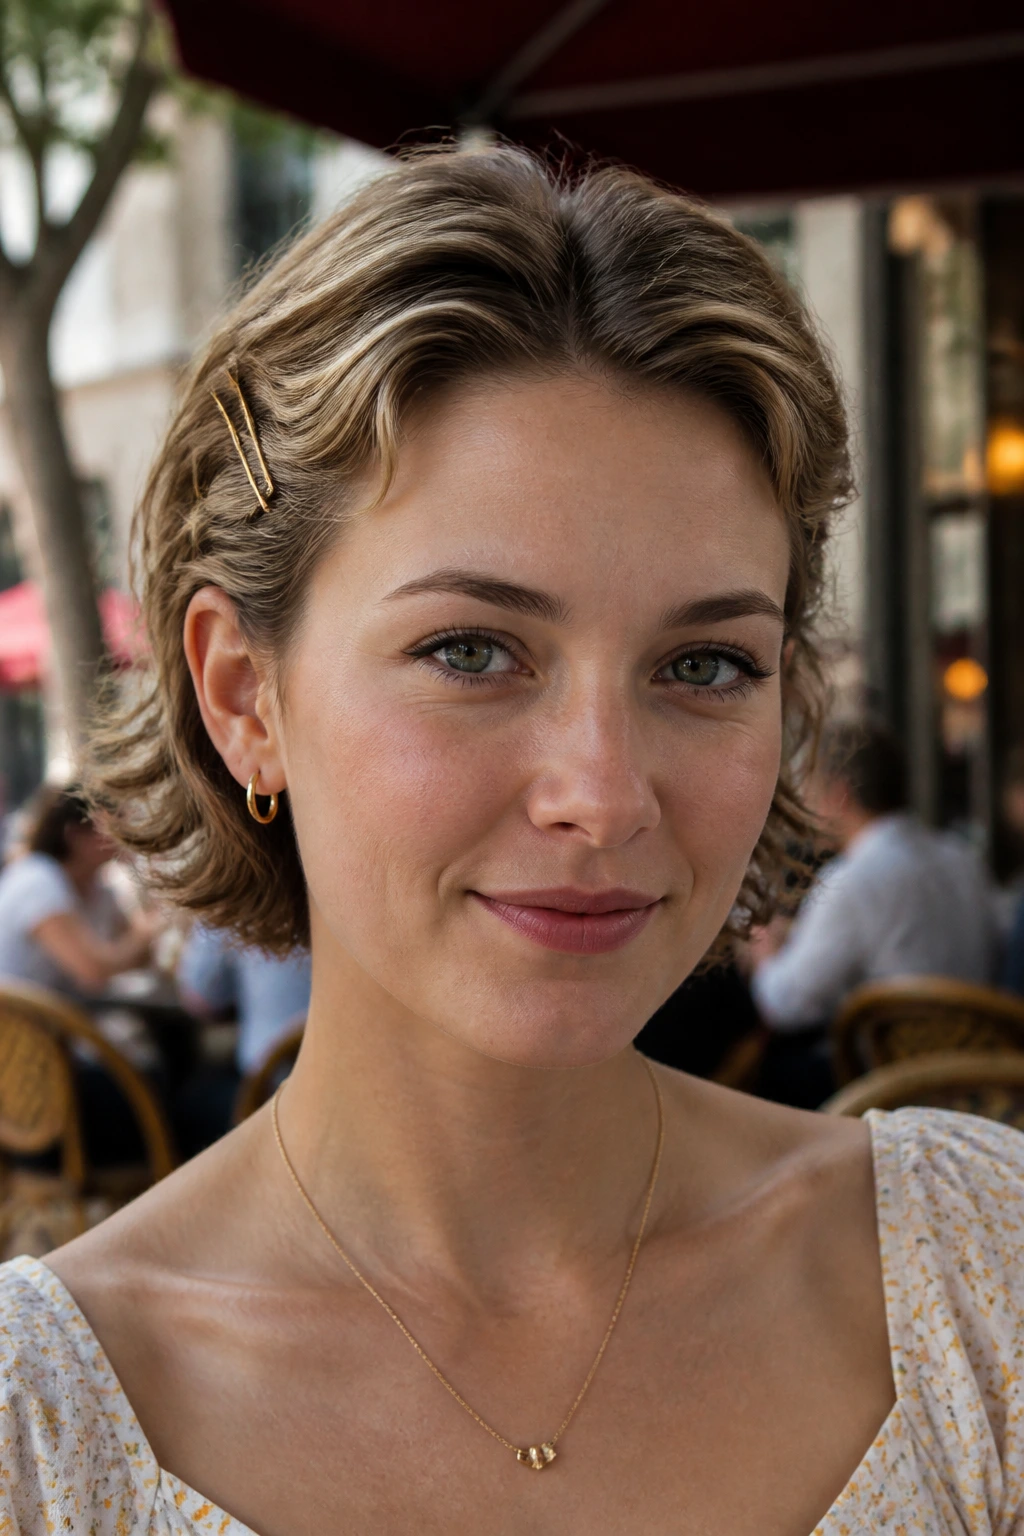
This is one of the simplest ways to make growing-out layers behave. Sweep the front sections back from both sides, then pin them just above the ears or slightly higher at the temple. You keep the face open, but the style still feels soft because the hair doesn’t disappear completely.
How to do it without looking stiff
Cross the pins if the sections slip. One pin goes in vertically, the second crosses over it at a slight angle. That tiny detail matters. A single flat pin can slide, while crossed pins grip the hair from two directions.
Choose pins that match your hair color if you want them to disappear. Or don’t. A small gold pin can look better than a hidden one, especially on dark hair.
This style is a good answer when bangs are at the eye-grazing stage and the sides are too short for a full tuck. It is also one of the quickest fixes for day-two hair. No tools. No heat. Just a neat sweep and a little patience with the pins.
12. The Bubble Ponytail for Short Hair
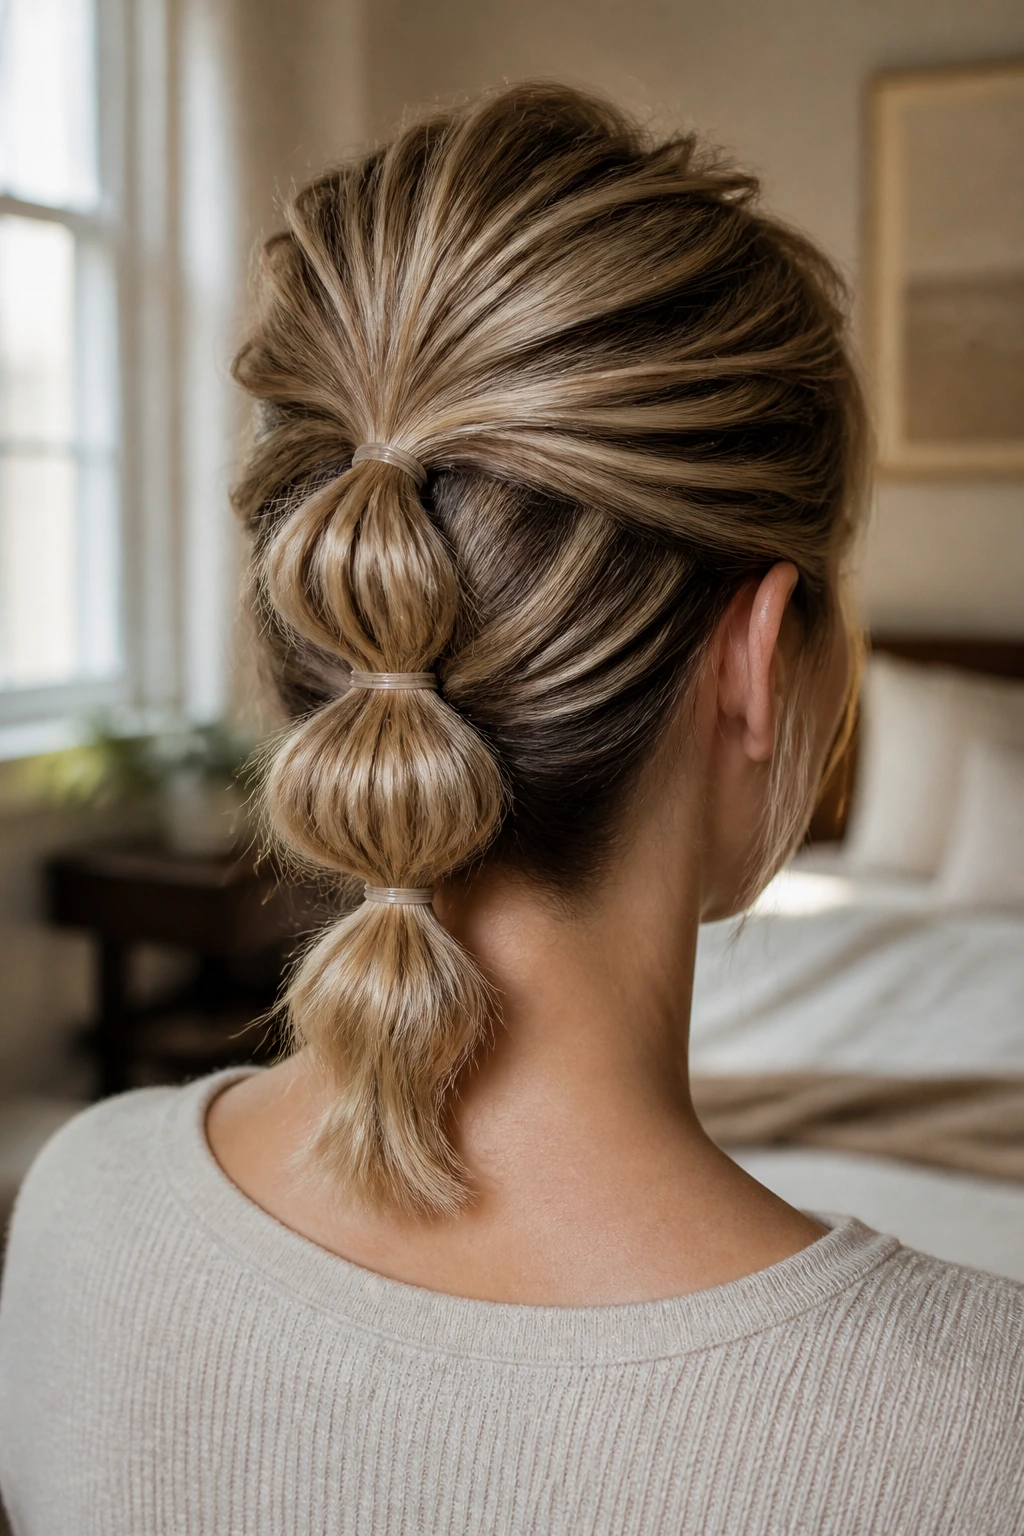
A bubble ponytail on short hair isn’t the long, glossy version you see on longer lengths. It’s a mini version, and that’s part of its charm. Gather whatever length you can at the back or into a half-up base, secure it, then add small elastics every inch or so down the tail.
That spaced-out elastic pattern creates the “bubble” effect, even if the tail is only a few inches long. Tug each section gently between the elastics to round it out. Don’t overpull or the whole thing collapses into a sad stub.
This style looks best when the crown has a little lift. A touch of texture powder at the roots helps. If the hair is too short for a true ponytail, do the same thing with a half-up section instead. Same idea. Less length required.
Tiny clear elastics are your friend here. Thick ones make the style look bulky and can snap short ends.
13. The Twisted Nape Pins
When the back is too short for a knot but long enough to twist, this style is a quiet winner. Take two narrow sections from each side, twist them back toward the nape, and pin them flat where they meet. The ends can disappear under the twist or be tucked against the neck.
It’s a good fix for layered bobs that kick out at the bottom. The twist redirects those layers and keeps the nape from looking fuzzy. It also works if your hair is naturally straight but refuses to sit still after air-drying.
Use two pins on each side if the twists are thick. One pin can hold for an hour. Two pins get you through a workday without fuss. If you want the finish to be softer, loosen the twists slightly before pinning so they sit with a bit of air.
This style is one of the least fussy options in the whole collection. It looks like you meant it, which is the main job.
14. The Finger-Wave Side Sculpt
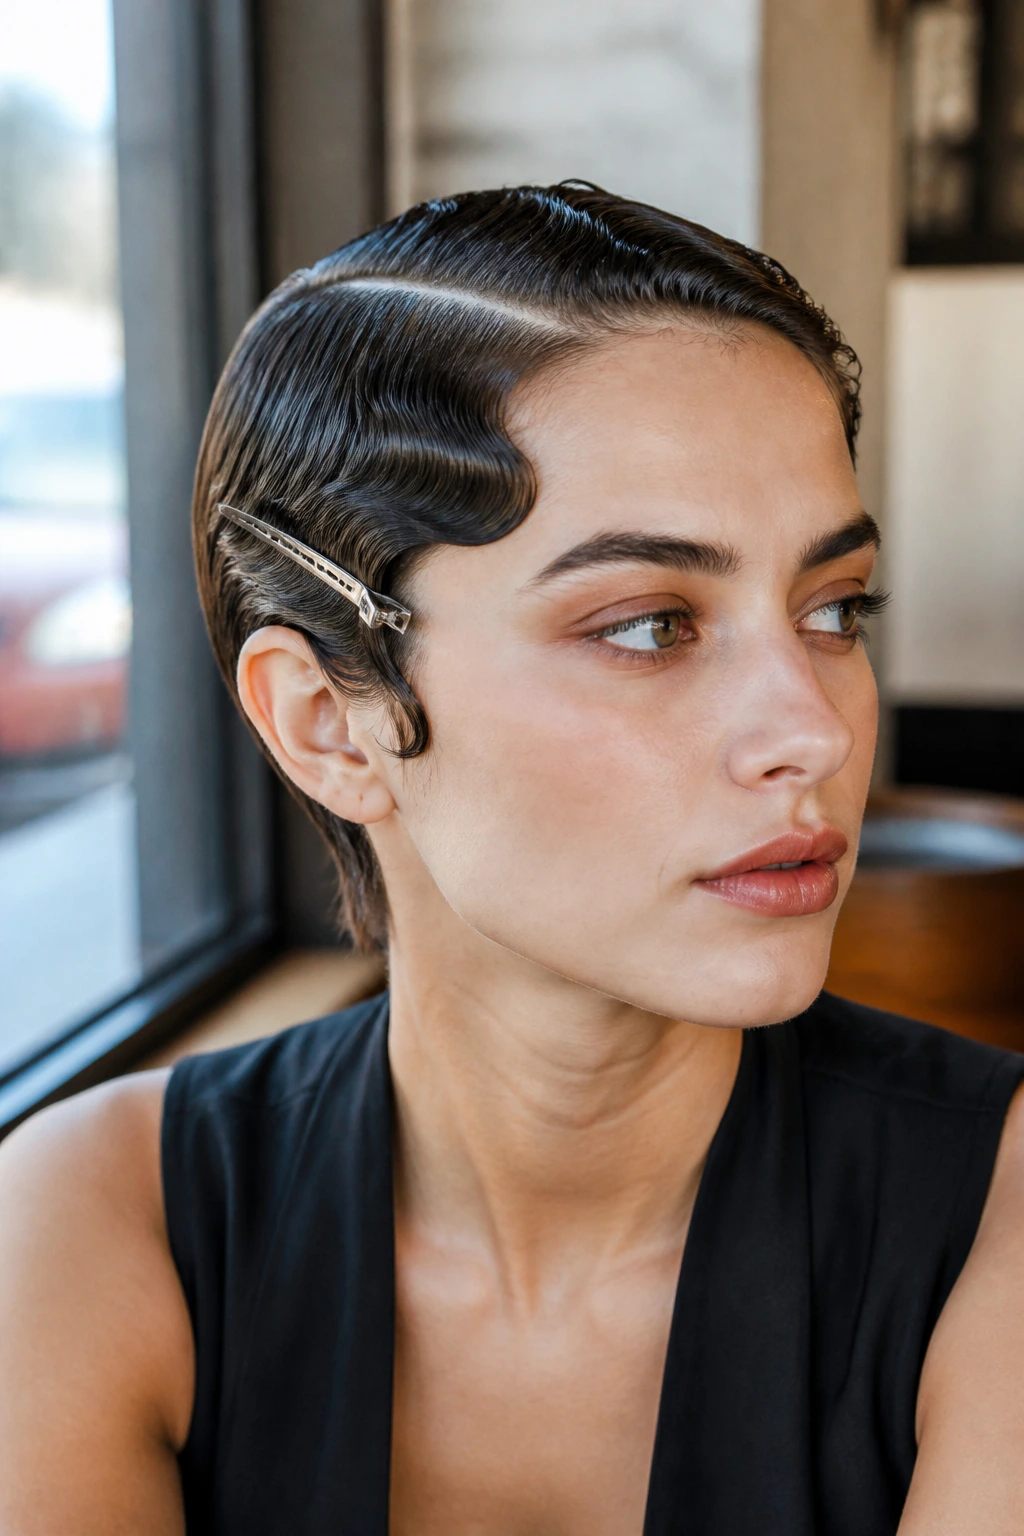
A finger-wave side sculpt gives short hair a sharper, almost old-Hollywood bend without requiring a full set-and-roll routine. It works best on pixie lengths, especially when the top has a few inches to shape and the sides need a little control.
Use a strong-hold gel on damp hair. With a comb, push the front section into a shallow S-shape, then clip it while it dries. The wave should sit close to the head, not puff away from it. If the hair is too dry before you set it, the shape falls apart.
This is the most editorial style in the group, which means it’s better for nights out or photos than for a fast grocery run. Still, it’s not fussy once you know the move. One side, one wave, one pin. That’s the whole game.
A shine spray at the end helps the wave read clean instead of crunchy. Too much, and the whole thing looks wet. Keep the finish controlled.
15. The Messy Mini Topknot
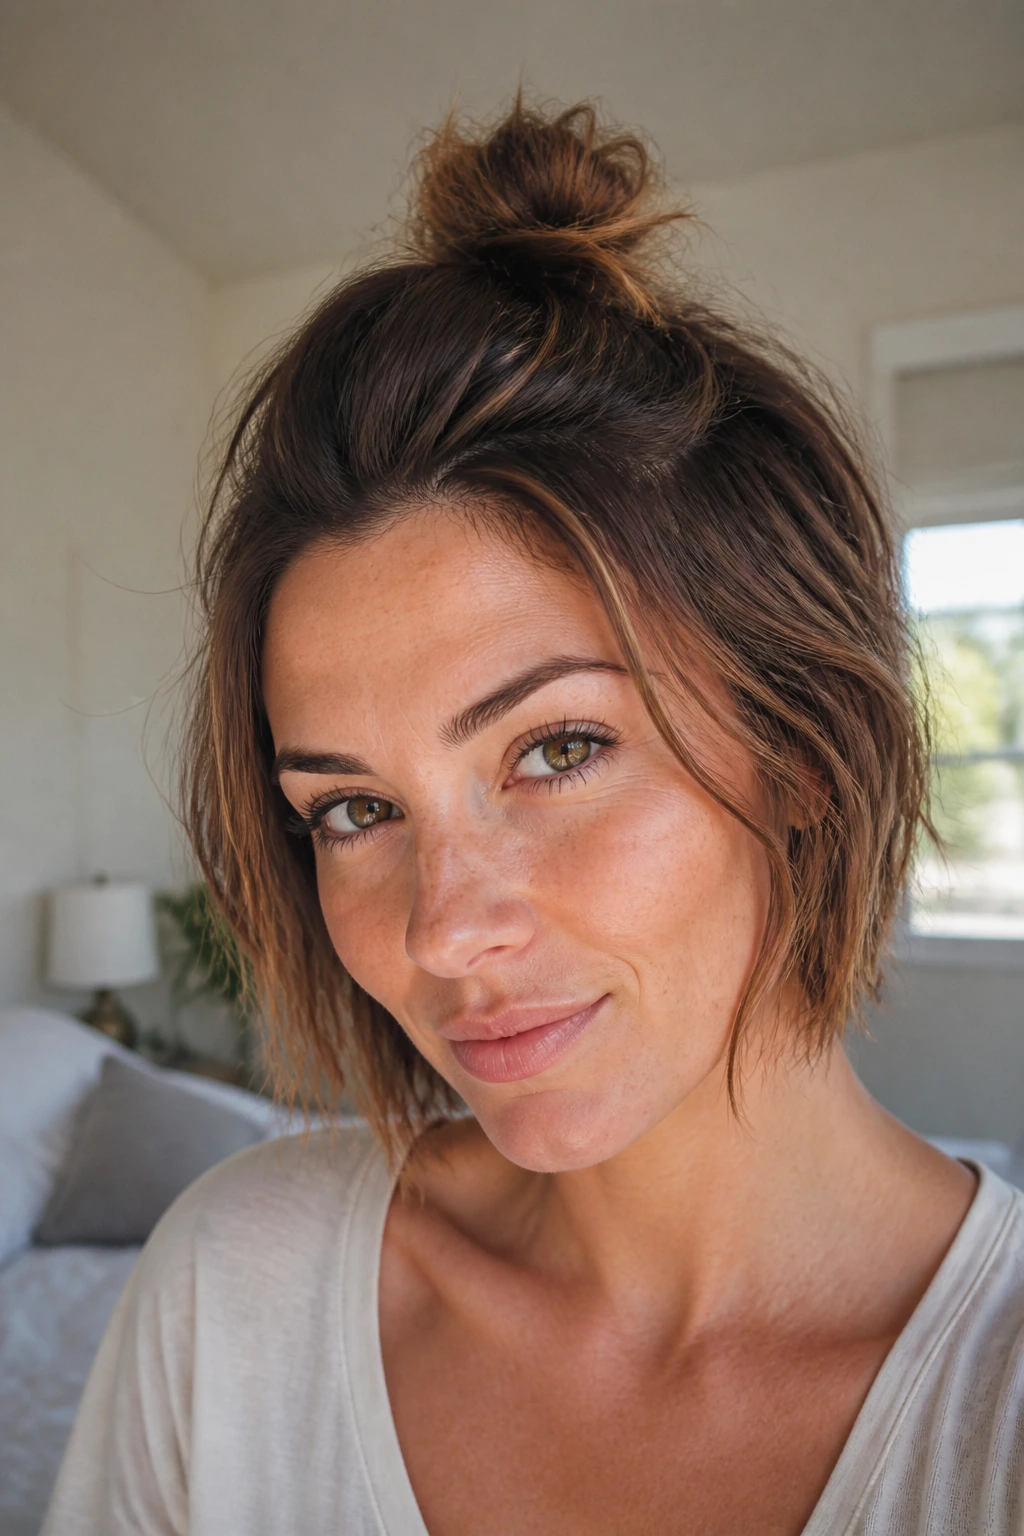
A topknot on short hair should never pretend to be a big bun. The smaller, messier version is usually better anyway. Pull the top section up, twist it loosely, and pin or tie it into a tiny knot at the crown while the bottom layers stay loose.
This is a good choice when your hair is long enough on top but still too short everywhere else. It lifts the face, keeps the neck clear, and gives the cut a bit of height. That height matters because short grow-out hair can sit flat in the wrong places.
A few things that help
- Use a tiny elastic before you twist if the hair is slippery.
- Leave the ends a little undone instead of forcing them into a tight coil.
- Pin from underneath so the knot sits close to the head.
- Pull a few short pieces free around the temples for softness.
On thicker hair, you may need to split the top section into two and join them at the crown. That’s not cheating. That’s using less hair at once so the knot stays compact.
16. The Barrette Parade
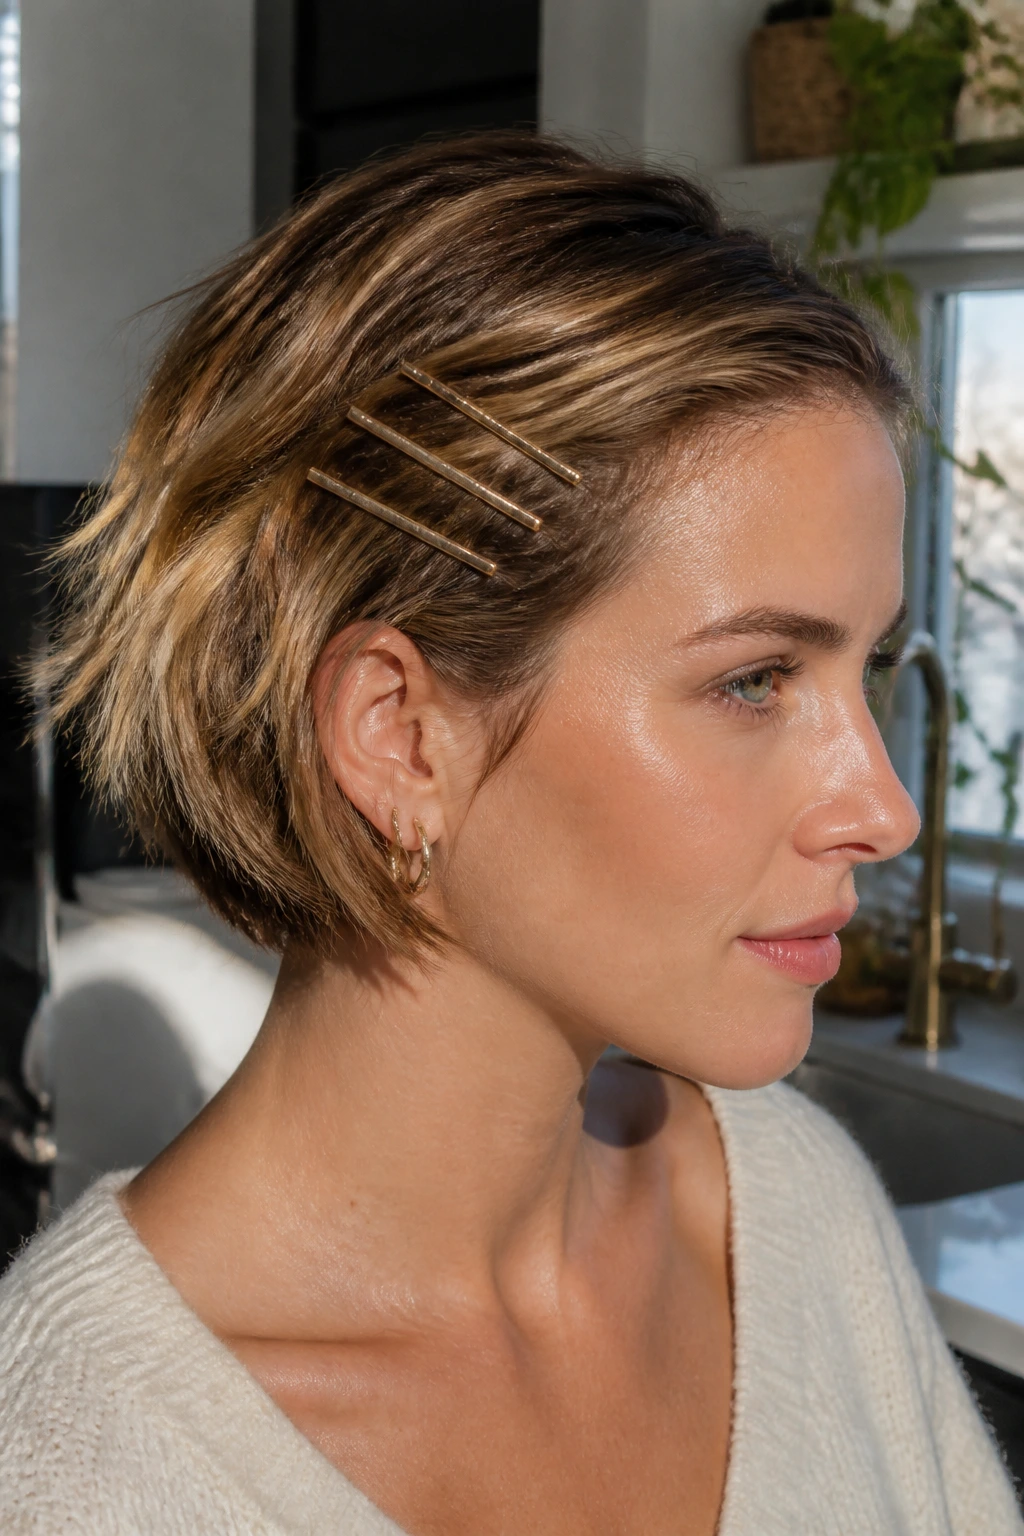
Sometimes the answer is not one accessory. It’s three. A barrette parade uses a row of slim clips on one side to hold back short layers while turning the whole cut into a finished look. It’s especially useful if your hair is between a pixie and a bob and the sides keep slipping free.
The first clip usually does the actual holding. The second and third are there to distribute the shape and keep the line from looking accidental. Stagger them slightly instead of placing them in a perfect row. That little offset looks better on growing-out hair, which is never perfectly even anyway.
This style is a lifesaver for shorter hair that refuses to stay tucked. It also works on second-day texture because the clips can control just enough of the side while leaving the top loose.
Choose clips with teeth or a grip lining if your hair is slick. Smooth decorative clips look nice, but they slide more. A parade only works when the pins hold.
17. The Low Pony for Chin-Length Hair

If your hair has reached chin length, a low ponytail starts to become fair game. The important part is keeping it small and low, almost tucked into the neck. This is not a long, swinging pony. It’s more like a compact gathered tail that keeps the shape clean.
A little smoothing at the sides helps, especially if you have layers around the face. Gather the hair with one hand at the nape, secure it with a tiny elastic, and wrap a thin strand around the base if you want to hide the band. That small wrap gives the style a neater finish than a visible elastic.
Best length window
- Works best on bobs that graze the jaw or chin.
- Needs enough length at the nape to clear the elastic.
- Can be softened with a bent piece at the front.
- Can be dressed up with a ribbon or narrow scrunchie.
If your hair is too short for a pony, don’t force it. Use the same low placement for a half-up version instead. It gives the same tidy feeling with less frustration.
18. The Braided Crown Halo
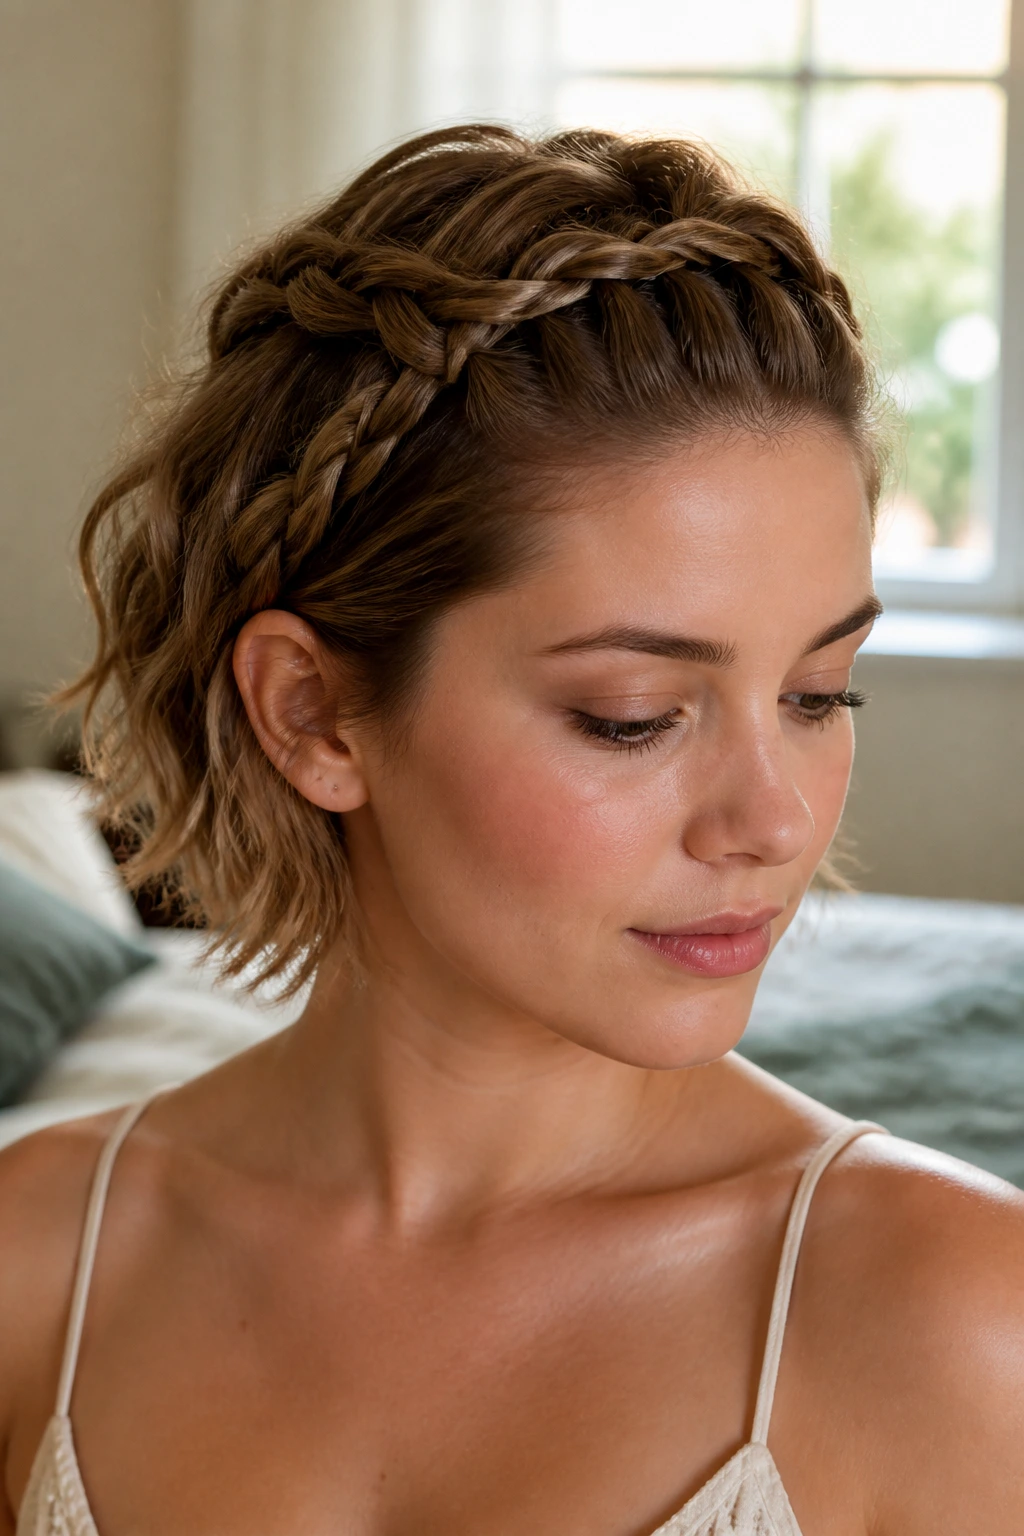
A braided crown halo is one of the prettiest ways to disguise uneven grow-out around the temples. Braid a narrow section from each side, bring them toward the back of the head, and pin them across the crown. The loose hair below stays free.
It works because the braids act like a frame. They hold the top and sides in place, which is where short hair tends to break apart first. On a bixie or a short bob, the halo creates a soft arc that looks intentional even if the lengths underneath are not playing nice.
What to watch for
The braids do not need to be tight. A little looseness keeps them from looking tiny and severe. If your hair is layered, start the braid a little farther back where the pieces are longer. That gives you more grip and a cleaner line.
Secure the ends with small pins tucked under the braid, not dangling out. Loose braid ends are the fastest way to make the style look unfinished. And if the front layers are too short to braid, pinch them into the halo with a pin at the temple instead of forcing them through the plait.
19. The Scrunched Natural Texture
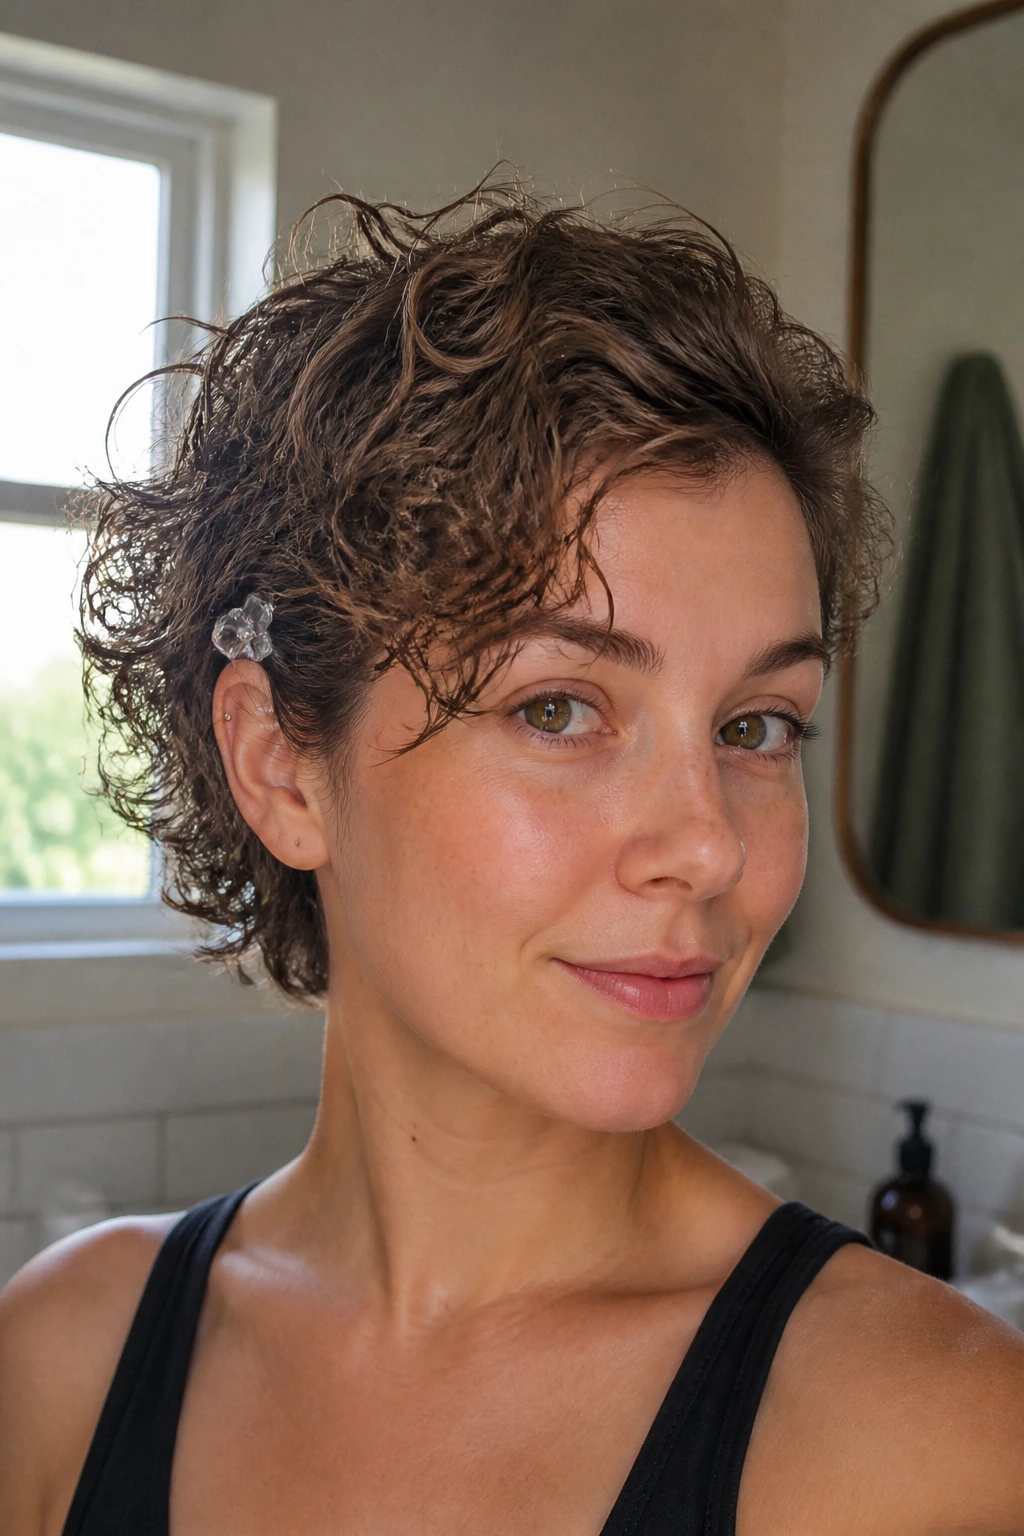
Not every grow-out style needs pins and accessories. Sometimes the answer is to lean into the texture you already have and shape it with a few smart moves. Scrunch in mousse on damp hair, either air-dry or diffuse on low, and let the cut sit where it wants to sit. Then clean up just one side with a tuck or clip.
This works well on curly, wavy, or slightly bent hair, where trying to smooth everything only makes the ends look frayed. A little mousse at the root gives lift. A dab of cream on the ends keeps them from looking dry. That balance matters more than people think.
Quick facts
- Best for hair that already has some bend or wave.
- Needs light-to-medium hold, not heavy grease.
- Looks better with one controlled side than with every strand separated.
- Can be refreshed with water and a bit of mousse the next day.
If your hair gets puffy in humidity, use less product at the crown and more definition at the ends. A lot of grow-out styles fail because they flatten the top and inflate the bottom. This one works better when you keep the root alive.
20. The No-Part Tuck-and-Go

A no-part style is the easiest reset when short hair feels split, flat, or over-styled. Brush everything back loosely, skip the formal part line, then tuck one or both sides behind the ears. Add a clip, an earring, or nothing at all. The point is to remove the visual argument.
It’s a clean answer for days when the crown won’t lift and the fringe won’t settle. Without a part, the shorter layers blend more naturally. The shape reads soft instead of precise, which is useful when the cut is growing out and no longer matches your last trim.
This is the style I’d choose on a rushed morning because it doesn’t demand much. A few fingers, a little product, and one decision: side tucked or both sides tucked. That’s it.
The best version leaves a tiny bit of movement at the front. Pulling everything back too hard can make the style look stern. Softness saves it.
Why These Grow-Out Styles Work on Short Hair

Short hair changes shape faster than long hair. That sounds obvious until you’re dealing with a nape that flips out, a crown that suddenly sits flat, and bangs that seem to have grown two centimeters in the wrong direction. The best grow-out hairstyles for short hair do not try to erase those shifts. They redirect them.
The real secret is balance. Short hair needs anchor points — usually the temple, the crown, or the nape. If every bit of styling happens in the middle of the head, the look spreads out and starts to feel puffy. If the sides are controlled and the top has a little lift, the cut looks sharper right away.
Texture matters more than length in this stage. A smooth finish can help, but a bit of grip is usually better. That’s why mousse, dry shampoo, texturizing spray, and light gel show up so often in short-hair styling. They make the pieces behave without turning them hard or greasy.
And one more thing: short hair often looks best when the style has a clear reason. One braid. One twist. One side tucked. One accessory. When the shape is simple, the grow-out reads as deliberate instead of unfinished.
Essential Tools for the Job
A short-hair kit does not need to be huge. It does need the right pieces, because a lot of full-size hair tools are awkward on a pixie or a bob that barely reaches the neck.
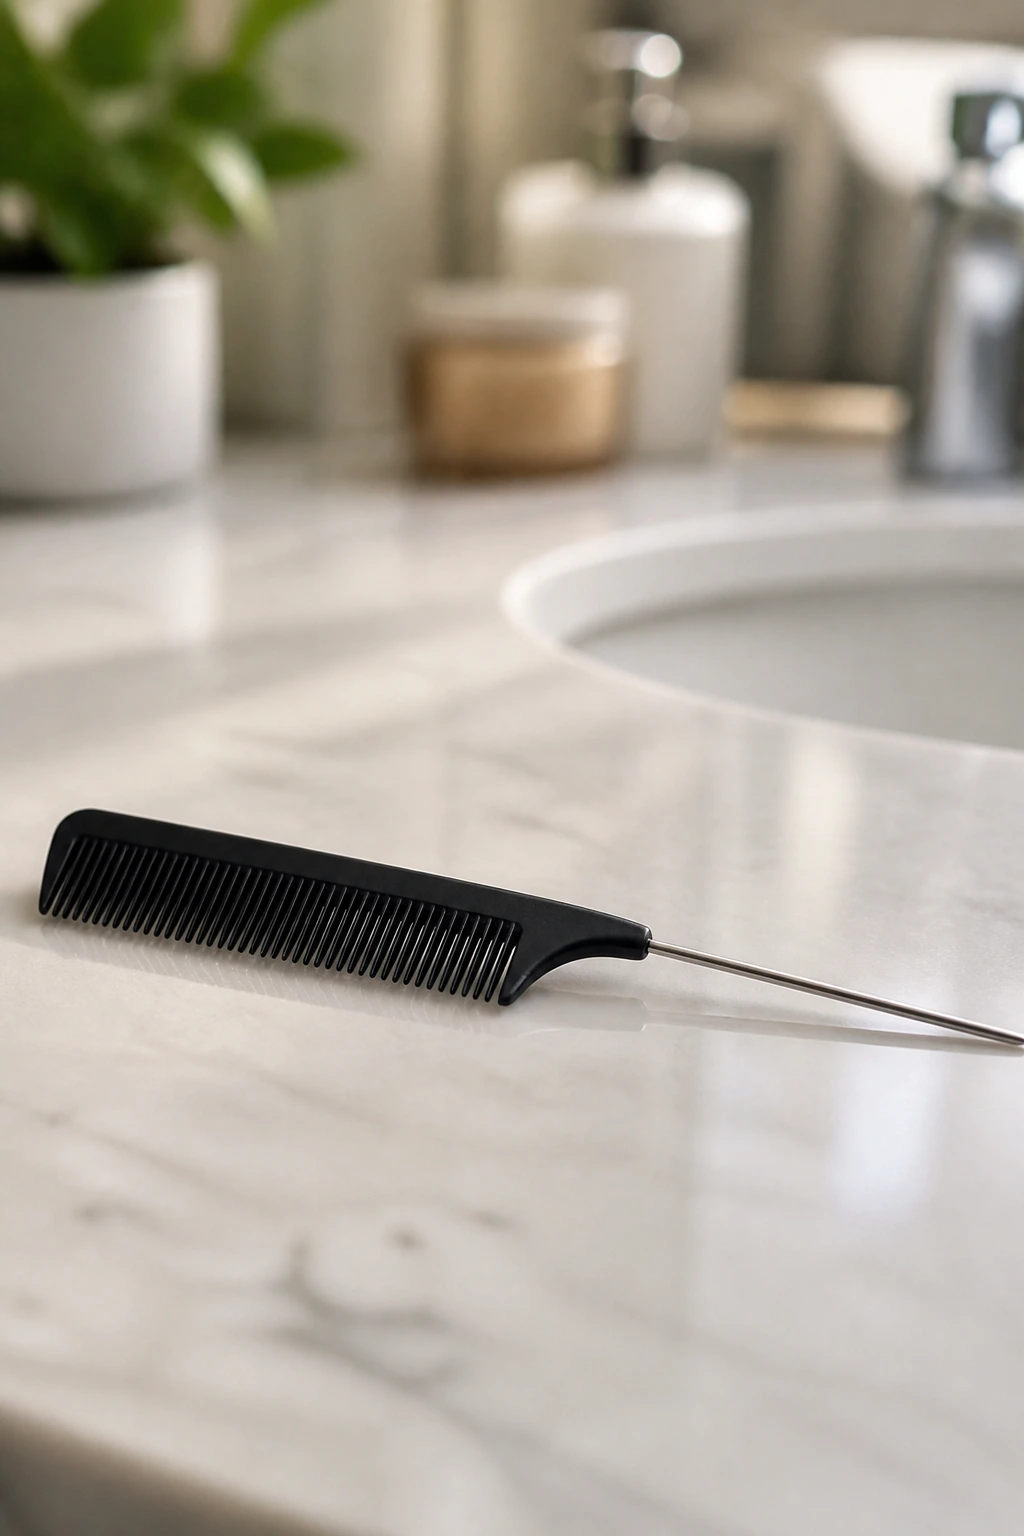
- Rat-tail comb: Great for deep parts, clean sections, and hairline braids.
- Mini elastics: Best for bubble styles, tiny pony sections, and short braids without bulk.
- Bobby pins in your hair color: These disappear better and grip loose layers more cleanly.
- Crossing pins or U-pins: Useful for twists, knots, and side sweeps that slip.
- Small claw clip: Works best on bobs and longer pixies where a full-size clip swallows the hair.
- Slim headband: Holds the front back without overwhelming a short cut.
- Silk or satin scarf: Good for wraps, soft control, and hiding a rough hair day.
- Texturizing spray: Adds grip, especially on clean or fine hair.
- Dry shampoo: Helps the roots hold shape and keeps sleek styles from slipping.
- Light mousse or foam: Gives lift and memory without weighing short hair down.
- Flexible-hold hairspray: Keeps the shape intact without making the ends crispy.
- Small flat iron or 1-inch curling wand: Handy for bending front pieces or softening the ends.
How to Choose Products That Keep the Shape
Short hair is not a place for heavy products unless your hair is thick and thirsty. Most grow-out styles need hold more than shine. That means looking for products that give grip without coating the hair in a slick film.
For fine hair, mousse and dry shampoo are usually the smartest starting point. A root-lifting foam at the crown gives the style a little body, and a light spray at the end keeps the look from falling apart. Skip thick oils near the roots. They flatten the shape fast.
Thicker or coarser hair often needs a little more control. A smoothing cream on the ends, a stronger gel near the hairline, and a pin with a decent grip can make the difference between a clean sweep and a puffball. If your hair has a stubborn wave, choose products that keep that wave defined instead of fighting it flat.
Accessories matter too. A headband with a grippy lining will stay put better than a smooth plastic one. Bobby pins with a matte finish usually hold short layers more reliably than slippery shiny pins. Tiny things. Huge difference.
How to Wear Them for Work, Errands, and Dressier Days
Short grow-out hair is at its best when the style matches the day instead of pretending every day needs the same amount of polish.
Workdays: A deep side part, low knot, or face-framing pin sweep looks tidy without taking long. These shapes keep the face open and stay neat under a coat collar, which is more useful than it sounds.
Errands and gym-adjacent days: The no-part tuck-and-go, the headband push-back, or the scrunched natural texture all work when you need the hair out of the way and don’t want to fuss. These are the styles that survive sweat, wind, and a few too many stops.
Dressier plans: A faux hawk, finger-wave side sculpt, or braided crown halo gives short hair enough shape to look deliberate with earrings or a bold lip. You don’t need extra length. You need a strong silhouette.
Hot or windy weather: Scarf wraps and secure pin sweeps keep the shorter pieces from blowing into your eyes every five minutes. Honestly, this is where accessories earn their keep.
Small Tweaks That Make the Styles Last Longer
Texture at the roots: A puff of dry shampoo or a little mousse at the crown gives short hair something to hold onto. Clean roots can be too slippery, especially if your hair is fine.
Part placement: A slightly off-center part often works better than a straight center line on grow-out hair. It hides uneven layers and keeps the front from splitting open in the middle.
Pin direction: Slide bobby pins against the direction of the hair’s movement, not with it. Cross them when the hair is slippery. One pin holds a detail; two pins hold a style.
Accessory scale: Small clips, slim bands, narrow scarves. Short hair can disappear under oversized accessories, and then the cut starts looking swallowed instead of styled.
Finish the ends last: If you use a cream, wax, or serum, put it only on the bottom inch or so. The roots need lift. The ends need calm. Mixing those jobs up is where a lot of styles go sideways.
Common Mistakes With Grow-Out Hairstyles for Short Hair
Using too much product: The symptom is obvious — flat roots and greasy ends by lunchtime. The fix is smaller amounts, worked through only the sections that need control. Short hair shows buildup faster than long hair.
Trying to force a ponytail that isn’t there: If the elastic has to stretch the hair into submission, the style will fall apart or pull at the scalp. Use a half-up version, a twist, or a tucked knot instead.
Choosing accessories that are too big: Wide headbands, giant clips, and oversized scrunchies can swallow a pixie or short bob. The haircut ends up looking smaller than it is. Scale the accessory down.
Ignoring the cowlicks and natural part: If your hair wants to split at one side or kick up at the crown, fighting that pattern usually makes the style puffier. Work with the growth direction. It saves time and keeps the shape cleaner.
Pinning only the surface layer: A surface pin may look fine at first, then slip as soon as you move. Catch a little bit of the hair underneath the section, or cross two pins so the style has a real anchor.
Making everything too sleek: A polished finish can look sharp, but on short grow-out hair it often exposes every uneven line. Leave some texture where the cut needs it. A bit of softness covers a lot.
Variations for Fine, Thick, Curly, and Bang-Grow-Out Hair
Fine-Hair Lift Kit: Use mousse at the roots, dry shampoo at the crown, and fewer pins than you think you need. Fine hair looks best when the shape is airy, not packed down. A deep side part and one clean tuck usually beat five accessories fighting for attention.
Thick-Hair Control Plan: Section the hair smaller before styling. Thick hair has more weight, so twists and braids need extra pins and a stronger hold product. A matte gel or cream near the hairline keeps the edges from blooming out by noon.
Curly Grow-Out Rhythm: Work with the curl pattern instead of forcing symmetry. A headband, scarf wrap, or one-sided pin sweep often looks better than a tight knot. Let the curls sit where they want, then control only the front and nape.
Bang-Grow-Out Fix: Mini braids, temple pins, and deep side parts are the best friends of long bangs that keep falling into your eyes. If the fringe is in that scratchy mid-length phase, tuck it, braid it, or pin it before it starts frizzing.
Heat-Free Week: Use scrunching, air-drying, and accessory-based styles like scarves and clips. This is the version for hair that’s tired, dry, or just overdue for a break. The cut still looks styled. It just doesn’t need hot tools to get there.
Keeping Short Hair Tidy Between Washes
Short hair usually needs a little more maintenance than people expect, especially when it’s growing out. The good news is that the fixes are small. You do not need a full restyle every morning. You need a quick reset and a clear plan.
At night, remove any tight pins or elastics before sleeping so you do not wake up with weird dents at the temples or pressure marks on the crown. If you’re wearing a scarf or want to preserve a sleek shape, a silk pillowcase helps. It cuts down on friction, which keeps the shorter layers from fraying out at the edges.
In the morning, dry shampoo at the root can revive body fast. If the hair is already textured, a little water on the fingertips plus a pea-sized bit of cream on the ends can wake up the shape without making it heavy. For sleek styles, a quick pass with a flat iron on the front pieces is often enough. Ten seconds beats a full blow-dry when you’re pressed for time.
Product buildup is the part people forget. If you use gel, wax, or pomade often, wash thoroughly every two or three days, or sooner if the roots start to feel coated. A clarifying shampoo every week or two can keep the crown from getting dull. And if the cut is starting to bulge at the back or flip hard at the ends, a trim every six to eight weeks usually brings the shape back into line.
Frequently Asked Questions

What length counts as “short” for these styles?
Most of these work on a grown-out pixie, a bixie, or a bob that sits somewhere between the jaw and the collarbone. Some, like the headband push-back and mini braid, work on very short lengths; others, like the low knot and low pony, need a bit more length at the nape.
How do I keep bobby pins from sliding out of short hair?
Cross them in an X, and slide them against the direction the hair wants to move. Pins grip better when they catch a little texture, so dry shampoo or texture spray first can make a huge difference.
Can these hairstyles work on curly or coily hair?
Yes, but the style should follow the curl pattern instead of flattening it. Scarf wraps, pin sweeps, twisted nape styles, and headbands tend to work especially well because they control the edges without fighting the texture.
What if my hair is too short for a ponytail?
Skip the ponytail and move to a half-up twist, a mini topknot, or a tucked side style. Forcing a tiny pony on hair that is too short usually ends in slipping, pulling, and a lot of irritation.
How do I hide bangs while they’re growing out?
A deep side part, a mini braid along the hairline, or a barrette sweep usually handles that stage best. If the fringe is too short to braid cleanly, pin it at the temple and let the longer pieces fall over it.
Do I need heat to make these styles work?
No. Heat helps with polish, but several of these styles — the scarf wrap, headband push-back, twist crown, and textured clip-back — work just fine with air-dried hair. A bit of product and a good sectioning comb do more than people expect.
How often should I trim while growing out short hair?
A trim every six to eight weeks usually keeps the shape from turning into a puffed-out, shapeless middle stage. You can leave the top slightly longer if you want more styling options, but the nape and sides tend to need regular cleanup.
What if my hair keeps flipping out at the ends?
That usually means the perimeter is in the awkward zone where it’s neither long enough to lie flat nor short enough to sit tight. A small bend with a flat iron, a tucked style, or a low pin-up is usually easier than trying to wrestle the ends straight.
Can I wear a claw clip on a pixie?
Sometimes, but only if the top layer is long enough to twist into a small bundle. A mini claw clip works much better than a big one, and even then the style is usually more of a half-up hold than a full updo.
The In-Between Stage Has Better Options Than It Gets Credit For
Short hair growing out is not a styling dead end. It’s a different shape, that’s all. Once you stop expecting a tiny ponytail from hair that doesn’t have one, the options open up fast.
The best part is how many of these styles need almost nothing: a side part, one braid, a few pins, a narrow headband, a little grip at the root. Small moves. Real payoff. And when the cut starts to behave again, you’ll know which shapes suit your hair instead of guessing at random every morning.
So the next time the back flips, the fringe hangs in your eyes, or the sides refuse to sit flat, reach for the style that matches the length you actually have. The awkward stage can look tidy, sharp, even a little stylish — if you stop treating it like a problem and start treating it like a phase with options.