Side-swept hairstyles earn their keep on mornings when the mirror is handing you bad news: flat roots, a cowlick that woke up fighting, and exactly six minutes before you need to leave. The magic is not that these styles are fussy. It’s the opposite. One clear part, one strong direction, and one anchor point — a pin, a barrette, a twist, a braid — can make hair look like you planned the whole thing.
A side sweep also does something that a straight-down style rarely manages before coffee: it creates shape fast. Hair falls across the forehead, tucks behind one ear, or drifts over one shoulder, and suddenly the face has a frame. The trick is that the style reads as deliberate even when the finish is a little loose. That looseness is an asset. It gives you room for day-two texture, a little frizz, or the fact that you had better things to do than spend twenty minutes polishing a part.
And yes, these looks work on more than one hair type. Fine hair gets lift from a deep side part. Thick hair behaves better when it’s guided into a braid or low twist. Curly hair looks cleaner when you follow the curl pattern instead of fighting it. Short hair has its own version of the move, too. The best part is that the fix changes very little between them. Same basic idea. Different finish.
Why These Side-Swept Looks Earn Their Keep

-
One Direction Does the Heavy Lifting: A side part or side anchor gives the eye a clear line to follow, so even a simple ponytail looks thought-out instead of leftover.
-
Day-Two Hair Helps, Not Hurts: Slightly lived-in roots and a bit of grip make braid, twist, and clip styles hold better than squeaky-clean hair ever does.
-
The Front Sections Do the Masking: A few pieces swept across the forehead hide sleepy roots, awkward grow-out, and the place where your hair refused to behave.
-
Most of These Need Few Tools: A tail comb, two or three pins, and one styling product can carry a lot of the work.
-
They Fit Different Hair Lengths: Pixies, bobs, lob-length hair, and long waves all have a side-swept version that works without forcing a fake shape.
-
You Can Change the Mood in Seconds: Swap a plain elastic for a barrette, scarf, or claw clip, and the same base style reads cleaner, softer, or sharper.
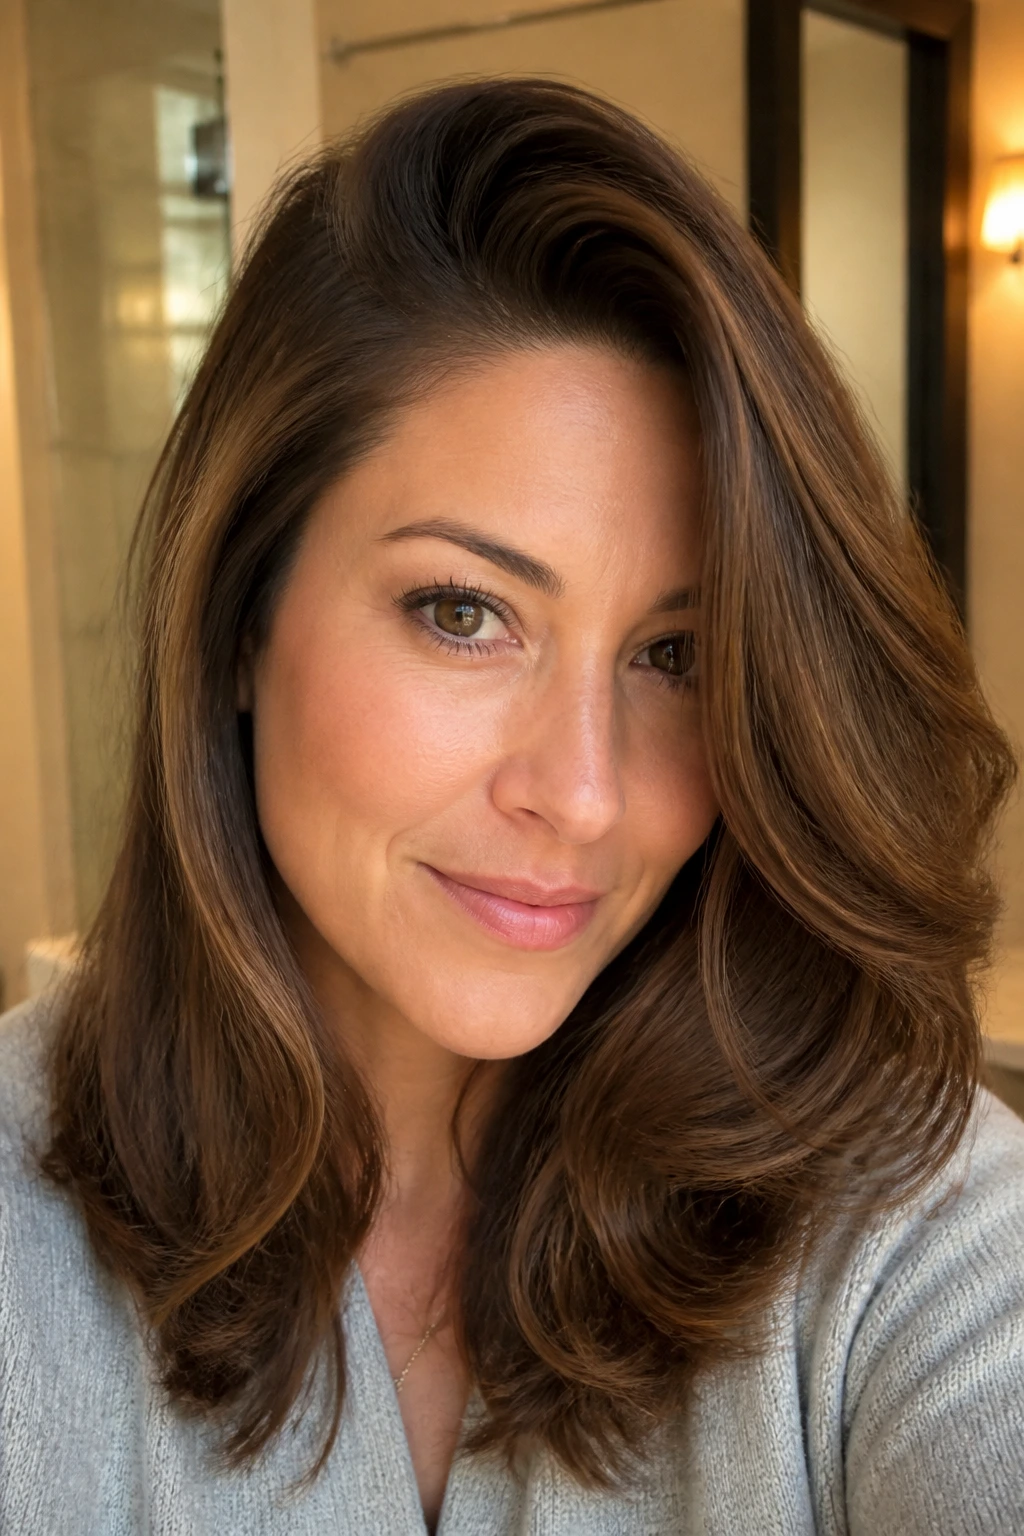
1. Deep Side Part with Soft Blowout
A deep side part changes the whole mood of a blowout. The heavier side drops across the forehead, the lighter side gets tucked back, and suddenly the hair has shape even if the ends are only loosely bent. It’s one of those styles that buys you time because it looks intentional before you’ve done much at all.
Start with a little mousse at the roots, then blow-dry the top section in the direction you want the hair to fall. Use a round brush on the front pieces and lift the crown for a minute or two; that small bend at the root is what keeps the style from collapsing by lunch. The finish should feel soft, not shellacked. A drop of serum at the ends is plenty.
This one works especially well when your hair is clean but flat. It also plays nicely with layers, because the front pieces can swing without making the whole cut look choppy. The secret is the part line itself — place it above the arch of the eyebrow, not directly in the center of the scalp, and the whole shape suddenly has more movement.
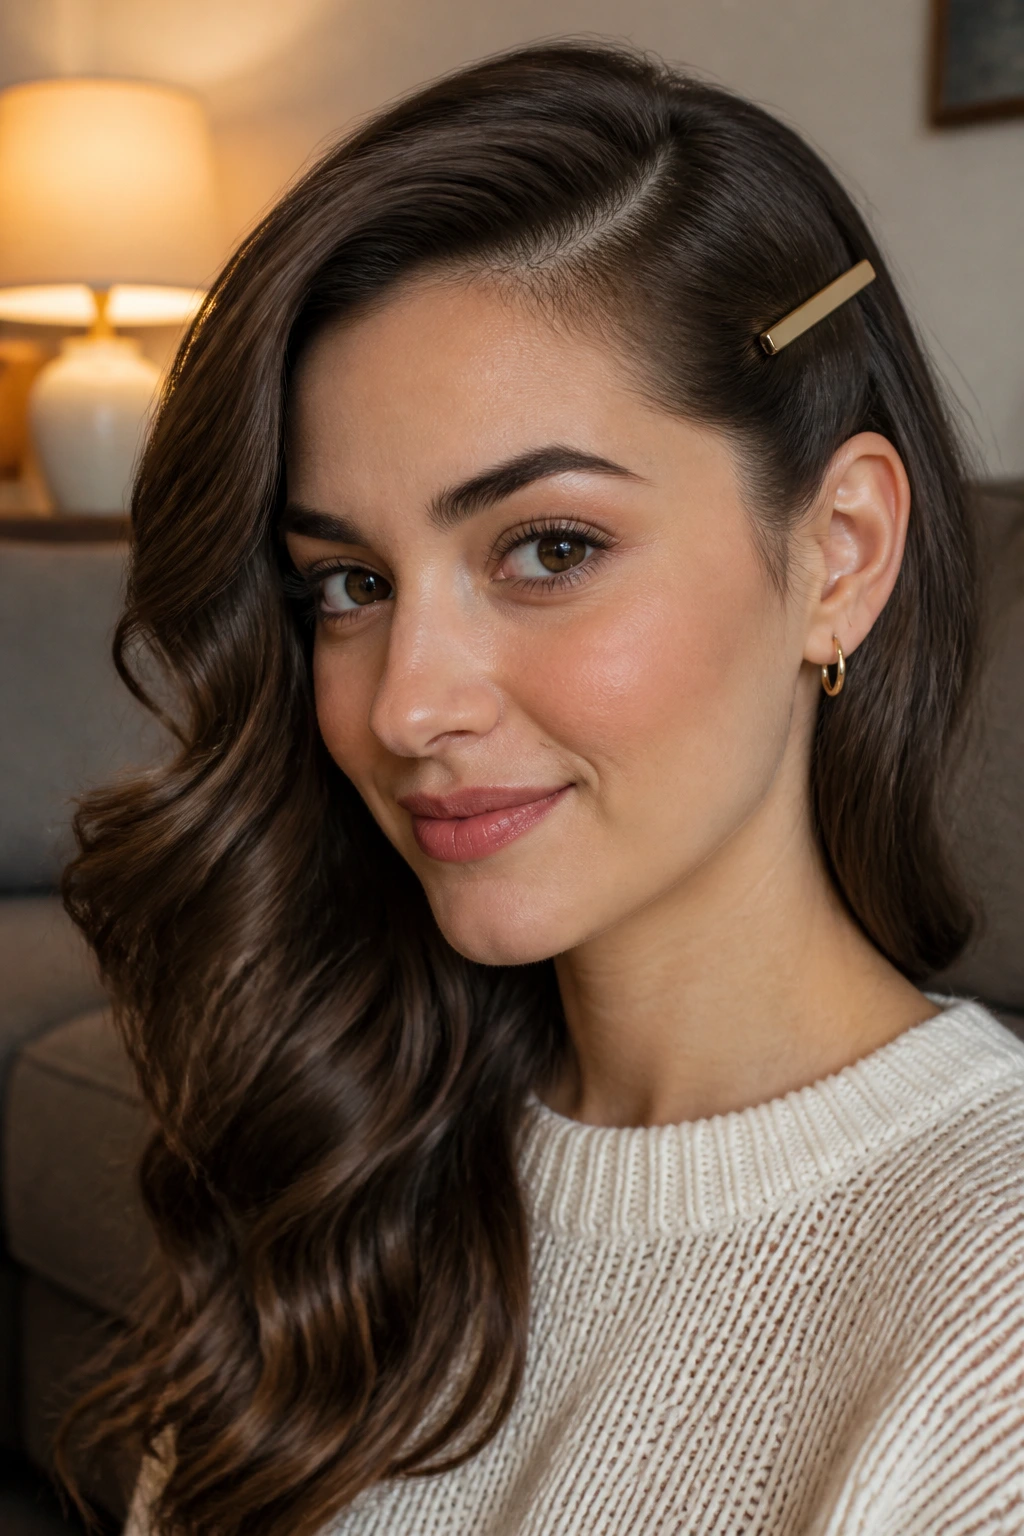
2. Side-Swept Waves with a Barrette
A barrette turns loose waves into a decision. Without it, the front half of the hair can look like it wandered off course. With it, the sweep has a clear anchor behind one ear, and the rest of the wave gets to do the pretty part.
Curl or wave the hair in 1-inch sections, then brush it out once so it looks lived-in instead of spiraled. Gather the heavier side low and slide a flat barrette just behind the ear, close to the scalp. Metal barrettes usually sit flatter than padded ones, which matters when you want the hairline to stay close to the head instead of puffing out.
This is a very good answer for medium and long hair that’s behaving but not thriving. A mist of texture spray at the mid-lengths gives the clip something to grip, and if your hair slips, cross two bobby pins under the barrette. Nobody sees them. They just stop the whole side from sliding forward every time you turn your head.
3. Low Side Ponytail with Polished Ends
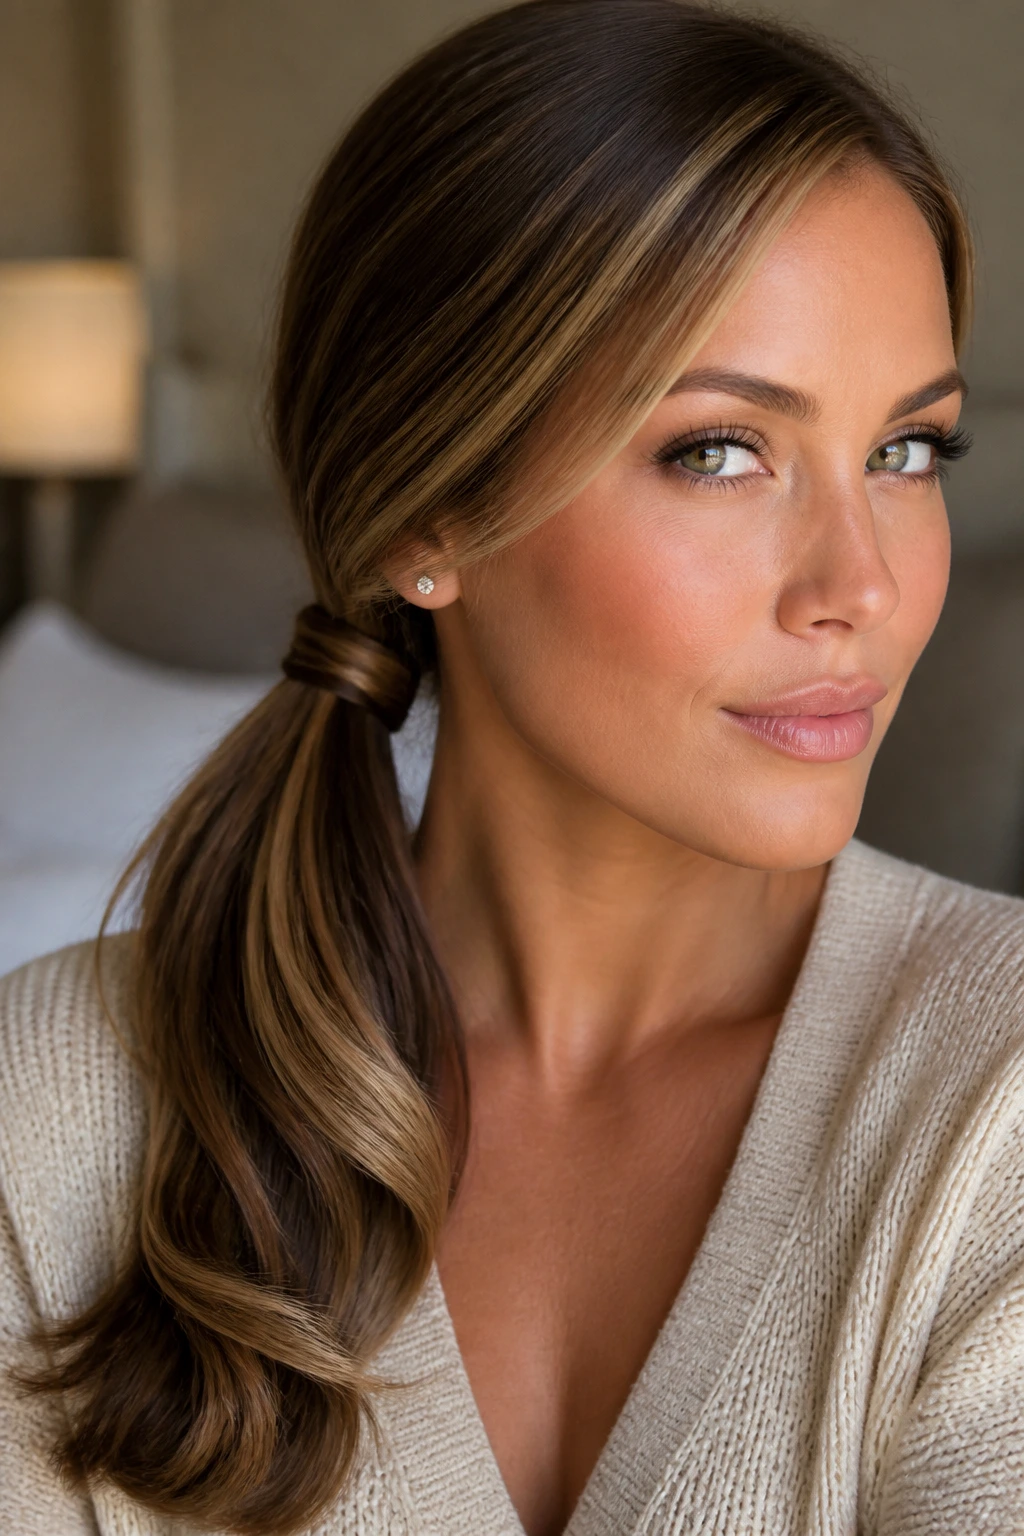
Why does a low ponytail feel more finished the second it moves behind one ear? Because the weight shifts. The front opens up, the shape of the face changes, and the whole thing stops looking like a fallback option.
Brush the hair smooth and place the elastic about an inch below the ear on the side you want to feature. That placement matters. Too low, and the ponytail disappears into your collar. Too high, and you lose the easy line that makes the shape flattering. Wrap a small strand of hair around the elastic if you want the finish to look cleaner, then pin the wrap under the ponytail with one bobby pin.
How to Keep the Base Neat
- Use a tiny amount of smoothing cream on the top layer only.
- Secure the ponytail with a covered elastic if your hair is thick.
- Pull one thin front piece free if the style feels too severe.
This works on straight hair, wavy hair, and blow-dried curls that need a second life. The ends can stay glossy or a little piecey; both read well.
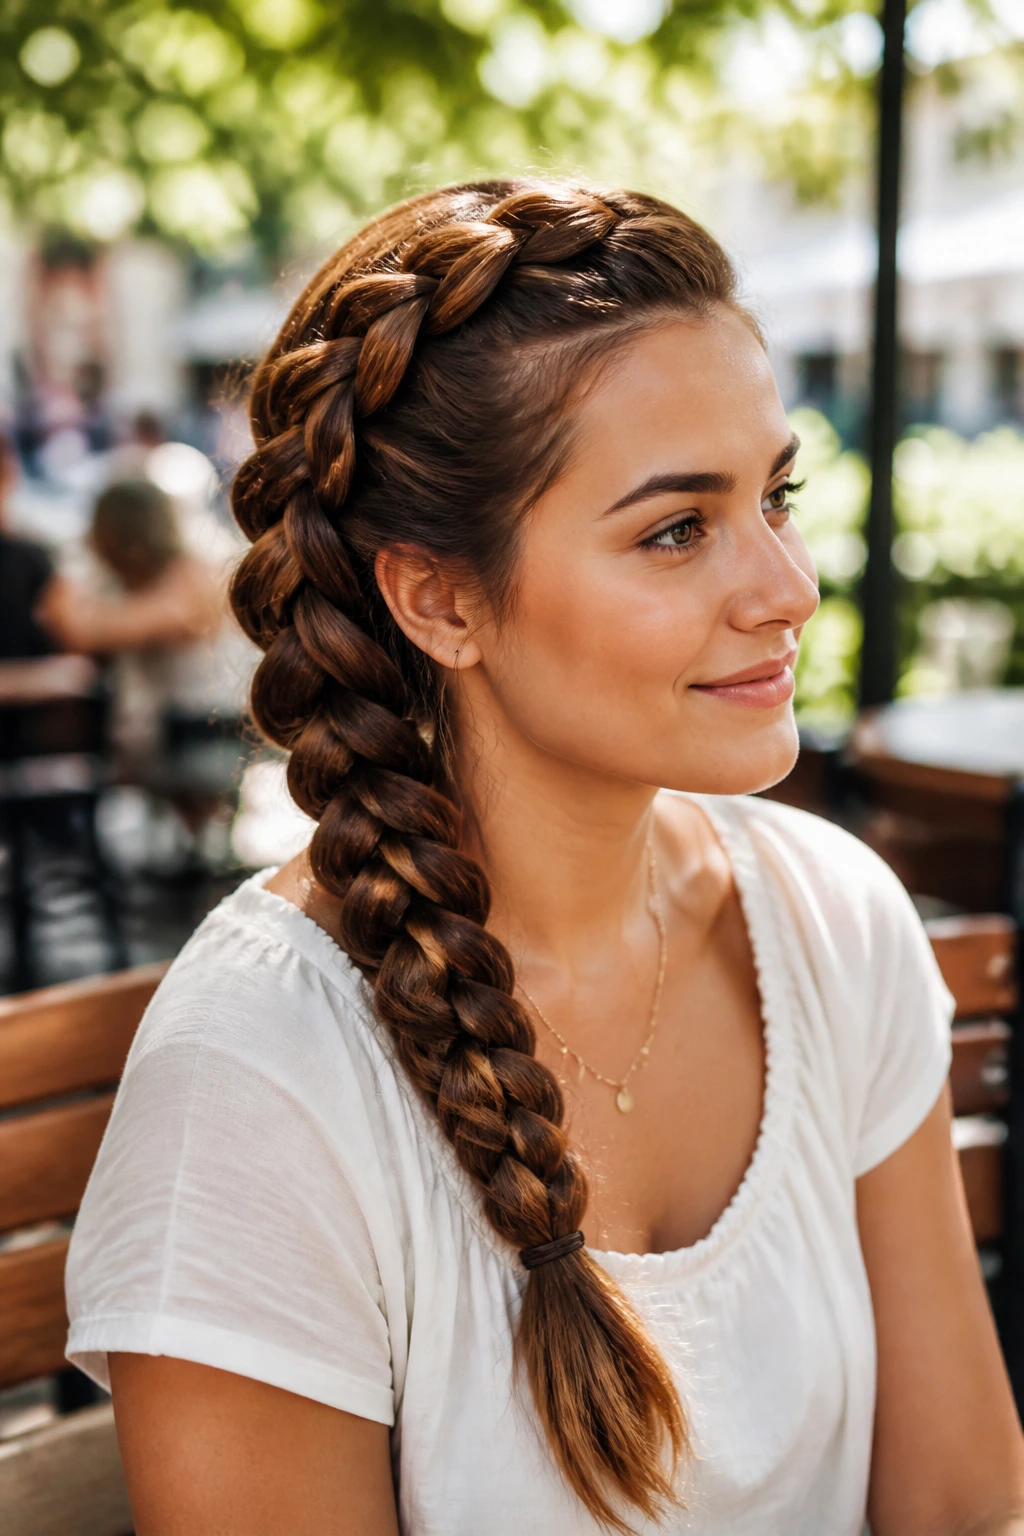
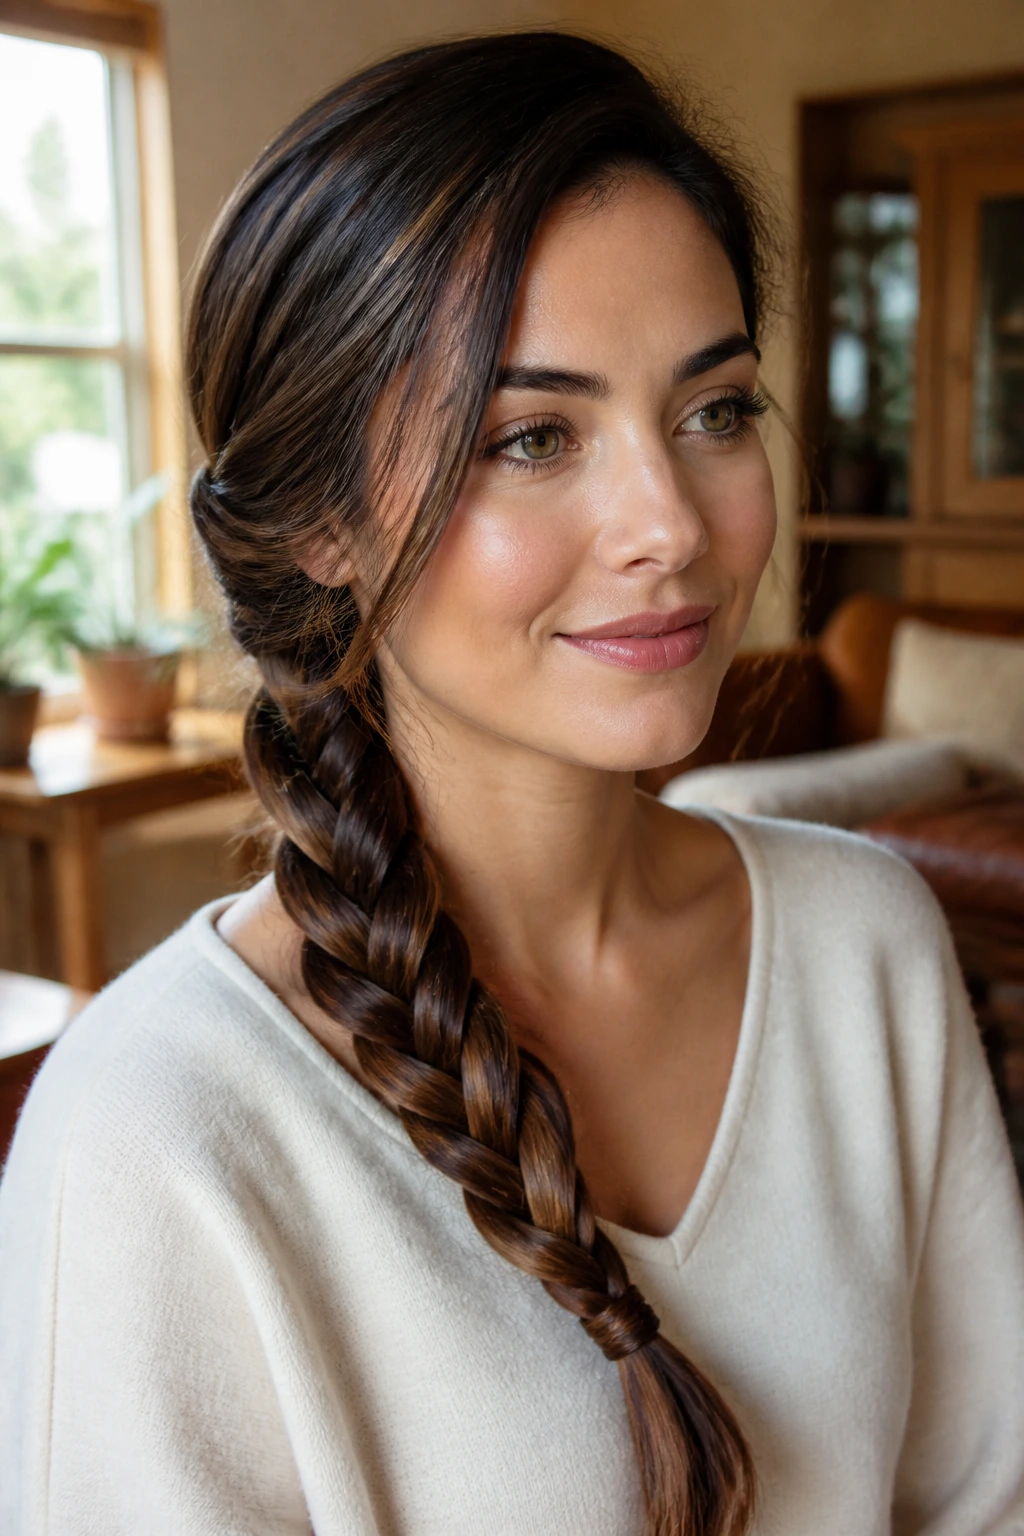
4. Loose Side Braid with Face-Framing Pieces

If you need hair that won’t flop into your coffee while you’re driving, a loose side braid is hard to beat. Start the braid low, just below one ear, rather than back at the crown. That small change keeps the braid from looking like a school uniform version of itself.
Leave two slim front pieces free before you begin, especially if your layers tend to disappear into the braid. Then braid loosely over one shoulder and tug gently at the outer edges once it’s secured. That little widening move — hair people call it “pancaking,” though I’ve never loved the name — makes the braid look fuller without needing more hair than you already have.
- Best for layered hair that drops out of regular braids.
- Good on second-day hair with a little dry shampoo at the roots.
- Stronger hold if you mist the lengths first with light hairspray.
This style is especially forgiving on mornings when your ends are not agreeing with each other. The braid hides a lot. It also leaves the front soft, which is the whole point of a side sweep in the first place.
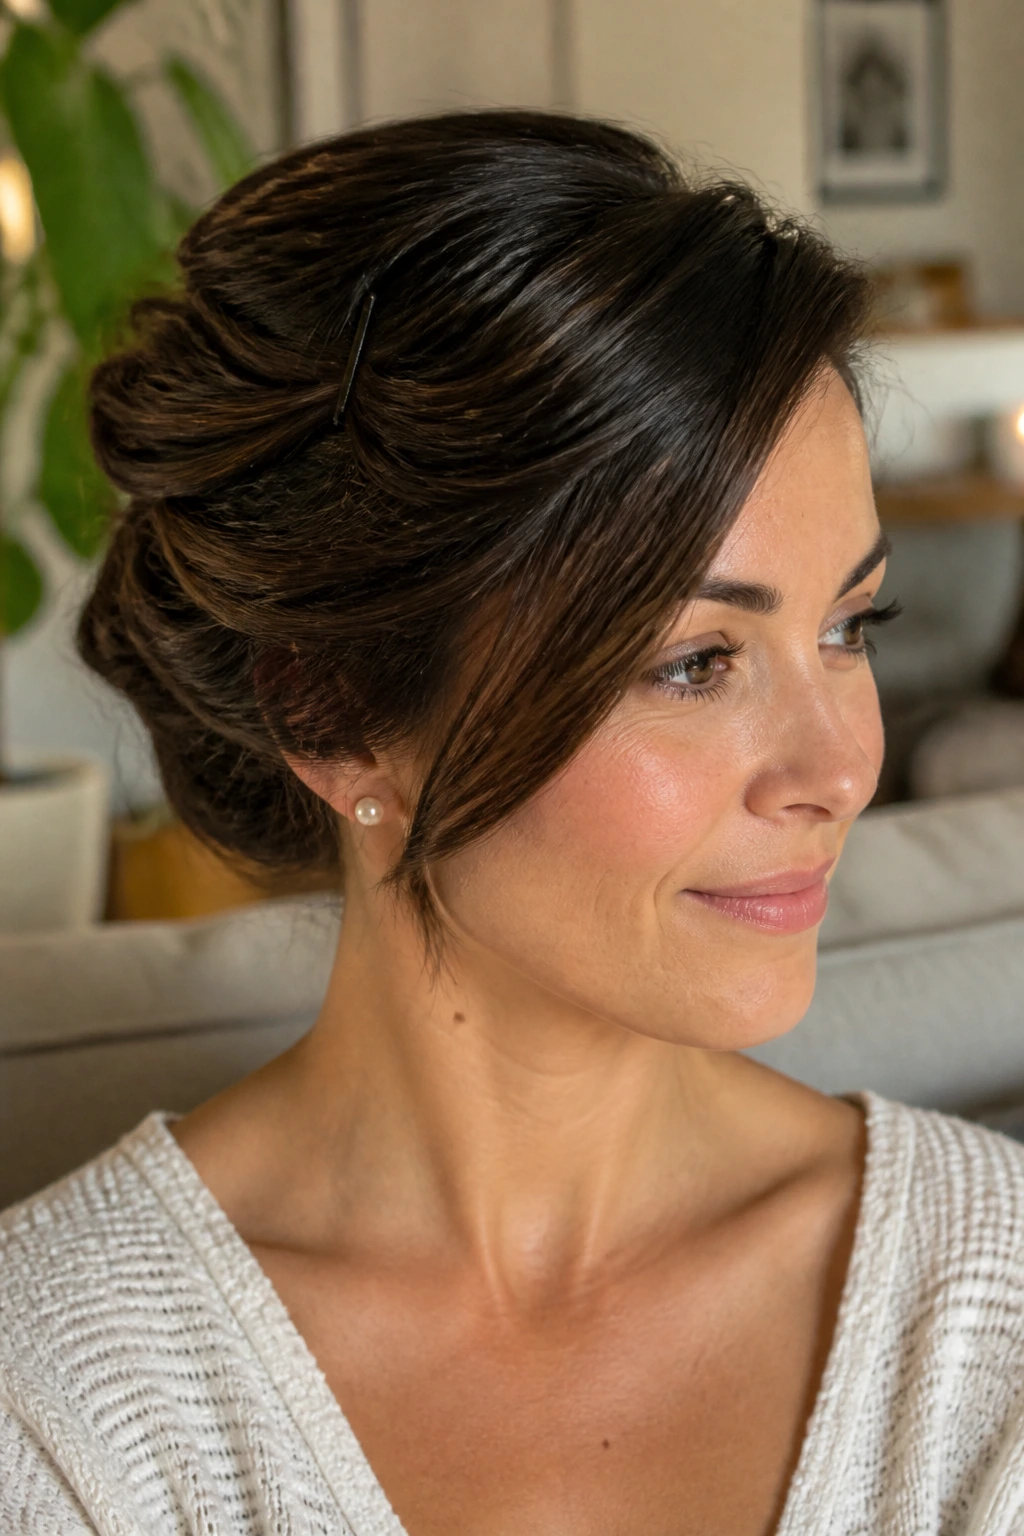
5. Side-Twist Half-Up for Mid-Length Hair
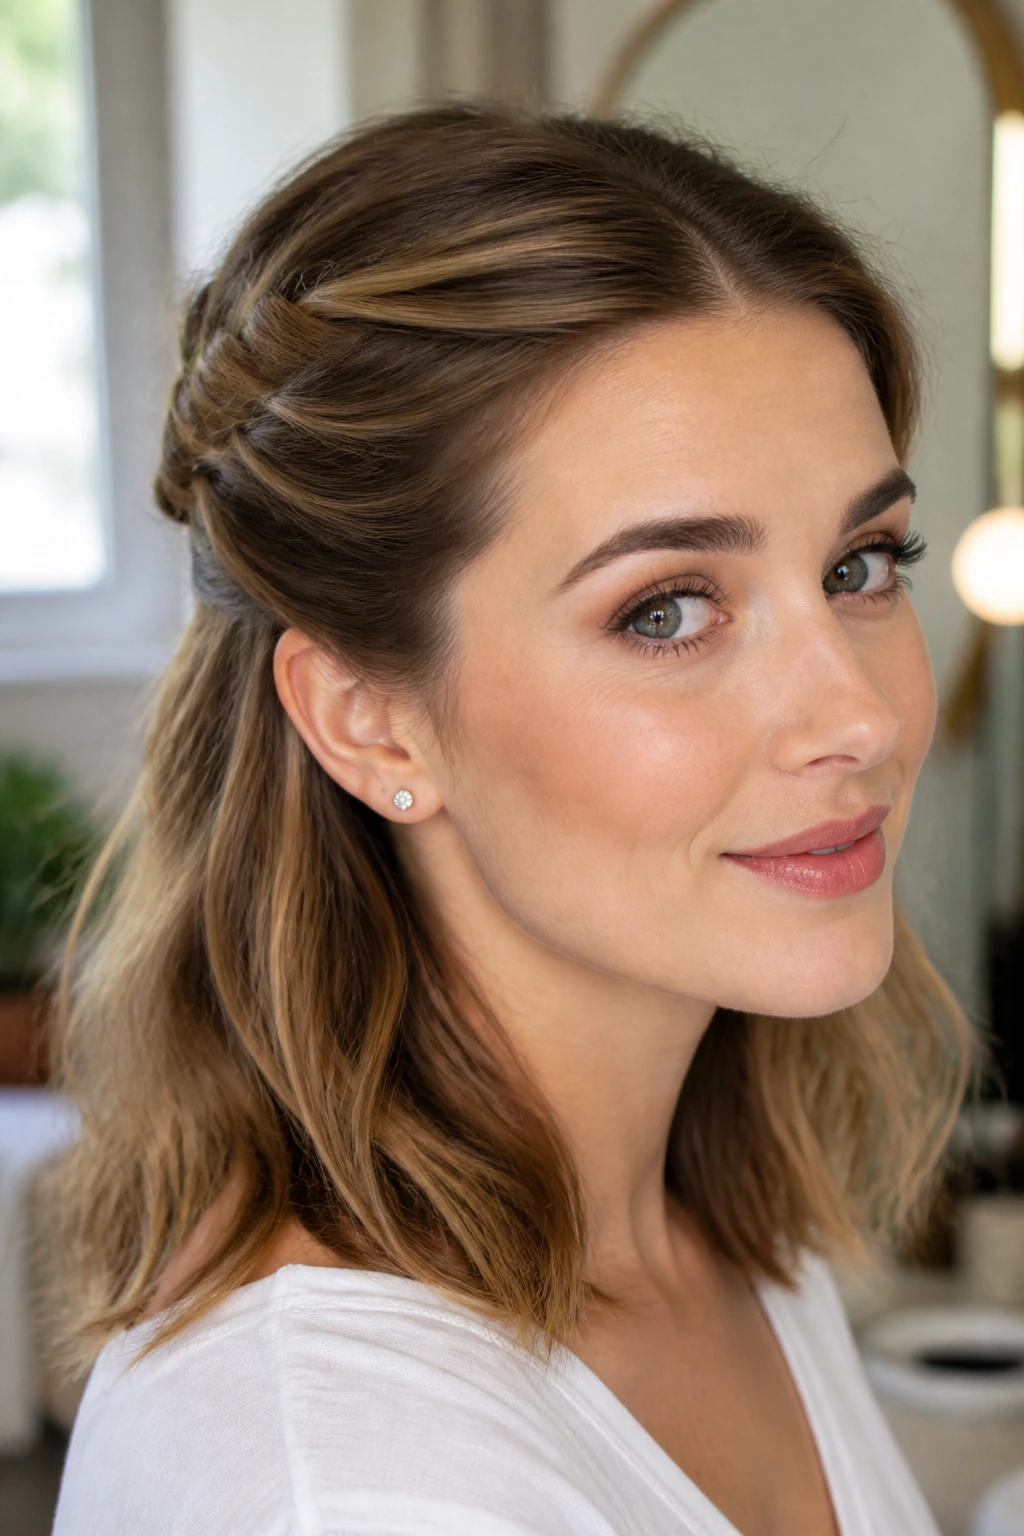
Half-up twists are the quiet little workhorses of the side-swept world. They keep hair off the face without pulling everything back, which matters when your length sits around the collarbone and refuses to choose between up and down.
Take a section from each temple, twist both sections toward the heavier side, and pin them together behind one ear. If the hair is silky, dust the roots with a bit of texture powder first; the twist grips better when the hair has a little roughness. Two crossed bobby pins beat one straight pin every time, especially if you’re dealing with fine hair that slips.
This style looks good with a lob, soft layers, or shoulder-length hair that needs a better shape at the front. It also survives a commute better than a loose clip because the anchor sits under the hair rather than on top of it. That keeps the shape from sliding down your cheek by midmorning.
6. Sleek Side-Tucked Bob
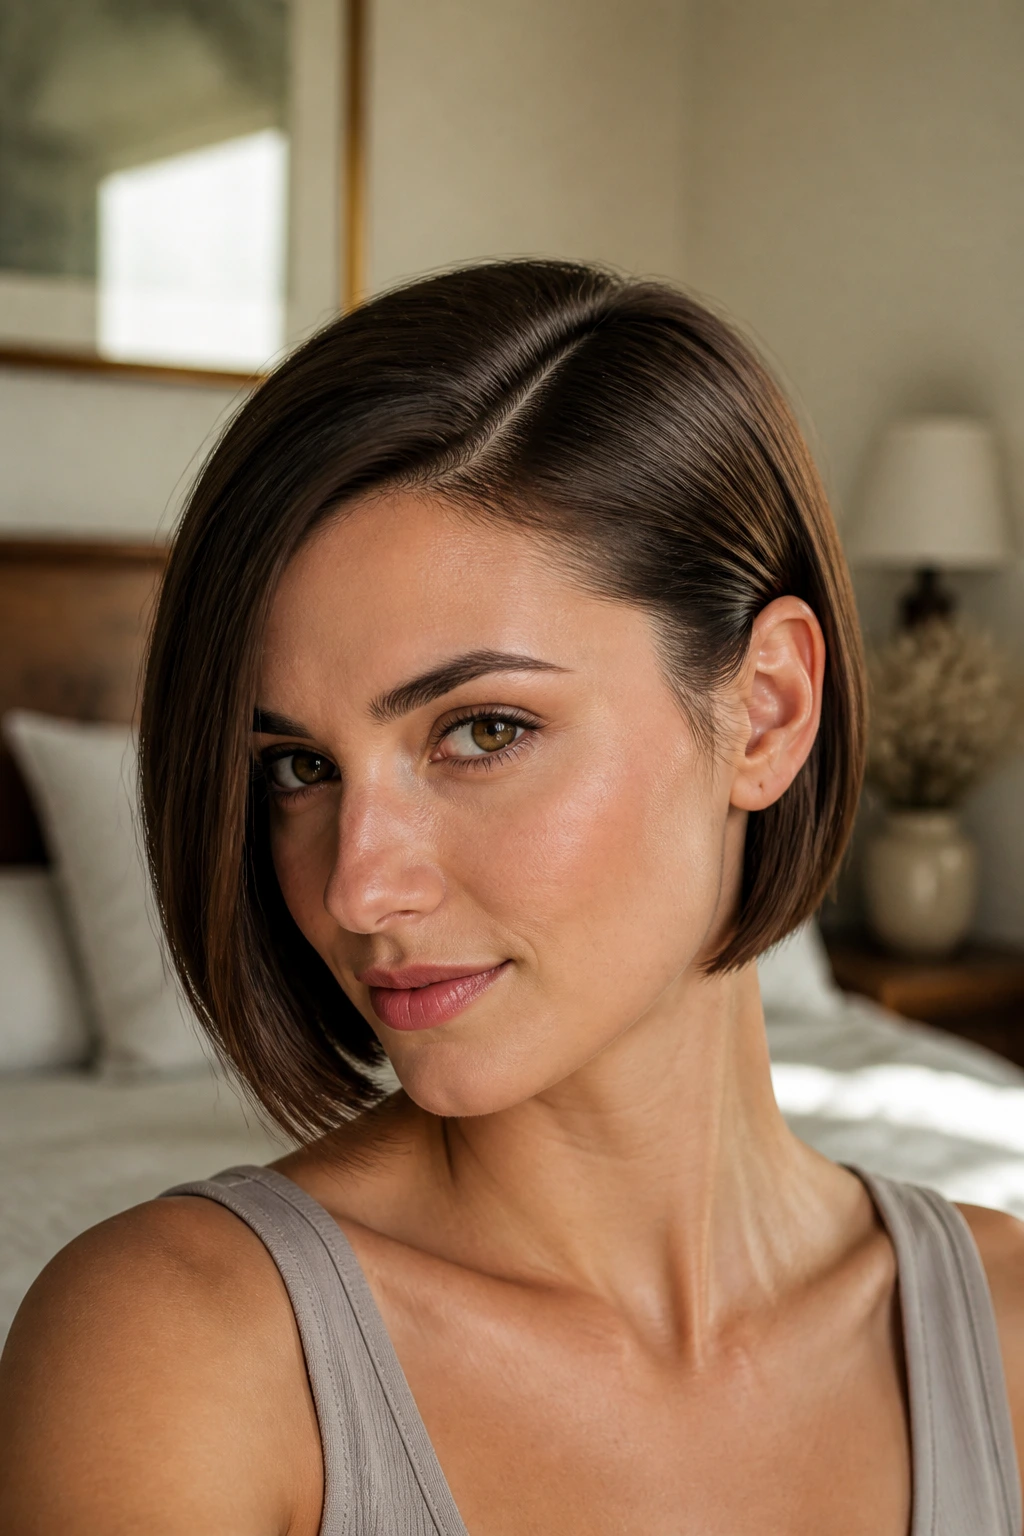
A bob with a deep side part and one side tucked behind the ear has a sharpness that a center part rarely gives you. It feels cleaner. More direct. Less like you’re waiting for the hair to decide what it wants to do.
Work a pea-sized amount of smoothing cream through damp hair, then blow-dry with the nozzle pointed downward so the cuticle lies flat. Create the part while the hair is still warm, and tuck the heavier side back with a small pin hidden just under the top layer. The goal is not to freeze the bob in place. The goal is to let the front plane stay smooth while the ends still move.
This is a good answer for chin-length and jaw-length cuts, especially if you wear earrings or a high neckline. The tucked side opens the face, and the loose side gives the bob a shape instead of a helmet line. Tiny detail, big payoff: press the tuck with your palm for three seconds after pinning. It helps the hair remember where to sit.
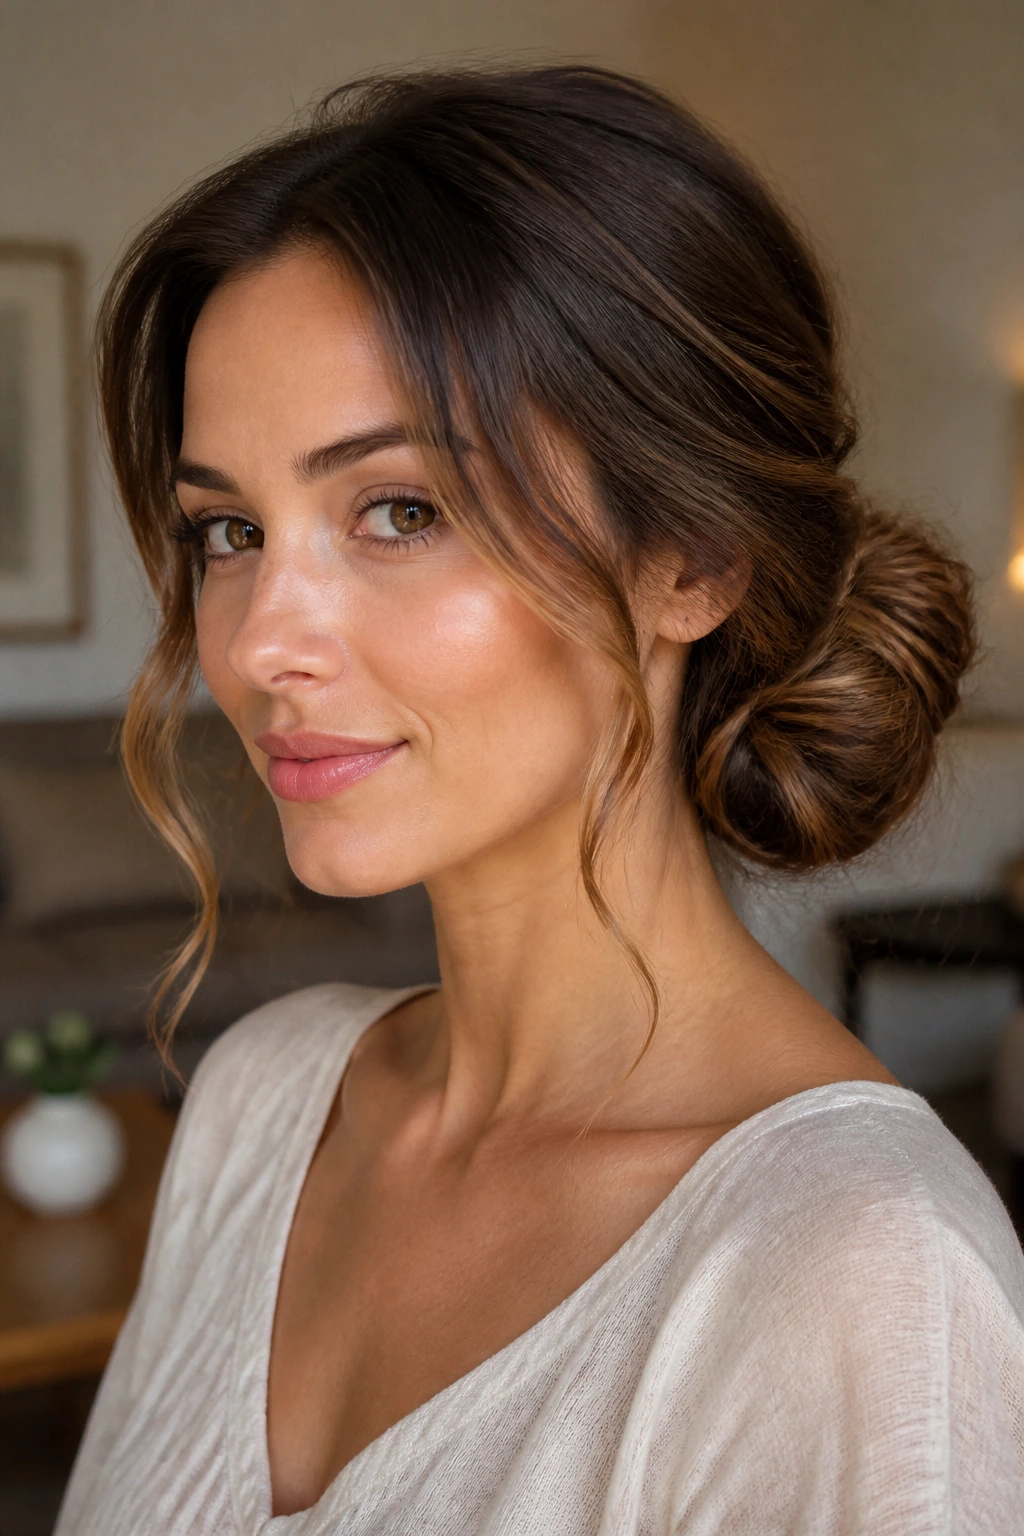
7. Messy Side Chignon
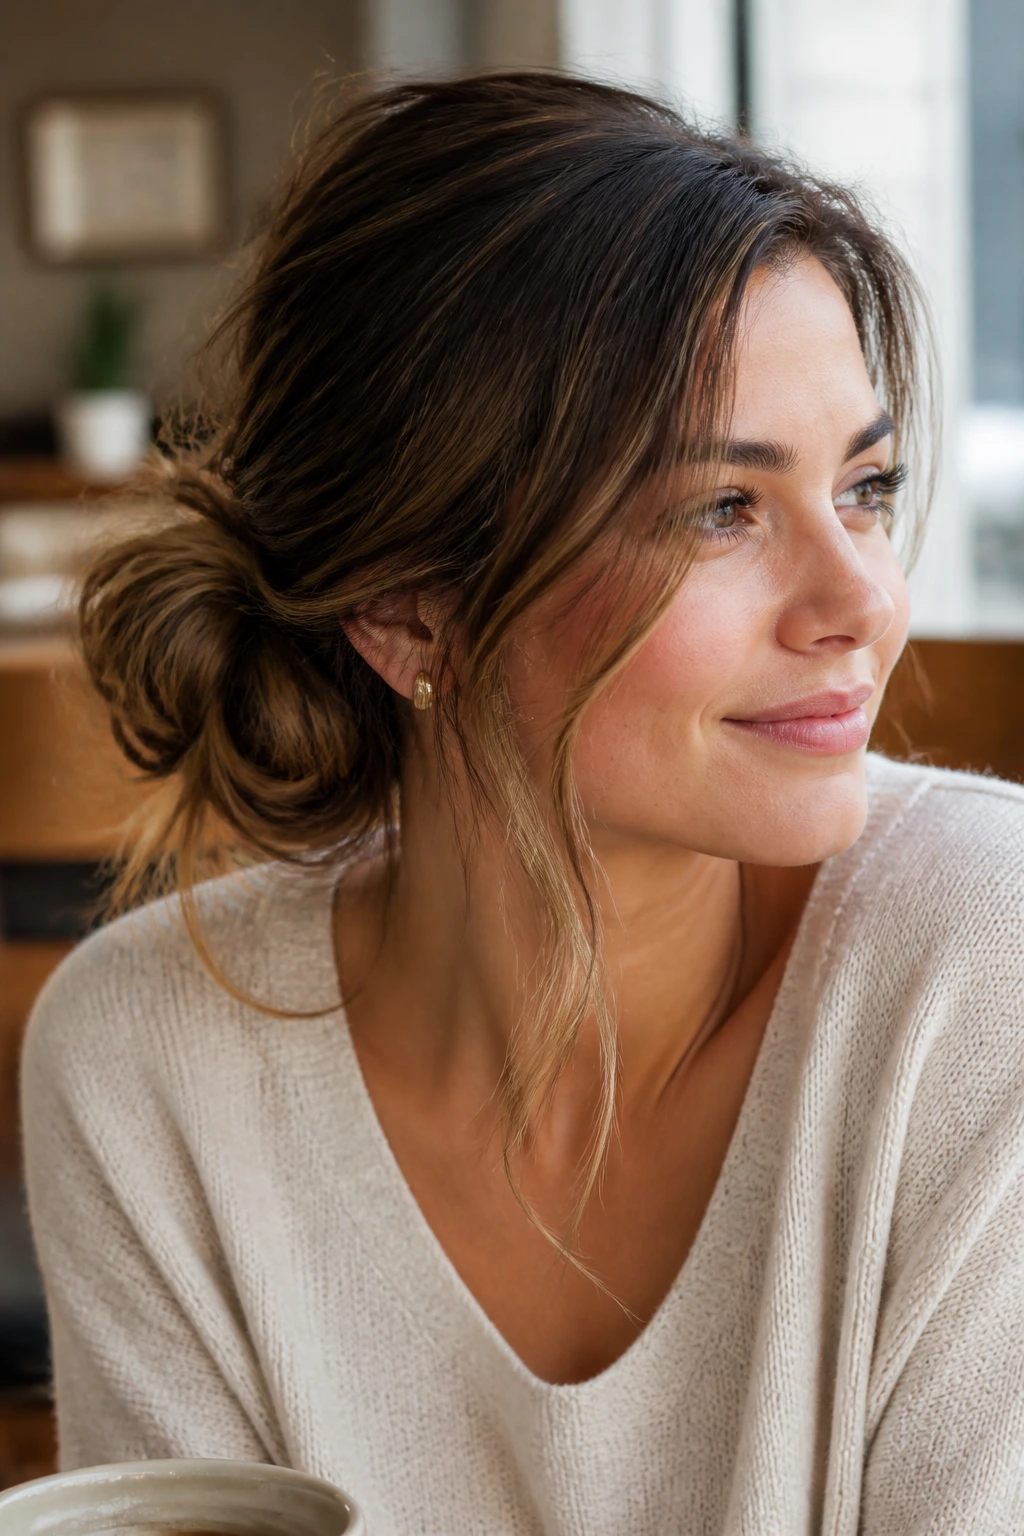
If you need a style that survives a commute, a coat collar, and a quick lunch run, a side chignon is the one I’d put money on. It’s the kind of knot that looks better when it isn’t too perfect. A little collapse around the face only helps.
Gather the hair low at the nape, shift the bundle toward one side, and twist it into a loose bun just behind the ear. Pin the bun with U-pins or two to four bobby pins crossed through the base. Leave a few ends out if your hair is layered; trying to force every strand inside the knot usually makes the bun look harder than it needs to be.
This works especially well on hair with some bend or texture. Very silky hair may need a mist of dry shampoo first so the bun doesn’t unravel the second you move. A wispy piece near the temple softens the line, but keep it to one or two pieces. Too many and the style starts looking accidental.
8. Dutch Side Braid for Thick Hair
A Dutch braid gives thick hair the structure it wants. The underhand crossing sits on top of the hair instead of disappearing into it, so the braid stays visible and the style keeps its shape through the day.
Begin near the front hairline on the heavier side and braid under, not over, as you move toward the shoulder. Keep the sections tidy but not tiny; thick hair can handle chunkier grabs without losing definition. Once you reach the end, secure it with a firm elastic and gently tug the outer loops so the braid spreads across the hair instead of standing upright like a rope.
What Makes It Hold Better
- Start with hair that has a little grip, not freshly washed silk.
- Keep tension even from the first cross to the last.
- Use a strong elastic at the end, because thick hair can snap the weak ones.
This braid is one of the few styles that can look more polished when the day gets rough. The braid just sits there and keeps behaving.
9. Claw-Clip Side Twist for Day-Two Hair
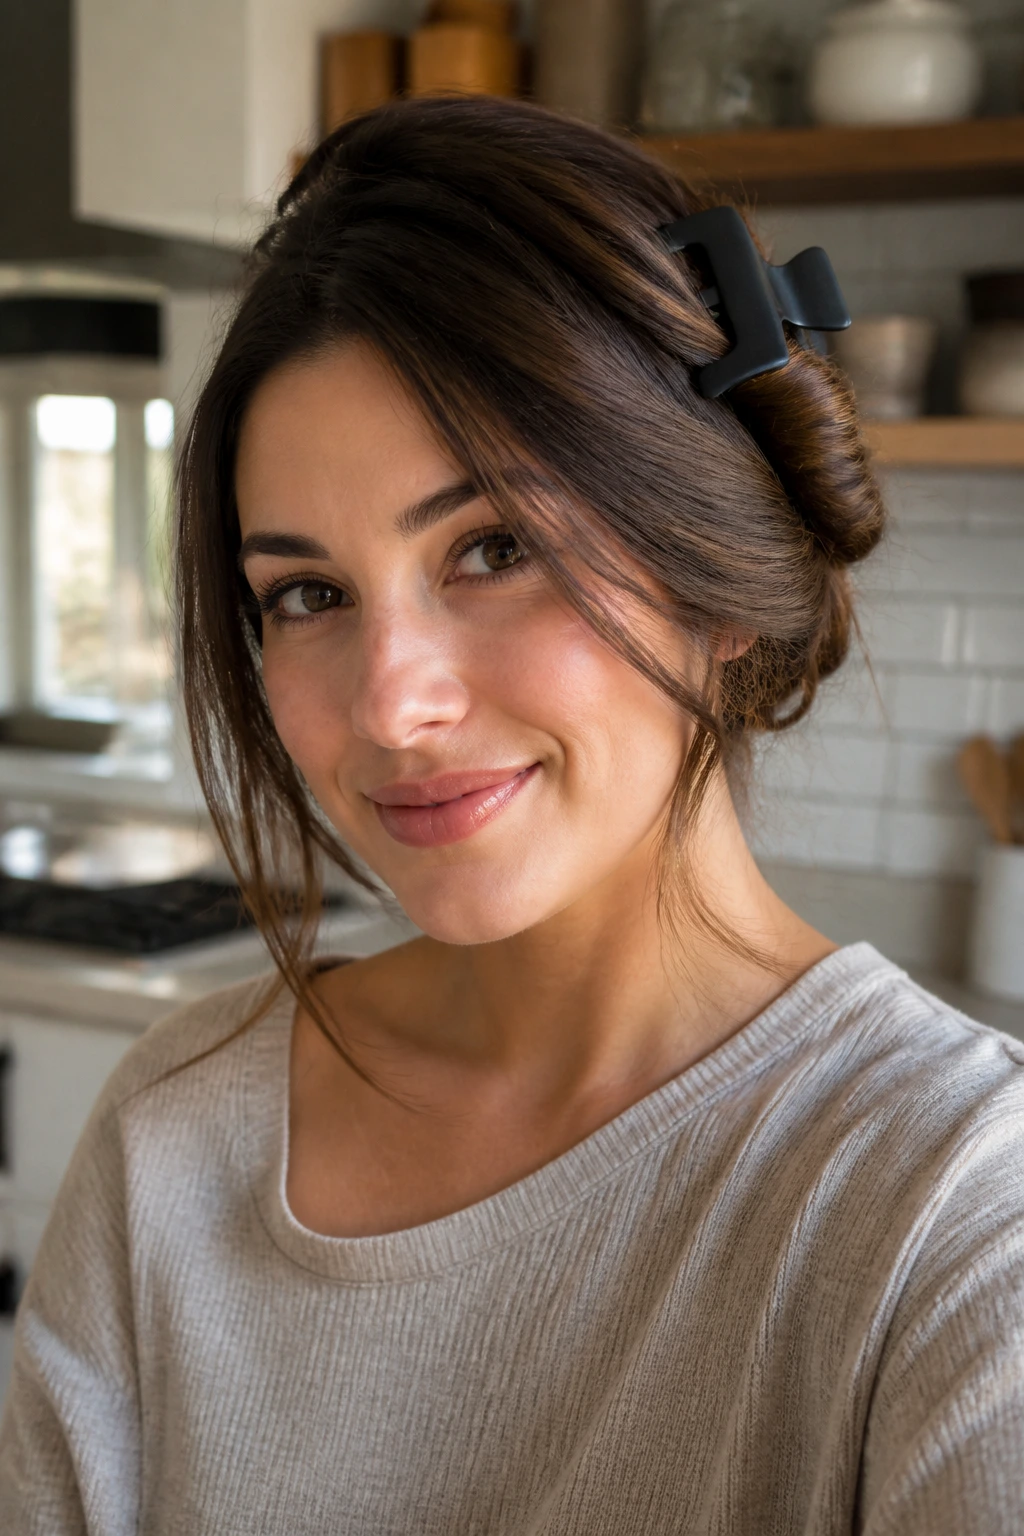
A claw clip earns its shelf space on mornings when your hair is almost cooperating. Twist the length low toward one side, lift the twist upward, and catch it with a medium or large clip where the twist meets the head. The shape should feel anchored, not squeezed.
Day-two hair is ideal here because it has enough texture to stay put. If the roots are oily, add dry shampoo first and wait thirty seconds before touching the hair again. That little pause helps the powder absorb instead of turning chalky. A soft bend at the ends keeps the look from feeling too rigid.
Use this version when you want the face open but don’t have time for pins and parting. It’s fast. It’s forgiving. And if the clip is matte or neutral-colored, the whole thing reads cleaner than a shiny plastic version that shouts for attention.
10. Side Bubble Ponytail
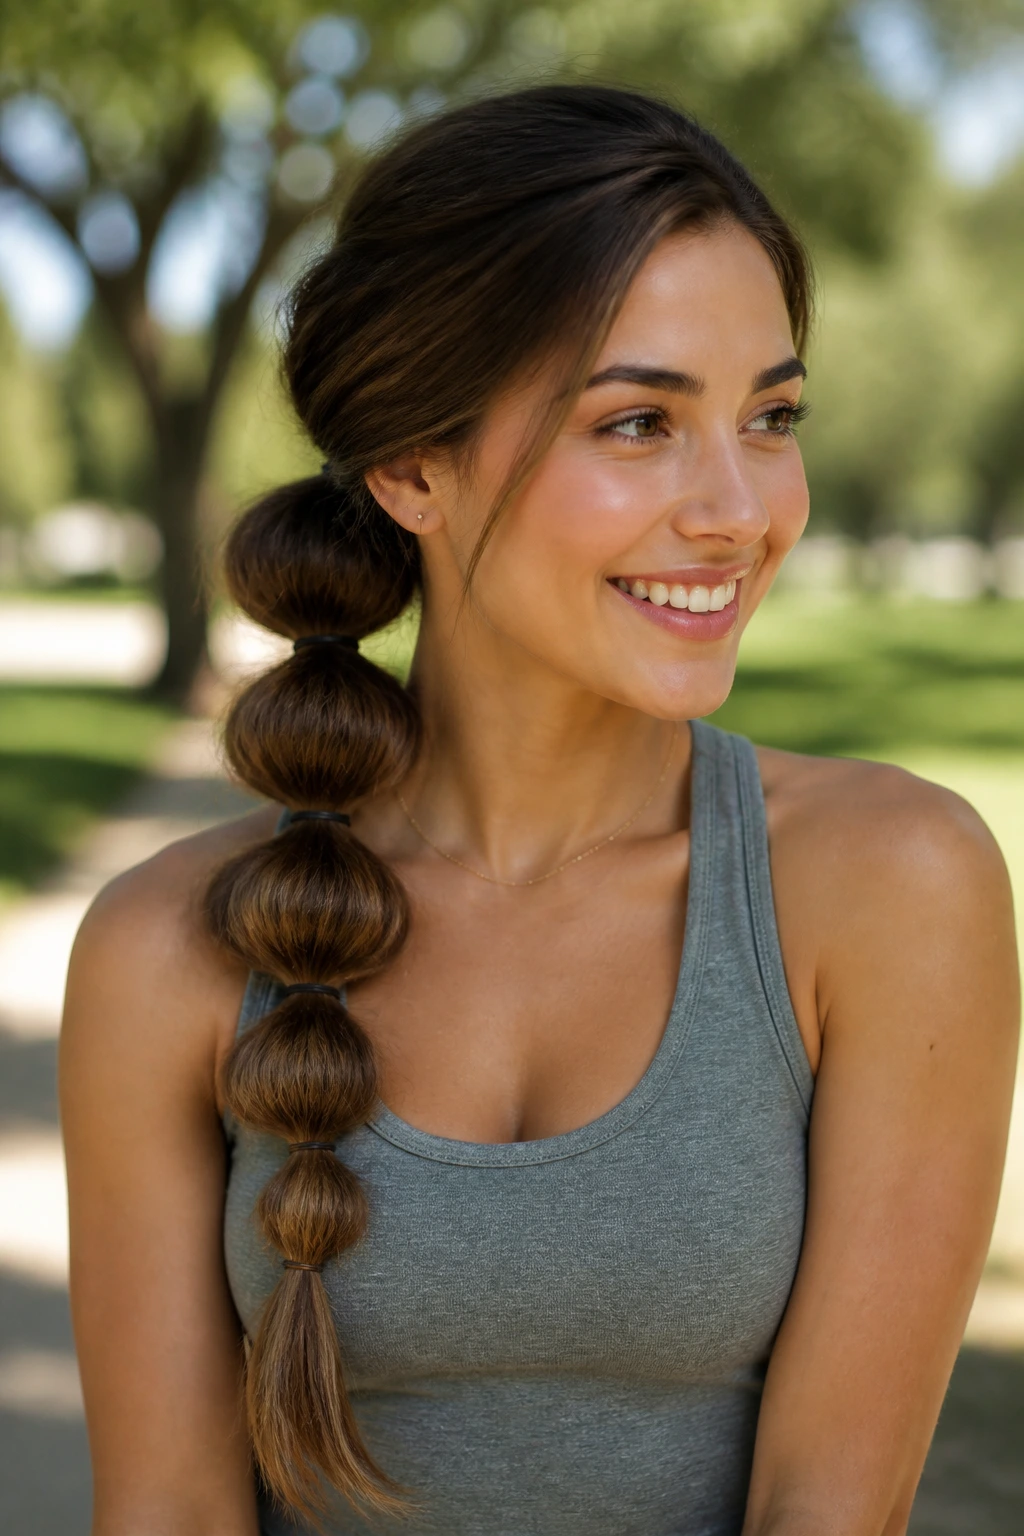
A bubble ponytail is basically a regular ponytail with better posture. The shape breaks up the length into small rounded sections, which makes the style look deliberate even if the actual styling time was not long at all.
Pull the ponytail low and to one side, then add small elastics every 2 to 3 inches down the length. Gently puff each section between the elastics so the “bubbles” form. If your hair is fine, tease each section with your fingers before tightening the next elastic. If it’s thick, keep the spacing a little wider so the bubbles don’t look cramped.
This style is useful when plain ponytails feel too bare but a braid feels like too much work. It also looks better with a side part than a center part, because the sweeping line gives the length somewhere to go. A strand wrapped around the base hides the first elastic and makes the whole thing look less gym-bag and more day plan.
11. Pixie with a Swept Fringe

Short hair gets left out of hairstyle lists too often, which is silly, because a pixie with a swept fringe can do a lot with almost no effort. A little paste, a little direction, and the front suddenly has purpose.
Work a pea-sized amount of styling cream or paste between your fingertips, then push the fringe across the forehead toward one side. If the front wants to stand up, blow-dry it for ten to fifteen seconds while guiding it with your fingers or a small round brush. Keep the finish touchable. Hard gel can make a pixie look stiff, and stiff hair around the face tends to age the whole cut.
This is a good move for short cuts that need a daily reset. It also works when the back is neat but the front has gone flat or grown out. The shape lives in the fringe. Get that line right, and the rest of the cut can stay simple.
12. Curly Side Puff with Defined Edges
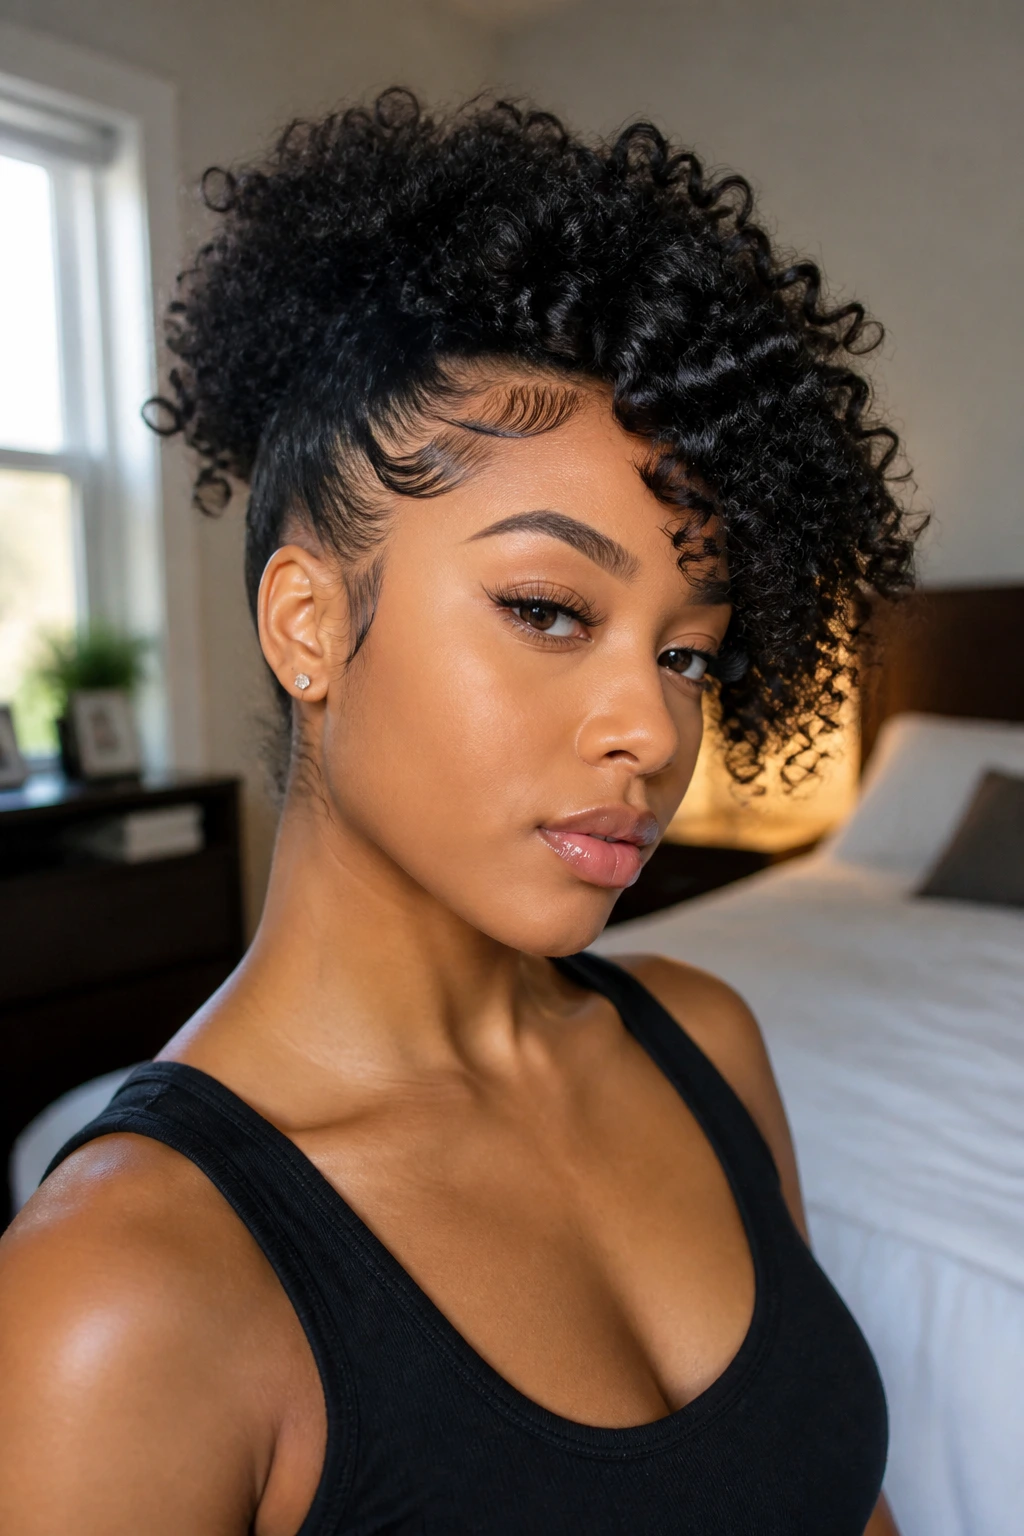
Curly and coily hair has its own side-swept language, and it’s a good one. Instead of forcing the curls flat, let the side part guide where the volume lands. One side can sit fuller while the front gently sweeps across the forehead.
Start with leave-in conditioner on damp hair, then define the curls with cream or gel while they’re still clumped enough to hold shape. After drying, part the hair deeply on one side and gather the shorter side with a pin or decorative clip if needed. Edge control around the hairline can clean up the front without dragging the rest of the style down.
This version is especially good when you want volume but not chaos. It keeps the curls visible, which matters. Curls look best when they’re treated like the feature, not the problem. A side sweep on textured hair doesn’t hide the curls; it gives them a direction.
13. Rope Braid Over One Shoulder
A rope braid looks fancier than the time it takes to make it. That’s the appeal. It uses only two sections, so the hand motion is easy to remember even before coffee.
Gather the hair into a low side ponytail, split it into two even sections, twist each section in the same direction, and then wrap them around each other in the opposite direction. Secure the end with a small elastic. If the hair starts to slip apart, mist the lengths with texture spray before you begin; rope braids hold better when the hair has a little grit.
This braid is a strong choice for straight or wavy hair that resists traditional braids. It also keeps the shape neat over one shoulder, which makes the front half feel more intentional. If you want it softer, pull a few pieces loose around the face. If you want it sharper, leave it tight and smooth the crown with the flat side of a brush.
14. Scarf-Wrapped Side Ponytail
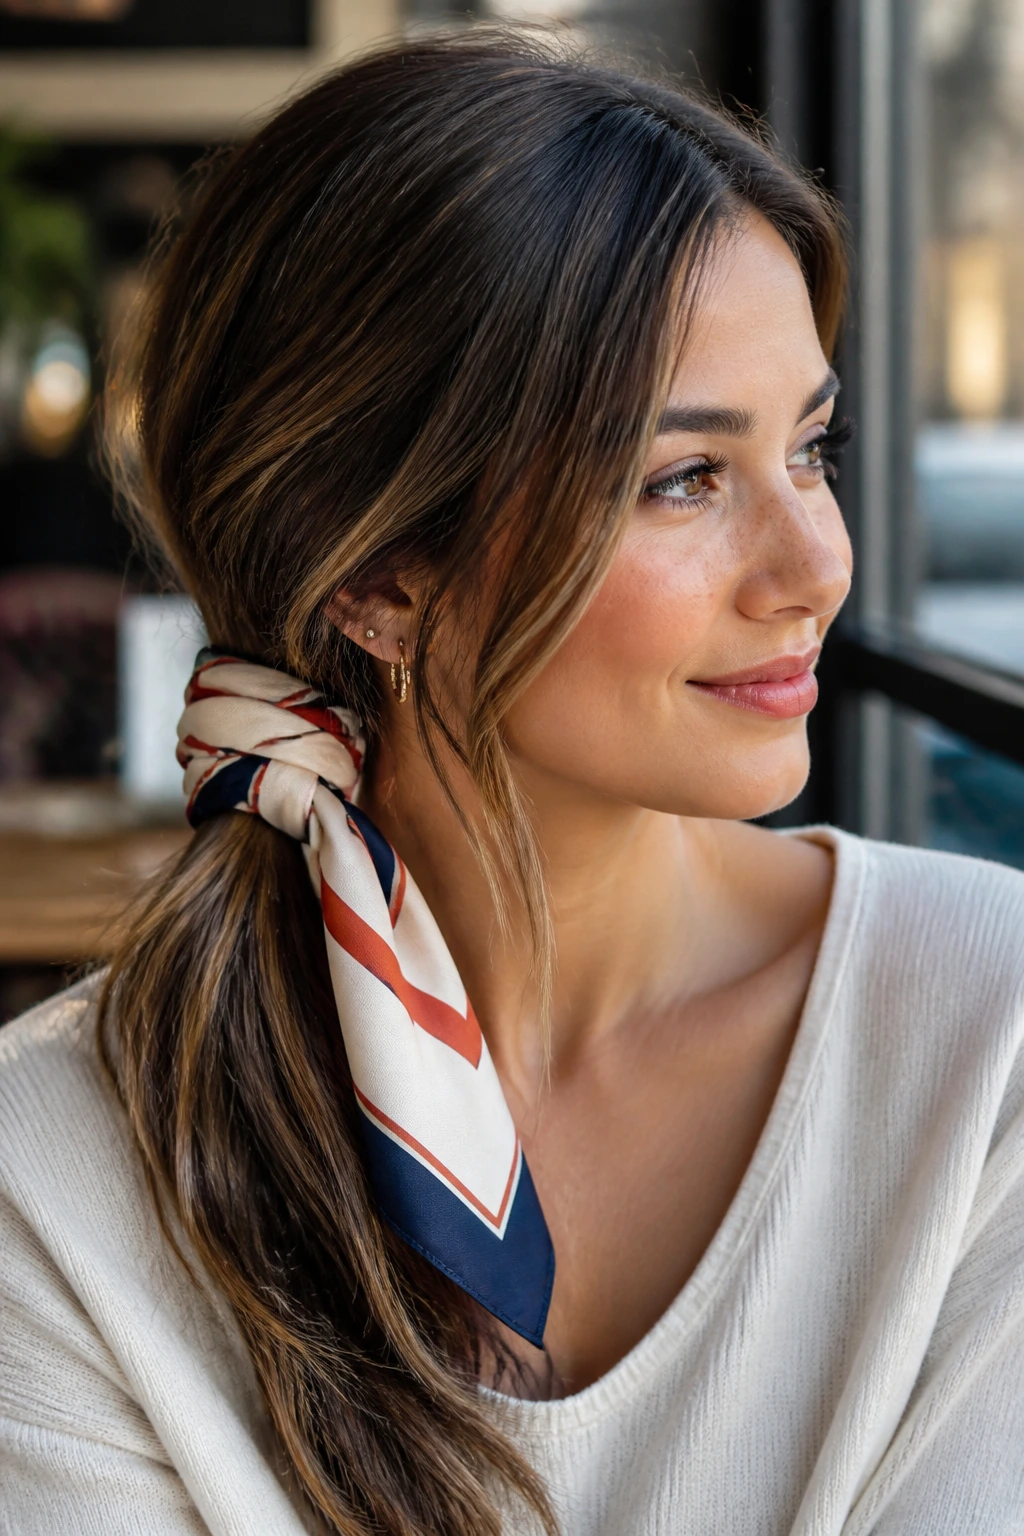
A scarf does a lot of useful work. It hides the elastic, adds color, and gives a plain side ponytail enough personality that nobody thinks you ran out the door in a hurry.
Make a low side ponytail and secure it with a covered elastic. Fold a silk or satin scarf into a narrow band, then tie it around the base with the knot sitting just off to one side. Let the ends hang with the ponytail, or wrap them once more around the elastic if you want a tighter finish. Keep the scarf smooth; wrinkles in the fabric show more than people expect.
This style is especially good when the roots are not perfect and you’d rather not pretend they are. The scarf acts like a visual decoy. It draws the eye to the accessory instead of the fact that you skipped a full blowout. That is not cheating. That is editing.
15. Crown Braid Swept to One Side
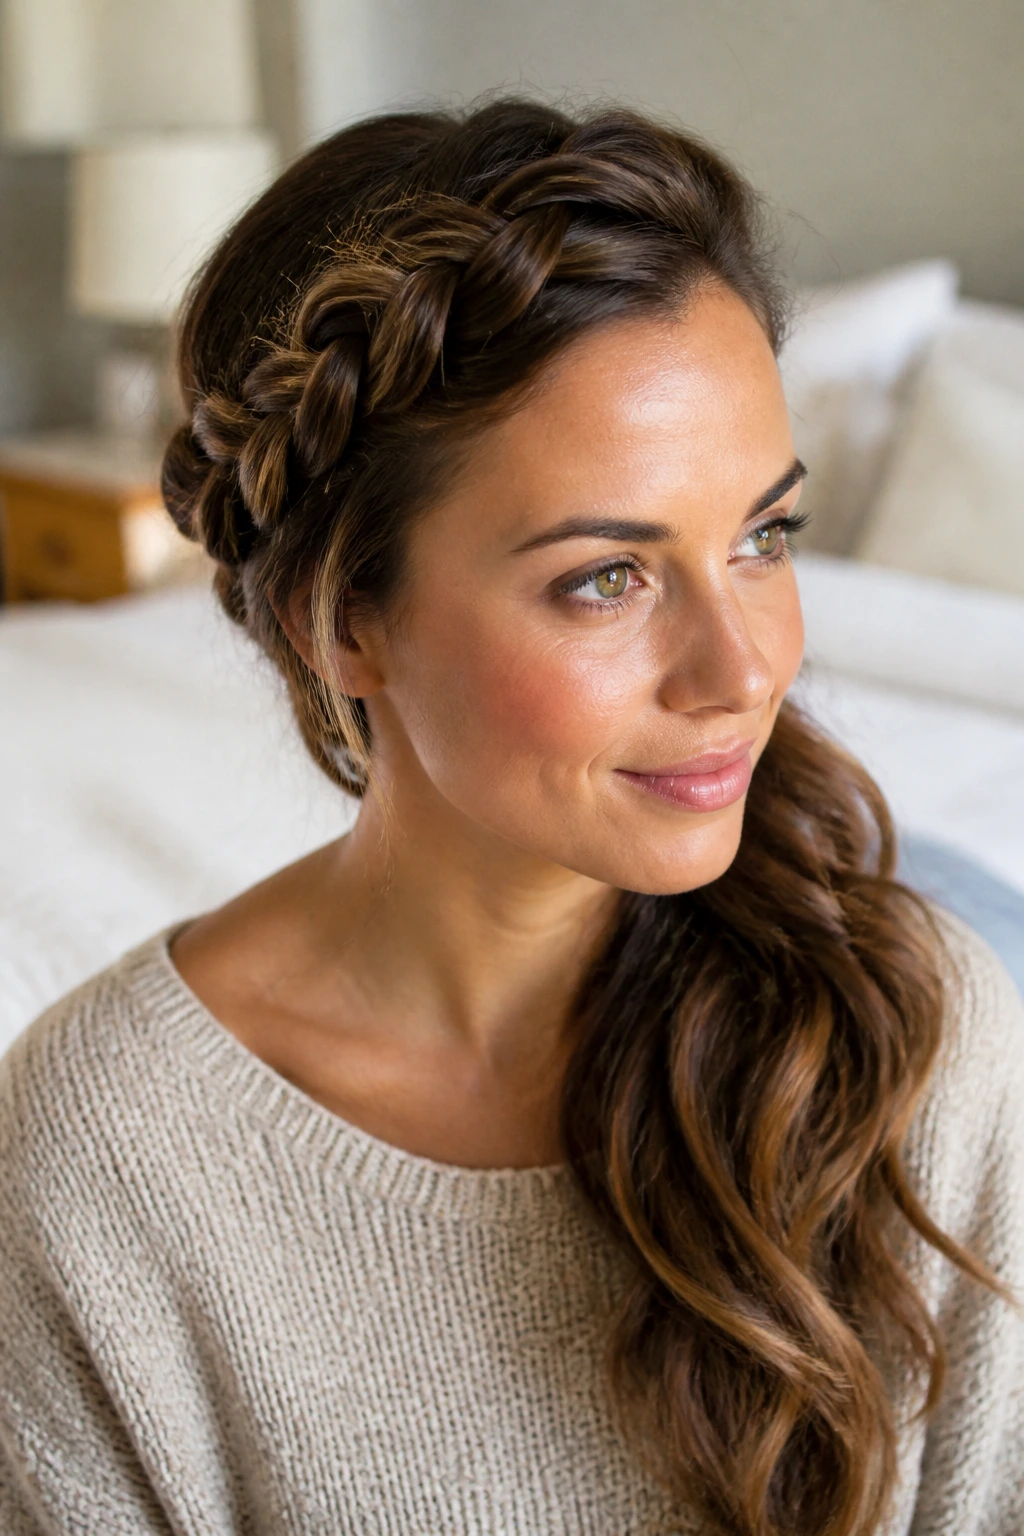
A crown braid swept to one side gives you the cleanest version of a side sweep with the most control at the front. It keeps the hairline tidy and moves the remaining length over one shoulder, which is handy when the front pieces want to escape every time you bend down.
Begin a braid along the front hairline on the heavier side and continue across the top or just behind it, depending on how much hair you want to keep loose. Pin the braid behind the ear, then let the rest fall over the opposite shoulder. If your hair is layered, braid a slightly smaller section so the shorter pieces don’t pop out halfway through the day.
This style takes a little more hand work than a ponytail, but not much more than a twist once you’ve practiced it twice. It’s a good pick for humid weather, long days, and any morning when you want your hair to stay off your face without looking severe.
16. Wet-Look Side Sweep
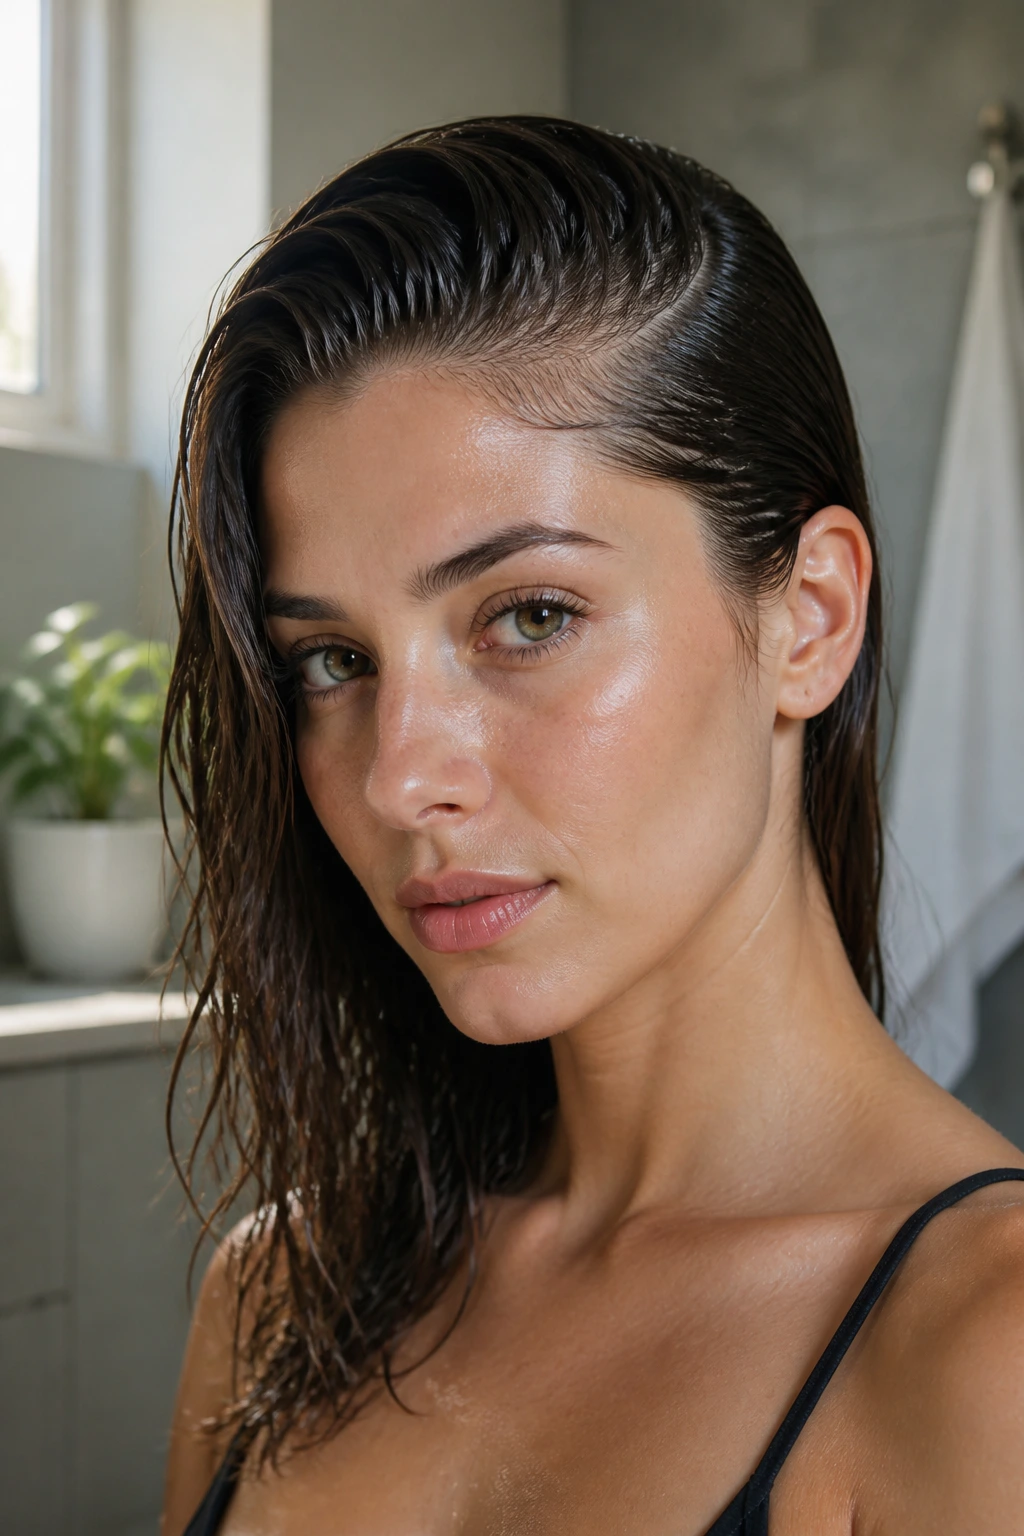
A wet-look side sweep is the blunt instrument of this list. It gives you control, shine, and zero fluff, which is useful when the hair refuses to behave or the day calls for something a little sharper.
Start on damp hair and comb in a deep side part. Work a small amount of gel from roots to mid-lengths, then use a fine-tooth comb to smooth everything in the direction you want it to fall. The front should sit close to the scalp, and the ends can stay slightly damp or air-dry into a soft bend. Too much gel turns the finish into a helmet. Too little and the whole thing puffs up before noon.
This style tends to work best on straight or wavy hair, though curls can use a softer version with curl cream and glossing gel. Keep the product away from the ends if you want movement. The shine belongs at the front, not all the way down the length.
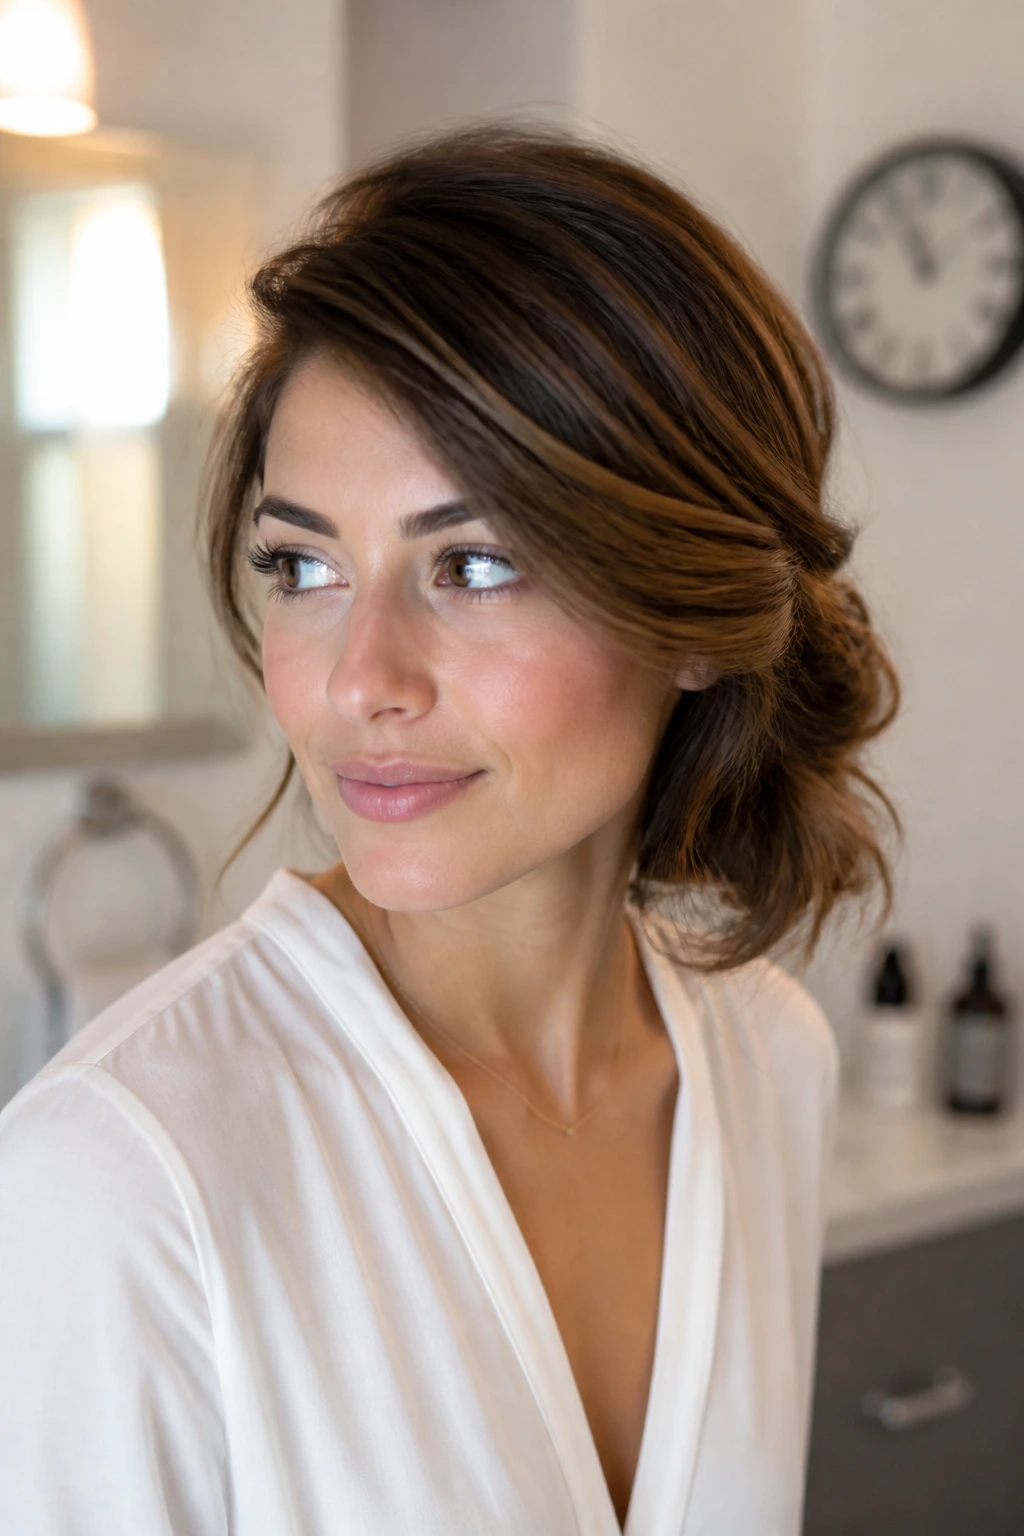
17. Side Bun with Loose Tendrils
A side bun lands in that sweet spot between polished and relaxed. It’s tidy enough for a day that needs structure, but the loose tendrils keep it from feeling stern.
Sweep the hair into a low side ponytail, twist it loosely, and coil it into a bun near the base of the neck on one side. Use U-pins to anchor the knot, then pull out one or two wisps around the temples. If the hair is slippery, rough up the roots with dry shampoo before you start. If it’s thick, use more pins than you think you need. Thick hair loves to break out of a bun when nobody is looking.
This style works well with medium to long hair and can handle a little imperfection. Actually, it likes a little imperfection. A bun that sits too neat can look severe against the softness of the side sweep.
18. Braided Headband into a Side Sweep
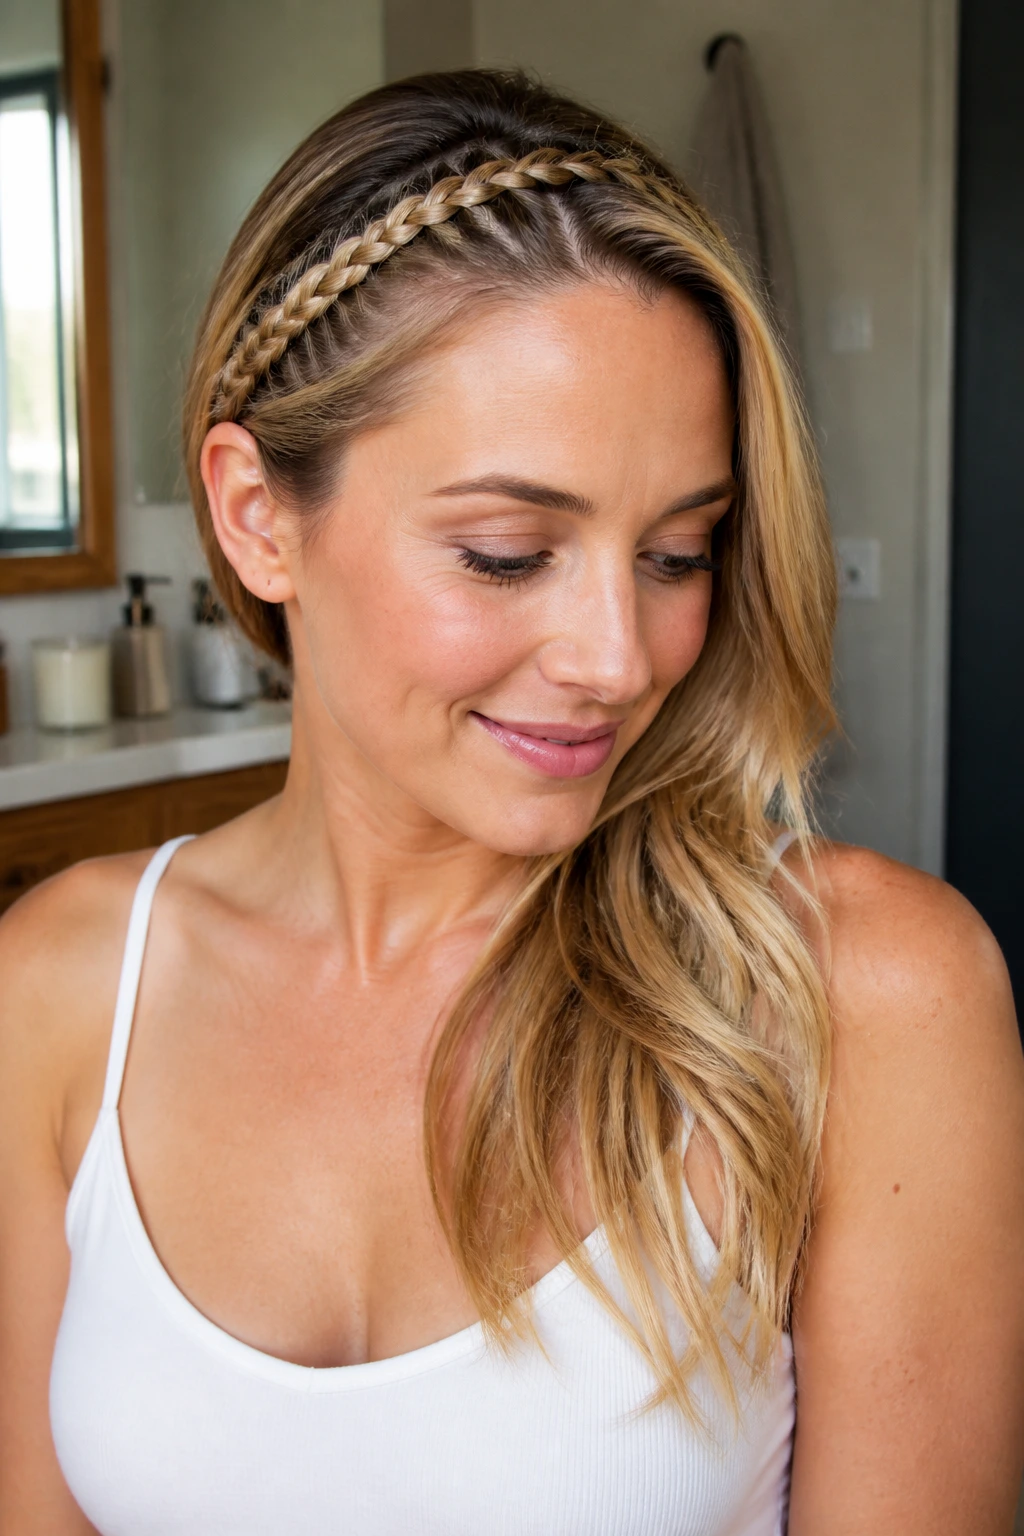
Braided headbands are a smart answer for grown-out bangs, mixed lengths, or front pieces that refuse to stay out of your eyes. The braid acts like a built-in clip, and the rest of the hair falls over one shoulder with much less fuss.
Take a small front section from the heavier side, braid it along the hairline like a headband, and pin it behind the opposite ear. Then guide the rest of the hair across the back and over one shoulder so the braid becomes part of the sweep. A tiny amount of smoothing cream on the surface keeps flyaways from stealing the line.
This style is useful when you want the front secured but don’t want a fully pinned look. It also works on medium hair that’s too short for a full braid but long enough to bend across the face. One thin braid can do a lot of work here. Keep it slim, keep it tidy, and let the rest stay loose.
Why Side-Swept Hairstyles Work When the Clock Is Tight
The reason these styles keep showing up in real bathrooms is simple: they do not ask for full symmetry. Symmetry takes time. Symmetry also breaks the minute a section slips or a cowlick pops up near the crown. A side sweep gives you a built-in escape hatch. Hair can be smoother on one side, looser on the other, and still read as finished.
That matters when your morning is already crowded. A deep part, a small braid, or a tucked side changes the whole silhouette of the face in a way that feels bigger than the work it takes. The eye sees direction. Direction looks intentional. And intentionality is what makes a five-minute style look like you knew what you were doing.
The styles here also tend to get better after they settle for a few minutes. That’s a nice trade. You’re not chasing a perfect shape that vanishes as soon as you touch a coat zipper. You’re building something with a little bend, a little grip, and enough structure to live through the day without needing a bathroom mirror every hour.
One more thing. Side-swept hair is forgiving around grow-out. Bangs are not fresh? Fine. Layers are flipping weird at the jaw? Tuck them. Roots are softer than you’d like? Use the part and move on.
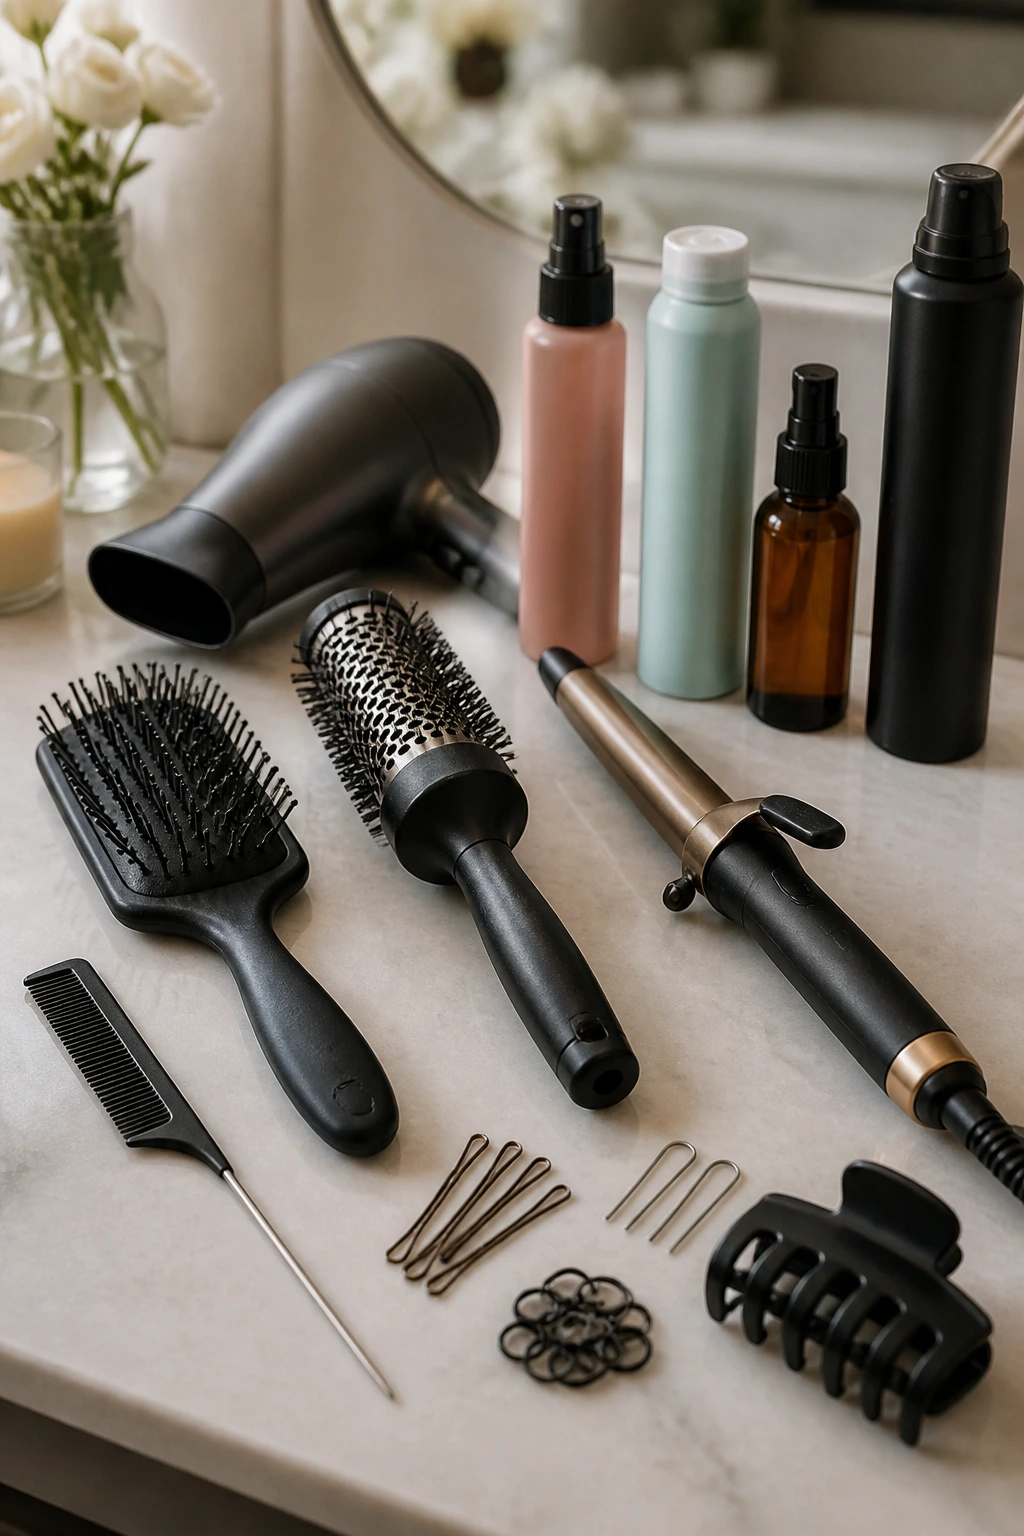
Essential Tools for Side-Swept Hairstyles
-
Tail Comb: The pointy end makes a clean side part, and clean parts are half the battle here.
-
Paddle Brush: Good for smoothing the top layer before a ponytail, bun, or tuck.
-
Round Brush: Helpful for bending the front pieces under a blow-dryer and lifting the crown.
-
Blow-Dryer With Nozzle: The nozzle matters because it narrows the airflow and keeps the roots from frizzing out.
-
1-Inch Curling Wand or Iron: Handy for the wave-based looks, especially the barrette sweep and soft blowout.
-
Bobby Pins: Keep both regular and extra-long ones around; thick hair eats the short ones.
-
U-Pins: Best for buns and chignons because they hold a coil without flattening it.
-
Mini Elastics: Use them for braids, bubble ponytails, and rope braid ends.
-
Claw Clip: A medium or large clip can hold a side twist fast, especially on day-two hair.
-
Texturizing Spray: Adds grip to fine or silky hair so twists and braids stay put.
-
Dry Shampoo: Good for roots that need a little roughness before styling, not just oil control.
-
Smoothing Serum or Cream: Keeps the top layer neat when you want the style to read cleaner.
-
Flexible-Hold Hairspray: Better than stiff spray for side sweeps, because you still want some movement.
Smart Product Picks for Side-Swept Hairstyles by Hair Type
Fine Hair
Fine hair usually needs grip before it needs shine. A lightweight mousse at the roots, a little dry shampoo at the part, and flexible hairspray at the end will do more than a heavy cream ever could. Heavy products make fine hair collapse faster, which is the opposite of the point.
Thick Hair
Thick hair behaves better when it’s divided into sections and nudged into a shape, not forced into one. Smoothing cream on the top layer, strong elastics, and U-pins are the unglamorous heroes here. They don’t look exciting. They keep the style alive.
Curly or Coily Hair
Leave-in conditioner and gel are the useful pair. The leave-in keeps the curl from drying out while the gel holds the front in the direction you want. A wide-tooth comb helps distribute product without turning the curls fuzzy.
Straight or Silky Hair
Texture spray, powder, and a little paste at the roots help more than extra shine. Straight hair often slips because it’s too smooth, not because it lacks styling. Give it friction and it stops acting like ice.
Short Hair
A wax stick, a small amount of paste, and a handful of mini pins go farther than a big collection of products. Short cuts need direction at the fringe and sideburn area, not a layer of weight that drags the shape down.
How to Wear These Styles So They Fit the Day

Finish: Pick the level before you start. A deep side part with soft waves reads calm and clean. A wet-look side sweep says sharp and deliberate. A loose braid or chignon lands somewhere in the middle, where most mornings actually live.
Accessories: Barrettes, scarves, flat pins, and tiny claws change the whole read of the style. Metal clips feel cleaner. Fabric scarves soften the line. A single decorative pin can make a plain side tuck look finished without adding another step.
Outfit Pairings: Side-swept hair works especially well with open necklines, button-down collars, crew-neck tops, and hoop or drop earrings, because the hair gives the face a line and the outfit gets room to breathe. High collars can be nice too — they make the sweep feel even more deliberate.
Time Budget: If you have five minutes, choose the side tuck, side ponytail, or claw-clip twist. Ten minutes buys you braid, wave, or rope-braid territory. Fifteen minutes is when you can slow down for blow-drying, crown lift, and a cleaner finish at the part.
Small Tweaks That Change the Whole Shape

A side-swept style lives or dies on tiny edits. Move the part half an inch farther from center, and the front suddenly gets more lift. Place the anchor point one inch higher or lower, and the whole line around the cheek changes. That sounds fussy. It isn’t. It’s the difference between hair that sits on your face and hair that frames it.
The other quiet upgrade is the front piece. Leave one strand out near the temple if the style feels too severe. Tuck it back if the sweep starts looking messy instead of soft. And if you are using pins, cross them. Two pins in an X hold far better than one lonely pin shoved straight in, especially when the hair is heavy or silky.
A final detail: mist the brush, not the head, when you want to smooth flyaways. That keeps product from building up in one spot. It also stops the top layer from turning sticky, which is a fast way to ruin a good side part.
Common Mistakes That Make the Style Fall Flat
The first mistake is starting with hair that is too slick. Freshly washed hair can look clean, but it often slips out of clips, braids, and twists before you’ve made it to the door. A little dry shampoo or texture spray at the roots gives the style something to grab.
Another common miss is placing the part too close to the center. A side sweep needs actual direction. If the part barely shifts, the face doesn’t open up and the shape can look like you changed your mind halfway through styling. Use the arch of the eyebrow as a rough guide and commit.
Overloading the hair with product is another trap. Too much serum makes the top layer slide. Too much spray makes the ends crunchy. The fix is simple: use less than you think, then add a second light pass only where you need it.
Pins cause trouble when they’re used lazily. One pin at the edge of a twist is not enough for thick or layered hair. Anchor near the base, cross pins when needed, and hide them under the overlayer instead of at the surface.
Last, don’t leave every face-framing piece out. A few strands soften the sweep. Too many and the style turns into a curtain.
Variations and Adaptations to Try

Five-Minute Emergency Sweep
This version starts with a deep side part, one low twist, and one clip or barrette. It’s the move for mornings when the mirror is not negotiating. Keep the front smooth, let the ends stay loose, and stop once the shape is clear.
Heat-Free Bend
Braid or twist damp hair the night before, then undo it in the morning and sweep the result to one side. The pattern gives you movement without a curling iron, and the side part helps hide any uneven bits. A little serum on the ends keeps the texture from looking frayed.
Curly-Hair Definition Version
Use leave-in and gel, then part the curls deeply and pin one side back if needed. This keeps the curl pattern intact while still creating the side sweep. A satin scarf for ten minutes after styling can help the front set in place.
Short-Hair Pinback Version
Take a small front section, sweep it to one side, and secure it with two crossed pins under the top layer. This version is good for pixies and short bobs that need a face-opening shape without a long ponytail or braid.
Office-Sleek Version
Choose the low side ponytail, the tucked bob, or the wet-look sweep. These are the neatest options in the group and they hold up well under collars, headphones, and long stretches at a desk.
Weekend Messy Version
Loose braid, loose chignon, or a soft barrette wave. Pull out a few wisps, keep the texture visible, and skip the urge to smooth every flyaway. The looseness is the point.
Keeping the Style in Place From Morning to Night
The easiest way to make a side-swept style last is to build grip before you build shine. Dry shampoo at the roots, a light spray at the part, and a firm anchor point will hold better than a glossy finish that looks nice for ten minutes and then slides. If you use heat, let the hair cool in shape for at least a minute or two before touching it. Warm hair forgets faster.
During the day, avoid constantly re-tucking the same pieces. That sounds harmless, but fingers leave oil behind and eventually flatten the front. If a style loosens, add one fresh pin or clip rather than pressing the old section back into place again and again. A quick mist on a toothbrush can tame flyaways around the hairline without soaking the whole front.
Night care matters too. If the style survived and you want to wear the same general shape tomorrow, wrap the hair in a loose silk scarf or sleep on a silk pillowcase. Buns and ponytails should come out before bed unless they’re soft and loose; tight elastics create dents that are harder to fix than people expect.
Frequently Asked Questions
Which side should I part my hair on?
Start on the side that gives you the most lift at the roots and the least fight from your cowlicks. If one side always splits open on its own, use that as your guide instead of forcing the opposite. Hair usually tells you where it wants to go.
Do side-swept hairstyles work on curly hair?
Yes, and they often work better than people think. The trick is to follow the curl pattern instead of brushing it flat, then guide the front section with gel, a pin, or a braid so the shape stays controlled.
How do I keep hair from falling back into my face?
Use a real anchor point: a pin hidden under the top layer, a barrette behind the ear, or a braid that starts near the front hairline. One weak clip at the surface usually slides out by midmorning.
Can I do these styles on very short hair?
Absolutely. Pixies and short bobs can use side-swept fringe, tucked sections, or tiny pinback shapes. The style changes, but the idea stays the same — create direction at the front and hold it there.
What if my hair is too silky for braids or twists?
Add texture first. Dry shampoo, texture spray, or a small amount of root powder gives the hair enough bite to stay in place. Braids on silky hair tend to unravel because the strands are too smooth to grip.
Are these styles okay for second-day hair?
They’re often better on second-day hair. The extra grip helps braid, twist, and clip styles hold. If the roots look oily, a small amount of dry shampoo fixes that faster than trying to start from scratch.
How do I keep a deep side part from going flat?
Blow-dry the roots in the direction of the part, then clip the lifted side while it cools for a minute. That gives the root line some memory. A tiny bit of mousse at the crown also helps the lift last longer.
What should I do if the style looks lopsided?
Check the anchor point first. Most lopsided looks are caused by a pin or clip sitting too low, too far back, or too close to the hairline. Move the anchor one inch, smooth the crown, and the whole shape usually settles into place.
Which One to Try First

If you want the easiest win, start with the deep side part and the low side ponytail. Both are fast, both work on a wide range of hair types, and neither needs a perfect hand. The shape does most of the work for you.
After that, the barrette wave and the side-twist half-up are the two I’d learn next. They’re forgiving, and once you understand where the anchor goes, you can repeat them without thinking too hard. That’s the real payoff here: not a hairstyle that looks staged, but one that behaves when you’re already halfway out the door.
Once you’ve got one or two of these in your routine, mornings stop feeling like a style emergency. You reach for the part, the pin, the clip, and move on.