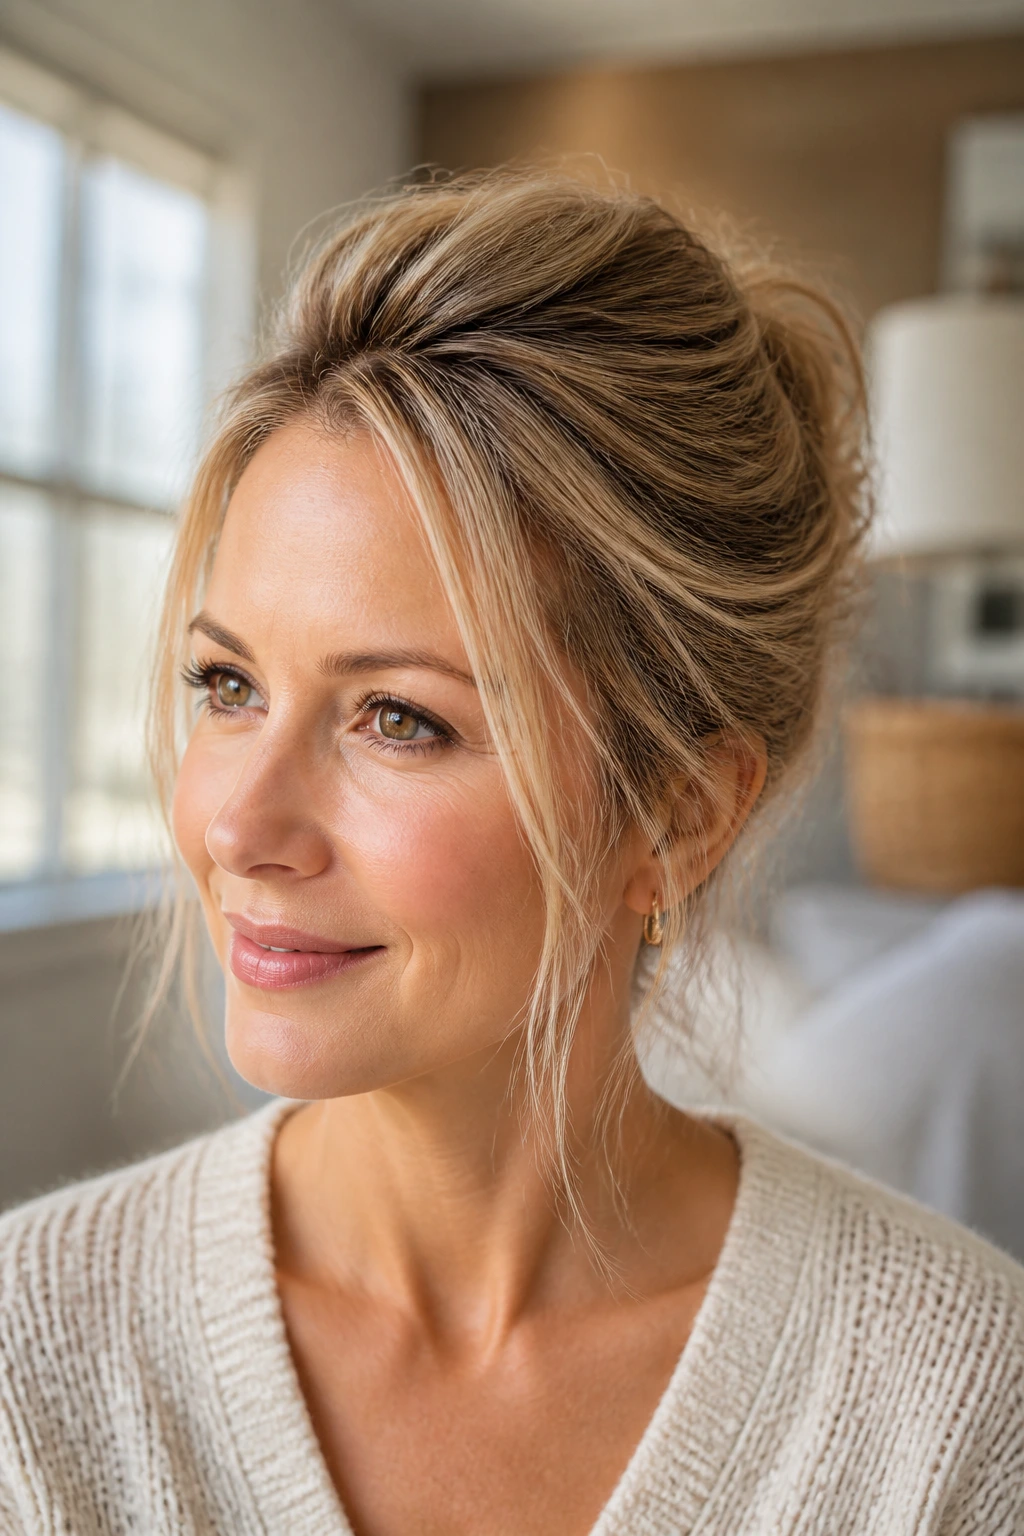
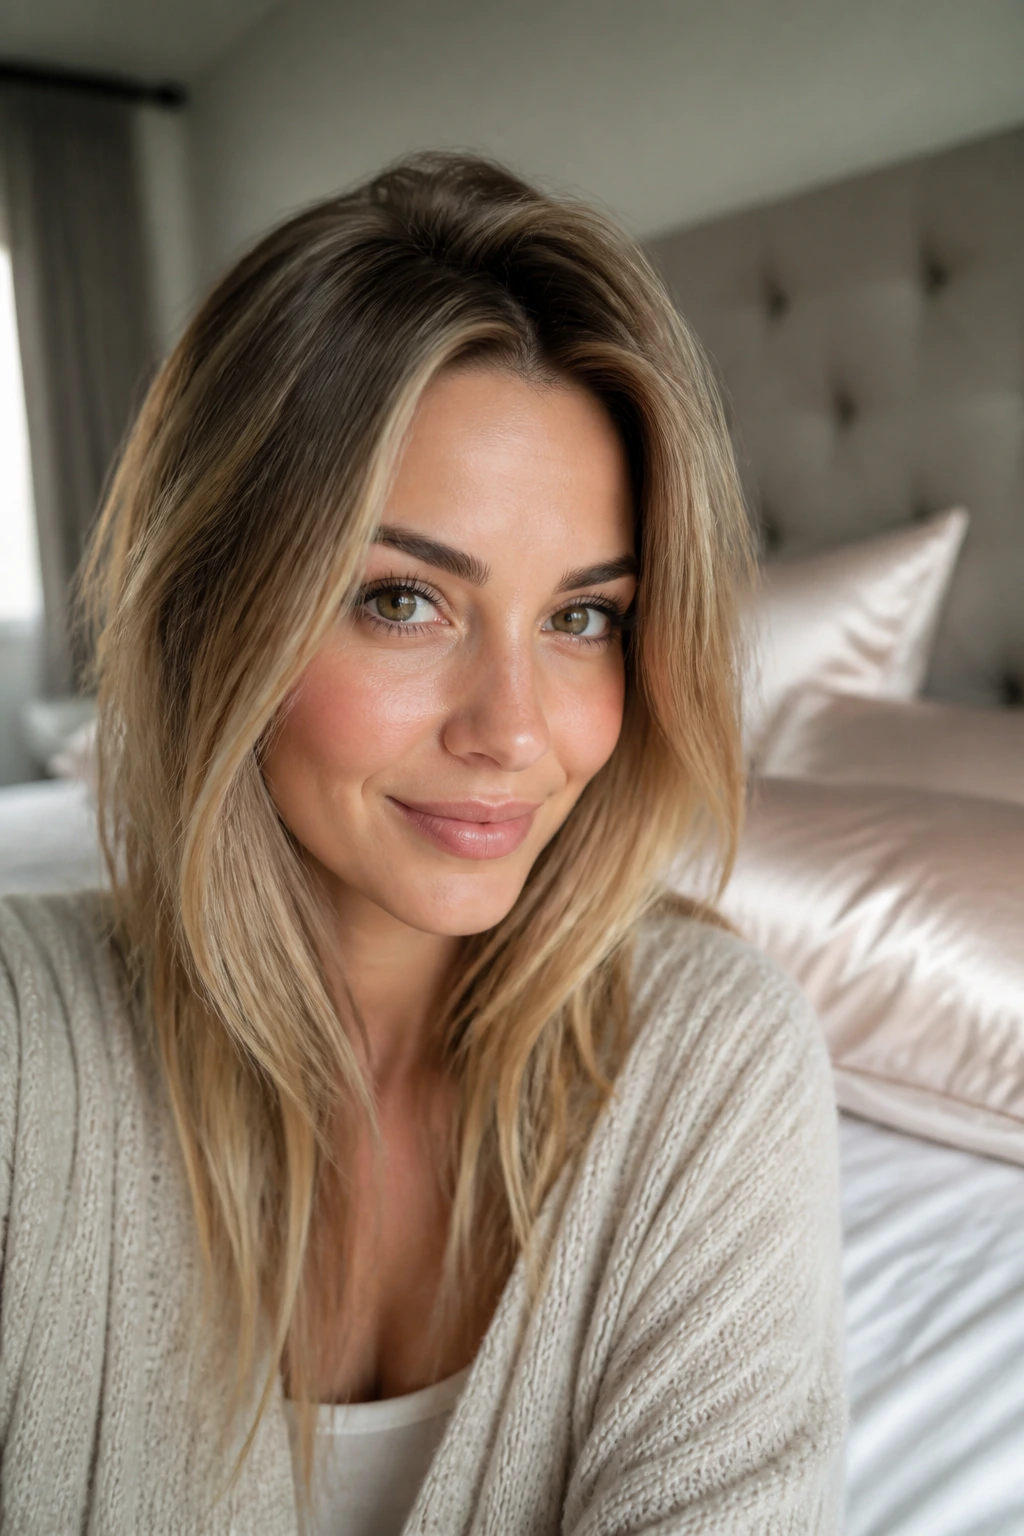
Fine hair has a small, annoying talent: it can look tidy for the first coffee refill, then collapse the minute you’re bending over a school bag, buckling a child into a seat, or tugging a coat sleeve straight. The trick with mum hairstyles for busy mornings with fine hair is not to fight that texture with brute force. It’s to give the hair a shape it can actually keep.
That means choosing styles that lean on a few honest tricks: a little root grip, a hidden anchor, a braid that fakes bulk, or a clip placed where the hair naturally wants to stay put. Fine hair isn’t always sparse hair, either. Sometimes there’s plenty of it, just in strands that slip through elastics and go flat under a brush like they’ve got somewhere else to be.
I’ve always preferred styles that look finished without looking fussy. If a style needs twelve pins and a prayer before 8 a.m., it’s not a morning style; it’s a project. The best ones here can be done fast, survive a bit of chaos, and still look intentional when you catch your reflection in a shop window three hours later. Some are polished. Some are slightly messy. All of them are built for real life.
Why These Mum Hairstyles Hold Up on Fine Hair
Root lift does the heavy lifting: Fine hair looks best when the crown has a little bend or pinch at the roots, because that’s where it flattens first and where a tiny bit of height changes everything.
Braids and twists fake thickness fast: A braid compresses slim strands into a fuller-looking line, while a twist hides the thin ends that usually give away how fine the hair is.
Hidden anchors beat heavy products: A couple of crossed bobby pins, a mini elastic, or a claw clip placed at the right spot usually works better than drowning the hair in spray.
Second-day hair has better grip: Clean, silky hair slides; hair with a touch of dry shampoo or natural oil holds shape, so these styles tend to stay put longer when they’re not freshly washed.
The shape matters more than the volume: With fine hair, a clear silhouette—low ponytail, half-up knot, braided crown—looks more finished than trying to force full, loose waves that go limp by lunch.
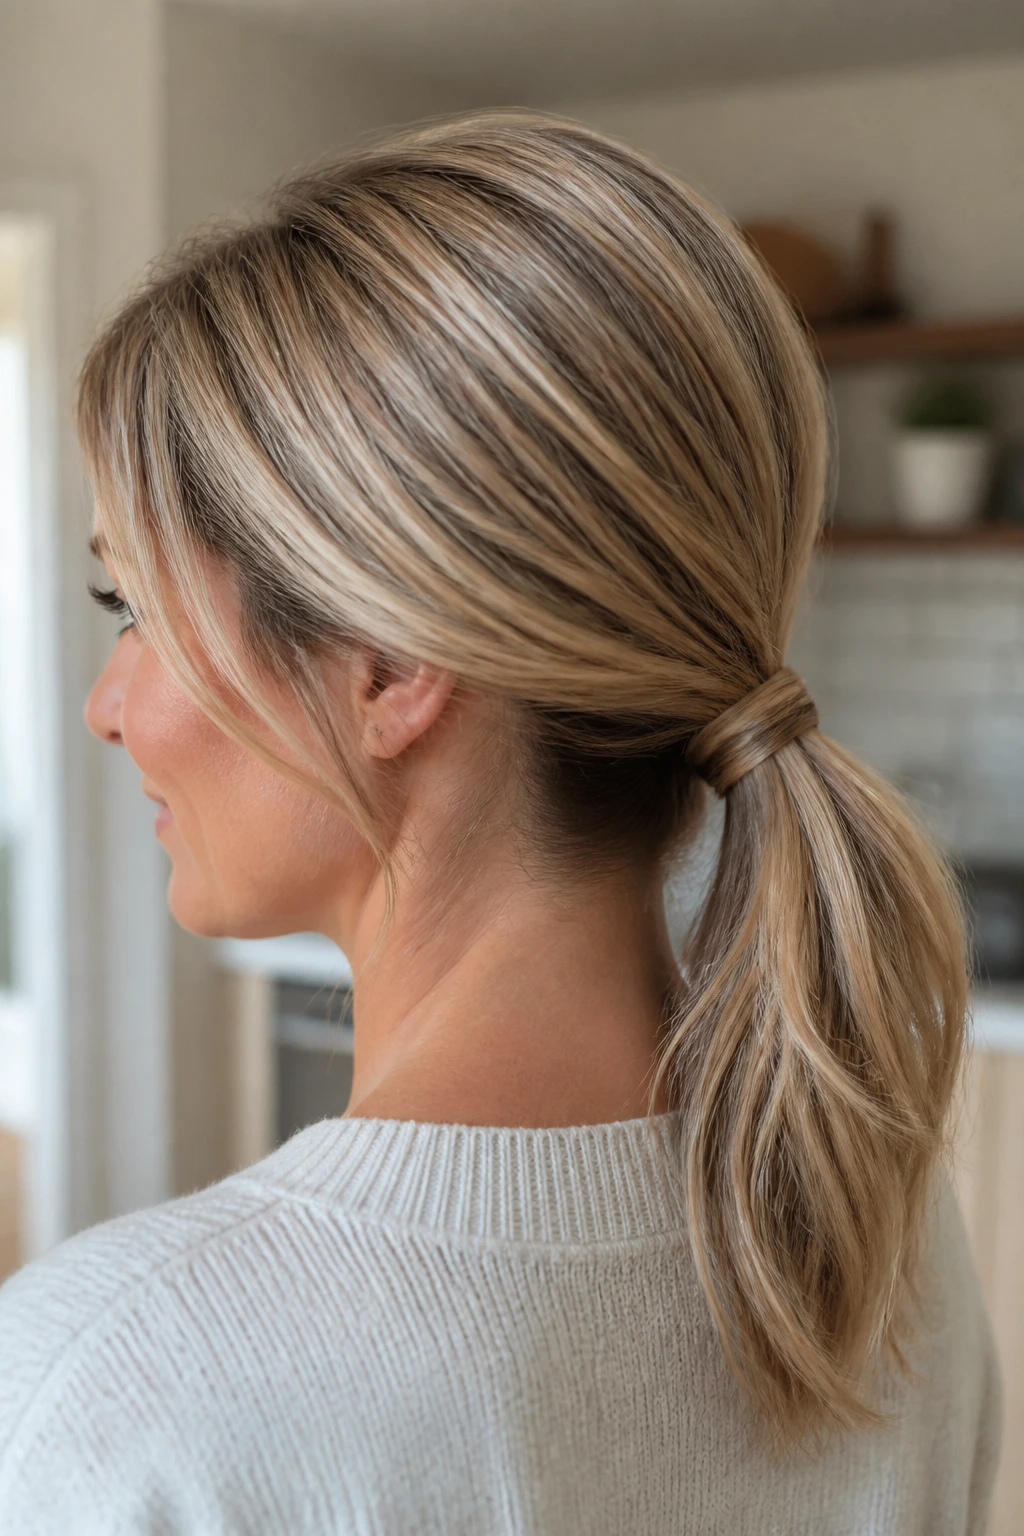
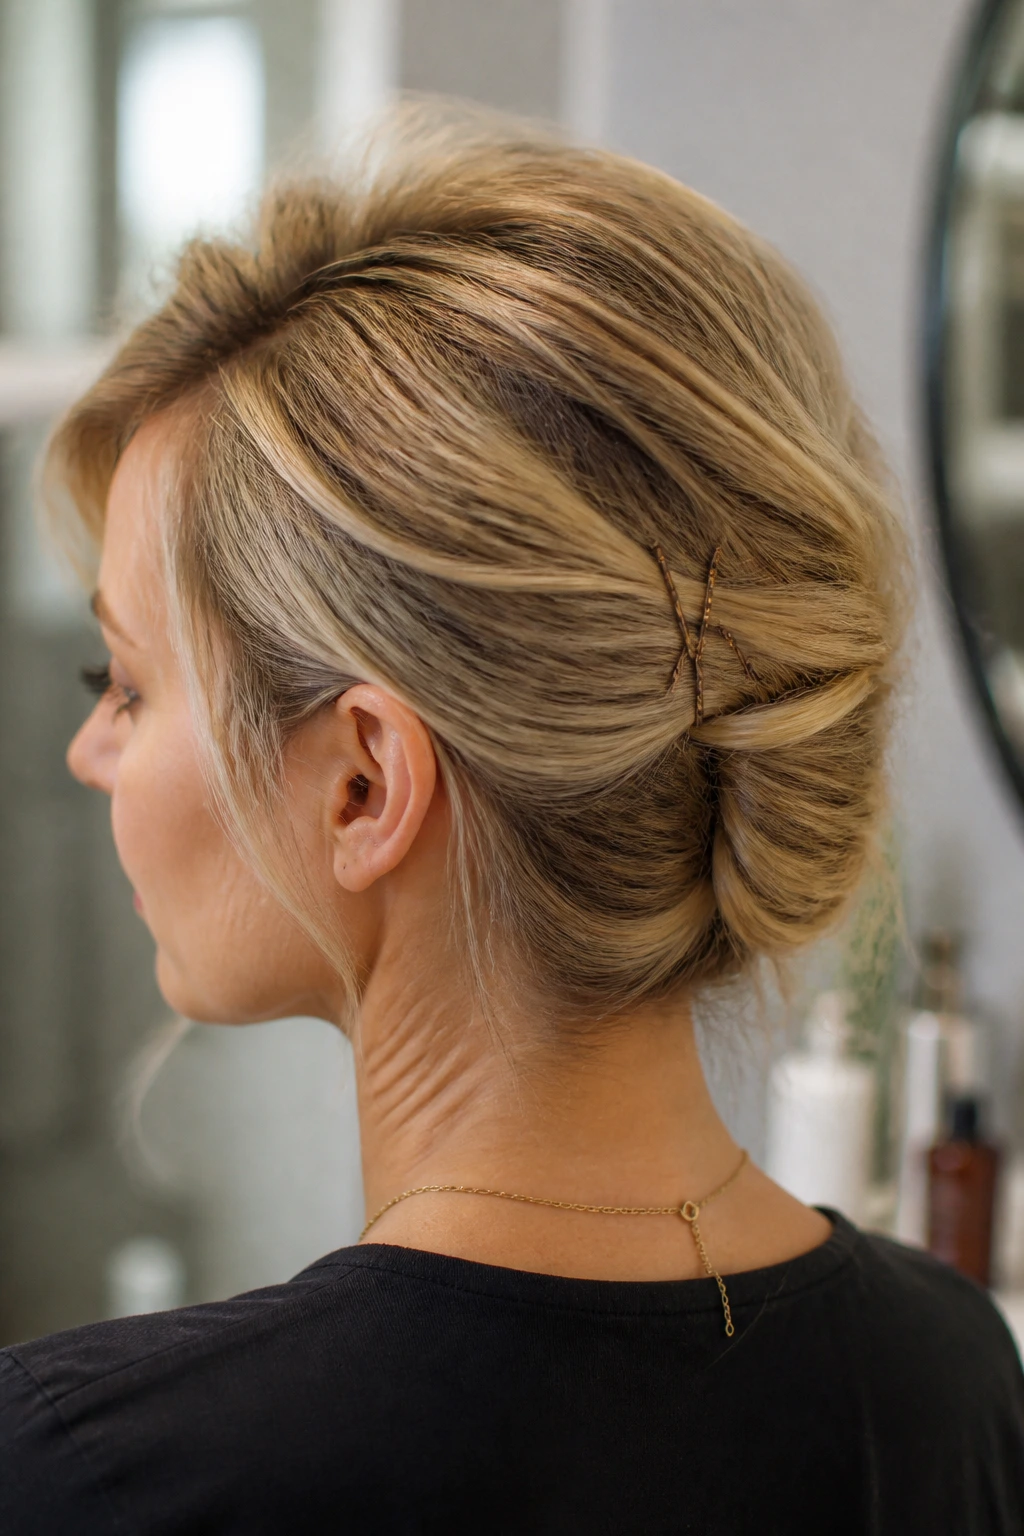
1. The Crown-Lift Low Ponytail
A low ponytail can look flat and apologetic, or it can look deliberate. The difference is the crown. Push a little height into the top section first, and suddenly the whole style reads cleaner, fuller, and less like you were racing the clock in the dark.
How to build it fast
Start by misting the roots with dry shampoo, then use the tail of a comb to lift a 2-inch section at the crown. Backcomb only that strip twice or three times; you do not need a bird’s nest, just a bit of grip. Smooth the top layer lightly, gather the hair at the nape, and tie it with a slim elastic.
Wrap a 1-inch strand around the elastic to hide it, then pin the end underneath with one bobby pin. If your hair sits very straight, pinch the crown once more with your fingertips and tug the ponytail loose by half an inch at the base. That tiny slack makes a difference.
Best for: straight or slightly wavy fine hair that usually falls flat after brushing.
Why it works: the style keeps all the weight low, where fine hair behaves better, but the lifted crown stops the ponytail from looking thin and pulled tight.
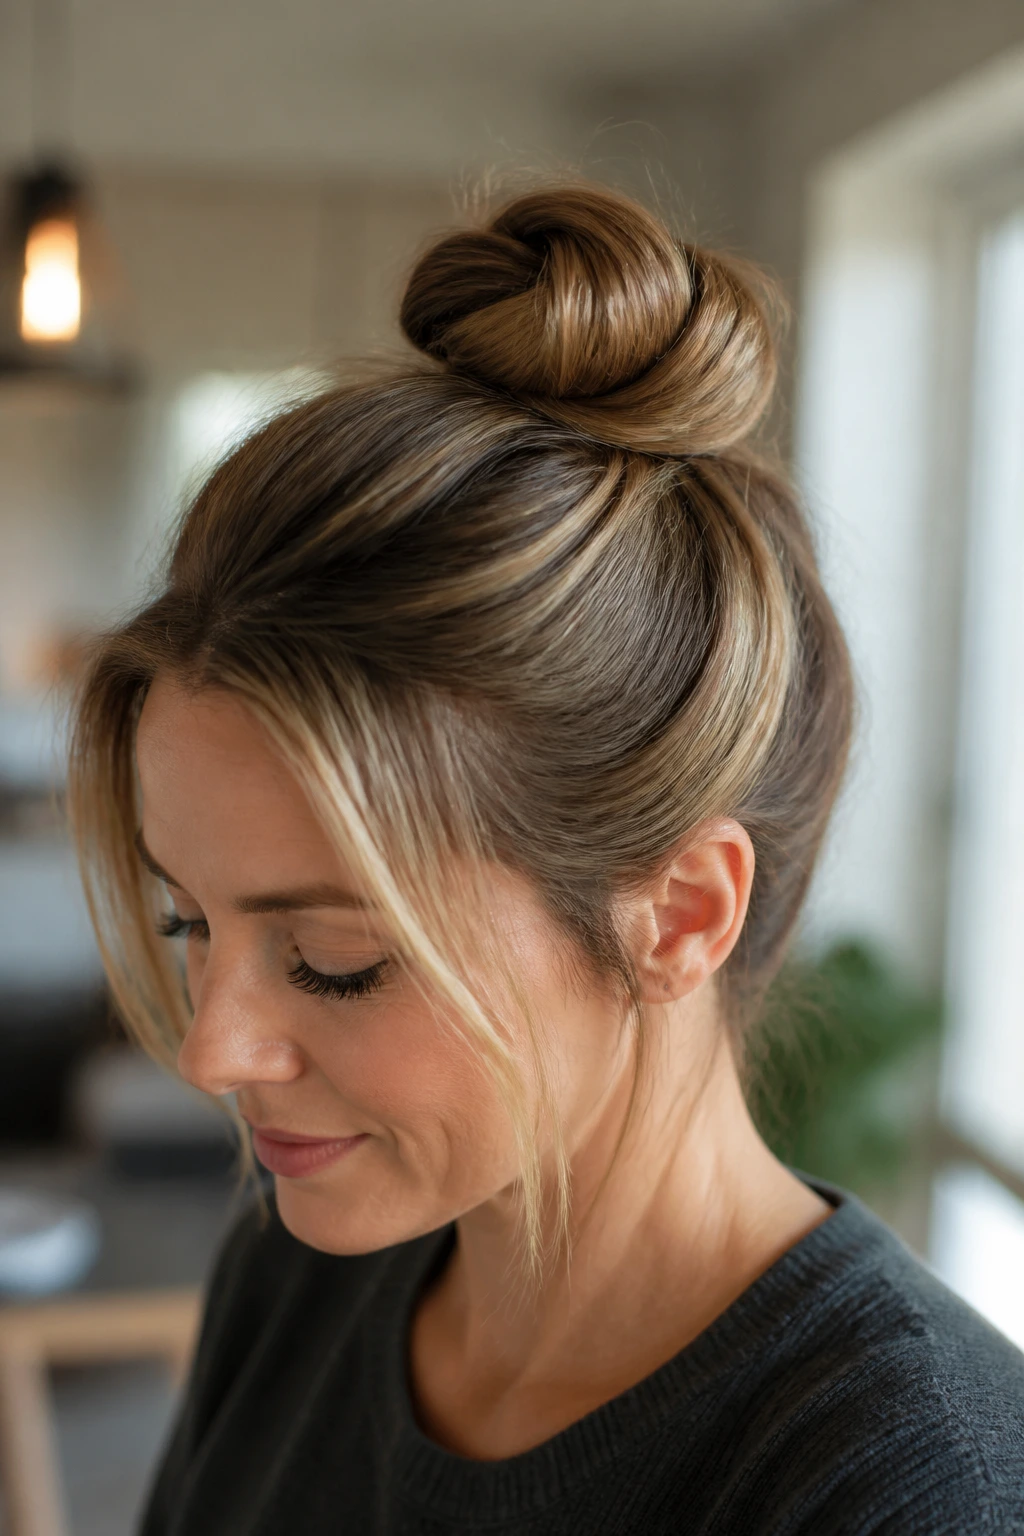
2. The Tucked Top Knot
Need something that looks tidy before the first school bell? This is the knot I’d reach for when the hairline is cooperative but the rest of the day is not. It works because it gathers the hair into one compact shape instead of leaving wispy ends hanging around to betray how fine the strands are.
Gather the hair into a high ponytail, but don’t yank it back so hard that the crown goes slick and shiny. Leave a little softness at the front. Twist the ponytail once, wrap it around the base, and secure it with two or three pins pushed in from different directions.
If the bun looks too small, pull the edges outward with your fingertips before pinning the last corner. Fine hair likes a gentle cheat here. A loose outer loop looks thicker than a tight little knot that sits like a pebble.
What to watch for
- Keep the ponytail a little above the crown, not at the very top of the head.
- Use a matte elastic, not one that slides.
- A few short pieces near the ears are fine. They make the knot look less severe.
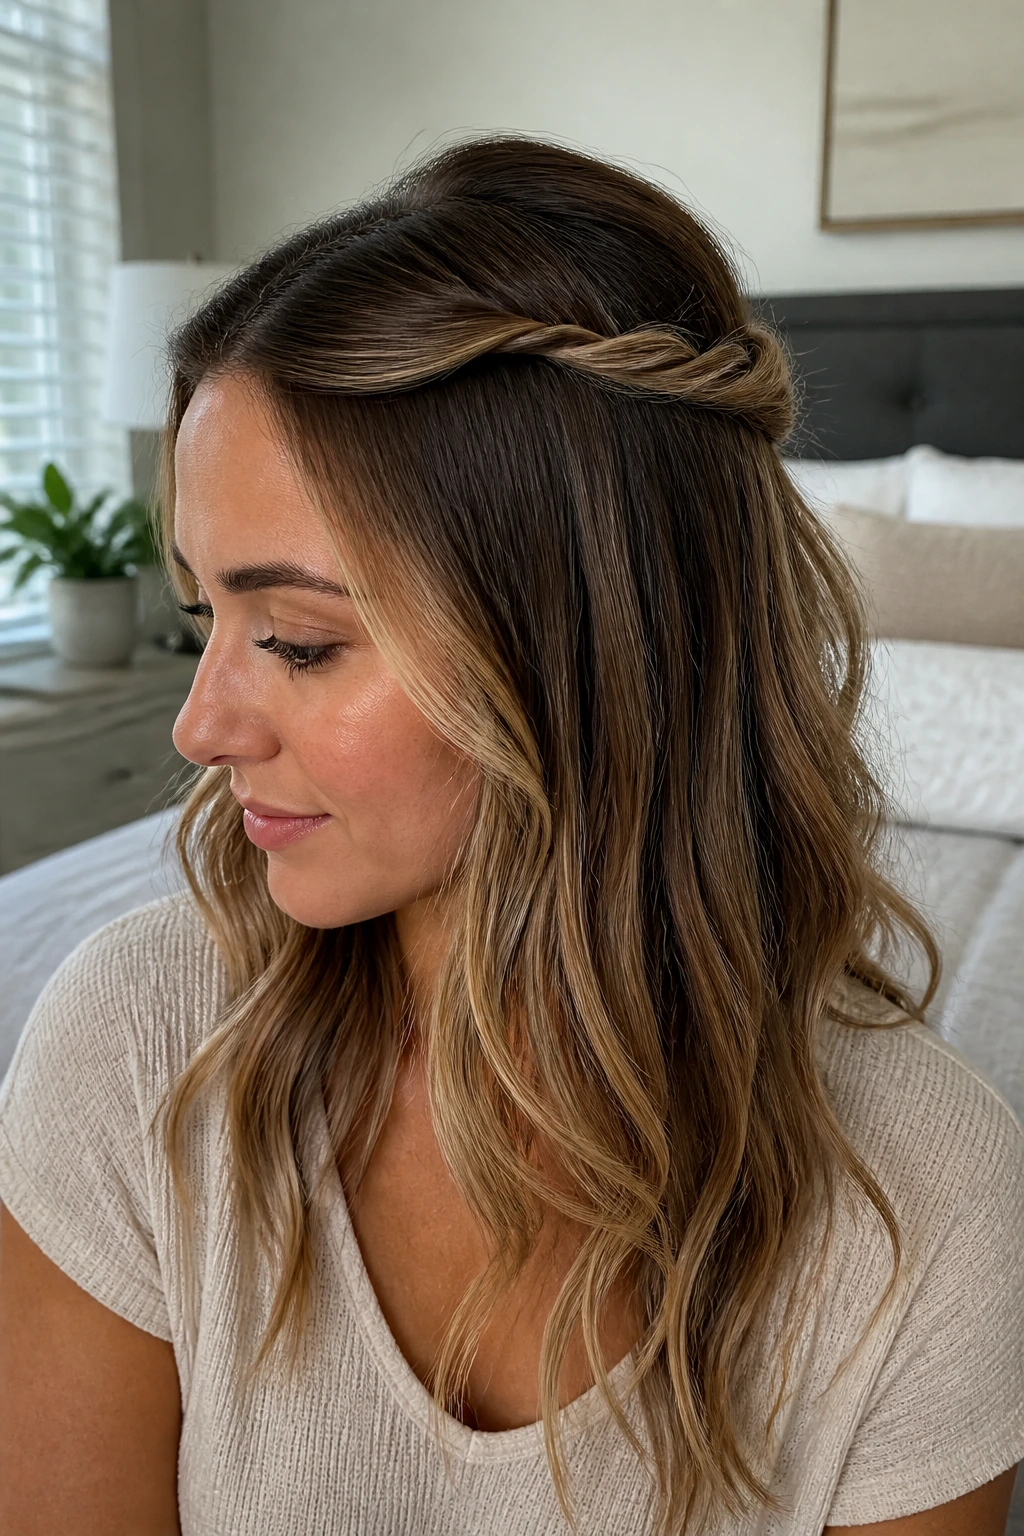
3. The Claw-Clip Half-Up Twist
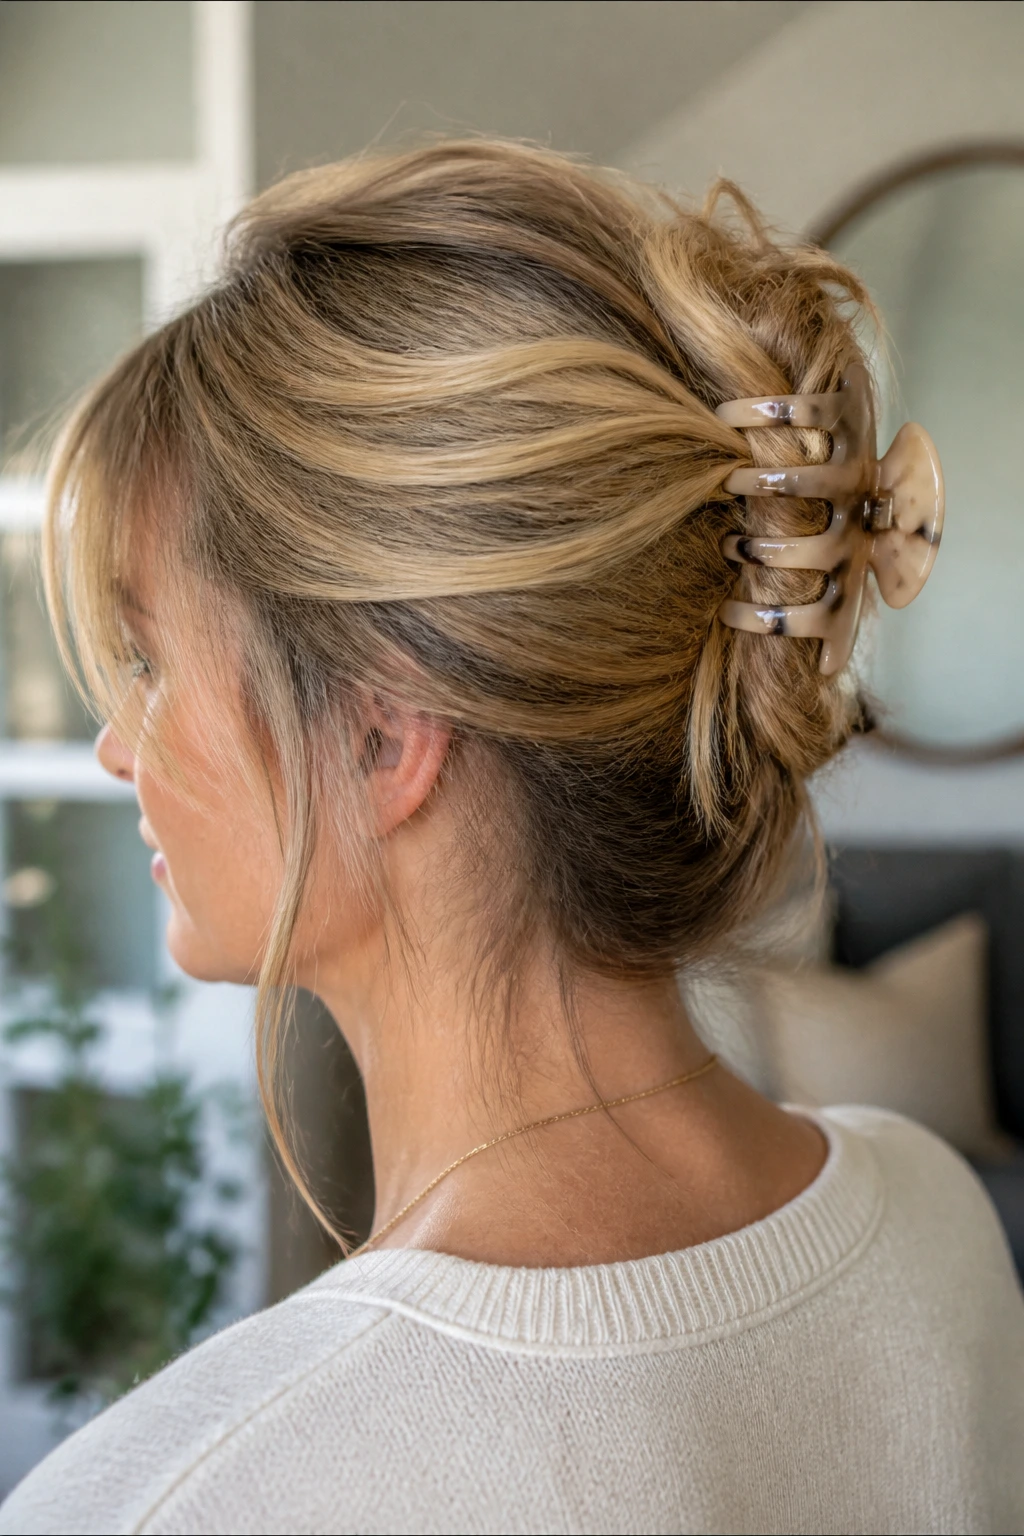
What if you only have four minutes and one claw clip? Good. That’s enough.
Take the front sections from each temple, twist them back toward the center, and join them just above the occipital bone—the little curve at the back of your head where the skull starts to drop away. Clip the twist there, then gently pull the twist apart with your fingertips so it looks a touch fuller. Leave the bottom half down.
This style does two smart things for fine hair. First, it lifts the hair off the face without asking the entire head of hair to carry the look. Second, the clip itself gives you structure, which fine hair often needs more than extra product. If your hair is shoulder length or shorter, this can be even better than a full updo because there’s less weight dragging it flat.
A medium claw clip usually holds better than a giant one. Too much clip, and the hair slides inside it. Too little, and it pops open the moment you bend over a sink.
4. The Bubble Ponytail
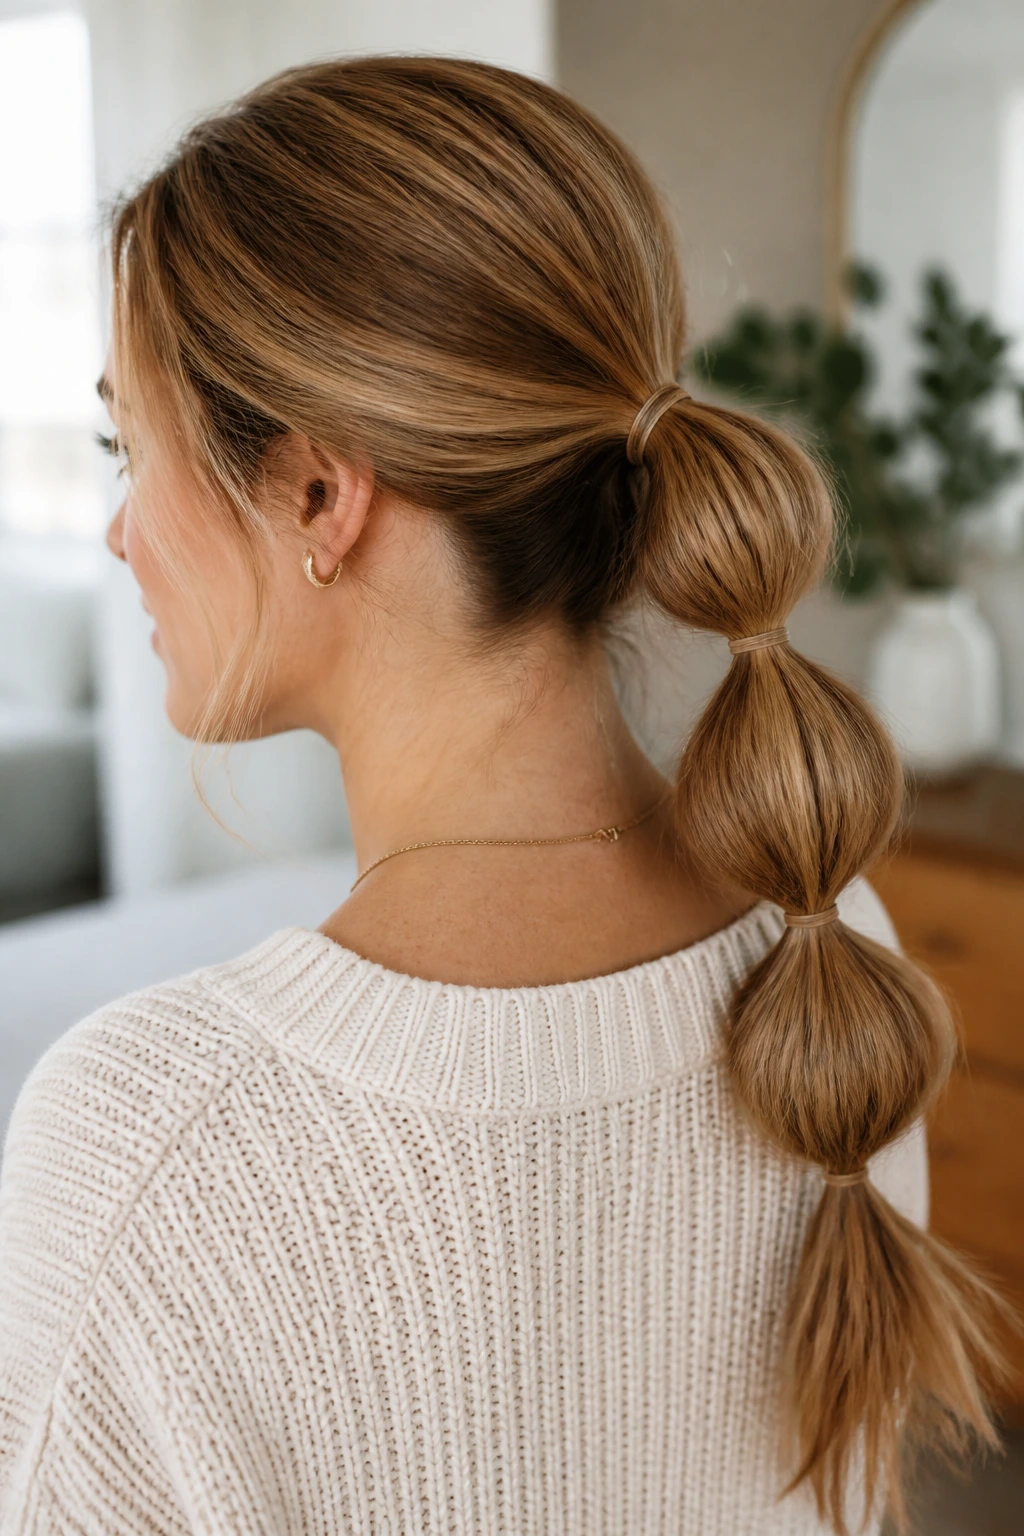
Bubble ponytails sound a bit theatrical until you try one on fine hair. Then you realize they’re doing something sneaky: each elastic creates a separate little section that looks fuller than one long, skinny tail ever could.
Make a low or mid ponytail first. Add another elastic 2 to 3 inches down, then another, all the way to the ends. After that, tug each section gently between the elastics until it puffs out. Don’t yank hard; you want a soft roundness, not a lopsided football.
This is especially good when your hair is too fine to look thick in a traditional ponytail, but you still want length on show. If the ends are very wispy, mist them with a little water and smooth serum before you start. That keeps the tail from looking frayed at the bottom.
Quick note: clear elastics disappear best, but small black ones can work if your hair is dark. Use whichever will not scream at you from the mirror.
5. The Side Braid Into Low Ponytail
A side braid buys you control, which is half the battle on a busy morning. Instead of leaving the front sections to flutter loose and frizz around your face, you braid one side and feed it into a ponytail at the nape.
Part the hair to one side, grab the heavier front section, and braid it loosely back along the hairline. Secure it with a tiny elastic, then gather all the hair into a low ponytail. If the braid ends too soon, pin it under the ponytail base; nobody needs to see the awkward little tail end.
The braid gives the ponytail a thicker-looking front, and that matters on fine hair because a plain low ponytail can look a little too neat in a bad way. This version has shape. It also keeps the style from sliding forward and collapsing around the temples.
Best use case
- School-run mornings when you want hair off your face.
- Days when the front pieces are flat but the back is still usable.
- Hair that’s long enough to braid one side without snagging.
6. The Sleek Low Bun
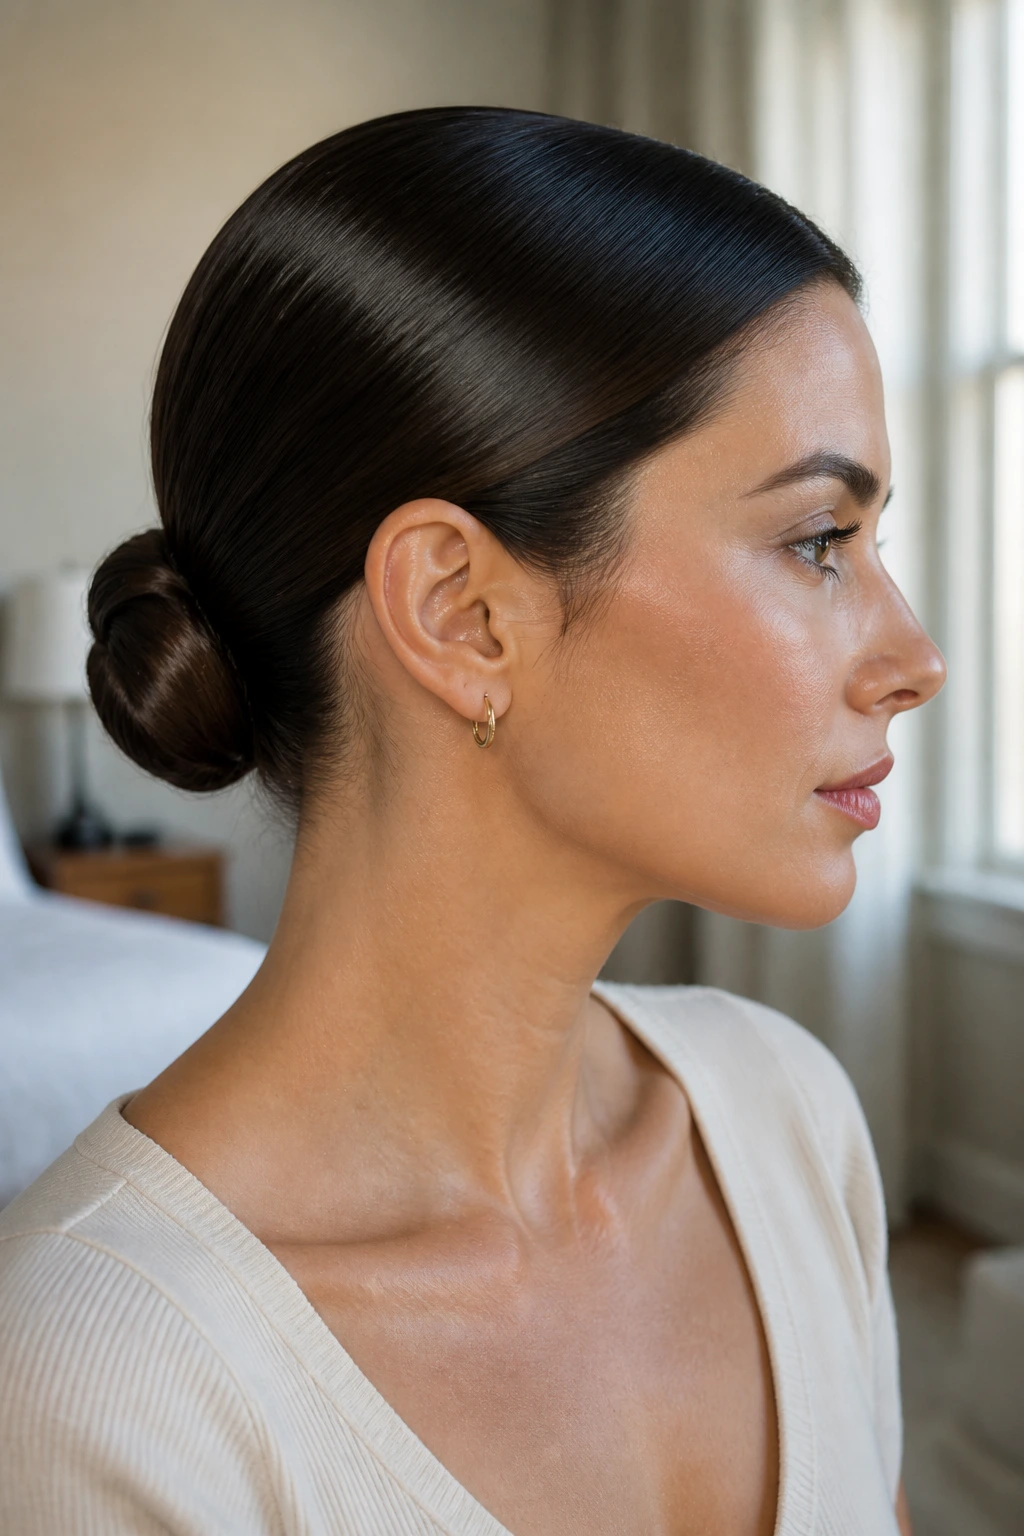
A sleek low bun works when the roots already have a touch of oil and you don’t want to fight it. That natural slickness can be your friend. It gives the hair a smoother surface, so the bun stays tidy instead of puffing up into a halo of flyaways by noon.
Brush the hair straight back or part it neatly down the middle if that suits your face. Smooth a pea-sized amount of light cream or gel over the top layer only, then gather a low ponytail at the nape. Twist the tail into a bun and pin it flat against the head.
The key here is restraint. Too much product makes fine hair stringy. Too little makes the whole thing unravel. One small squeeze of smoothing product across the outer layer is usually enough.
This is the style I’d pick when the day needs to look a little more put together than it feels. It’s clean, practical, and doesn’t demand thick hair to make sense.
7. The Half-Up Knotted Back

Two small knots can do what one big ponytail sometimes cannot: create shape without stealing too much length. This one is especially useful when the ends of your hair are too thin for a full updo, but you still want the front off your face.
Take one section from each side of the head, tie them together once at the back, then tie them again if the hair is long enough. If the knot feels loose, secure it underneath with a slim bobby pin. Leave the rest down and finger-comb the top only enough to soften the part.
The look depends on a little looseness. If you pull the knot too tight, it shrinks and disappears. If you keep it slightly soft, it gives the impression of more hair than there really is. Fine hair loves that illusion.
I like this one for afternoons when you’ve already washed your hair and it still needs to survive a second round of errands. It’s the sort of style that looks as if you planned it, which is a lovely bonus.
8. The Rope-Twist Ponytail
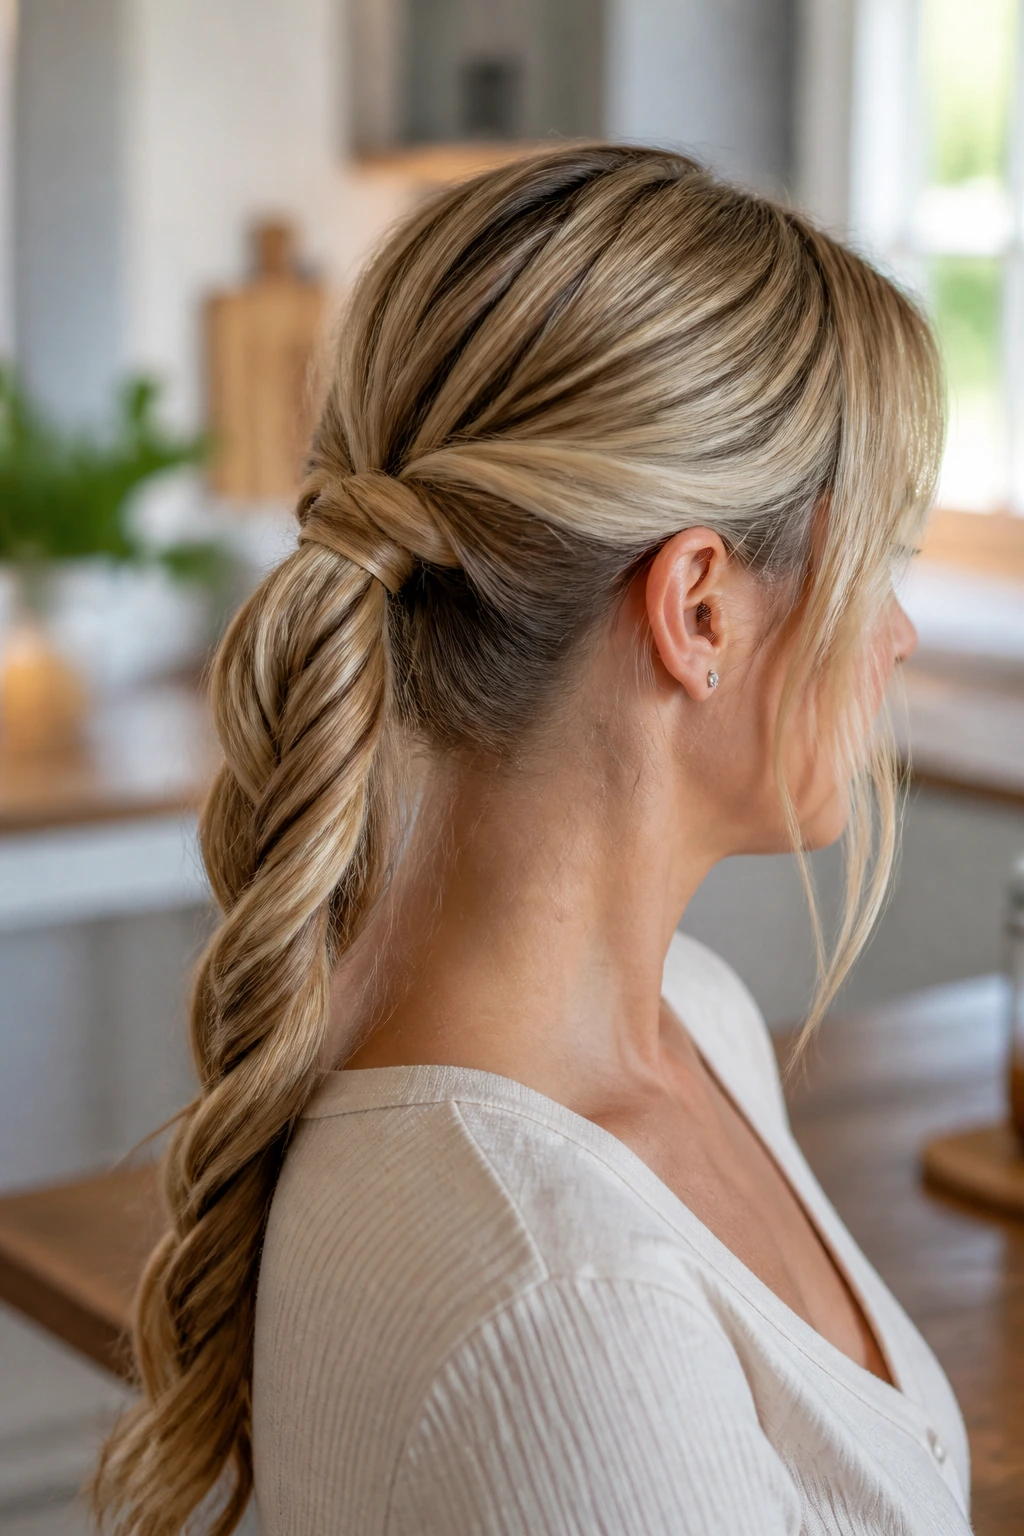
Rope twists are sneaky. They make slim hair look more textural than it actually is, and they hold better than a single smooth tail because the strands lock together while you twist them.
Pull the hair into a low or mid ponytail, then split the tail into two sections. Twist each section in the same direction, then wrap them around each other in the opposite direction. Secure the end with a small elastic. If you want more shape, gently tug the twist apart before you reach the bottom.
Why it’s kinder to fine hair
- It uses the length of the hair without needing a thick braid.
- It hides the thin end of the ponytail.
- It gives the style a defined line, which fine hair often lacks after brushing.
This is a good one when you want something neater than a messy ponytail but less formal than a bun. It takes about five minutes once you’ve done it twice.
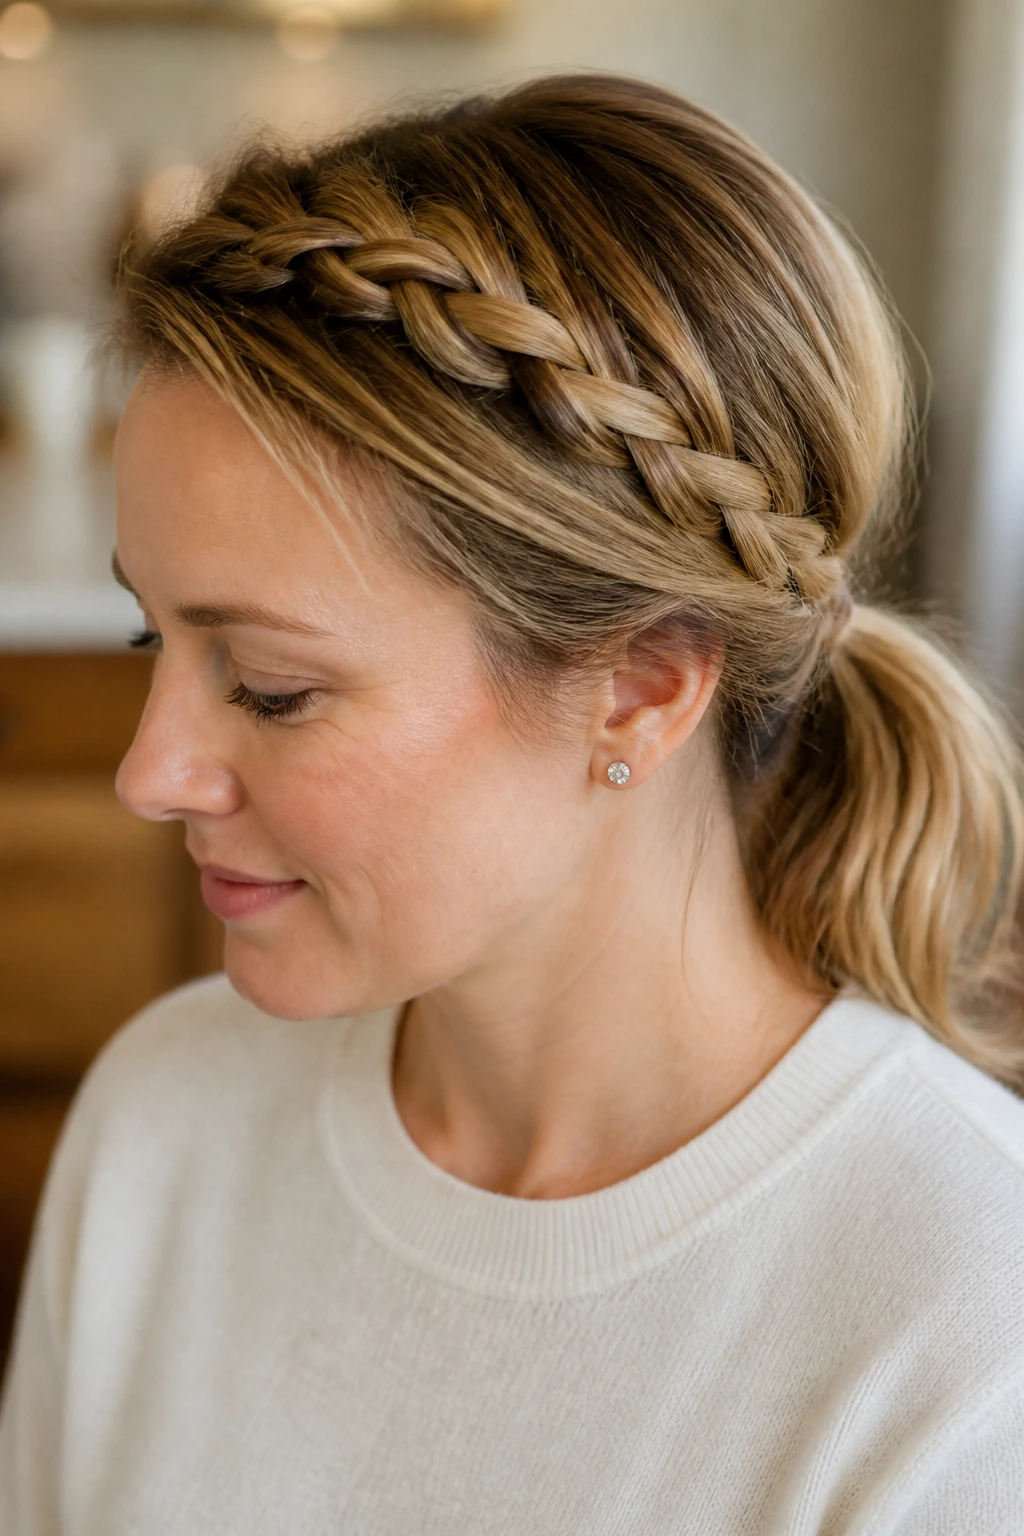
9. The Braided Headband Half-Up
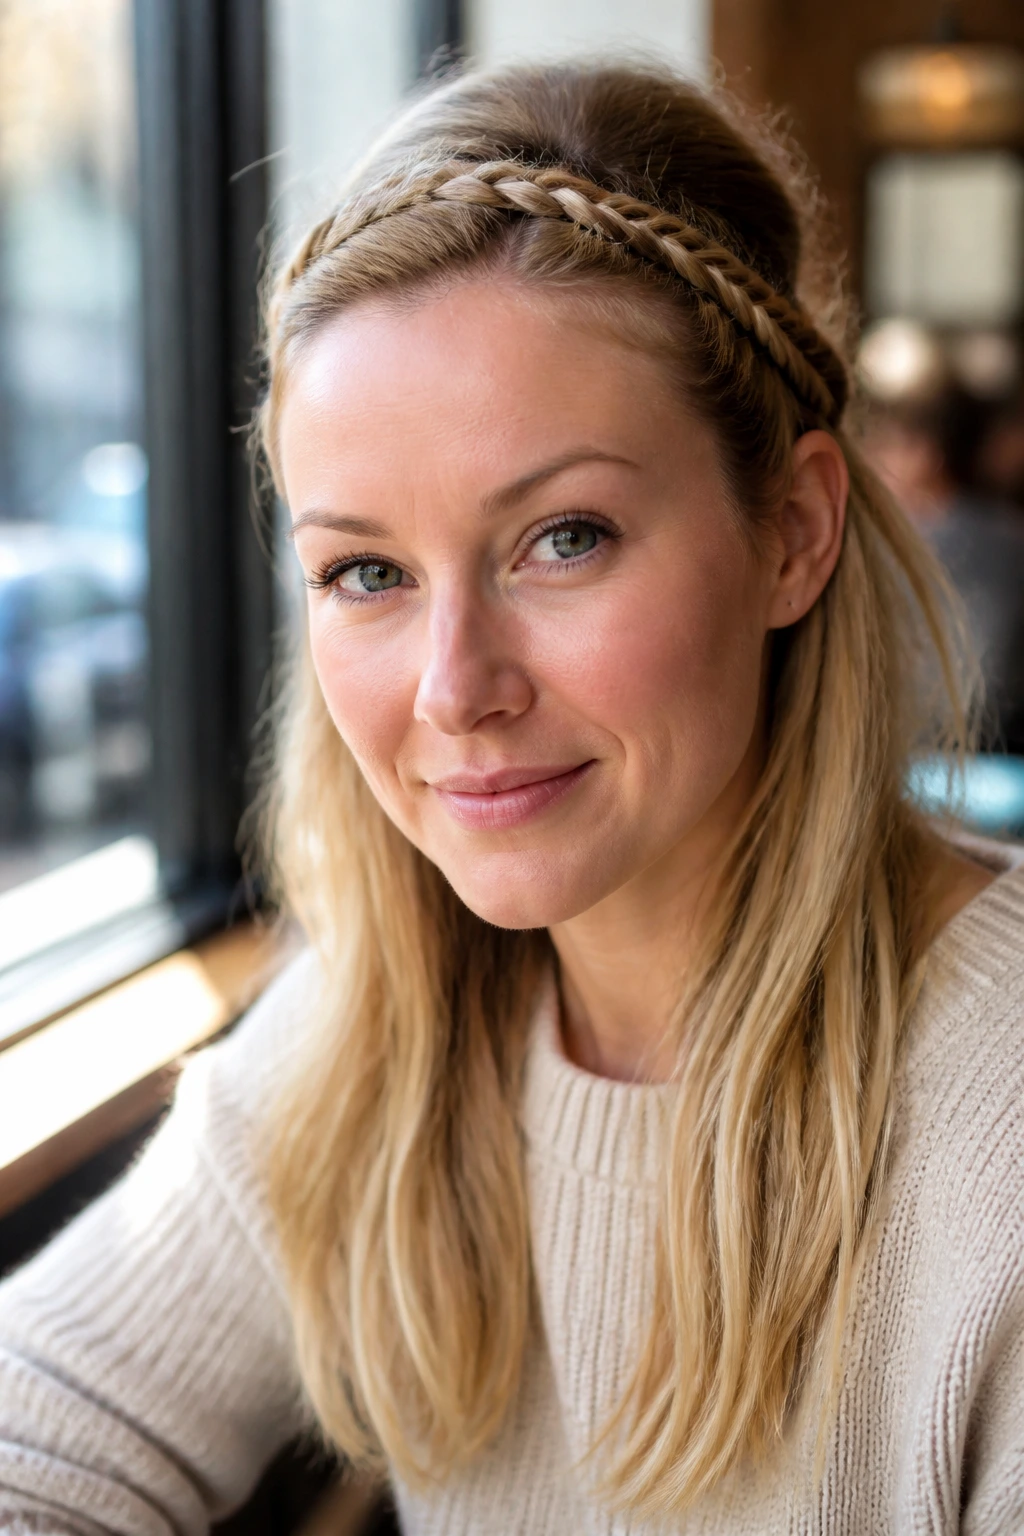
Want your fringe off your face without committing to a full braid? This is the answer. A braided headband takes a front section and turns it into a built-in band, which is brilliant for fine hair because it stops the front from falling flat against the forehead.
Start near one temple and braid a 2-inch section along the hairline toward the other side. You can French braid if you want more grip, but a simple three-strand braid works too. Pin it behind the opposite ear, then leave the rest of the hair down or loosely tucked back.
The trick is keeping the braid narrow and close to the head. If it sits too high, it looks like an afterthought. Too low, and it disappears into the rest of the hair. Right at the hairline, it behaves like a soft frame.
This one has a slightly softer feel than a ponytail, which makes it useful when you want your hair down but still under control.
10. The Scarf-Wrapped Ponytail
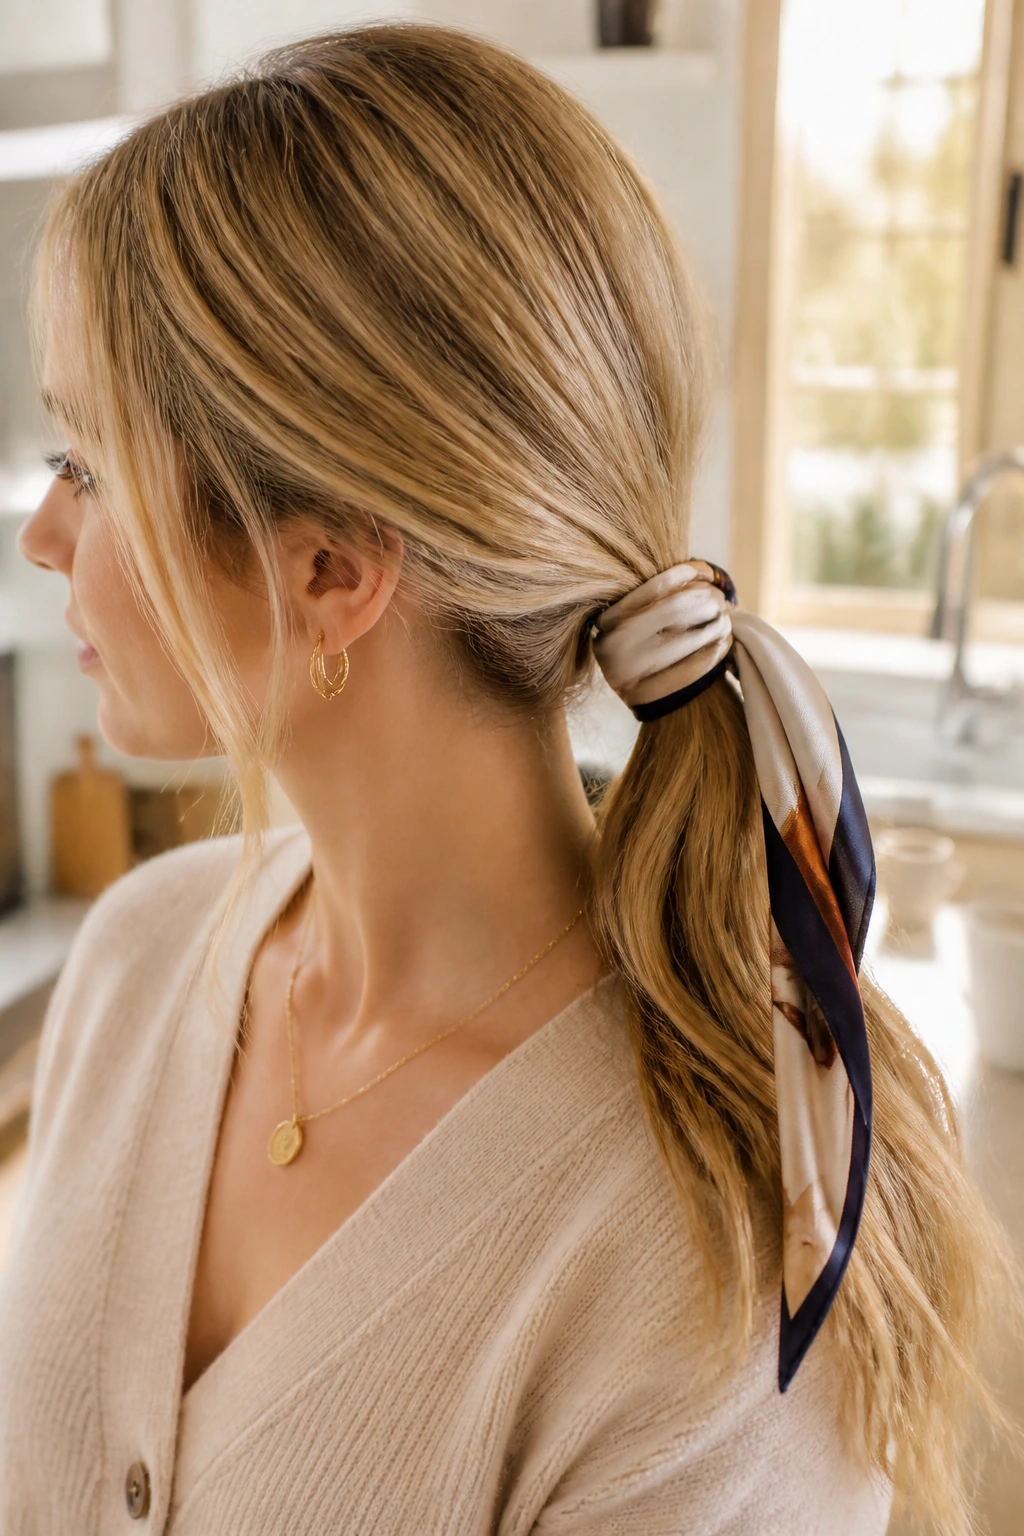
A scarf can hide a thousand sins. In this case, it hides a ponytail base that looks too slim on its own.
Tie the hair into a low ponytail first. Fold a silk or cotton scarf into a long strip, wrap it around the elastic, and knot it neatly above or to the side of the ponytail. Leave the scarf tails hanging, or tuck them under for a cleaner look.
This style works because the scarf gives the eye something to read besides the thinness of the ponytail. It adds width at the base, which is where fine hair often looks smallest. And if you pick a scarf with a bit of texture, it also keeps the elastic from slipping.
A scarf-wrapped ponytail is one of the easiest ways to make a plain style look intentional without extra heat or backcombing. It’s also forgiving. If the ponytail isn’t perfectly even, the scarf covers the wobble.
11. The Double-Twist Half-Up
Two twists usually hold better than one big piece of hair pulled back and pinned. That’s the secret here. Fine hair doesn’t always have the weight to stay anchored in a single section, but split sections can grip more neatly.
Take a section from each temple, twist them back, and cross them over one another at the center. Pin them where they meet, or join them with a small clear elastic first and hide that with a pin. Leave the bottom hair loose.
The shape is soft, but the hold is good. You can tug the twists outward a little once they’re pinned to create more width, which helps the style read as fuller. If your hair is very straight, a little dry shampoo at the roots first makes the twists less slippery.
I like this one because it behaves like a compromise. It keeps the front controlled, leaves some length on show, and never feels as serious as a full bun.
12. The Low Braided Bun
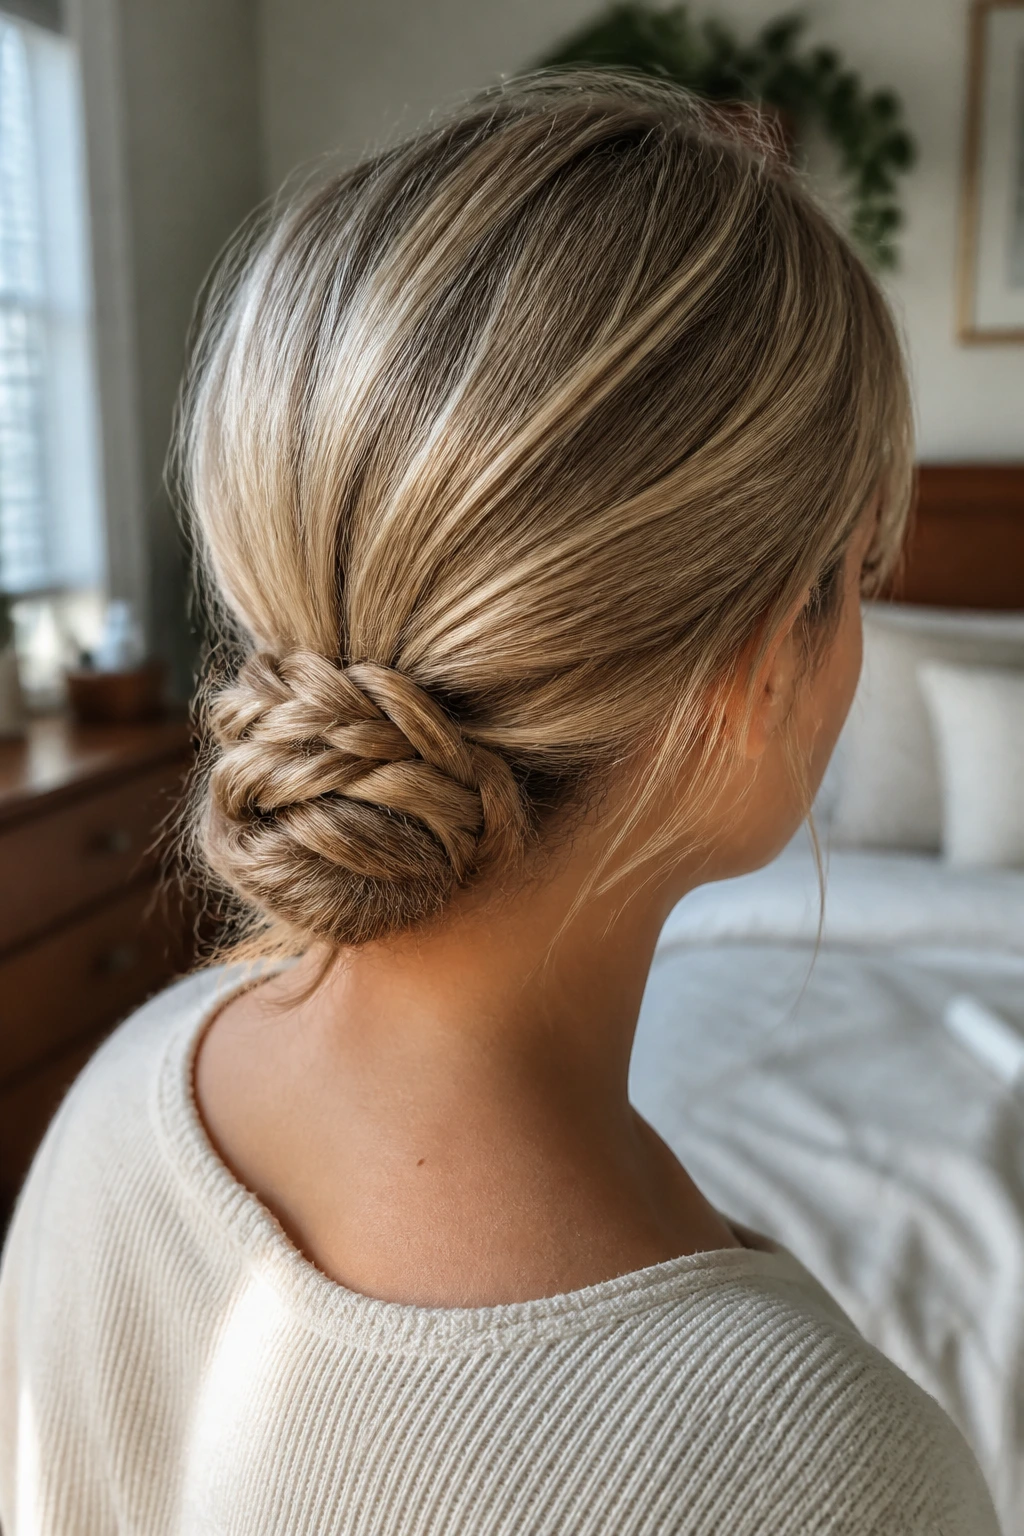
If the ends of your hair are thin, braid them first. That’s the whole reason this style works.
Gather the hair into a low ponytail, braid the tail all the way down, then wrap the braid around the base into a bun. Pin through the braid in a few places so the shape stays flat and close to the head. If the braid is short, coil it tighter; if it’s long, let one end tuck under naturally.
This gives the bun more body than a plain twist. Fine hair often looks wispy when it’s wrapped directly, but a braid creates a thicker-looking texture that the bun can show off. It’s also neat enough for a busy day and secure enough that you don’t need to keep checking it in the mirror.
Pro move: braid only to the last inch or two and leave a tiny tail loose if you want the bun to look softer. That little imperfection can make the whole thing look more expensive than it is.
13. The Claw-Clip French Twist
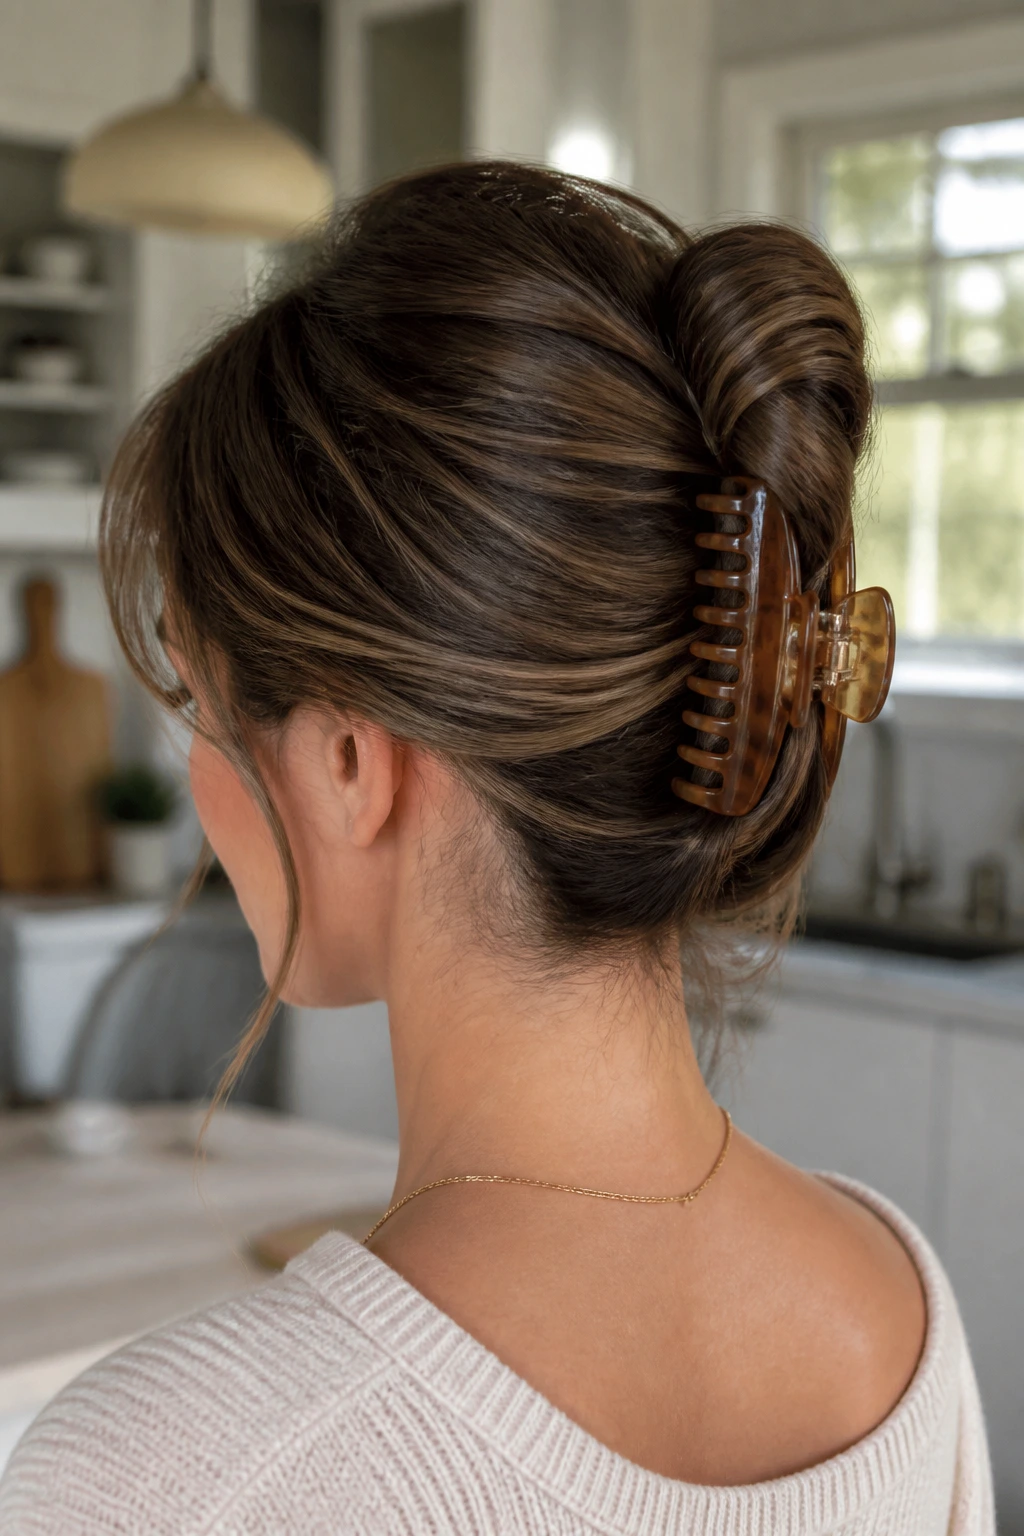
A claw clip can make fine hair look fuller than a scrunchie ever will, mostly because it lifts and folds the hair instead of squeezing it flat. The French twist version is one of the quickest ways to get there.
Gather the hair as if you’re making a low ponytail, twist it upward against the back of the head, and tuck the ends in. Clip the twist vertically. If the hair feels slippery, cross two bobby pins under the clip for extra bite.
Pin map
- One clip at mid-back height gives more lift than one sitting too low.
- A few loose strands around the face soften the shape.
- If the twist is too tight, pull one edge out before clipping.
This is a solid option for mornings when you need to look like you made an effort, even if you did it in the kitchen between packing lunches. It’s tidy, quick, and works best when the hair has a little texture from the day before.
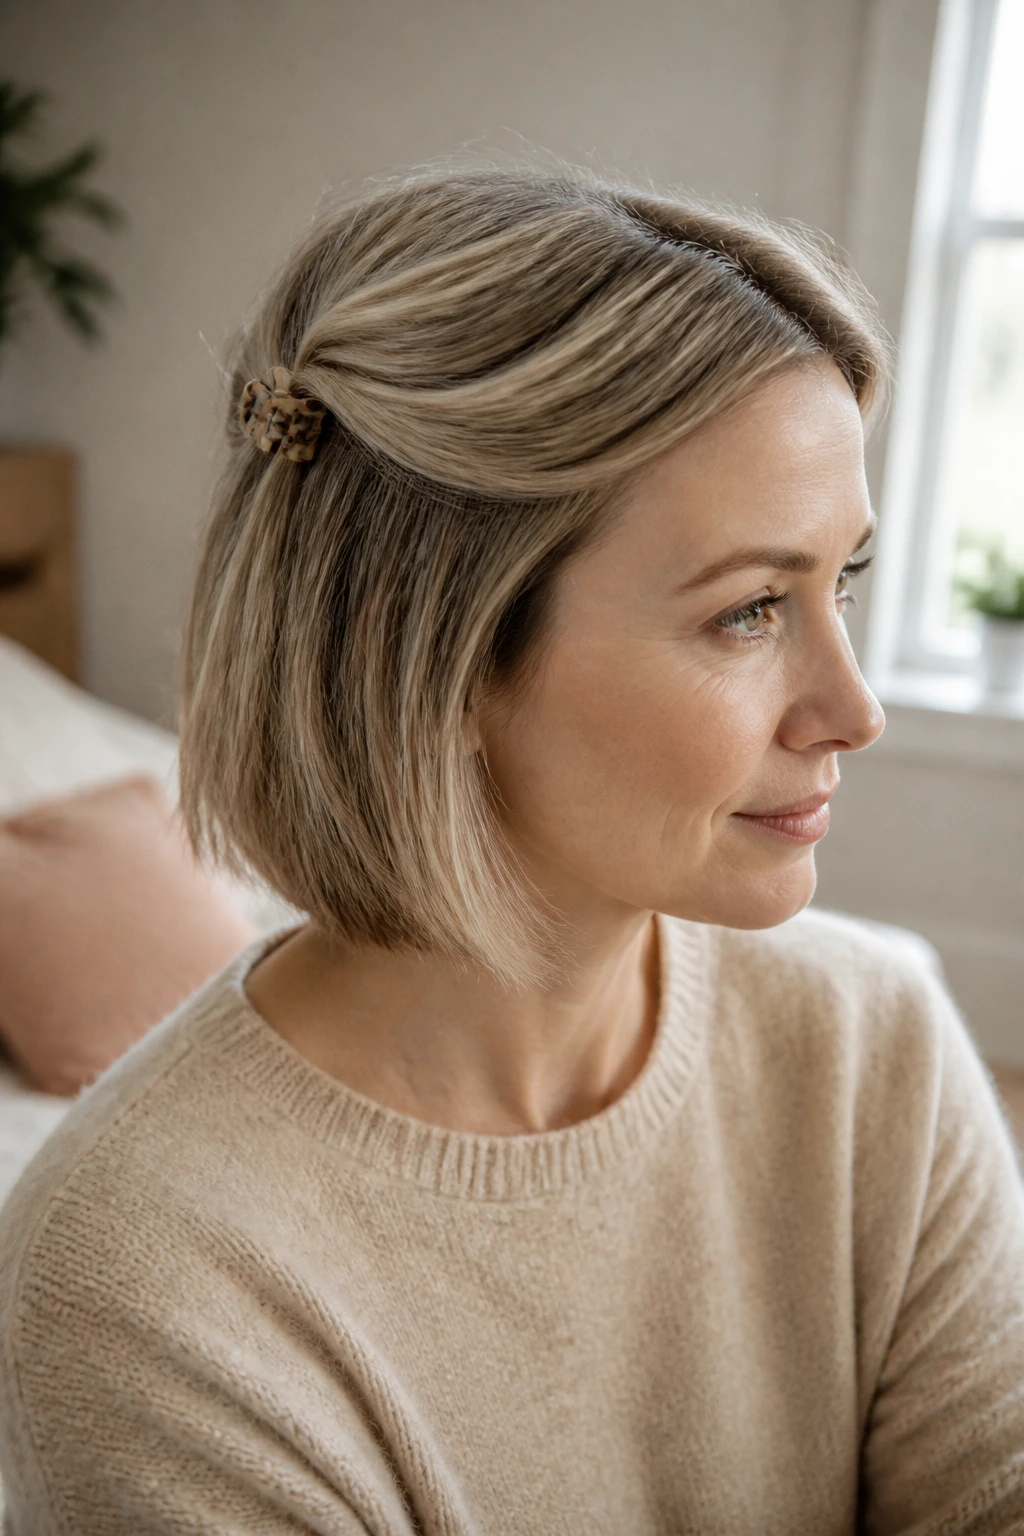
14. The Side-Pinned Loose Hair
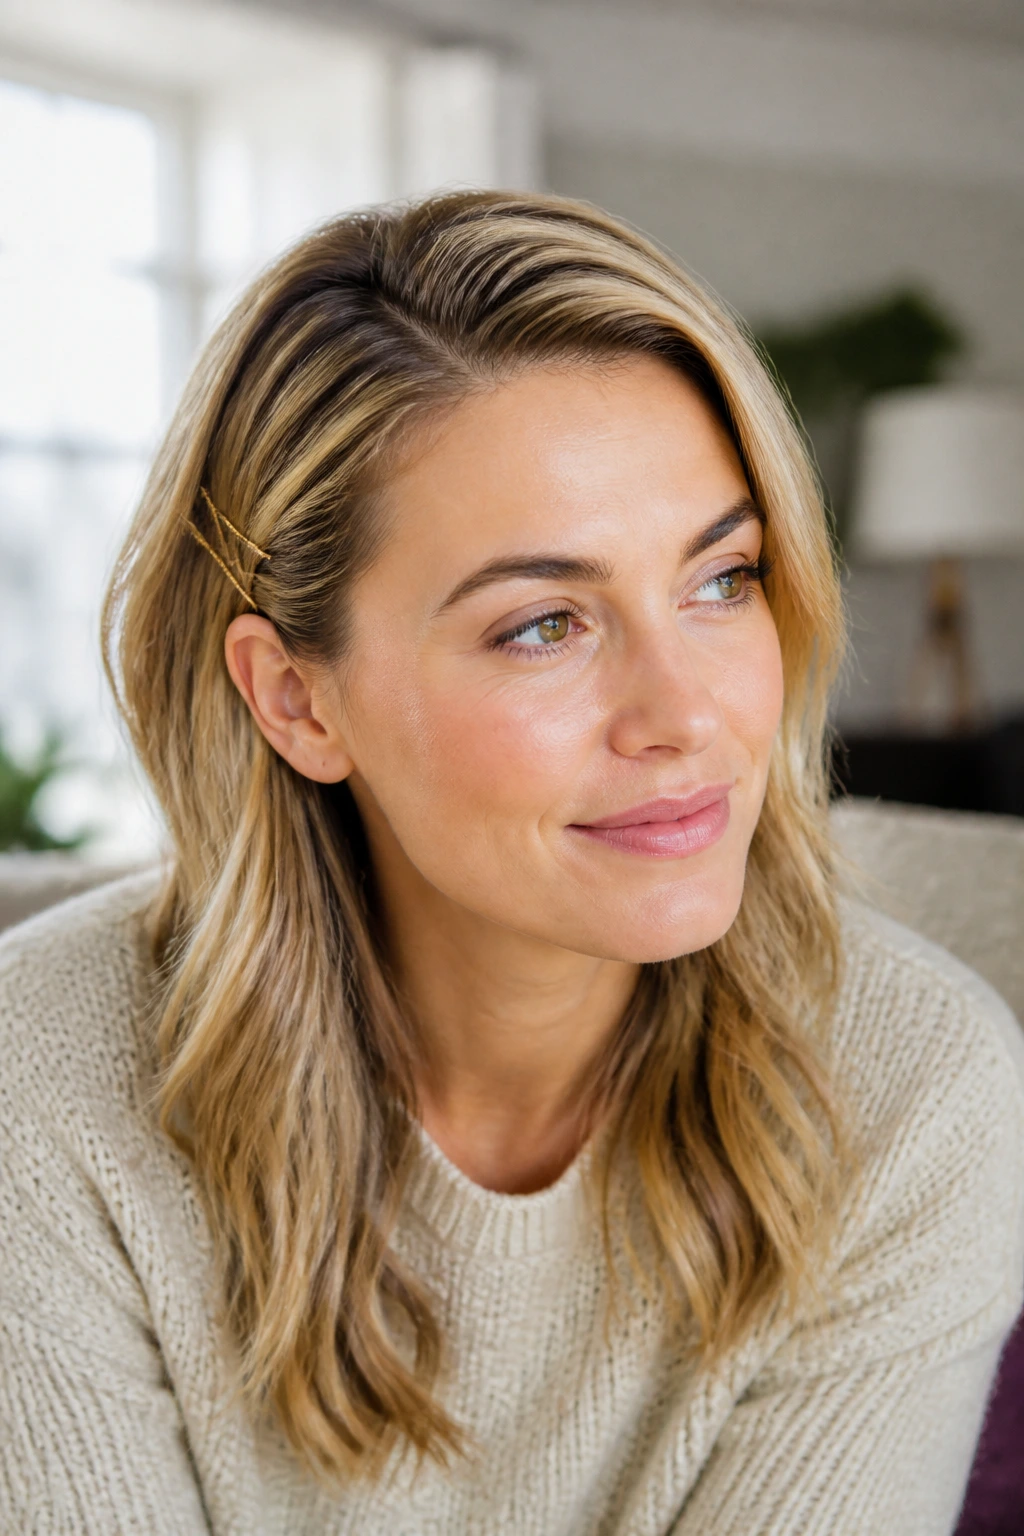
What do you do when your hair is too flat to wear down but you cannot face tying it up again? You pin one side back and let the rest fall.
Create a deep side part, take the heavier front section on one side, and tuck it behind the ear with two crossed bobby pins or a small decorative barrette. Do the same on the other side if needed, or leave one side loose for a softer shape. A light mist of dry shampoo at the roots keeps the part from looking greasy.
This works especially well with very fine hair that loses volume when brushed. Instead of forcing the entire style to do more than it can, you use the face-framing pieces to create structure. It’s the hair equivalent of a quick tidy-up that still counts as getting ready.
It also takes almost no time. That matters on mornings when the kettle is already screaming and someone has misplaced a shoe again.
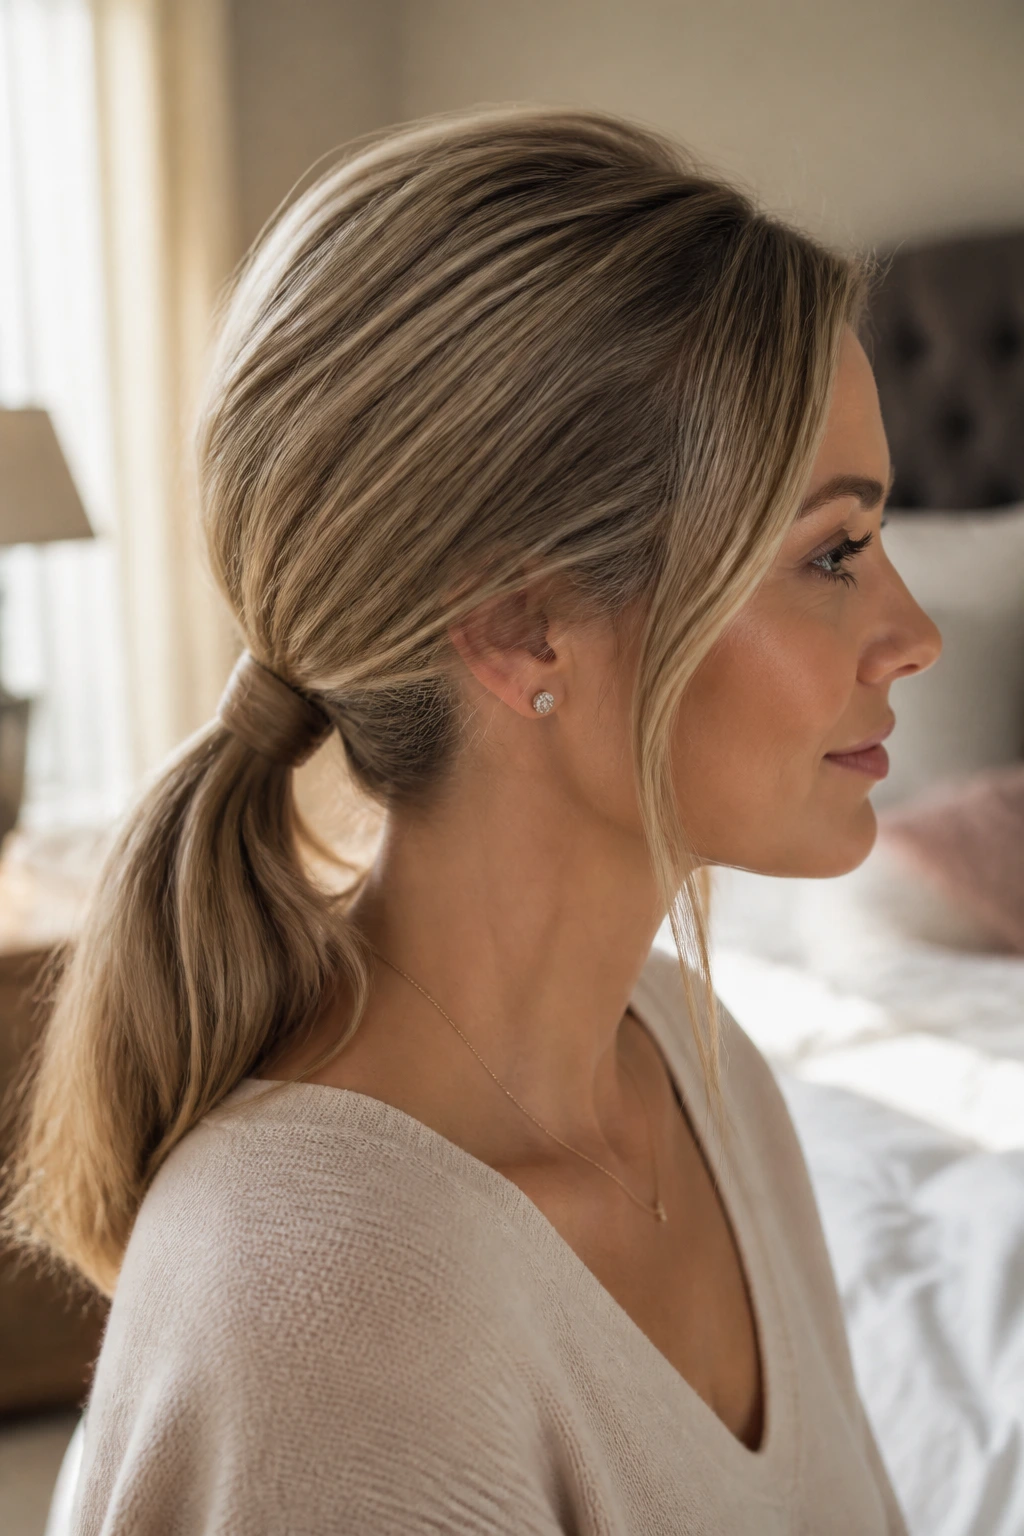
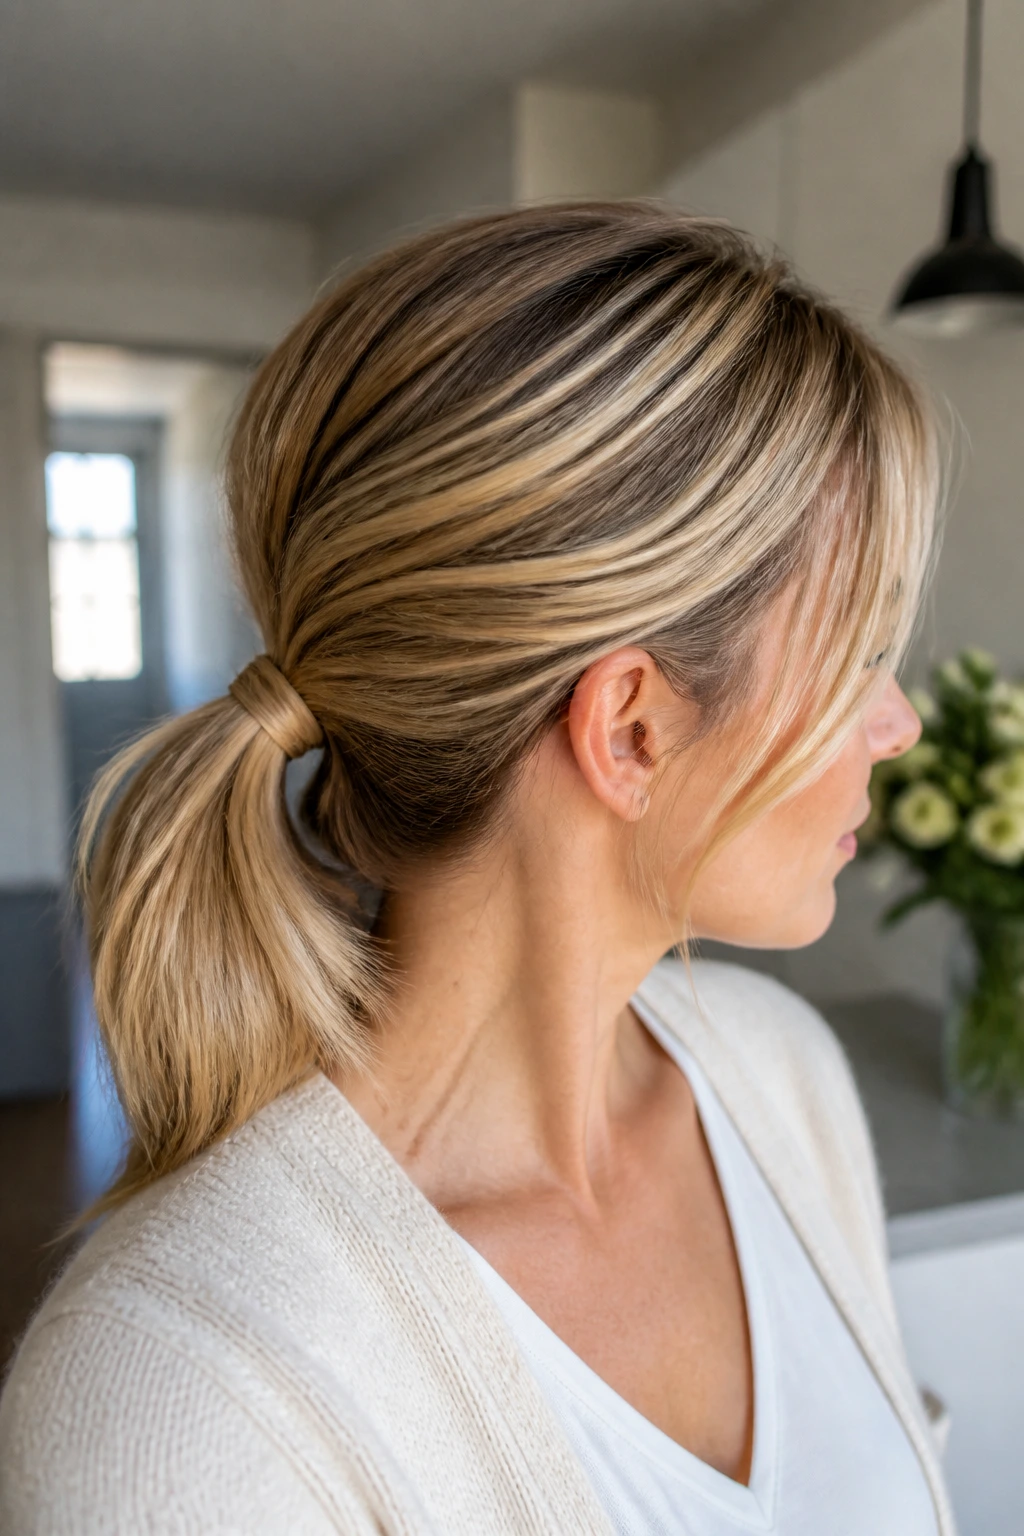
15. The Wrapped-Base Ponytail
A wrapped-base ponytail is one of those tiny upgrades that makes a plain style look thought out. Hide the elastic, and suddenly the ponytail feels cleaner and less thrown together.
Make a ponytail at the nape or slightly higher. Take a slim 1-inch strand from underneath the tail, wrap it around the elastic once or twice, and pin the end beneath the ponytail. Keep the wrap snug so it doesn’t unwind. If the tail is very fine, gently tug the hair above the elastic outward to create a bit more width at the base.
This style is simple, but I prefer it to a naked elastic because the wrapped section gives the eye a place to land. On fine hair, that little bit of polish matters more than people think. A visible elastic can make the whole style look unfinished, especially if the ponytail itself is small.
You can do this one with almost no tools. One tie, one pin, done.
16. The Soft Twin Braids
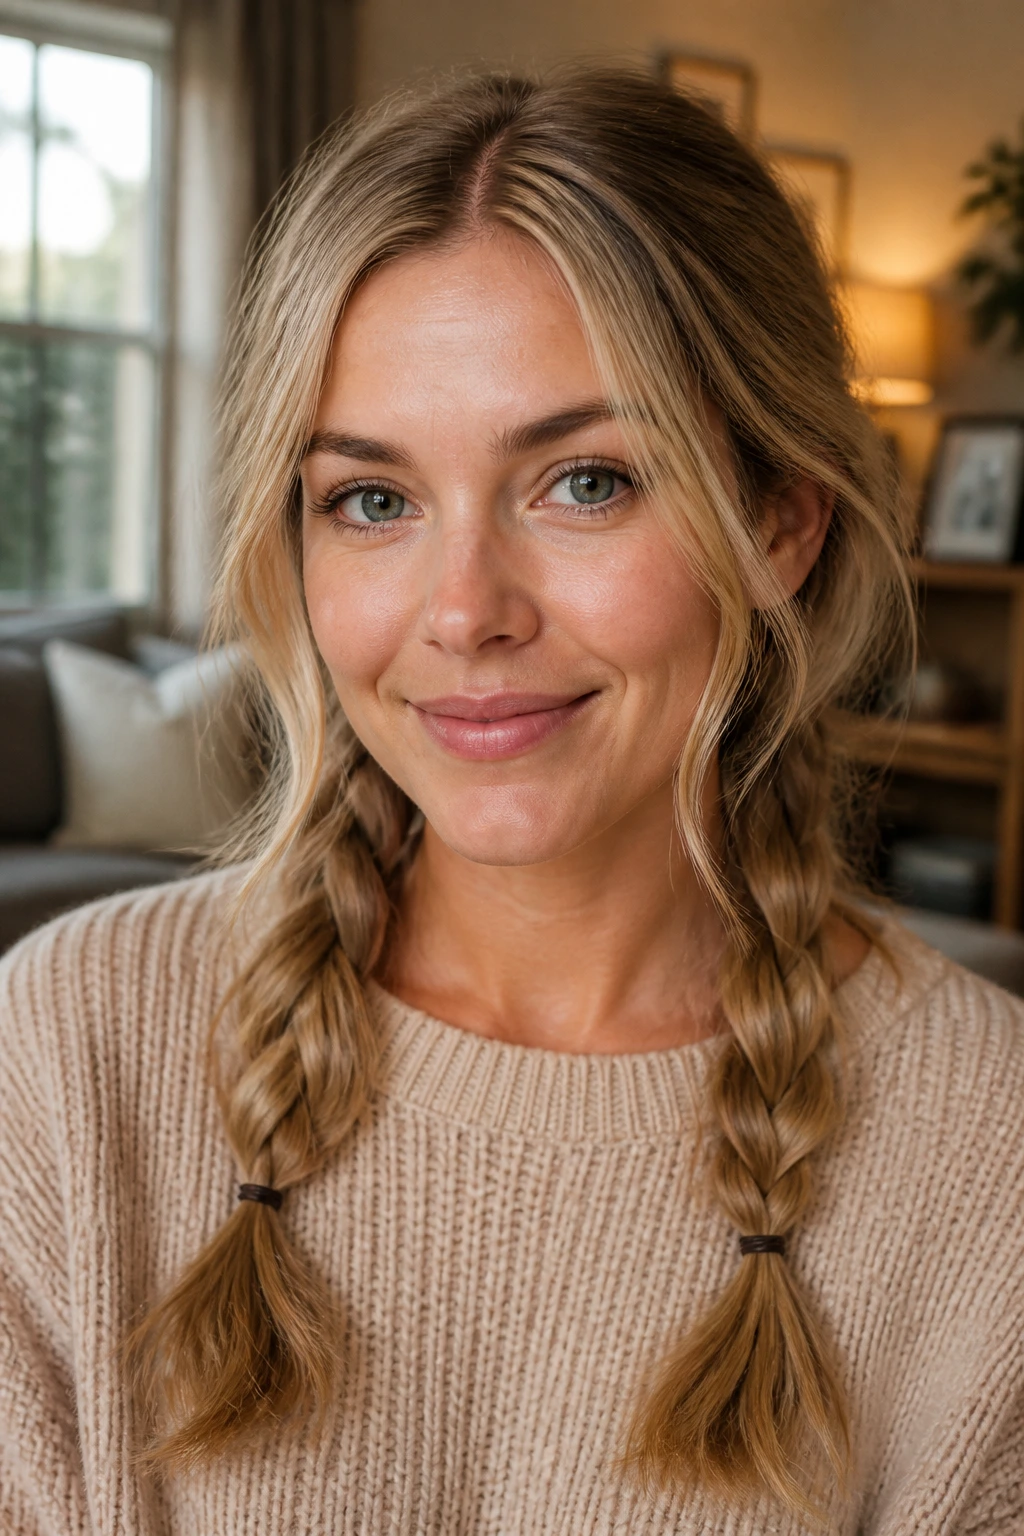
Twin braids are not childish when they’re low, loose, and a little broken up with your fingers. On fine hair, they can actually be one of the smartest styles around because they divide the hair into smaller, more manageable sections.
Part the hair down the middle and braid each side loosely, starting just below the ears or even lower if your hair is long enough. Secure each braid with a tiny elastic. Then tug the edges gently so each braid looks fuller and softer.
The style keeps the hair contained without needing much length or thickness. If the braids look too neat, pull out a few face-framing strands. If they look too sparse, loosen the outer links a touch; that small adjustment usually gives them more presence.
This is a good one for active days, wet-weather days, and any morning when you want the ends out of the way. It also holds up well if you need to put your hair up and take it down again later.
17. The Crown Braid Halo
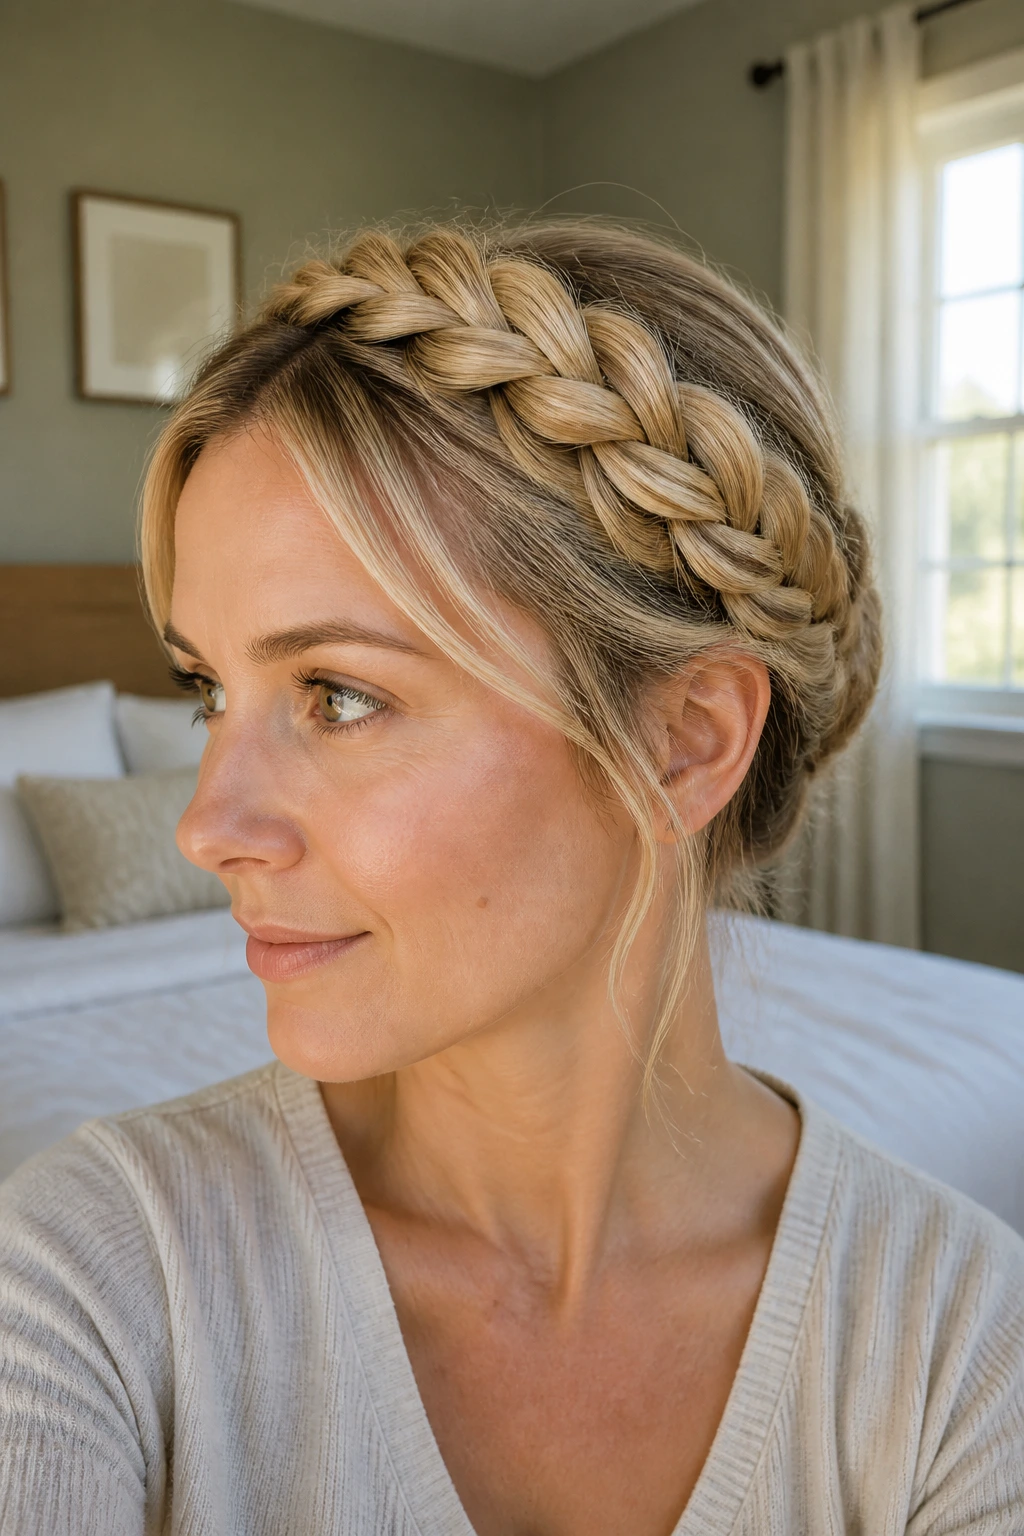
A crown braid sounds fussy. In practice, the loose version can be faster than trying to wrestle a perfect bun out of fine hair.
Start behind one ear and braid across the back of the head toward the other ear, staying close to the hairline. Pin the braid behind the opposite ear and hide the tail under the rest of the hair. You don’t need the braid to be tight; in fact, a looser braid usually looks better here because it creates more width.
Fine hair benefits from this style because the braid itself adds visible texture around the head. It frames the face and makes the hair look denser than it is. If you have layers, the shorter pieces may escape a little. Let them. That softness is part of the charm.
This is the style I’d choose when I want the hair fully controlled without looking severe. It takes a little more time than a ponytail, but not by much once your fingers learn the route.
18. The Messy Chignon
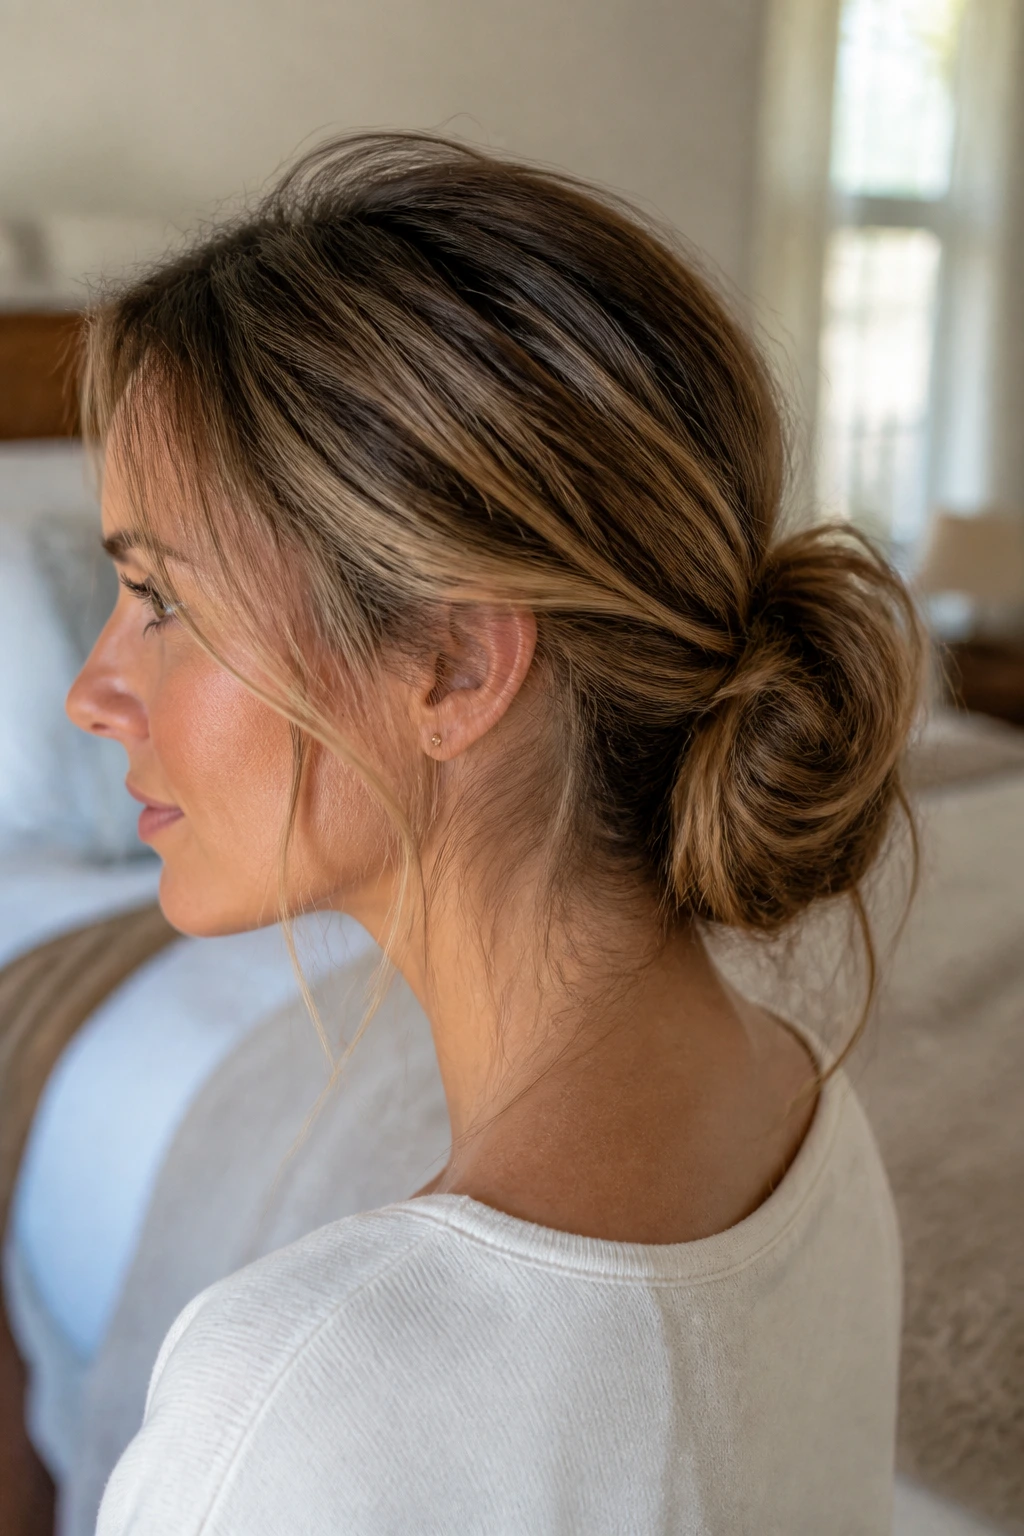
The messy chignon is where fine hair gets to cheat a little. The shape is soft, the ends are tucked away, and the slight looseness makes the bun look fuller than a tight knot ever could.
Make a low ponytail, twist the length, and wrap it around the base into a bun. Don’t chase perfection. Leave the last inch or two a bit undone, then pin around the shape so it stays in place. Pull a few tiny pieces free at the temples if you want a softer finish.
It’s a good closing style for the list because it suits almost any morning: office, school run, last-minute errands, you name it. If your hair is particularly fine, backcomb the ponytail lightly before wrapping it; two seconds of teasing can give the chignon enough bulk to stay visible.
My opinion: this works best when it looks a touch lived-in. A too-perfect chignon on fine hair can feel severe and small. A slightly undone one looks fuller, kinder, and far less like you spent twenty minutes trying to hide the elastic.
The Five-Minute Prep That Gives Fine Hair Grip
Fine hair usually does better when it’s not squeaky clean. A tiny bit of texture gives pins and elastics something to catch on, and that’s worth more than another round of brushing. If you washed your hair that morning, use dry shampoo at the roots first, then wait a minute or two before styling so the powder can settle.
Start with the right amount of texture: one or two sprays of dry shampoo at the crown and nape is often enough. If you overdo it, the hair goes chalky and dull, which is its own kind of problem.
Use grip where the style needs it: backcomb only the sections that will be pinned or tied. The crown, the nape, and the section under a clip are the spots that matter. You do not need to tease the whole head.
Pin smarter, not harder: cross two bobby pins in an X when a twist keeps slipping. That holds better than stacking them in the same direction, and it’s usually the fix when a style keeps opening up halfway through the day.
Keep the finish soft: once the style is in place, stop fussing with it. Fine hair goes flat if you keep re-smoothing it. A single fingertip adjustment is enough.
What Belongs on the Bathroom Shelf
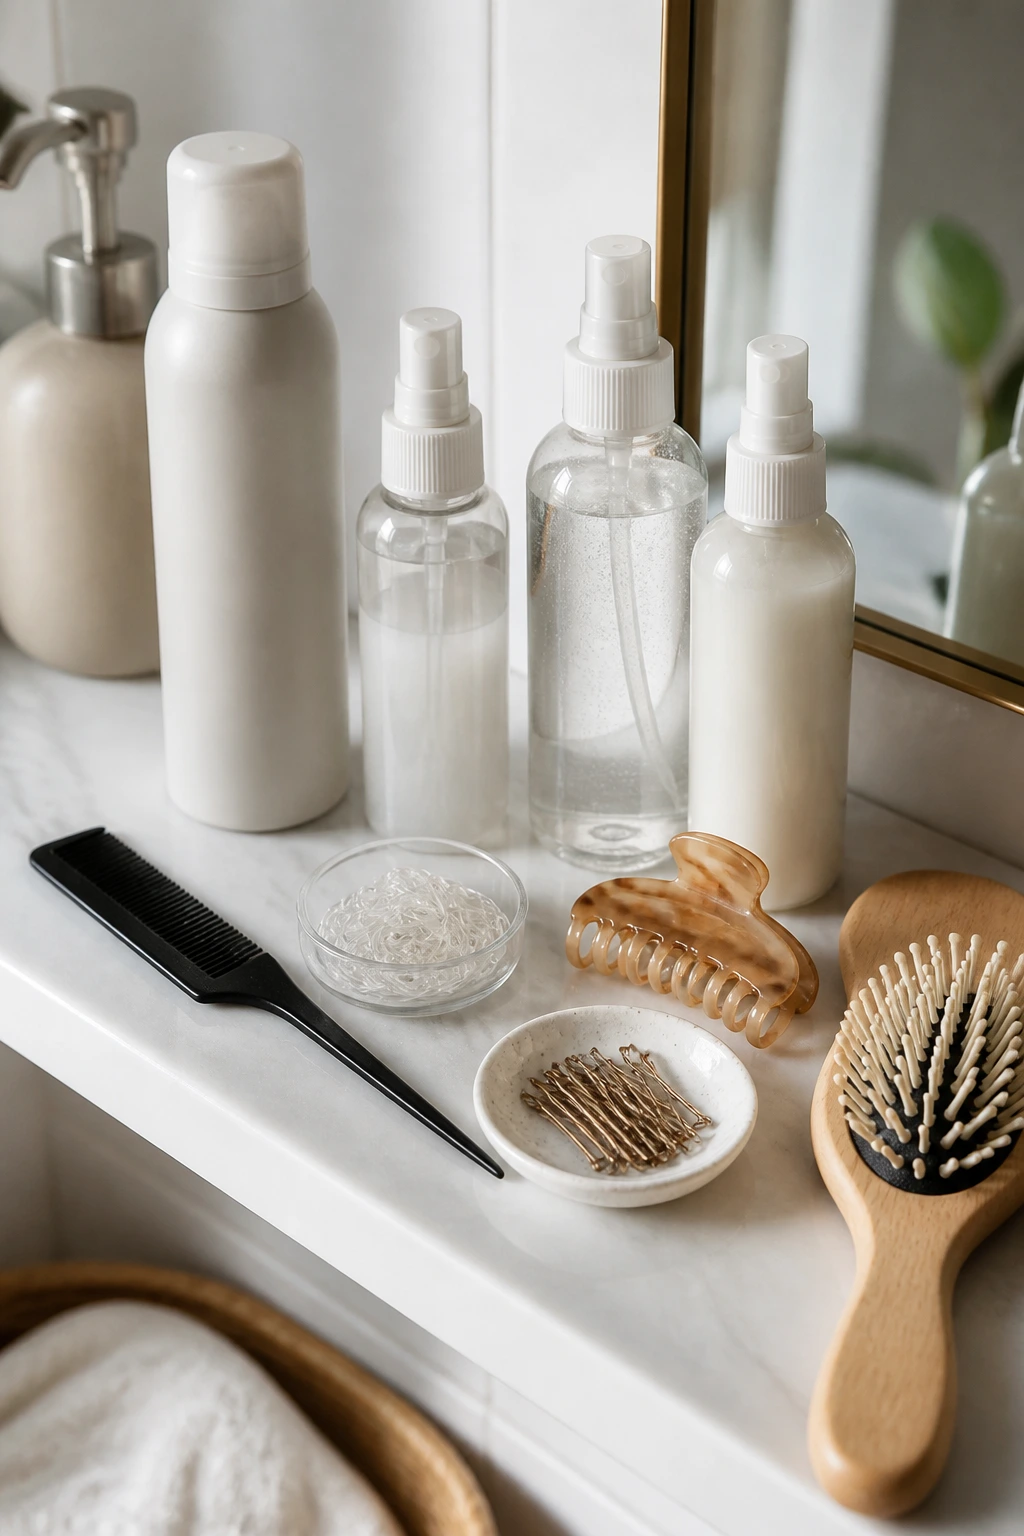
A good fine-hair morning doesn’t need a suitcase of products. It needs a small set of tools that do one job each, and do it properly.
- Tail comb: Best for lifting a small section at the crown or making a clean part line.
- Dry shampoo: Adds grit at the roots so the style doesn’t slide; spray it from 6 to 8 inches away.
- Small clear elastics: Useful for tiny braids, bubble ponytails, and half-up twists without bulk.
- Bobby pins in your hair color: Match them as closely as you can; they disappear better and hold side sections in place.
- Medium claw clip: A sturdy clip that closes fully holds better than an oversized one that wobbles.
- Light-hold hairspray: One mist over the finished style is enough; too much turns fine hair stiff and shiny.
- Texture spray or powder: Good for day-two hair or whenever you need extra friction before pinning.
- Soft brush or paddle brush: Use it to smooth only the outer layer so you don’t erase the volume underneath.
One more thing. Keep a few pins and a spare elastic in your bag. That tiny backup kit saves a surprising number of mornings.
The Mistakes That Make Fine Hair Fall Flat
Mistake: Starting with hair that’s too clean and too slippery. The style looks neat for ten minutes, then the elastics start sliding and the crown goes flat. The fix is simple: add dry shampoo or texture spray first, then wait a minute before you style.
Mistake: Using too much smoothing product. Fine hair turns stringy fast when it’s coated in cream or oil. Use only a pea-sized amount, and keep it on the outer layer or the very ends.
Mistake: Pulling styles too tight at the hairline. A super-tight ponytail or bun can look smaller, not sleeker, because the hair compresses against the scalp. Leave a little softness around the crown and temples so the style keeps some shape.
Mistake: Choosing the wrong elastic. A thick, bulky tie can flatten the ponytail and make a fine-hair style look even thinner. Slim elastics usually work better, and if the tie slips, use two thin ones instead of one heavy one.
Mistake: Over-brushing after the style is finished. Fine hair loses its shape quickly if you keep combing it once it’s pinned. Smooth it once, pin it, then stop. That’s the part many people forget.
Easy Swaps for Short Hair, Straighter Hair, and No-Heat Mornings
Short-Hair Shift: If your hair barely reaches the nape, swap buns and braids for half-up twists, claw-clip styles, and side-pinned sections. A shorter cut often looks fuller when you stop trying to force it into a long-hair shape.
Silky-Hair Fix: For very slippery hair, use dry shampoo before styling and choose shapes with more anchors—braids, twisted half-ups, or a wrapped-base ponytail. Smooth hair needs friction, not more shine.
Wavy-Hair Shortcut: If your hair has some natural bend, skip the brush and work with your fingers. A loose braid or messy chignon usually looks better on wavy fine hair than a sleek style that fights the texture.
No-Heat Morning: Avoid curling irons and blow-dryer tricks on mornings when time is short. Use the shape of the hair you already have, then add one detail—like a scarf, a braid, or a claw clip—to make it look intentional.
Day-Two Rescue: If the roots are oily but the ends are dry, split the difference. Dry shampoo at the scalp, a touch of leave-in only on the ends, and one of the low styles from above usually beats trying to start over.
Keeping Fine Hair Fresh Between Wash Days
Fine hair often looks best on day two, sometimes even day three, as long as you don’t let product pile up at the roots. That’s the sweet spot. The hair has enough grip to hold a style, but it hasn’t crossed into that heavy, coated feeling that makes everything collapse.
If you use teasing for lift, brush it out the same day or the next morning at the latest. Sleeping on backcombed hair turns the top layer rough and tangled, and that is a fight nobody needs. For braids and twists, a satin pillowcase helps more than people expect. It cuts down on friction, so the shape doesn’t get mashed overnight.
Dry shampoo can stay in the hair for a day, sometimes two, but it should be brushed through before you add more. Too many layers of powder make the roots look dusty. Wash the brush every week or two as well, because old product on the bristles goes right back onto clean hair.
And if a style is meant to last only a day, let it be a day style. Not every look needs to survive until the next school run. Sometimes the win is getting through one chaotic morning without touching it again.
Questions About Fine Hair and Busy Morning Styles
What hairstyles make fine hair look thicker?
Braids, wrapped ponytails, bubble ponytails, and loose buns usually give the best result because they create visible structure. Anything that hides the elastic and gathers the hair into a clear shape tends to look fuller than loose hair left to do its own thing.
Can I do these styles on freshly washed hair?
Yes, but add dry shampoo or texture spray first, and use fewer brush strokes. Freshly washed fine hair is often too soft and slippery, so the style may need a couple of extra pins to stay put.
How do I keep bobby pins from slipping out?
Cross them in an X, and slide them in with the wavy side down if yours have a grip side. If the hair is very silky, spray the pin lightly with hairspray before you insert it. That tiny bit of tack helps more than people expect.
Which styles work best for shoulder-length fine hair?
Half-up twists, claw-clip French twists, side-pinned looks, and low braided buns are usually the easiest. Shoulder-length hair often has enough length for shape, but not so much weight that the style drags itself down.
Can I sleep in braids or twists?
A loose braid or soft low twist can work for one night if it’s not pulled tight at the scalp. Skip tight elastics and anything that digs into the head, or you’ll wake up with dents and a sore hairline.
Is teasing bad for fine hair?
A little teasing at the crown is fine. The damage comes from overdoing it, ripping through knots, or teasing the same section every day without brushing it out gently later. Small, targeted backcombing is enough for morning styles.
What if my hair is too short for a bun?
Use clips, side pins, mini braids, and half-up sections instead. A good morning style doesn’t have to be an updo. Sometimes the smartest move is controlling the front and letting the rest stay loose.
Do I need heat tools for any of these?
No. Heat can help if you want a bend or wave, but it isn’t required. For fine hair on busy mornings, the most reliable styles are the ones that work with the texture you already have.
The School-Run Styles I’d Reach For First
If I had to pick only a few of these for real-life mornings, I’d keep the crown-lift low ponytail, the claw-clip half-up twist, the wrapped-base ponytail, and the messy chignon in heavy rotation. They’re fast. They hide the thin-looking bits that fine hair is famous for. And they don’t demand a perfectly fresh wash or a calm house, which is half the battle.
Fine hair rewards small, smart decisions. A little lift at the crown. A braid where the ends need help. A clip placed where the hair already wants to bend. That’s the whole game, and once you see it, the morning routine gets easier in a very practical way.
Pick two styles for the week, keep your pins where you can actually find them, and let the rest be flexible. On the mornings that start sideways, the style that holds without a second thought is the one worth repeating.