Braided hairstyles for kids with thick hair work best when the braid pattern respects the hair’s density instead of fighting it. Thick hair has a lot going for it: grip, body, and a braid that usually looks fuller from day one. But it also needs cleaner parts, steadier hands, and a little more patience at the hairline. Rush the first row, and you’ll see fuzz before lunch. Take your time, and the style can stay neat through recess, snacks, nap time, and one too many times taking a hoodie on and off.
That’s the part people miss. Thick hair is not “hard” hair. It just asks for a different plan.
The styles that work best here aren’t always the fanciest ones. Sometimes it’s a straight-back cornrow set that lies flat under a backpack strap. Sometimes it’s two Dutch braids that keep all that volume tucked in. Sometimes it’s a braided bun, or a crowned braid, or a playful part pattern that makes the whole style feel special without turning bedtime into a fight. The good versions are the ones that hold shape, stay comfortable, and do not leave a child flinching every time you touch the scalp.
Why This Collection Works
- Less Frizz, More Hold: Thick hair gives braids more surface to grip, so the finished style usually keeps its shape longer than it would on fine hair.
- School-Ready and Sport-Friendly: Styles that sit close to the scalp keep hair out of the eyes, under helmets better, and away from lunch trays.
- Not All-Day Maintenance: A clean braided style can buy you several calmer mornings, especially when you keep the roots moisturized and the parts neat.
- Dressy or Low-Key: The same braid pattern can look plain with clear elastics or dressed up with beads, ribbon, or a sharper part line.
- Gentler on Ends: Keeping the hair tucked into braids reduces rubbing on coat collars, chair backs, and car-seat straps.
- Built for Volume: Thick hair makes braid patterns read clearly. A small braid on dense hair can still look substantial instead of skimpy.
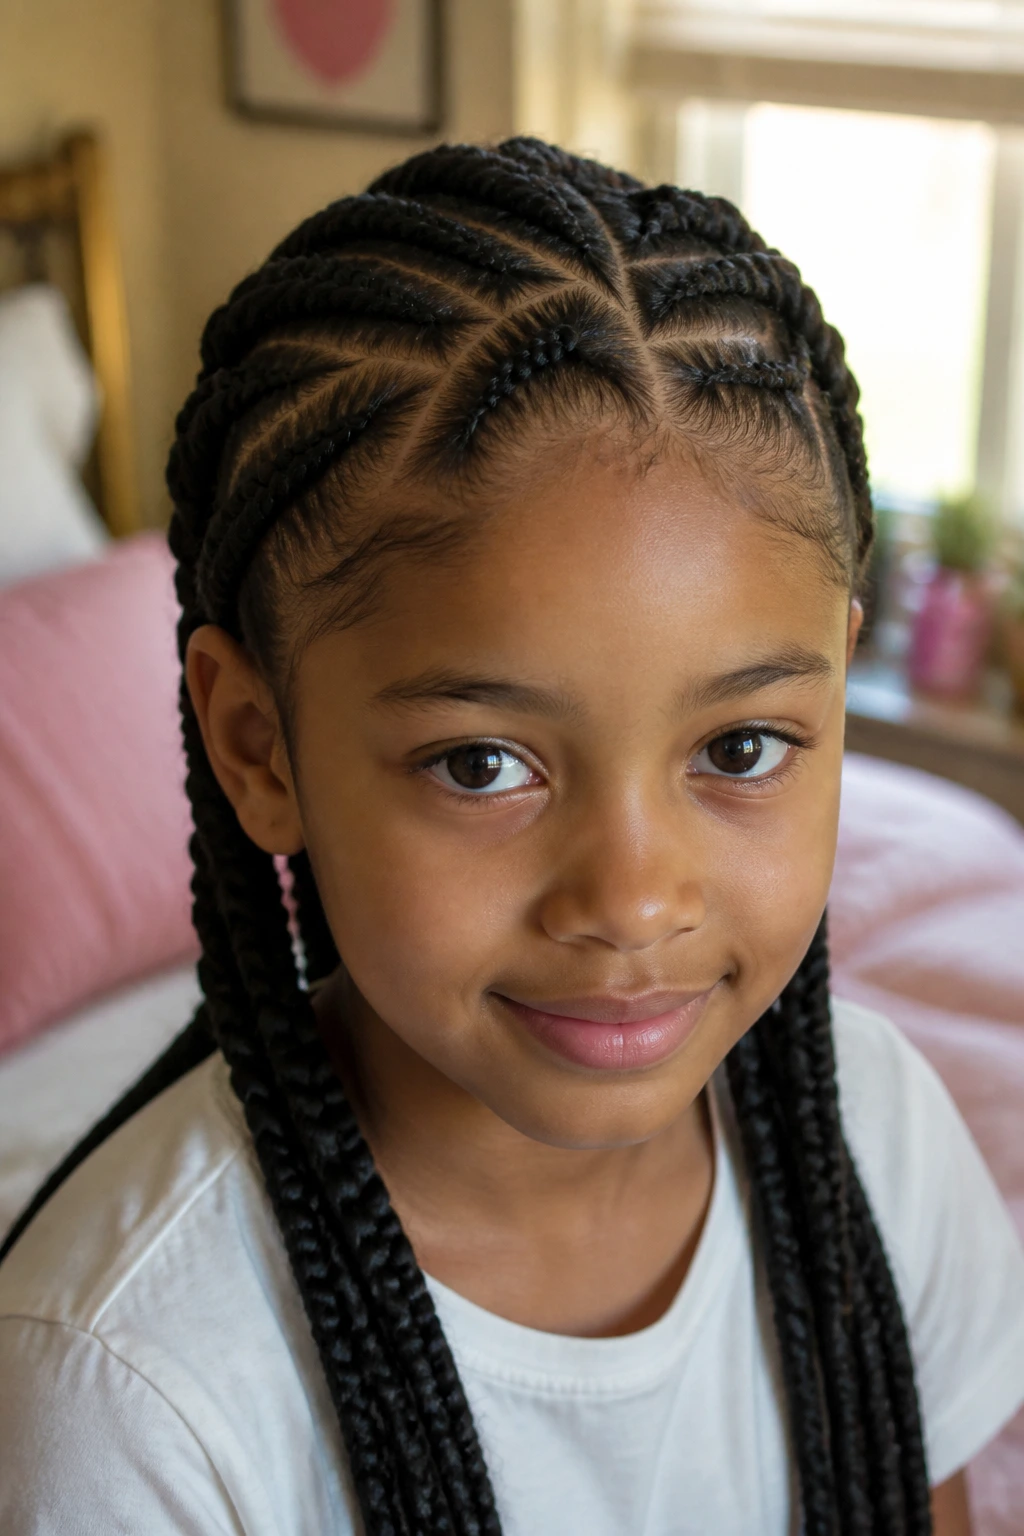
1. Straight-Back Cornrows for a Clean School Morning
Straight-back cornrows are the style I reach for when the day needs order. Clean rows, tidy ends, and no loose hair falling into the face. Thick hair gives these braids a solid base, so the style looks full instead of thin or stringy.
Why It Works on Thick Hair
Dense hair fills out each row, which helps the braids sit flat and hold their shape. Four to eight rows are usually enough for a child with thick hair; you do not need twenty tiny parts to get a neat look. I like this style because it does the job without turning the head into a construction project.
- Best for school, daycare, and sports practice.
- Works well when hair has been detangled in 4 sections first.
- Lasts longer when the first inch at the hairline is smooth, not tight.
- Looks neat with or without small elastics at the ends.
One rule: if the scalp looks pulled or shiny at the front, the braid is too tight.
2. Side-Part Dutch Braids That Stay Put at Recess
Two Dutch braids are the no-nonsense answer when thick hair keeps escaping ponytails. The braid sits on top of the hair instead of sinking into it, which gives the whole style a little more shape and a lot more hold.
Start with a deep side part if the child likes one side to feel softer, or a center part if you want symmetry. Work each braid from the crown down to the nape, then secure with a snag-free elastic. On thick hair, a tiny bit of braid cream at the roots helps the sections stay smooth while you work.
I prefer this style over a high ponytail for kids with a lot of hair because the weight spreads out. That matters. A ponytail can tug in one spot; two braids share the load. If the child is active, this style usually holds up better through running, climbing, and the general chaos of a long afternoon.
3. Halo Crown Braid for Dress-Up Days
Why does a halo braid look so full on thick hair? Because every section has enough body to show the braid’s curve instead of disappearing into the scalp. Thick hair makes the crown read like a real shape, not a skinny line trying to pretend it belongs there.
A halo braid works best when the hair is smooth and fully detangled first. The braid can start at one temple, wrap around the head, and pin at the back, or it can be built from two side braids that meet in the middle. I like the second version for beginners because it gives you more control over the finish.
How to Wear It
Use a few bobby pins that match the hair color, then tuck the braid ends under the curve so they vanish. A light mist of water and leave-in conditioner helps if the hair is dry and puffy. For special events, this is one of those styles that looks polished without needing curls, hot tools, or a whole afternoon.
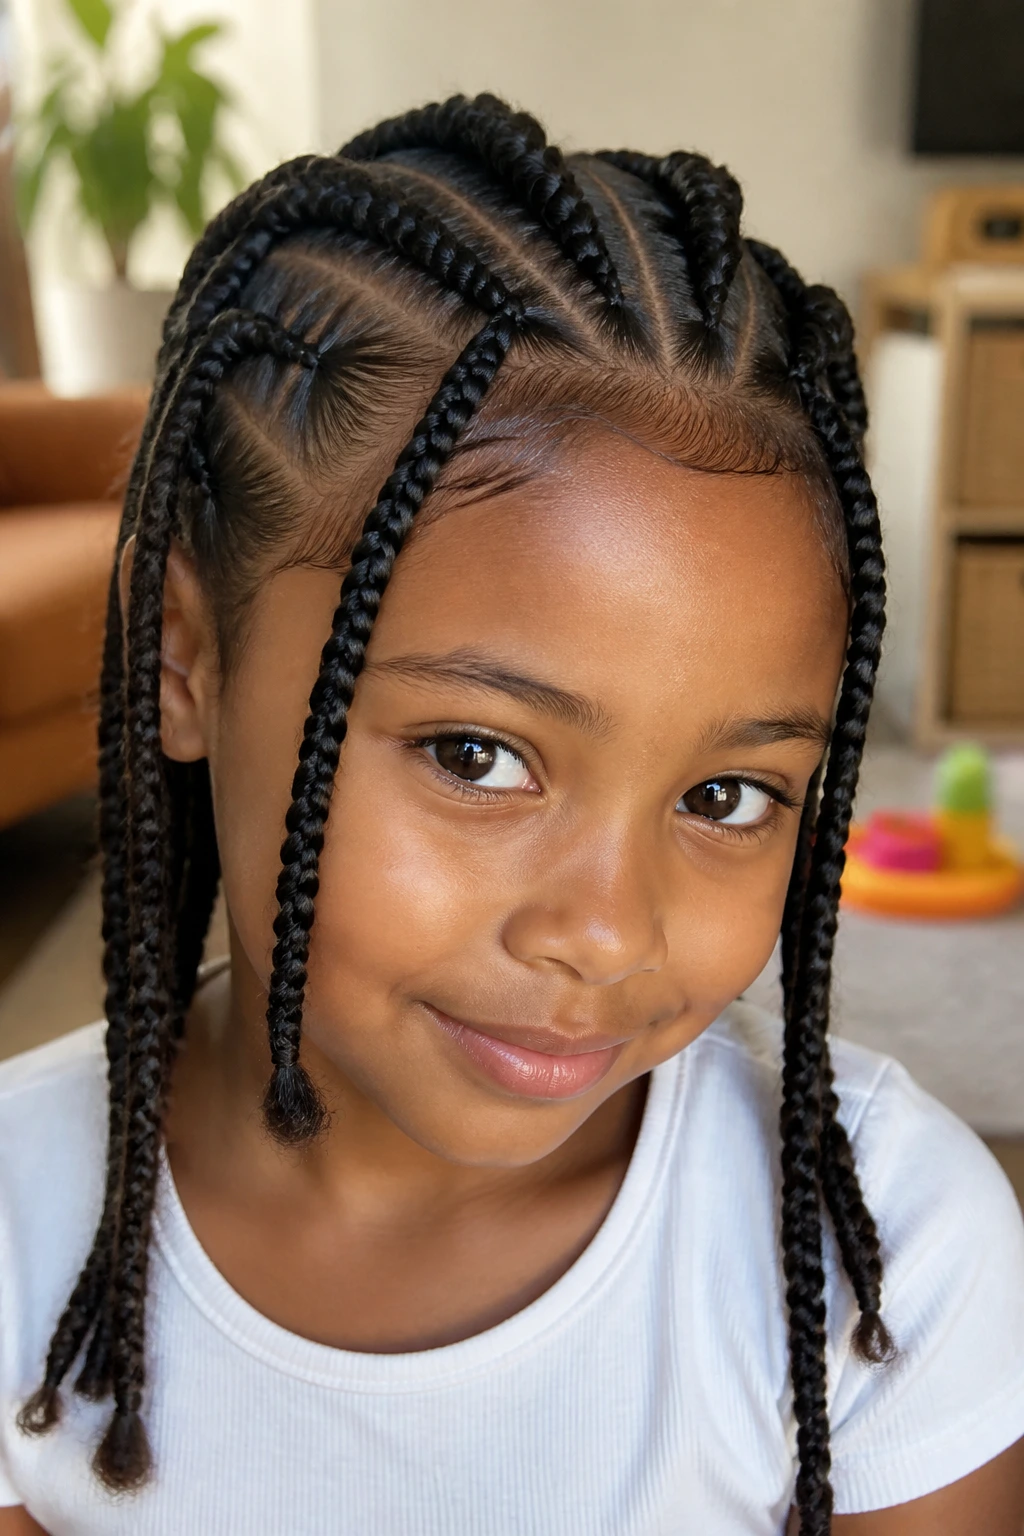
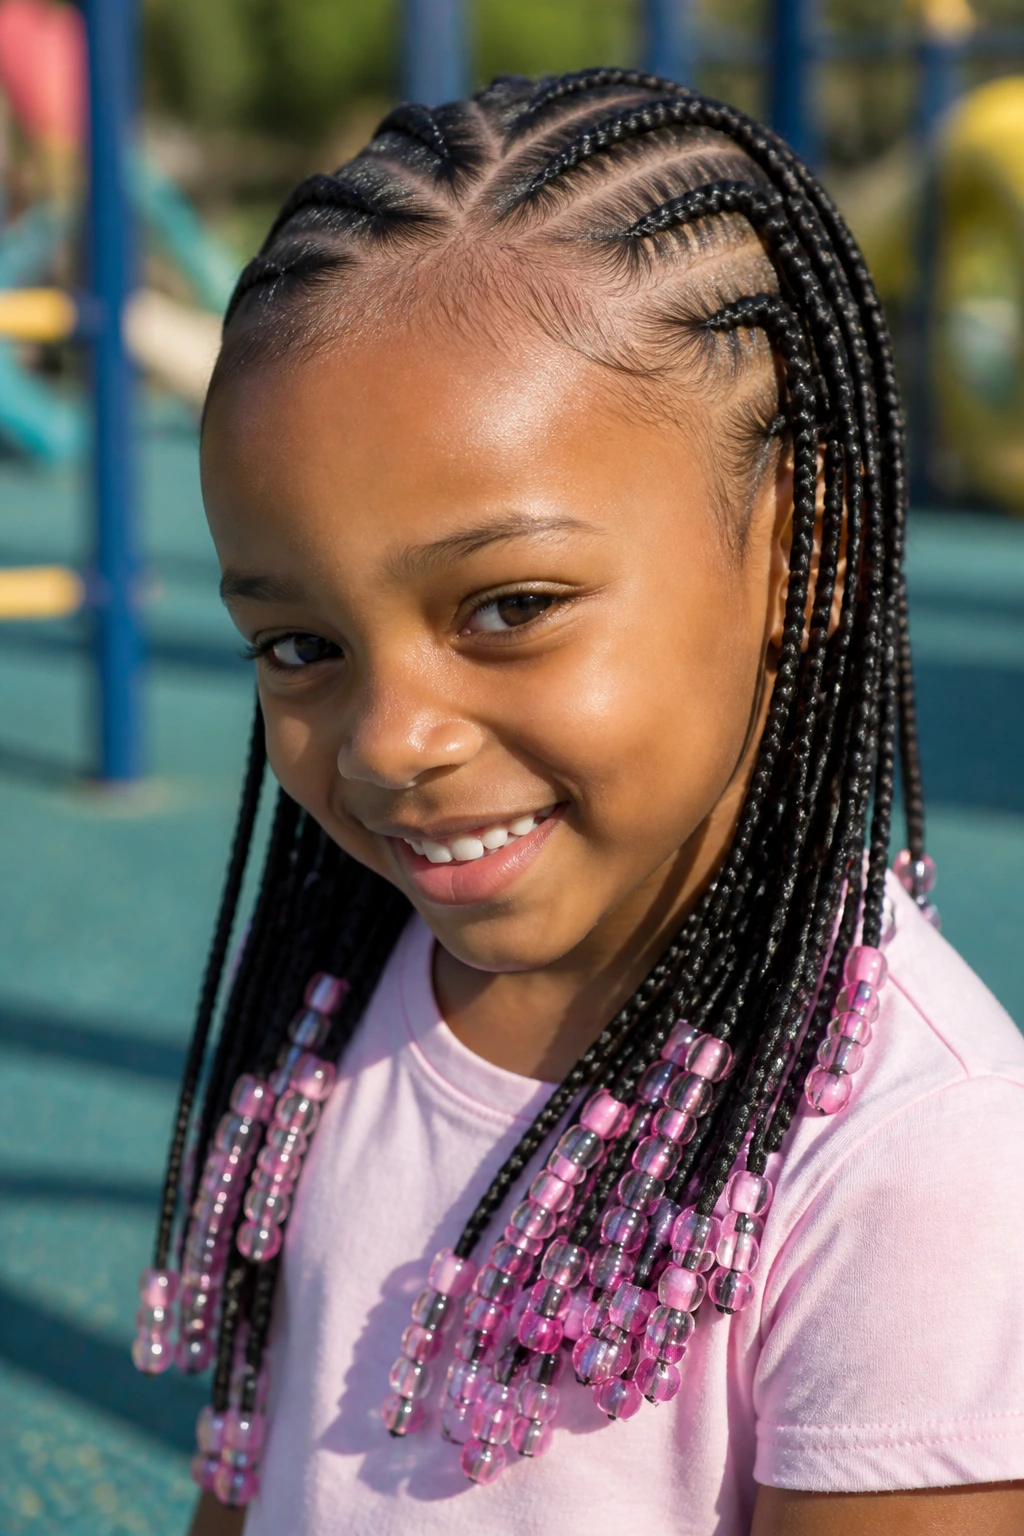
4. Feed-In Braids with Beads That Move Well
Picture a child who wants braids that feel fun, not stiff. Feed-in braids are a good match. The braid starts small near the hairline, then you gradually add hair as you move back, which keeps the front from looking bulky or over-pulled. On thick hair, that gradual build is worth its weight in gold.
Beads make this style shine, but I’d keep them in moderation. A few on the ends is enough for most kids. Too many beads, and the braids get heavy fast, especially if the child likes to toss their head when they laugh. The hair should move, not clatter.
- Use small clear elastics before adding beads.
- Keep bead patterns simple so the style doesn’t feel crowded.
- Choose beads with wide holes if the hair is dense or the ends are thick.
- Stop a little before the scalp starts to look strained.
The best part of feed-in braids is the transition from neat roots to playful ends. It has shape, but it doesn’t feel overworked.
5. Boxer Braids for Busy Sports Days
Boxer braids are the style I trust when hair needs to stay out of the face from breakfast to practice. Two Dutch braids, a clean center part, and enough tension to keep the braids from loosening before pickup. Thick hair gives these braids more visual weight, which is a good thing here. They look intentional even when the rest of the day gets messy.
A little gel or mousse at the roots helps the sections stay smooth while you part. Don’t pile it on. Too much product turns the hair slippery, and slippery hair takes longer to braid than you’d expect. Keep the braid tight enough to stay put, but not so tight that the child keeps touching their scalp.
This is one of those styles that earns its keep. It works under a bike helmet, under a baseball cap, and under the general pressure of an active day. If you’ve ever redone the same ponytail three times before noon, you already know why this one matters.
6. Zigzag-Part Cornrows That Turn the Parting into the Style
Unlike straight rows, zigzag parts make the scalp pattern the point of the whole look. That matters on thick hair, because the part line stays visible longer before the braids puff and soften. The shape reads playful right away, even if the actual braid itself is simple.
What Makes It Different
The zigzag part gives you movement before you even start braiding. Use the tail of a rat-tail comb and keep the angles broad, not tiny and jagged. Little corners disappear faster on thick hair. Big, clean zigzags hold their shape better and are much easier to recreate if you need to touch up the front.
This style works well for kids who like something a little louder than plain rows but do not want extra length or heavy accessories. The pattern does the talking. The braid does the holding. And if the child likes to compare parts in the mirror, this one usually gets a grin.
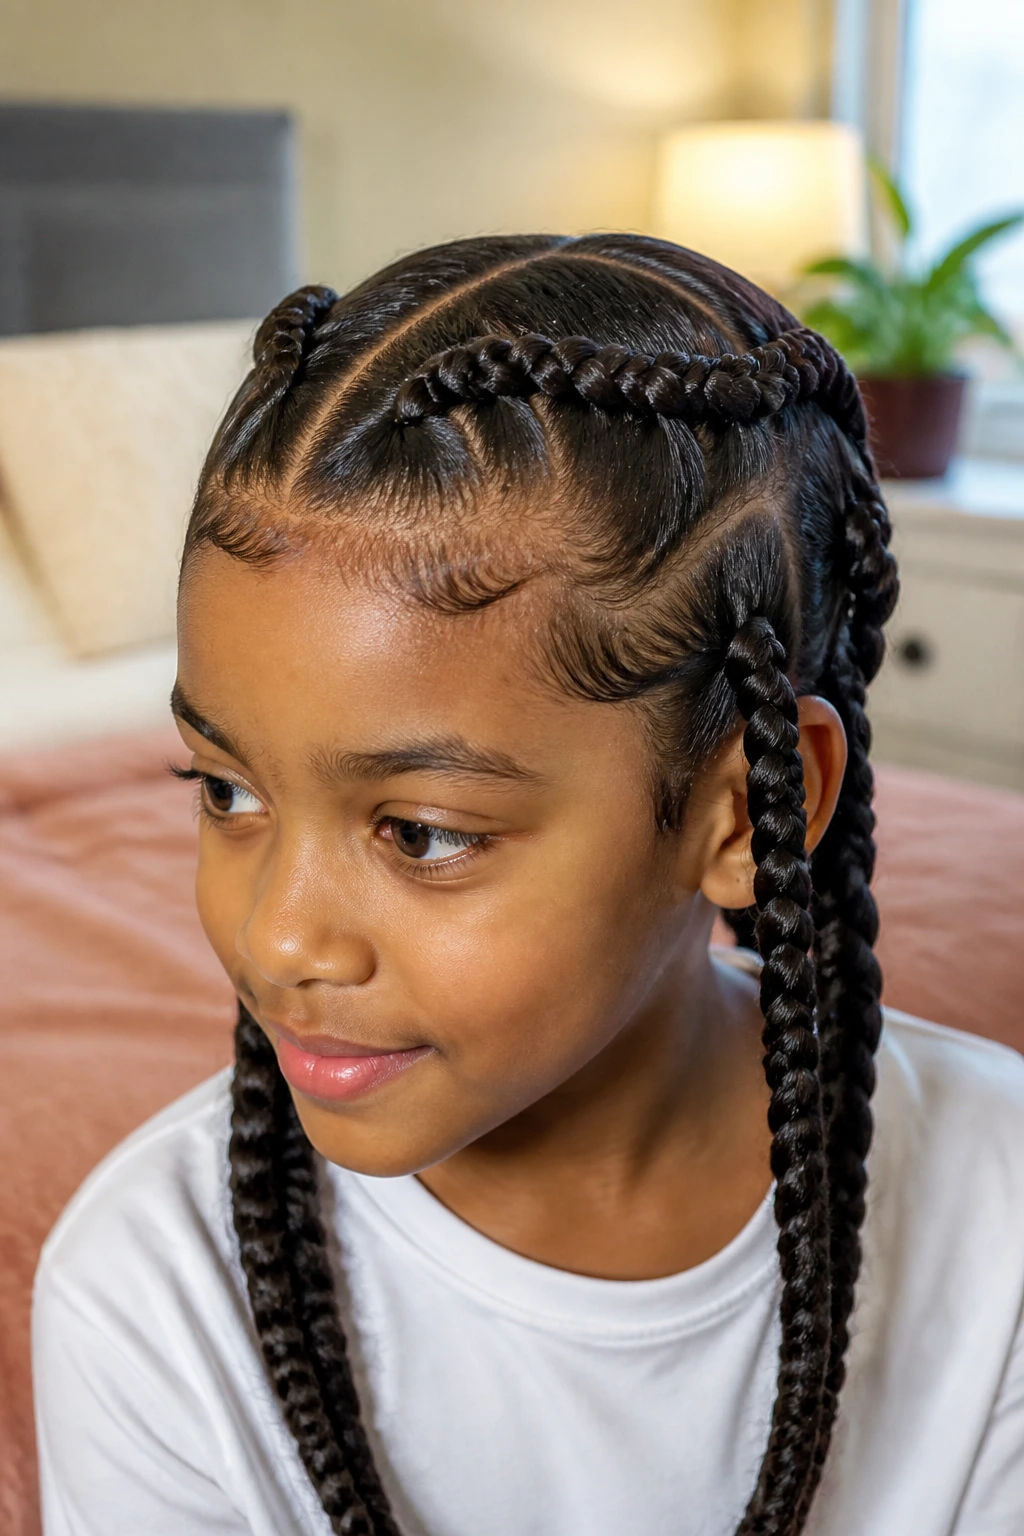
7. Fulani-Inspired Braids with Center Detail
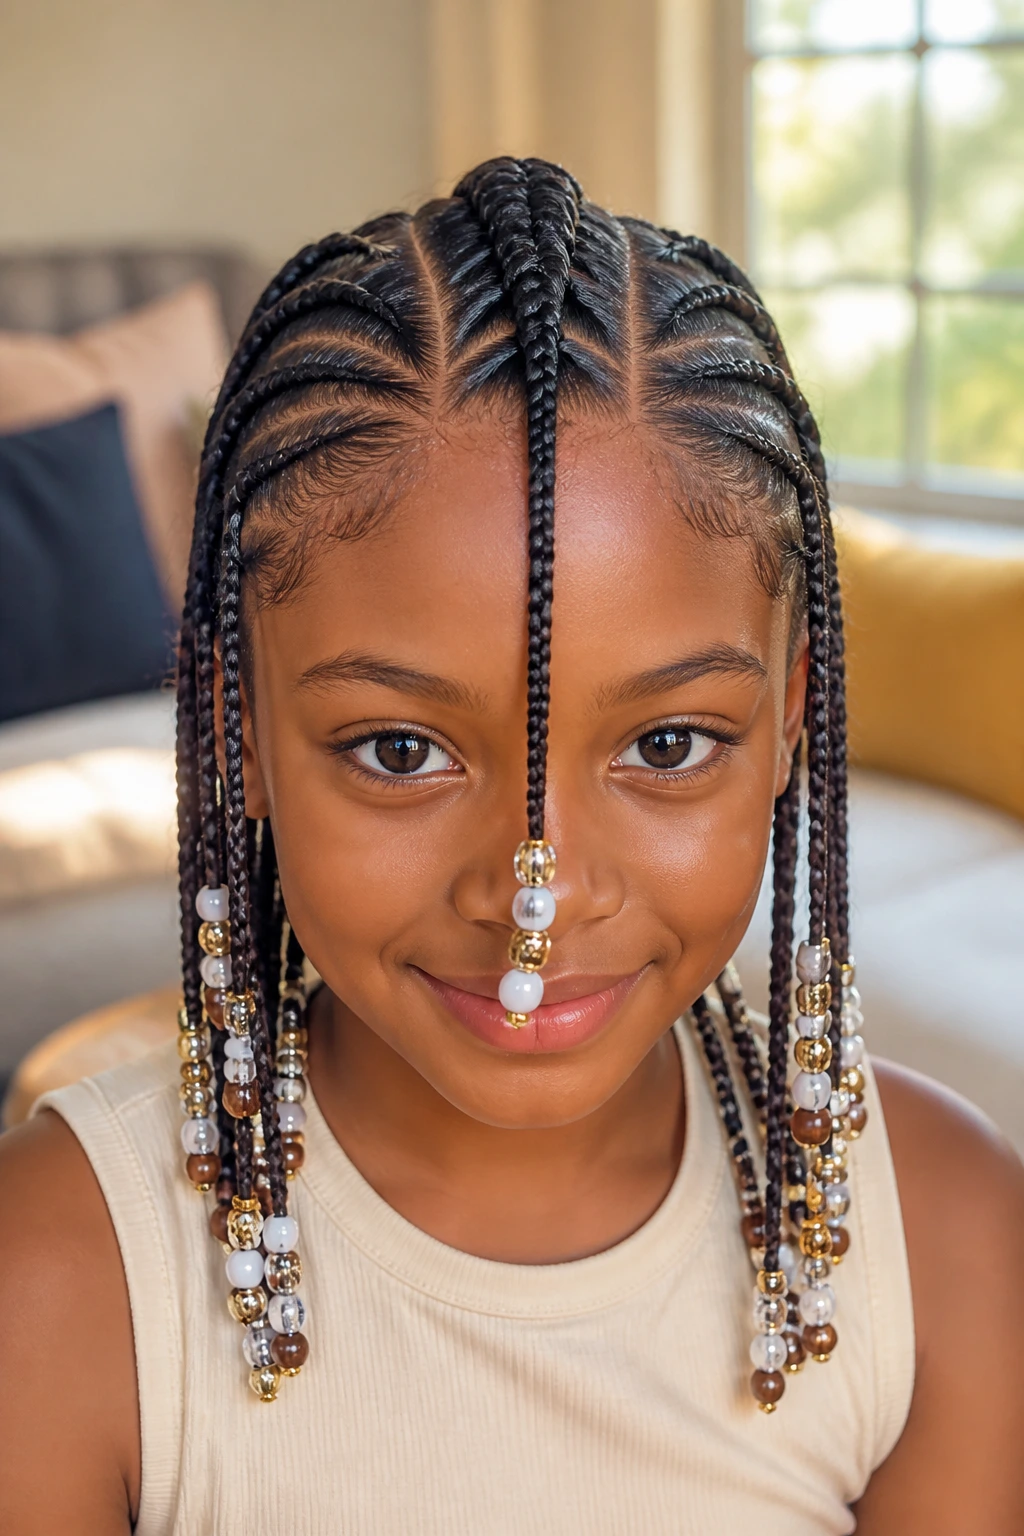
Fulani-inspired braids are a good choice when you want the hair to look special without asking it to do too much. A center braid or two, side braids with beads, and a little space left for the thick hair to show through. That balance is the point.
Thick hair helps this style because the braids do not disappear into the head. The sections stay visible, and the beads sit with some weight instead of floating around. I like this style for family photos, school events, and any day when a child wants the hair to feel decorated but still practical.
Quick Details That Matter
Keep the center braid slightly wider if the child has a lot of density at the crown. Use lightweight beads near the ends so the style doesn’t pull downward. And leave enough room at the scalp that the style can last more than one day without getting sore. Pretty is fine. Comfortable is better.
8. Braided Bun with Stitched Cornrows on the Sides
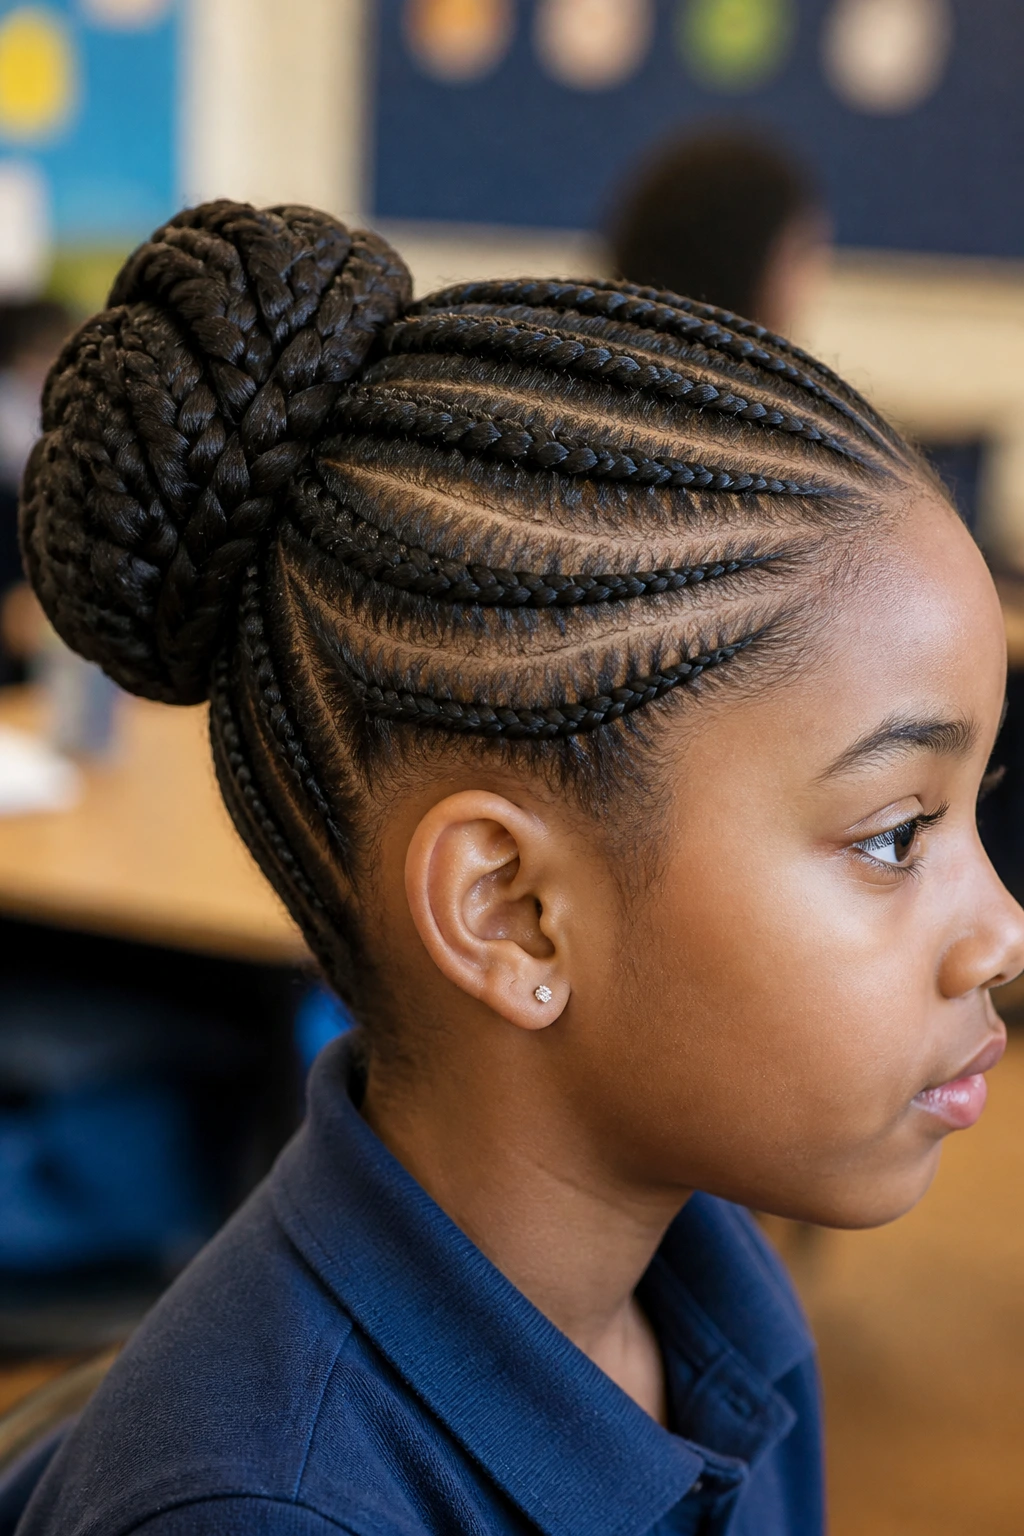
Need the neck clear but still want the hair to look finished? This is the one. The sides are braided close to the scalp, then gathered into a bun at the back or crown. Thick hair gives the bun enough size that it looks deliberate instead of puny.
The “stitched” part comes from the clean, visible lines between the cornrows. On dense hair, those lines look especially crisp if you part carefully and keep the rows even. A bun with too much bulk can feel heavy, so I usually keep the cornrows smooth and let the bun itself carry the drama.
How to Wear It
This style makes sense for school picture day, dance class, or hotter weather when loose hair turns into a neck curtain. Secure the bun with an elastic first, then use pins only where you need them. If you pin every inch, the style can get pokey. One good anchor is usually enough.
9. Braided Ponytail with a Wrapped Base
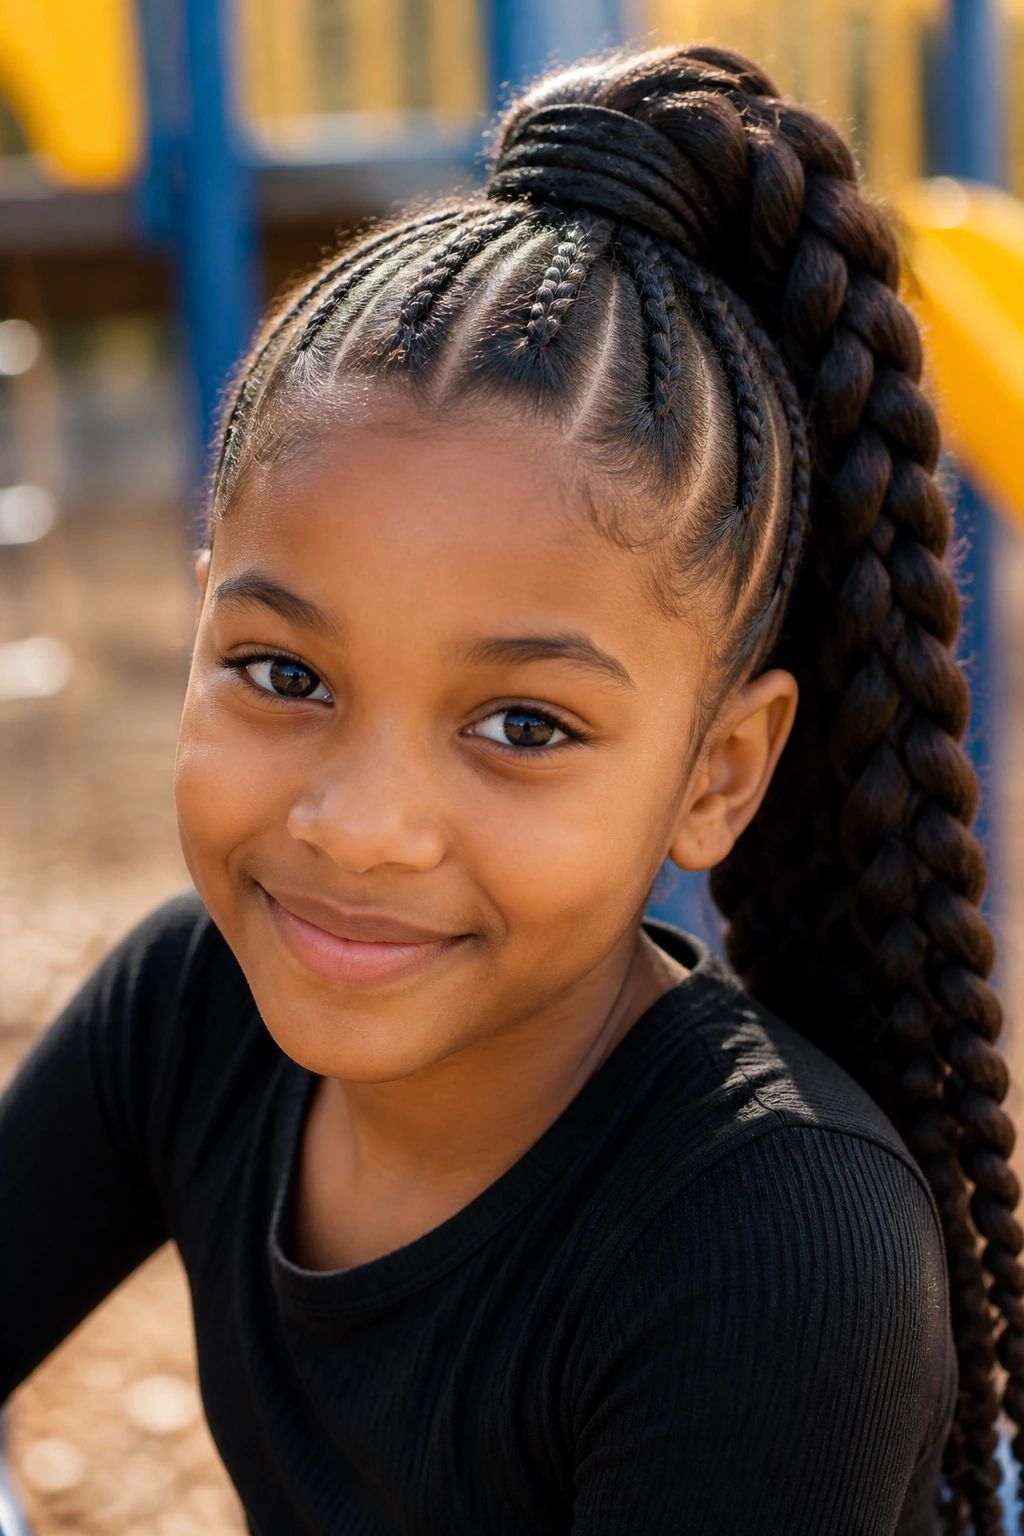
A braided ponytail with a wrapped base gives you one strong braid that ends in a swingy tail. It’s simple, but not plain. Thick hair makes the ponytail section look full, and the wrapped base keeps the transition neat instead of messy.
Start with a small braided or twisted section at the front, then gather the rest into a high or mid ponytail. Braid the ponytail down, or leave the ends sealed with a clear elastic if the hair is very dense and long. I like a wrapped base here because it hides the hair tie and gives the style a cleaner finish.
- Good for kids who want one braid, not many.
- Works well when the hair has enough length to gather cleanly.
- Helps if you want a style that can turn from school to dinner without a redo.
- Looks best when the crown is smoothed before the ponytail goes up.
It is a simple style. It just doesn’t look lazy.
10. French Braid into a Low Ponytail
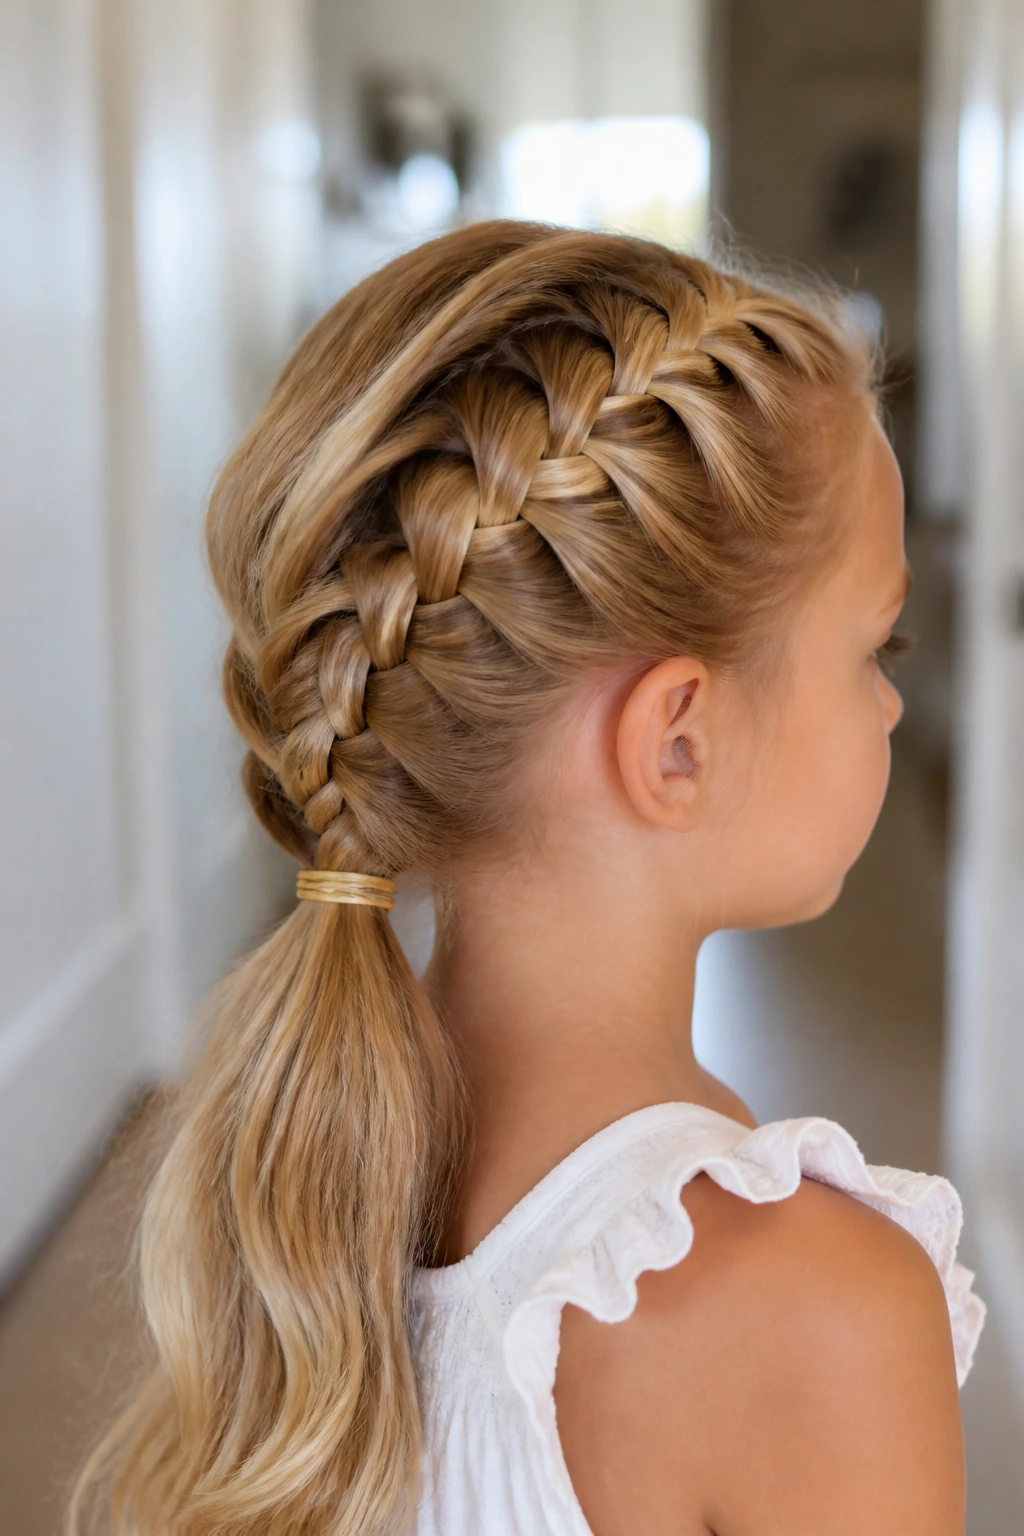
A French braid into a low ponytail is softer than straight-back cornrows and less fussy than a full set of braids. The braid starts at the crown and keeps feeding in hair as it moves down, then everything ends in a ponytail at the nape. Thick hair gives the braid a nice ridge, almost like a rope running down the center.
I reach for this one when the child wants hair out of the face but doesn’t want the feel of a tight style. The low ponytail keeps the weight off the top of the head, which matters on dense hair. If the braid loosens a little by the end of the day, it still looks fine. That’s rare, and worth keeping.
Use a small dab of leave-in on the lengths before braiding so the braid slides evenly. Don’t rush the first three feeds. Those set the whole line.
11. Rope-Twist Fronts Feeding into Braids
Rope twists at the front are a nice break from full three-strand braiding. They use two sections twisted around each other, which can feel quicker on thick hair and gentler at the root. Then you can let the twists feed into braids down the sides or back.
This style is useful when the child’s hair is dense but not long enough for a complicated crown braid. The twists give the front a neat shape, and the braids behind them anchor everything. I like it because it looks more finished than a plain twist-out style, but it does not demand a perfect braiding hand.
If the ends are dry, tuck them into a small braid or secure them with a tiny elastic. Thick hair can hide a lot, which is why this hybrid style works so well. It forgives a little unevenness and still looks put together from a few feet away.
12. Heart-Part Braids for Birthdays and Photos
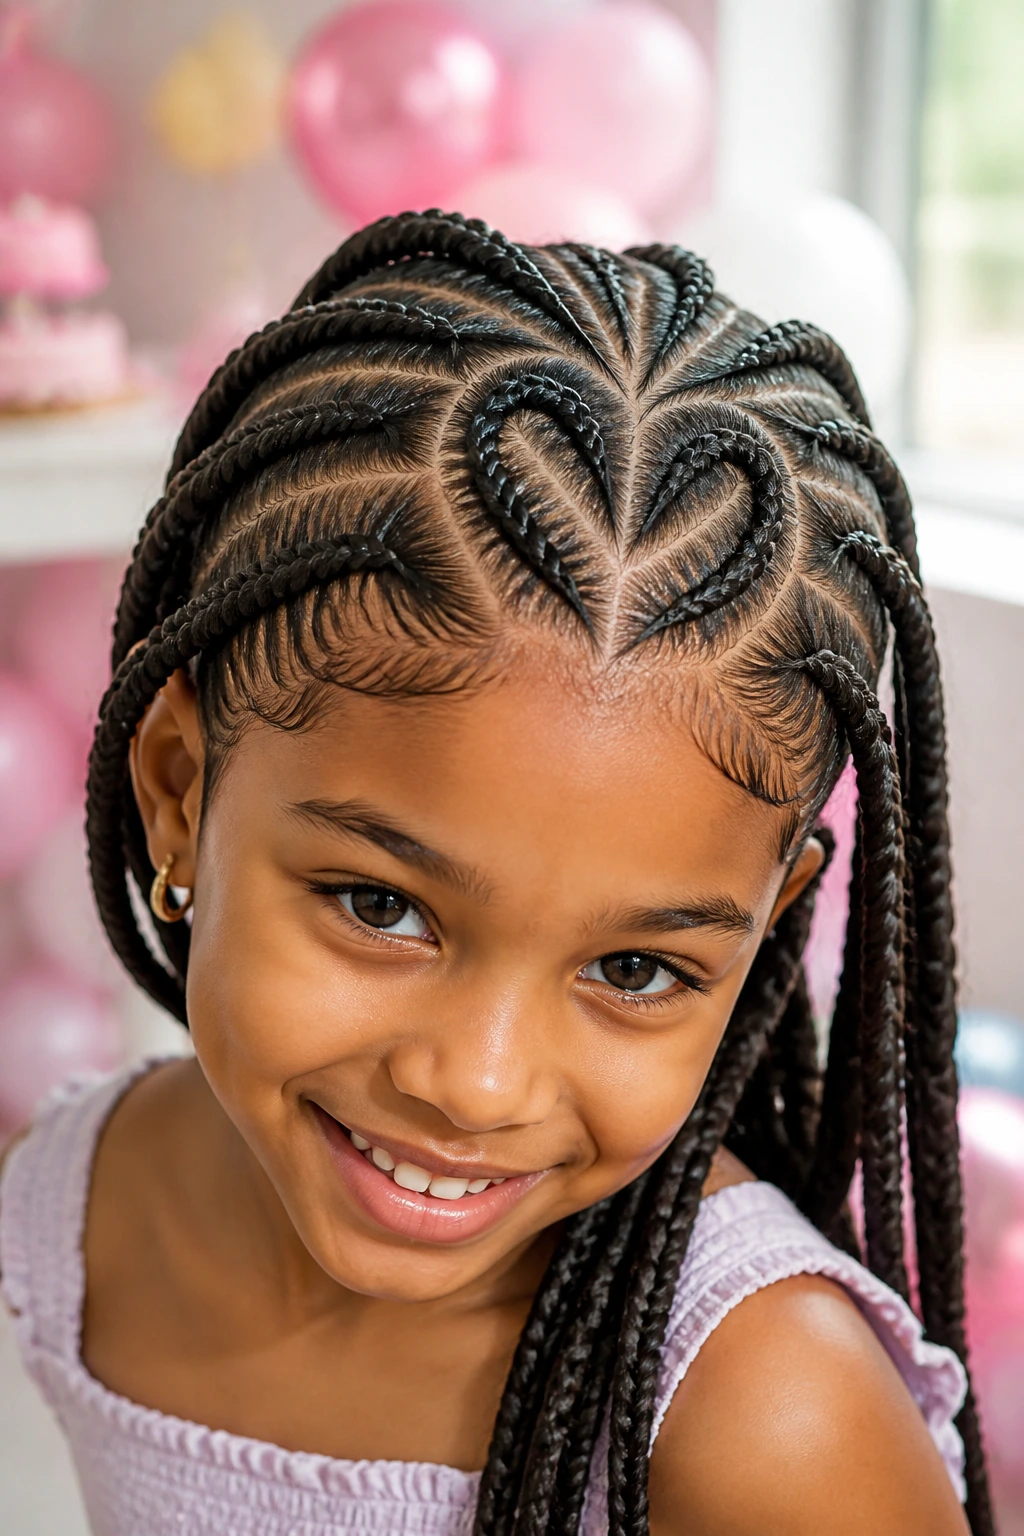
Heart parts turn the scalp into part of the design, and thick hair makes the shape easier to see. The line is bold enough to read in a photo, which is exactly why this style gets picked for birthdays, family gatherings, and the occasional big school event.
Why It Works
A heart part looks best when the shape is broad and smooth, not tiny and sharp. On thick hair, tiny curves can get lost once the braids settle. A larger heart keeps the design visible and gives the surrounding braids something to frame.
- Best with 2 to 4 braids coming off the part.
- Easier to maintain when the braids are medium size, not micro-small.
- Looks cleaner if you map the shape before the first braid goes in.
- Needs a steady hand, but not magic.
My favorite move: outline the heart with the comb first, then braids second. Don’t try to “freehand” the shape and hope it works.
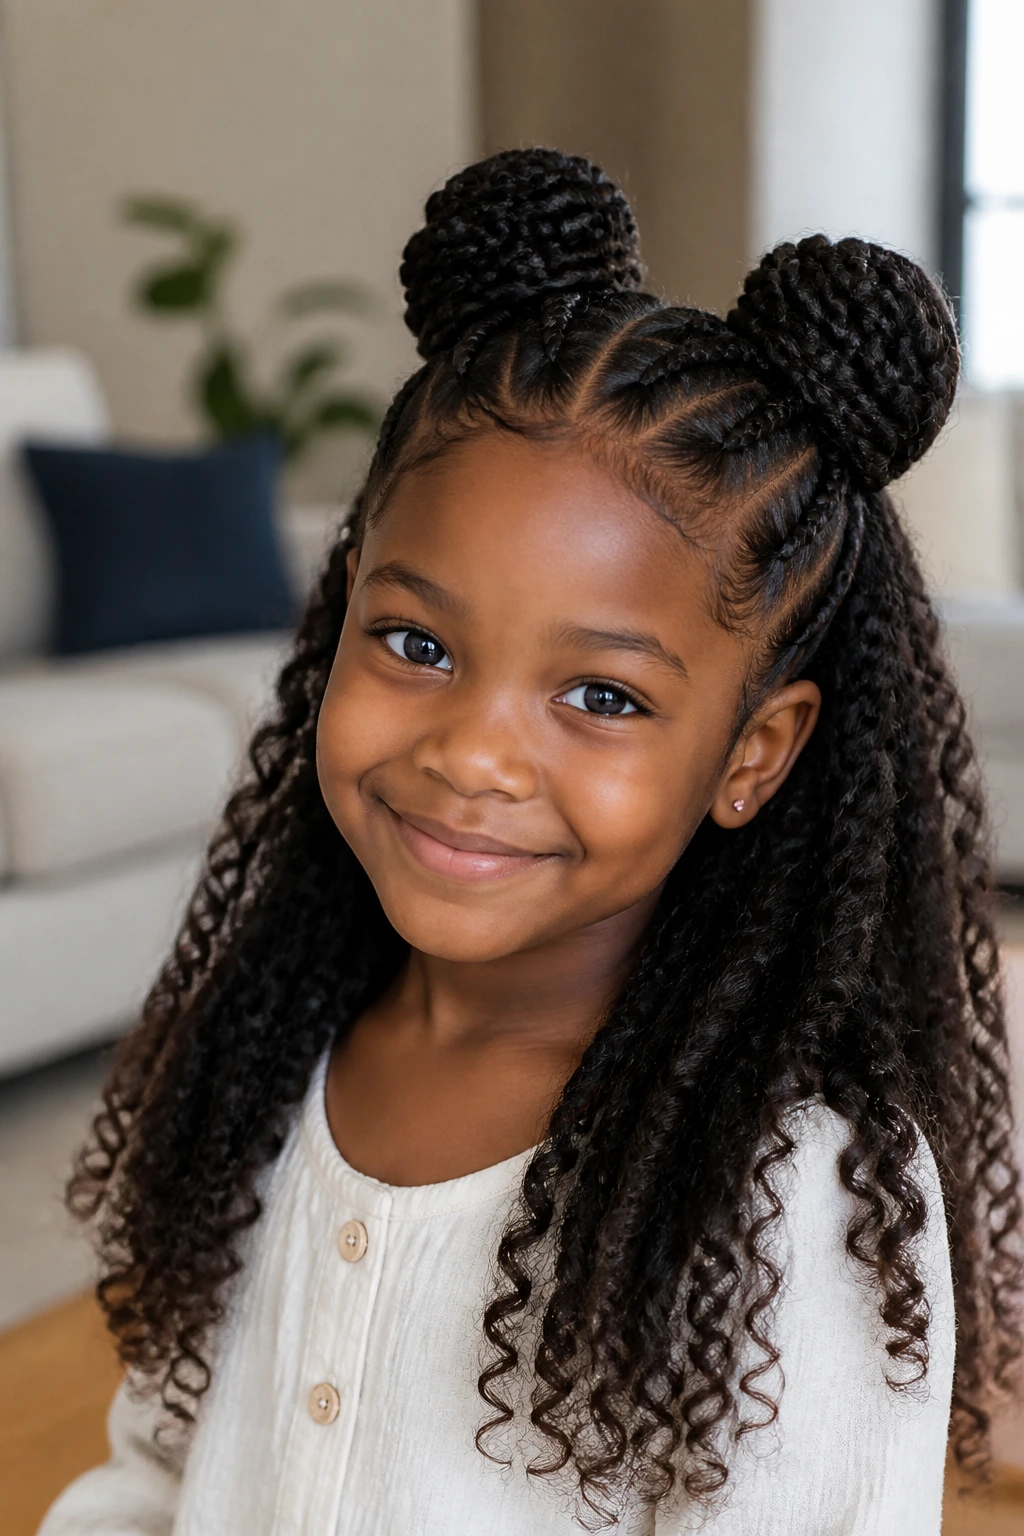
13. Space Buns with Braided Pigtails

This style survives more playground nonsense than most. Two braids go into two buns, and thick hair gives each bun enough volume to look cheerful instead of thin. The result is playful, secure, and less likely to collapse if the child leans back on a car seat.
Start with two clean sections down the middle. Braid each pigtail, then twist the braid into a bun and pin or tie it in place. Leave the buns a little loose if the child has a tender scalp. Tight buns look neat in a photo, but they can pinch by afternoon.
Space buns work especially well for kids who want something fun without long loose ends. If you want to add ribbon, weave it through the braid before the bun goes up. Keep the ribbon soft and narrow so it doesn’t snag.
14. Ladder Braid Half-Up for Longer Thick Hair
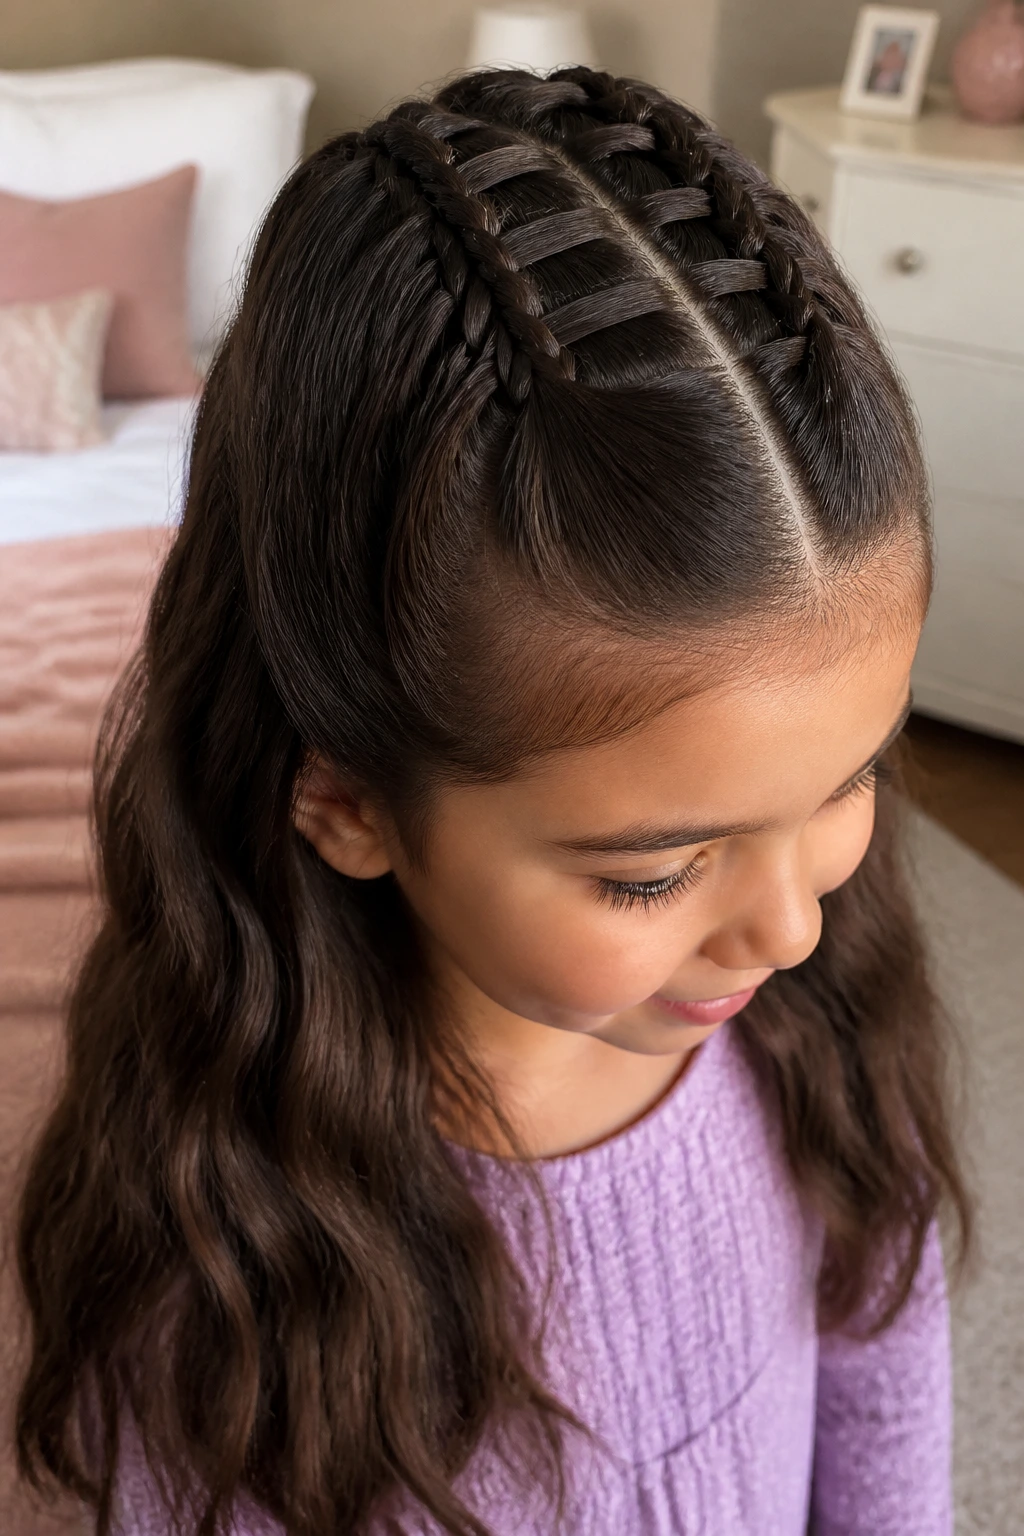
Can a ladder braid stay neat on thick hair? Yes, if you keep the top section controlled and don’t try to feed in too much at once. The ladder effect looks strongest when the braid sits over a smooth, brushed base and the lower length hangs free.
This style is a sweet spot between fancy and practical. The half-up section keeps hair out of the face, while the rest of the length shows off the thickness. Thick hair makes the braid pattern look full, which gives the “ladder” its shape instead of letting it blur into the rest of the hair.
How to Wear It
Best on longer hair that can hold a good top section without slipping. If the lengths are layered or slippery, tuck the loose ends with a small elastic. A little smoothing cream at the roots helps, but don’t coat the whole head. Too much product flattens the design, and the braid loses that stepped look.
15. Half-Up Braided Puffs with Loose Length Below
This is the style for days when nobody wants a full braided set but the hair still needs control. Braid or twist the top half, then leave the bottom in puffs or loose curls. Thick hair gives the lower section enough shape that the contrast looks intentional, not unfinished.
I like this option because it gives breathing room. You get the security of braids at the crown and the softness of loose hair below. It works well on mixed textures too, especially when the top needs more control than the bottom. If the child is sensitive about having all the hair pulled back, this is a kinder compromise.
A small accessory at the half-up point — a bow, a clip, or a tiny elastic wrap — can make the whole style feel special without changing the braid itself. Small effort. Big payoff.
16. Cornrow Mohawk That Leaves the Center Full
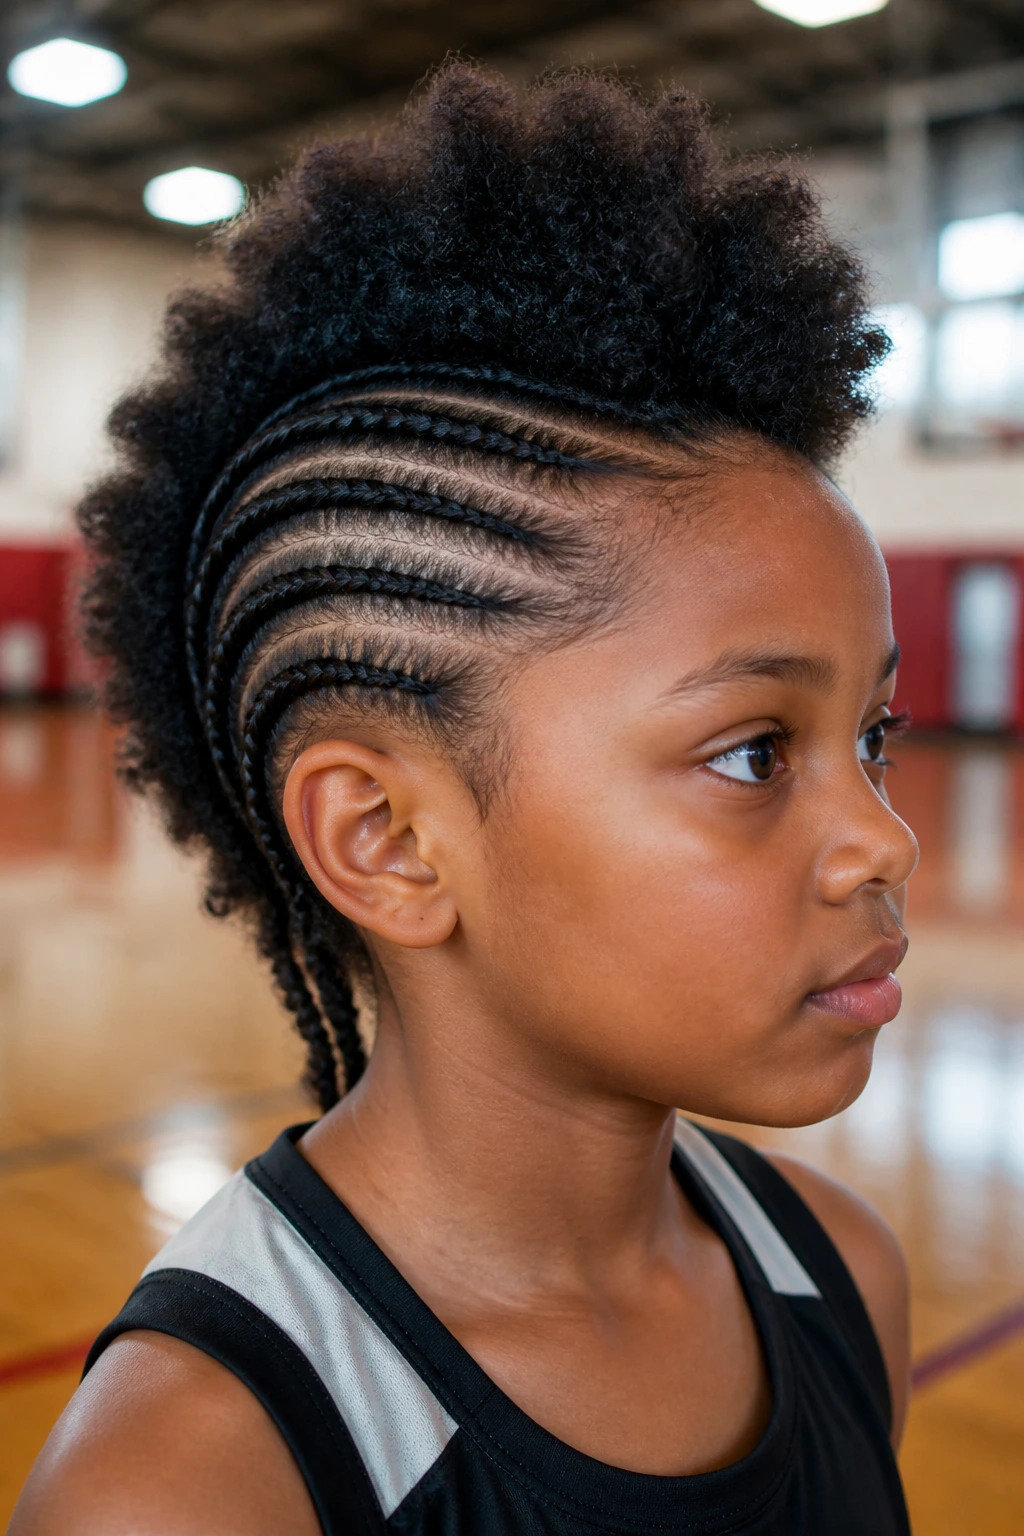
Unlike full-head cornrows, this style keeps the center section big and dramatic. The sides are braided back or in toward the middle, while the center stays loose or is shaped into a larger braid. Thick hair makes that center section look rich instead of flat.
This is one of my favorite styles for older kids who want something bold. It feels sporty without looking plain. It also gives the child some movement in the middle, which matters if they dislike their hair pinned down everywhere.
The main thing here is balance. The side braids should anchor the style, not fight the center section. If the mohawk line looks too narrow, the whole style can look stiff. Keep the center full, and let the sides do the quiet work.
17. Pull-Through Faux Braid for Kids Who Do Not Sit Still
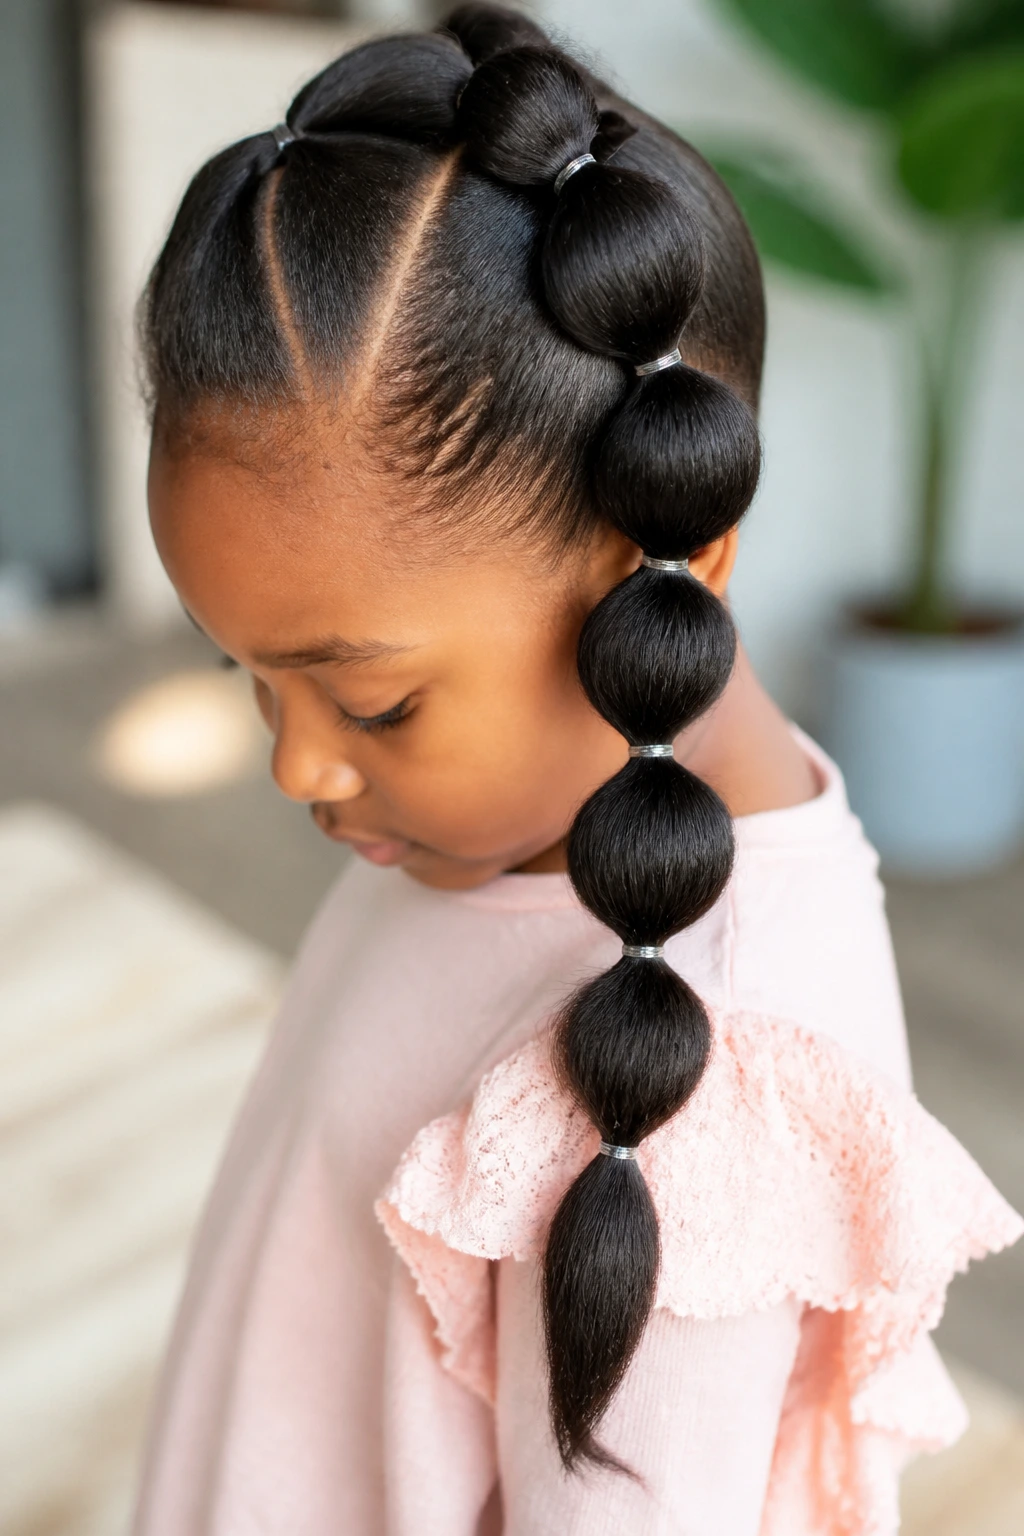
A pull-through braid is the closest thing to a fast braid look without the full braiding labor. It uses a line of small elastics and flipped sections to mimic a thick braid. On dense hair, the bubbles come out plump and visible, which is half the charm.
This style is a lifesaver when a child cannot sit long enough for a long braid session. Section the hair, tie each segment with a clear elastic, then split and pull the next section through. It looks more complex than it is. That’s the beauty of it.
Because thick hair already has volume, the faux braid does not need a lot of teasing or fluffing. Keep the sections even, and the braid reads clean. If one bubble looks larger than the others, don’t panic. Real hair rarely behaves like a ruler.
18. Waterfall Side Braid with Soft Loose Ends
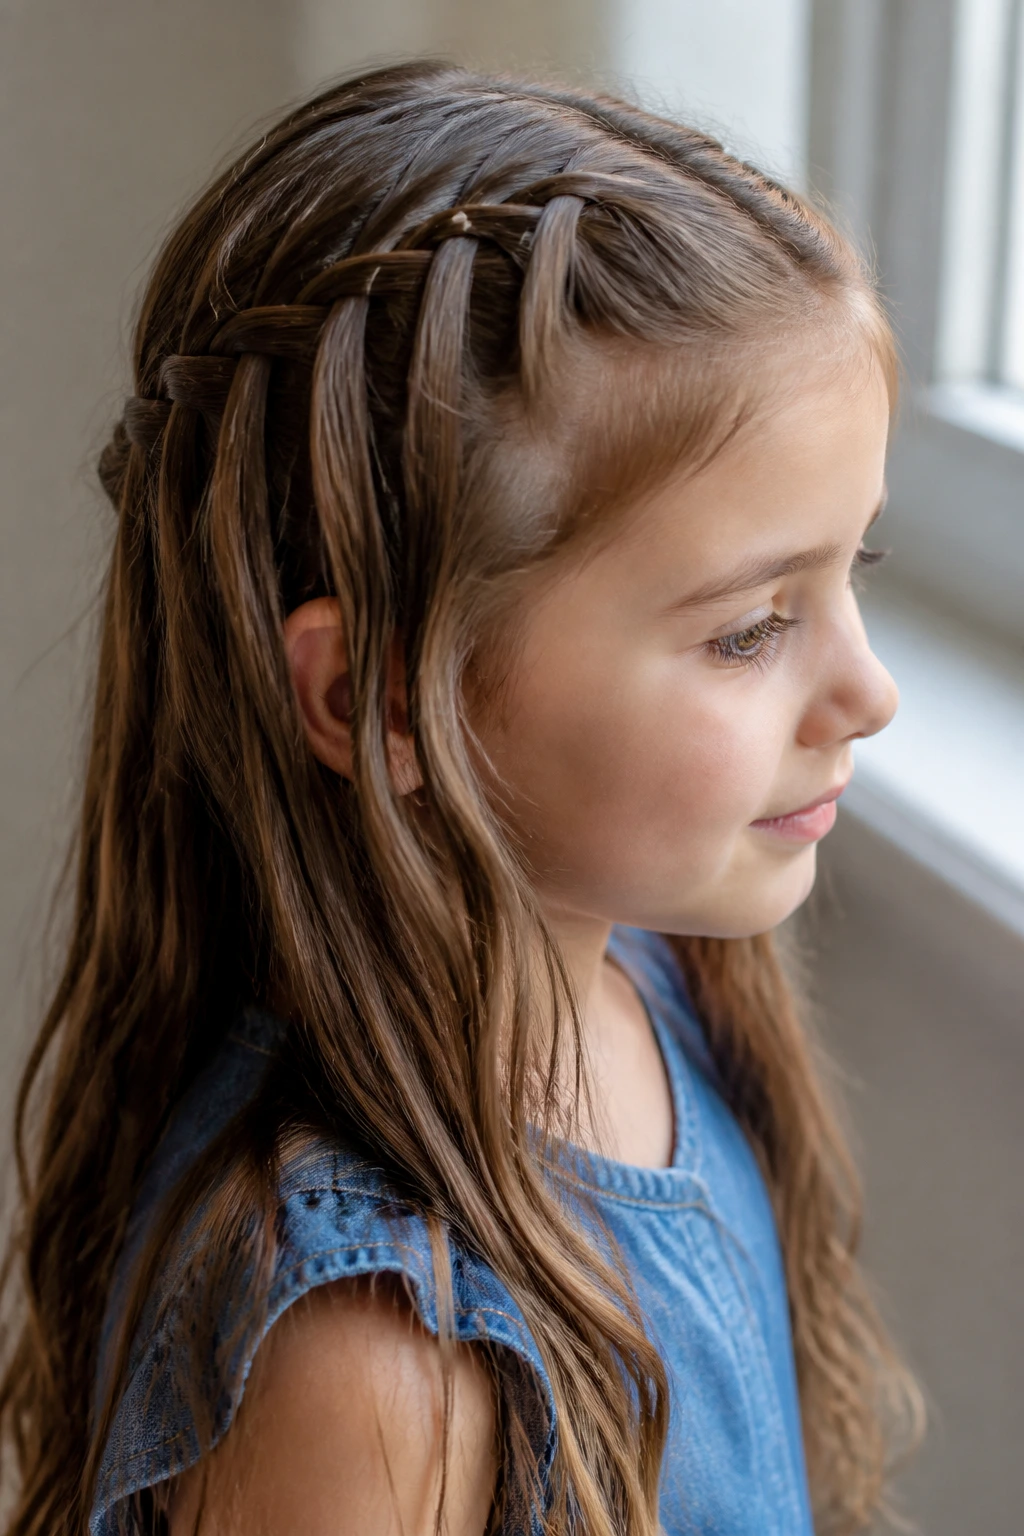
A waterfall side braid gives thick hair a soft, layered look without hiding all the length. The braid drops sections through the pattern so pieces fall free, which creates that airy, stepped effect. On dense hair, the pattern has enough weight to stay visible.
This is a style I save for calmer days or special events, not for rough playground duty. The loose ends can frizz sooner than a tighter style. But if the goal is a softer finish with a little movement around the face, it earns its place.
Why Thick Hair Helps Here
The braid needs body to show the falls, and thick hair supplies that naturally. Use a light smoothing cream on the top layer and keep the dropped sections neatly separated as you braid. If the hair is very long, pin the braid behind one ear and let the rest fall. It has an old-school charm to it, and thick hair gives it enough substance to look intentional.
Why Braided Hairstyles for Kids with Thick Hair Hold Their Shape So Well
Thick hair gives braids something to hold onto. That sounds obvious, but it changes everything. A braid on fine hair can go limp fast; a braid on dense hair usually keeps its shape longer because there’s more material inside the pattern and more friction between the strands.
The tradeoff is time. Thick hair takes longer to part, smooth, and section cleanly. If you’re rushed, that’s where the style starts to unravel first — not in the braid itself, but at the roots where the parting got sloppy. I’d rather make six clean parts than ten rough ones. Every time.
The other reason these styles work so well is simple geometry. Full hair creates clearer braids, fuller buns, and more visible parting patterns. A heart part looks like a heart. A zigzag stays readable. A halo braid has presence. Thin hair can do all of those styles, but thick hair gives them shape with less need for padding, teasing, or extra clips.
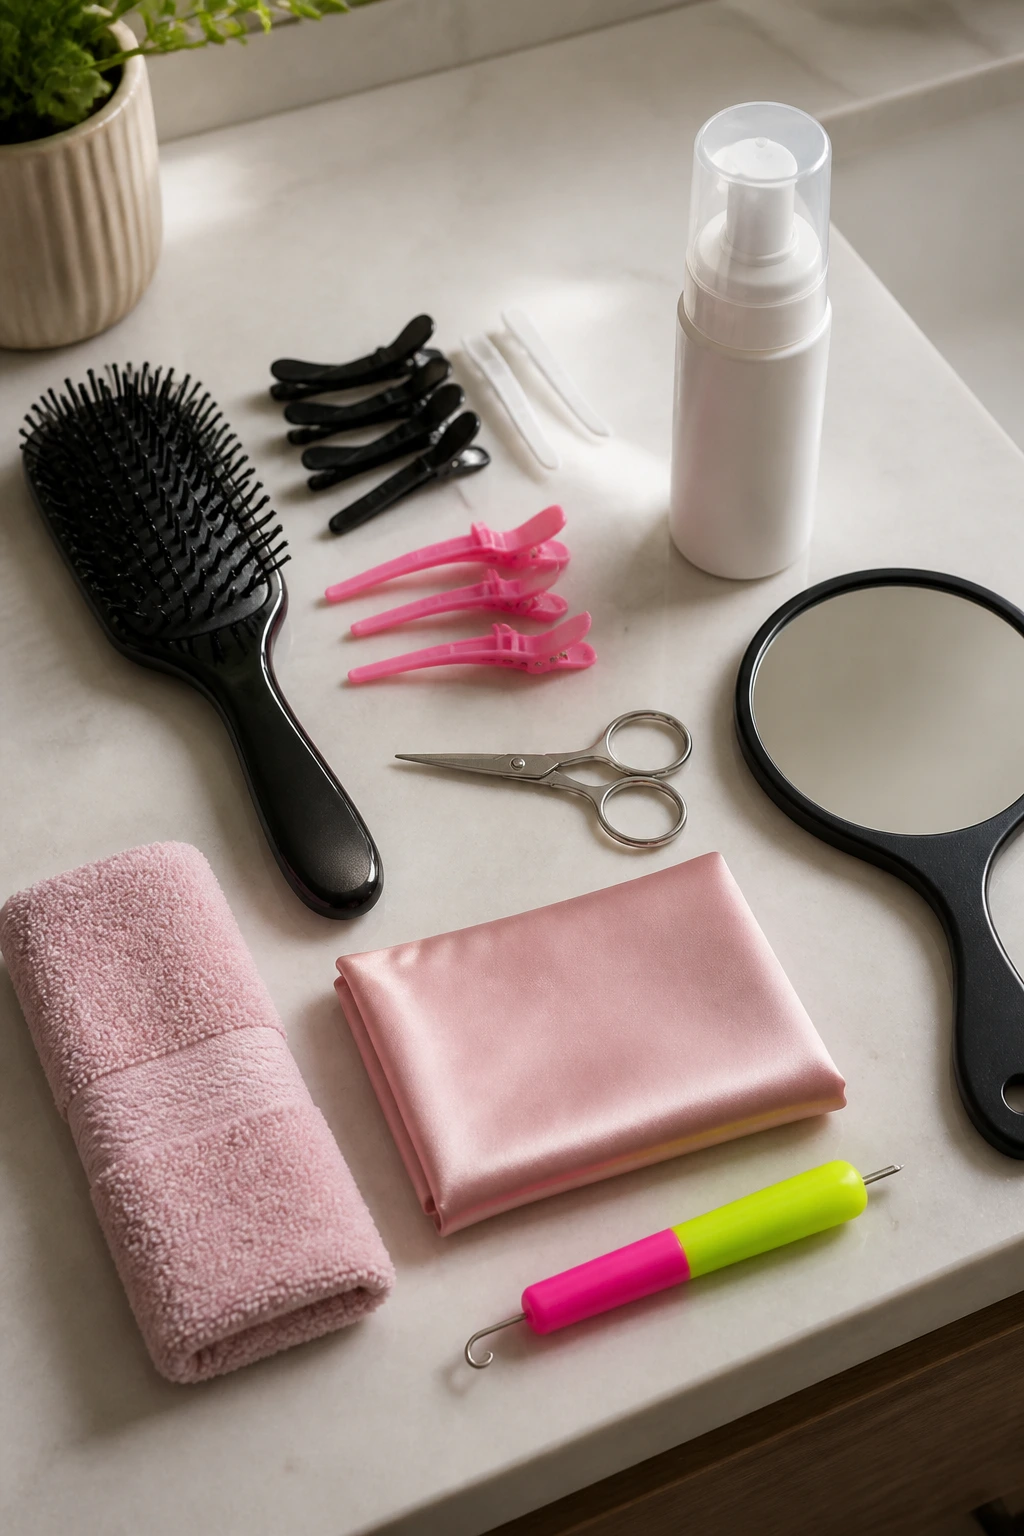
Essential Equipment for These Styles
- Rat-tail comb: The pointed end is what makes clean parts happen, especially for cornrows and zigzags.
- Wide-tooth comb: Use this first on damp, conditioned hair so you are not ripping through knots.
- Spray bottle with water: A light mist helps smooth sections without soaking the whole head.
- Leave-in conditioner: Choose a light, water-based one so the hair gets slip without feeling greasy.
- Braiding cream or light styling gel: A small amount keeps flyaways down at the roots.
- Snag-free elastics: Clear or matching bands work best for ends, ponytails, and pull-through styles.
- Duckbill or section clips: These save the rest of the hair while you work one section at a time.
- Bobby pins: Useful for halo braids, buns, and tucked ends.
- Satin bonnet or scarf: Night protection matters if you want the style to last more than one day.
- Small beads or ribbon: Optional, but they can make simple braids feel special without changing the structure.
What to Buy Before You Start Braiding

The product shelf can get crowded fast, and most of it is unnecessary. For thick kids’ hair, I’d rather have a few good basics than a basket full of things that sit unused. Start with a detangling conditioner, a light leave-in, and one styling product with decent hold. That’s the core.
Avoid heavy waxes unless you know the hair handles them well. Thick hair can take more product than fine hair, but too much grease makes parting slippery and builds up near the scalp. You want slip, not a helmet. A water-based leave-in usually gives the best balance: enough glide for braiding, not so much residue that the style feels coated.
Buy elastics that do not snag. That part matters more than people think. A cheap elastic that snaps halfway through a braid session turns patience into irritation, and nobody wins there. If you plan to use beads, check the hole size against the braid ends before wash day. If the bead has to be forced on, it is the wrong bead.
For accessories, keep it simple. One color family. One or two bead sizes. A ribbon roll in a soft fabric. Thick hair already brings the volume; the extras should support the style, not compete with it.
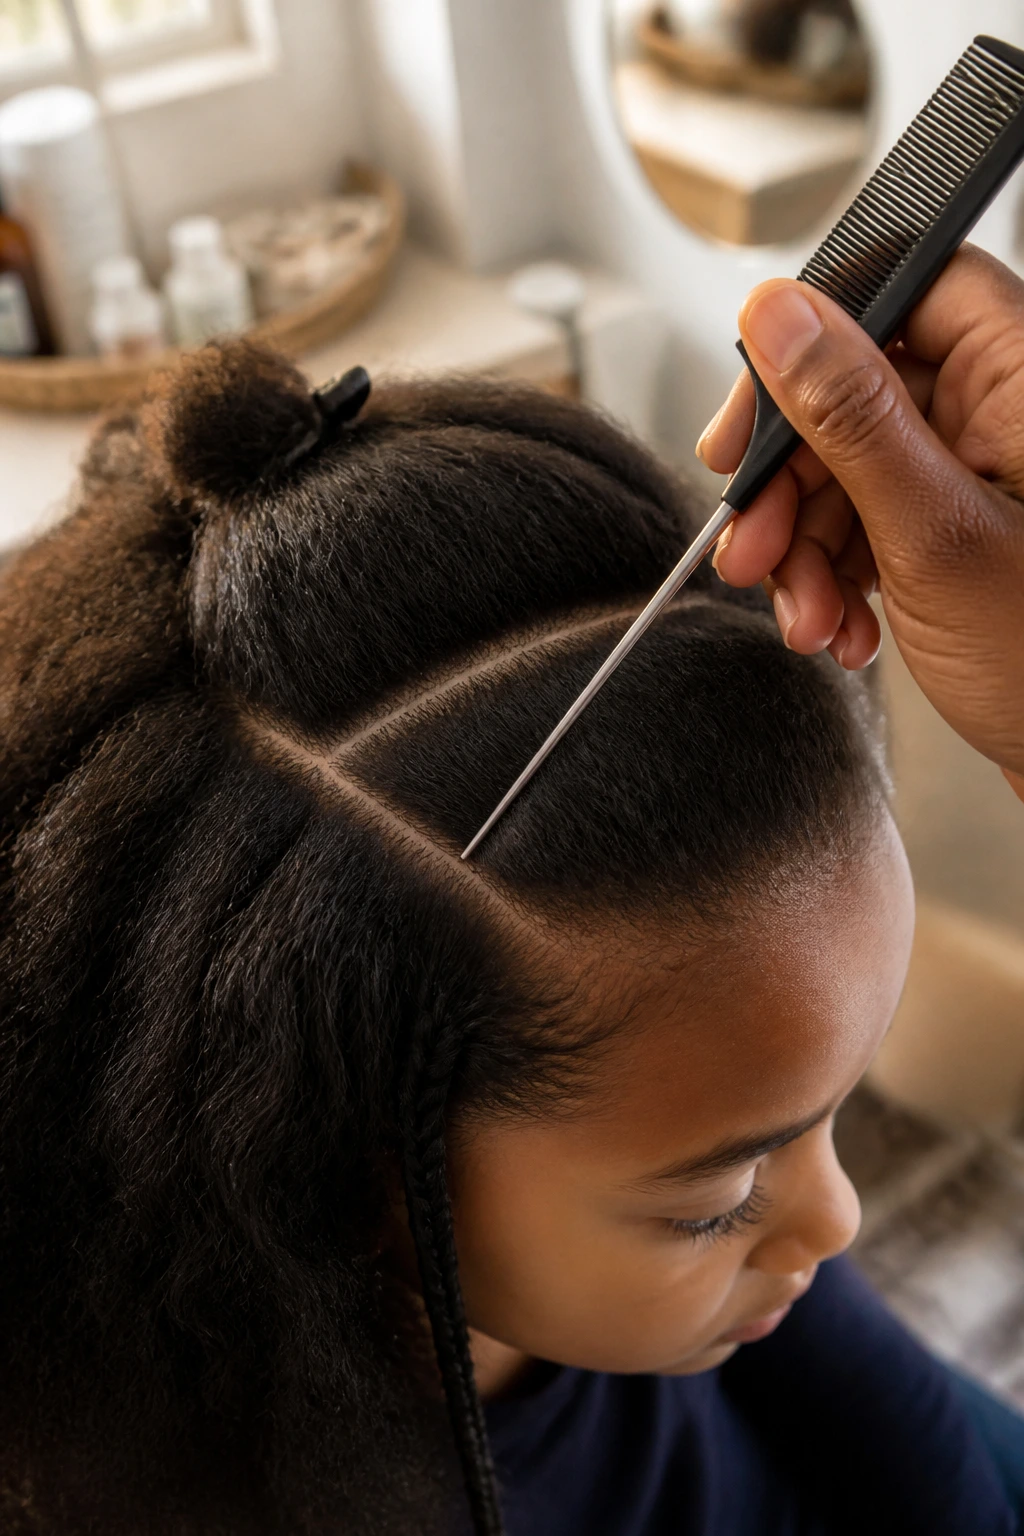
How to Prep Thick Hair So Parts Stay Clean
Prep is where braided styles either settle into place or start fighting you. Thick hair needs to be detangled in sections, not all at once. I usually split the hair into four quadrants, mist each one lightly, and work from the ends upward with conditioner or a leave-in. That keeps the comb from hanging up in the middle of a knot and pulling the child around with it.
Once the hair is smooth, let it dry enough to braid cleanly. Damp is fine for some styles, but soaking wet hair is a bad idea for anything that will stay in for days. Thick hair dries slower than people expect, and a braid can trap moisture at the center if you’re not careful. That trapped dampness leads to puffing, odor, and a style that looks older than it is.
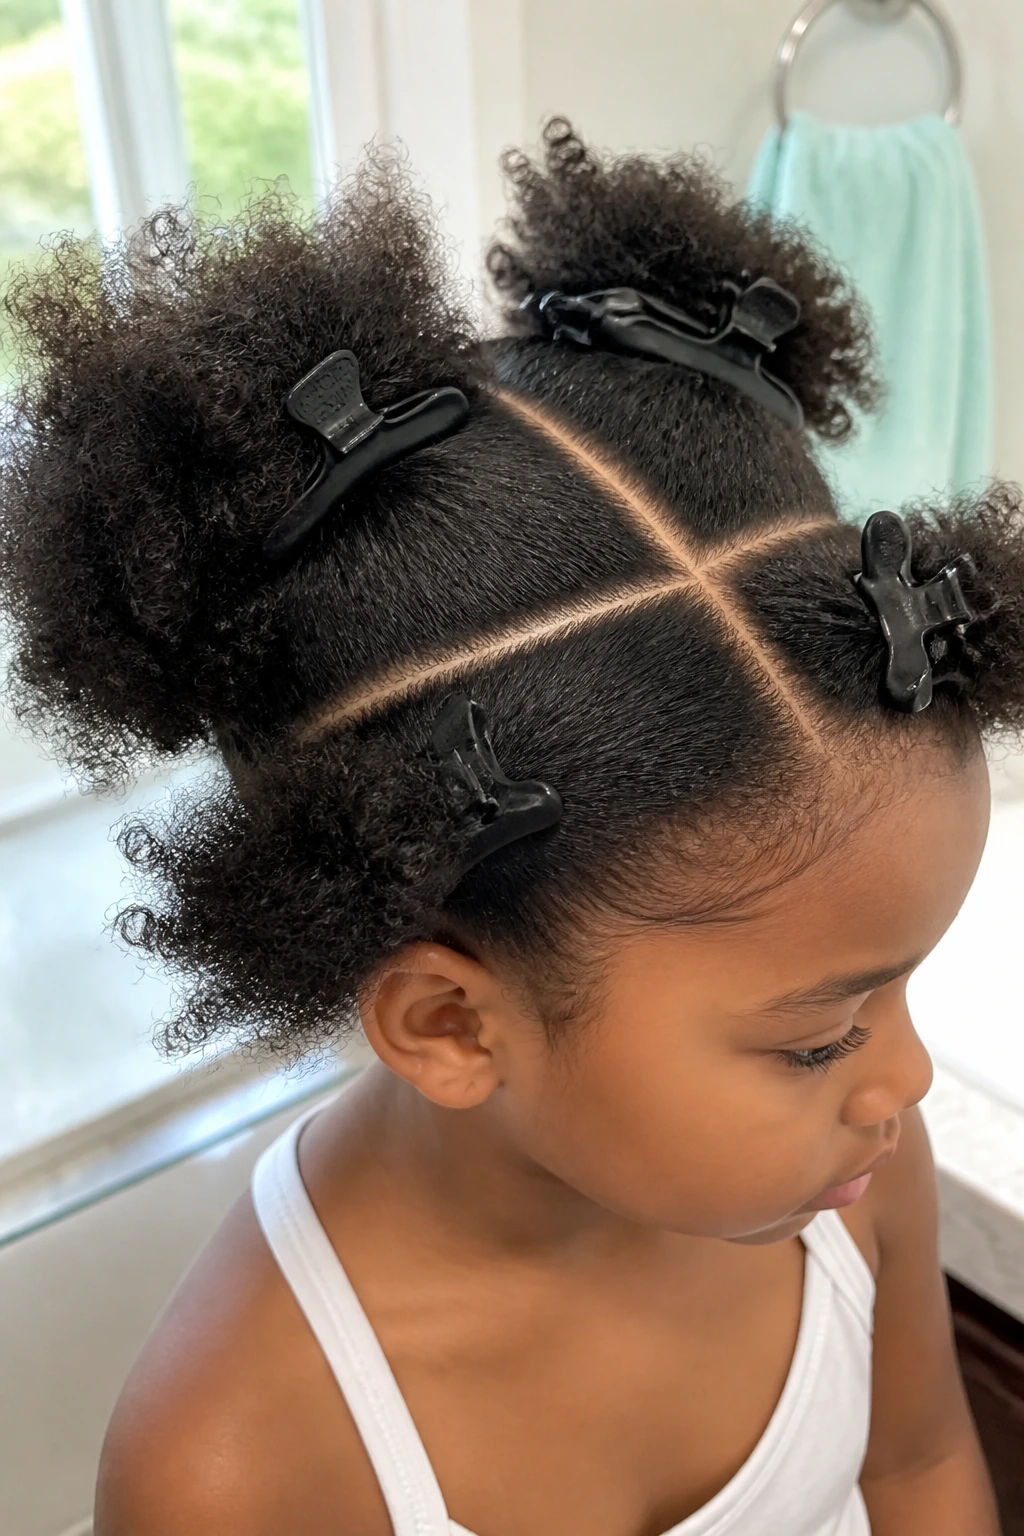
Parting gets easier when the scalp is calm and the hair is separated into neat sections. Use clips. Use more clips than you think. And keep a towel nearby so your hands are dry when you grab the next section. Slippery hands make crooked parts, and crooked parts show up immediately on thick hair.
Practical Tricks for a Smoother Braiding Session

Sectioning: Work in four or six quadrants, depending on how dense the hair feels. Smaller sections are easier to braid cleanly, and they keep the rest of the head out of the way while you work.
Tension control: Hold the braid snug at the roots, then relax your grip slightly as you move down the length. The braid should feel secure, not sharp. If a child says the scalp hurts, stop and redo it.
Parting order: Lay down every part before you start the first braid if the style is complex. That one move saves time and keeps the rows even.
Finish smart: A tiny dab of cream on the fingertips is enough for flyaways. You do not need to smooth the whole head in product. Too much makes thick hair collapse instead of staying plush.
A small detail helps more than a big one here. A calm wrist. A clean comb. A child who can watch something while you braid. Boring? Sure. Also effective.
Common Mistakes That Make Braids Frizzy or Hurt

The first mistake is braiding too tight at the hairline. You can spot it when the scalp looks raised, shiny, or angry red. The fix is simple and non-negotiable: loosen the braid, especially around the front inch, and keep the braid anchored by section size instead of brute force.
The second mistake is starting on tangled hair. Thick hair hides knots until you hit them with a comb, and then the whole session slows down. Detangle in sections with slip from conditioner. Do not try to “braid through” a knot and hope it disappears. It won’t.
The third mistake is using too many tiny parts for the style. Thick hair can handle detailed parting, but tiny sections take longer and can make the scalp feel overworked. If the child is fidgety, go wider. Clean and medium-sized beats perfect and unfinished.
The fourth mistake is leaving damp hair tucked away in a long-term style. That is asking for puff, odor, and a rough scalp. If the hair was wet when you braided it, give it enough time to dry fully before bed.
Variations and Alternatives to Try
The School-Ready Short Version: Keep the braid pattern to two or four larger braids and skip beads. It takes less time and still holds through a long day.
The Soft-Sides Version: Replace tight cornrows with rope twists along the hairline, then braid the back. This is a kinder option for tender scalps.
The Bead-Light Version: Use just one or two bead clusters at the ends. The style still feels special, but the weight stays manageable.
The Sporty Low-Bulk Version: Choose boxer braids or a low braided bun and keep the crown flat. This fits under helmets and headphones better than fuller styles.
The Dress-Up Version: Add ribbon, a centered heart part, or a halo braid. The structure stays the same; the finish gets a little more ceremony.
Tools, Clips, and Small Extras That Save Time
- Detangling brush or comb with flexible teeth: Helpful when thick hair has a mix of curls, waves, or straight sections.
- Sectioning clips in at least 4 pieces: More useful than a big pile of bobby pins during the actual braid.
- Foam or mousse bottle: Optional, but useful if the hair frizzes fast and you want a smoother finish.
- Tiny scissors: Keep one clean pair on hand for trimming elastic ends if needed.
- Mirror setup: A handheld mirror plus one wall mirror helps check the back without guessing.
- Satin pillowcase: Easier than trying to keep every child on a bonnet all night.
- Small towel: Good for catching product drips and keeping hands dry during parting.
- Elastic hook tool: Handy when beads or tiny bands make removal harder than expected.
Sleep, Wash, and Refresh Routine
Braids last longer when the nighttime routine is boring and consistent. A satin bonnet or satin pillowcase helps reduce frizz at the edges and keeps the braid surface from rubbing raw against cotton. For thick hair, that friction matters more than most people think. The hair has more volume, which means more surface area to snag.
For wash day, many braided styles can go about 7 to 10 days before the scalp needs a proper cleanse, depending on sweat and product use. If the style is a looser dress-up braid, it may need refreshing sooner. If it is a tighter cornrow style with clean parts, it can usually go a bit longer, as long as the scalp is comfortable.
Refreshing does not mean starting over. A little water, a small amount of leave-in, and a fingertip touch of cream at the roots is often enough. If a front section has frizzed, smooth it lightly and rewrap it for bed. Rebraiding the entire head every time one edge softens is wasted effort.
And if a child wakes up with a sore scalp, pay attention. That is the hair telling you the style needs to come out or be redone.
Frequently Asked Questions About Braided Hairstyles for Kids with Thick Hair

How long do braided hairstyles usually last on thick hair?
A simple braid set can last about 5 to 10 days if the scalp is cared for and the child sleeps on satin. Styles with beads or more detailed parts may need a touch-up sooner, especially around the hairline.
Should thick hair be blown out before braiding?
Not always. A smooth stretch can help parts look cleaner, but many thick hair styles braid well after a good detangle and a light stretch from braiding cream or blow-drying on cool or low heat. If the hair is very curly or tightly coiled, some stylists prefer a stretched base because it reduces shrinkage at the roots.
What if my child says the braids hurt the next day?
That usually means the front is too tight, or the style was done on hair that was already tangled. Take it out if the soreness does not ease quickly. A braided style should feel secure, not sharp or throbbing.
Are beads safe for sleep?
They can be, but they may press into the head if there are too many or if they’re placed too close to the scalp. A few beads at the ends are usually safer than a heavy cluster near the roots. For bedtime, a satin bonnet helps keep them from bouncing around.
What style is best for a child who plays sports?
Boxer braids, cornrows, and braided buns are the strongest choices. They keep hair close to the head and stay put when the child runs, jumps, or wears a helmet.
Can I do these styles on mixed textures?
Yes. Mixed textures often braid beautifully, but the slippery sections may need a little more product or a tighter grip at the root. Keep the tension even so one texture does not get pulled harder than the rest.
How do I keep braids from puffing up so fast?
Clean parts, a little leave-in, and nighttime satin care make the biggest difference. Puffy roots usually mean the style started on rough hair, got tugged too hard, or rubbed too much during sleep.
Is it better to braid wet or dry hair?
For long-wear styles, I’d rather braid hair that is damp at most, never soaked. Wet hair can stay trapped under the braid and take forever to dry, especially when the hair is thick and dense. Dry or lightly damp usually gives a safer, neater result.
A Style That Holds Up

The best braided hairstyles for kids with thick hair do more than look neat for a photo. They stay comfortable. They stay readable. They survive lunch, car rides, and one more round of recess without falling apart at the roots.
That’s what makes thick hair such a good match for braids when you treat it with a steady hand. Start with a clean part, keep the tension honest, and choose a style that fits the child’s day instead of fighting it. Some mornings call for cornrows. Some call for two Dutch braids. Some call for a halo braid and a little patience.
A braid that still looks decent at pickup has already done half the work.