Half-up hairstyles for long hair with thin hair have one deceptively hard job: make the crown look fuller without stealing all the weight from the length. If you pull every strand back, the roots go flat, the part gets wider, and the whole style can look smaller than the hair actually is. Leave it all down, though, and long fine hair often reads as a curtain with no shape at the top.
The trick is not more hair. It’s smarter placement.
A good half-up style gives the top section a little structure — a tease, a twist, a braid, a clip, a knot — while the lower lengths keep doing the heavy visual work. That’s why these styles can look polished on fine hair in a way a full ponytail often can’t. They borrow strength from the long lengths instead of fighting them.
Why These Styles Earn Their Keep
- Crown lift without a full updo: Only the top section gets controlled, so the back length still creates the sense of fullness.
- Better hold on slippery strands: Fine hair grips more easily when you work with day-old texture, dry shampoo, or a small amount of root powder.
- Less damage than constant teasing: A narrow tease at the crown or a few well-placed pins does the job without turning the whole head fuzzy.
- Flexible for different settings: The same twist can look casual with a matte claw clip or cleaner with a wrapped elastic and a little shine spray.
- Kind to long layers: Face-framing pieces and shorter layers can stay out of the eyes without getting yanked into one tight bundle.
- Fast enough for real mornings: Most of these styles take between 3 and 8 minutes once your hands know the shape.
Why Half-Up Styling Works So Well on Thin Long Hair
Thin long hair has a strange problem: the length looks like a win, but the length also drags down the roots. A full ponytail makes that weight obvious. A half-up style splits the difference and uses the hair’s own length to create a fuller silhouette around the shoulders.
The real magic happens at the crown. A little lift there changes how the eye reads the whole head. If the top sits flat, every thin spot gets louder. If the top has a ridge, a twist, or a tiny bit of tease, the eye moves past the scalp and starts reading shape instead of sparseness.
Crown Height Gives the Illusion of Density
You do not need a giant bouffant. You need a small cushion of lift where the head starts to curve. A 1-inch section backcombed underneath, or a braid loosened after it’s secured, usually gives more payoff than piling product onto the whole head.
Loose Length Keeps the Style Looking Like Long Hair
Half-up styles work because the lower half still hangs freely. That long section adds movement and bulk around the shoulders, which helps the hair look like it has more mass than it does. It also keeps the style from tipping into “tiny top knot on top of a lot of scalp,” which is not the mood anyone wants.
Small Anchors Beat Heavy Accessories
Thin hair likes anchors that bite without dragging. Bobby pins, clear elastics, small claw clips, ribbon ties, and French pins tend to hold better than oversized accessories that look cute in the drawer and slide out in five minutes. The right tool matters more here than brute force.
The Prep That Makes Fine Hair Hold Its Shape
Freshly washed hair can be the least cooperative version of itself. It’s too clean, too soft, too slippery. If you want half-up hairstyles for long hair with thin hair to stay put, start with a little grit at the roots and some bend through the lower lengths.
A light mousse at the roots before blow-drying helps, but don’t drown the hair in product. A golf-ball-sized amount is enough for most long hair, and it should be worked mostly through the crown and upper sides. If you use a root-lifting spray, aim it at the scalp line and then blow-dry upward with your fingers or a round brush.
Day-old hair is a gift. So is dry shampoo. Put it at the roots, wait a minute, then massage it in. That short pause matters more than people think; it gives the product time to grab instead of disappearing into the hair.
For the lower lengths, a loose wave often beats pin-straight hair. Even a few bends with a 1-inch curling iron can make the style look thicker. Leave the ends a touch straighter if your hair is very fine. It keeps the length from turning wispy.
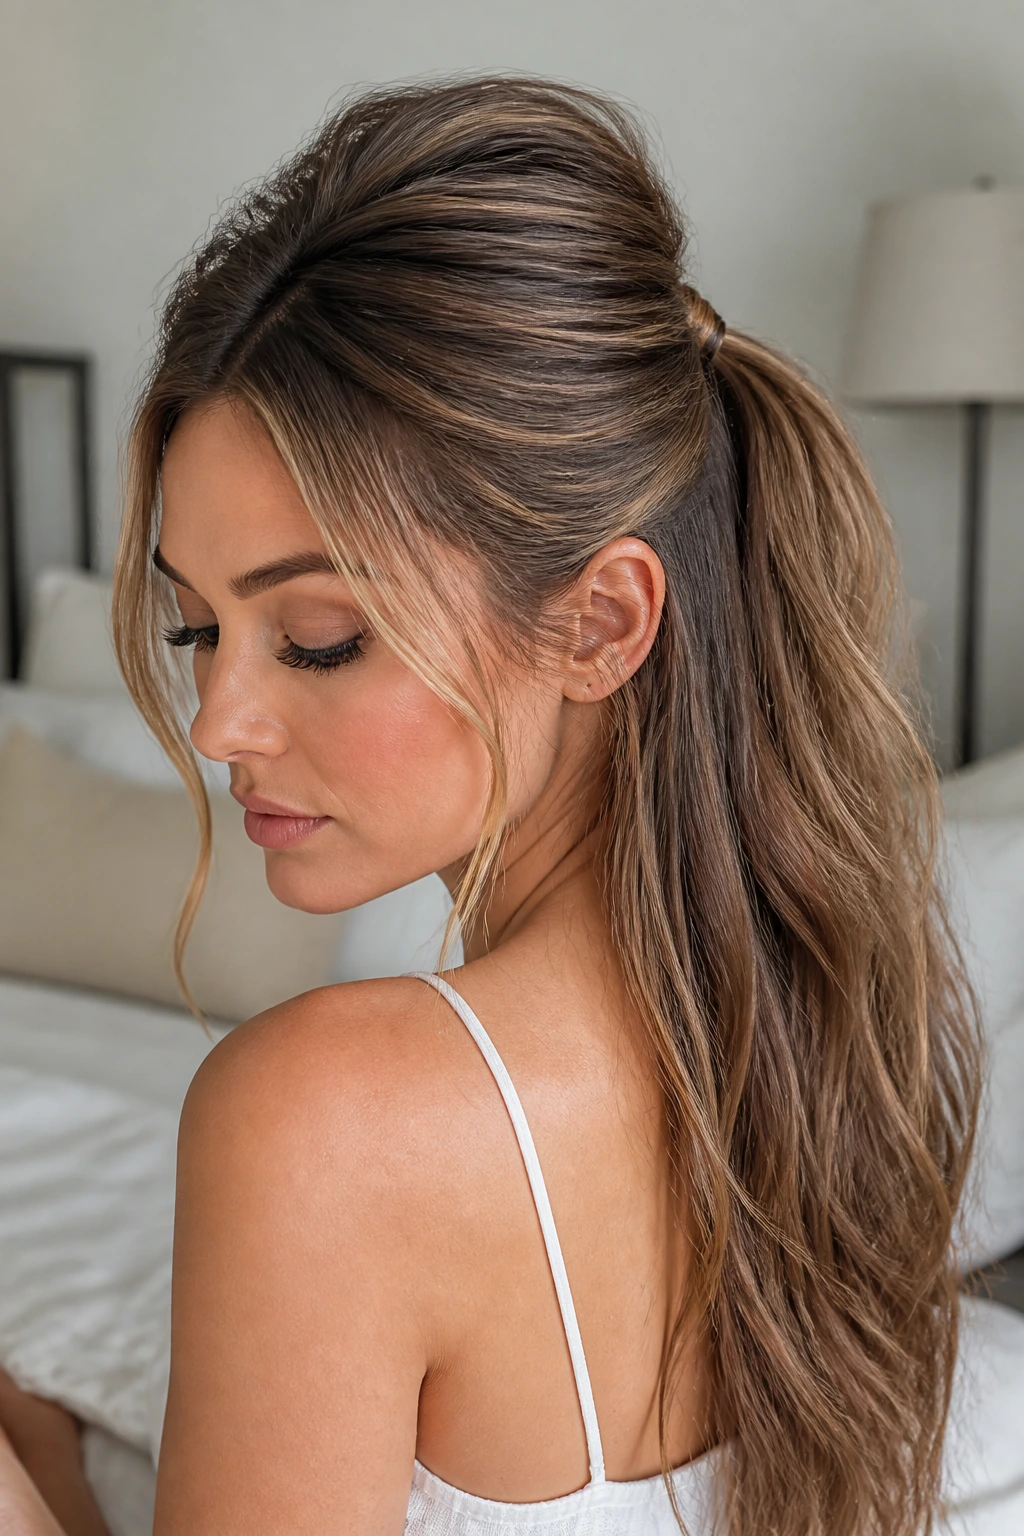
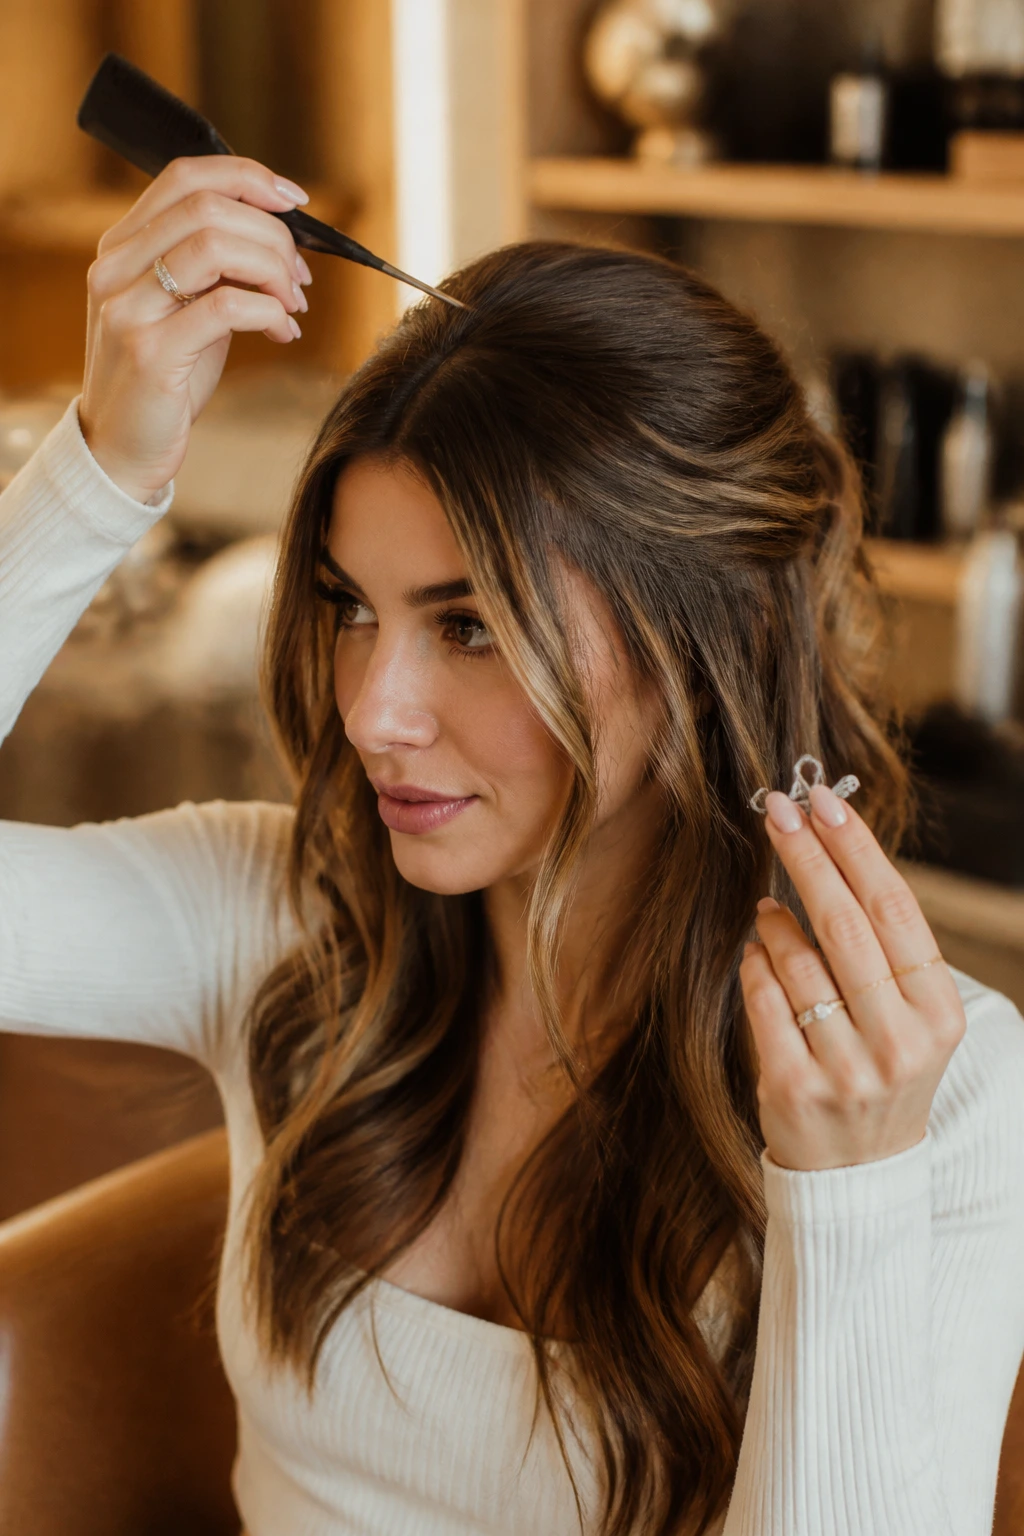
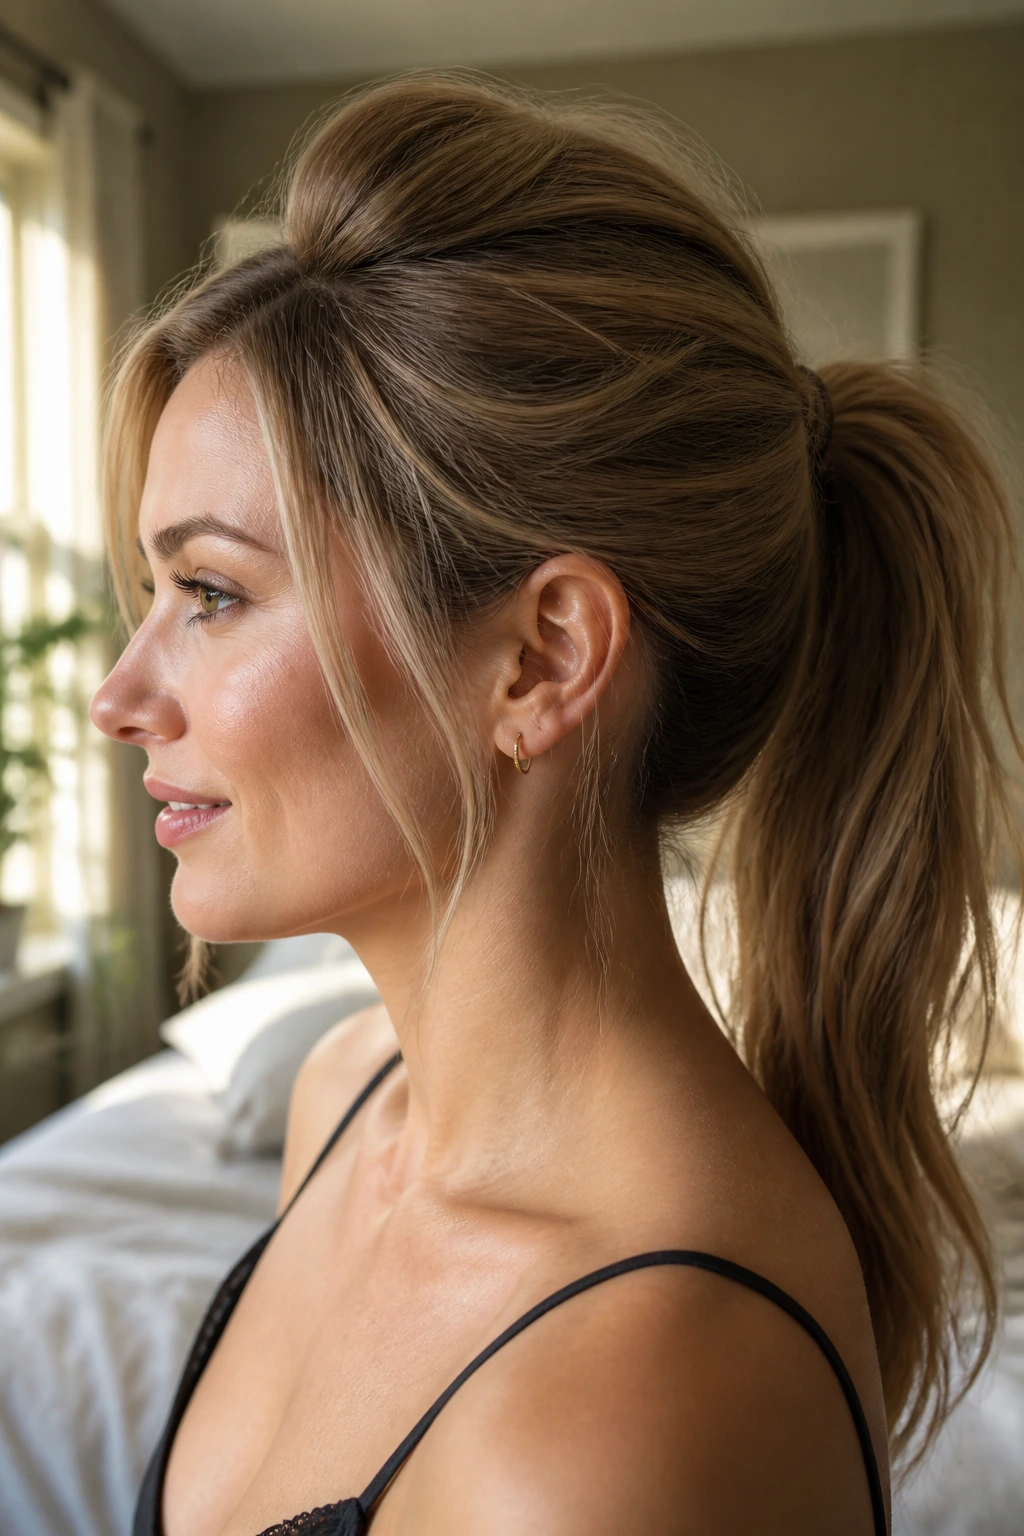
1. Teased Crown Half-Up Ponytail
This is the one I reach for when the crown looks widest and the ends look longest. The small lift at the top changes the whole profile, and it does it without pretending the hair is something it isn’t.
Take a 2-inch section from the top center of the head and gently backcomb the underside only, using 3 or 4 short strokes. Smooth just the outer layer over the tease, gather the top half at the back of the crown, and secure it with a small elastic. A tiny strand wrapped around the base makes the style look finished instead of accidental.
Where the tease belongs
Keep the tease narrow. If you backcomb the whole crown, fine hair turns fuzzy fast. A small cushion under the top layer is enough, especially if you mist the underside with flexible-hold hairspray before smoothing it over.
A style like this works best on hair that has a little texture already, but it can also rescue freshly cleaned hair if you use dry shampoo first. The shape matters more than the volume of product. That’s the whole game here.
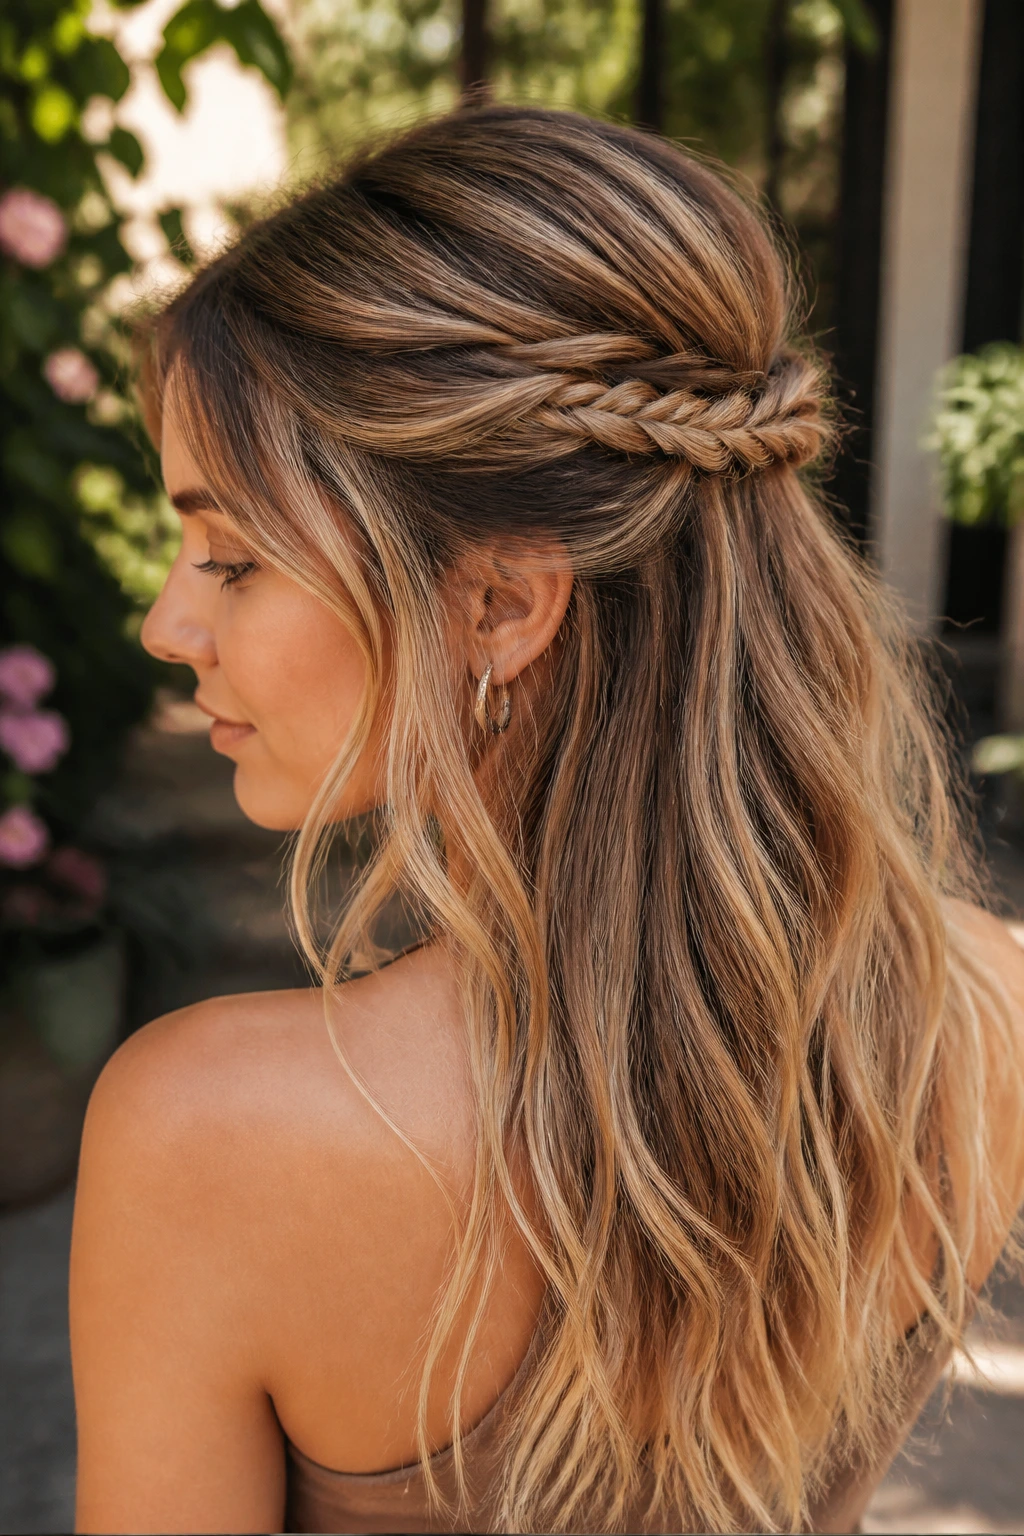
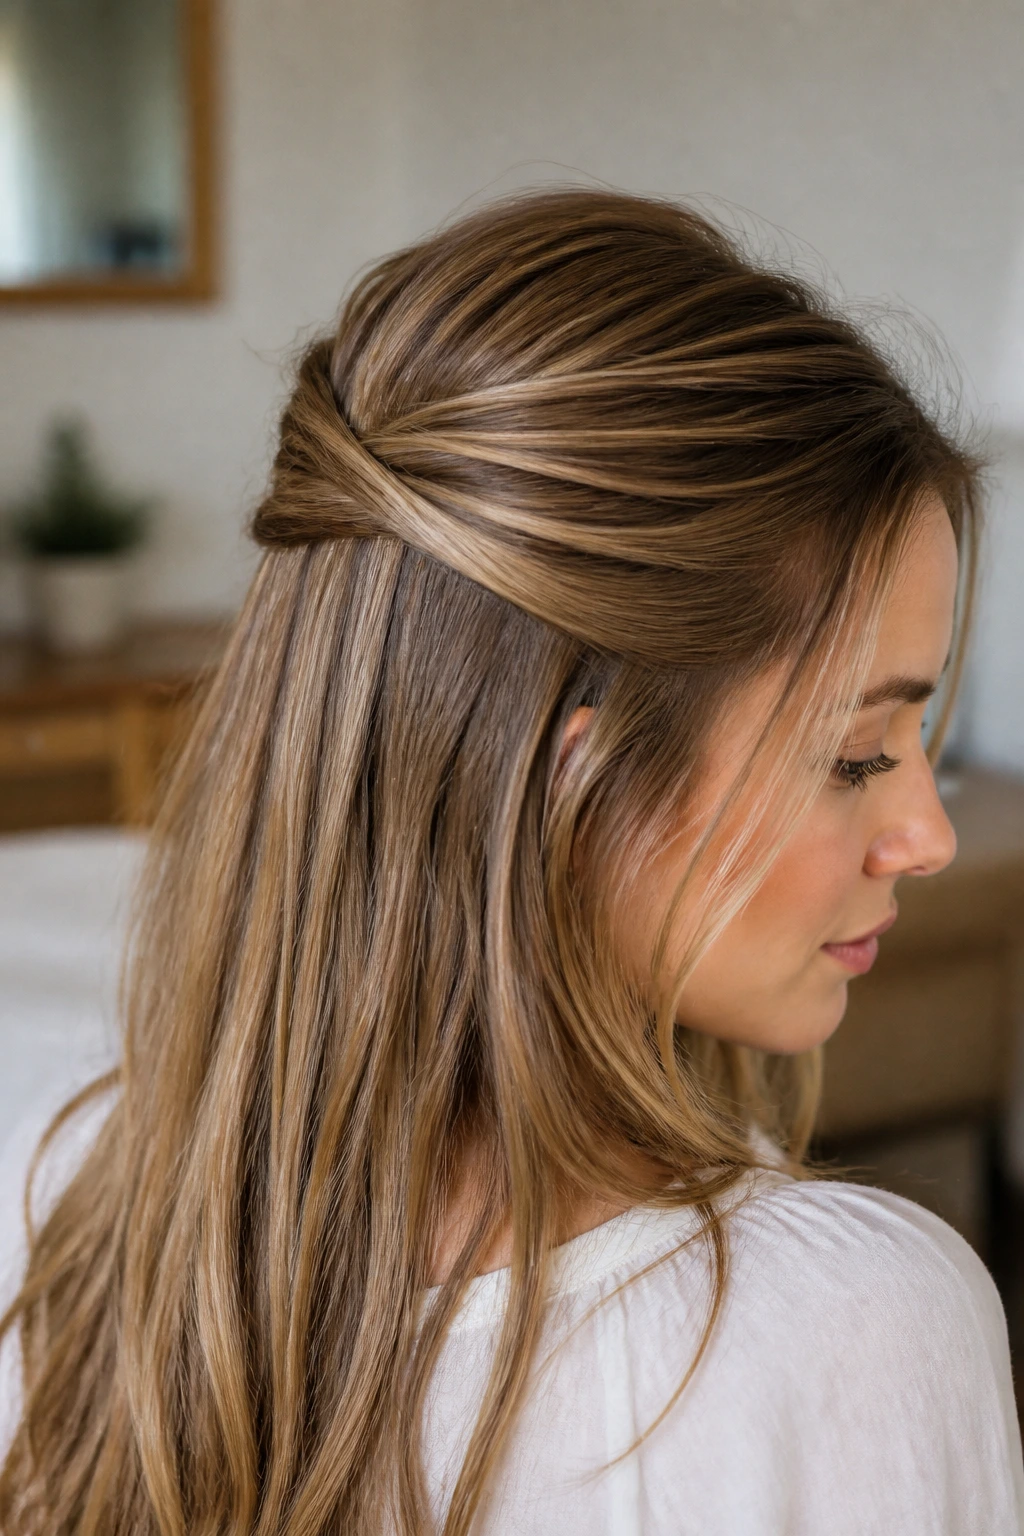
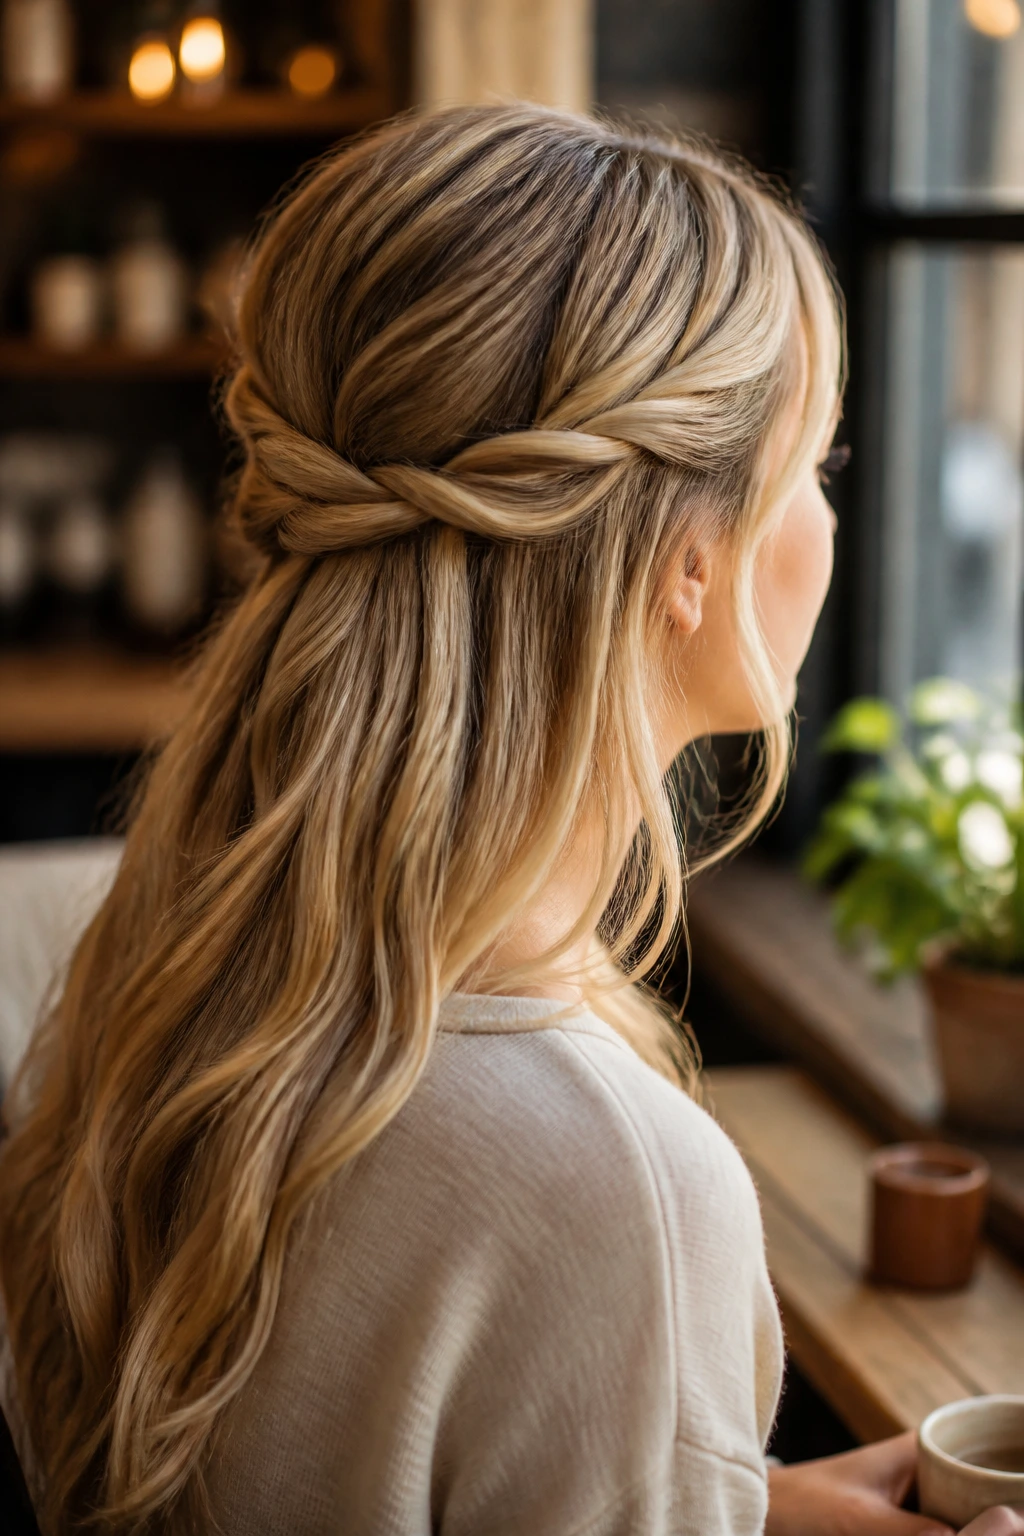
2. Rope-Twist Half-Up
This is the easiest elegant half-up for slippery hair, and it looks more deliberate than a simple clip-back. The twist creates width, which thin hair needs, and it holds better than a loose section that’s only pinned once.
Take one 1- to 1½-inch section from each temple, twist them away from the face two or three turns, then bring them to the back and cross them over one another. Pin the crossed section with two bobby pins placed in an X, not just side by side. That little X keeps the twist from rolling loose.
The style is especially good when your hair is straight and doesn’t want to stay textured. Add a light wave through the lower lengths if you can; the contrast between the smooth twist and the soft ends makes the whole thing look fuller.
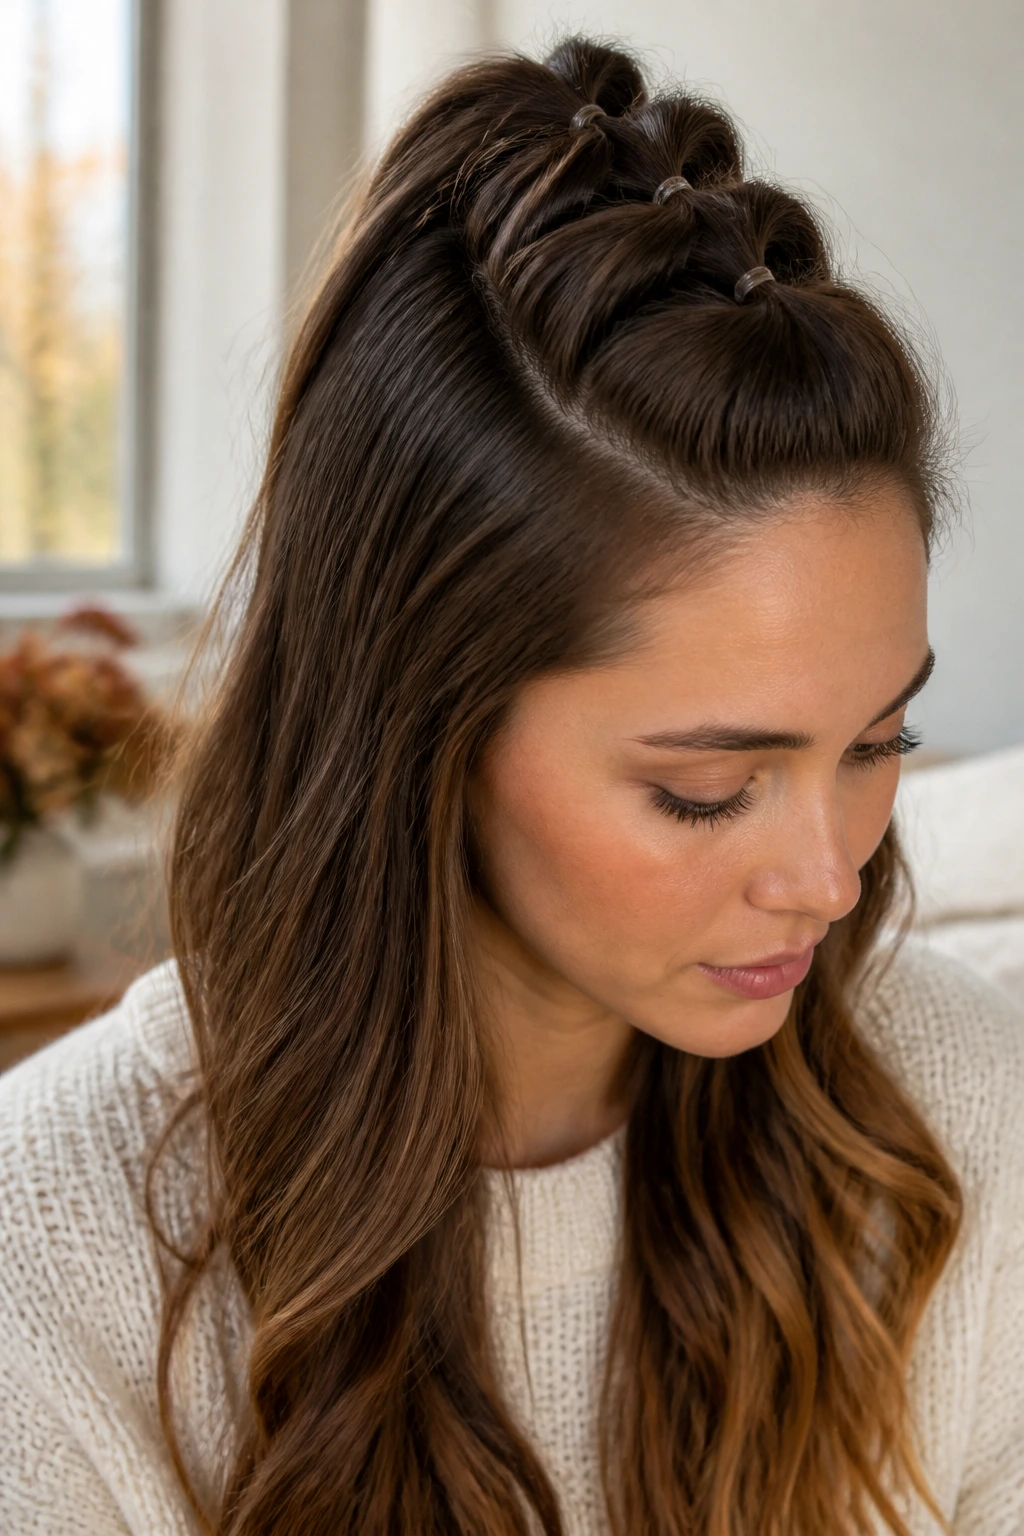
3. Mini Bubble Half-Up Ponytail
Why do bubbles work on thin hair? Because each elastic creates a tiny visual break, and those breaks make the hair look thicker than one continuous narrow tail. It’s one of those low-effort tricks that makes a lot of sense once you see it in a mirror.
Gather the top half into a small ponytail and secure it with a clear elastic. Add another elastic 1½ to 2 inches down, then another, until you have three or four bubble segments. Gently tug each section outward with your fingertips so the bubbles puff up a little, but don’t yank them into strange little balloons.
How to keep the bubbles even
Use the same spacing between each elastic. Uneven spacing makes the bubbles look broken, not intentional. If your hair is extra fine, keep the bubbles smaller and closer together; a short series of tight bubbles often looks better than one or two oversized ones.
A mist of texturizing spray at the end helps the sections keep their round shape. The style reads playful, but it’s also practical. That combination is not common enough with thin hair, and it’s part of why this one works.
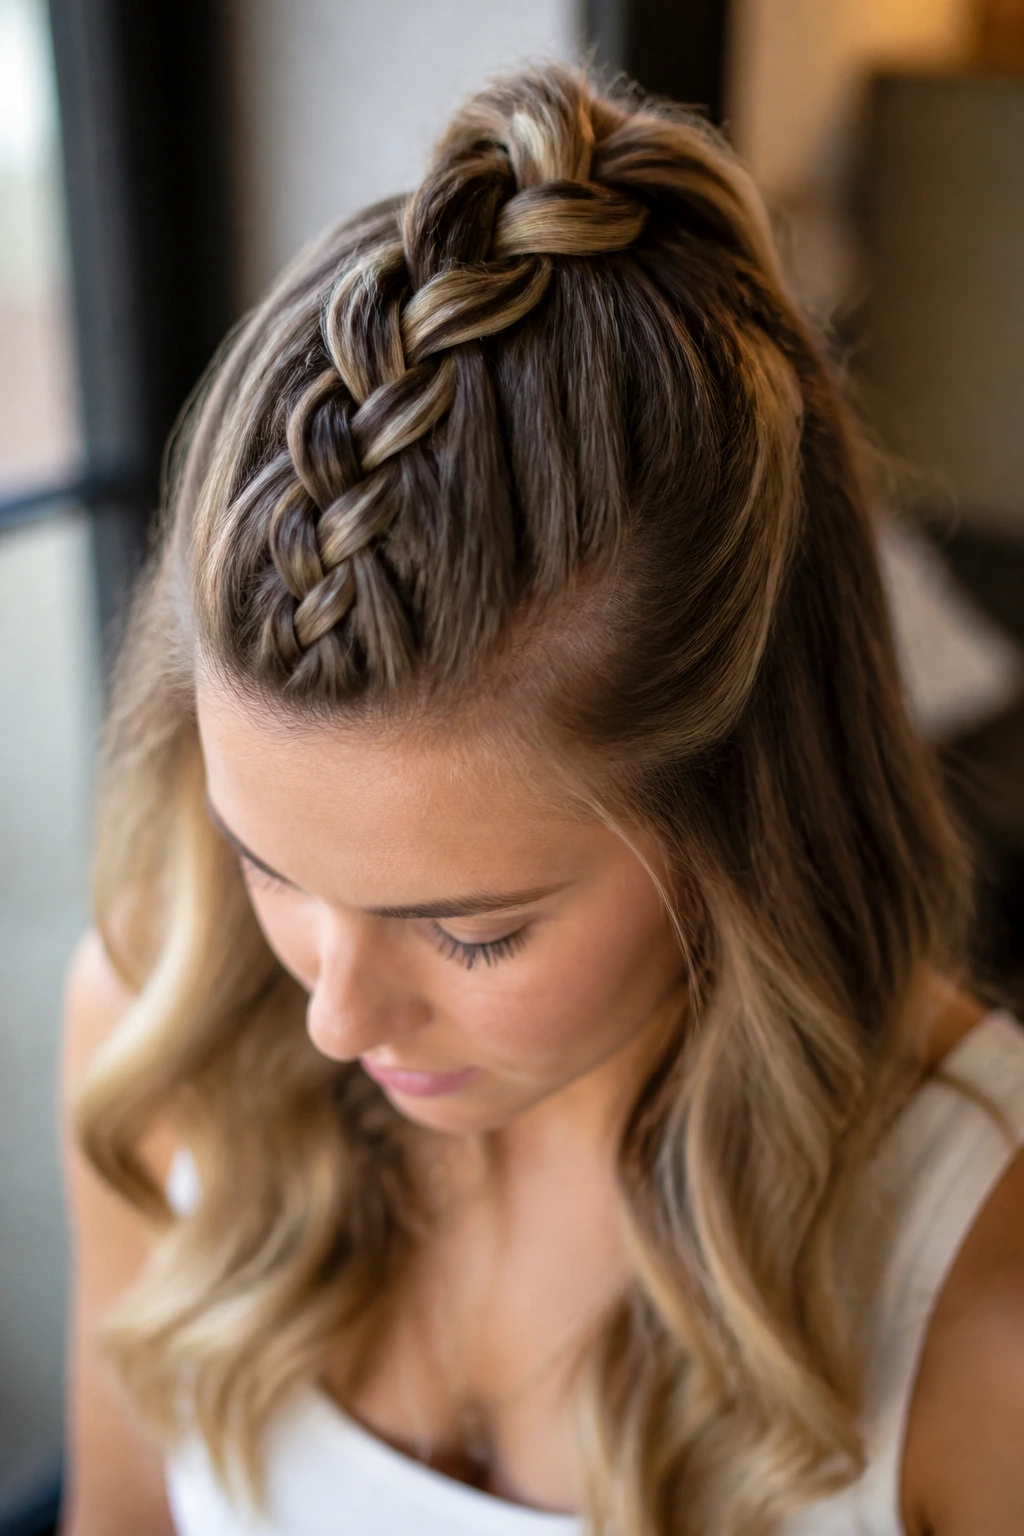
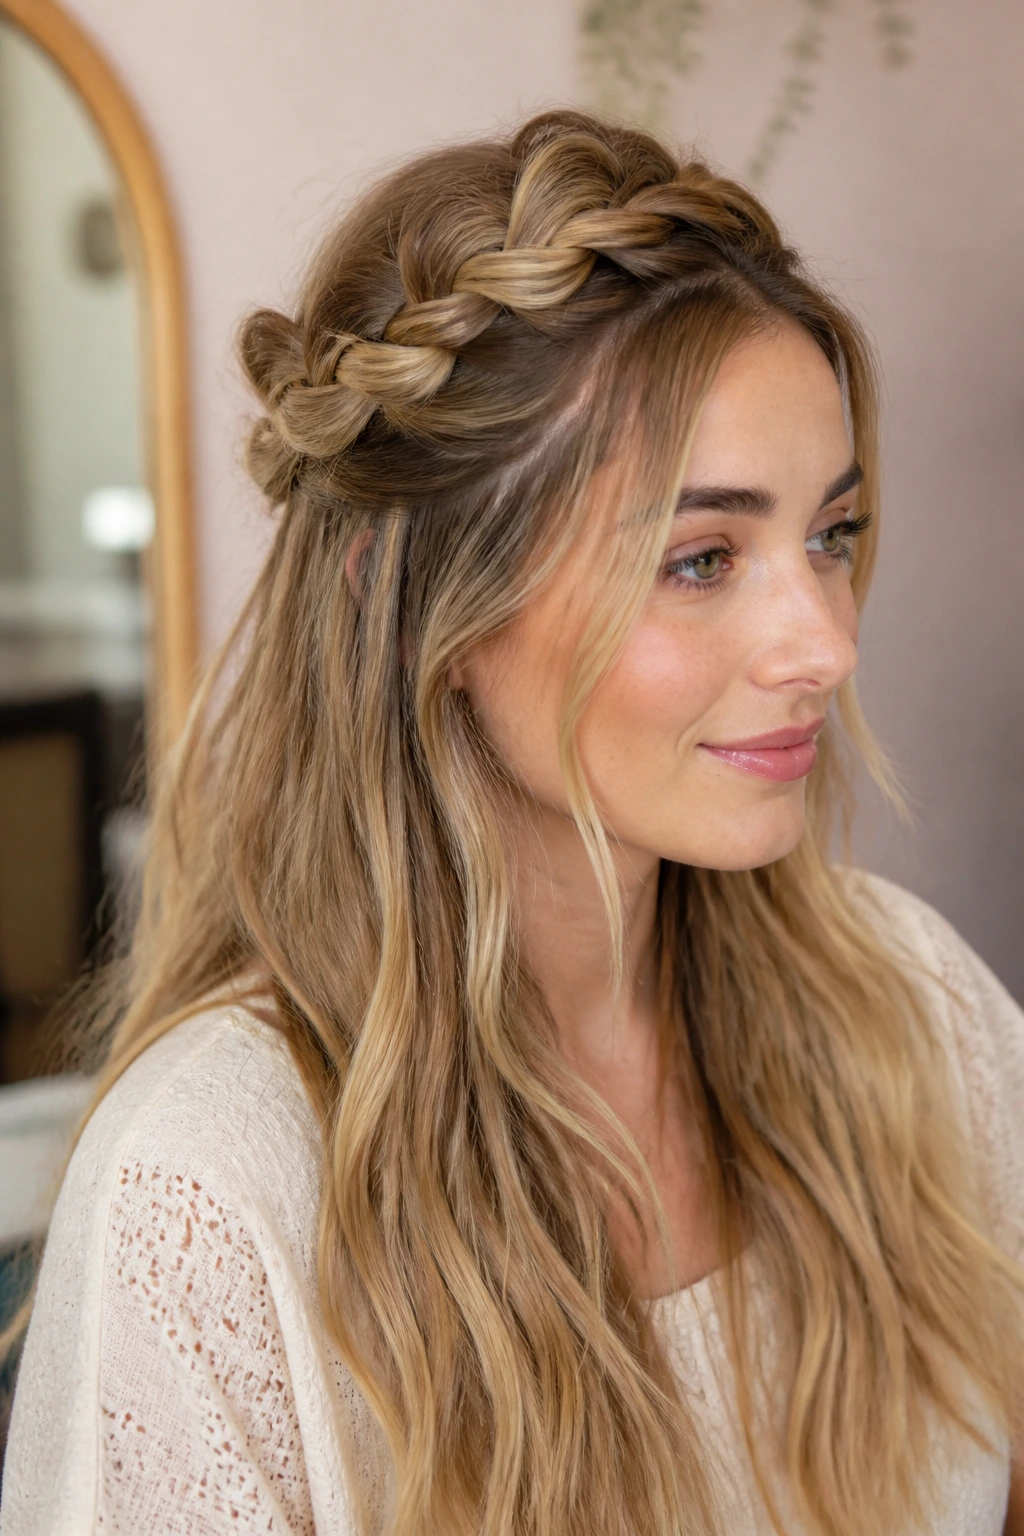
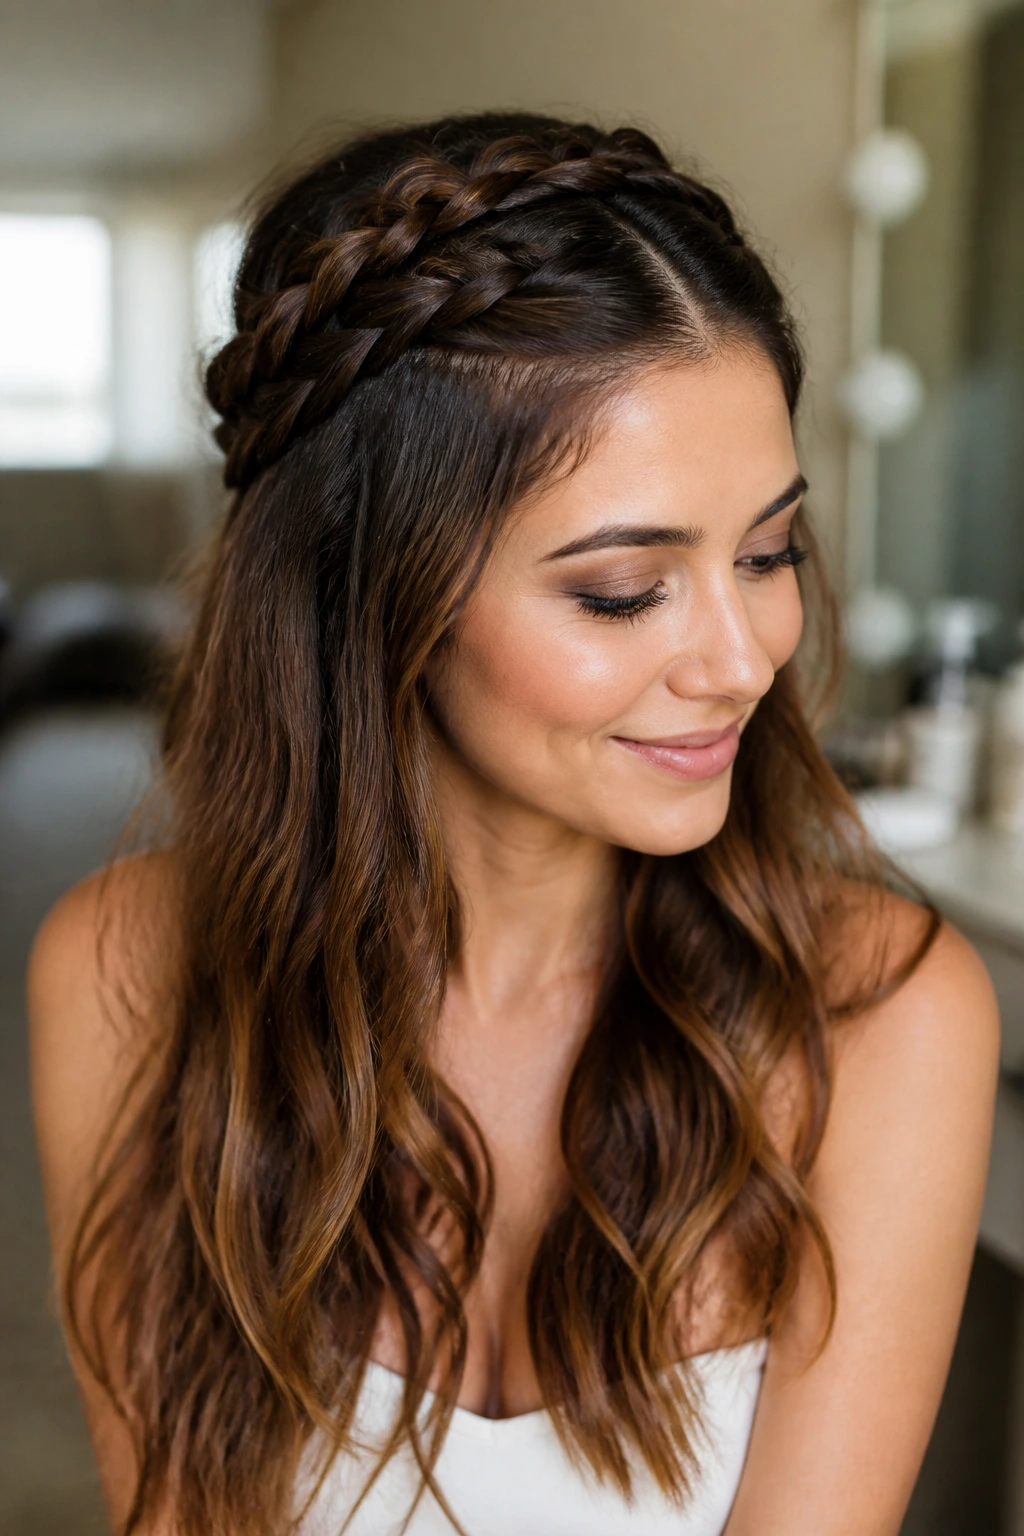
4. Braided Crown Halo Half-Up
When the front section goes flat the second you step outside, a braided halo gives you a better frame for the face. The braid sits where hair usually loses shape first, so it covers the weakest point instead of exposing it.
Make two small braids starting at each temple, or one braid that travels from one side to the back of the head. Keep the sections narrow; thick braids swallow fine hair and can look heavier than the rest of the style. Once the braid is secured, loosen the outer edges with your fingertips so it looks a little wider.
Thin hair does better with this style when the braid stays close to the head and the lower lengths are left loose. If you want more shape, curl the bottom half into soft bends. That gives the halo something to sit on instead of hanging in space.
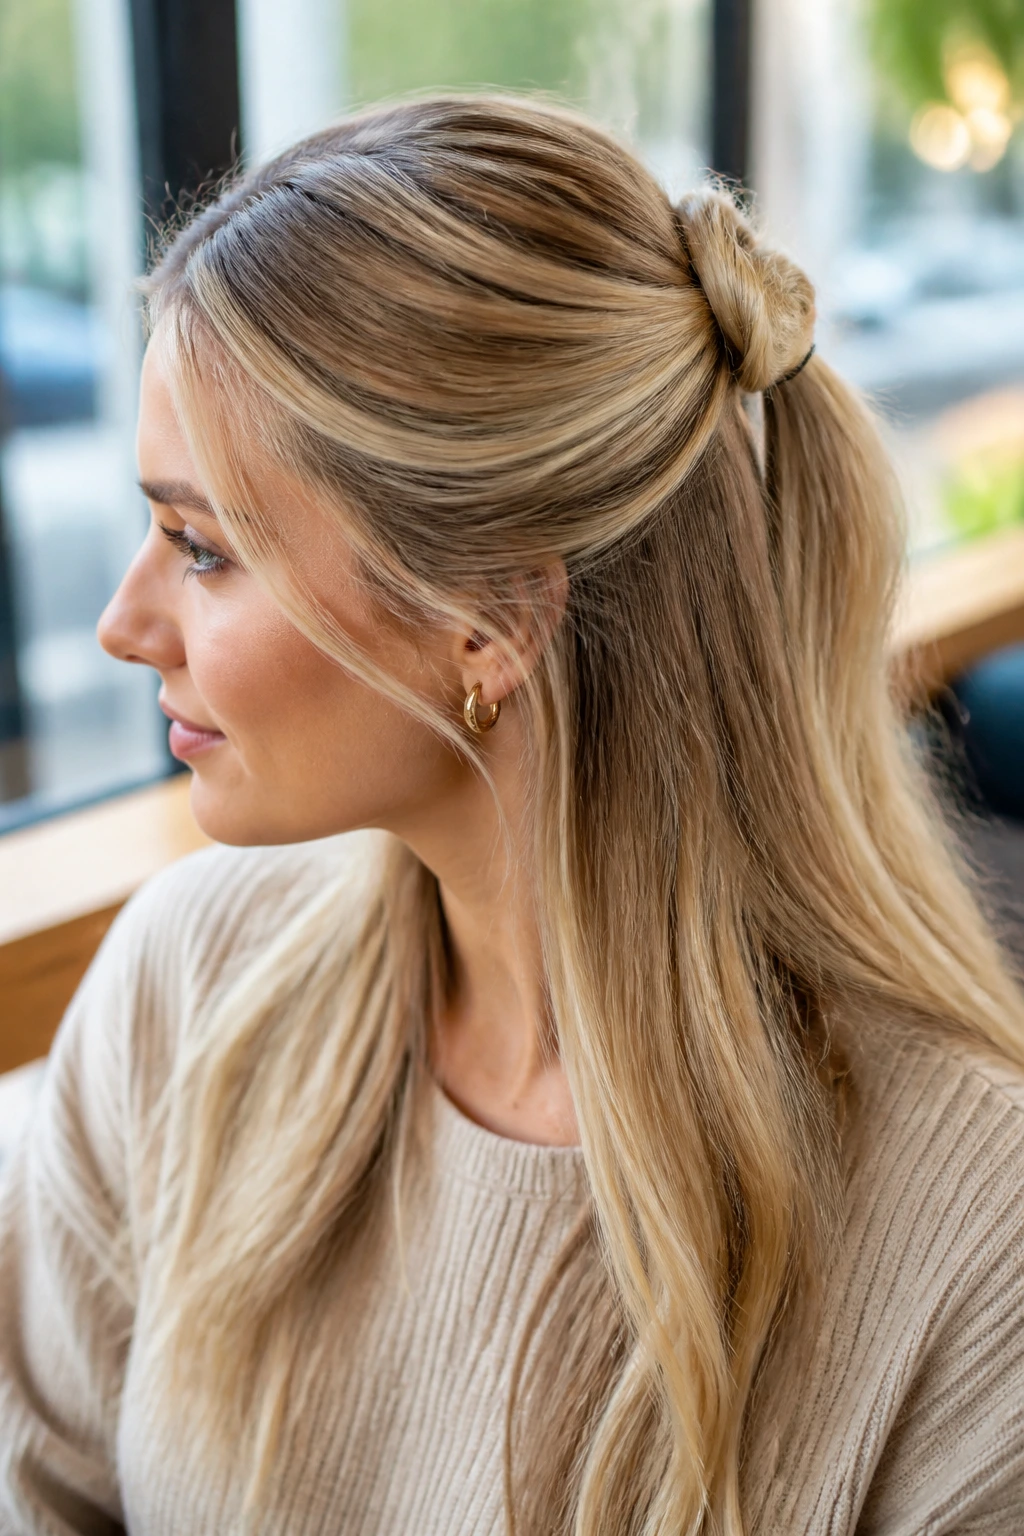
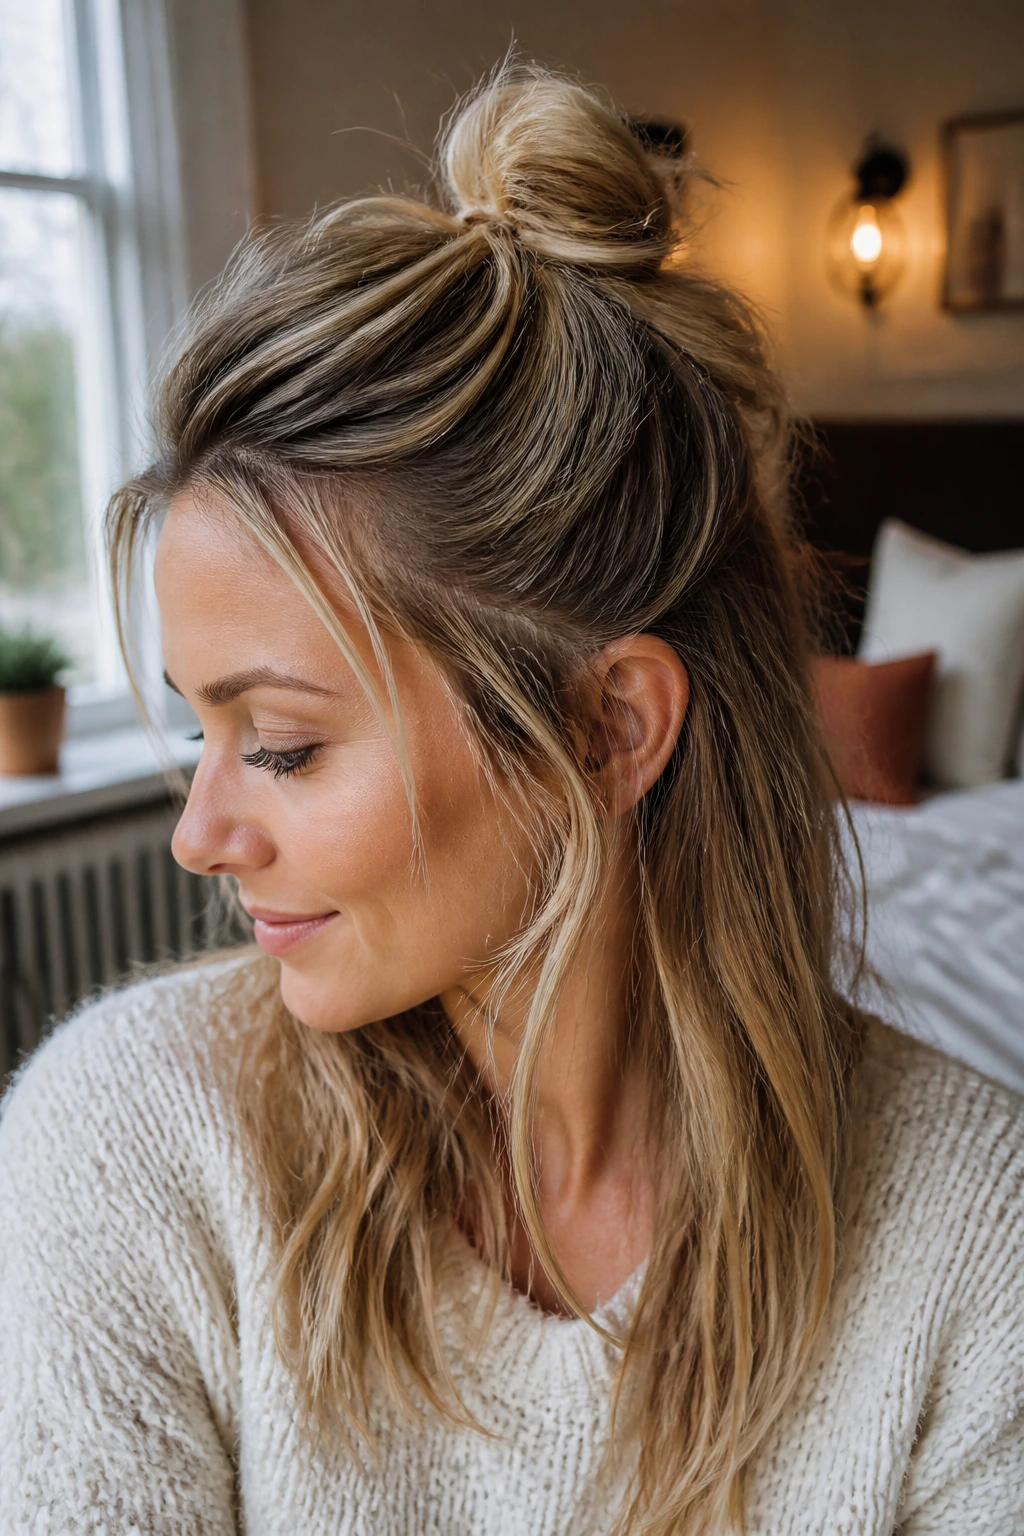
5. Messy Half-Up Top Knot
A top knot on thin hair should be small and slightly undone, not a giant donut sitting on a scalp with nothing else happening. The best version looks like you tossed it up, then made a few careful decisions.
Pull the top third of the hair back to the crown, twist it once or twice, and wrap it into a compact knot. Secure it with two or three pins, not one giant elastic, because pins let the bun keep its shape without crushing the hair flat. Leave the lower half loose and give it a few bends if it’s pin-straight.
The knot should be small enough that it still shows the hair’s texture. If you make the bun too big, thin hair can look stretched. A little mess is useful here. A tiny bit of fray around the edges makes the style feel softer and hides how little hair is actually bundled up top.
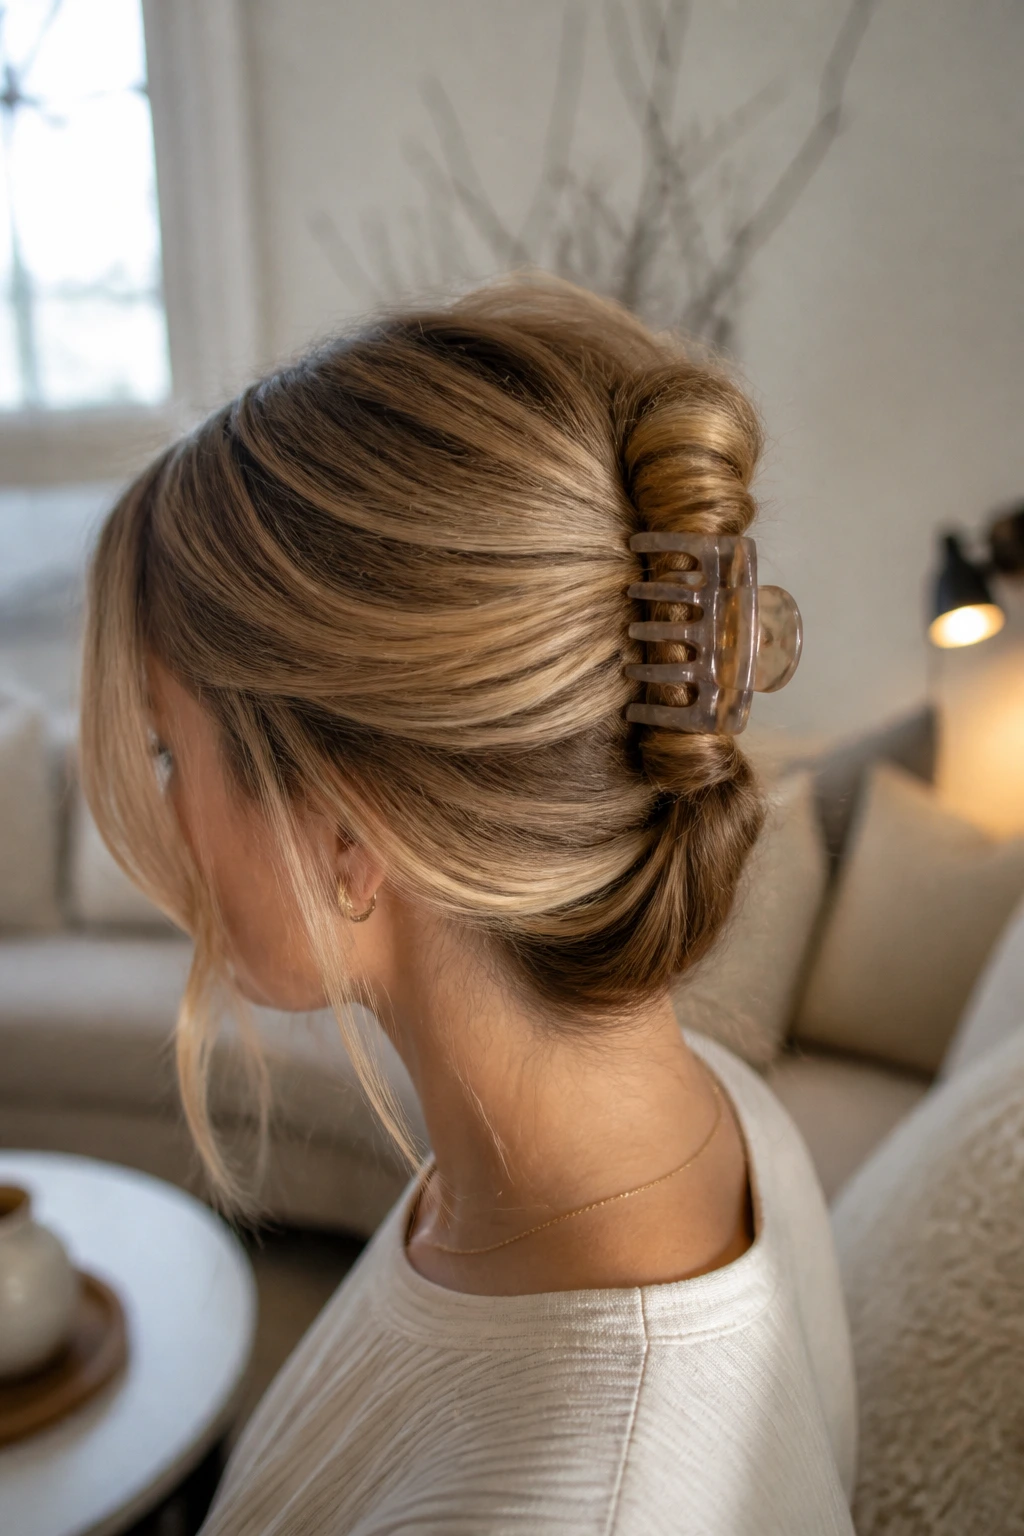
6. Claw-Clip French Twist Half-Up
A good claw clip gives fine hair a cleaner silhouette than a bulky elastic. It also spreads the tension out, which helps when your hair wants to slip out of everything by lunch.
Twist the top half upward like a narrow French twist, tuck the ends under, and clip it in place with a medium claw clip that has teeth, not just smooth plastic jaws. The clip should grip the hair without being so heavy that it drags the twist down. If it slides, the clip is too slick or too wide for your hair density.
This style is especially kind to long thin hair because it keeps the length visible while lifting the top off the neck. On straight hair, a small wave through the ends keeps the look from feeling severe. And if you want it cleaner for a work setting, leave the twist tidy and skip the loose face pieces.
7. Fishtail Accent Half-Up
A tiny fishtail reads more detailed on thin hair because the pieces are smaller and neater to begin with. You don’t need a thick rope of hair to make the pattern visible. You need clean sections and a hand that stops before the braid gets too tight.
Take a small section from each temple and combine them into a fishtail at the back, or make two short fishtails and join them together. Use only a few passes — four to six is often enough on fine hair — and secure the end with a tiny elastic. If the braid is too long, it starts to look stringy instead of intricate.
Keep the weave loose enough to show
Pinch the outer edges of the braid outward after it’s secured. That widens the pattern and makes it read fuller. A light mist of texture spray before you start helps, too, especially if your hair is silky and straight.
This one is best for hair that already has a little bend in it. Straight, shiny hair can still wear it, but the braid needs a bit of grip or it will slide apart faster than you want.
8. Ribbon-Tied Double Twists
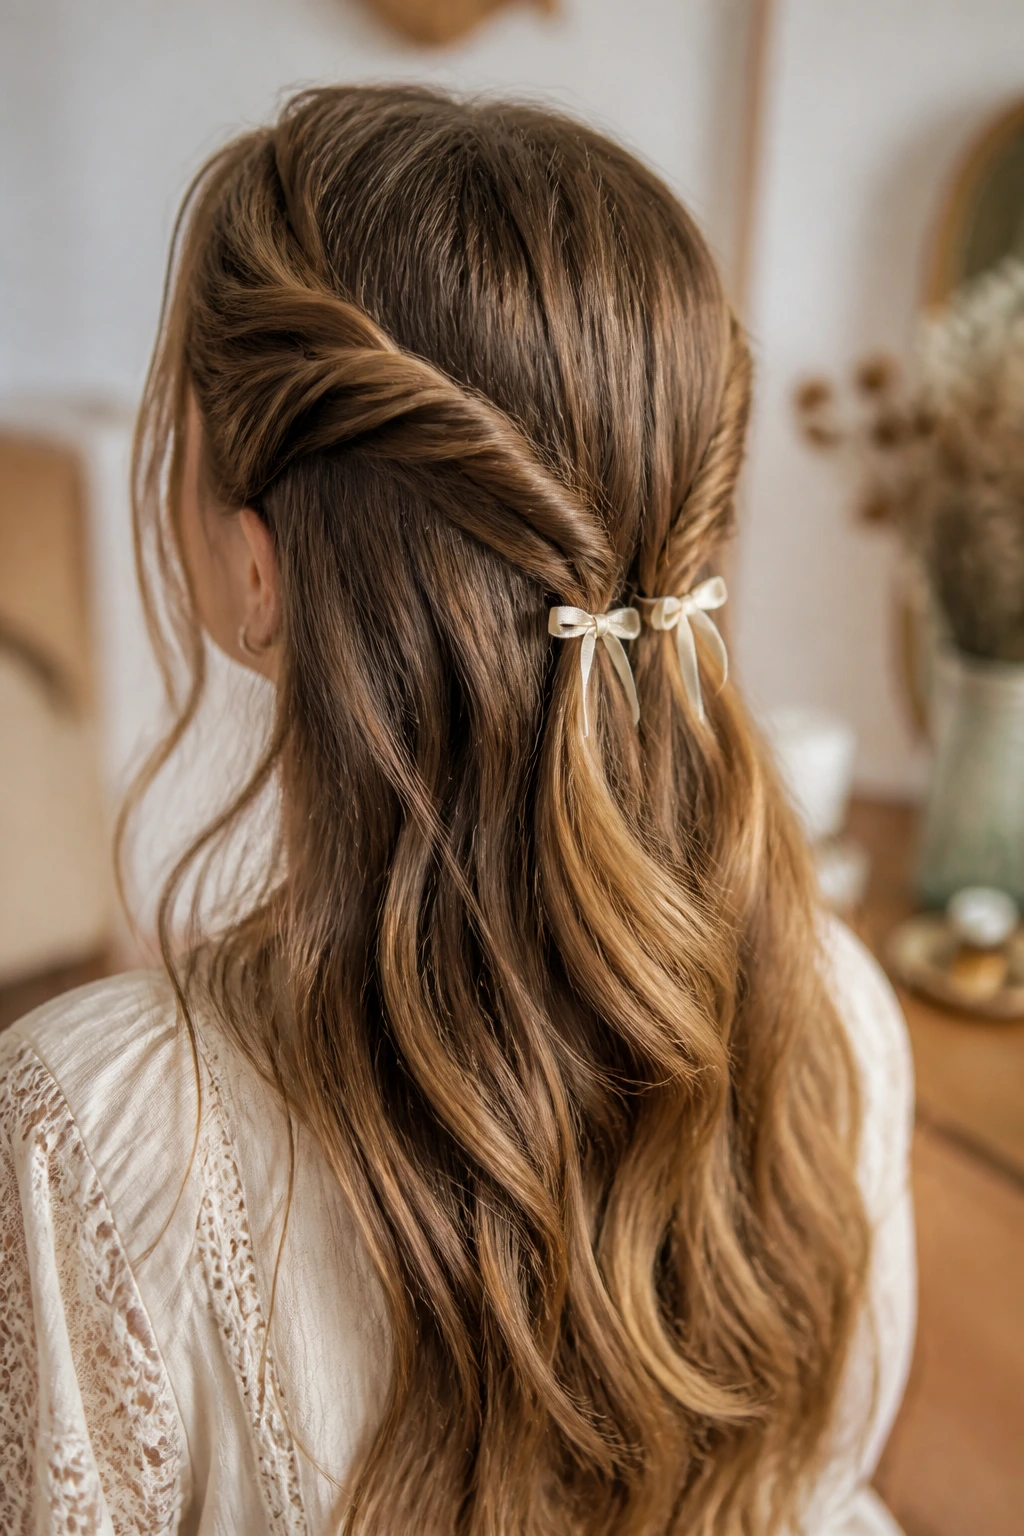
Ribbon does more for thin hair than another heavy product ever will. It adds a soft focal point right where the eye lands, and it hides the fact that the top section is smaller than a full ponytail.
Take a section from each side of the head, twist them backward, and secure both with a narrow ribbon tied into a knot or bow at the back. A ¼- to ½-inch ribbon usually looks best; anything wider can overpower fine hair. Velvet or matte grosgrain grips better than silk if your hair is very slippery.
This style works because the twists give shape and the ribbon gives it finish. You’re not asking the hair to support a lot of weight. You’re asking it to look intentional, and that’s a very different job.
9. Waterfall Braid Half-Up
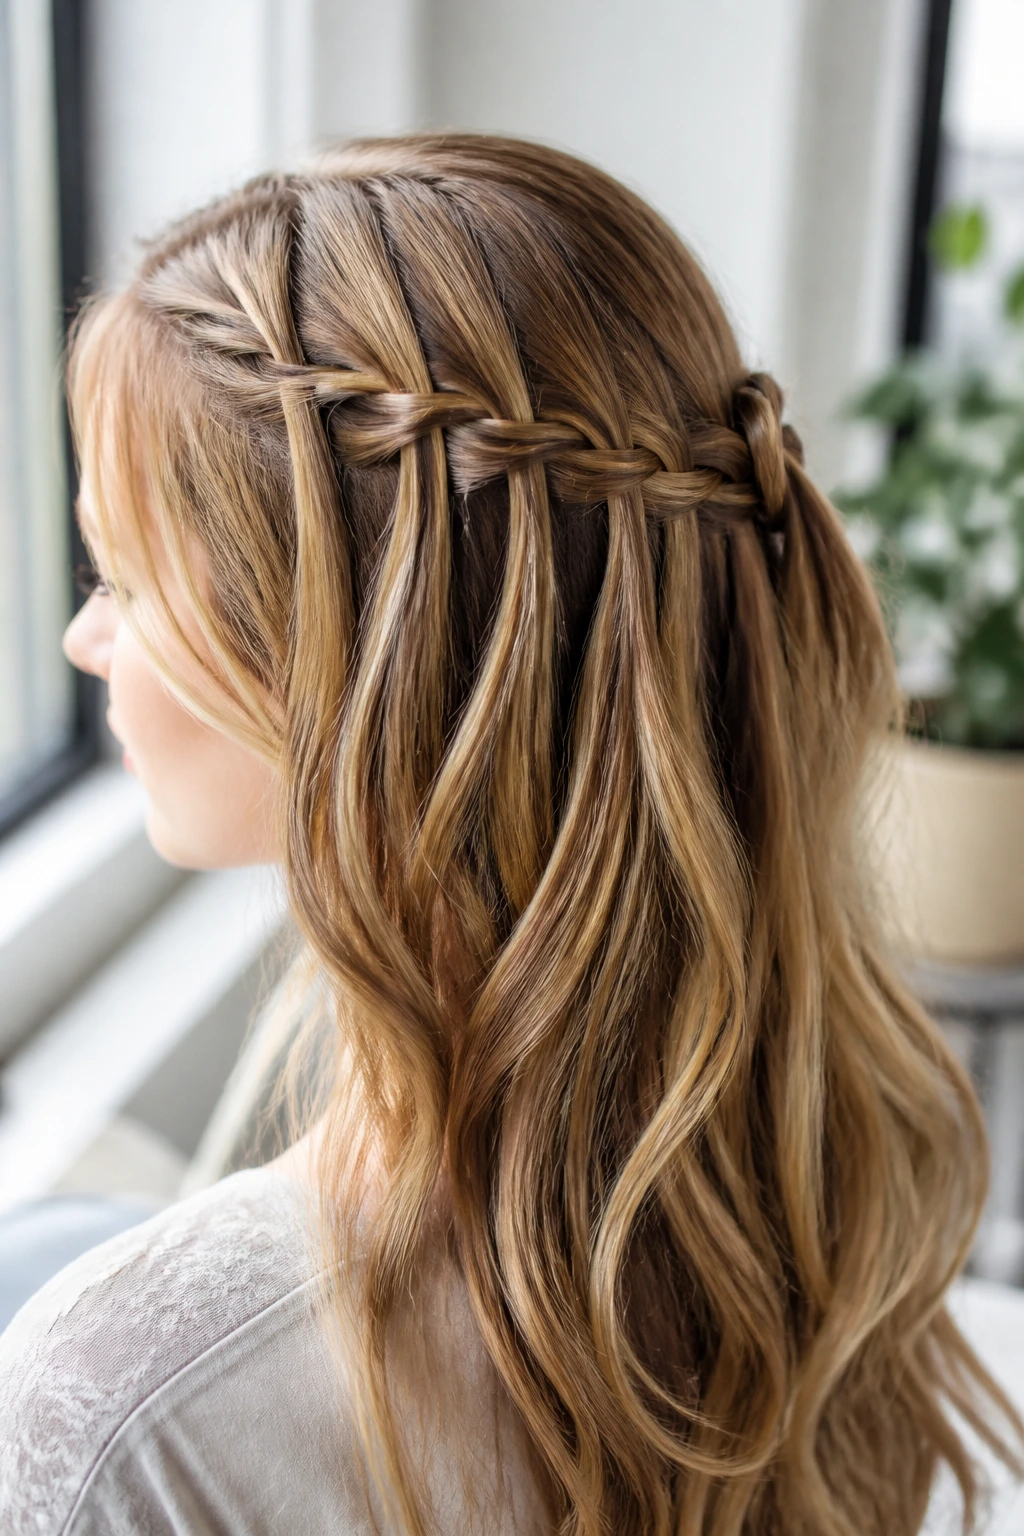
Why does a waterfall braid look so pretty on long fine hair? Because the dropped strands create movement without taking away much density from the lower half. The braid stays delicate, and the loose sections keep the style from feeling overworked.
Start near one temple, braid across the back of the head, and let one strand fall through each stitch of the braid. Keep the braid neat and fairly close to the head, then pin it where it ends. If the sections are too chunky, the waterfall effect gets muddy and the braid starts looking thick in the wrong way.
This style likes texture. If your hair is pin-straight, add a light bend to the lower half first. A waterfall braid on very sleek hair can show every little gap, and that’s not flattering when the density is low. Give the hair a little grit and it settles into place.
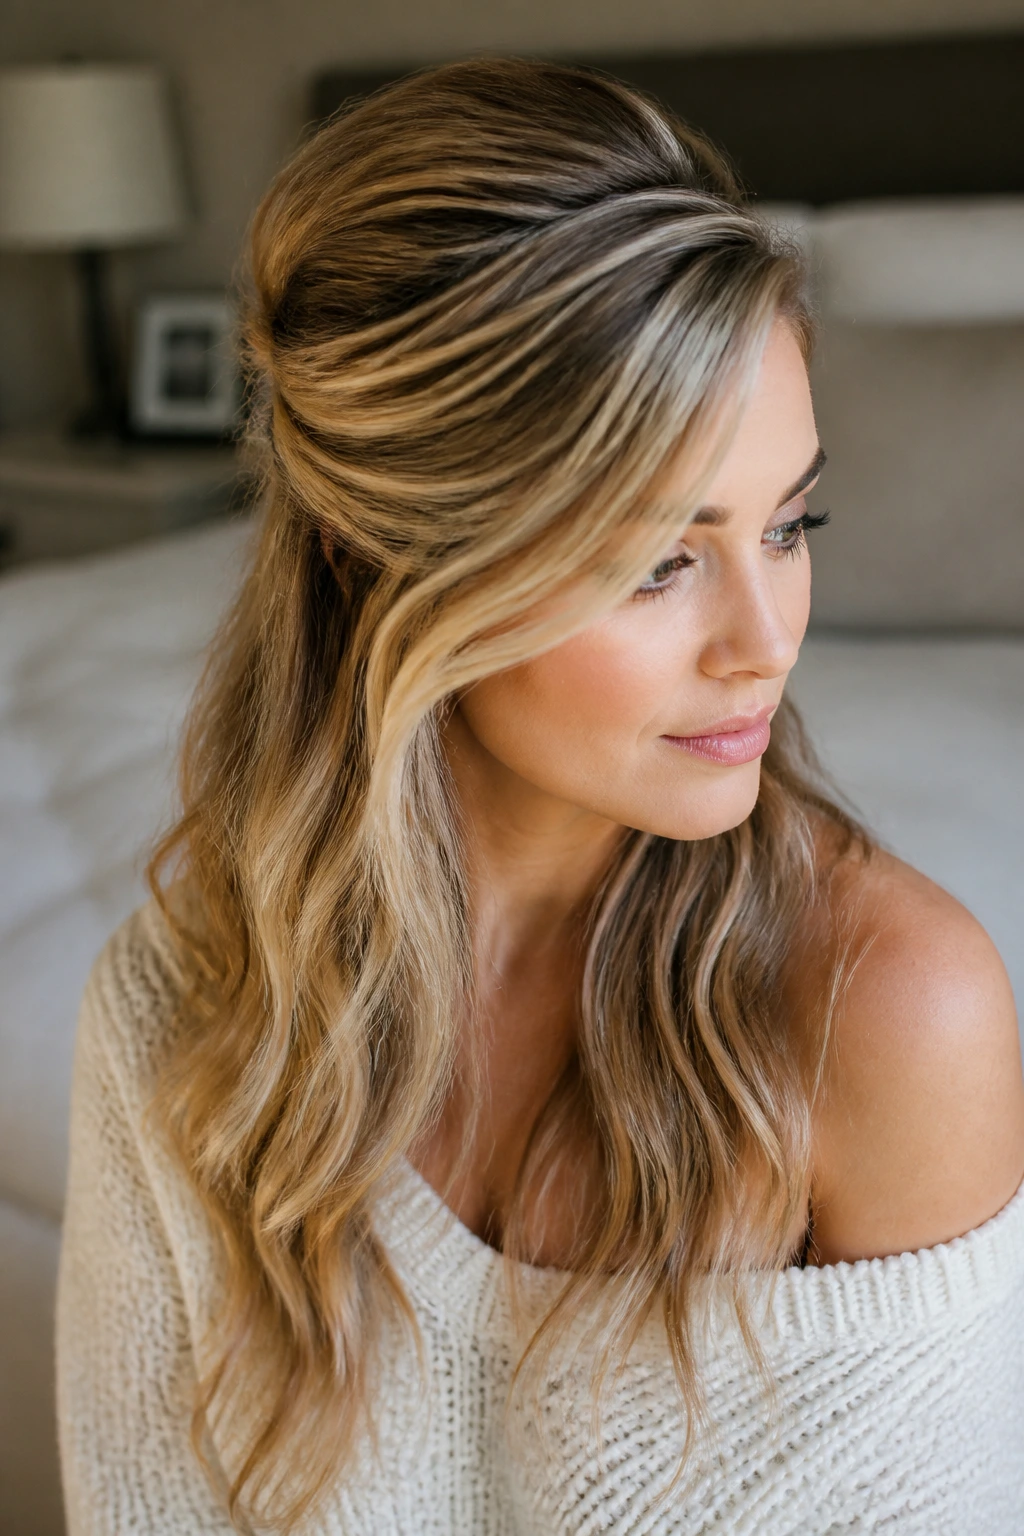
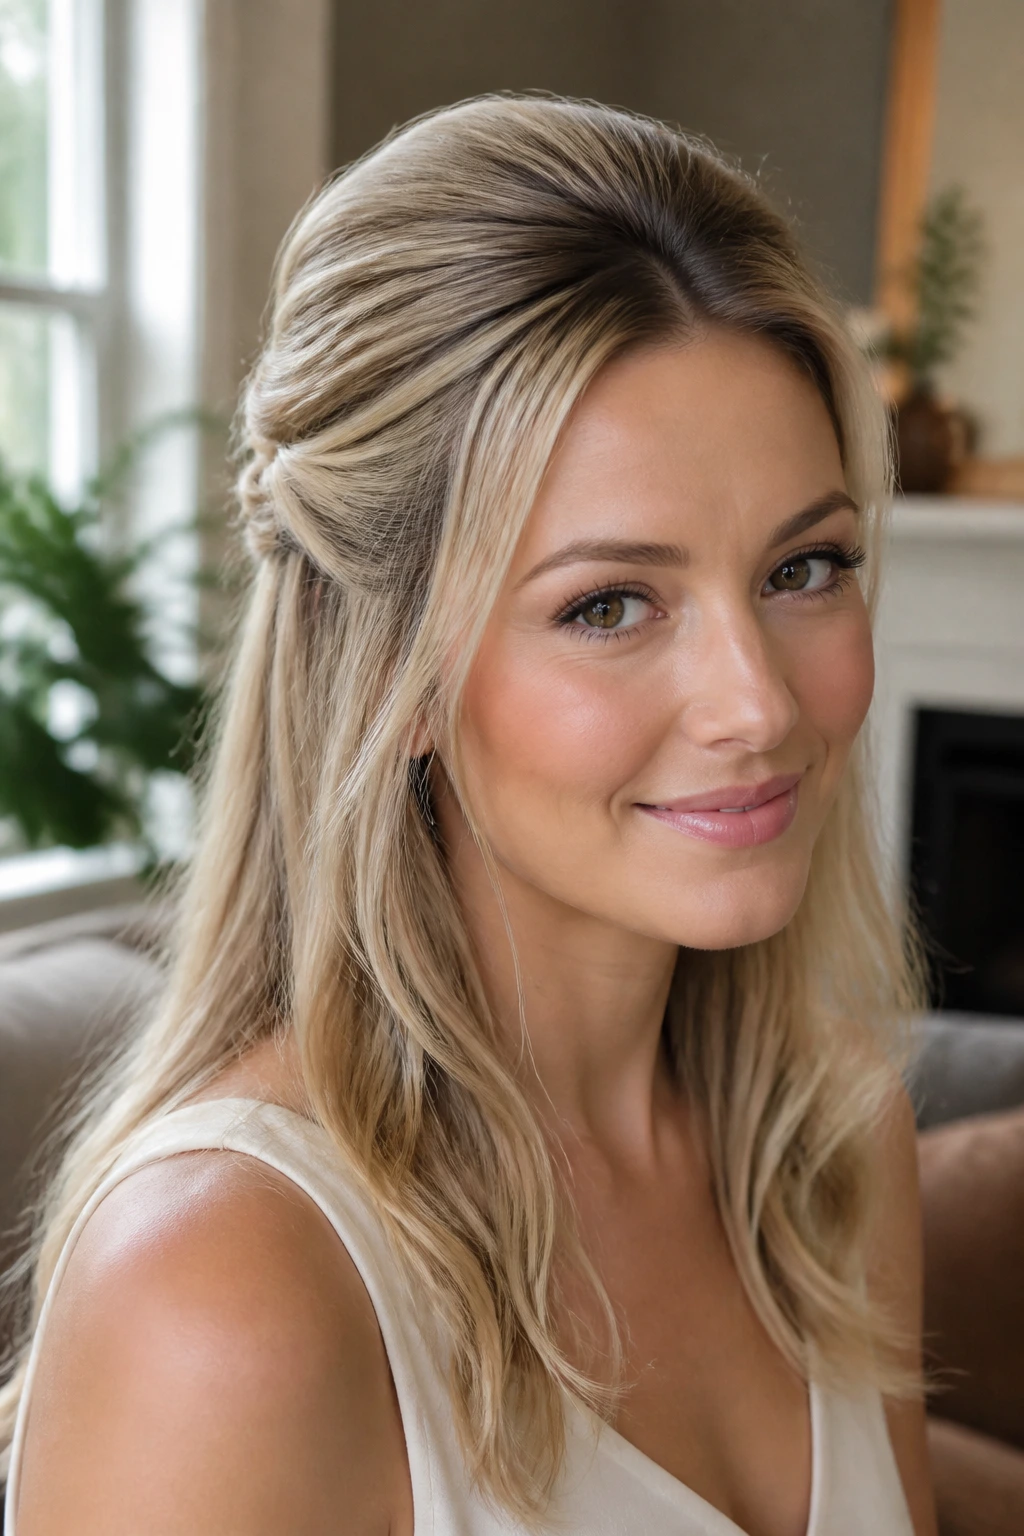
10. Sleek Half-Up with Face-Framing Pieces
Thin hair can look expensive when it isn’t overworked. A sleek half-up style proves that. The top is smooth and controlled, the front pieces soften the face, and the lower lengths keep the overall shape long.
Brush the top half back with a touch of styling cream or light serum, but keep the product mostly from the ears down. Leave two slim face-framing pieces out, then secure the back section with a hidden elastic and wrap a small strand around it. If the ends are looking rough, bend them under slightly with a flat iron set below 325°F.
This is one of the better choices for formal settings because it reads clean, not fussy. Thin hair does not need to be buried under product to look polished. It needs the right sectioning and a bit of restraint.
11. Mini Double Buns Half-Up
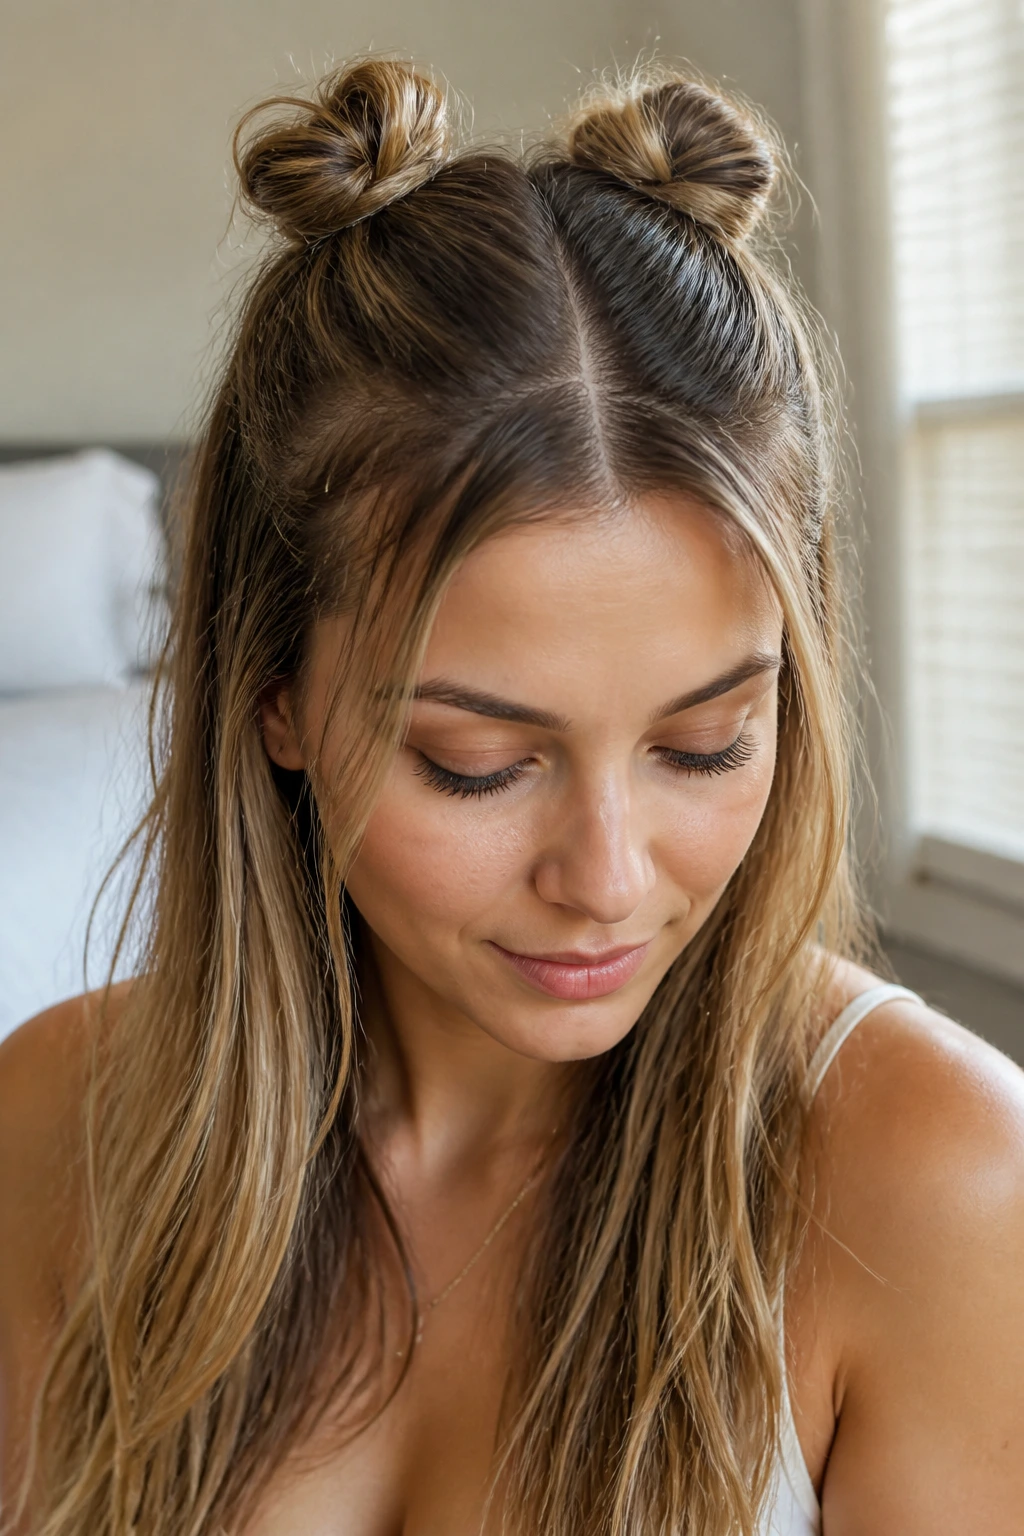
Two tiny buns can make thin hair look playful instead of sparse, as long as you keep them small. Big buns expose the problem. Small buns solve it by turning the limited amount of hair into a shape that feels deliberate.
Split the top half into two sections, one on each side of the crown, and twist each into a compact bun. Secure with pins or tiny elastics, then gently widen the edges with your fingers so the buns don’t look too tight. The lower hair should stay loose and soft, not over-styled.
If your hair is very fine, keep the buns slightly uneven in size. Perfect symmetry can make thin hair look stricter than it is. A little looseness takes the pressure off and makes the whole thing easier to wear.
12. Crisscross Pin-Back Half-Up
If braids feel like too much work, this gives you the same kept-back shape with half the effort. It also works well when your hair is too fine to hold a thick twist.
Take a section from the right front side and pin it toward the left back side. Then take a matching section from the left and cross it over the first, pinning it toward the right. The two sections should meet in an X shape at the back of the head. Use four bobby pins if needed, because a pin-back style should be secure even if the hair is very smooth.
This is one of the best choices for layered hair. Short pieces around the face can stay tucked without needing to be forced into a braid. Clean, minimal, and fast. That’s the appeal.
13. Wrapped Half-Up Ponytail
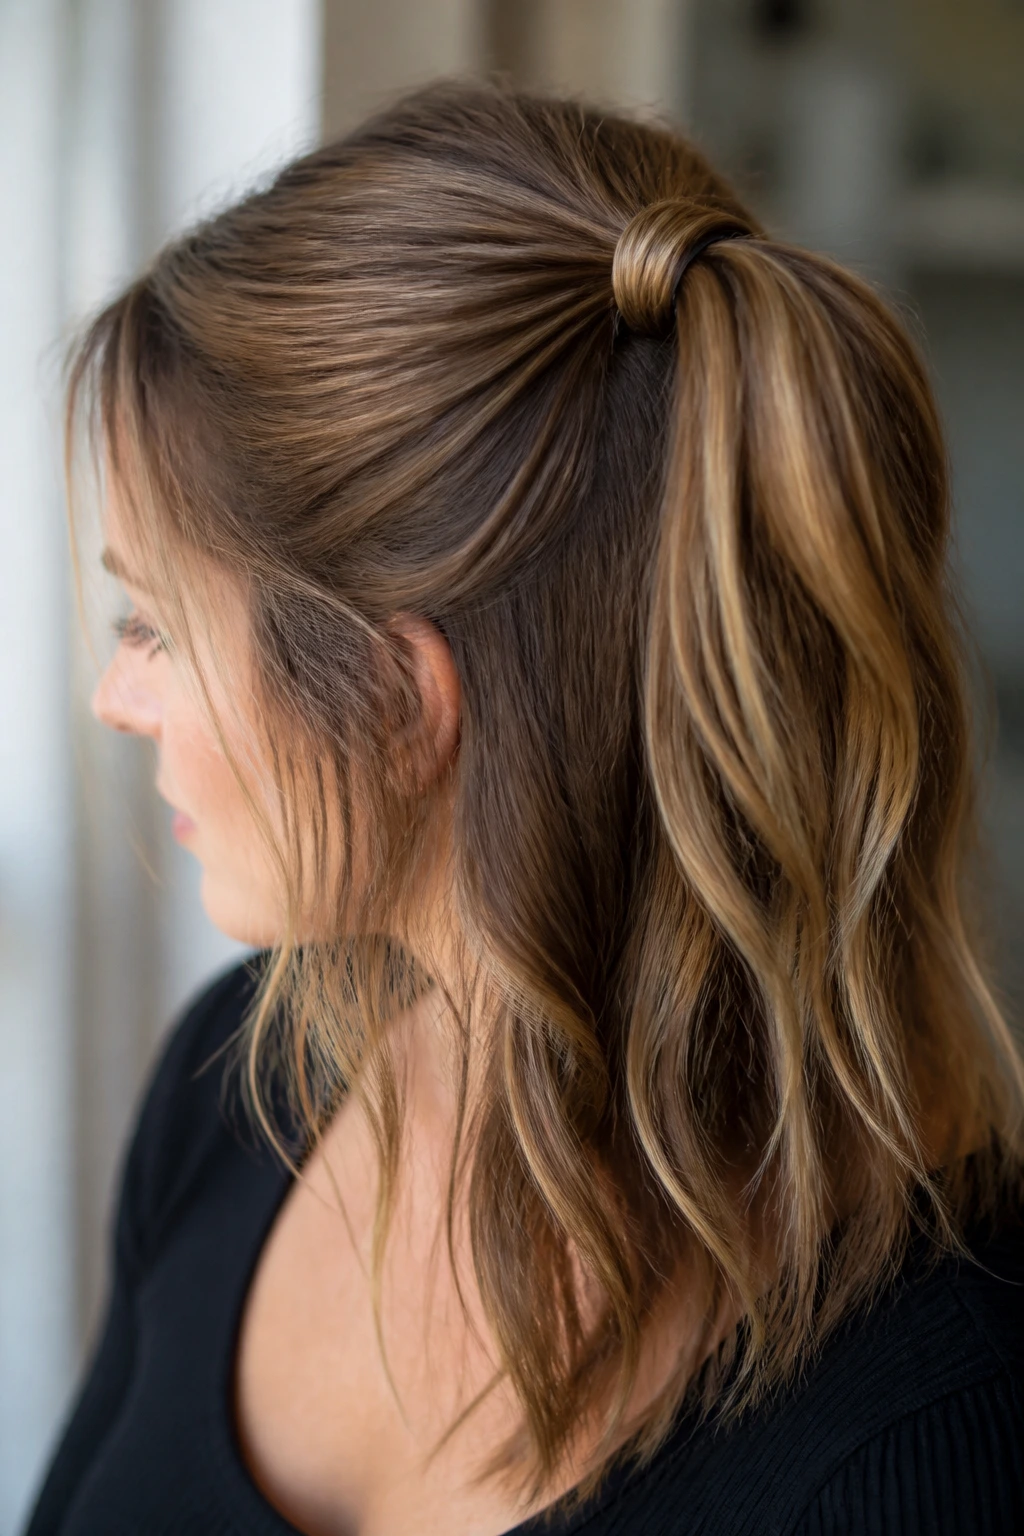
One hidden wrap changes the whole thing. A plain half-up ponytail on thin hair can feel a little bare, but once the elastic disappears under a wrapped strand, the style looks more finished and more expensive than it really is.
Gather the top half into a small ponytail at the crown or just behind it. Take a 1-inch section from underneath, wrap it around the elastic, and pin the end below the base so it vanishes. If the hair is straight and slippery, mist the wrapping strand lightly with hairspray first; it helps the wrap stay flat instead of unraveling.
I like this look when the lower half is softly curled. The wrapped base keeps the top neat, while the ends give the length something to do. Without that bend, the pony can look too narrow on very fine hair.
14. Dutch-Braid Mohawk Half-Up
This is the one that gives thin hair visible structure from forehead to crown. A Dutch braid sits raised on top of the head, so even a small braid reads clearly and gives the style a backbone.
Start at the front hairline and Dutch braid the center section backward, pulling in only the top portion of the hair. Keep the braid snug enough to stay put, but not so tight that it presses flat against the scalp. Once it’s secured, loosen the edges gently with your fingers.
The raised braid adds shape where thin hair needs it most. Leave the sides loose and smooth, or curl them softly if you want more fullness. This one works especially well when you want a half-up style that feels a little more built, a little more visible, and a lot less likely to collapse.
15. Low Knotted Half-Up Bun
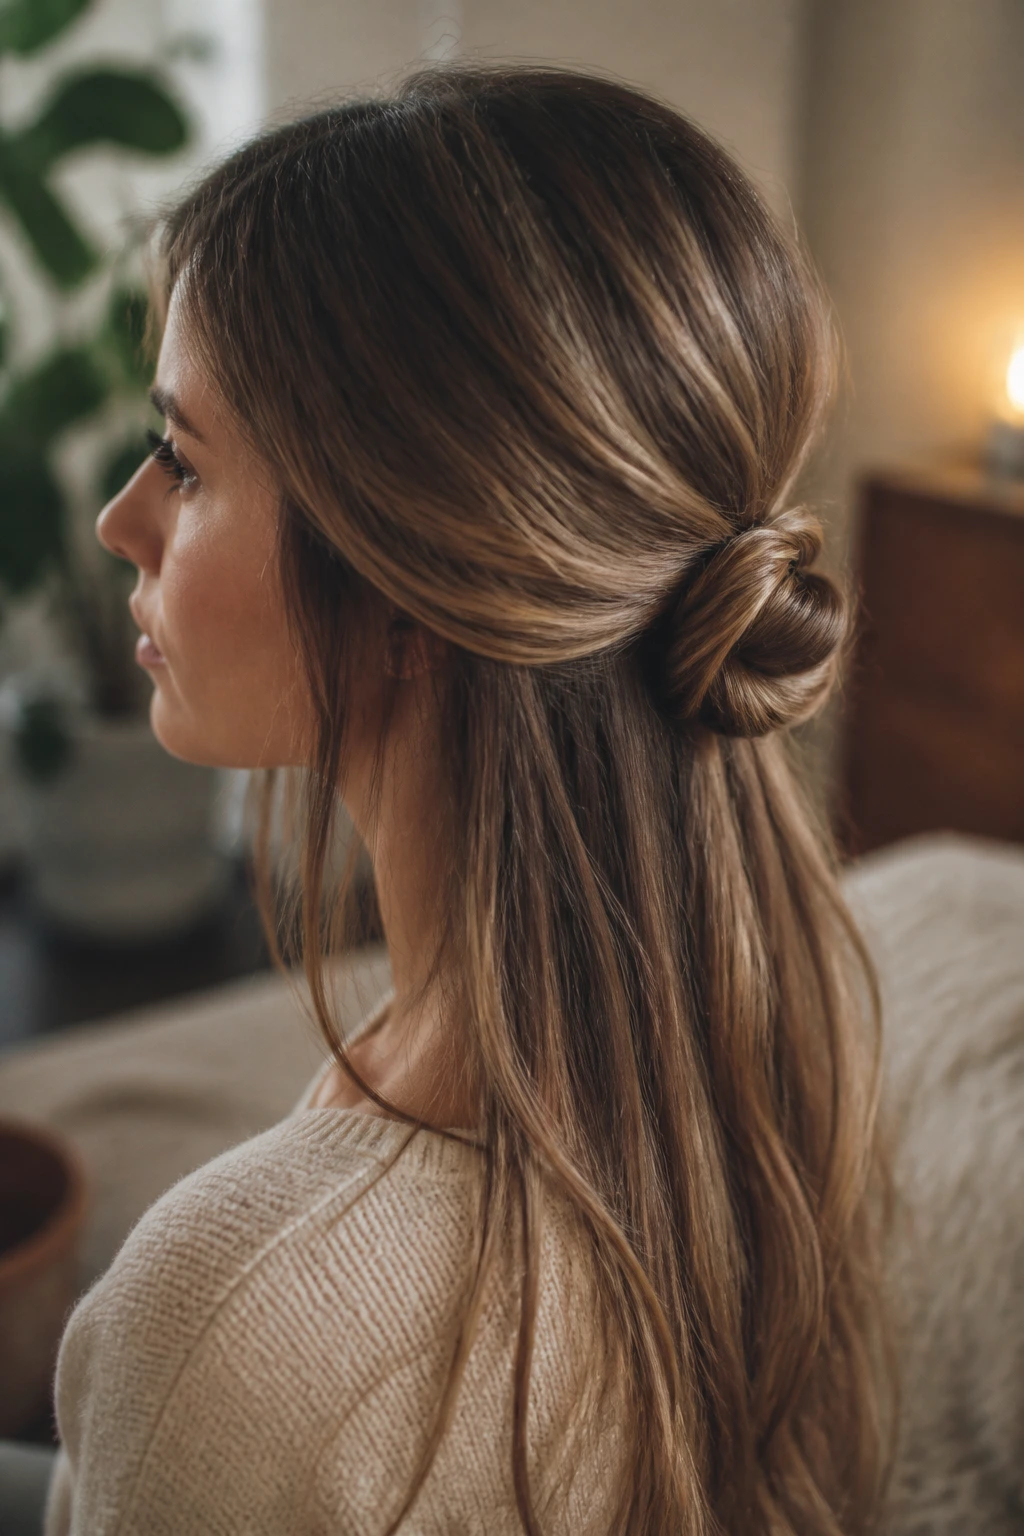
Why put the knot lower? Because it keeps the crown calmer and lets the long lengths balance the style. A knot too high can make thin hair look like it’s trying too hard.
Gather the top half just above the nape and tie it into a simple overhand knot. Tuck the ends under and pin them in place so the knot stays compact. The lower half should hang free and straight or softly waved, which keeps the length doing the visual work.
This is a good choice for work days and humid weather. It doesn’t need much volume at the roots, and it doesn’t punish you if the hair is a bit flat. If the crown falls a little through the day, the style still looks fine. That’s rare, and useful.
16. Silk Scarf Half-Up
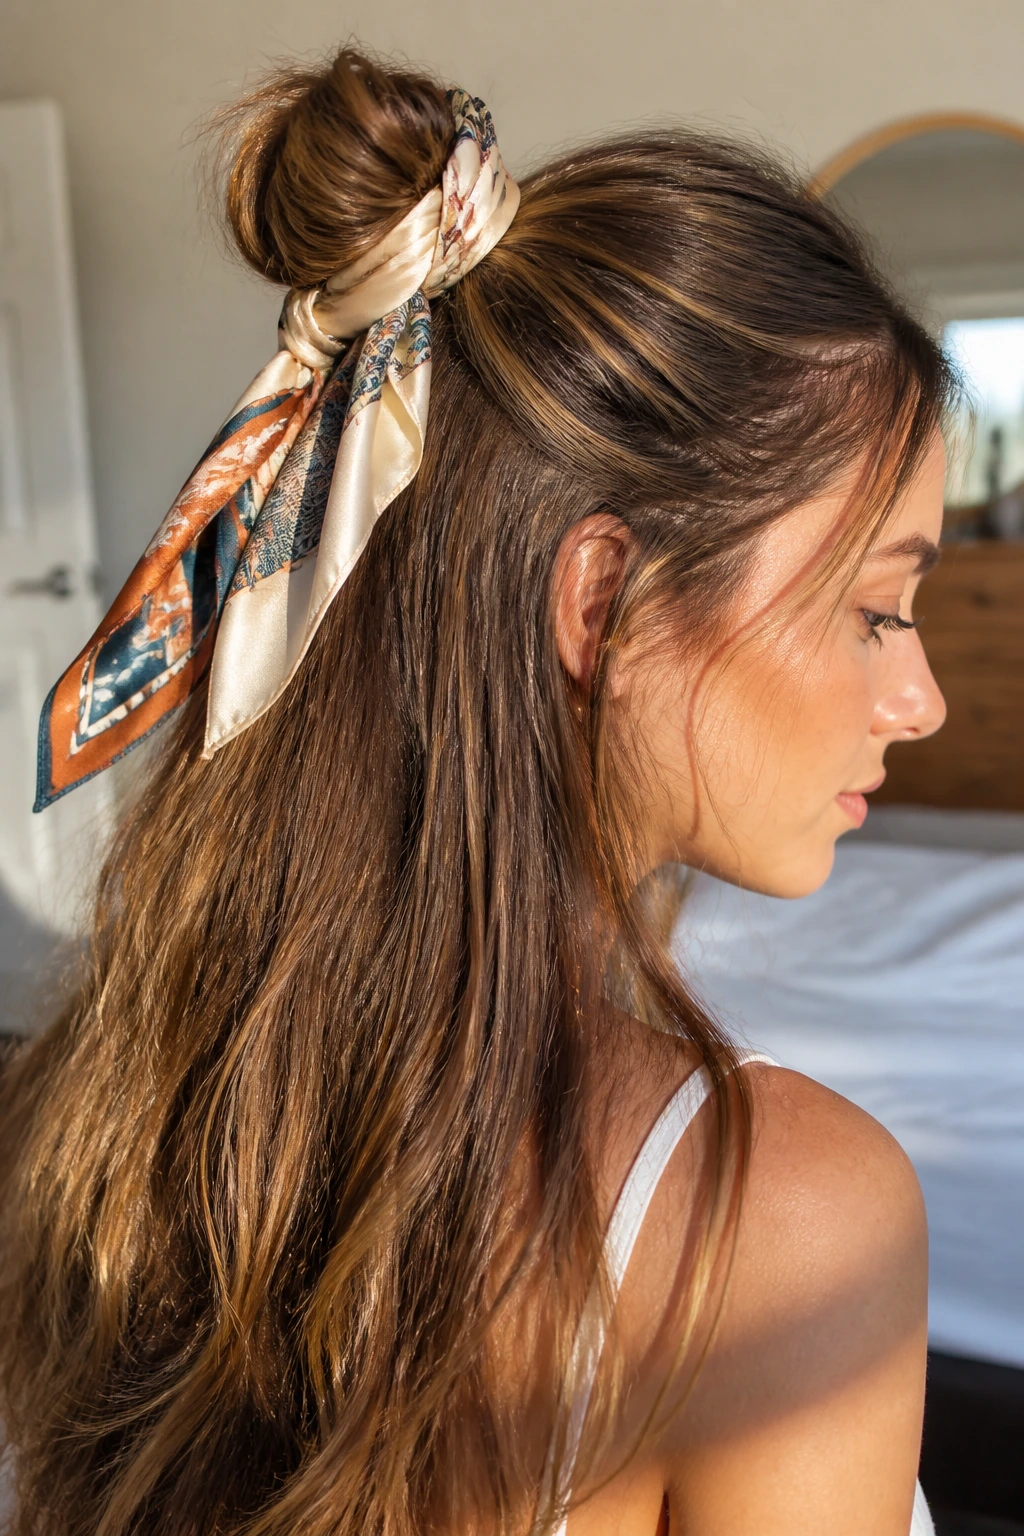
If your hair slips out of clips, use the scarf as the anchor. It gives you grip, color, and a little visual softness all at once.
Gather the top half into a small ponytail or twist, then tie a narrow silk, satin, or matte scarf around it. A scarf that’s about 20 to 25 inches long is usually enough to tie cleanly without swallowing the hair. If your hair is very fine, a matte cotton or linen scarf can hold better than a slick silk one.
The scarf becomes the style. That’s the part I like most. Thin hair does not have to pretend to be thick when a good accessory can carry some of the look for it.
17. Deep Side-Part Half-Up
A deep side part is the simplest cheat for fine hair volume, and it works because it shifts the eye away from the flattest side. The lift appears bigger simply because the shape is asymmetrical.
Part the hair 2 to 3 inches off center, then gather the heavier side into a soft half-up twist or pin-back. Leave the lighter side loose and sweeping across the forehead or cheek. That asymmetry gives the style movement and keeps the crown from looking too perfectly centered, which can expose sparse areas.
This look is good when your hair is long but not especially dense at the roots. The part does half the work before you even touch a pin. That’s the sort of shortcut I can get behind.
18. Pancaked Crown Braid Half-Up
Regular braids can vanish in thin hair. Pancaking fixes that by widening the braid after it’s secured, which gives the illusion of more hair without adding any.
Make a braid along the crown or from one side toward the back, then secure the end. Starting at the bottom, gently pull the outer edges of each braid section outward, one loop at a time. Don’t rush this. If you yank too hard, the braid gets lumpy instead of fuller.
A tiny bit of root powder beforehand helps the braid hold its shape. The finished look should feel wider and softer, not messy for the sake of mess. On fine hair, that distinction matters.
19. Stacked Barrette Half-Up
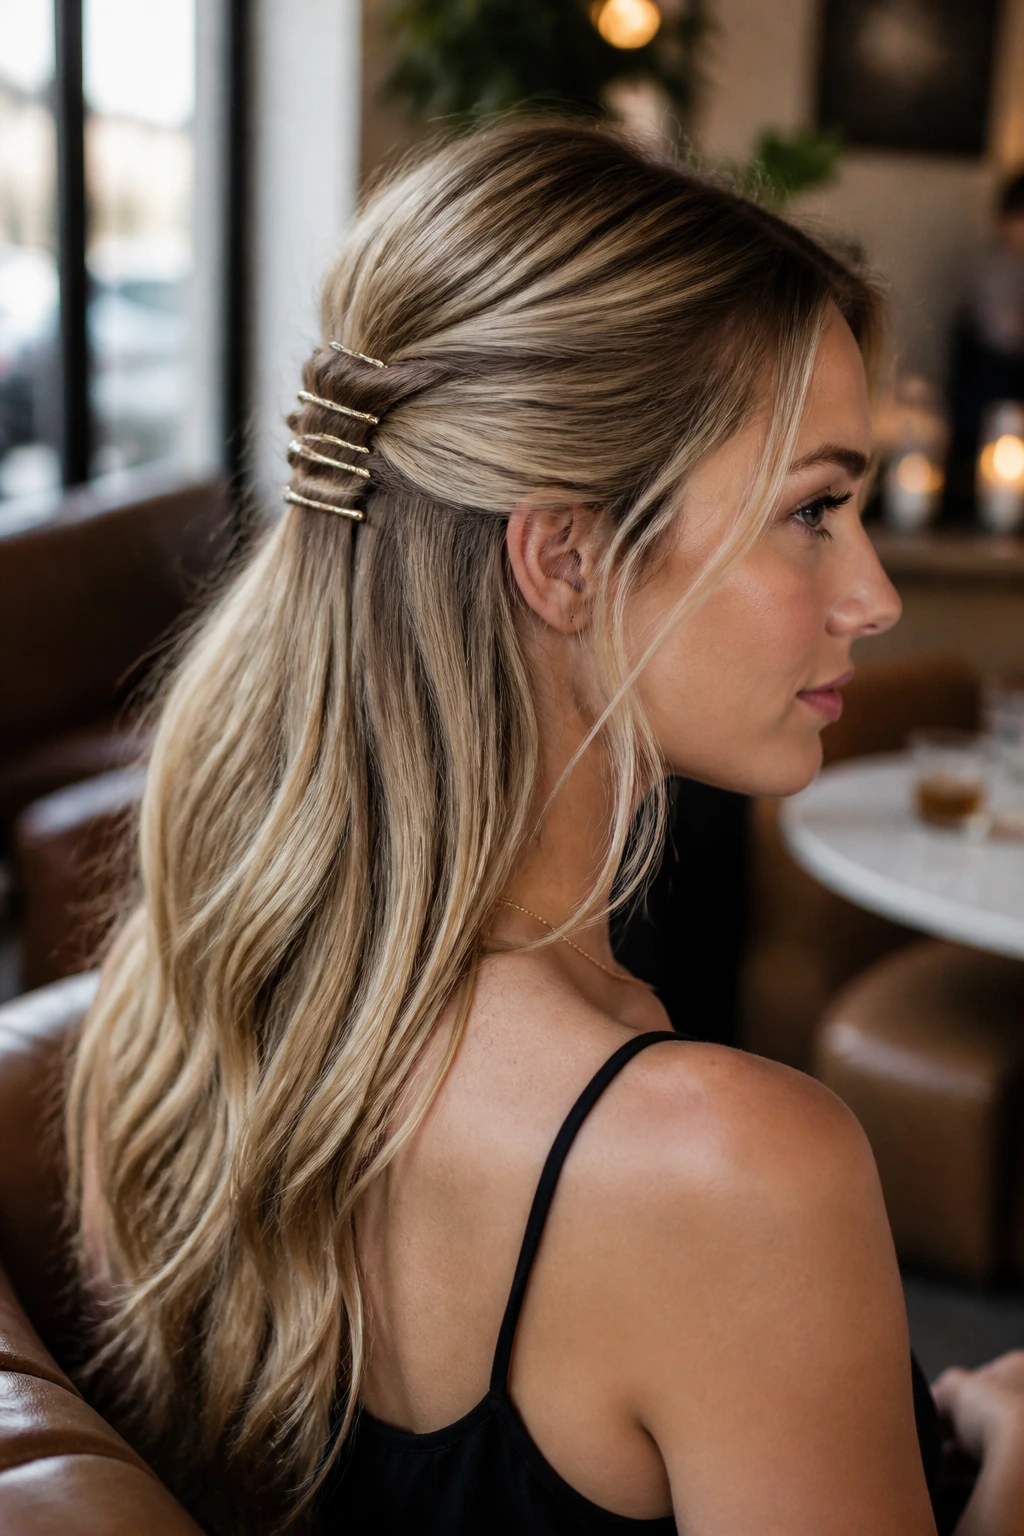
Three small clips often hold better than one dramatic barrette. That’s the quiet truth here. Thin hair likes spread-out support, not all its weight concentrated in one spot.
Twist or smooth back the top half, then stack two or three slim barrettes or small clips along the back section. You can line them up vertically or stagger them slightly so they form a little trail. The effect looks polished, and the multiple points of contact help the style stay in place.
This is a smart choice if your hair has shorter layers that pop out of single clips. The extra hardware catches those ends and keeps the shape cleaner. It also lets you wear accessories without asking one flimsy clasp to do everything.
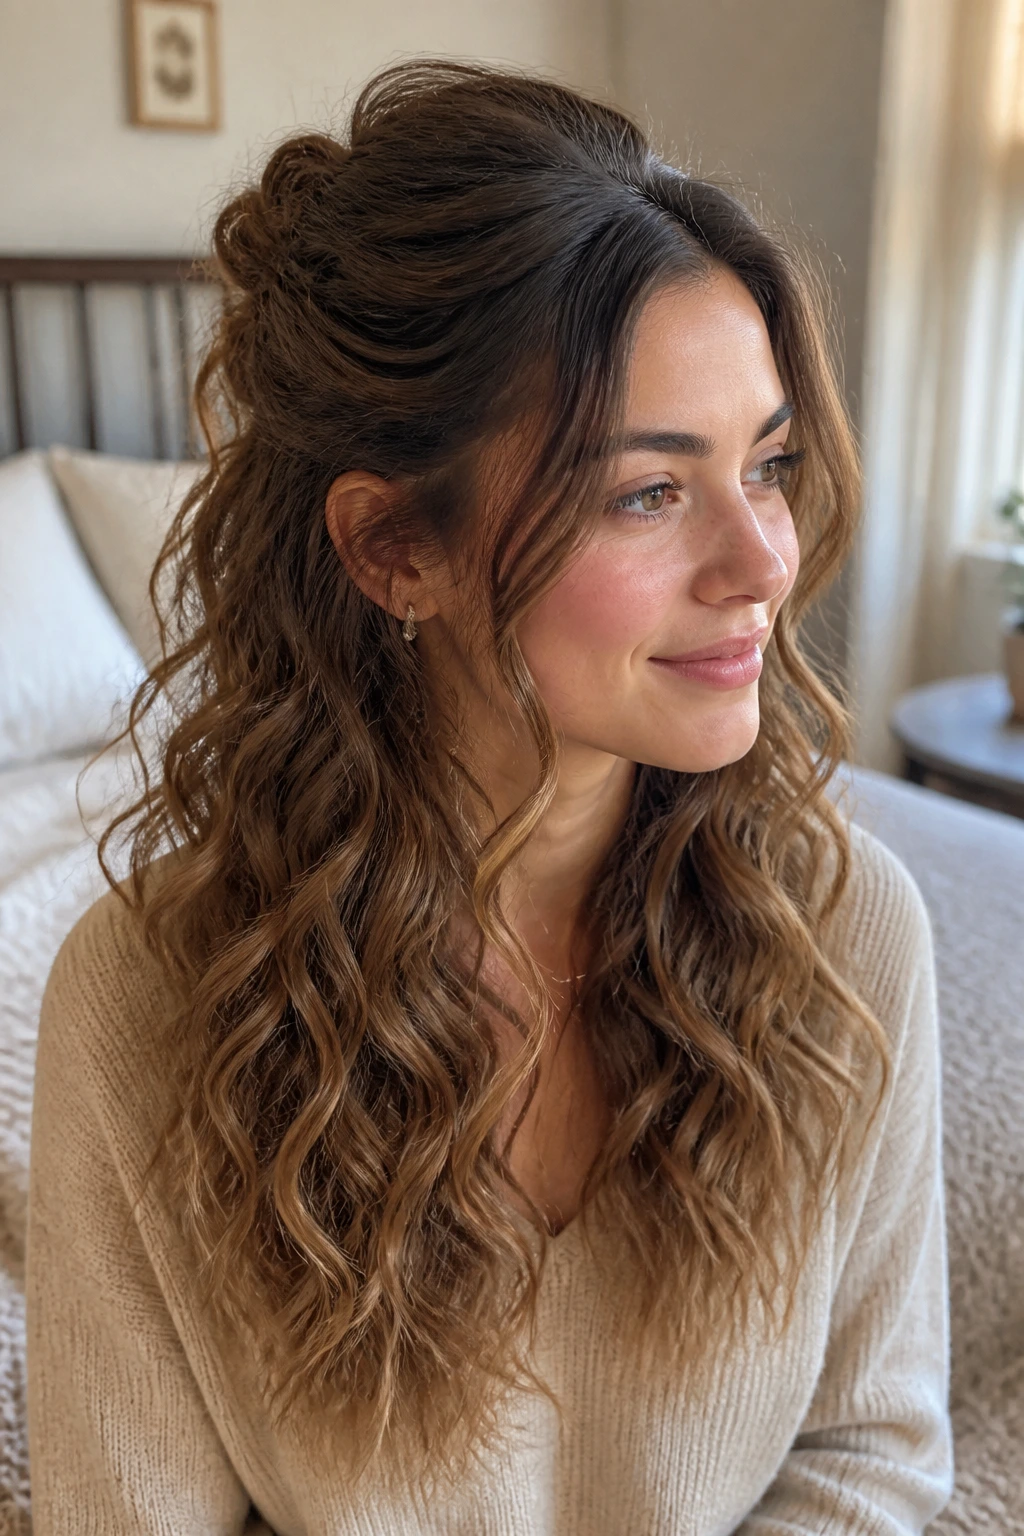
20. Bouffant Half-Up Twist
A small bouffant can change the whole silhouette. Thin hair often lacks shape at the crown, and a carefully lifted front section gives it one.
Backcomb only a 1-inch square at the crown, smooth the top layer over it, and then twist the sides back into a half-up shape. You want a soft curve, not a dramatic bump. The lift should be visible from the side, but not so high that it looks like a retro costume choice.
This style works well when you want something more formal or a little dressier. It pairs nicely with softly curled lengths, because the bend at the bottom balances the lift at the top. Keep the tease narrow and the result stays flattering instead of stiff.
21. Curved Curl-Set Half-Up
Soft bends are kinder to thin long hair than tight curls. Tight curls can shrink the length and make the ends look narrow, while a curved set keeps the hair looking long and full.
Use a 1-inch curling iron to bend the mid-lengths away from the face, but leave the ends a little straighter so they don’t turn wispy. Then gather the top section into a soft half-up twist or clip, letting the curved lower lengths do the rest. The style should feel loose and airy, not crunchy.
Why the bend matters
The curve widens the shape of the hair without making it look overdone. That’s why it suits long fine hair so well. The style reads as full because the length has body, not because the roots were overloaded with product.
22. Knotted Half-Up Pony
This one is blunt, quick, and better than it sounds. A simple knot creates a clean focal point, which is useful when your hair is thin and you want the style to look intentional fast.
Take two front sections, tie them once in an overhand knot at the back of the crown, and secure the knot underneath with a pin if needed. Leave the lower half loose. If the hair is extra silky, use a little dry shampoo or texture spray before knotting so the sections grip each other instead of slipping apart.
The knot should stay compact. On thin hair, a small knot looks refined; a large one can sag. Keep it small, keep it snug, and let the rest of the length do the visual balancing.
How to Make Fine Hair Hold the Style Without Looking Sticky
Fine hair usually needs grip, not more product. That’s the difference that matters. Heavy creams, oils, and dense serums can flatten the crown before the style even starts, which is a bad trade for thin hair.
Root Prep: Put dry shampoo or root-lift spray at the crown, side part, and hairline, then let it sit for a minute before brushing it through. That tiny pause helps the product grip instead of vanishing into the hair.
Sectioning: Use smaller top sections than you think you need. A huge half-up section can leave the rest looking skimpy, especially if your hair is dense only at the ends.
Pin Placement: Slide bobby pins in with the wavy side against the scalp for better hold. Crossing two pins over each other often works better than using one stronger pin, especially near the crown.
Product Load: Keep shine serum and oil away from the top half unless the hair is frizzy. Put those products on the bottom lengths only. The top needs structure. The ends need control.
Refresh Move: If the style sags later, pinch the crown upward with one hand and mist lightly underneath with hairspray. Don’t drown the surface. You want a little lift, not a shell.
Essential Tools for These Hairstyles
- Rat-tail comb: Useful for clean parts, small sectioning, and lifting a narrow crown section without grabbing too much hair.
- Teasing brush or fine-tooth comb: Best for creating a small cushion at the roots without roughing up the whole head.
- Clear mini elastics: These disappear into fine hair and work well for bubbles, twists, and wrapped ponytails.
- Color-matched bobby pins: Pick pins close to your hair color so they don’t flash through thin strands.
- French pins or U-pins: Great for low knots, twist-ups, and styles that need support without a big visible clip.
- Medium claw clip with teeth: A smooth, oversized clip slips on fine hair; choose one with a better bite.
- Light-hold hairspray: Keeps the surface in place without making the hair crunchy or heavy.
- Dry shampoo or root powder: Adds grip at the scalp and helps second-day hair behave.
- 1-inch curling iron or wand: Makes soft bends and waves that give long fine hair more body.
- Small barrettes or decorative clips: Better than one heavy clip when the hair is very thin or layered.
- Satin ribbon or narrow scarf: Gives visual softness and can do the holding for you when hair itself is slippery.
Common Mistakes That Make Thin Hair Look Thinner
The biggest mistake is making the top section too large. When too much hair gets pulled into the half-up, the lower half starts to look sparse and the whole style loses balance. Keep the top section to the crown and upper sides, not half the head.
Another common problem is over-smoothing the roots with oil or cream. Fine hair goes flat fast when it’s coated too heavily, and the style falls before it has a chance to look finished. Use those products on the lengths only, and keep the scalp area light.
People also tease too much hair. A giant backcombed cloud might look dramatic in a mirror, but it tends to look fuzzy and weak by the time you walk out the door. A small tease under the crown is enough.
Using one oversized clip is another trap. If the clip is too heavy or too slick, it will drag the style down. Smaller clips, pins, and wrapped elastics spread the weight better.
Finally, don’t ignore the ends. Straight, wispy ends make the whole style look thinner. A few soft bends or a simple curl through the lower half gives the hair more body and keeps the half-up from floating over nothing.
Variations and Adaptations for Different Textures and Occasions
Soft-Wave Version: If your hair already has wave, lean into it. Skip the tight braid or sleek finish and choose rope twists, a wrapped ponytail, or a low knot. The wave gives the style body, and the half-up just needs to frame it.
Extra-Fine Hair Version: Use smaller sections, fewer accessories, and more pins. A crisscross pin-back, side-part half-up, or tiny claw-clip twist usually works better than a thick braid. The goal is clean shape, not bulk.
Straight-Hair Version: Add texture first. A 1-inch curling iron, dry shampoo, or a little crimp at the roots helps the style stay put and keeps the crown from collapsing. Straight hair can wear every style here, but it usually needs more grip.
Formal-Event Version: Pick sleek styles with one elevated detail: a wrapped ponytail, bouffant twist, ribbon tie, or stacked barrettes. Keep the lower lengths glossy and the top section controlled. That contrast reads polished without looking stiff.
Humidity-Fighting Version: Use a low knot, claw-clip twist, or scarf tie. These styles handle frizz better because they don’t depend on perfect smoothness. A bit of texture becomes a feature instead of a problem.
How to Refresh Half-Up Styles and Wear Them Longer
Thin hair often looks best on day one or day two, not day three with no help. Still, a half-up style can last longer than people expect if you treat it kindly. A satin pillowcase helps overnight, and a loose silk scarf can keep the crown from getting crushed if the style has a lot of shape.
If you want to wear the style again the next day, remove any wrapped strand carefully, shake out the lower half, and re-smooth the crown with a dry brush. Add a little dry shampoo at the roots, then re-pin the top section where it started to slip. You do not need to rebuild the whole thing. Usually, two or three fresh pins are enough.
For styles with curls or bends, re-warm only the front pieces and the outer lengths. You don’t have to redo every wave. A 30-second touch-up on the face-framing pieces often brings the whole style back to life.
Questions People Ask Before Trying These Looks
Can half-up hairstyles work on very thin hair, or will they look smaller?
They can work well if the top section stays small and the lower half keeps its length. The trick is to create shape at the crown without exposing too much scalp or taking too much hair away from the bottom.
Is day-old hair better than freshly washed hair?
Usually, yes. Day-old hair has more grip, which helps pins, braids, and clips stay in place. If you have to style freshly washed hair, add dry shampoo or root-lift spray before you start.
Do I need to curl my hair first?
No, but a soft bend often helps thin long hair look fuller. You do not need tight curls. A loose wave through the lower half is usually enough.
What is the best accessory for slippery fine hair?
Pinned styles and small claw clips usually hold better than one big heavy clip. If your hair is extra smooth, a wrapped elastic plus a few bobby pins is often more secure than a decorative barrette alone.
How do I keep layers from falling out of the style?
Use smaller sections and catch the shorter pieces with pins placed close to the scalp. Styles like crisscross pin-backs, low knots, and wrapped ponytails tend to handle layers well.
Can these styles look formal enough for an event?
Yes. Sleek half-ups, bouffant twists, ribbon ties, and wrapped ponytails all work for dressier settings. The key is neatness at the top and some movement in the lower lengths.
What if the style collapses after an hour?
Start with more grip at the roots, use fewer smoothing products, and add two pins instead of one. If the hair is very clean and silky, that alone can explain the slip.
Should I use heavy hairspray to lock everything down?
Not on fine hair. Heavy spray can flatten the crown and make the style feel sticky. Use a light mist at the end and, if needed, a little spray underneath the lifted section.
The Styles I’d Reach For First
Thin hair does not need to be forced into looking thick in the wrong places. It needs a smarter shape. Half-up styles do that better than most people give them credit for, because they keep the long lengths doing their job while the crown gets just enough lift to stop looking flat.
If you only try three from this list, I’d start with the teased crown ponytail, the wrapped half-up ponytail, and the low knotted version. They’re quick, they hold, and they make the hair look like it has a plan. That matters more than having a style that looks fancy for ten minutes and falls apart before you’ve left the house.
Pick the one that matches your texture on the day in front of you, not the one that looks most complicated on a screen. That’s where the good hair days usually begin.