Thin hair can look wonderful at a wedding, but it has one habit that makes people mutter at the mirror: it refuses to stay where you put it. Wedding guest hairstyles for long hair with thin hair work best when you stop asking the strands to do a job they hate and start building shape in a smarter way — at the crown, around the face, and in the way the hair is pinned, twisted, or curled. Length gives you options. Density is the part that needs a little strategy.
That strategy does not have to be fussy. A 1¼-inch curling iron, a can of flexible hairspray, a few color-matched bobby pins, and a bit of root lift can completely change the silhouette. The trick is to make the style look intentional instead of overworked. Thin hair tends to show every rough pin, every over-teased patch, every curl that has gone lazy halfway through the reception. So the best looks are the ones that build visual fullness without making the hair feel shellacked.
I’ve always preferred styles that use structure rather than bulk. A clean twist, a side sweep, a braided frame, a low ponytail with a wrapped detail — those have more staying power than a giant puffed-up updo that starts to deflate before dinner. The styles below are all wedding-appropriate, photo-friendly, and realistic for long hair that doesn’t have a ton of density. Some are polished. Some are softer. A few lean romantic and a few lean sleek, which is exactly how it should be.
Why These Styles Work on Fine Hair Without Looking Overdone
-
They create the illusion of thickness where it matters: A lifted crown, a curved side part, or a braided edge changes the head shape more than 20 extra curls ever could.
-
They keep the ends under control: Long, thin hair can look stringy when it’s left to hang without a plan. These styles give the length a job, whether that’s wrapping, looping, or cascading in a set pattern.
-
They survive a long event better than loose styles alone: Fine hair tends to collapse under its own weight. Pins, twists, and segmented ponytails anchor the style so it still looks finished after a ceremony, dinner, and a lot of hugging.
-
They play well with accessories: Pearl pins, combs, bows, and ribbon all have a place here, and none of them demand a huge amount of hair to make sense.
-
They work with second-day texture: Slightly lived-in hair usually grips better than freshly washed hair that has gone all silk and slidey. That matters more than people admit.
-
They flatter long hair without making it look heavy: The length stays visible, but the shape feels deliberate. That’s the sweet spot.
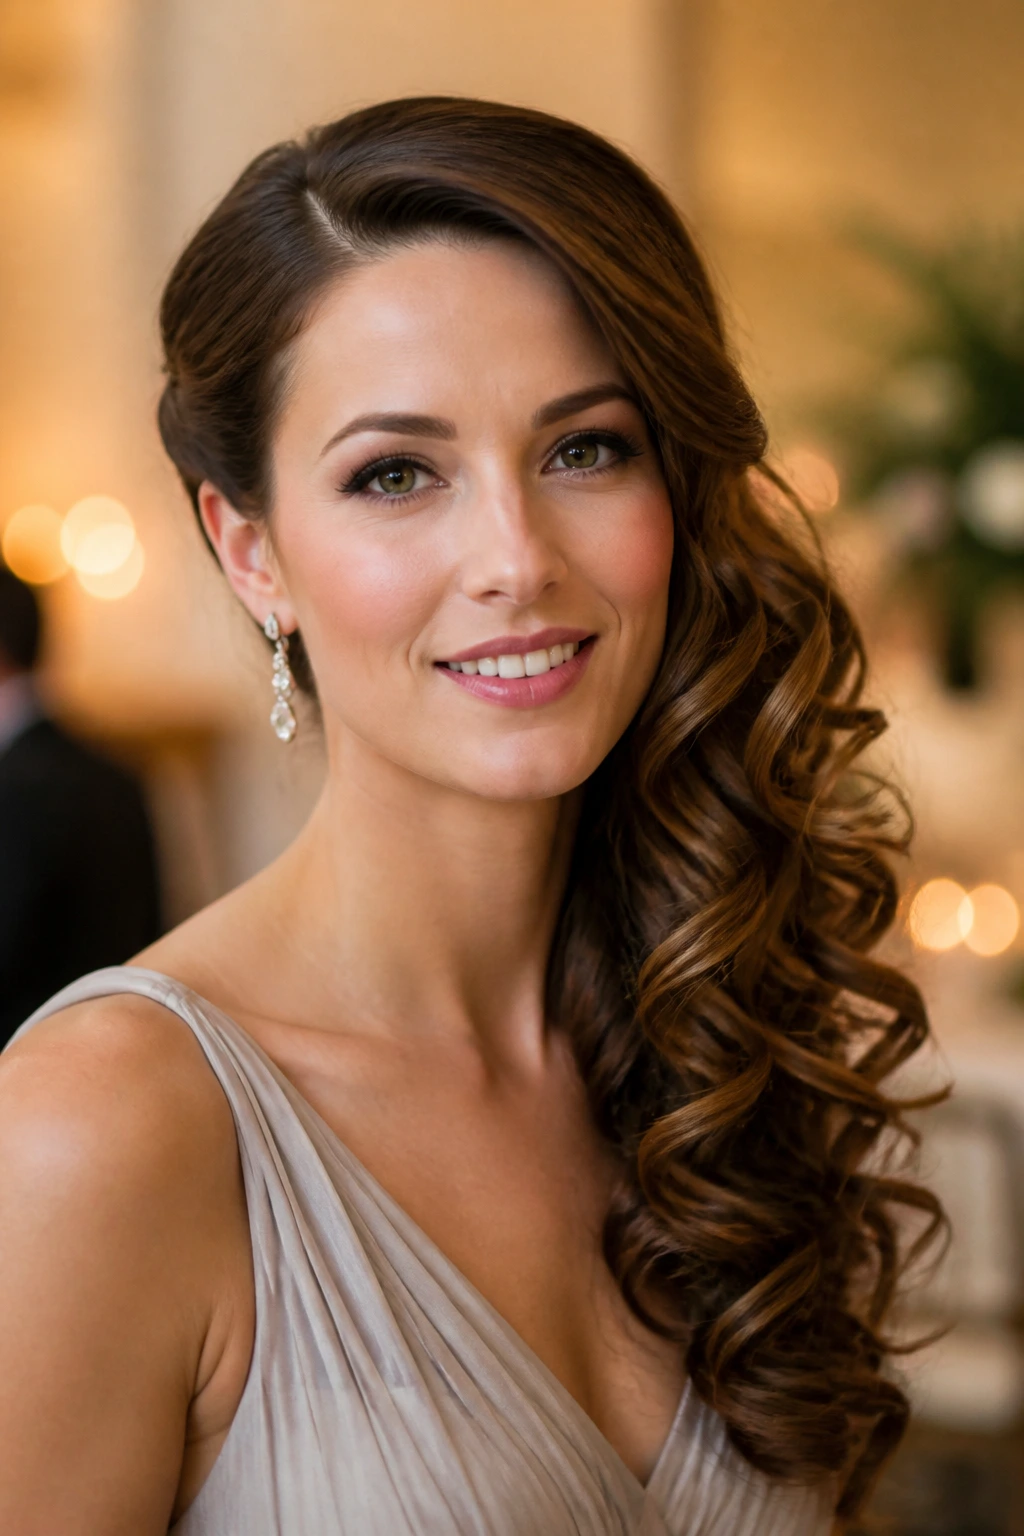
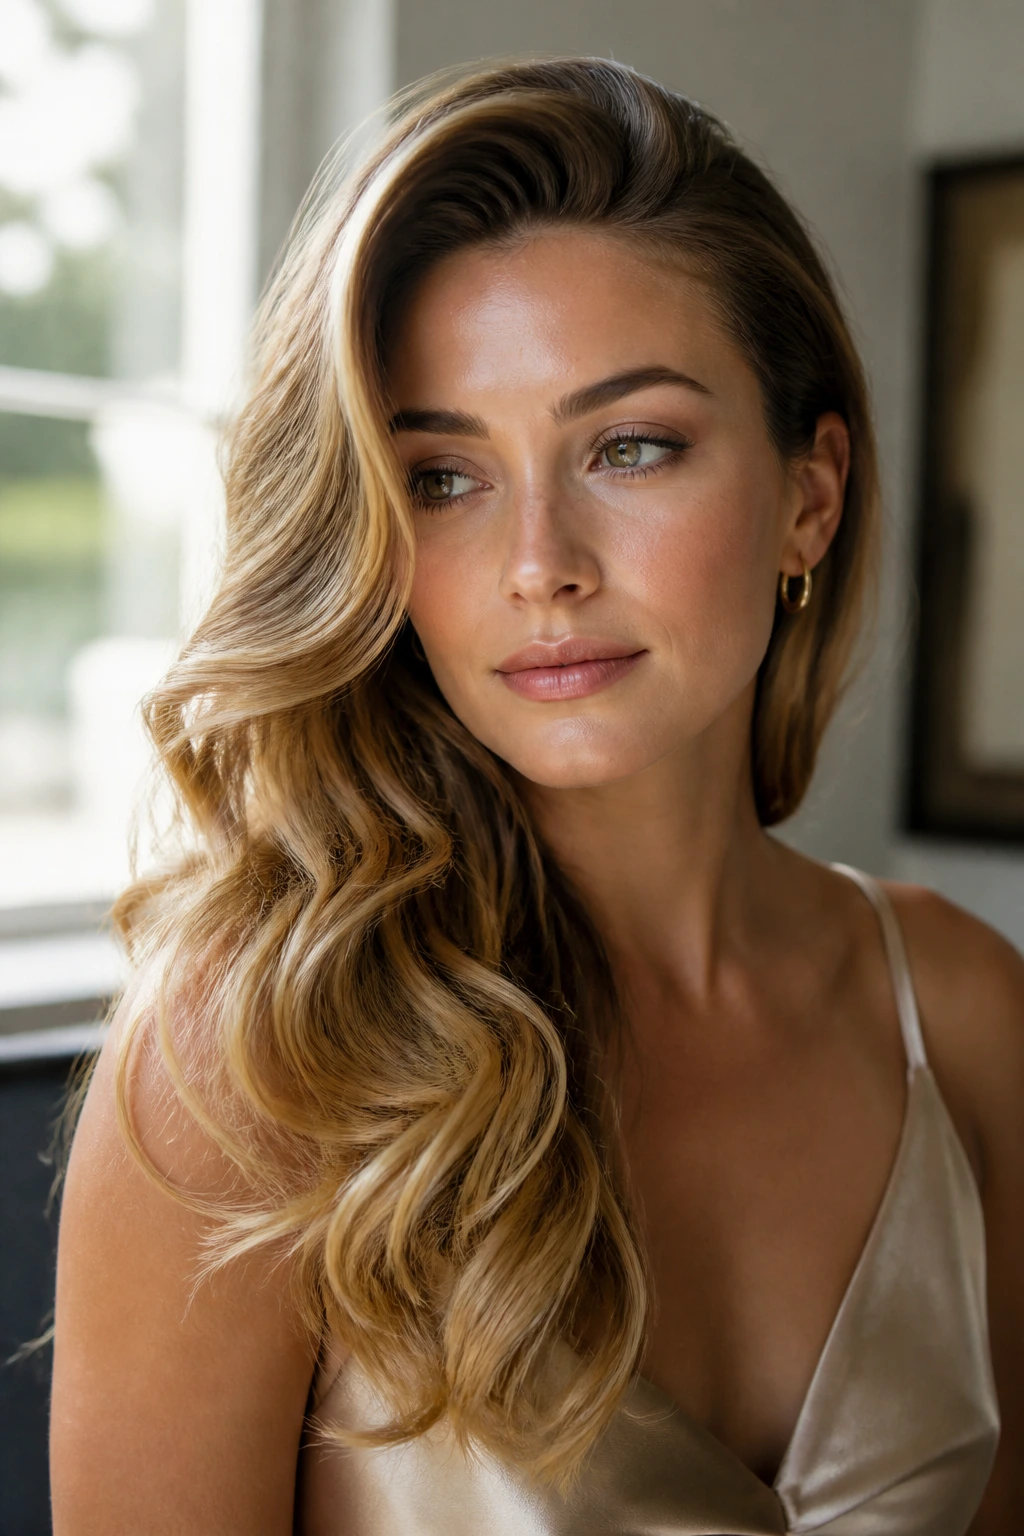
1. Soft Hollywood Waves with a Deep Side Part
A deep side part does half the work before the curling iron even comes out. On long, thin hair, it shifts the weight away from the center of the head and gives the front a little lift, which makes the whole style look fuller. The waves themselves should be soft and brushed out, not stiff ringlets sitting in place like they’ve been frozen there for a photograph.
Why this one earns its keep
Use a 1¼-inch curling iron or wand and curl away from the face on the top sections. Clip each curl to cool for a few minutes if you can stand the extra step; that small pause helps the curl hold shape instead of dropping flat the second you touch it. Once the curls are cool, brush them out with a boar-bristle brush or even your fingers, then mist lightly with flexible spray.
The deep side part gives you a little extra root height at the top, which is where thin hair often looks most see-through. If you need more lift, set two Velcro rollers at the crown while you do makeup. That old-school trick still works. It just does.
A side-swept wave pattern looks lovely with one-shoulder dresses, off-the-shoulder necklines, and anything with a dramatic earring. It’s one of those styles that reads polished from across the room and still moves when you turn your head.
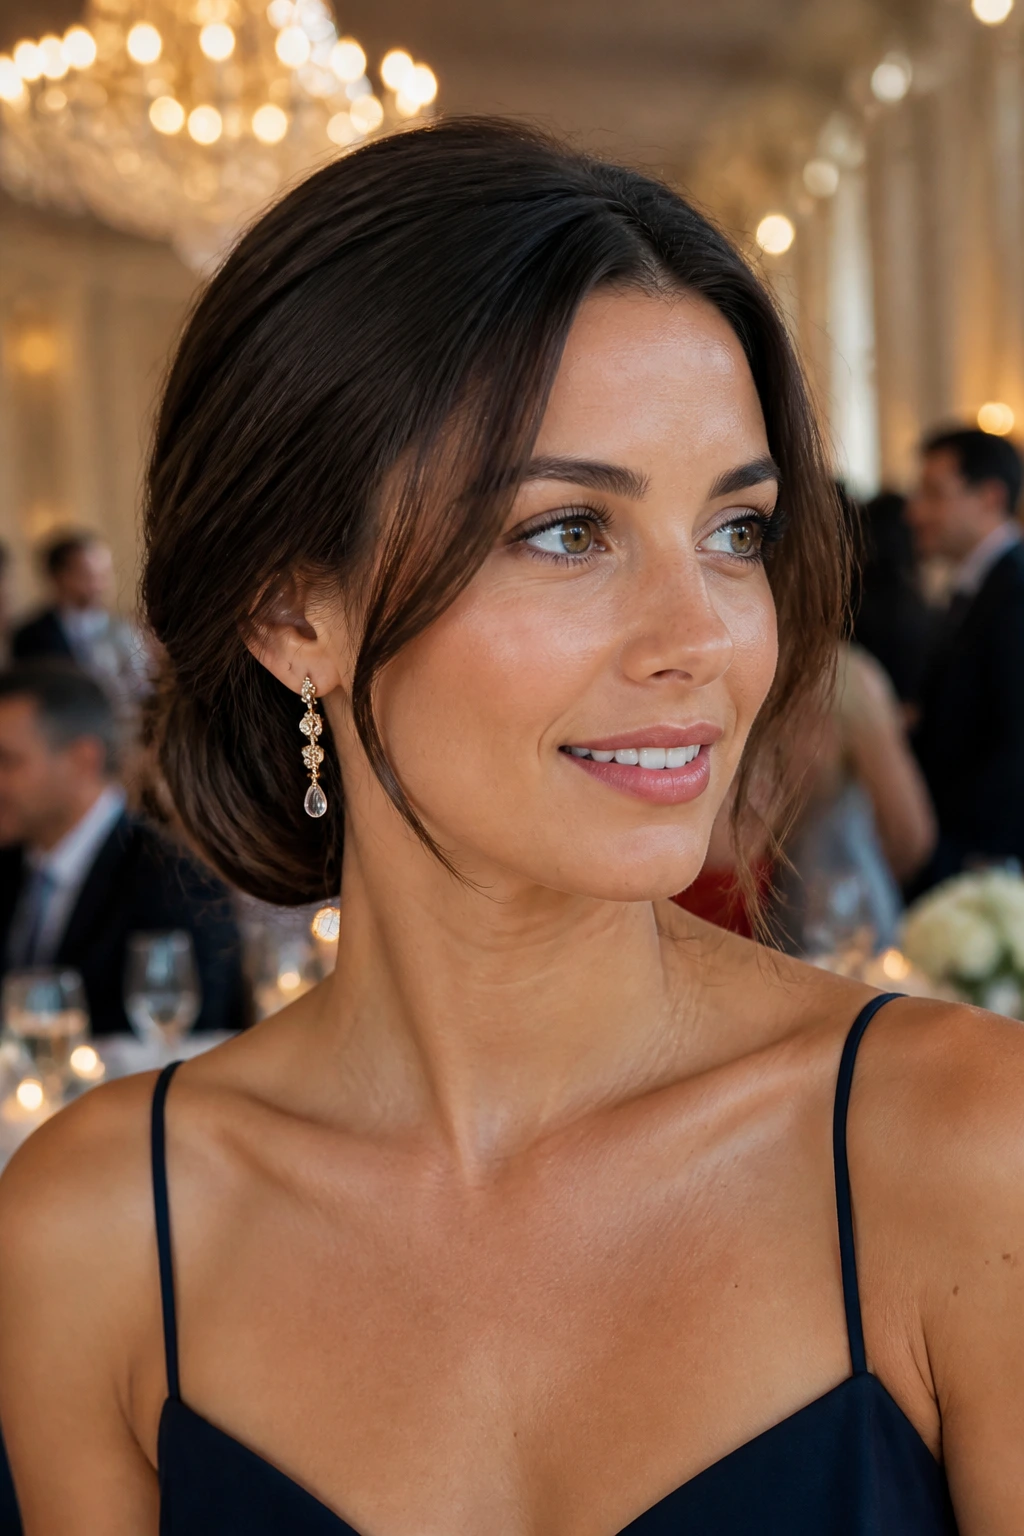
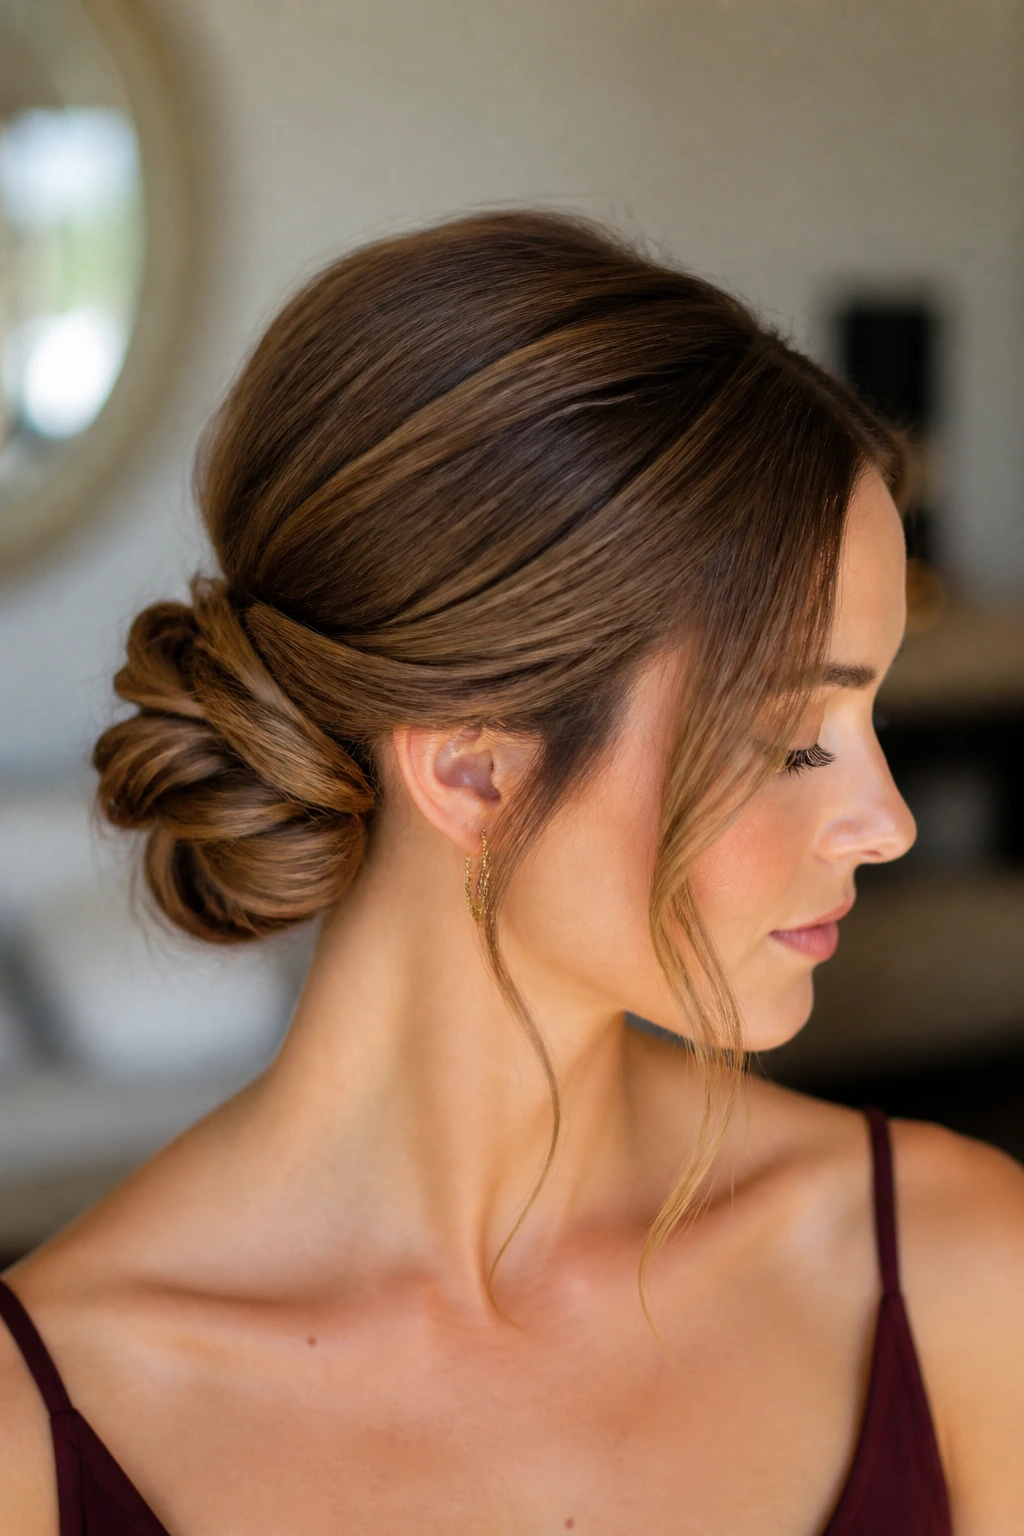
2. Low Twisted Chignon with Face-Framing Pieces
A chignon sounds formal because it is formal, but a soft low twisted version can feel surprisingly airy on thin hair. The point is not to build a giant knot at the nape. The point is to make the hair look sculpted and tucked, with just enough looseness around the face that it doesn’t feel severe.
The shape does the heavy lifting
Start by leaving out two slim face-framing sections. Not thick chunks. Thin, soft pieces that can be curled once and left alone. Then split the rest of the hair into two low sections, twist each side inward, and pin them into a low coil or knot at the nape. The twists make the bun look fuller than it is because they show texture instead of just a flat wrap.
If your hair slides easily, rough it up first with dry shampoo or a light mousse at the roots. Fine hair often needs some grit to hold a pin, and this style looks better with a little texture than with glossy slippage. I’d rather see a few soft flyaways around the chignon than a style that looks pasted down.
A small detail that matters
Use U-pins and a few crossed bobby pins instead of trying to force the shape with one long pin. Thin hair stays put better when you anchor it from more than one angle. A small pearl comb tucked into one side can finish it without competing with the shape.
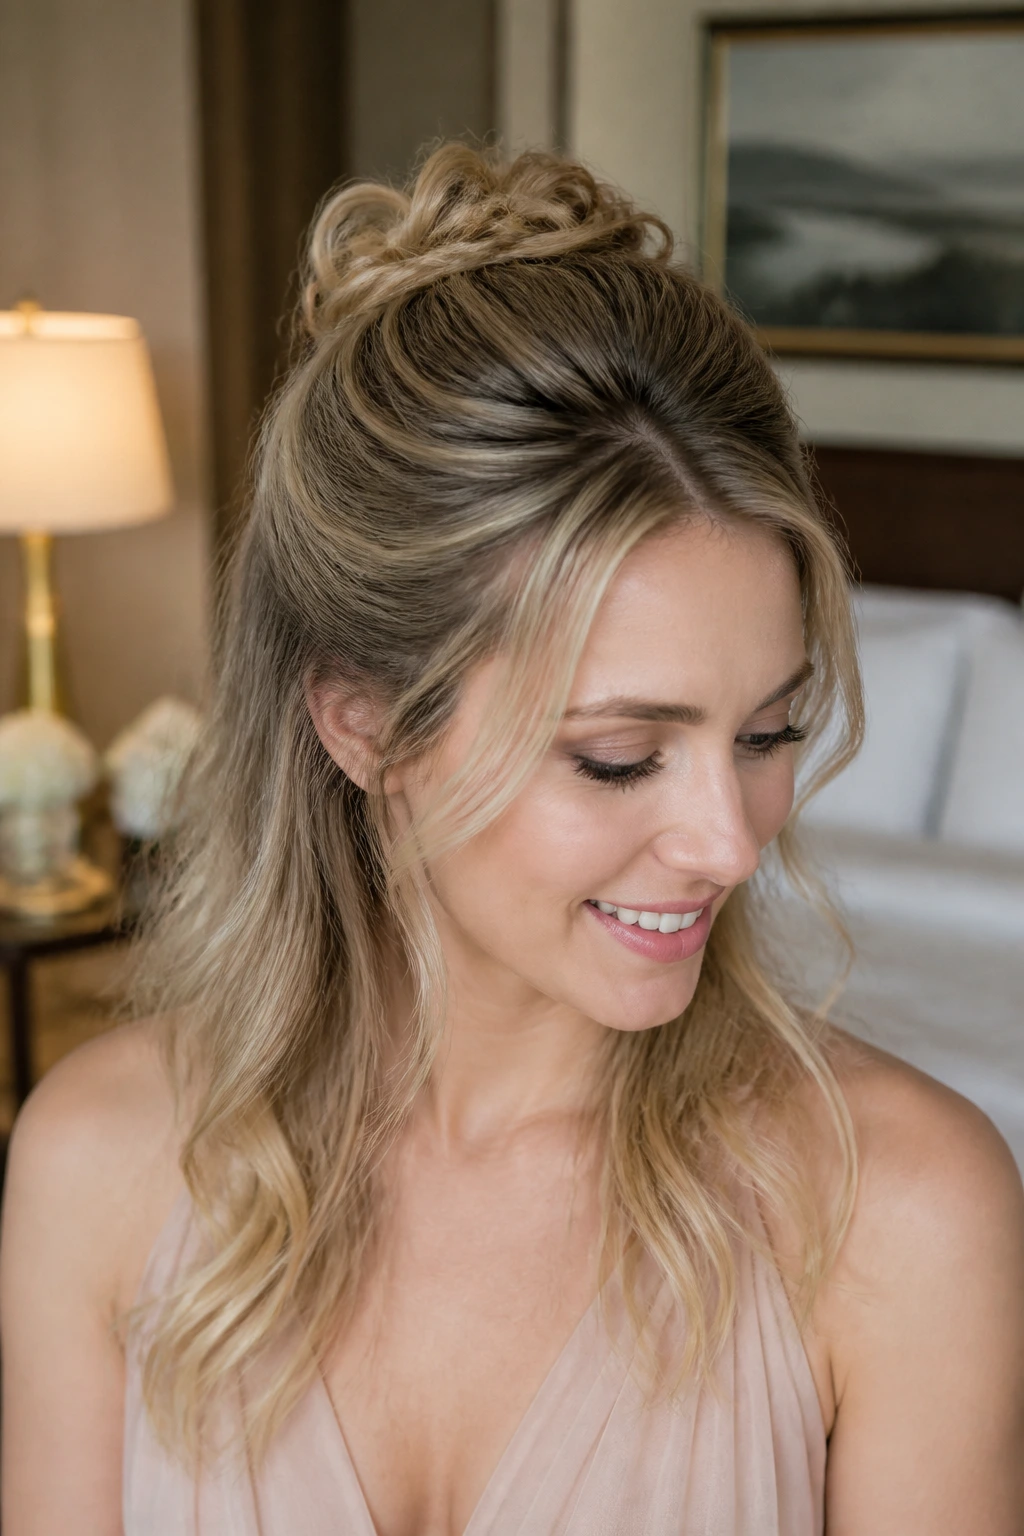
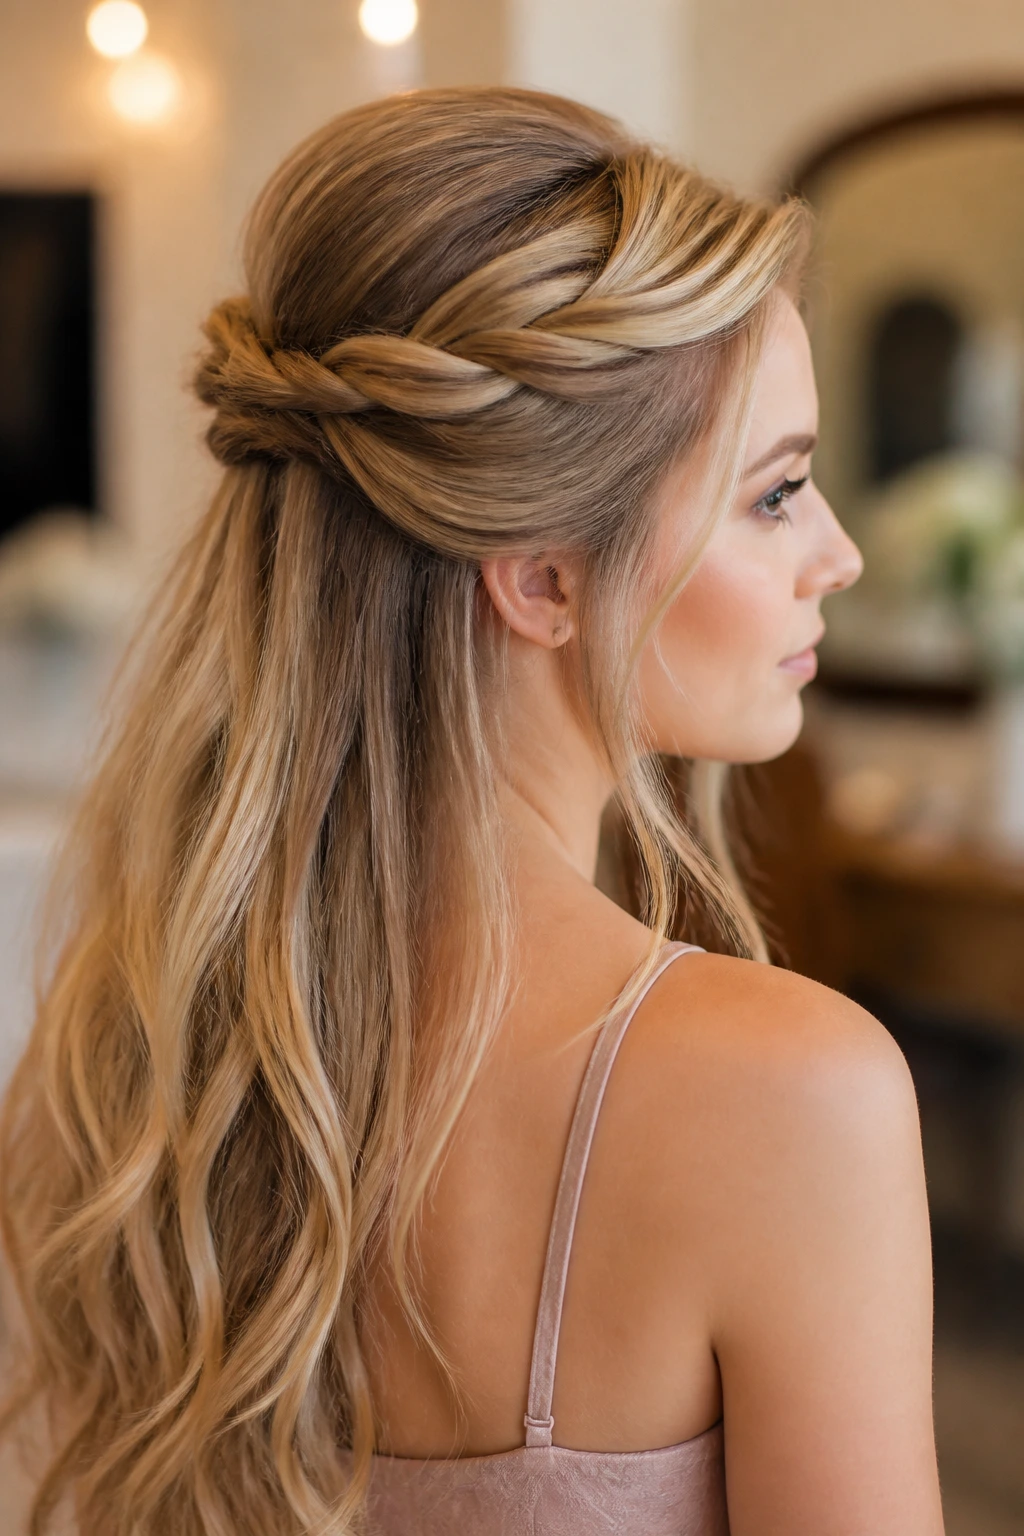
3. Half-Up Crown Twist
Half-up styles are one of the safest bets for thin long hair because they give you lift at the crown while keeping the length visible. That matters. If all your hair gets pulled back, fine hair can start to look like it has vanished. A crown twist leaves the long ends in play, which keeps the style from shrinking.
The trick is to make the top look fuller than it really is. Tease a narrow strip at the crown, smooth the top layer over it, and twist the sides back toward the middle. Secure the twists just below the crown so the hair lifts slightly before it drops into the rest of the length. The little bump at the top should be soft, not helmet-shaped.
This style works especially well if you like wearing a dress with a detailed back. You get the romantic feel of hair down, but your face stays open and lifted. Add a few tiny pins with pearls or crystals if you want to dress it up. Keep the jewelry small. The hair already has enough going on.
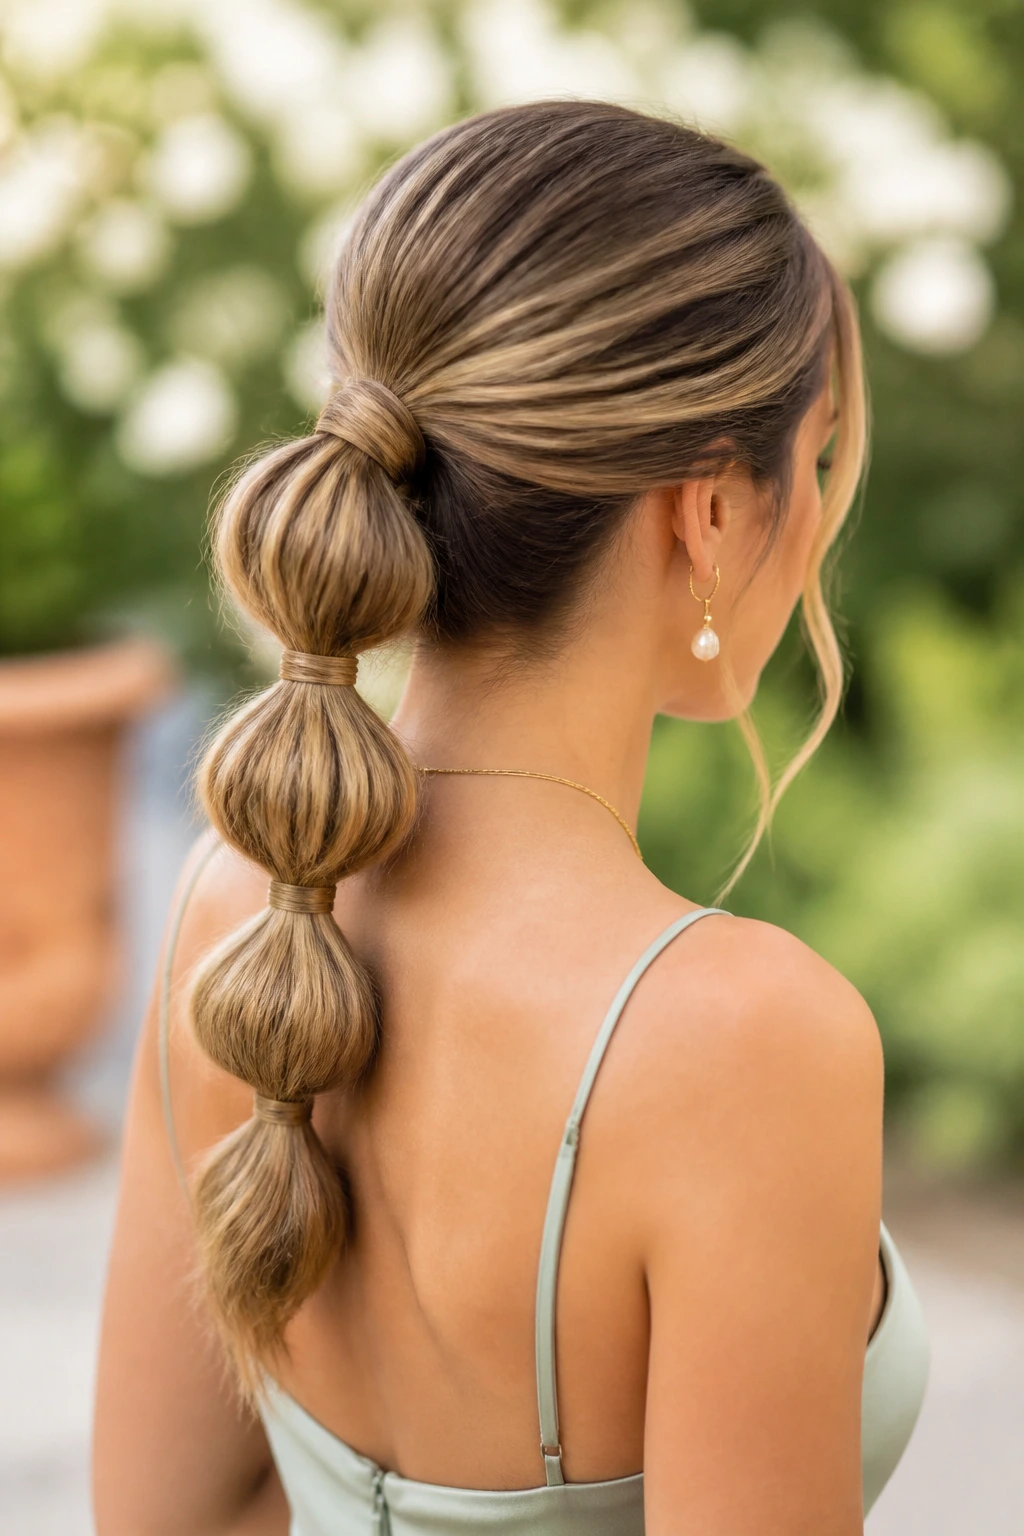
4. Bubble Ponytail with Wrapped Elastics
A bubble ponytail is one of the best fake-thickness tricks there is. Thin hair often looks better when it’s divided into segments, because each section gets its own little pocket of volume. The bubbles create shape where a plain ponytail would just hang straight and narrow.
Why this style is unfairly useful
Pull the hair into a low or mid ponytail and secure it with a clear elastic. Then add another elastic 2 to 3 inches down, tug the hair between the elastics outward, and repeat. The bubbles should feel rounded, not over-stuffed. If the hair is extra fine, gently backcomb each section before adding the next elastic. Just a little. Too much teasing and the bubbles start to look dusty.
Wrap a thin strand of hair around the first elastic or use a satin ribbon if the dress can handle it. That one move cleans up the whole style. It also keeps the ponytail from looking like an afterthought.
This is a good pick for modern weddings, cocktail dresses, and any event where you want movement without a lot of pinning. It’s also kinder to hair than a tightly pulled updo, which makes the whole evening more comfortable.
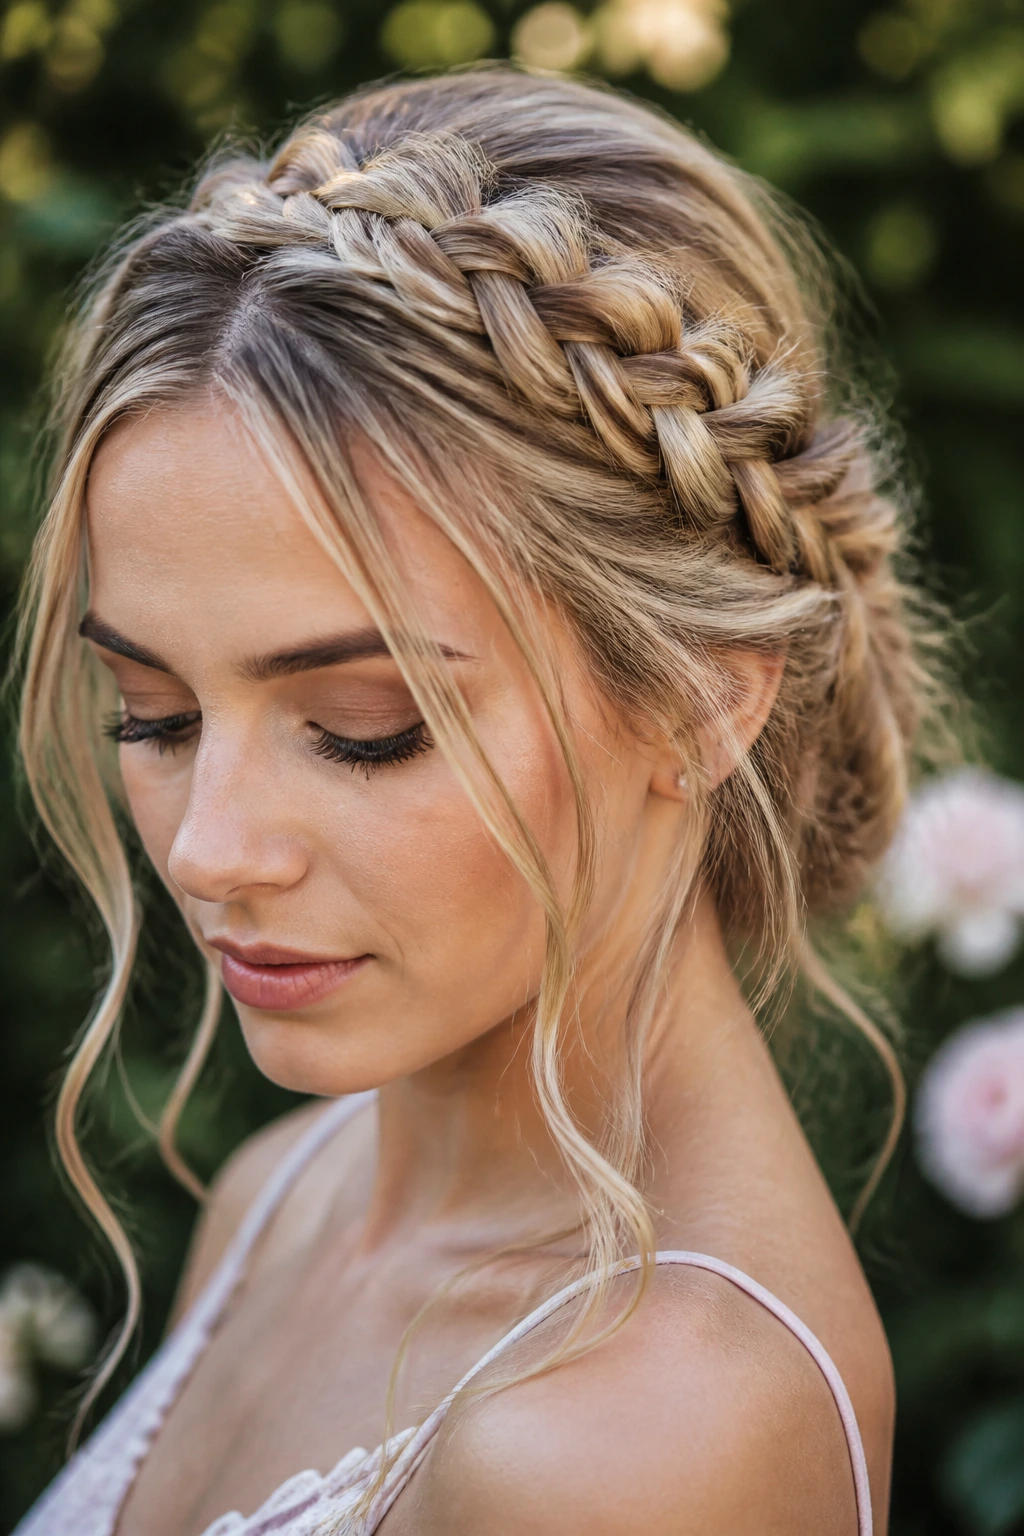
5. Braided Halo with Loosened Sections
A halo braid can sound like a thick-haired person’s hairstyle, but thin hair actually benefits from the structure. The braid acts like a frame, and the frame does the visual work. You do not need a rope-thick plait. You need a braid that has a clear edge and a little looseness pulled into it after it’s pinned.
Small sections are the key. Start with two braids from either side of the head, bring them around to the back, and pin them into a crown shape. Then tug gently at the outer edges of each braid to widen them. This is the part people call pancaking, and it does matter here. Done softly, it makes the braid look richer without turning it into a fuzz ball.
This style is especially nice for outdoor ceremonies, garden venues, and dresses with lace or embroidery. It keeps the hair off the neck and still looks romantic from every angle. If the hair is very silky, a bit of texture spray before braiding helps the style stay put. Otherwise the braid can loosen and slide more than you want.
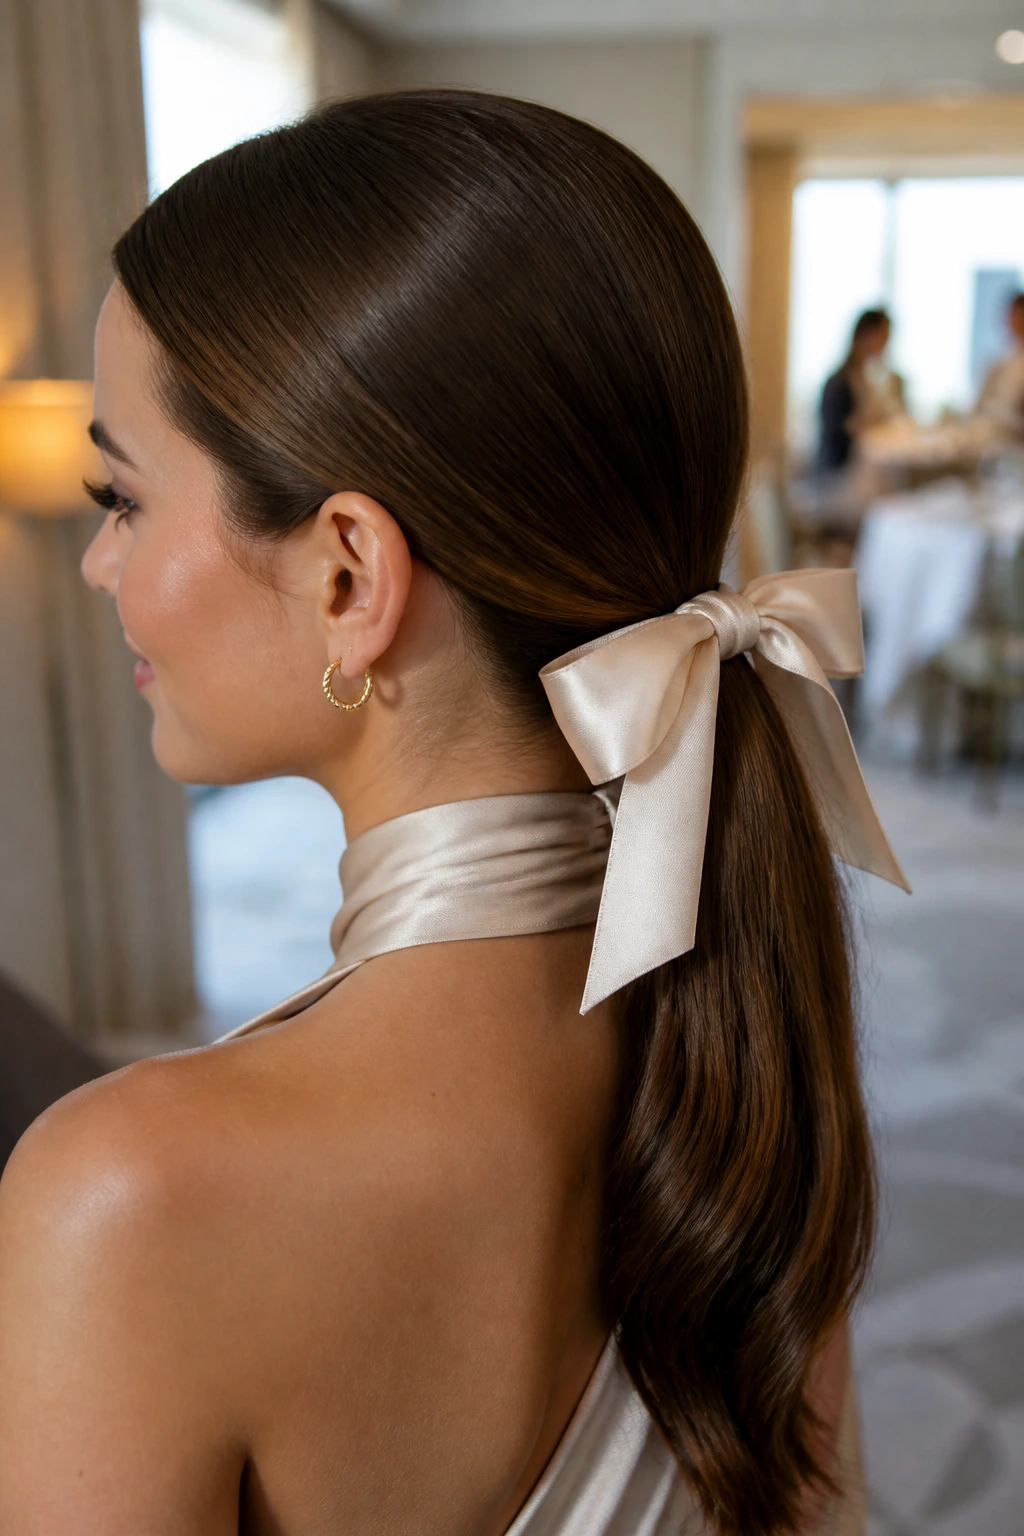
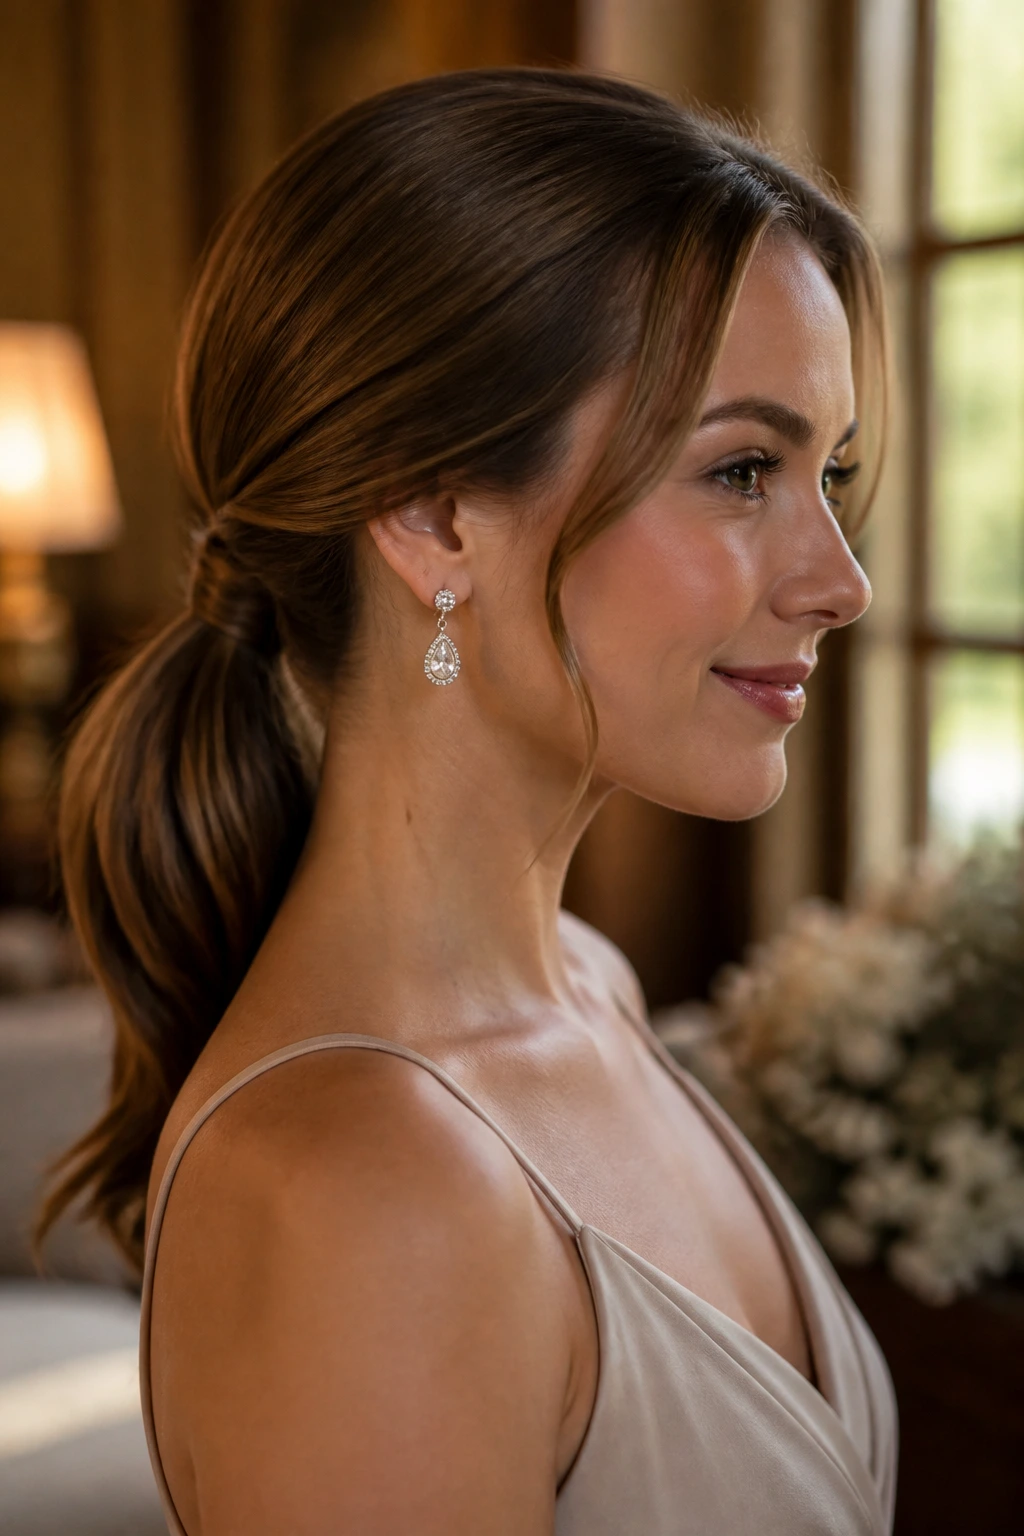
6. Sleek Low Ponytail with a Silk Bow
Sometimes the smartest move is to stop trying to force volume into thin hair and let the sleekness be the point. A low ponytail with smooth roots and a silk bow looks deliberate, elegant, and cleaner than most overworked updos. Long thin hair often shines in this kind of simple structure because the length becomes the main feature.
Clean lines beat fluffy panic
Use a fine-tooth comb and a pea-sized amount of smoothing cream or serum through the top section only. Keep the product away from the roots if your hair tends to go flat. Gather the ponytail at the nape, secure it tightly, and wrap a small strand around the elastic before tying on the bow. A bow that is 2 to 3 inches wide usually sits better than a giant floppy one.
The style works especially well with high necklines, halter dresses, and statement earrings. The hair stays out of the way, but it doesn’t disappear. If you want a little more fullness at the tail, clip in a small piece of hair under the ponytail before you tie the bow. One discreet piece is enough.
It’s a clean look. Not plain. There’s a difference.
7. Side-Swept Curl Cascade
If you want to wear your length down but still make it look styled, a side-swept cascade is one of the better options. Thin hair can fall limp when it’s parted evenly and left hanging on both sides. Sweeping all the curls over one shoulder creates a thicker-looking profile and gives the style a clear shape.
The best version starts with a deep part. Curl small sections in alternating directions so the waves don’t all collapse into the same curve. Then pin the hair on the opposite side behind the ear, letting the rest fall over the shoulder and across the front of the dress. That front sweep matters. It gives the style a bit of drama without adding extra bulk.
This one looks especially good when the dress has an open back or one bare shoulder. The curls frame the neckline rather than fighting it. If you’re heading to a very formal wedding, a jeweled clip at the pinned side can sharpen the whole look. Keep the clip low and close to the head so it doesn’t dominate the waves.
8. Faux Bob with Tucked Ends
A faux bob is one of my favorite tricks for long, fine hair at a wedding because it solves two problems at once. It makes the hair look fuller and removes the weight that can drag thin strands downward by the second hour. The style gives you the polished shape of a bob without cutting anything.
The illusion is all in the tuck
Curl the hair first. Slightly bent hair tucks more cleanly than poker-straight hair. Then pin the ends under at the nape, rolling the length upward and hiding the tucked sections beneath the surface layer. If the hair is very long, you may need to create two small folds instead of one big one. That’s normal.
The real goal is to keep the exterior soft and rounded. You want the illusion of a chin-length or collarbone-length shape, not a hidden nest of pins. Thin hair actually helps here because there’s less hair to fold under. The pins can grab better, and the finish often looks cleaner than it does on thick hair.
This style pairs well with vintage-inspired dresses, structured gowns, and anything with a higher neckline. It also stays cool, which matters when you’re standing through a ceremony and then sitting under lights for dinner.
9. Voluminous Blowout with Velcro Rollers
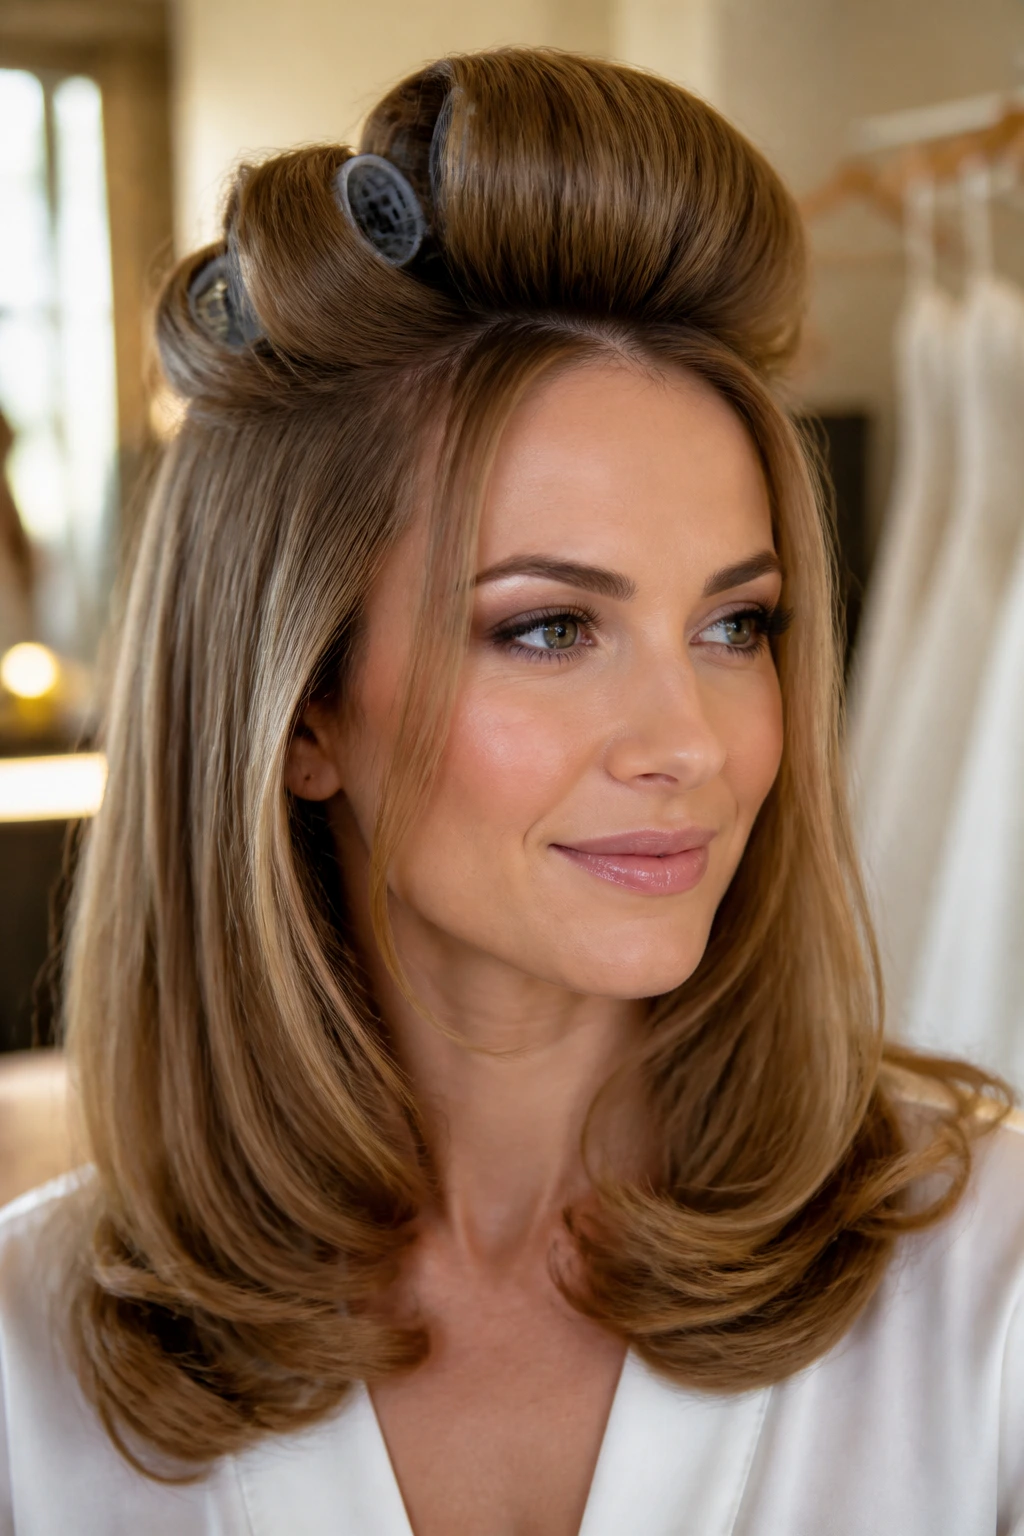
A good blowout is not boring. It’s just disciplined. On long, thin hair, a smooth blowout with crown lift can look more expensive than a style that tries too hard. The big difference is the root support. Without it, the hair falls in two hours and you’re back to square one.
Use rollers like you mean it
Work a lightweight mousse through damp hair, then blow-dry with a round brush, lifting each section at the root before pulling it smooth through the ends. Once the hair is dry, set the crown and top sides in medium Velcro rollers while you get dressed. Ten to fifteen minutes helps; twenty is better if you have the patience.
Take the rollers out only after the hair has cooled. That cooling time is the part people skip, and it’s the part that gives you the lift. Brush lightly through the ends, not the roots, so you keep the movement without flattening the crown. A soft side part can help if the hair tends to lie flat in the middle.
This look works well for weddings where you want your hair to look polished but not pinned. It’s also the most forgiving style in this group if you’re not great with bobby pins. Sometimes the simplest answer is the one that lasts.
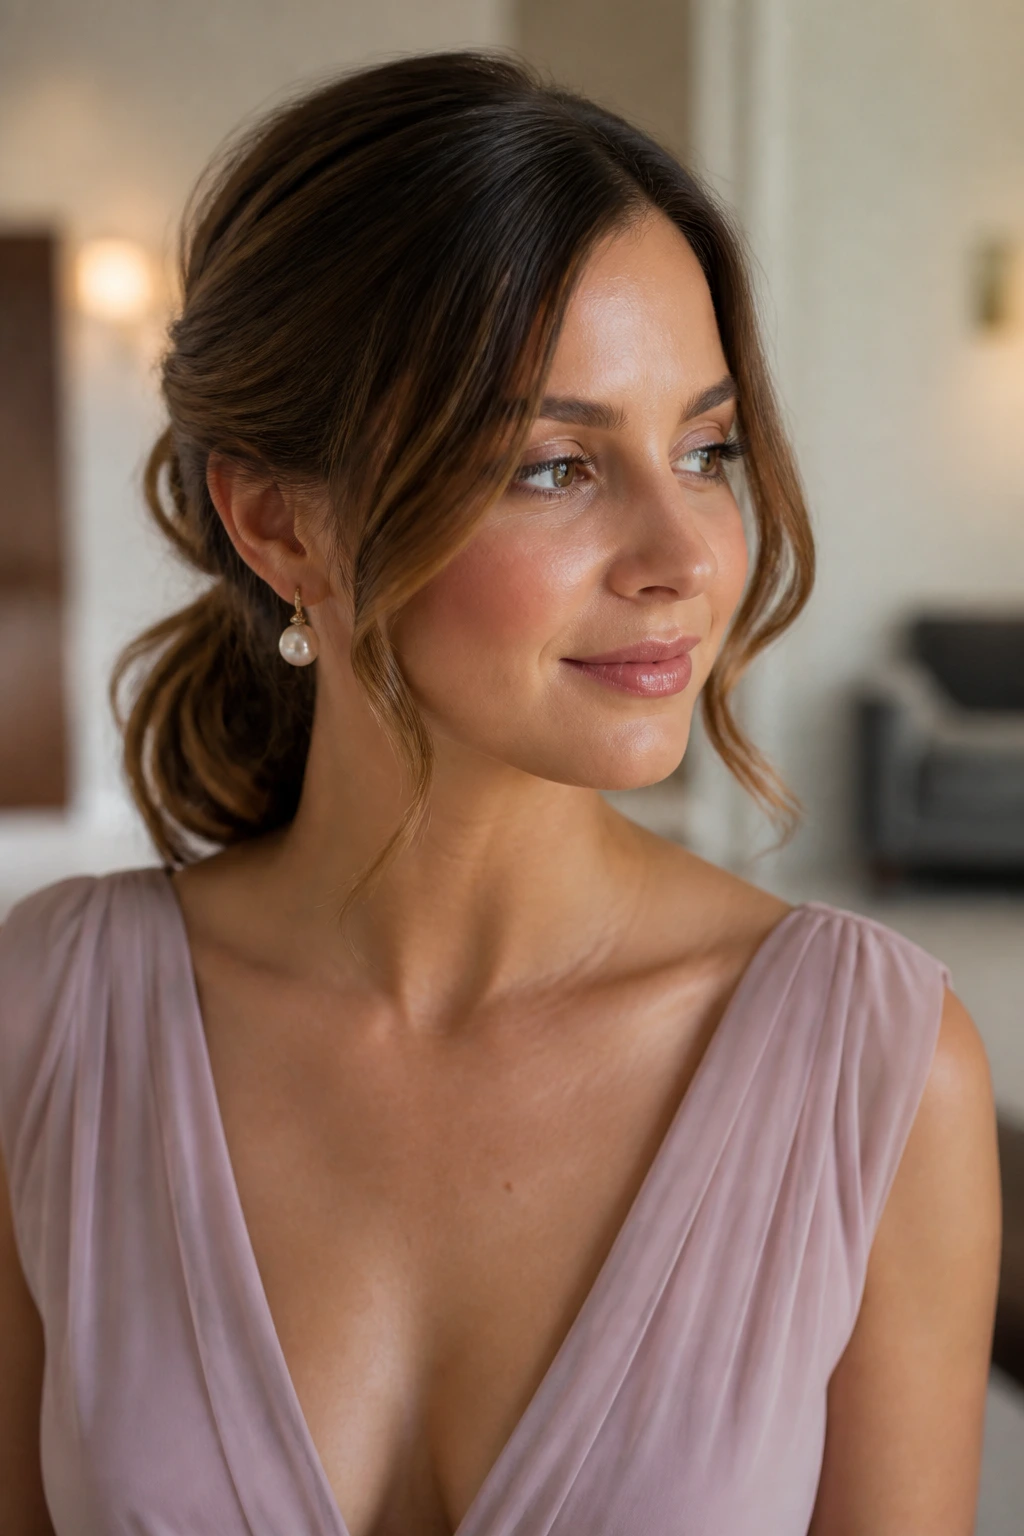
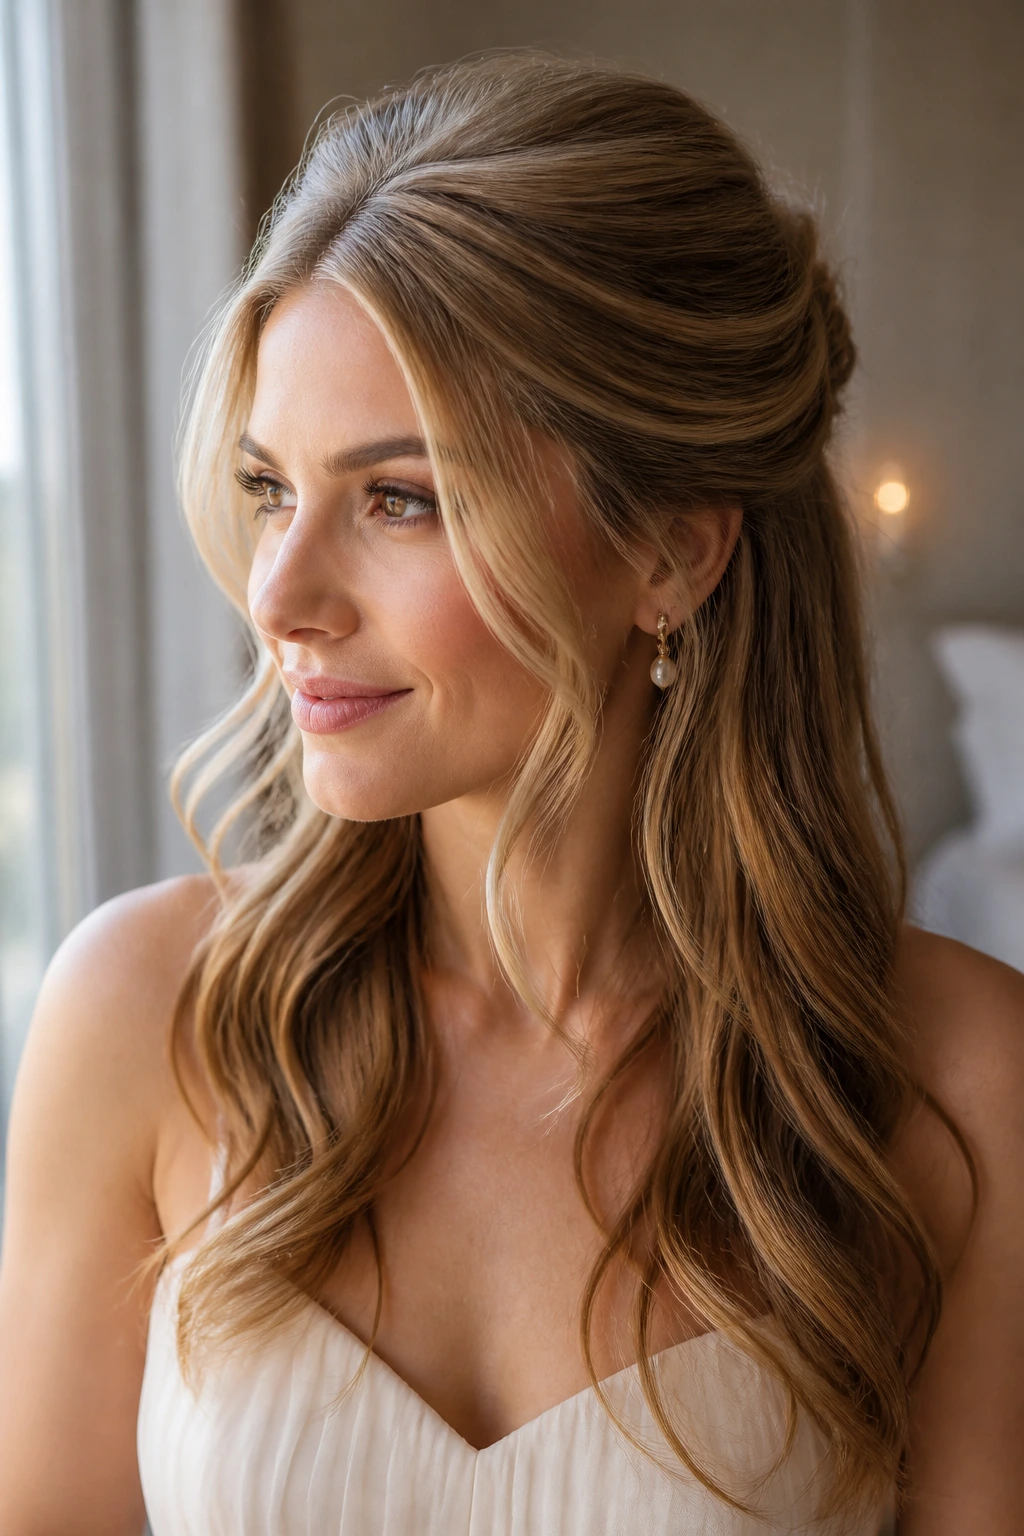
10. Half-Up Knot with a Teased Crown
A half-up knot gives thin hair the one thing it loves most: a little height. Not a giant stack of teasing. Just enough lift at the crown to keep the top from collapsing flat against the scalp. The knot itself sits like a small, neat punctuation mark above the rest of the length.
If you’re doing this at home, tease a narrow section at the crown, smooth the surface over it, and gather the top half into a knot or small loop just below the crown line. Pin it from underneath so the hardware stays hidden. The lower half can stay in loose curls, soft waves, or a polished bend, depending on the dress.
This style is good when you want some structure but still want to see the length of your hair. It’s also one of the easier styles to refresh later in the evening. A quick lift at the crown and one extra pin usually fixes it.
Keep the knot modest. A tiny knot that sits in the right place looks intentional. A big one can swallow the head.
11. Rope-Braid Low Bun
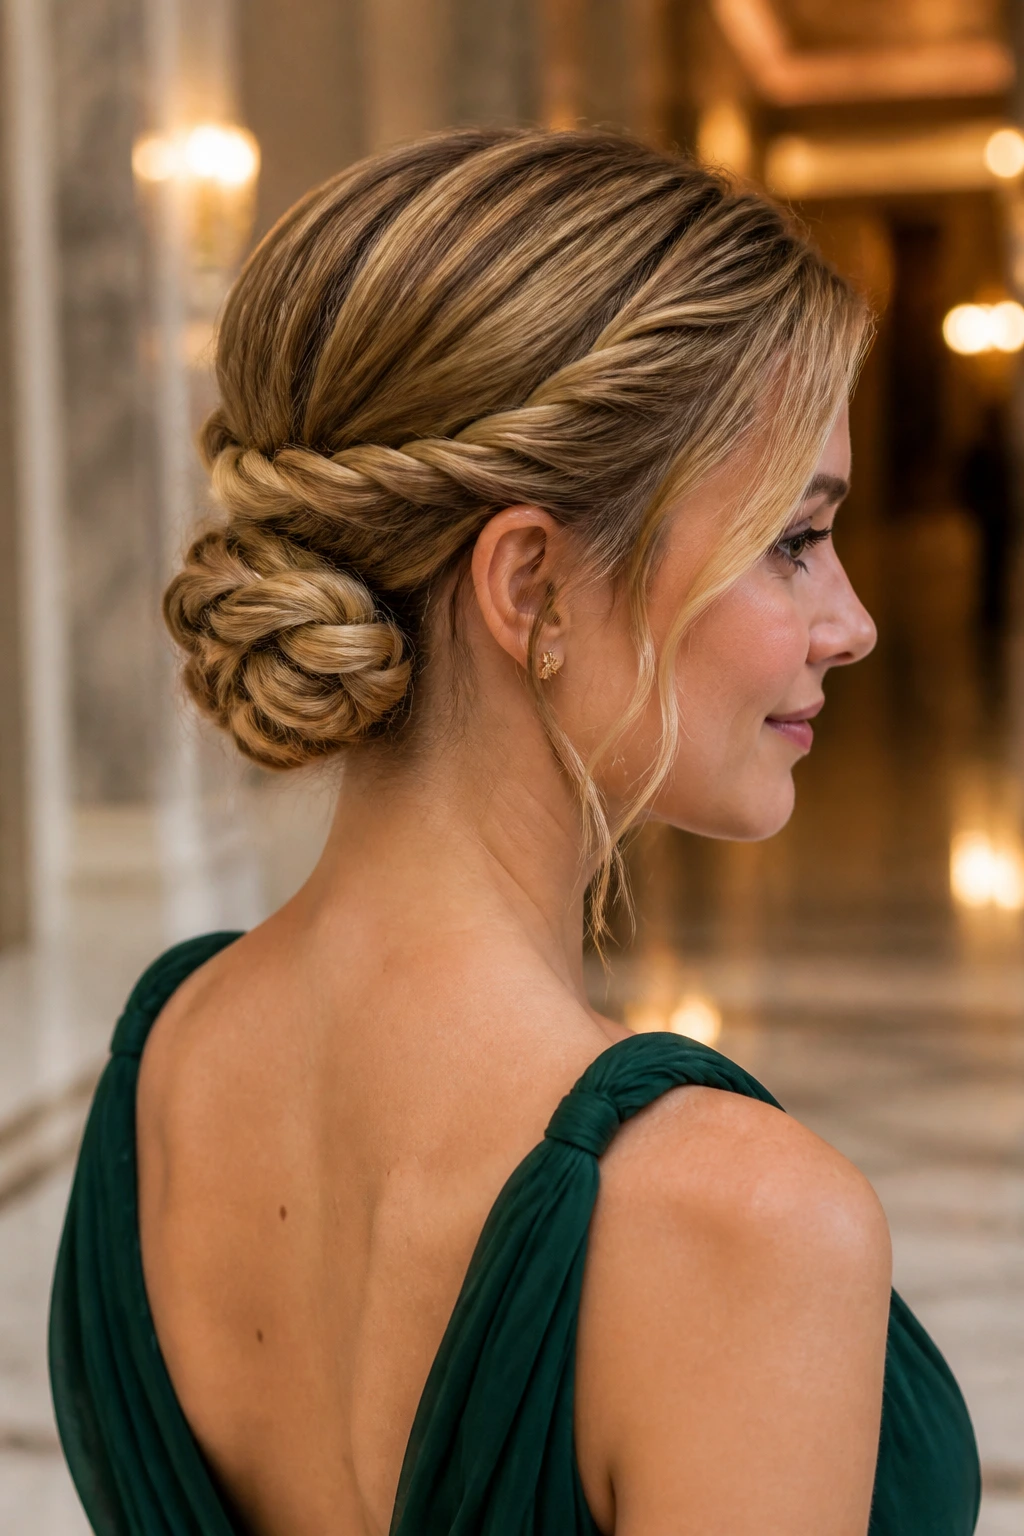
Rope twists are underrated. They give you detail without demanding a lot of hair, which makes them a smart pick for long thin hair that needs shape more than bulk. The low bun version feels neat, formal, and a little modern.
Start by dividing the hair into two sections and twisting each one in the same direction before wrapping them around each other in the opposite direction. That creates the rope effect. Then coil the twist into a bun at the nape and pin it securely. The twist pattern makes the bun look denser than a plain wrapped bun would.
A small bun can still look full
If your bun tends to shrink, gently spread the coil before pinning the final section. Thin hair benefits from a slightly wider shape because it takes up more visual space. A few hidden pins under the bun can help the style sit outward instead of flat against the head.
This is one of the better choices for formal dresses, especially if the fabric is textured or the neckline is detailed. It keeps the look calm and elegant. No fuss. No stray ends pretending to be romantic.
12. Textured French Twist
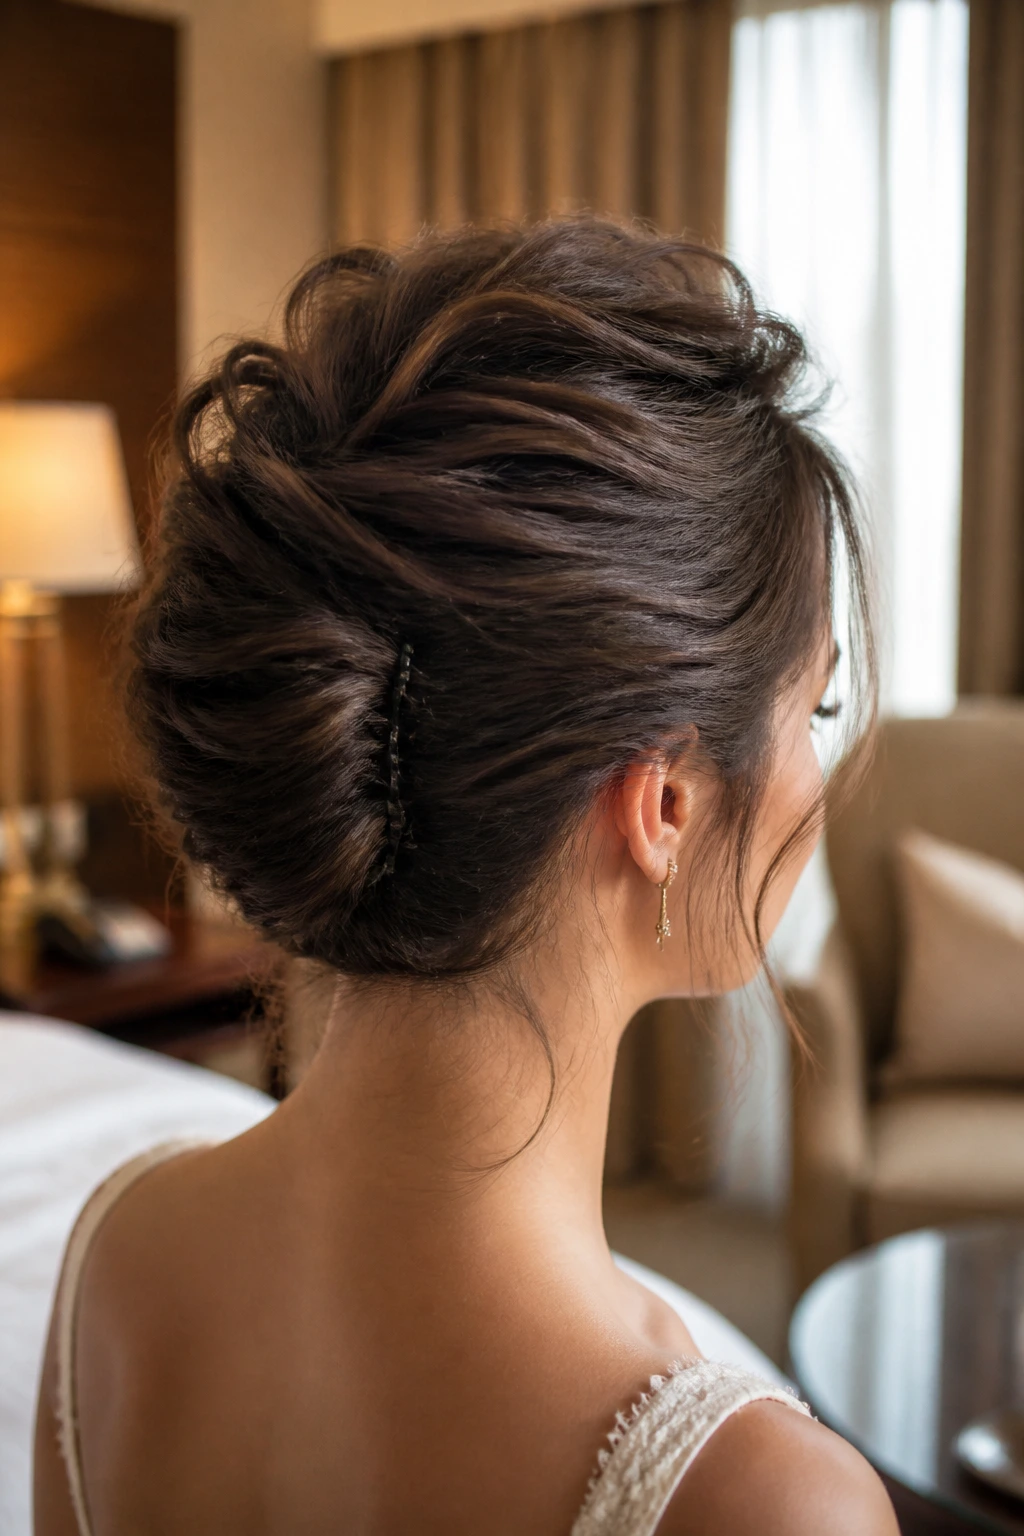
A French twist on thin hair can be gorgeous, but only if it’s done with a light hand. The old, super-tight version can make fine hair look smaller. A textured version gives you the same vertical shape without crushing the crown.
Backcomb a small section at the back of the crown, smooth the top layer over it, and gather the hair upward as if you’re making a low twist along the back of the head. Pin the seam vertically with several strong bobby pins. If a few ends peek out, that’s fine. Too-perfect twists can look harsh on thin hair.
What makes it hold
Use texture spray before you start and a final mist of flexible hairspray once the twist is pinned. Fine hair often needs grip from the inside, not a heavy coat on the outside. If the hair slips, add one or two hidden cross-pins at the twist seam. That usually fixes it faster than trying to repin the whole style.
This style is ideal for black-tie weddings, satin gowns, and anything that needs a sharper finish. It looks formal without looking stiff, which is a surprisingly rare balance.
13. Waterfall Braid with Loose Length
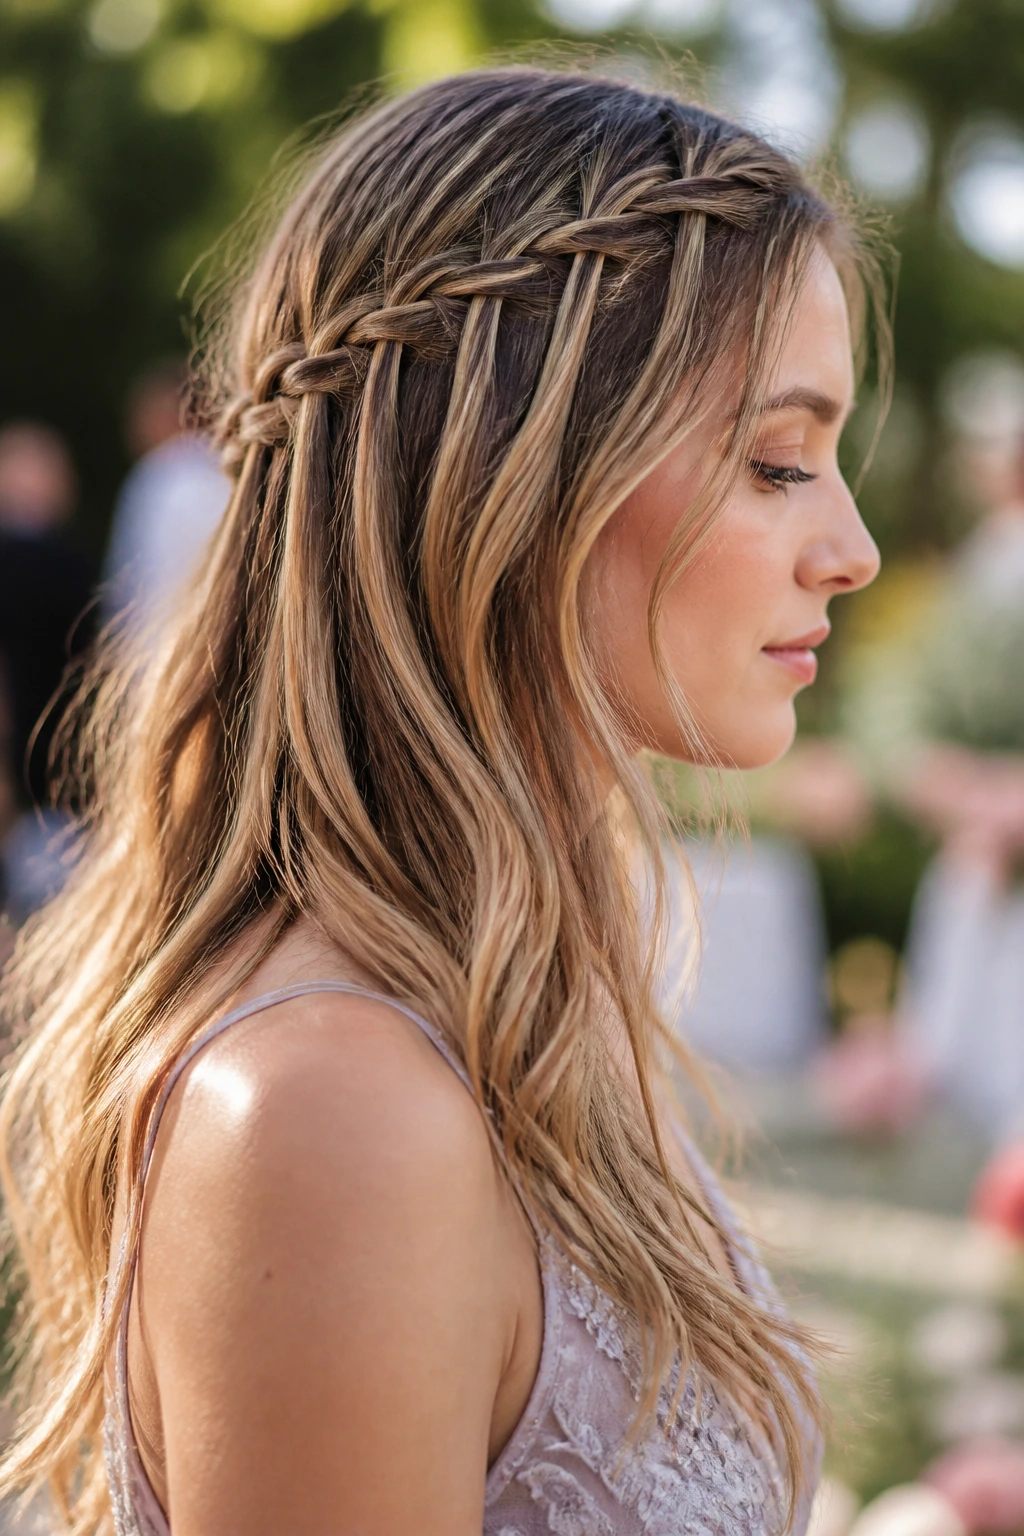
A waterfall braid is more decorative than structural, which is exactly why it works on thin long hair. Instead of asking the braid to support all the hair, you let it frame the style and feed the eye down into the loose lengths. That keeps the look soft and airy.
Make the braid with small sections so the pattern stays clear. If the sections are too thick, the braid can look clumsy and the dropped strands lose their shape. Pair it with loose curls or gentle bends through the rest of the hair so the ends don’t look unfinished.
This is a good option for garden weddings, softer dresses, and guests who want something pretty without a full updo. The braid gives the style a focal point near the face, and the length still gets to show off. That balance matters on thin hair, which can disappear if every strand gets pulled back.
A few tiny pins behind the braid can help anchor it. The braid itself should look like a detail, not a battle.
14. Clipped-Back Glam Waves
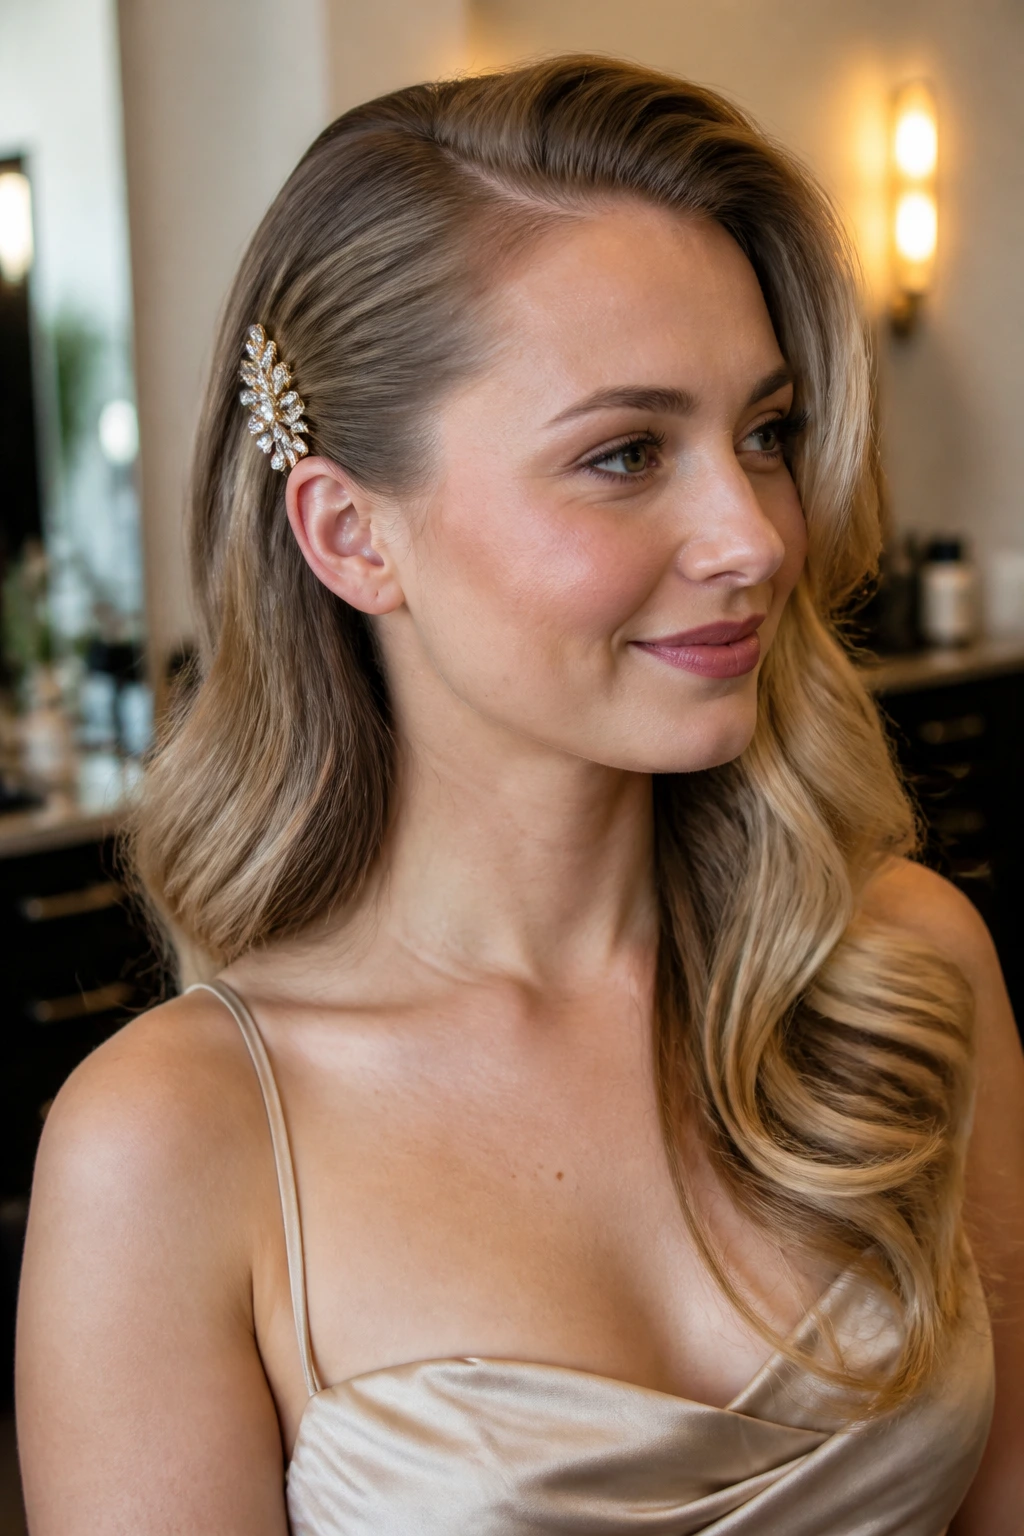
Sometimes the easiest hairstyle is the right one. Loose glam waves with one or two statement clips are fast, flattering, and kind to thin hair because most of the length remains free. The clips provide the style interest; the waves provide movement.
Less fuss, more finish
Create a soft wave pattern with a curling iron or wand, then brush it out so the curls become smooth bends. Pin one side behind the ear with a jeweled clip, or use two small clips stacked above the temple if you want a little more sparkle. The key is to clip into a section that has some texture. Silk-smooth hair can slide right out.
This style works especially well when you’re short on time or don’t want your hair tied up for hours. It also plays nicely with dresses that already have a lot of detail. If the gown has beading or lace at the neckline, the hair can stay simpler.
I like this look for thin hair because it doesn’t pretend the hair is something it isn’t. It just gives the strands shape and lets the accessories do some of the visual work.
15. Low Bubble Bun
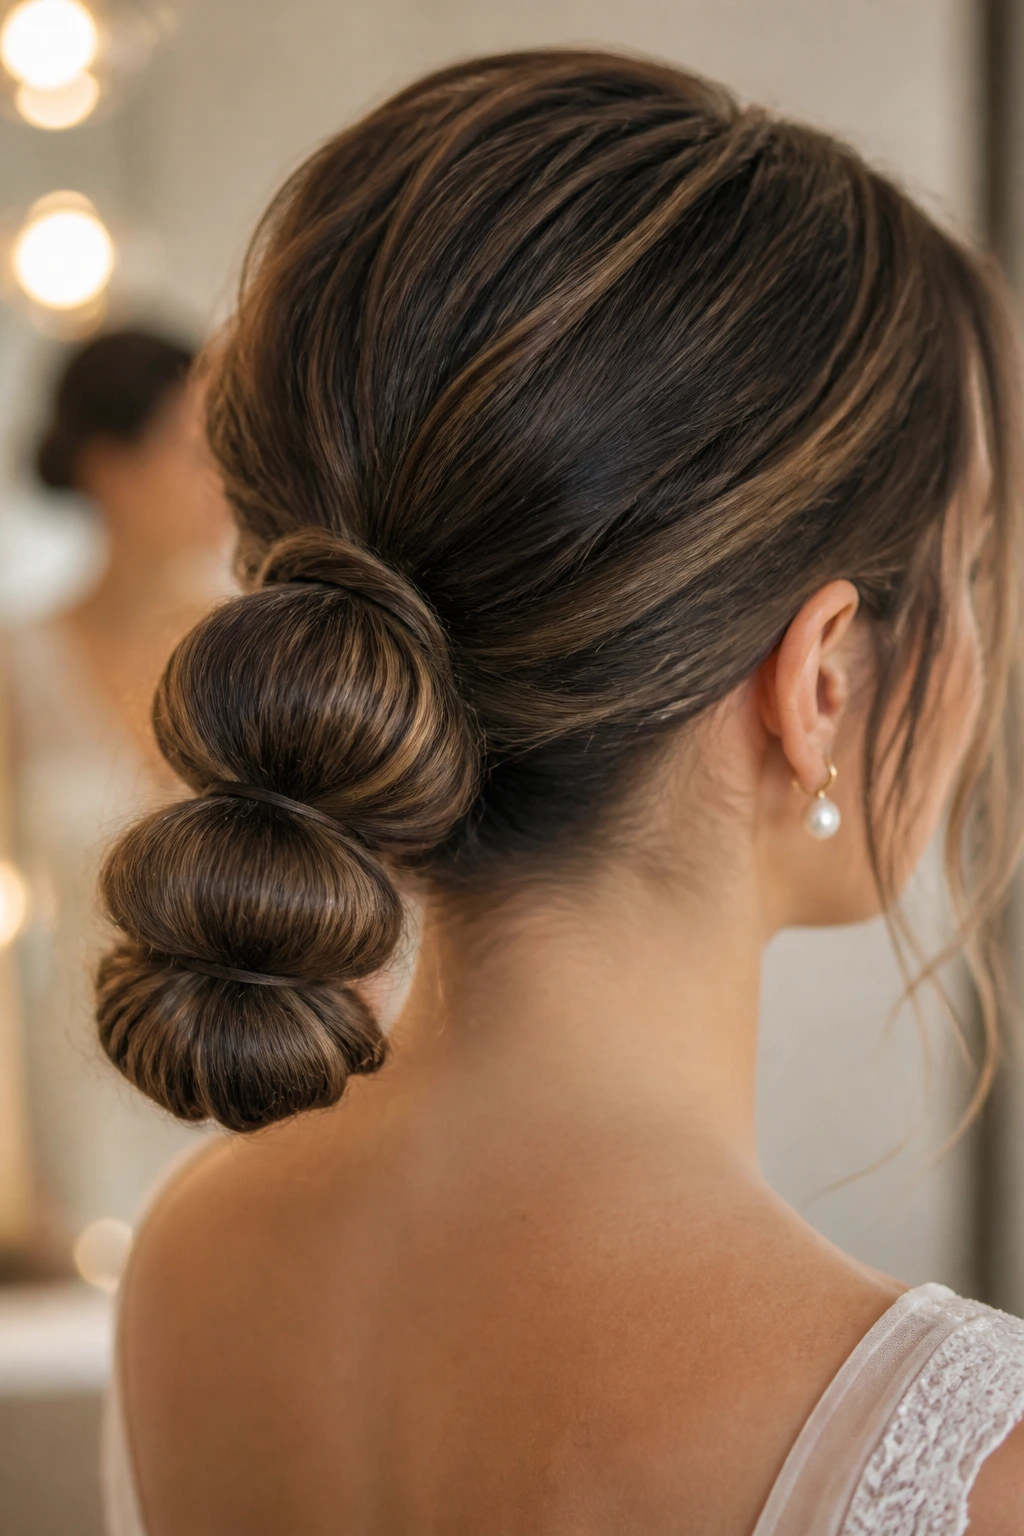
A low bubble bun sounds playful, but it can look surprisingly polished if you keep the bubbles controlled. Thin hair benefits from the segmented shape because each little bubble creates width. A plain bun often shrinks. This one does not have to.
Start with a low ponytail and add clear elastics every few inches down the tail. Tug each section gently so it rounds out, then wrap the segmented tail around the base and pin it into a bun shape. The result should look soft and layered, almost like pleated fabric made from hair.
The base matters more than the bun
A little root texture at the crown helps the style stay lifted. If the top is too sleek, the bun can feel attached instead of built. Dry shampoo or a small amount of volumizing powder at the roots usually fixes that.
This style works well for modern dresses, reception dancing, and weddings where you want a style that can move without collapsing. Add a small comb or a few pearl pins if you want to lean more formal. Keep the accessories clustered. One side is enough.
16. Messy Top Knot with Polished Edges
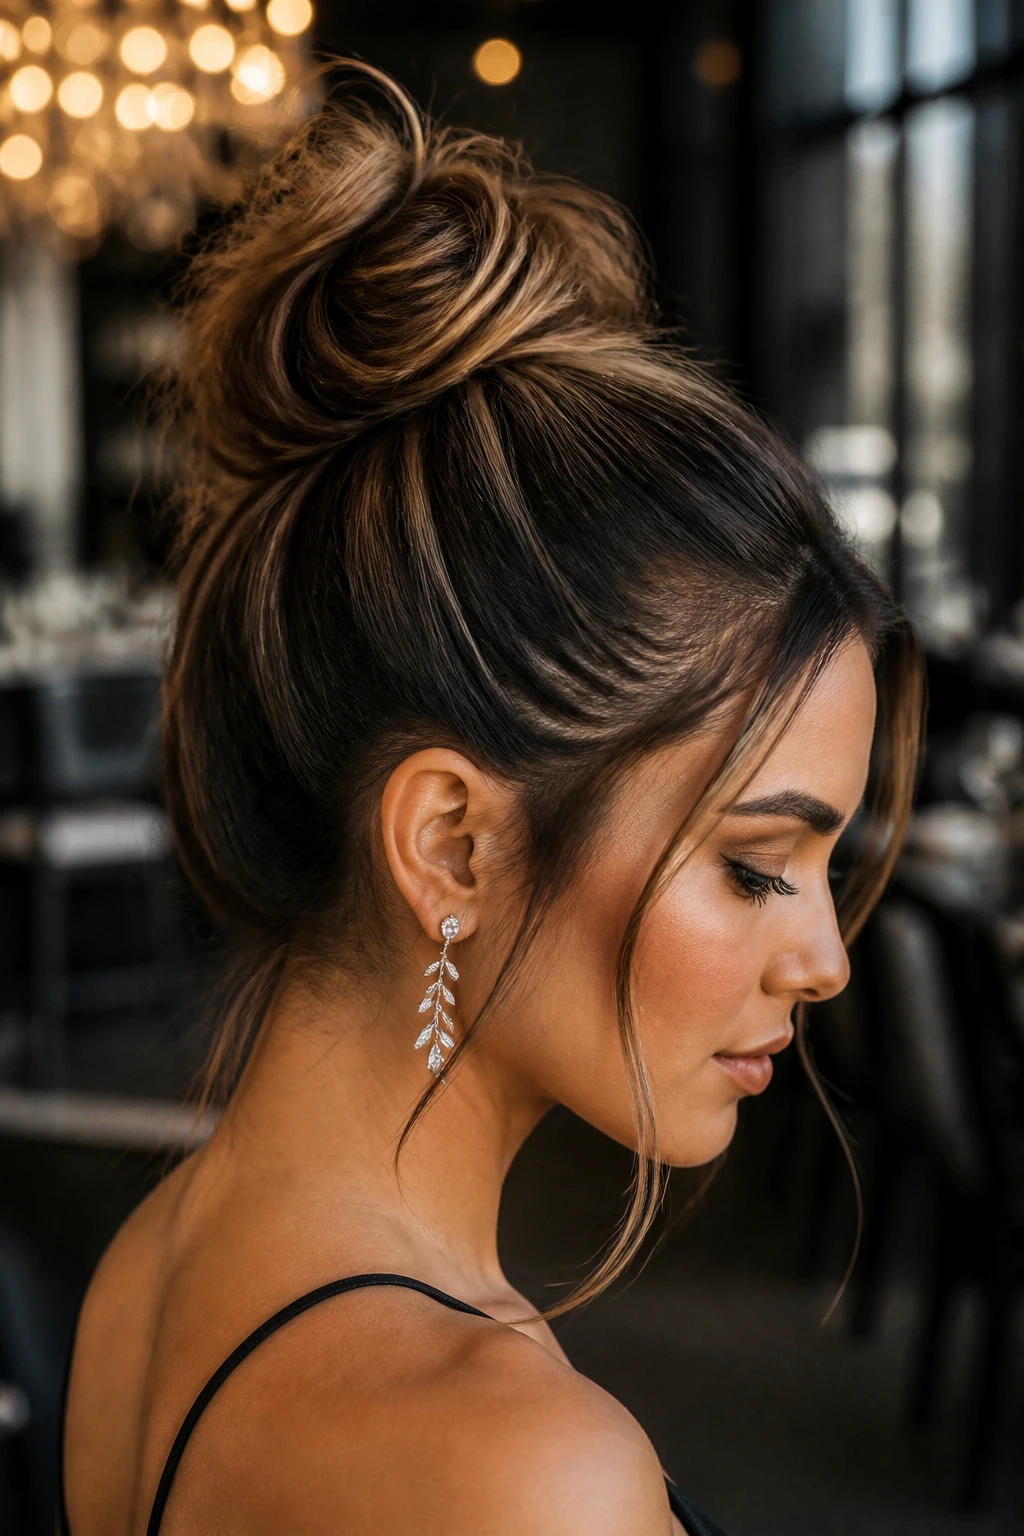
A top knot can work for a wedding guest look, but it needs polish around the edges or it starts to feel like gym hair in a nicer outfit. On thin hair, a controlled messy knot gives you height and shape while keeping the style from sinking into the head.
Build the knot with a little padding if you need it. A small donut or even a softly rolled base can help the bun look wider. Smooth the sides back, leave the knot itself airy, and pull a few face-framing pieces loose if the dress calls for softness. The contrast matters: sleek sides, relaxed knot.
This is a better fit for contemporary weddings, city venues, or outfits with strong lines. It also holds up well if you’re dancing a lot, because the structure is compact. Thin hair often does better with a higher style than people expect; it keeps the crown from going flat by the time the cake comes out.
17. Scattered Pearl Pins with Loose Curls
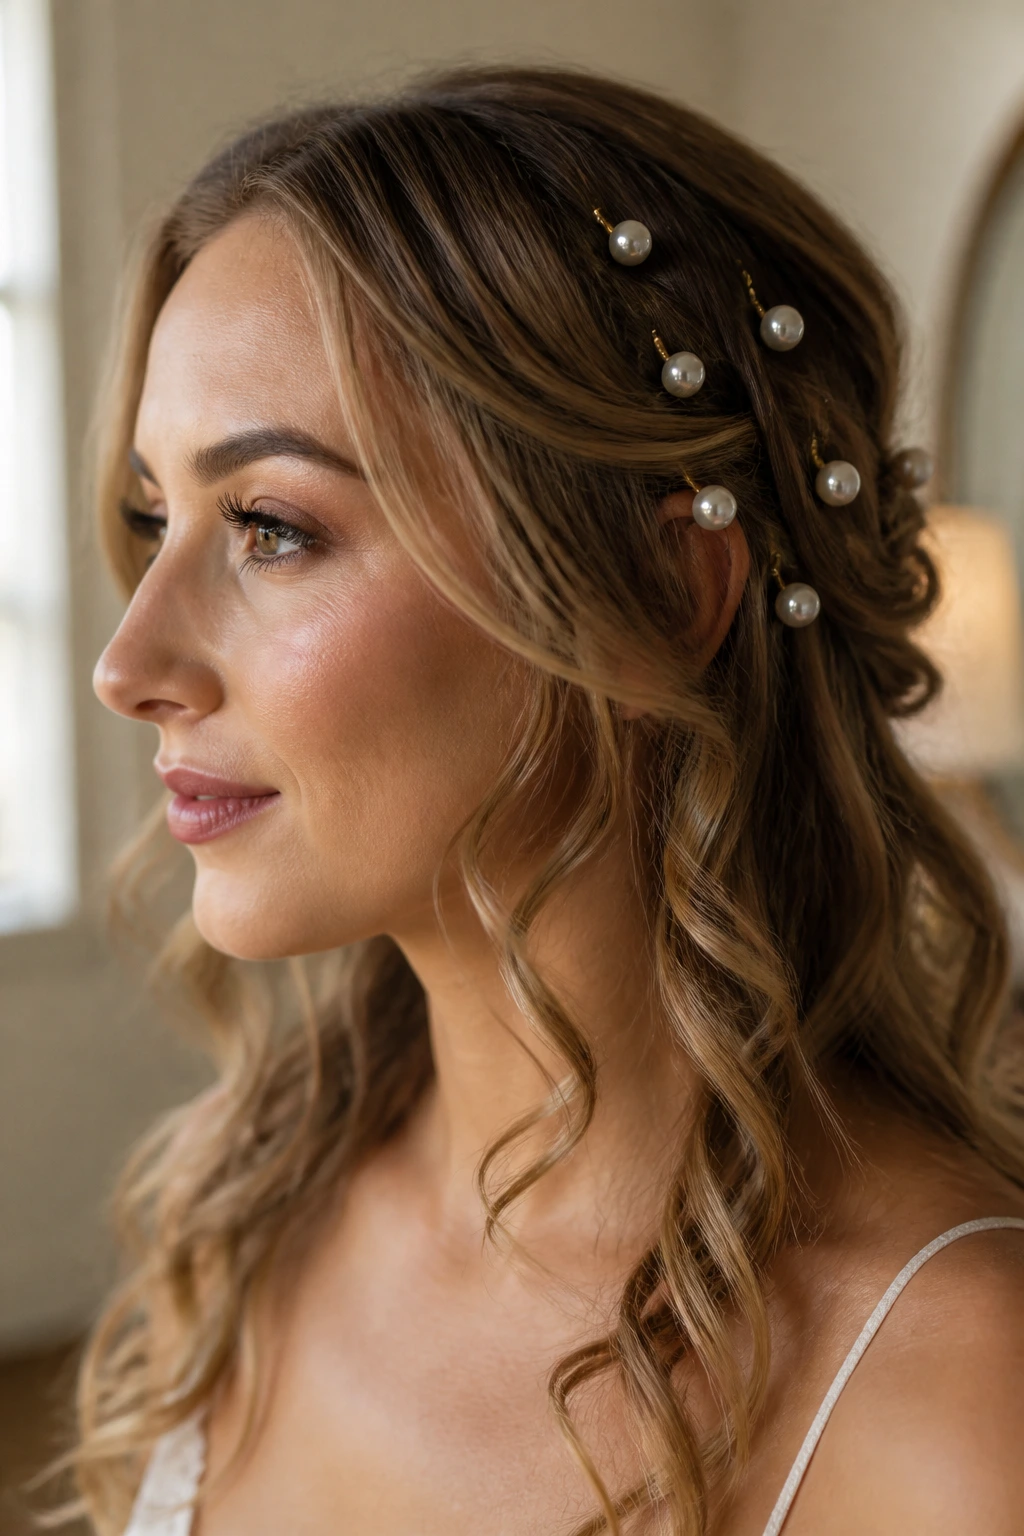
Pearl pins are not a hairstyle by themselves, but for thin long hair they might as well be. A few loose curls plus thoughtful pin placement can create a finished wedding look without forcing the hair into a shape it doesn’t want to hold. The decoration becomes part of the architecture.
Use a middle or side part, curl the length softly, and then place three to seven pearl pins on one side, or along the curve of a half-up section. Do not scatter them everywhere. Too many pins look busy. A small cluster looks intentional and gives the eye a place to rest.
Why this works on fine hair
The pins add visual weight where the hair itself is light. That can make the style feel fuller without making it heavy. If you want the look to last, anchor the pins into a section that has a little texture from waves or backcombing. They hold better there than they do in smooth strands.
This is a good choice when your dress is simple and you want the hair to do a bit more. It’s elegant without being fussy, and it doesn’t ask for a giant time commitment.
18. Ribbon-Woven Half Ponytail
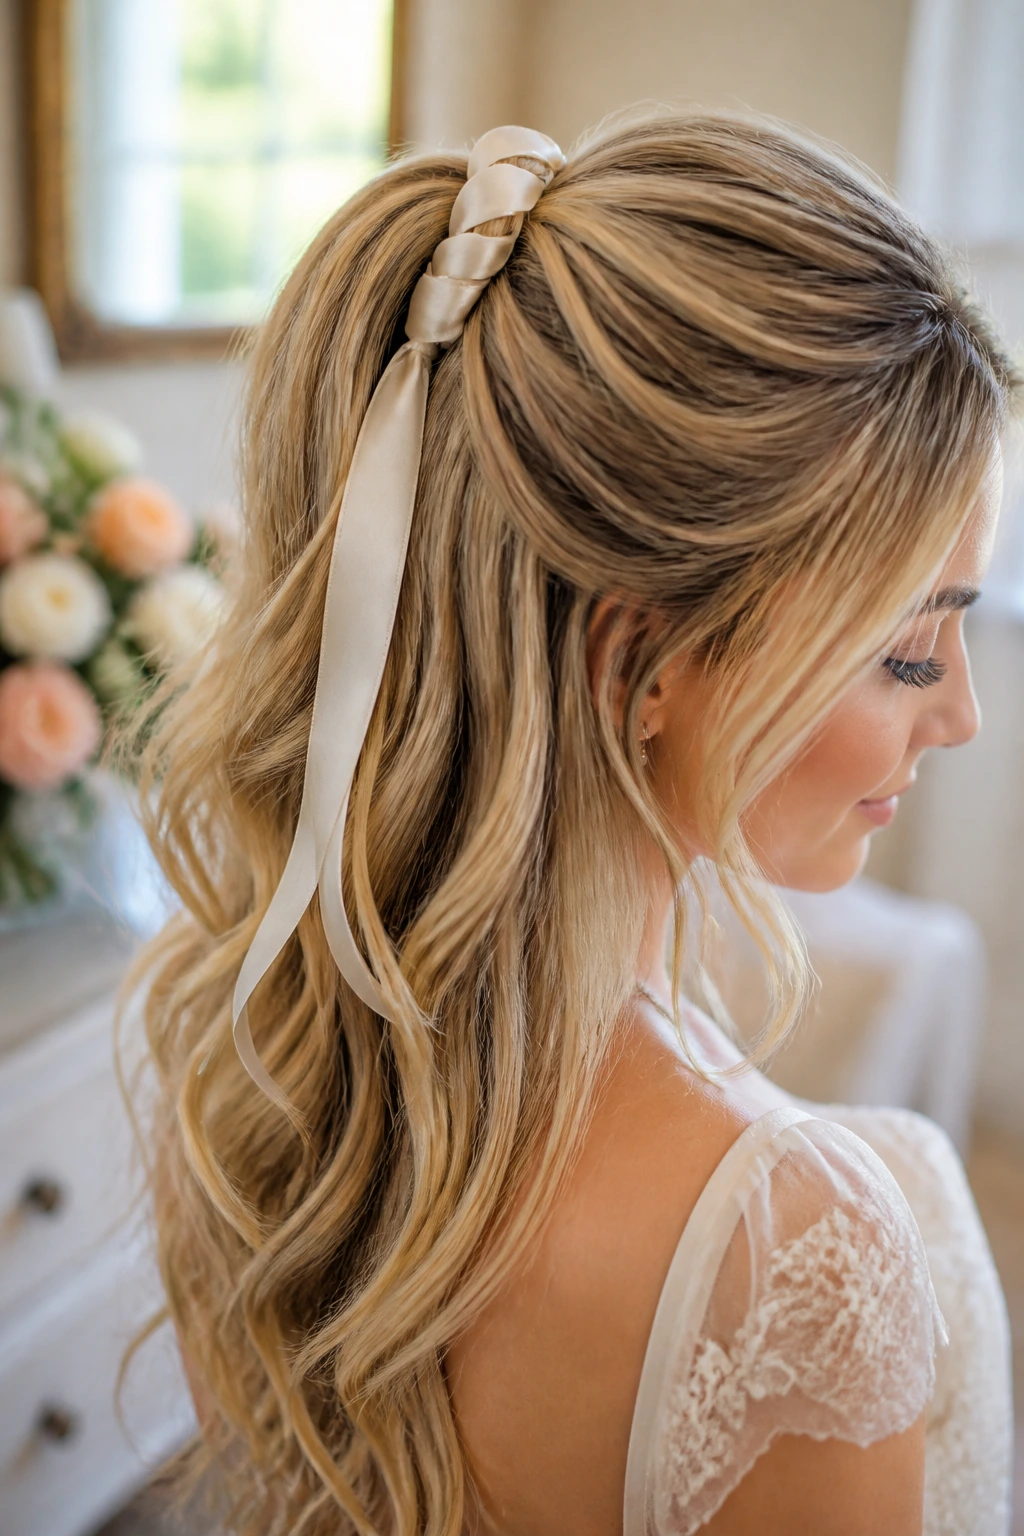
A ribbon-woven half ponytail is romantic in a way that doesn’t feel childish, which is a tricky line to walk. On thin long hair, the ribbon gives the eye a clean path to follow, and that makes the style feel fuller. The half-up structure also keeps the crown lifted while the length stays visible.
Secure the top half into a small ponytail or twist, then tie or weave a satin ribbon around the base. A ribbon that’s about ½ to 1 inch wide usually sits best. Too thin and it disappears. Too wide and it can overpower the hair. If you want extra shape, curl the lower half into soft bends before adding the ribbon.
This style works nicely with floral dresses, soft tailoring, or dresses that already have delicate details. It is also a good compromise if you want a hair accessory but do not want to go full jeweled clip. The ribbon carries the mood without dragging the whole style down.
Why Wedding Guest Hairstyles for Long Hair with Thin Hair Need Shape, Not Bulk
The big mistake with thin hair is chasing volume in the wrong place. People pile product at the roots, tease the crown until it frays, then wonder why the style looks tired by the time they arrive at the venue. The better move is to build a shape that gives the illusion of fullness from the outside. That means side parts, structured twists, pinned curves, and styles that use the hair’s length as part of the design.
The crown matters more than the ends
A little lift at the top changes everything. Even ½ inch of root height can make the whole hairstyle read as fuller, especially in photos. That’s why half-up styles, low twists, and polished waves often outperform giant buns for thin hair. They keep the silhouette open.
Texture is not the same as frizz
Fine hair often needs grit, but grit should not look like neglect. Dry shampoo, mousse, and texture spray create grip. Over-teasing and over-spraying create roughness. Those are not the same thing, and your hair knows the difference before you do.
Long hair still helps
Length gives you room to twist, wrap, braid, and sweep. That is a gift. Thin hair can look sparse when it’s hanging straight, but the same hair can look rich when it’s arranged in a pattern that uses every inch of length for shape.
The Tools That Make Fine Hair Easier to Style
-
1¼-inch curling iron or wand: A medium barrel usually gives the kind of bend that lasts on long hair without making the curls too tight.
-
Velcro rollers: Best for crown lift and soft body; leave them in until the hair cools completely.
-
Fine-tooth comb: Useful for clean parts, smooth top sections, and tidy ponytails.
-
Boar-bristle brush: Good for brushing out waves without making the finish look frizzy.
-
Duckbill clips: Handy for sectioning the hair while you curl or twist.
-
Color-matched bobby pins: The unglamorous hero. Buy more than you think you need.
-
U-pins: Better than standard pins for buns, chignons, and French twists.
-
Clear elastics: Small and invisible for bubble ponytails, half-up styles, and wrapped bases.
-
Lightweight mousse: Gives fine hair grip without the greasy feel heavy creams can leave behind.
-
Texture spray or dry shampoo: Adds hold and a little roughness at the roots and mid-lengths.
-
Flexible-hold hairspray: Keeps the style in place without turning the hair into a helmet.
-
Pearl pins, combs, ribbon, or a silk bow: These are the finishing pieces that make the hairstyle feel wedding-ready.
Smart Product and Accessory Picks for Thin Wedding Hair
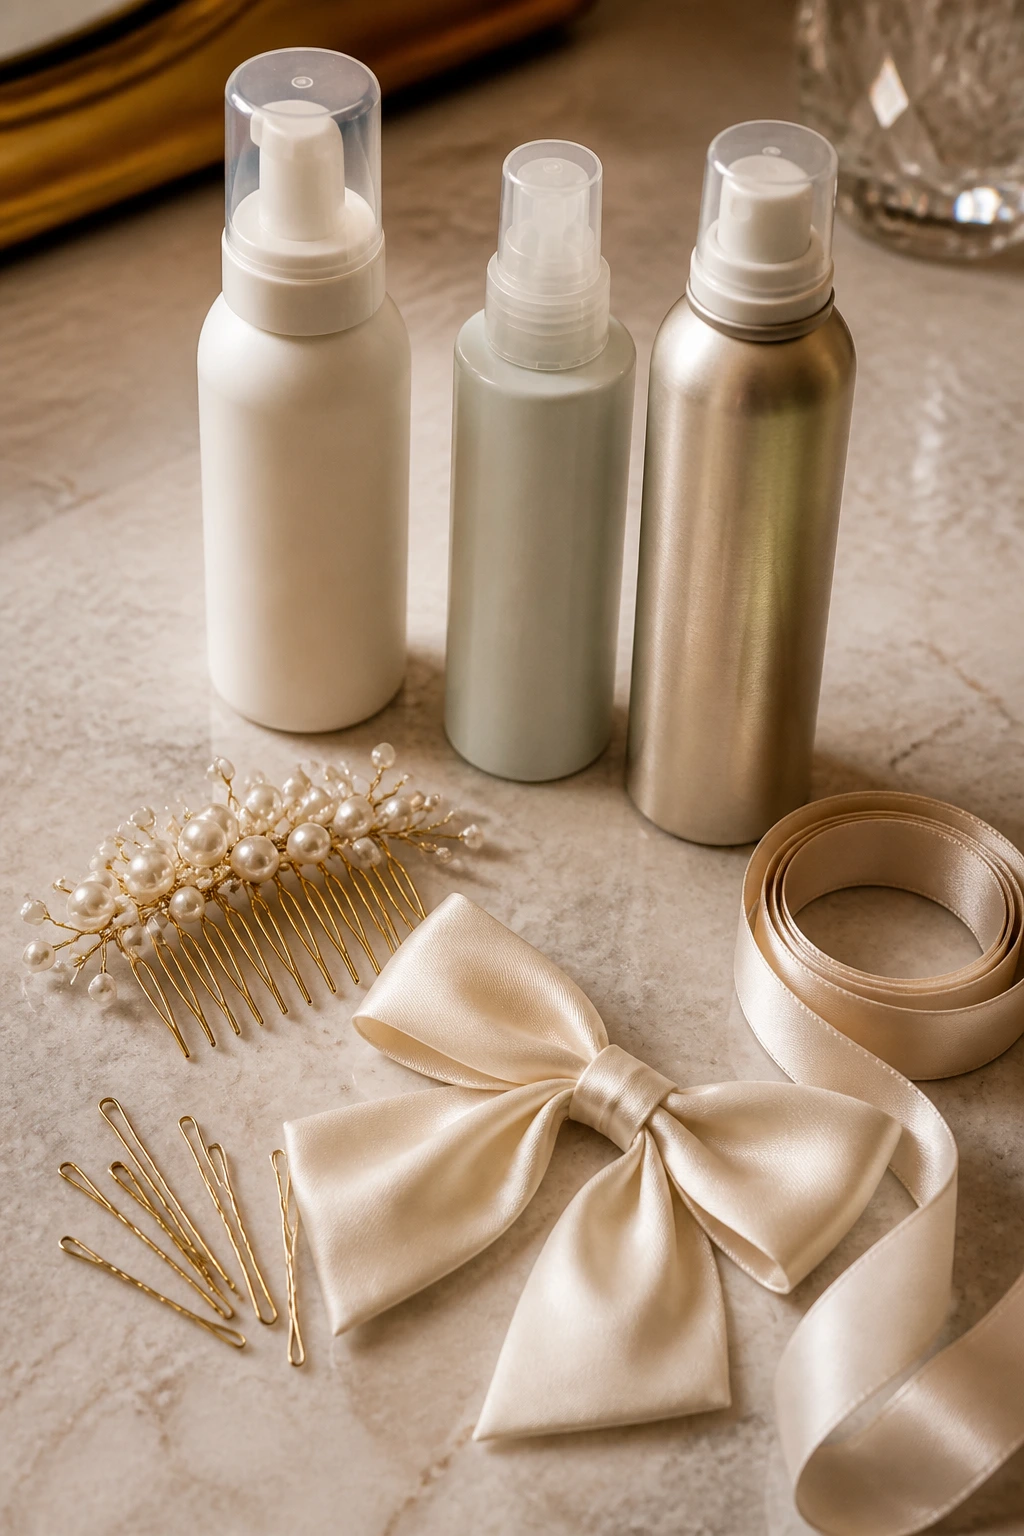
The wrong product load can flatten fine hair before the event even starts. Heavy oils, rich leave-ins, and thick creams tend to sink into the roots and leave the crown limp. Better to reach for light, grippy products that build shape without coating the hair in shine. A mousse at the roots, a texturizing spray through the mid-lengths, and a flexible finish spray at the end is often enough. Anything heavier should stay on the ends, if you use it at all.
Accessories matter more on thin hair than they do on dense hair, because they pull visual focus. That does not mean you need oversized clips or giant bows. In fact, smaller pieces often look more expensive and sit better. A pearl comb can nest into a half-up twist. A silk bow can soften a low ponytail. A narrow ribbon can make a braid or half ponytail look considered instead of bare.
Color matters too. If your hair is blonde, brown, or red, color-matched pins disappear better than silver ones. If your dress is busy, let the hair accessory stay quiet. If the dress is plain, that’s when the accessory can do more of the talking. I prefer that kind of balance. It keeps the whole look from screaming for attention.
How to Wear the Look Without Fighting Your Dress or Jewelry
Presentation: Pick the hairstyle shape that sits against your neckline instead of competing with it. A high neckline usually wants a low bun, ponytail, or French twist. A low back or one-shoulder dress usually looks better with waves or a side-swept style that leaves some skin visible.
Accompaniments: Treat earrings and hair accessories like they’re on the same team. If you’re wearing chandelier earrings, keep the hair cleaner and simpler. If the hairstyle already has pearl pins or a ribbon, skip the oversized jewelry and let the hair detail stay in charge.
Proportions: Thin hair looks best when the volume stays controlled. Crown lift is good. Giant, puffy height is not. A little width at the sides and a smooth shape at the back usually look better than a huge bun that starts small and then spreads in the wrong direction.
Weather and movement: Outdoor ceremonies and packed dance floors punish loose pins. Cross-pin every bun, twist, or braid anchor point, and carry two spare bobby pins in your bag. If the forecast is sticky or windy, favor styles with lower centers of gravity — low chignons, bubble ponytails, and tucked styles hold up better than high, airy shapes.
Additional Tips and Style Boosters
Texture Boost: If your hair is too clean and slippery, dust the roots with dry shampoo before styling and let it sit for 5 to 10 minutes. That little wait gives the product time to grab, which matters more than people think.
Accessory Swap: A pearl comb can be swapped for a satin ribbon, and a gold clip can be swapped for a small floral pin. The shape of the hairstyle stays the same; only the mood changes.
Face-Frame Strategy: Leave the front pieces thinner than your instinct tells you to. Thin hair looks more delicate when the face-framing sections are soft and narrow, not thick and heavy like side curtains.
Make-It-Yours: If you like a cleaner finish, keep the hair smooth and let the part, twist, or accessory carry the look. If you like more softness, loosen one or two pieces around the face and break up the waves with your fingers after they cool.
Shortcut Upgrade: Clip in one small filler piece at the crown or under a ponytail if you want a more formal shape. You do not need a full head of extensions to get a better silhouette.
Mistakes That Flatten Wedding Hair Fast
The most common error is washing the hair the morning of the wedding and styling it from scratch. Freshly washed fine hair tends to be too soft, too slippery, and too eager to collapse. A little day-old texture almost always holds better. If you must wash it, use mousse and dry shampoo to replace the missing grip.
Another problem: too much teasing, too early. Over-teased hair can look fluffy for ten minutes and then start fraying at the top while the rest of the style sinks. Keep teasing confined to hidden sections at the crown or underneath the top layer. You want support, not a nest.
Heavy accessories are sneaky. A huge clip or a thick bow can drag thin sections down and make the whole style look smaller by comparison. Choose pieces that sit close to the head and match the scale of the hair. The accessory should finish the style, not swallow it.
Skipping the cool-down stage is another one. If you curl, pin, or twist hair and then start shaking it loose right away, it drops faster. Let curls cool before brushing them out. Let pins sit for a few minutes before you move around. That pause buys you staying power.
Finally, people often make the front too tight. Hair pulled flat at the temples can make the crown look flatter than it really is. Leave a little softness near the hairline and put the structure a little farther back. The style will look fuller from the front and side.
Variations and Adaptations to Try
The Clip-In Lift Kit: Add one small weft or a volumizing filler piece at the crown before building a half-up, ponytail, or blowout. This is the easiest way to add visual density without making the rest of the hair bulky.
The No-Heat Wave Set: Sleep in loose braids, foam rollers, or a twist set if your hair does not like hot tools. The waves will be softer and often hold better on fine strands that get weighed down by a curling iron.
The Humidity-Ready Version: Choose low chignons, rope-braid buns, or a sleek ponytail if the weather is sticky. Keep the product load light at the roots but stronger on the finished style, and avoid loose, brushed-out waves unless you can refresh them later.
The Minimal Metal Finish: Swap pearls and bows for a slim gold clip or a tiny crystal comb. The style becomes sharper and a little more modern without changing the basic structure.
The Soft Romance Edit: Use ribbon, face-framing pieces, and brushed-out curls if the dress is floaty or floral. This version works especially well with outdoor venues and softer fabrics.
The Formal Floor-Sweep: Choose a French twist, low twisted chignon, or faux bob when the dress has a dramatic neckline or structured fabric. These styles keep the head shape tidy and the hair off the dress.
Make-Ahead, Refresh, and Aftercare for Wedding Hair
For thin hair, timing matters almost as much as technique. Styles built on day-old hair usually hold better than styles built on just-washed hair, especially if you’re doing waves, ponytails, or braids. If you’re styling at home before the event, wash the hair the day before, not the morning of, unless your scalp needs a fresh wash to feel comfortable. Then add texture with a light product and let the hair rest overnight in a loose braid or silk wrap if possible.
If you style the hair the night before, keep it very secure. A loose chignon, a braid, or soft rollers can survive overnight if you sleep on a silk pillowcase or wrap the hair in a silk scarf. In the morning, don’t brush everything out immediately. Warm it up with your hands first, then use a curling iron only on the pieces that need a little revival. Two or three quick touch-ups are usually enough.
During the event, keep a mini kit in your bag: 4 bobby pins, a tiny hairspray, and one small comb. That’s enough to fix the common issues — a loose side, a drooping twist, a ponytail that has started to slide. If you’re wearing a style with curls, a tiny mist of water on the very ends can wake them back up, but keep it light. Soaking the hair will flatten the top all over again.
After the wedding, brush out any pins before you sleep. Thin hair tangles more easily when it has been sprayed and pinned for hours, and leaving accessories in overnight is how you wake up with odd bends and snap points. Wash the product out within a day or two, especially if you used dry shampoo, teasing powder, or a lot of hairspray. The scalp will thank you.
Questions People Ask Before Styling Thin Hair for a Wedding
Which style gives the most volume for thin long hair?
A soft Hollywood wave with a deep side part usually creates the strongest volume illusion, especially at the crown and around the face. If you want even more shape, the half-up crown twist or the voluminous blowout with Velcro rollers can push the top higher without looking stiff.
Should thin hair be clean or a little dirty before styling?
A little texture usually helps more than perfectly clean hair. Day-old hair or hair that has been lightly prepped with mousse and dry shampoo tends to hold pins, waves, and braids better than freshly washed strands that slide apart.
Can I use clip-in extensions without making the style obvious?
Yes, if you keep the pieces small and place them where the hair needs support, not where it already looks full. A tiny filler piece under the crown or in a ponytail tail can blend well. The trick is not to overload the head with more hair than the style can hide.
What if my curls fall flat before the reception?
That’s common with fine hair. Set the curls fully before brushing, pin them while they cool, and finish with flexible hairspray rather than a soft mist that disappears in ten minutes. If they still drop, refresh only the front layers and the crown instead of re-curling the whole head.
Are braids good for thin hair or do they make it look smaller?
Braids can be excellent on thin hair if they’re used as framing or structure, not as giant thick ropes. A halo braid, waterfall braid, or small side braid can make the style feel fuller because the braid gives the eye a clear shape to follow.
What hairstyle works best if I’m wearing statement earrings?
A sleek low ponytail, French twist, or side-swept wave usually lets the earrings stand out without competing. Keep the hair away from the earlobes so the jewelry has room.
How far ahead can I style the hair?
Loose waves and some braided styles can be done a few hours ahead, but most updos look best done the same day. If you need to prep ahead, do the rough texture and curling first, then finish the pinning close to the event.
What if my hair is too slippery for bobby pins?
Use texture spray, dry shampoo, or a light dusting of volumizing powder first. Then cross two pins in an X shape at the anchor point. One pin often slips; two usually hold.
The Style That Stays Put
Thin hair does not need to be bullied into looking thicker. It needs a better plan. A good wedding guest hairstyle on long, fine hair works because it gives the eye a shape to follow: a wave, a twist, a braid, a ponytail with a clean line, or a clip that pulls the whole look together.
The best part is that you do not have to fight your hair texture to get there. Use the length. Add grip where the hair is softest. Keep the crown alive. Then let the style do what it’s supposed to do — sit neatly through the ceremony, hold up under a few hours of talking and dancing, and still look like you meant it when you look in the mirror at the end of the night.