Long hair can be gorgeous and dull at the same time. Give it a blunt outline and it turns into a sheet; leave it all one shade and the ends disappear into the rest of the length. Layered hairstyles for long hair with caramel highlights fix both problems at once. The cut makes the movement, and the color gives your eye something to follow.
Caramel is the sweet spot for a lot of brunettes because it adds warmth without tipping hair into orange or icy blonde territory. On long hair, that matters. Layers need light and shadow to show up, and caramel ribbons do that job better than heavy blonde panels or flat dark lowlights. The right placement can make a feathered face frame look lighter, a shag look less choppy, or a blowout look like it was done on purpose.
Some of these looks are soft and polished; others are messy in the good way. A few are built for thick hair that wants to puff out, and a few are for finer hair that needs lift without losing length. The common thread is simple: when the cut moves, the caramel moves with it. That’s the whole trick, and it’s worth seeing in a dozen different ways.
Why These 25 Caramel-Layered Looks Work So Well
-
Caramel gives the cut shape: The warm ribbons sit on top of the layers and make every bend, flip, and wave easier to see from across the room.
-
Long hair finally gets a job: Instead of hanging in one heavy curtain, the layers create movement from cheekbone to ends, which keeps the length from feeling static.
-
The grow-out is softer: Caramel highlights usually fade into a gentler root line than high-contrast blonde streaks, so you can stretch the time between salon visits.
-
You can tune the mood: The same base cut can read beachy, polished, edgy, or soft just by changing where the color lands and how much texture you add.
-
Lowlights make the caramel look richer: A few deeper pieces under the top layer stop the color from washing out and give long hair more depth than highlights alone.
-
It works with a lot of styling habits: Air-dried waves, a round-brush blowout, or a quick bend with a curling iron all show off these layers differently, which is half the fun.
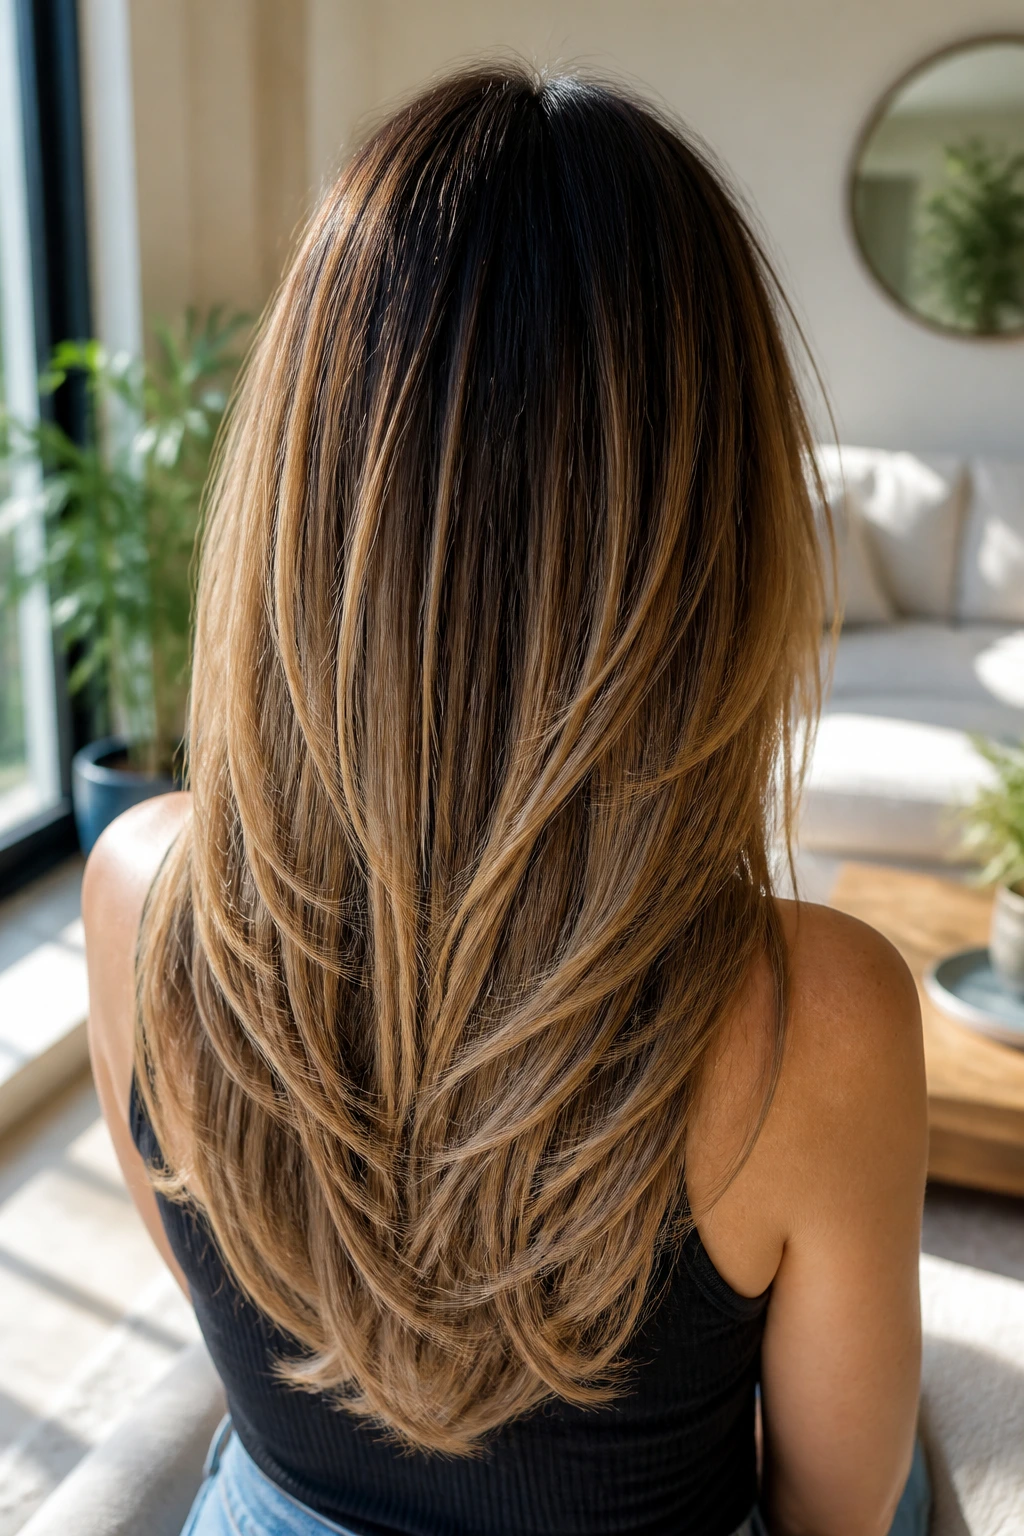
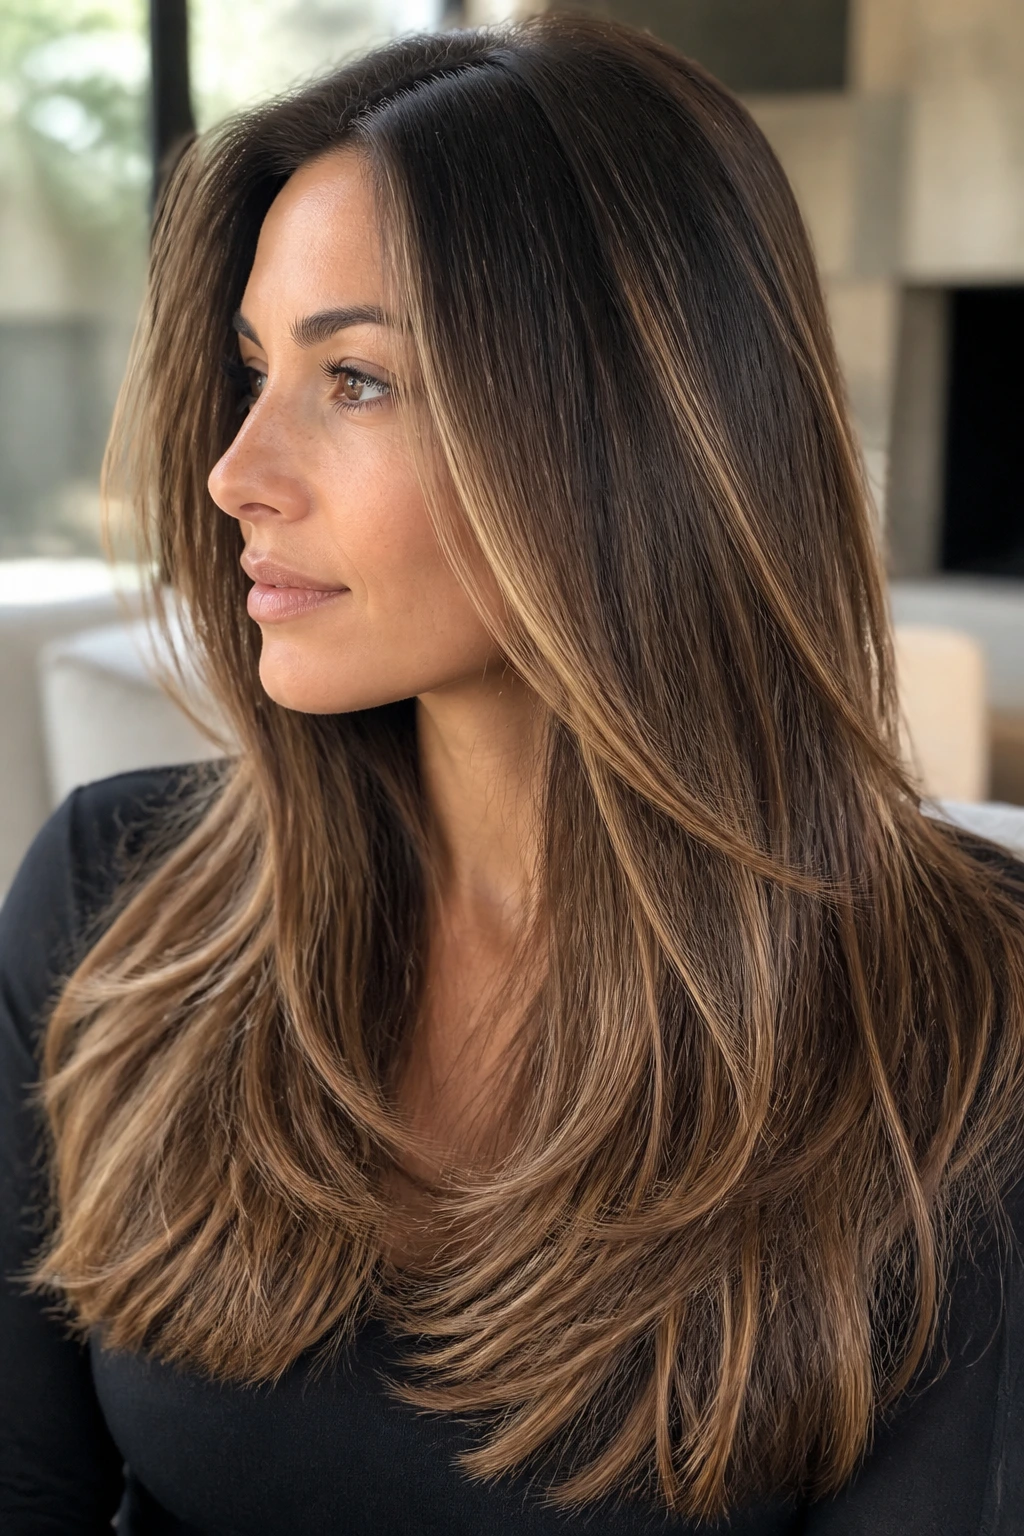
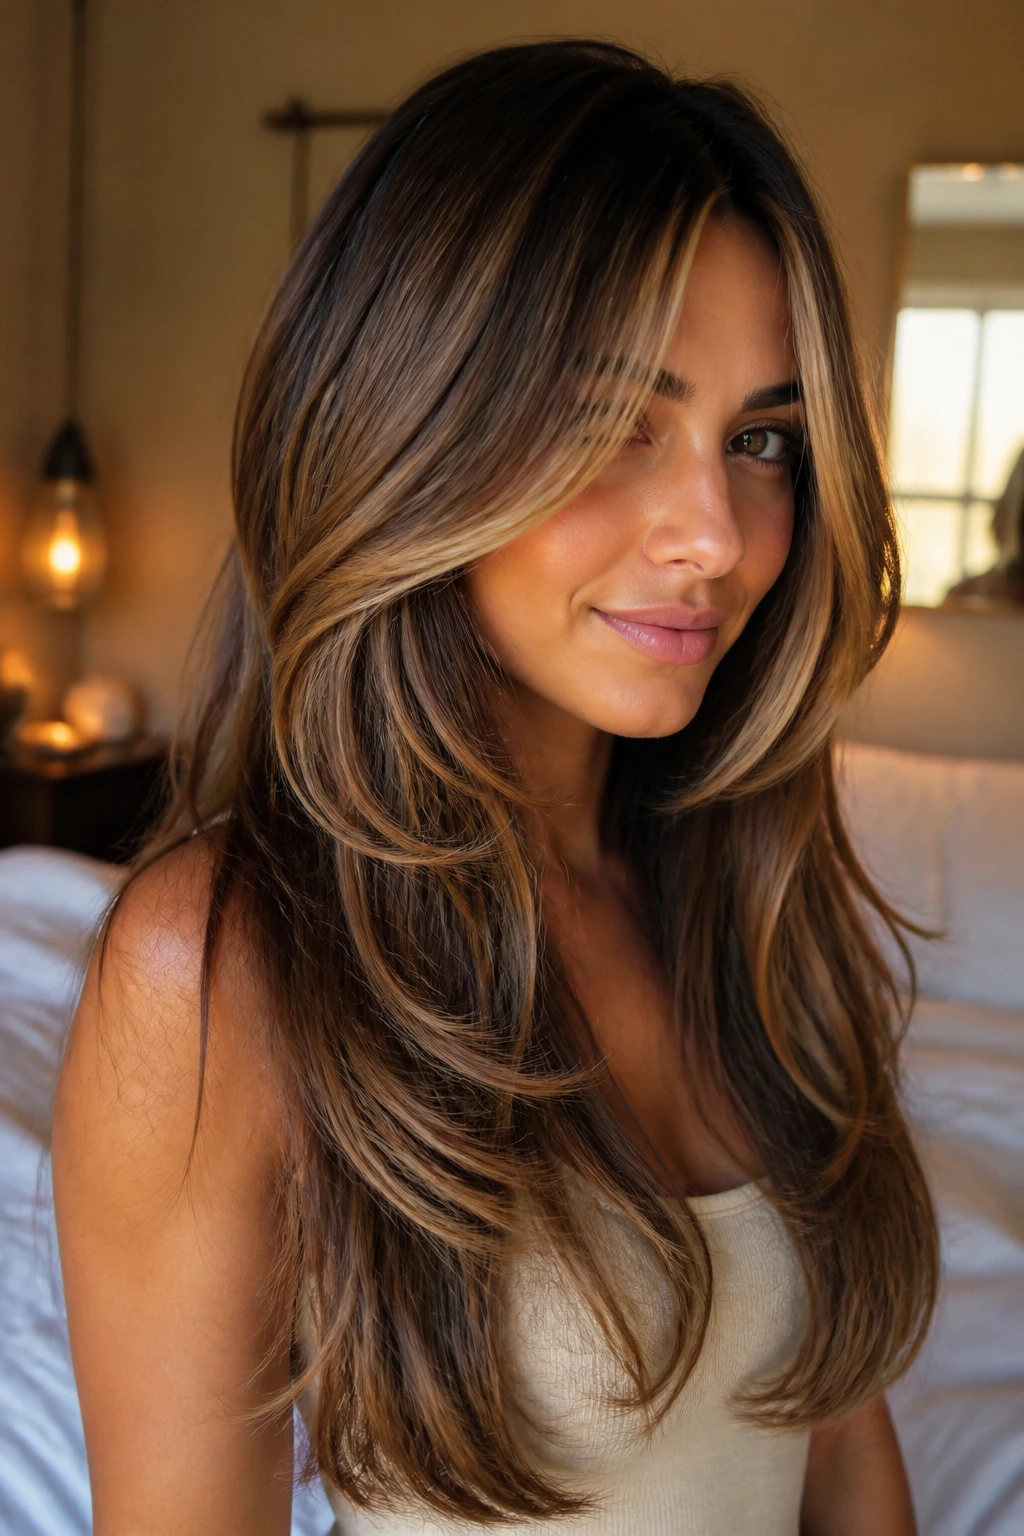
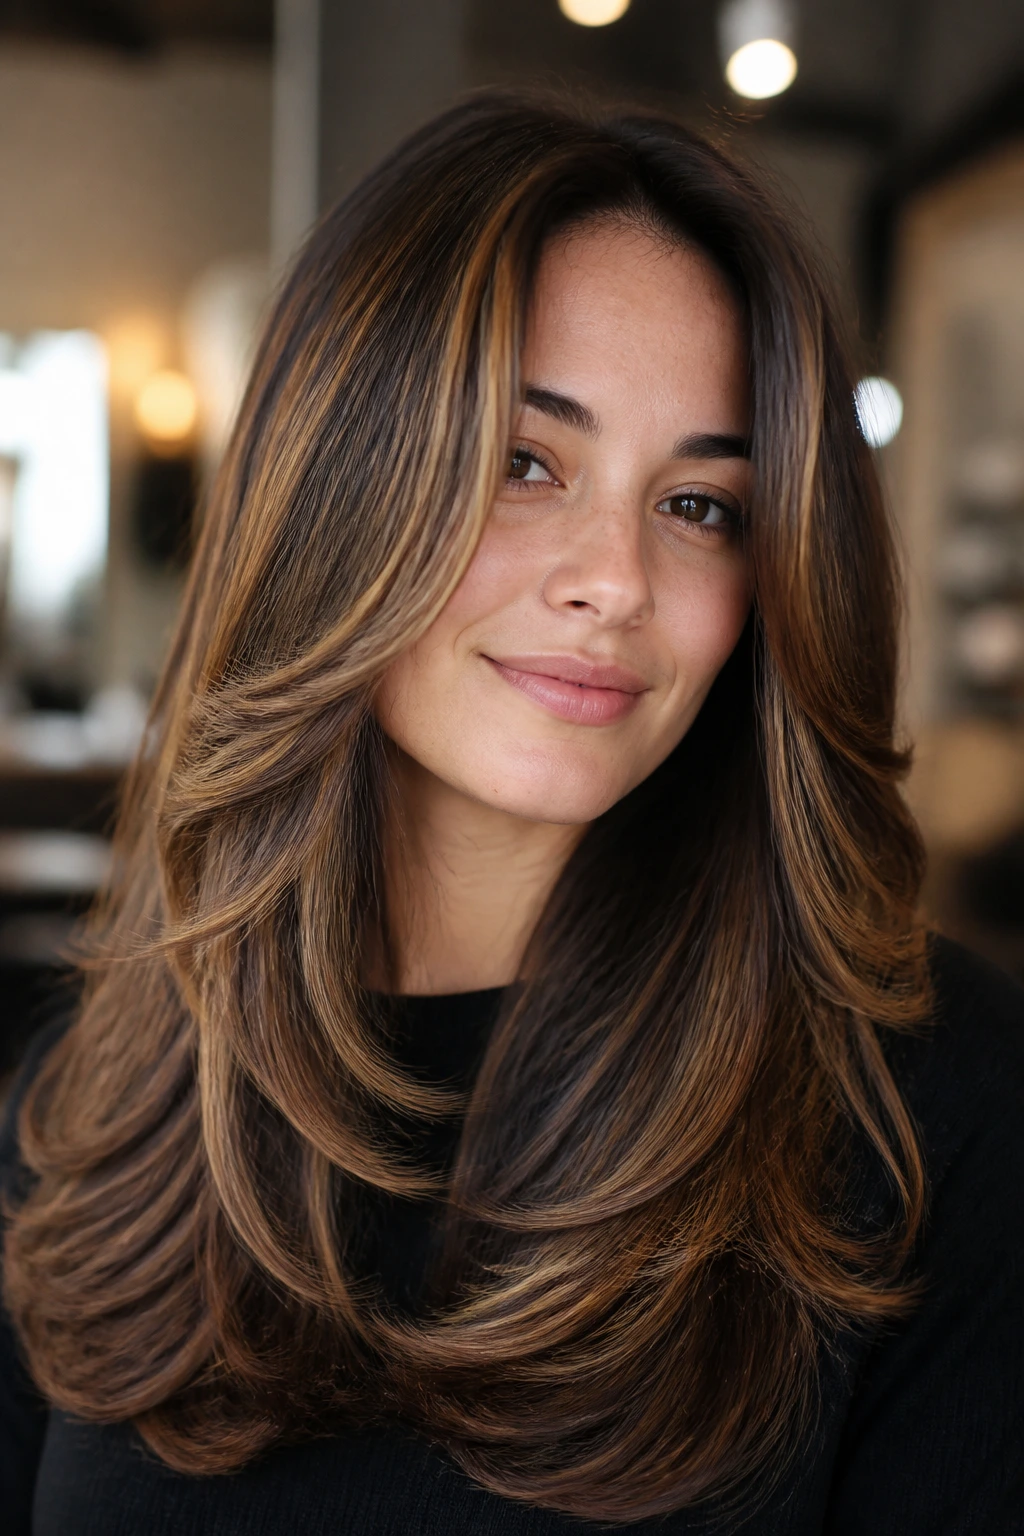
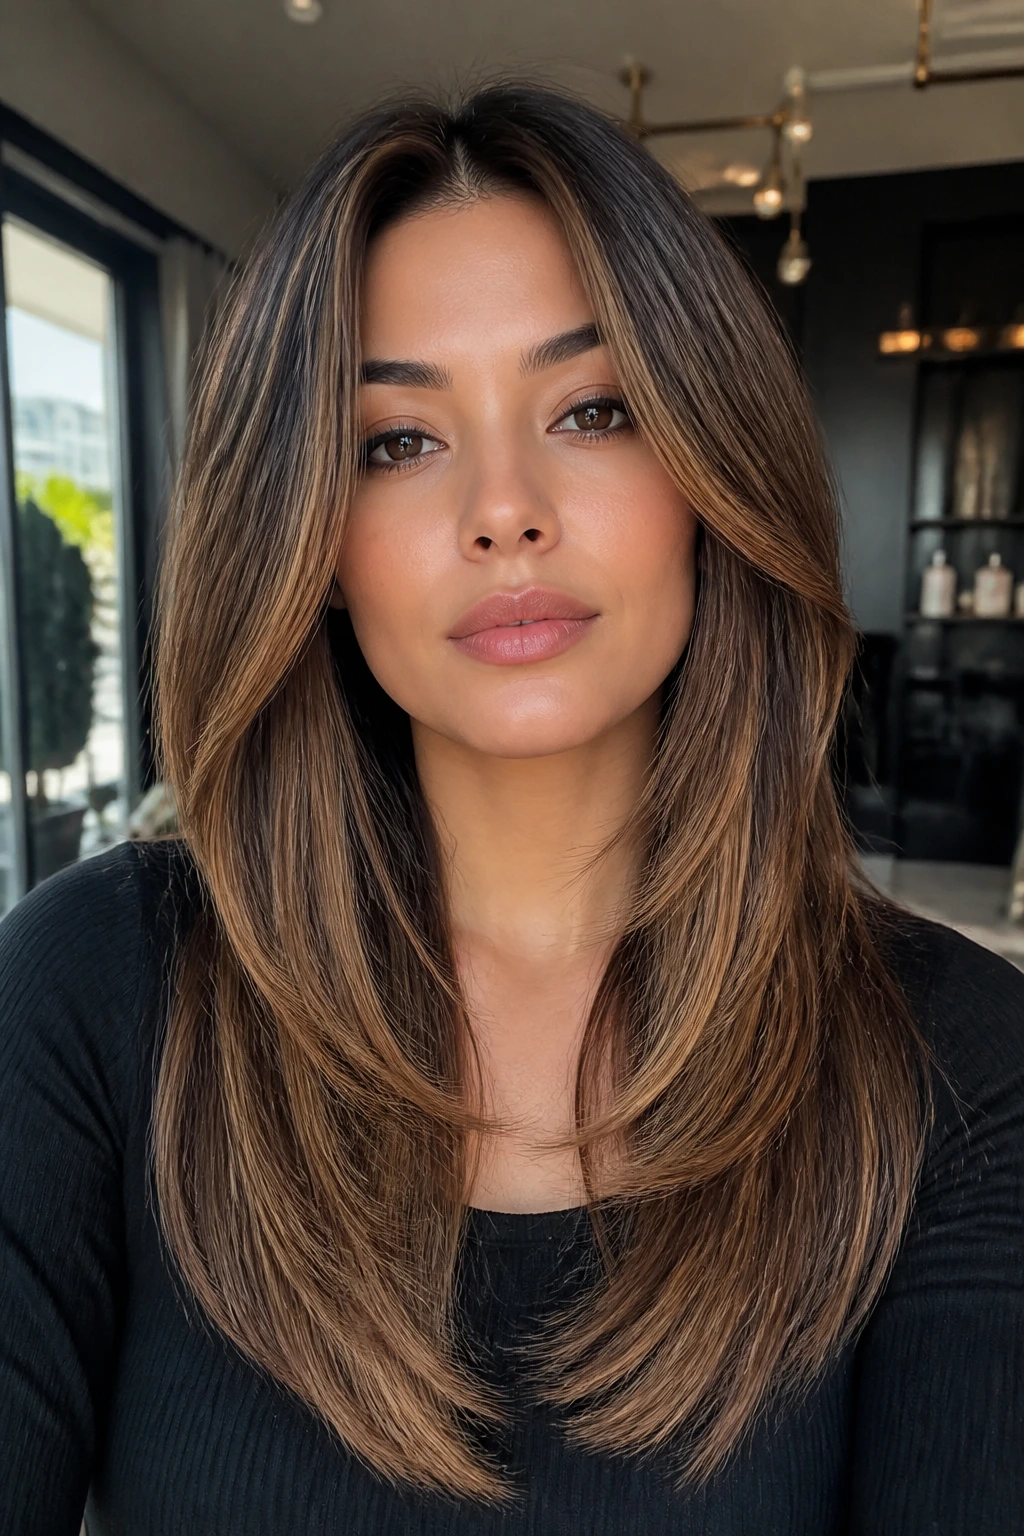
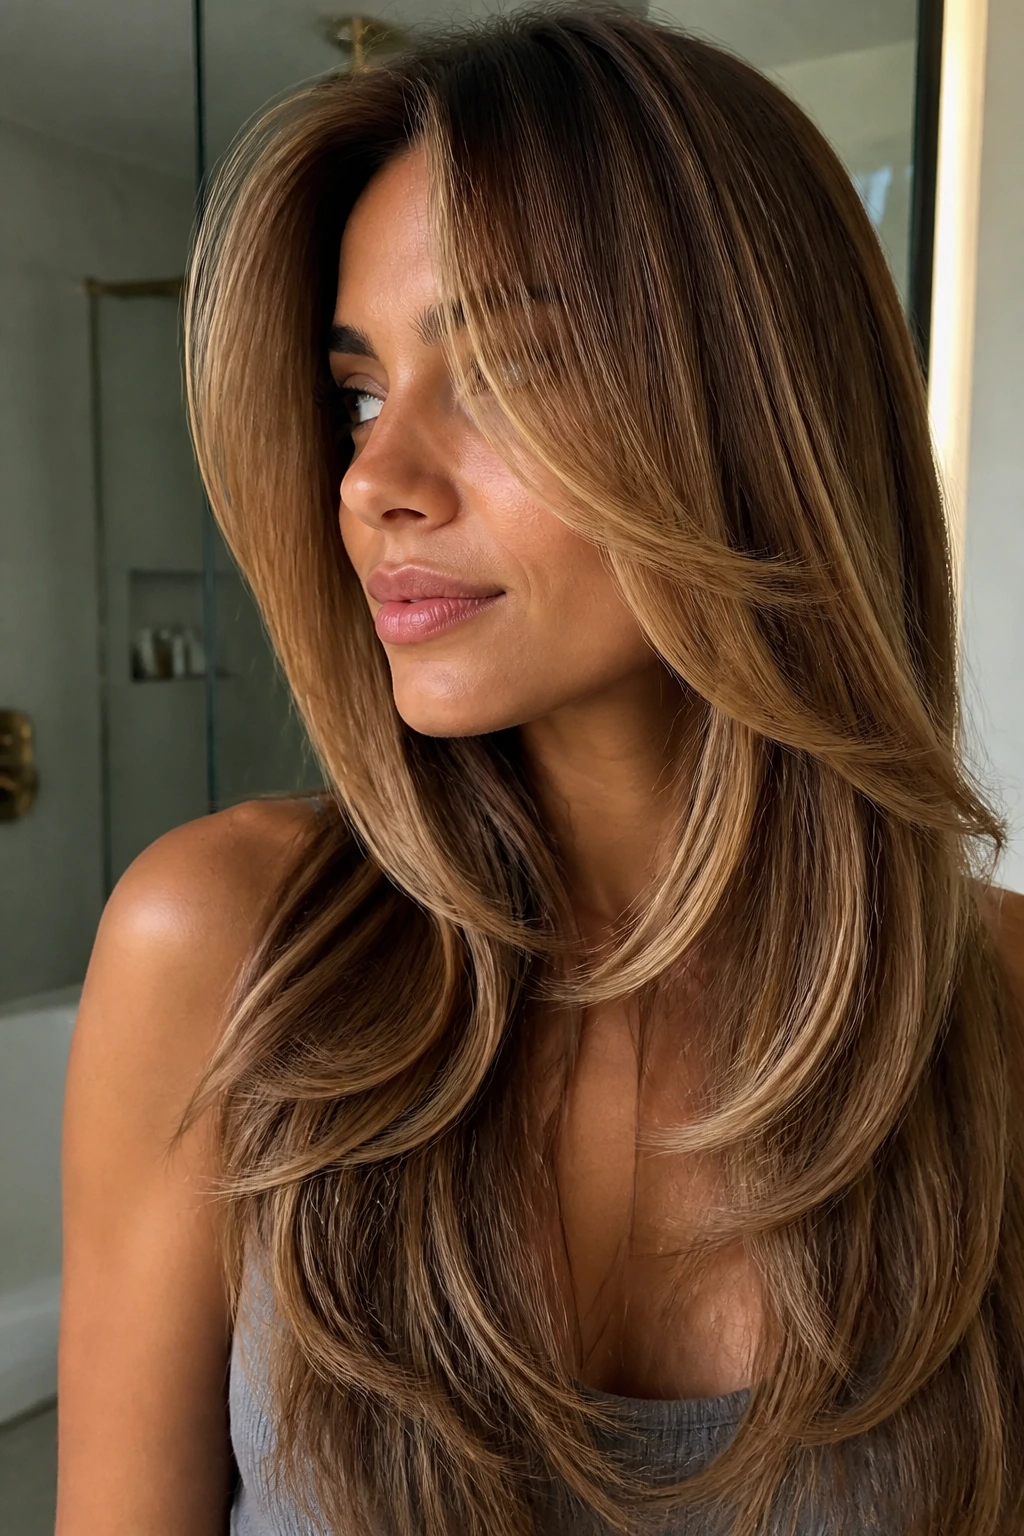
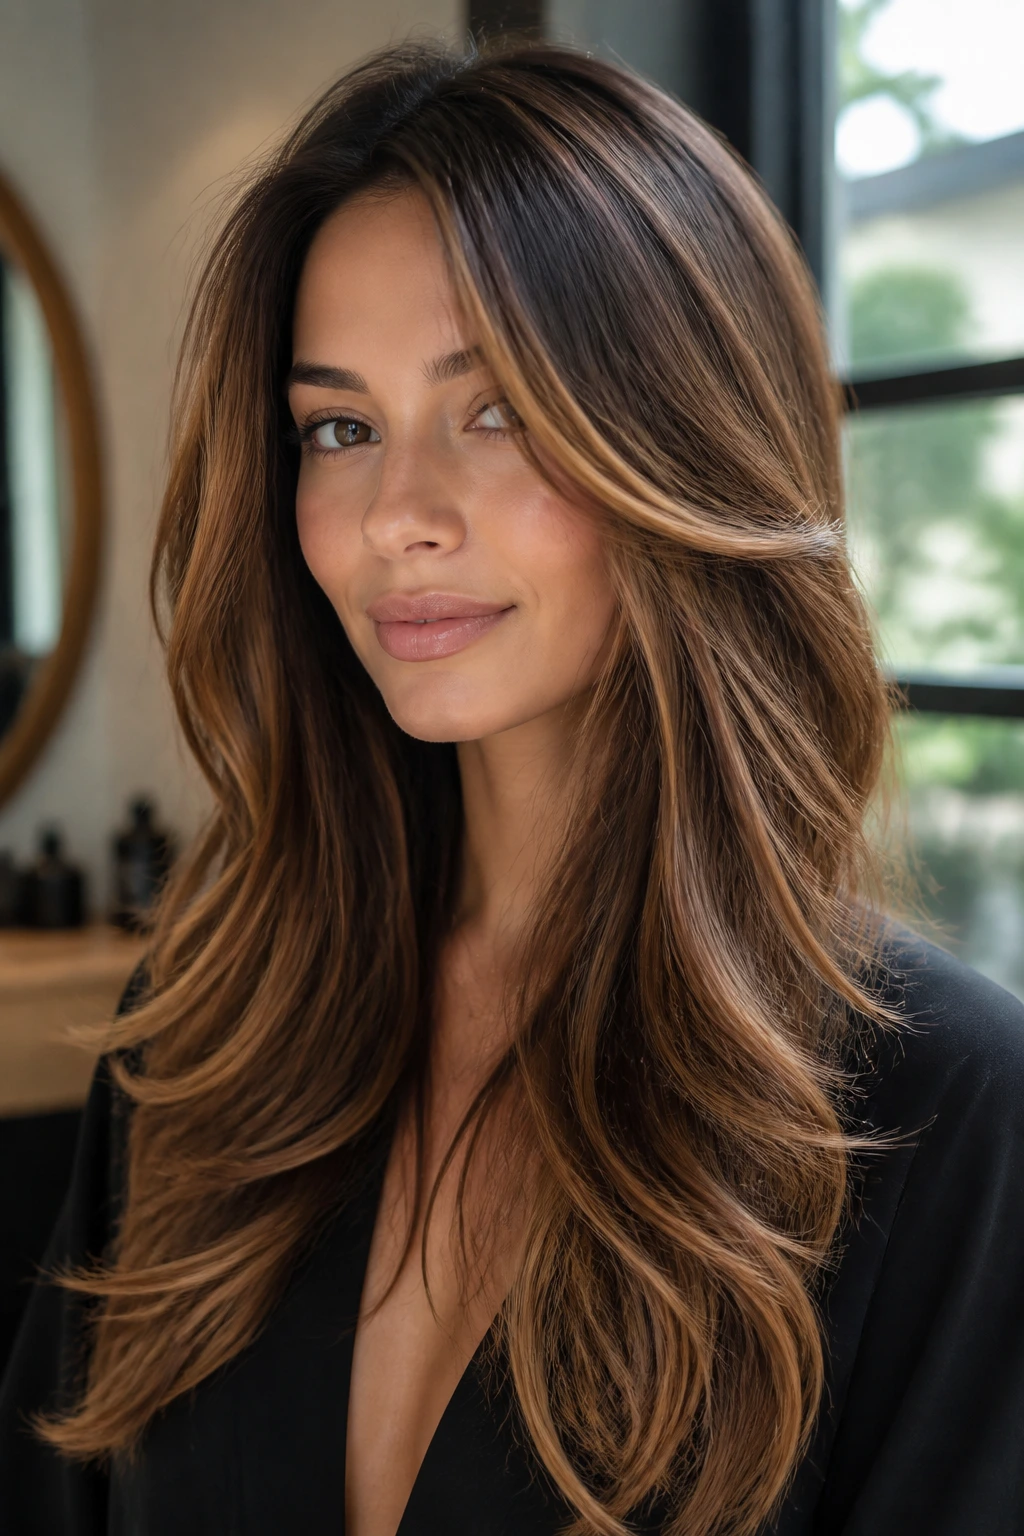
1. Feathered Face-Framing Layers with Caramel Ribbons
Feathered layers are the easiest place to see caramel doing real work. The shape starts around the cheekbones, then softens as it drops toward the collarbone, so the light pieces don’t just sit there — they follow the curve of the cut.
This version works best when the caramel is painted around the face and through the first two layers, not scattered everywhere. Too many bright streaks turn the feathering busy; just enough warmth gives the hair that lifted, airy swing people usually want from a long cut.
A round brush makes this look behave. Pull the front pieces away from the face, let the ends bend under slightly, and the caramel will catch on every turn instead of disappearing into the length.
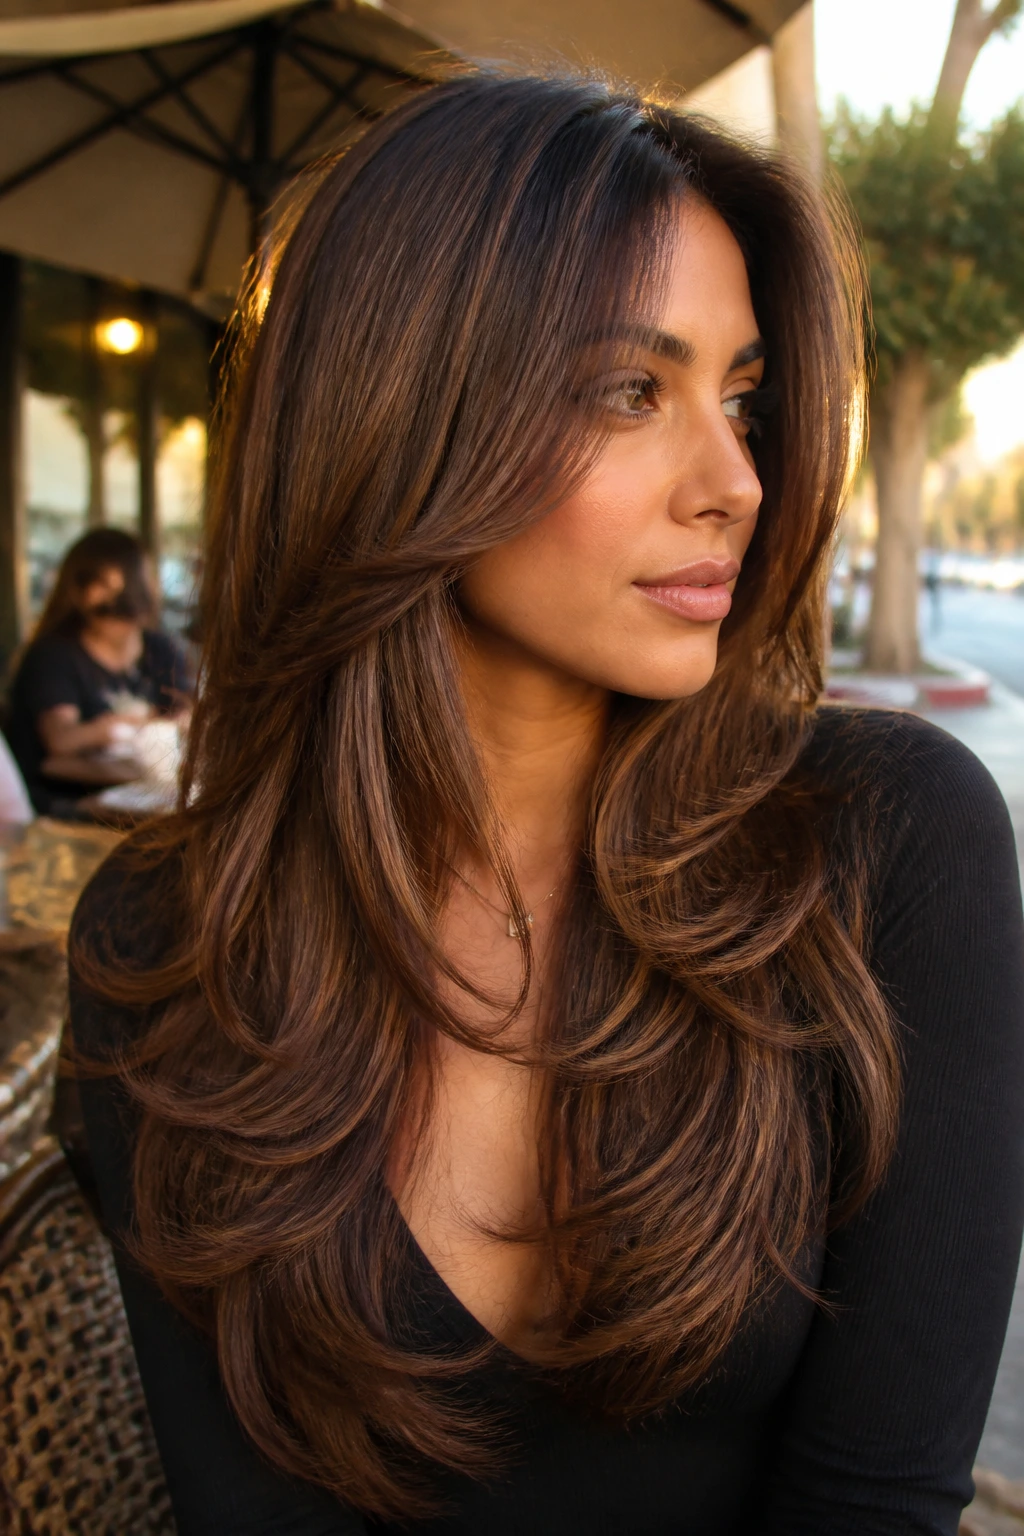
2. Butterfly Cut with Honey-Caramel Ends
Why does the butterfly cut keep showing up on long hair? Because it gives you the feeling of shorter layers without sacrificing the length everyone came for. The top section sits high and light, while the bottom stays long and full, which makes it a very practical illusion.
Honey-caramel ends suit this shape because they lighten the lower half just enough to keep the bottom from looking dense. Ask for the shortest face-framing pieces to land around cheek level, then keep the back long enough to show a clean cascade.
Blow it out and the difference between the two layer zones becomes obvious in the best way. Air-dry it, and the same cut still reads soft because the caramel at the ends keeps the whole style from sinking visually.
3. U-Shaped Long Layers and Soft Caramel Balayage
A U-shape sounds plain until the ends swing. The rounded perimeter makes long hair feel smoother than a sharp V, and soft caramel balayage keeps that curve visible without turning the style stripey.
This is one of my favorite cuts for thick hair that wants to fall in one heavy block. The U gives the silhouette a gentler edge, and the balayage can be focused through the midlengths and outer ends so the shape feels lighter every time the hair moves.
If you wear a center part, this cut gets even better. The two sides mirror each other, the caramel shows up in a soft arc, and the whole thing looks calm instead of overworked.
4. V-Cut Layers with Dark Caramel Depth
A V-cut is sharper, and that’s the whole appeal. The back tapers into a point, the front pieces stay longer, and the shape gives you a dramatic line that looks especially good when the hair falls over a coat or sweater.
Dark caramel lowlights are the detail that keeps this cut from looking thin at the point. The deeper pieces add weight through the middle, so the V still feels full instead of stringy when the ends separate.
This style likes a little bend through the lengths. A 1.25-inch iron or a big round brush will make the shape read from root to tip, and the caramel highlights will trace the outline instead of sitting flat on top of it.
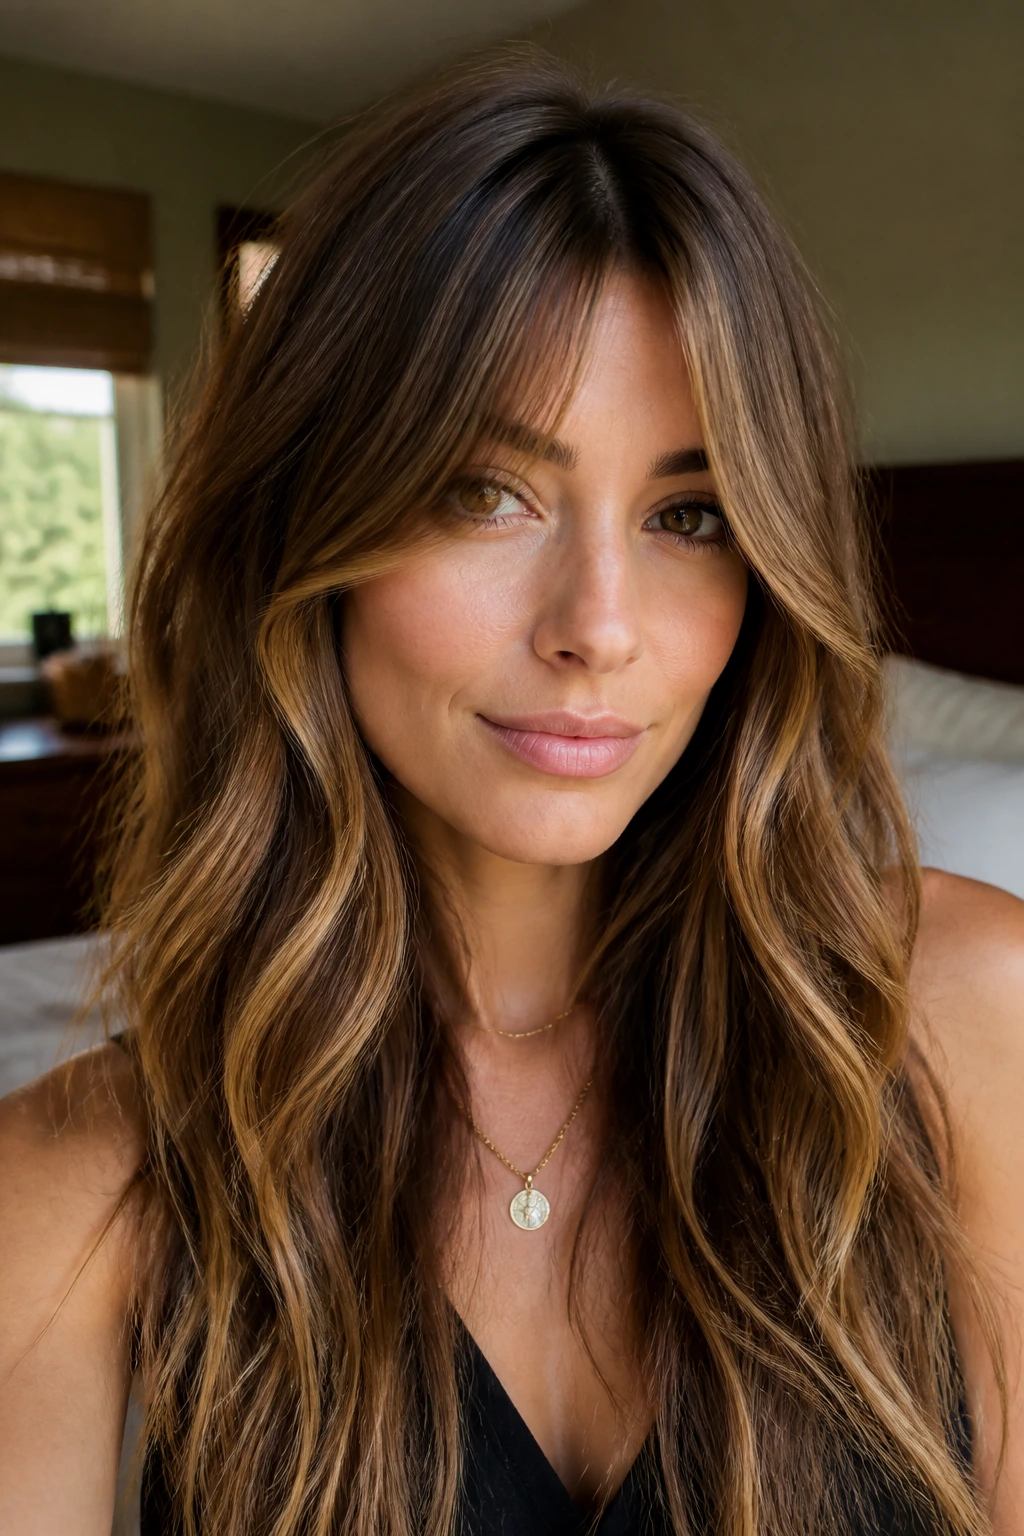
5. Curtain Bangs and Long Layers with Caramel Money Pieces
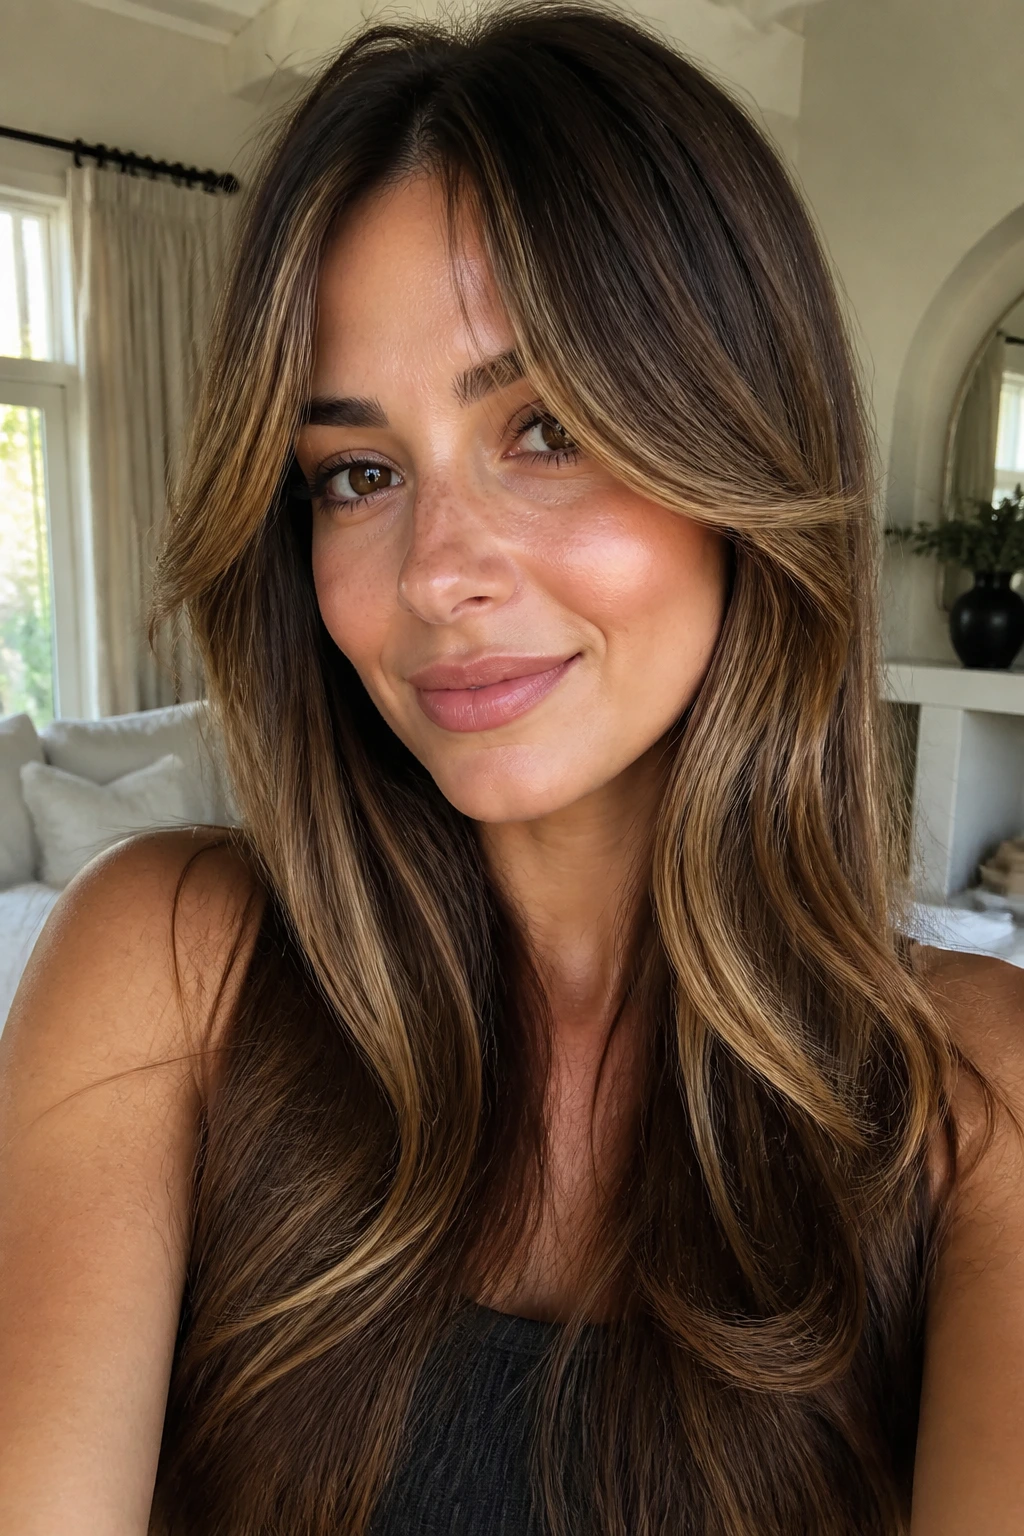
Curtain bangs can feel fussy, but on long hair they solve a problem: too much length around the face. They split easily, sit softly at the temples, and make a long cut feel less severe before you even touch the rest of the hair.
The money piece should be warm, not stripey. I like caramel that starts at the temples and blends into the first long layer, because it keeps the front bright without screaming for attention every time you move.
This is the kind of look that gets better with a quick blow-dry and a round brush at the front. Turn the bangs away from the face, let the layers fall in a soft curve, and you’ll get a frame that feels lived-in rather than styled to death.
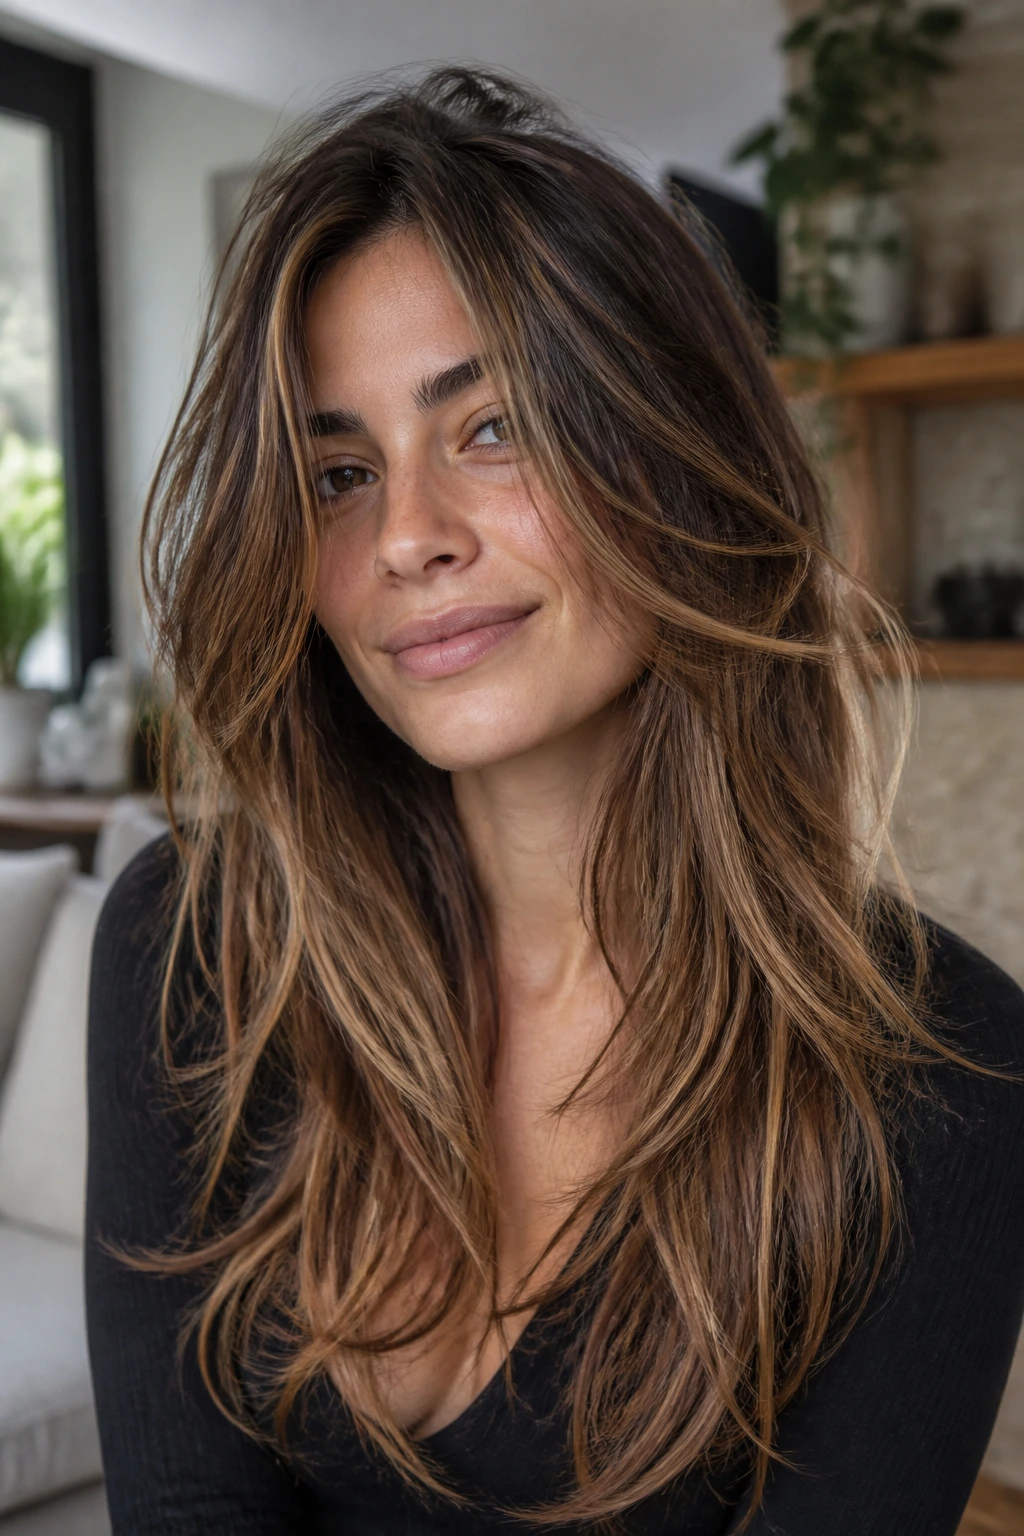
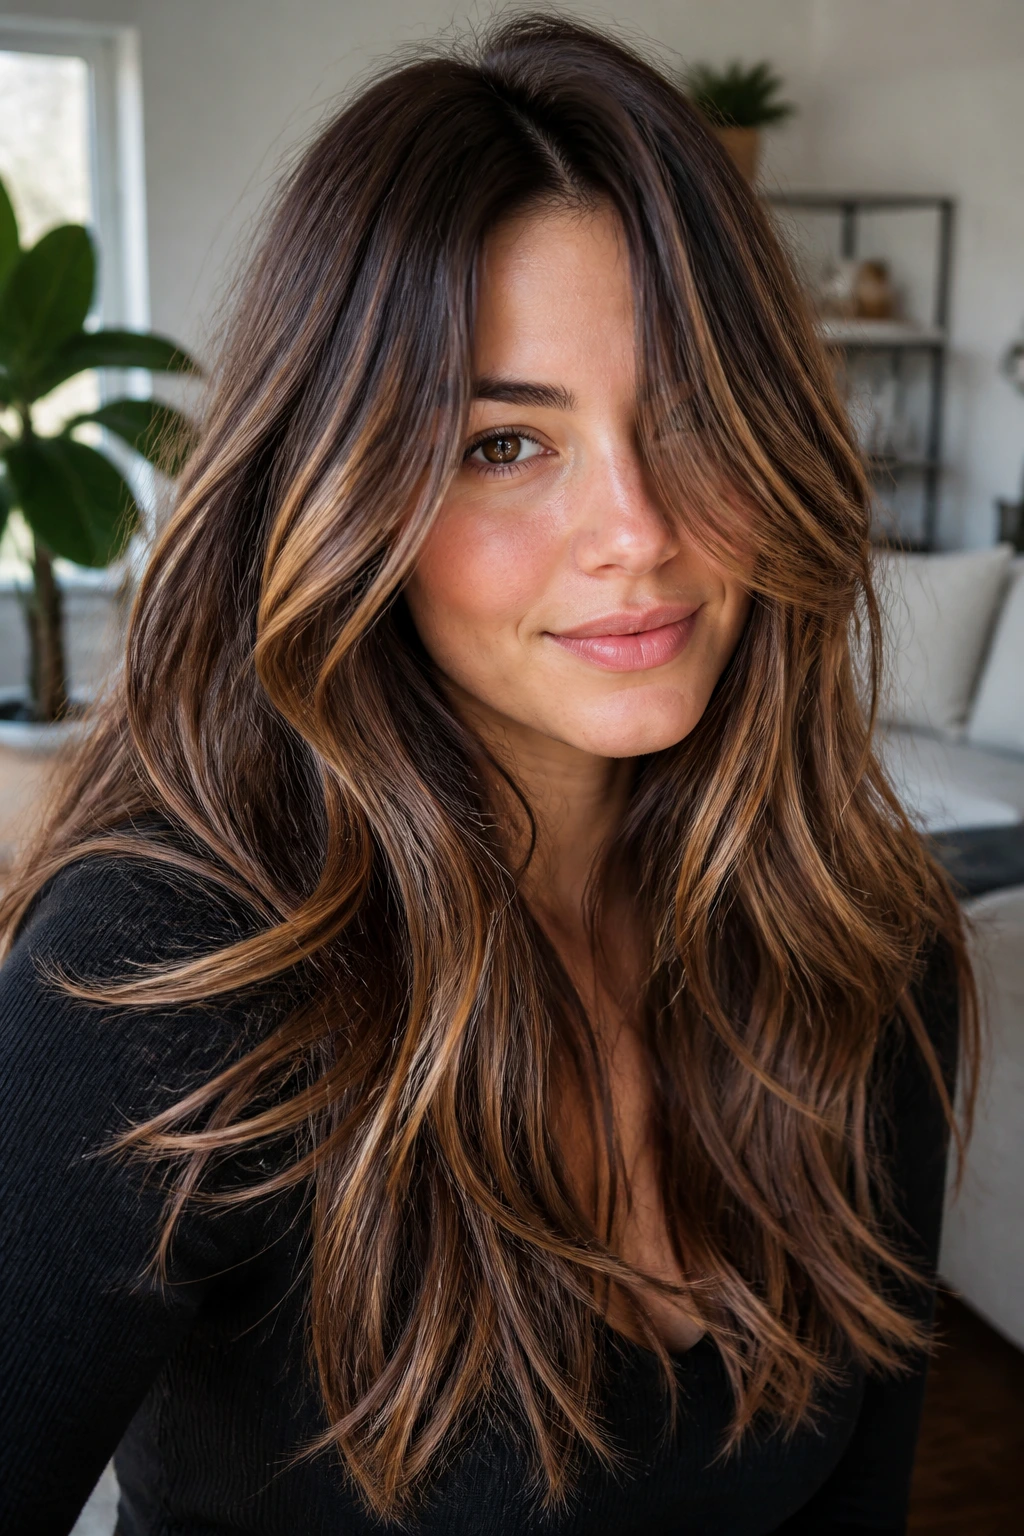
6. Soft Shag Layers with Toasted Caramel Highlights
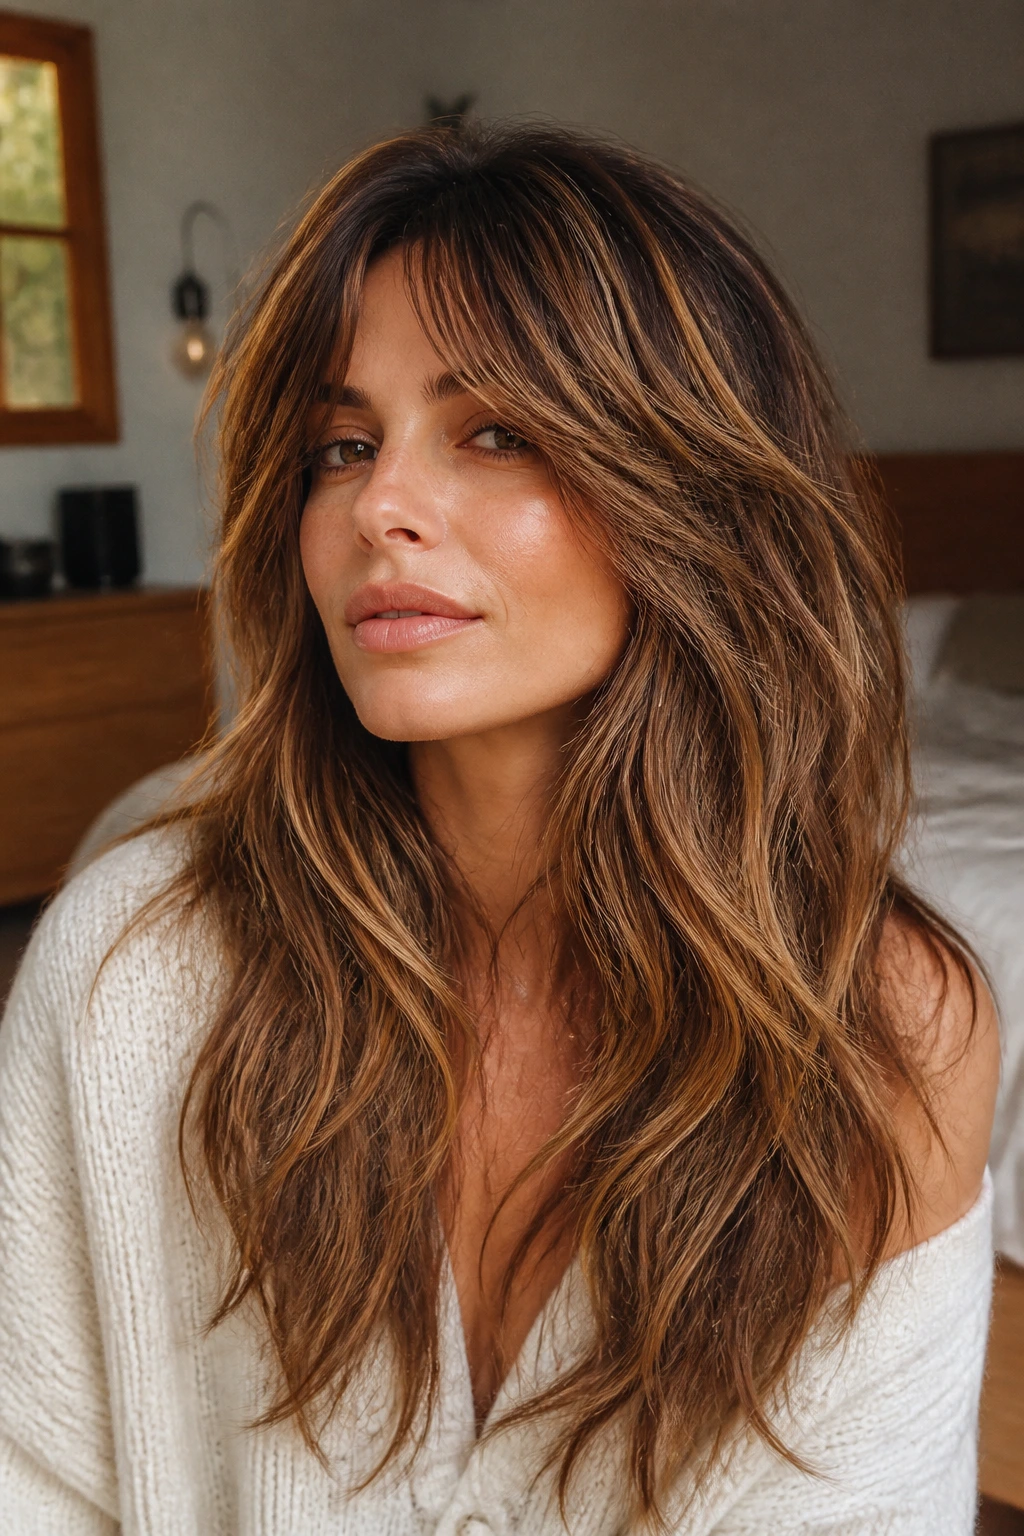
Soft shags like a little mess. The layers are broken up, the ends are piecey, and the caramel highlights should look like they were scattered by hand rather than painted in neat stripes.
Toasted caramel works well here because it gives the haircut some warmth without flattening the texture. Put brighter pieces around the crown and face, then leave a few deeper lowlights underneath so the shape doesn’t turn into one bright cloud.
This cut is happiest with a rough finish. A little texture spray at the midlengths, a quick scrunch, and a finger-combed fringe are enough to bring out the shape. It should look slightly imperfect. That’s the point.
7. Invisible Layers for Fine Long Hair
Fine hair needs a different trick. Too many short layers and it starts looking wispy at the ends, which is exactly what most people are trying to avoid when they keep their hair long.
Invisible layers solve that by cutting movement inside the haircut instead of carving the perimeter to bits. Caramel highlights stay mostly on the outer canopy and front pieces, so the color adds dimension without making the hair look thinner than it is.
This is a smart choice if you like smooth hair and do not want the ends to explode outward. Keep the layers long, keep the highlight placement soft, and let the cut do the quiet work.
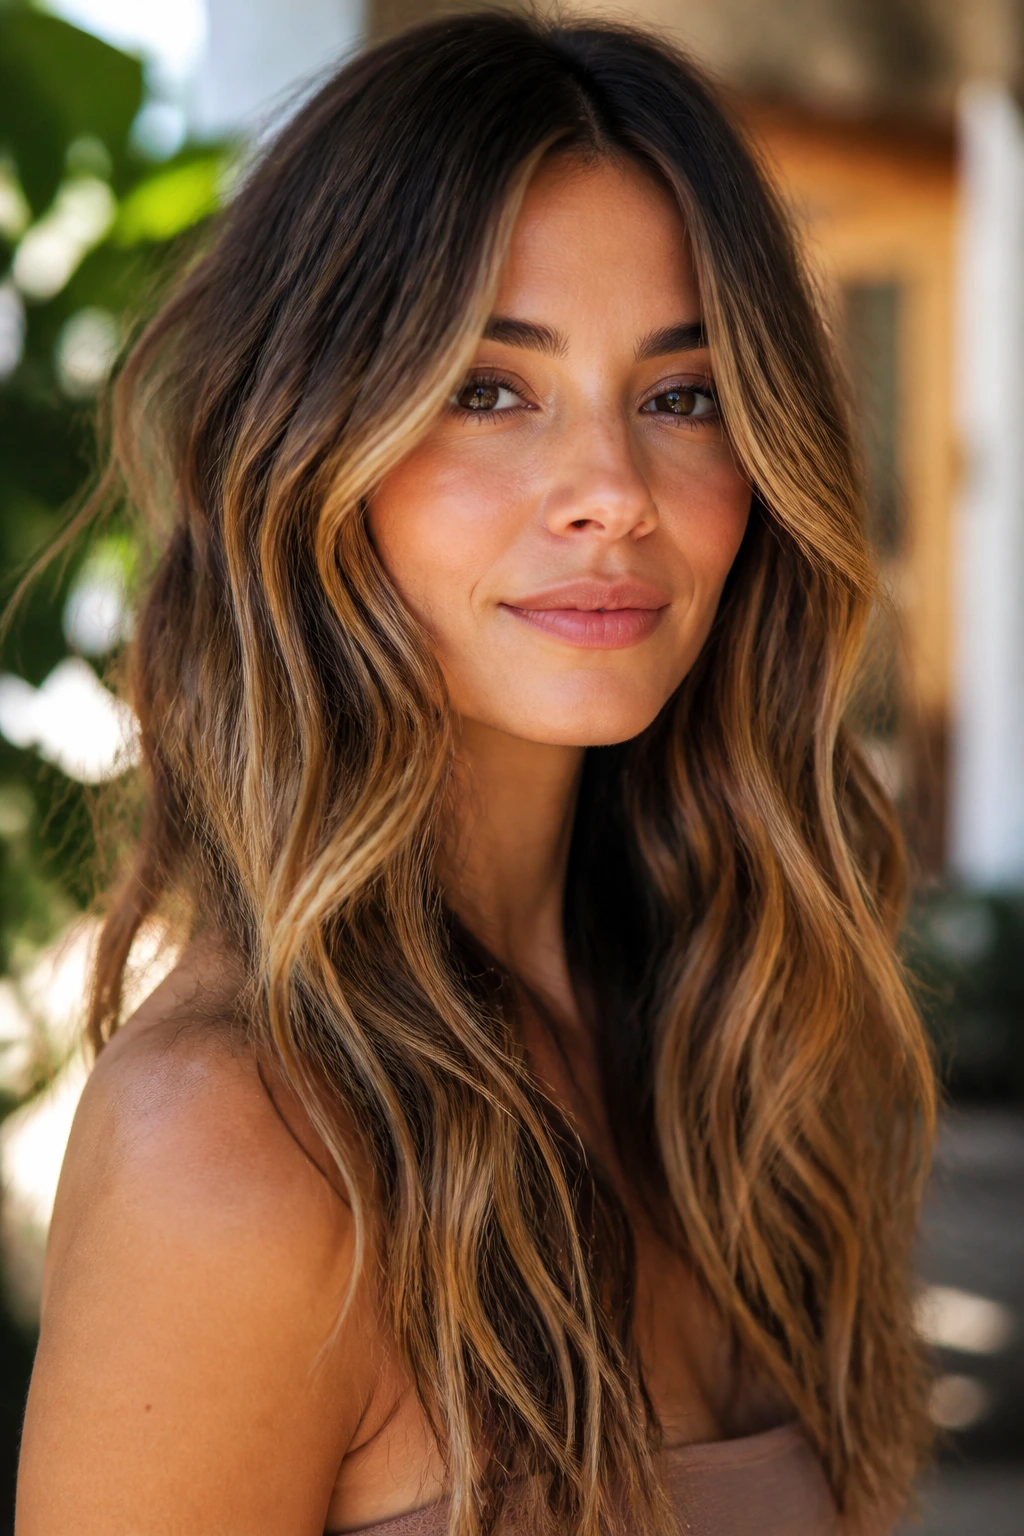
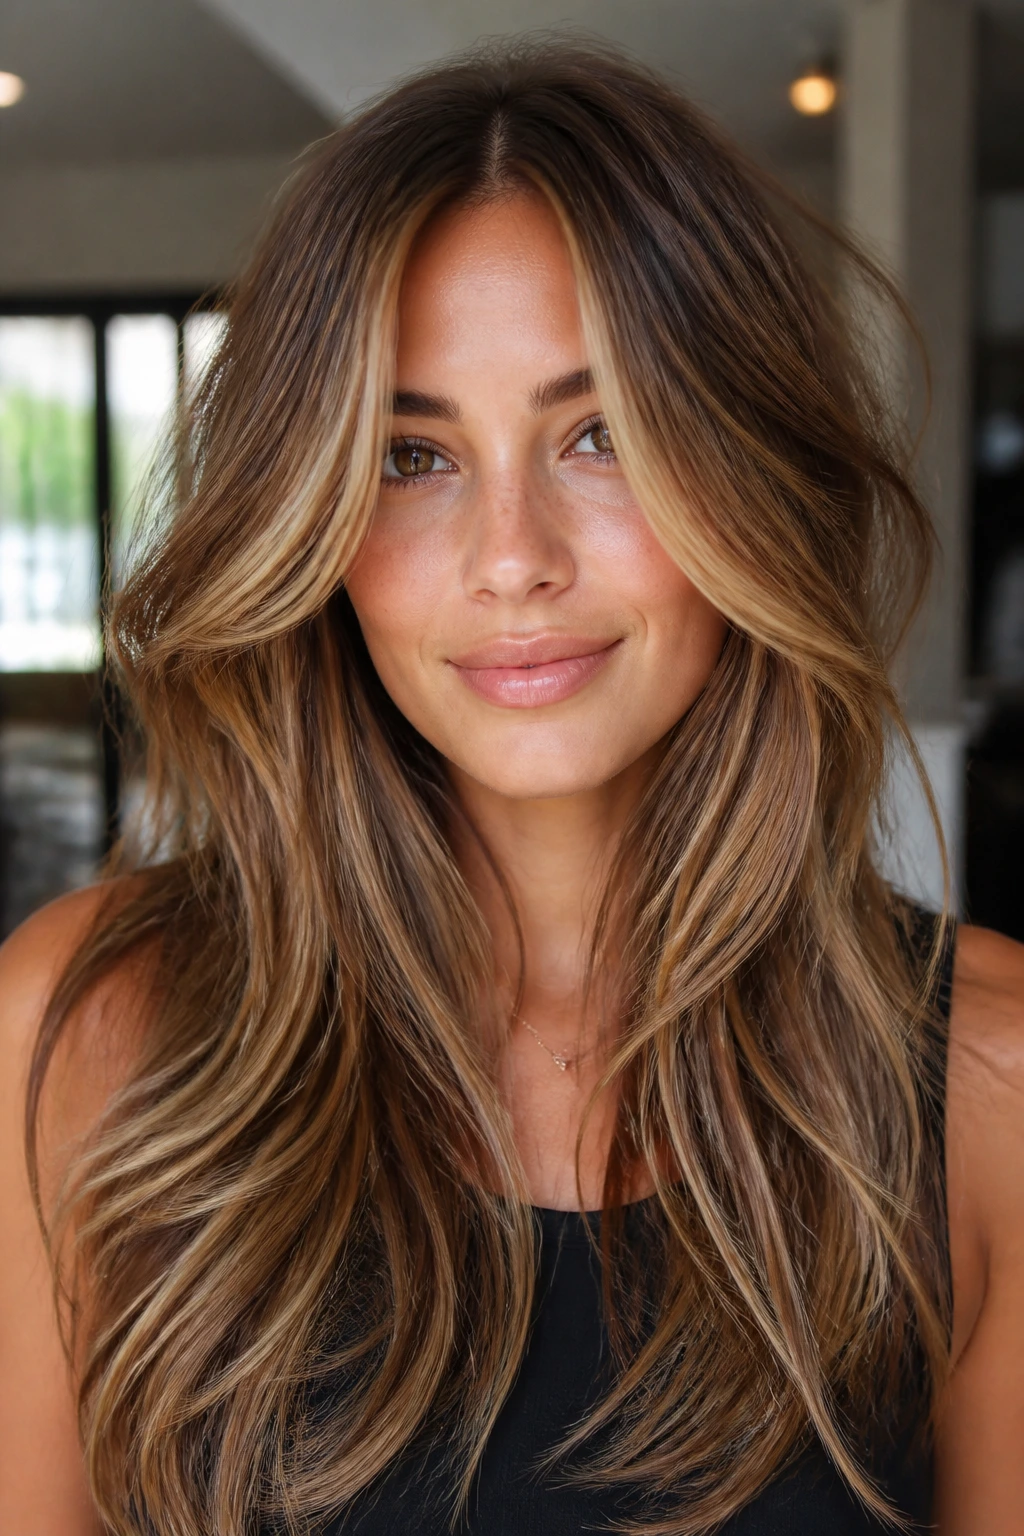
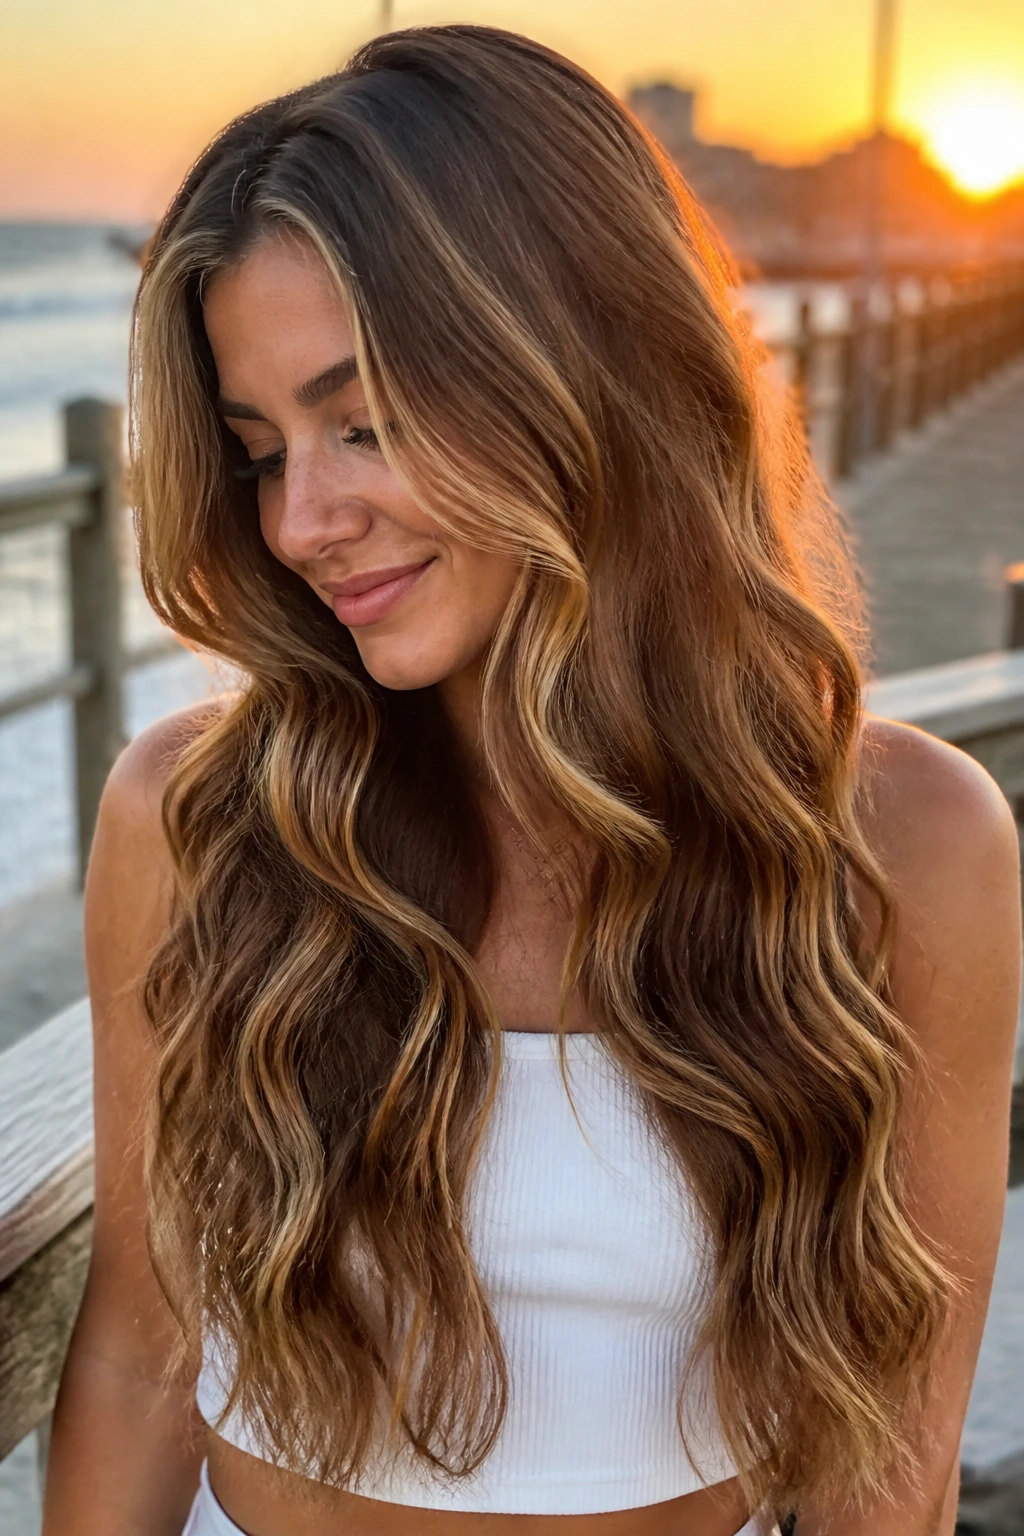
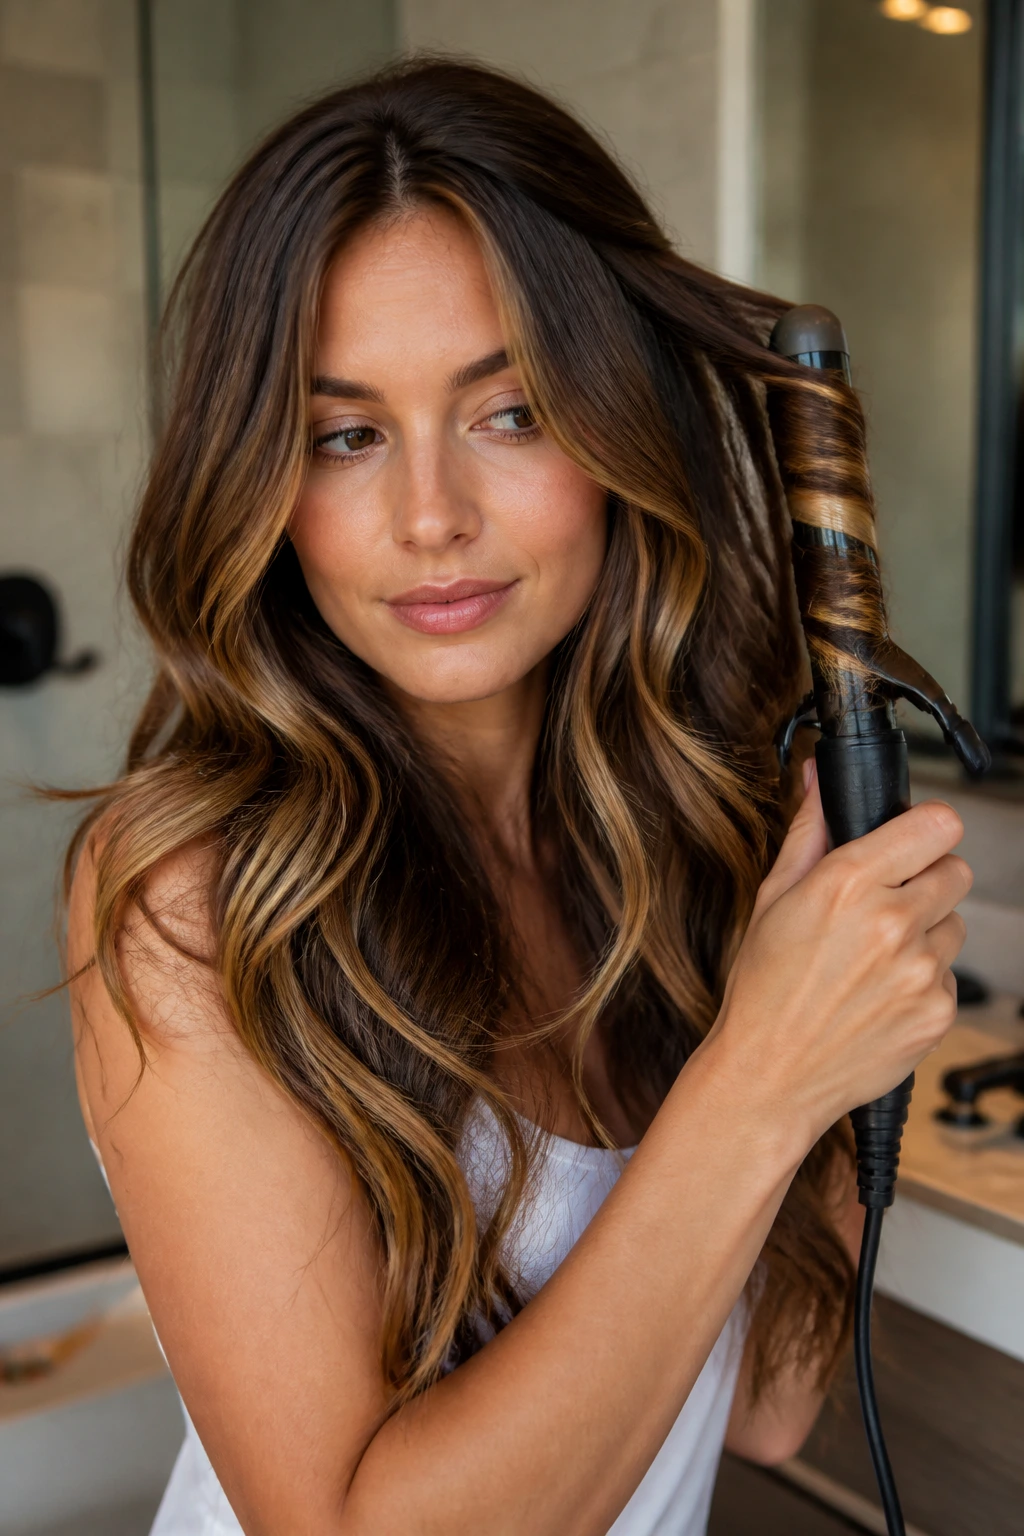
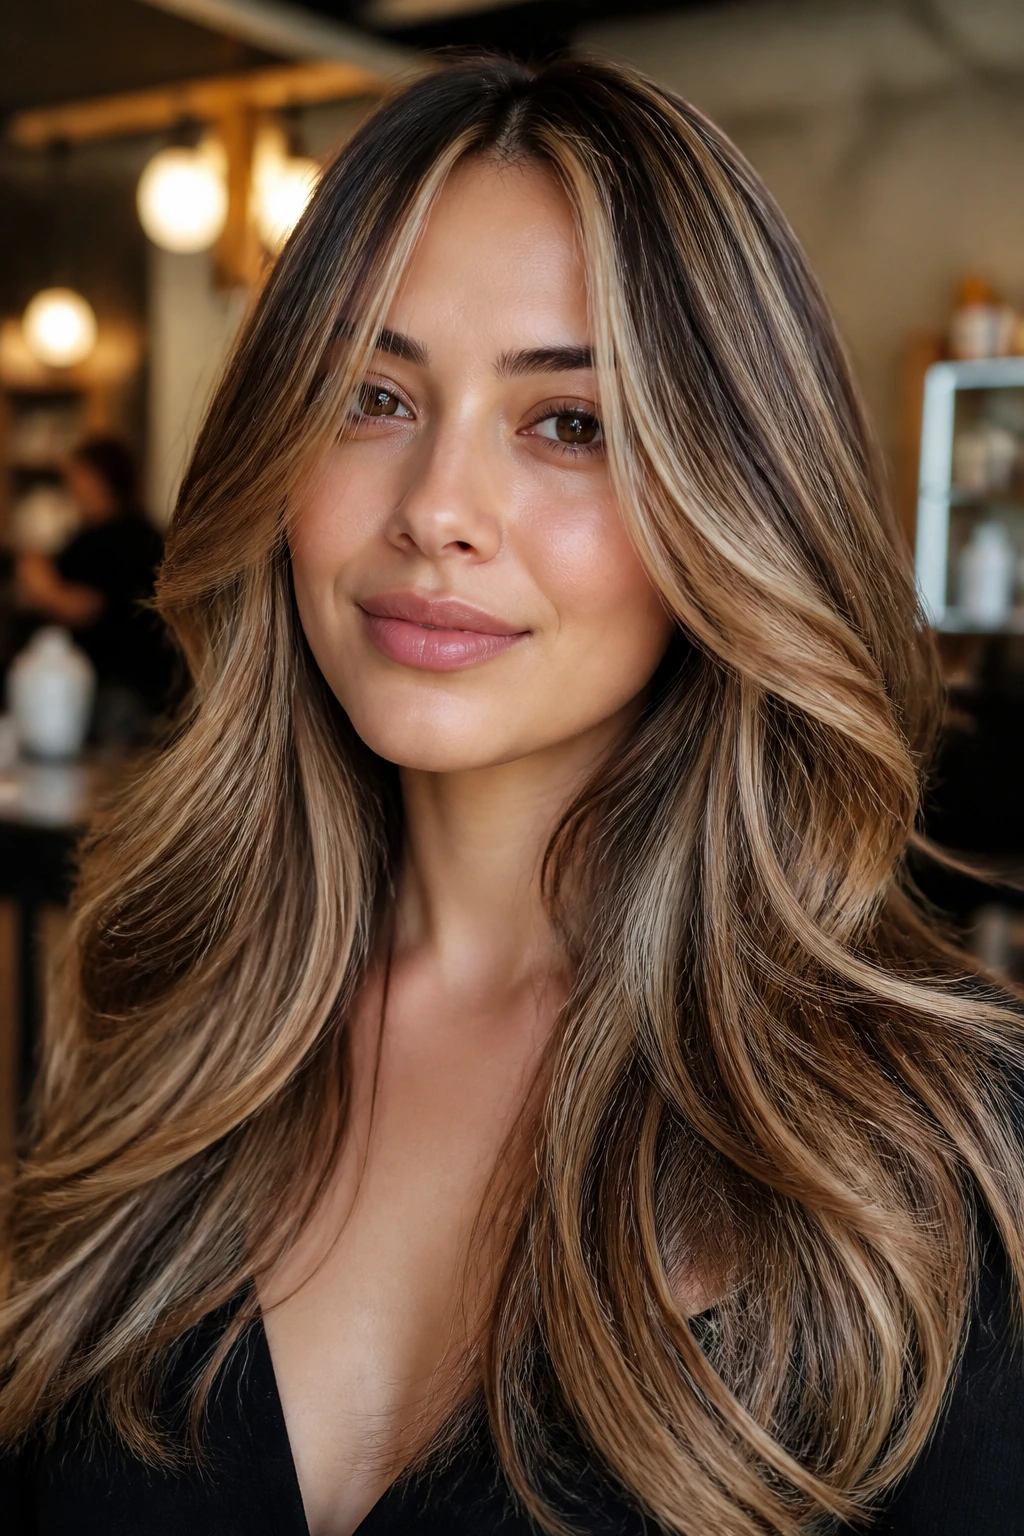
8. Beach Waves with Ribboned Caramel Highlights
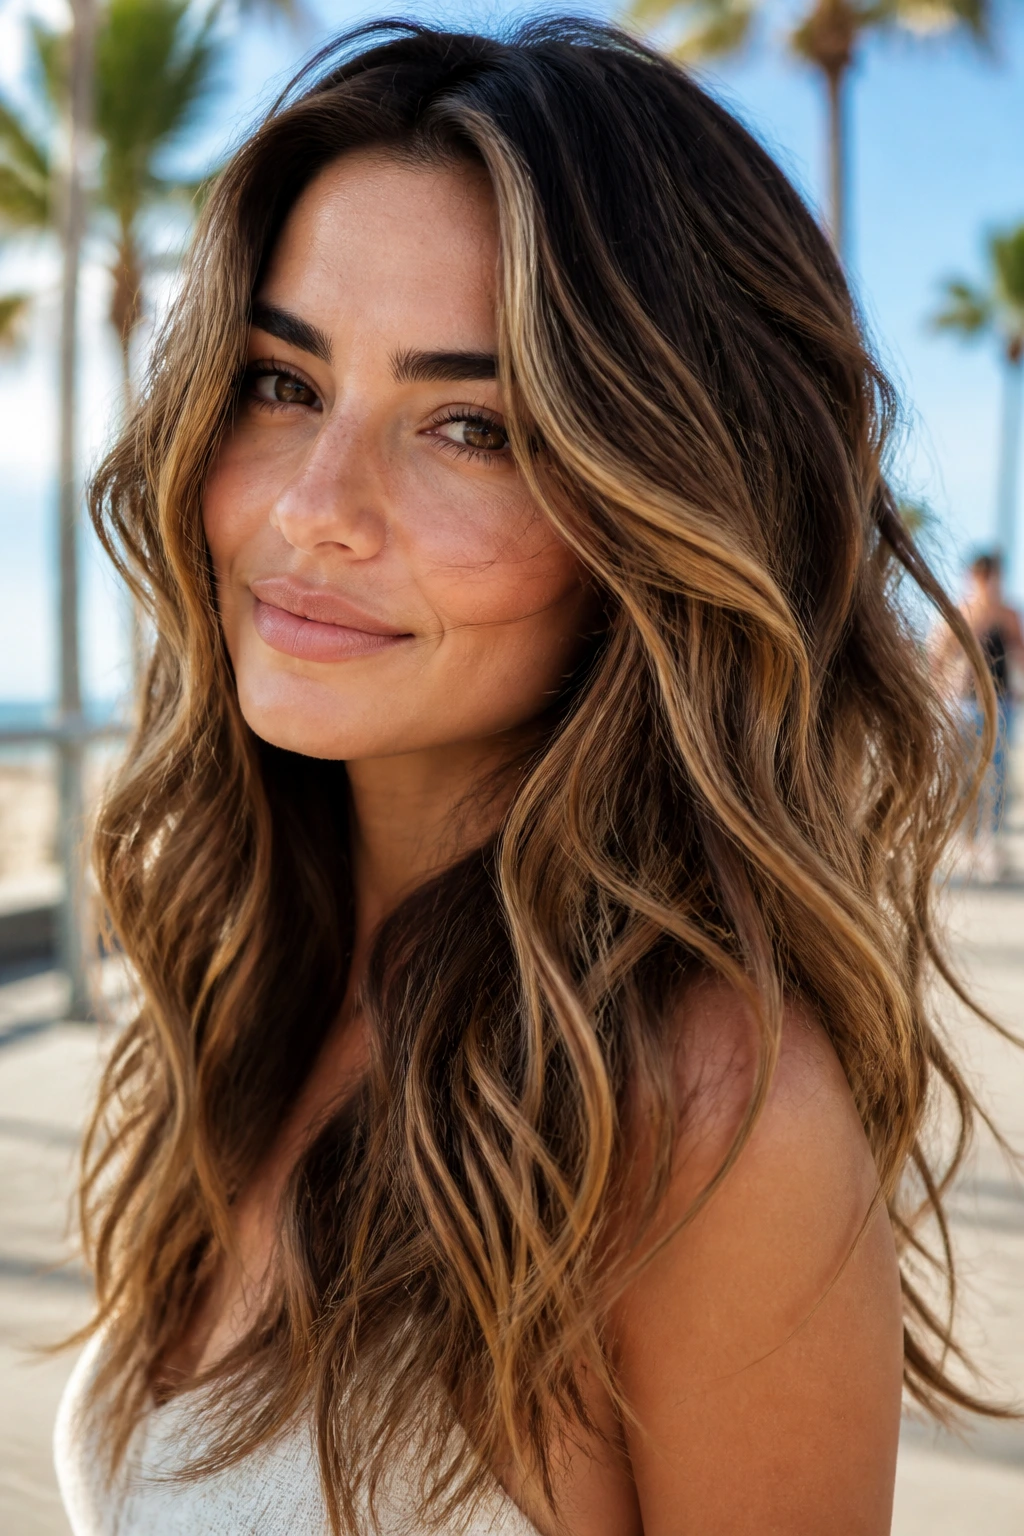
Beach waves get flatter than they should when the color is too uniform. Ribboned caramel highlights fix that by following the bends of the wave instead of sitting in one rigid line.
The best version of this style uses wider highlight sections through the midlengths and thinner pieces near the face. That mix gives the waves something to break around, which makes the hair look fuller even when the layers are soft.
A curling iron is only half the story. Wrap sections away from the face, leave the ends out on a few pieces, and mist lightly with texture spray once the hair cools. If the waves all land in one direction, the caramel looks forced. A little variety keeps it alive.
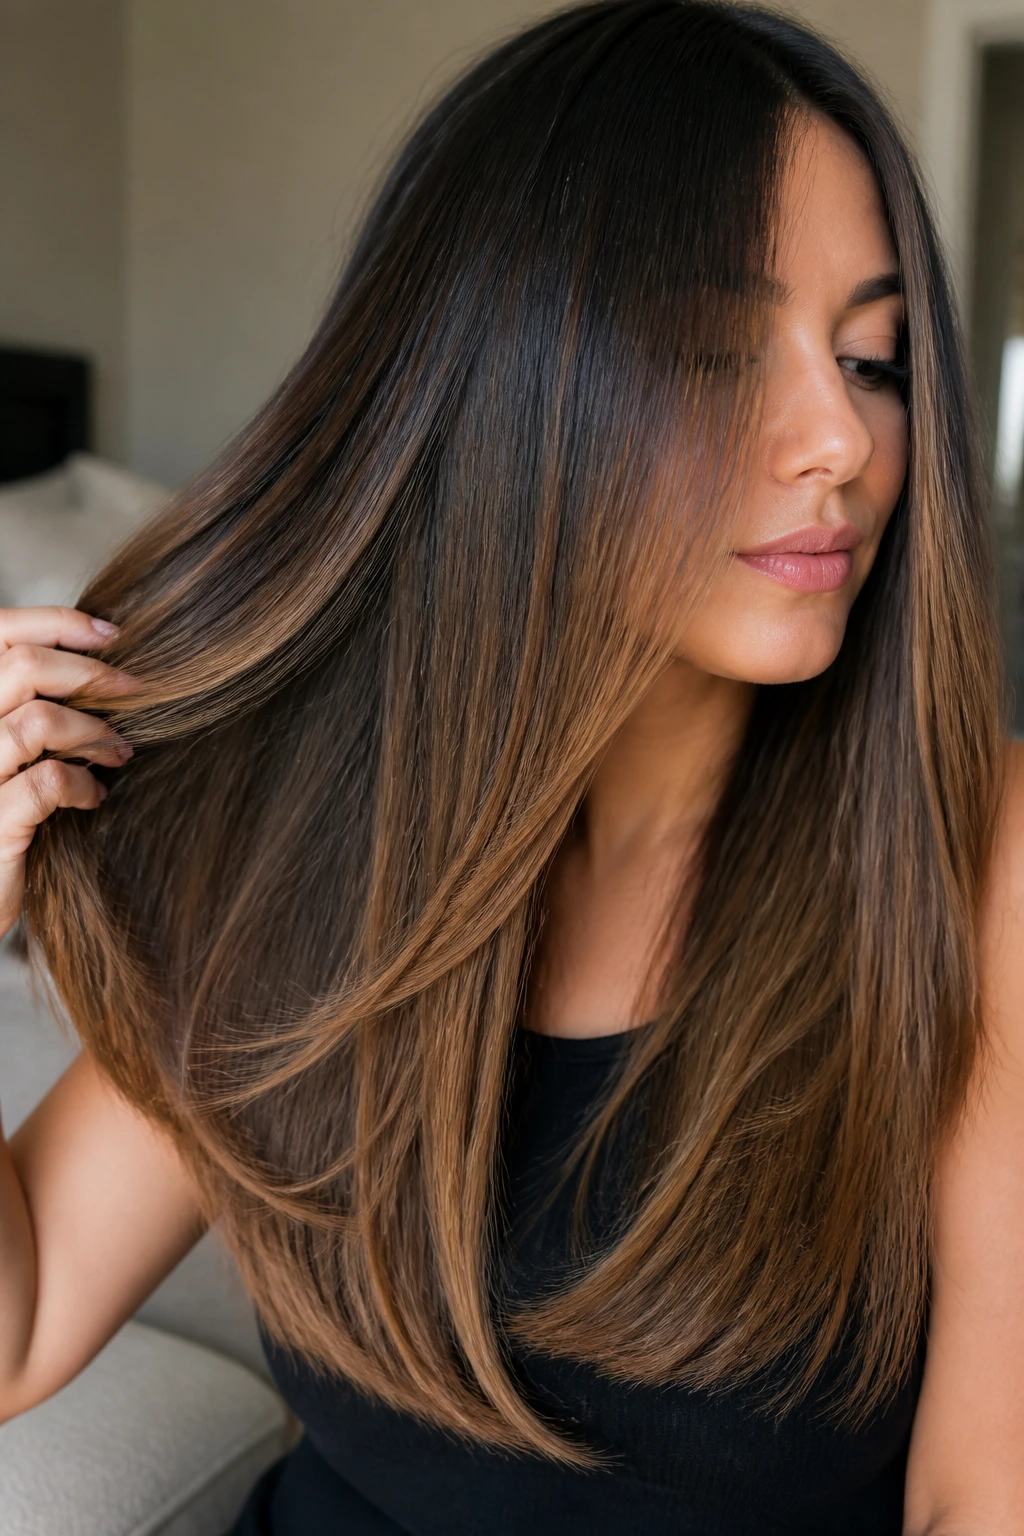
9. Sleek Straight Layers with Glossy Caramel Dimension
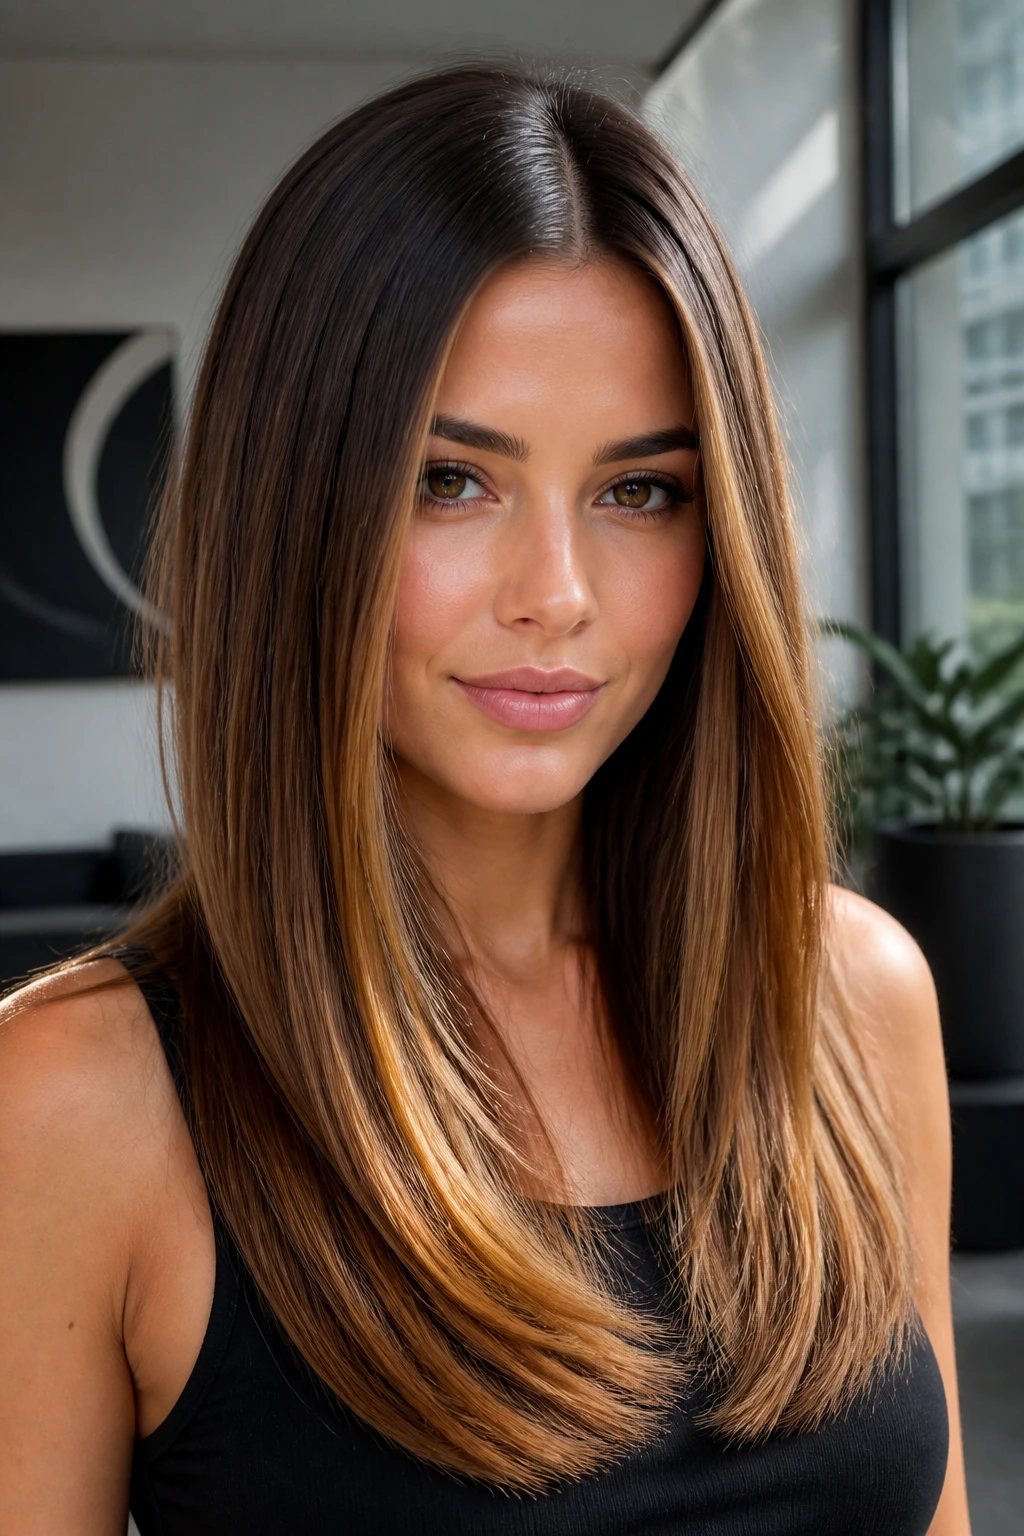
Straight hair can hide a haircut. That’s the problem, and it’s why sleek layers need color placement that does more than decorate the surface.
Caramel should sit through the midlengths and inner layers here, where it flashes only when the hair shifts. Add a gloss or glaze and the whole thing gets a reflective finish that makes the layers visible without turning the style into a wave.
This look is sharp with a center part and a flat iron passed once or twice over each section. Keep the ends clean, not over-curled, and the caramel will read like depth instead of stripey highlights.
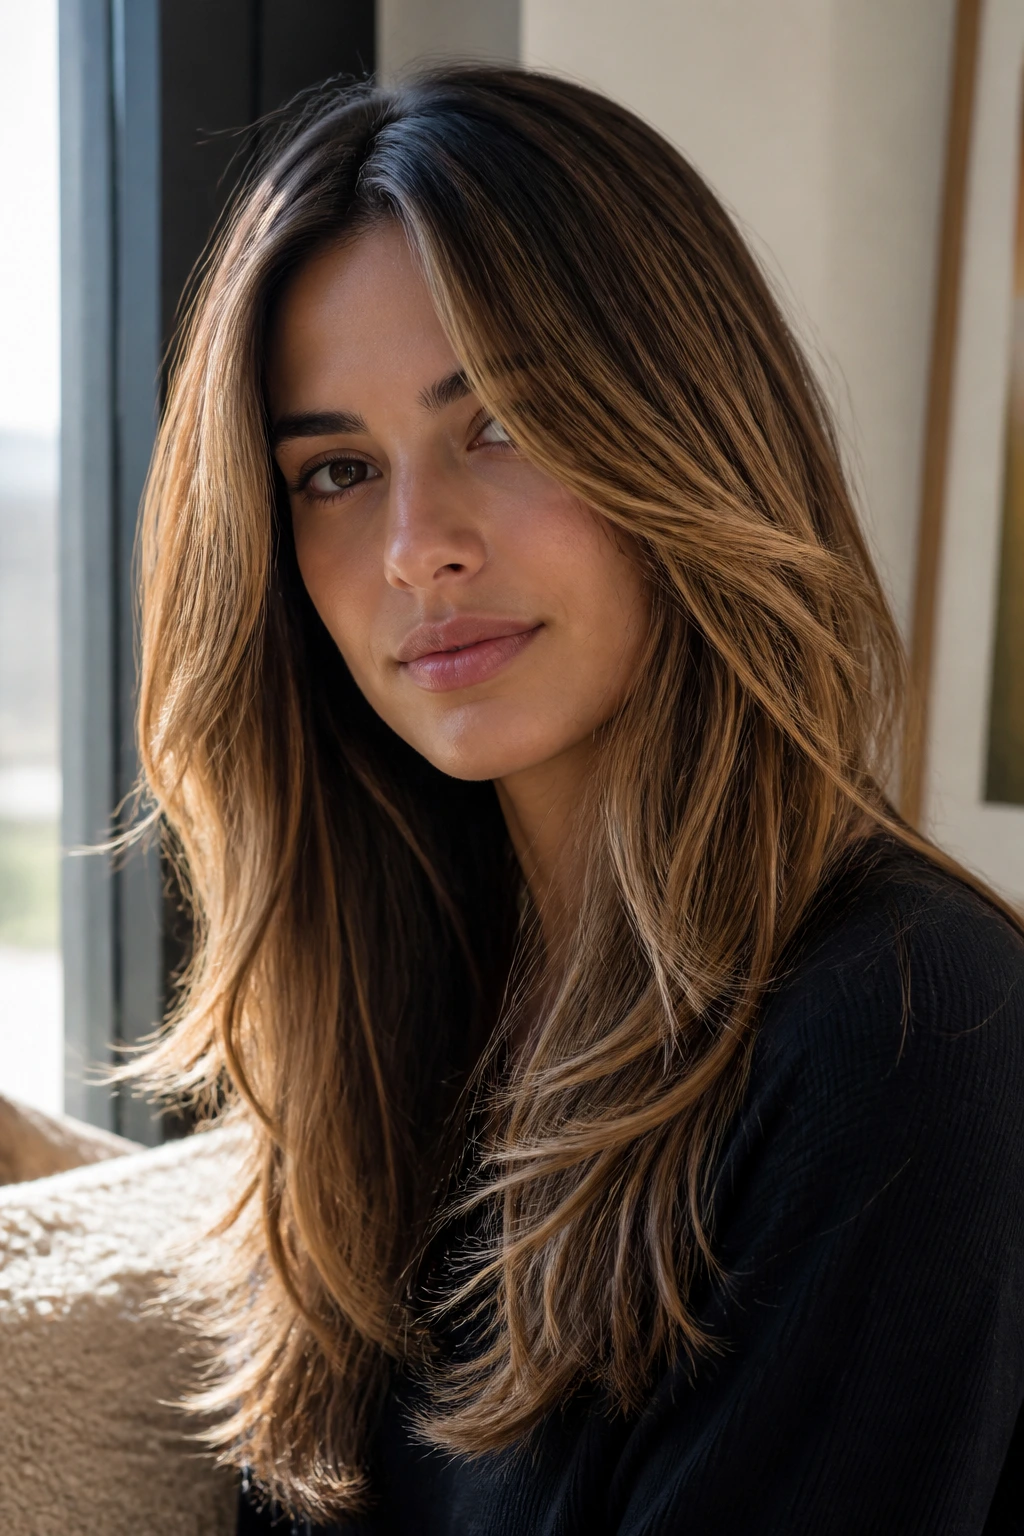
10. Long Razored Layers with a Tousled Finish
Razored layers are not for everybody. They give long hair a feather-light edge, but if the hair is already fine and fragile, too much razor work can leave the ends looking thin and tired.
On denser hair, though, the texture is excellent. Caramel streaks break up the bulk and help the airy ends look intentional, especially when you rough them up with a little texturizing spray.
The finish should feel piecey, not crunchy. Scrunch, twist a few sections, and let the layers fall where they want. When razored cuts work, they look like movement was carved into the haircut. When they don’t, they look overcut. There’s a difference.
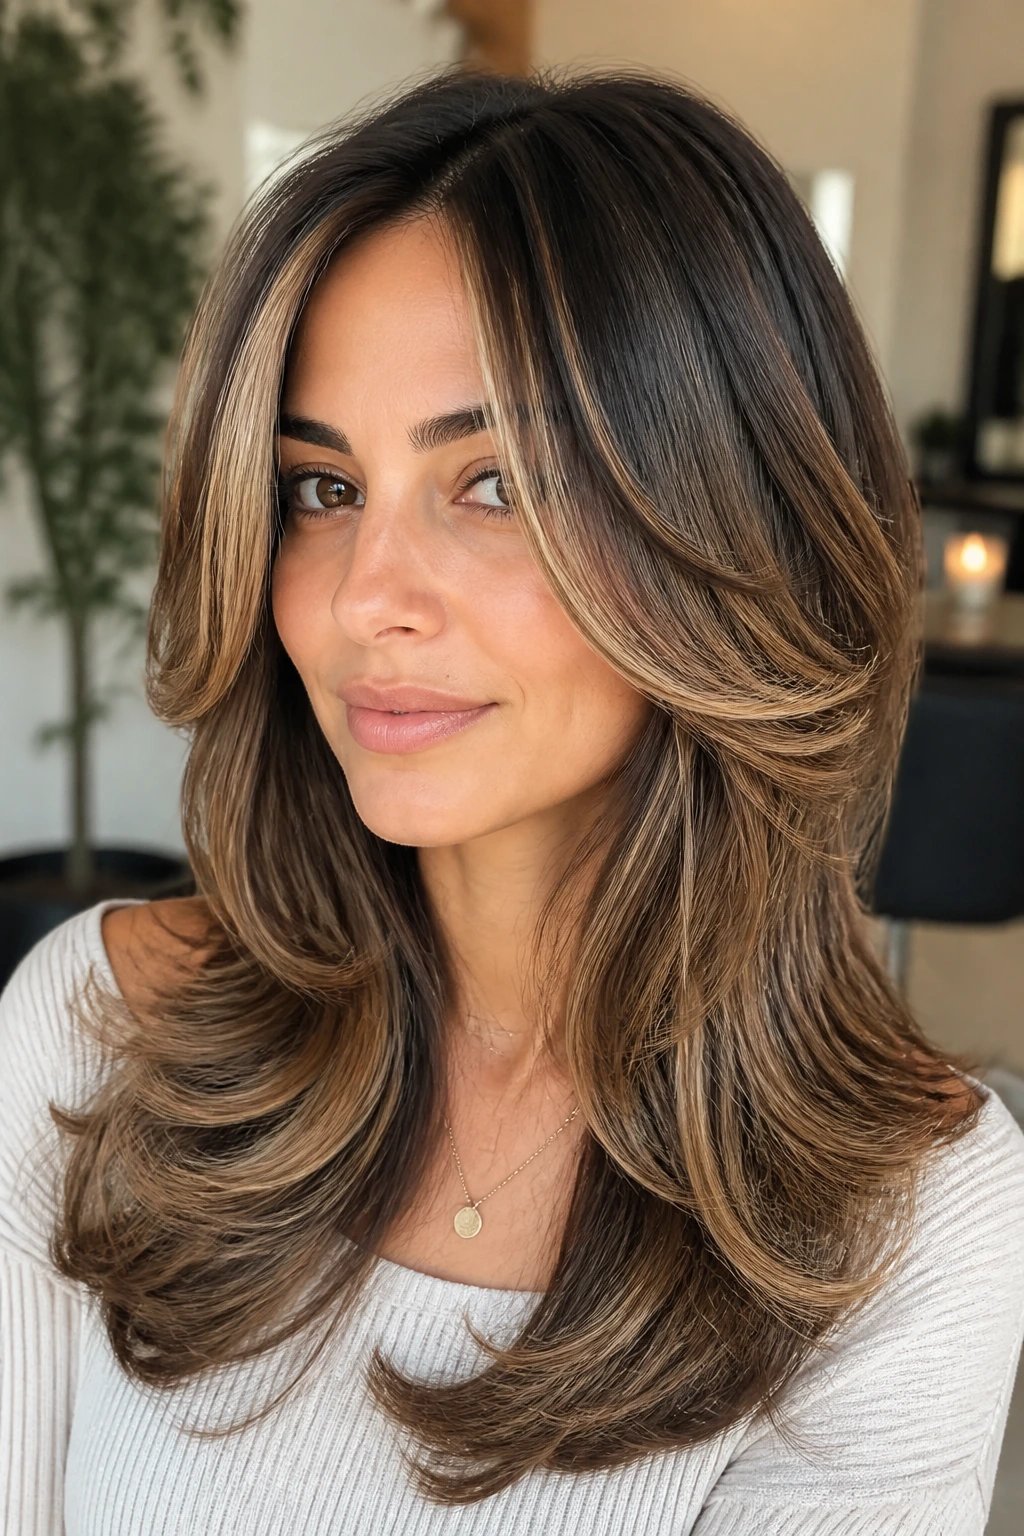
11. Waterfall Layers with Warm Caramel Contour
Waterfall layers are the quiet middle ground. They cascade down in stages, but the steps are softer and less dramatic than a V-cut, which makes the hair feel flowing instead of sharp.
Warm caramel contour around the face and outer edge of the layers gives this style a lifted effect. It’s almost like contouring makeup, except the light and dark pieces are doing the shaping for you.
This one loves a blowout that turns the ends under and out in a gentle pattern. If the layers are cut cleanly, the caramel will show the curve of the haircut without any extra fuss.
12. Choppy Textured Layers for Thick Hair
Thick hair carries weight in a different way. If the layers are too soft or too close together, the whole cut can feel bulky at the bottom and puffy around the sides.
Choppy textured layers help by removing density where the hair needs room to breathe. Caramel highlights then break up the mass visually, so the ends don’t look like one heavy shelf.
I’d ask for point-cut ends and a few deeper lowlights under the top section. That keeps the finish from going too bright and gives thick hair a bit of shadow, which it usually needs.
13. Bottleneck Bangs with Flowing Caramel Pieces
Bottleneck bangs do not behave like regular fringe. They sit narrower in the center, then widen toward the cheekbones, which makes them useful if you want face-framing without a blunt bang line.
Caramel pieces should follow that shape. Brighten around the forehead and cheeks, then let the longer layers carry the color downward so the front feels connected to the rest of the hair.
This style is a good fit if you want movement near the eyes but still like your long hair to feel controlled. The bangs do the talking first, then the layers follow. That order matters.
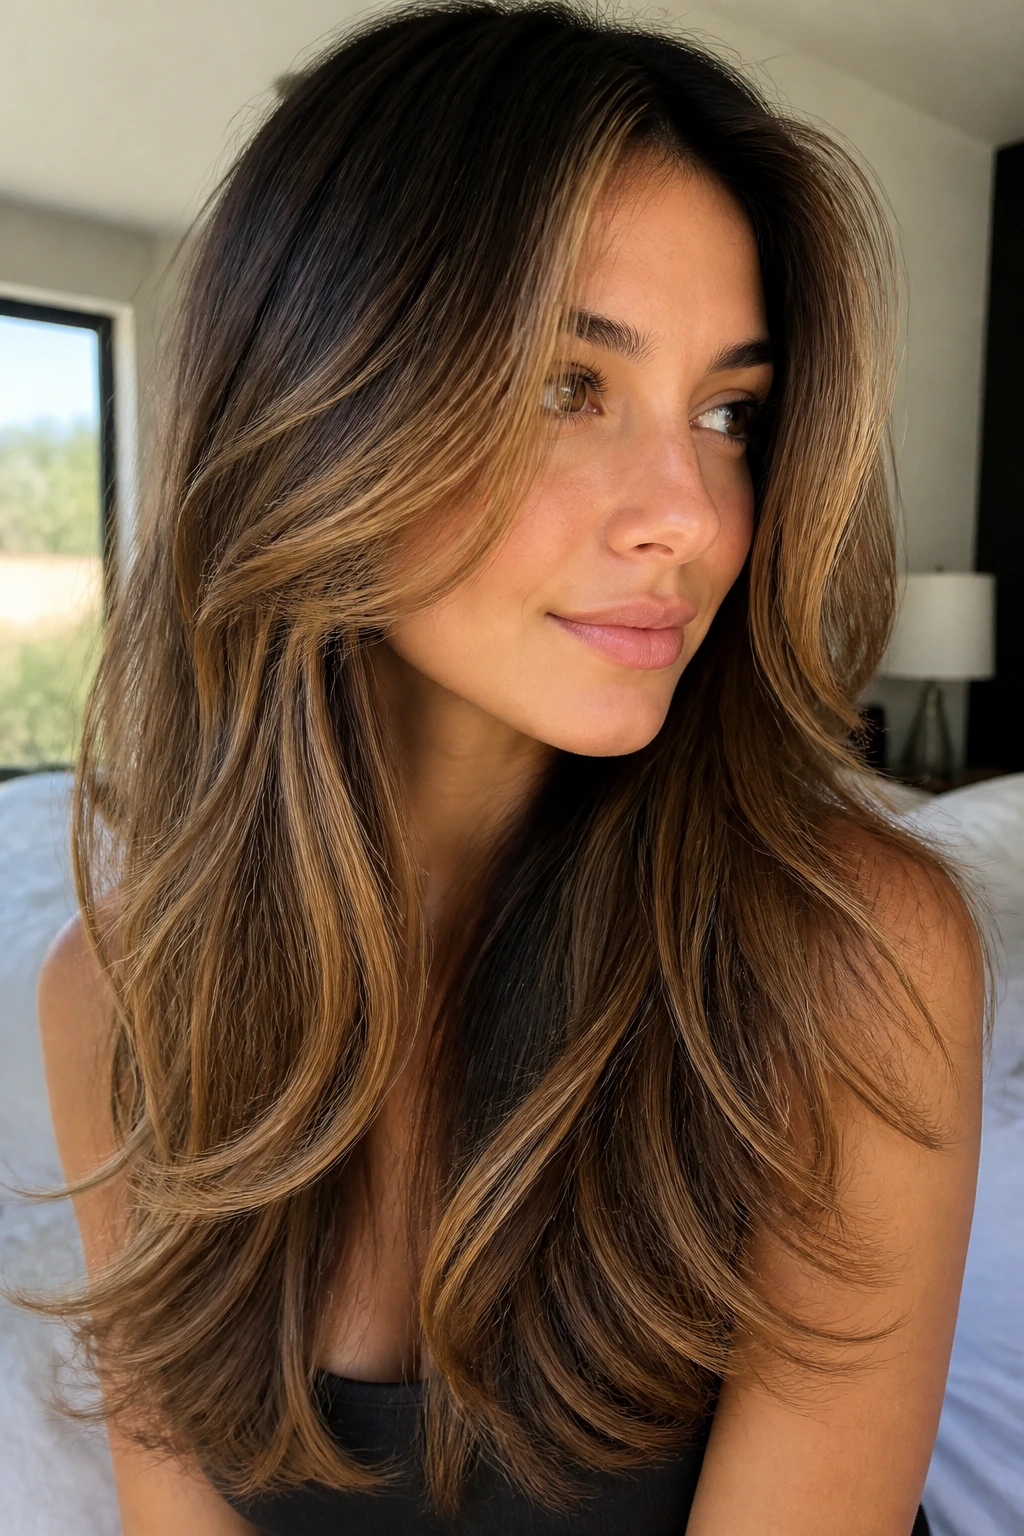
14. Boho Layers with Lived-In Caramel Balayage
Boho layers are what I reach for when someone wants lower-maintenance color. The cut is soft, the lines are loose, and the balayage should look like it grew that way after a few summers and a few too many braids.
Shadow root helps here. It keeps the top of the hair from looking too light, while the caramel through the midlengths and ends brings the motion back in. A flat, one-note blonde would ruin the whole point.
The styling should be relaxed. Loose bends, maybe a braid overnight, maybe a little wave spray the next morning. If it looks too neat, you’ve lost the charm.
15. Rounded Layers for Fuller Long Hair
Rounded layers can save a long cut from turning into a triangle. The perimeter stays soft and curved, which is especially helpful when the hair is naturally thick or the face shape needs a little balancing.
Caramel highlights around the outer arc of the haircut make the roundness easier to see. A few deeper pieces underneath keep it from looking puffy, which is the main problem with very full long hair.
This style likes a curved blow-dry. Lift the roots with a round brush, bend the ends gently inward, and let the color show the shape. It’s neat without being stiff.
16. Long Layers with a Center-Part Money Piece
A center part changes everything. It creates a clean line down the middle, which gives long layers a symmetrical frame and makes a money piece look sharper than it would on a side part.
The front panels should be one or two levels lighter than the base, but not so bright that they fight the rest of the hair. Around the face, keep the caramel soft and blended so the cut still reads as long and layered, not just front-loaded.
This is a polished look when the hair is smooth, and it softens nicely when the waves are loose. If you like balance and clear lines, this one delivers that without feeling severe.
17. Side-Swept Layers with Soft Caramel Sweep
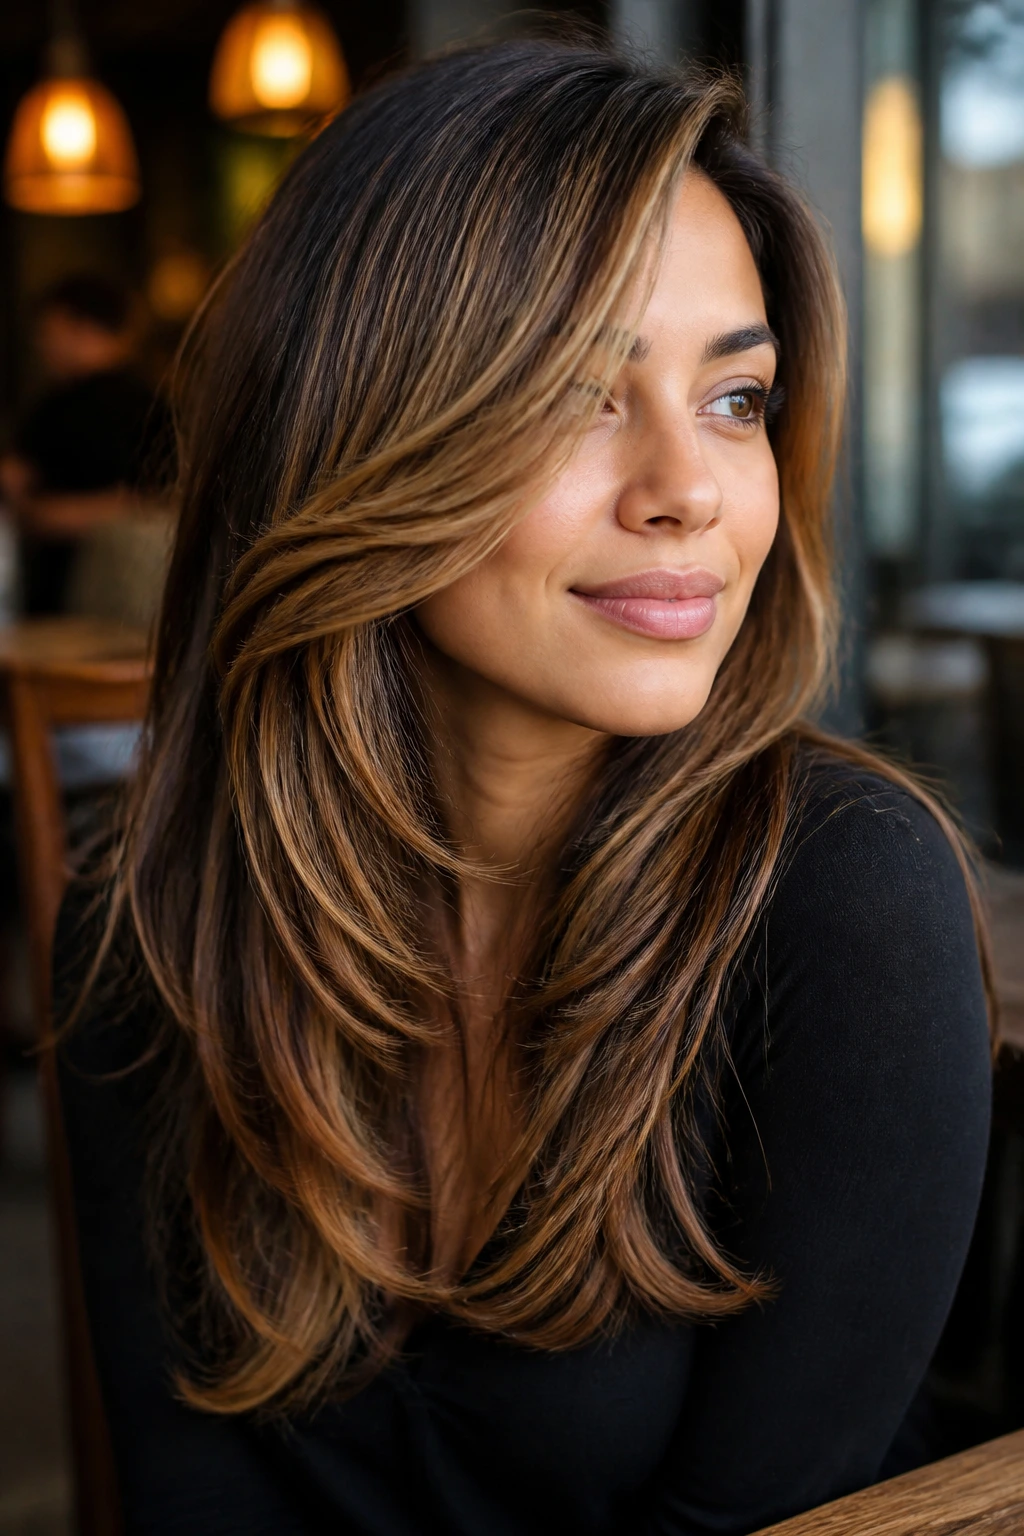
Side-swept layers are a little old-school in the best way. They add asymmetry, which gives the hair motion even before the wind touches it, and they’re useful if your hair naturally falls heavier on one side.
The caramel should sweep with the part, not against it. Keep the brightest pieces where the hair falls forward, then let the back stay a touch deeper so the silhouette doesn’t flatten out.
This cut works well if you want to soften a strong jawline or break up a very straight face frame. A side part also gives you a good excuse to flip the front pieces with a round brush, which never hurts.
18. C-Curl Layers with Blended Caramel Lowlights
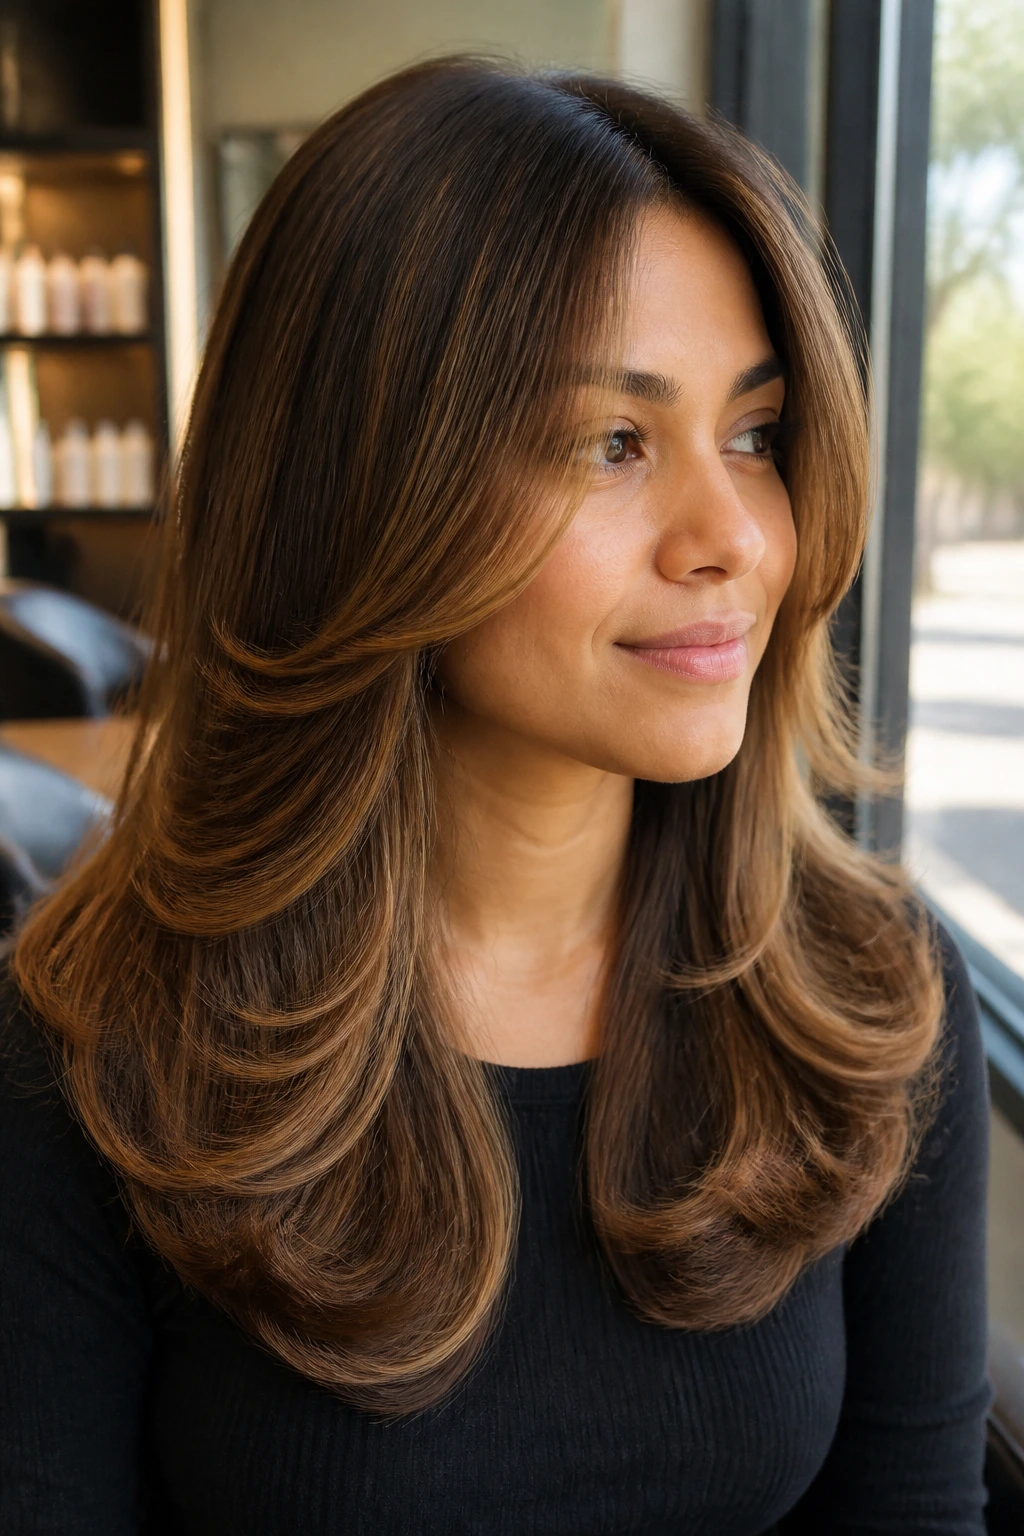
C-curl layers look polished because the ends bend inward on purpose. The shape is subtle, but it gives long hair a tidy finish that still feels soft.
Blended caramel lowlights are the part that keeps the style rich. If every piece is light, the curl can look pale and dry; if a few panels stay deeper, the bend reads more clearly and the hair looks denser.
Use a round brush or the bend of a curling iron to tuck the ends under just slightly. You do not need a full curl here. The shape should be clean enough for work and soft enough that it doesn’t look stiff.
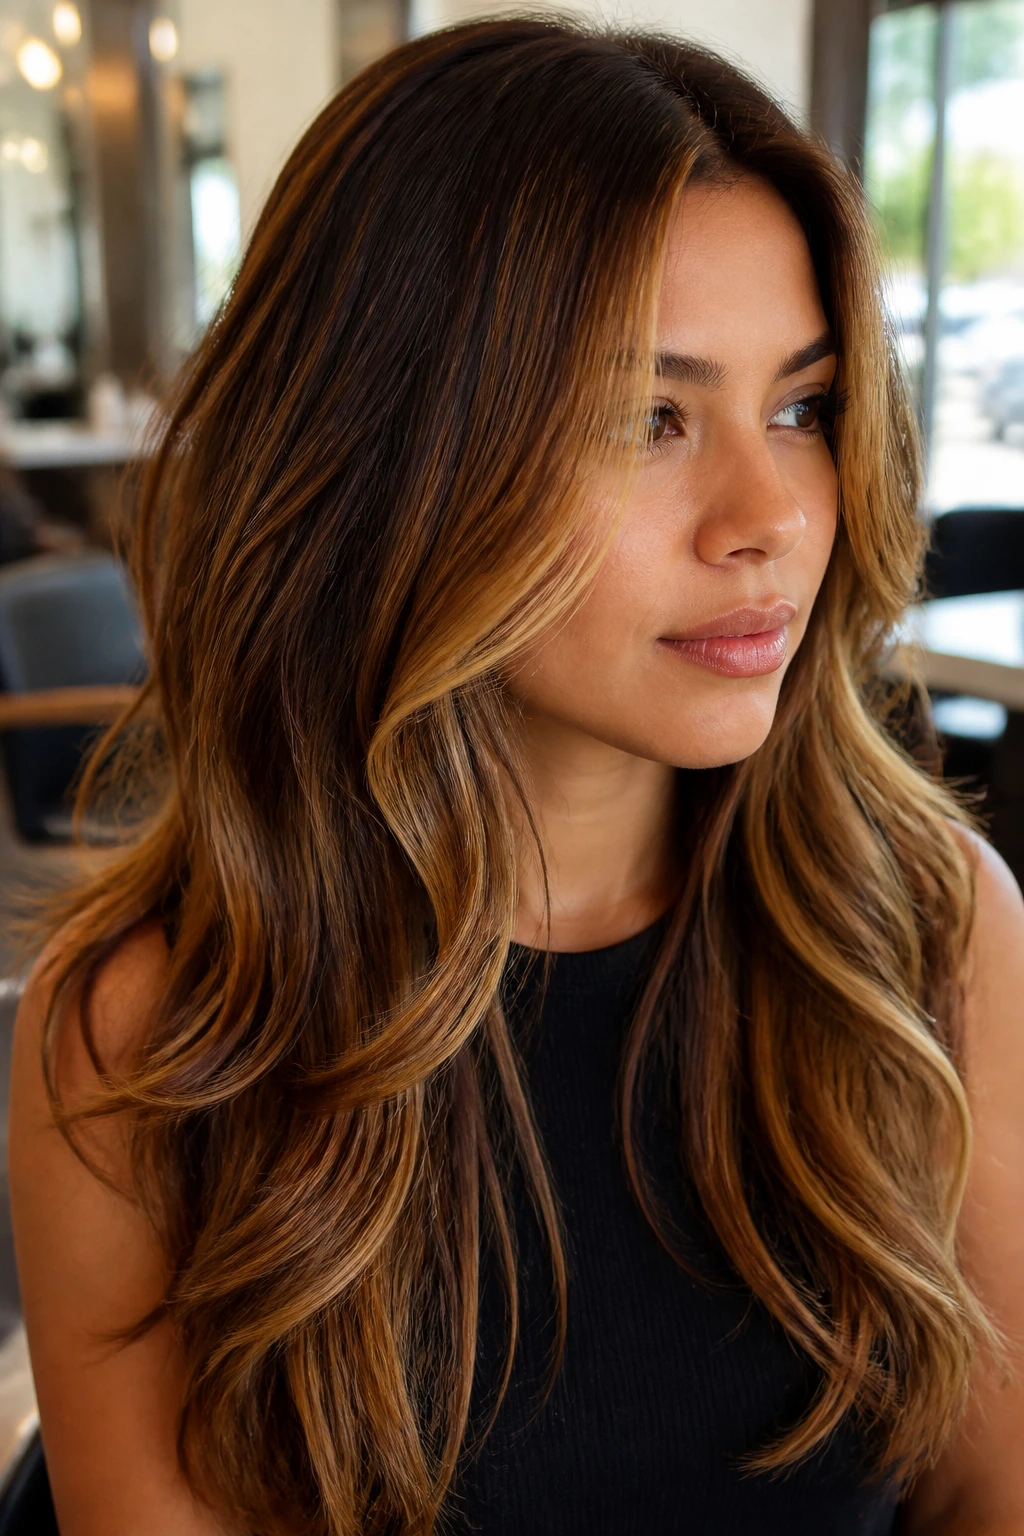
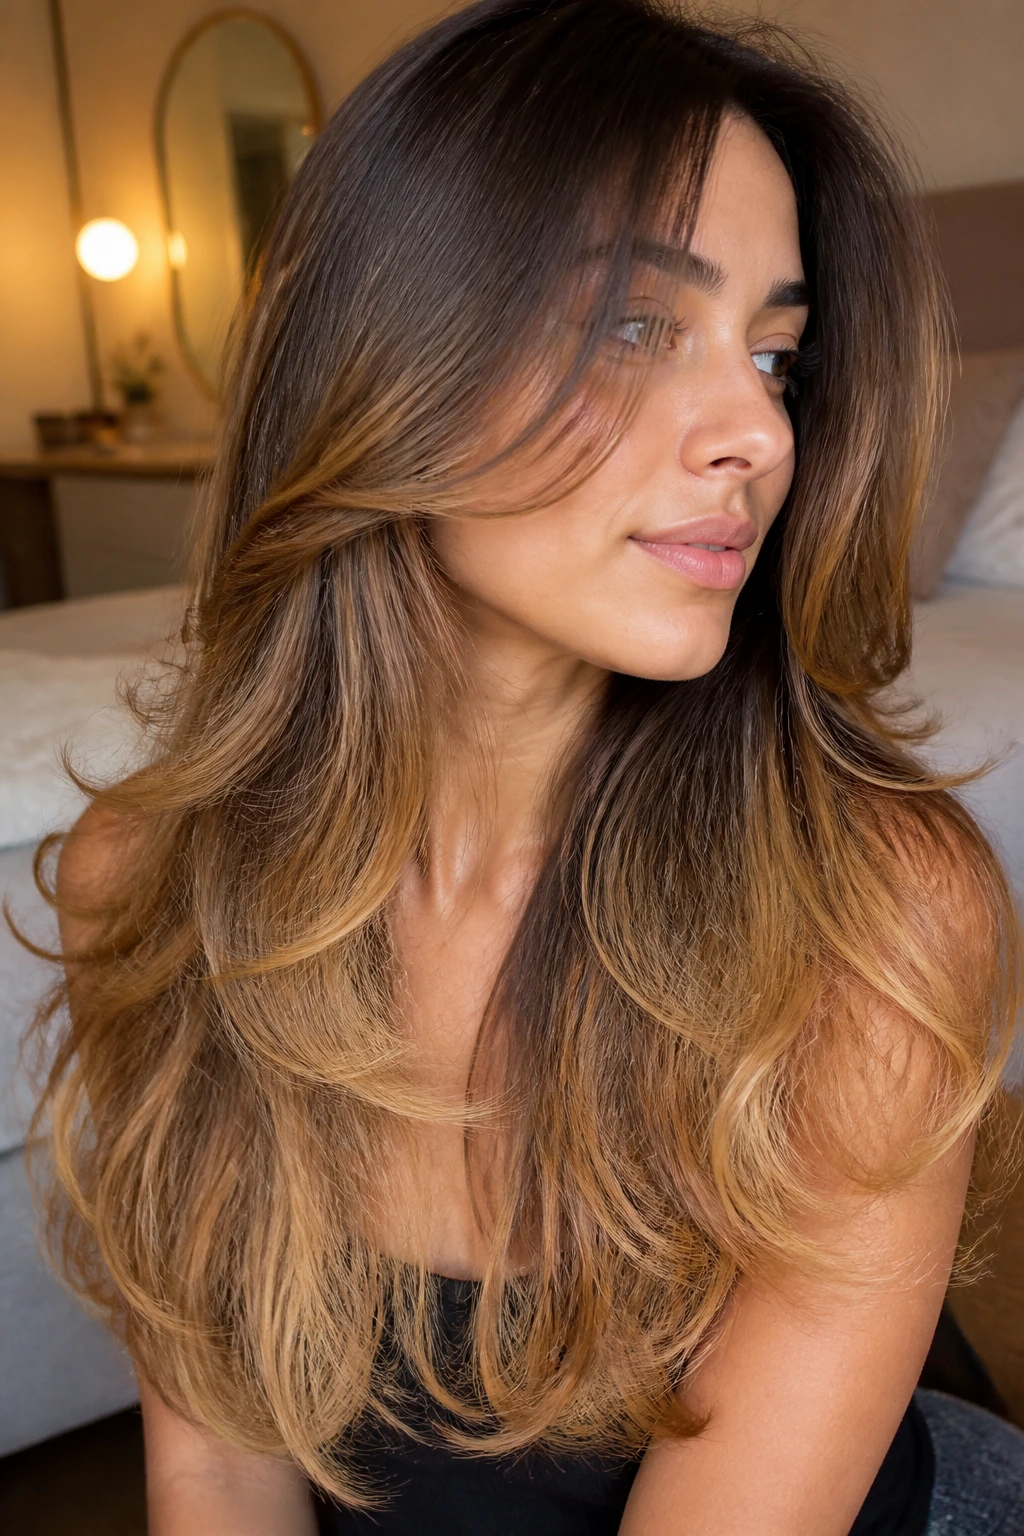
19. Mermaid Waves with Dimensional Caramel Ribbons
Mermaid waves need space to breathe. The hair should be long enough to show the wave pattern, and the layers should be subtle enough that the finish still feels like one long sheet with movement, not a chopped-up cut.
Dimensional caramel ribbons give the waves depth from a distance. Put some brighter pieces on the outer layer and keep a few darker panels underneath so the curls don’t collapse into one flat color when they settle.
This is a good style for long hair that looks flat in photos. Loose waves and spaced-out caramel pieces create a soft pattern that reads clearly even when the light is low.
20. Long Curly Layers with Honeyed Ends
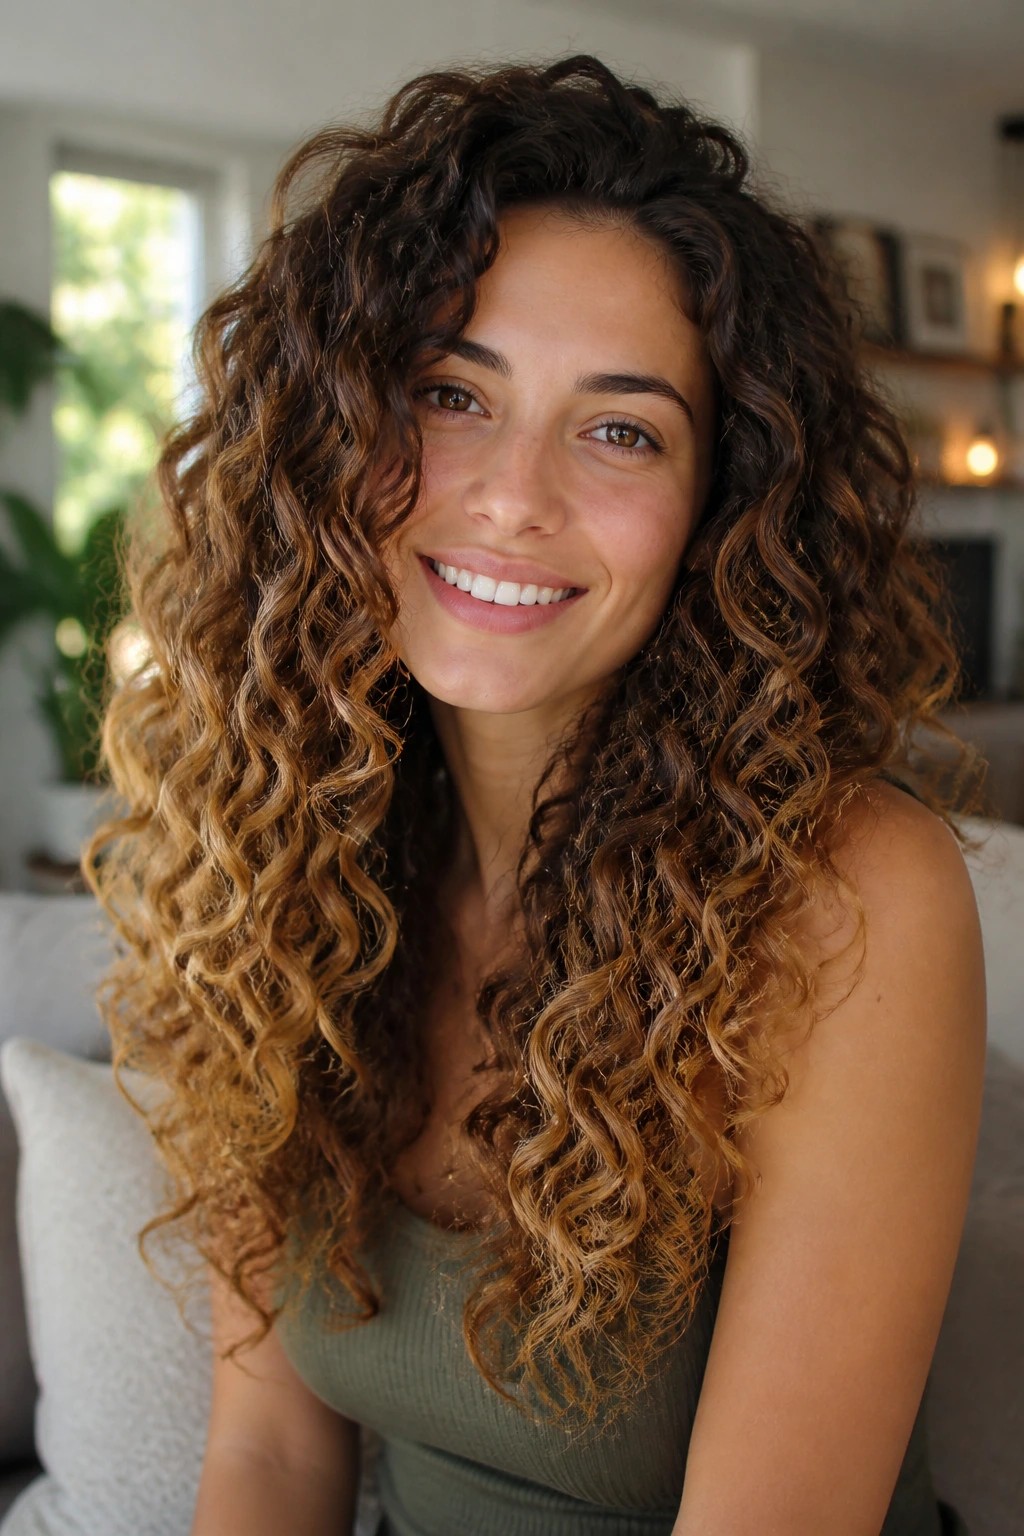
Curly hair asks for shape, not decoration. The layers should follow the curl pattern, or they’ll bounce out in weird places and fight the natural spring of the hair.
Honeyed ends work well because they lighten the lower portion of the curl without making the roots look overprocessed. You get a brighter outline around the shape, and the curls look more defined when they dry.
A dry cut or curl-by-curl shaping usually gives the cleanest result. Diffuse gently, scrunch in a little cream, and let the curls settle before judging the shape. Curly long layers can look too big when they’re wet and just right once they’ve finished shrinking.
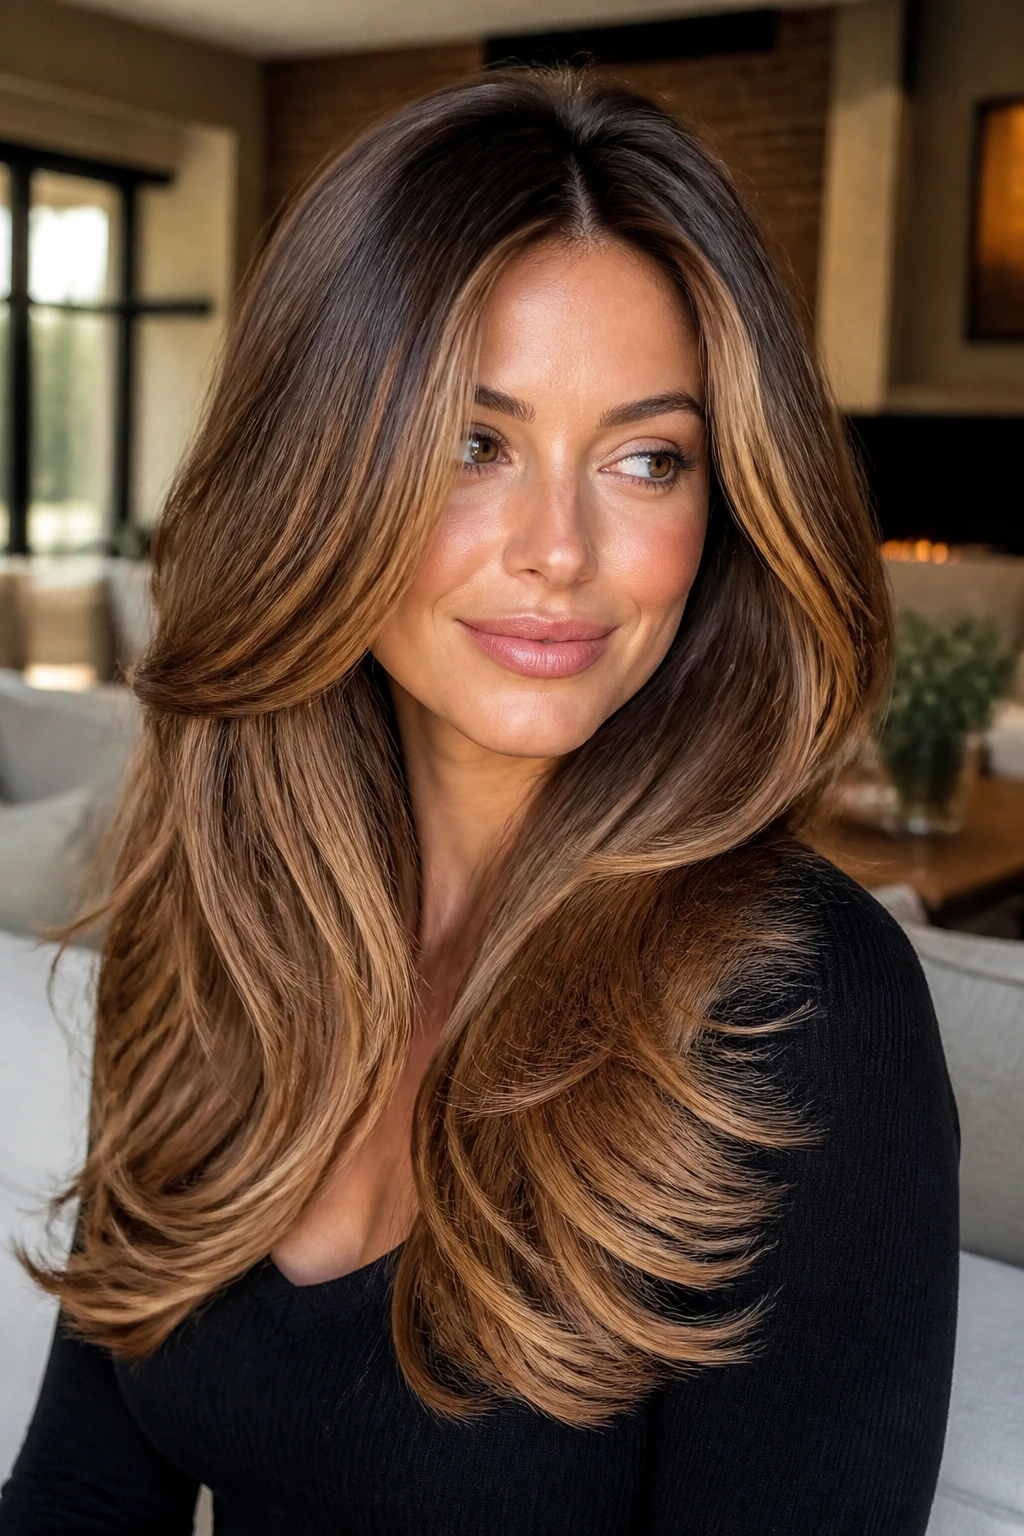
21. Layered Blowout with Flipped Ends and Caramel Shine
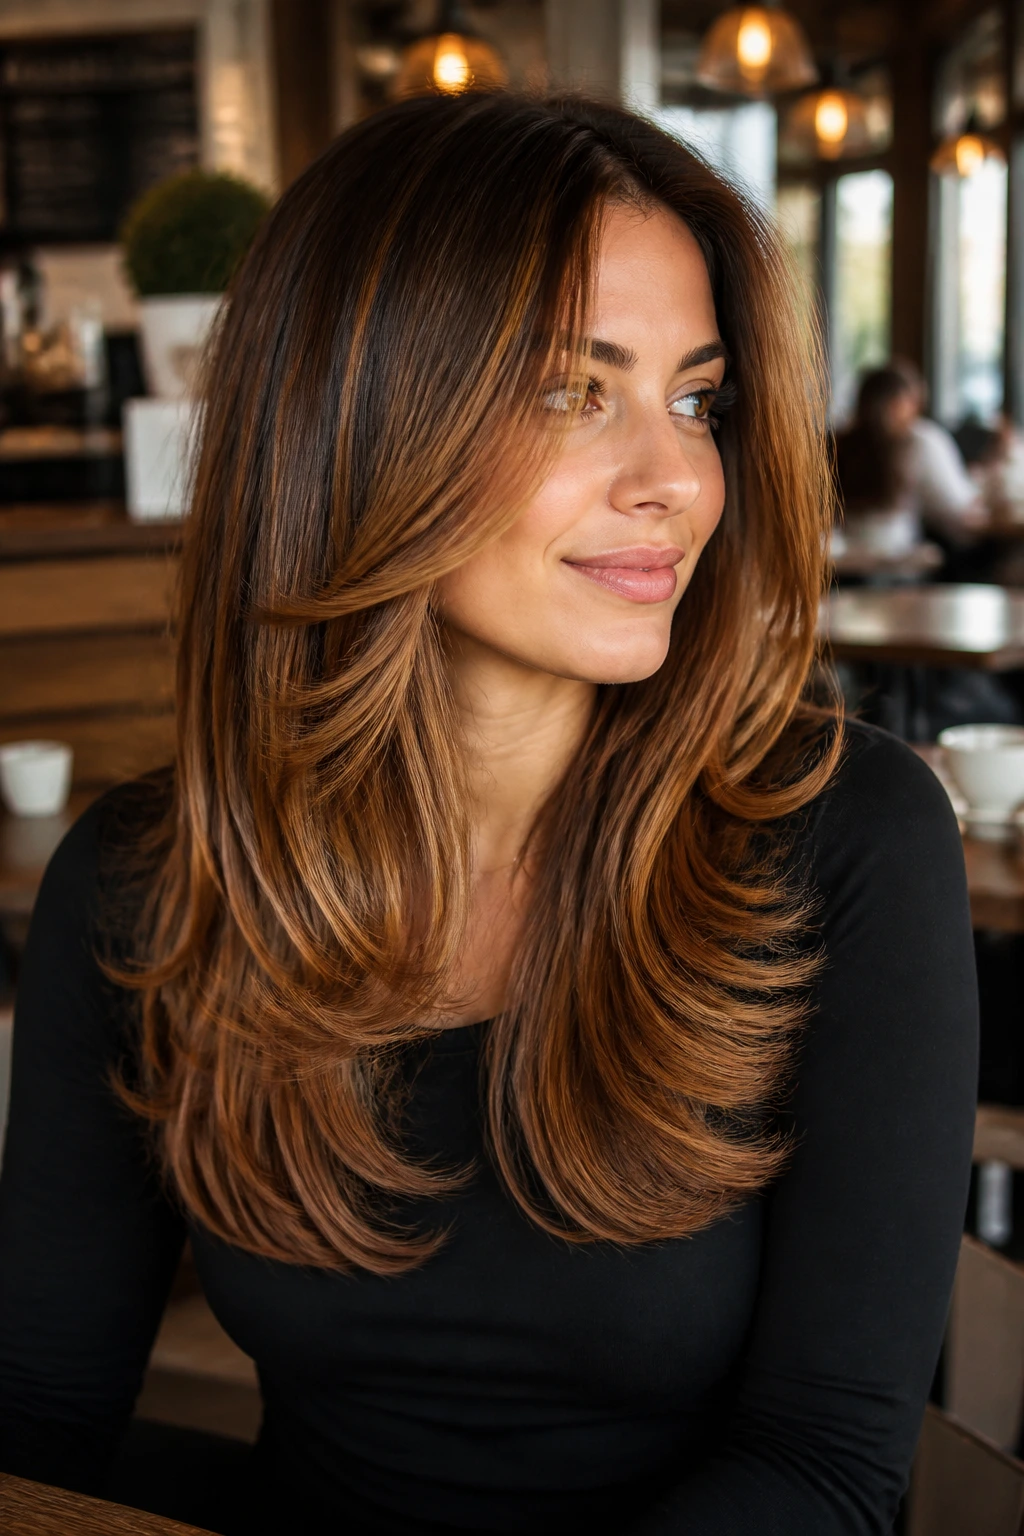
A blowout with flipped ends carries a different kind of polish. The layers kick out at the bottom, the roots lift a little, and the whole cut feels finished without looking frozen in place.
Caramel shine belongs on the midlengths and ends here. That’s where the light catches first when the hair swings, so the color placement should follow the movement instead of covering the crown.
A large round brush and a decent heat protectant do most of the heavy lifting. Keep the flips soft, not curly, and the style stays modern enough to wear with a plain tee or a blazer.
22. Subtle Caramel-Bronde Shift
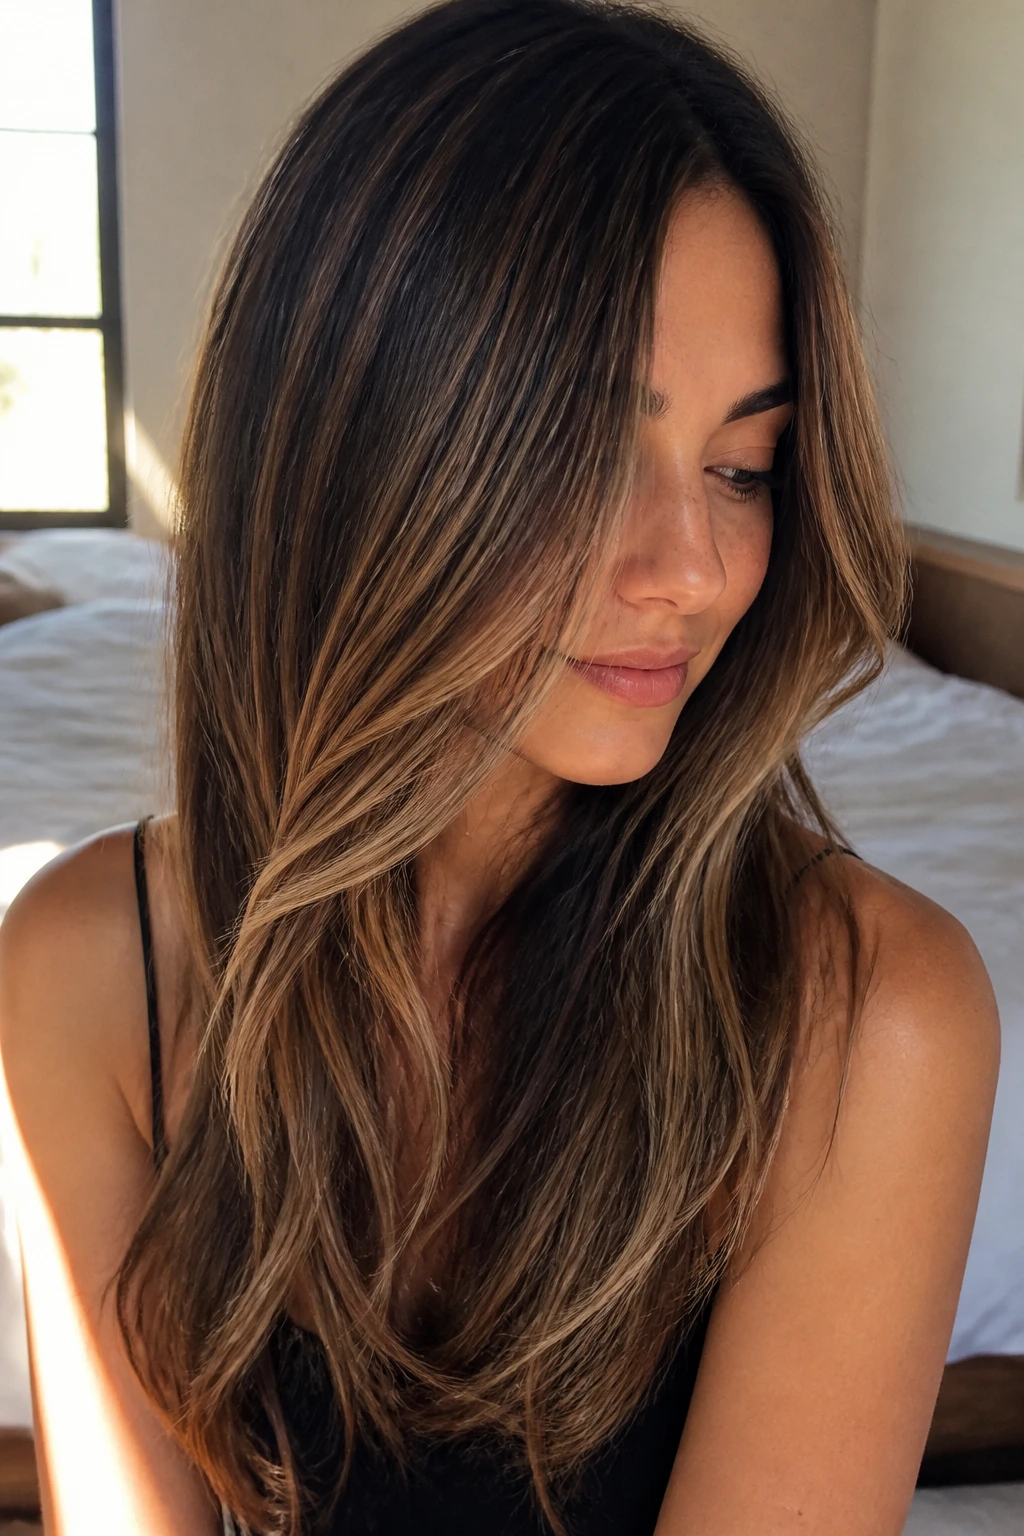
Brunette hair can go softer, not brighter. That’s what this look is about: a quiet blend of caramel and bronde pieces that lighten long hair without turning it into a high-contrast color story.
Ask for fine ribbons, not chunky sections. A soft root shadow and a few lowlights around the underside keep the color grounded, which matters when the base is medium brown or deeper.
This style is the one I’d point to for someone who wants change without making a loud statement. It still shows movement in layers, but the overall effect is mellow, blended, and easy to grow out.
23. Tapered Ends with Caramel Contour
Tapered ends are about restraint. The cut narrows gradually toward the bottom, which keeps long hair from feeling blunt and heavy, especially when there’s a lot of density to work with.
Caramel contour belongs around the jawline, collarbone, and outer lengths. Those brighter pieces shape the face while the deeper base underneath keeps the cut from reading thin at the very bottom.
This is a good option if you want movement without obvious steps. The layers are there, but they hide in the silhouette. That’s what makes the cut feel clean.
24. Hidden Internal Layers for Maximum Length
Hidden layers are the haircut equivalent of a good lining. You do not see the work at first glance, but the structure is there, and the hair behaves better because of it.
For long hair that should keep its length, this is a smart move. The outer surface stays mostly one length, while the internal layers add bounce and prevent the bottom from dragging down the whole shape. Caramel panels on the underside can flash through when the hair moves, which is a nicer surprise than blunt streaks.
This works well if you wear your hair mostly straight or in loose bends. You get movement without losing the long, dramatic line.
25. Glossed Caramel Ends and Soft Volume
Gloss can rescue ends that look tired from three feet away. On long layered hair, a clear or warm caramel gloss makes the lighter pieces look smoother and keeps the cut from drying out visually.
Soft volume at the roots and midlengths gives the hairstyle its shape, while the gloss on the ends keeps everything connected. It is a simple combination, but it makes a strong difference when the hair has been lightened more than once.
This is the version I’d pick for anyone who wants the polished finish without a heavy curl pattern. A clean trim, a little root lift, and glossy caramel ends are enough. Sometimes that’s all the hair needs.
Why Layered Cuts and Caramel Ribbons Work So Well Together
The best thing about this pairing is that it solves two problems at once. Long hair can lose its shape when the layers are too soft, and it can lose its richness when the color is too flat. Caramel splits the difference. It warms the hair, outlines the layers, and gives the eye somewhere to land.
Placement matters more than most people expect. Bright pieces around the face pull the cut forward; deeper panels underneath keep the top from going frothy. If the hair is thick, lowlights stop it from looking puffy. If the hair is fine, the right caramel placement creates lift without chopping the silhouette apart.
Where the Color Should Sit
The most useful zones are the face frame, the midlengths, and the outermost ends. Those are the pieces that move first, so they pick up light every time you turn your head. A few interior ribbons are helpful too, but only if the stylist keeps them broken up instead of drawing stripes through the whole head.
Why Lowlights Matter
People skip lowlights when they want brightness, and then wonder why the color goes flat. A deeper caramel or soft mocha piece beneath the highlights gives the top layer contrast, which makes the highlights look more expensive and less blown out. That tiny bit of shadow is what keeps the whole thing from reading one-note.
Choosing the Right Caramel Shade for Long Layers
Caramel is not one single color. On a dark brown base, it can lean like toasted sugar or warm amber. On medium brown hair, it can go honeyed and soft. On dark blonde, it needs a little more depth so the result does not wash out into beige.
A good rule: go one or two levels lighter than the base if you want subtle contrast, and a bit more if you want the highlights to show through waves and curls. If your hair is already warm, ask for a caramel tone that has a touch of beige or mocha so it does not go orange when the sun hits it.
Base Color Matters More Than the Photo
The same caramel formula will look different on every base. Level 4 brown needs a richer, deeper ribbon. Level 6 brown can take brighter honey pieces. Very light brunette or dark blonde usually needs lowlights mixed in, or the caramel ends up looking dusty instead of dimensional.
Ask for Dimension, Not One Flat Shade
One caramel tone painted from root to end can be pretty, but it often reads flat on long hair. A better request is a mix: a brighter caramel around the front, a softer ribbon through the lengths, and a few deeper pieces underneath. That mix gives the haircut depth you can actually see.
Essential Tools and Products for These Looks
-
1.25-inch curling iron or wand: Best for soft bends, beach waves, and face-framing movement without tiny curls.
-
Large round brush: Useful for feathered layers, C-curls, and blowouts that need a clean bend at the ends.
-
Blow dryer with concentrator nozzle: Helps smooth the cuticle so caramel highlights look glossy instead of fuzzy.
-
Heat protectant spray: Non-negotiable if you use hot tools; highlighted hair dries out faster than virgin hair.
-
Lightweight mousse or root-lift spray: Good for fine or flat hair that needs the layers to show.
-
Texturizing spray: Adds grit to shaggy, boho, and razored styles without making the hair sticky.
-
Hair oil or serum: A tiny amount on the ends keeps lightened pieces from looking dry or frayed.
-
Sectioning clips: Make it easier to style long hair in clean layers instead of wrestling all of it at once.
-
Color-safe shampoo and conditioner: Helps protect the caramel tone from fading too fast and keeps the highlight blend softer.
-
Wide-tooth comb: Better than a brush on wet hair, especially if the cut has curls, waves, or lots of layered movement.
How to Wear These Layers Without Losing the Shape
Presentation: Keep the front pieces visible. A center part sharpens symmetrical cuts, while a soft side part gives feathered and waterfall layers a little more movement through the front. If your layers start below the cheekbone, tuck one side behind the ear to let the caramel show where the light hits.
Accompaniments: Round-brush blowouts, loose waves, and half-up styles all work well with these cuts because they let the layers separate without looking piecey in a bad way. Heavy, pin-straight styling can hide the shape; if you like straight hair, leave a slight bend at the ends so the cut still reads.
Length: Keep the longest layers long enough to keep the silhouette flowing. For most long-hair cuts, that means avoiding aggressive trims on the bottom six inches unless you want a completely different shape. The more the color sits near the ends, the more important this becomes.
Finish: A small amount of shine cream or lightweight oil on dry ends keeps the caramel from looking thirsty. Use less than you think you need. Long layered hair gets greasy fast if you flood the front pieces.
Styling Tips That Make Caramel Highlights Look Richer
Color Boost: Ask for two caramel tones instead of one if you want the hair to look dimensional in indoor light. A brighter honey ribbon near the face and a deeper toffee piece through the back usually work better than one flat, all-over tone.
Styling Shortcut: Curl only the midlengths and leave the last inch or two straighter. That little contrast makes the layers look longer and keeps the caramel ends from forming a too-perfect spiral.
Texture Fix: If the layers separate too much, smooth a pea-sized amount of cream between your palms and press it lightly over the midlengths. The goal is separation with softness, not a crunchy finish.
Make-It-Yours: If your face is narrow, keep the front pieces fuller and the caramel a bit lighter around the temples. If your face is broad, shift the bright pieces lower and let the top stay deeper so the frame feels softer.
Common Mistakes That Flatten the Look
Over-layering the bottom: The ends turn thin, see-through, and stringy. You’ll notice the shape losing weight after a few weeks, especially if the hair is already fine. The fix is to keep the last several inches more intact and take the movement out of the interior instead.
Putting caramel too high at the crown: The color grows out fast and can look stripey near the part. If you want soft dimension, keep the brightest pieces around the face and midlengths, then let the top stay a shade deeper.
Using only one caramel tone: Long hair can swallow a flat color. Without a few lowlights or a deeper ribbon underneath, the highlights start to look washed out instead of rich. Ask for contrast, not just brightness.
Curling every section the same way: The layers stack on top of each other and the style turns helmet-like. Alternate curl direction, leave some ends straighter, or use a brush to break up the pattern once the hair cools.
Skipping trims too long: Long layers grow out into a heavy curtain, and the caramel pieces lose the clean separation that made them work in the first place. A trim every 8 to 12 weeks keeps the shape readable.
Variations and Adaptations to Try
Soft Mocha-Caramel Blend: Swap some of the brighter caramel for mocha lowlights if your hair is very dark brown. The result is calmer and richer, with less contrast around the face.
Bright Money-Piece Version: Keep the body of the hair deeper and concentrate the caramel around the front panels only. This is the one to choose if you want the color to frame the face without changing the entire head.
Curly Halo Layers: If your hair is curly, keep the layers rounded and let the caramel sit around the outer halo of curls. The shape looks fuller, and the color shows up where the curls catch the light.
Low-Maintenance Balayage: Ask for hand-painted caramel that starts below the crown and grows brighter toward the ends. This grows out softly and works well if you do not want obvious regrowth lines.
Glossed Brunette Version: If you want warmth but not much contrast, ask for a caramel gloss over a medium brown base with barely-there highlights. It changes the tone more than the level, which is easier to wear in softer settings.
Maintenance, Refreshing, and Between-Appointment Care
Long layers need regular shape checks. If you want the outline to stay clean, trim every 8 to 10 weeks, or 10 to 12 if the hair is very thick and grows slowly. Letting the cut go too long usually shows first around the face, where the shortest pieces lose their swing and start hanging.
Caramel highlights usually hold their warmth longer if you wash with lukewarm water and a color-safe shampoo. Two to three washes a week is a good target for most long hair, because over-washing strips both the tone and the shine. A weekly mask on the midlengths and ends helps the lighter pieces stay smooth, especially if you use hot tools.
If your color is a glossed caramel or warm balayage, expect the tone to soften after about 4 to 6 weeks. A quick gloss refresh can bring the warmth back without redoing the whole head. The cut itself may still look fine, but the color usually needs a little tuning before the layers lose their contrast.
Night care matters more than people admit. A loose braid, a silk scrunchie, or a pillowcase that doesn’t snag the hair will keep the ends from breaking and preserve the shape of those front layers. When the morning arrives, a few passes with dry shampoo at the roots and a 1.25-inch iron over the front pieces are often enough to make the style look fresh again.
Frequently Asked Questions
Do caramel highlights work better on brown hair than blonde hair?
They usually look richest on brown hair because the warmth has somewhere to sit. On blonde hair, caramel can still work, but the result often needs lowlights or a deeper root shadow so it doesn’t fade into one pale tone.
How do I know if I need face-framing layers or a full layered cut?
If you like keeping most of your length, face-framing layers are the safer choice. If your hair feels heavy all over or your ends look flat, a full layered cut will give the caramel more movement to sit on.
Can fine hair handle a lot of layers?
Yes, but not a lot of short ones. Fine hair usually does better with invisible layers or long feathered layers, because too many short steps can leave the ends thin and see-through.
How often should caramel highlights be refreshed?
Most caramel tones need a gloss or refresh every 4 to 8 weeks, depending on washing and heat styling. The highlights themselves can last longer, but the warmth often softens first.
What if my layers look stringy after a trim?
That usually means the cut removed too much weight from the bottom or the styling is overdoing separation. Try a smoothing cream on the midlengths and ask for longer layers next time so the silhouette keeps more body.
Can I wear this look without heat styling?
Yes, especially if the cut is built for waves or curls. Air-drying with a light leave-in and a bit of curl cream can still show the caramel placement, though the layers will look softer and less defined than with a blowout.
Do I need lowlights with caramel highlights?
You don’t always need them, but they help long hair look deeper and less flat. If your base is dark brown or your highlights are very bright, a few lowlights underneath usually make the whole style look richer.
Will curtain bangs work with very long hair?
They do, and they can be one of the easiest ways to break up a long cut. Keep them soft and blended into the front layers so they frame the face instead of hanging like a separate section.
A Cut That Keeps Moving
The smartest thing about layered hair with caramel highlights is that it doesn’t depend on one styling trick. You can smooth it, wave it, rough it up, or let it air-dry, and the shape still has something to say. That’s rare. A lot of long hair only looks good under one specific light, in one specific style, with one specific brush. This combination gives you more room.
If you want the look to last, start with the shape, then place the caramel where the hair naturally moves. That’s the part that keeps the layers readable when the curls loosen, when the blowout falls, and when the roots start showing a little. The haircut does the structure. The color keeps the structure visible.