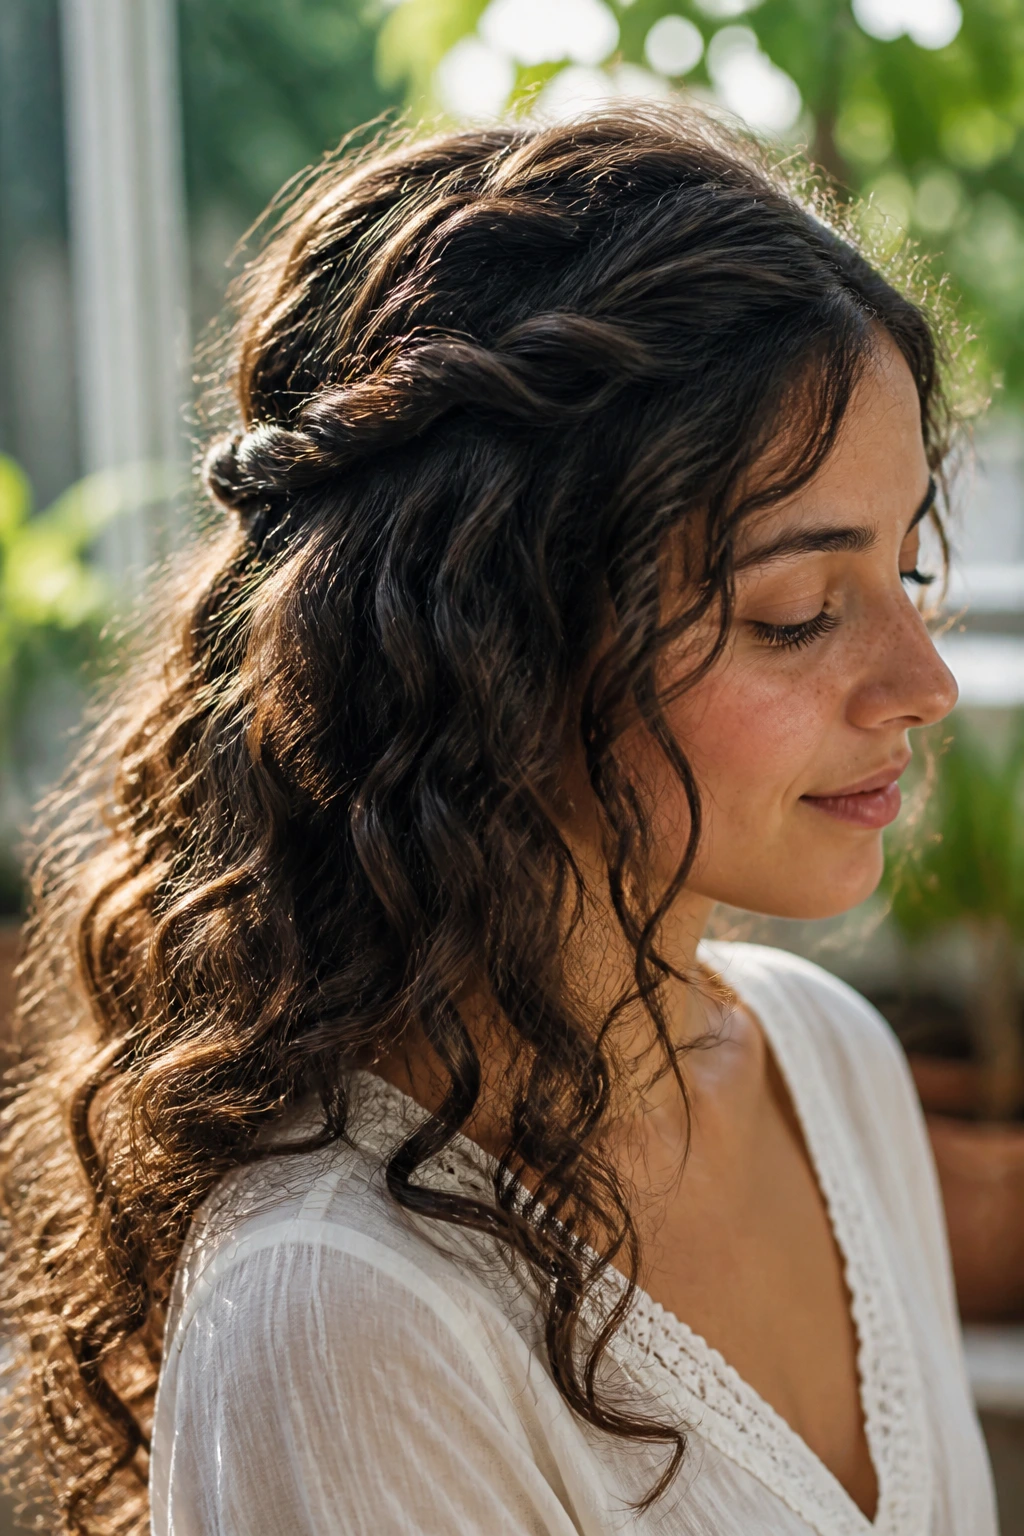
Curly hair looks best when it still looks like curly hair. The prettiest hairstyles for curly hair with beachy waves don’t try to sand the texture down into something slick and obedient; they give the curl a shape, a direction, and a little room to move. That’s the whole trick.
Beachy waves and curls have a nice tension between them. One wants softness and drift. The other wants spring and lift. Put them together and you get hair that feels relaxed but still has structure, which is why a few pins, a braid, or a twist can change the whole mood in five minutes.
A claw clip, a satin scrunchie, and six bobby pins can do more for your hair than another round with a hot tool. Seriously. The styles below lean on that idea: less flattening, more framing, and just enough hold to survive wind, errands, and a long dinner where you keep tucking pieces behind your ears.
Why You’ll Love These Cute Simple Styles
- They work with texture, not against it: A little frizz and uneven curl clumping actually helps these styles look softer and more lived-in.
- Most of them need almost no precision: If one twist sits higher than the other, the style still reads as intentional because curly hair hides tiny imperfections well.
- They hold better on second-day hair: Slightly worn-in curls give pins, clips, and elastics more grip than freshly washed hair that still feels slippery.
- Accessories do a lot of the work: A single claw clip, a silk scarf, or a row of barrettes can make a quick style feel finished fast.
- They suit different curl patterns and lengths: Loose waves, spirals, and thicker curls can all use the same basic ideas with small tweaks.
- They keep the face open without pulling everything back: That matters when you want to show off your texture instead of burying it under a tight ponytail.
Why Loose Shape Flatters Curly Hair and Beachy Waves
Curly hair likes direction more than control. That sentence saves a lot of frustration. When you force every strand into the same lane, the whole style gets stiff at the roots and puffy at the ends. When you give curls a twist, a braid, or a soft anchor point, they settle into a shape that looks natural from the first minute and even better after they move around a little.
The other reason loose styles work is simple: curls have volume built in. You do not need to create fullness from scratch. A half-up knot, a clipped-back side, or a low bun takes advantage of the lift already sitting at the crown and the bend already living through the lengths. Beachy waves are especially good at this because the texture isn’t trying to be polished. It wants a bit of separation.
Humidity changes the equation, too. Tight styles often expand at the wrong spots as the day goes on, while softer styles tend to absorb a little chaos without falling apart. That’s why a braid that looks slightly too loose in the mirror at home often looks better an hour later. It has room to settle.
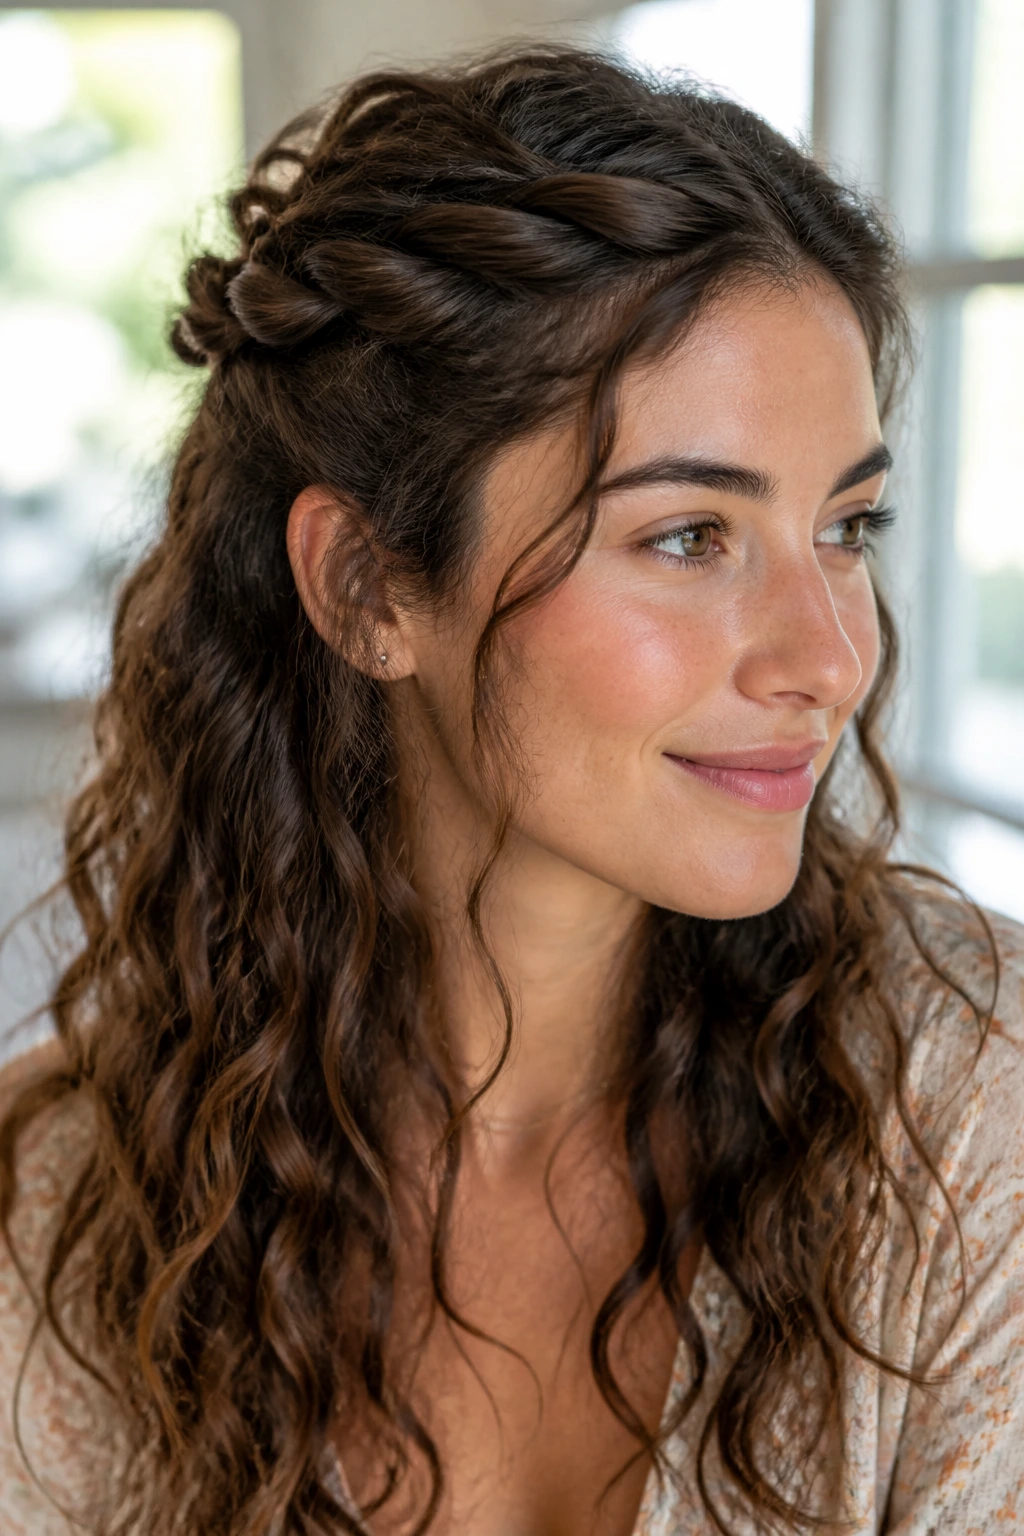
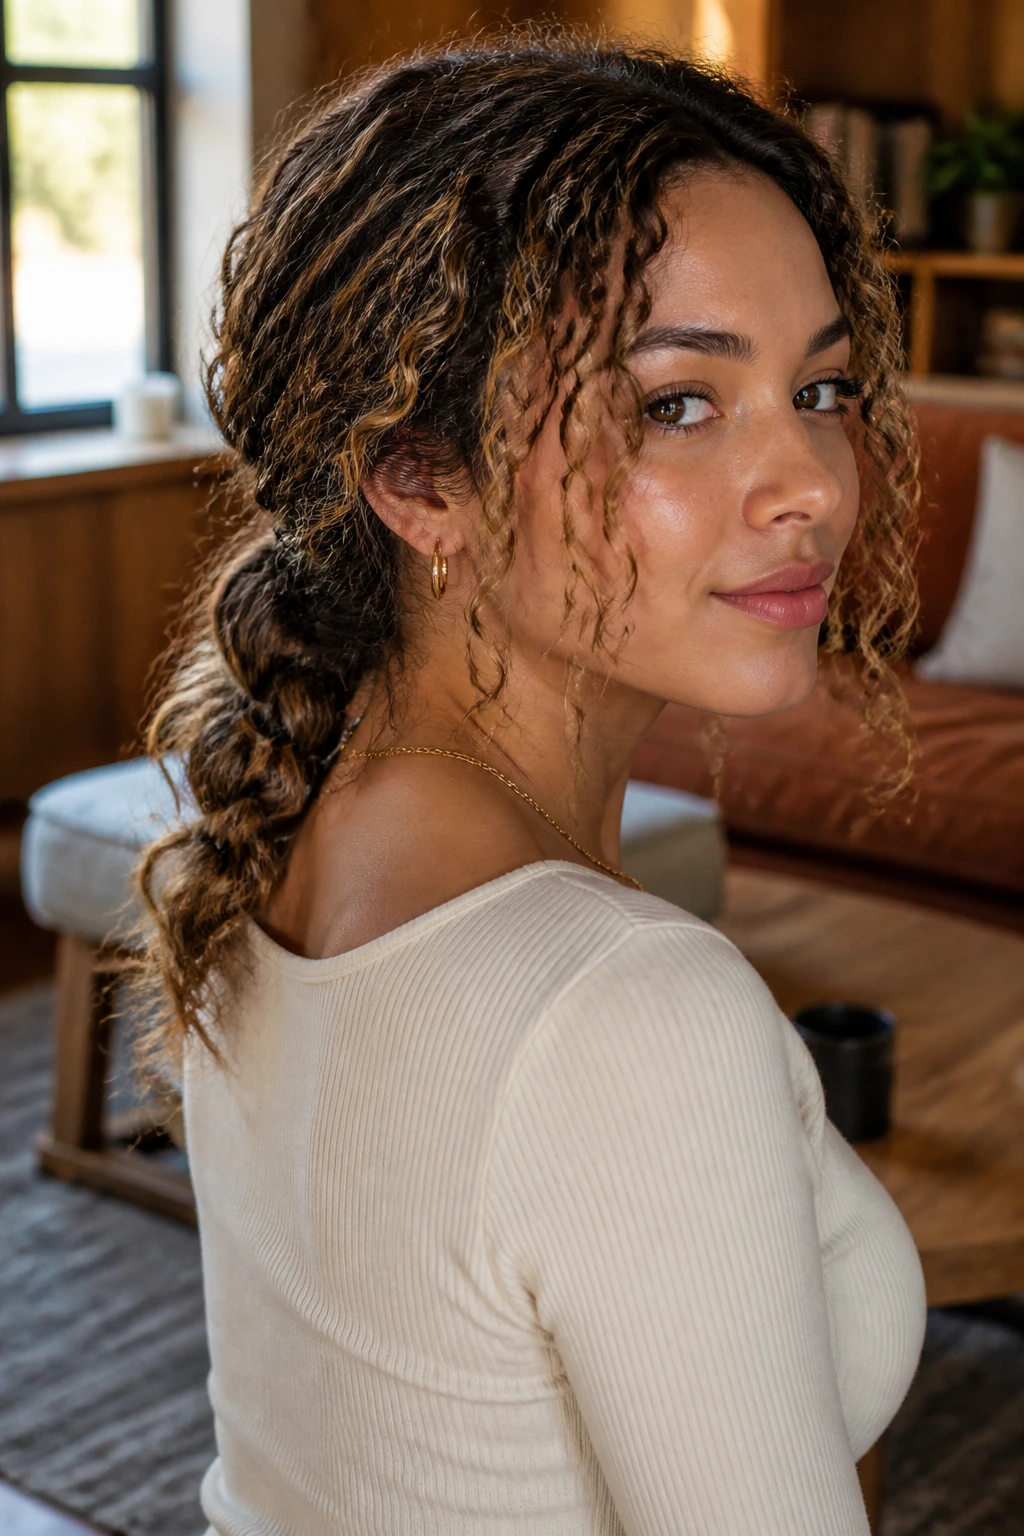
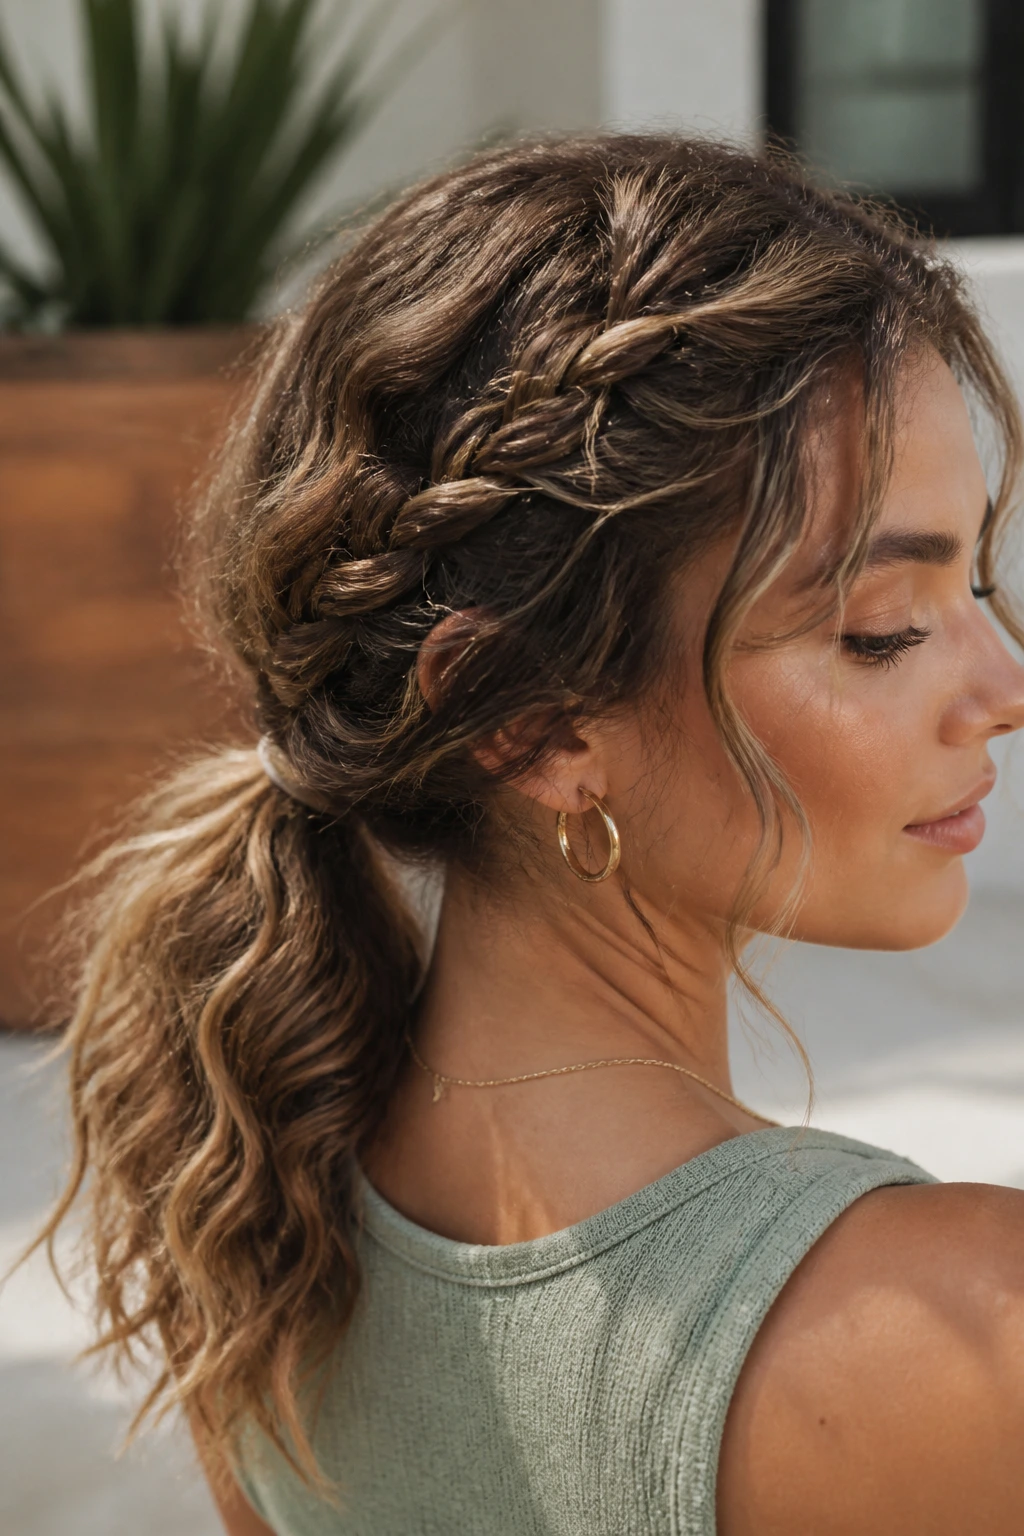
1. Half-Up Twist Crown
This is the one I recommend when you want your curls to stay visible but still need the front section off your face. Twist a section from each temple back toward the crown, then pin them together just above the back of the head. Do not place the pins too high, or the whole thing starts looking like a tiny topknot trying to be a tiara.
The sweet spot is soft and low enough that the twists blend into the rest of your hair. Leave a few shorter pieces free near the ears. Those little bits stop the style from looking overworked and give it that easy, late-afternoon softness beachy waves are known for.
Use two crossed bobby pins on each side if your hair is slippery. One pin tends to drift; two pins feel much more serious. If your curls are thick, twist only the top layer and leave the underlayer alone so you do not create a bulky ridge at the back.
2. Claw Clip French Twist
A claw clip and curly hair are old friends for a reason. Gather the hair at the nape as if you were making a low ponytail, then fold the length upward and tuck it into the clip so the ends spill out on purpose. That spill matters. It keeps the style from looking too strict.
This works especially well when the ends are dry and springy. The clip holds the shape, while the loose ends keep the texture visible. If you have shoulder-length curls, leave a few inches out so the movement stays obvious instead of compressed into the clip.
The main mistake here is using a clip that’s too small. If the teeth bite too hard into the hair, the style feels tense and starts sliding by lunchtime. Pick a medium or large clip with a slightly curved shape; it grips better without flattening the crown.
3. Bubble Ponytail With Curly Segments
Bubble ponytails look playful on curls because each section puffs differently. Tie your hair into a low or mid ponytail, then add small elastics every 2 to 3 inches down the length. Gently tug each section outward until it rounds into a bubble.
Do this with clear elastics or soft black ties, depending on your hair color. The whole point is to keep the elastics nearly invisible while the curly texture does the rest. If your hair is long, you can make three or four bubbles. If it’s shorter, two well-shaped sections are enough.
The style reads cute without trying too hard, which is exactly why it works. It also keeps the ends contained while still showing off the pattern in each curl clump. That’s a nice tradeoff on days when loose hair feels too chaotic but a slick ponytail feels wrong.
4. Side Braid Into a Low Pony
Start with a loose side part and braid the front section on one side from the temple down toward the ear. Stop before the braid gets too tight; you want texture, not a rope. Then gather the rest of the hair into a low ponytail and let the braid blend into it.
This style is a good answer when one side of your hair keeps falling in your face. The braid acts like a built-in side sweep, and the ponytail keeps the back neat enough to feel intentional. A soft finish at the ends keeps the whole thing from becoming too school-uniform.
I like this one for medium-length hair because it gives you structure without swallowing your curl pattern. If you have tighter coils, braid only the front section and leave the pony looser so the style doesn’t shrink too much at the back.
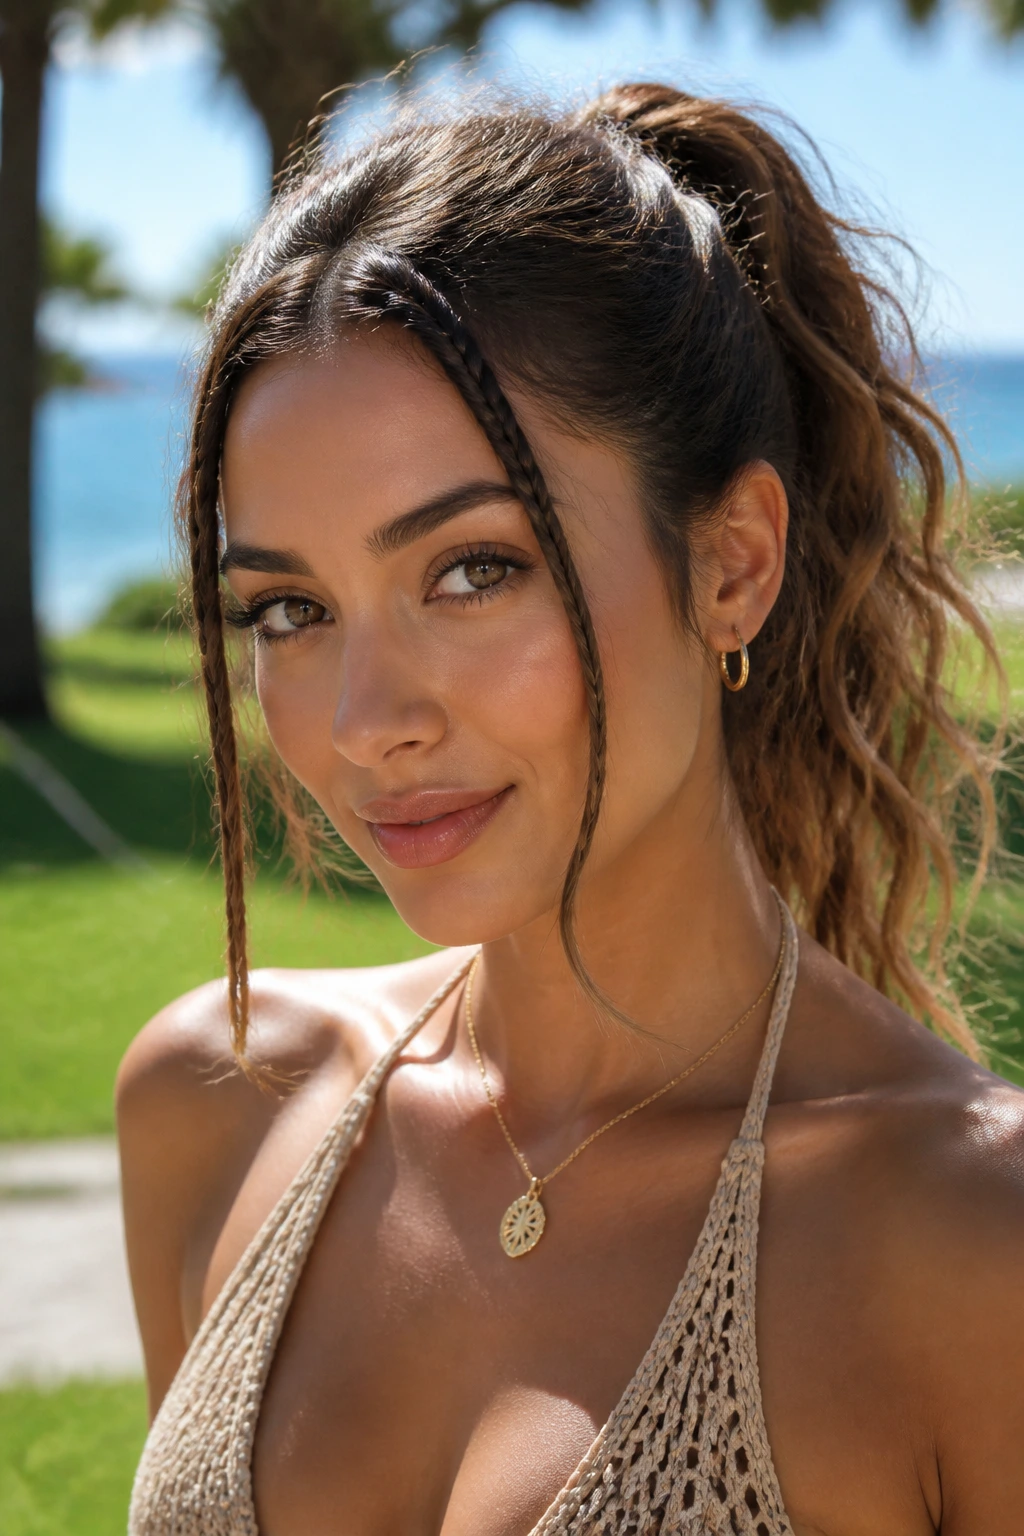
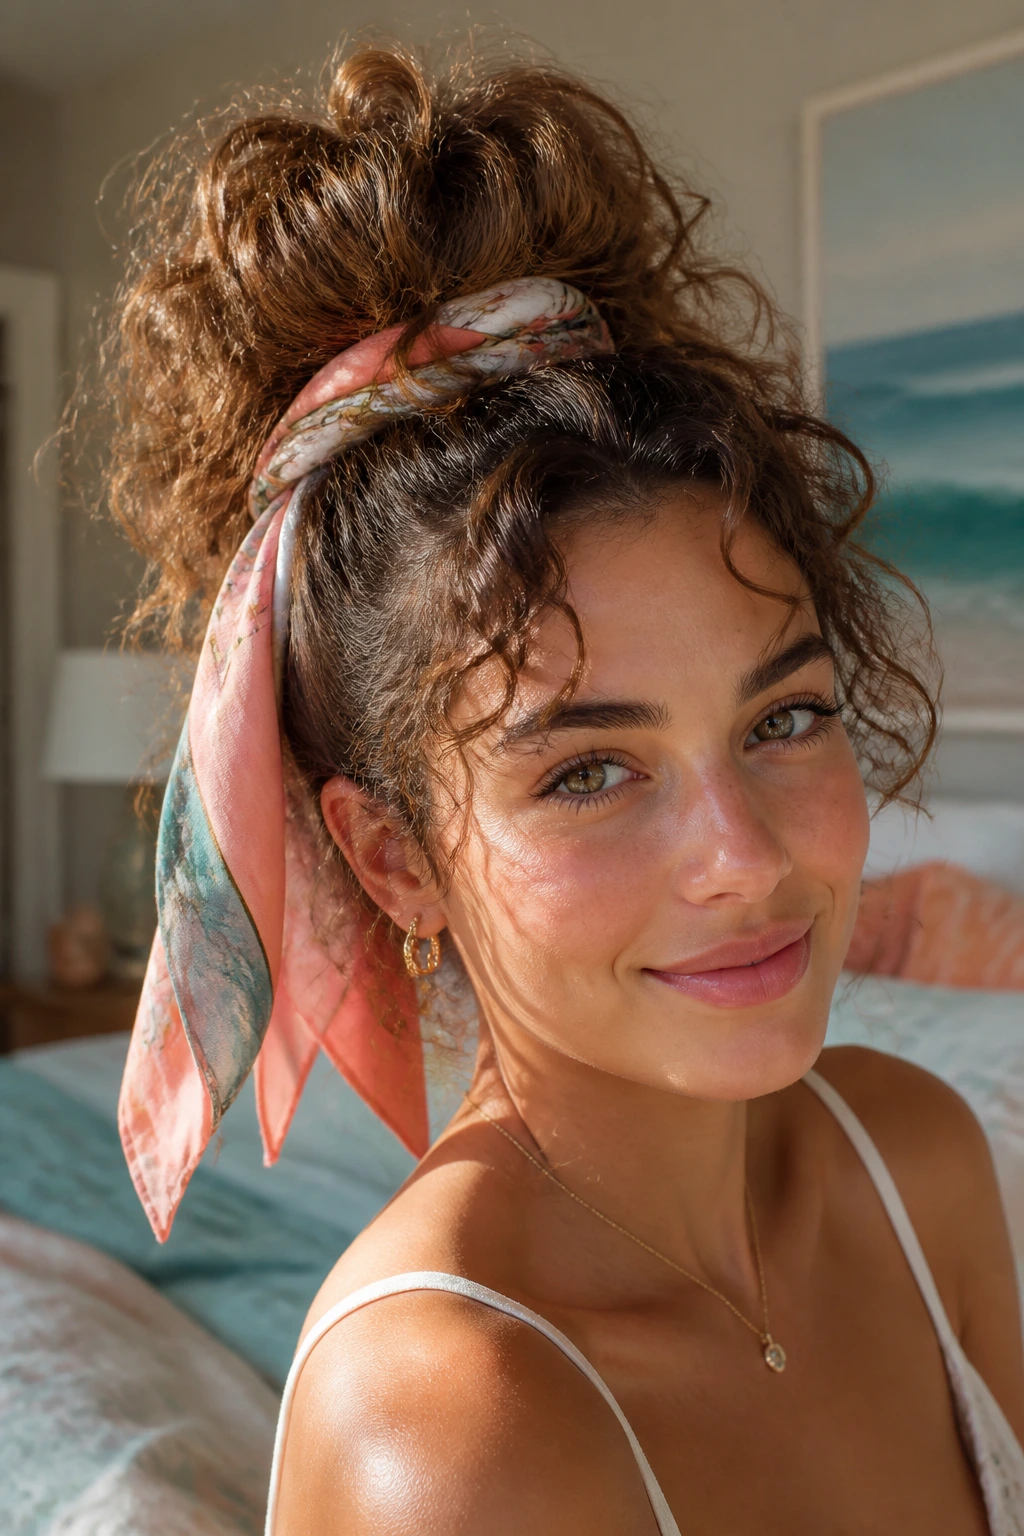
5. Pineapple Pony With a Silk Scarf
A high pineapple pony is one of the easiest ways to keep beachy waves looking airy. Gather the hair high on the crown, secure it with a soft scrunchie, and let the lengths fan upward and outward. Then tie a silk scarf around the base or weave it through the ponytail for a little color.
The scarf does two jobs. It dresses up the style, and it helps keep the tie from digging into the curls. That matters if your hair is thick, because a hard elastic can create a dent right where you want volume.
Leave the ends loose and a little wild. A pineapple that looks too tidy loses the whole beachy feel. If you want it to look softer, pull out one or two face-framing pieces and let them fall where they want.
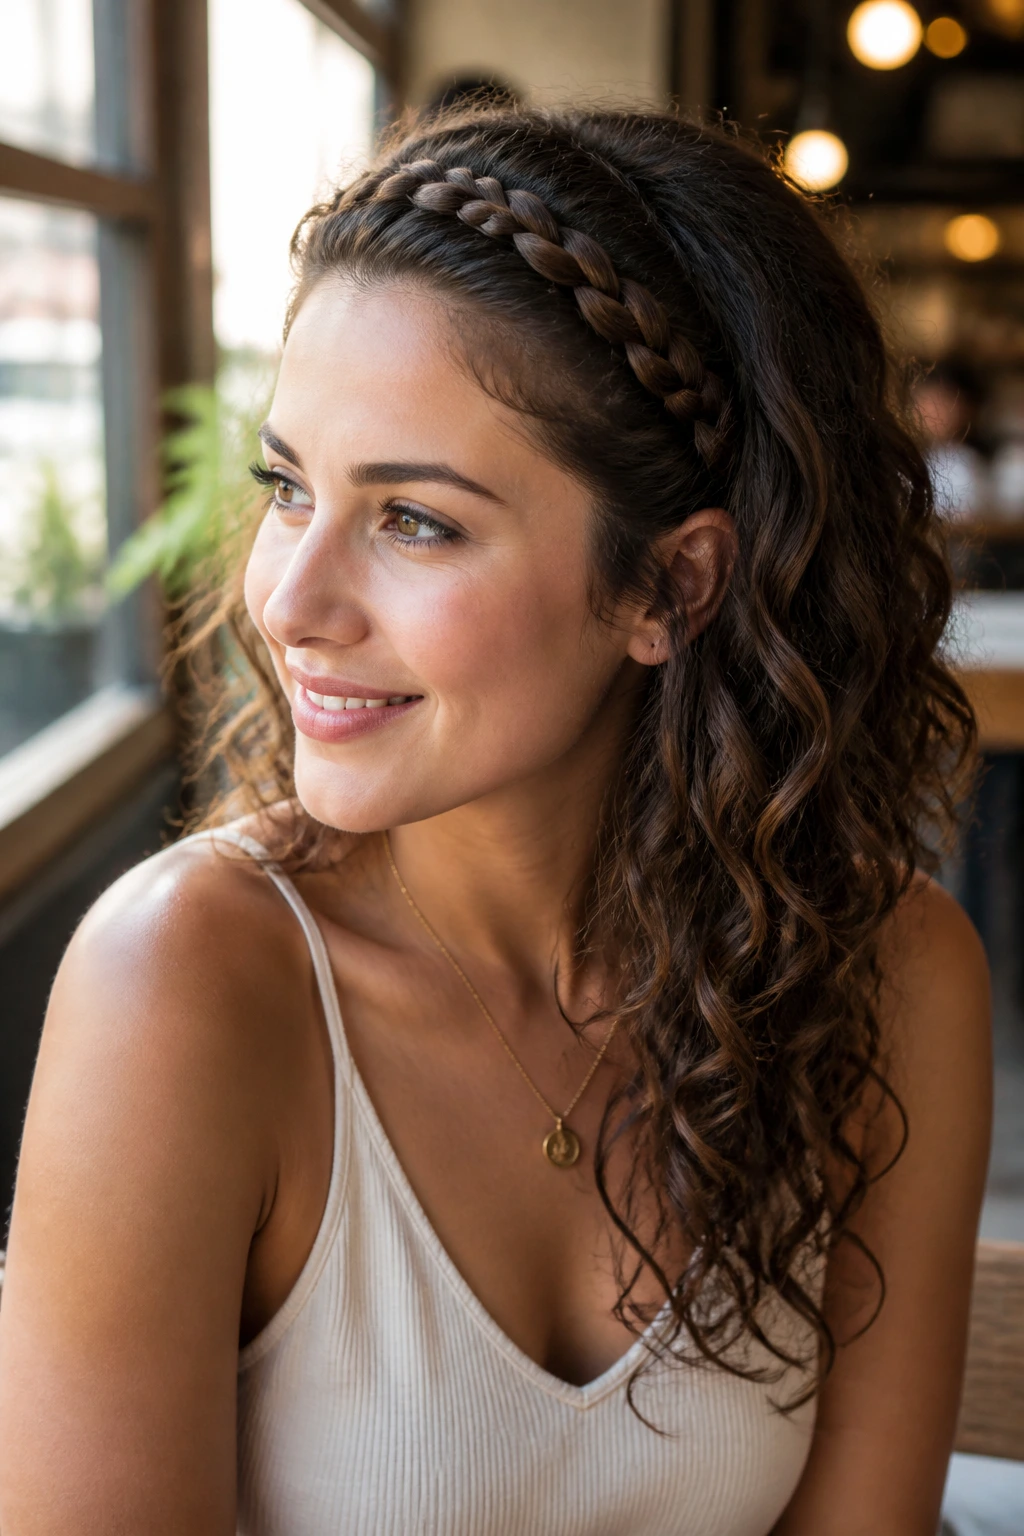
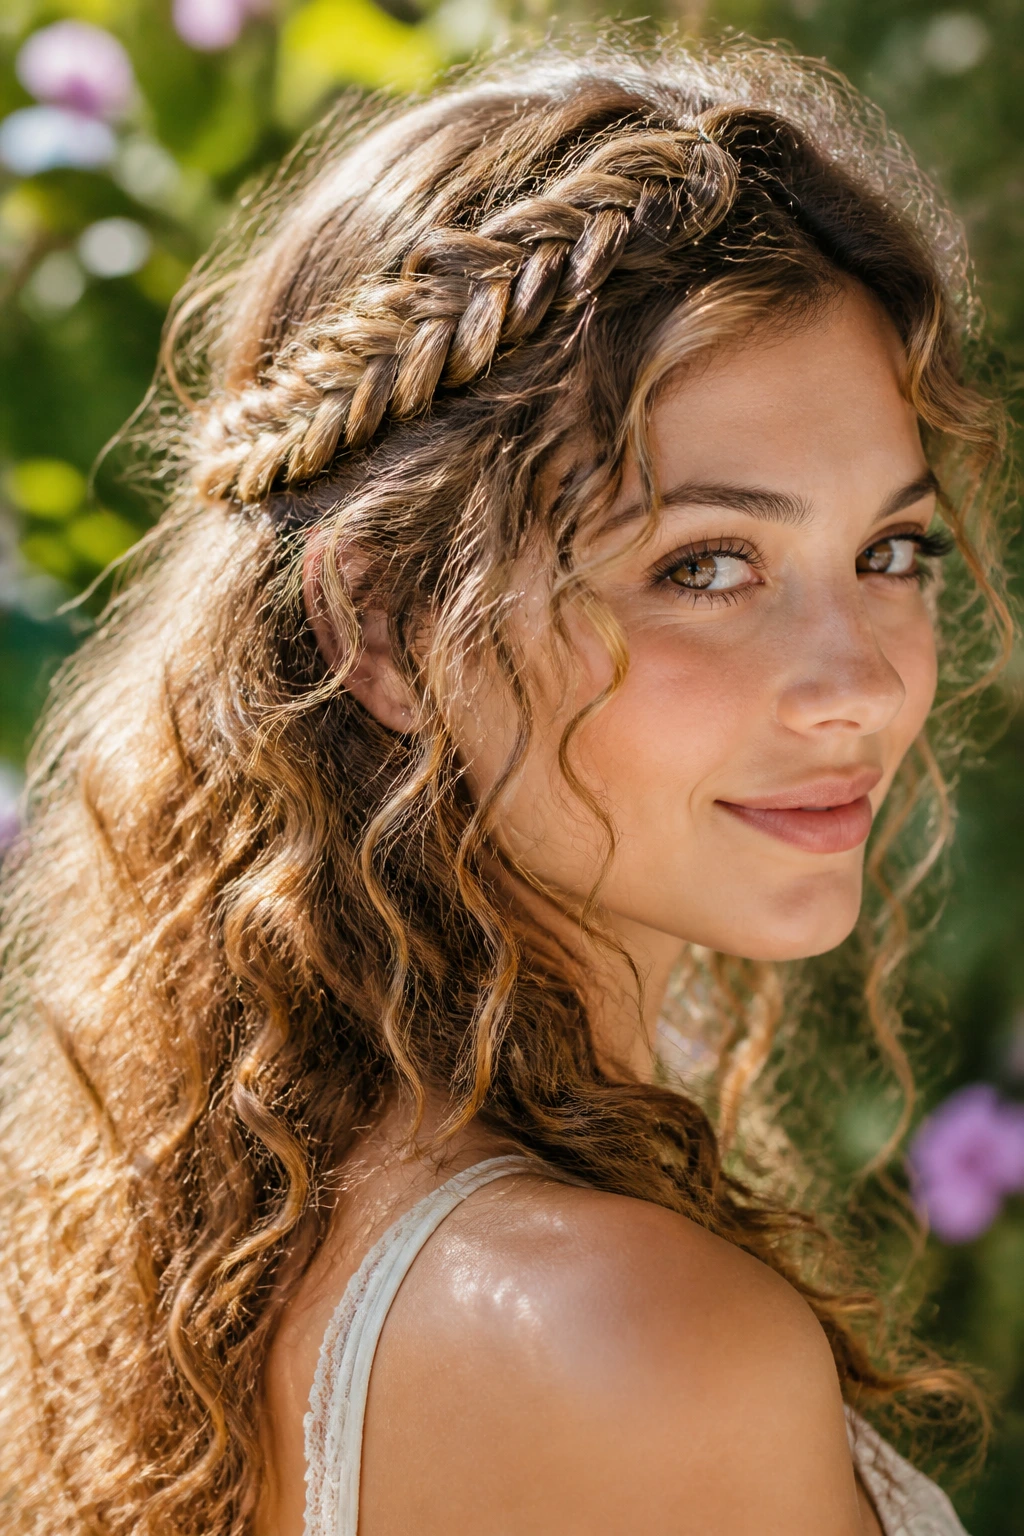
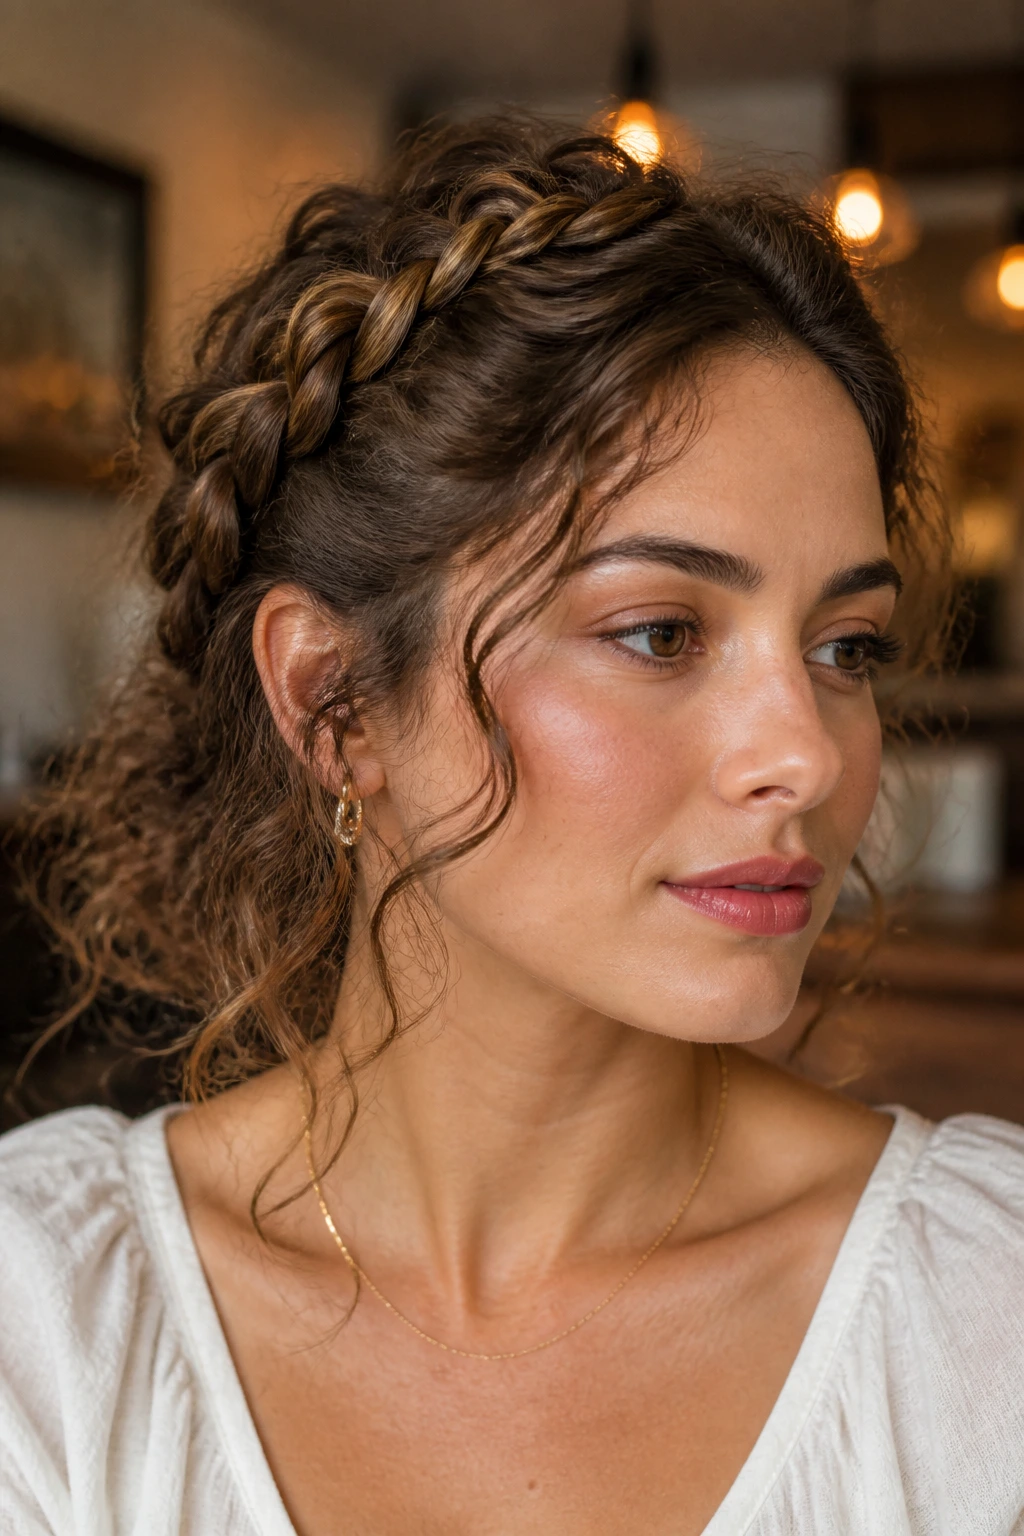
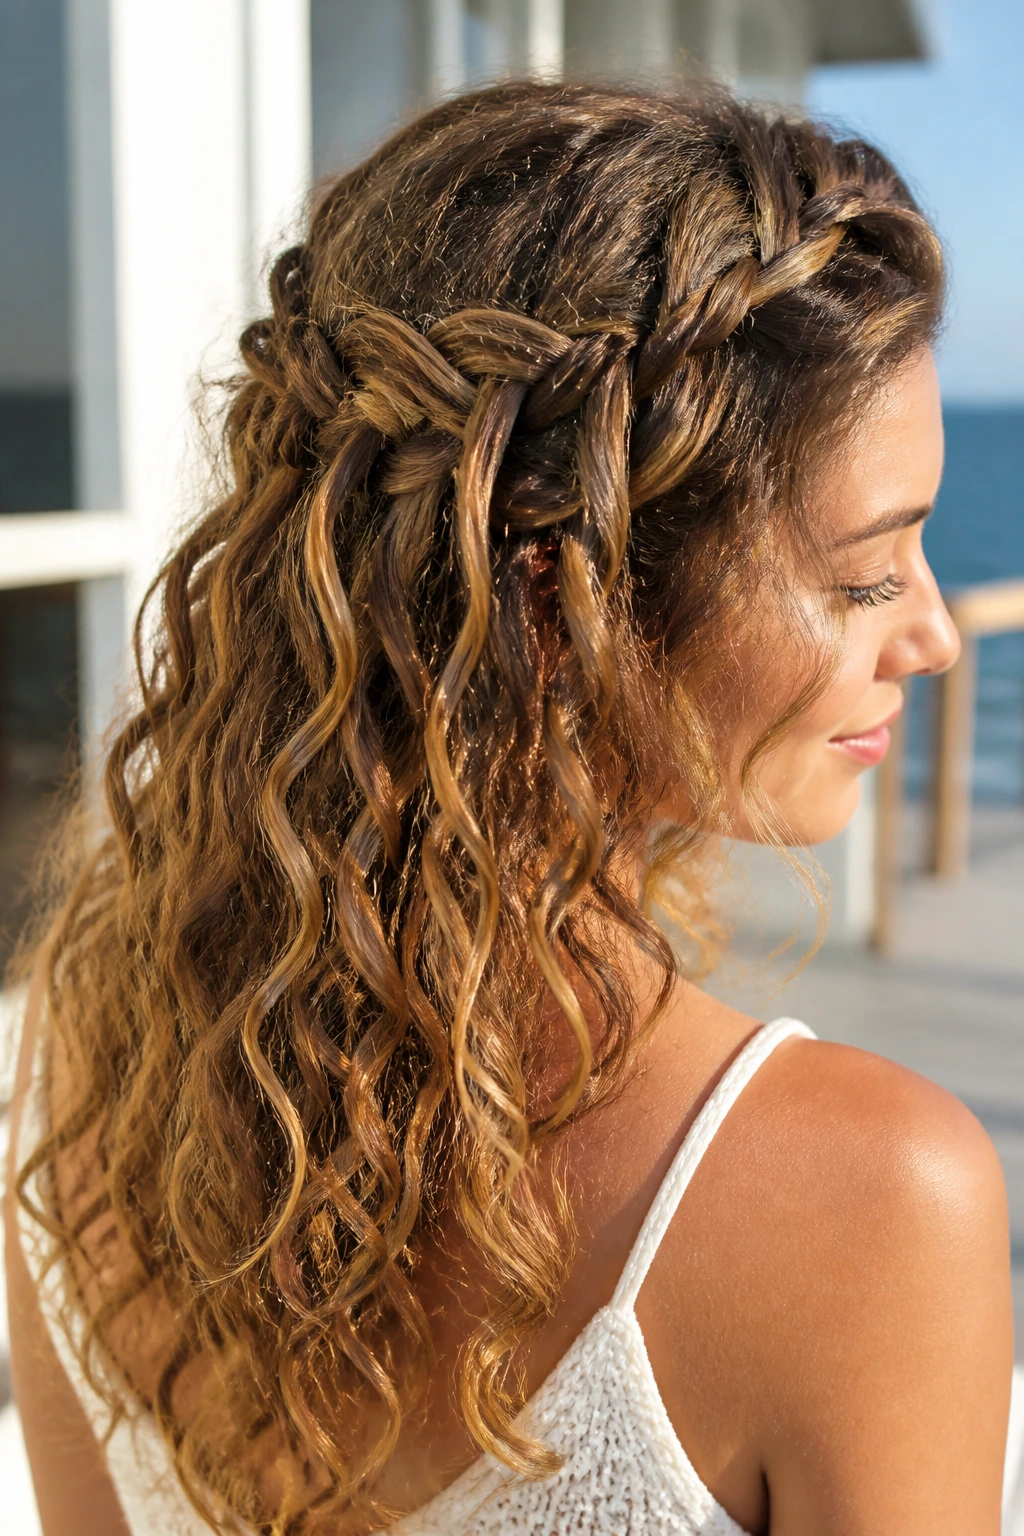
6. Loose Halo Braid
A halo braid sounds fussy, but a loose one is simpler than people think. Braid along the hairline from one side to the other, keeping the sections chunky instead of tiny, then tuck the end behind the ear or under a hidden pin. The result is a braid that sits like a soft frame around the face.
This style shines on curly hair because the braid doesn’t need perfect smoothness. In fact, a little texture makes it better. Pancake the braid gently by pulling the outer edges wider once it’s secured; that gives it thickness and keeps it from looking like it was pulled from a ballet class costume bin.
Best part: it stays put. Once the braid is anchored on both sides, it doesn’t need much babysitting. If your hair is layered, use a couple of extra pins behind the ears so the shorter pieces don’t escape.
7. Messy Low Bun With Curly Tendrils
A low bun on curly hair should never look like a tight knot. Gather the hair at the nape, twist it once or twice, then pin it into a loose bun with the ends tucked unevenly on purpose. Pull out a few tendrils around the temples and just below the ears.
Those loose pieces matter more than people think. They break up the outline of the bun and make the whole style feel softer, almost like it formed there naturally after a long day. If your curls are very springy, let the bun sit a little higher at the nape so it doesn’t puff upward weirdly as the day goes on.
Use U-pins or long bobby pins if you have a lot of hair. A single elastic can flatten the bun and make it look too compact. The looser the tuck, the better this one reads.
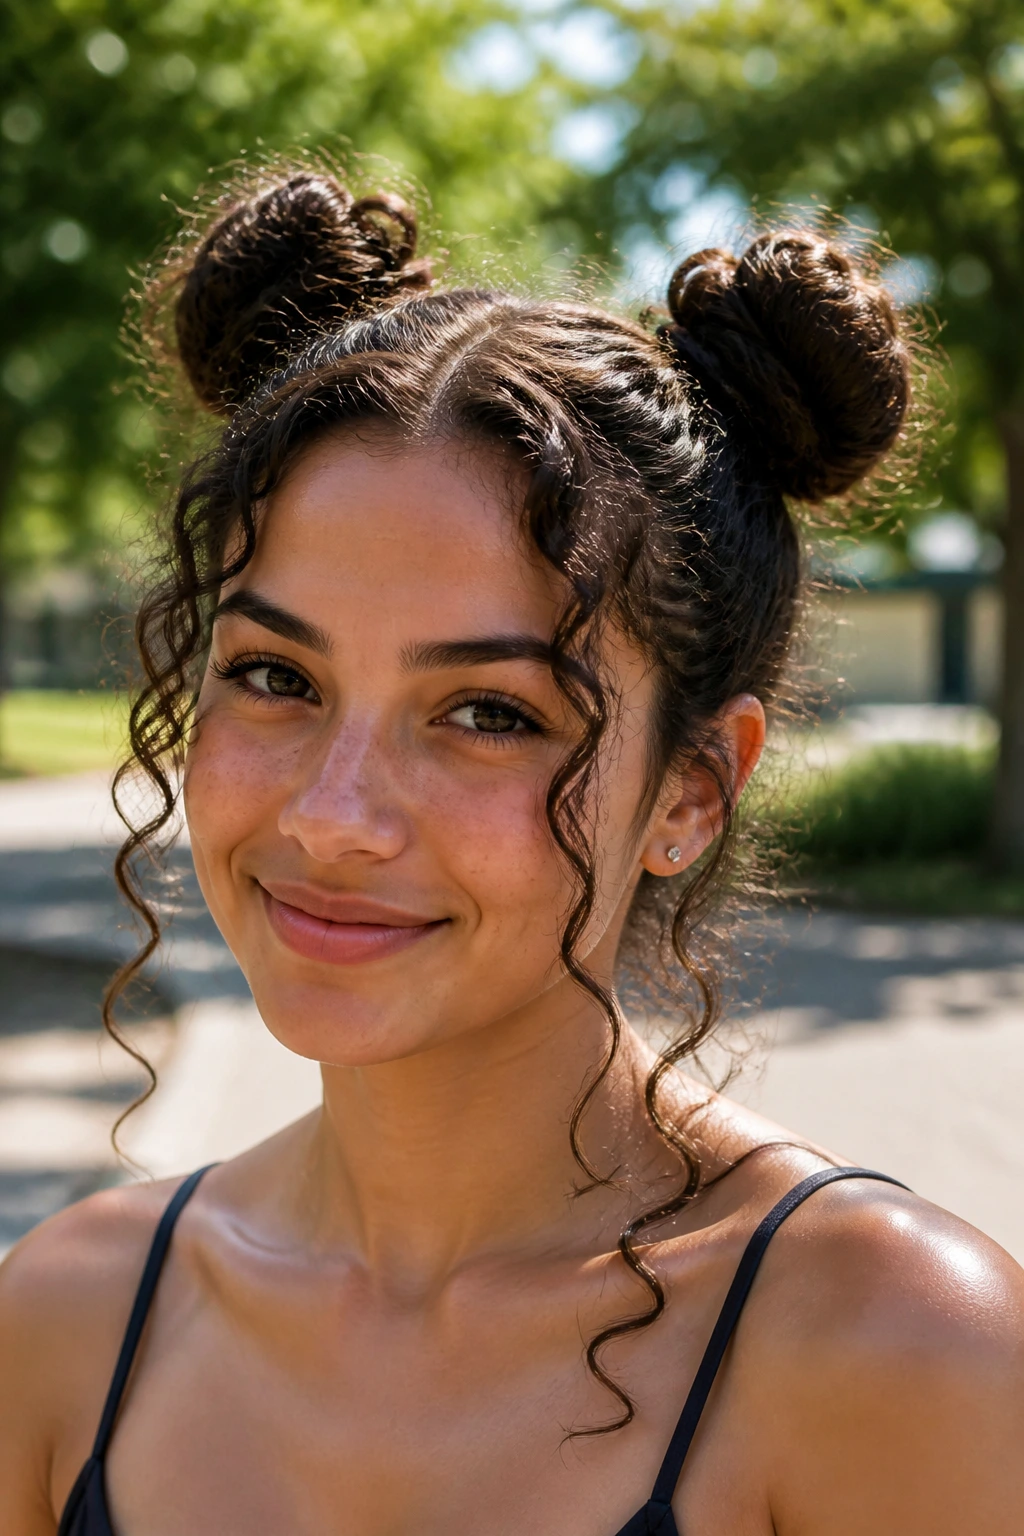
8. Mini Space Buns
Two small buns high on the head can be surprisingly flattering on curly hair. Part your hair down the middle, twist each side into a small bun, and leave the ends curly rather than stuffing every last piece in. The buns should sit high enough to show the crown shape but not so high that they look like they’re floating.
This style is fun because it uses texture as part of the shape. The loose curls around the buns soften the look fast. You can keep the buns neat or deliberately messy; both versions work, though the messier one usually feels better with beachy waves.
It’s a smart option for curls that get frizzy around the face. Pull the front pieces forward a little before pinning so the final result doesn’t feel too severe. And if you want a little more polish, wrap a thin strand around each elastic.
9. Waterfall Half-Braid
A waterfall braid sounds more complicated than it is. You braid across the back or side of the head and drop one section each time so curls fall through the braid like little windows. That loose drop is what gives the style movement.
This one is pretty when you want something that looks more detailed than a regular half-up style but still keeps the lower length free. Because the braid only controls the top layer, the rest of the hair stays soft and full. That balance suits beachy waves especially well.
Do not braid too tightly or too evenly. A relaxed waterfall braid should have a little irregularity in the spacing. If the braid gets too neat, it starts looking formal in a way curly hair does not need.
10. Deep Side Part With Barrette Stack
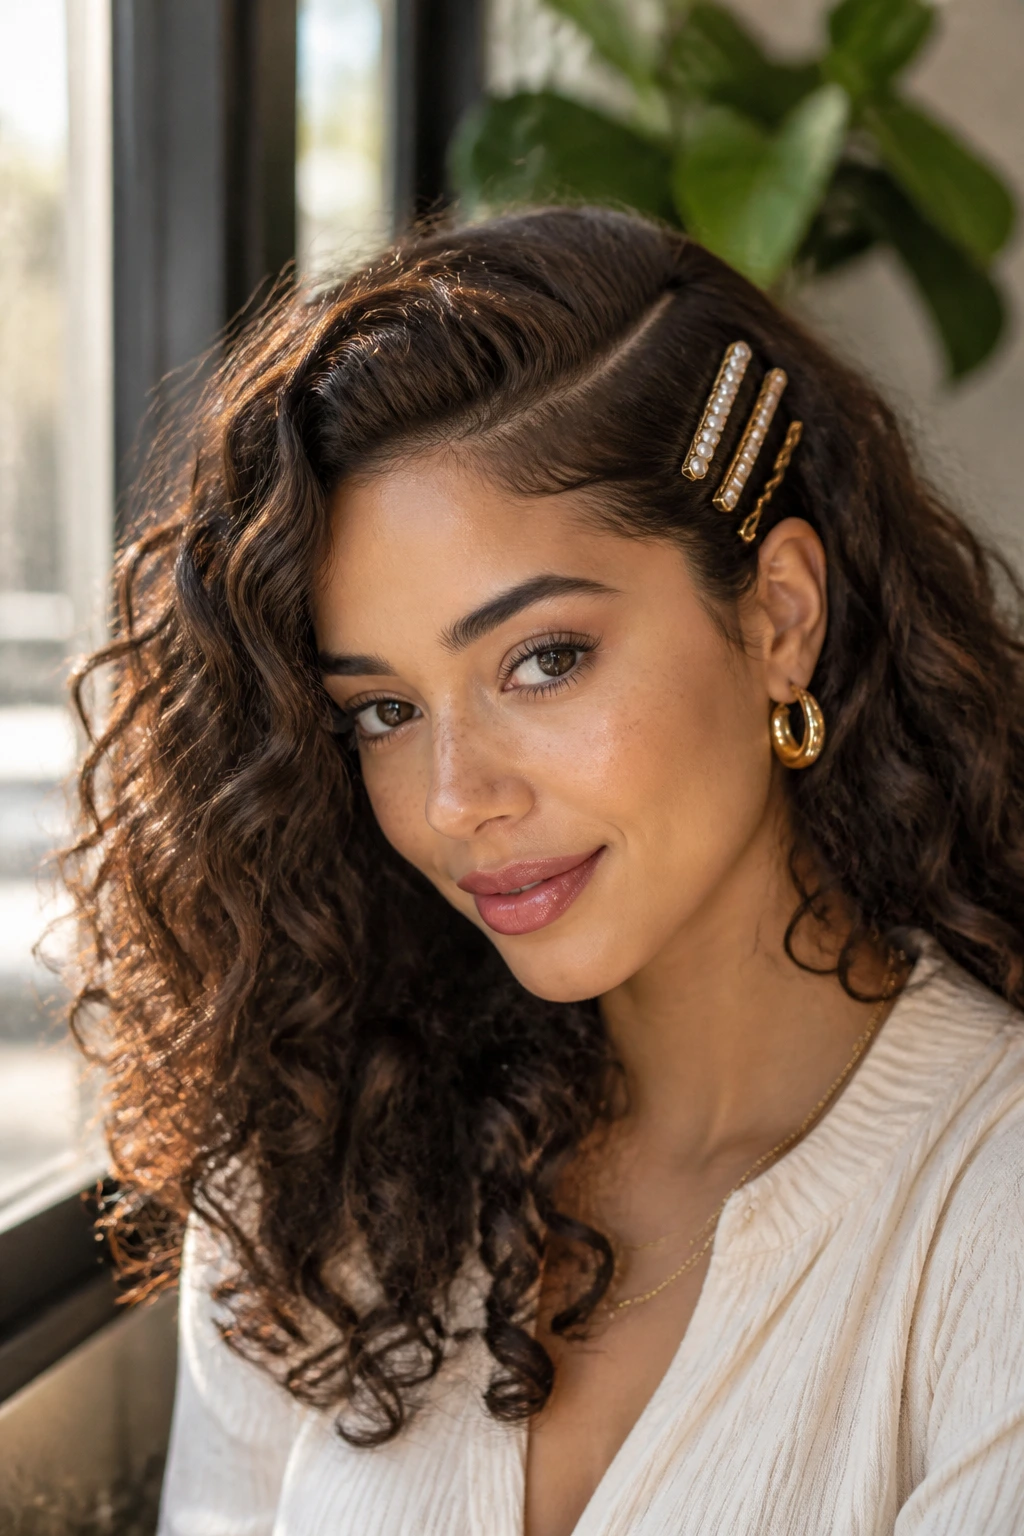
Sometimes the simplest answer is the cleanest. Make a deep side part, tuck one side behind the ear, and stack two or three barrettes above the temple on the heavier side. The curls do the rest.
This style is almost embarrassingly easy, which is exactly why it earns a place here. It works because it changes the shape of the hair without changing the texture. That makes it ideal for mornings when you want your curls to look styled but you don’t have the patience for braiding.
I like a mix of one plain clip and one decorative clip. Too much sparkle can fight with the texture. One good metal barrette and one smaller pin usually feels enough.
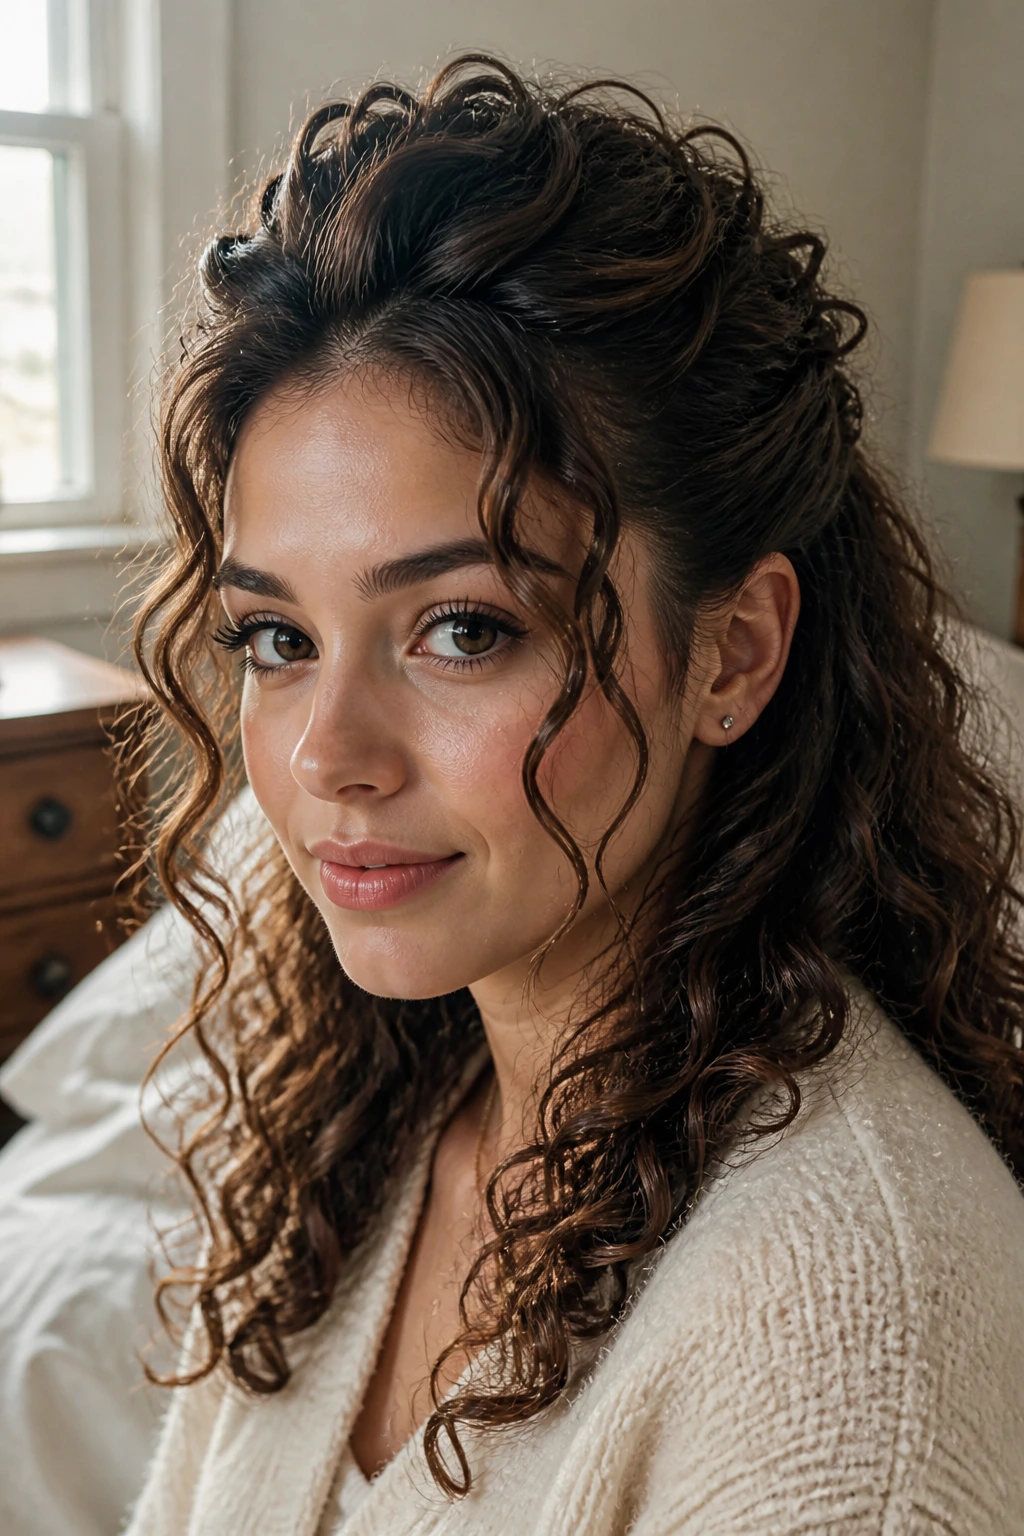
11. Half-Up Top Knot
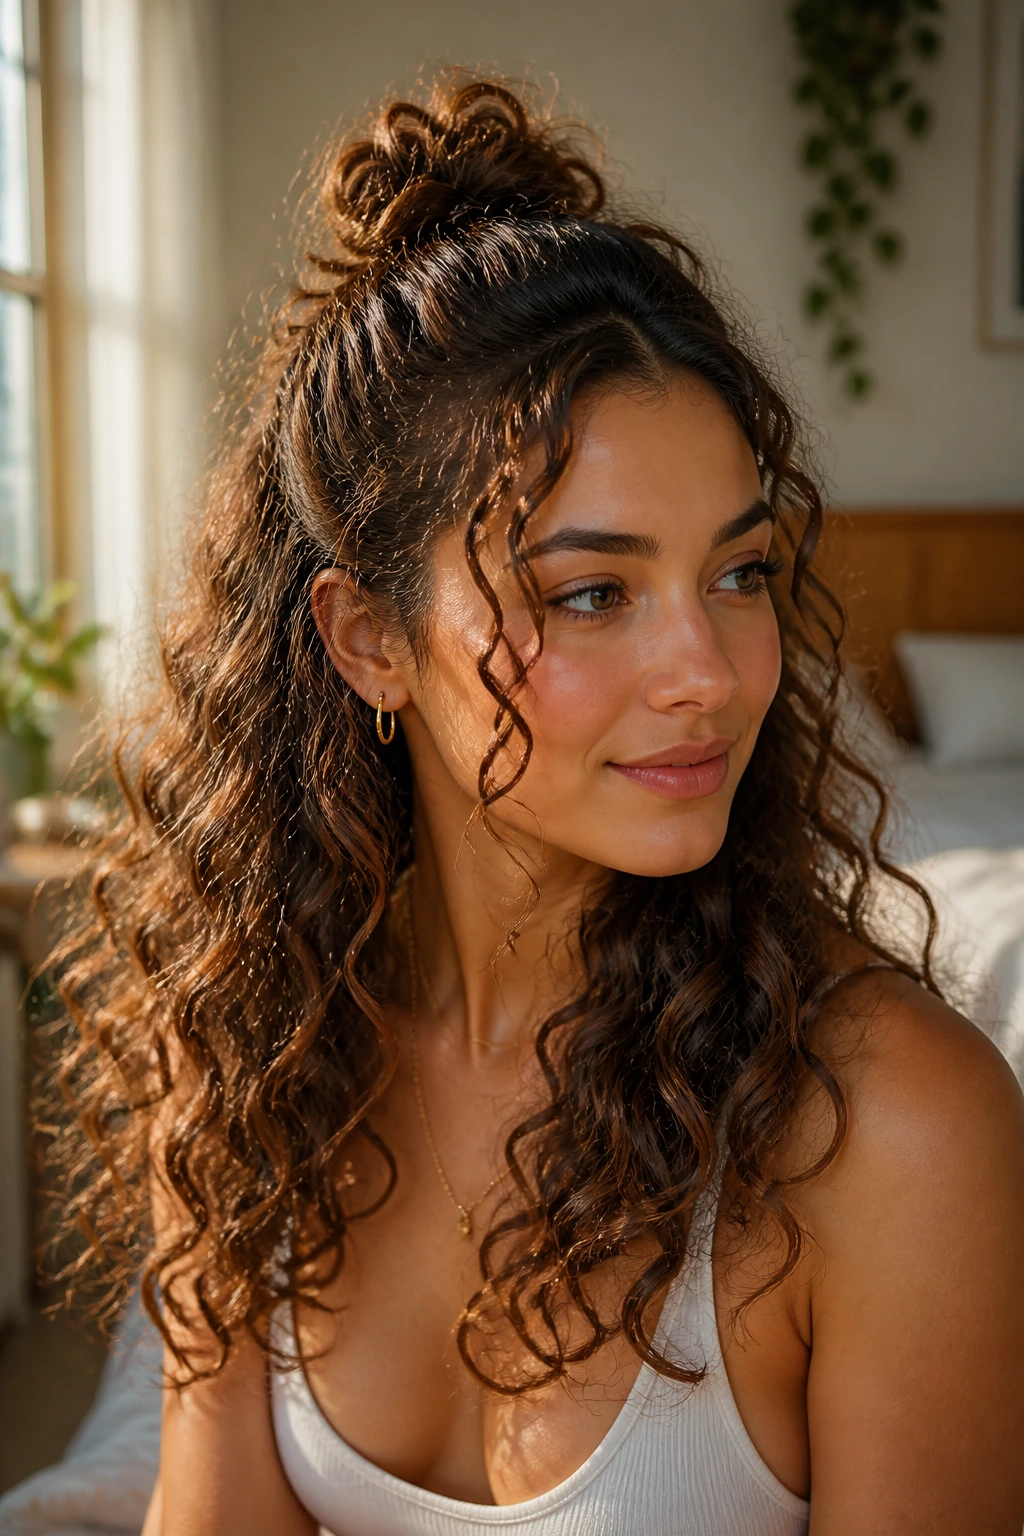
A half-up top knot gives you lift at the crown and keeps the lower curls free to move. Gather the top third of your hair, twist it into a loose knot, and secure it with a small elastic or two pins. Leave the knot slightly messy so it doesn’t look like a hard little ball on top.
This is one of those styles that looks different on every curl pattern. On looser waves, it reads casual and airy. On tighter curls, it feels fuller and more playful because the knot has more body.
The important part is restraint. If you over-tighten the knot, the back gets pulled flat and the front loses height. Keep it soft, and let a few pieces fall around the hairline.
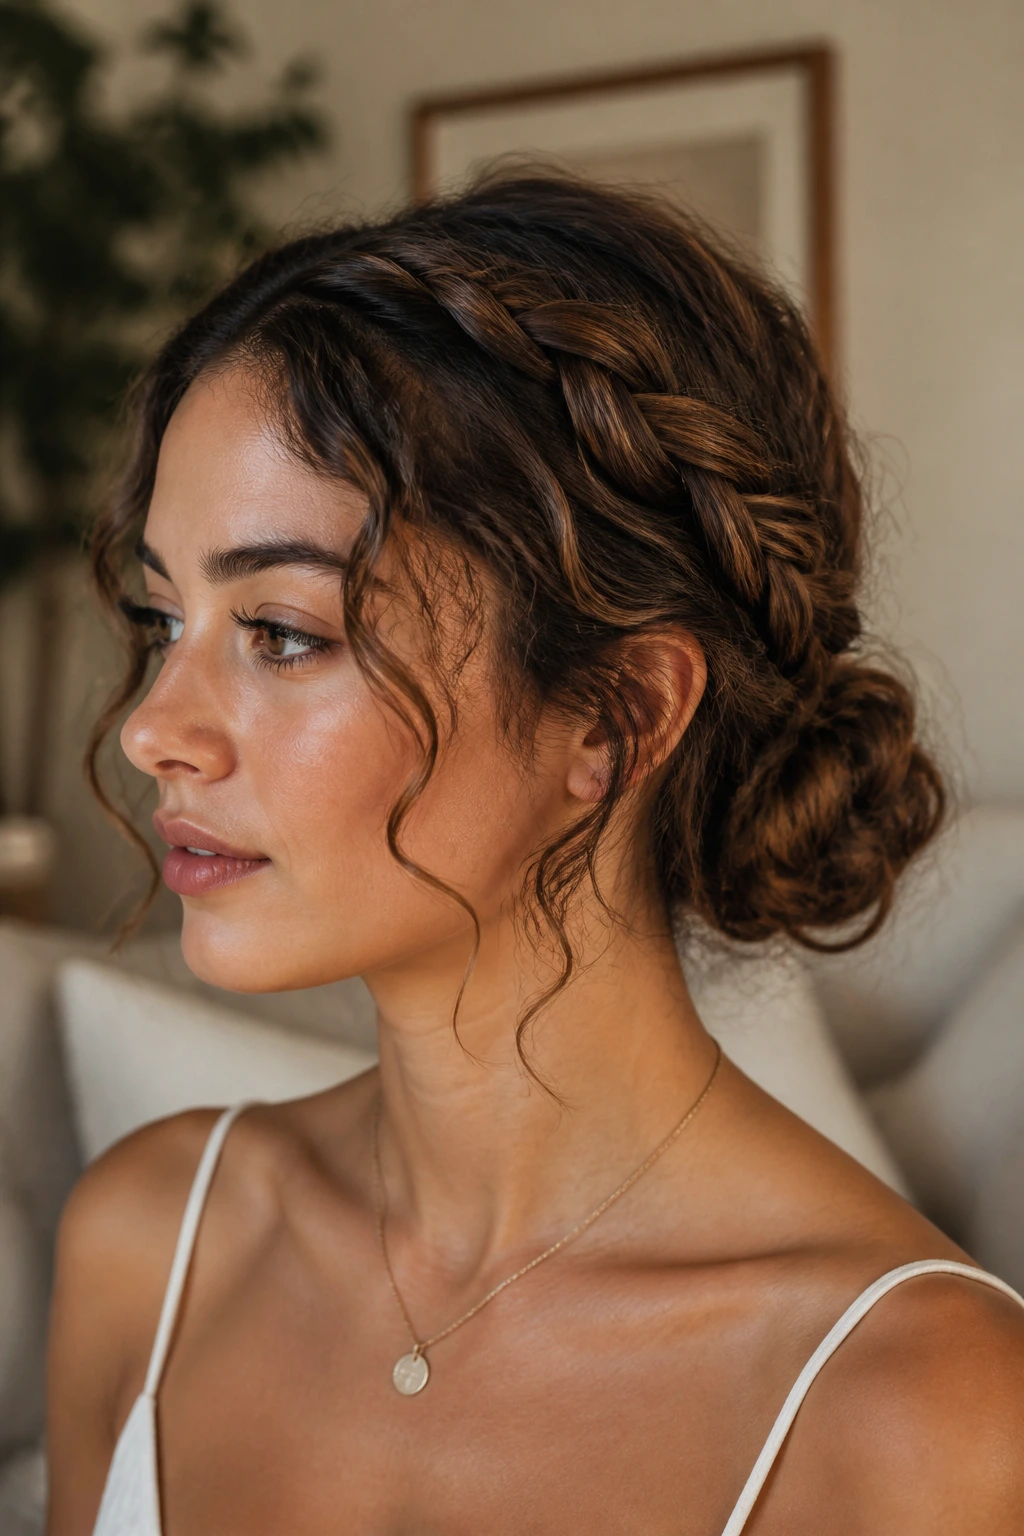
12. Braided Headband Sweep
Braided headbands are useful when you want the front of your hair controlled without losing the rest of the wave pattern. Take a section from one side, braid it, and sweep it across the hairline like a headband before pinning it behind the opposite ear.
This is especially good for growing-out bangs or shorter face layers that keep slipping into your eyes. The braid acts like a built-in accessory and does the job better than a stiff metal headband that digs into curls. If the braid looks too narrow, tug it wider after securing it.
The charm here is in the contrast. The front gets definition while the rest stays loose and soft. That mix feels more natural than a fully pinned-up style, and it usually sits nicely with beachy waves.
13. Twisted Nape Chignon

A chignon sounds fancy until you make it loose. Gather the hair low at the back, split the length into two sections, twist them together, and coil the twist into a soft knot at the nape. Pin the knot from underneath so the curl pattern stays visible on top.
This one works when you want a cleaner finish without losing the texture. It’s a better choice than a tight bun if your curls need to stay soft around the ears and neck. The twist gives the style some polish, but the looser coil keeps it from looking severe.
If your hair is layered, tuck the shorter ends into the base first and leave the longer curls to wrap around the outside. That helps the chignon look full instead of patchy.
14. Fishtail Half-Up
A fishtail braid makes curly hair look more detailed without asking for a lot of length. Pull back the top section, split it into two parts, and cross tiny pieces from the outer edge of one side into the other. Keep the braid loose enough that you can pull it open later.
This works because the braid sits like texture on top of texture. Curly hair already has movement, so a fishtail accent adds pattern without competing with the rest of the style. A tiny elastic at the end disappears into the curls better than a big one.
If you want the braid to look fuller, gently widen it with your fingers before pinning it back. Do that after it’s secure, not before. If you pull too soon, the braid loosens and falls apart at the crown.
15. Pinned-Back Sides and a Soft Puff
This is the style for days when you want the easiest possible fix. Take the sides back from the temples and pin them behind the ears, leaving the top and back in a soft puff of curls. The shape is simple, but it still looks considered.
It’s good on short curls, medium curls, and anything that sits between a bob and a shoulder-length cut. The pins keep the front calm while the rest of the texture stays free. If you want a little extra lift, lightly mist the roots before pinning and give the crown a gentle lift with your fingers.
The whole thing lives or dies on pin placement. Hide the pins under a curl clump, not on top of one. That tiny move makes the style look cleaner and keeps the pins from sliding around.
16. Wrapped Low Ponytail
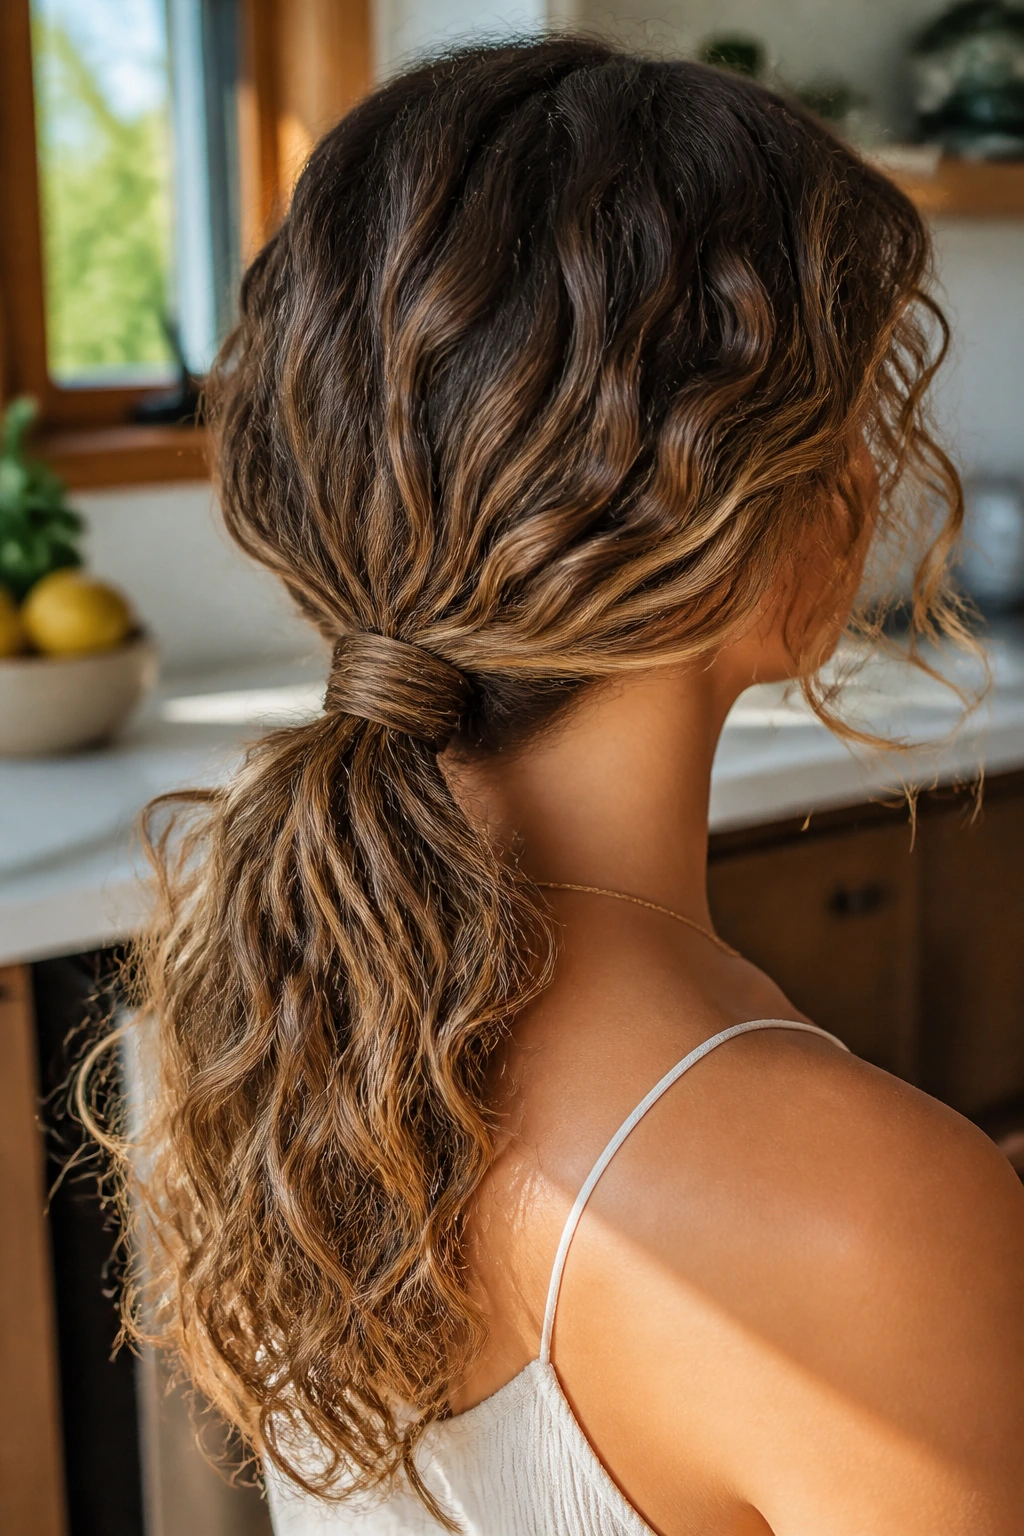
A wrapped ponytail is one of those details that makes a plain style look finished. Put the hair into a low ponytail, then take one small curl or thin section from underneath and wind it around the elastic until it hides the tie. Secure the end with a bobby pin under the pony.
That wrap changes the whole mood. Instead of seeing a rubber band, you see a smooth little finish at the base, which makes the ponytail feel more intentional. The rest of the hair can stay soft and fluffy, so you keep the beachy texture where it matters.
This is one of my favorites for dinners, meetings, or any situation where you want your hair out of the way but not careless. Use a satin scrunchie under the wrap if you need extra comfort. Your scalp will thank you.
17. Curly Pigtails
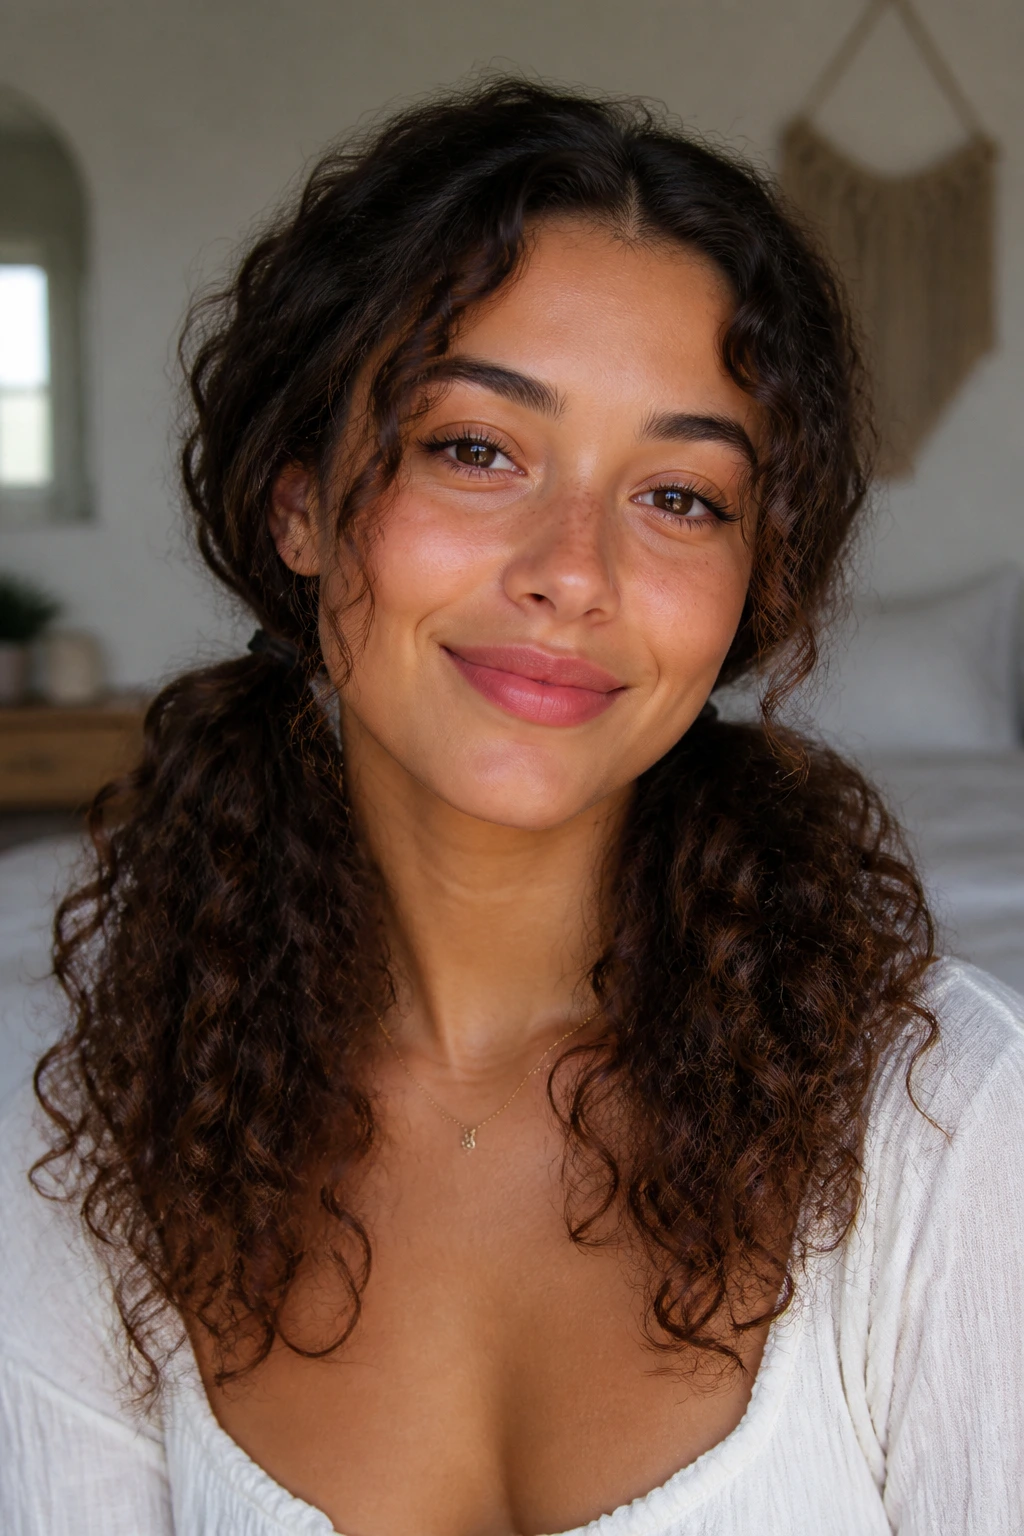
Pigtails are not just for kids. On curly hair, they can look playful, modern, and surprisingly sweet when the sections are kept loose. Part the hair down the middle and place the pigtails low for a softer feel, or higher for a more lively shape.
The trick is to leave the ends free and avoid pulling the sections tight against the scalp. A little puff at the roots makes the style feel natural. If your curls are dense, you may need to split each side into two sections before tying so the pigtails don’t turn into heavy lumps.
A middle part makes the look clean. A slightly crooked part makes it more casual. Both work, and both beat the kind of over-polished pigtails that fight the texture.
18. Faux Hawk With Clipped Sides
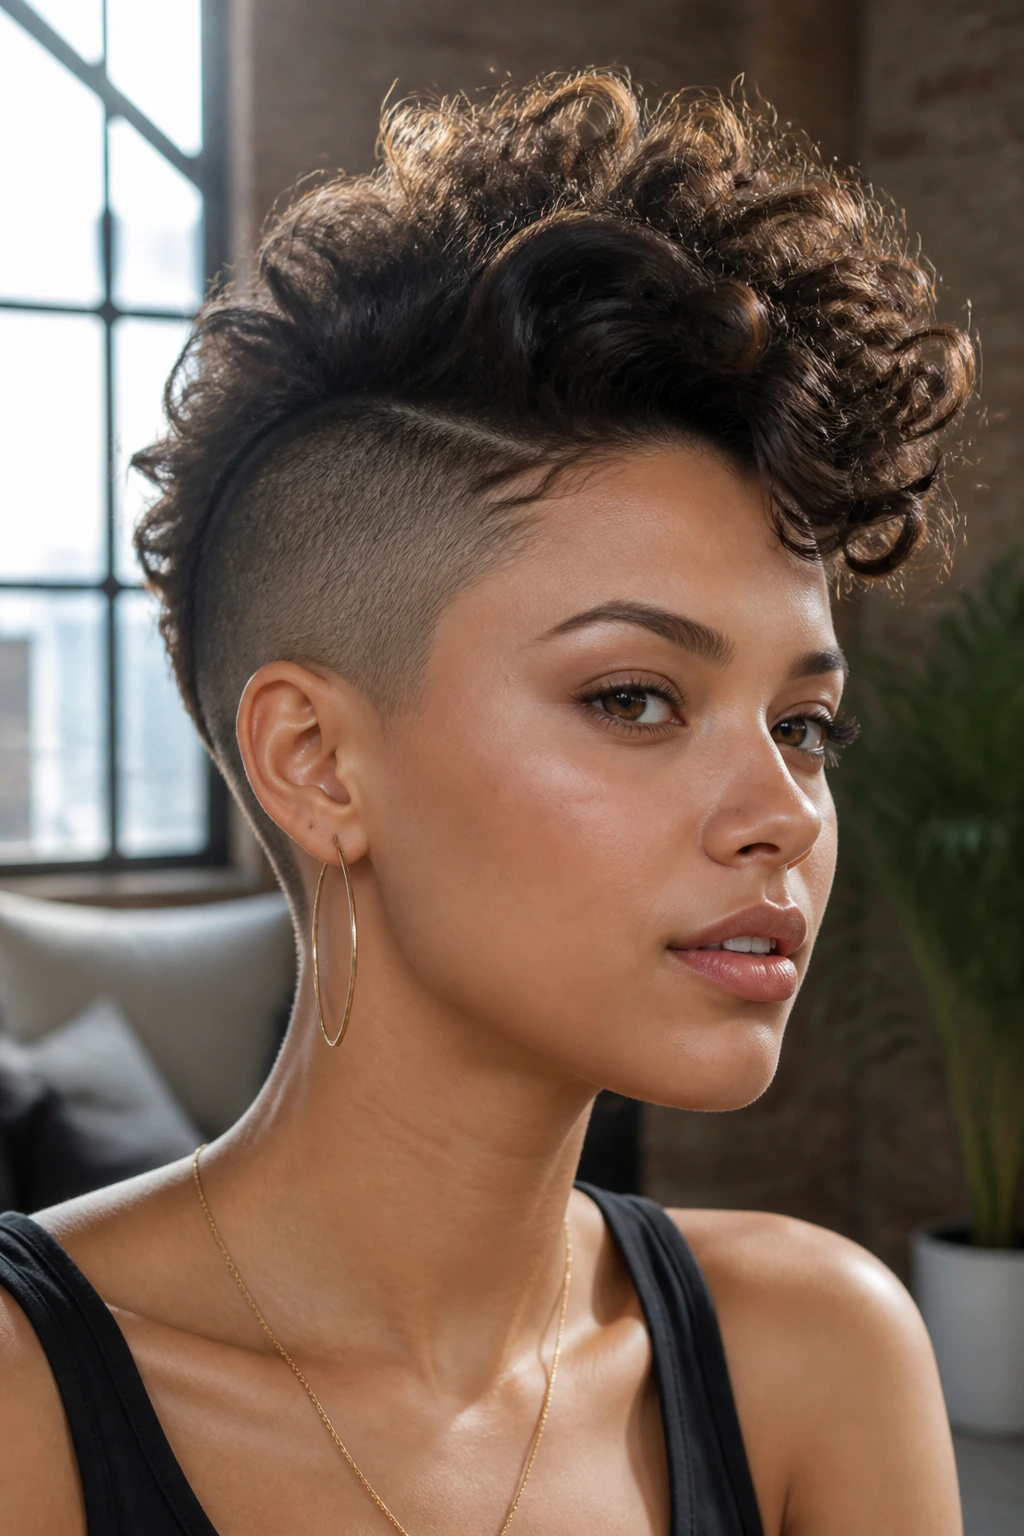
If you want a little edge without much effort, pin the sides of your hair back and leave the center section high and full. That creates a faux hawk shape that lets the curls stack up through the middle. It’s dramatic in the best way.
This one depends on volume. Curly hair gives it naturally, so you don’t need much teasing. Clip the sides tightly enough to keep the shape, but not so tight that the front goes flat. The center should still lift and move when you turn your head.
It’s a smart pick for thicker curls that want to spread everywhere. The faux hawk gathers that movement into one clean line. If your hair is fine, use a light texturizing spray at the roots before pinning for a bit more grip.
19. Scarf-Tied Ponytail
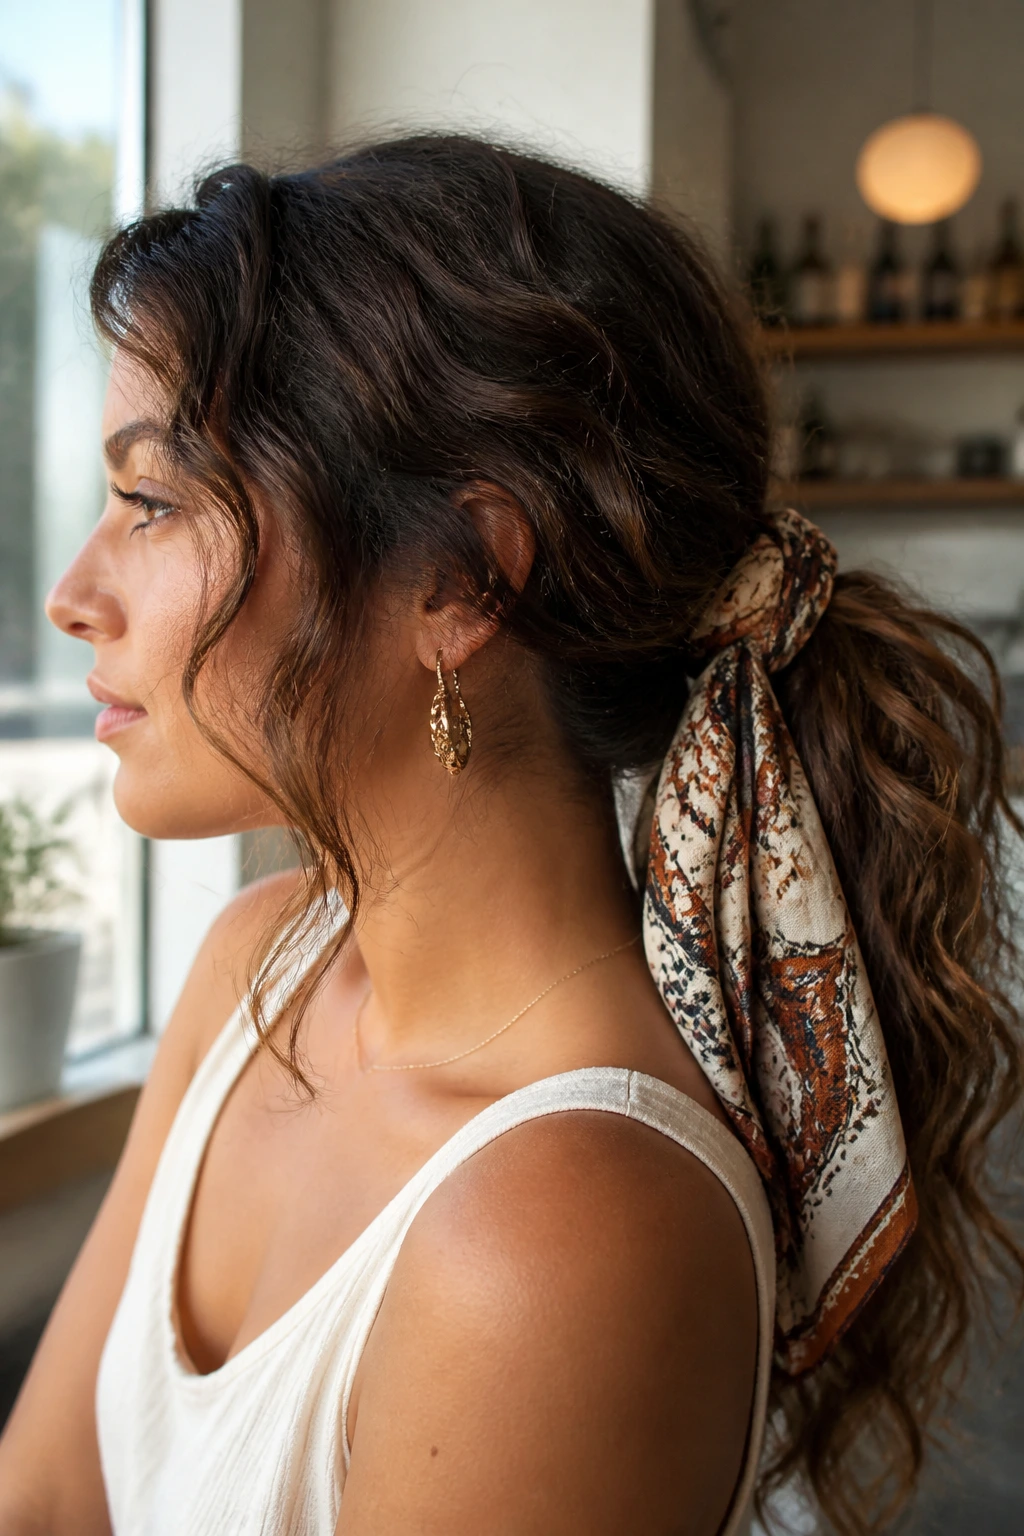
A scarf can turn a basic ponytail into something much more interesting. Tie the hair into a low or mid ponytail, then knot a scarf around the base and let the ends trail down with the curls. Pick a scarf with a fabric that doesn’t slide too much; silk feels nice, but a slightly grippy cotton blend stays put better.
This style works because the scarf gives the ponytail a focal point. You do not need extra braiding or twisting. The color and fabric do the styling for you. That’s especially useful when the rest of your hair is already doing a lot.
Choose a scarf that picks up one color in your outfit or one tone in your hair accessory set. The style looks more finished when the scarf feels like a deliberate part of the look instead of an afterthought.
20. Braided Bun
A braid-bun combination gives curls extra hold. Put the hair into a low ponytail, braid the tail loosely, then wrap the braid into a bun and pin it at the base. The braid keeps the bun from unraveling, which is handy if your hair is slippery or freshly washed.
The finished look is tidy but not rigid. You still get texture from the braid pattern and from any loose curls that escape around the edges. If you want it softer, pull a few strands free before you pin the bun down.
This style is useful for long days because it lasts better than a loose twist. It’s not the most casual look in the bunch, but it still feels friendly and wearable, especially with a few face-framing curls left out.
21. Double Twist Half-Up
Twists are underrated. Take a section from each side of the head, twist them back toward the center, and join them with a small clip or pin. The rest of the hair stays loose, so the style keeps that beachy movement while cleaning up the front.
What I like here is the balance. Braids can feel a little busy on very textured hair. Twists stay softer and let the curl pattern show through. They also take less time, which matters on mornings when you want structure but don’t want to spend ten minutes making it happen.
If your hair is layered, start the twist a little lower near the temples so the shorter pieces have something to grip. Pin the twists under a curl clump and they disappear nicely into the rest of the style.
22. Side-Swept Clip Stack

A clip stack is exactly what it sounds like: several barrettes or small clips arranged on one side of the head. Sweep the front section back, clip it in layers, and let the rest of the hair fall loose. The look is simple, but the shape change is real.
This style works because the clips act like a little line drawing at the temple. They pull the eye upward and make the curls feel intentional, even if the rest of the hair is doing its own thing. It’s one of the fastest ways to make second-day hair look styled.
Keep the clips slightly curved so they follow the head. Straight clips can stick out awkwardly in thick curls. A gentle arc sits much better and feels less fussy.
23. Low Braid-Out Pony
This one is a quiet favorite because it uses the curl pattern instead of hiding it. Gather the hair into a low ponytail, braid the pony loosely, and secure the end. Later, or after a couple of hours, you can gently loosen the braid for a softer, more waved effect.
The style is useful when you want your curls to stay contained without looking pinned down. The braid keeps the length tidy while the texture stays visible through the plait. Once you release it, you get a little extra wave and a less uniform finish.
Do not braid it tightly. Tight braids erase the airy shape and can leave a crimp that feels too sharp. Looser sections make the finish softer, which is exactly what you want here.
24. Curly Bob Tuck With Mini Clips
Short curls need love, too. For a bob or lob, tuck the back sections slightly under and pin the sides with mini clips near the jawline or just behind the ear. The style keeps the shape neat without trying to force short hair into a long-hair trick.
This is one of the easiest ways to make a short cut feel styled in under two minutes. The clips give the hair a little direction, while the loose crown keeps the volume alive. If the front pieces are long enough, leave them soft and sweeping instead of forcing them back.
Tiny clips matter here. Big clips overpower a bob fast. Use smaller pins or barrettes that sit close to the head, then let the ends flip and bend however they want.
25. Loose Pony With Face-Framing Braids
A couple of thin braids at the front change the whole mood of a ponytail. Braid one small section from each side of the face, then gather the rest into a loose pony at the back. Leave the pony soft and a little messy so the braids feel like an accent, not a costume.
This works on almost every curl pattern because the braids control only a tiny part of the hair. The rest stays free, which keeps the beachy texture visible. If you want it softer, braid only the front inch or two and stop before the pattern gets too tight.
I like this one when the hair feels too open but a full updo seems like too much. It sits in that sweet middle ground. Clean enough to look done. Loose enough to still feel like you.
Why These Styles Work Better Than Over-Smoothing

The big secret is that curls usually look their nicest when they are given a shape that leaves some movement at the edges. That’s why the styles above keep coming back to twists, loose braids, soft pins, and accessories that sit on top of the texture instead of crushing it. The goal is not sleekness for its own sake. The goal is hair that can breathe.
A lot of people try to solve curly hair by flattening the crown and yanking the sides tight. It rarely ends well. The hair loses its lift, the roots puff anyway, and the ends hang around looking confused. Loose styling gives the curl pattern some room to settle into place, which is why these looks stay softer longer.
The other advantage is forgiveness. A braid that isn’t even. A twist that sits a little higher on one side. A clip that lands slightly off-center. On straight hair, those things can look like mistakes. On curly hair, they often read as part of the style.
Tools That Pull Their Weight
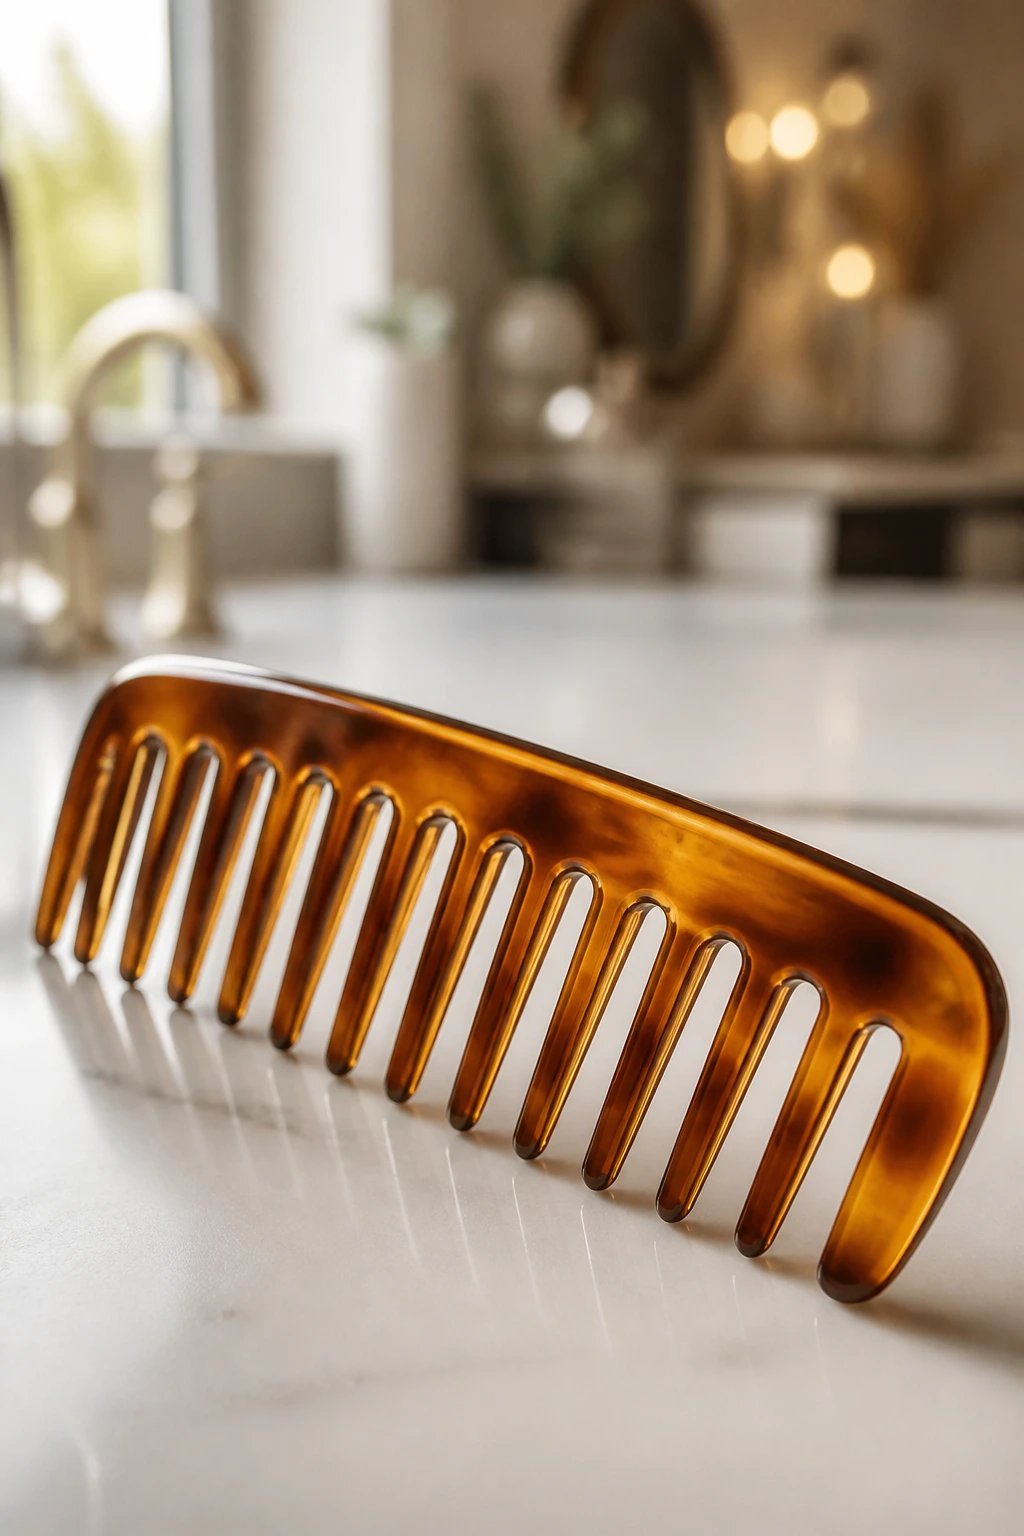
- Wide-tooth comb: Use it on damp curls or to separate sections gently; it keeps clumps intact better than a fine comb.
- Misting bottle: A few sprays help reshape front pieces without soaking the whole head.
- Satin scrunchies: These hold ponytails and pineapples without leaving a hard dent.
- Medium and large claw clips: One small clip usually slips; one properly sized clip changes everything.
- Bobby pins with a strong grip: The wavy kind holds better in thick or slippery curls.
- Mini clear elastics: These are useful for braids, bubble ponytails, and tiny sections at the front.
- Texturizing spray or light-hold gel: A little grit at the roots helps styles stay in place.
- Silk or satin scarf: Useful for tying, wrapping, or sleeping without wrecking the curl shape.
- Tail comb: Great for clean parts and for lifting sections without dragging through the whole head.
- Diffuser attachment: Optional, but handy if you want to set the hair before styling and keep the wave pattern intact.
Prep That Makes the Style Hold Better

Start with hair that has some grip. Freshly washed curls can be too slippery, especially if you piled on leave-in and oil. Day-two or day-three hair usually behaves better for braids, clips, and twists because the cuticle isn’t so slick. If you do wash first, use a light mousse or curl cream and dry the roots well before you start styling.
Sectioning matters more than people think. Take the front pieces first, then deal with the back. That keeps you from getting halfway through a braid and realizing the side you meant to pin is buried under the rest of your hair. Small clips or duckbill clips help more than a big mirror full of hope.
Pinning should feel like anchoring, not decorating. Push bobby pins in against the direction of the hair they’re holding, and if one pin feels weak, cross a second one over it. That little X holds far better than one pin floating on its own.
How to Keep the Shape Soft Through the Day
Root lift: If a style starts to sag, lift at the roots with your fingertips instead of tugging on the ends. The crown needs air more than the ponytail does.
Hold without crunch: Use a light mist of flexible-hold hairspray from about 10 inches away. If you spray too close, the curls get stiff in weird patches.
Frizz control: Smooth a pea-sized amount of serum or cream over the outer layer only. Skip the roots. Heavy product there tends to flatten the shape and make clips slide.
Midday refresh: Wet your hands, shake off the excess, and scrunch the face-framing pieces. That wakes up the texture without collapsing the style.
Overnight save: Sleep on a satin pillowcase or tie the hair in a loose pineapple with a scrunchie. Tight bands at night are the fast lane to dents and frizz.
Common Mistakes That Flatten Curly Hair
- Pulling everything too tight at the hairline: The style starts with a sleek look and ends with a headache. Leave a little slack at the front so the crown still has lift.
- Using heavy oil at the roots: Curls can get shiny and flat in the worst way, and pins slide out faster. Keep heavier product on the ends only.
- Styling soaking-wet hair: Wet sections change shape as they dry, so braids and twists can loosen unevenly. Aim for damp or mostly dry hair unless the style is meant to set overnight.
- Choosing tiny elastics for thick curls: They snap, snag, and make the ends look rough. Use stronger mini elastics or a satin tie that spreads the tension out.
- Overhandling the finished style: Every extra touch opens up the frizz. Put the shape in place, check the mirror once, then stop fiddling.
- Ignoring face pieces: A style can look harsh if every front curl is dragged back. Leave a few tendrils loose or define them with a finger twist.
Easy Variations for Different Lengths and Densities
Short-Cut Shuffle: If your curls are chin-length or shorter, swap buns and long braids for clips, side sweeps, and pinned-back sections. The shape will hold better, and you won’t fight shrinkage all day.
Thick-Curl Version: Use larger clips, more pins, and looser twists. Dense curls need anchoring in more than one place, or the style bulges at the back and slips at the sides.
Humidity-Proof Finish: Start with a light gel at the roots, then keep oils away from the crown. Humidity loves soft, polished roots. It also loves making them collapse.
Soft Romantic Version: Replace tight braids with rope twists and use pearl or gold pins instead of plain ones. The style still stays simple, but it reads a little more dressed up.
Sport-Friendly Version: Favor low buns, braided ponytails, and claw clips that sit close to the head. Anything high and loose tends to bounce around more than people expect.
How to Refresh These Styles Tomorrow Morning
Most of these looks can survive a night if you treat them gently. A satin pillowcase helps, but the real move is keeping tension low before bed. If the style has a ponytail or bun, loosen the tie a touch and smooth the edges with your hands. That keeps you from waking up with a hard crease that refuses to move.
For a quick refresh, mist the front and crown lightly, then scrunch or re-pin the parts that went flat. Do not soak the whole head unless you want to start from scratch. A little water goes further than people think. If one braid looks fuzzy, twist the fuzzy section around a finger instead of redoing the whole thing.
Some styles actually look better the next day. The low braid-out pony, the side braid into a pony, and the claw clip French twist are good examples. They settle, loosen, and get a bit softer after a few hours of wear.
Frequently Asked Questions
Which of these works best on short curly hair?
The pinned-back sides, side-swept clip stack, curly bob tuck, and half-up twist crown tend to behave best on shorter cuts. They use the length you already have instead of asking it to mimic a long ponytail.
Should I style curly hair wet or dry?
For braids, clips, and twists, hair that’s mostly dry usually gives the best grip. Damp hair can work too, but soaking-wet curls often shift shape as they dry and can loosen the style in odd places.
How do I keep clips from sliding out?
Choose a clip that matches your hair density, not your outfit. If the clip is too small, it slips. If it’s too smooth, it slides. Add a little dry shampoo or texturizing spray near the roots before clipping.
Can I do these styles if my curls are frizzy?
Yes. Frizz is not a dealbreaker here. A small amount of frizz can make the style look softer and more beachy, as long as the roots are anchored and the front pieces are shaped on purpose.
What’s the easiest style for second-day hair?
The deep side part with clips, the half-up top knot, and the claw clip French twist are probably the fastest. Second-day texture gives you the grip you need, so the style usually holds with less fuss.
How can I make a ponytail look more polished on curly hair?
Wrap the elastic with a small curl, smooth the crown with a tiny bit of product, and leave a few face pieces out. That combination makes a basic ponytail look finished without killing the texture.
Do I need salt spray for beachy waves?
Not necessarily. Salt spray can add grip, but it can also dry curls out if you use too much. A light mousse or texture spray often gives a softer result, especially if your hair already has wave and bend.
What’s the best way to sleep in these styles?
Use a satin pillowcase or a loose pineapple on top of the head. Tight elastics, rough cotton, and sleeping with the hair pinned hard against the scalp are the fastest ways to wake up with dents and fuzz.
Soft Hair, Simple Hands
The nice thing about these looks is that none of them ask curly hair to stop being curly. They shape the texture, clean up the edges, and leave enough movement in the ends so the style still feels alive after a full day of wear.
Start with the simplest one that fits your hair length — the half-up twist, the claw clip French twist, or the deep side part with clips. Once you see how little effort it takes to make curly hair look deliberate, the rest of the styles stop feeling like “hairstyles” and start feeling like tools you can reach for without thinking twice.