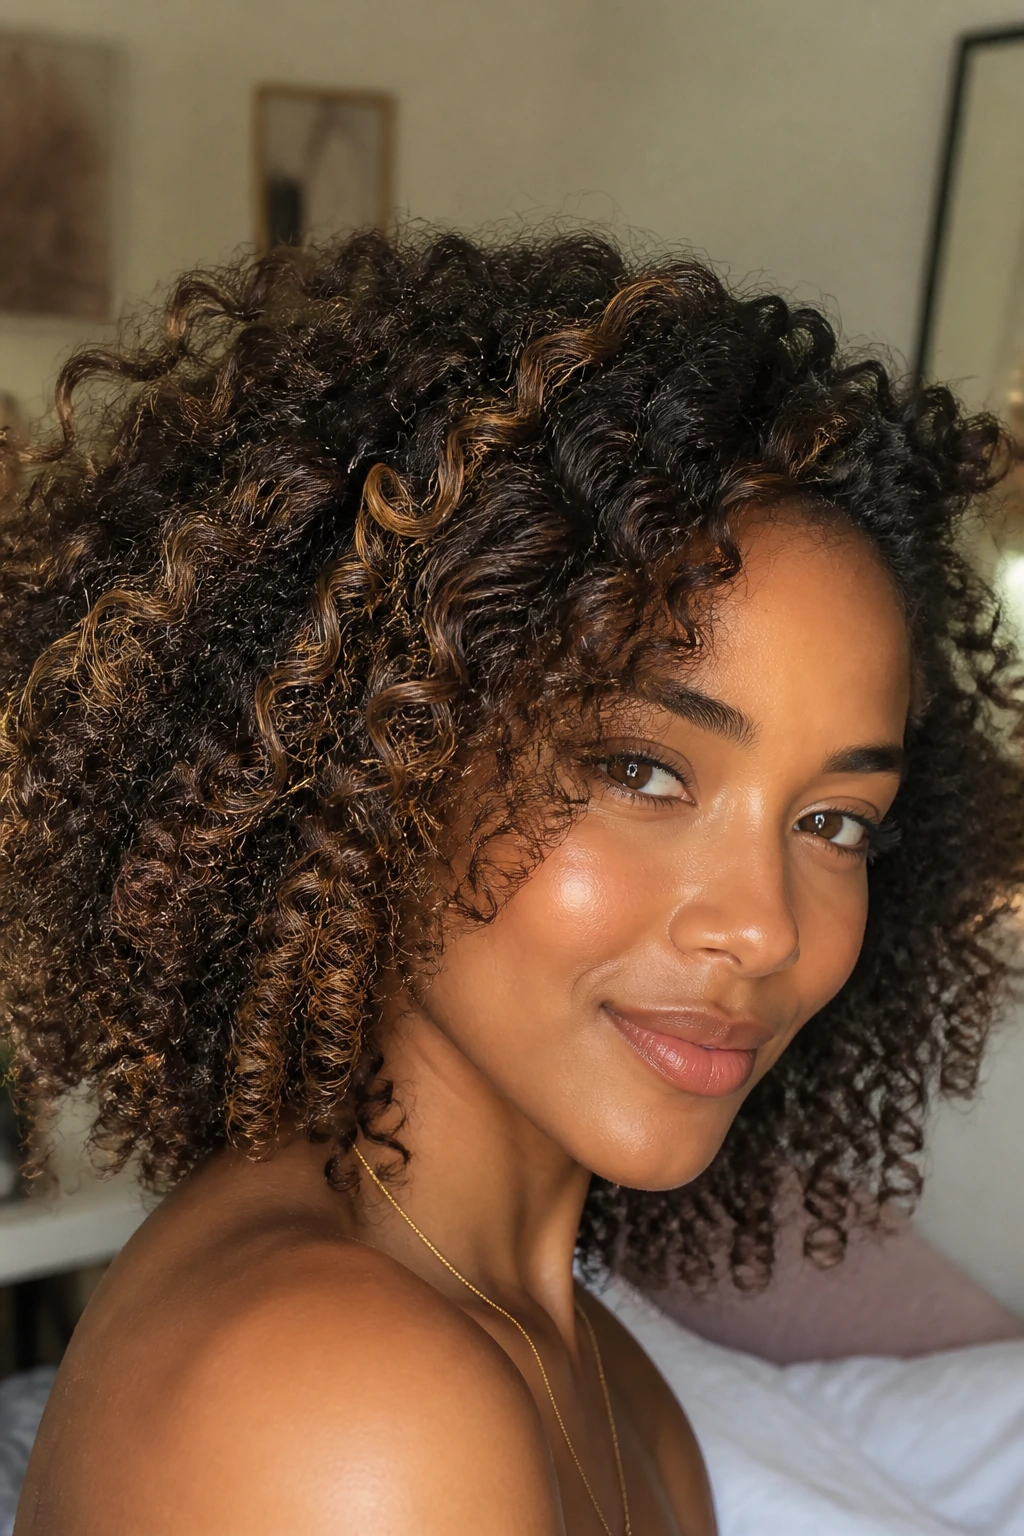
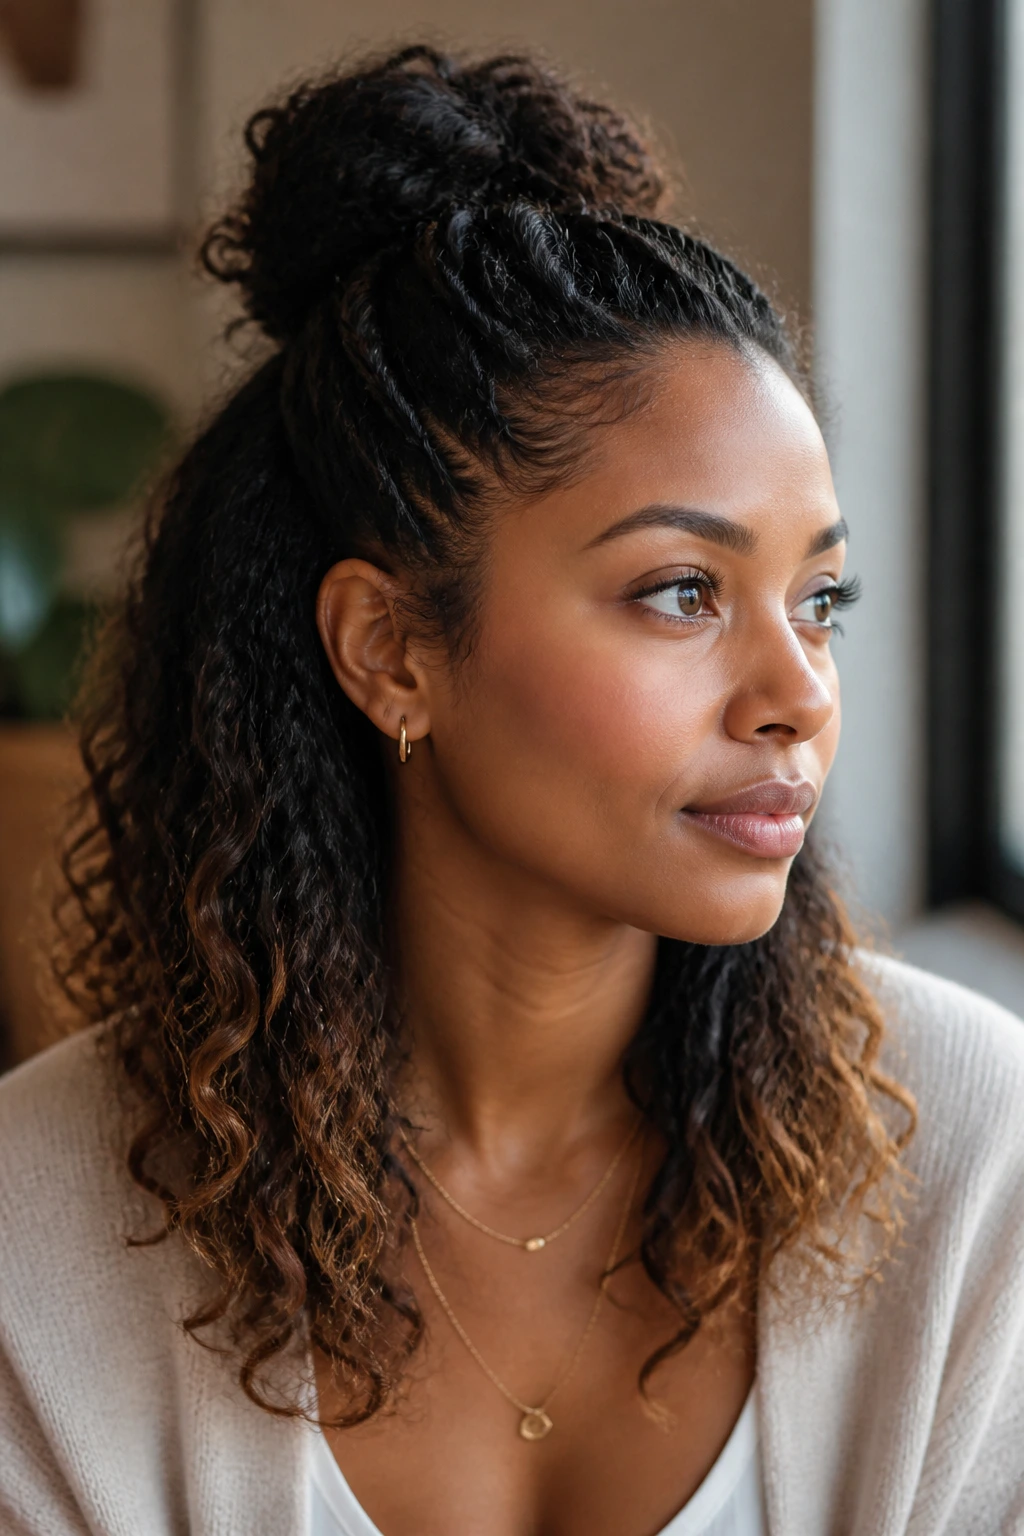
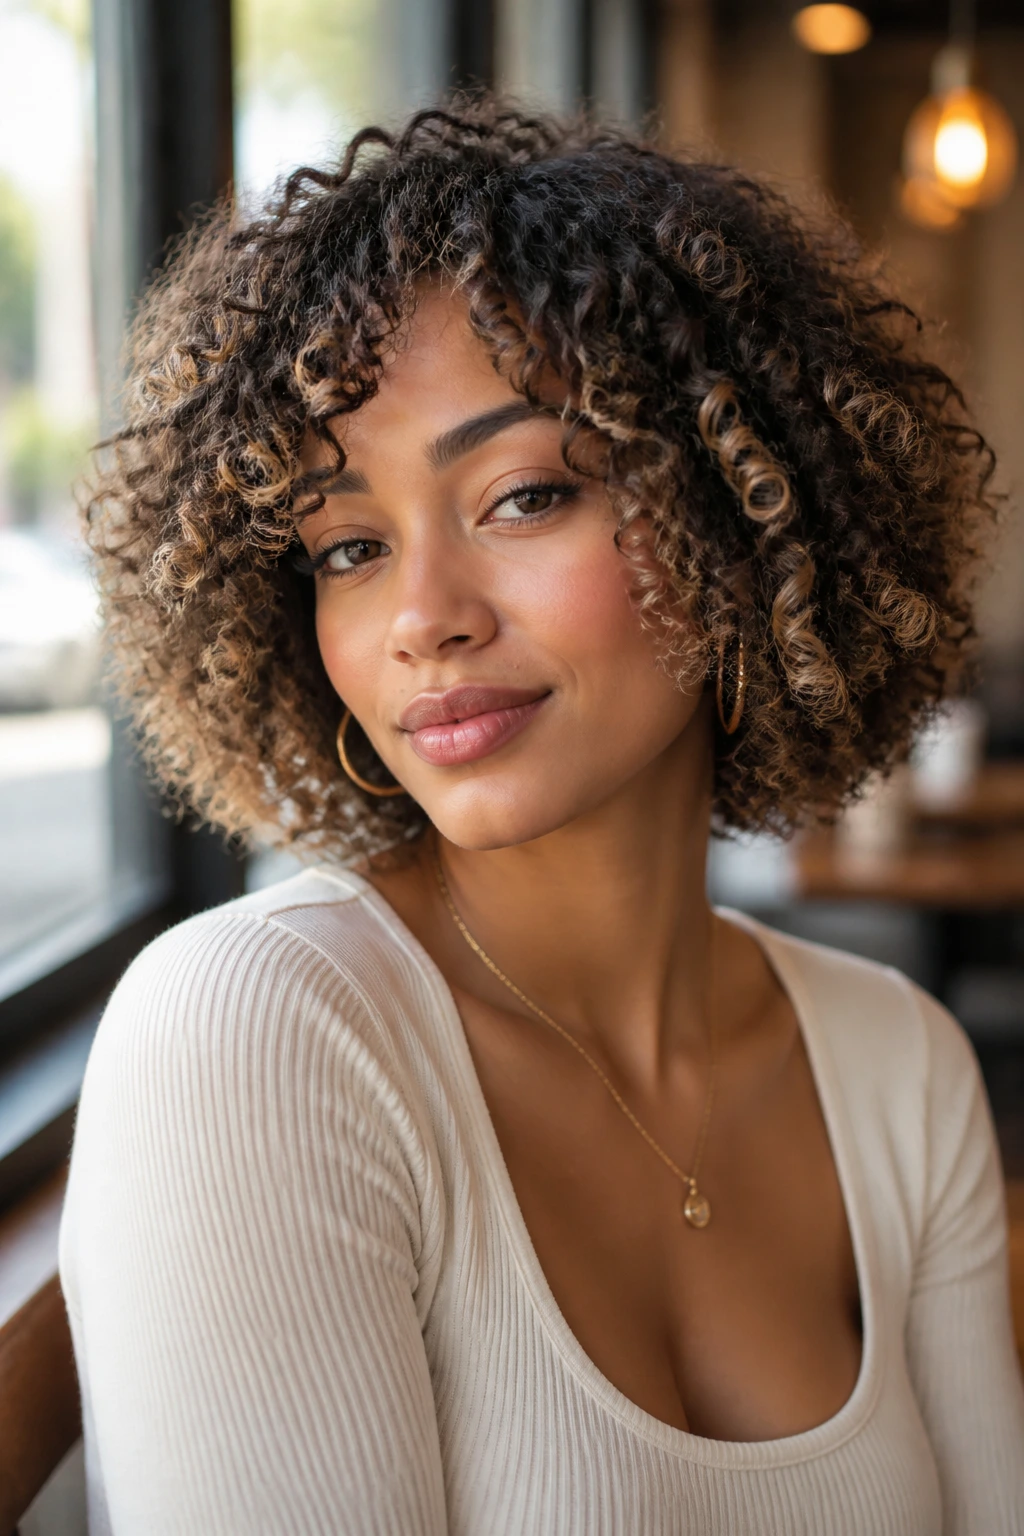
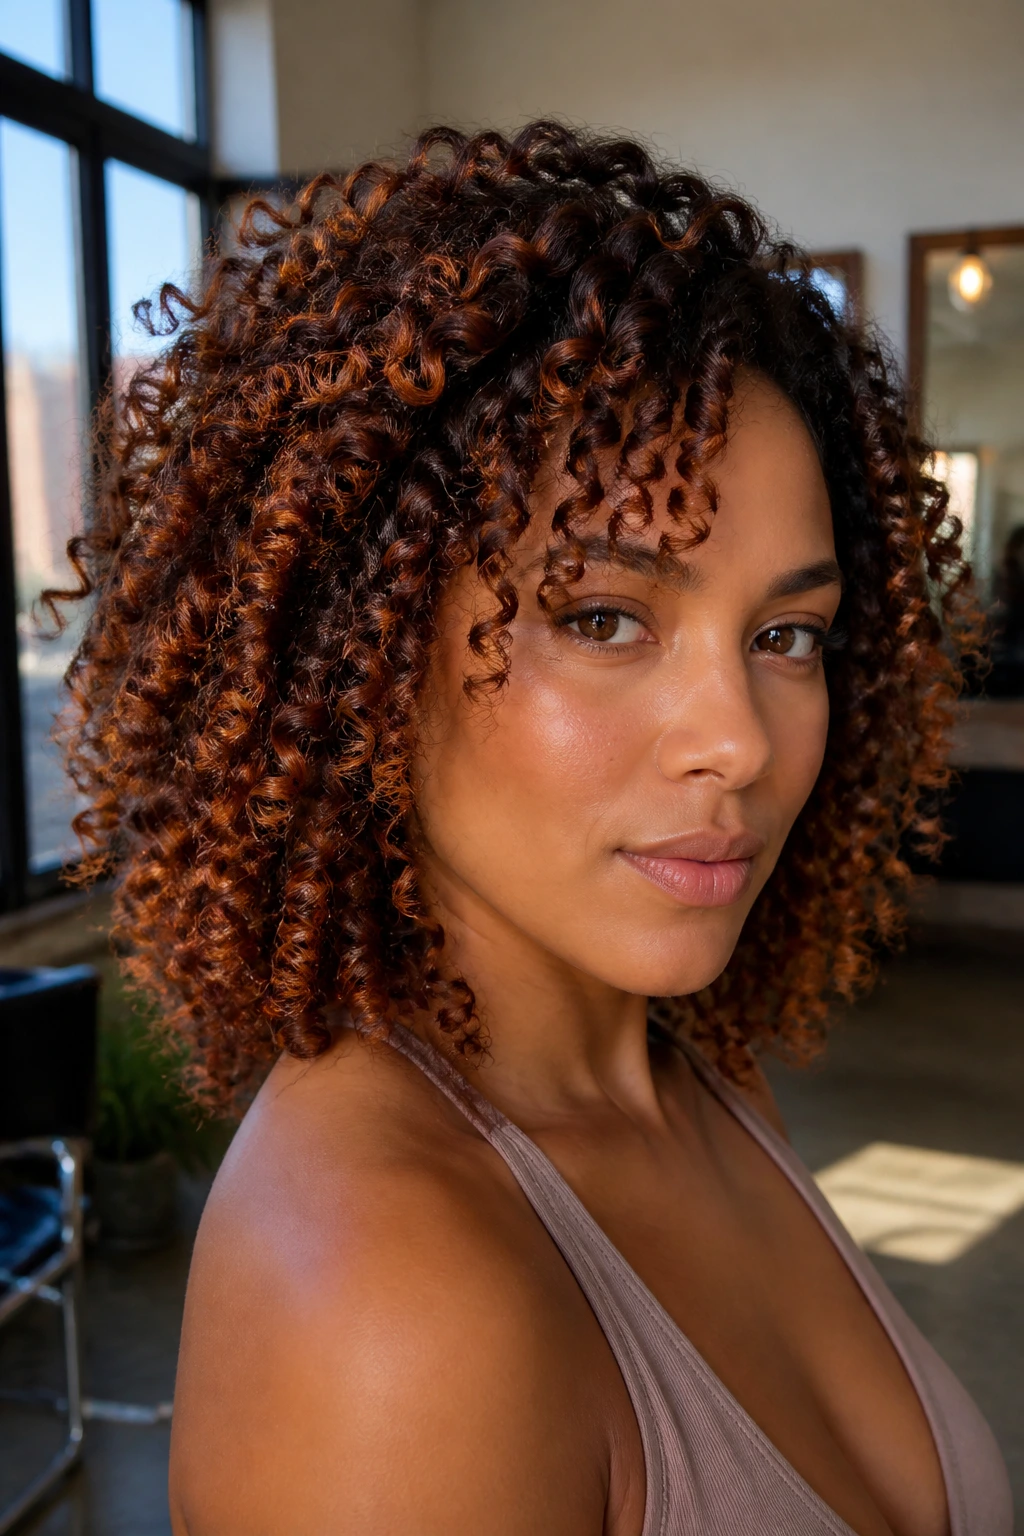
Natural hair with babylights can look muddy when the slices are too wide, and it can look quietly expensive when the color follows the curl instead of fighting it. That’s the whole trick. Babylights are tiny enough to disappear into a twist, a puff, or a braid-out, then show their hand when the light shifts across the hair.
Chunky streaks have their place, but on coils and curls they can read like a ruler line if the placement is lazy. Fine highlights behave differently. They sit inside the bend of the strand, flash at the crown, and soften as the style gets older — which is one reason they age better than bold stripes.
The 22 looks here cover wash-and-gos, twist-outs, puffs, protective styles, tapered cuts, and pinned-up shapes because babylights do not read the same way on every texture. A face frame on a tight coil is one thing. A honey ribbon on a stretched blowout is another. Both can work, and both can miss hard if the placement ignores shrinkage, density, and the way your hair actually moves.
The first rule is simple: choose the placement for the texture, not the other way around.
Why These Babylight Pairings Read Soft, Not Stripey
-
Fine placement respects shrinkage: A babylight that looks tiny on stretched hair can spread across a much larger surface once curls spring back, so the color stays visible without looking blocked out.
-
Grow-out is gentler: Thin slices of lightening blend into your base more cleanly than chunky foils, which means the root line stays softer for longer and the style doesn’t shout for a touch-up the second it grows.
-
Texture keeps the color moving: Twists, puffs, braids, and coils change the way light lands on the strand every time you turn your head, so babylights feel active instead of flat.
-
Tone matters as much as placement: Honey, caramel, copper, beige, and espresso lowlights all tell a different story on natural hair, and the wrong tone can flatten the shape even when the placement is good.
-
You can dial the visibility up or down: A side part, a high puff, or a stretched blowout will show more of the color; a mini twist set or low puff can keep things quieter if you want the hair to do the talking first.
How Shrinkage Changes the Way Babylights Land
Babylights are not just a color choice on natural hair. They’re a map. A slice that sits neatly on a blown-out section can disappear into a coil once the hair shrinks back up, and that’s not a failure — it’s part of the design. If your hair has a lot of spring, a colorist needs to think a little farther out than the eye does in the chair.
I like to think about three zones: the outer canopy, the face frame, and the places where the style lifts away from the scalp. Those are the spots where babylights read best because the strand turns toward the light there. On a dense afro, that might be the top third. On a wash-and-go, it might be the temples and the first two rows around the part. On a puff, it’s often the crown and the ends.
Root Shadow, Lowlights, and Why They Keep the Style from Floating
Babylights without grounding can look like confetti. Pretty for about five minutes, then strangely disconnected from the rest of the hair. A soft root shadow or a few lowlights gives the bright pieces something to sit against. That contrast is what makes the color look intentional instead of scattered.
A lot of stylists stop at the light pieces and call it a day. That’s the lazy version. The better version leaves a little depth at the root, sometimes even a full shade or two darker at the base, so the highlights do not hover above the style like a separate wig.
Choosing the Right Babylight Tone for Your Base
Warm and cool tones behave very differently on natural hair, and the base color underneath matters more than people admit. If your hair is deep brown or near-black, honey, amber, caramel, and soft copper usually look rich because they sit close enough to the base to feel blended. Push too far into icy blonde and the result can go brassy fast unless you commit to frequent toning.
For medium brown bases, beige-gold, latte, and muted bronze can read clean and polished. They show up without shouting. If your hair already has red or auburn warmth, a copper babylight often looks more believable than a cool beige piece, which can feel disconnected against that undertone.
The Tone Families I Reach for First
-
Honey and caramel: Best when you want warmth that feels soft and not orange; these are the safest starting points on dark brown curls.
-
Copper and bronze: Best when you want the color to show in photos and in daylight without looking pale or washed out.
-
Beige and mushroom: Best on looser curls or stretched styles when you want a cooler, softer contrast with a root shadow underneath.
-
Espresso lowlights: Best when the hair needs depth more than brightness; they keep babylights from floating on top of the head like separate ribbons.
If you’re unsure, ask for a sample strand next to your base in good natural light. Salon lights lie. They lie all the time.
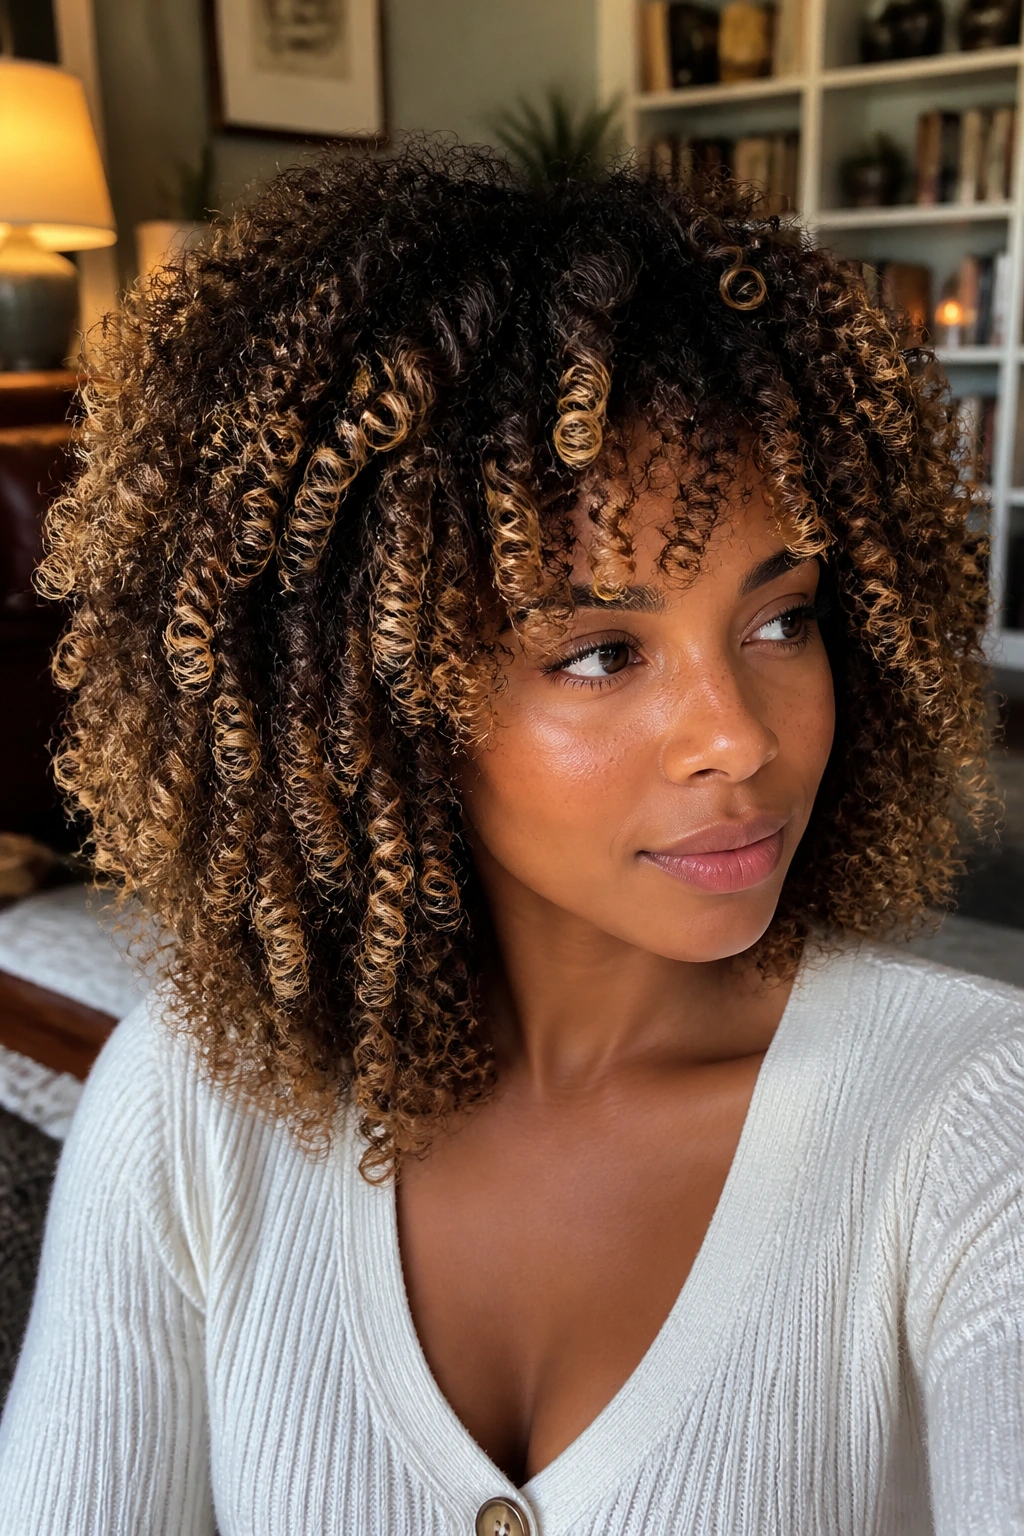
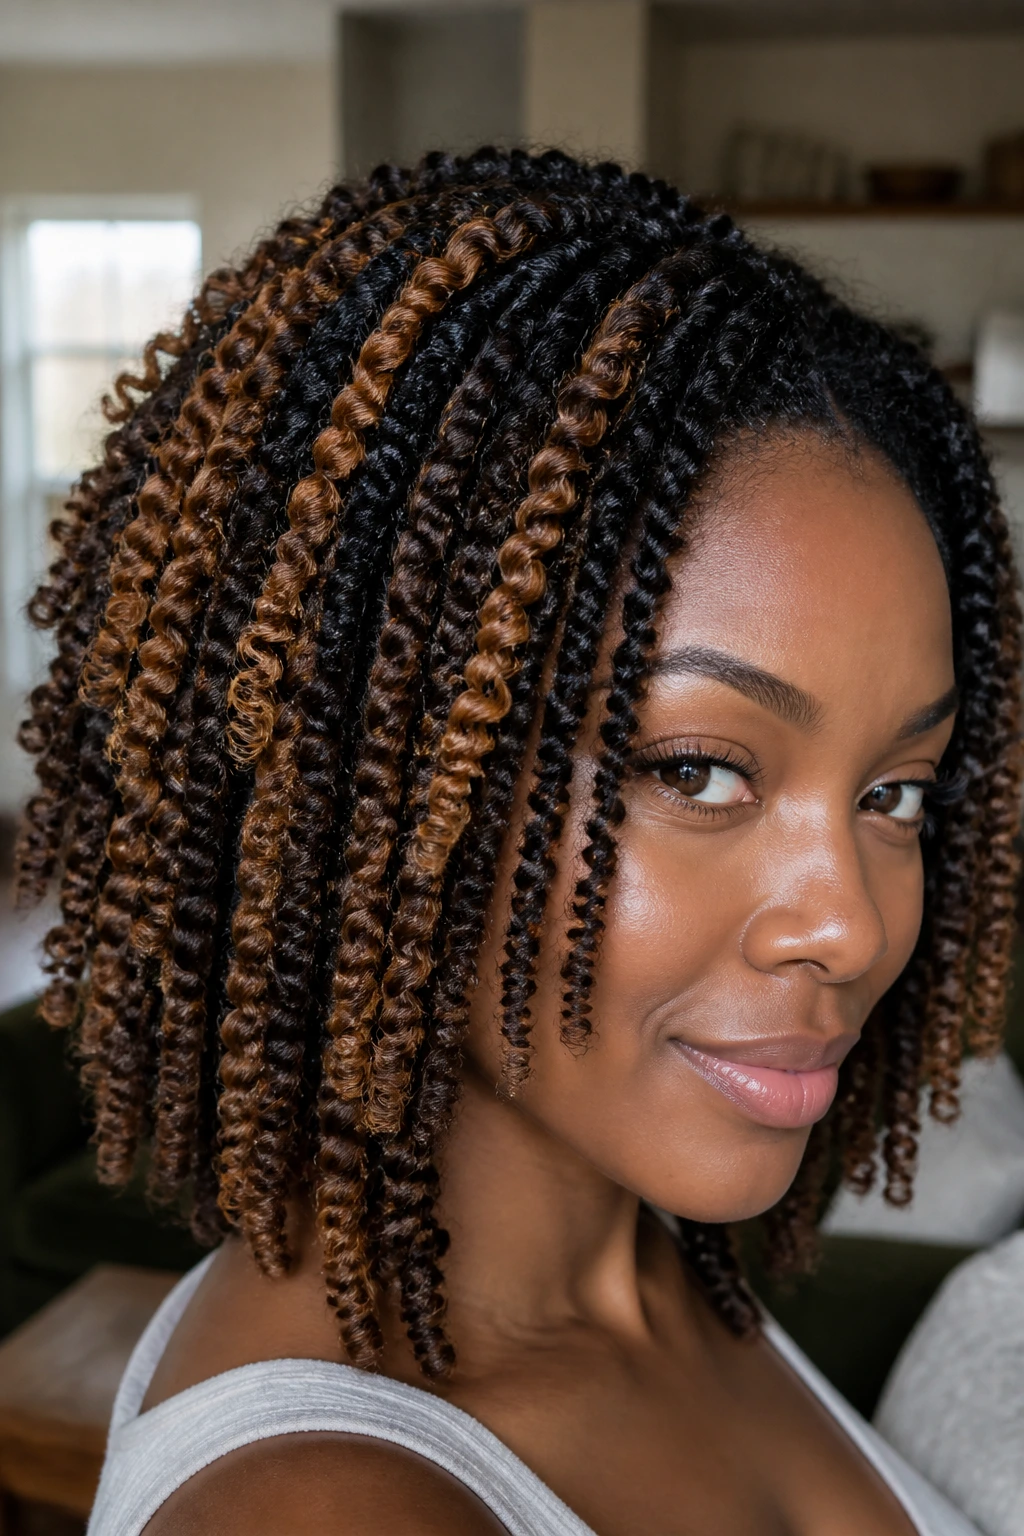
1. Defined Twist-Out with Caramel Ribbons
Babylights on a twist-out behave like thread wrapped around rope. That’s the entire appeal. The twists hold the highlight pattern in a tidy, narrow path, then unravel into soft ribbons that show off the color without making the style look busy.
This is one of the easiest places to see why fine color works on natural hair. A twist-out already gives you movement, and caramel babylights ride right along the bend of the curl. If the pieces are placed on the outer surface of each twist, they catch the light when the hair separates. If they’re buried too deep, they vanish.
A medium-hold cream plus a small hit of gel keeps the definition crisp enough for the color to read. I’d keep the highlight tone one to two levels lighter than your base and leave the roots a shade deeper. That keeps the grow-out from feeling harsh and gives the twist-out some weight at the scalp.
Why it works: The twist pattern creates built-in lines, so the babylights don’t need to do heavy visual lifting. They just follow the curl path and pop when the hair loosens.
Pro move: Unravel only when the hair is fully dry. If the twists are still cool in the center, you’ll frizz the cuticle and blur the light pieces before they’ve had a chance to show.
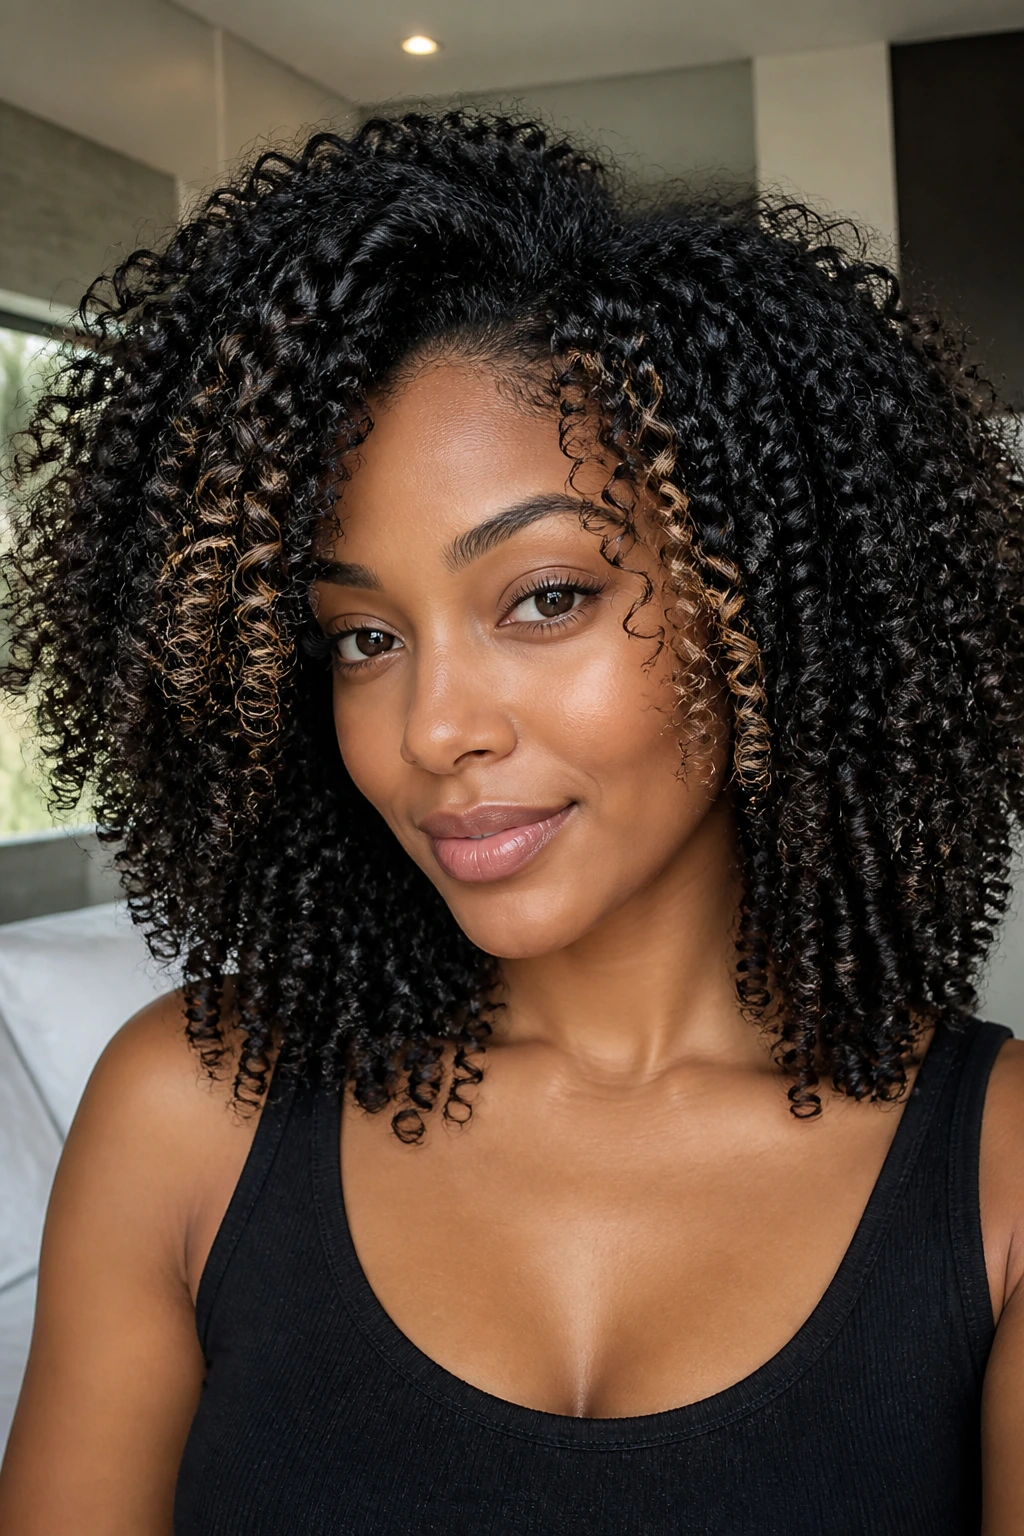
2. Wash-and-Go with Face-Framing Babylights
A wash-and-go can make babylights look almost invisible at first, and then suddenly perfect once the curls clump. That’s why the face frame matters so much here. Tiny lighter pieces around the temples and hairline give the style definition before the rest of the head even comes into view.
This look is strongest on looser curls and stretched coils, but it can work on tighter textures too if the highlights sit in the outer layer rather than deep inside the mass of the hair. The color should look like it’s being carried by the curl, not pasted on top of it. If you rake through the hair too much while styling, the highlight bands separate and look busy. Hands off. Let the curls settle.
I like a lightweight gel cast here because it keeps the outline neat enough for the babylights to show. Diffusing at low heat helps, too. Air-drying is fine if you want softness, but the color usually reads cleaner when the curls dry with a little lift at the root.
Why it works: The style already has a lot of visible texture, so tiny light pieces just sharpen the shape instead of competing with it.
Watch for: Heavy creams near the face can mute the light and make the babylights look dusty by the second day.
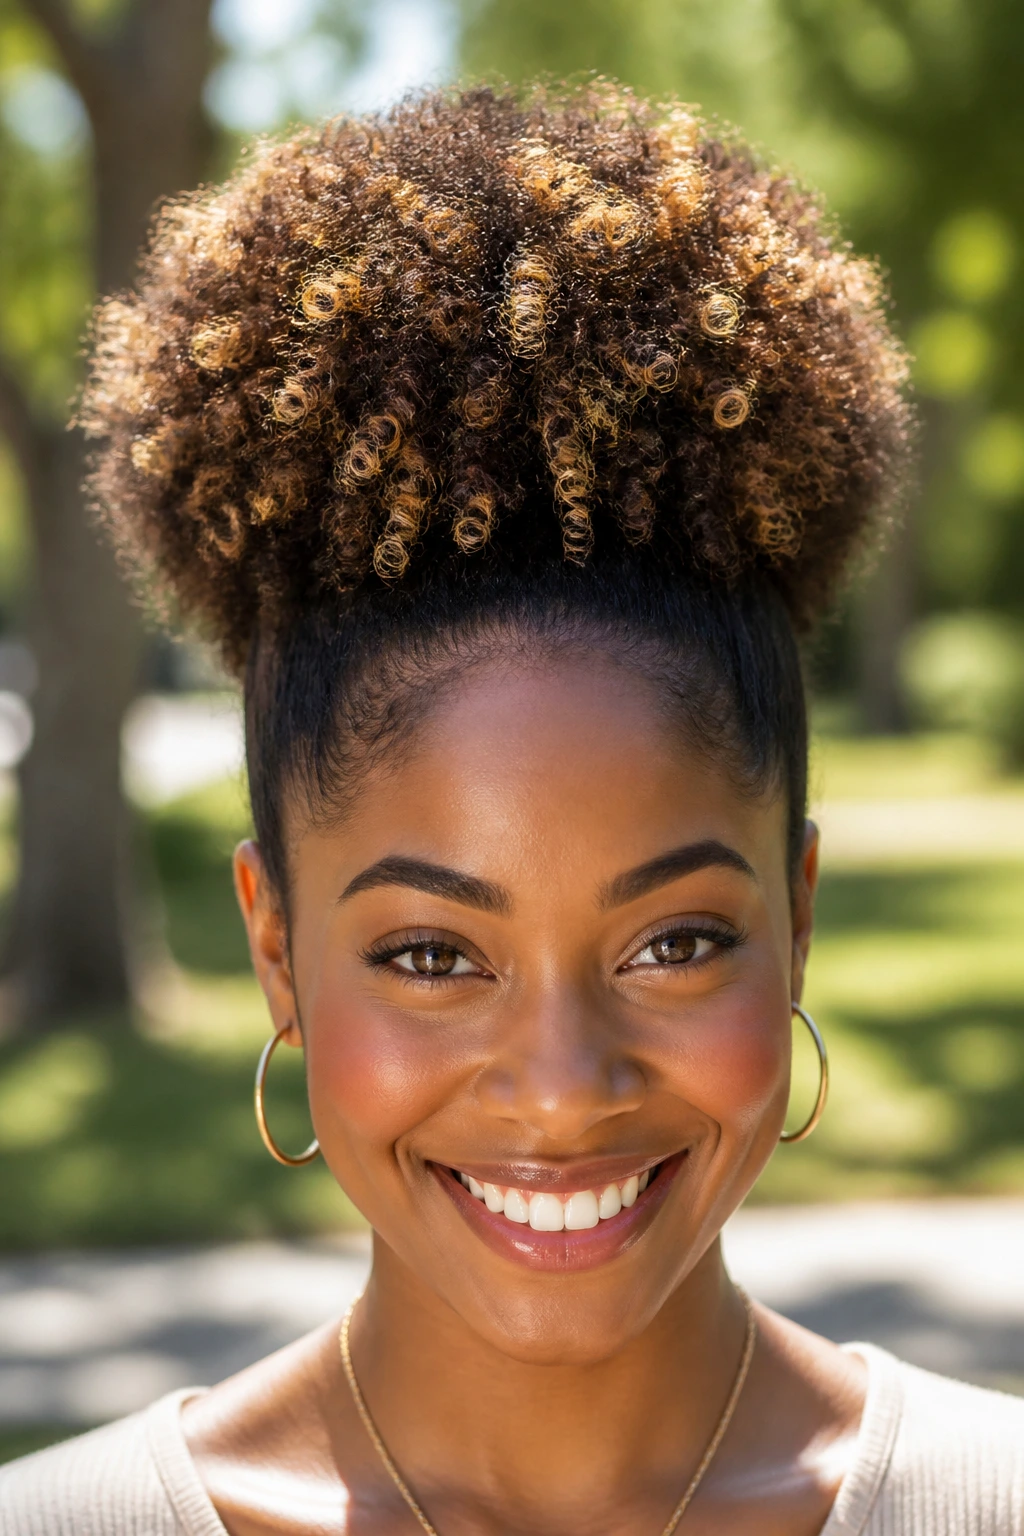
3. High Puff with Bright Crown Sparkle
A high puff is one of the few styles where babylights can feel almost playful. The hair lifts away from the scalp, the crown opens up, and the lighter pieces start flashing every time you move. If the hair is dense, this is where a few well-placed highlights do more than a whole head of mediocre ones.
The crown and the outer halo are the money zones. That’s where your eye lands first, and that’s where the light can do its work. I’d keep the babylights a touch brighter than you would in a twist-out, but not so pale that the puff loses its depth. The trick is brightness at the top, not a blond cap.
A soft edge brush and a little gel at the hairline are enough. Don’t slick the front so hard that the puff starts looking severed from the rest of the head. The best version has a little lift at the front and enough fullness in the puff to show the highlight pattern.
How to wear it: Let the puff sit slightly forward if you want the face frame to show. Pull it straight back if you want the babylights to read more from the side.
Good pairing: Gold hoops and a clean neckline. The style already brings the movement. Don’t over-accessorize the face.
4. Braid-Out with Honey Threading
A braid-out turns babylights into narrow lines, and that’s why this style works so well for people who want visible color without blunt streaks. Each braid lays down a thin path of light, then the unraveling creates a threadlike pattern that feels almost woven into the texture.
Honey is the tone I reach for most here because it feels warm without going orange. If the hair is medium to deep brown, honey babylights often read softer than blonde and more alive than chestnut lowlights. Set the braids on stretched, damp hair and don’t rush the dry time. If you take them down early, the highlights puff apart and the whole style gets fuzzy in a hurry.
Smaller braids give you more lines of color, while larger braids create broader waves with fewer visible streaks. I prefer the smaller braid pattern when the goal is dimension, especially around the crown and front. The finish is a little more controlled. Better for seeing the color.
How it works: The braid itself becomes a guide rail for the babylight, so the color looks built into the texture rather than painted over it.
Tip: Use a tiny bit of oil on the fingertips only after the style is set. Too much shine before the braid-out is undone will flatten the light.
5. Flat-Twist Crown with Dimensional Ends
Flat twists give you a calm surface up top, which makes babylights at the edges and ends read even more clearly. That contrast — smooth at the scalp, loose at the perimeter — is the whole reason this style keeps showing up in formal and protective-style conversations.
Keep the color concentrated in the areas that will move: the nape, the twist ends, and a few micro-slices around the hairline. If every inch of the crown is lightened, the style loses its shape. It starts to look washed out instead of dimensional. A deeper root shadow at the base keeps the twist pattern visible, even from across the room.
This is a good style when the hair needs a break from daily manipulation but you still want some visual interest. The babylights peek out as the ends swing. Not loudly. Just enough.
A neat pin or two can secure the crown without flattening it. I would skip heavy creams on the twist surface because they tend to make the lighter pieces look dull and greasy by day two.
6. Tapered Cut with Micro Babylights
Short natural hair can carry babylights in a way long hair never quite does. A tapered cut gives the color edges to live on. The dark sides frame the bright top, and the whole shape looks sharper because the highlights point your eye to the architecture of the cut.
Micro babylights are the move here. Not thin enough to vanish, not broad enough to look stripey. A few slices around the temple, top, and front ridge are enough to bring out the shape. If the sides are clipped close, a touch of lowlight or just the natural depth at the sides keeps the top from floating.
I like this look when the cut is fresh and the lines are clean. The babylights should follow the curl direction at the top so the texture still looks like hair, not a painted helmet. On coily hair, the highlights often read more as brightness than as distinct strands, and that’s fine. Sometimes that’s better.
What to ask for: Fine slices on the top third, a soft root shadow, and no chunky panels near the temple. The shape should still be the star.
7. Rounded Afro with Scattered Glow

A rounded afro makes babylights feel like they were caught in motion rather than placed in rows. That’s why scattered color works here. Too much symmetry kills the softness. Too much color at the hairline pulls the eye straight to the edge and away from the shape.
I’d keep the highlights mostly on the outer canopy and through the top half of the shape, then let a few pieces land lower near the temples. The result should look like light sitting on top of the curl cloud, not inside a set of obvious streaks. The rounded shape helps because it spreads the contrast out in a natural way.
This style looks especially good when the hair is picked into a clean sphere first and then lightly shaped with a moisturizing cream or sheen spray. Not heavy grease. Heavy grease drags the entire surface down and can make the babylights look muted. You want airy brightness, not slickness.
A one-sentence truth: the shape does more work than the color here. The babylights just make the shape easier to read.
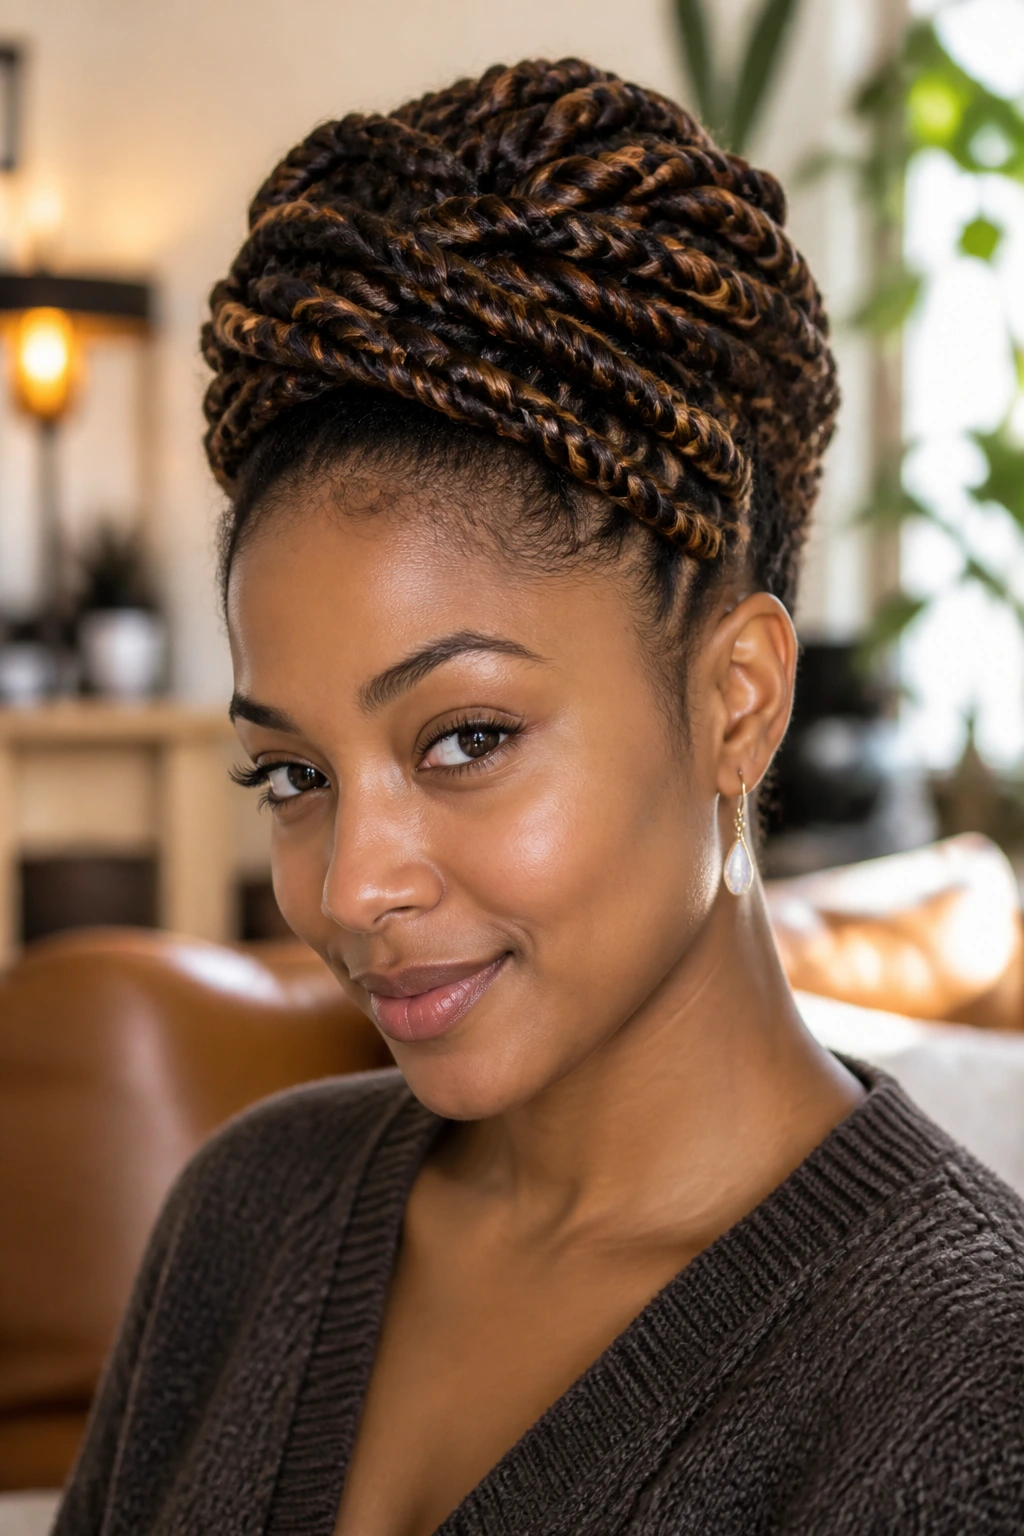
8. Bantu Knot-Out with Copper Flickers
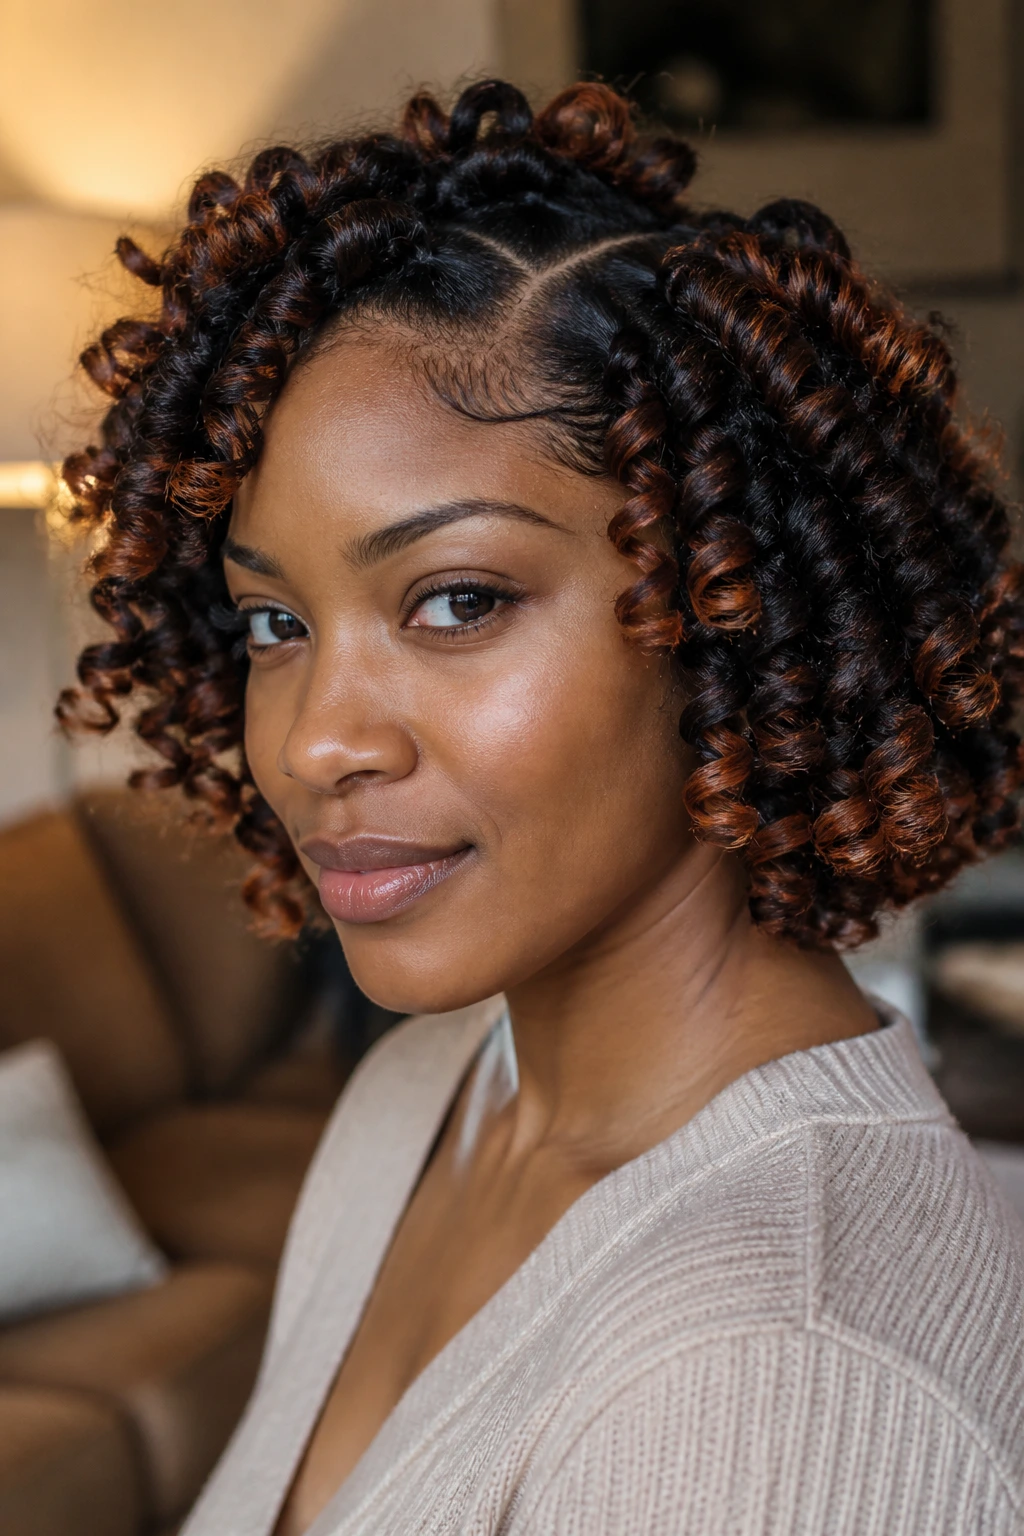
Bantu knot-outs and copper babylights get along like they were introduced on purpose. The knots create springy spirals, and copper sits in those spirals with a warm flash that reads from several feet away. On deep brown hair, the contrast can be stunning in person — not because it screams, but because it moves.
The key is restraint. Copper looks rich when it’s thin and deliberate. When it’s too broad, it can start to read brassy, especially on porous hair that drinks up toner fast. Keep the highlights in the outer portions of the knot pattern and let the root stay deeper.
Setting foam helps here. So does patience. Let every knot dry fully before you separate it, or the babylights will frizz into a halo and the definition will collapse. That sounds dramatic because it is dramatic in the chair. Once the spirals fray, the color loses its clean edge.
I like this look for evenings and events because it has a little glow without needing a full updo. It moves when you move. Good hair should do that.
9. Half-Up, Half-Down with Soft Highlighted Ends
Half-up, half-down styles give babylights a place to hide and a place to show. The top section stays tidy, while the loose bottom half lets the highlight pieces swing and separate. That contrast makes the style feel deliberate even when the texture is a little imperfect.
If the hair has layers, put more of the lighter pieces toward the ends. That’s where the eye lands when the hair falls over the shoulders. Face-framing babylights at the front help too, especially if the top knot or clip is sitting high enough to expose the sides of the face. A lot of people overthink this style and place the color too evenly. Don’t. The point is movement, not balance in the strict sense.
This is a strong choice for medium to long hair that wants some polish without the commitment of a full updo. I’d use a clip or satin scrunchie instead of a tight elastic because the line of the half-up section should stay soft. A hard band can make the top look clenched.
Best detail: Highlighted ends show off the cut. If you’ve got layers, let them speak.
10. Low Puff with Hidden Babylights
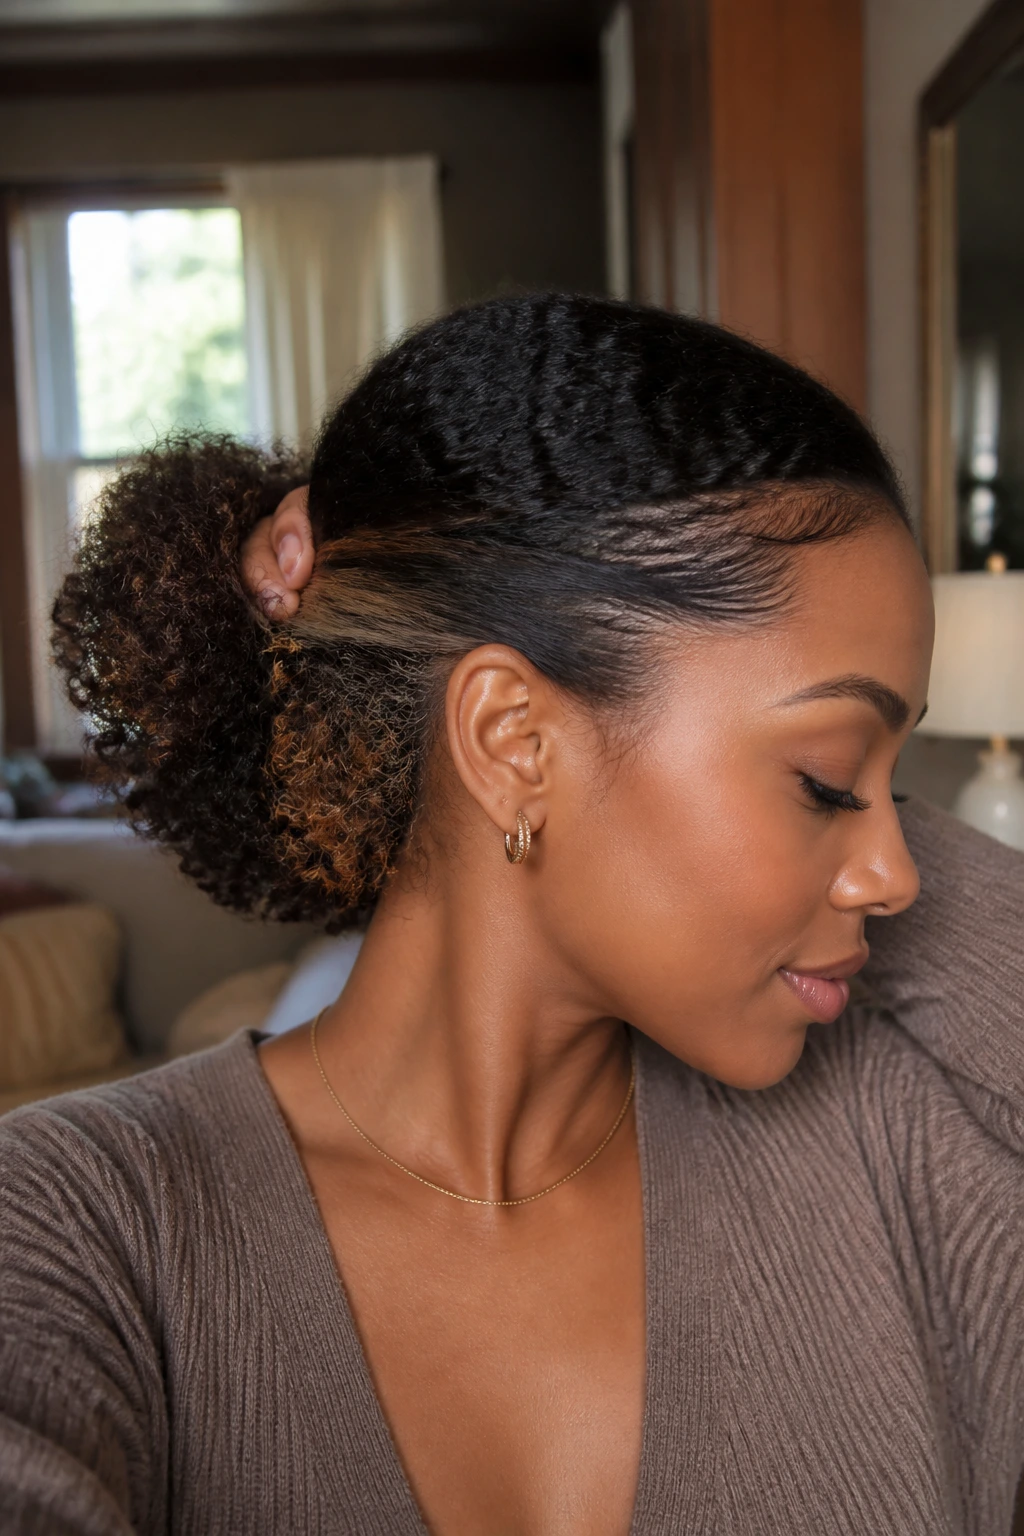
A low puff is the quiet cousin of the high puff. The color doesn’t announce itself from across the room, which is exactly why it can feel so good. Hidden babylights under the crown and near the nape flash only when the hair shifts or when you turn your head.
This style is for people who like the idea of color but do not want it in their face all day. You still get depth at the surface, but the real payoff sits underneath. That makes the grow-out easy to live with, especially if you don’t want a high-maintenance touch-up schedule.
I’d ask for a deeper base and a few lighter strands tucked into the underlayer. The puff above should stay dark enough to keep the shape grounded. If the entire outer layer is lightened, the style loses that tucked-away richness and starts to feel overworked.
This is the kind of style I’d pull out for workdays, dinners, or any setting where you want the hair neat but not severe. It reads polished from the front and more interesting from the side.
11. Box Braids with Subtle Highlight Feed-Ins
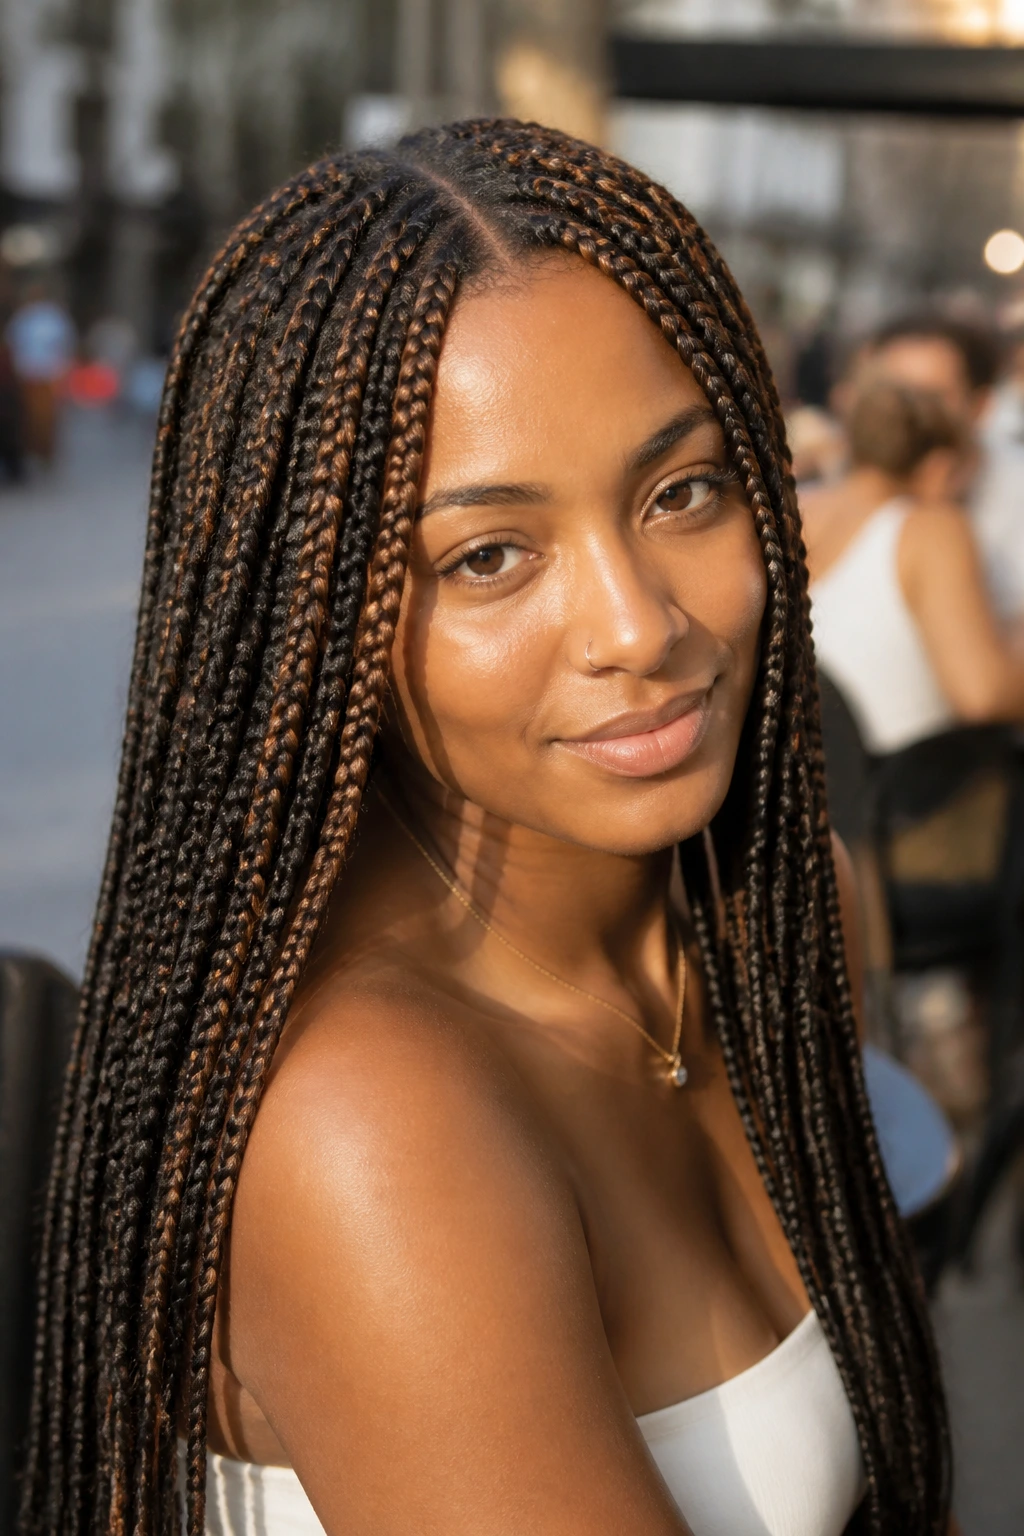
Box braids can take babylights two different ways: through your own colored hair before braiding, or through pre-colored braiding hair if you want to skip bleach on your strands. I usually prefer the second route when the goal is subtle dimension and the hair needs protection. It gives you the look without asking your own hair to carry all the lifting.
The color should be worked in as feed-ins or very thin accent strands, not thick chunks. A few lighter braids around the face and at the top can change the whole read of the style. Too much color and the braids start to feel busy. Too little and the effect disappears into the weave.
Keep tension honest. That matters more than the color plan. If the braids are too tight, the scalp never settles down and the style becomes a regret with nice highlights. Also, color-matched extensions should still have depth. One flat shade is the fastest way to make the braids look synthetic in a bad way.
Best for: People who want babylight-inspired brightness with less daily manipulation.
12. Faux Locs With Earthy Babylight Blends
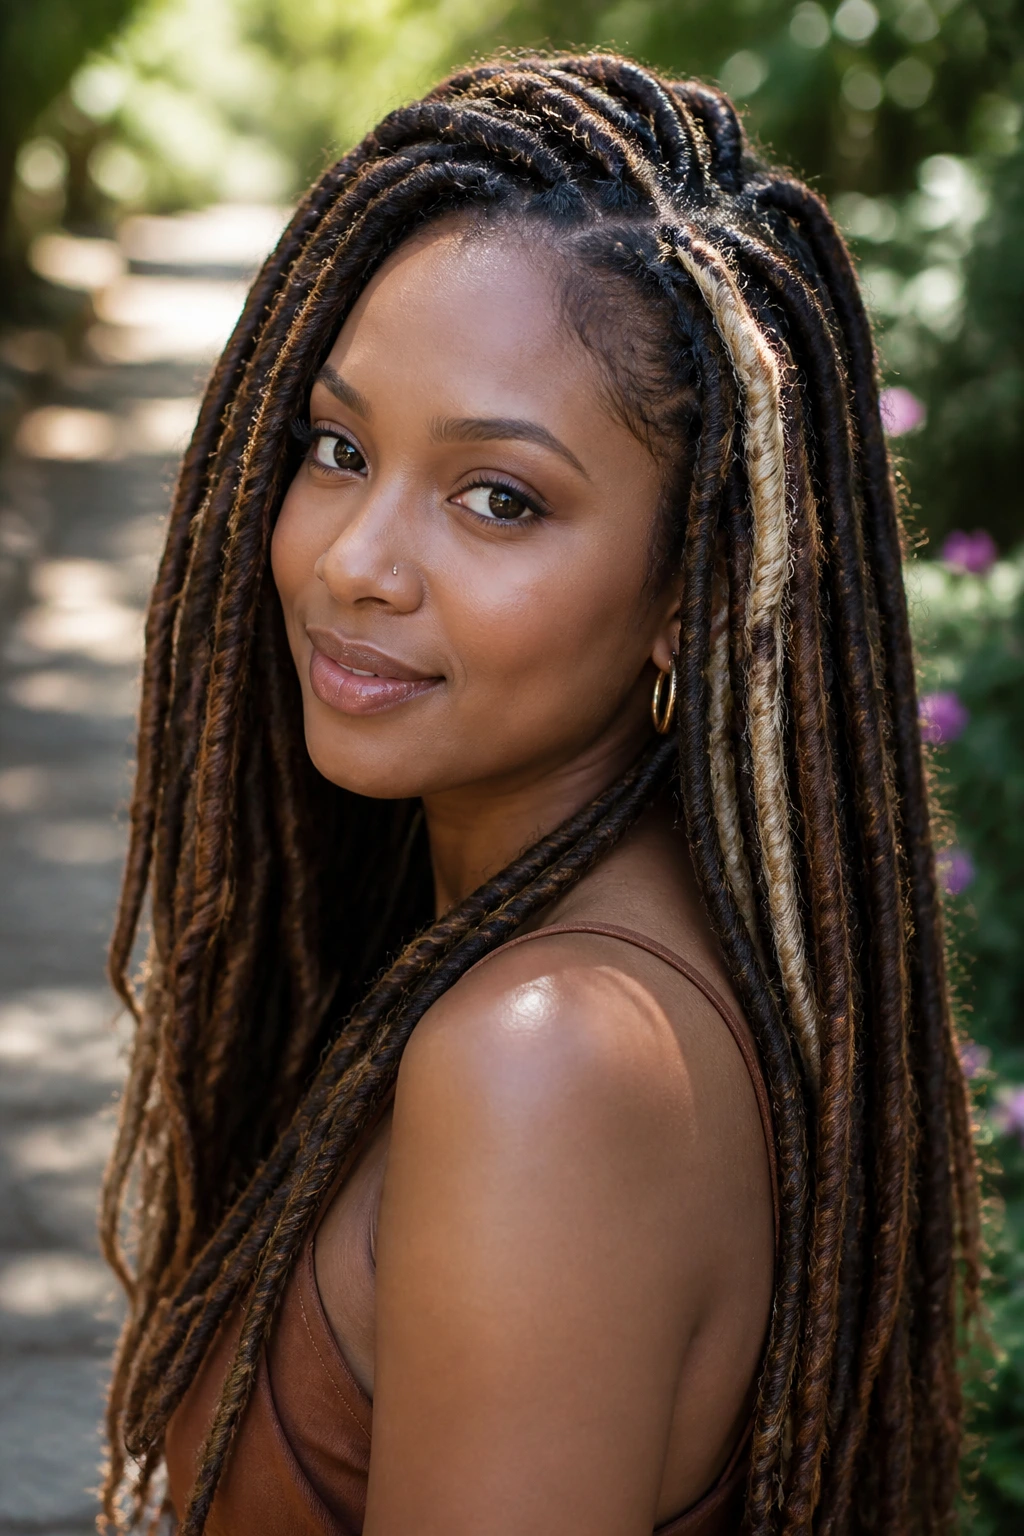
Faux locs with babylights look best when the tones stay earthy. Think amber, soft bronze, smoked caramel, or muted gold. The effect should feel sun-warmed, not neon. On textured hair, that restraint is what keeps the locs from overpowering the face.
You can place the lighter strands in the wrap hair, in a few select locs, or as accent pieces near the front. I like a shadow root here because it keeps the base of the style grounded. If every loc is equally bright, the whole head can lose depth and start reading one-note. A little darkness near the roots and a touch of light near the ends is enough.
This style is especially useful if you want a protective look that still has a color story. The babylights don’t need to be seen all at once. They can show in small flashes as the locs swing and settle.
A small warning: if the wrap hair is too shiny, the lighter pieces can look plastic. Choose texture in the synthetic hair too. That detail matters more than people think.
13. Curly Bob With Latte Highlights
A curly bob gives babylights a shorter, neater frame to live in, and that frame makes the color look cleaner. Latte-toned highlights are a smart fit because they sit between warm and cool, which means they don’t fight the curl shape as hard as a bright blonde would.
The best part of this cut is the way the babylights trace the perimeter. On a bob, the ends and the outer layer matter more than the middle mass, so a few well-placed lighter pieces around the cheeks and jawline can sharpen the whole look. If the bob is blunt, keep the color subtle. If it has layers, you can scatter the light a little more freely.
I’d diffuse this style rather than let it air-dry into a frizz cloud. A clean curl pattern gives the highlights a defined border, and that border is what makes the color feel intentional. A little mousse at the end can help the curl cast hold shape.
One useful detail: bob-length hair grows out faster visually than longer hair, so soft roots and muted contrast will save you a headache later.
14. Layered Coils With Shadow-Root Dimension
Layered coils are the perfect excuse to mix babylights with lowlights. The layers create movement on their own, and the color only needs to support that shape. A shadow root at the top, a few lighter ribbons through the middle, and some deeper pieces underneath can make dense hair look airy without making it look thin.
This is the style I’d recommend when the hair needs dimension more than brightness. A lot of people think highlights mean lighter means better. Not here. On layered coils, too much brightness can flatten the silhouette, because the eye stops reading the layers and starts reading the color as a block.
Ask for a color story rather than a single highlight placement. That usually means a darker base near the scalp, babylights on the outer layer, and a few lowlights tucked in where the layers bend. It sounds like a lot, but the result is surprisingly calm. The eye doesn’t get stuck.
The cut and the color should be talking to each other. When they do, the curls look fuller, not louder.
15. Side-Part Fro With Bright Money Pieces
A side-part fro loves asymmetry. That’s why the money pieces at the front matter so much here. A few brighter babylights around the part and hairline can turn a regular afro into a shape with direction. The highlight doesn’t need to cover much ground. It just needs to land where the eye starts.
I’d keep the brighter pieces narrow and let them fade back into the crown. Chunky front streaks can feel dated fast on textured hair, especially when the rest of the shape is soft. Fine placement keeps the face frame light and the rest of the fro still dense and rounded.
This is a strong choice if you want the hair to elongate the face a little. The side part opens one side and lets the color slant across the forehead. It’s a small move with a big payoff.
My take: the money piece should look like part of the haircut, not a separate accessory.
16. Pineapple Updo With Toned Ends
A pineapple updo is what happens when second-day hair gets a little smarter. The babylights often show up most at the ends and outer layer, which makes the shape feel lively instead of flattened by gravity. The higher you place the puff, the more the lighter pieces cluster near the top.
This style is good for showing off toned ends, especially if the highlights are concentrated toward the bottom half of the hair. That gives the ponytail or puff a soft halo effect. A satin scrunchie is better than a hard elastic because it keeps the base from looking too severe and protects the strands at the same time.
If you want the babylights to read clearly, keep the edges neat but not shellacked. A small amount of edge control is enough. Too much product around the front can steal the light and make the ends look like the only interesting part, which defeats the point.
This is one of those styles that looks casual but is quietly doing a lot of work. The highlight placement is what keeps it from looking thrown together.
17. Blowout With Piecey Babylight Strands
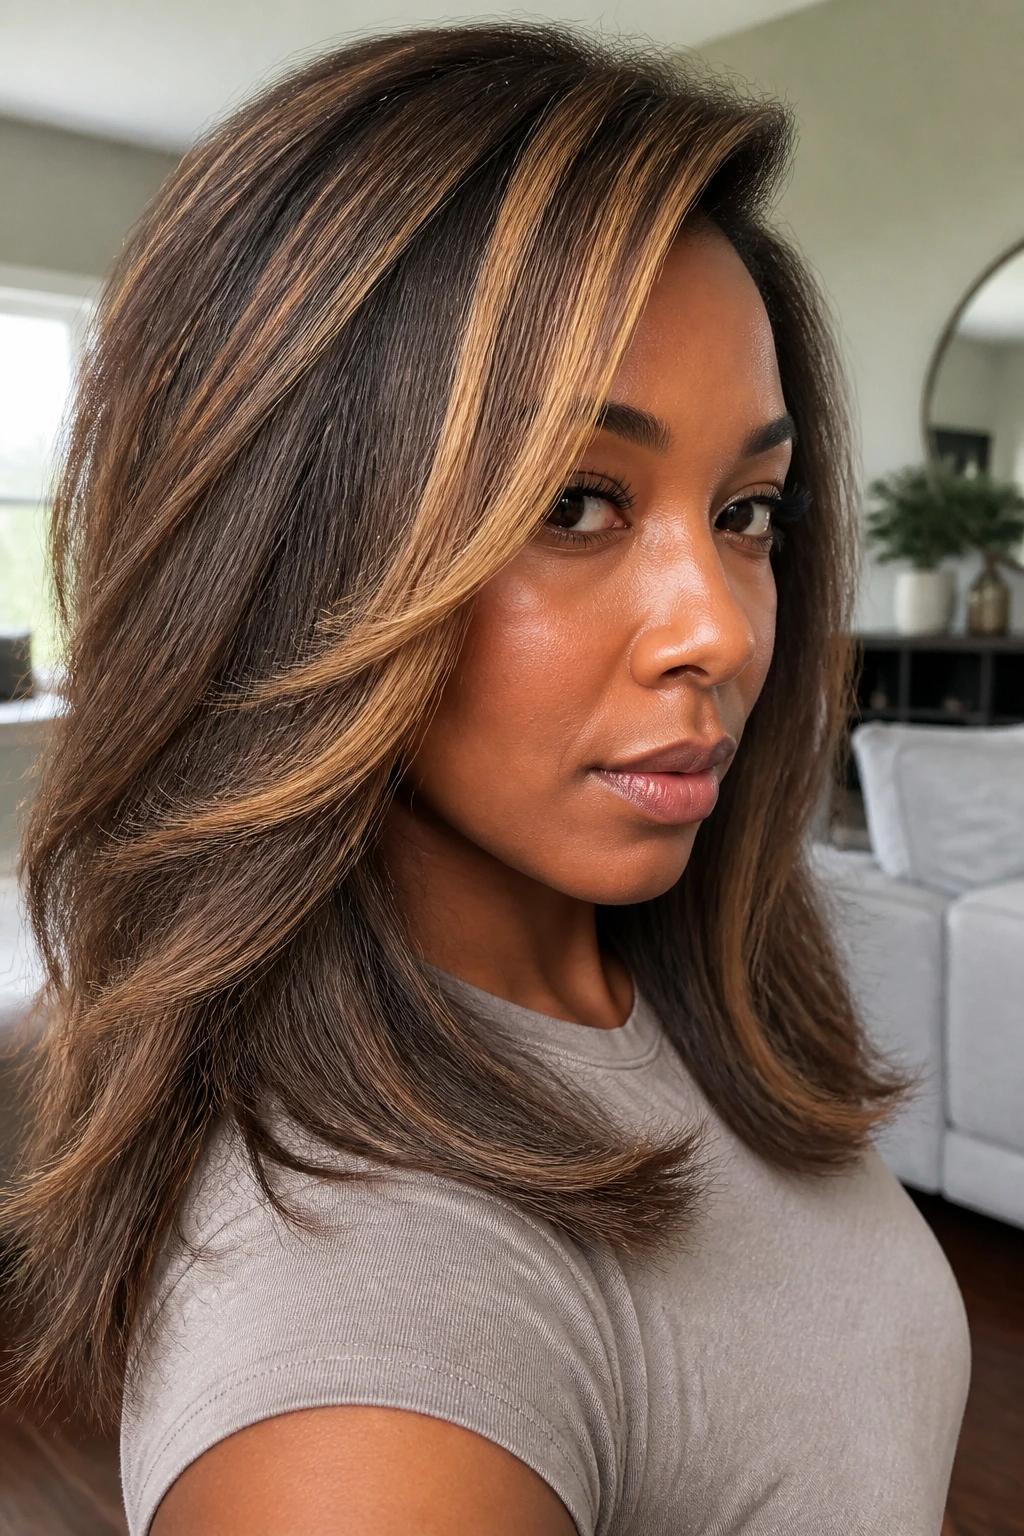
A blowout gives babylights a different life. The color looks more graphic because the hair stretches, the curl pattern loosens, and the individual lightened strands can stand on their own. If you want to actually see the placement, this is one of the clearest ways to do it.
The danger is heat. Too much heat, and the whole head looks tired before the color even has a chance to shine. Use a heat protectant, keep the temperature honest, and stop once the hair is stretched enough to show the babylights. You do not need a glassy silk press for this to work. In fact, a little texture often looks better.
Piecey babylights near the front and along the top layer are enough. The rest of the head can stay darker and denser so the style keeps its body. That contrast is what makes the blowout interesting. It’s not about turning textured hair straight. It’s about showing the length and the color without erasing the texture entirely.
I’d reserve this look for times when you want the color to be obvious from several angles. It’s not subtle. That’s the point.
18. Cornrow Updo With Peekaboo Ribbons
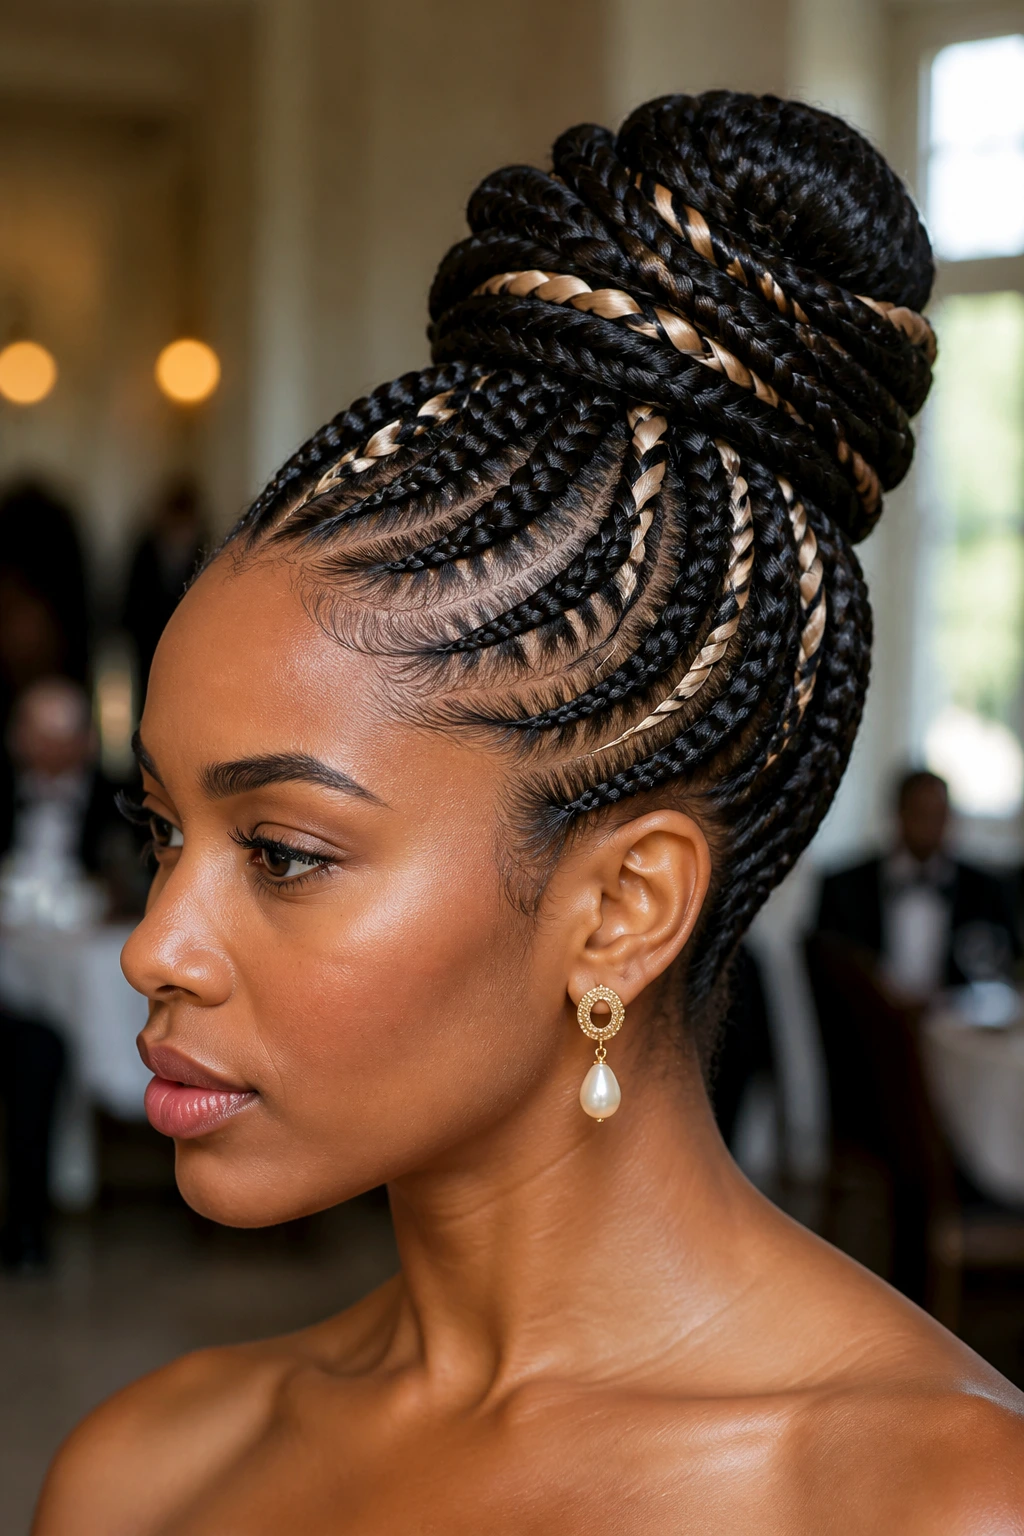
Cornrow updos can swallow color if the placement is too conservative, so the babylights need to live in the places that break the pattern. Think outer rows, tucked panels, and the bits that show when the head turns. That’s where peekaboo ribbons do their best work.
This is a smart style for formal events because it keeps the hair secure while still giving you movement in the color. The updo can sit in a bun, a folded knot, or a pinned shape, and the lighter pieces will peek through when the braids curve around the head. The result is understated in front and more detailed from the side.
Tension matters here. Tight cornrows are not a badge of honor. They pull at the scalp and make the style harder to wear, especially once the hair has been lightened. Ask for clean but sensible tension so the scalp can breathe and the babylights can sit without stress.
A few gold cuffs or a single pin are enough. The color is already doing the work.
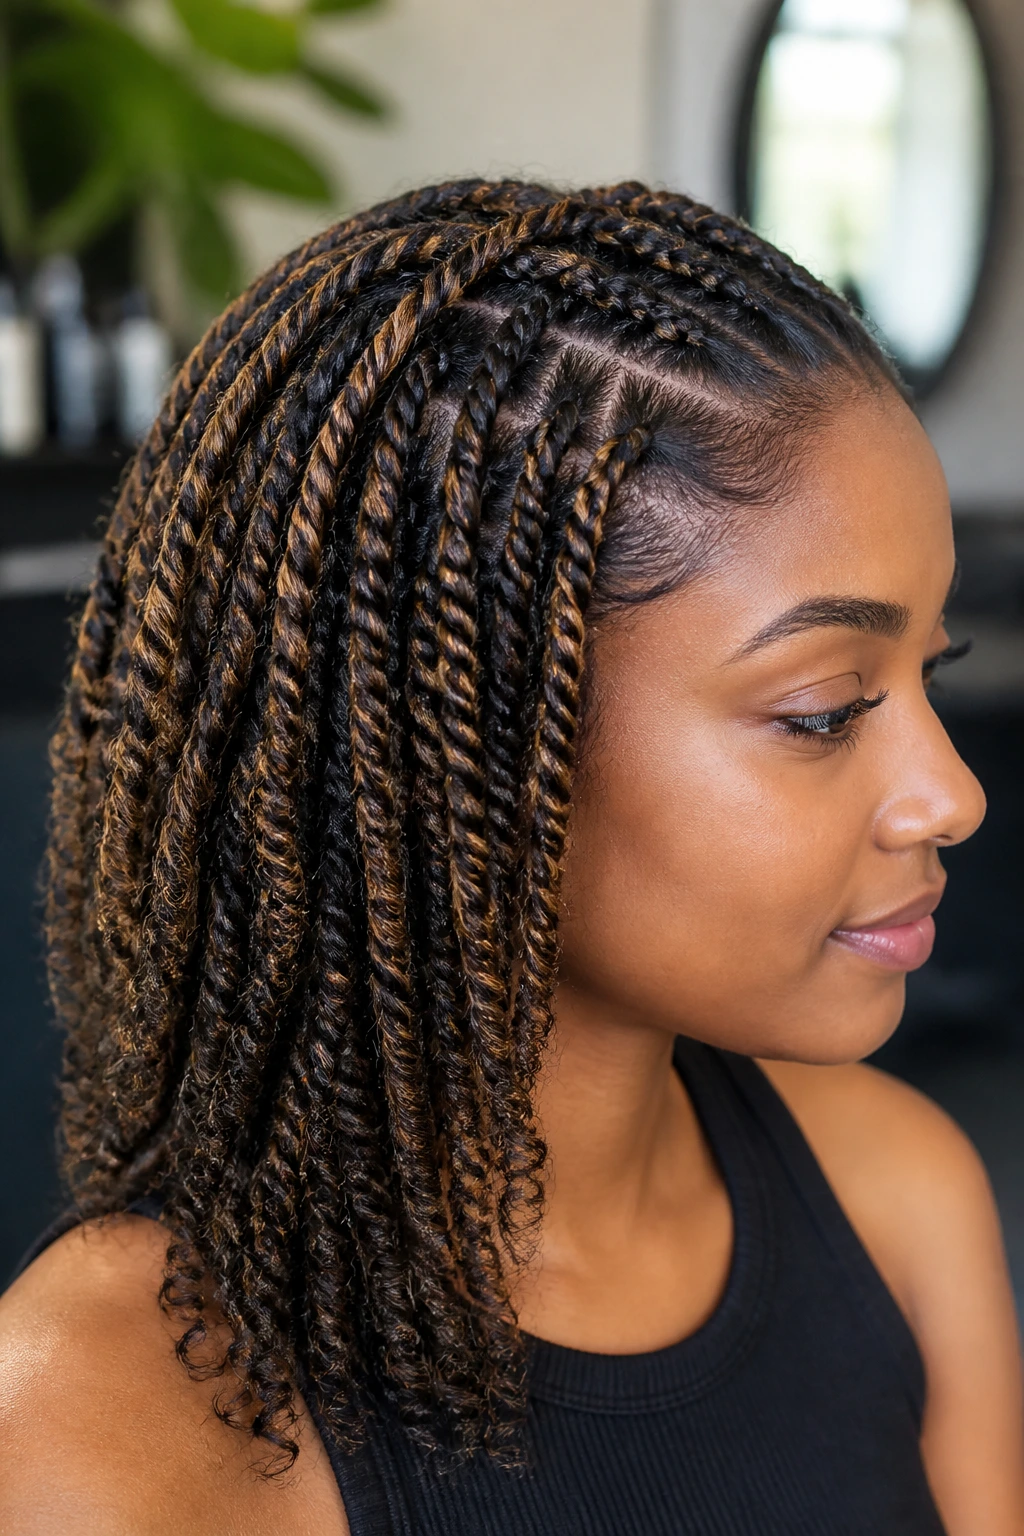
19. Two-Strand Twist Updo With Warm Glow
Two-strand twists have a rope-like shape that babylights love. Stack them into an updo, and the color appears in curved lines instead of straight pieces. That makes the style feel softer than a standard bun or ponytail, especially when the highlights are warm and close to the base color.
The best version uses babylights on the twist surface and a deeper shade underneath. That way the lighter pieces flash when the twists overlap, but the whole head still has depth. If the twists are all the same brightness from root to end, the style can look flat even though the texture is nice.
This is a good low-manipulation option if you want to keep the hair neat for several days. It also makes a good bridge style between a twist-out and a full protective style. You get structure without sealing the hair away completely.
Keep the moisturizers light. A heavy cream can make the babylights look cloudy, and cloudy color is a waste of good placement.
20. Curly Ponytail With Halo Highlights
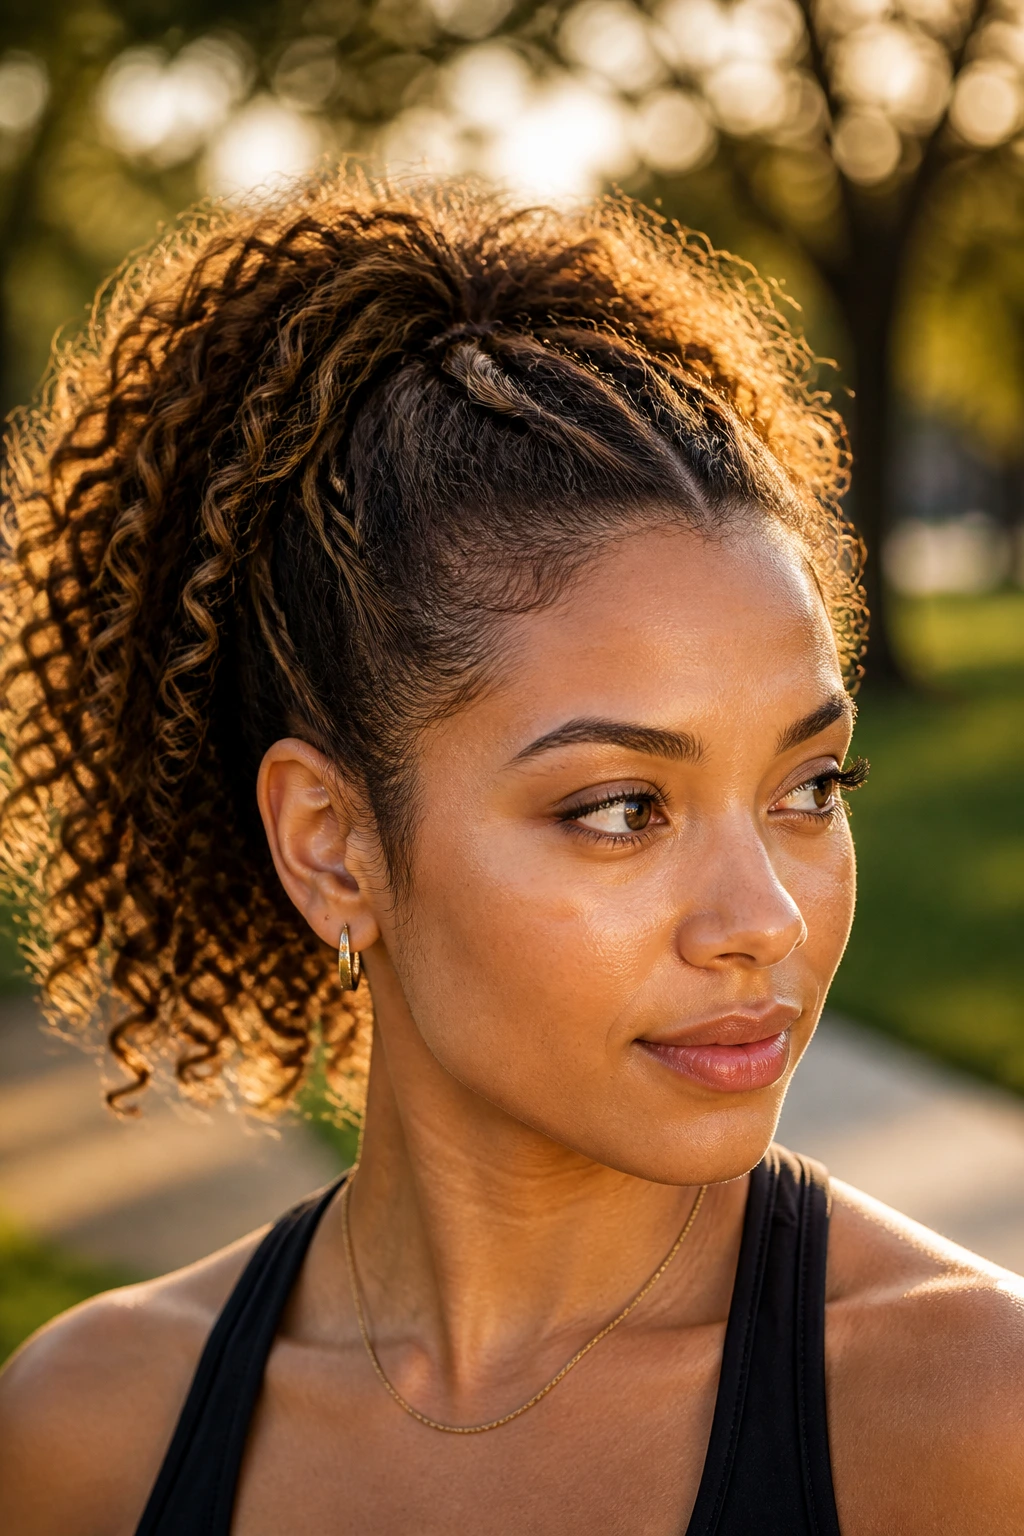
A curly ponytail gives babylights a clean stage. The halo around the hairline and the crown catches light first, and the ponytail itself becomes the moving part that carries the color through the room. On textured hair, that movement matters more than perfection.
I like the highlights concentrated near the part, the temples, and the upper section of the ponytail. That gives the style a lifted look without turning the whole pony into a light blob. If the hair is dense, a few brighter pieces at the top help the ponytail separate from the base and keep it from looking heavy.
This style pairs well with a wrapped base or a small section of hair hidden around the elastic. That detail can make the whole look cleaner. The babylights should stay visible in the tail, not trapped at the scalp where nobody sees them.
A little curl cream or a foam mousse on the ponytail can help define the coils so the highlights sit on top of a clear pattern. Loose, undefined curls blur the color. Defined curls make it sing.
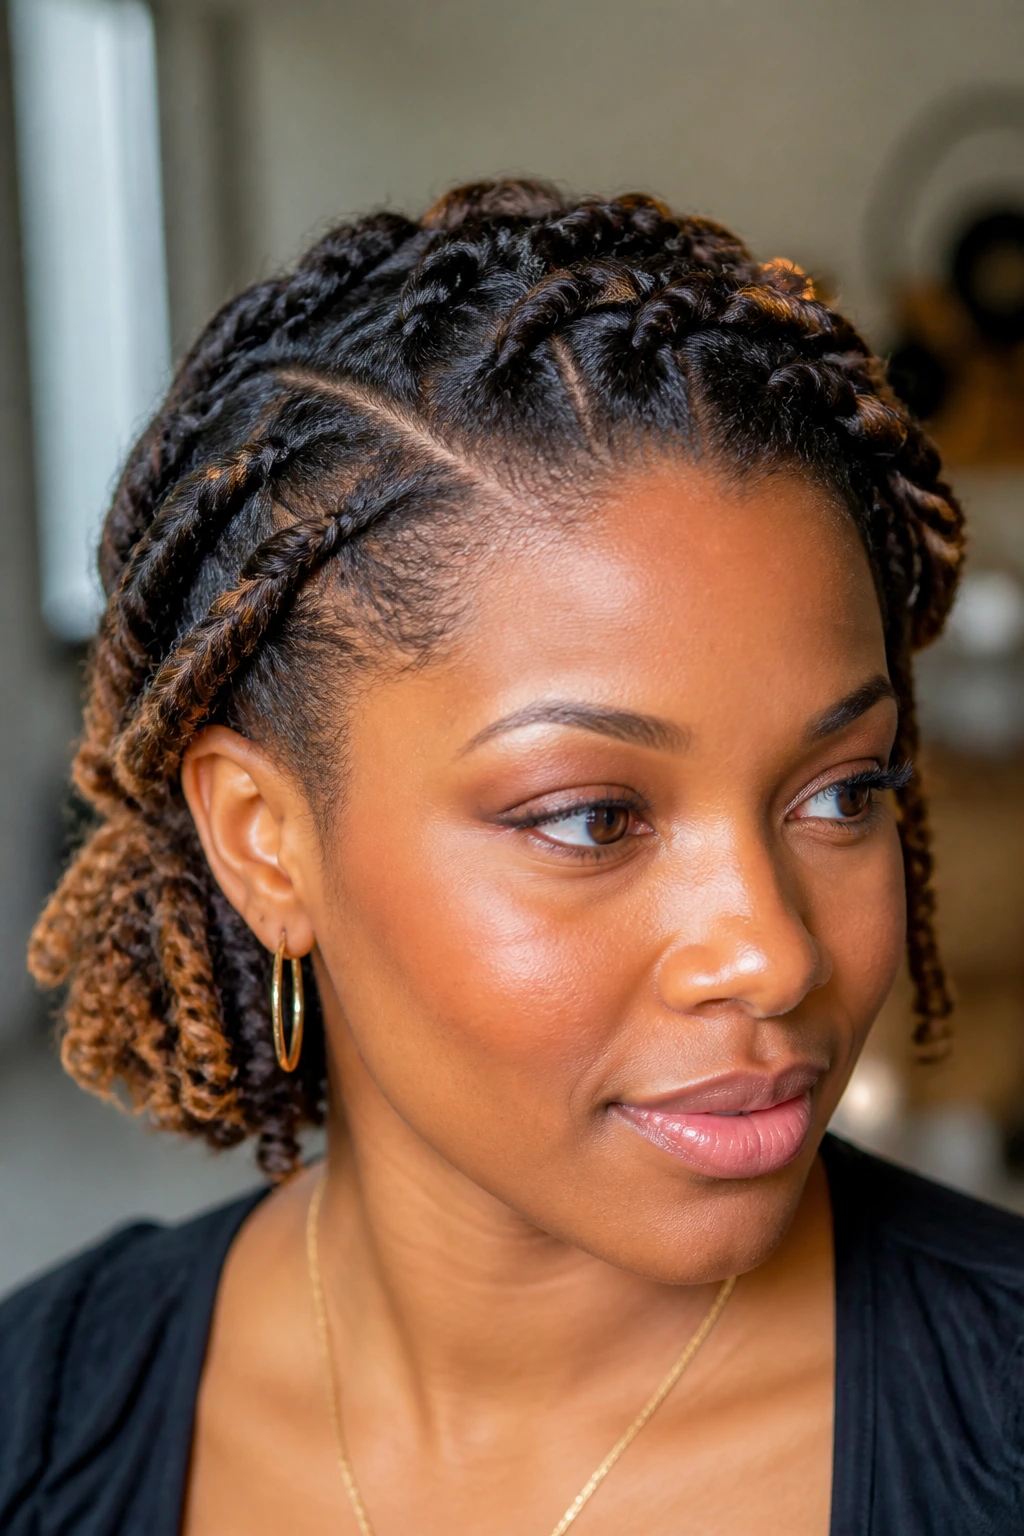
21. Mini Twist Set With Seamless Color Melt
Mini twists are for people who want the color to last longer than a weekend and still look deliberate on day five. The tiny size of the twist makes babylights almost melt into the hair, which is perfect if you want subtle movement rather than obvious stripes.
This style loves a seamless color melt from root to end. A slightly deeper base, mid-tone babylights through the outer layer, and a soft finish at the ends create a gradient that feels more natural than stripy. The smaller the twists, the more the color looks woven in. That’s what makes this style so good for low-maintenance wear.
It does take time to install, and that’s the tradeoff. But once it’s in, the maintenance is easier than with loose styles because the hair stays contained and the highlight pattern remains stable. A satin bonnet at night and a light scalp spray are usually enough.
If you like subtle color that rewards a second look, this is one of the smartest options on the list.
22. Halo Braid With Lit Edges
A halo braid puts the color right where the eye travels around the head. That’s why babylights on the edges, perimeter, and braided curve read so well here. The braid itself is the frame; the highlights are the line work.
I like this style when the hair is stretched or blown out enough to hold a clean braid path. The babylights should follow the contour of the head, not fight it. A few lighter pieces near the temples and along the braiding path are usually enough. Too many and the braid loses its shape. Too few and the light disappears once the braid wraps around the back.
This is a strong choice for events because it looks polished without feeling stiff. A couple of pins can lock the braid in place, but the color needs room to move a little. If the hair is too slicked down, the babylights lose the texture that makes them interesting.
A small opinion: this is the kind of style that looks much better with a little irregularity than with perfect symmetry.
What Makes Babylight Placement Read Soft Instead of Stripy
The difference between soft and stripey is almost always placement, not color. Fine babylights can still look harsh if they’re packed in too thick or dropped in the same zone from front to back. On textured hair, you want the light to break up across the surface, not sit in one obvious lane.
I pay the most attention to the parts people actually see first: the part line, the temples, the top layer, the crown, and any ends that move. Those are the places where a highlight can do work without overwhelming the style. If the hair is dense, more slices go on the outside. If the hair is fine, fewer pieces are enough. Simple.
A root shadow helps. So do lowlights. They give the bright pieces a place to belong. Without them, babylights can float strangely against the base, especially on coily hair where the texture itself already has a lot going on.
And yes, the cut matters too. A blunt bob, a layered fro, and a tapered shape all show color differently. I’d rather see a slightly less dramatic highlight with a good shape than a loud highlight hiding inside a weak one.
Essential Tools for Babylighted Natural Hair
-
Sulfate-free shampoo: Helps clean the scalp without stripping color too fast; ideal for wash days after lightening.
-
Moisturizing deep conditioner: Use this weekly or every other week to keep the hair from feeling rough after the color service.
-
Bond-building treatment: Useful if the hair was lightened and feels weaker or stretchier than usual; follow the package directions, not a guess.
-
Leave-in conditioner with slip: Makes detangling safer and keeps highlighted strands from snagging while you style.
-
Curl cream or foam: Choose based on the style; cream for twist-outs and braid-outs, foam for sets that need lighter hold.
-
Strong-hold gel: Best for wash-and-gos, puffs, and sleek edges where you want the babylights to sit on a clean shape.
-
Heat protectant: Non-negotiable if you’re blow-drying or doing a stretched look; lightened hair hates repeated heat without protection.
-
Diffuser attachment: Optional, but worth having if you wear wash-and-gos or curly bobs and want the color to dry in defined clumps.
-
Rat-tail comb: Helps make clean parts so the highlight placement and styling line up instead of fighting each other.
-
Wide-tooth comb or detangling brush: Better than forcing a brush through fragile, lightened curls.
-
Satin bonnet or scarf: Keeps babylights from drying out overnight and reduces frizz on exposed lighter pieces.
-
Microfiber towel or soft T-shirt: Cuts down on roughing up the cuticle while the hair is wet.
Smart Shopping and Product Picks for Color-Treated Curls

When babylights are part of the plan, the product shelf changes a little. Shampoo matters more. So does how much protein your hair can handle. If the hair was lightened, look for a balance between moisture and strength rather than pouring on heavy oils and calling it a day. Oils can seal the strand, but they do not repair it.
A good aftercare routine usually starts with a sulfate-free cleanser, a rich conditioner, and a leave-in that makes detangling easy. If the hair feels mushy or overly stretchy after coloring, a protein treatment can help restore structure. If it feels stiff, back off and use moisture first. The hair will tell you. You just have to listen with your hands.
If you’re booking the service, ask what developer strength the colorist plans to use and why. On textured hair, lower volume lightening and careful timing usually make more sense than blasting the hair with high developer and hoping toner will fix the rest. It usually won’t. A 10-volume or 20-volume conversation is a sensible one; 30-volume should not be the starting point unless there’s a real reason for it and the hair can handle it.
For tone, bring photos in natural light. Salon pictures lie under warm bulbs and filter-heavy mirrors. You want references that show the color next to your base, your curl pattern, and your normal part. That tells the stylist far more than a single “I want this” screenshot ever will.
How to Wear These Looks in Everyday Life
Presentation: Keep the brightest babylights where the shape opens — around the face, along the top layer, or through the ends if you want movement to do the work. On denser hair, a lifted crown or side part can make the color show faster than adding more slices.
Pairings: Gold hoops, slim clips, satin scarves, and clean necklines tend to help babylights read clearly. Heavy accessories can compete with the color, especially on smaller styles like bobs and tapered cuts.
Scale: If your hair is thick, you can usually handle more highlight placement on the outside layer without losing depth. If your hair is fine or lower-density, keep the babylights tighter and more strategic so the style does not look overexposed.
Best Setting: Loose curls, twist-outs, and puffs are the most visible versions of these looks. Mini twists, braids, and halo styles are better when you want the color to stay calmer in office settings or formal environments.
Styling Upgrades and Shine Boosters
Gloss Refresh: A clear or tinted gloss every 4 to 6 weeks can keep babylights from looking dry or smoky, especially if the lightened pieces started to fade warm. It’s a small thing. It changes everything.
Definition Boost: On twist-outs and braid-outs, use a foam or cream that gives the curl pattern a clean edge. The babylights show best when the texture has shape, not when it’s puffed into a halo of frizz.
Accessory Trick: Gold cuffs, narrow clips, and a single side pin can draw the eye toward the brightest pieces without cluttering the style. I like this especially on braids, twists, and halo looks where the color lives in the details.
Make-It-Yours: If you want more contrast, ask for the babylights to sit a shade or two lighter and keep the base deeper. If you want a softer read, ask for a root shadow and a few lowlights so the bright pieces have something to rest against.
Night Care, Wash Days, and Touch-Up Timing
Babylighted natural hair holds up best when the nighttime routine is boring in the right way. Satin bonnet or scarf every night. No exceptions. The lighter pieces at the surface dry out faster than the darker interior strands, and they’re the ones that usually frizz first if you sleep on cotton.
For loose styles like twist-outs, braid-outs, wash-and-gos, and bobs, a refresh every 3 to 5 days is usually enough. That might mean a water-based mist, a small amount of leave-in, and a quick re-scrunch or retwist at the front. For protective styles like braids, mini twists, and locs, the hair itself may go longer between full washes, but the scalp should still be cleaned on a sensible schedule — often every 1 to 2 weeks for exposed scalp areas, or sooner if product and sweat build up.
Deep condition every 1 to 2 weeks if the hair feels dry. If the strands start getting gummy or mushy after the color service, add a protein treatment every 4 to 6 weeks, not every wash. Too much protein can make the hair brittle. Too little and the lightened pieces can feel stretched out and weak.
Touch-up timing depends on how bold the babylights are. Soft, fine placements with a shadow root can often go 8 to 12 weeks before they need a real salon refresh. Brighter face frames may need attention sooner if you want the lines crisp. A gloss or toner is usually easier than re-lightening the same strands over and over.
Common Mistakes That Make Babylights Look Heavy
-
Making the highlight too thick: If the lightened pieces are wide enough to be seen as bands, the style starts to look striped. The fix is simple: ask for finer slices and more placement on the outer layer, not the full mass of the hair.
-
Lifting too far too fast: Dark natural hair can turn orange or feel rough if the lightener is pushed hard in one session. Better to lift in stages, use bond-building support, and stop when the tone is warm enough to tone cleanly.
-
Ignoring shrinkage: A babylight placed low on stretched hair may vanish when the curl springs back, or it may bunch into a weird lump. The fix is to plan placement based on how you actually wear the hair, not just how it looks flat on the table.
-
Skipping lowlights or root shadow: Bright pieces without depth can float against the base and make the hair look thinner than it is. A little darkness under the light creates contrast and keeps the color anchored.
-
Using heavy product on lightened sections: Thick oils and butter-heavy creams can mute the babylights and make them look dusty. Use lighter products on the highlighted areas unless the hair is very dry and needs more sealant.
Variations and Adaptations to Try
Honey Melt on Deep Brown Bases: Ask for caramel and honey babylights that stay close to your natural depth. This version is good if you want warmth without a big leap into blonde territory, and it tends to grow out quietly.
Copper Coil Accent: Swap the warm honey tones for copper or bronze when you want the color to show more clearly in daylight. Copper gives coily hair a lively edge, but it needs a careful toner plan so it doesn’t skew brassy.
Beige Ribboning for Looser Curls: On type 3 curls or blown-out natural hair, beige and latte babylights can read soft and airy. The trick is keeping a root shadow and a few lowlights so the lighter pieces don’t wash out the curl definition.
Peekaboo Underlayer Color: Hide most of the lighter pieces under the top layer and around the nape. This keeps the look quiet until the hair moves, which is good for anyone who wants dimension without making color the whole story.
Protective-Style Color Without Bleach on Your Own Hair: Use highlighted braiding hair or loc wrapping hair instead of lightening your strands. You get the babylight effect with less direct stress on the hair you’re trying to protect.
Shadow-Root Brunette Blend: Keep the root one or two shades deeper and let the babylights start lower through the mid-lengths. This is the easiest adaptation if you want a salon look that doesn’t demand constant maintenance.
Questions People Ask Before Booking Babylights
Can babylights work on 4c natural hair?
Yes, but the placement needs to respect shrinkage and density. On tighter coils, babylights often read best on the outer layer, the crown, and the face frame, especially when the hair is worn stretched or in a defined style.
Will babylights damage my curls?
Any lightening changes the hair fiber, so there’s always some risk. The goal is to reduce that risk with careful lift, bond-building support, and aftercare that focuses on moisture, protein balance, and low heat.
What babylight color looks best on dark brown hair?
Honey, caramel, copper, and soft bronze usually work first because they stay close to the base and look rich instead of chalky. If you want something cooler, beige or mushroom can work, but the toner has to be kept in check.
Are babylights better than balayage for natural hair?
Babylights are usually finer and softer, which makes them easier to blend into textured hair. Balayage can still work, but if the sections are too broad, the contrast can get loud fast on coils and curls.
How often do babylights need touch-ups?
Fine babylights with a root shadow can often go 8 to 12 weeks before they need a refresh. Brighter or more visible pieces may need toner or a gloss sooner if you want the color to stay clean.
Can I get babylights with protective styles?
Yes, and this is often smarter than lightening hair that’s already a little fragile. Many people use pre-colored extensions or add the color before installing braids, twists, or faux locs so the natural hair stays calmer.
What if the highlights turn brassy?
That usually means the tone faded warm, which happens more easily on porous hair. A color-safe gloss, a blue or purple-leaning conditioner used carefully, or a salon toner can bring the color back into line.
Should I cut my hair before or after babylights?
I’d do the cut first if you’re changing shape a lot. The highlight placement should follow the silhouette you’ll actually wear, not the one you’re growing out of.
A Softer Way to Wear Color

Babylights on natural hair work because they respect the hair’s shape instead of trying to flatten it into something else. The best versions don’t announce themselves at first glance. They show up in movement, in the twist-out, in the puff, in the side part, and in the places where the light lands for half a second and then moves on.
That’s the part I keep coming back to. The color should follow the style, not drag it around. When the placement is thin, the tone is right, and the texture is allowed to breathe, the result feels lived-in in the best way — like the hair was designed for motion.
If you’re picking one look to start with, choose the style you already wear most often and place the babylights there first. The right color should make your usual hair look a little sharper, a little warmer, and a lot more deliberate the next time you catch it in the mirror.