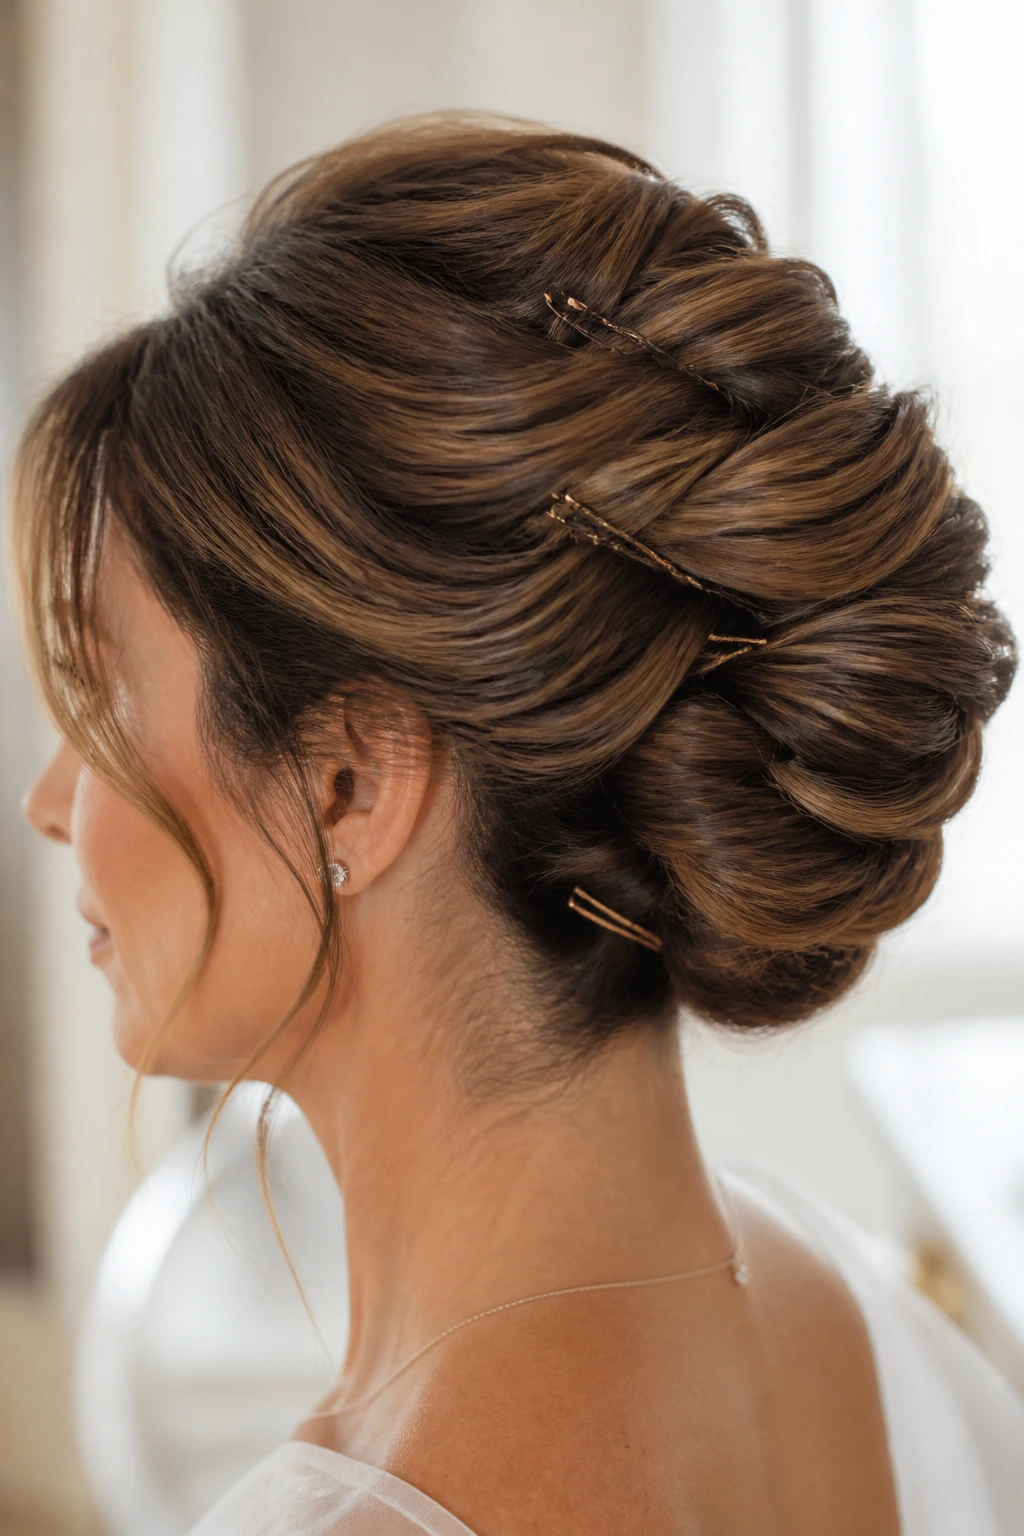
Thick hair can be a gift on wedding day. It has body, shine, and enough weight to make a folded style look full instead of flimsy. It can also be a pain in the neck, because the same density that gives you shape can shove a bun outward, make pins slide, and leave the crown puffing up by the time the cake gets cut.
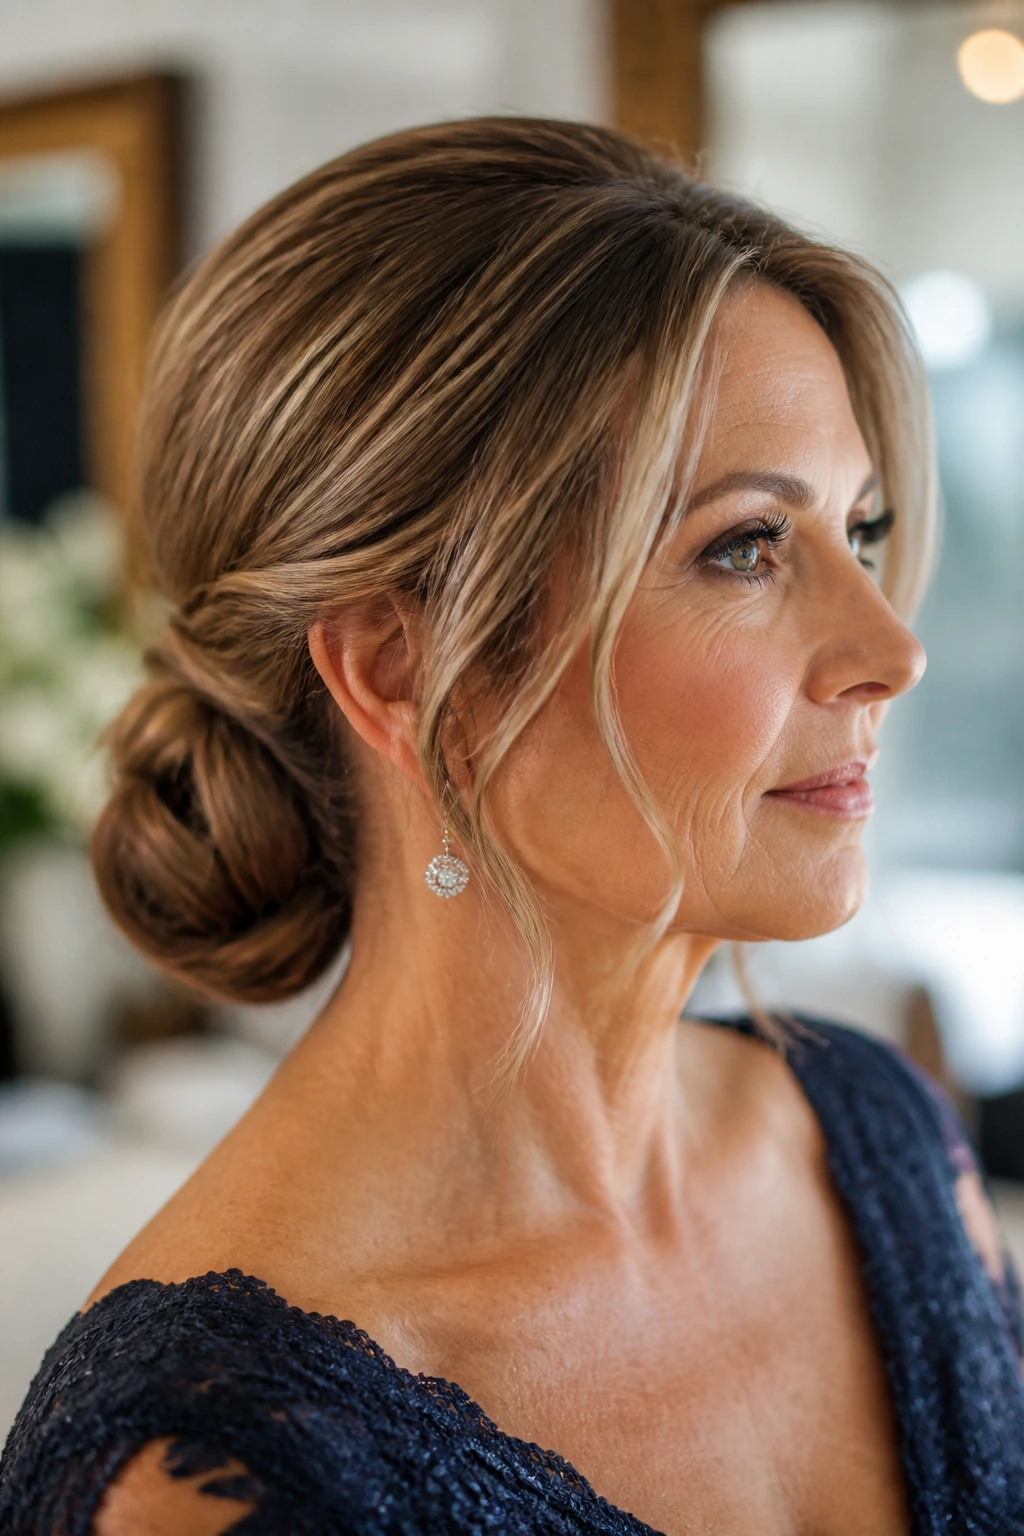
For a mother-of-the-bride or mother-of-the-groom look, the sweet spot is a style that feels polished from the front, steady from the back, and calm enough to wear through hugs, photos, and a long reception without a mirror check every ten minutes. Medium-length hair is especially useful here. It gives you enough length to tuck, twist, and coil, but not so much that the whole thing turns into a heavy knot that wants to sag.
The best wedding updos for this hair type do not fight the hair’s natural density. They use it. They lean on direction, a clean base, and a few smart pins in the right places rather than a mountain of spray and hope. Once you work with thick hair instead of flattening it into submission, the styling options get a lot better.
Why This Collection Fits Thick, Medium-Length Hair
- Built for density: These styles use thick hair’s own grip and weight, so the finished shape looks full instead of puffed out in random places.
- Works at medium length: Collarbone-to-shoulder hair can still tuck, roll, and knot without needing extensions in every case.
- Wedding-appropriate without feeling stiff: The looks stay neat at the nape and crown, but you can still leave a few soft pieces around the face if that suits the dress.
- Comfort matters here: Low placements and hidden anchors keep the style steady through a ceremony, dinner, and a long night of standing.
- Easy to personalize: Pearl pins, a comb, a veil, or a sparkly barrette can change the mood fast without rebuilding the whole style.
- Good for real-life hair texture: Thick hair, a few layers, and a little wave are not problems here. They’re part of the design.
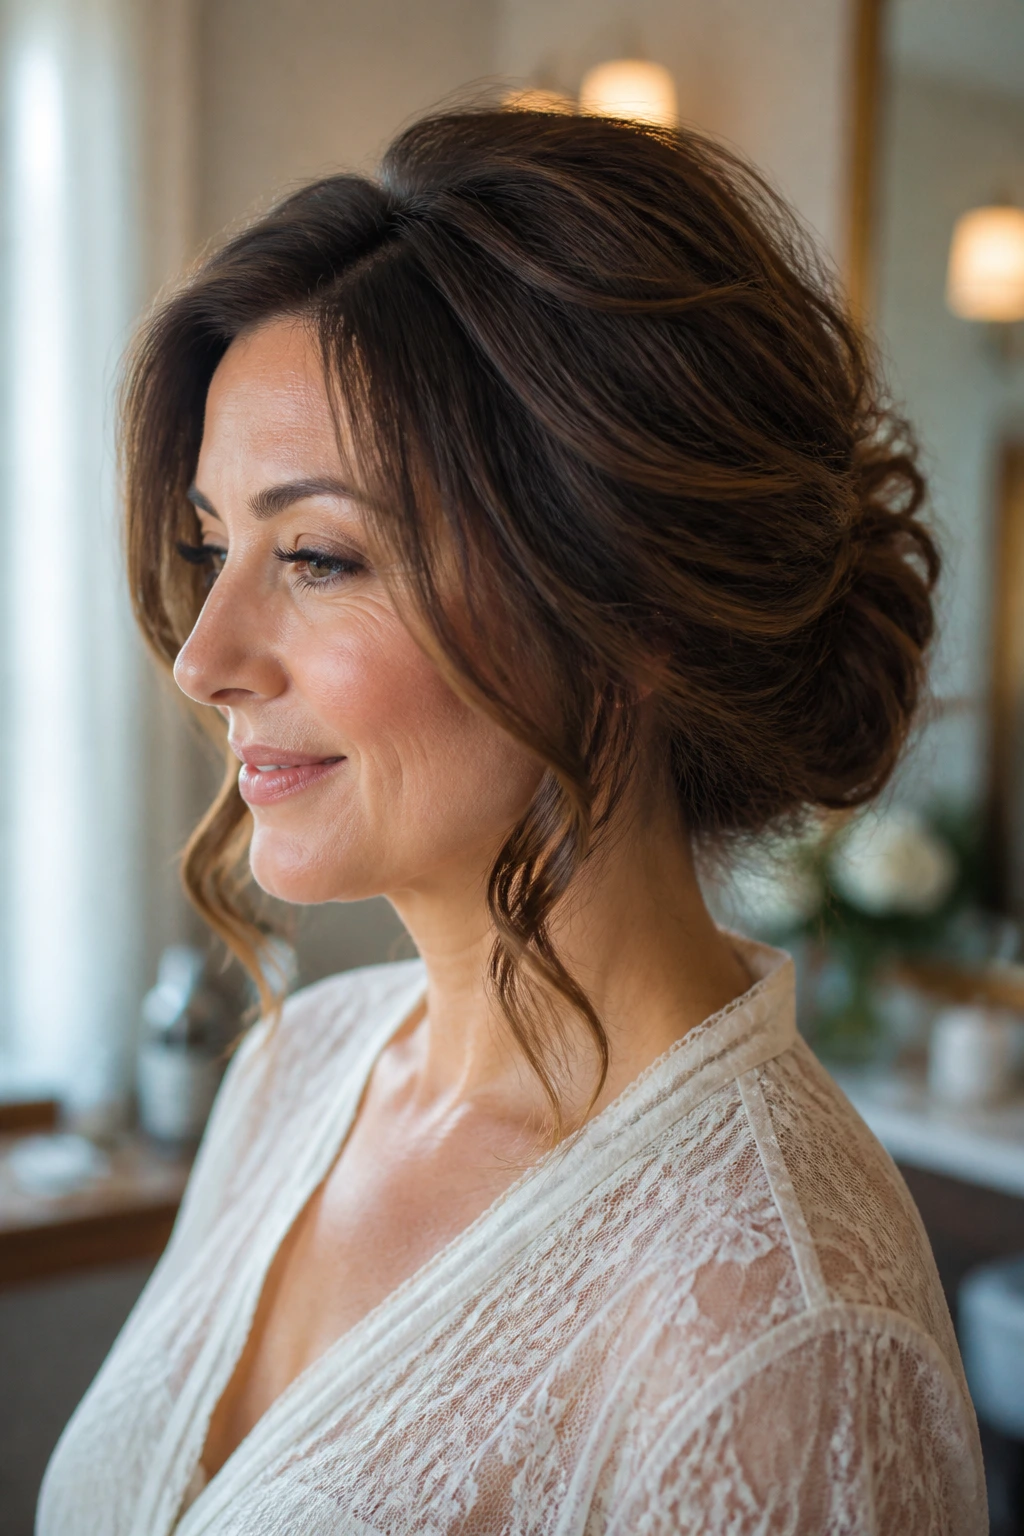
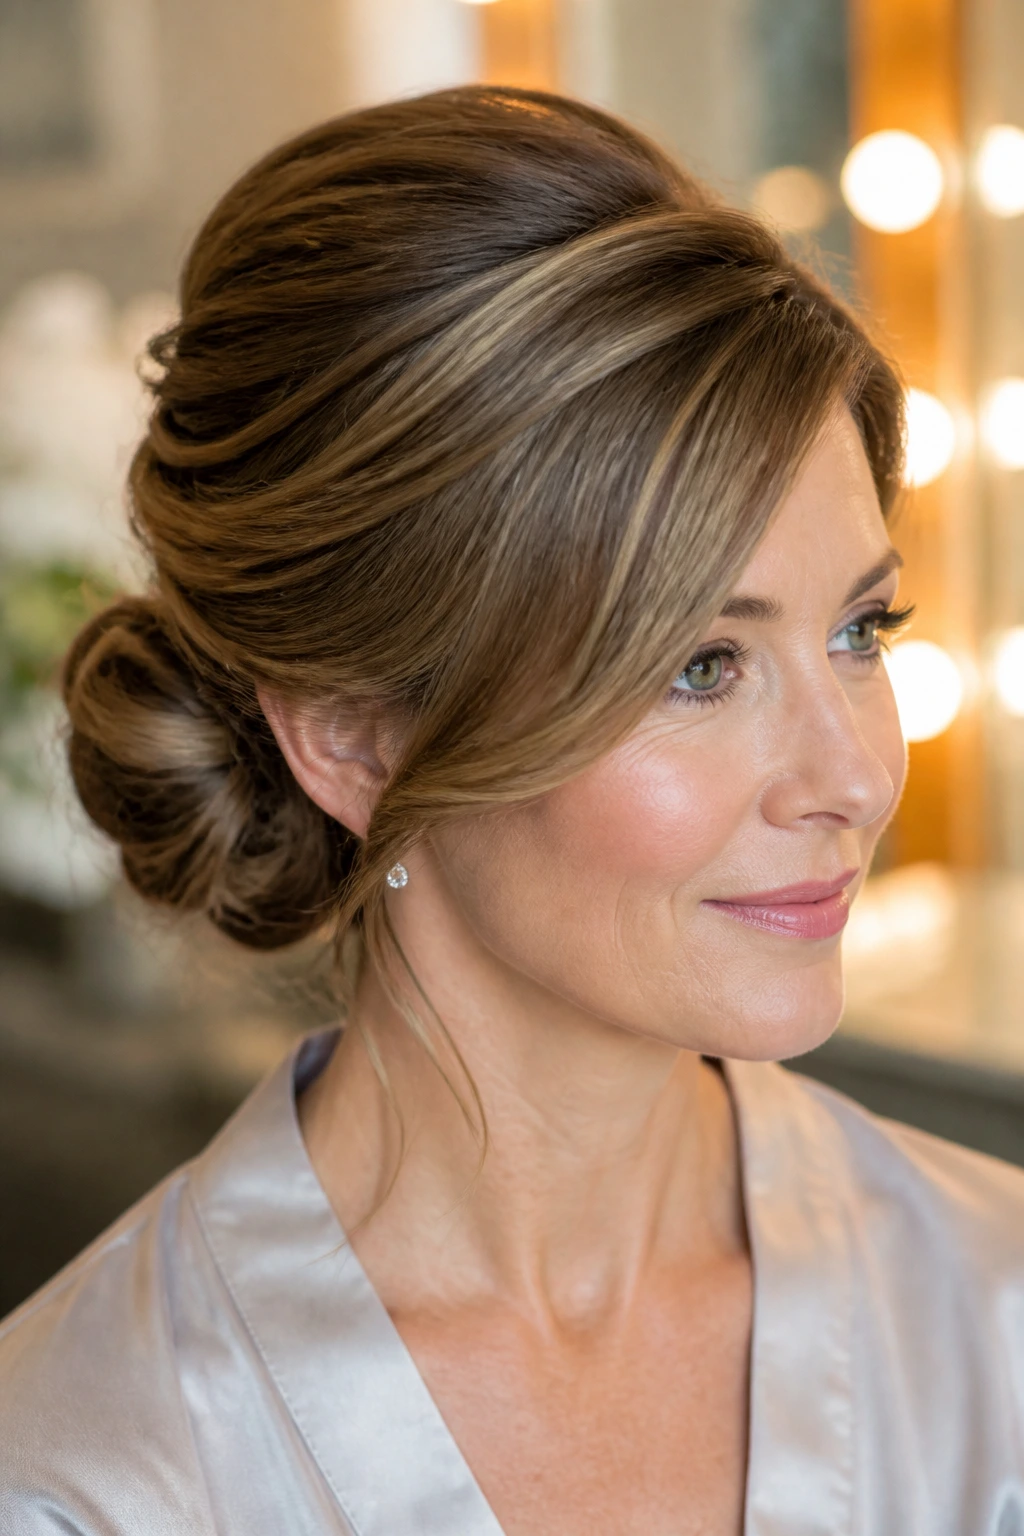
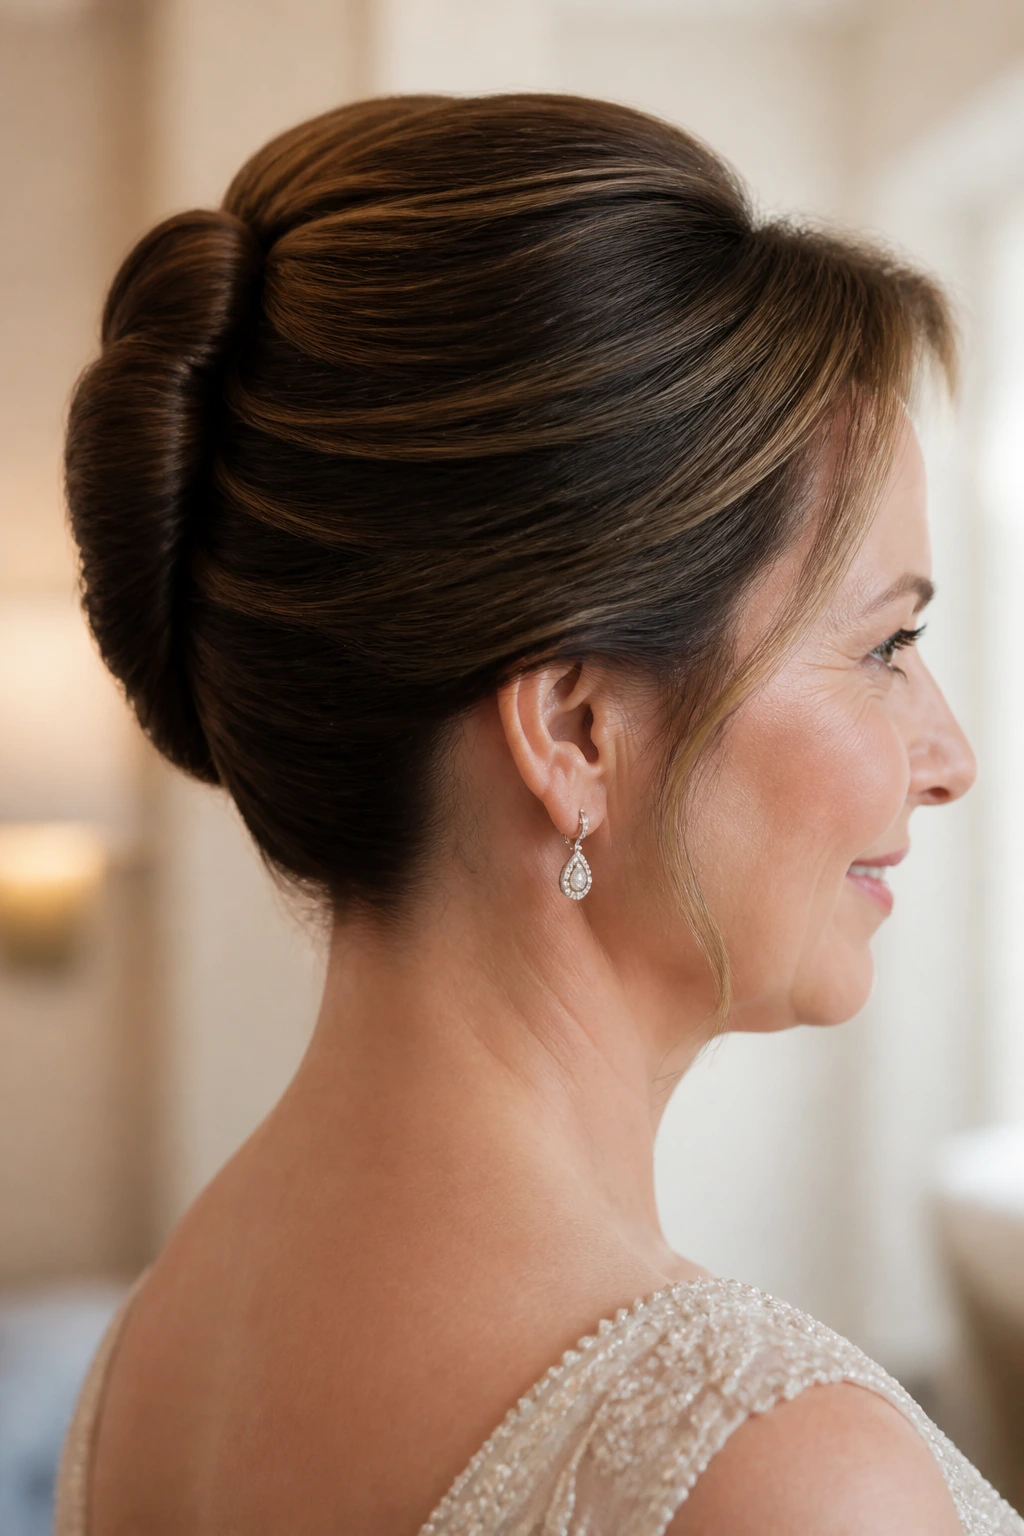
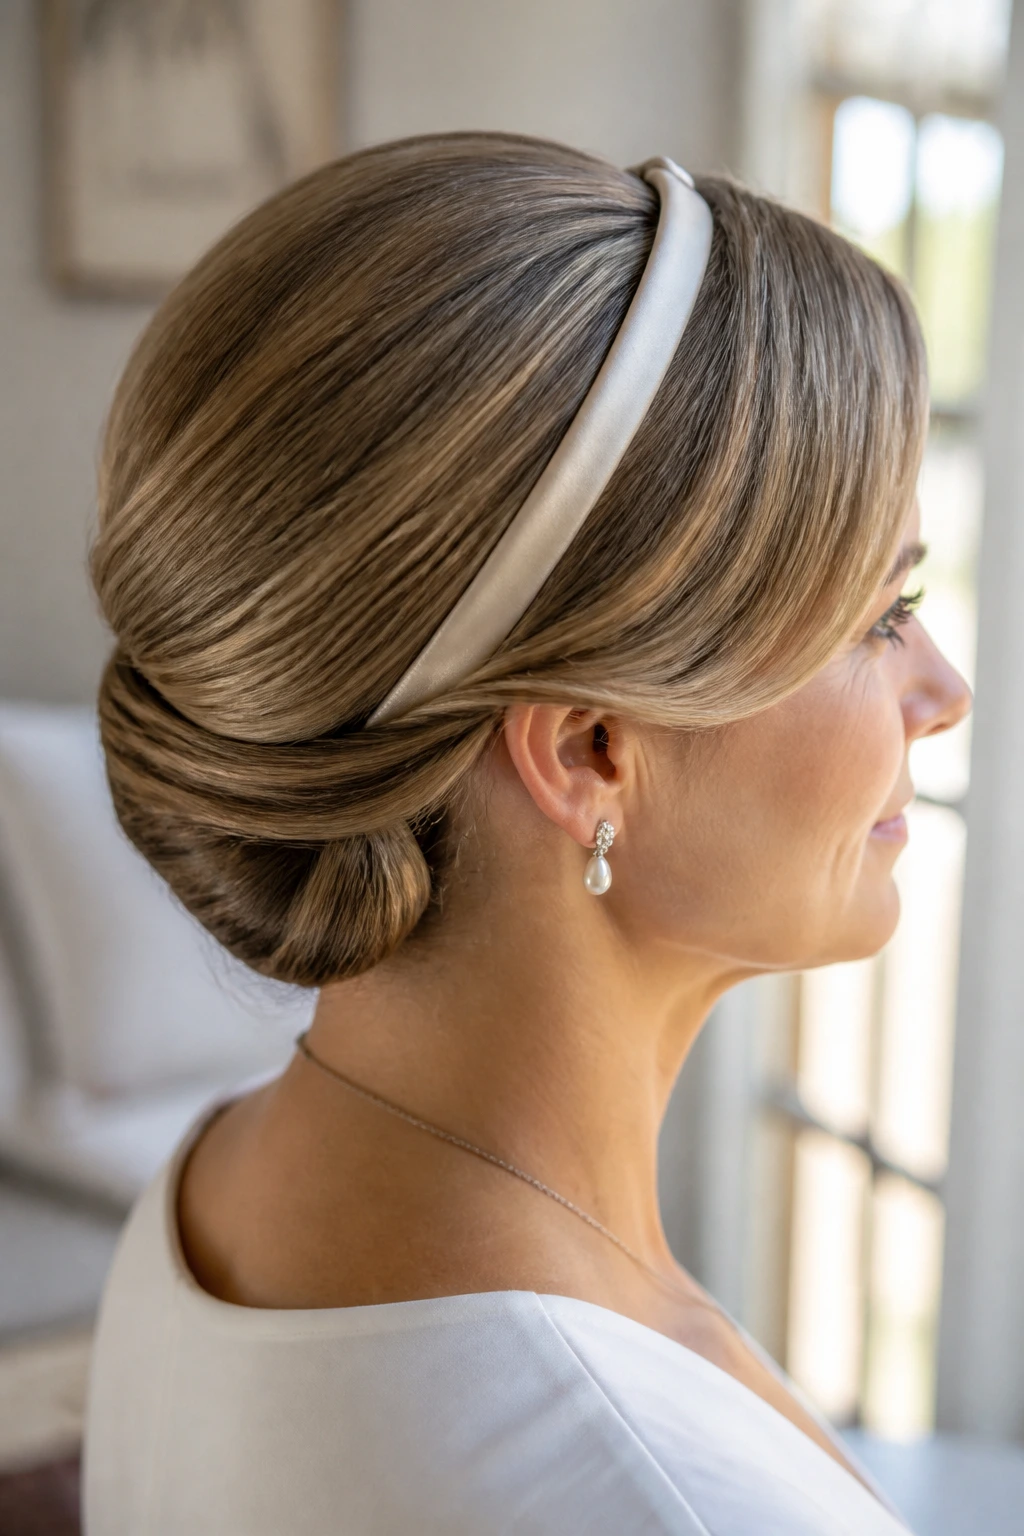
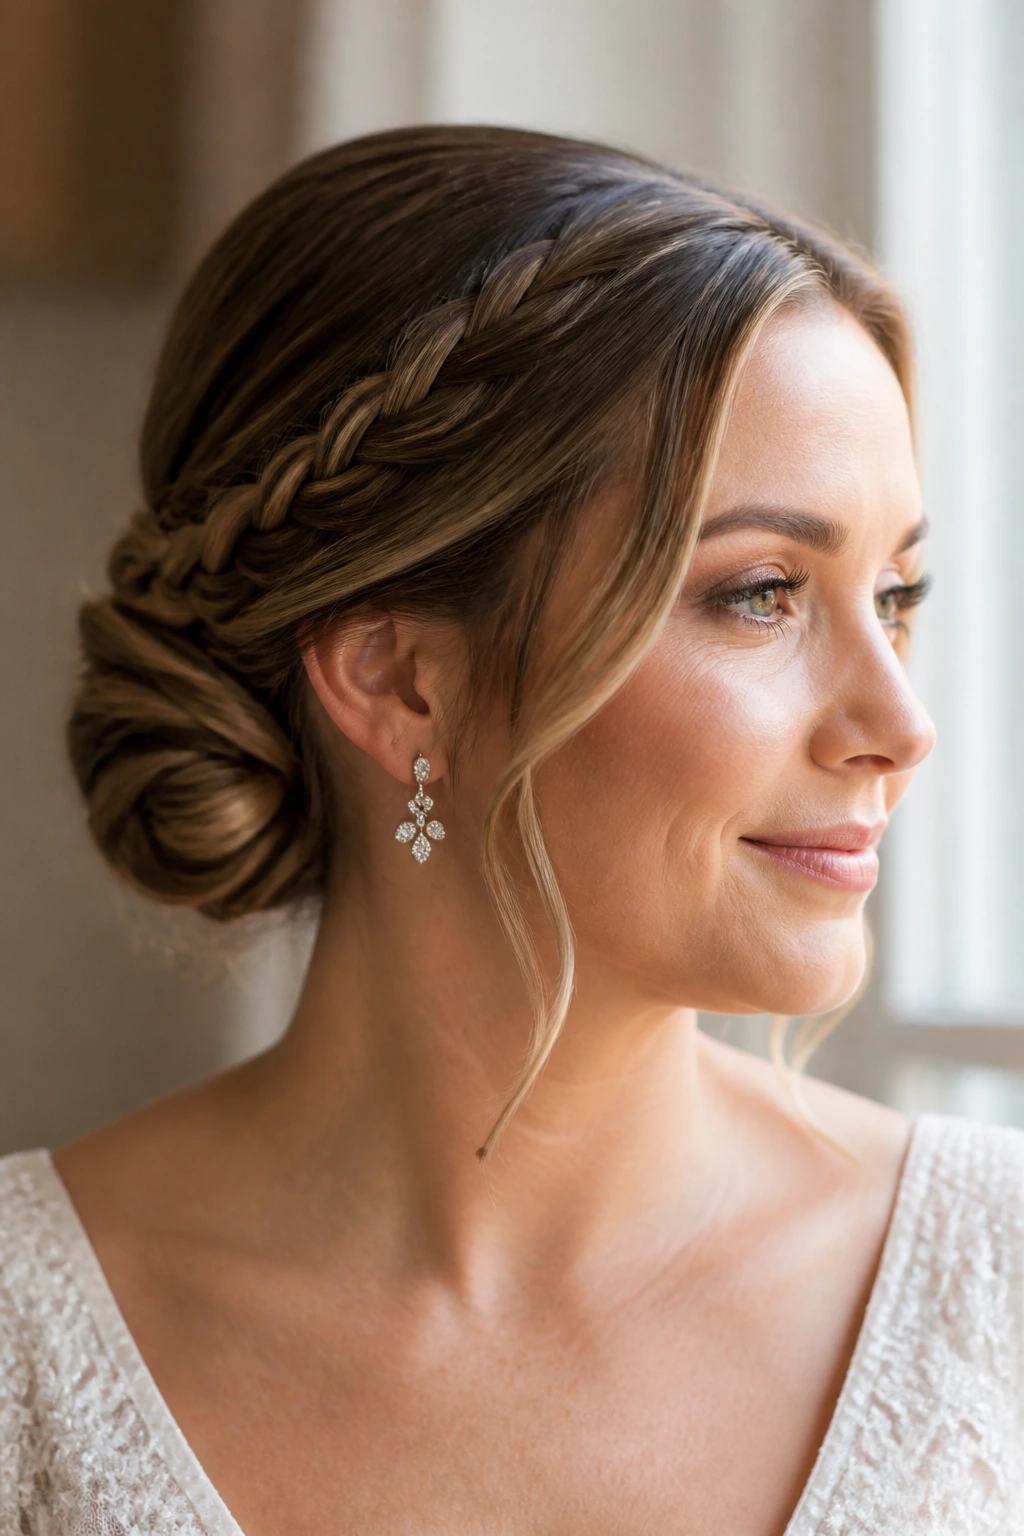
1. Soft Side-Part Chignon
A soft side-part chignon is the style I reach for when someone wants polished without looking overworked. The side part gives the front a little movement, and the low knot keeps the weight at the nape where thick medium-length hair behaves best. It reads calm from across a room, which is exactly what you want when the dress already has enough detail.
Why It Works on Thick Hair
The side part helps redistribute the bulk before you gather the hair, so the bun does not bulge like a small dome. With thick hair, that tiny shift matters. It makes the back flatter, cleaner, and easier to pin.
A deep side part also gives the front a little softness around the eye and cheek. That can be flattering in photos, especially if your hair tends to fall forward on its own.
How to Pin It
- Smooth the top with a light serum, then make a clean side part.
- Gather the hair at the low back of the head, not in the middle of the crown.
- Twist the length into a compact coil and pin it from the inside out with long bobby pins.
- Leave the bun slightly oval instead of forcing it into a perfect circle; thick hair sits better that way.
Best for: formal ceremonies, veils, and dresses with a clean neckline.
Watch for: over-smoothing the crown until it looks flat and hard.
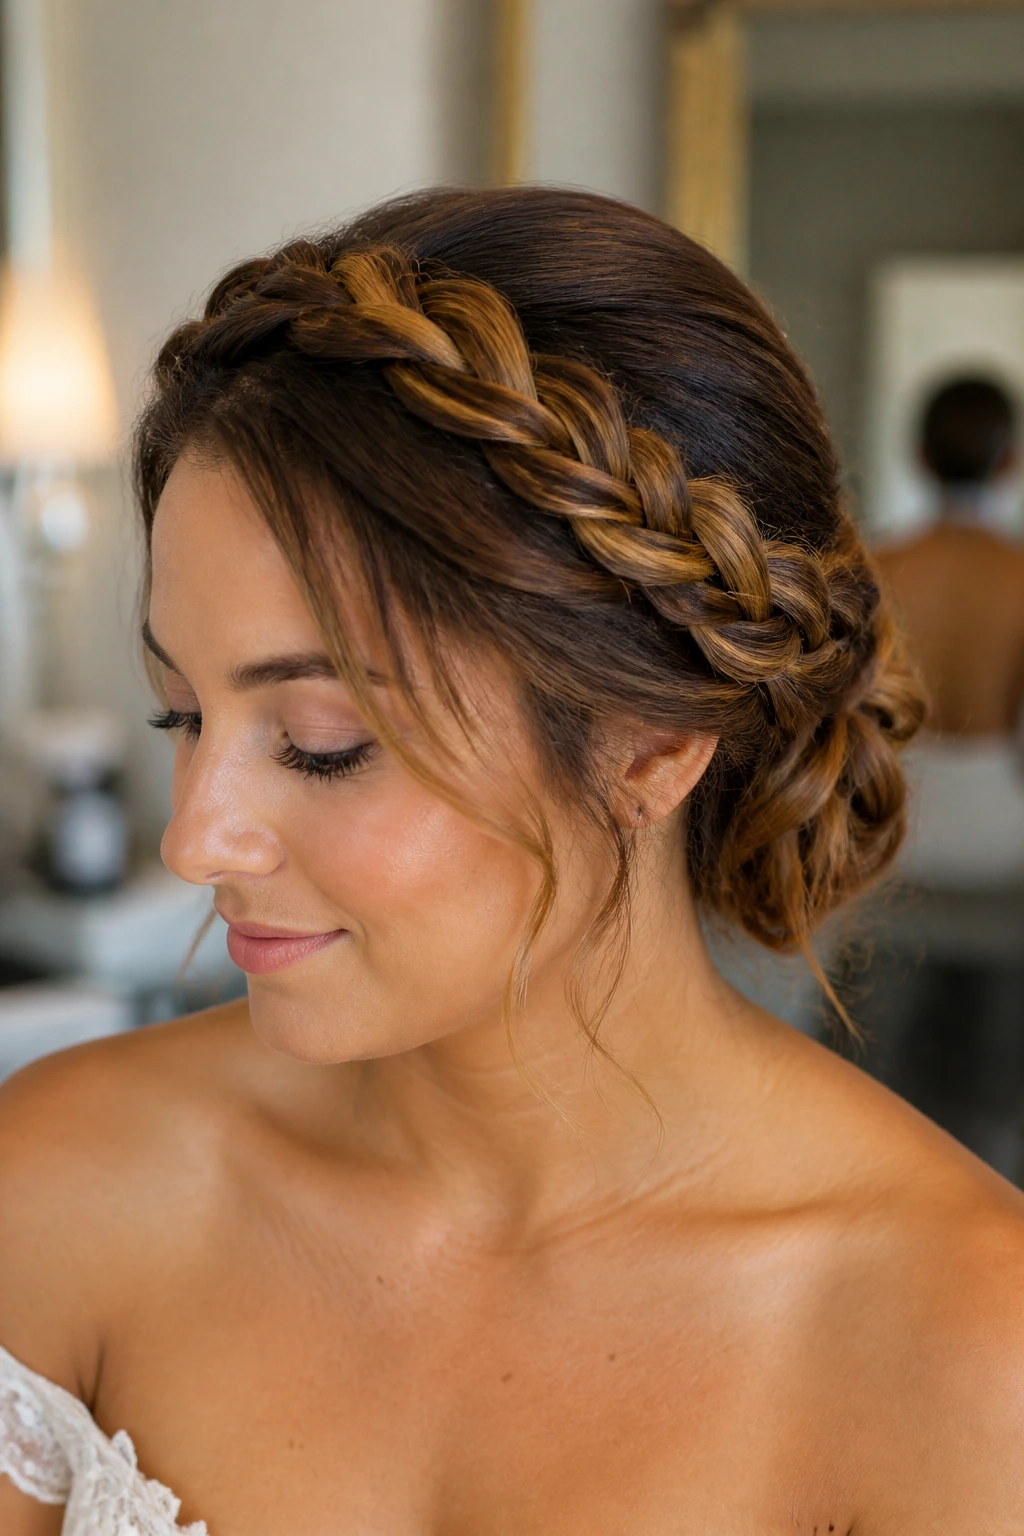
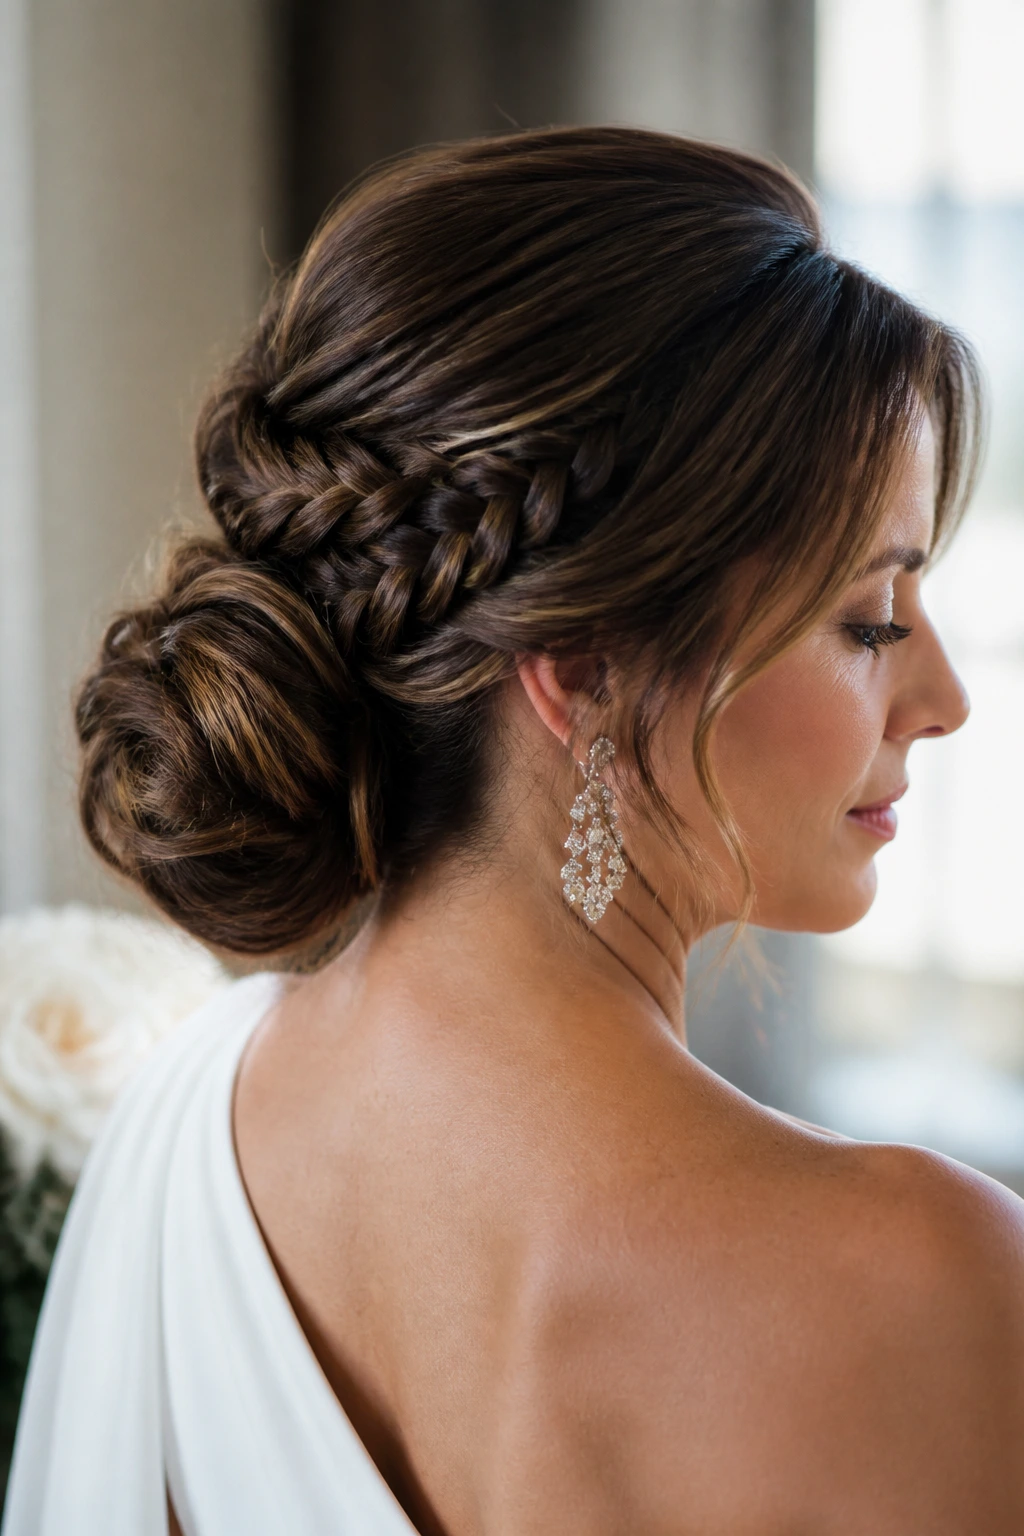
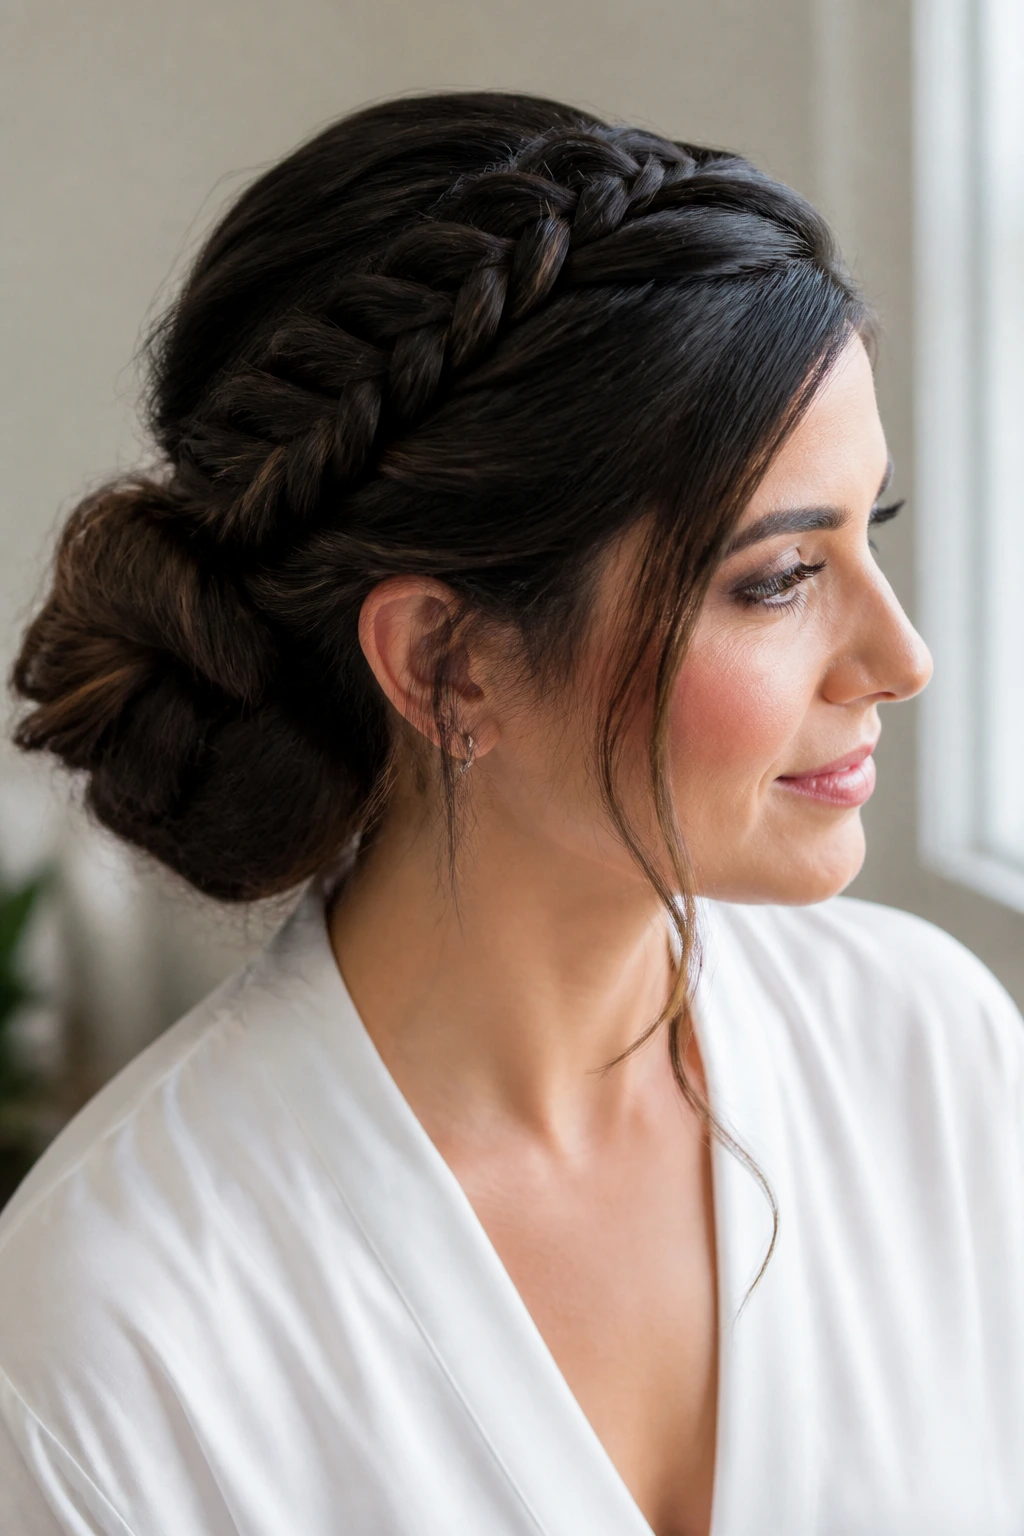
2. Braided Crown Bun
This is one of the safest bets for thick hair that likes to slip out of plain twists. A braided crown bun gives you a built-in frame along the hairline and a low bun that feels anchored, not glued on. It has texture up top, so the style looks finished even before you add pins or accessories.
The braid matters because it creates small ridges for the pins to grip. On thick hair, that’s a gift. A smooth base can look elegant, but a braid often holds better and gives the style some depth without needing more product.
Use a loose Dutch braid or a simple three-strand braid along the crown, then gather the rest into a bun at the nape. If the braid is too tight, the style can pull at the temples and make the whole thing feel tense. Keep it snug, not strung tight.
This one is especially good if the dress has lace or beading near the shoulders. The braided line echoes those textures without competing with them.
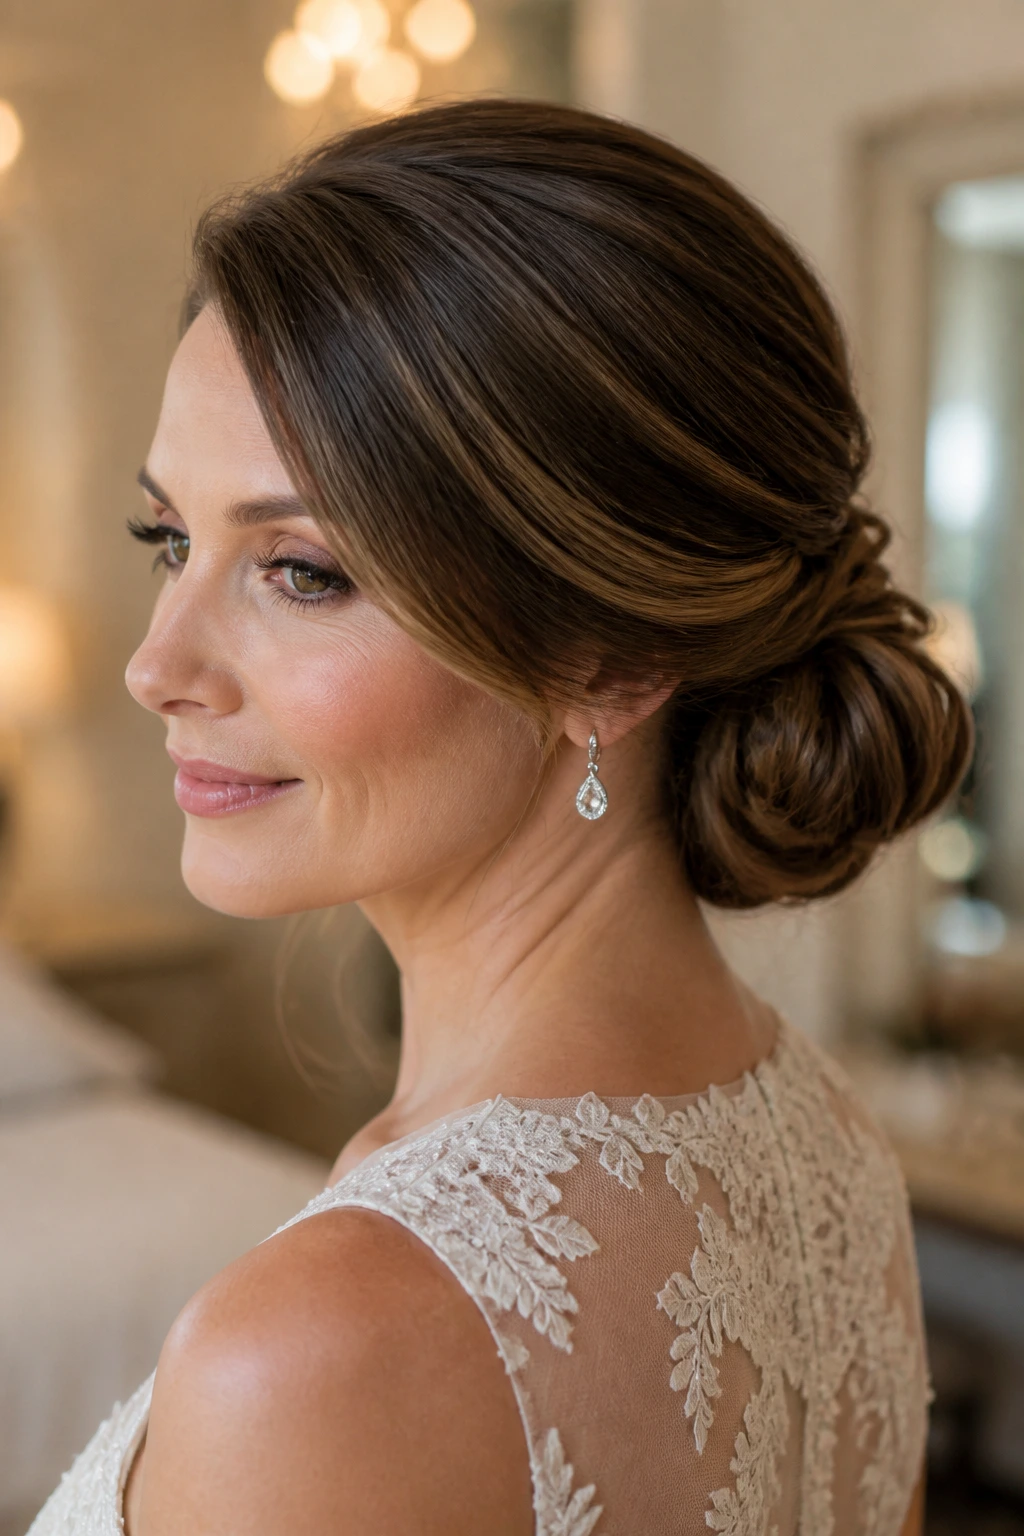
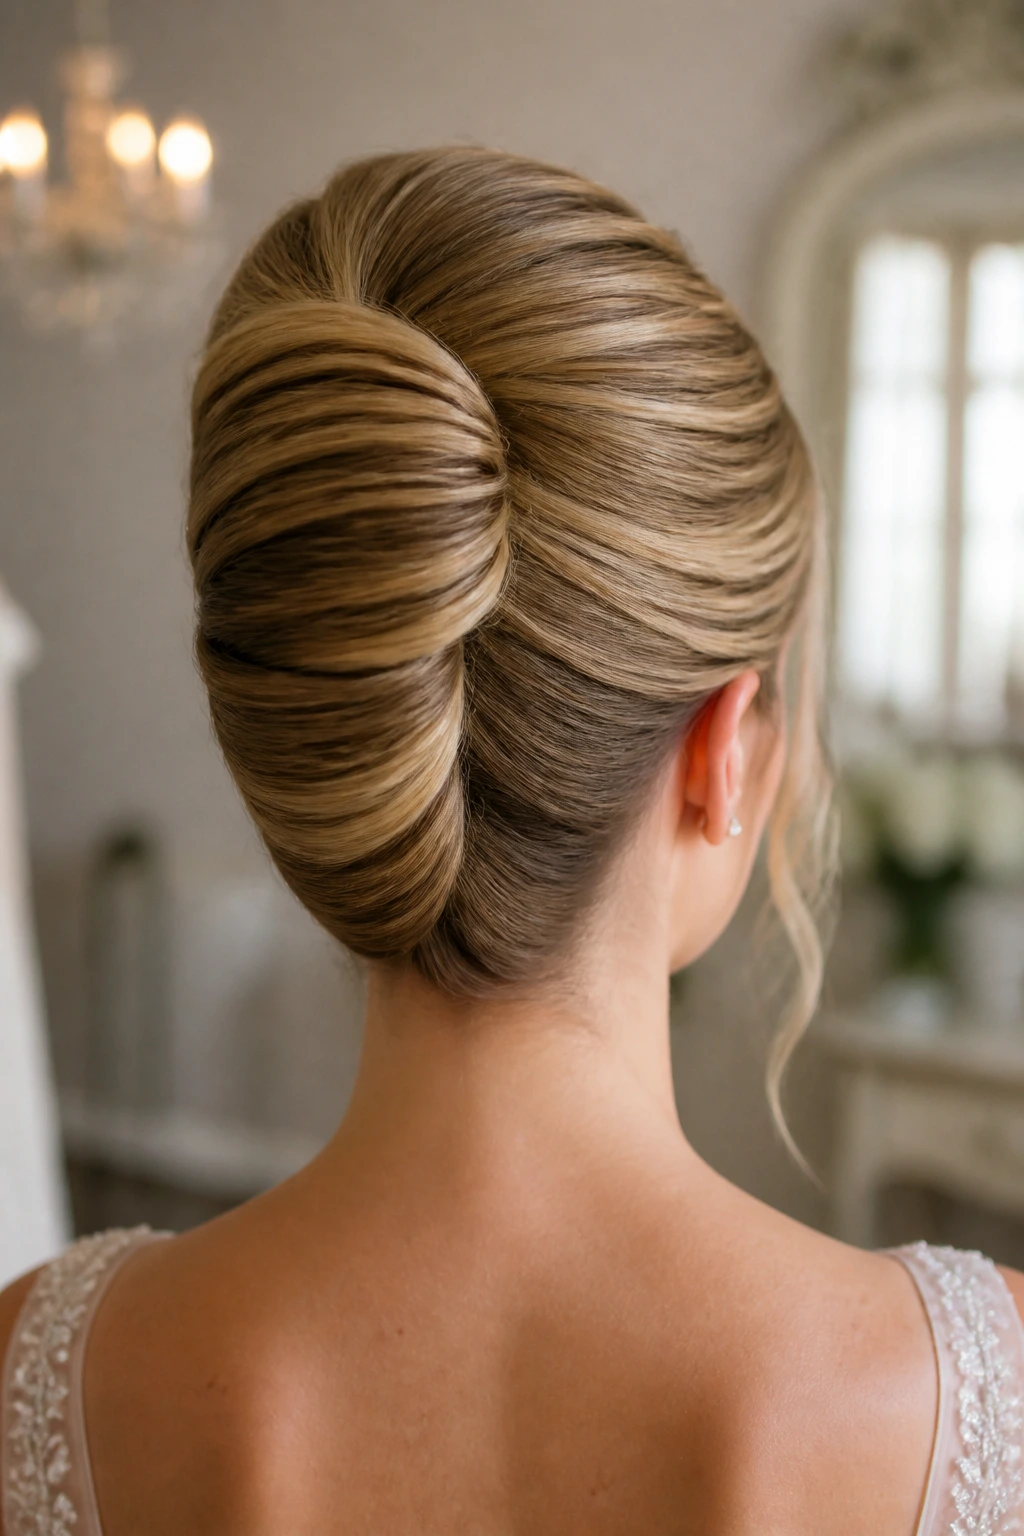
3. Polished French Twist
A French twist on thick, medium-length hair has real presence. It does not need to be gigantic to look elegant, and that is the trick. The vertical fold at the back gives you height, while the tucked ends keep the length neat and contained.
I like this style when the outfit is more tailored than romantic. Think satin, crepe, creased pleats, clean shoulders. The twist gives the whole look some backbone.
What Makes It Hold Better
Thick hair behaves better in a French twist when the first section is lightly misted with texturizing spray. Not soaked. Just enough to give the shell a little bite. After that, use a row of pins along the seam, not just one or two in the middle.
If your hair has layers, tuck the shorter pieces toward the inside of the twist first. That keeps the fringe pieces from popping out halfway through the ceremony. A few hidden U-pins can do more than a whole can of hairspray.
4. Wrapped Low Knot with Face-Framing Pieces
Do you want the clean outline of an updo but not the severe finish that sometimes comes with one? This is the sweet spot. A wrapped low knot gives you a smooth base at the nape, while two soft front pieces keep the face from feeling boxed in.
The pieces around the cheekbone do a lot of heavy lifting here. They soften the jawline, move a little when you walk, and keep the whole style from reading too formal. For a mother’s wedding look, that balance is often better than trying to hide every strand.
How to Pin the Fringe
Start by parting the front pieces before you gather the rest. Clip them out of the way. Build the knot first, secure it, and only then curl or smooth the face-framing sections so they fall where you want them.
If you curl those front pieces too early, they usually get squashed while you work. Ask me how I know. The order matters.
5. Gibson Tuck with Rolled Ends
The Gibson tuck is one of those old-fashioned shapes that keeps surviving for a reason. It sits low, feels secure, and makes medium-length thick hair look neat without pretending it’s finer than it is. The rolled ends disappear into the fold, which is handy when the length wants to fray at the bottom.
The nicest version of this style has a little fullness at the crown and a clean roll at the back. It should look finished, not stiff. If your hair is very thick, divide it into two sections before rolling. That makes the tuck flatter and easier to pin.
A ribbon or slim comb can sit above the fold, but don’t crowd it. The tuck already carries enough visual weight on its own.
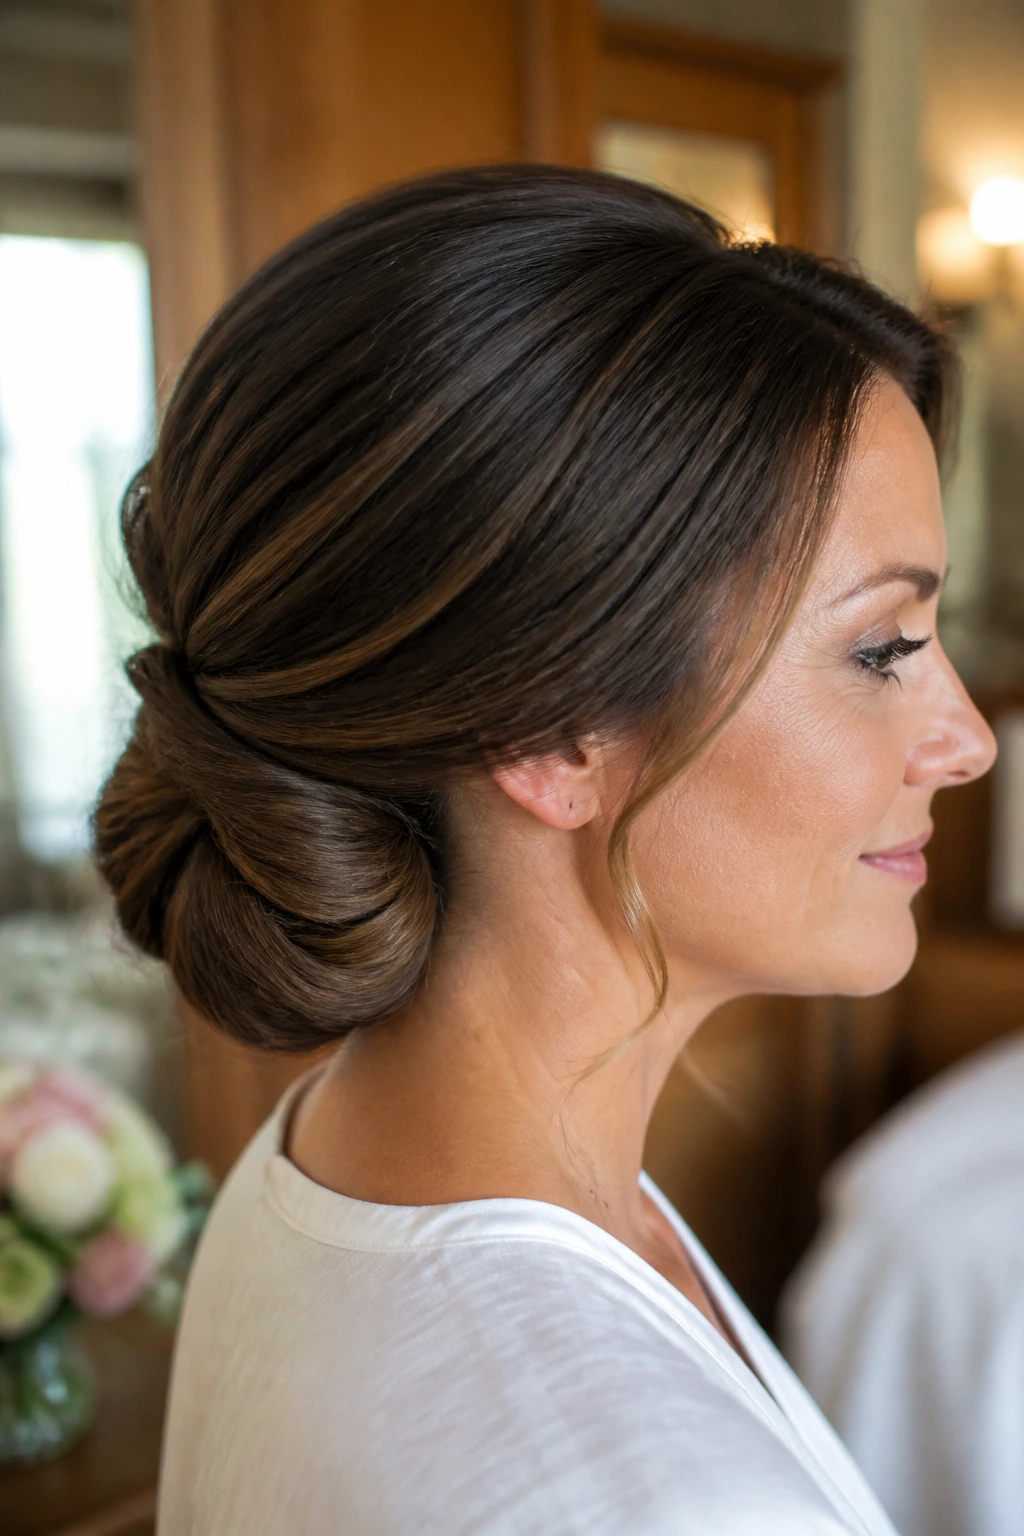
6. Sleek Low Ponytail into a Knot
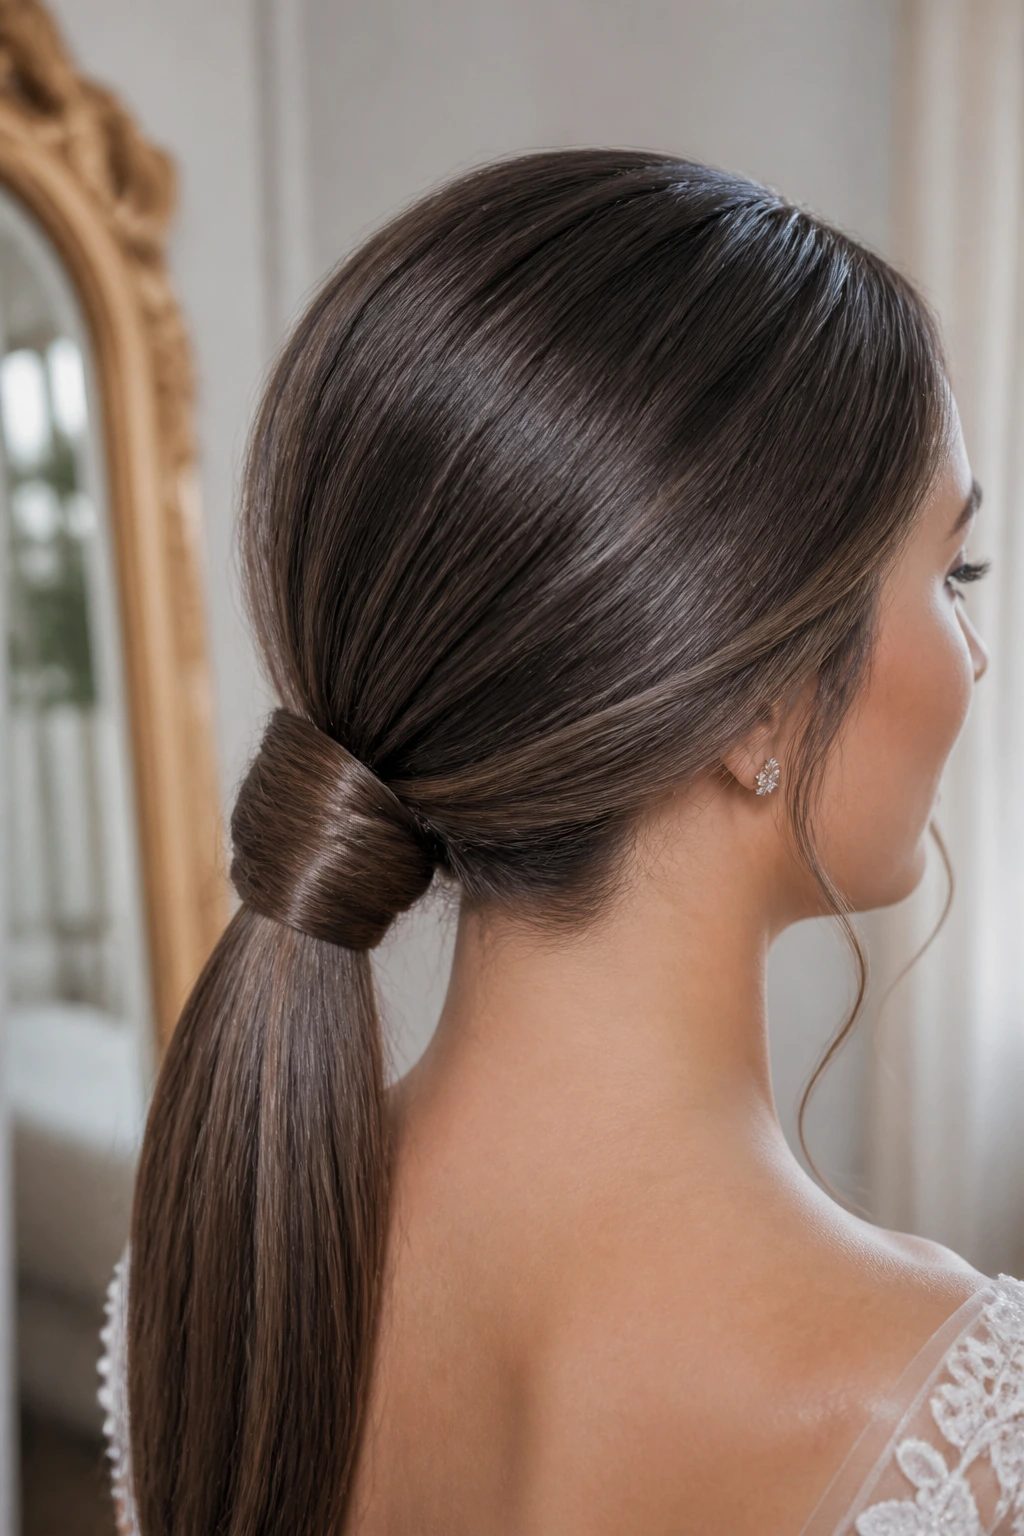
Sometimes the best move is the simplest one. A low ponytail that gets wrapped into a knot gives you the clean lines of a modern style without the fuss of a big sculpted bun. It is especially good for medium-length thick hair because the ponytail creates a neat base before you fold the ends under.
Unlike a loose chignon, this one is better when you want the back to stay sleek and the neckline to stay visible. It’s the style I’d choose with a high neck, a statement earring, or a dress that already has enough decoration.
If your hair is coarse, smooth the top first with a pea-sized amount of cream. If it’s slippery, rough up the ponytail base with a little dry texture spray. Same style, different grip.
7. Double Twisted Bun

The double twisted bun is what happens when you stop asking thick hair to behave like thin hair and start treating it like material with structure. Split the ponytail into two sections, twist each one into a rope, then coil them around each other at the nape. The result looks layered and deliberate.
This is one of my favorites for dense hair because the twist pattern uses volume instead of fighting it. The bun ends up looking sculpted without being hard.
Best Detail to Add
A hair net can help here, and I do not say that lightly. If the hair is especially heavy, a thin mesh net in your hair color keeps the knots tight while the surface stays smooth. Few people will notice it. Your pins will.
8. Halo Braid Updo
A halo braid gives the head a built-in frame, which is useful when the dress has open shoulders or a simple neckline. Thick medium-length hair makes the braid look substantial without needing extra stuffing or padding. That fullness is the whole point.
I like this style when someone wants a softer mood but still wants the hair completely up. It has a gentle, almost woven look that feels romantic without drifting into messy territory. Keep the braid medium-sized. If it gets too chunky, it starts to look like the whole head has been wrapped in rope.
Tuck the tail into a low bun or twist at the back and pin it under the braid line. A few pearl pins along the side can be lovely, but don’t scatter them everywhere. One small cluster near one ear is usually enough.
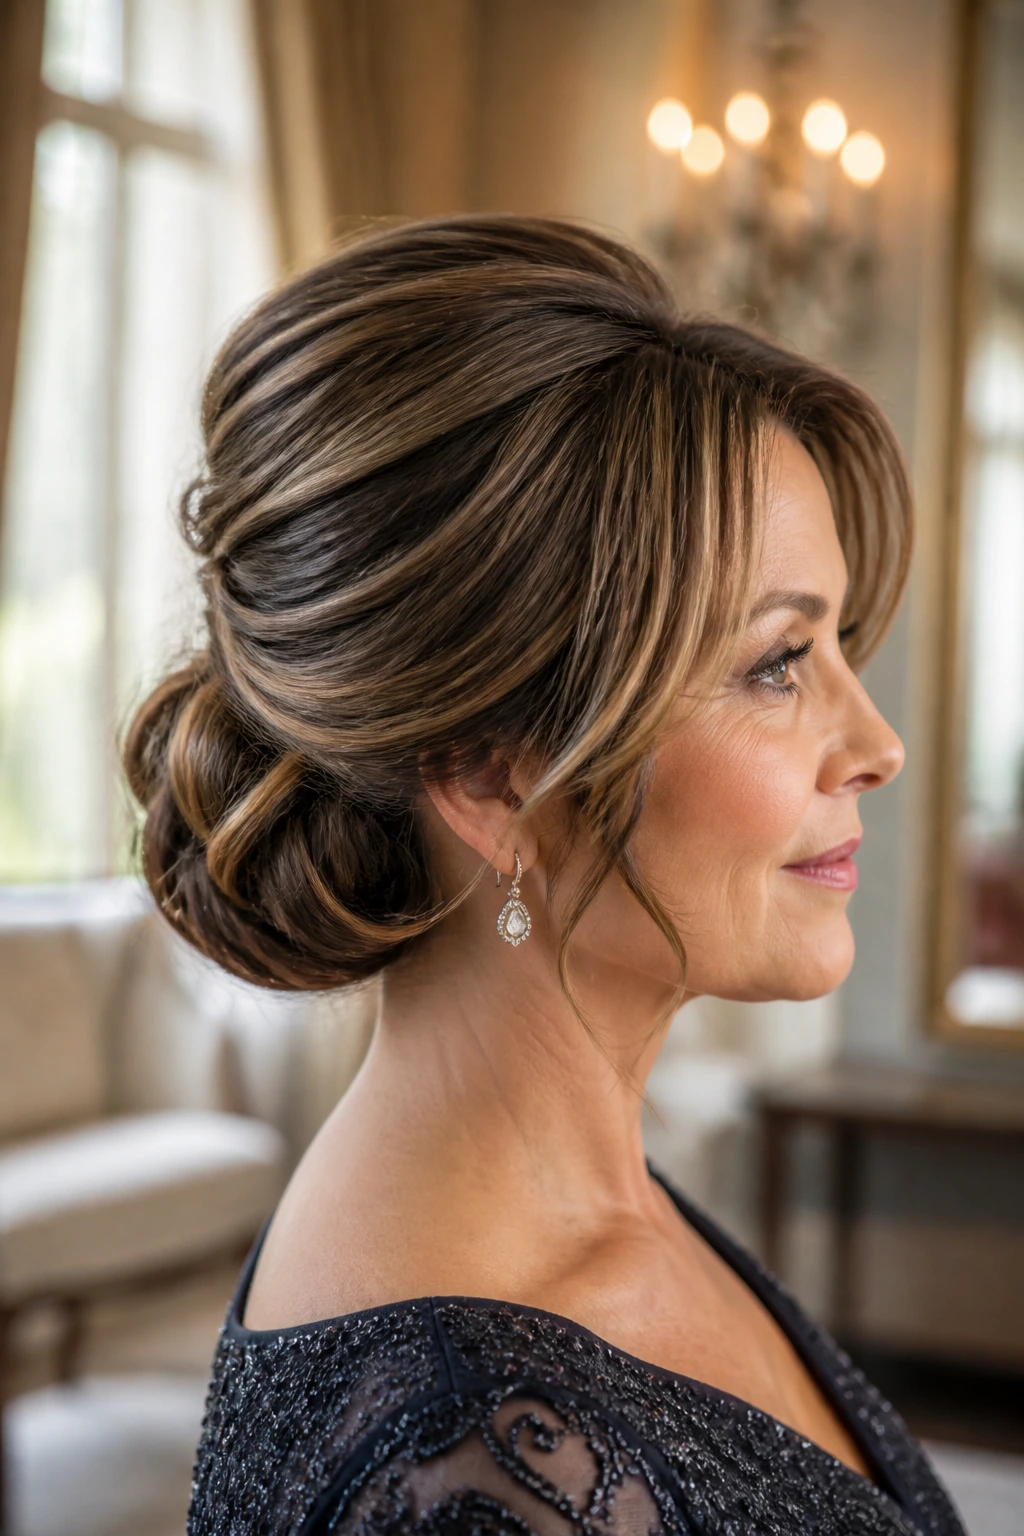
9. Bouffant Bun with Side Sweep
A little crown lift changes everything. A bouffant bun gives the top of the head some height, which is useful if you have a round face, a simple dress, or hair that tends to lie too close to the scalp. The side sweep softens that lift so it doesn’t feel retro in a costume sense.
This is not about making the crown huge. It is about putting enough height at the top that the bun underneath has room to breathe. With thick hair, too much teasing turns into a pillow. You want structure, not puff.
Use a teasing brush at the roots, smooth the top layer over it, and pin the bun low. If you can feel the bobby pins pulling at the sides, they’re too tight. Back off a little and let the shape settle.
10. Side Bun with Hidden Braid
A side bun works especially well when the dress has a one-shoulder cut or a neckline that leans to one side. Move the hair toward the fuller side, build a hidden braid beneath the top layer, and wrap the ends into a bun that sits just behind the jaw.
The braid underneath gives the style a spine. That matters with thick hair, because side styles can loosen fast if the first anchor is weak. Once the braid is pinned, the rest of the shape becomes much easier to control.
This is also a good style if you wear one strong earring and want the hairstyle to frame it rather than compete with it. It has enough softness to look graceful, but it still feels secure.
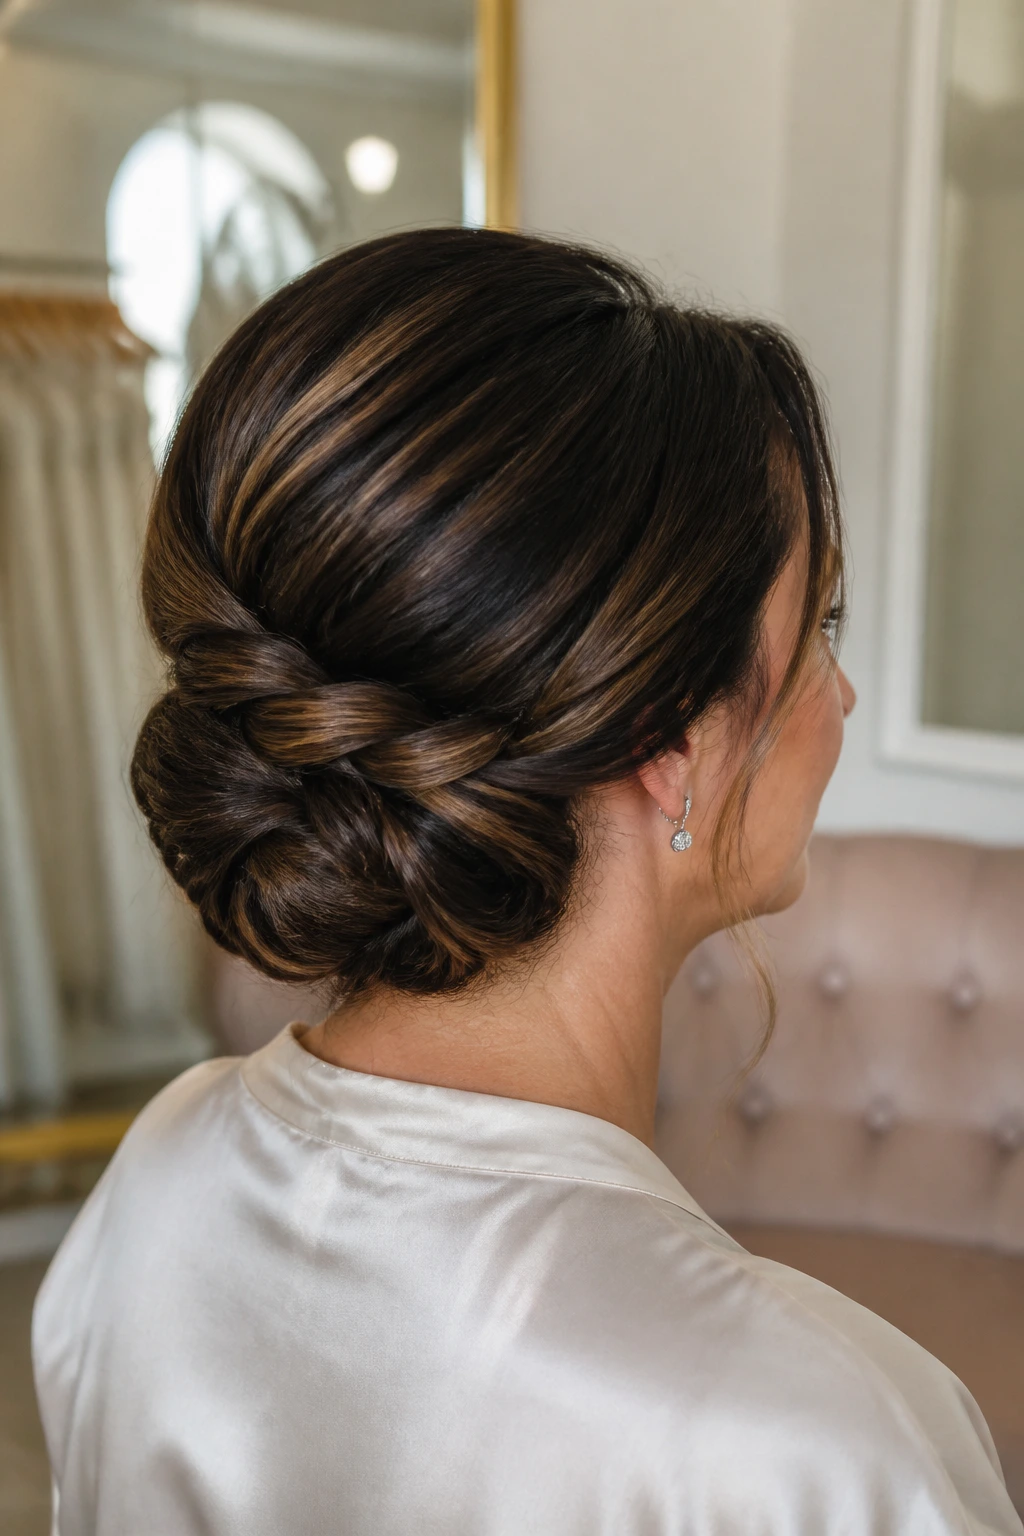
11. Rope-Braid Wrap Bun
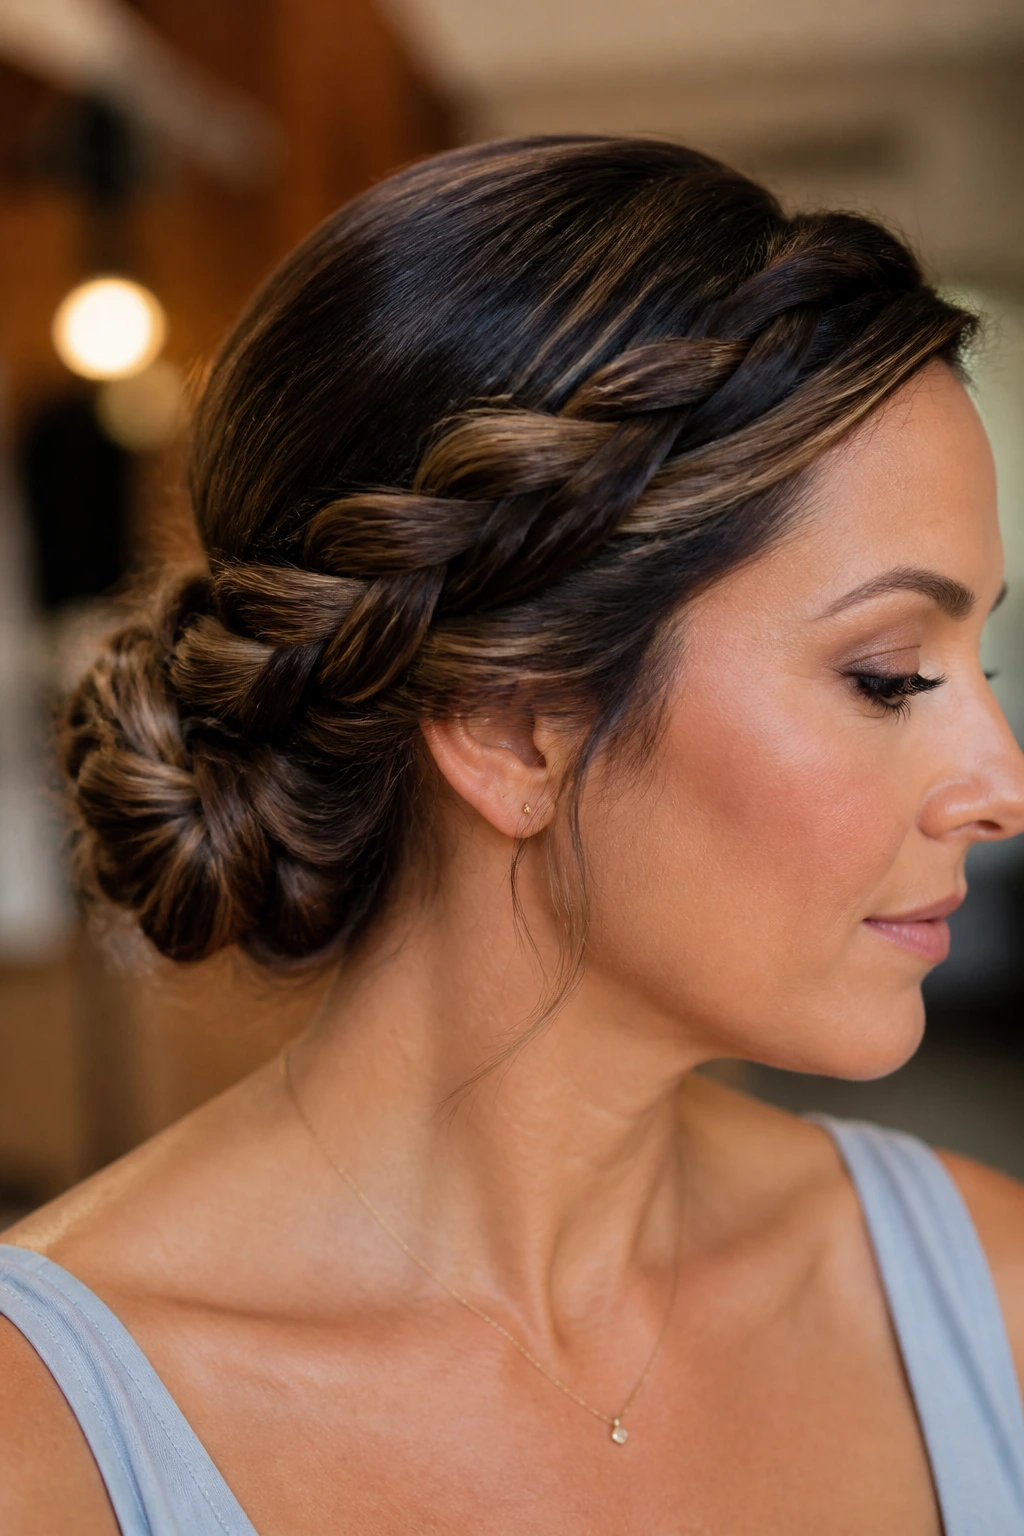
Rope braids are underrated. They are fast, tidy, and surprisingly good at holding thick medium-length hair in place. Twist two sections in the same direction, wrap them around each other in the opposite direction, then coil the result into a low bun.
The texture is smoother than a regular braid, which gives the style a more refined finish. It also tends to hold better on coarse or slippery hair because the rope pattern locks itself a bit as it tightens.
This is the style I’d pick when time is short but the look still has to feel careful. If the hair keeps springing loose from normal twists, rope braid it. The structure is more cooperative.
12. Center-Part Knot with Pearl Pins
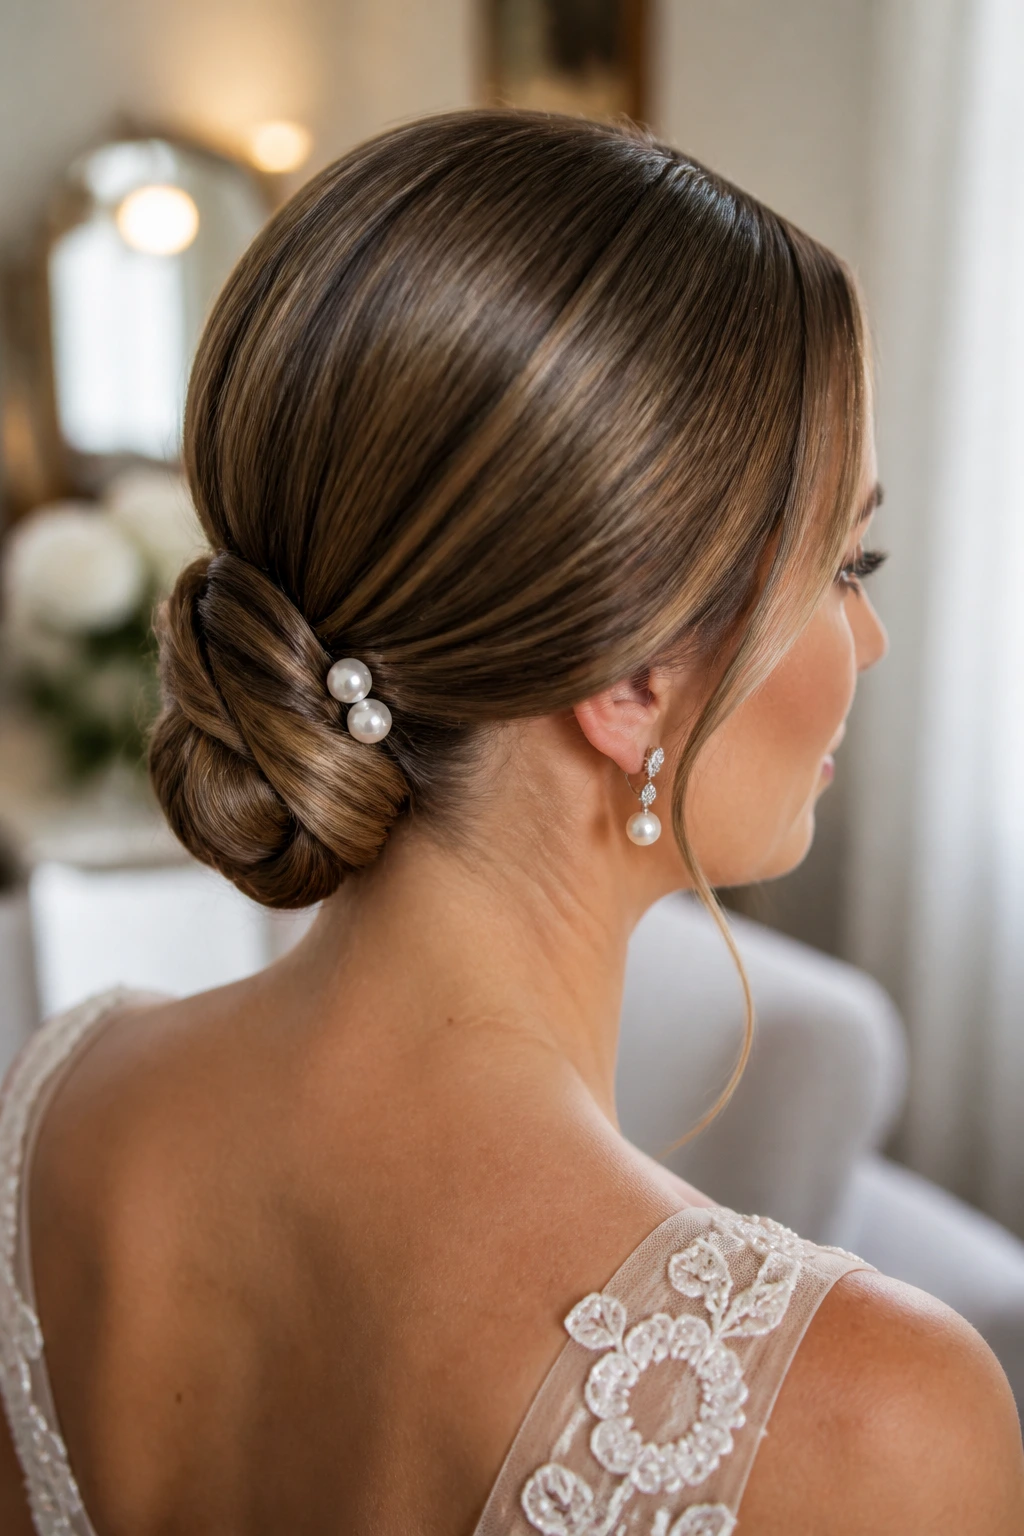
A center part gives this style a calm, modern line, and the knot at the nape keeps the whole thing grounded. Add pearl pins along one seam or tuck a tiny comb into the fold, and it suddenly feels wedding-ready without needing extra height or drama.
This style is especially useful when the dress already does the talking. If the gown has beading, a strong neckline, or a statement back, the hair can stay quiet and still look deliberate. The clean middle part keeps the front balanced, which is flattering in photographs.
A Small Styling Rule
If the gown has heavy pearl or crystal work, use fewer hair accessories than you think you need. One echo is elegant. Three echoes start to look crowded.
13. Pinned Curl Chignon

Pinned curl chignons have a lovely, slightly old-world feel because each curl becomes its own piece of the design. That makes them excellent for medium-length thick hair, especially if the hair already has a bend or wave. Instead of forcing everything into one knot, you pin the curls in layers and let the shape build itself.
The finish is soft, but not loose. The individual curls create a rounded chignon that feels full from the side and back. This is one of the few updos that can look rich without looking heavy.
It’s a good choice if you don’t like a super-smooth surface. The texture does the talking here. A light shine spray over the finished curls is enough; don’t drown the shape in hairspray or you’ll lose the movement that makes it work.
14. Clean Banana Twist
The banana twist is sleek in a way that still feels special. Hair is swept back, rolled upward, and pinned into a narrow vertical fold that sits close to the head. On thick medium-length hair, the shape can hold well as long as the first roll is firm and the pins are placed into the base, not the fluff.
This style has a little vintage discipline to it, which I like for formal weddings. It pairs well with pearl earrings, a simple veil, or a dress with sharp lines. It also keeps the neckline open, which is useful if the fabric already sits high.
Keep the surface smooth, but not shellacked. A little movement at the front keeps it from looking dated in the wrong way.
15. Braided Low Updo with Tucked Ends
A braided low updo is one of the most useful styles in the whole group because it handles layers better than a plain knot. Start with a braid or two at the nape, then tuck the ends inward so they disappear into the roll. Thick hair gives the braid enough body to look full instead of skinny.
I reach for this when the hair is medium length but not perfectly even. If the layers are a little awkward, the braid keeps them contained. That alone makes the style practical for wedding morning stress.
It also gives you a nice back view without requiring a huge bun. The braid reads as detail. The tucked ends read as polish.
16. Fishtail Crown and Bun
Why does a fishtail braid work so well here? Because thick hair makes the braid visible from a distance without making it bulky. The braid can travel along the hairline or crown, then feed into a low bun that feels intricate without being fussy.
The downside is tension. A fishtail can tug if it’s pulled too tight, and wedding-day hairlines do not like being yanked for hours. Keep the braid secure, but let the edges breathe a little. You want controlled texture, not a headache.
Where It Looks Best
This one shines on dresses with simple backs and on faces that like a bit of framing at the temples. The braid gives you detail from the front and side, so the style still looks finished in profile.
17. Nested Knot with Pearl Pins
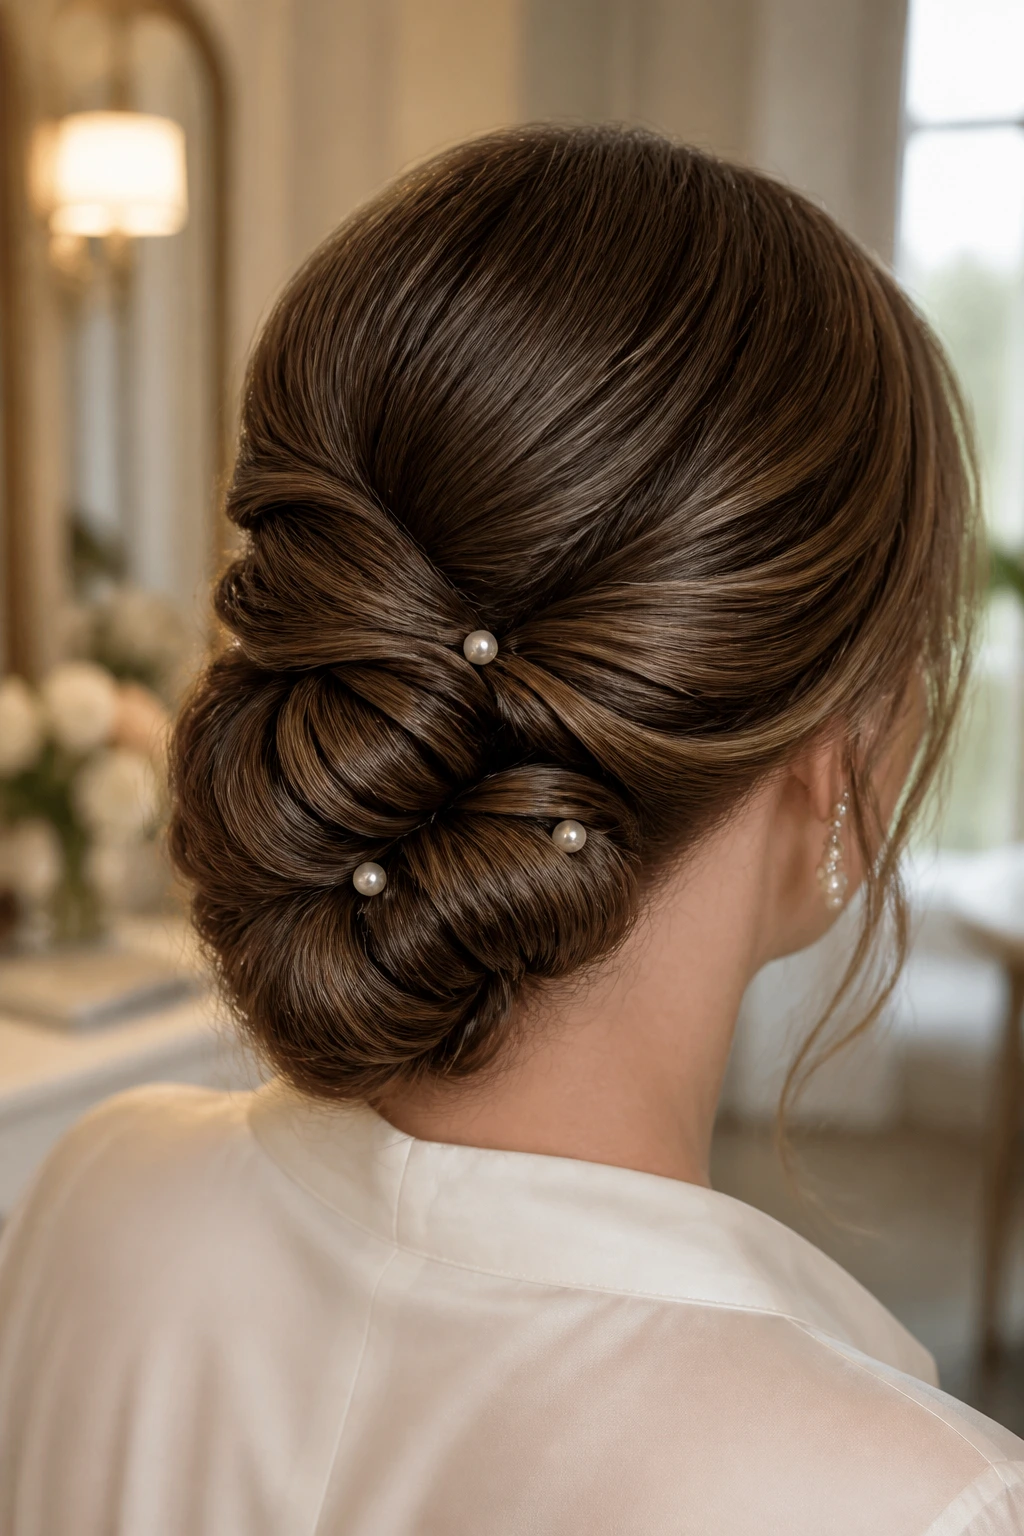
A nested knot is a good answer when thick hair refuses to fit into one tidy bun. Instead of forcing one giant coil, you create two or three smaller knots at the nape and tuck them into each other. The shape ends up looking architectural, which is a nice way of saying it behaves.
Pearl pins fit this style well because the knots have visible seams. You can place a pin where the folds overlap and the accessory looks intentional rather than pasted on. Use them sparingly. A few is enough.
This style is also kinder to medium-length hair that wants to split apart at the ends. The nested folds catch those shorter pieces before they slip out and frizz around the collar.
18. Soft Victory Roll Updo

A victory roll updo is for the mother who wants a little personality in her hair without crossing into costume territory. Keep the front rolls soft, not oversized, and let the back fall into a low tucked bun. The result feels vintage, but grounded.
This is one of those styles that really comes alive with a simple dress. If the gown is minimal, the hair can carry more character. If the dress is already ornate, keep the rolls smaller so the whole look stays balanced.
The front section needs a good set. A small round brush, a blow-dry with lift at the roots, or a couple of large rollers will help. Flat front sections make this style look tired fast.
19. Inverted Ponytail Bun

An inverted ponytail bun starts with a low ponytail, then the hair flips up and through itself before it gets wrapped into place. It sounds more complicated than it is. The upside is that the flip creates a natural pocket for medium-length thick hair, which means the style holds with less fuss.
This is a useful style if you want the ease of a ponytail but need it to look wedding-ready. It has enough structure to feel deliberate, and the inverted center gives the back a clean seam.
It also behaves well with second-day hair. That slight grip at the roots helps the ponytail stay put, which is exactly what you want when thick hair gets a little too soft from washing.
20. Tucked-Under Headband Roll
A tucked-under headband roll is one of the best answers for someone who wants the accessory to do half the work. Use a slim satin or jeweled headband, roll the hair under it, and pin the ends along the nape. The band holds the front, and the tuck keeps the back neat.
This style is especially good for medium-length hair that reaches the shoulders but doesn’t have a ton of extra length to spare. The headband gives you a line to build against, so the style does not need to rely on pure pinning strength.
It’s also kinder to windy outdoor settings than many softer updos. The band acts like a boundary. A useful little thing.
21. Asymmetrical Low Roll
An asymmetrical roll is a nice change from the centered bun that shows up in half the wedding photos out there. Sweep the hair to one side, roll it low and off-center, and pin it so the shape sits just below one ear. It has movement without being messy.
I like this on thick hair because the uneven placement breaks up the bulk. If the head is all one mass of hair, the style can feel too heavy. Shifting the weight to one side creates a clearer silhouette.
This is also a strong choice for sloping necklines and dresses with a little motion in the fabric. The hair echoes that movement instead of sitting like a hard knot in the middle of the back.
22. Faux Bob Updo with Crown Volume
A faux bob updo is the trickiest style here, but it pays off when you want the shape of shorter hair without actually cutting anything. Lift the crown a little, tuck the ends under in stages, and pin them so the lower half disappears into a smooth shell. Thick medium-length hair helps because the fullness gives the illusion of a true bob from the back.
The result looks polished in a way that feels deliberate, not sugary. It opens the neck, frames the jaw, and gives earrings a little space to matter. That combination is useful for formal wedding portraits.
If your layers are stubborn, don’t fight them with one giant pin. Tuck them in small sections. It takes a minute longer, but it keeps the faux bob from collapsing into a lumpy roll halfway through the evening.
Why Folded and Tucked Shapes Hold Up So Well
Thick hair has weight, and that weight is the whole story. Left loose, it can pull styles down and make smooth sections split apart. Folded and tucked shapes use that weight as support instead of treating it like a problem. A low knot, a roll, or a twist gives the hair a place to settle.
Medium length helps, too. There’s enough length to anchor the style, but not so much that the hair keeps dragging the shape downward. That’s why these wedding updos tend to hold their own better than elaborate high buns on the same hair type.
The other reason is simple: the nape is forgiving. Hair at the back of the neck can be pinned in layers without showing every single anchor, and thick hair gives you enough bulk to hide the mechanics. The finished look feels elegant because the structure is doing quiet work underneath.
The Tools That Save Your Arms and Your Sanity
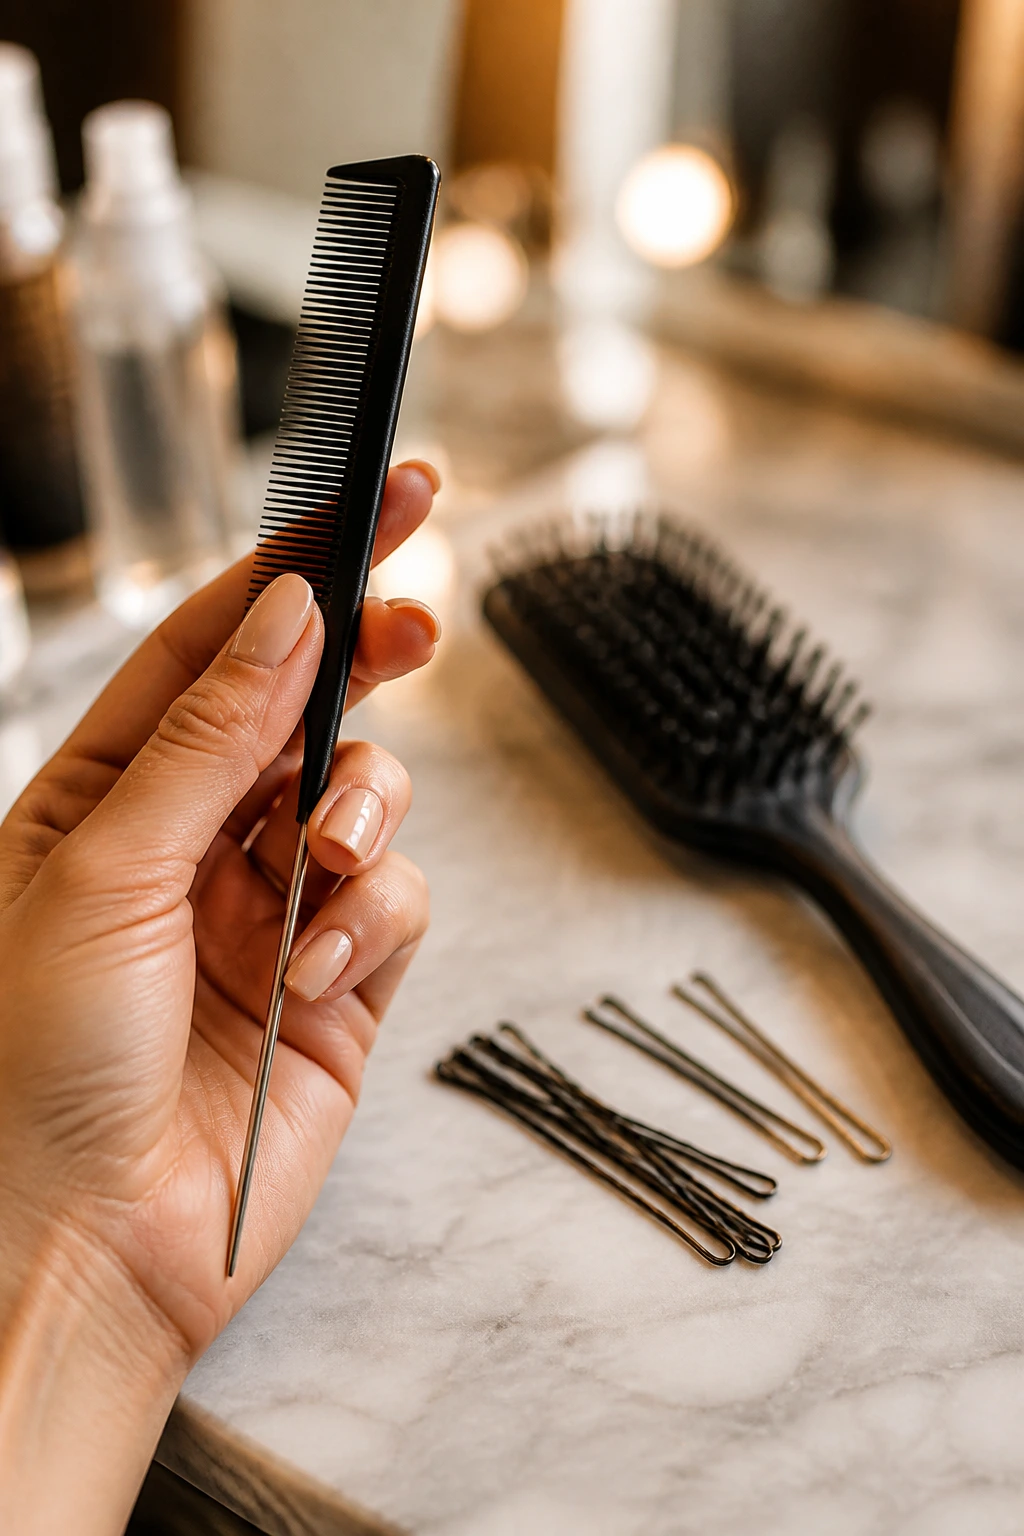
You do not need a drawer full of gadgets. You do need the right ones, and for thick hair that means tools with enough grip to do real work.
- Rat-tail comb: clean parts and precise sectioning, especially for side parts and center parts.
- Teasing brush: useful for crown lift, but don’t overdo it or the style gets fuzzy.
- Long bobby pins in two sizes: the standard size for seam pinning, and the longer ones for heavy twists and buns.
- U-pins: helpful for holding nested knots, rolls, and looser chignons without flattening them.
- Small clear elastics: secure the base before you start wrapping or braiding.
- Texturizing spray: gives grip to clean hair and helps thick strands stay where you place them.
- Flexible-hold hairspray: keeps movement at the front while controlling flyaways.
- Smoothing cream or lightweight serum: keeps the surface neat without making the hair greasy.
- Sectioning clips: they keep front pieces and side sections out of the way while you build the back.
- Hair net or donut filler: optional, but useful when the hair is so dense that a bun needs containment.
- Handheld mirror: non-negotiable if you’re checking the back yourself.
- Decorative pins, combs, or a veil comb: only after the shape is secure.
Prep, Product, and Sectioning That Make Pins Hold
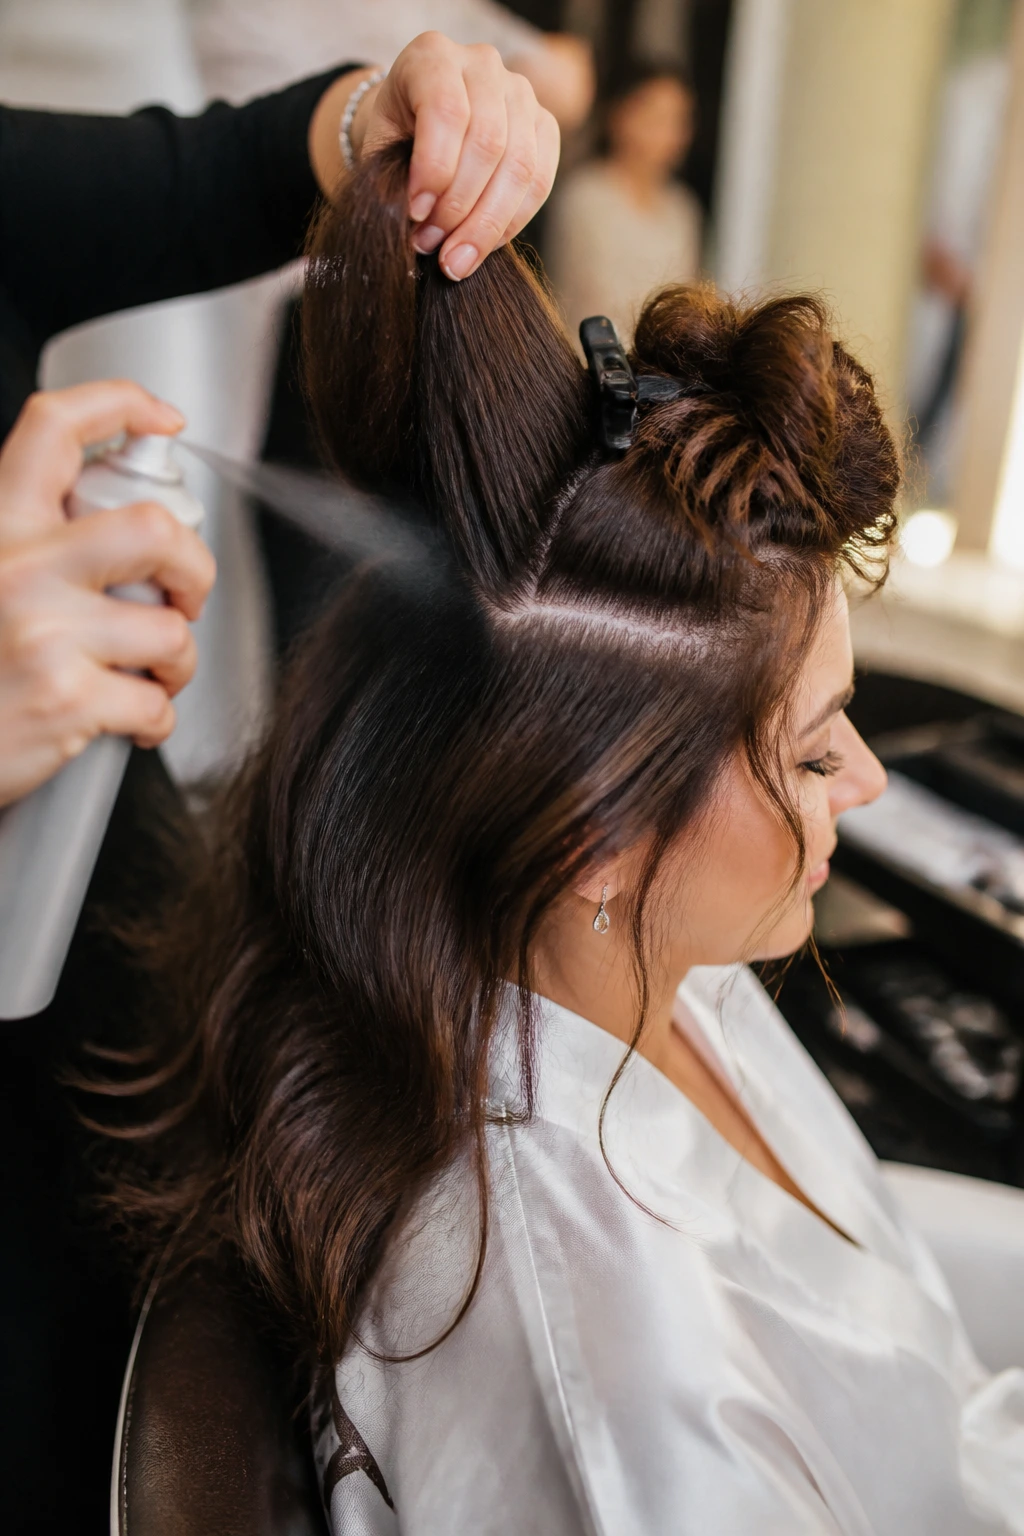
Thick hair does not need a lot of product. It needs the right order. Start with clean, dry hair that has some grip. If the hair is freshly washed and too slippery, it may need a mist of texturizing spray at the roots. If it’s coarse or dry, a small amount of smoothing cream on the outer layer helps the surface lie down.
The big mistake is spraying everything before the shape is built. That gives you crunchy hair that still slips. Better to section the hair first, build the base, then finish the surface.
Sectioning matters more than people expect. A low bun is easier to control if the top and sides are clipped away while you form the nape. Thick hair can get bulky fast when it’s all handled at once. Smaller sections are easier to fold, pin, and smooth.
If you’re styling on wedding morning, work in this order: part, prep, build, pin, then polish. Do not try to polish first. It only makes the hair harder to move later.
How to Match the Updo to the Dress, Veil, and Wedding Role
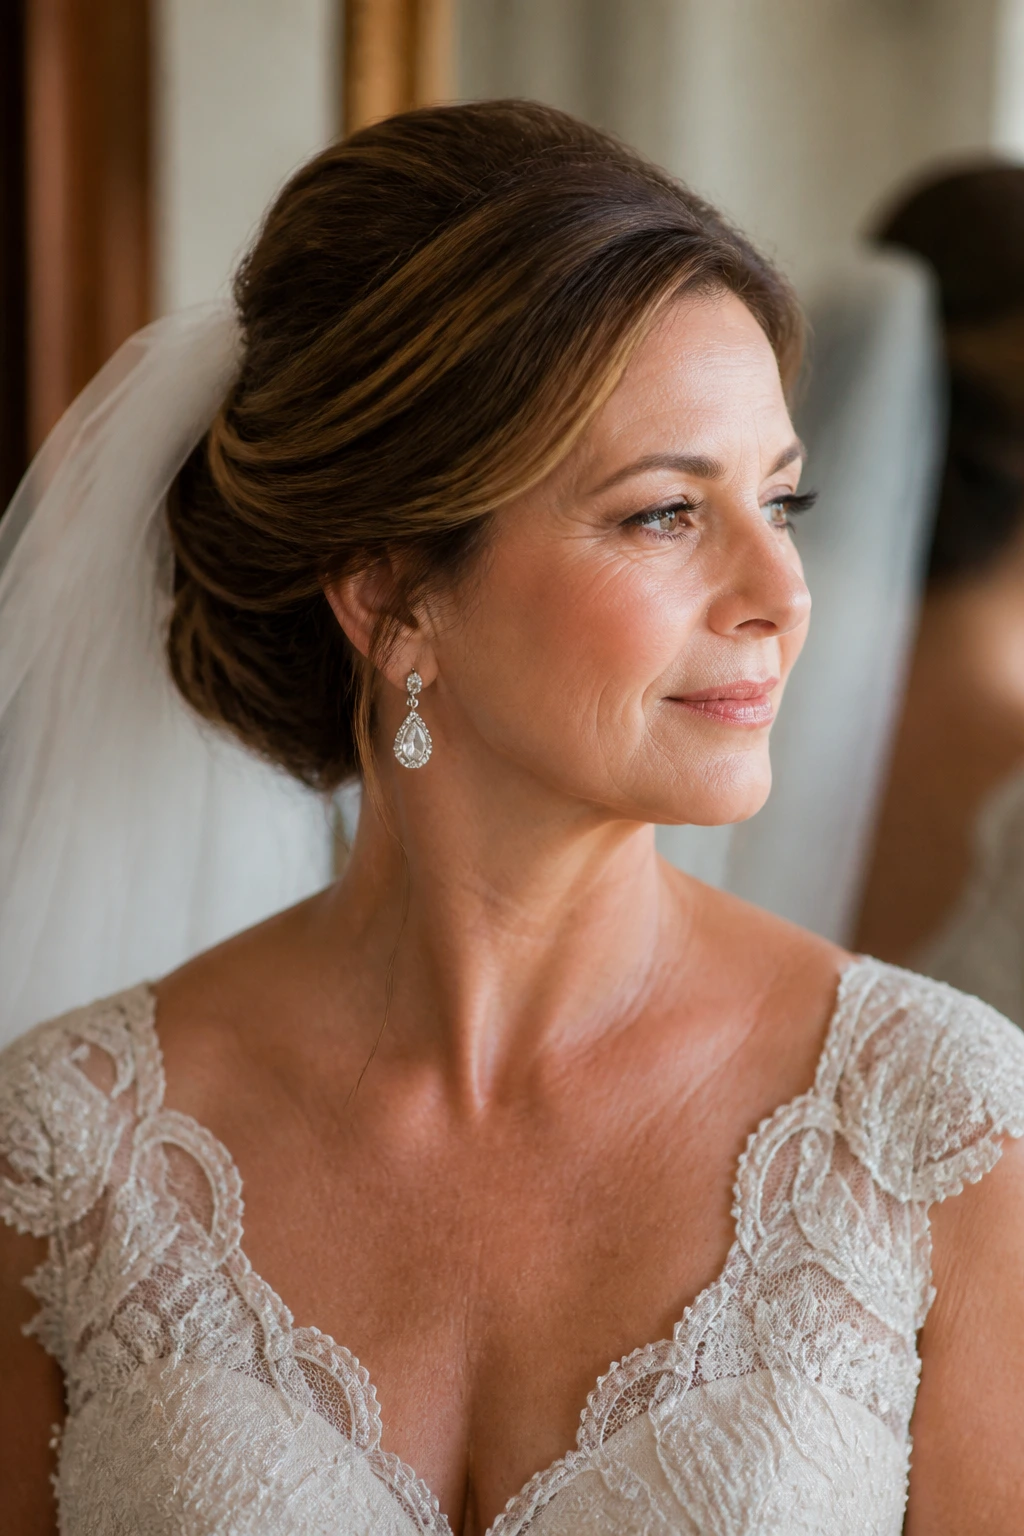
Placement: If the dress has a high neckline or a detailed back, keep the bun low and neat so the fabric stays visible. If the dress is simple or strapless, a little crown lift can keep the style from sinking into the shoulders.
Accessories: Pearl pins suit clean folds and French twists. Combs work well on side buns and chignons. A veil wants a secure anchor point near the crown or upper bun, so build the style with that in mind instead of trying to shove the comb in at the end.
Scale: Thick hair can handle more shape, but the hairstyle still needs balance. If the dress is heavily beaded, keep the hair tighter and quieter. If the dress is plain, a braid, roll, or bouffant can carry more visual detail.
Comfort: If you’ll be hugging a lot, sitting through a long ceremony, or dancing until the floor gets sticky, choose a lower style with fewer loose ends. Anything that sits on the shoulders will get moved around more than you expect.
Little Tweaks That Make the Style Feel Like You
Texture Boost: A mist of texturizing spray at the roots gives thick hair a little grit before pinning. Use it sparingly. One good pass is enough.
Softness: Curled front pieces or a slight bend around the ears can take the edge off a very structured bun. That small change matters more than piling on more accessories.
Accessory Upgrade: One pearl comb, a slim floral pin, or a single crystal barrette usually looks better than three separate ornaments. Thick hair already brings presence; it does not need clutter.
Comfort Edit: If your scalp is sensitive, shift weight away from the temples and put the main anchor lower at the nape. The style will still look formal, and you’ll stop noticing it by the time the first speech starts.
Common Mistakes That Make Thick Hair Puff or Drop

- Using too few pins: Thick hair can swallow a couple of bobby pins and ignore them. If the style feels loose after the first few pins, keep going with more hidden anchors, especially at the seam and base.
- Smoothing the hair to death: A glossy top is nice. A flat, shellacked crown is not. Leave a little movement in the surface so the style doesn’t look stiff or dated.
- Building the bun too high: Thick hair gains weight fast at the crown. If you place the knot too high, it may tilt backward or start sliding out of shape.
- Ignoring the ends: Shorter layers and thinner ends need to be tucked in small sections. If you shove them all under at once, they usually spring back out around the collar.
- Choosing the wrong amount of hold product: Too little and the flyaways win. Too much and the hair feels dirty before the vows. Aim for control, not cement.
- Skipping a test run: Wedding day is the wrong moment to discover that your headband sits too far back or your veil comb fights the bun shape.
Smart Variations for Different Hairlines, Textures, and Comfort Levels
The No-Tease Version: Skip crown backcombing and lean on a braid, twist, or rope pattern for grip. This suits anyone who hates the feeling of teased roots and still wants a polished finish.
The Extra-Secure Version: Add a hair net in a matching color over the finished bun, then place pins through the net and into the base. It’s not glamorous to talk about, but it is excellent for very dense hair or long wedding days.
The Soft-Frame Version: Leave two curled sections around the face and keep the nape smooth. This takes some hardness out of structured styles like French twists and banana rolls.
The Veil-Friendly Version: Build a firmer crown base and keep the top surface smooth enough for the comb to sit without wobbling. This works best on low buns, chignons, and tucked rolls.
The Fast-Morning Version: Choose rope-braid buns, low ponytail knots, or tucked-under headband rolls. They are the least fussy shapes in the group and still look intentional when you’re short on time.
Keeping the Style Fresh From First Photo to Last Song
Hair behaves better when you plan for the whole day, not just the ceremony. That starts the night before. If your hair gets oily fast, wash it the day before so it has a little grip. If your hair is coarse and dry, a same-day wash with a lightweight blow-dry cream can keep it smoother.
Bring a tiny repair kit. A handful of matching bobby pins, one travel spray, and a small comb are usually enough. You do not need your whole bathroom in a clutch. If a side piece starts slipping, pin it quietly instead of trying to rebuild the shape.
Humidity and dancing are the usual enemies. A low style with a solid base usually outlasts a fluffy one because it has less surface area to frizz. If the reception gets lively, pat the hairline dry with a tissue or blotter before you touch the style with your hands. That stops oil and moisture from spreading.
Frequently Asked Questions
Which style is best if my medium-length hair is very thick but also layered?
Braided low updos, rope-braid buns, and nested knots tend to handle layers best because the smaller sections catch the shorter pieces before they escape. Plain smooth chignons can work too, but they need more internal pinning.
Do I need extensions for these wedding updos?
Usually, no. Thick medium-length hair already gives you enough body for most of these shapes. Extensions only make sense if you want a faux bob, a larger crown lift, or a bun that looks extra full from every angle.
Can I wear a veil with a low bun or chignon?
Yes, and in many cases that’s the easiest pairing. A veil comb sits more securely when the bun has a firm anchor near the crown or upper nape, so build the style with the veil placement in mind before you finish the pins.
What if my hair slips out of pins halfway through the day?
That usually means the base was too smooth or the pins were inserted into only one layer of hair. Cross the pins in an X where the hair folds, and make sure you’re catching both the outer surface and the denser section underneath.
Is second-day hair better for thick hair updos?
Often, yes. Second-day hair has more grip at the roots and usually holds sectioning better. If your hair tends to feel dry on day two, a light mist of smoothing spray on the outer layer can stop it from puffing.
What style looks best if I want my neck and shoulders to show?
A low chignon, banana twist, French twist, or sleek low knot keeps the neckline open without leaving the hair limp. A bun that sits too low and too wide can crowd the shoulders, so keep the shape compact.
Can I do one of these myself, or do I need a stylist?
A rope-braid bun, tucked-under headband roll, or low ponytail knot is realistic for a careful DIY. French twists, faux bobs, and polished victory rolls are easier with another pair of hands, especially if you’re also dealing with a veil or decorative comb.
How much hairspray is too much?
Enough to hold the shape, not enough to make the surface crunchy before you’ve even left the house. If you can no longer move the front pieces with your fingers, you’ve gone too far. A flexible spray layered in light passes usually beats one heavy blast.
Final Pins
Thick medium-length hair gives you more wedding-day options than people often assume. It can hold a twist, carry a braid, support a bun, and still leave enough softness around the face to feel like you. The trick is choosing a shape that works with the density instead of trying to erase it.
If you remember nothing else, remember this: low anchors, smart sectioning, and a little restraint at the crown will save you more grief than any fancy product. Pick the style that suits the dress and the role, do a test run, and keep a few spare pins close by. The rest is just spray, patience, and a mirror at the right angle.