Long waves have a funny way of looking easy and acting difficult. They slip out of tight pins, puff up at the crown when you don’t want them to, and somehow manage to look too casual and too formal in the same afternoon. The good news is that those same bends and ridges also give you leverage. Long wavy hair grips bobby pins better than slick, freshly ironed hair, and it has enough natural body to make even a five-minute twist look deliberate.
That’s why the best updo hairstyles for long hair with wavy hair are not the ones that fight the texture. They’re the ones that use it. A little frizz around the temples can soften a knot. A bit of wave at the nape can keep a bun from looking pasted on. And if your hair is layered, all the better — those shorter pieces can blur the hard edges that make some updos look stiff and overworked.
I keep coming back to one simple idea: wavy hair does not need to be tamed into submission to look polished. It needs the right structure, the right pins, and a shape that respects its bend. Once you stop chasing perfect symmetry, a whole set of styles opens up, and most of them are faster than people think.
Why Wavy Hair Makes These Updos Easier
- The texture gives pins something to grab: Wavy strands have more friction than straight ones, so a crossed pair of bobby pins usually holds better and slips less.
- Second-day hair behaves better: A little scalp oil and leftover texture make buns and twists sit closer to the head instead of puffing out like a fresh blowout.
- Loose pieces look intentional here: On wavy hair, a soft curl at the temple reads as style, not failure. That matters.
- The shape hides the mess: A low bun can cover uneven ends, grown-out layers, or a few frizzed spots without looking bulky.
- Most of these styles need only one or two products: Texture spray, dry shampoo, and a light hairspray do more work than a drawer full of tools.
- You can dress them up or down fast: Change the placement, add a clip, or pull out two face-framing pieces, and the same base style works for errands or an event.
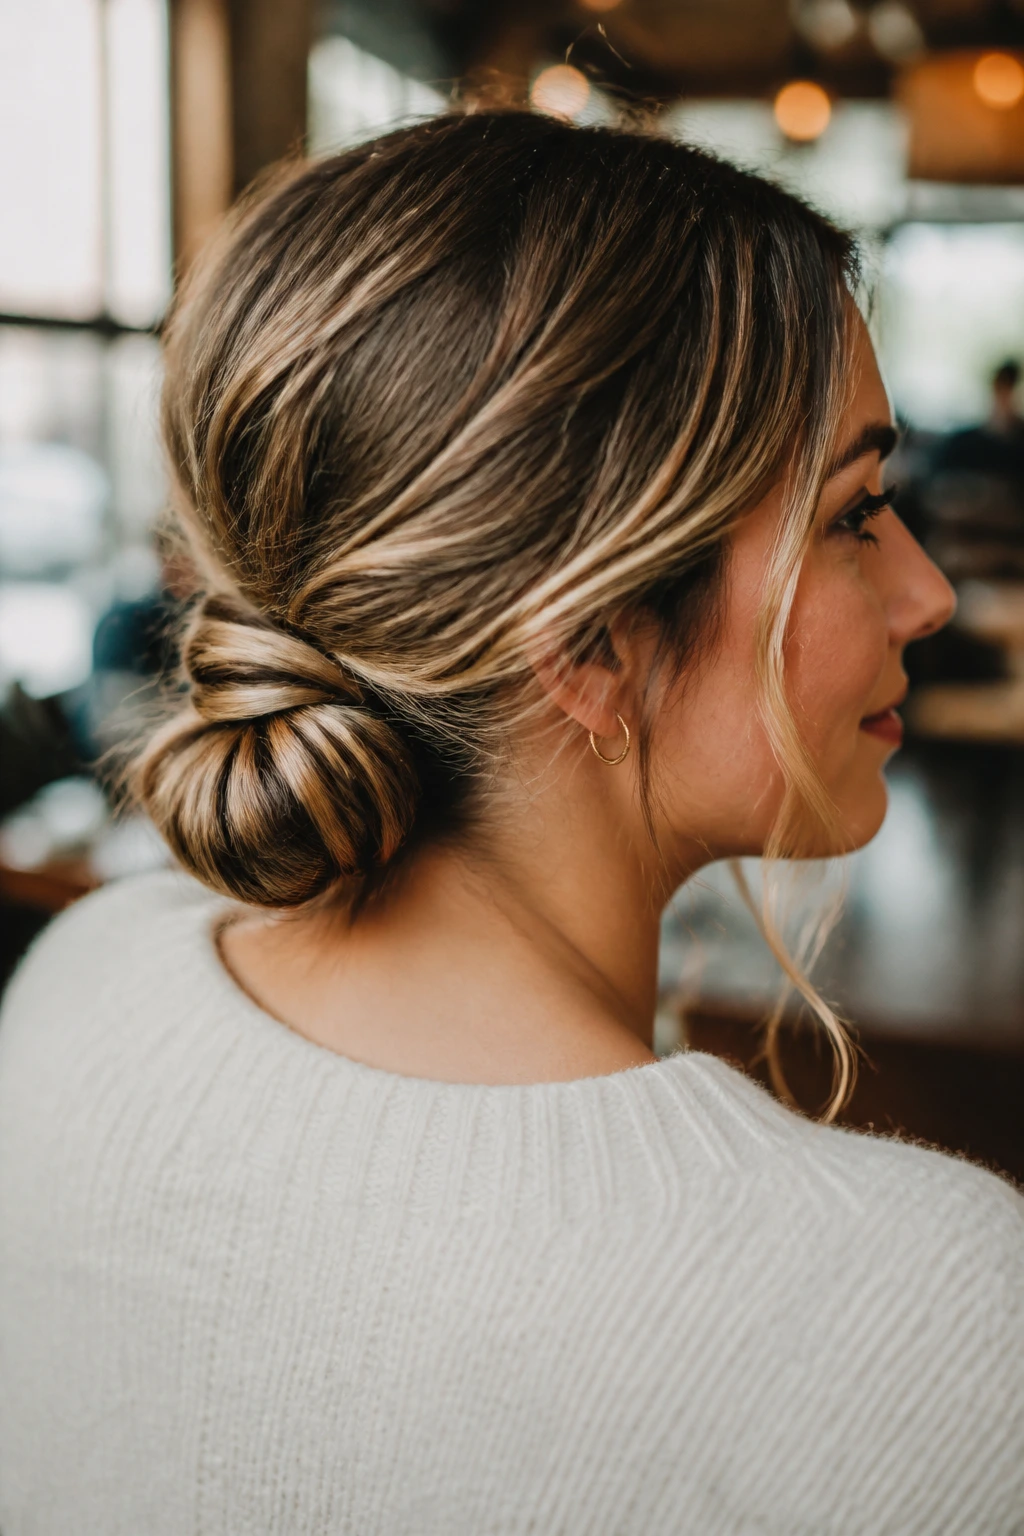
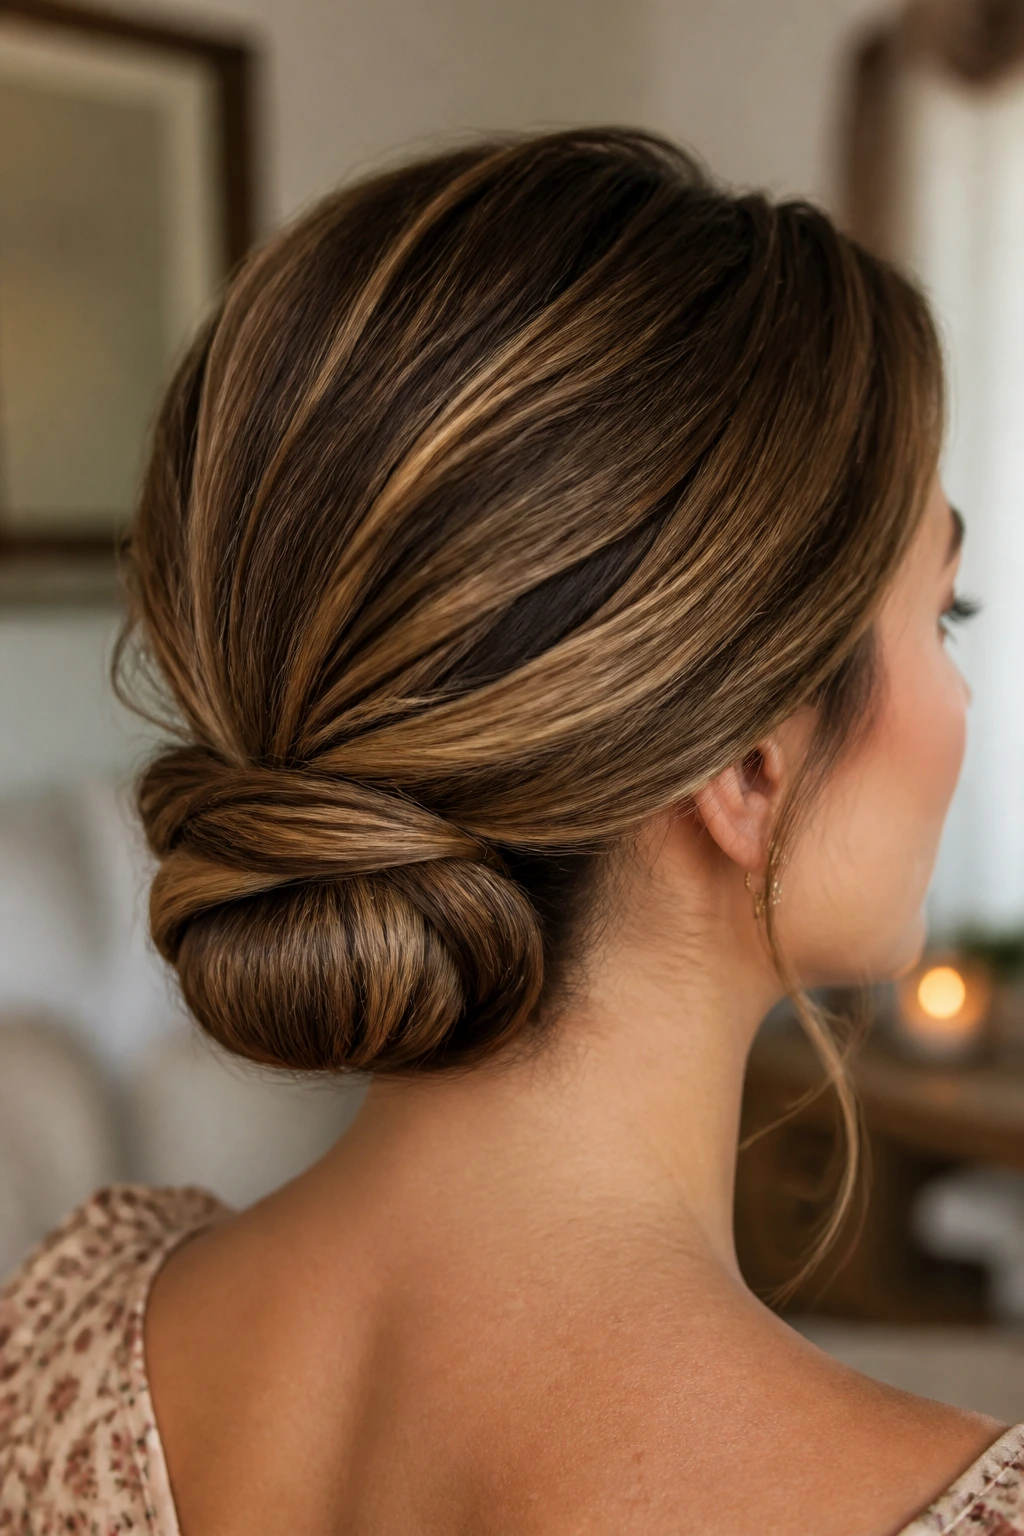
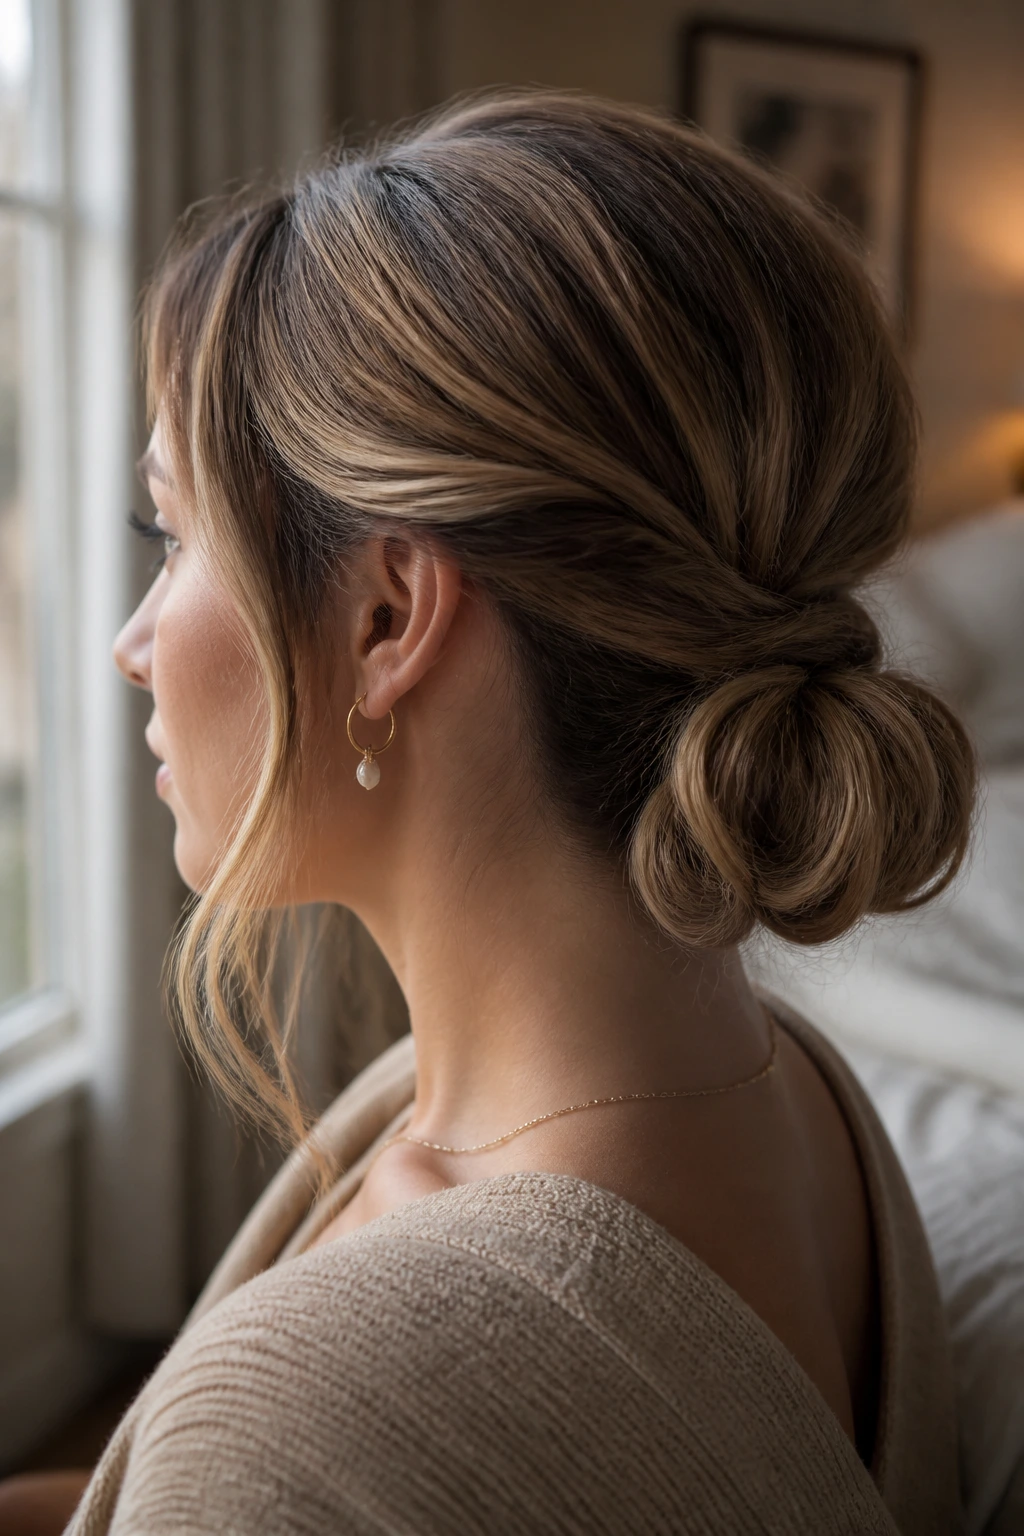
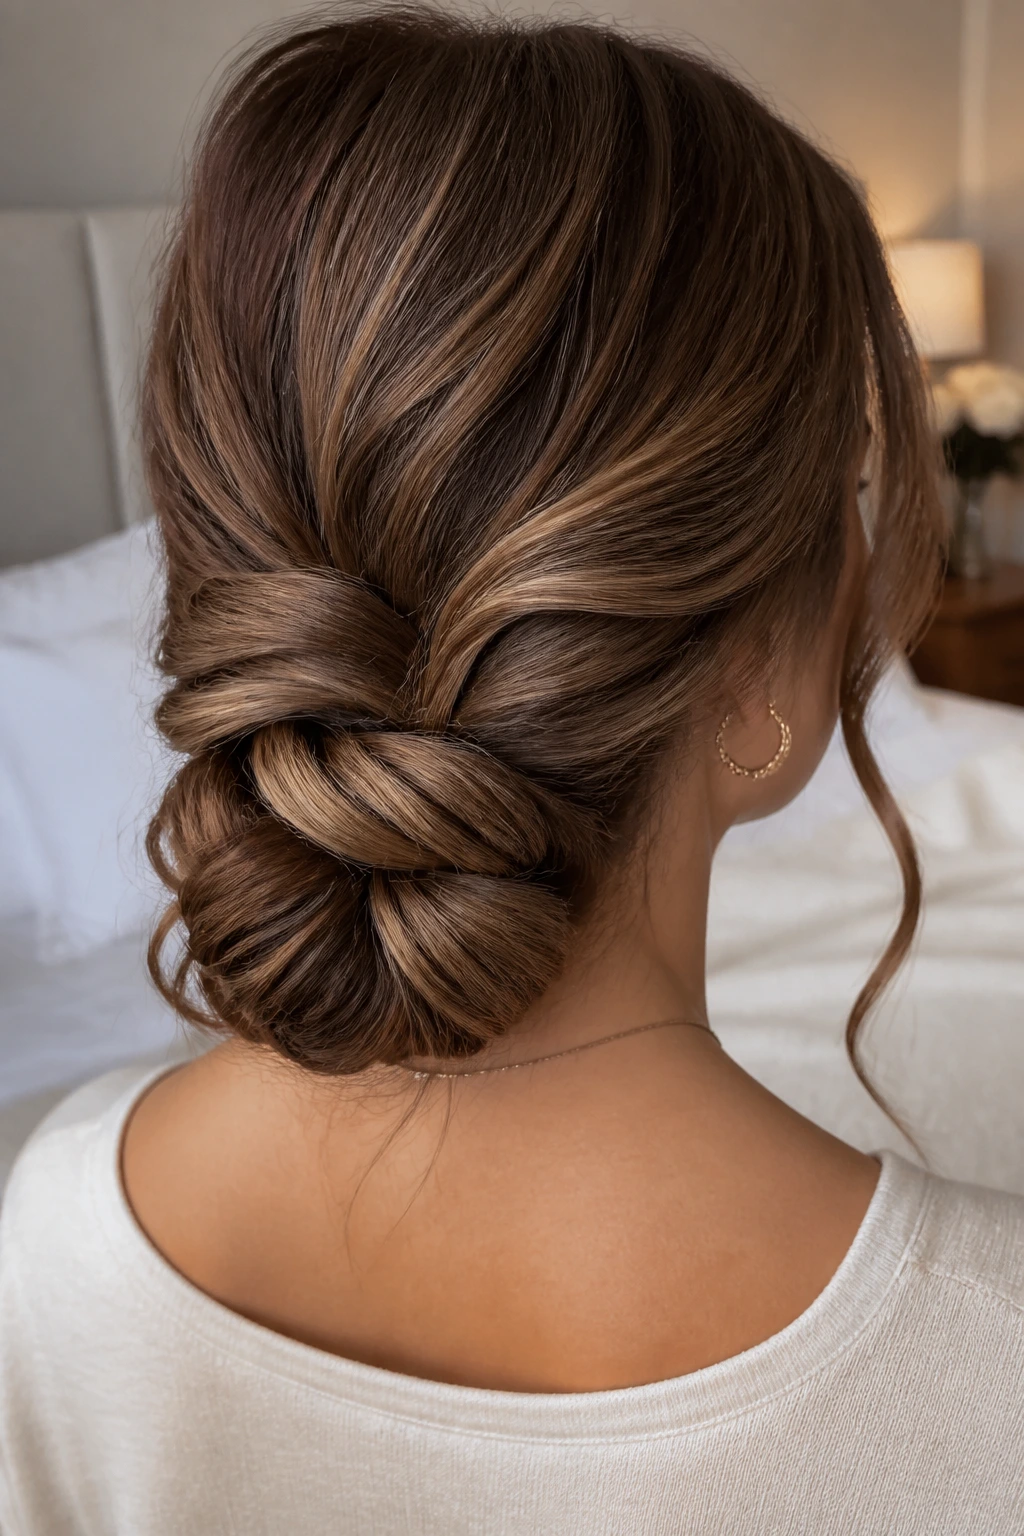
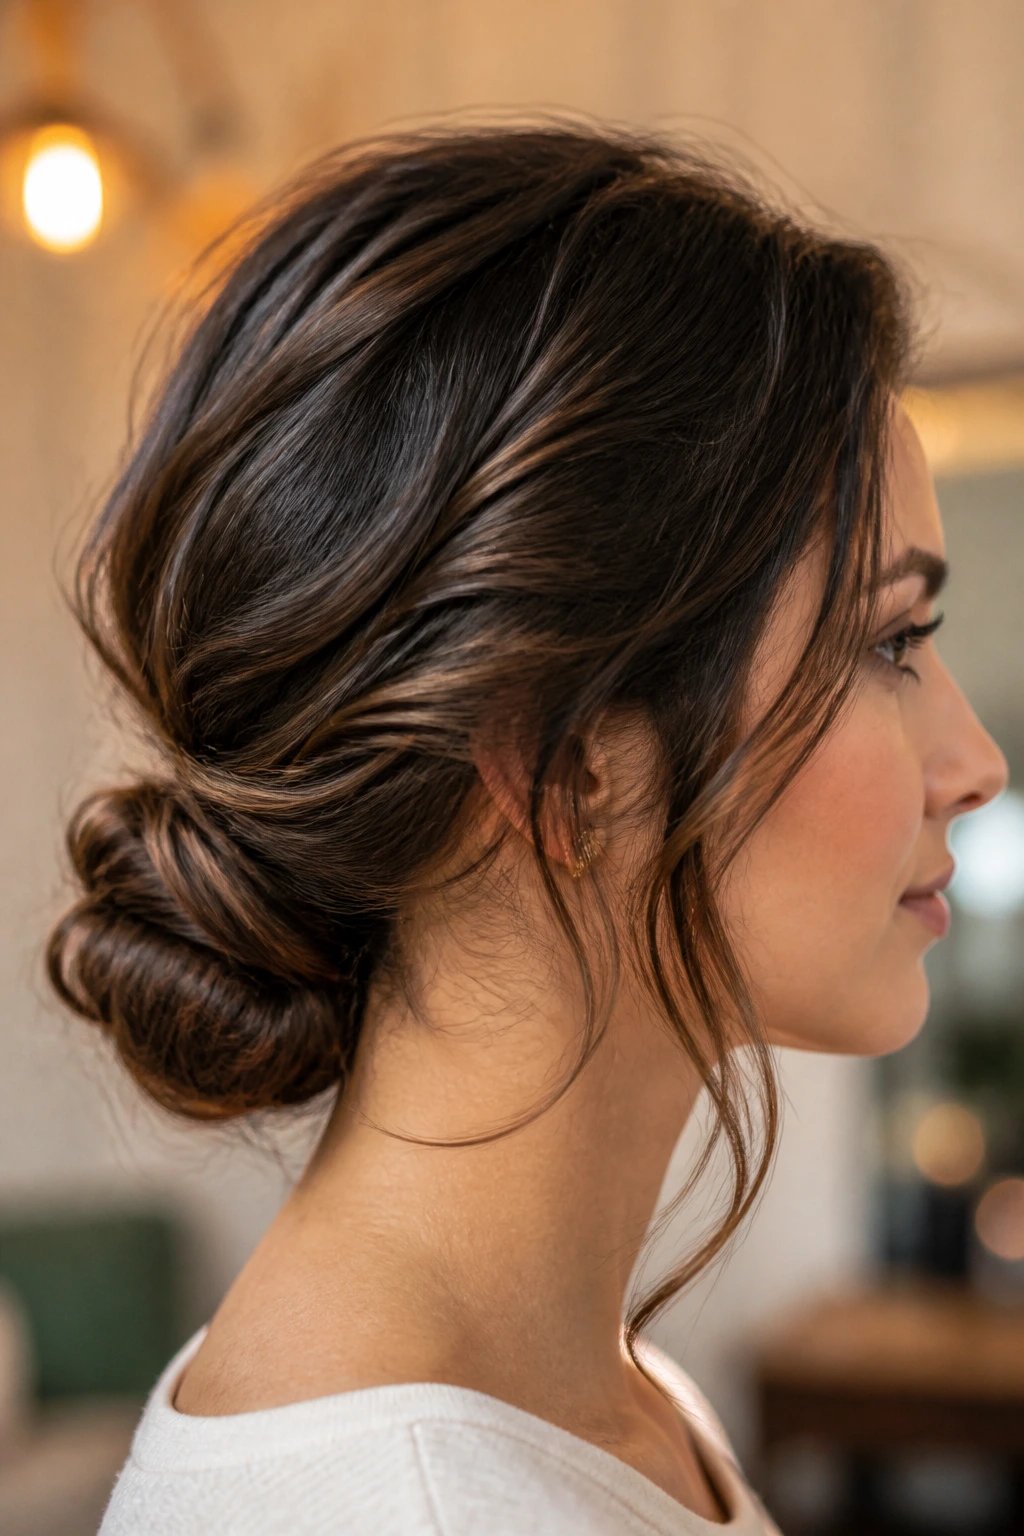
1. Low Twisted Bun
A low twisted bun is the style I reach for when I want long wavy hair to look tidy without losing its soft edges. It sits at the nape, not the crown, so the waves don’t fight the shape as much. The twist hides the fact that the ends are folded under, which is half the battle with long hair.
Why it works: The bun stays secure because the hair wraps around itself in a compact coil, and the wave pattern keeps the surface from looking flat. If your hair is thick, this is one of the few styles that won’t turn into a giant knot if you keep the twist loose. It also survives a long day better than a high bun, mostly because gravity is working with you instead of against you.
How I’d do it: Smooth the top with your hands, gather the hair low, and twist the tail until it starts to coil. Wrap the twist into a bun and pin it with 4 to 6 bobby pins, pushing each pin in at a slight angle. If the bun feels too perfect, tug a few small sections at the crown and around the ears.
Best for: workdays, dinners, and any time you want your hair off your neck without looking severe.
Small upgrade: Mist the mid-lengths with texture spray before twisting. It gives the bun a little grip and keeps the rolled surface from slipping apart.
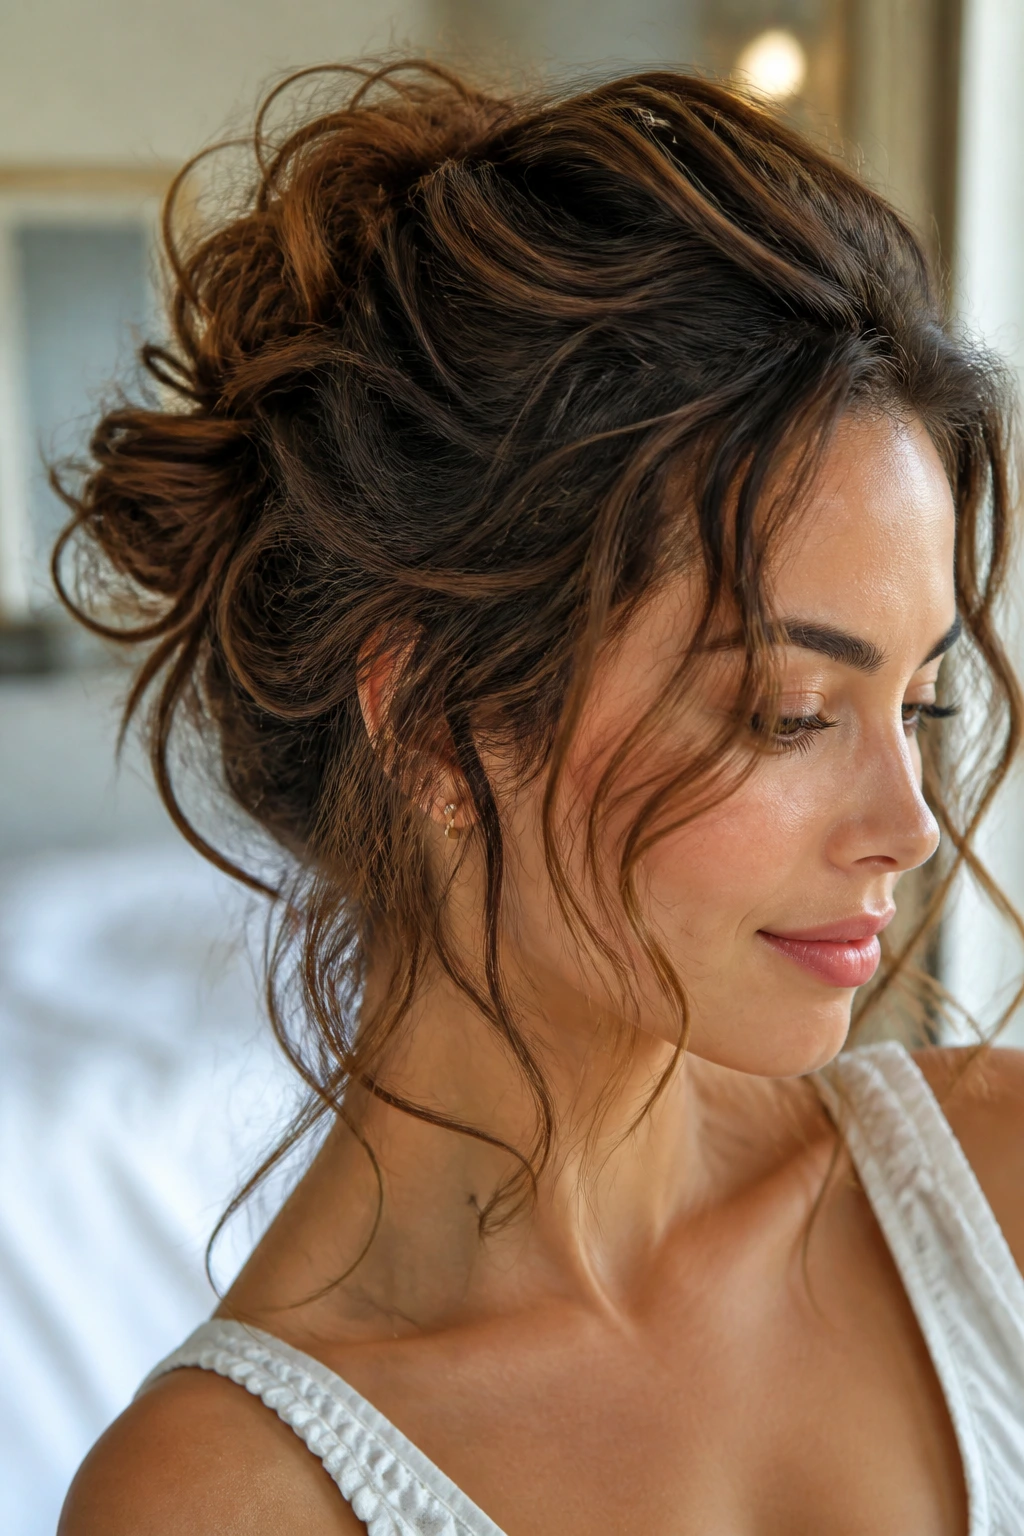
2. Messy Textured Bun
This one is for people who want the “I threw my hair up and somehow it worked” look without actually depending on luck. A messy textured bun on long wavy hair gets its charm from the shape of the waves, not from accidental chaos. Done right, it looks soft and expensive. Done badly, it looks like you changed your mind halfway through.
What makes it easy is that you do not need every strand to behave. Pull the hair into a high or mid-height ponytail, wrap it loosely, and leave the ends a little imperfect on purpose. The waves give the bun volume, so you usually need fewer pins than you would with straight hair. That said, the top layer should still be anchored — loose does not mean loose enough to fall apart by lunch.
I prefer this version on hair that’s been air-dried or rough-dried with a diffuser. Freshly washed waves can be too slippery, and the bun ends up feeling airy in the wrong way. A little dry shampoo at the roots changes the whole thing.
If you want the best version, keep the bun slightly off-center and pull out two thin face-framing pieces. That small shift makes the style look relaxed rather than accidental.
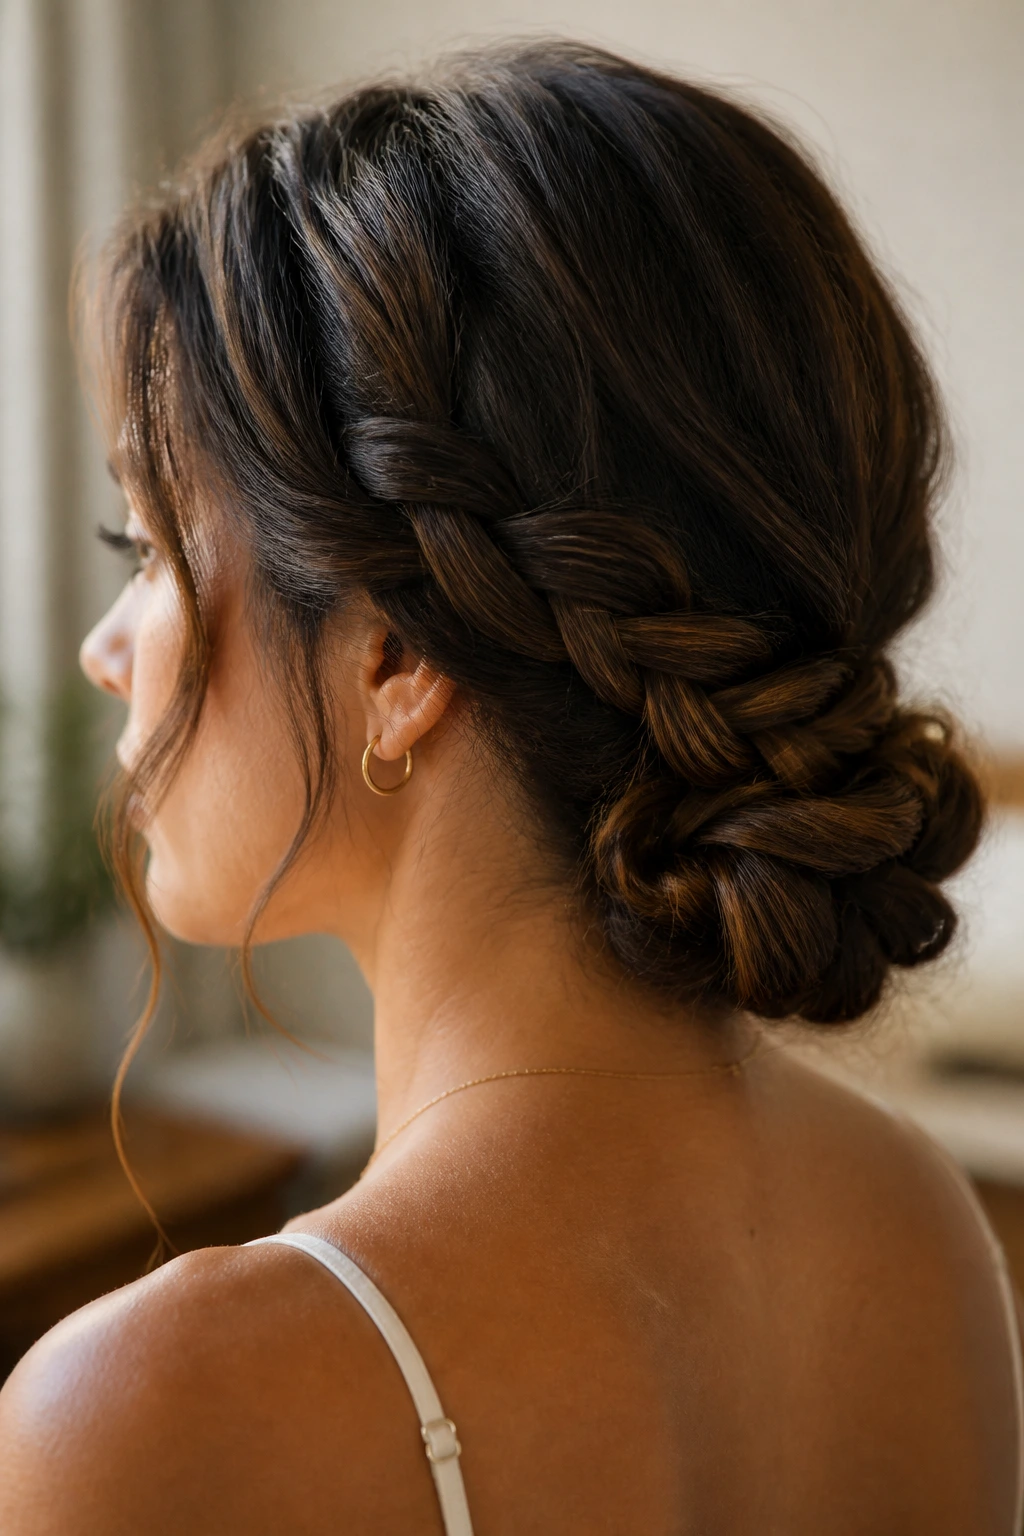
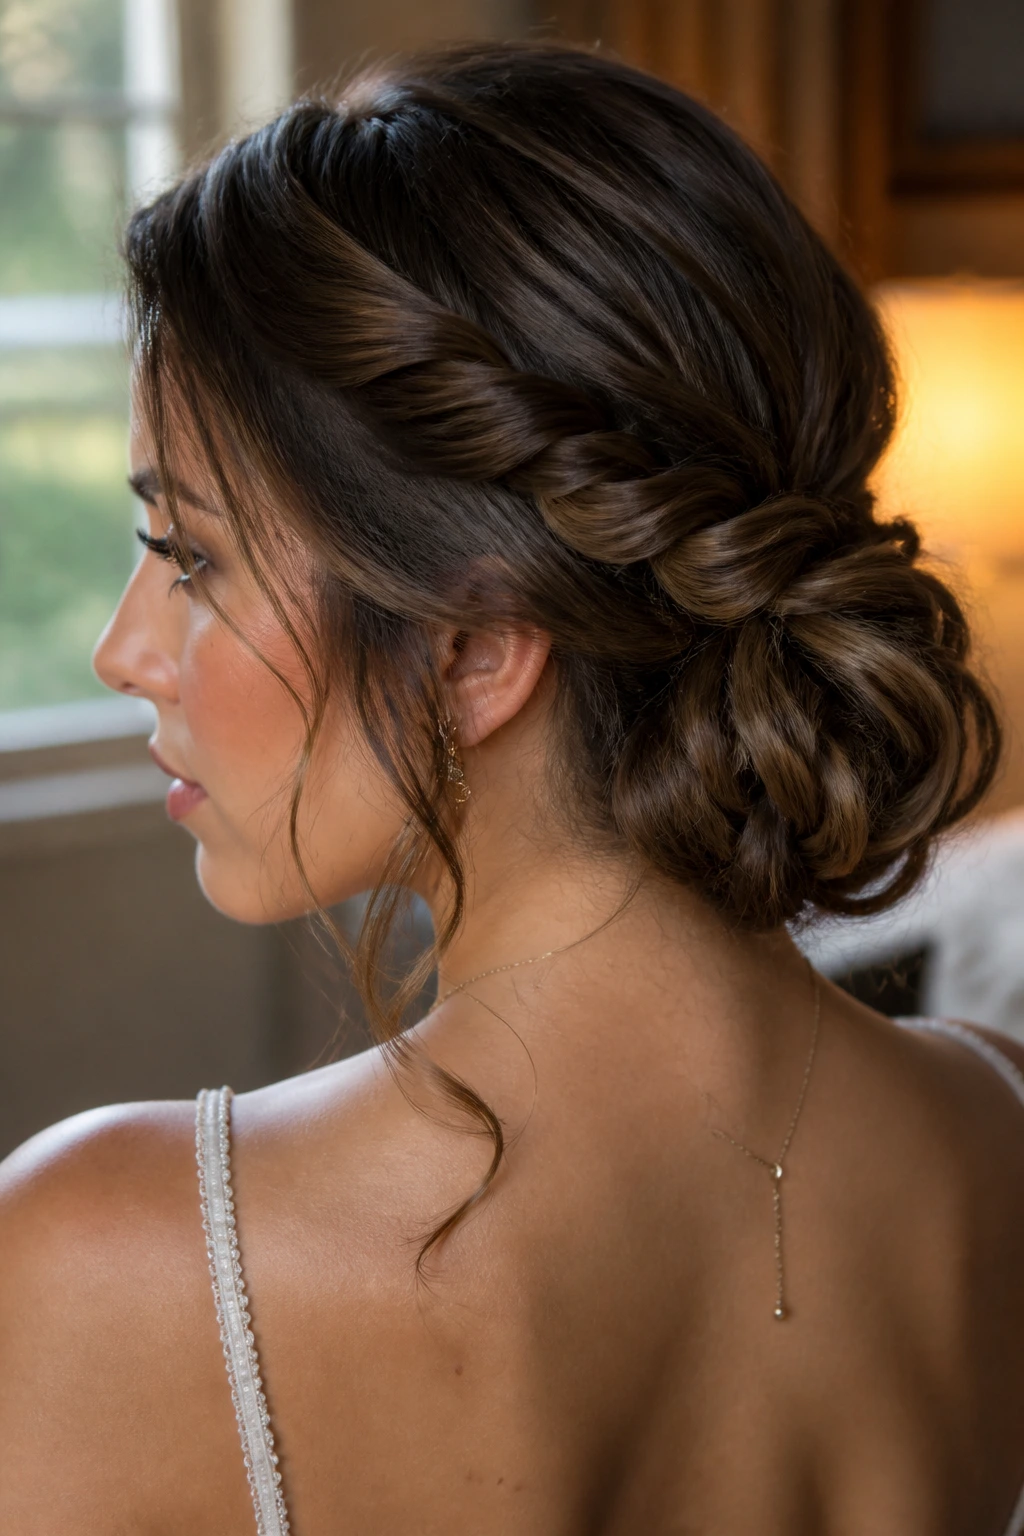
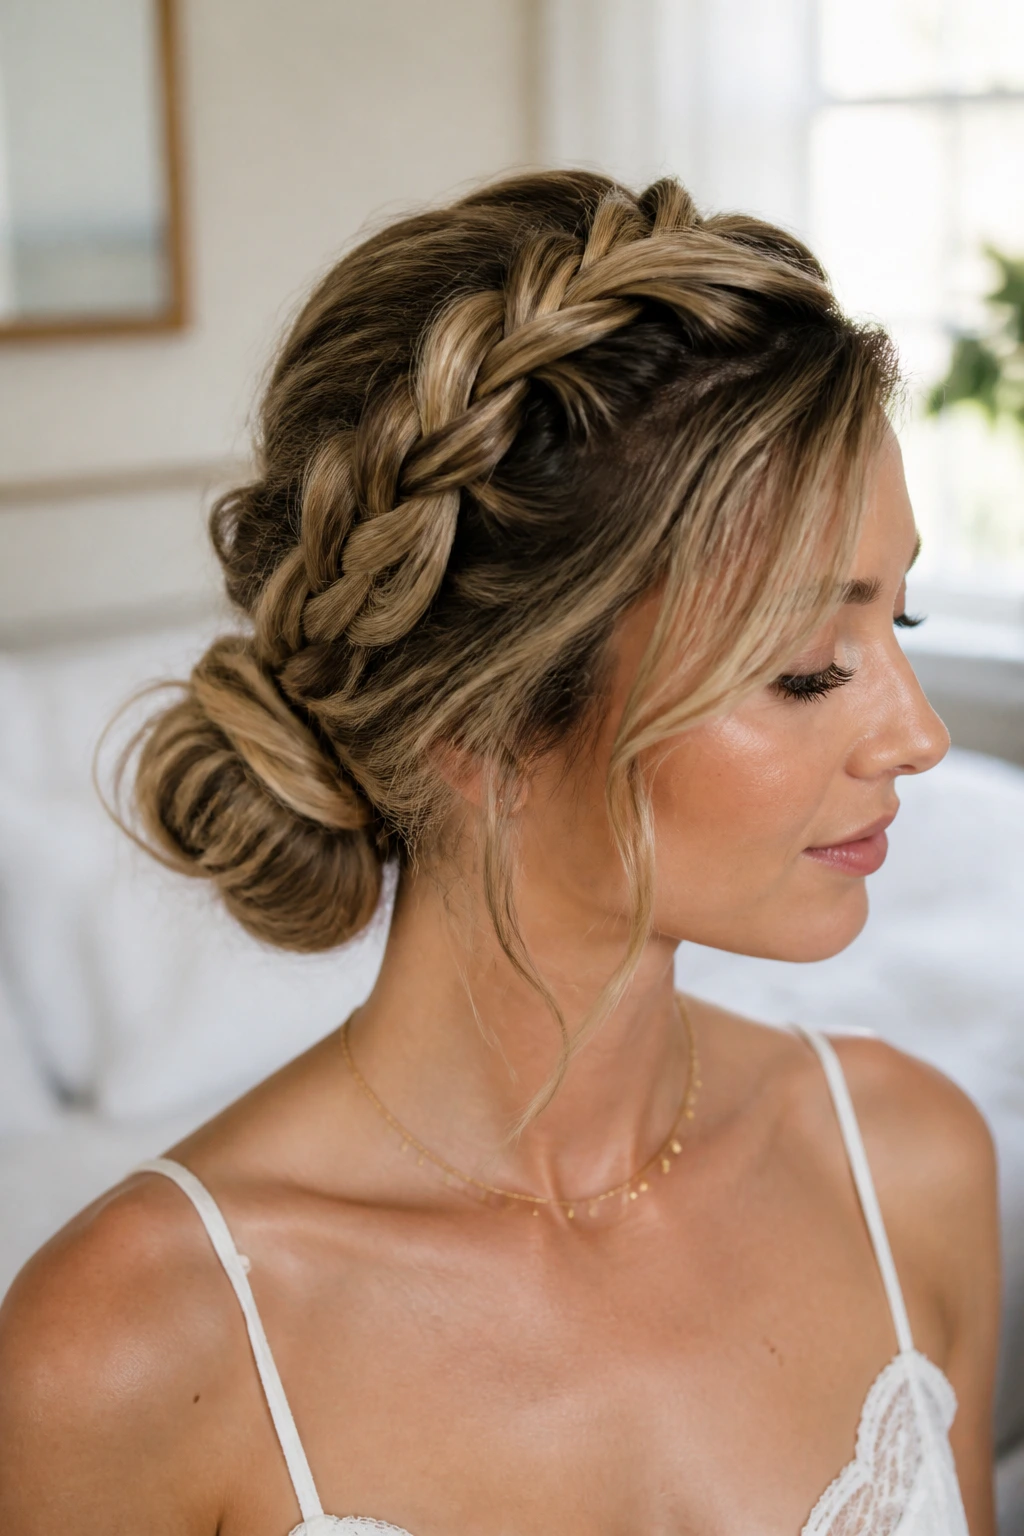
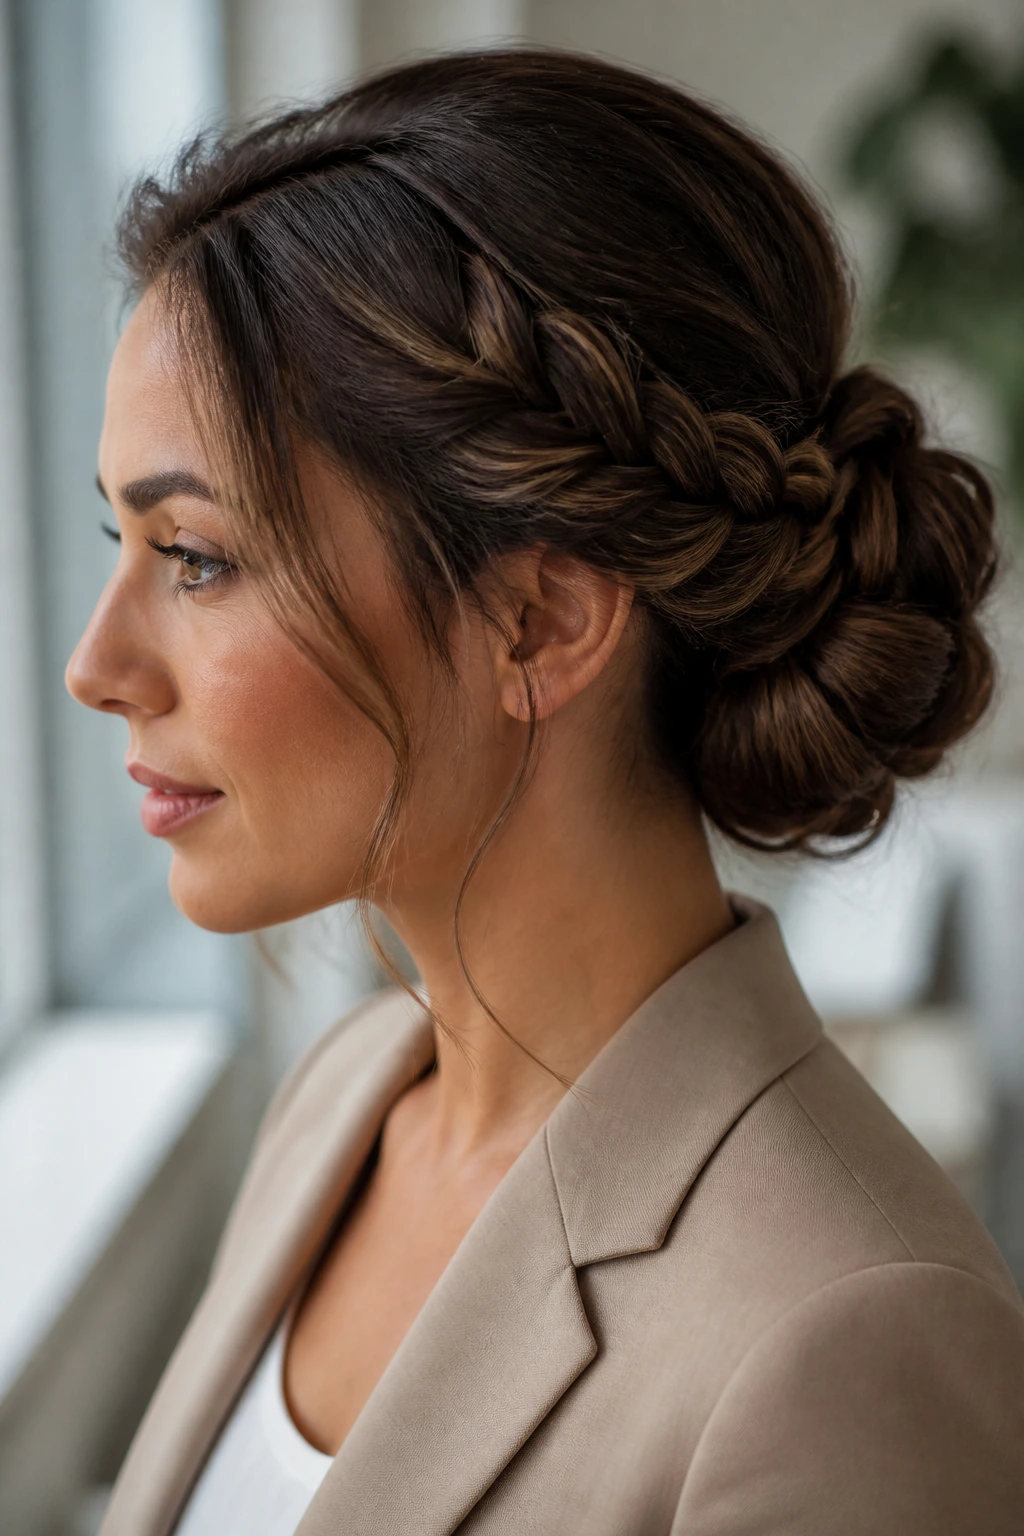
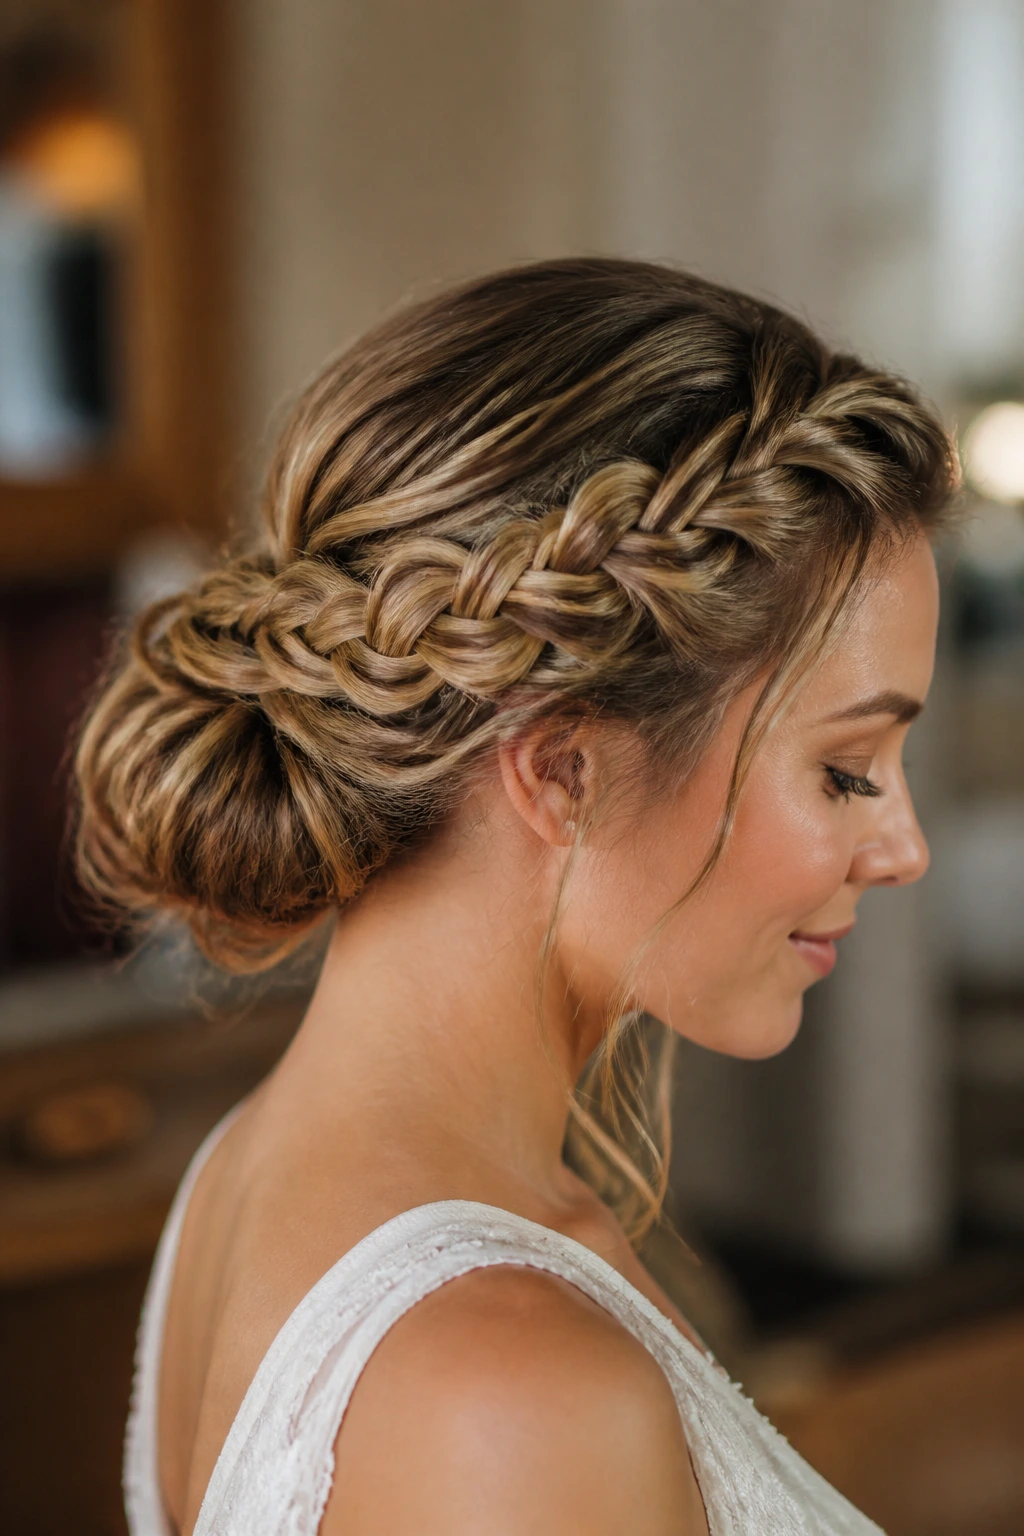
3. Braided Crown Bun
A braided crown bun gives long wavy hair a better job to do than just sitting in a loop at the back of your head. The braid adds structure along the hairline, and the bun anchors the length so you aren’t left with heavy ends hanging around and undoing the shape.
Why it works: Waves make the crown braid look fuller, which is useful because tiny, tight braids can disappear into long hair. The texture also helps the braid stay put, especially if you pancake it a little after weaving it. That little tugging-out step matters; it turns a flat braid into something with width and grip.
How to wear it: Start with a side part or center part, braid each front section toward the back, then wrap the remaining length into a low bun. Pin the bun first, then pin the braid ends underneath it so the transition looks smooth. If your hair is layered, a few shorter pieces may pop out near the temples. Leave them.
Best for: weddings, showers, and any event where you want the hair up but not severe.
Watch for: don’t braid too tightly at the hairline. A crown braid that pulls hard across the scalp tends to look neat for ten minutes and then gives you a headache for the rest of the day.
4. Half-Up Top Knot
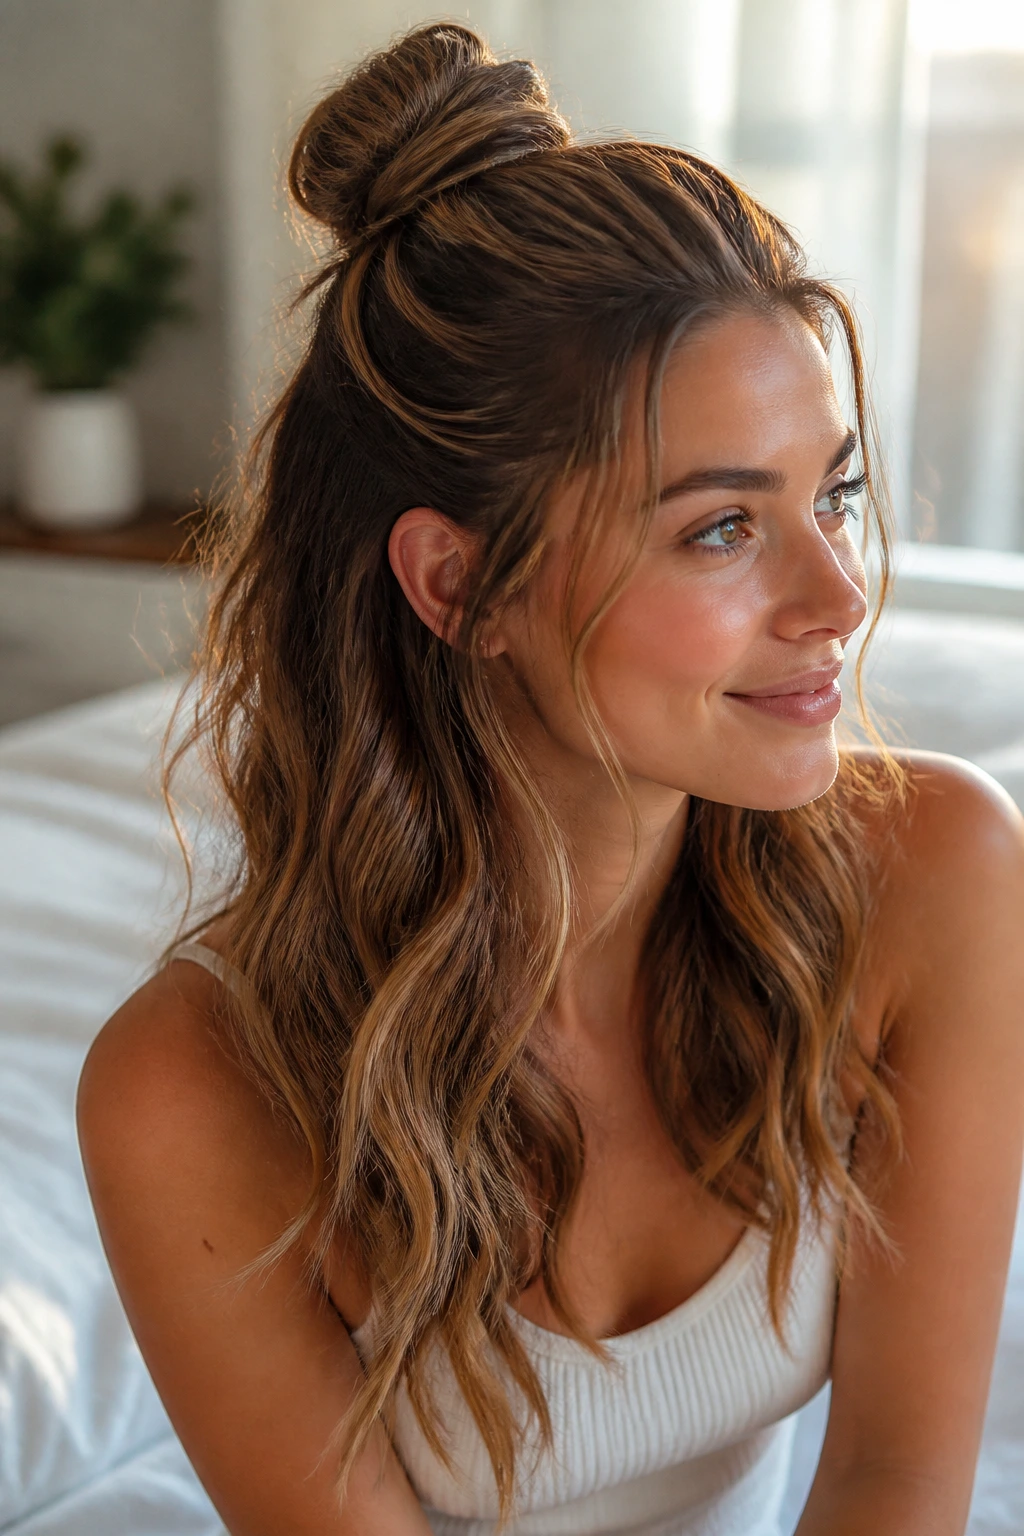
The half-up top knot is the style I recommend when you want to look put together in about four minutes and you do not care to hear a lecture about symmetry. It keeps the top away from your face, shows off the length, and lets the waves stay visible in the lower half. On long wavy hair, that contrast is the whole point.
Gather the top third of the hair, roughly from the temples up, and tie it into a small ponytail. Twist that ponytail into a knot and pin it down if the hair is heavy. If your hair is thick, use two pins crossing each other instead of one. The knot should sit high enough to lift the face but not so high that it looks like a tiny bun floating above the head.
I like this one with a little volume at the crown. Lift the roots gently before tying, then smooth the surface with your fingertips. If the lower waves have some frizz, good. That texture keeps the style from looking overstyled.
This is one of the best updo hairstyles for long hair with wavy hair when you need the hair out of the way but still want the length to read as part of the look.
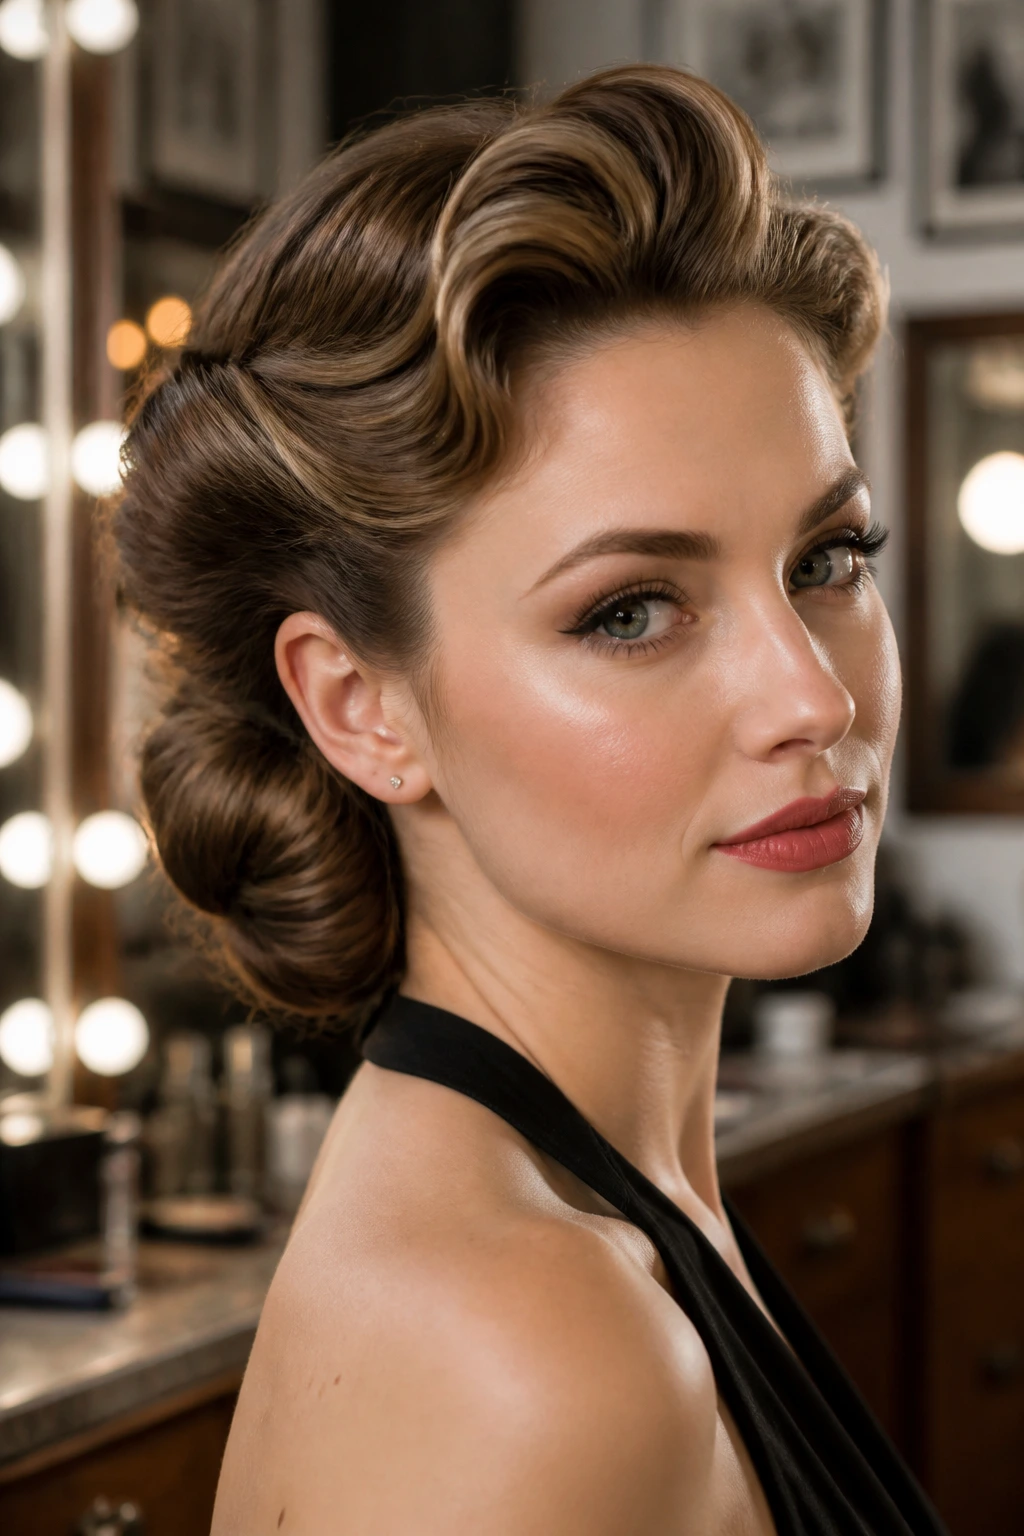
5. French Twist with Loose Ends
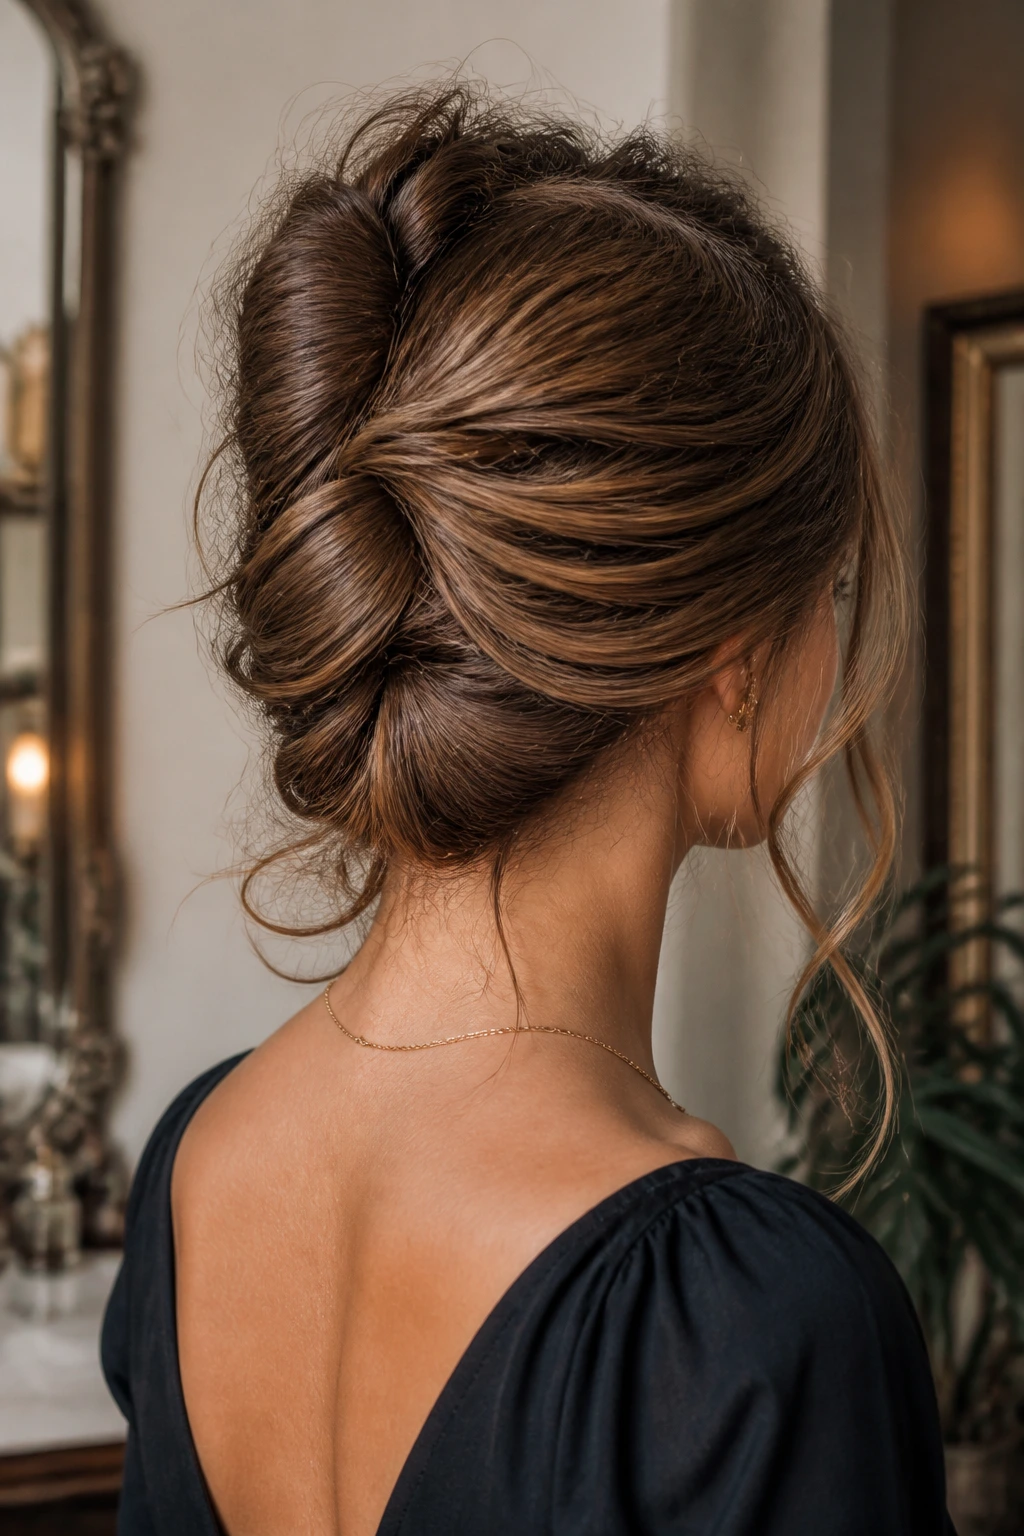
A French twist on long wavy hair is one of those styles that sounds more complicated than it is. The trick is not to force every wave into a clean, glossy column. Let the texture do part of the work. The result is softer, less rigid, and honestly more wearable than the classic lacquered version.
The twist runs vertically along the back of the head, and the ends are tucked upward into the roll instead of hanging loose. On wavy hair, I like to leave a little looseness at the top and the nape. That tiny bit of give keeps the style from looking costume-like. A rigid French twist can feel too formal for real life. This version doesn’t.
Use a brush or wide-tooth comb only on the outer layer if you want it smoother. Then gather the hair as if making a low ponytail, twist upward, and tuck the length inside the shell of the twist. Secure with U-pins or long bobby pins, not short ones. Short pins tend to pop out when the hair is heavy.
If you’re wearing it to an event, a side part and one curved face-framing piece can soften the line at the front. That one piece does a lot. More than people admit.
6. Low Braided Chignon
The low braided chignon is the polished cousin of the messy bun, but it still behaves nicely on wavy hair because the braid brings enough surface texture to keep the shape from going limp. I like it because it looks more intentional than a plain coil, yet it takes almost the same amount of effort.
Start with a low ponytail, braid the length into a simple three-strand braid, and then wrap that braid around the base into a bun. Pin it at the sides and through the center so the braid doesn’t slowly unwind as the day goes on. If your hair is very long, fold the braid once before wrapping so you don’t end up with a giant round lump at the nape.
The braid matters here. It keeps the ends controlled, which is the part that usually gets fussy on long hair. Wavy texture makes the braid look fuller, so you do not need to pancake it much unless you want a softer, wider bun.
I’d wear this style with a blazer or a dress with an open neckline. It sits low and neat, which keeps the line around the neck clean. And if a few waves escape around the ears, let them. That tiny bit of movement keeps the style from looking too stiff.
7. Claw-Clip Twist
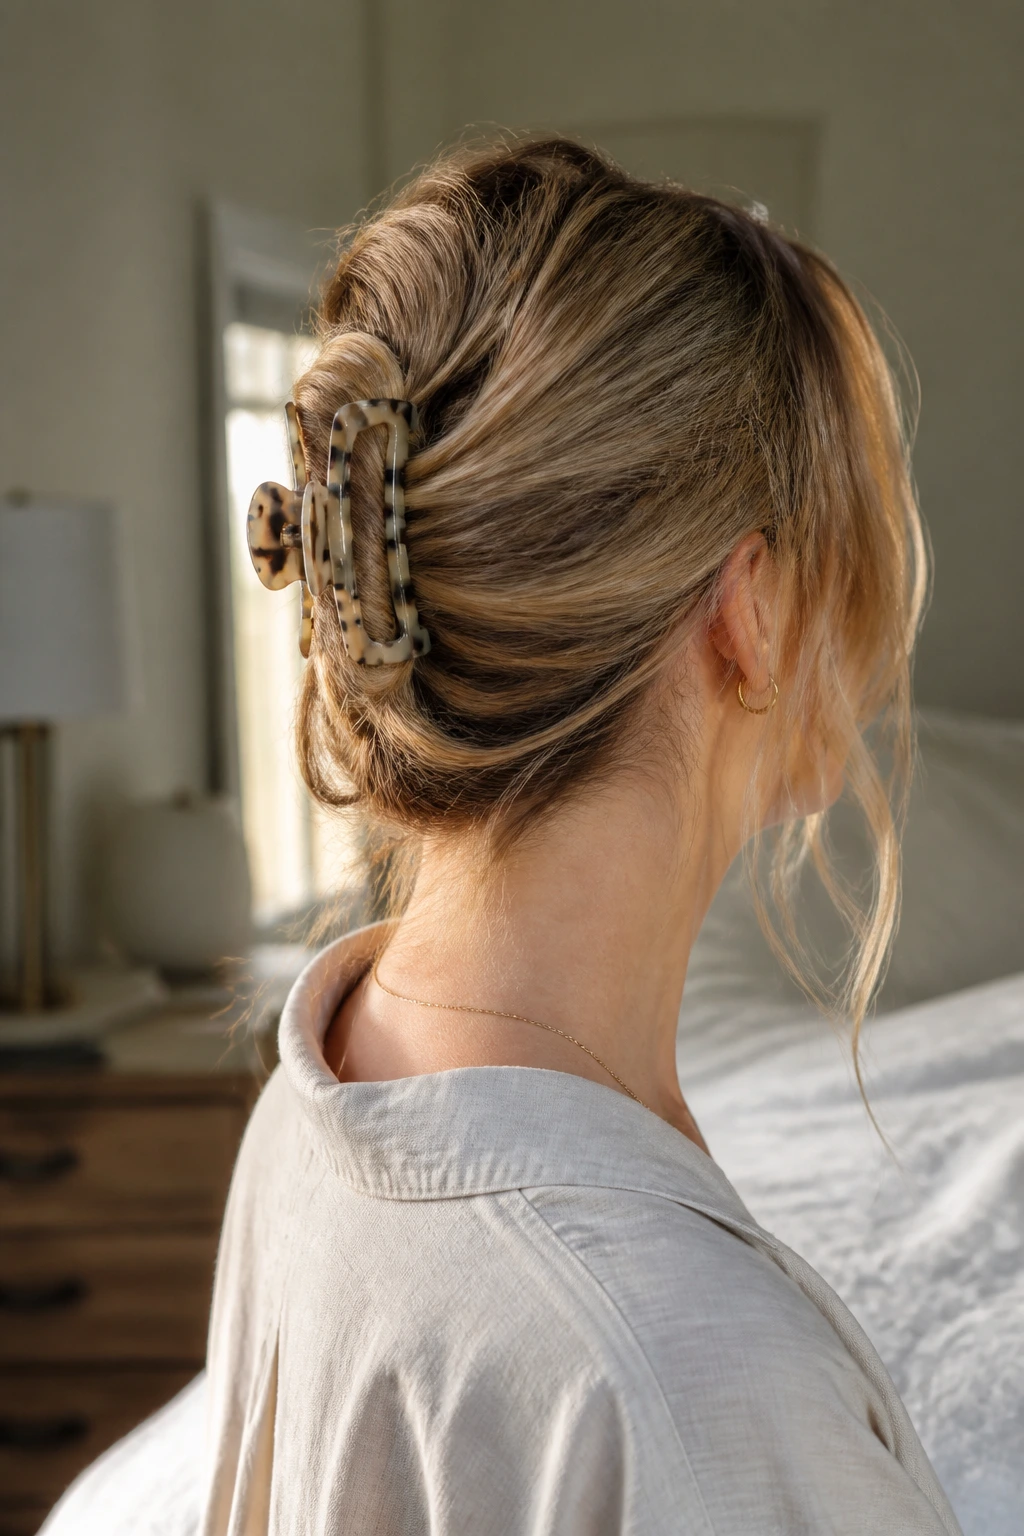
A claw-clip twist is the lazy-day style that doesn’t look lazy if you place the clip well. Long wavy hair helps here because the texture gives the twist something to hold on to. Straight hair tends to slide right out of the clip unless you prep it. Waves usually behave better.
Gather the hair at the back, twist it upward, fold the length once, and clamp a medium or large claw clip over the twist so the ends tuck in. If your hair is thick, choose a strong spring clip with curved teeth. Tiny decorative clips are cute until they fail under the weight of actual hair.
This style works best when the twist sits centered and a little loose. If you pull it too tight, the clip has to do all the work, and that’s where things go wrong. A few loose pieces around the jawline make it feel relaxed rather than unfinished.
I like this one for travel, errands, and afternoons when you need your hair up but don’t want a tense-looking bun pressing against the back of your head. It’s also a good test style if you’re trying to see whether a clip can handle your hair before buying three more of the wrong kind.
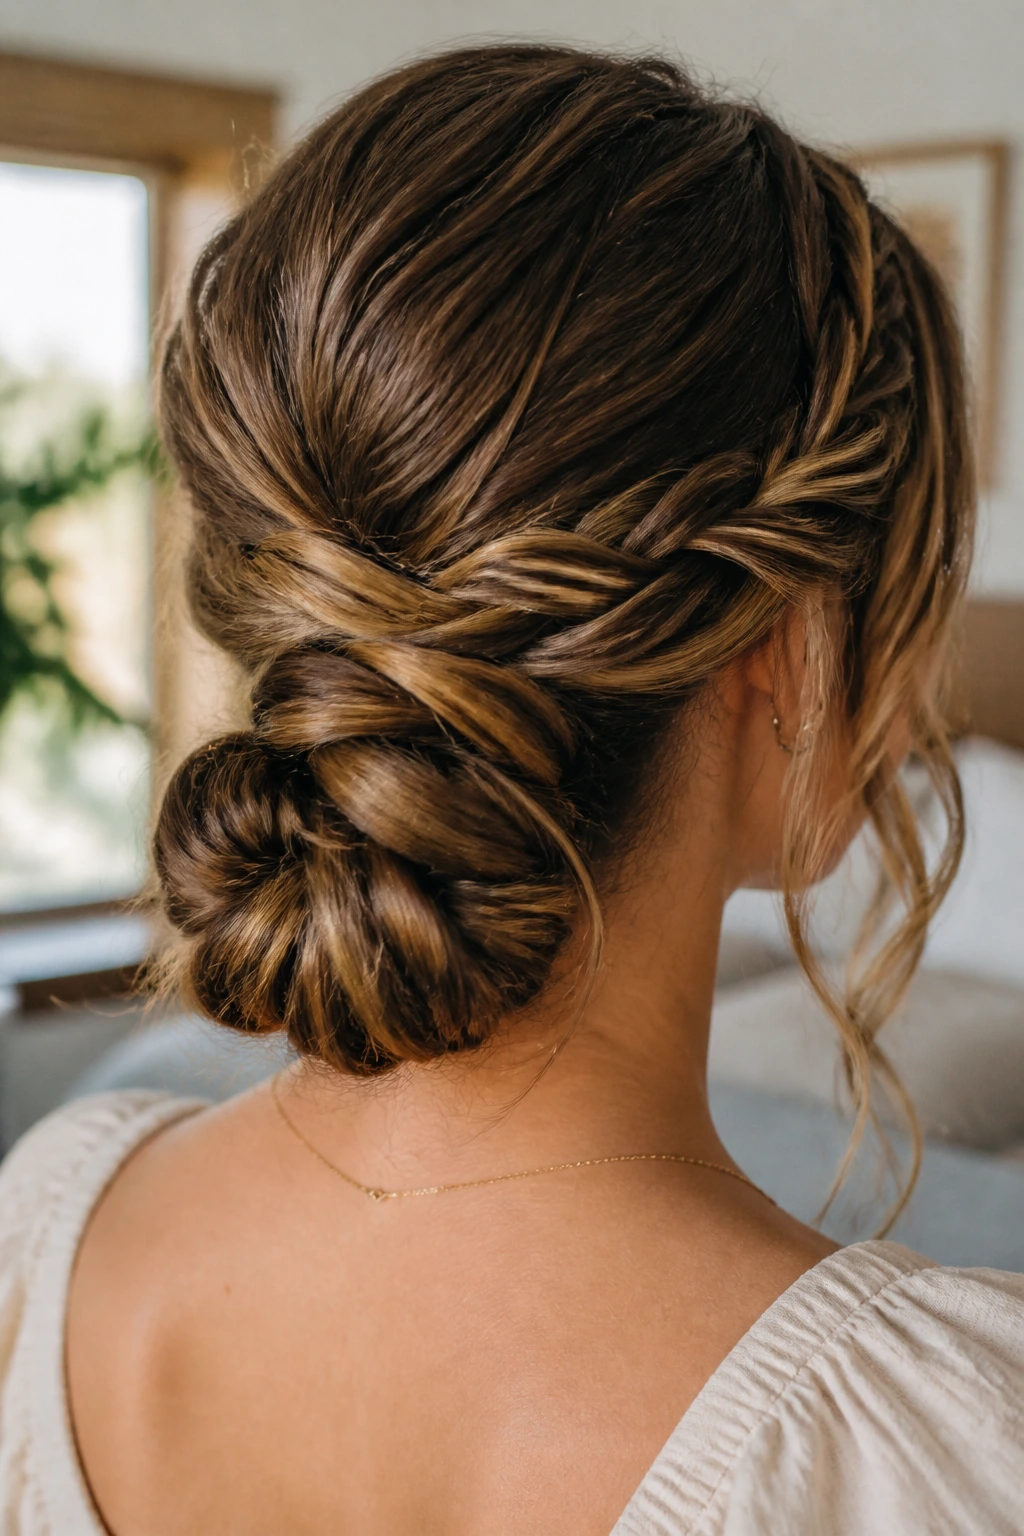
8. Rope-Braid Bun
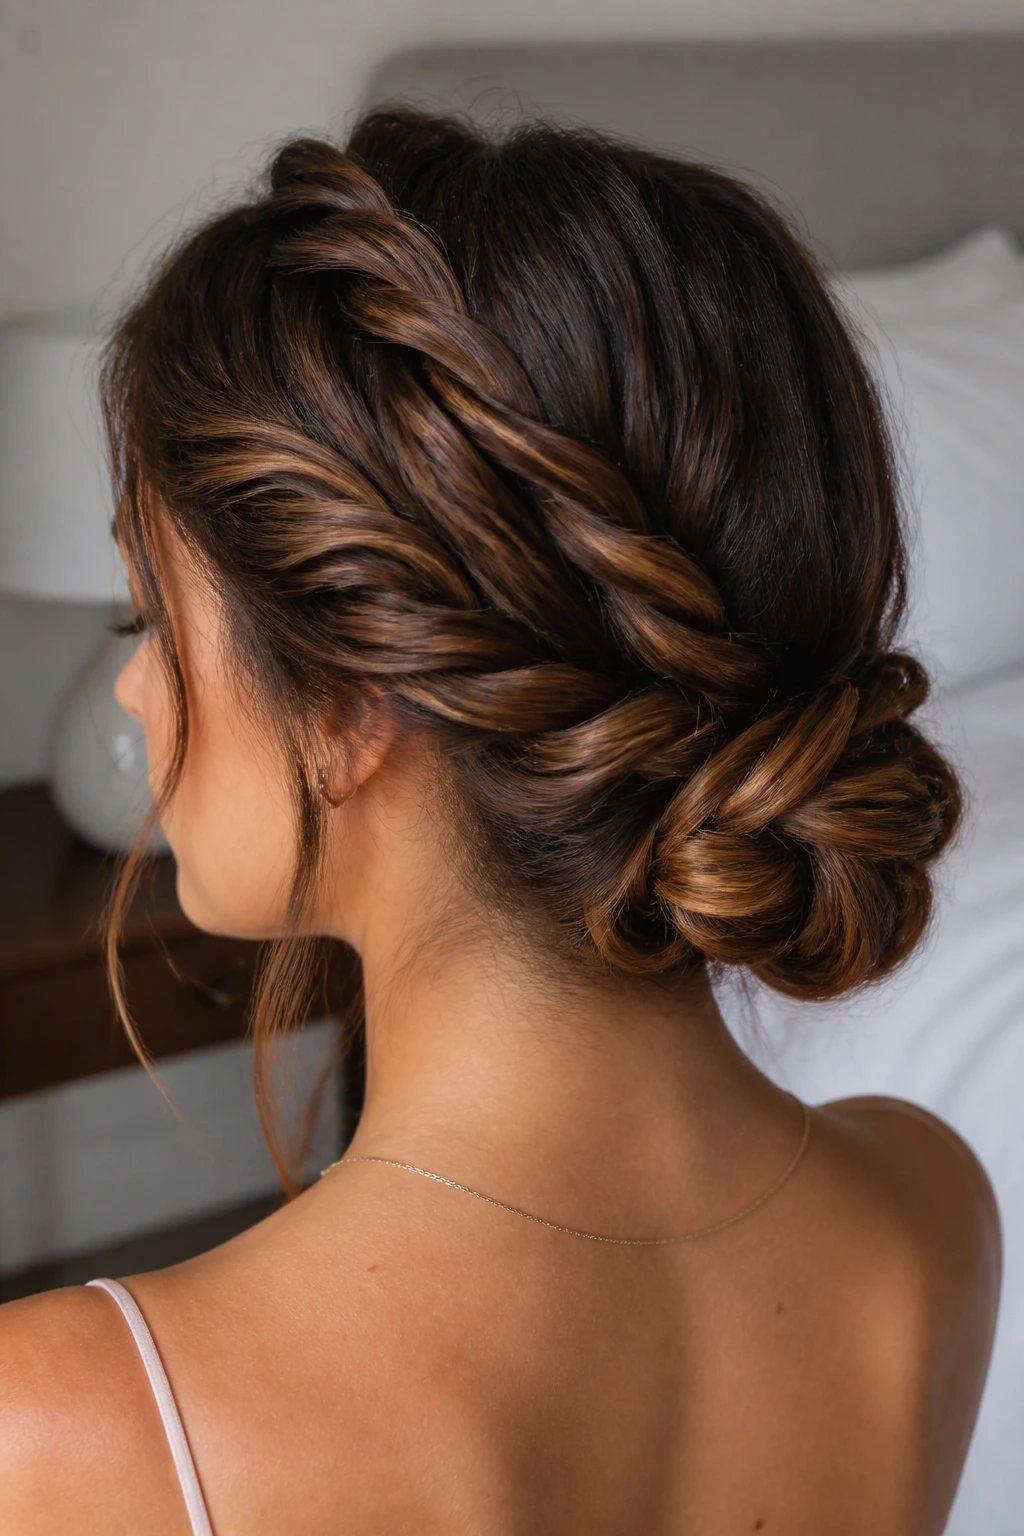
Why does a rope braid work so well on wavy hair? Because the waves already create the slight irregularity that makes a rope braid look thick and dimensional, even when you only use two sections. The braid has a twistier, looser feel than a standard plait, and that looseness helps the final bun sit soft instead of tight and severe.
Split the ponytail into two sections, twist each section in the same direction, then wrap them around each other in the opposite direction. That’s the rope braid. Coil the end into a bun and secure it with pins at the base. If the hair is slippery, add a little dry shampoo or texture spray before you start twisting.
The best thing about this style is that it looks more complicated than it is. It’s also forgiving if one section is a little thicker than the other. The twists won’t look identical, and that’s fine. On wavy hair, a slight mismatch often makes the braid look richer.
If you want to wear it casually, leave the crown a little loose and let the braid sit lower. For a dressier finish, smooth the top with a fine brush and use a stronger hold spray on the surface only. Don’t drown the whole style in it. You’ll kill the movement.
9. Bubble Ponytail Updo
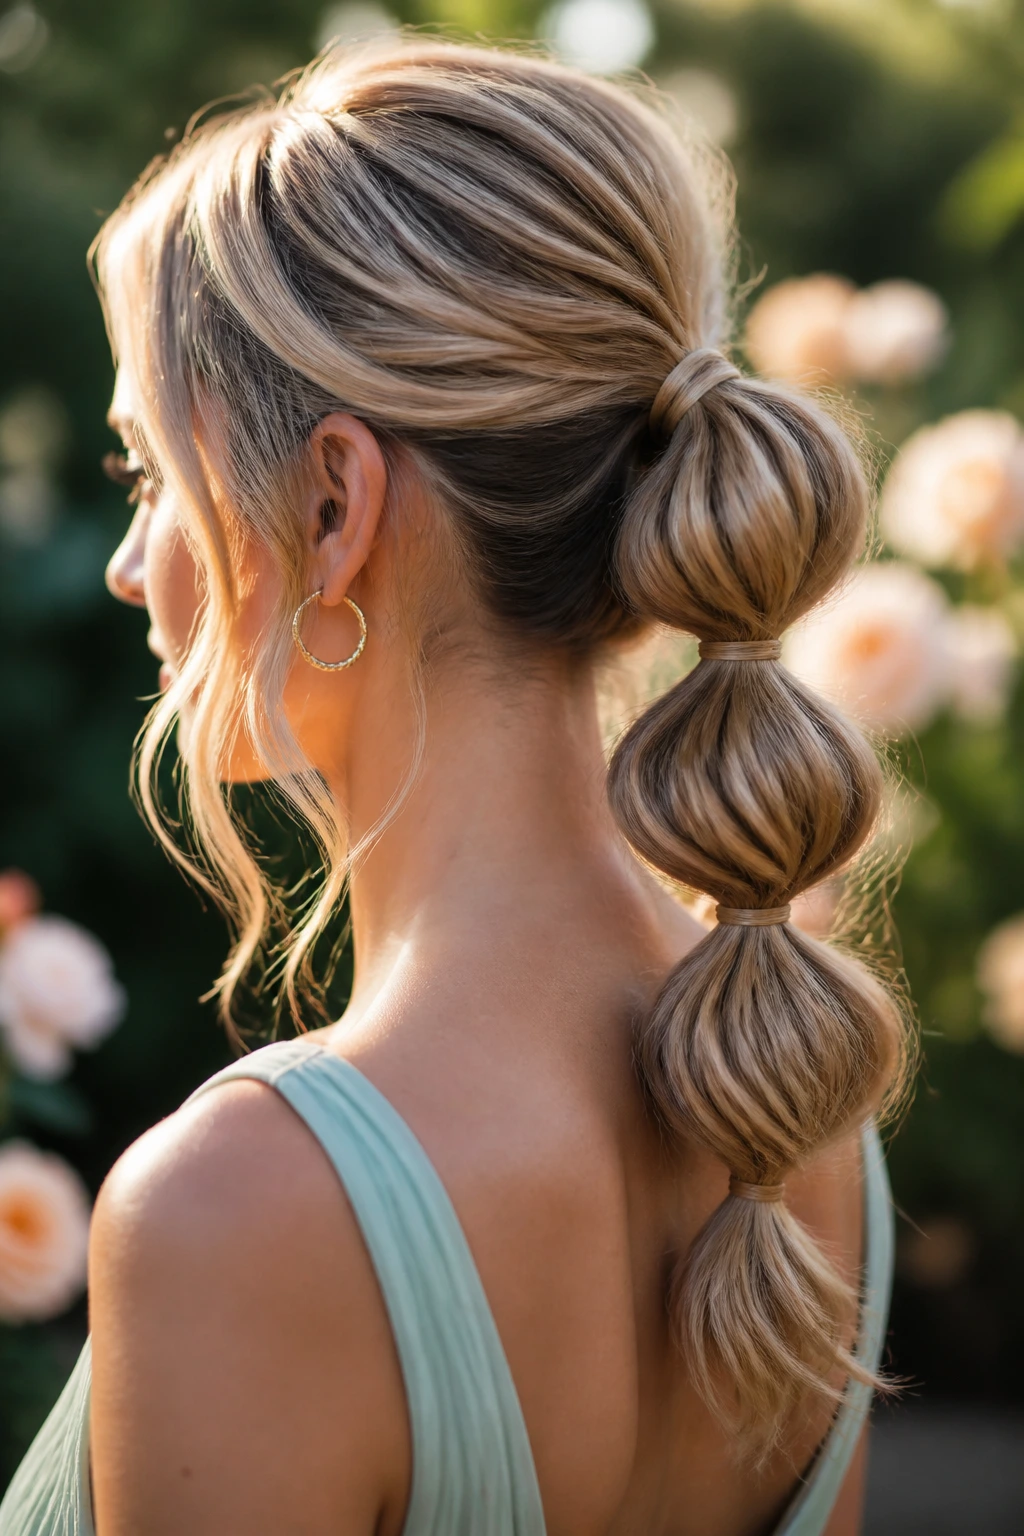
A bubble ponytail is not technically a bun, but on long wavy hair it behaves like an updo because it lifts the length, keeps the hair controlled, and shows off the texture in a way that feels playful instead of precious. The bubbles also make long hair look intentionally styled, which is useful when the length tends to swallow simpler looks.
Tie the hair into a low or mid ponytail, then add elastics every 2 to 3 inches down the length. Gently pull each section between the elastics to puff it out into rounded bubbles. If your hair is very thick, use clear elastics or slim coated ones that won’t snag. If it’s fine, tease each section lightly before widening it.
The reason this works on waves is simple: the bends in the hair break up the shape, so the bubbles look softer and less toy-like. A glossy straight ponytail can make bubbles look obvious. Wavy hair gives them a bit more shape.
I like this for outdoor events or days when a full bun feels too fixed. You still get the hair off your neck, but the style keeps some swing at the ends. That movement matters. It keeps the look from turning stiff.
10. Gibson Tuck

The Gibson tuck is one of those old-school styles that deserves more attention than it gets. On long wavy hair, it looks soft instead of formal in the stiff, museum-piece sense. The tucked roll at the back gives you a clean shape, but the texture keeps the whole thing human.
Create a loose low ponytail, split the hair above the elastic a little, and tuck the length upward and into the gap. Then pin the roll across the back so it sits flat. If the ends are very long, fold them once before tucking. Otherwise, you end up stuffing hair into the pocket like a coat with too many receipts in it.
I like this style most when the waves are brushed just enough to soften the outline but not so much that they disappear. It’s one of the few updos that looks better when it has a little surface irregularity. A perfect Gibson tuck can look severe. A slightly loosened one looks expensive in a quiet way.
If your hair layers are short around the face, leave them out. They soften the front and keep the style from looking too historical. That tiny bit of looseness changes the whole mood.
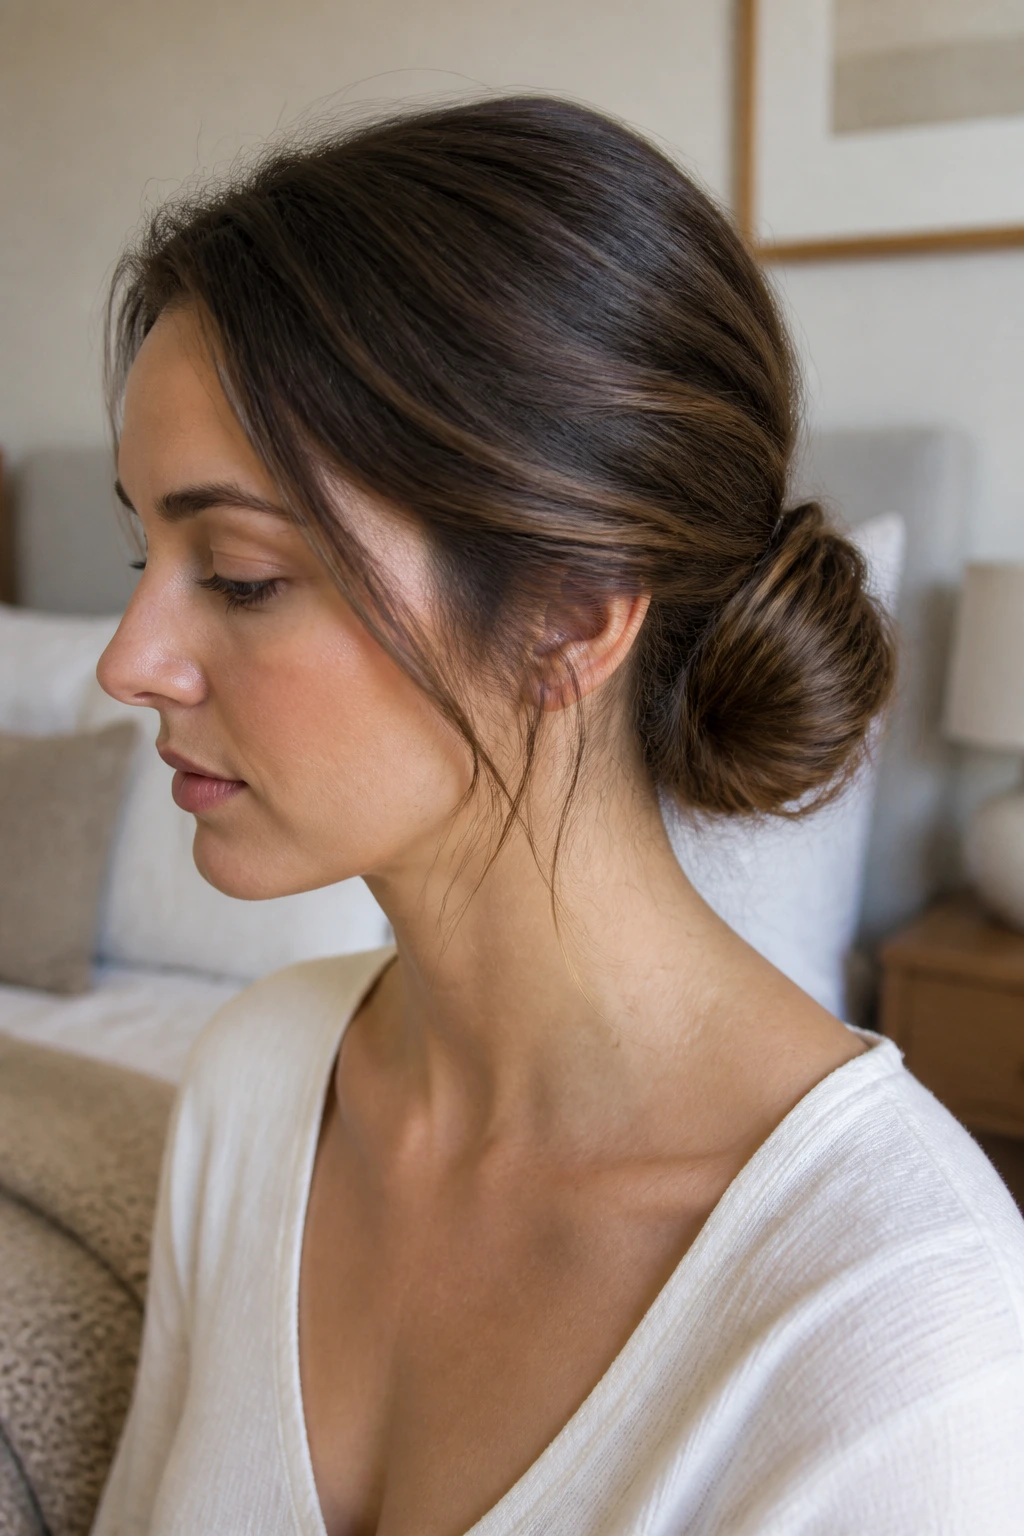
11. Knotted Low Bun
A knotted low bun is what happens when you want the hair to look organized but not pinned into submission. It’s one of the easiest long-hair updos because the “knot” does the visual work. Your job is mostly keeping it from pulling apart.
Take the hair into a low ponytail, split the length into two sections, and tie a simple overhand knot. Fold the remaining ends around the knot and pin them underneath. The wave pattern helps here because the ends do not need to lie perfectly flat to look finished. In fact, too much smoothing can make the knot look lumpy in a bad way.
This style is especially good for thick, wavy hair because the knot creates a shape without requiring a tight coil. If your hair is very long, you may need to fold the length twice. That’s fine. Just anchor each fold with a pin hidden under the knot.
I’d choose this for days when I want something quick that still looks like a hairstyle and not an emergency. It’s casual, but it has enough structure to read as deliberate. And if the knot sits a little off-center, that often makes it look better.
12. Side-Swept Twisted Updo
A side-swept twisted updo gives long wavy hair a softer line than a centered bun. The twist starts on one side, crosses behind the head, and gathers into a low pinned shape near the opposite nape. That diagonal line is flattering because it breaks up the bulk of long hair and keeps the style from feeling blocky.
What makes it work: The side sweep uses your waves as a visual line, not just a texture. Instead of forcing every piece to disappear into one compact knot, the style lets the front section curve across the head. On wavy hair, that curve looks natural even if it isn’t perfectly neat.
I’d build it with two loose twists rather than one heavy one. Twist each front section back, cross them, and pin them into a low tucked shape. If the hair is layered, you may need a few extra pins under the twist to stop it from creeping open. That’s normal with long hair. Long lengths carry weight.
Leave one thicker tendril in front of the ear if you want the style to look softer. Or don’t. A sleeker face line works too. The shape at the back matters more than people think, and the side sweep gives you room to play.
13. Braided Pony Wrap Bun

This style starts with a ponytail, but the braid around the base changes the whole feel. It’s one of my favorite easy updo hairstyles for long hair with wavy hair because it controls the length without hiding the texture. The waves stay visible in the braid and in the wrapped bun, which keeps the style from going flat.
Make a low or mid ponytail, braid the tail, then wrap the braid around the elastic to form a bun. Pin the braid end underneath. If you want a larger bun, gently widen the braid before wrapping it. If you want a neater look, keep the braid narrow and smooth the outer layer with a brush.
The nice part is that the braid acts like a belt around the base. It gives the bun a finished edge, and that helps a lot on long hair, where the shape can otherwise look like a lump of gathered length. Wavy hair makes the braid texture richer, so even a basic three-strand plait looks a little more built out.
I’d wear this style when I want something between casual and polished. It handles a scarf, a blazer, or a plain T-shirt without looking out of place. That flexibility is the real win.
14. Infinity Braid Bun
An infinity braid bun sounds fancier than it is. Once you know the braid pattern, the style is mostly a controlled wrap at the back of the head. On wavy hair, the loops look thicker, which is exactly what you want. A skinny braid can get lost in long lengths. A wavy one reads clearly.
Start with two front sections and cross them in a figure-eight pattern, adding hair as you go if you want a more secure hold. Gather the remaining length into a bun at the nape and tuck the braid into the base. The braid should frame the bun rather than disappear into it.
This style is a little more intricate than a simple twist, but it still qualifies as easy once you practice the hand motion. The key is keeping the braid close to the head so it doesn’t puff out. If the hair is layered, a few short strands may slip free from the braid. Pin them under the bun instead of chasing every one individually.
I like the infinity braid because it gives a plain bun some architecture. Without it, long wavy hair can collapse into one round mass. With it, the style has direction.
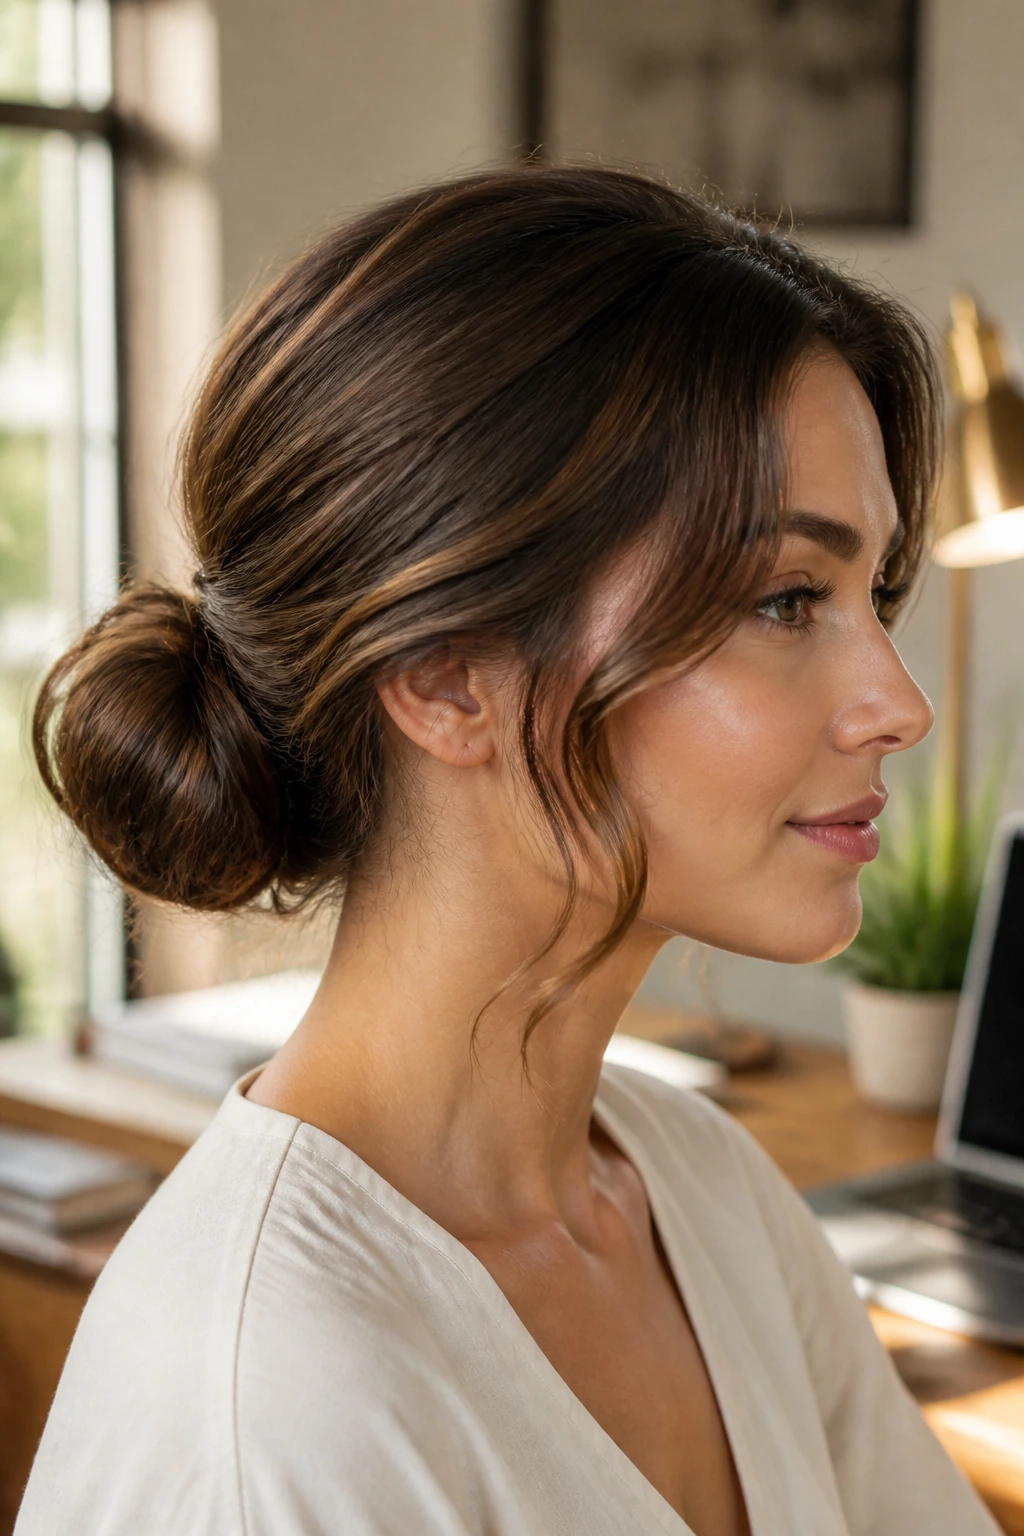
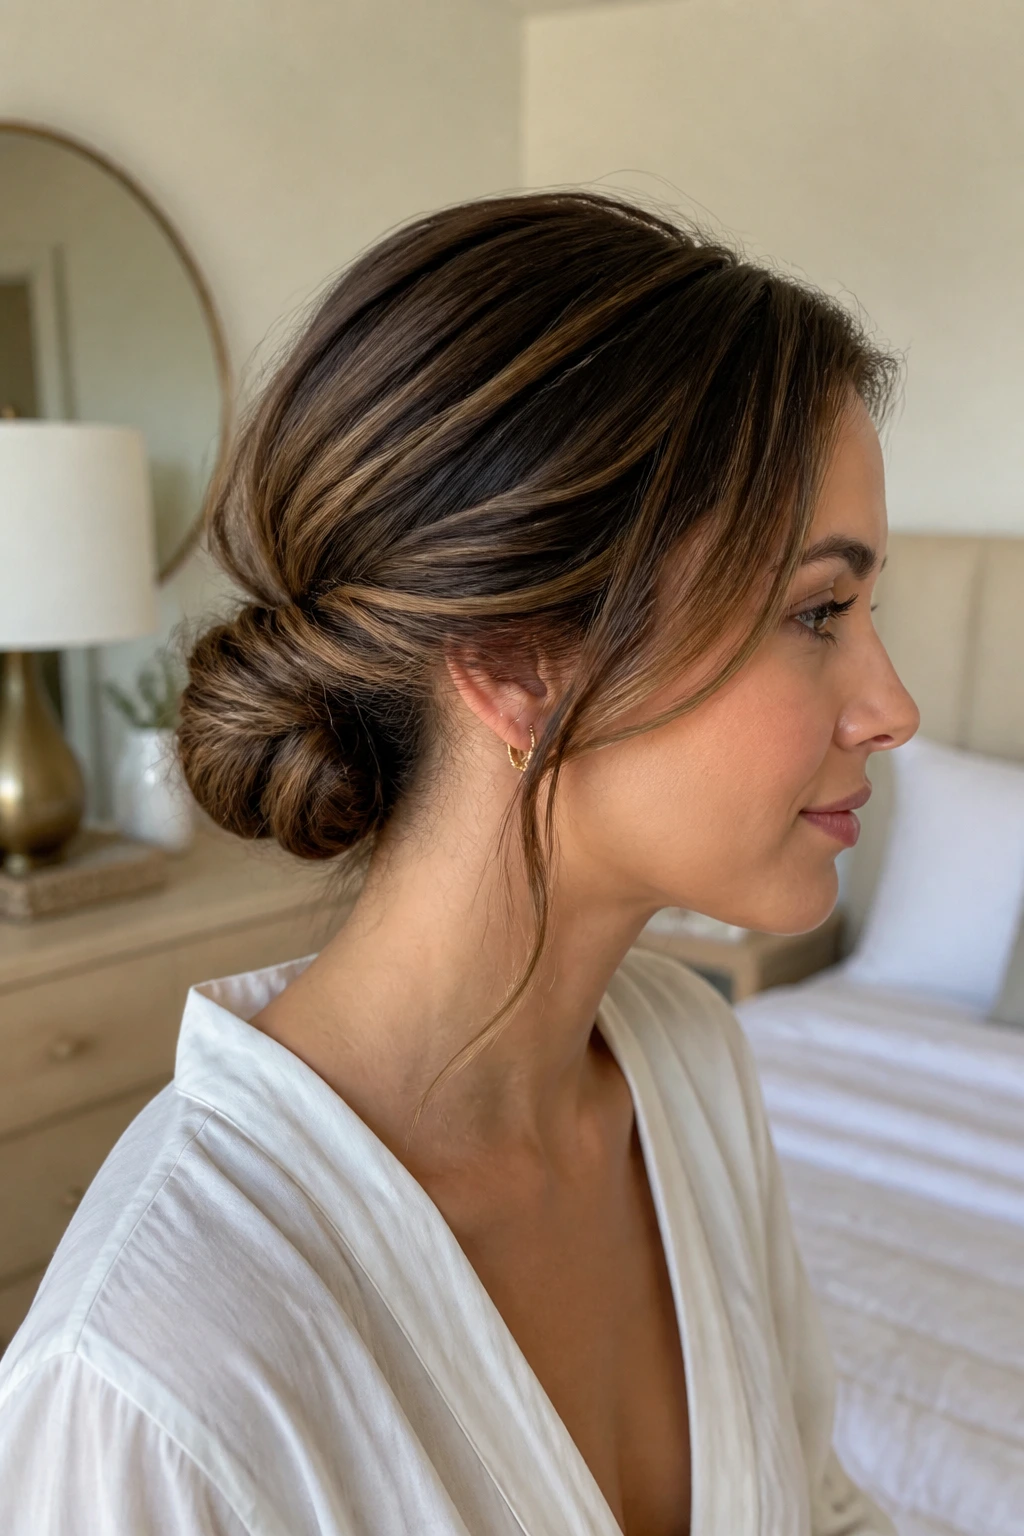
15. Sleek Low Bun
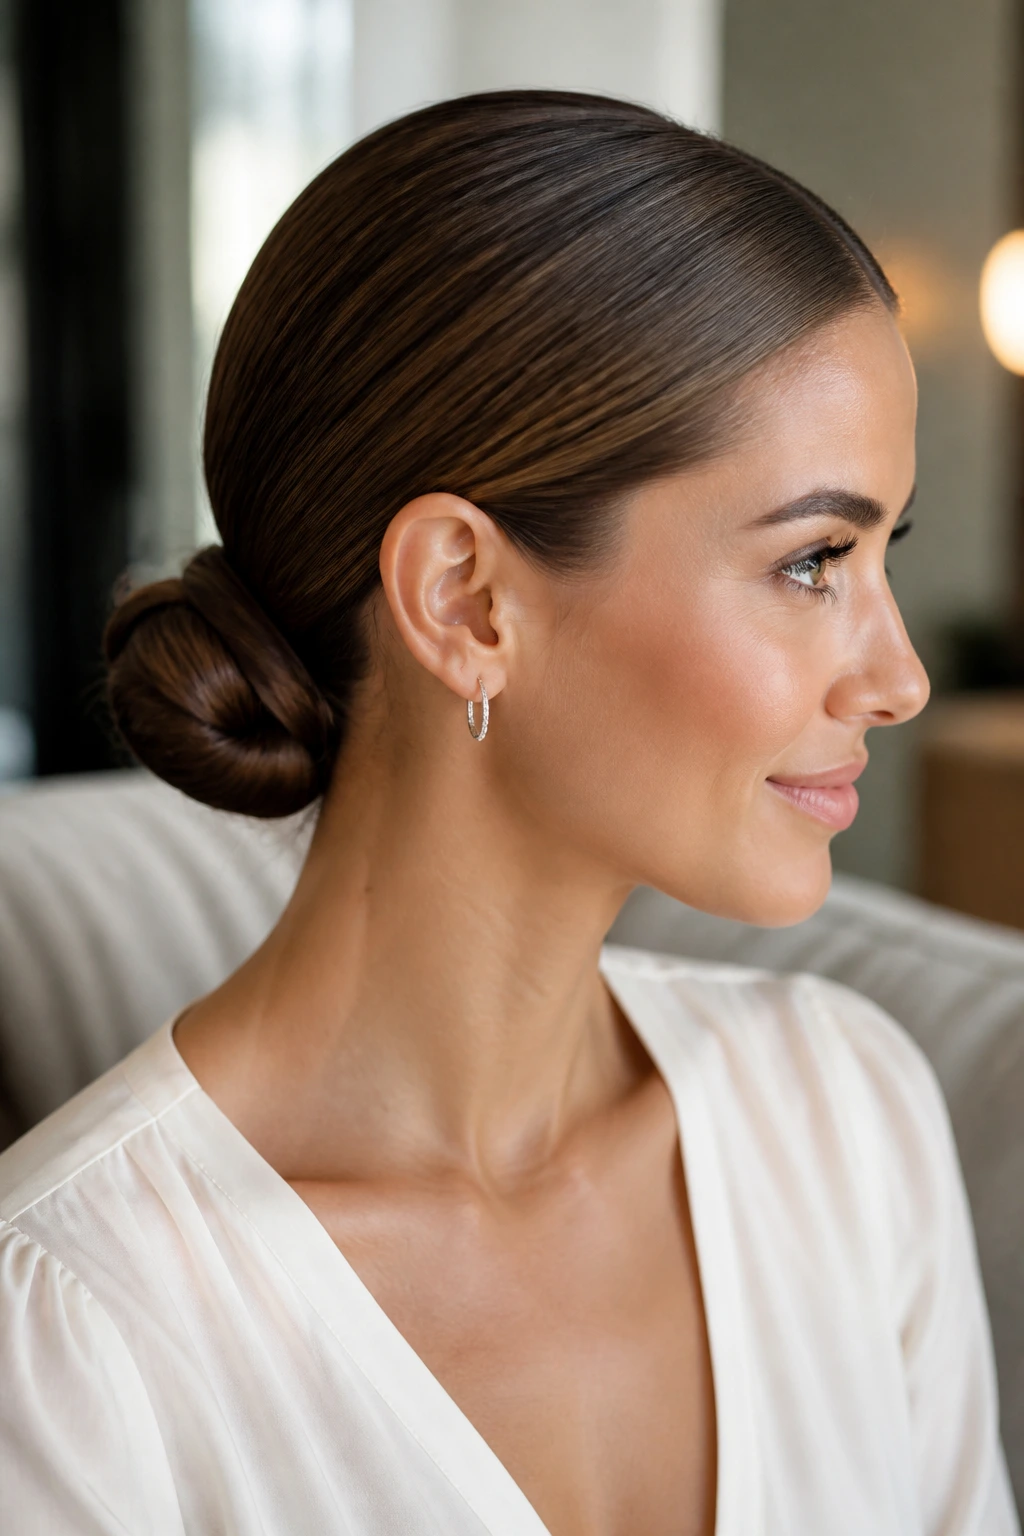
A sleek low bun on wavy hair is a study in restraint. You smooth the top, keep the bun compact, and let the shape do the talking. I’m partial to this one when the outfit is doing the heavy lifting and the hair needs to behave in the background.
Use a fine-tooth comb or soft brush and a small amount of smoothing cream along the surface, then pull the hair into a low ponytail. Twist the length into a tight coil and pin it flat against the nape. The tighter finish is what separates this from a messy bun, so the top should sit neat and the bun should feel anchored. Not stiff. Anchored.
Wavy hair can push back against sleek styles if you try to flatten every bend. I prefer to smooth only the outer layer and leave the understructure alone. That keeps the bun polished without making the hair look overprocessed. If you want extra hold, spray the brush, not the whole head. It gives you control without turning the hair crispy.
This style works best when the hair is dry, detangled, and not freshly conditioned at the roots. Too much slip and the bun will slowly slide lower than you planned. That’s a detail people notice only after they’ve spent the evening re-pinning it.
16. Rolled Tuck Bun
The rolled tuck bun has a little vintage energy, but it’s one of the easiest ways to get long hair off the neck without building a huge knot at the back. The roll folds the length inward in one motion, which is useful when the ends are too long for a simple bun to sit comfortably.
Pull the hair into a low ponytail, loosen the elastic just enough to create a small pocket above it, and roll the length upward and inward through that gap. Then pin the roll flat. If your hair is very long, you may need to roll in sections rather than all at once. That’s fine. The style doesn’t need to look engineered.
On wavy hair, the roll has a softer surface than on straight hair, so the tuck reads as gentle rather than rigid. That’s one reason I like it for daytime events. It sits neatly, but it doesn’t have the hard edge that some chignons get when the hair is slicked too tight.
If your ends keep poking out, use a second pin crossed over the first one. One pin holds the shape. Two pins stop the mutiny.
17. Loose Dutch Braid Updo
A loose Dutch braid updo is what I suggest when someone wants the security of a braid and the softness of an updo without spending half the morning on it. The braid rides on top of the hair instead of sinking in, so long wavy hair gets a raised, visible pattern that holds up well through the day.
Braid from the hairline backward, keeping the sections wide rather than tiny. Once you reach the nape, pin the remaining length into a low bun or tucked fold. If you want more volume, gently tug the braid apart from the outside only. Don’t pull the center apart. That’s how it falls apart in a hurry.
I prefer this style on hair that has a little grit to it. Freshly washed waves can be too smooth, especially if the braid is meant to stay raised. A dusting of dry shampoo near the roots usually fixes that. It also helps the braid feel thicker under your fingers, which is useful when the hair is long and heavy.
Compared with a French braid, the Dutch version has more visual presence. It sits on the surface instead of blending in. That makes it a better choice when you want the braid itself to be part of the look.
18. Low Ponytail Flip Bun
This one is fast, a little clever, and oddly flattering on long waves. The low ponytail flip bun uses the elastic as a hinge, so the length flips through itself and forms a tucked loop. It looks neat from the side and still has softness because the waves keep the loop from looking rigid.
Tie a low ponytail, split the hair just above the elastic, and flip the length up through the opening. If there’s enough hair left, tuck it through again or coil the ends under. Pin the sides if the loop feels loose. The style works best when the ponytail sits low and slightly loose, not yanked tight at the base.
I like this one because it solves the “what do I do with all this hair?” problem without asking for a braid, clip, or extra hands. The wave pattern gives the loop body, which keeps it from hanging limp. If your hair is very thick, the loop may sit wider and lower. That can look better, honestly.
It’s a smart choice for quick mornings. Not because it’s lazy. Because it’s efficient, and those are not the same thing.
19. Scarf-Wrapped Updo
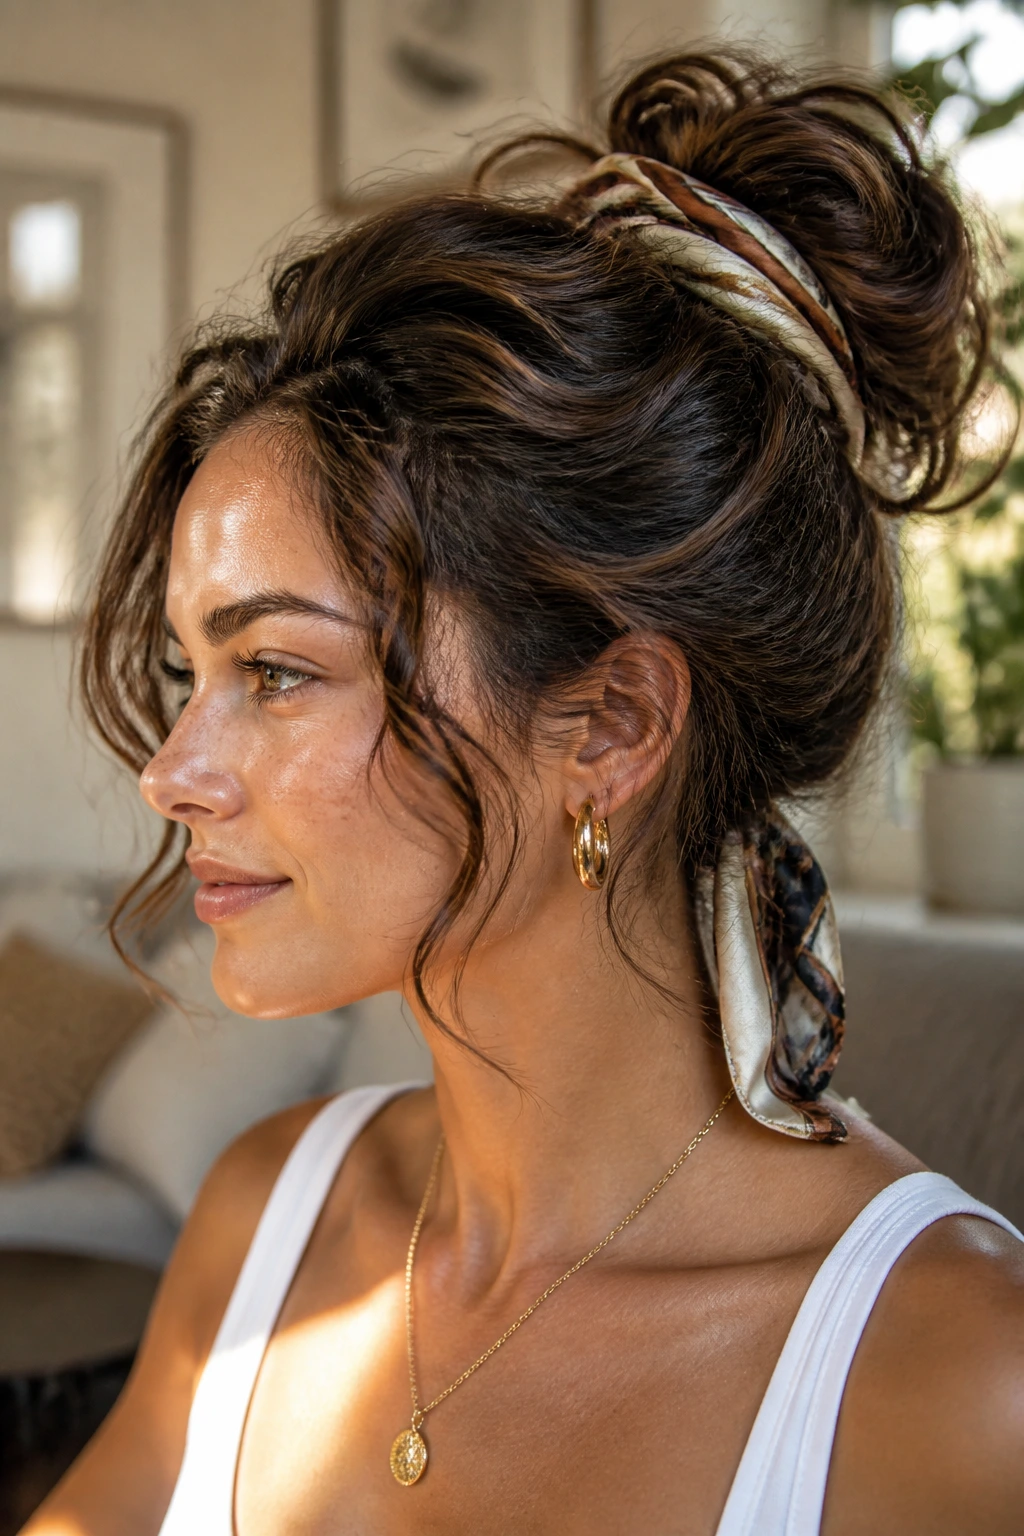
A scarf-wrapped updo can save a plain bun when you want the style to look finished without adding more hair work. The scarf breaks up the shape and gives the eye something to land on, which is handy on long wavy hair when the bun itself can feel large or heavy.
Start with a bun or twist you already like, then thread a narrow scarf or ribbon through the base and wrap it once or twice around the hair. Tie it under the bun or at the side, depending on the look you want. A silk scarf gives a softer finish. A cotton one looks more casual and holds a little better if your hair is slippery.
The scarf also hides small flaws. If one side of the bun sits slightly higher, the fabric can visually balance it out. That’s a useful trick when you don’t want to spend another ten minutes re-pinning.
I like this most with low buns and braided styles. The fabric sits naturally there, and the length of the hair doesn’t compete with it. If the scarf is printed, keep the rest of the style quieter. If the scarf is plain, you can make the bun a little messier.
20. Half-Up Braided Bun
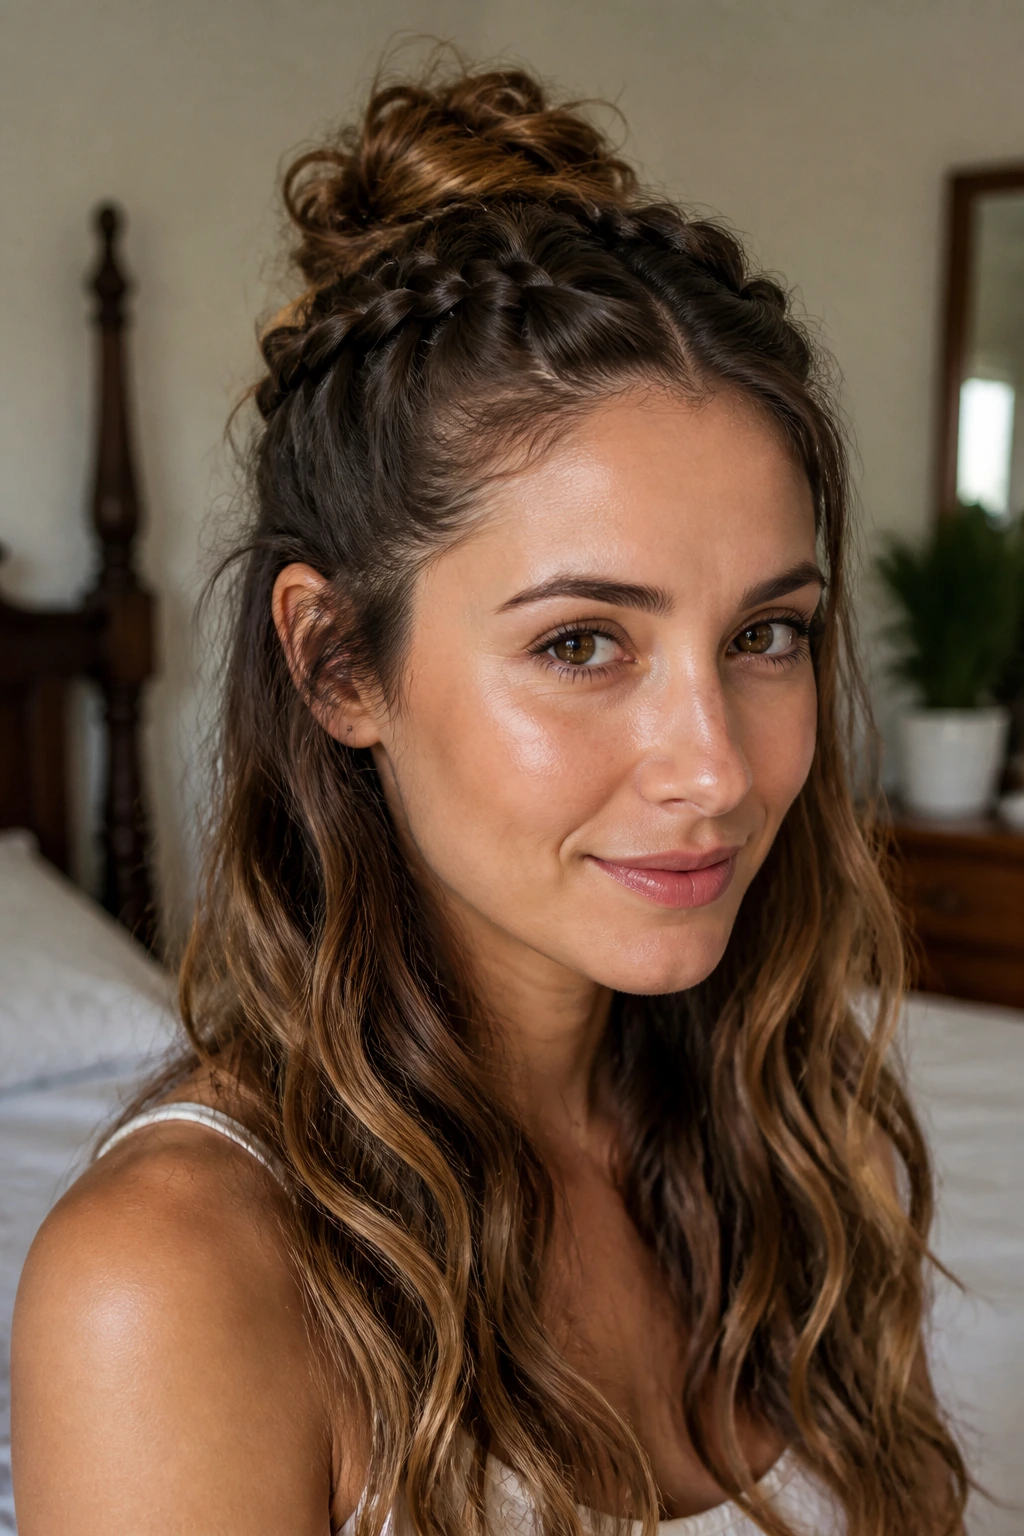
This style gives you the best part of an updo without losing the wave pattern through the length. You braid the top section, twist or coil it into a small bun, and leave the bottom half free. On long wavy hair, the contrast is excellent: a compact top with loose movement underneath.
Why I like it: The braid controls the front and crown, which is where long waves tend to puff or fall forward. The bun stays small enough to be comfortable, and the lower length still shows off the texture. If your hair has layers, this style handles them well because the free half can absorb the shorter pieces instead of fighting them.
Start with a half-up section from temple to temple, braid it back, and wrap the braid into a mini bun. Pin it securely. Then fluff the lower waves with your fingers, not a brush. A brush turns the finish too puffy and breaks the wave pattern.
This is a good choice when you want something youthful without looking childish. That balance is harder than it sounds, and the braid-bun combo pulls it off easily. Keep the bun small. If it gets too large, it swallows the style.
21. Pin-Up Twist Roll
A pin-up twist roll has a bit of drama, but the technique is straightforward: roll sections inward and pin them flat against the head. On long wavy hair, the rolls create a neat structure while the texture keeps the finish soft and touchable instead of helmet-like.
Take one side section at a time, roll it backward toward the nape, and pin it in place. Repeat on the other side, then gather the remaining length into a low tucked shape or small bun. The rolls should sit snugly, but they do not need to be mirror images. In fact, a little unevenness often looks better because it avoids that overly polished, salon-window feel.
I like this style for dressier outfits because it frames the face and keeps the back clean. It’s also a good option if your hair tends to split at the crown when you pull it straight back. The side rolls give you a controlled shape without flattening everything.
Use long pins or sturdy bobby pins here. Short pins can hold one roll, but they won’t usually survive thick, long hair for a full day.
22. Folded Wave Knot
The folded wave knot is the style I’d hand to someone who wants one last easy option that still looks thoughtful. It takes the length, folds it into itself, and lets the natural wave pattern keep the edges soft. It’s less rigid than a bun and less fussy than a braid, which is a nice place to land.
Pull the hair low, split the length into two or three loose folds, and pin each fold into a compact knot at the nape. The shape should feel layered, not packed. On long wavy hair, the folds stack neatly because the bends help hide where one section ends and the next begins. That’s the reason this works at all.
If the style looks too flat, lift the crown a little before pinning. If it looks too round, press the center of the knot down with one hand while you anchor the sides. Tiny adjustments matter here. A few millimeters change the whole silhouette.
This is one of those styles that looks better after you’ve worn it for an hour. The top loosens a touch, the waves settle, and the knot stops looking newly arranged. That’s the sweet spot.
Why Wavy Hair Gives These Updos a Head Start
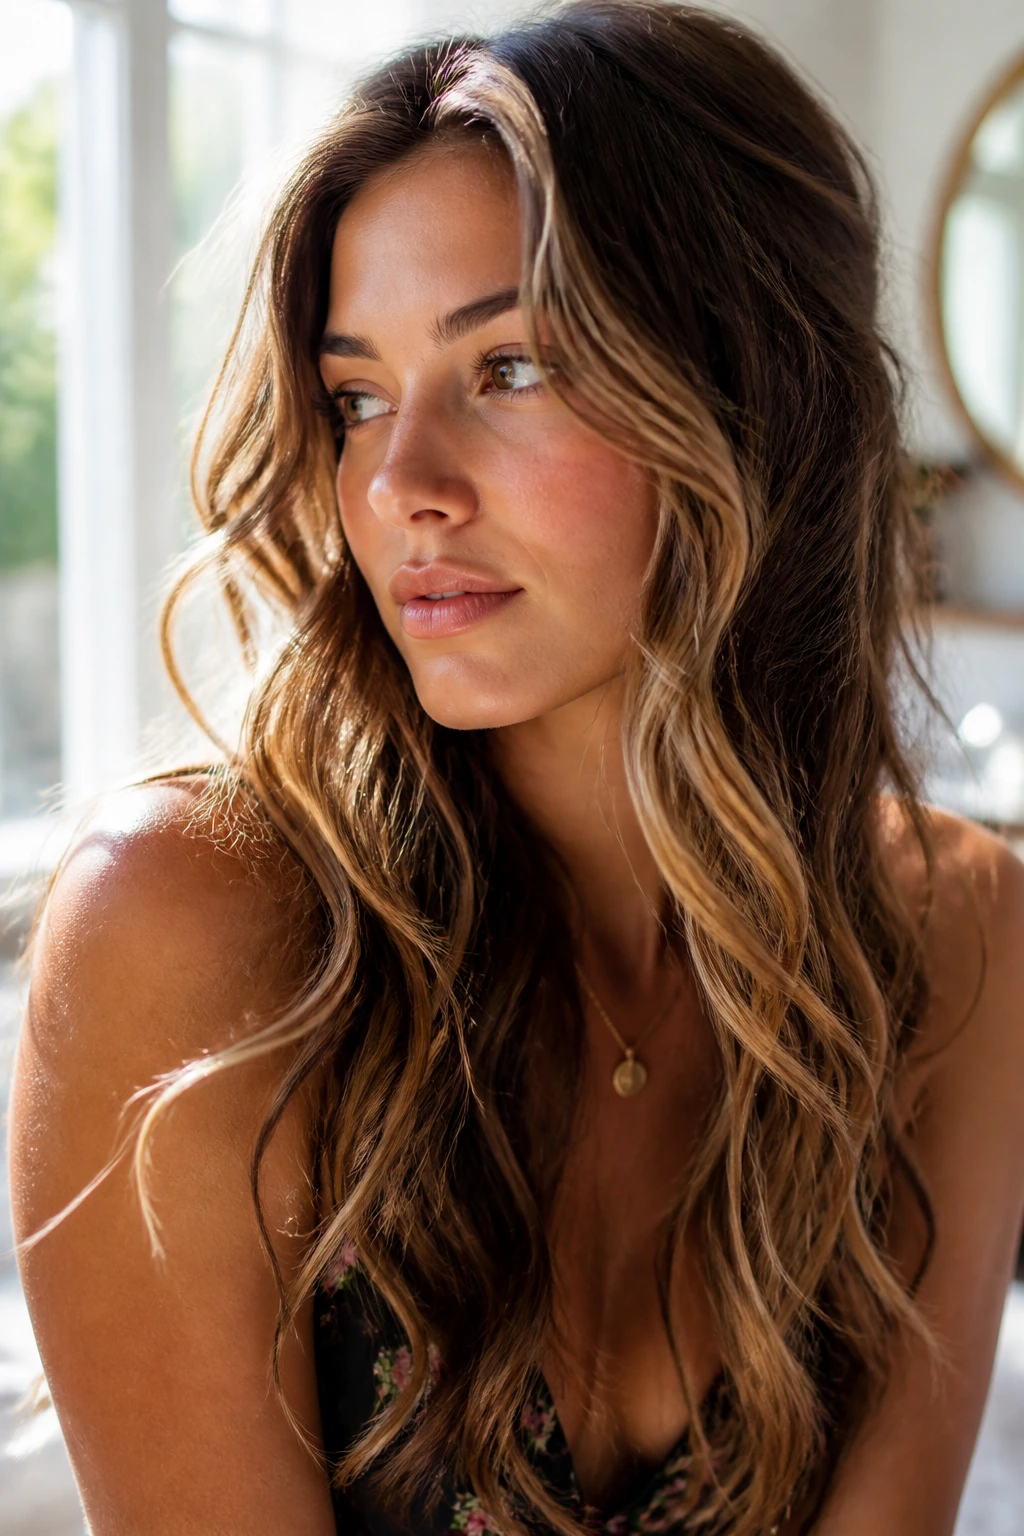
Long wavy hair has a built-in advantage that straight hair often has to fake. The bends give the pins something to grab, the texture breaks up blunt lines, and the surface catches light in a way that makes even simple twists look layered. You do not need to erase the wave to make the style work. You need to choose a shape that can carry it.
The biggest mistake people make is treating wave texture like a problem to solve. It is usually the reason the updo looks good in the first place. Those little bends around the nape keep a bun from looking like a ball. The volume at the crown keeps a low twist from sinking into the head. And if a few strands escape, they tend to soften the style instead of ruining it.
Hair length changes the game too. With long hair, the weight can pull a style down if the base is weak. That is why low buns, tucked rolls, and braided anchors tend to hold better than styles that rely on one elastic alone. You want the structure to distribute the weight. One pin doing all the work will lose, every time.
The Pins, Clips, and Texture Spray That Actually Help
A good updo on long wavy hair starts with tools that match the hair, not cute accessories that give up at the first sign of density. I’d keep a pack of strong bobby pins, a handful of U-pins, a few snag-free elastics, and one large claw clip in easy reach. That covers nearly everything in this collection.
Bobby pins: choose the longer, sturdier ones with a little bend in the center. They hold thicker sections better than flimsy decorative pins.
U-pins: useful for buns and French twists when you want to secure shape without flattening the style.
Snag-free elastics: better for ponytails and braid bases because they grip without chewing up the ends.
Texture spray or dry shampoo: gives slippery waves some bite before twisting or braiding.
Fine-tooth comb and soft brush: use the comb only when you need a sleek finish; the brush is better for smoothing the surface without pulling too much texture out.
Sectioning clips: small but useful. They keep one side of the hair out of the way while you build the other.
I also like having a mirror that lets you see the back of your head, because guesswork is overrated. The place where a style usually fails is the nape, not the front.
How to Prep Long Waves Before You Start Twisting

You can get away with skipping prep on a few styles, but long wavy hair usually behaves better with a small amount of setup. Start with detangled hair, even if you plan to keep the finish soft. Knots near the ends make pinning harder and can leave a lumpy base under the bun.
If the hair is freshly washed, use less conditioner at the roots than you think you need. Slippery roots make updos slide. A little dry shampoo at the crown and behind the ears gives the shape something to hold on to. If the hair is day two or day three, you may not need much at all. That’s one reason waves are so useful.
For smoother looks, run a pea-size amount of smoothing cream or light gel over the outer layer only. Don’t coat the whole head. You’ll weigh the waves down and lose the body that makes these styles look full. For messier styles, mist the mid-lengths with texture spray and let it sit for a minute before you start. It should feel slightly rough, not sticky.
If you have a lot of layering, pay attention to the shortest pieces around the face and neckline. Those are the strands most likely to escape. Sometimes the fix is not more pins. Sometimes it’s a different section size.
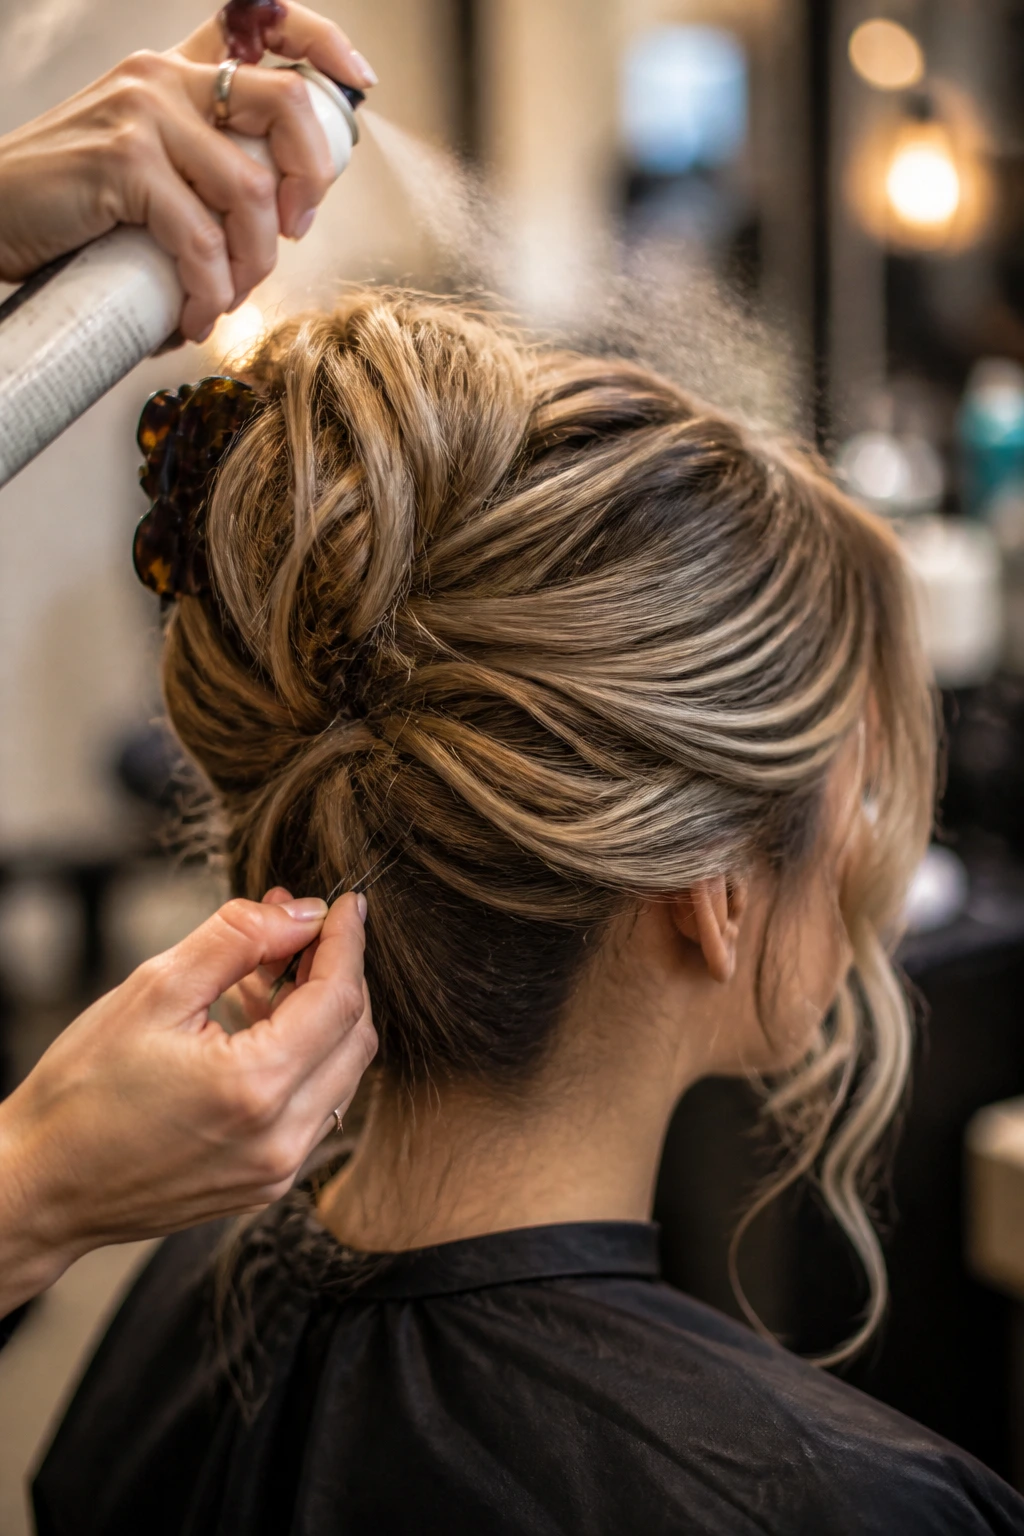
How to Keep the Style in Place All Day

A style can look good at 8 a.m. and start sliding by lunch if the anchor is weak or the hair is too clean. The easiest fix is to secure the base first and then shape the surface. People often do the opposite. They smooth everything, build the bun, and hope the pins will save it. They usually won’t.
Crossing pins is the simplest upgrade. Push one bobby pin in from one side of the bun, then another from the opposite side so they meet under the twist. That cross grip is far steadier than a single pin shoved into the top. For thick hair, use two crossed pairs at the nape and one more near the crown or braid base.
Humidity changes the rules a bit. In damp air, keep the style slightly looser and use a flexible-hold hairspray rather than a hard shell. A stiff finish can crack when the waves expand. If you’re heading somewhere windy, anchor the front sections first before building the back. Otherwise the front will keep escaping while you chase it from behind.
A style should feel secure, not painful. If the scalp starts tugging after an hour, the sections are too tight or too small. Fix that before you leave the house. Pain is not a styling strategy.
How to Choose the Right Updo for Work, Weddings, and Errands
Not every updo needs to do the same job. A Monday meeting asks for something different than a wedding guest look or a grocery-run knot. The shape, the finish, and the amount of looseness should all shift with the setting.
For work, I’d lean toward the low twisted bun, sleek low bun, or low braided chignon. They sit neatly, stay close to the head, and don’t demand constant touch-ups. If your office leans casual, the claw-clip twist or knotted low bun feels less rigid and still looks intentional.
For a wedding or dressier event, the braided crown bun, French twist, Gibson tuck, or pin-up twist roll carries more visual detail. Those styles give you room for earrings, a bare neckline, or a hair accessory without the hair competing with the outfit. They also benefit from a little face-framing softness. Not too much. Just enough to keep the shape from looking formal in a stiff way.
For errands, travel, or school pickup, the half-up top knot, bubble ponytail updo, or scarf-wrapped bun is the quickest route. They’re practical, but they still look styled. That matters on days when you don’t want to feel like you gave up.
Practical Tips That Make These Styles Easier
- Start with a little grit: If your hair is freshly clean, add dry shampoo or texture spray before pinning. Waves hold better when they are not silk-smooth.
- Pin from the inside out: Secure the base first, then add visible pins only if the style needs reinforcement. It looks cleaner and lasts longer.
- Use the weight of your hair on purpose: Long hair can drag a style down, so low buns and tucked rolls usually hold better than tall top knots.
- Leave a few face pieces on purpose: Two thin strands around the temples can soften almost any updo without making it look unfinished.
- Test the comfort before you leave: If the style tugs at the scalp or presses hard behind the ears, loosen it. A headache is a bad trade for neat hair.
- Keep extra pins in your bag: One loose pin after a commute is normal. Five loose pins means the base needs more support.
Common Mistakes That Make These Styles Fall Apart

The first mistake is over-smoothing. People brush out every wave, soak the hair in product, and then wonder why the bun slides. Wavy hair usually holds better with a little texture left in it. The fix is simple: smooth the top layer and leave the mid-lengths alone unless you’re going for a sleek look.
Another common problem is making the style too small for the amount of hair. Long waves carry weight. If the bun or twist is tiny, the length will pull it down. Build a wider base, fold the ends in sections, and use more than one anchor point.
Freshly washed roots can also sabotage the whole look. Slippery hair at the scalp lets the style creep downward. Dry shampoo at the crown and a bit of texture spray near the nape usually solve that. Don’t wait until the style is already falling apart.
A lot of people also place the pins in the wrong direction. If a pin slides in parallel to the hair, it tends to back out. Cross it against the direction of the twist, and the hold improves immediately. It’s a tiny adjustment that saves a lot of redoing.
Finally, too-tight styles cause the worst tradeoff of all: they hold, but they feel awful. If the scalp starts aching, the style is not “secure.” It’s too tight. Loosen the tension and add better pins instead.
Easy Variations for Fine Hair, Thick Hair, and Shorter Layers
The Soft Office Version: Smooth the crown, keep the bun low, and avoid big pulled-out sections. This version works when you want a cleaner finish that still respects wave texture. It’s especially good for meetings, interviews, or any setting where you want the hair to stay quiet.
The Romantic Loose Version: Pull two face-framing pieces, loosen the crown by a half-inch, and leave the bun or twist slightly off-center. That small asymmetry gives the style a softer line. It’s the easiest way to make a basic updo feel more finished for an evening out.
The Thick-Hair Anchor Version: Use two elastics close together at the base, then pin the length in sections instead of trying to force all the hair into one loop. Thick waves need distributed support. If one pin feels like it’s carrying everything, it is.
The Fine-Hair Boost Version: Tease the crown lightly and use texture spray before you twist. Fine waves can look beautiful in updos, but they need a little lift at the roots so the style doesn’t collapse into the head.
The Layer-Friendly Version: Let shorter ends live around the temples and nape rather than chasing every single strand into the bun. Layers often look better when they’re allowed to soften the outline. That’s not a compromise. It’s the shape working with your haircut.
How to Refresh the Style the Next Day
Most of these styles can be worn, touched up, and worn again if you treat them kindly. A low bun, French twist, or braided style usually survives overnight better than a high knot because it sits flatter against the head. If you plan to keep the style, sleep on a silk pillowcase or wrap the hair with a silk scarf to cut friction.
In the morning, don’t rip the style apart and start over unless you need to. Check the pins, smooth the crown with your hands, and mist the surface lightly with water or a leave-in spray if the waves have gone fuzzy. A tiny bit of dry shampoo at the roots can bring back grip without making the hair chalky.
If the style is meant to last through a second day, choose one with a braid or tuck rather than a loose bun. Braids keep the shape together when the hair starts to loosen. A messy knot can look cute on day one and tired on day two. That’s the tradeoff.
For health, give the scalp a break between tight styles. Alternate low tension looks with looser ones. Long hair can handle a lot, but the roots and edges don’t love being pulled the same way every day.
Frequently Asked Questions
Which updo works best on freshly washed wavy hair?
The low twisted bun, Gibson tuck, and sleek low bun usually behave best if you’ve just washed your hair. They rely on clean lines more than gritty texture, though a little dry shampoo at the roots still helps. If the hair is extra slippery, wait an hour after drying before you start pinning.
How do I keep long wavy hair from slipping out of a style?
Use texture spray before you pin, then anchor the base with crossed bobby pins or a strong elastic. The slip usually starts at the roots or at a heavy fold in the back, so fix those two spots first. If you’re still losing hair, the section is probably too smooth or too small.
Can I do these styles if my hair is layered?
Yes, and layers often make the result softer. The trick is not to fight every short piece. Let a few face-framing layers stay out, and pin the shorter ends under the bun or twist instead of trying to force them into the main coil.
What if my waves are frizzy?
Use that texture to your advantage. A light smoothing cream on the surface or a touch of hair oil at the ends can calm the frizz without flattening the whole style. Too much product will weigh the waves down and make the style collapse.
Do I need heat tools to make these updos work?
No. Most of these styles are better on naturally wavy hair, air-dried hair, or hair that has been rough-dried with a diffuser. Heat can help with smoothing a sleek bun, but it is not necessary for the braided and twisted looks.
Which styles are best for thick hair?
Low braided chignons, braided pony wrap buns, rope-braid buns, and folded tuck styles usually handle thickness better than tiny top knots. Thick hair needs a wider base and more pins, not more force. If a style feels bulky, split the hair into two sections before folding it in.
Can I wear a claw clip all day with long hair?
Yes, if the clip is large and strong enough. The style should sit with some tension in the twist, but not so much that the clip has to bite through all the weight. If it starts sliding, switch to a clip with deeper teeth or add one hidden pin under the twist.
What’s the fastest style if I’m running late?
The claw-clip twist and half-up top knot are the quickest in this collection. Both can be done in under five minutes once you know where you want the hair to sit. A little texture spray before you start makes them more reliable.
How tight should an updo feel?
Secure, not strained. If you can feel your scalp pulling, the style is too tight or the weight is sitting in the wrong place. A good updo stays put because of good pinning and sectioning, not because it hurts to move.
The Styles I’d Reach For First
If you only try a few of these, start with the low twisted bun, the braided pony wrap bun, and the half-up top knot. Those three cover a lot of ground without asking your hair to do anything unnatural. They work with waves instead of sanding them down.
That’s the real trick with long wavy hair. Stop trying to make it look like somebody else’s texture, and the whole process gets easier. The bends become the design, the pins become the structure, and the style lasts longer because it was built on the hair you actually have.
And once you’ve got one or two favorites, the rest of the list gets easier to play with. Keep a few pins close, leave a little softness at the front when it helps, and let the wave pattern stay part of the picture.