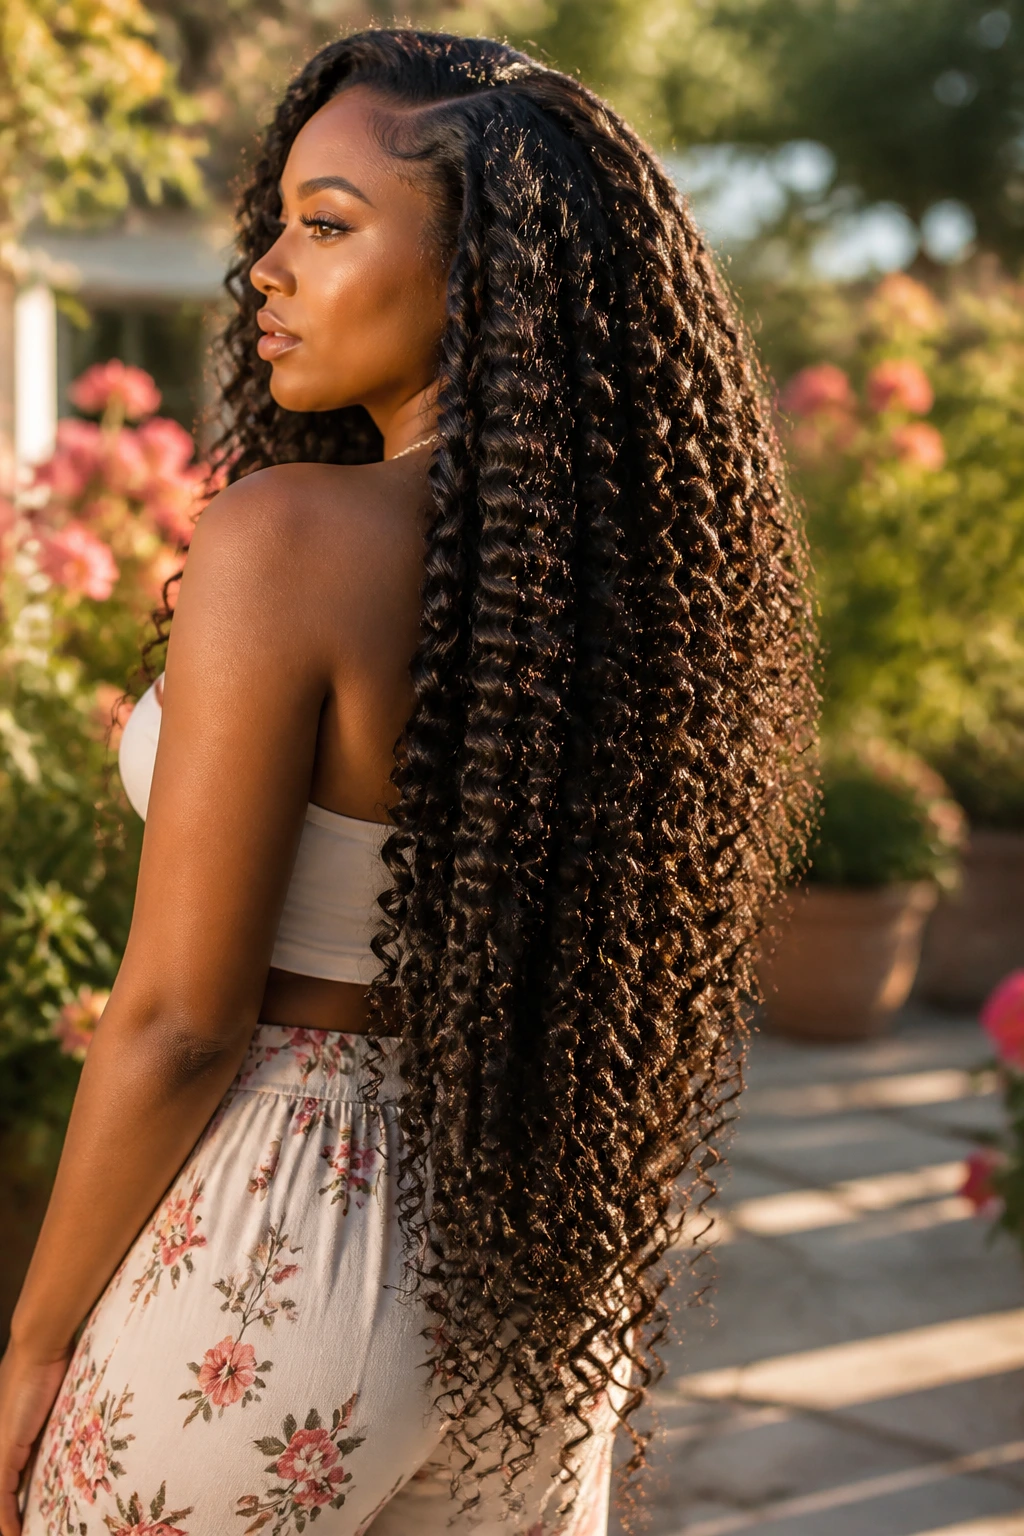
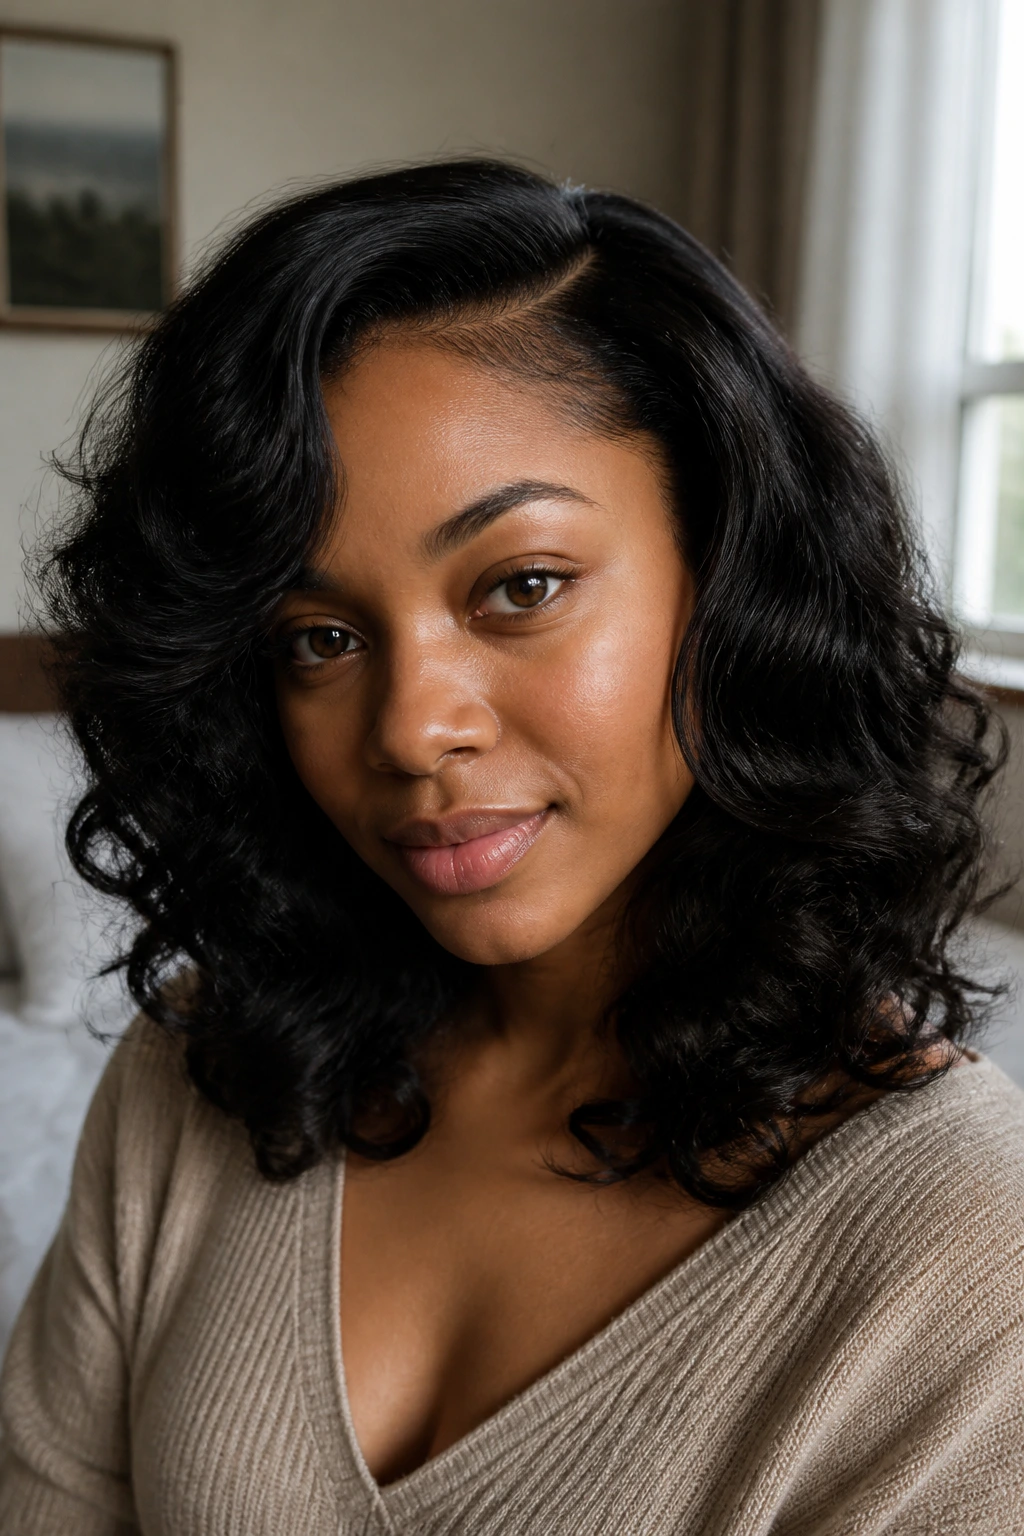
Chunky weaves for Black women with curly hair work because they let the curl do the heavy lifting. Too many installs try to flatten everything into submission, and that’s where the trouble starts: the roots puff, the ends lose shape, and the whole style looks busy in a way that never quite settles down. Thick curl patterns, clean parting, and a strong silhouette solve that.
The best versions have a shape you can read from across a room. A deep side part. A blunt bob that lands right at the jaw. A high ponytail with a wrapped base that keeps the eye moving upward. Nothing flimsy. Nothing fussy. Just enough density to look full, and enough curl to keep the style from feeling stiff.
That’s the appeal here. These looks can be polished for work, loose enough for weekends, and dramatic enough for a dress-and-heels night without needing a full restyle every few hours. Some lean sleek at the crown and soft through the ends. Others stay fluffy on purpose. Either way, the style should look rich, not overworked.
Why These Chunky Weaves Stand Out
-
They work with curl texture instead of fighting it: Water wave, deep wave, and kinky-curly bundles blend more cleanly with 3c to 4c hair, so the style reads as one shape instead of separate pieces.
-
They give you real silhouette control: Thick sections, blunt ends, and strong parts create a shape that holds up when humidity hits or the day gets long.
-
They can protect the hairline better than over-tight installs: Several of these looks use closures, low ponytails, or braid patterns that keep the perimeter calmer.
-
They cover a lot of ground without looking generic: You can go from chin-length bob to waist-length curls, and the finish changes with the part, density, and accessory choice.
-
They make accessorizing easier: Big hoops, gold cuffs, a scarf, or a bold lip can all work because the hair already has structure.
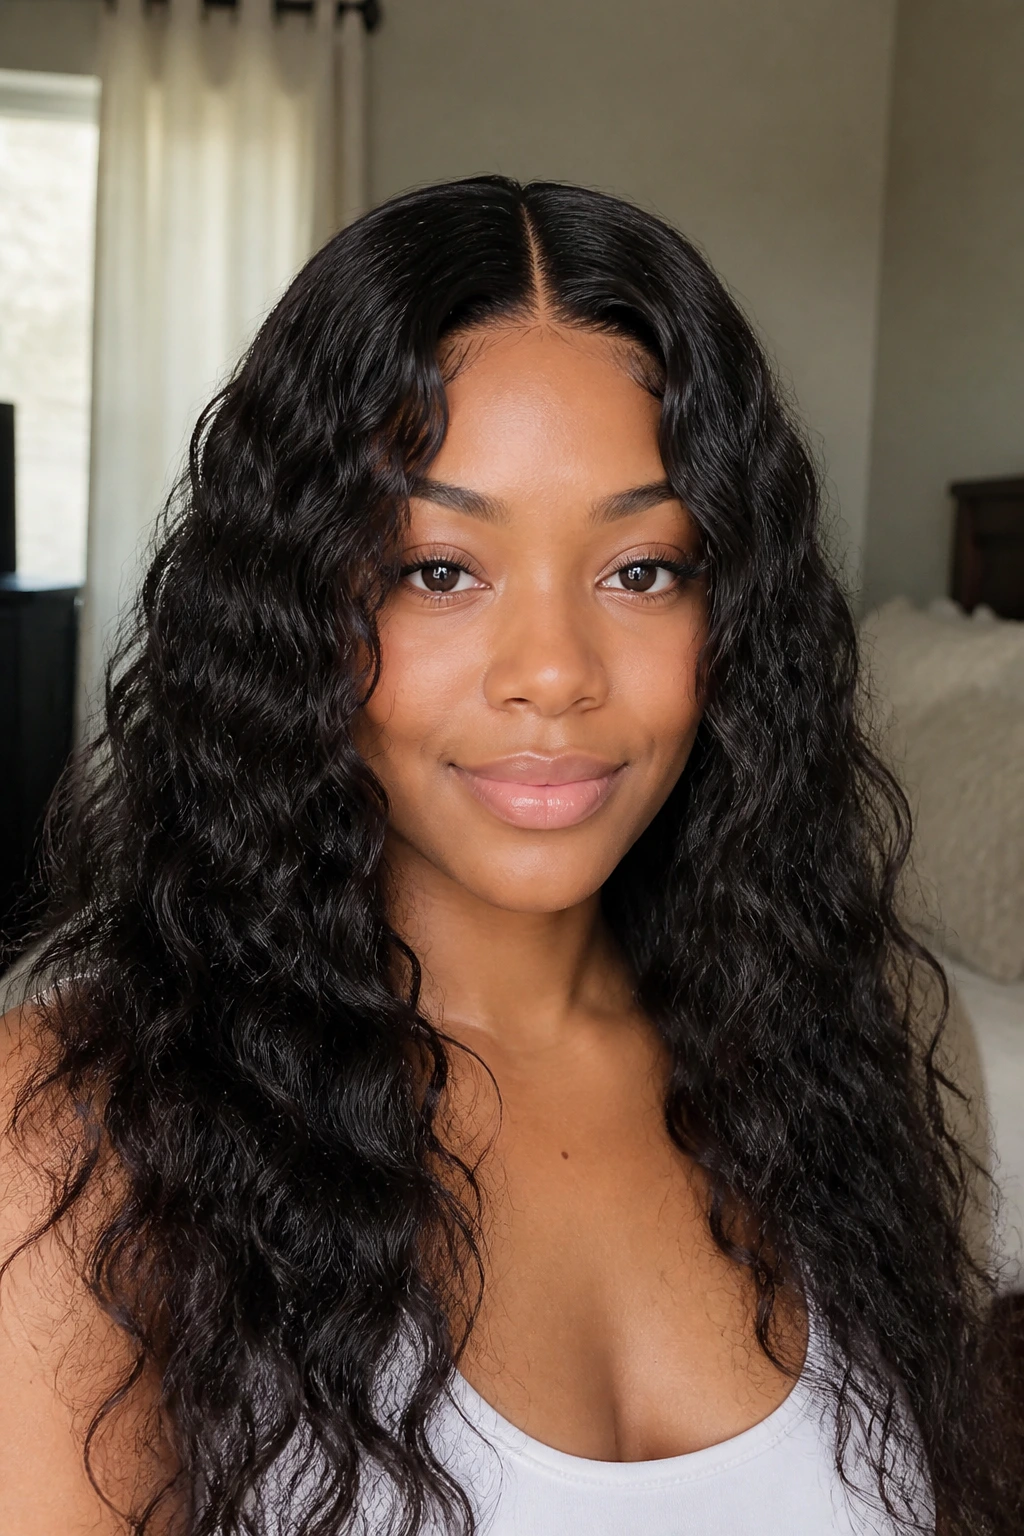
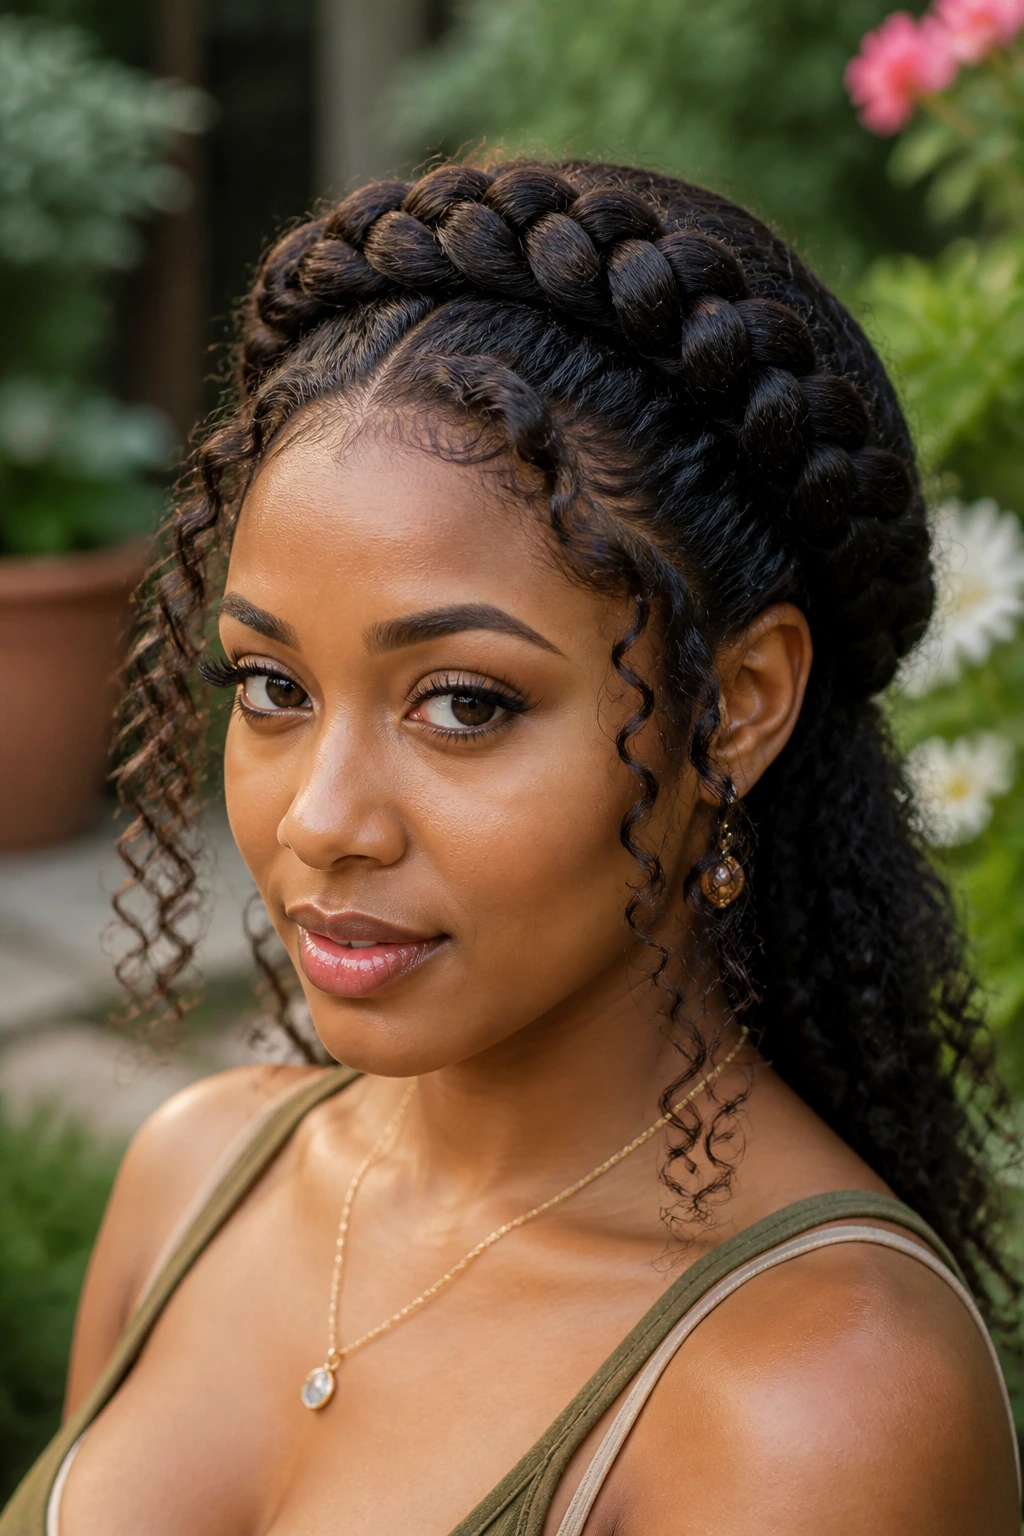
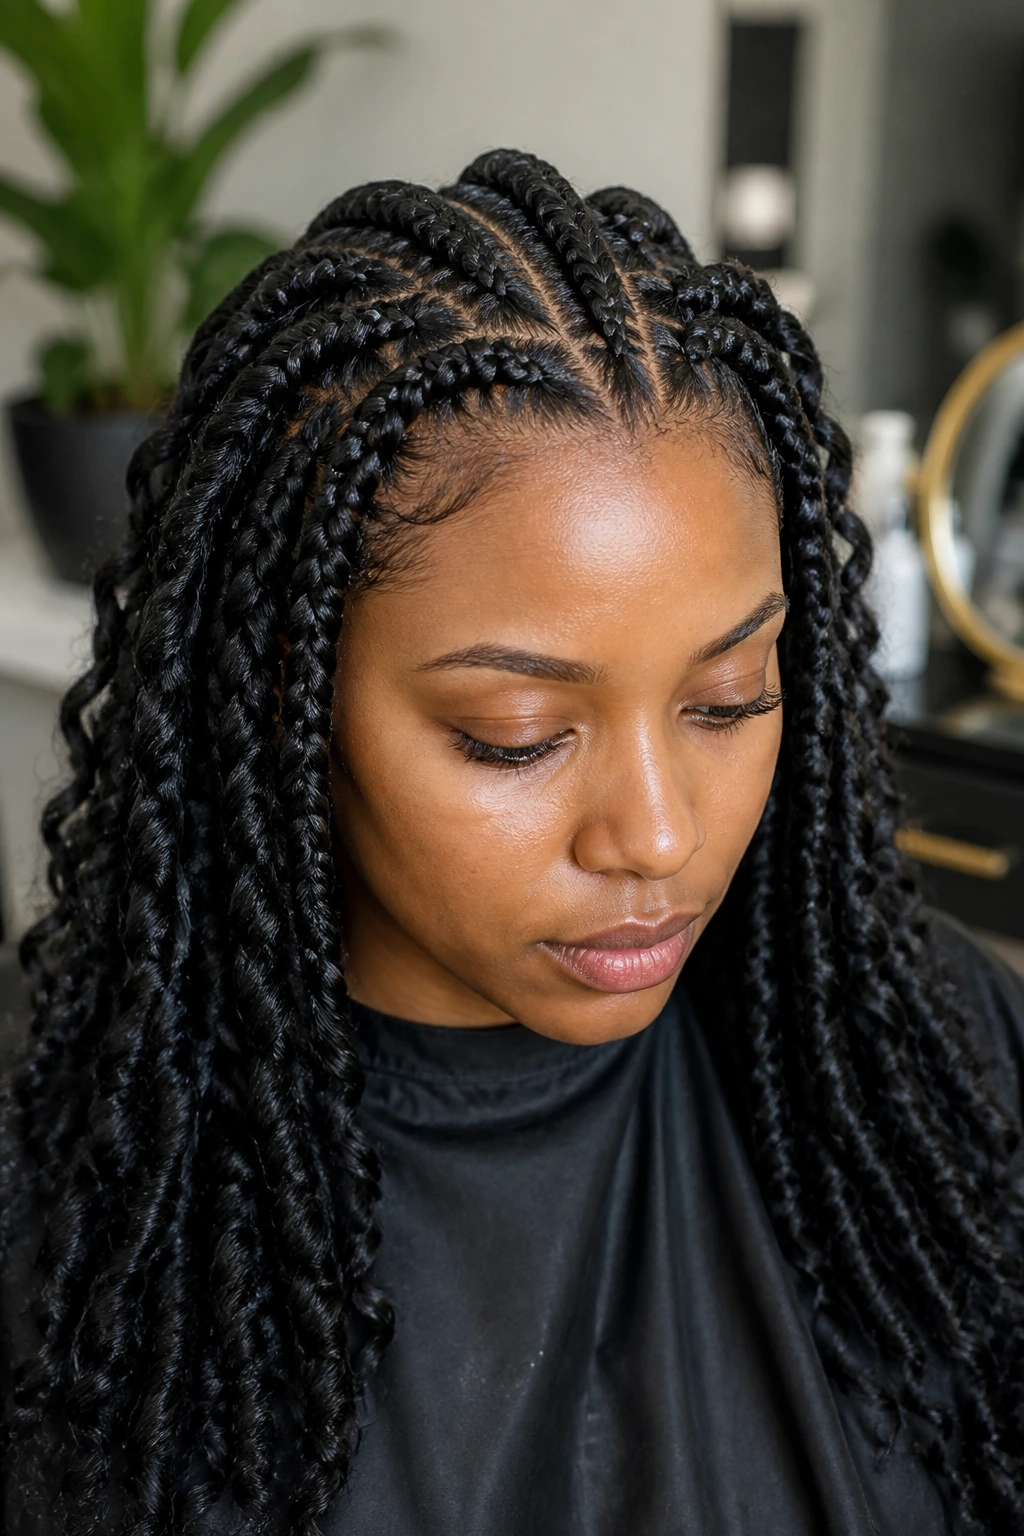
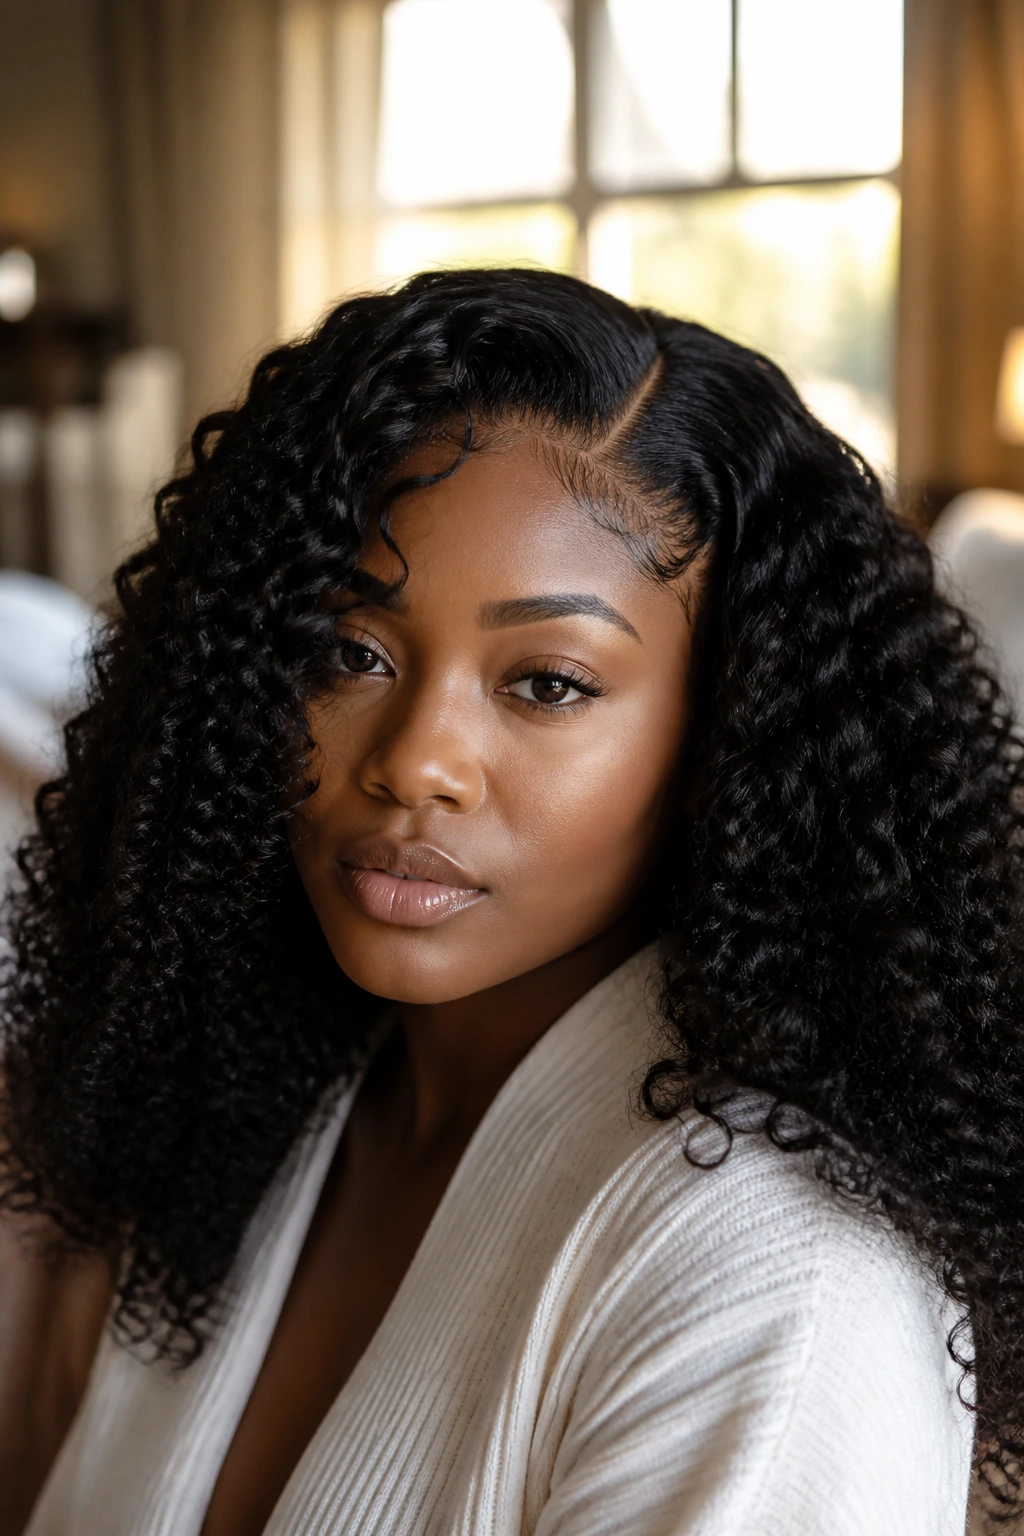
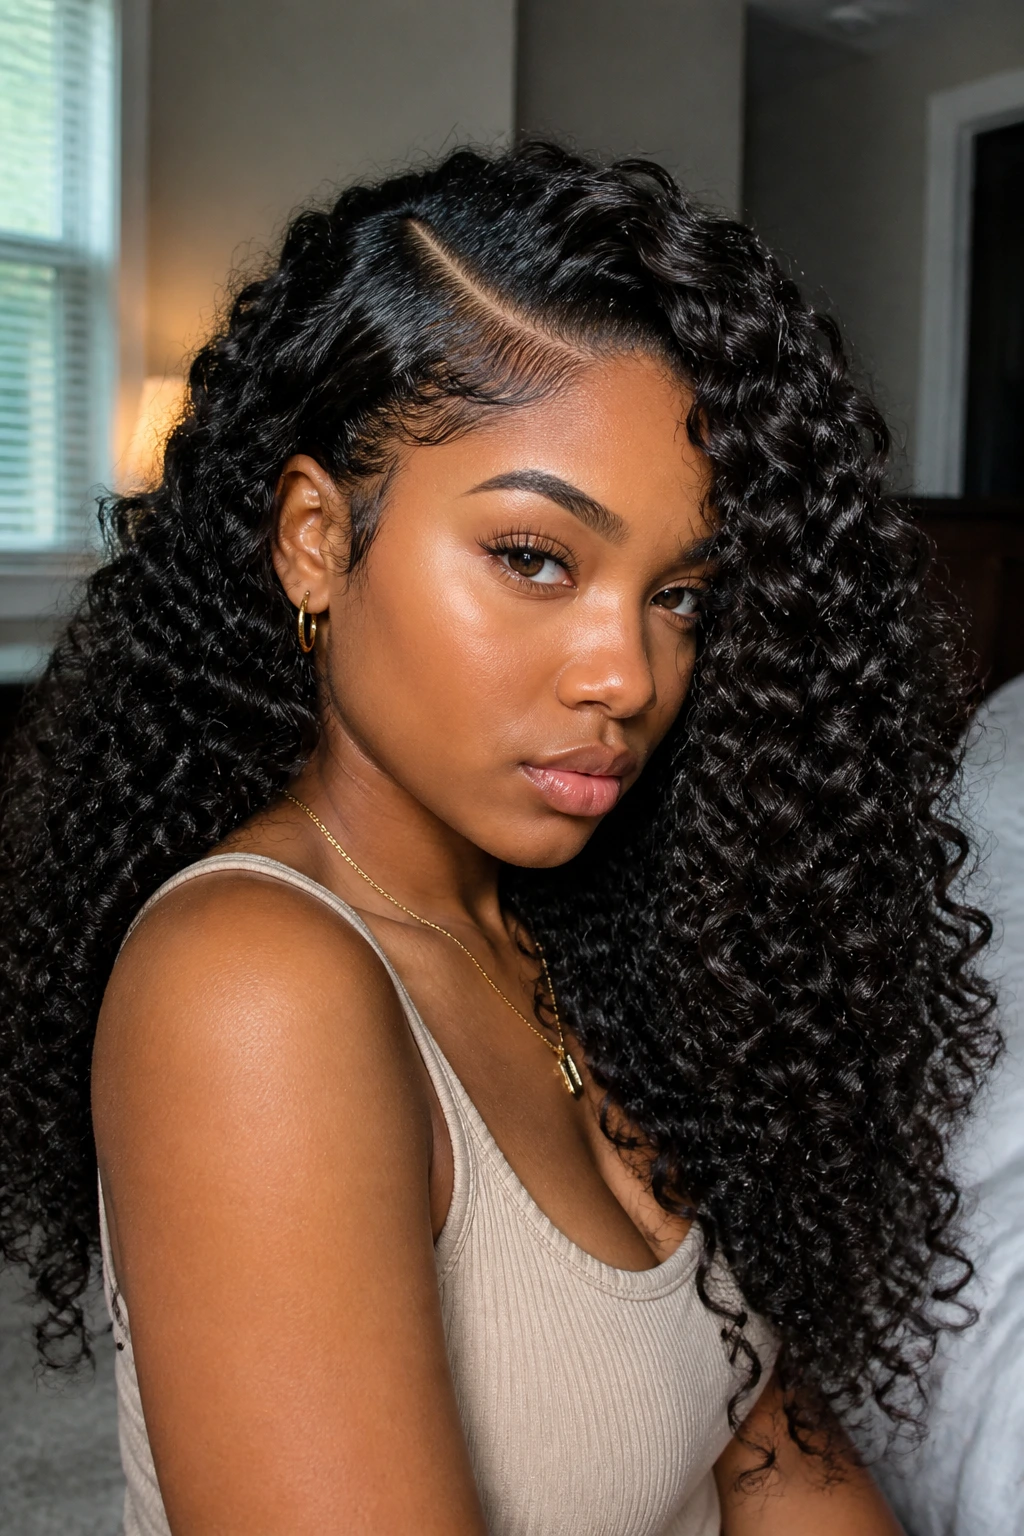
1. Chunky Side-Part Curly Sew-In
A deep side part changes the whole mood. The diagonal line pulls the eye across the face, and the fuller side gives this style a clean, almost sculpted look even when the curls themselves are soft and loose. It’s one of those installs that looks deliberate from the first glance.
Why It Lands So Well
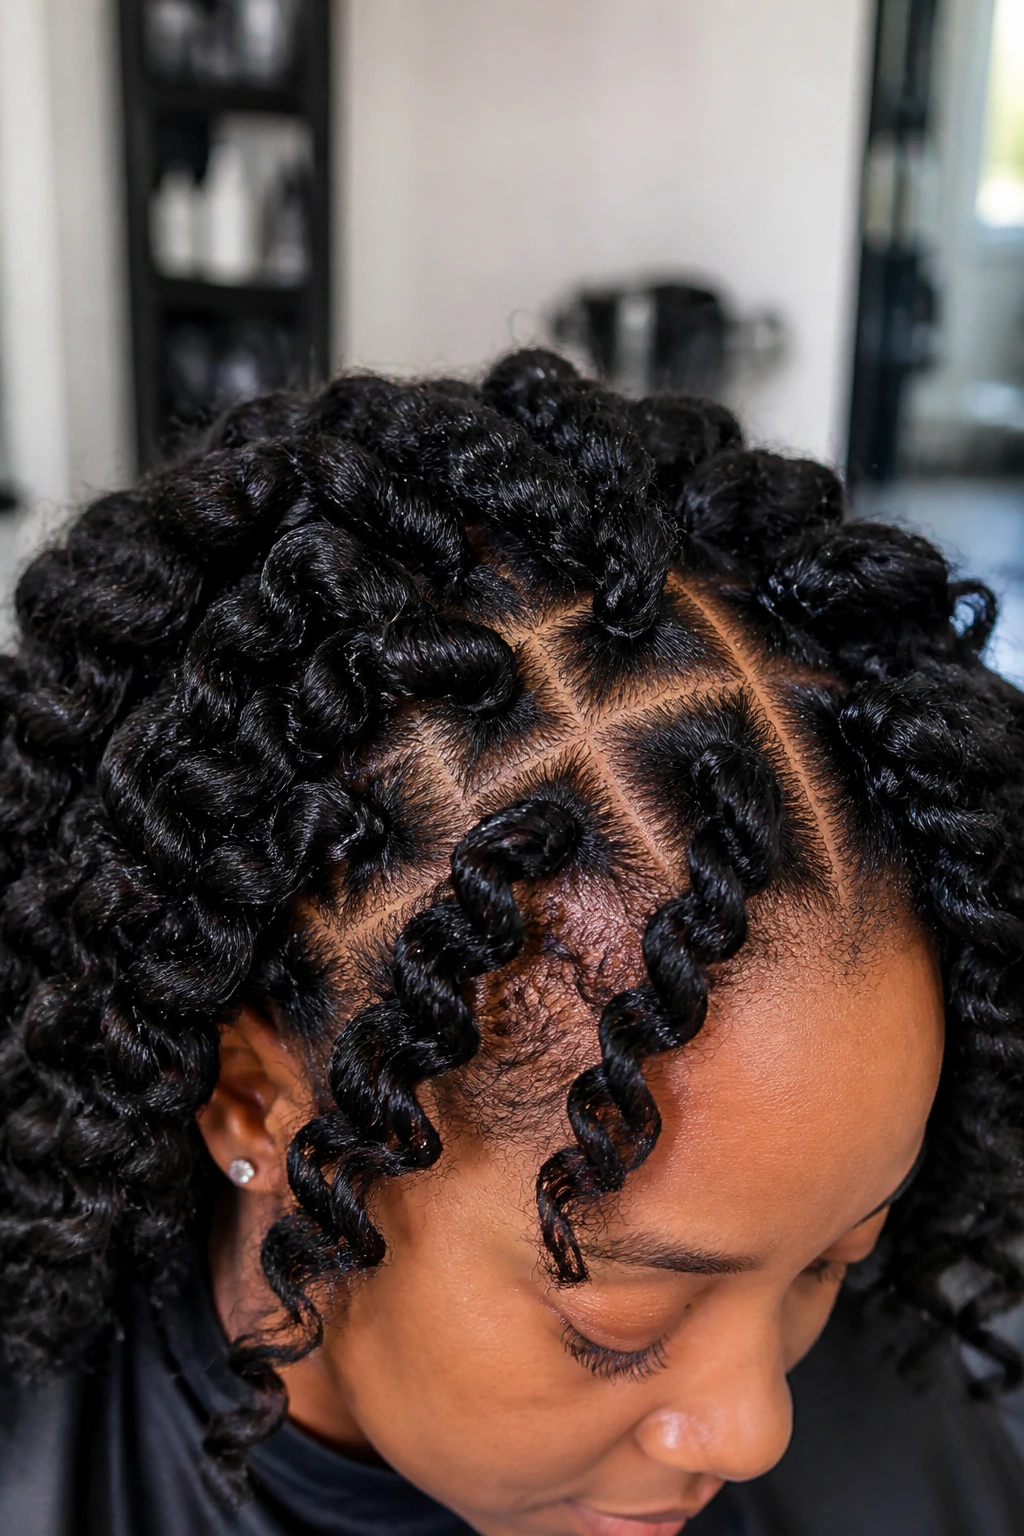
A side part gives thick curly hair a place to fall instead of piling straight back from the hairline. That matters with chunky weaves, because the part itself becomes part of the design. A 4×4 or 5×5 closure works nicely here, but a leave-out sew-in can also work if your texture blends well and you’re not planning to flat iron the front every few days.
Quick Styling Notes
- Keep the part about 2 to 3 inches off center.
- Use 3 bundles in the 18- to 20-inch range for full shoulder-to-mid-back volume.
- Smooth the roots with a light foam, then let the curls keep their body.
- Tuck one side behind the ear if you want the face to open up a little more.
Best for: round, oval, and heart-shaped faces that need a little length through the front.
Small warning: if the braid pattern underneath is bulky, the part will sit too high and the whole style loses that clean line.
2. Half-Up, Half-Down With Loose Curly Length
This one has range. You get the lifted shape up top, the soft spill of curls below, and enough structure that the style still looks finished when it’s not freshly done. The half-up section keeps hair off the face, which is a blessing on busy mornings.
The trick is to keep the top section neat and the bottom section full. If the top is too loose, the style looks accidental. If it’s too tight, it starts to pull the whole look stiff. I like a small snag-free elastic or a wrapped pony base, then a few face-framing pieces left out on purpose.
For curly hair, this style works best with 20- to 24-inch bundles and a texture that already has some movement. Deep wave and water wave both behave well here. A curly clip-in pony can also work if you want a faster version with less commitment.
3. Chin-Length Curly Bob
A curly bob is one of the smartest chunky weave choices because the volume stays close to the face instead of dragging downward. The shape is tidy, but never flat. And when it’s cut right, the ends swing a little when you turn your head.
This style looks especially good when the density is kept around 150% to 180%, not pushed all the way to heavy. Too much hair at this length turns the bob into a triangle. A better cut lands at the chin or just below it, with the sides softened enough to frame the jaw instead of boxing it in.
4. Jumbo Cornrows Into Curly Ends
Thick cornrows with curly ends have a strong, confident shape that feels protective without looking plain. The braid base gives structure, and the loose ends keep the style from getting too severe. That balance is why this look keeps showing up in salons and on real heads, not just on mood boards.
What Makes It Different
The braids should be wide enough to read as design, not tiny rows hidden under hair. I usually think in 1- to 1.5-inch sections, depending on head size and the weight of the curly extensions. The ends can fall shoulder-length or longer, but the base should stay close to the scalp so the whole style sits neatly.
A few gold cuffs or a clean middle part can shift the whole feeling. And yes, this style is easier on the scalp than a tight install when it’s done with a little restraint. That restraint matters.
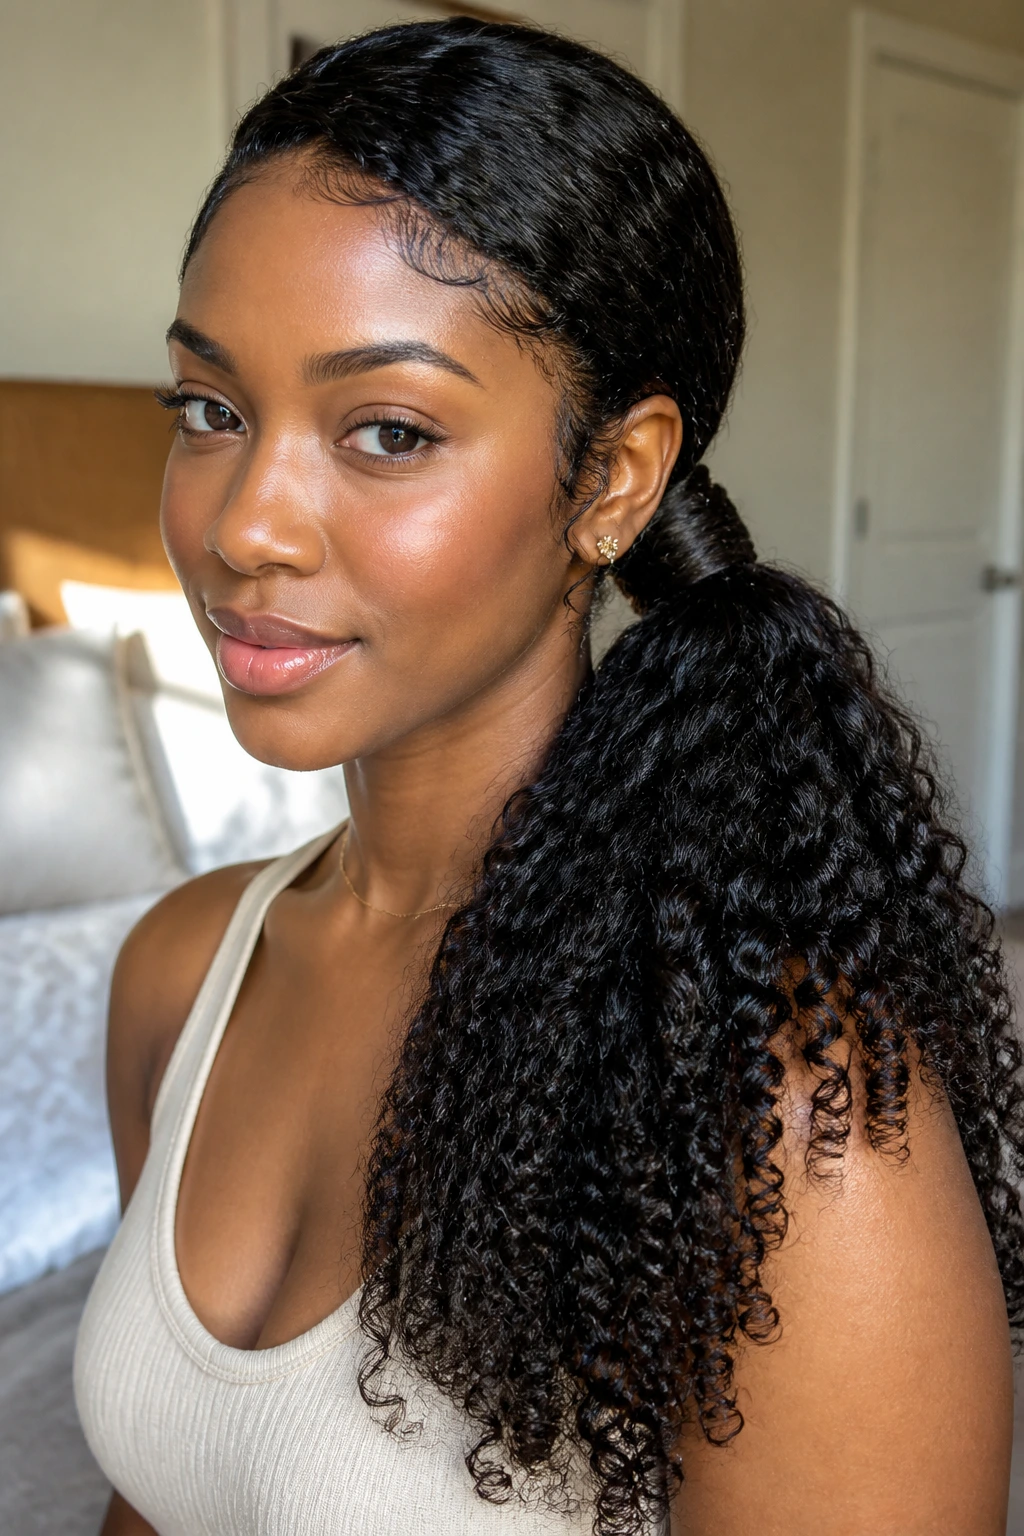
5. High Curly Ponytail With Wrapped Base

A high curly ponytail gives instant lift. It opens the face, shows off the cheekbones, and lets the curls do something dramatic without forcing the whole head into a complicated install. The wrapped base is the part that makes it look finished instead of gym-rushed.
The crown should be sleek, but not lacquered. If the edges are plastered down too hard, the ponytail starts to look like it belongs to someone else. A little shine at the roots is enough. Then let the ponytail itself be full, loose, and slightly wild at the ends.
For a proper chunky version, use a 20- to 24-inch curly ponytail extension or a full install that’s gathered high and secured with pins. Wrap a small strand around the base, pin it underneath, and keep the ponytail slightly off-center if you want a softer profile.
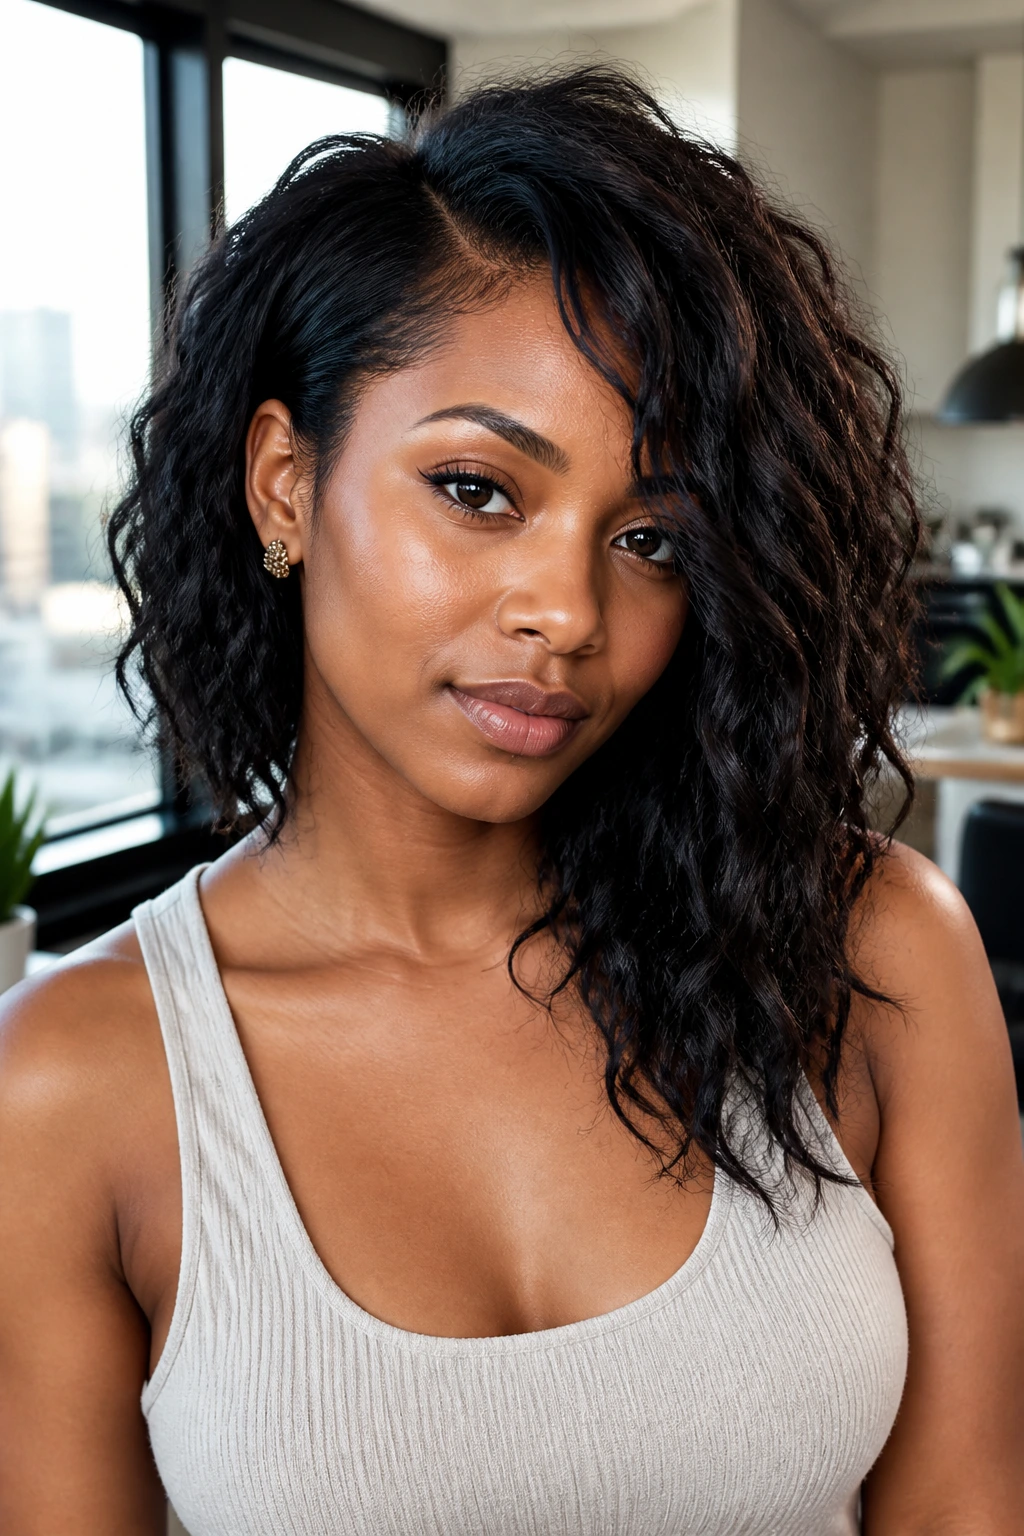
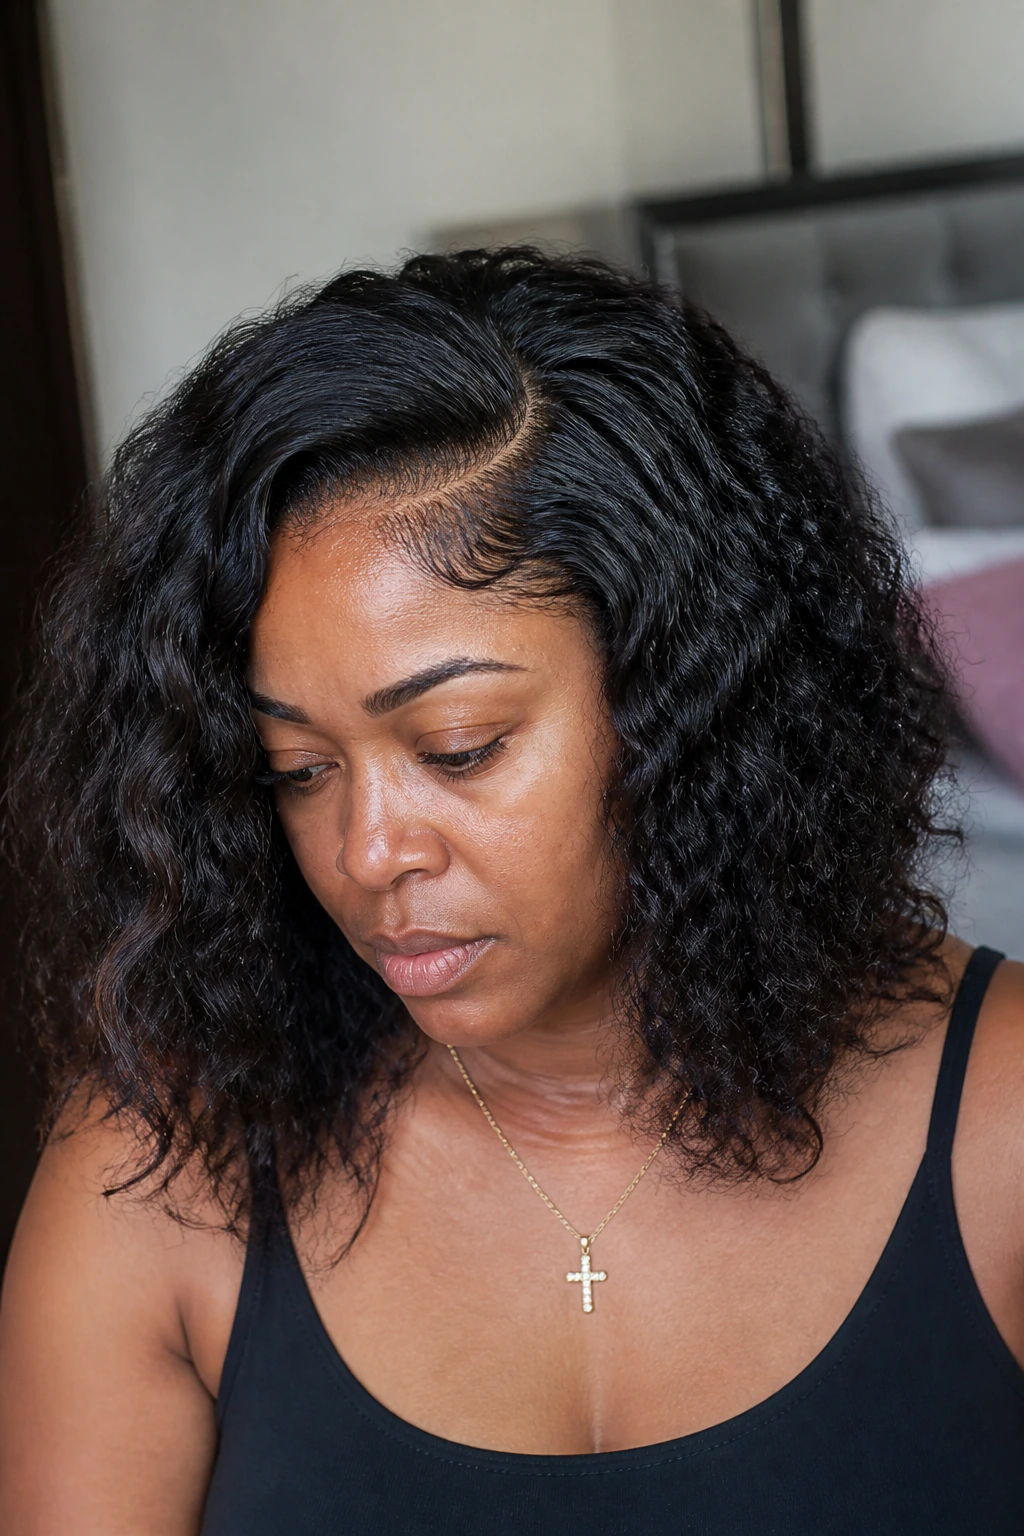
6. Middle-Part Water Wave Layers
A middle part gives curly weaves a calm, symmetrical shape that works especially well when the hair has layered ends. Water wave textures are useful here because they hold a soft clump without getting too frizzy too fast. The result feels smooth, but not flat.
This is a strong choice if you like the face framed evenly on both sides. A 5×5 closure or a frontal makes the part easier to maintain, and layered bundles keep the curls from stacking into one heavy curtain. If the front pieces start around the chin and the longest layers hit the chest, the style gets that easy fall people try to fake with curling irons.
7. Deep Side Sweep With Face-Framing Pieces

A deep side sweep changes the balance of the whole head. One side sits fuller, the other side falls back a touch, and the face-framing pieces soften the line near the cheekbones. It’s flattering in a very practical way.
This style works well when you want the hair to look thick without feeling all one-length and blocky. Ask for the shortest front pieces to land around the chin or lower cheek. Anything shorter can bounce too high and create that clipped look nobody asked for.
I like this on square or heart-shaped faces because the sweep rounds out the front without hiding everything. It’s also a good choice if your natural hairline is a little uneven and you want a style that doesn’t force every side to behave the same way.
8. Curly Bangs and Shoulder-Length Body
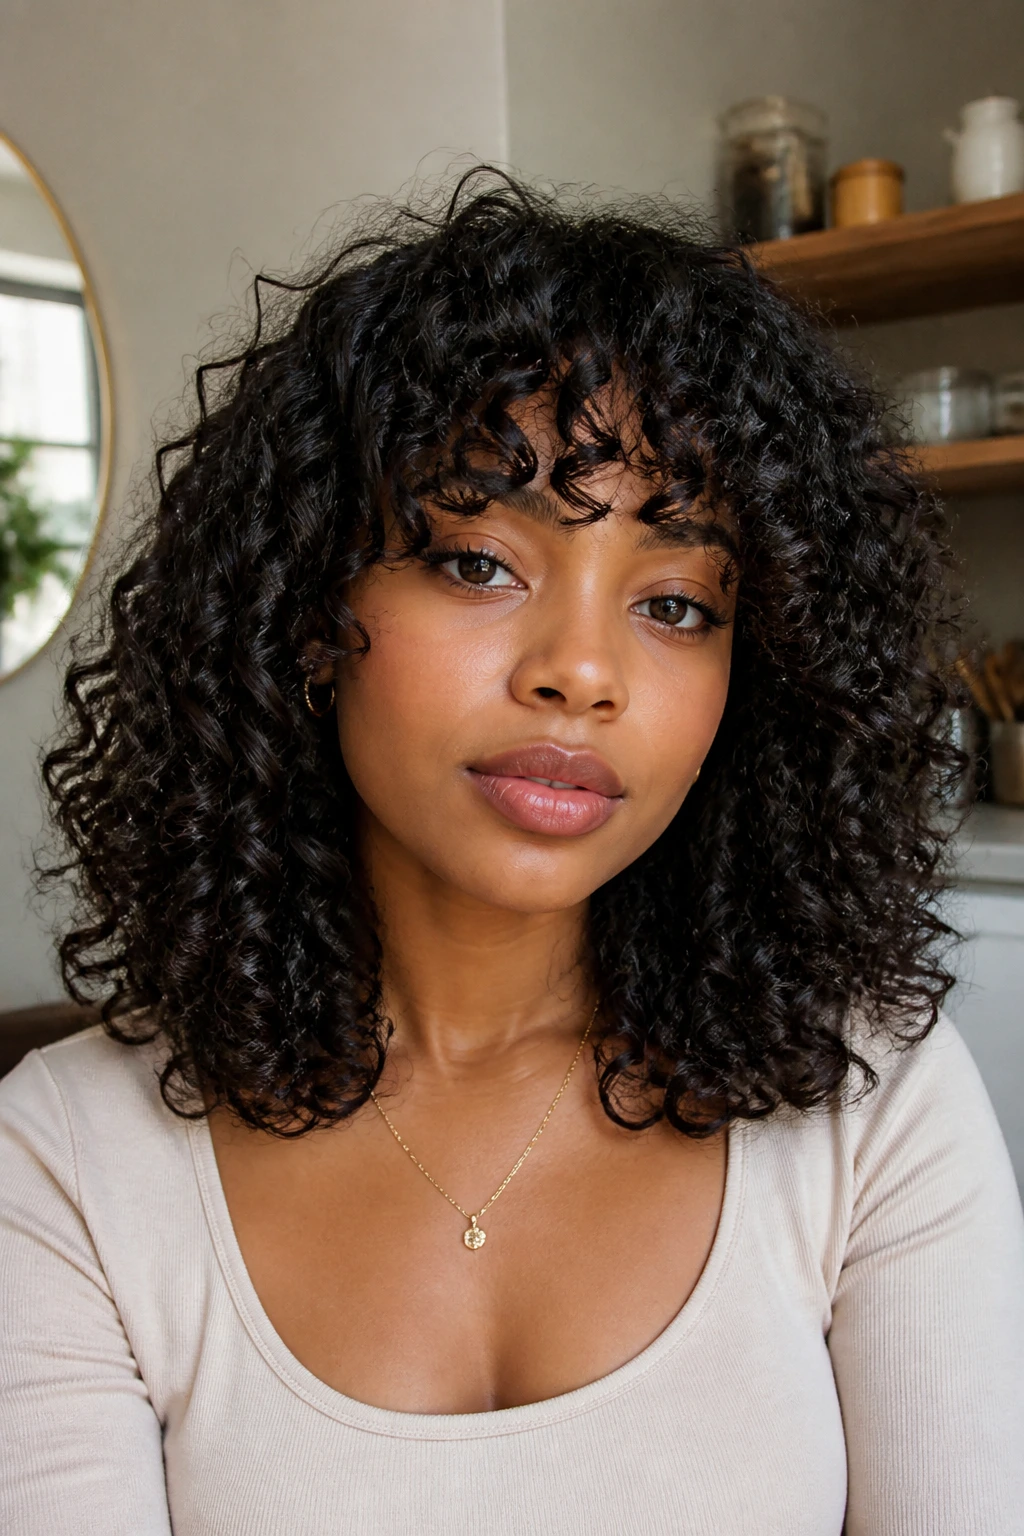
Curly bangs are a bold move, and I mean that in a good way. They break up the forehead, soften the face, and make a shoulder-length weave feel a little more playful than the usual sweep-and-fall shape. When they’re cut well, they sit in that sweet spot between fringe and full curl.
The key is to cut them dry. Curly bangs shrink, and if you snip them wet, you can end up with a tiny, stubborn little fringe that sits miles above the brows. Keep the rest of the style at shoulder length, then trim the bangs slowly until they land where you want when the hair is dry and sitting in its natural curl pattern.
Best On
- Faces that can handle some coverage at the forehead.
- Wearers who want movement without a long install.
- Anyone who likes a softer, more youthful silhouette.
9. Sleek Crown, Full Ends
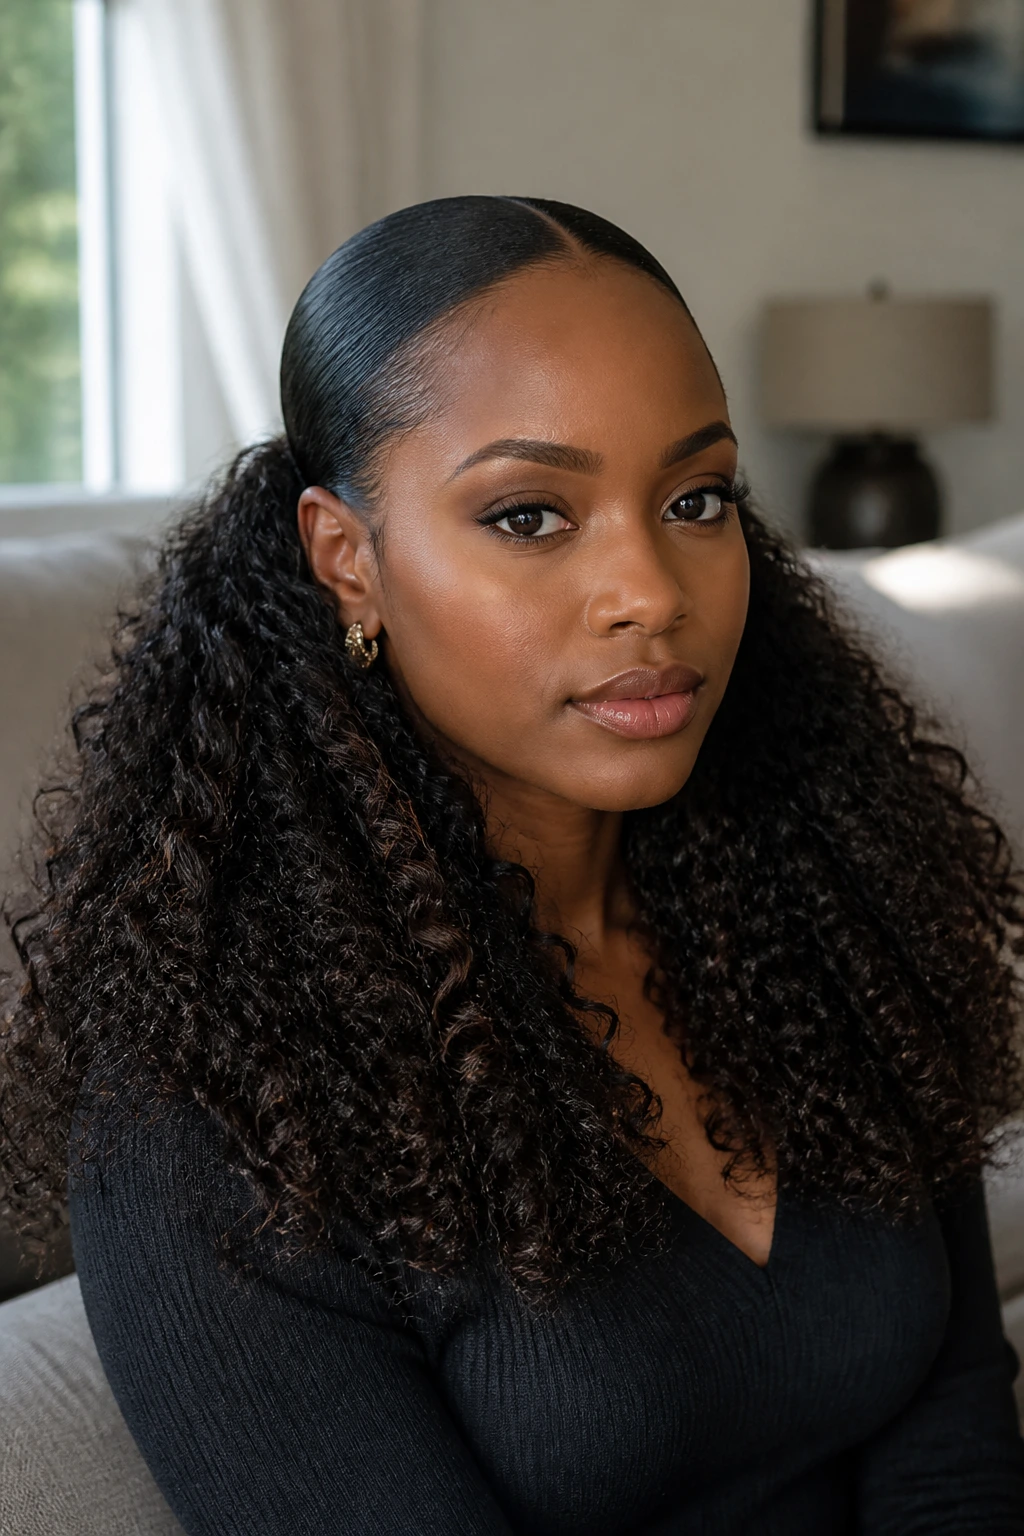
This one is about contrast. The crown lies smooth and close, then the ends bloom into a lot of curly body. The difference between the top and the bottom makes the style look intentional, not overdone. That contrast is what gives it polish.
A hot comb at the roots or a careful press on the leave-out can help, but only on the top section. The ends should stay curly and full, because that’s where the shape lives. If you press everything, you lose the whole point.
This look pairs nicely with a side part and a 5×5 closure if you want a cleaner scalp line. It also works for formal settings because the crown stays controlled while the length still gives you movement when you walk.
10. Asymmetrical Lob With Extra Body
A lob with one side a little longer than the other has a sharp, modern feel without becoming severe. The asymmetry keeps the style from sitting like a block, which matters when the hair is thick and curly. It makes the whole cut look custom.
This is one of my favorite options for women who want volume but do not want a lot of weight hanging past the shoulders. Keep the back a touch shorter and let the longer side skim the collarbone. That shape gives the curls space to fall instead of bunching.
It also handles grow-out well. A little asymmetry still looks deliberate when the install is a week or two old, which is more than you can say for some blunt cuts.
11. Halo Braid With Curly Drop-Out
A halo braid with curly drop-out pieces has a softer, more romantic feel than a standard braid crown. The braid frames the top of the head, while the curls spill through the back or at the temples. It looks detailed without needing a dozen moving parts.
Where It Shines
- Weddings and formal events.
- Dressy dinners where you still want some volume.
- Anytime you want a protective style that doesn’t look too “done.”
The braid should sit close to the head and stay even all the way around. Leave the drop-out curls loose enough that they can move, but not so loose they separate into stringy pieces. A little mousse and finger-coiling on the loose sections goes a long way here.
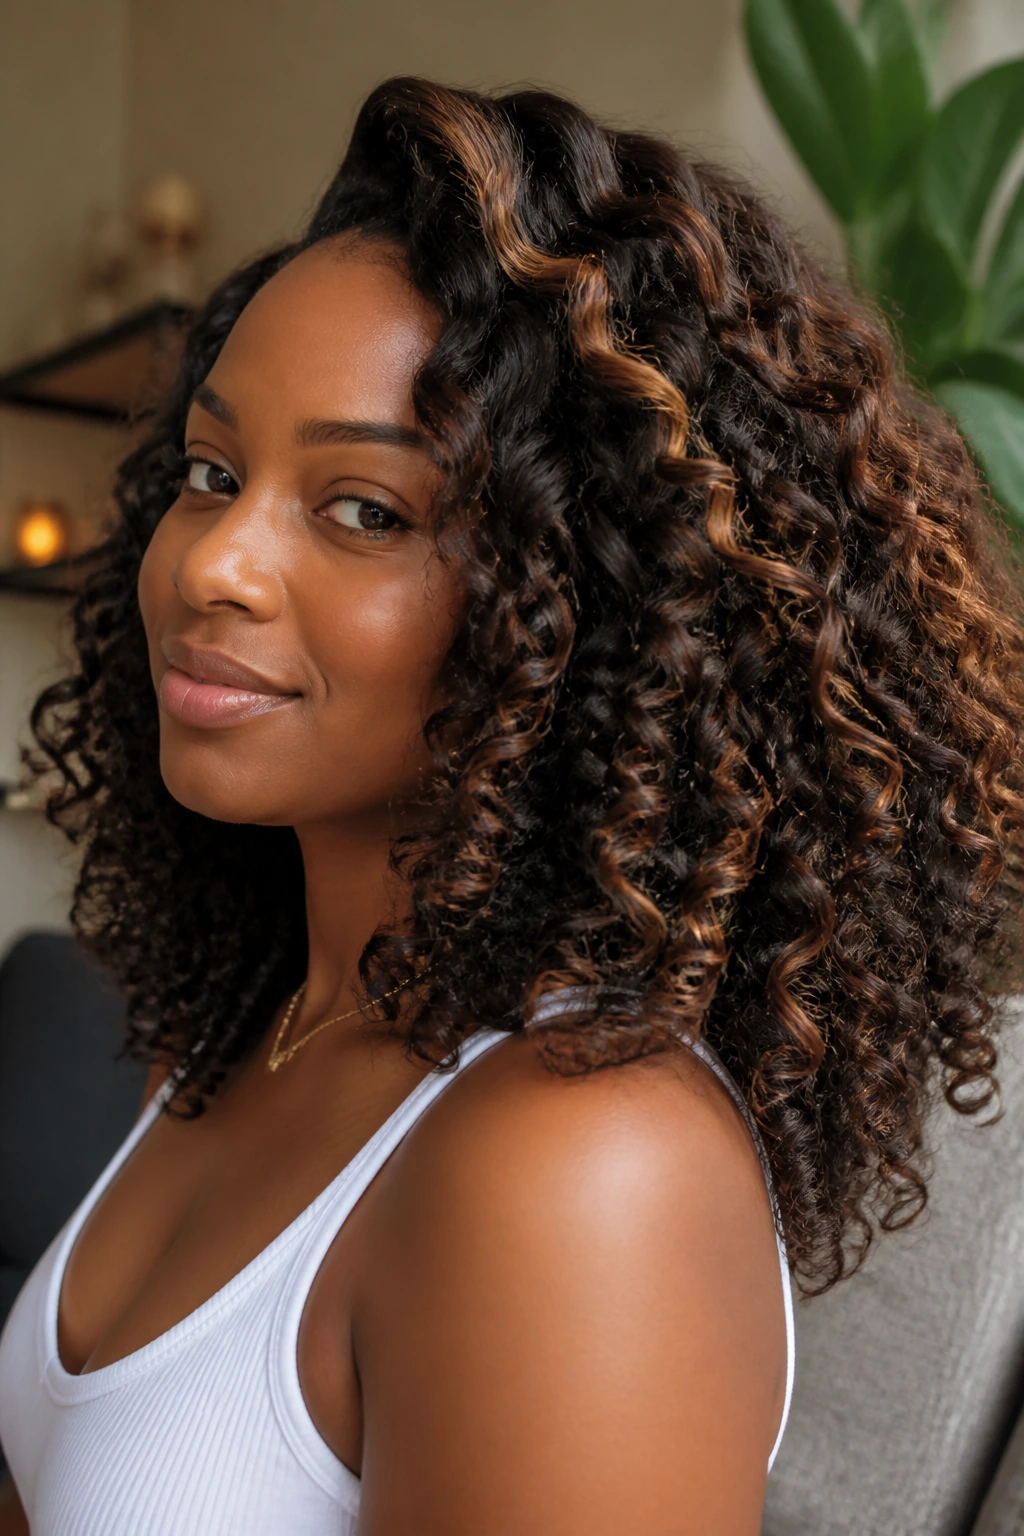
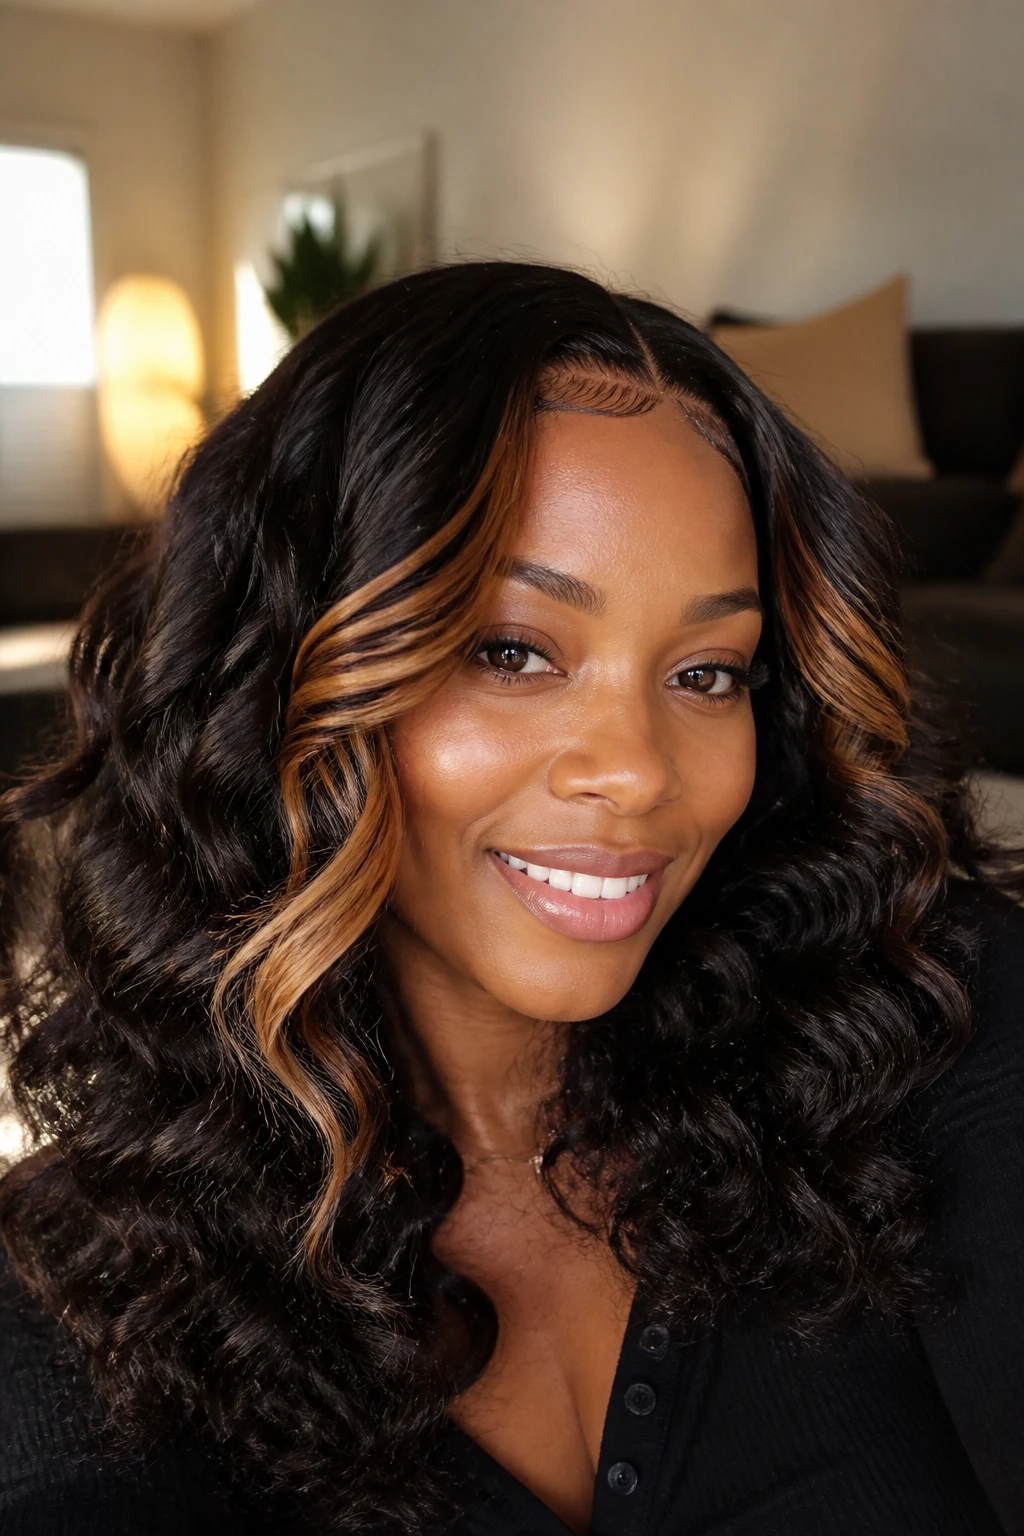
12. Honey-Blonde Highlighted Curly Weave
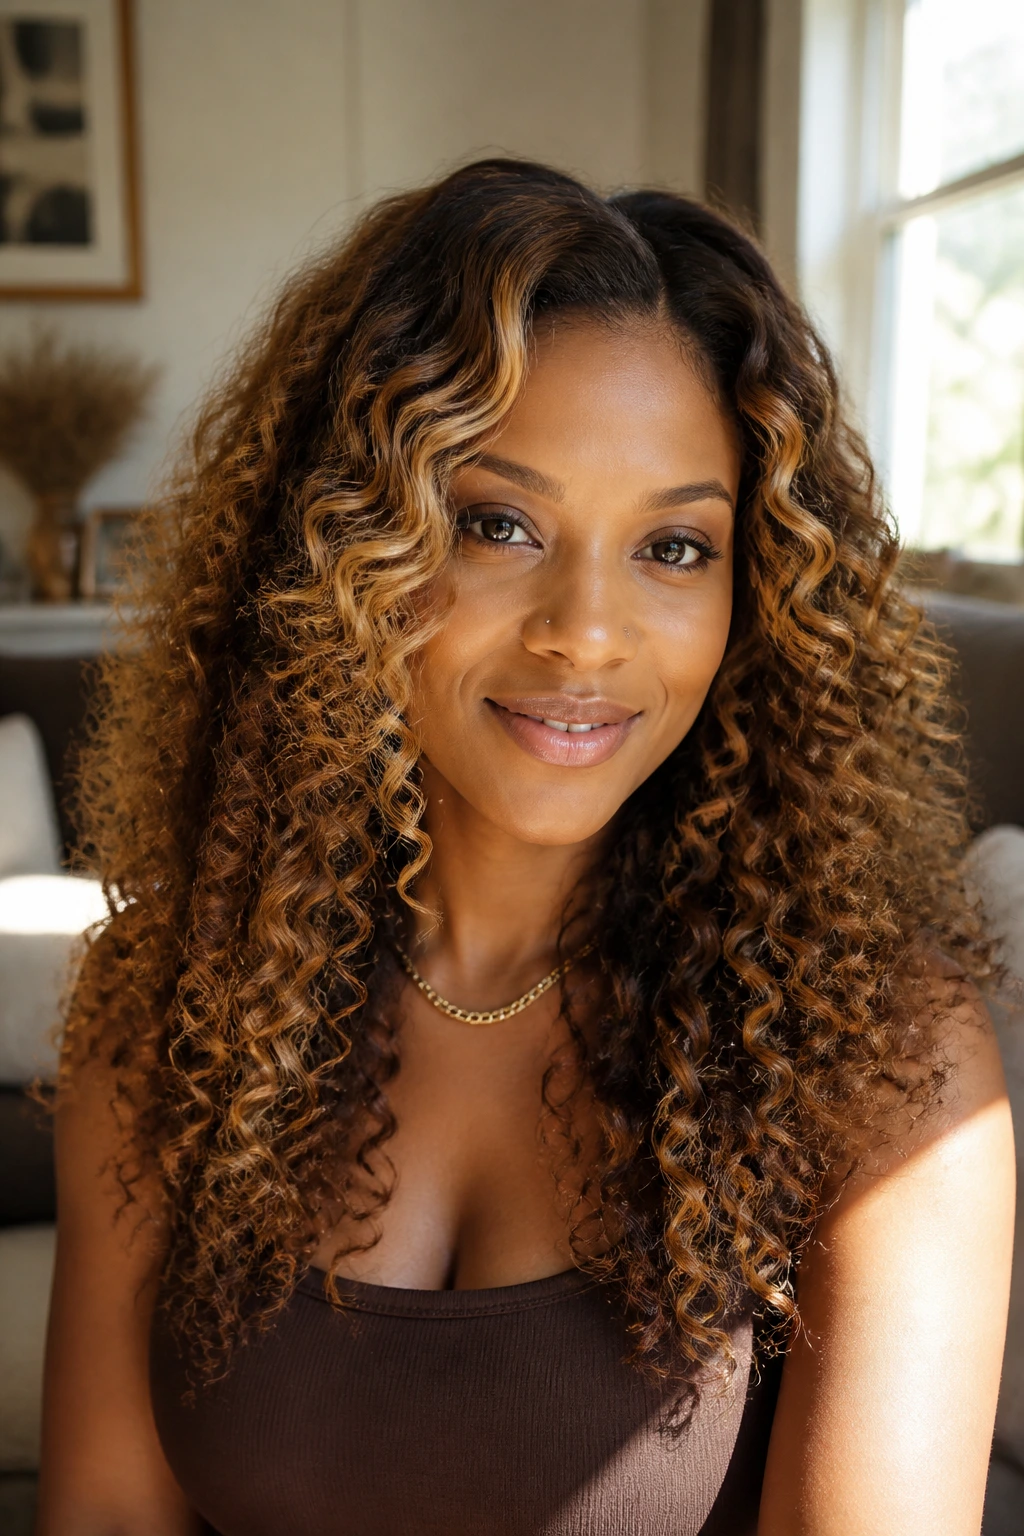
Honey-blonde highlights wake up curly hair fast. You do not need a full bright-blonde install to get dimension; a few warm ribbons near the face and through the top layers can change the whole read of the style. Curly texture catches light differently when the color is warm, and that’s part of the appeal.
I like this best when the base stays deeper brown or black. That contrast keeps the highlights from washing out the curls. If the entire install goes blonde, the style can lose depth unless the curl pattern is very defined and the cut is layered well.
This is a good pick if you want brightness without a hard color commitment. It also pairs well with a side part because the color shift becomes more visible when the front pieces move.
13. Burgundy Curly Weave
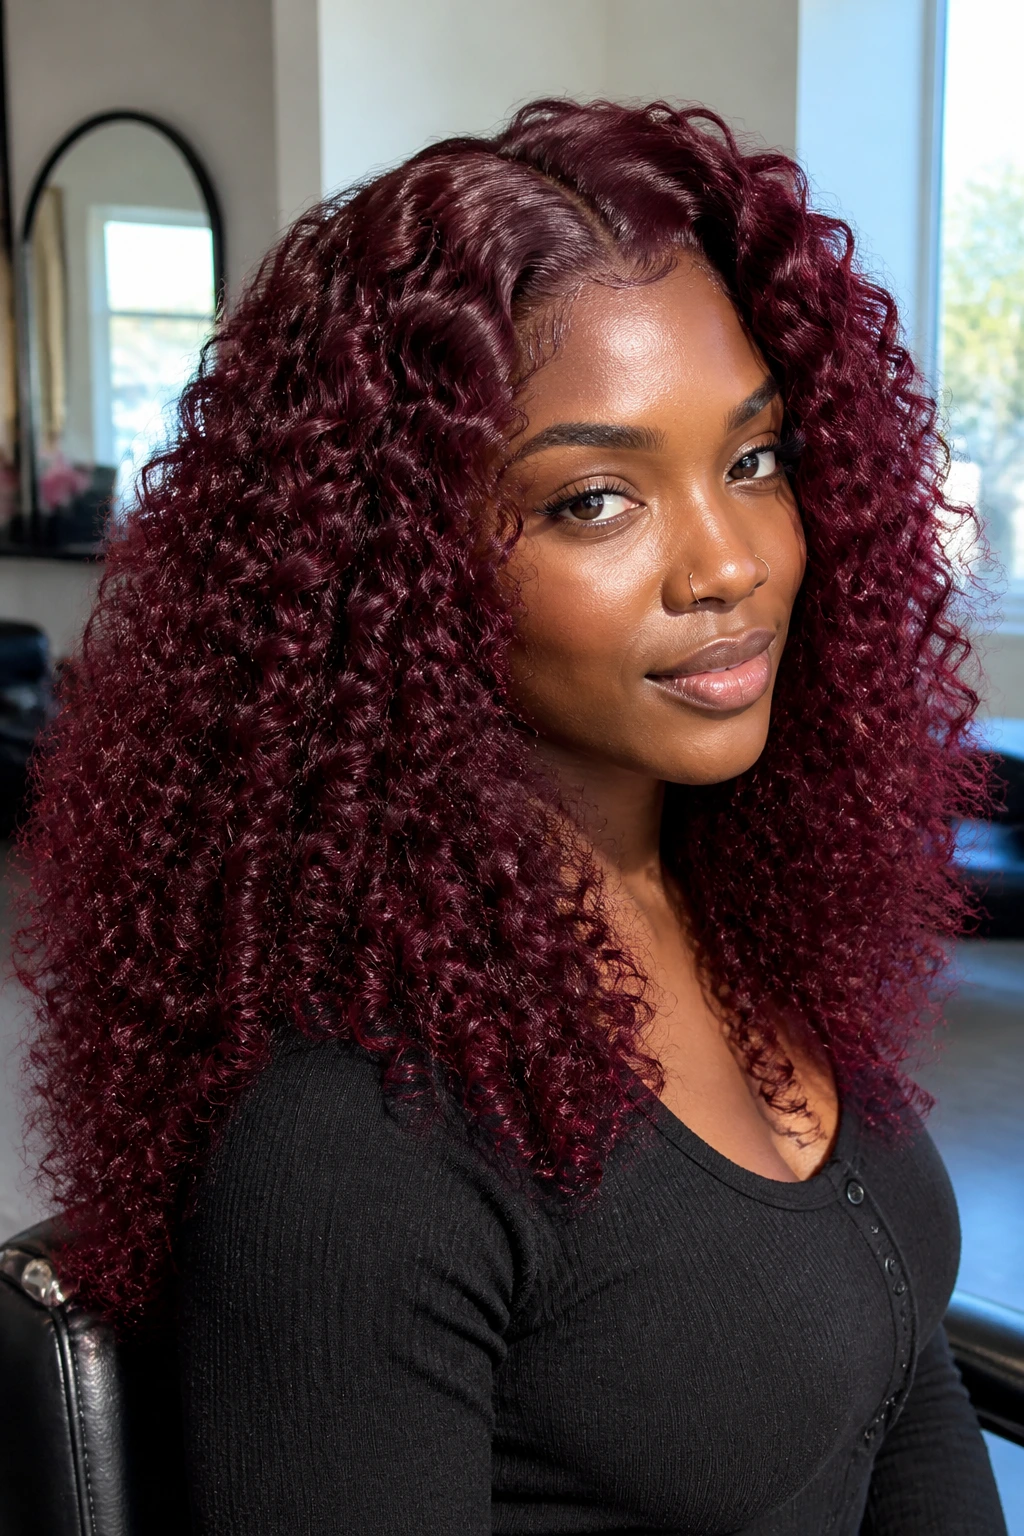
Burgundy brings mood. It reads rich, not loud, and on curly hair the color has enough depth to look expensive even when the install is simple. The darker red-violet tone also plays well with coily textures because the shadows between curls keep the color from looking flat.
If you’re buying pre-colored hair, check that the bundles match in tone before they’re installed. A bundle that skews brown next to a bundle that leans purple will show the difference more than you want. If you’re coloring the hair yourself, keep the process gentle and use color-safe products after install.
Good pairing
A center part, low bun, or shoulder-length cut keeps burgundy looking clean. The color already has presence; you do not need to pile on extra shape.
14. Wet-Look Defined Curl Set
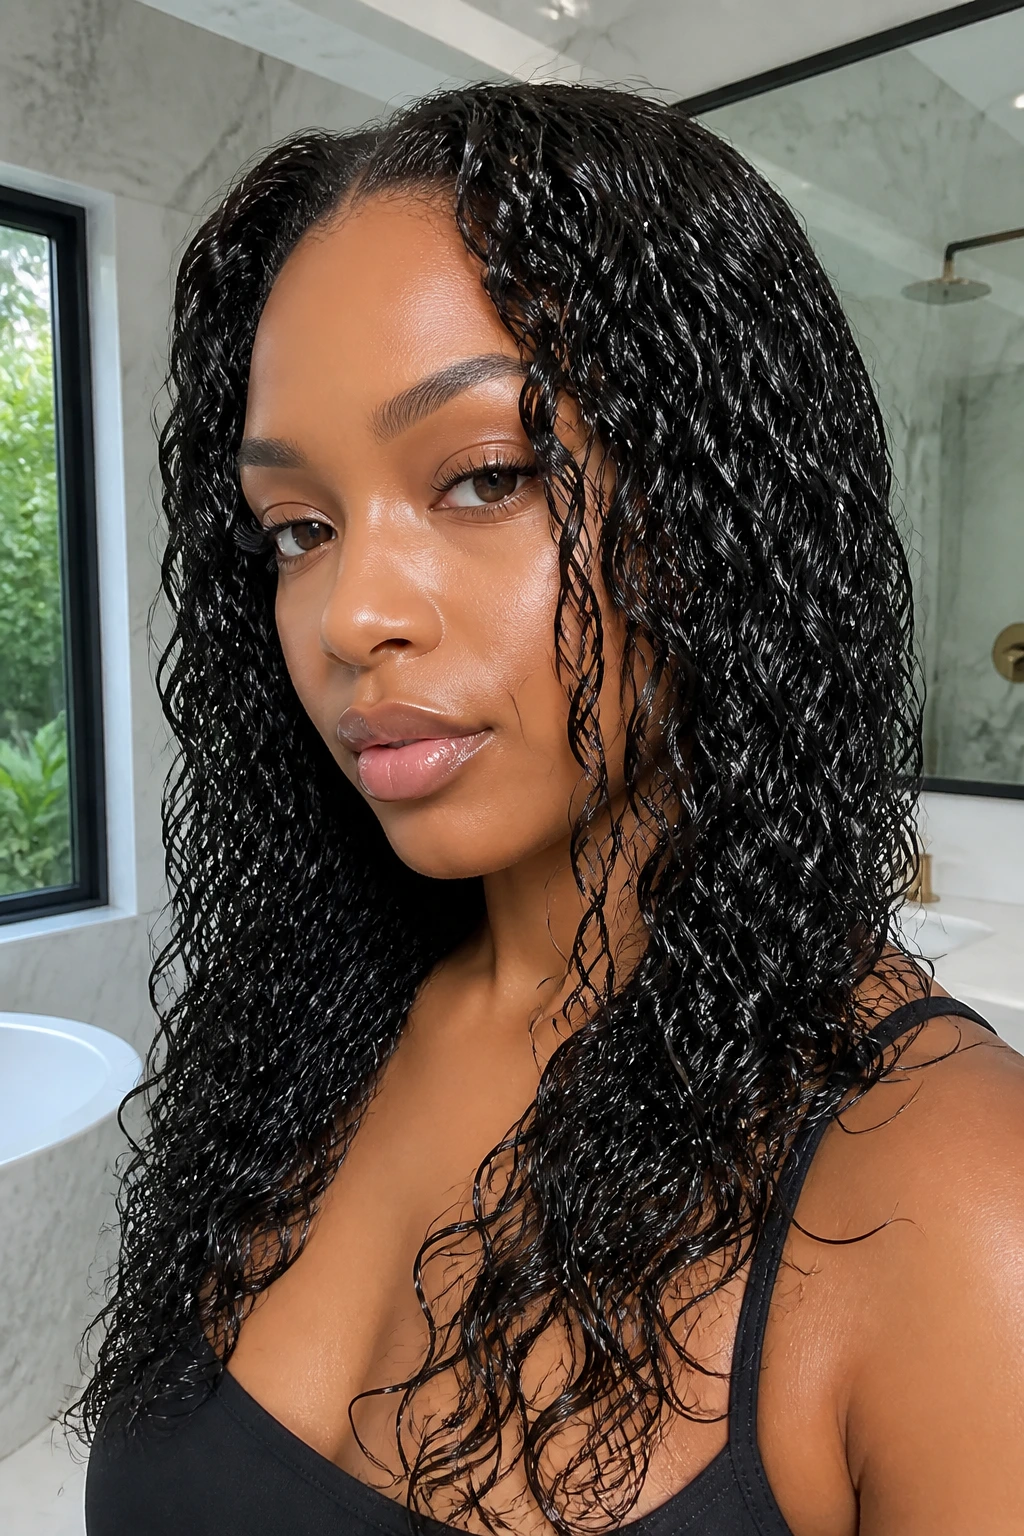
A wet-look curly weave has a glossy, clumped finish that looks fresh without being crunchy. The key is controlled product layering: leave-in, curl cream, then a foam or light gel to lock the curls together. If you use too much gel, the hair turns stiff and starts flaking by day two.
This style works best when the curls are set while damp and left alone until dry. Diffuse on low for a few minutes if you need the drying process to move faster, but don’t rough them up. The whole point is clean definition.
I like this look for humid weather because the curl groups stay visible even when the air feels heavy. If the finish gets a little stiff, scrunch it gently with dry hands and a drop of serum. That usually fixes the problem without starting over.
15. Fluffy Blowout-Texture Weave

Not every curly weave needs perfect ringlets. A fluffy blowout-texture install has more air in it, which gives the hair a bigger, softer shape. It’s the style for people who like volume more than precision.
The trick here is not to brush the curls dry. That’s where the shape gets frayed and the ends start to look tired. Use a wide-tooth comb only when the hair is damp, then let it dry into that stretched, airy finish. Blowout-texture bundles or gently stretched kinky-curly hair both work here.
This shape looks especially good in a shoulder-length or mid-back cut. Too long, and the fluff can start to drag. Too short, and you lose the easy cloud effect that makes it interesting.
16. Low Bun With Curly Perimeter

A low bun with curly pieces around the perimeter is one of those styles that looks more polished than it feels. The bun sits at the nape, the curls soften the edges, and the whole thing reads as neat without being severe. It’s the kind of style that gets out of the way and still looks finished.
What to Ask Your Stylist For
- A low, secure bun that doesn’t tug at the nape.
- Curly tendrils left near the temples and neckline.
- Enough density around the perimeter so the bun doesn’t look tiny.
The bun itself should be smooth but not glued down hard. If you need five layers of gel and half a can of hairspray to make it stay, the base is too tight. Keep the tension moderate, pin the bun flat, and let the curls handle the softness around the face.
17. Long Hip-Length Spiral Weave
Long spiral curls make a statement before you even move. The length gives the style its drama, but the spiral curl pattern keeps it from reading as a straight curtain of hair. Every turn of the head changes the shape a little, which is part of the fun.
This style needs more hair than a bob or lob, and it needs more care. Four bundles is a starting point, not a joke, and layered cutting keeps the bottom from looking stringy. If you want the hair to stay full through the ends, ask for face-framing layers and a little shaping at the back.
Be honest with yourself about weight here. A long install looks great, but if your head starts feeling tired after a day, the style is not worth it. A closure install can take some pressure off the front and make the whole thing easier to wear.
18. Side Pony With Wrapped Base
A side ponytail has a softer profile than a straight-back pony, and it shows off curly texture in a way that feels relaxed but not messy. The wrapped base keeps the style from looking like an afterthought. One strand around the elastic makes a bigger difference than people expect.
This is a strong choice when you want the hair off one shoulder and out of the face. It works with dresses, button-downs, and even a simple T-shirt because the silhouette does the work. Let the pony sit low and off to one side if you want a gentler look, or place it higher if you want more lift near the cheekbones.
A few face-framing curls make it feel less rigid. That small detail is what keeps the style from drifting into basic territory.
19. Crochet-Inspired Chunky Curl Install
A crochet-inspired install is fast, light, and easier on the scalp than a lot of heavier sew-ins. The sections stay chunky by design, which fits the theme here better than tiny, overpacked curls. You get volume without having to load the head with too much weight.
This option is especially useful if you want a style that can be installed and removed without a long salon session. Pre-looped curl patterns, properly spaced cornrows, and a little shaping around the hairline make the difference between “quick” and “sloppy.” They are not the same thing.
The downside is root polish. Crochet styles can sit a little less sleek at the scalp, so if you want a glassy root line, this is not your first pick. If you want movement, though, it’s hard to beat.
20. Glam Old-Hollywood Wave Weave

Old-Hollywood waves are all about sculpted curves. The curls are not meant to stay separate and springy; they’re brushed into soft, polished waves that sit close together. That gives the style a more formal finish than the fluffier curly looks in this list.
It takes setting and patience. Large-barrel wand curls, pinning, and brushing them out after cooling gives the wave its smooth bend. A side part helps the shape stay classic, and a little shine spray at the end keeps the finish clean without drowning it.
This is the style I’d pick for a wedding, gala, or any event where you want the hair to sit with the outfit instead of competing with it. It looks especially strong on longer lengths with enough density to hold the wave pattern.
21. Twist-Out Blend With Weave Pieces
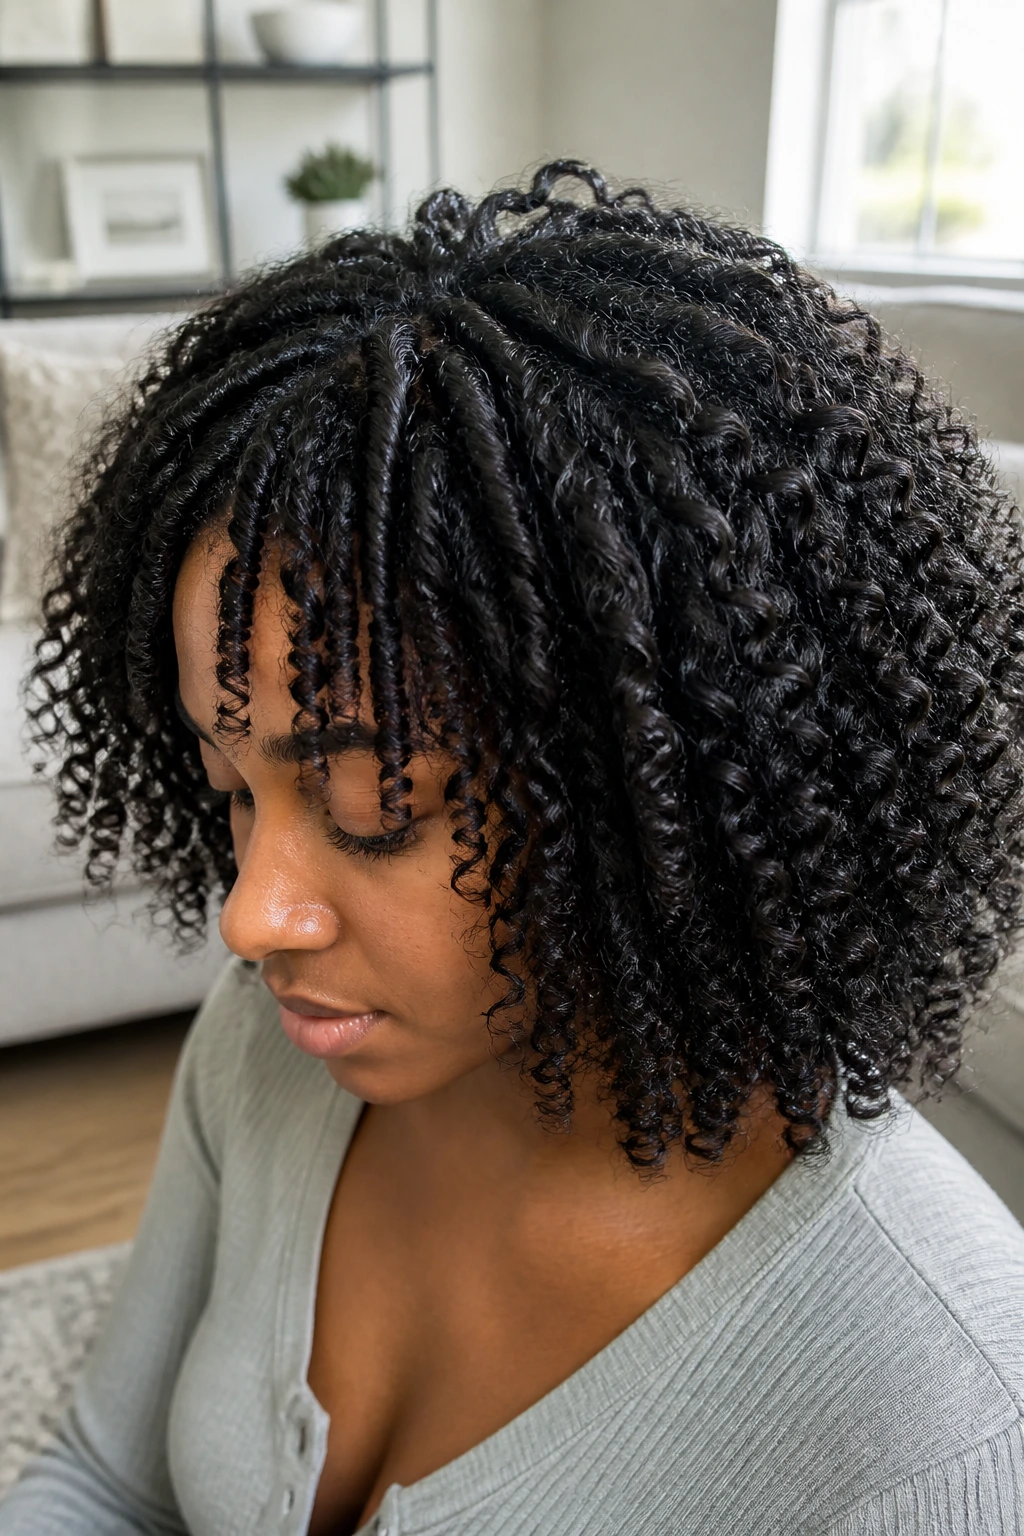
A twist-out blend works when you want your own hair to stay part of the story. Instead of hiding every texture difference, the style uses the natural curl at the front or crown and lets the weave carry the length or fullness underneath. That gives the look a real-life, lived-in feel.
The twist sections should stay uniform. Half-inch parts usually work well, and each twist needs enough moisture to hold its shape without turning mushy. If your own curls are 4b or 4c, this can be a very good way to keep the install from feeling like a wig sitting on top of your head.
Why It’s Worth Considering
It gives you a softer blend than a full leave-out sew-in. It also reduces the pressure to flat iron your real hair every time you wear an install. That alone makes it worth a serious look.
22. Scalp-Friendly Protective Chunky Weave
A scalp-friendly chunky weave is built around comfort first. The braid pattern stays medium-sized, the closure covers the front, and there’s no leave-out asking to be heat-styled every three days. If your edges need a break, this is the style to reach for.
The best version of this look is neat, not tight. A 5×5 closure, three well-chosen bundles, and a braid pattern that doesn’t sit too close to the hairline are enough. You want the scalp to breathe, and you want access for cleaning without having to take the style apart.
This is also the style I’d choose if you like keeping hair on for a few weeks but do not want the daily maintenance of blending and curling your own leave-out. It’s calm. It’s practical. And it still looks full.
Why Chunky Weaves Work So Well on Curly Hair
The thing people miss is that curly hair already has built-in movement. A chunky weave works because it respects that movement instead of trying to pin every strand in place. When the bundles match the natural pattern even loosely, the whole style settles into a better shape after the first day.
Part size matters more than most people think. A clean side part, a middle part with enough depth, or a braid pattern that sits flat under the install will change how full the hair looks at the crown. If the base is bulky, the style reads heavy. If the base is neat and the density is right, the curls look expensive in the plainest, most useful sense of the word.
There’s also a practical reason these looks hold up. Curly textures hide small shifts better than straight ones do. A little frizz, a little lift at the root, a little movement from wind or humidity—none of that breaks the style if the silhouette is strong. That’s why you’ll see people wearing chunky curly installs longer than pin-straight ones. They age with more grace.
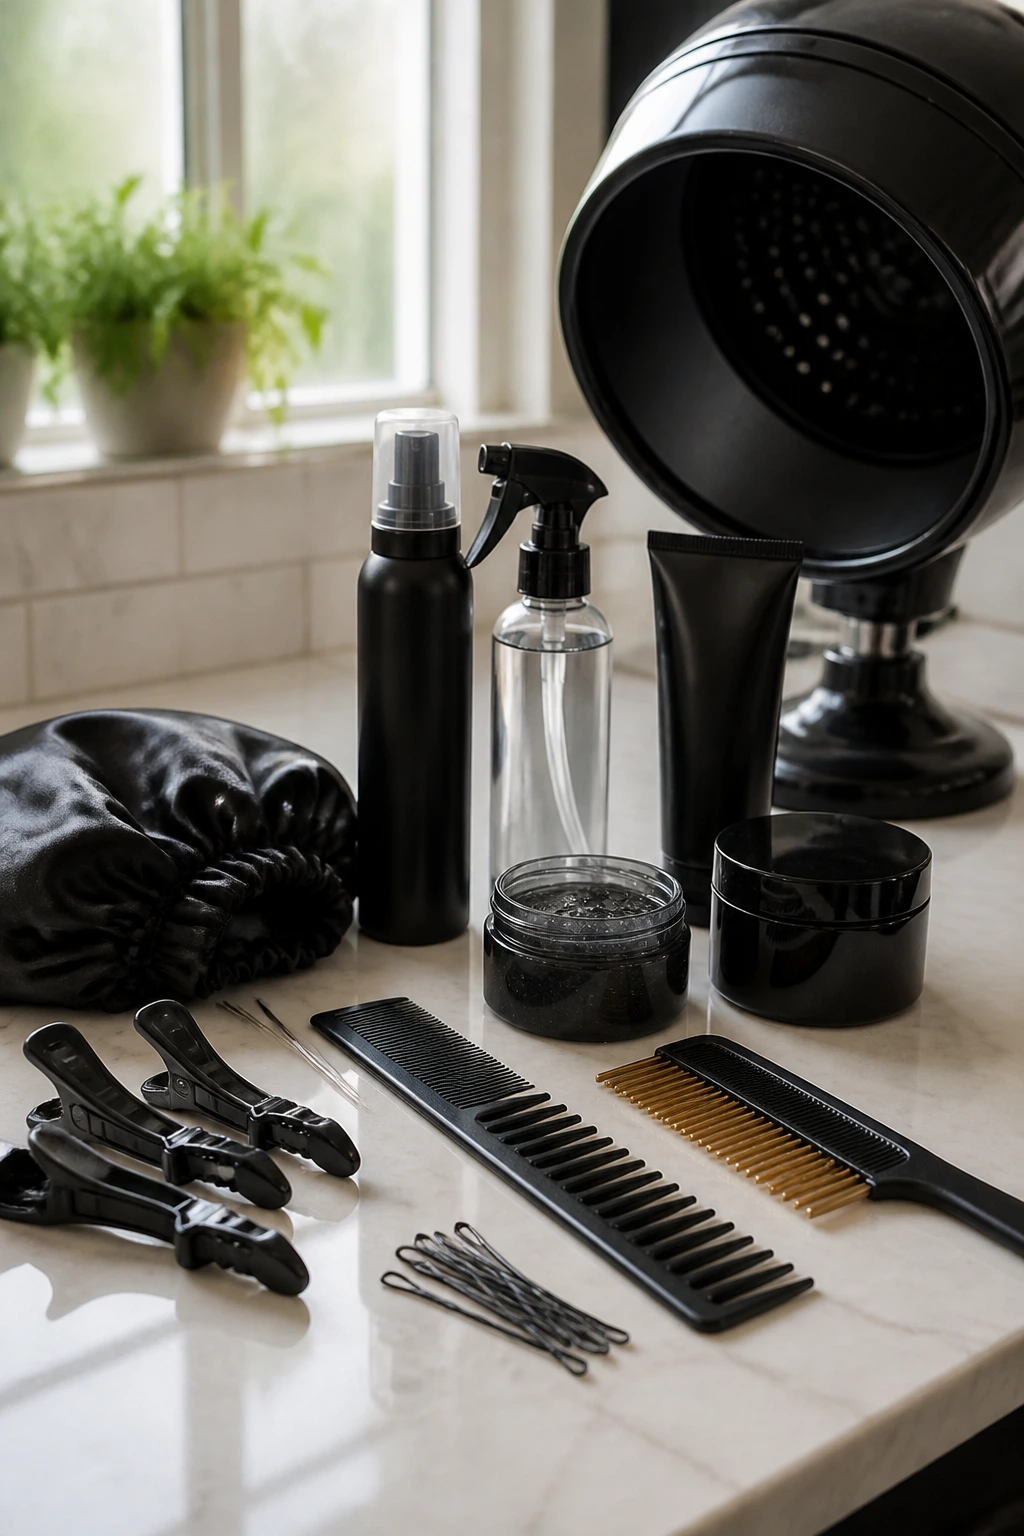
Essential Tools for Chunky Weave Styling
-
Rat-tail comb: Essential for clean parts and precise sectioning, especially on side parts and closures.
-
Duckbill clips: These keep curls out of the way while you shape the crown or smooth the leave-out.
-
Wide-tooth comb: Use this on damp curls only; it separates without ripping the pattern apart.
-
Mousse or foam wrap lotion: Helps curls clump, set, and dry with less frizz.
-
Light leave-in spray: A water-based leave-in keeps the hair soft without turning the roots greasy.
-
Flexible-hold gel or edge control: Useful for the hairline, but keep it off the curls unless you want stiffness.
-
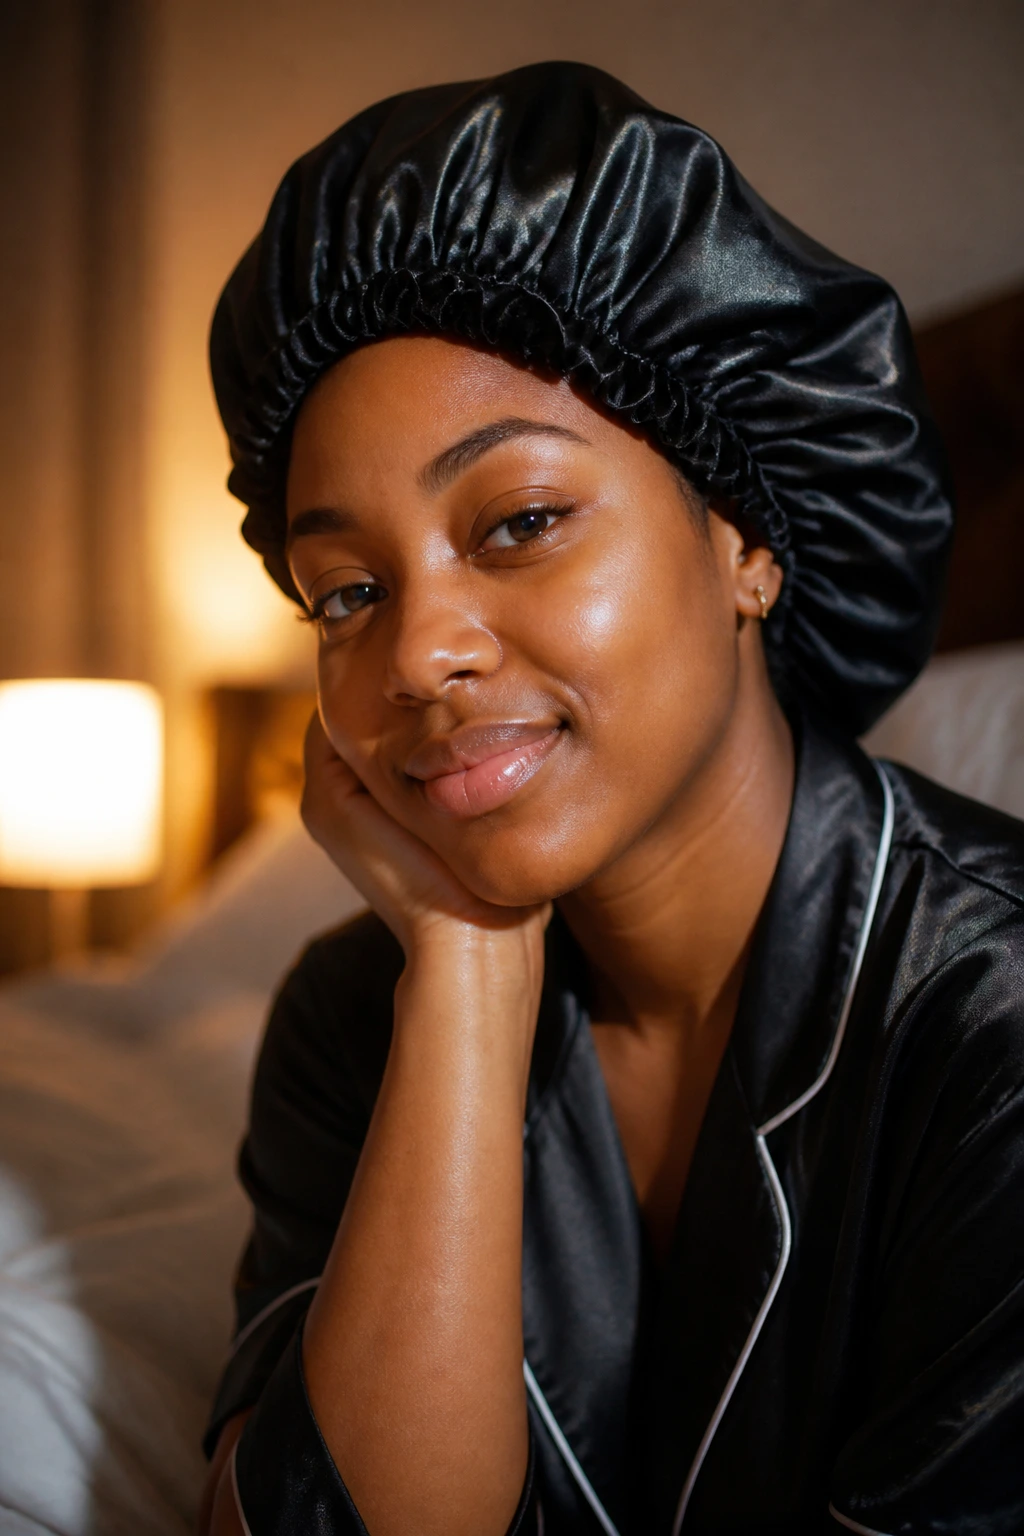
Satin bonnet and scarf: Night protection matters, especially on curly installs that fray at the ends.
-
Bobby pins and snag-free elastics: Needed for ponytails, buns, and wrapped bases that need to stay put.
-
Hooded dryer or diffuser: Helpful for setting curl definition without roughing up the pattern.
-
Silk press comb or hot comb: Optional, but handy for smoothing a leave-out or crown area when the install calls for it.
-
Bundle hanger or satin storage bag: Keeps unused hair from tangling or collecting dust before install.
Smart Shopping for Bundles, Closures, and Curl Patterns
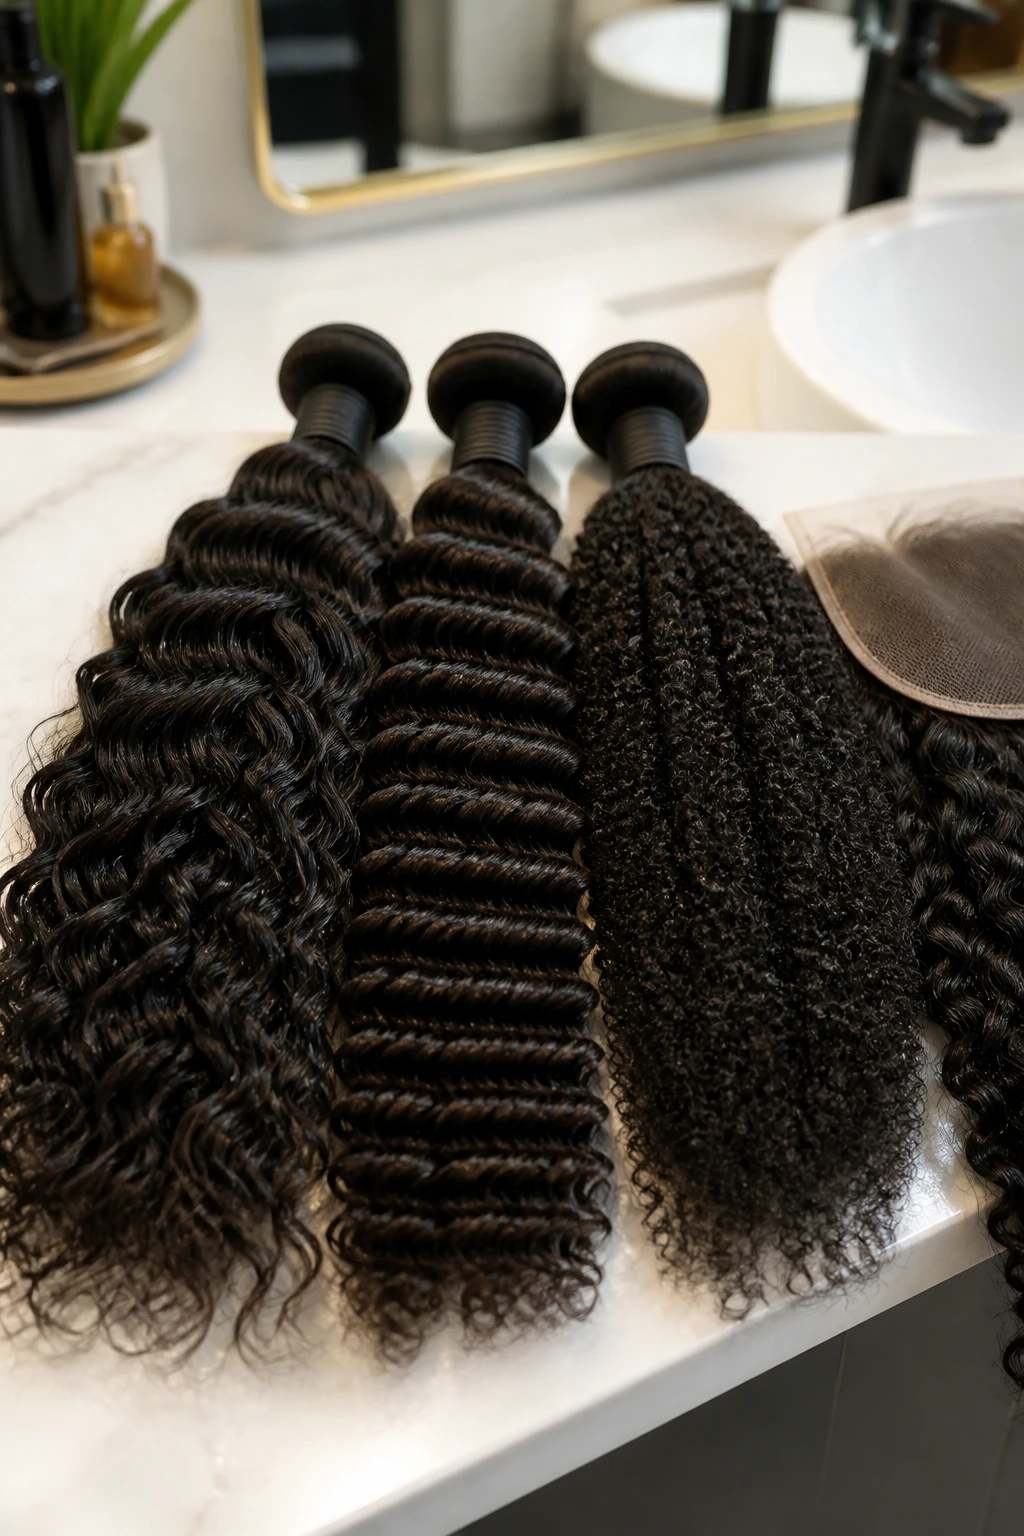
Start with texture, not length. If your own curls sit around 3c, 4a, or 4b, water wave, deep wave, and kinky-curly bundles usually blend more naturally than bone-straight hair pretending to be curly. If you prefer a softer wave, body wave works only when you plan to style it into shape; otherwise it can sit too limp next to real curls.
Bundle count matters more than people expect. A chin-length bob may only need 2 to 3 bundles, while long, chunky curls often need 3 to 4, sometimes 5 if you want the ends to stay full after cutting and layering. Curly hair compresses. If you buy too little, the ends can look thin once the hair is installed and styled.
Closure choice changes the whole install. A 4×4 closure is enough for a simple middle part or side part, but a 5×5 gives you more room to shift the part and move the hair around the face. Frontals are better for ponytails, deep side sweeps, and styles that need a lot of scalp realism in the front.
Human hair is the safer buy if you want to wash the style, refresh the curls, and keep it on for a few weeks. Synthetic can work for short wear or one-off events, but it usually fights heat, product layering, and repeated washing. Also check the ends before you buy. Dry, crunchy ends on curly bundles are a warning sign, not a bargain.
How to Wear the Look Without Letting the Hair Wear You
Presentation: Choose the part and shape first, then build the rest around it. A side part gives lift; a middle part gives symmetry; a low bun or ponytail gives clean lines around the face. If the style already has thick curls, keep the edges neat and the part crisp so the volume looks intentional instead of crowded.
Accompaniments: Big hoops, a sharp brow, and a simple neckline usually do more than extra hair accessories. A curly bob looks good with a wide neckline or blazer collar. Long, full curls can handle a sleek dress or a plain tee because the hair already brings texture to the outfit.
Proportion: Shorter chunky weaves are easier if you have a petite frame or a shorter neck. Longer installs can look gorgeous on taller frames or on anyone who likes a dramatic outline, but they need layers so the bottom doesn’t turn into one heavy curtain. If you’re unsure, stop the length at the collarbone first. That’s a safer place to start than waist length.
Occasion Pairing: Office days usually favor the bob, the low bun, or the sleeker middle part. Nights out can handle the high pony, highlighted curls, or a deep side sweep. A wedding or formal event is where the halo braid, Old-Hollywood waves, and burgundy installs really earn their keep.
Extra Ways to Make the Style Feel Like Yours
Texture Boost: Mix curl tightness on purpose. Keep the front pieces more defined, then let the mid-lengths stay fluffier so the style has movement instead of one uniform curl pattern.
Customization: Add a money piece, a few caramel highlights, or a single bold color panel near the underside if you want the hair to shift when you move. That works better than coloring every bundle when you only want a little edge.
Finishing Touch: A tiny amount of serum on the ends can help the curls look separated and soft. Use less than you think you need. A greasy finish makes curly weave hair collapse fast.
Make-It-Yours: If you prefer low maintenance, go for a closure-based style with fewer leave-out demands. If you like face-framing, choose a side part or front layers. If you want maximum comfort, keep the install shorter and lighter rather than trying to force waist-length hair onto a head that wants movement.
Night Care, Washing, and Refreshing the Curls
The first 48 hours set the tone. Let the install settle, avoid heavy oils at the scalp, and stop yourself from tugging at the part every ten minutes. That little bit of restraint helps the braids and closure lie flat.
At night, use a satin bonnet or scarf and keep the curls gathered loosely, not smashed. For a ponytail or long install, a loose pineapple works fine. For bobs and lobs, a satin wrap over the top keeps the crown smooth and the ends from rubbing into the pillow.
If the style has leave-out or natural curls blended in, refresh every 2 to 3 days with a water-based mist and a light leave-in. Scrunch the curls, finger-separate the parts that clump too much, and let the hair dry completely before touching it again. Wet hair left pinned down all night turns limp and can get that stale, flattened smell nobody wants.
Clean the scalp every 7 to 10 days if you’re wearing a sew-in or closure style. Use a diluted shampoo bottle, point the nozzle at the braid rows, and rinse carefully. Let the scalp dry fully with cool air or a hooded dryer on low. If you wear the style for more than a few weeks, keep an eye on tension, itching, and buildup. Those are signs to clean it or take it out, not push through.
Extra bundles should be stored clean and dry in a satin bag or hanging organizer. If you co-wash them before storage, make sure they are fully dry first. Damp hair in a drawer is a bad idea.
Mistakes That Make a Chunky Weave Look Flat or Tired
The first mistake is choosing hair that’s too silky for the style. A shiny, straight bundle can fight curly hair instead of blending with it, and the install ends up looking disconnected. Match the texture to your own curl pattern, or stay in the same family—deep wave with deep wave, kinky-curly with kinky-curly, water wave with softer curls.
Too much product is another one. Heavy cream, thick oil, and sticky edge control can all weigh down curls until they collapse into dull strings. If the hair starts looking greasy by midday, you used too much. Wipe it back, cut the product in half, and keep most of the moisture at the ends, not the scalp.
Tension is the quiet troublemaker. If the braids are too tight, you’ll feel it at the temples and nape first, then the style starts pulling the hairline backward. That’s not a normal part of “breaking in” a weave. It’s a warning. The install should feel snug, not painful.
People also miss the shape at the ends. Chunky curls need layers or a clean cut so the bottom doesn’t sag into one blunt block. And if you skip nightly protection, the ends frizz, the part lifts, and the whole style starts looking older than it is.
Variations and Adaptations to Try
Soft Side-Part Blend: Keep the deep side part, but use lighter density and shorter face-framing layers. This works if you want a full look without the dramatic bulk of a heavy install.
Color-Pop Money Piece: Leave most of the weave dark and add one or two brighter bundles around the front. It brings light to the face without making the whole style high-maintenance.
Low-Tension Closure Set: Choose a closure, medium-sized braids, and shoulder-length bundles. It gives you chunk and shape while keeping the hairline calmer than a leave-out install.
Short-Stack Bob Swap: If long hair gets in your way, keep the same chunky texture but cut the install into a jaw-length bob. You still get body; you just lose the weight.
Event-Ready Wave Finish: Set the curls with larger rollers or a wand, then brush out the top section for a smoother finish. This is a good pick for weddings, dinners, or photos where you want the hair to read a little dressier.
Humidity-Proof Refresh: Use water, foam, and a tiny bit of anti-frizz serum on the ends. That keeps the curl clumps visible when the air turns heavy and the style starts to puff.
Frequently Asked Questions That Come Up Before the Install
How long does a chunky weave last on curly hair?
A well-installed closure or sew-in usually wears well for about 2 to 4 weeks with regular scalp care, and sometimes a bit longer if tension is low and the hair is protected at night. Leave-out styles usually need more upkeep and start looking tired sooner because your own curls are doing part of the work.
Do I need a closure or a frontal?
If you want a simple middle part or side part, a closure is usually enough and easier to maintain. A frontal makes sense if you want a ponytail, a deep sweep, or a lot of styling freedom across the hairline.
What bundle texture works best for 4c hair?
Kinky-curly, deep wave, and some water wave textures blend best for 4c hair, especially if you’re not planning to flat iron your own leave-out every few days. The goal is not perfect sameness. It’s a close enough match that the install reads as one shape.
Can I wear chunky weaves if my edges are delicate?
Yes, but choose low-tension braiding, a lighter density, and a closure-based style. Avoid super-tight ponytails and keep gel off the hairline as much as possible. If the style hurts, it’s too tight. Full stop.
How do I keep the curls from getting frizzy so fast?
Use water-based moisture, not heavy oil, and let the curls dry before you touch them again. A satin scarf at night helps a lot. If the style starts to puff, lightly mist it, scrunch it, and stop brushing it dry.
Can I work out with a chunky weave?
You can, but pick a style that keeps the hair secure—high ponytails, low buns, or closure installs are easier to manage. Sweat means you’ll need to dry the scalp after workouts and refresh the curls a little more often.
How many bundles do I need?
For shoulder-length styles, 2 to 3 bundles may be enough depending on texture. For long, full curly installs, 3 to 4 bundles is a safer starting point. If the hair is very dense or you want blunt ends after cutting, buy one extra bundle.
How do I take the style down without damaging my own hair?
Take your time and cut the thread or unravel the braid rows slowly, section by section. Detangle your real hair while it’s lightly damp with conditioner before shampooing, not after it’s already dry and tangled. Rushing the takedown is where a lot of breakage starts.
The Styles That Keep Their Shape

The best chunky weave styles do one thing well: they hold their line while still letting the curls move. That’s why the side parts, bob cuts, ponytails, and layered installs keep coming back. They give curly hair a shape you can trust.
If you’re choosing between them, start with your real routine, not just the look on a mood board. Pick the style you’ll actually maintain at night, clean on wash day, and wear without fussing at the mirror every hour. That’s usually the one that ends up looking the best in real life.
And once you find the shape that fits your face, your curl pattern, and your patience level, everything gets easier from there.