Curly hair does not need to be flattened to look polished on a big day. That’s the first thing I’d tell anyone standing in front of a mirror with a brush in one hand and a curling wand in the other. The best romantic waves on curly hair don’t erase texture; they arrange it. They keep the soft bends, the spring, the little flick at the ends, then clean up the crown and front so the whole head reads as intentional.
And that matters more than people admit. A side part that opens the face, a wave pattern that stays loose around the cheekbones, a clipped-back temple section that doesn’t fight your natural curl—those details do more for a special-occasion style than a pile of hairspray ever will. I’ve seen plenty of hair look “done” in the bathroom and collapse into something fussy by dessert because the shape was built on the wrong idea: too much smoothing, too much heat, too much control.
The sweet spot is softer than that. On curly hair, romantic waves work best when they borrow from what the hair already wants to do. A little stretch. A little bend. Enough shine to catch the light, enough movement to sway when you turn your head. The looks below lean into that balance, from polished side-swept waves to loose braids, pinned crowns, and brushed-out texture that still feels like hair, not helmet.
Why These Waves Earn a Place on a Special Day
-
They respect your curl pattern: Each look keeps some natural movement in the ends or crown, so you’re shaping curls instead of forcing them into something stiff.
-
They hold up in photos: Soft volume at the roots and a clean front section make the hair read well from the front, side, and back without needing a lot of retouching.
-
They work with accessories: Pearls, combs, pins, ribbons, and flowers sit better on a wave pattern than on a flat blowout that slips by the second hour.
-
They fit more than one dress code: Some of these looks are quiet enough for a dinner date, while others can carry a formal gown, a suit jacket, or a ceremony dress with a high neckline.
-
They’re flexible with length: Shoulder-length curls, long spirals, and even shorter lobs can all wear a version of these styles if you match the barrel size and pinning to the cut.
-
They keep the hair touchable: A good special-day style should survive a hug, a breeze, and a long evening without turning crunchy or stiff by the end of it.
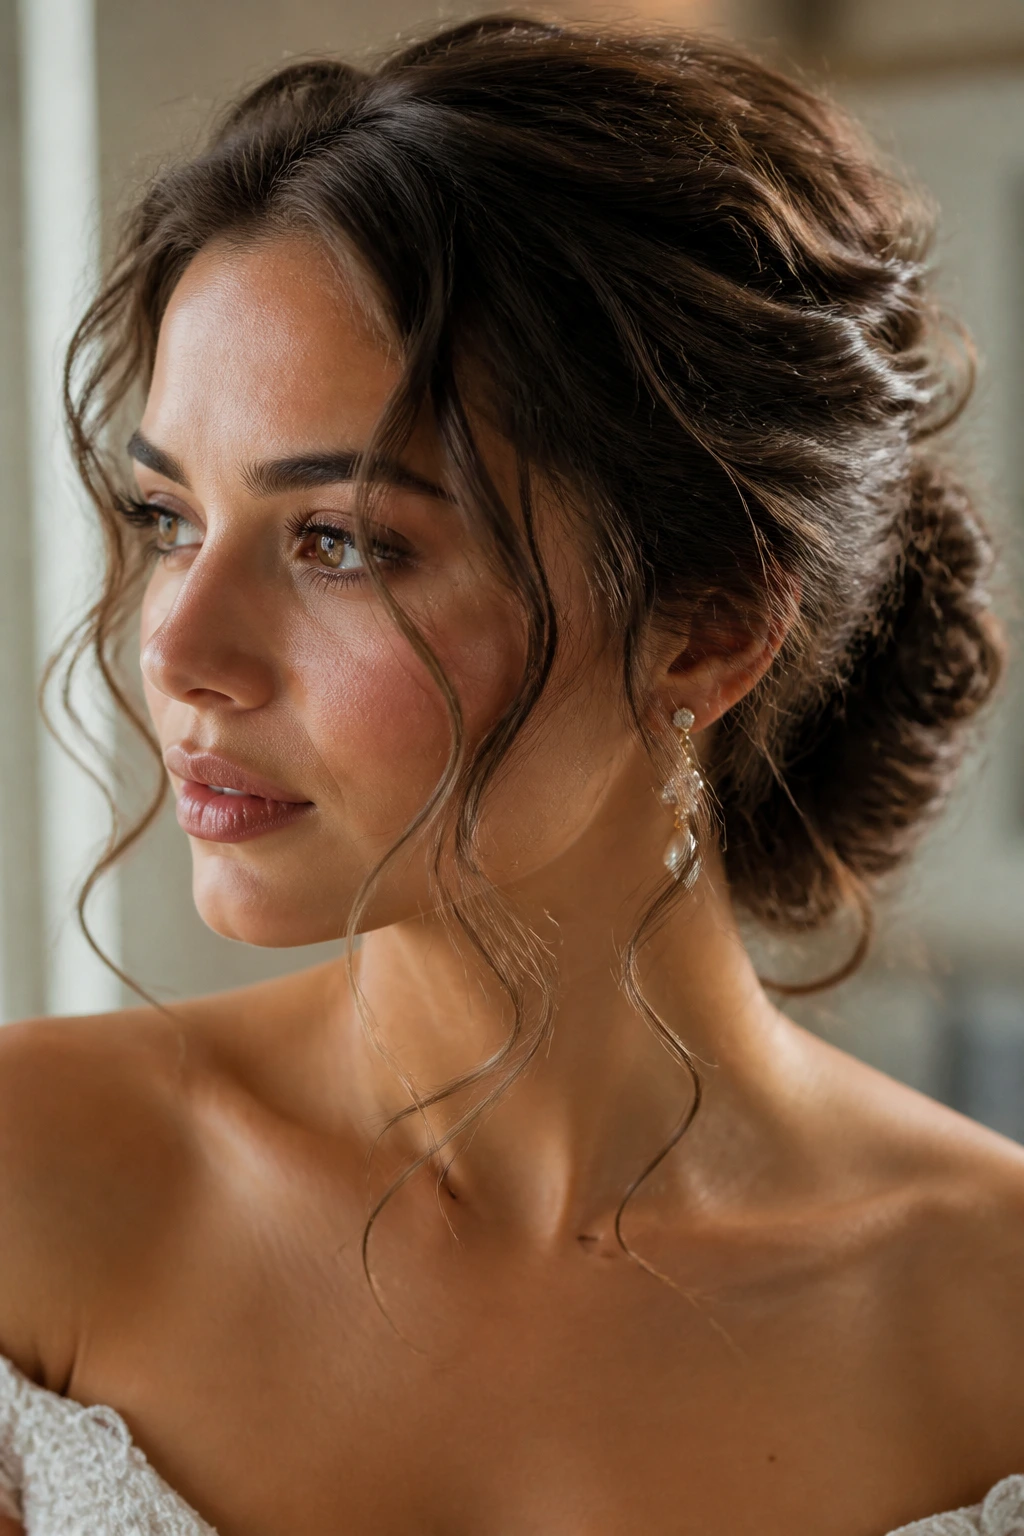
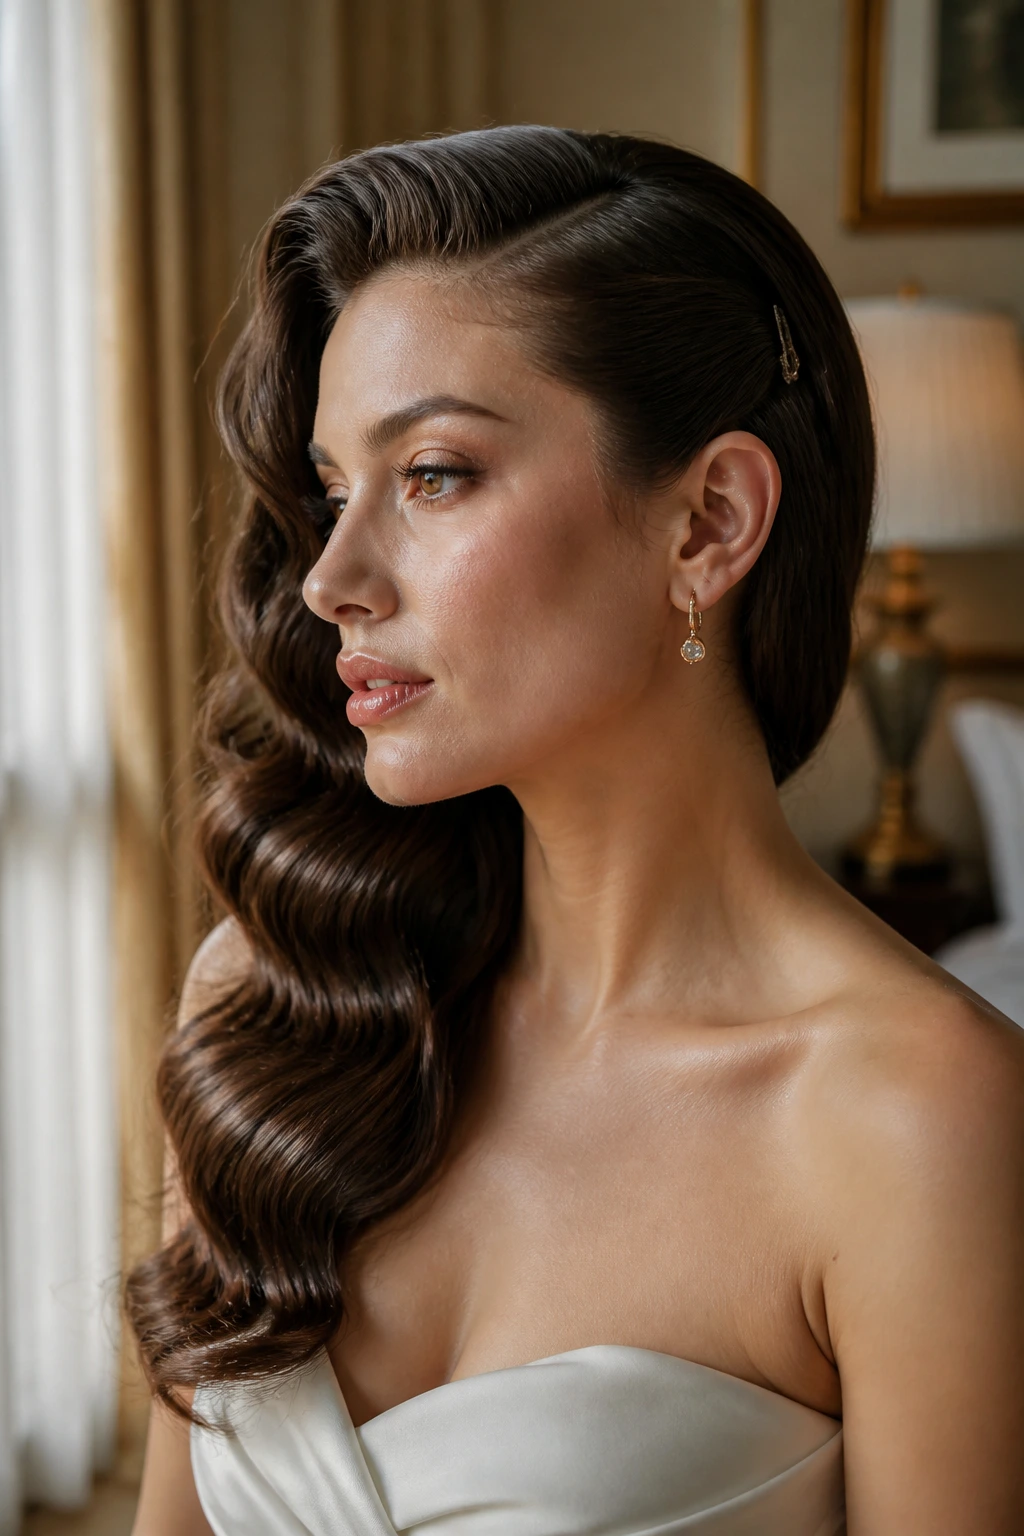
1. Side-Swept Hollywood Waves
A deep side part does a lot of heavy lifting on curly hair. It opens one side of the face, gives the front a cleaner line, and lets the rest fall in one smooth curve instead of a cloud of separate pieces. This is the look I reach for when the outfit has a strong neckline or the occasion wants a little extra drama without losing softness.
Why It Works
Curl the front sections away from the face with a 1.25-inch iron or wand, then clip those pieces flat while they cool. Once the hair is fully cool, brush lightly with a boar bristle brush so the bends merge into one ribbon-like wave. That brush-out is the difference between “curled” and “glamorous.”
For curly hair, the trick is not to over-smooth the crown. Leave a touch of root lift at the part, then tuck the heavier side behind one ear and pin it discreetly under the top layer. It keeps the style from sliding into your face halfway through the night.
Best for: long layers, shoulder-to-mid-back length, and anyone who wants a clean profile in photos.
Tiny detail that matters: spray the top layer before brushing, not after. Dry spray at the finish can leave white flecks on dark curls.
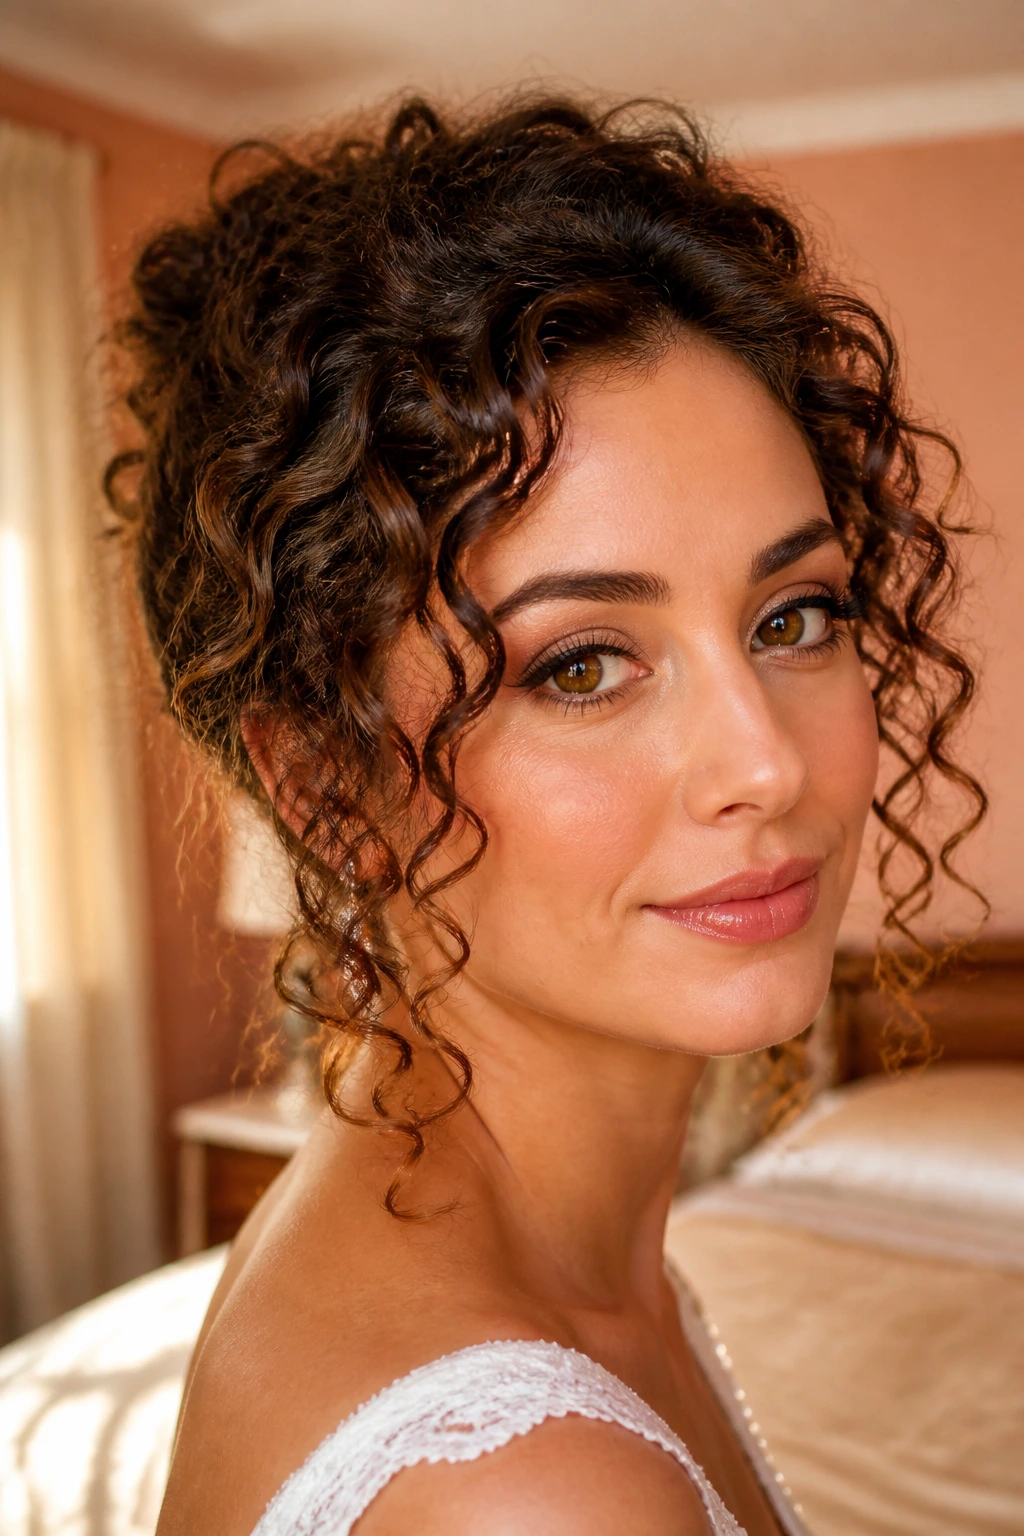
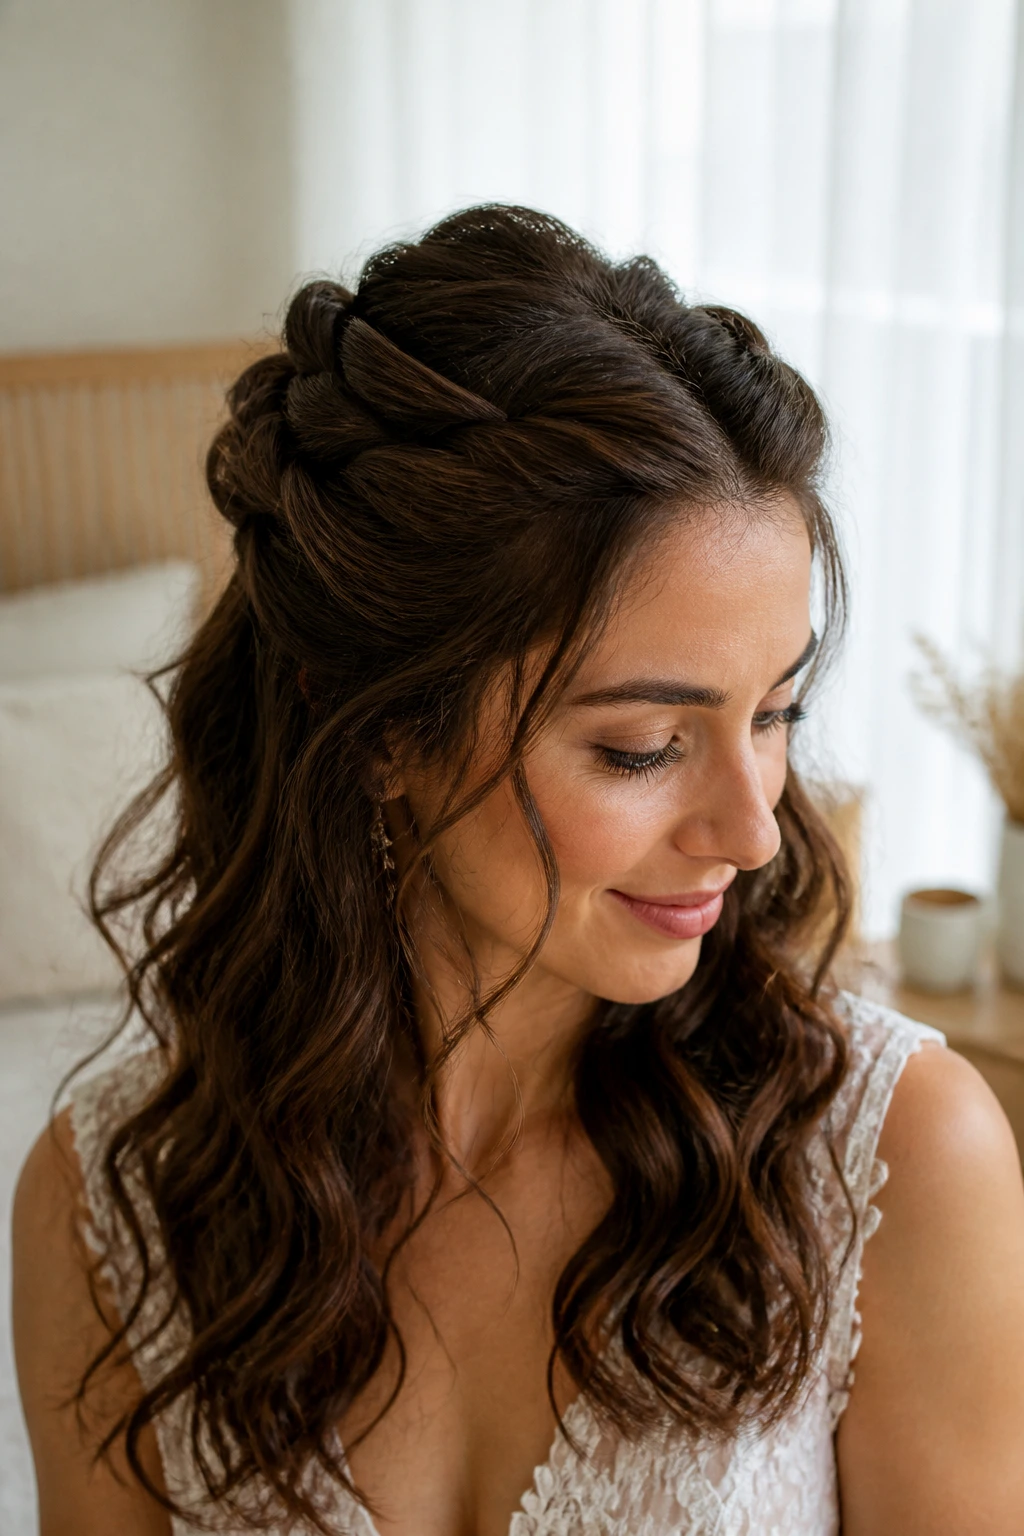
2. Half-Up Twist Crown Waves
If you want romance without committing to a full updo, this is the move. Twist each front section back from the temples, meet them at the crown, and hide the pins under the twist so the top looks smooth but not tight. The rest of the hair stays loose and wavy, which gives the whole style a soft, almost floating shape.
What Makes It Different
The half-up section pulls the eye upward, which is useful on curly hair because it gives the crown a cleaner line before the wave pattern starts. I like this on hair that has a little density; thin curls can wear it too, but the twists should be narrower so the top doesn’t feel overbuilt.
Use a medium-hold cream on the front pieces before twisting so they stay together without becoming sticky. If the ends are extra springy, wrap the last inch around your finger before pinning. It prevents little frizz halos at the twist edge.
Good pairing: pearl pins, a small comb, or a satin ribbon tied around the joined twist. That’s enough. More tends to crowd the shape.
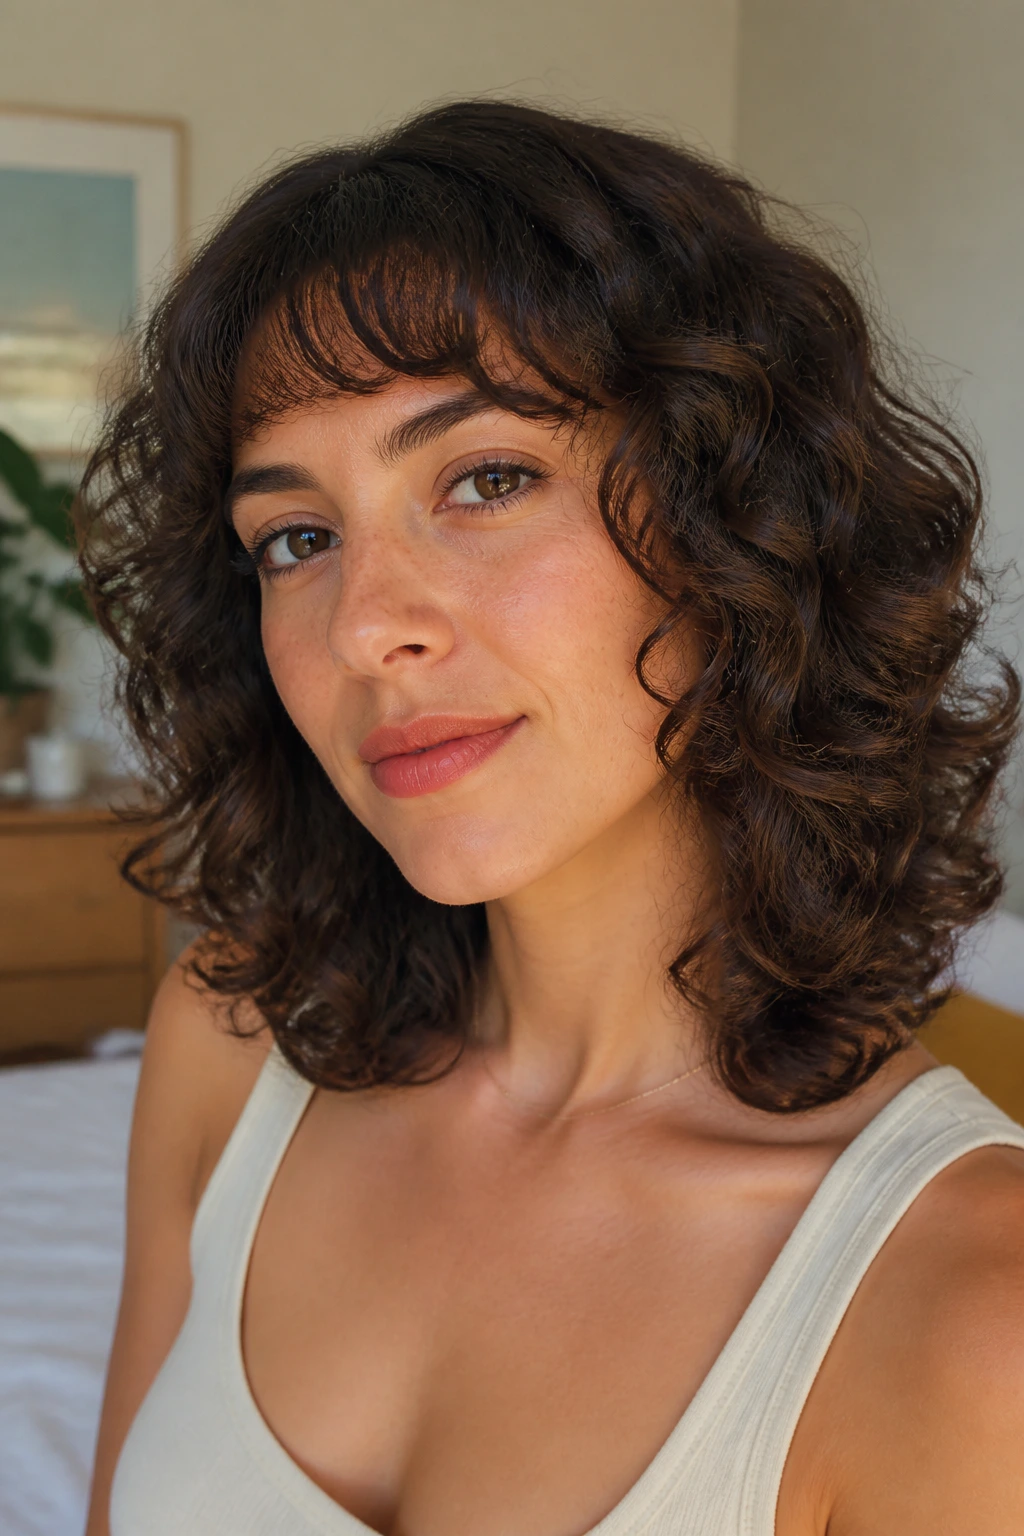
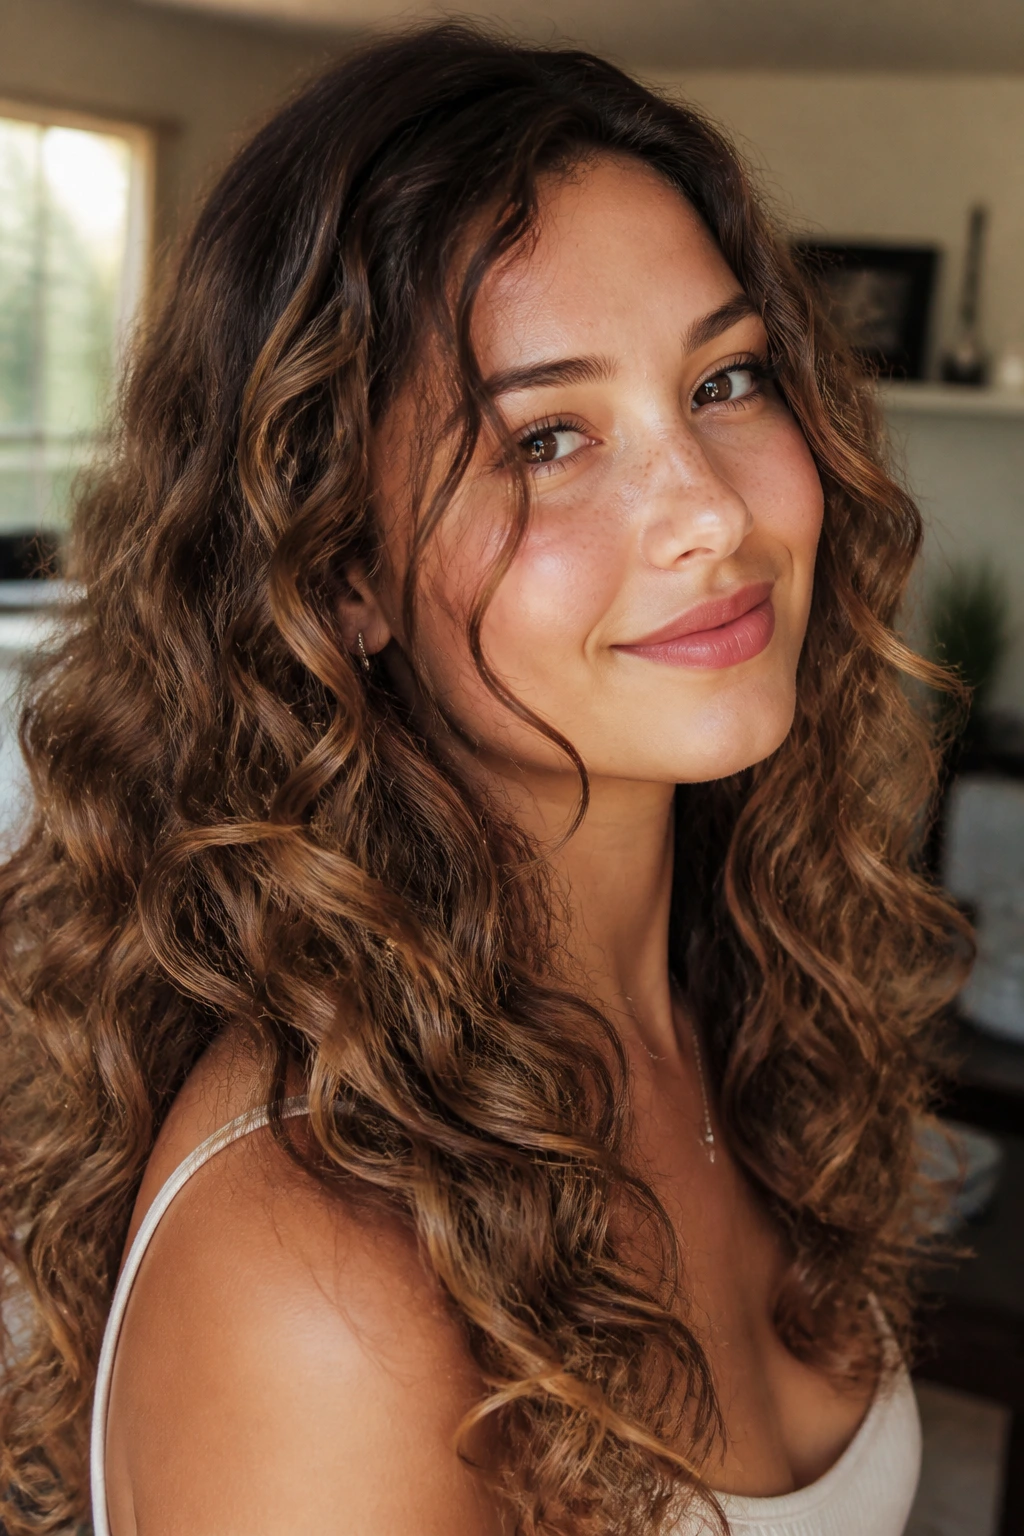
3. Brushed-Out Ringlet Waves
This is the look that proves curls can be soft without disappearing. You set the curls first, then brush them out while they’re fully cool, so the ringlets melt into a wide, airy wave pattern that still shows texture. It’s not flat. Not by a mile.
A brushed-out finish works especially well when the hair already has a defined curl to begin with. Start with a little curl cream, diffuse until about 80% dry, then use a soft brush to loosen only the mids and ends. Leave the roots alone if you want height at the crown; dragging a brush through the base makes the whole style sink.
How to Wear It
This style loves satin dresses, structured blazers, and anything with a shoulder-baring neckline. It also looks good with larger earrings because the hair moves away from the jaw instead of crowding it.
One sentence of warning: don’t brush while the hair is warm. Warm curls collapse fast and can frizz at the bend, which leaves you with puffy waves instead of soft ones.
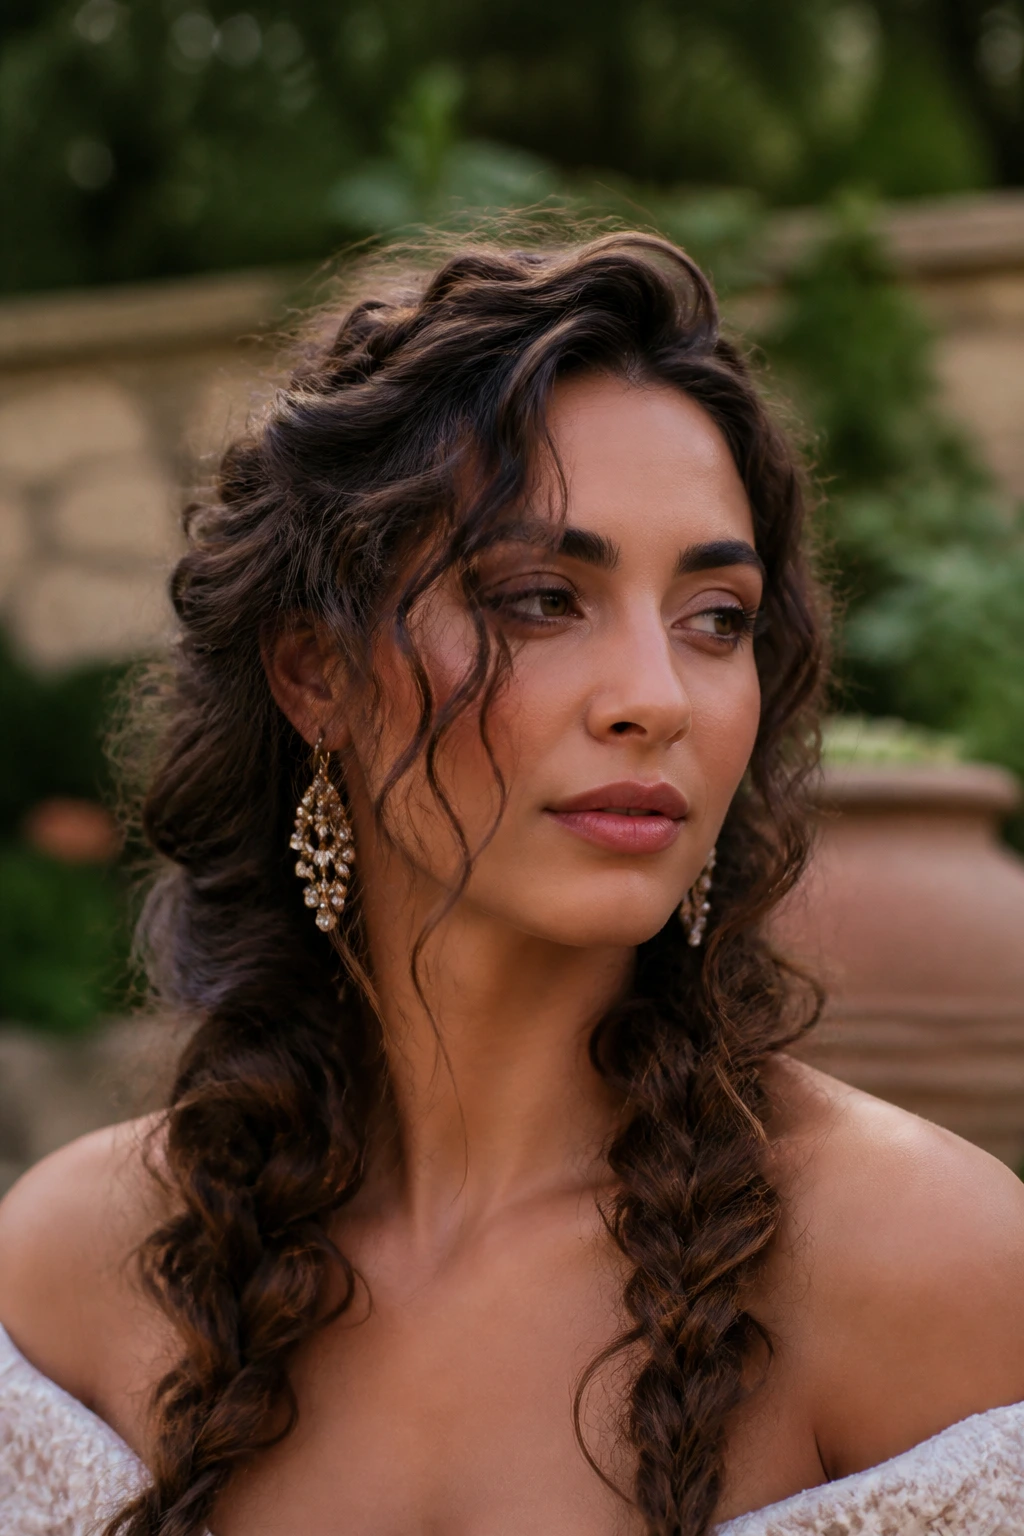
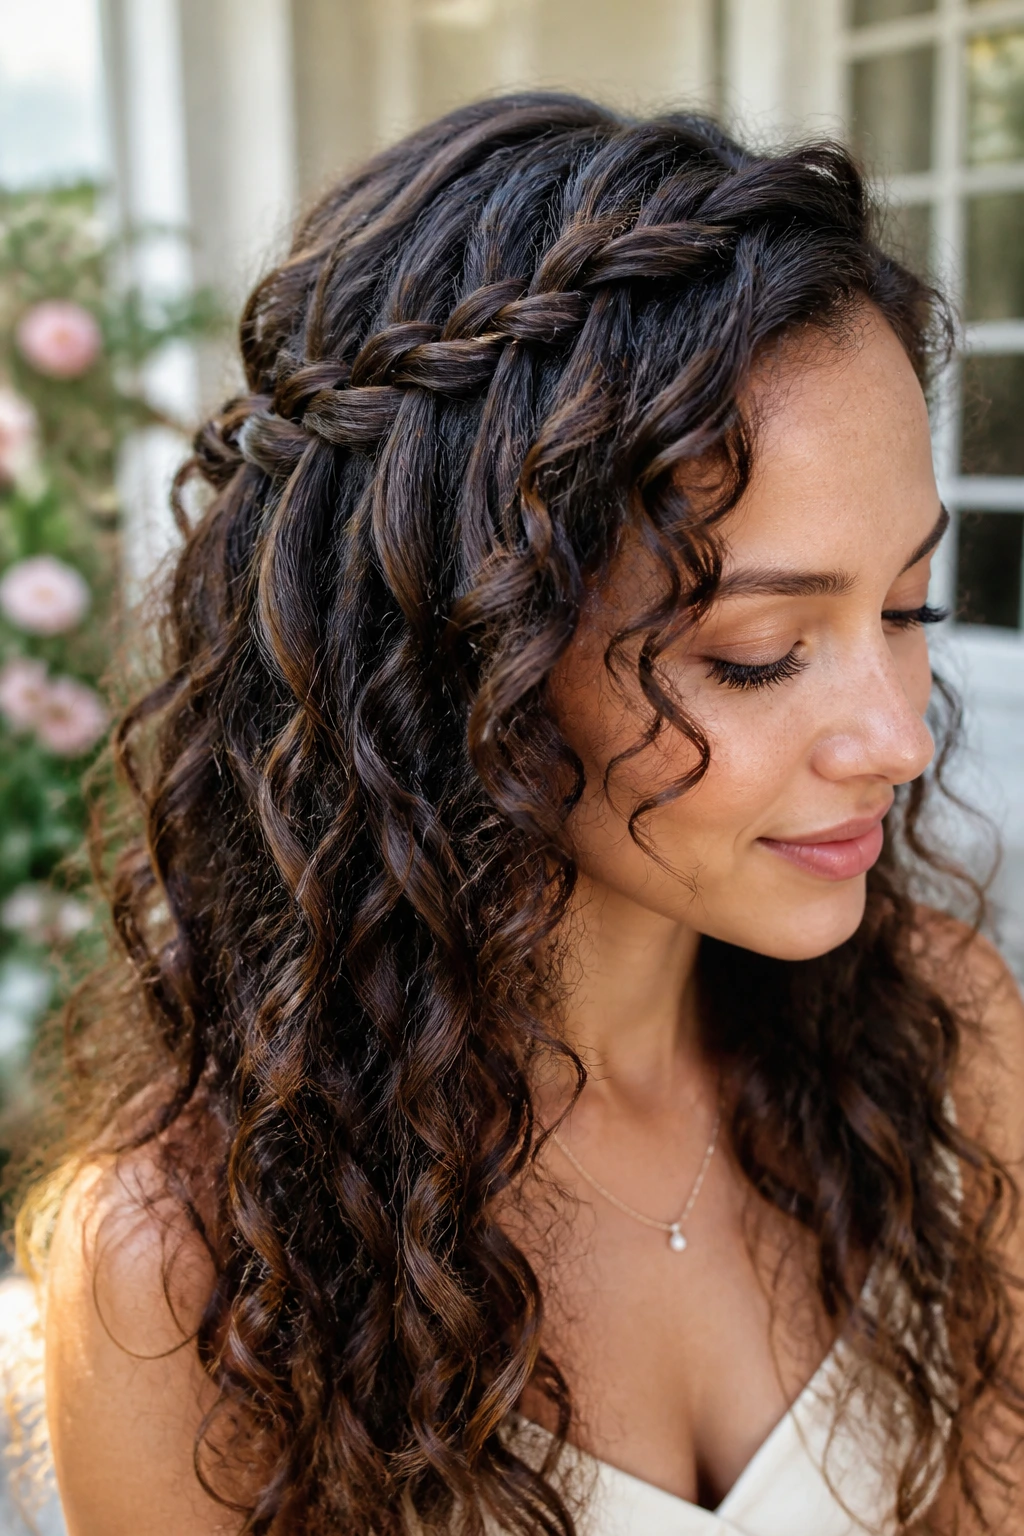
4. Waterfall Braid Waves
A waterfall braid gives curly hair a pretty frame without eating up the whole style. The braid starts near the hairline, releases strands as it moves across the head, and lets the loose lengths keep their wave and bounce. It has movement from the front and softness in the back. Good combination.
The braid itself should be loose enough that you can see the pattern without seeing your scalp through every gap. If the braid is too tight, it creates a hard ridge that fights the natural texture. If it’s too loose, it slides. The middle ground is a braid that sits on the surface of the hair like a ribbon.
Styling note: mist the braid line with a light hairspray before you secure the last section. That gives the style a little grip and keeps the shorter pieces from poking out around the temple.
This is one of those looks that reads especially well on layered curls. The braid holds the top, and the layers soften the fall underneath.
5. Low Side Chignon with Wave Tendrils
The low side chignon is what I’d call controlled romance. The hair gathers low and to one side, but a few wave pieces are left out around the face and near the nape so the whole thing doesn’t go rigid. It’s polished enough for formal wear, yet it still has the softness curly hair does so well.
Best for a More Elegant Dress Code
If the event has a structured neckline, this style helps balance it. It keeps the hair off the shoulders and still leaves a bit of motion near the face. That’s the point. A full, tight bun can look severe against textured curls; a side chignon with loose tendrils feels warmer.
Pin the bun first, then shape the tendrils with a 1-inch iron if they need a cleaner bend. Don’t over-curl the front pieces. A single wrap around the barrel is usually enough, and it keeps the tendrils from looking too springy.
One practical tip: cross the bobby pins in an X at the base of the chignon. It sounds small. It’s not. That little pin cross stops a heavy texture from slipping apart.
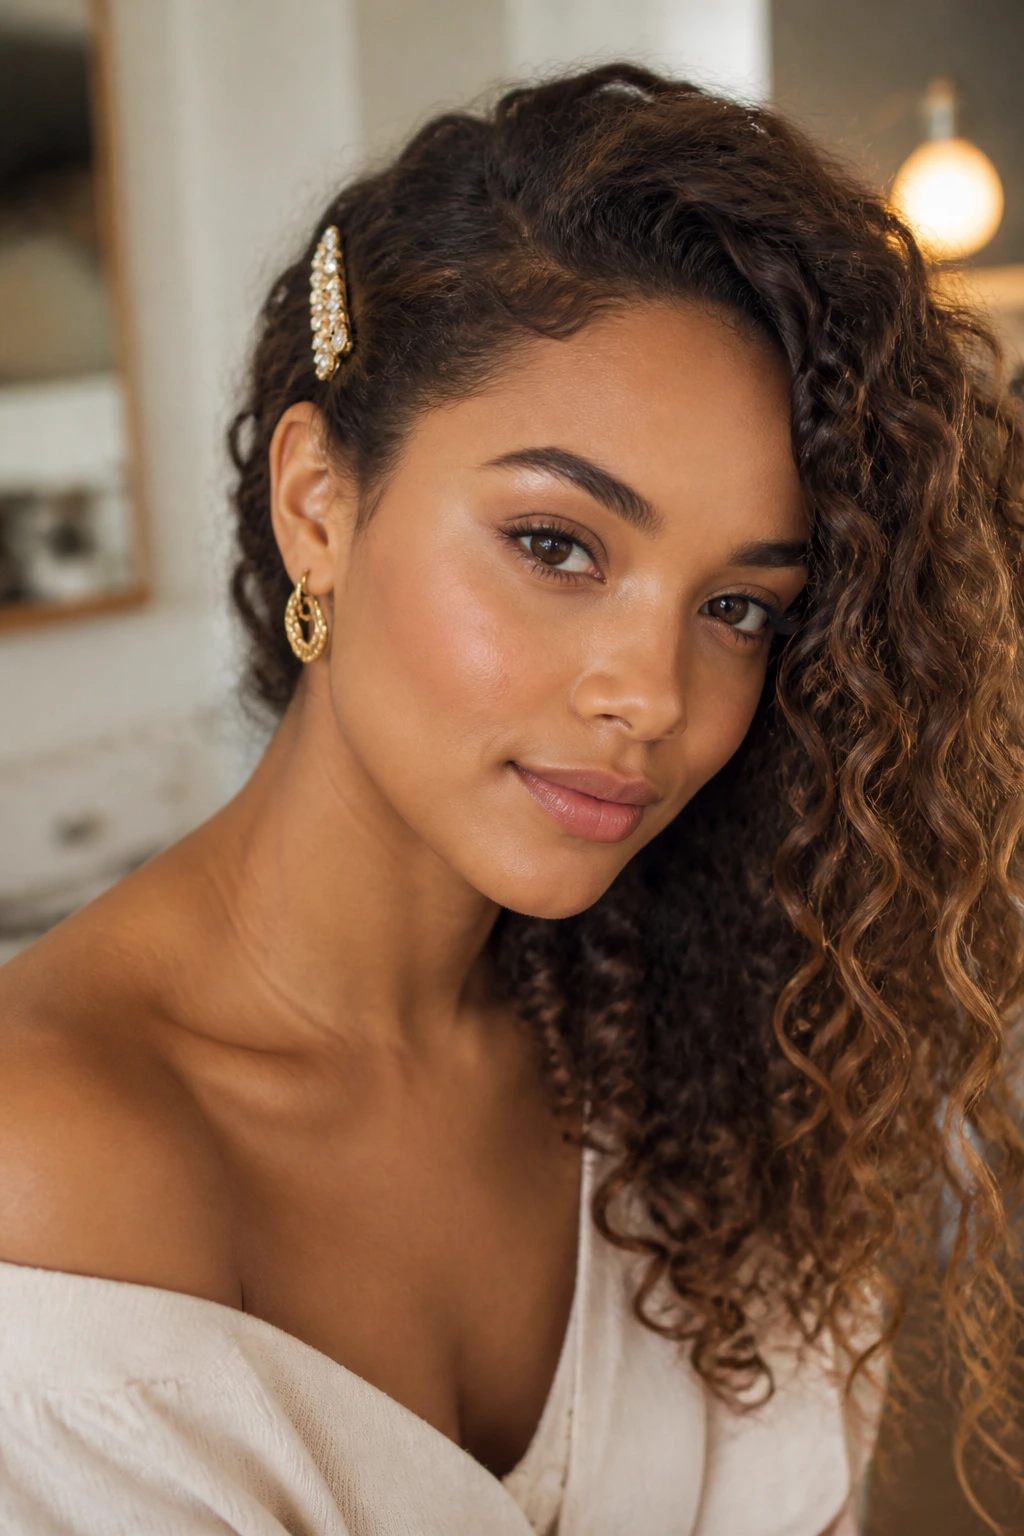
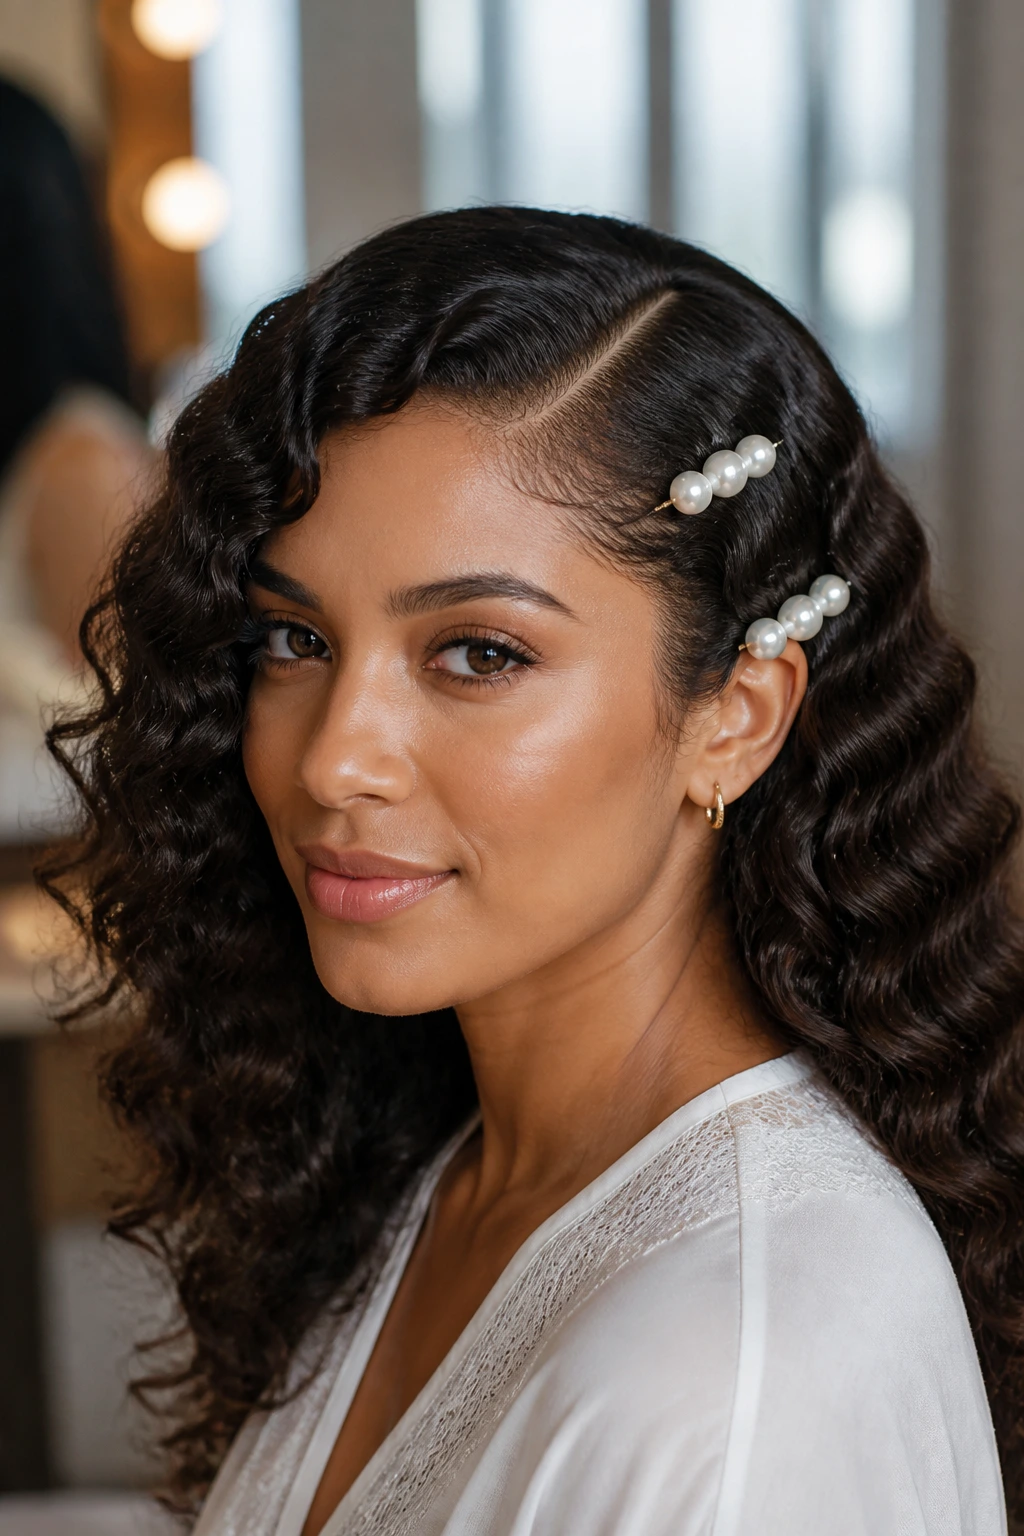
6. Pearl-Pinned Deep Waves
Pearl pins can turn a simple wave pattern into event hair fast. The trick is to place them where the hair already curves, not where you wish the hair would curve. On curly hair, that usually means one temple, a point just above the ear, or a shallow arc along the side part.
A deep wave pattern gives the pearls room to sit. If the hair is too fluffy or too uniform, the pins disappear into the shape. Start with a deep side part, curl everything away from the face, then brush only the top layer so the waves become broad and glossy underneath the pins.
Why It Works
The contrast matters. Smooth crown, soft wave body, small bright pin. Each part has a job. The style feels expensive in the old-fashioned sense of the word: deliberate, not loud.
Use two or three pins at most. More than that and the hair starts to look crowded. One line of pearls near the part usually gives enough shine for photos.
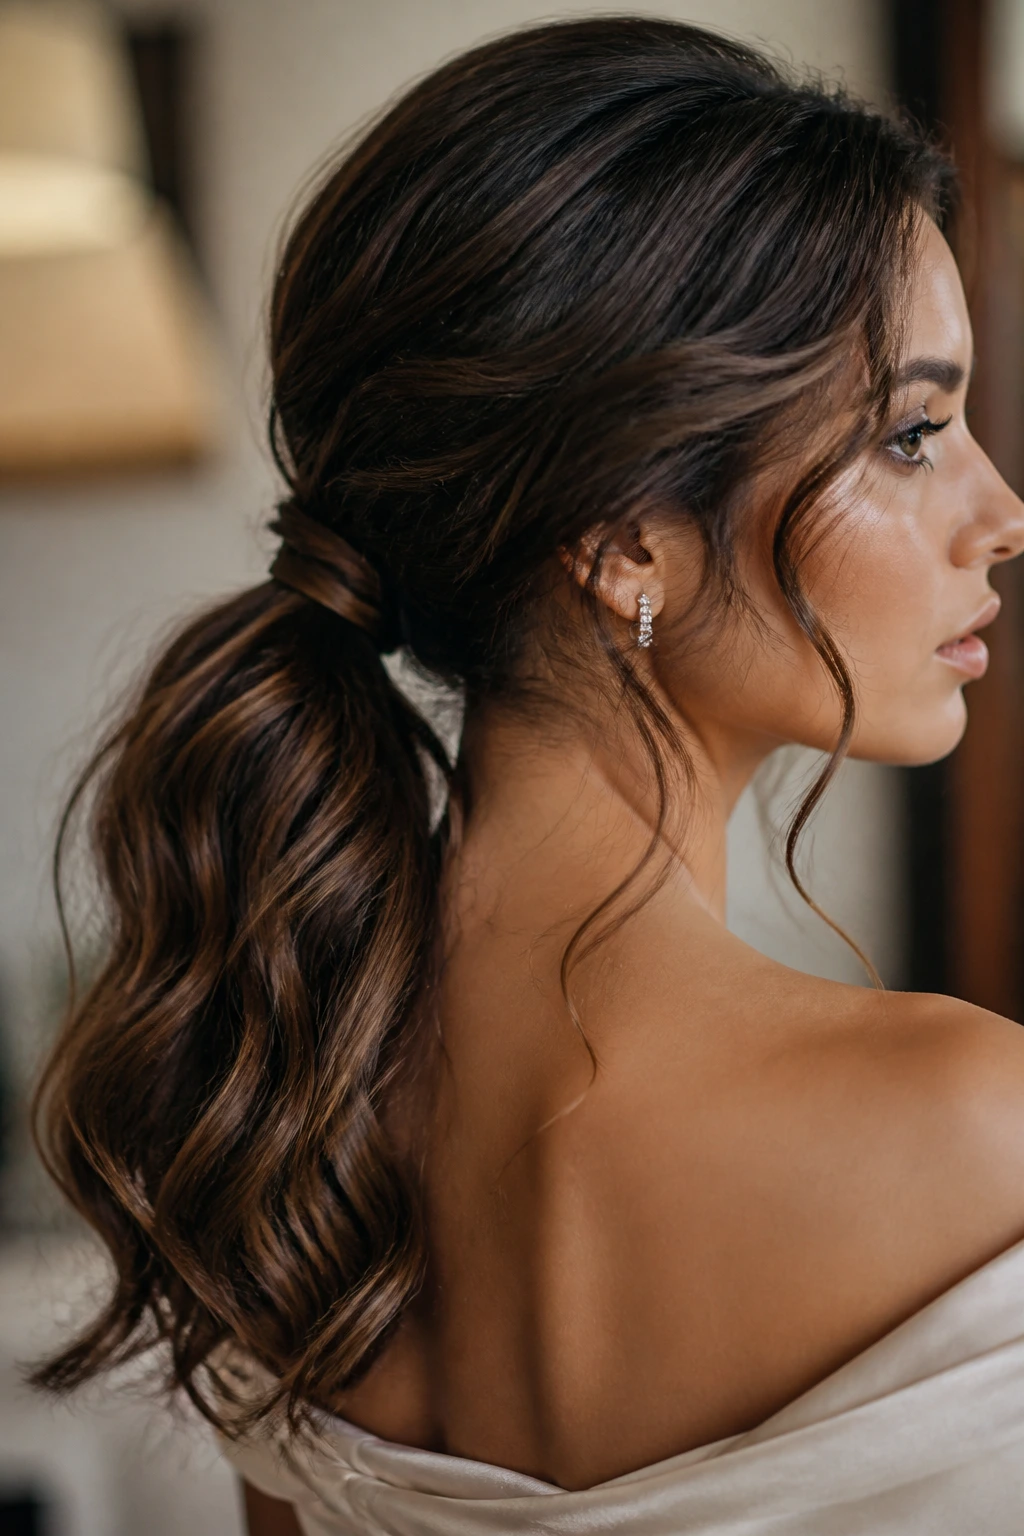
7. Romantic Ponytail Waves
A low ponytail can still look special if the wave pattern is generous enough. Pull the hair back loosely, keep the crown smooth, wrap a section of hair around the elastic, and let the ponytail itself stay soft and curved. The result is cleaner than loose hair but less formal than a bun.
This is a smart choice for curly hair that gets bulky at the nape. The ponytail removes some weight from the back, which can make the front wave pattern sit better. It also keeps the neck open, which matters if the outfit has a high collar or a lot of detail around the shoulders.
Try this: curl only the ponytail lengths after securing them, then separate the waves with your fingers instead of a brush. That keeps the tail from puffing out too much.
A small ribbon or velvet tie can make the base feel finished without stealing the show.
8. Sculpted S-Waves
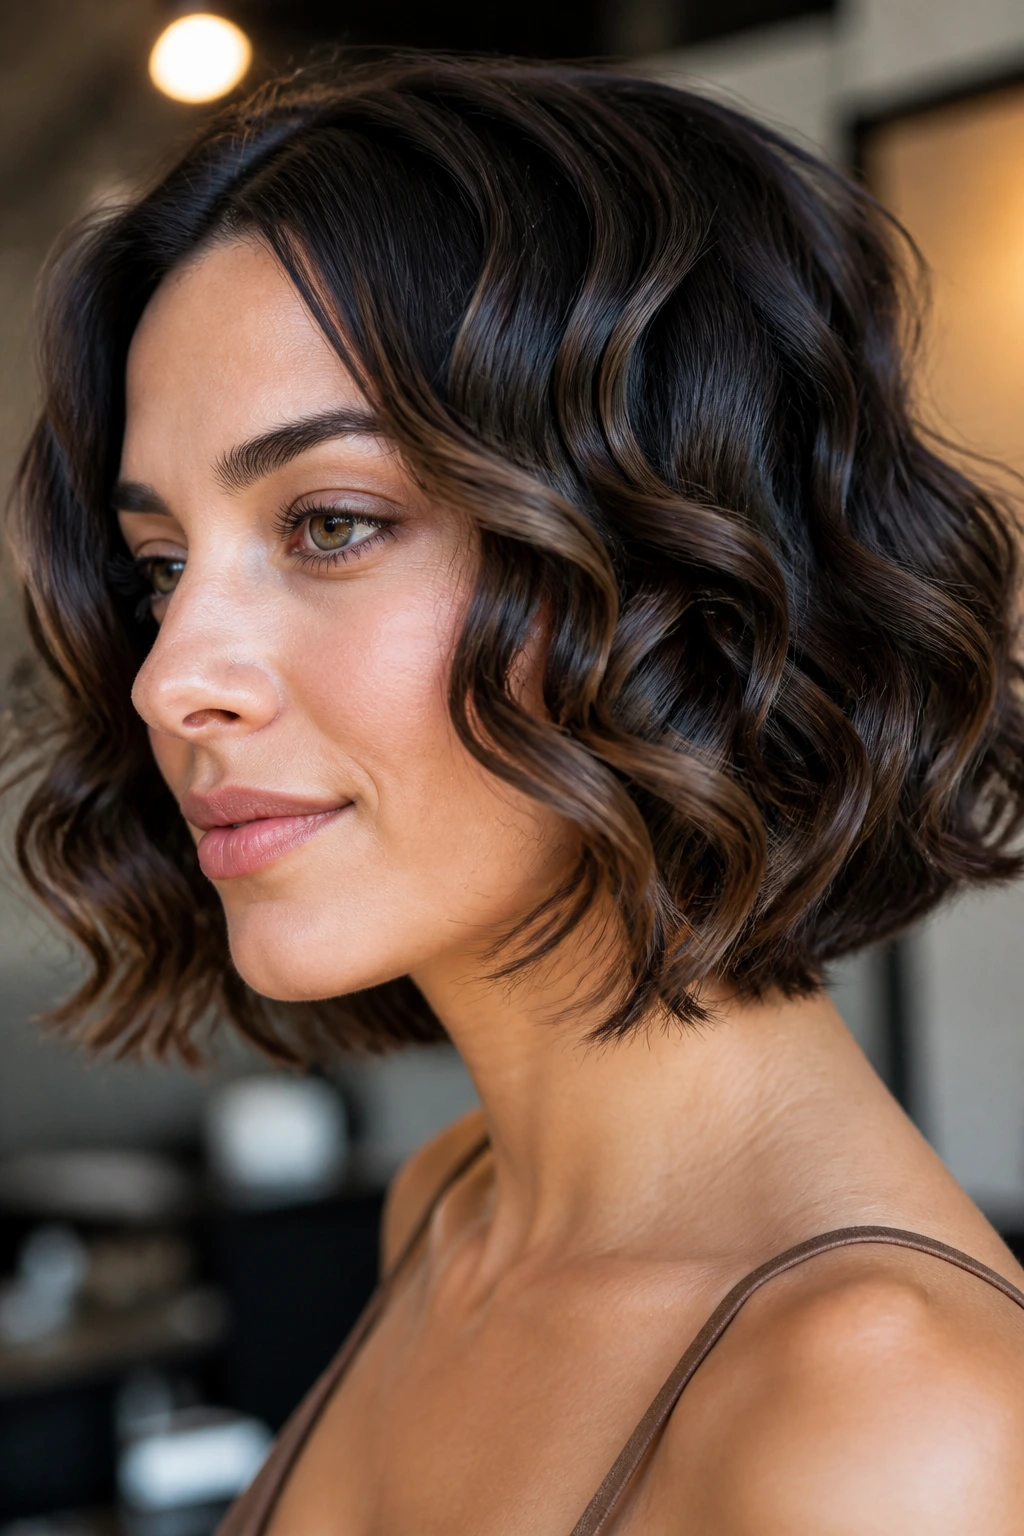
S-waves are sharper than soft beach waves, and that’s exactly why they look good on shorter curly hair. The bend moves in one direction, then back the other way, creating a clear S-shaped line through the length. It has more structure than a brushed-out wave and more polish than a curl left to do its own thing.
On a bob or lob, this style can look elegant instead of busy. Use a flat iron or a narrow wand, bend the hair in alternating directions, and pinch the wave flat for a second while it cools. That pinch is where the shape sets. Skip it, and the wave stays too round.
Best for: shoulder-length cuts, one-length bobs, and anyone who wants movement without losing the clean edge of the haircut.
A little shine serum on the ends goes a long way here. Use a pea-sized amount, not a palmful. Too much product will blur the S and leave the finish limp.
9. Boho Halo Braid Waves

A halo braid around the crown gives curly hair a soft frame and leaves the lengths free to ripple below it. It has that slightly undone, garden-party feel that works beautifully with dresses that have lace, embroidery, or a little texture in the fabric.
The braid should sit like a crown, not a helmet. Keep it loose enough that it doesn’t press hard into the scalp, and leave a few finer curls near the temples so the hairline still looks soft. After the braid is secured, mist the lengths with a salt-free texturizing spray and scrunch lightly.
How to Style It
If your curls are dense, braid only the top third of the head and stop before you reach the back. That leaves more weight in the lengths, which stops the style from feeling too top-heavy. If your hair is finer, a halo braid can act like built-in structure and keep the shape from falling flat.
A few tiny flowers or pearl pins fit here, but the braid itself already carries the look.
10. Face-Framing Curtain Waves
Curtain waves are one of my favorites because they do something practical and flattering at the same time. The center part opens the face, the front pieces sweep outward, and the rest of the hair falls in loose, separated waves that don’t crowd the cheekbones. It’s a simple setup, but on curly hair it can look polished fast.
The key is the front. Those two face-framing sections should be smoother than the rest of the hair and curled away from the face. If they collapse inward, the whole style loses its shape. Clip them until they cool, then release and lightly stretch the bend with your fingers.
Works especially well with: layers, curtain bangs, or a cut that has shorter pieces around the chin.
I’d skip heavy accessories with this one. The charm is in the shape itself. A small barrette or one tucked pin is enough.
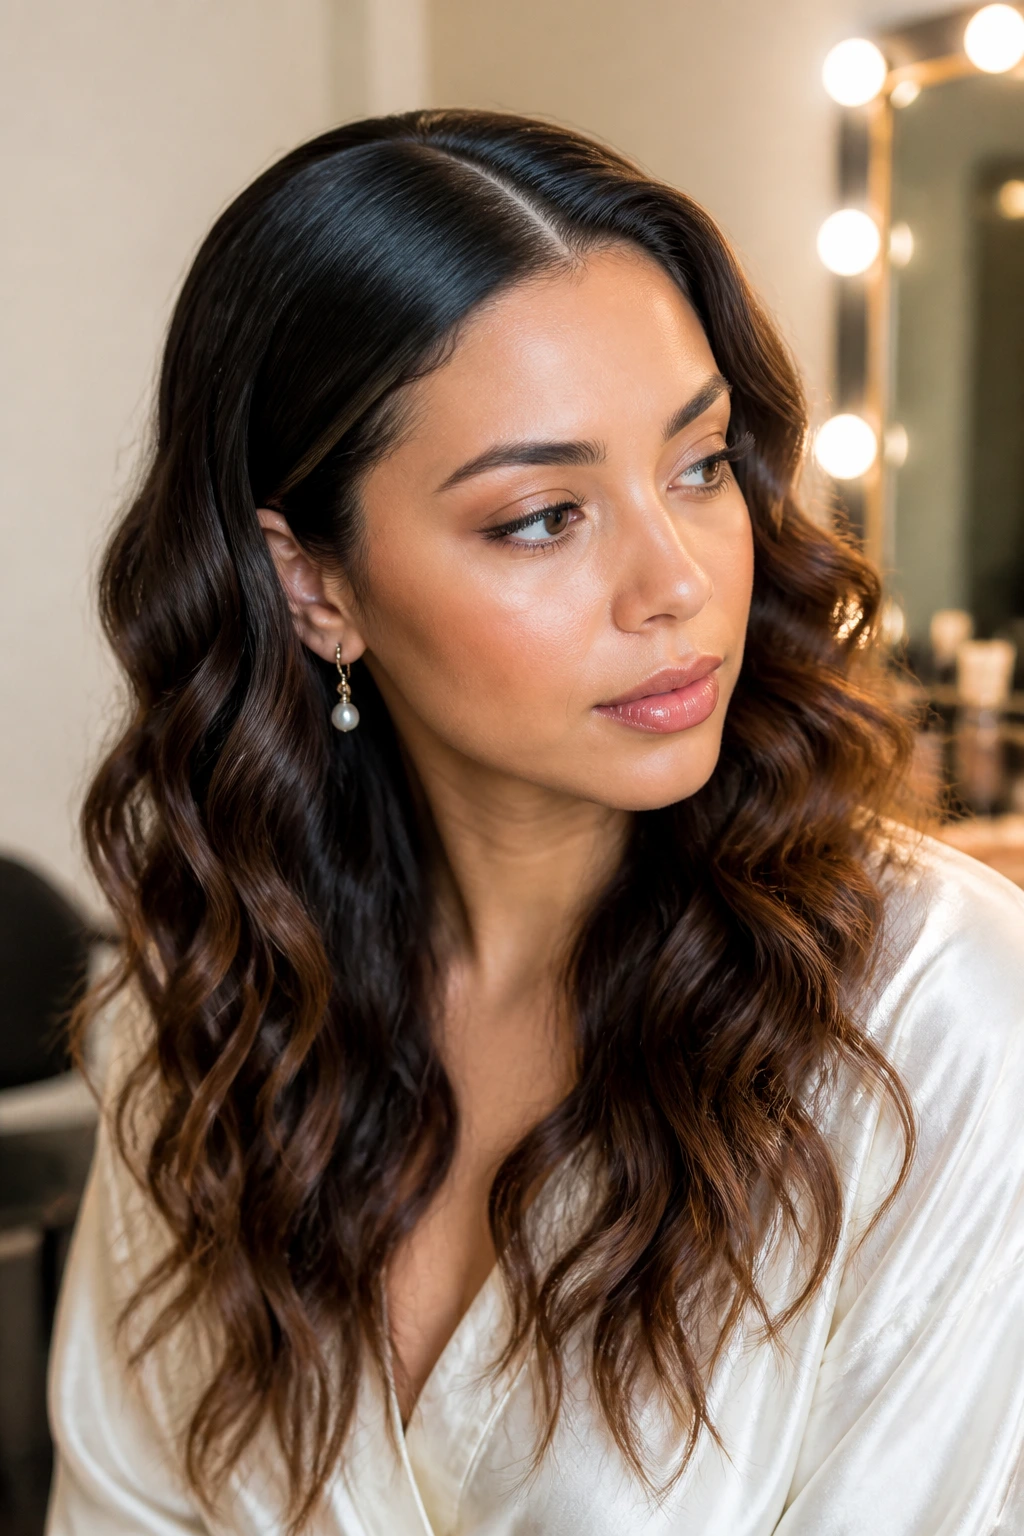
11. Glossy Mermaid Waves
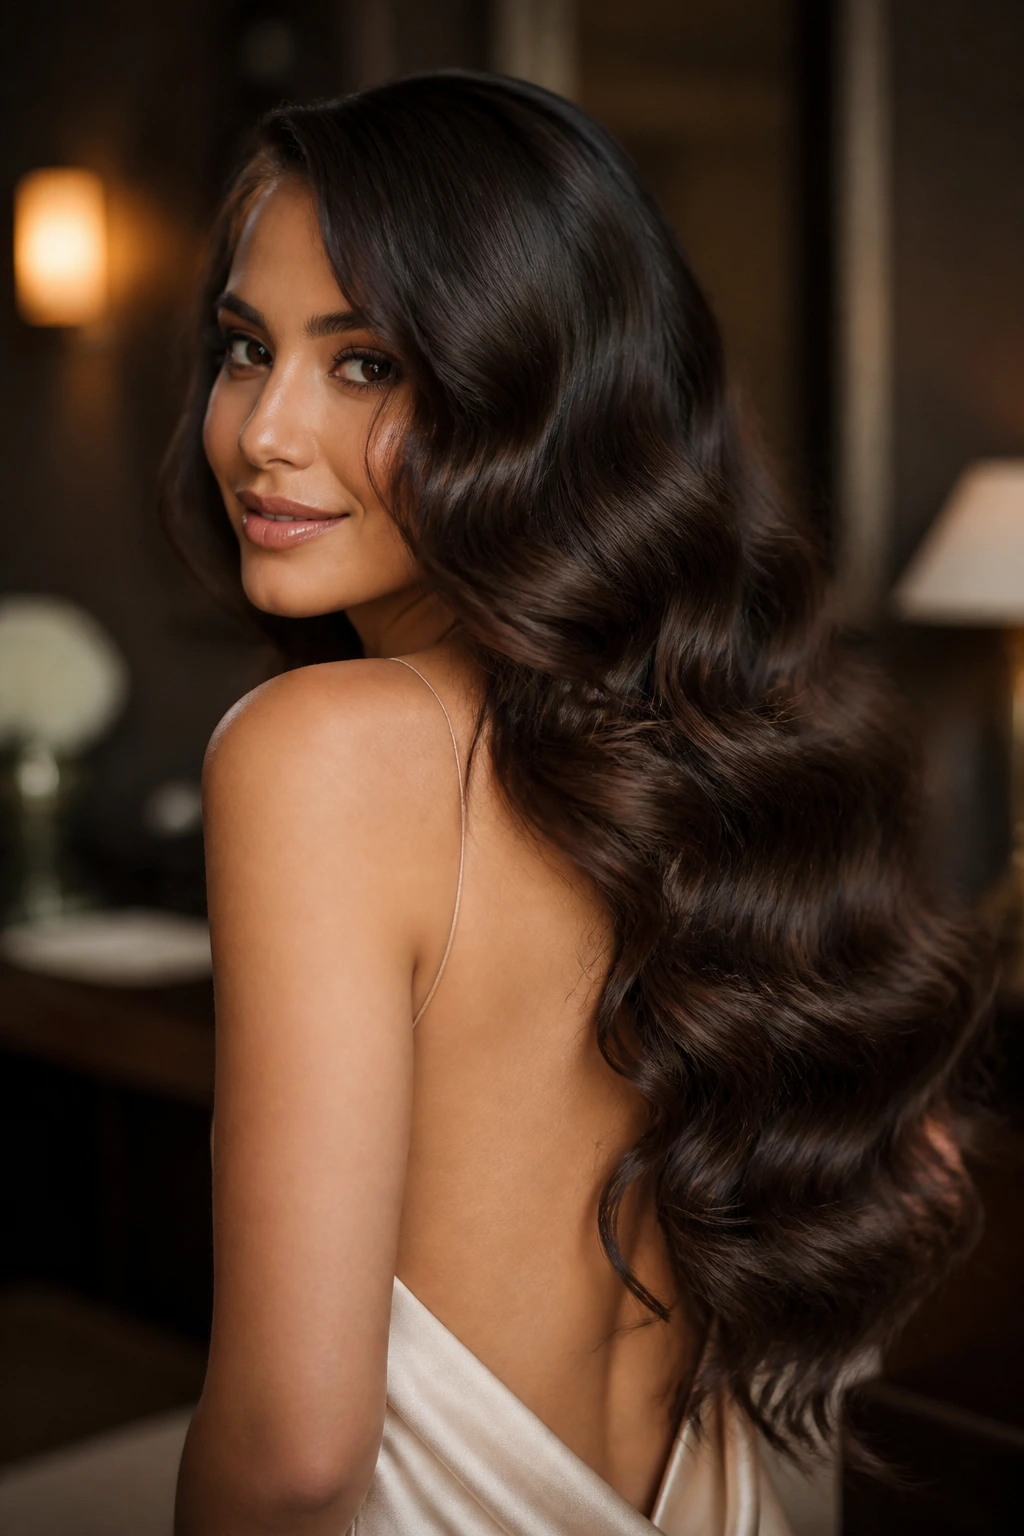
Long curly hair can look stunning in broad, glossy waves that fall down the back like a single continuous line. The trick is not to over-separate the curls. You want enough definition to show movement, but not so much texture that the surface turns busy.
Work with large sections and a bigger barrel, around 1.5 inches, if your hair can take it. Brush the waves once they’re cool, then stop. Repeated brushing creates fuzz. One pass usually does the job. If the ends need more polish, bend only the final 2 inches under with the iron so the whole length reads as one shape.
Why It Works
This style suits thick, long curls because it keeps the silhouette long and vertical. That can be more flattering than breaking the hair into too many small pieces. It also looks good with backless dresses and open tops because the wave line shows from behind.
A drop of shine oil on the mid-lengths—not the roots—keeps the finish from looking dry under bright indoor light.
12. Retro Flip Waves
A slight flip at the ends changes the whole mood of curly hair. Instead of letting the lengths sit heavy, you coax the bottom inch outward with a brush or round brush, then pair it with a soft wave through the rest of the hair. It reads playful, polished, and a little vintage without getting costume-y.
This works best on medium-length cuts. On longer hair, the flip can get lost under all that weight unless the layers are already there. On shorter cuts, the flip often looks sharper and cleaner.
Quick styling cue
Set the curls first, then use a flat brush to turn the very ends away from the neck. Keep the motion small. If you flip too much, it stops looking romantic and starts looking theatrical.
This is a good one for dresses with clean lines or square necks. The hair brings the soft movement while the outfit stays crisp.
13. Pin-Curled Celebration Waves
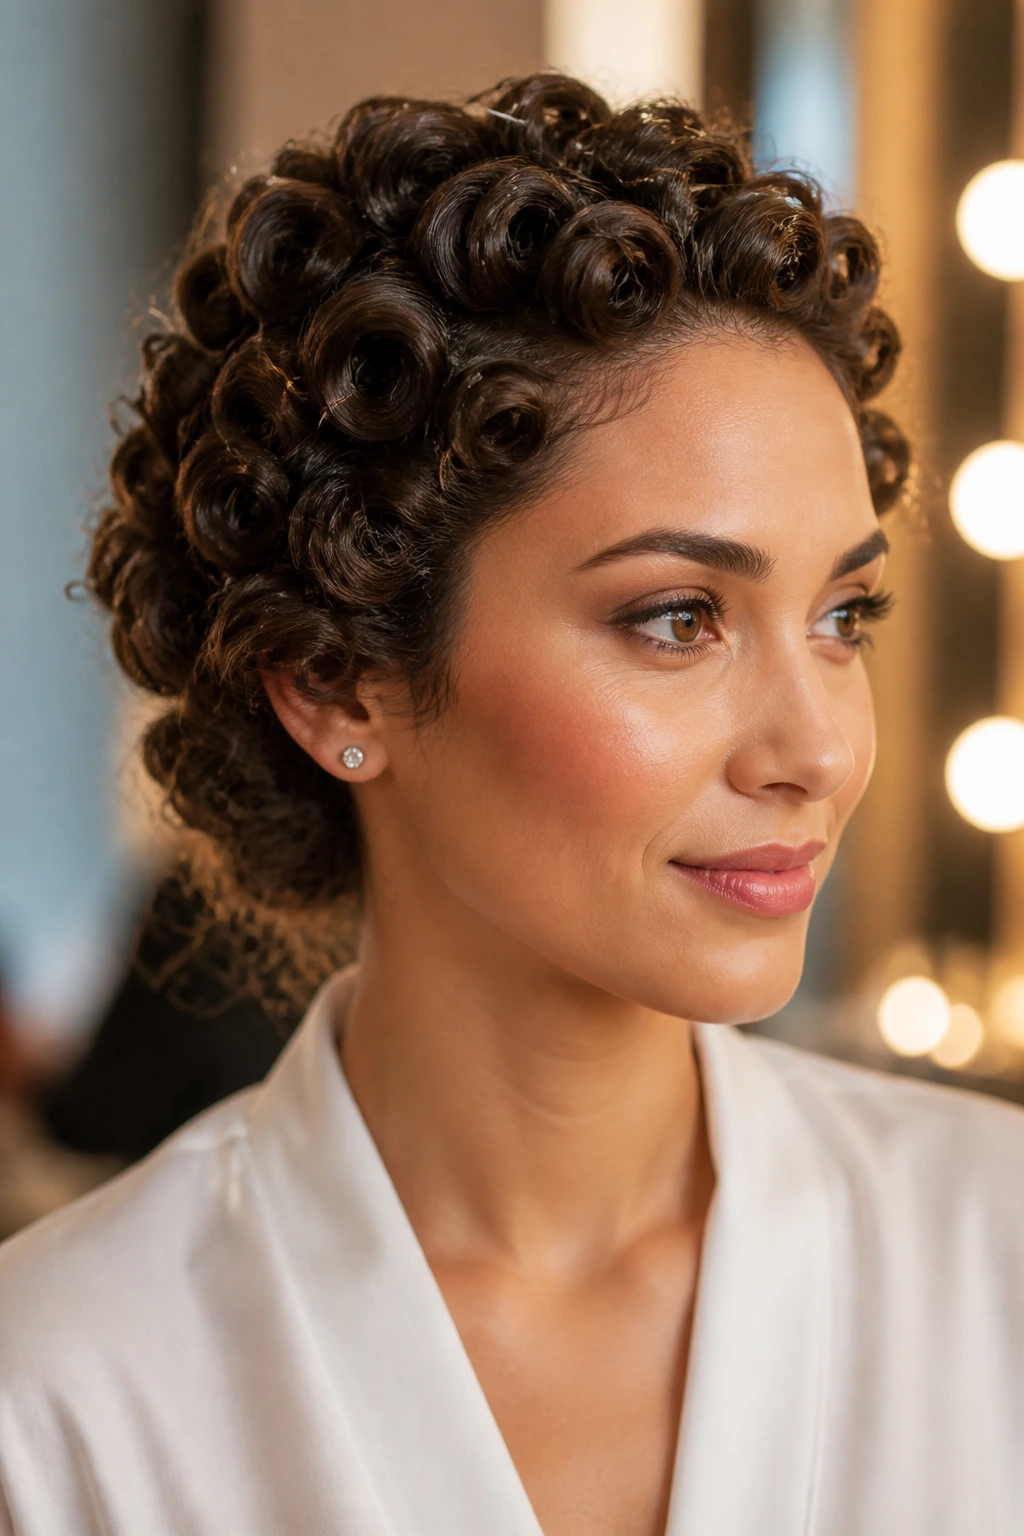
Pin curls are old-school for a reason. They hold shape, they set cleanly, and they make curly hair look intentionally arranged instead of merely styled. Roll each small section into a flat coil, pin it against the head, and let it cool completely before releasing.
Once the pins come out, don’t rake through the hair right away. Separate the waves with your fingertips first. Then use a soft brush only where the surface needs smoothing. If you brush too early, the pin curl pattern loosens before it settles.
Best for: people who want strong shape for a long event, especially if the hair tends to drop by the second hour.
One small thing: this style can be done a day early with good results. The curls tend to settle overnight into a softer wave, which is often prettier than the fresh set.
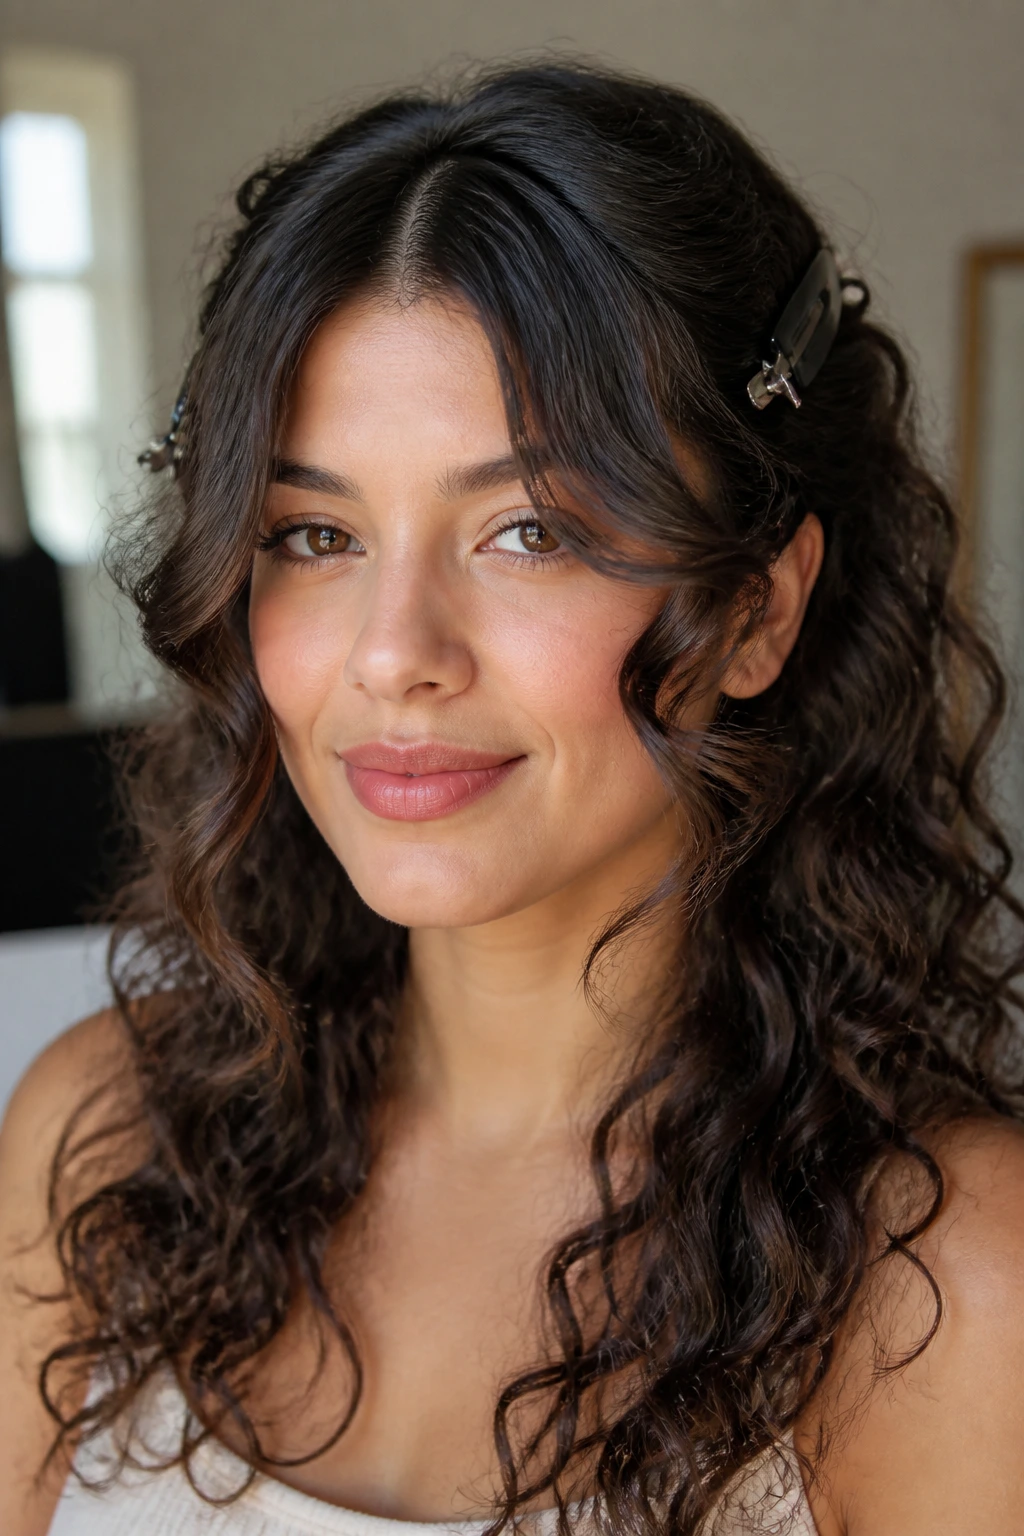
14. Tucked-Behind-the-Ear Waves
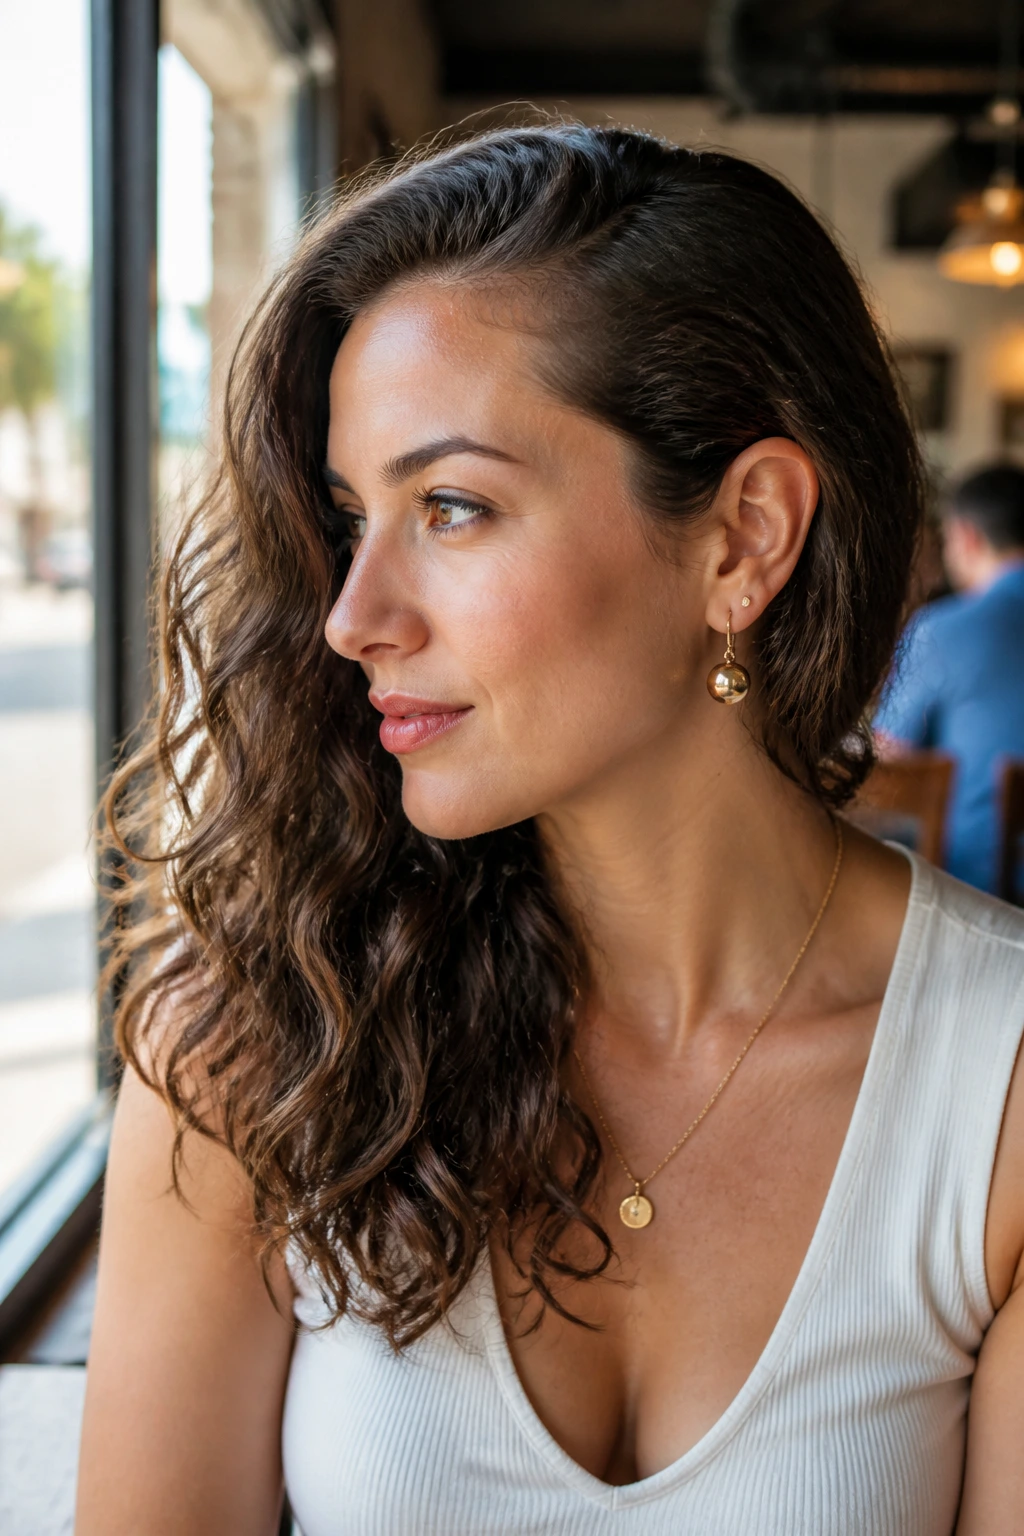
There’s something quietly sharp about one side tucked behind the ear and the other left loose. On curly hair, that contrast shows off the wave pattern on one side while giving the face a cleaner frame on the other. It’s simple, but not plain.
Use a small side part or a loose center part, then tuck the heavier side behind the ear and secure it with a narrow clip if the hair slips. The tucked side should stay flat enough to show the earring, but not so flat that the scalp looks pressed. A tiny bit of volume at the root makes the look feel softer.
What to watch for
If the hairline around the ear puffs up, smooth it with a dab of leave-in on your fingertips. Don’t reach for a full brush. That often breaks the texture at the edge and creates frizz where you don’t want it.
This style is useful when the outfit has statement earrings or one shoulder is bare. Let the hair make room for the clothes.
15. Ribbon-Laced Waves
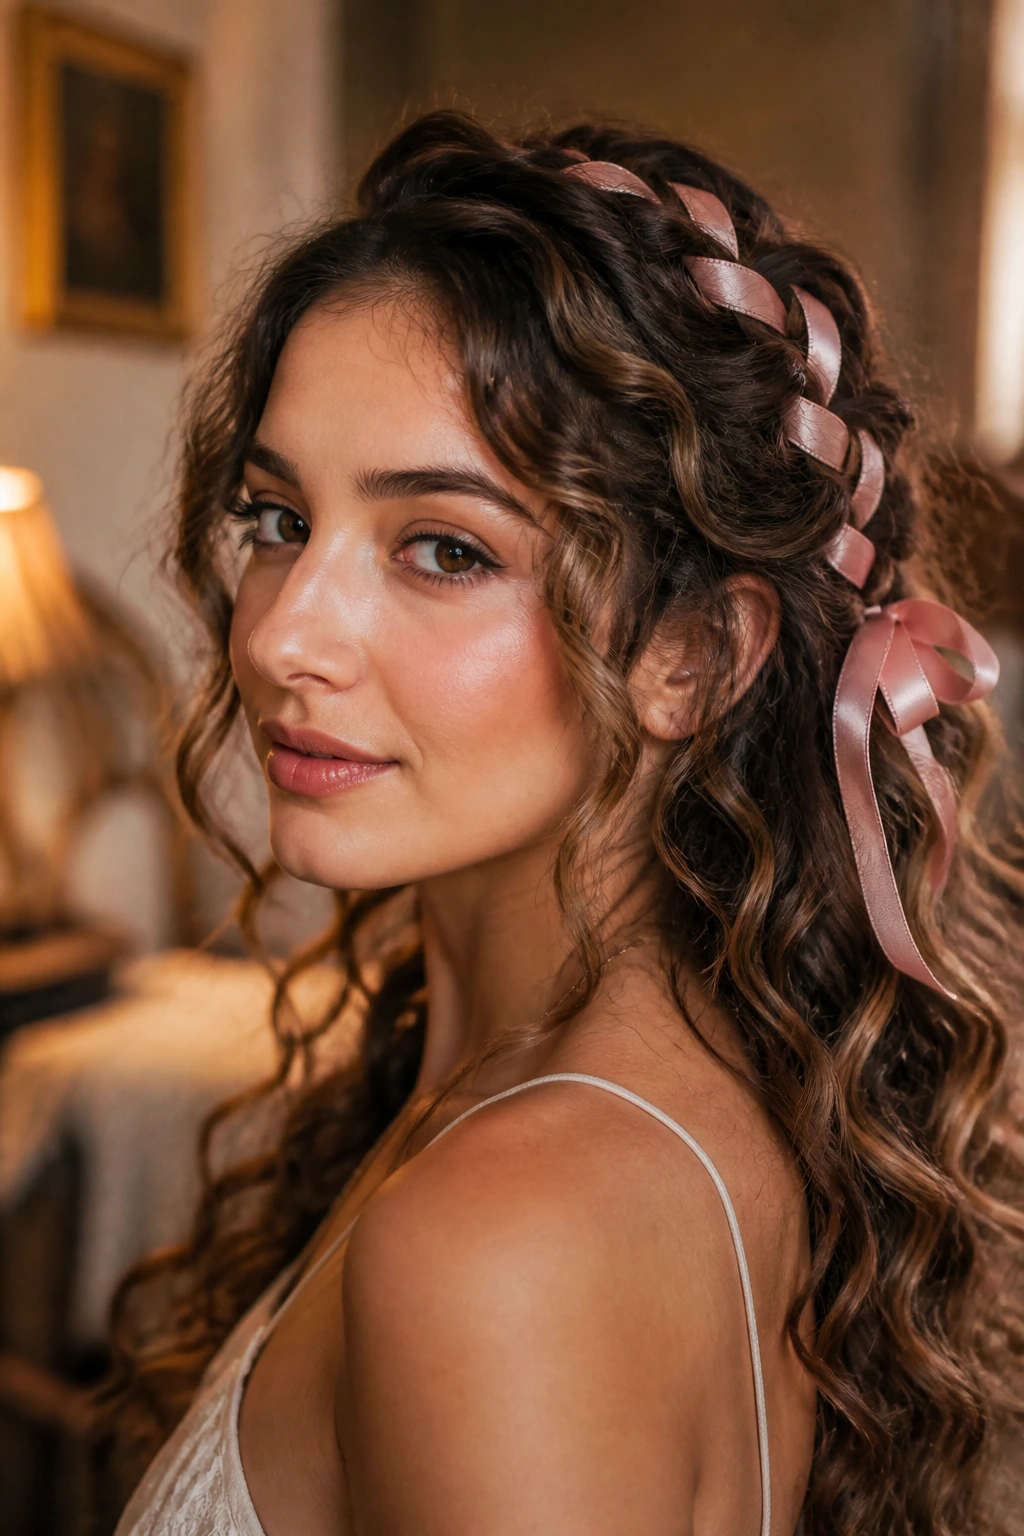
A silk ribbon threaded through soft waves changes the whole mood. It can run through a braid, tie around a half-up section, or weave through a low ponytail, and the result feels personal without tipping into fussy territory. On curly hair, ribbon works best when the texture is still loose enough to move around it.
Choose a ribbon that’s narrow and soft. Wide satin can look bulky, especially on shorter cuts. Tie it low, then let the tails hang down the back or off to one side. If the rest of the hair has a broad wave pattern, the ribbon gives it a more romantic finish without stealing the line of the style.
A warm tone like blush, champagne, or deep green tends to look rich against curly texture. Bright colors can work too, but they shift the mood fast.
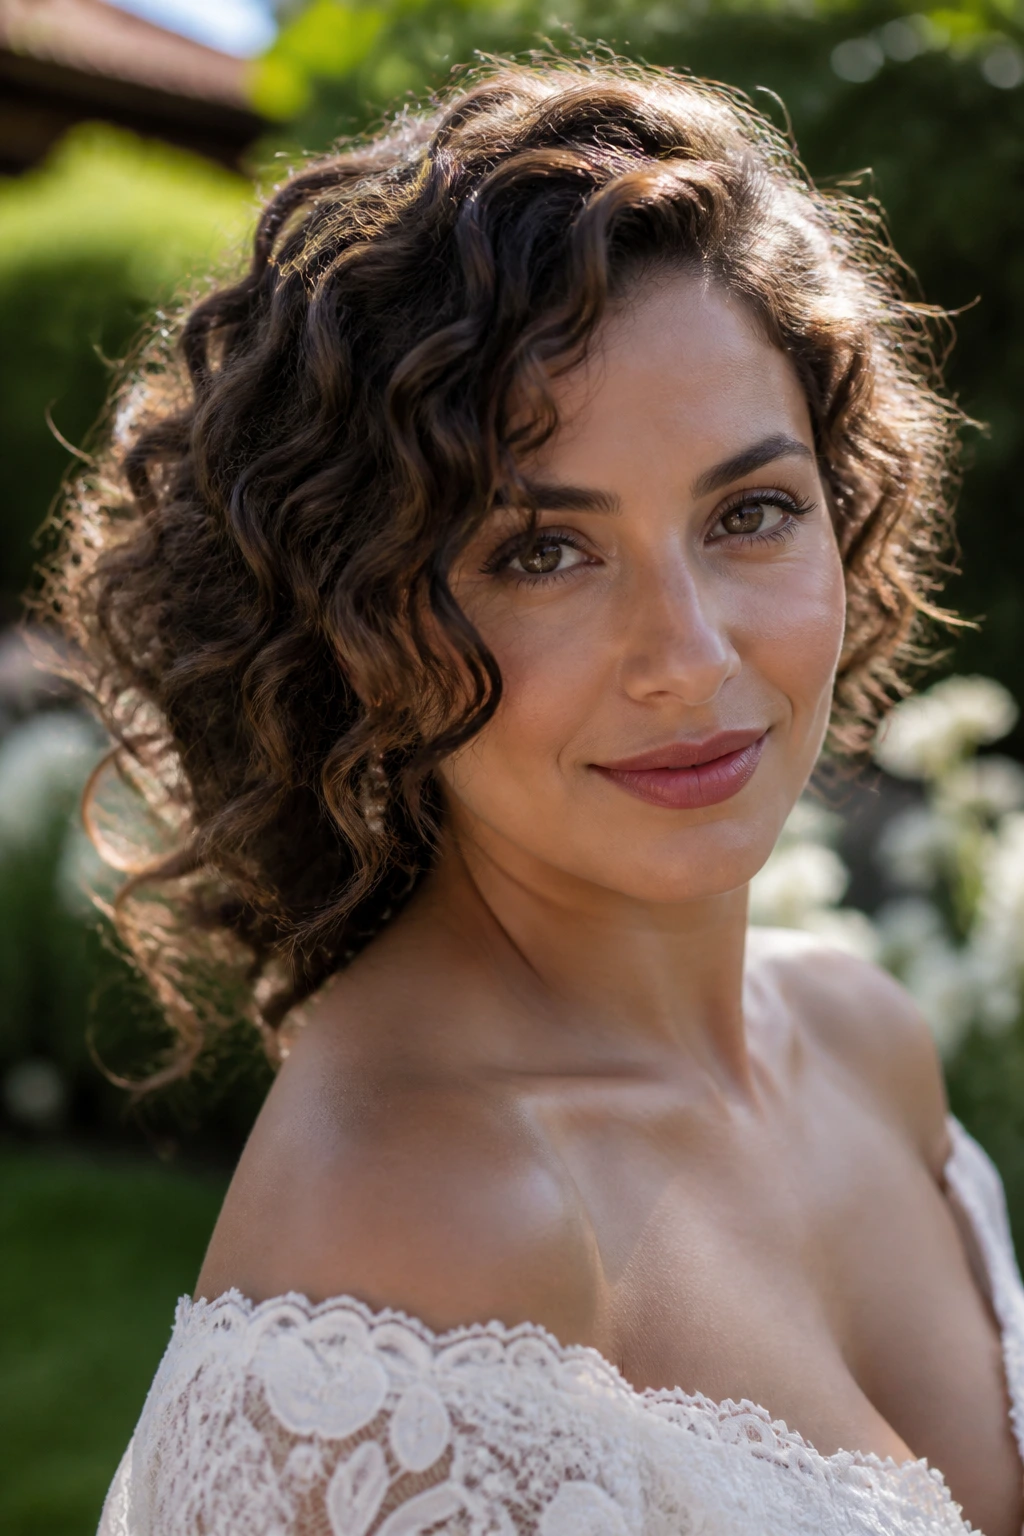
16. Soft Curl-Out Bob Waves
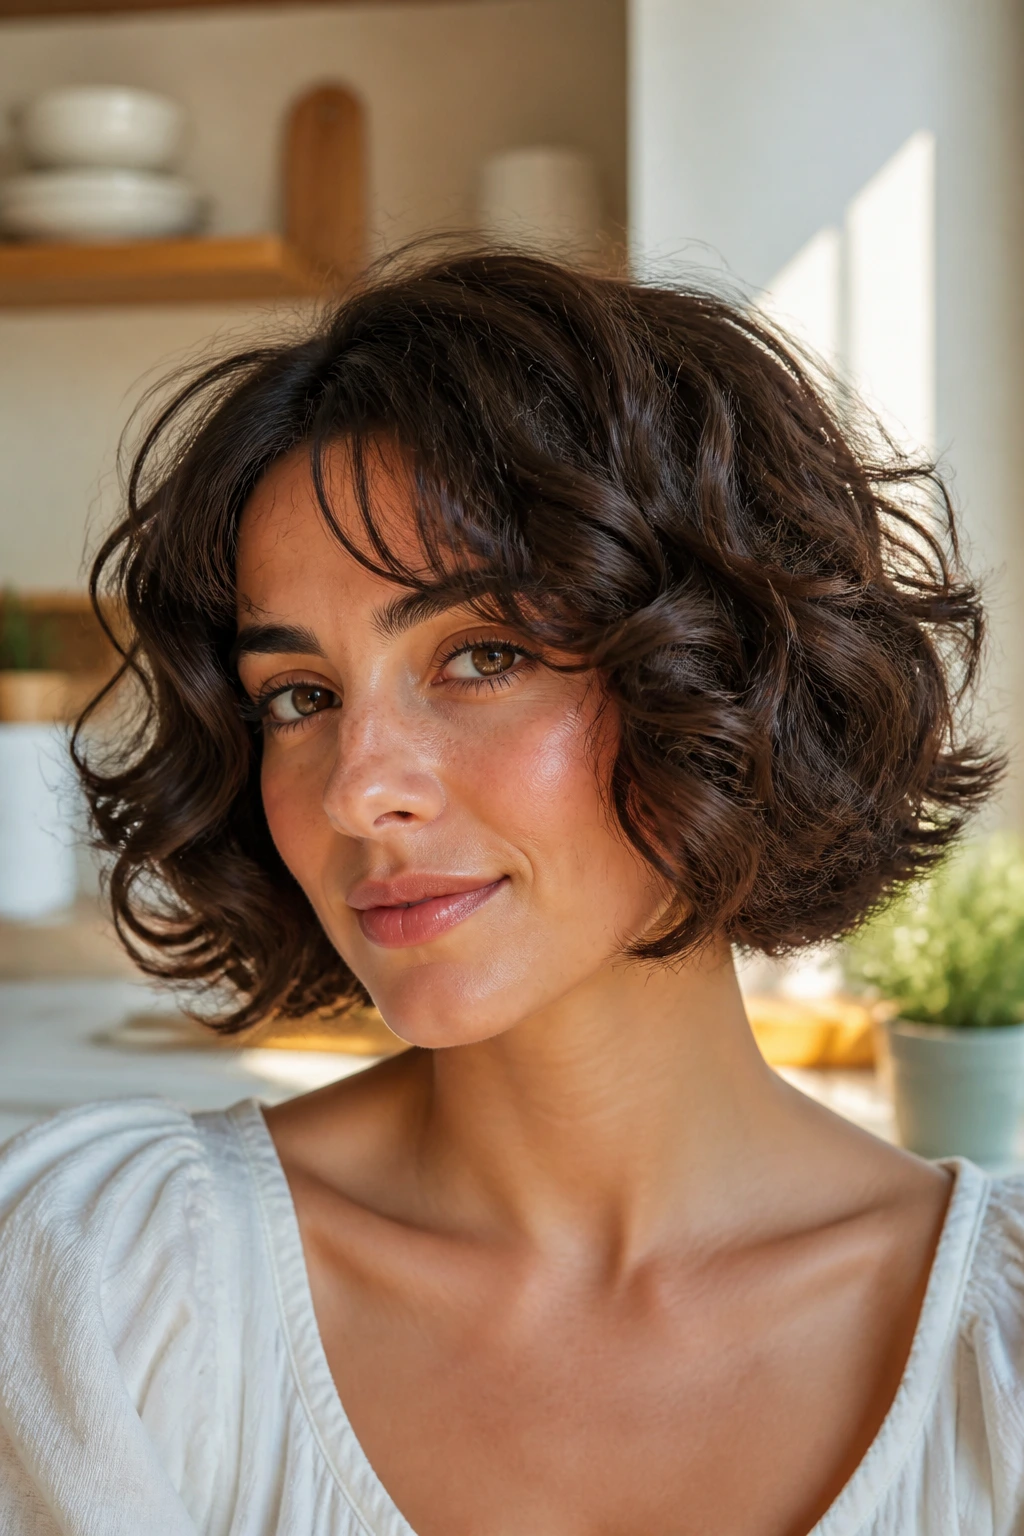
Short curly hair deserves its own special-day treatment, and a curl-out bob does that job beautifully. The shape stays light around the face, the ends curve outward just enough to feel styled, and the whole cut keeps its shape without a mountain of product.
Use a small-to-medium barrel, around 3/4-inch to 1-inch, depending on how much bend your curls already have. Curl only the pieces that need help. If you curl everything, the bob can become round in the wrong way. You want movement, not a helmet.
Best for
Chin-length bobs, lobs, and cuts with some internal layering. It’s also a good option for hair that looks flat when brushed but has enough body to hold a shape once set.
A side part makes the bob feel more romantic. A center part makes it cleaner and more modern. Pick the one that fits the neckline of the outfit.
17. Twisted Crown Half-Up Waves
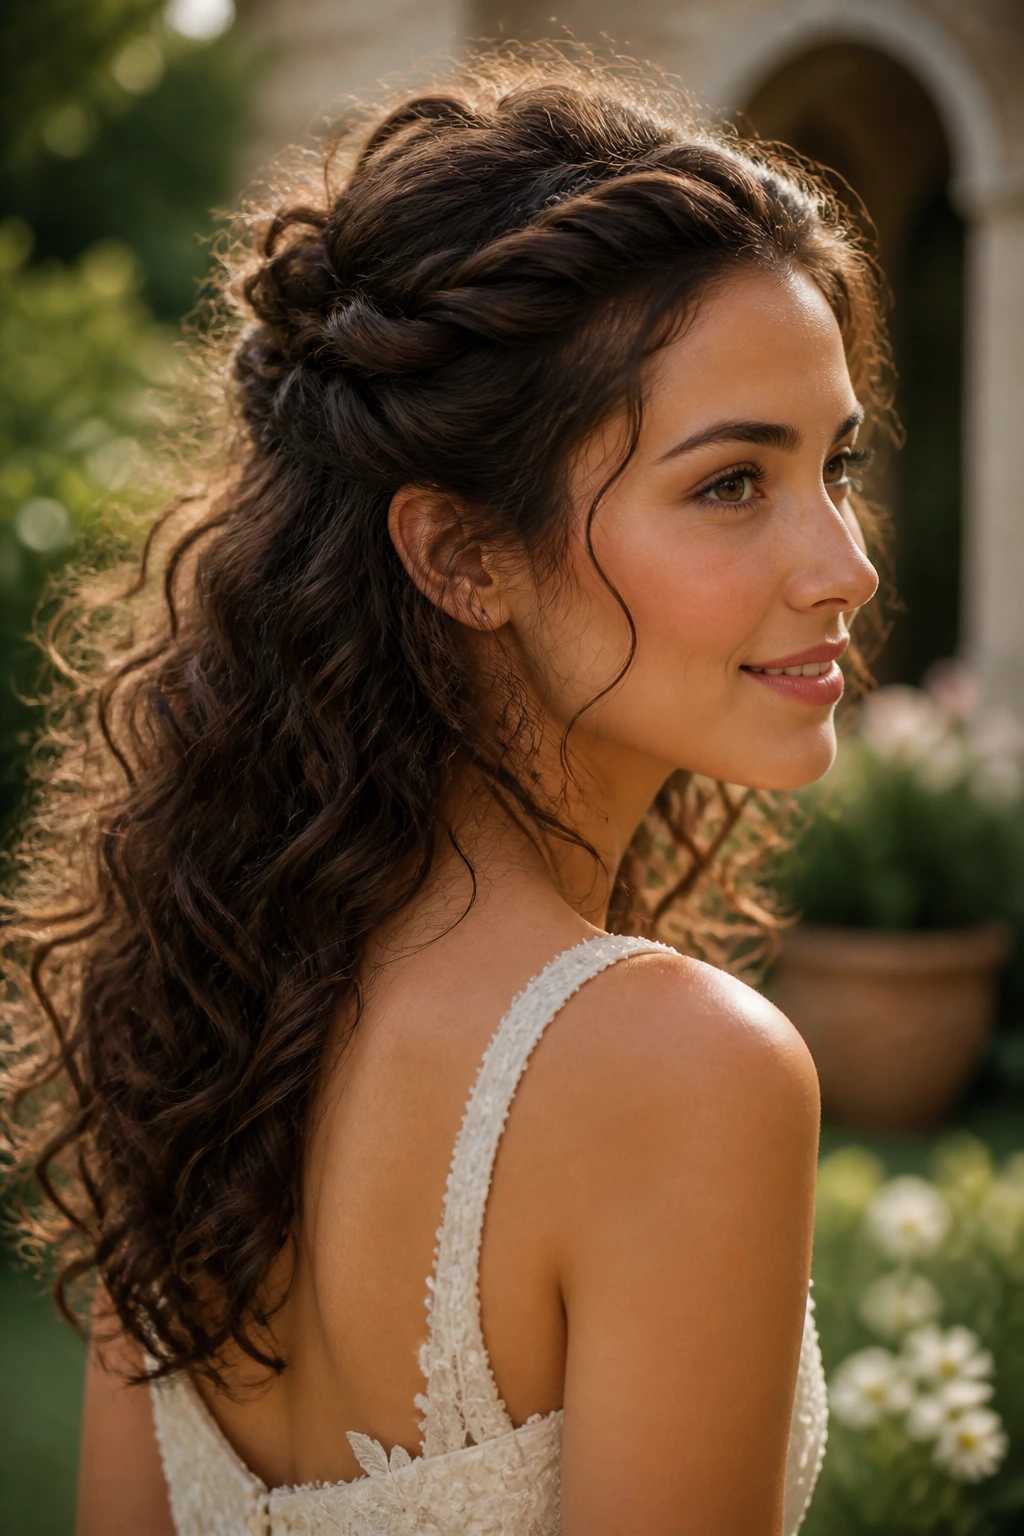
Twisting the front sections back into a small crown is a nice middle ground between loose and pinned-up. It keeps the hair away from the face, adds height near the crown, and still lets the lengths move. On curly hair, that last part matters a lot. You don’t want the whole head pinned down when the texture can do more.
Use two thin twists from the temples or one wider twist on each side, then anchor them behind the head with crossed pins. If the hair is layered, twist a little lower so the shortest layers stay tucked in. Short bits that slip out around the crown can be charming. Too many of them, though, starts to look unfinished.
A small comb or a pair of decorative pins fits here well. The twists give the accessory a place to live.
18. Airy Shoulder-Length Waves
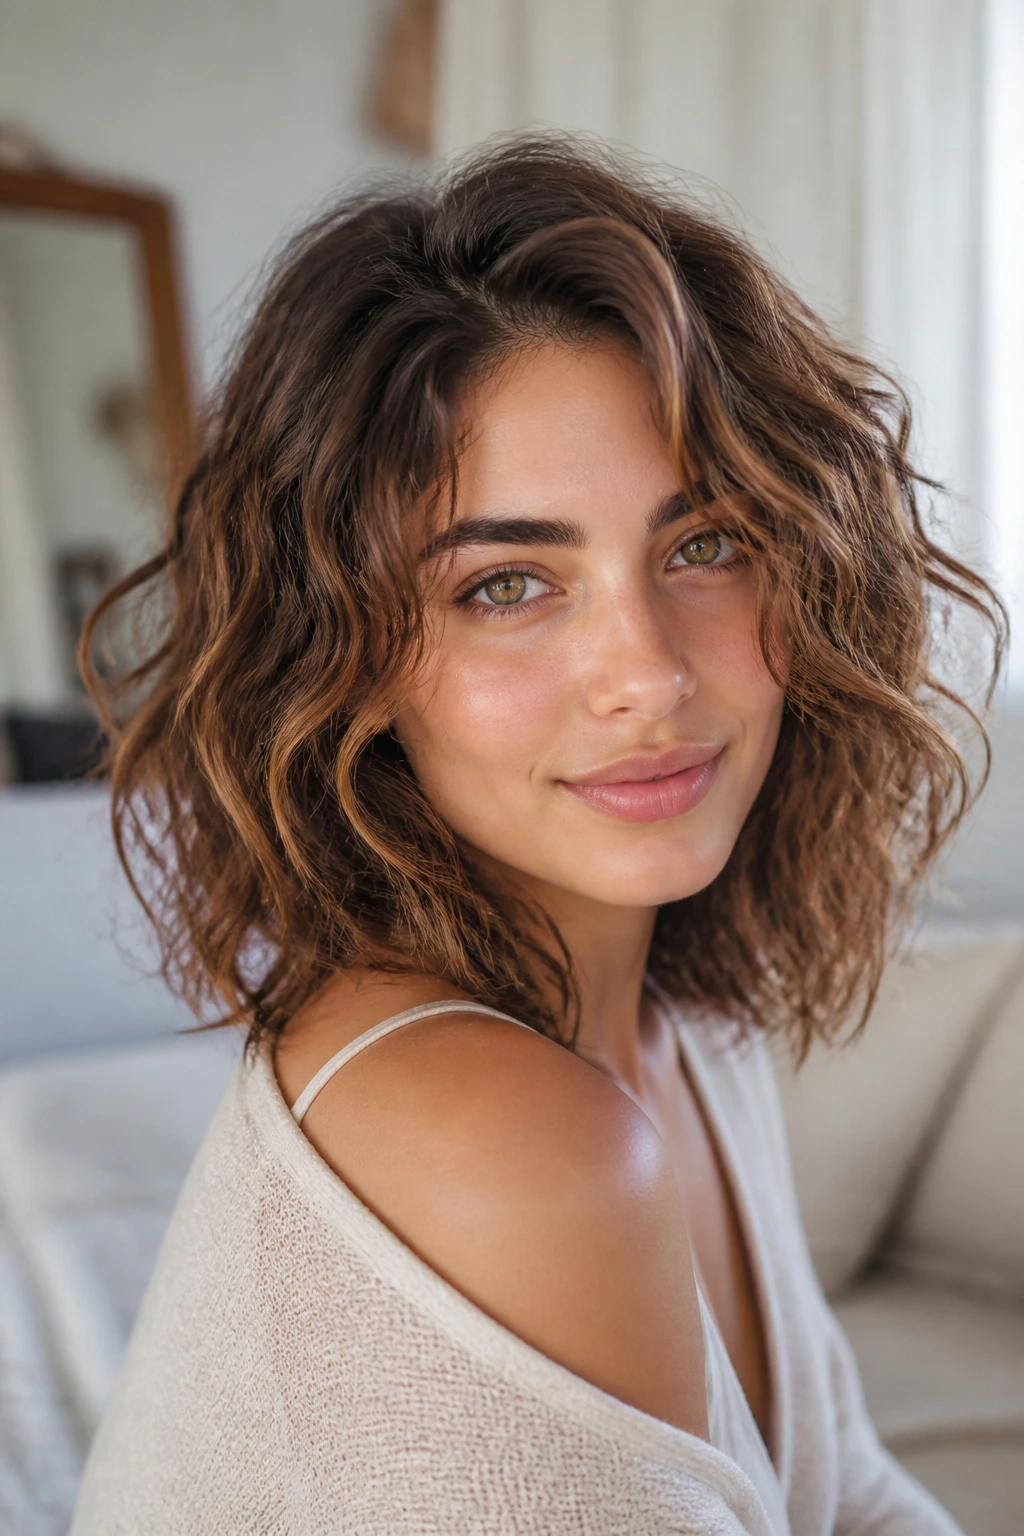
Shoulder-length curls can be tricky because the hair sits right at the point where it can either swing nicely or puff out at the sides. The fix is an airy wave pattern with a little room between the strands. Don’t pack every piece tight. Let the wave breathe.
Diffuse the hair until it’s almost dry, then wrap random sections around a larger iron to smooth the shape. Focus on the mids and ends. The roots usually need less help than people think. Over-working the crown on shoulder-length hair often makes the style too round.
Why It Works
This length benefits from movement more than symmetry. If one side sits a little fuller than the other, that can actually look better. The cut already has motion in it; the styling should support that, not erase it.
A light mist of flexible hairspray is enough here. Heavy spray turns shoulder-length curls into stiff little clumps, and the whole thing loses the airy effect.
19. Side-Tuck Barrette Waves
A barrette placed just behind one ear can change the whole line of curly hair. Tuck one side back, leave the other side open, and let the wave pattern fall forward in a soft diagonal. It’s a clean, simple shape, but the asymmetry makes it feel dressed up.
Choose a barrette with a flat back so it sits close to the head. Oversized clips can tilt and pull the curl pattern down. If your hair is thick, pin the section first and place the barrette over the pins. That gives the clip a base and keeps it from sliding out before the event even starts.
This is one of the easiest styles to pair with statement earrings. The hair makes space for them without needing a full updo.
20. Low Bun with Loose Wave Veil
A low bun does not have to be severe. Leave a soft veil of wave pieces around the face and neck, then keep the bun relaxed at the nape so the shape feels gentle rather than tight. On curly hair, a few loose tendrils can make the difference between “formal” and “stiff.”
Build the bun with the hair’s own bend. Don’t fully brush it out first if the texture is strong; that often creates a puff at the base that fights the bun shape. Instead, smooth the top with your hands, gather low, twist, and pin. Then pull out a few face pieces and reshape them if needed.
Good for
Evening events, dressy dinners, and outfits with a strong back detail. The bun keeps the neckline clear, while the loose pieces keep the style soft.
A small shine spray on the bun itself—nothing heavy—helps the curves read in low light.
21. Humidity-Smart Defined Waves
Some special days are outdoors. Some are in rooms that feel warmer than they should. Either way, a humidity-smart wave needs more hold than the airy styles do. That doesn’t mean crunchy. It means planned.
Start with a light mousse at the roots and a flexible gel or cream through the mids, then set the curls or waves with a medium barrel and let them cool fully before touching them. The cooling time matters more here than people expect. Warm hair is easy to reshape. Cool hair keeps the bend.
What makes it different
This look is about control without stiffness. If the weather is damp, keep the sections slightly smaller and spray each section before pinning it down to cool. You’re basically giving the hair a stronger memory.
This is the style I’d pick when you know there will be photos, heat, and a long stretch of time between styling and leaving the house. It earns its keep.
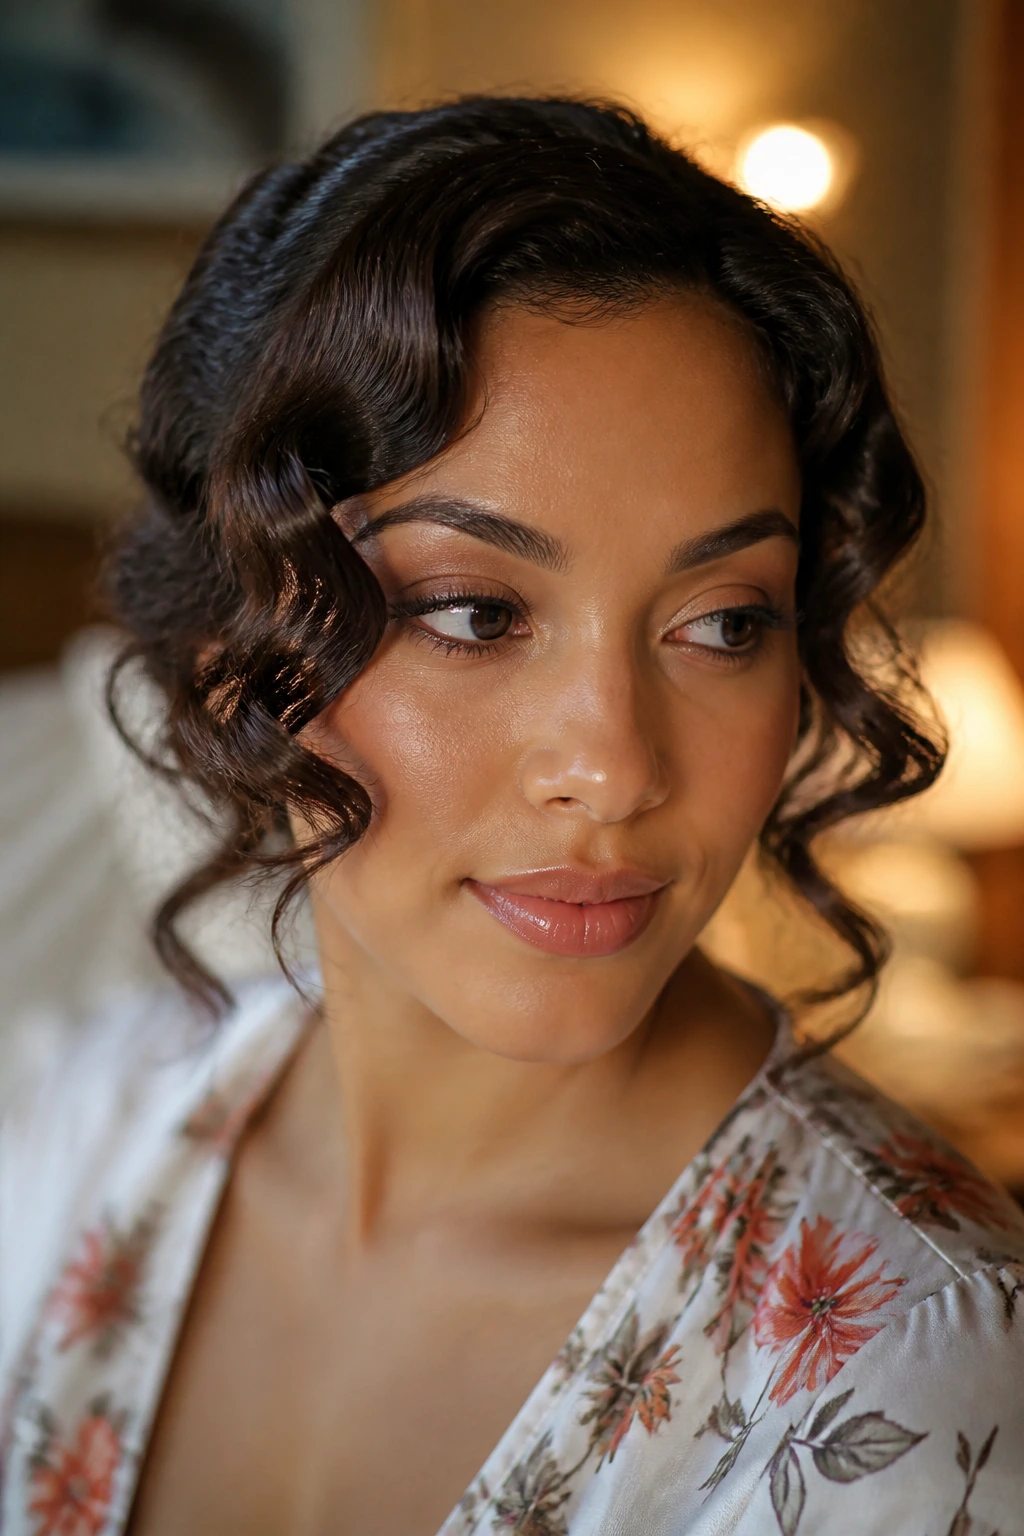
22. Soft Finger Waves with Curly Hair
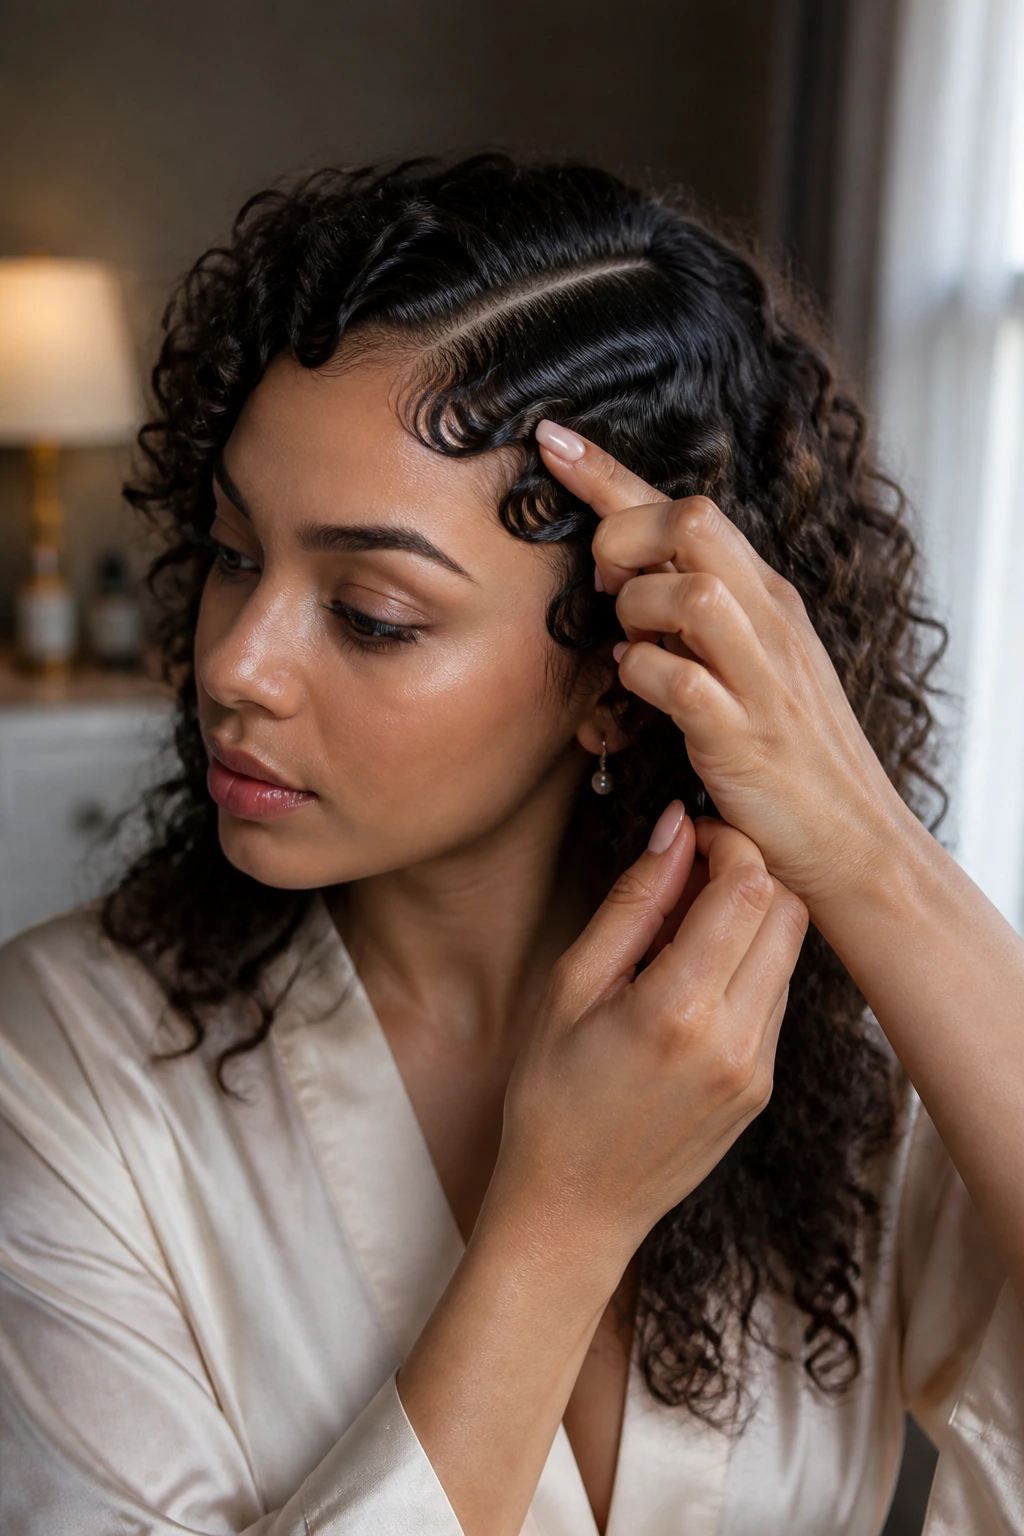
Finger waves are usually talked about as a short-hair style, but curly hair can wear a softened version with real charm. The trick is to keep the S-shape loose, not glassy. Use your fingers and a fine comb to guide the front sections into a wave, then pin them flat until they set.
This works well when the haircut is short to medium and the front has enough length to shape. On longer curls, use finger waves only at the hairline and let the rest fall free. That contrast looks better than trying to force the whole head into a vintage mold.
Practical note: a strong gel helps the wave line stay clean, but you need to apply it with a light hand. Too much and the hair loses softness fast.
A deep side part makes the wave pattern easier to see. A center part hides too much of the movement.
23. Deconstructed Braided Waves
This is what happens when a braid comes apart on purpose. Start with one or two loose braids, sleep in them or wear them for a few hours, then take them down and shake the curls loose until the wave pattern softens. It’s a good fit for curly hair that likes texture but doesn’t love strict shapes.
The style has a little more edge than the others here. The wave is less polished, more lived-in. That makes it ideal for outdoor ceremonies, brunches, or any event where you want romance without looking overdone.
A bit of dry texture spray at the roots helps the braid release into something airy instead of frizzy. If the hair is very fine, braid fewer sections and keep them loose. Fine curls can go from soft to stringy quickly if the braid is too tight.
24. Floral-Accent Waves
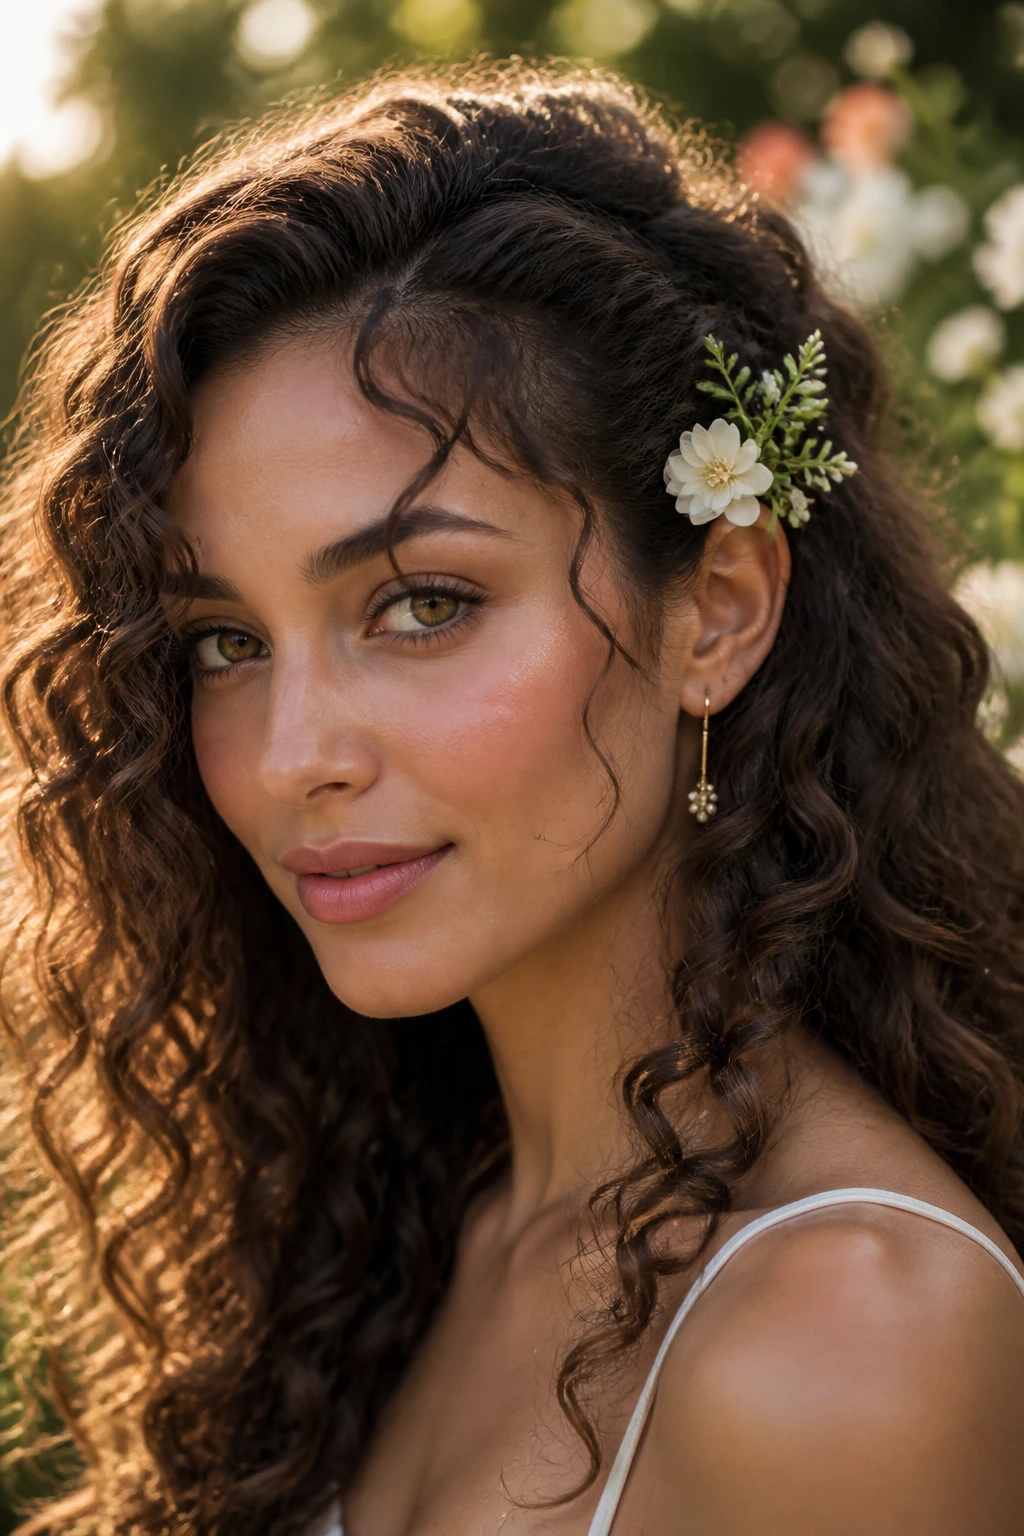
Fresh flowers can be lovely in curly hair, but the placement has to make sense. Tuck a small bloom near the ear, line a few tiny pins along the part, or nestle one flower into a side sweep. That’s enough. A whole bouquet in the hair usually fights the shape.
Soft waves give the flowers a base that doesn’t slide around as much as straightened hair does. The texture grips pins more easily, and the movement of the waves keeps the blooms from feeling pasted on.
Best use: weddings, garden events, photo sessions, or any special day with a romantic dress code.
One practical warning: choose blooms that can handle warmth and a little handling. Delicate petals bruise fast, and once they wilt, the whole style can look tired.
25. Feathered Layer Waves

Layered curls need direction, not just curl definition. Feathered waves keep the top layers lighter and the lower sections softer, so the cut doesn’t become one heavy block. If your haircut already has layers, this style makes them visible in a good way.
Use a smaller wrap at the top and a slightly larger one at the bottom. That gives the hair a staggered flow. Curly hair often benefits from this kind of mixed bend because the layers don’t all land in the same place. Uniform waves can hide the cut. Feathered ones show it off.
Styling detail
Flip your sectioning side after you finish the top third of the head. That changes the way the lengths fall and keeps the wave from leaning too hard to one side.
This is a smart option if your haircut has movement built into it already. Let the cut do some of the work.
26. Sleek Root, Soft Length Waves
A sleek root with soft lengths is one of the easiest ways to make curly hair look finished without making it flat. Smooth the top with a brush and a touch of cream, then leave the mids and ends loose, bendy, and touchable. The contrast gives the style shape.
This is especially flattering on thick hair because it reduces bulk at the crown while keeping the length full. It’s also helpful when the outfit has a crisp collar or a sharp shoulder line. The hair doesn’t need to compete. It can just flow.
A clean middle part or a deep side part both work. Pick the one that matches your face shape and the neckline. A center part reads a little calmer; a side part brings more drama.
Don’t overload the roots with oil. That’s the fastest way to lose the sleek part and end up with a separated, greasy crown.
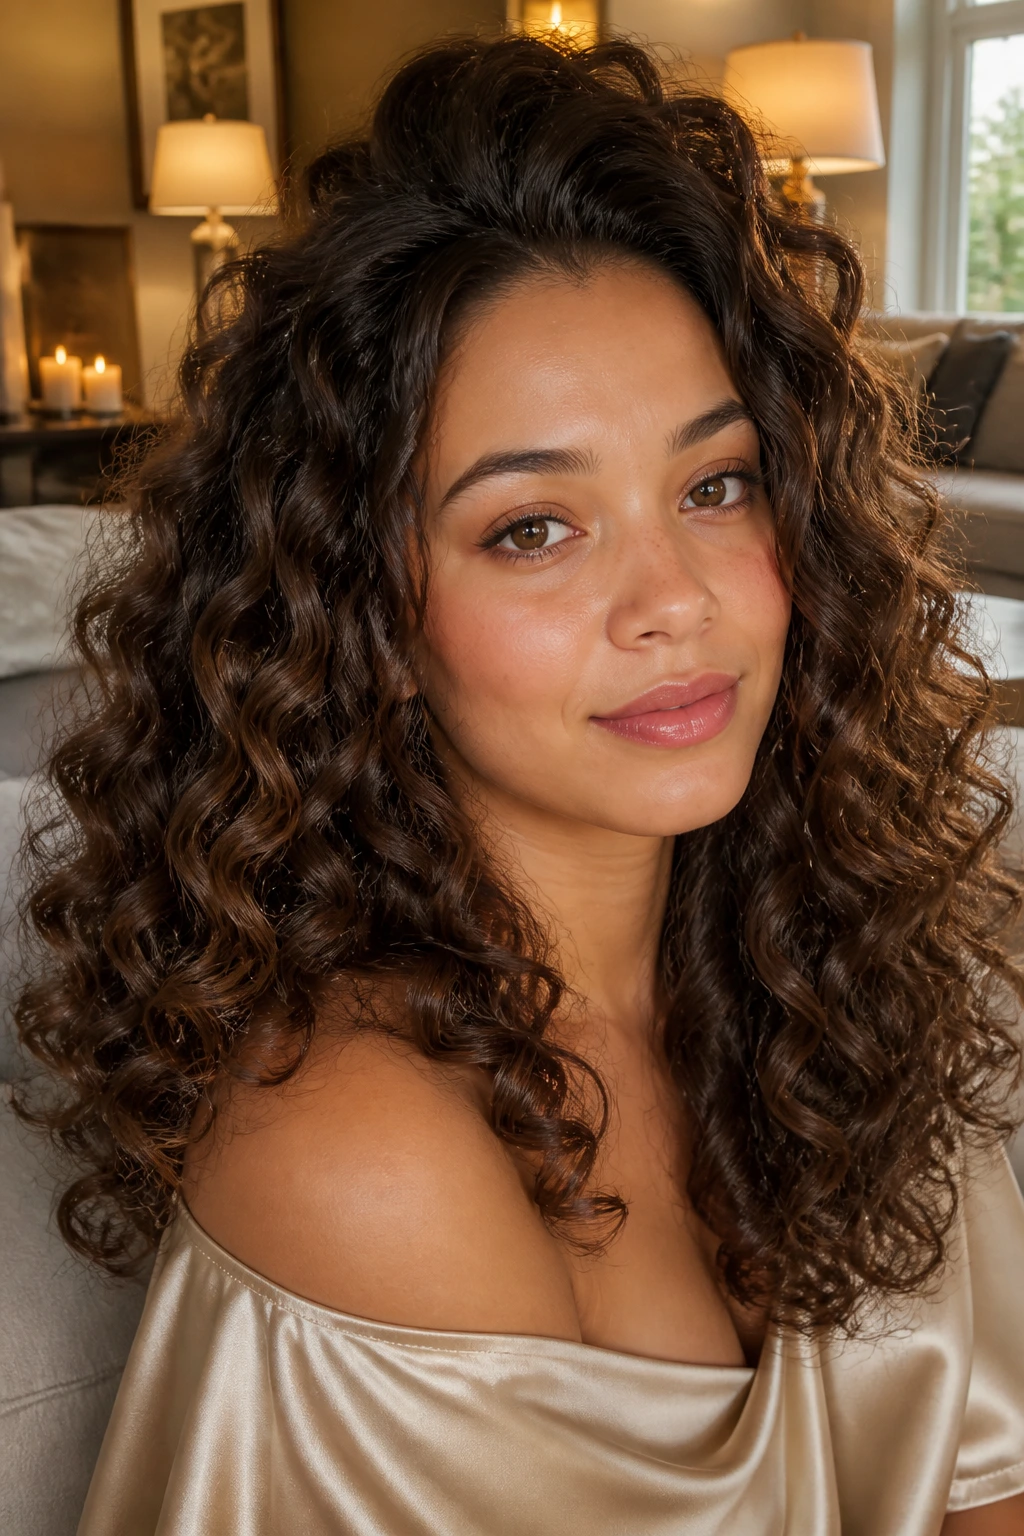
27. Candlelit Date-Night Waves
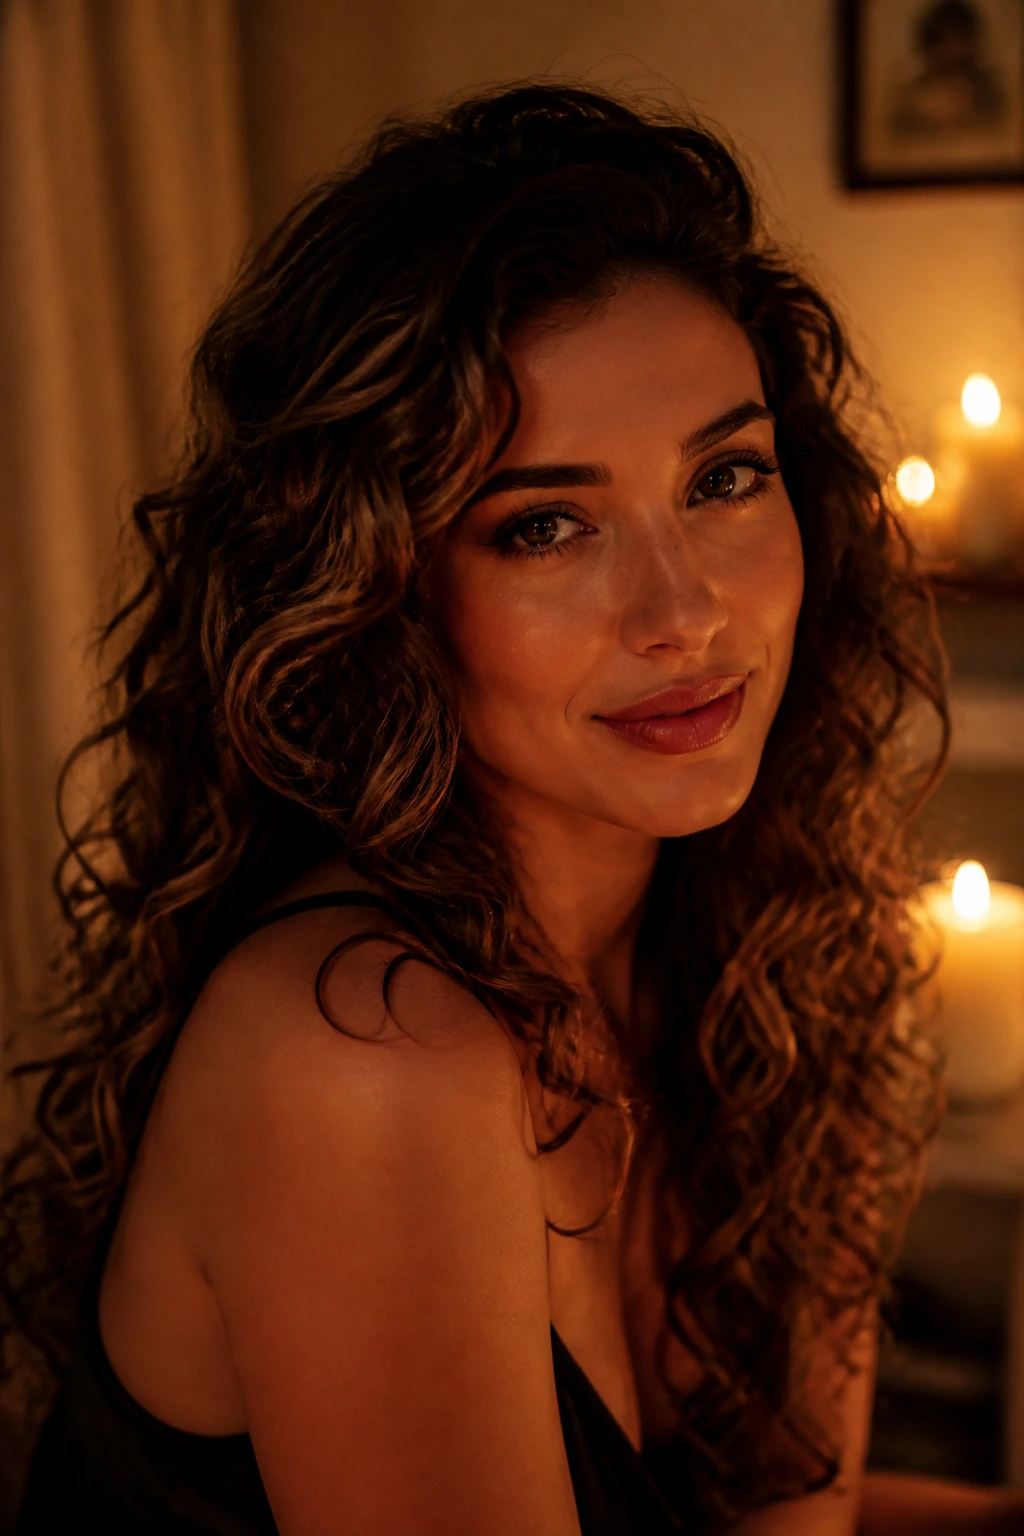
Not every special day needs a formal finish. Some nights call for hair that moves easily, catches the light in small pieces, and looks better after you’ve been wearing it for a while. Candlelit date-night waves live in that space. They’re soft, a little undone, and not trying too hard.
Start with your natural texture, stretch it slightly with a diffuser or a blowout brush, then wrap just a few strategic sections around a wand to create a pattern rather than a full set. That’s enough. You do not need to curl every inch. In fact, leaving some of the original curl pattern visible makes the style warmer.
A finger-combed finish works better than a brush here. Keep the volume, lose the separation only where it feels too busy. It’s relaxed, not messy.
28. Lace-Edge Soft Waves
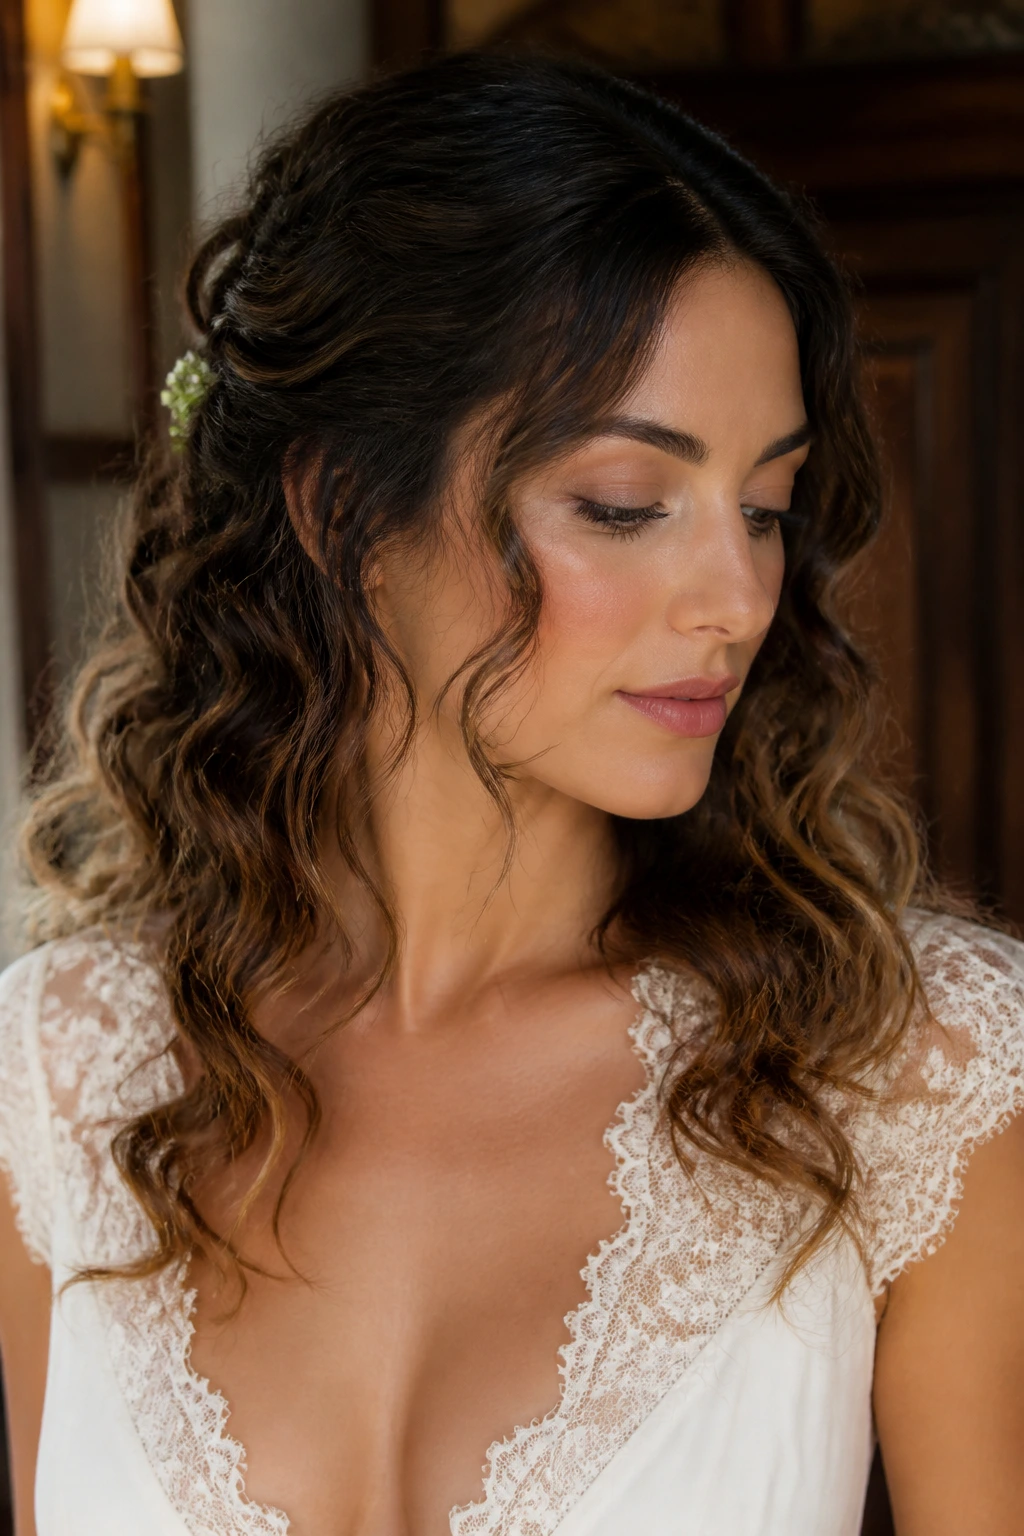
This one is all about pairing the hair with a lace neckline, a textured dress, or a delicate collar. The waves stay soft and open around the shoulders while the front sections are guided back just enough to show the fabric. It’s a style that knows when to step aside.
Create loose bends with a larger iron, then tuck or pin only the front-most pieces so the neckline stays visible. If the dress has a lot of detail, keep the wave pattern a little broader and less piecey. Too much separation can compete with the outfit.
Why It Works
Curly hair already brings texture. Lace brings texture too. The trick is making sure they don’t argue. A broader wave pattern and a smooth hairline give the fabric room to show, while the lengths still feel romantic and full.
This is the style I’d use when the outfit is the star but the hair still needs to feel finished. Quiet, but not forgettable.
Why Curly Hair Loves a Softer Wave Pattern
Curly hair already has memory. That’s the hidden advantage. You’re not building shape from zero the way you might with pin-straight hair. You’re deciding where the curve should be broad, where it should stay tight, and where the front needs a cleaner line so the whole head looks intentional.
The other reason these styles work is simple: curly hair gives you texture even when the wave itself is brushed out. That means a romantic wave can look soft without going limp. A little root lift, a little bend through the mids, and a touch of separation at the ends are enough to keep the style alive for hours.
I also think curly hair wears accessories better than people give it credit for. Pins sit in the texture. Barrettes catch on a wave ridge. Flowers have something to nestle into. Straight hair can be beautiful with accessories, sure, but curly texture gives them somewhere to live instead of slide.
Essential Tools for These Styles
-
1-inch, 1.25-inch, and 1.5-inch curling irons or wands — Different barrel sizes give you tighter bends for short hair and broader waves for long, dense curls.
-
Heat protectant spray — Use it before any hot tool; curly hair can show heat damage at the ends first, then the frizz appears later.
-
Duckbill clips or sectioning clips — These keep the crown pieces separate while they cool, which is a big part of getting the wave to hold.
-
Fine-tooth comb and tail comb — Good for clean parts, soft shaping at the hairline, and setting S-waves or finger waves.
-
Boar bristle brush or soft paddle brush — Best for brushing out waves once they’re fully cool; don’t use a rough brush on fresh curls.
-
Flexible-hold hairspray — Look for something that keeps movement. Stiff spray makes curly hair feel dried out fast.
-
Light mousse or curl foam — Helpful at the roots when you want volume without a heavy finish.
-
Bobby pins and hairpins — Choose a shade close to your hair color, and keep a few extra in your bag because textured hair eats pins.
-
Silk or satin scarf — Useful for setting curls while they cool or preserving the style overnight.
Smart Product and Finish Tips
The best product for romantic waves on curly hair is usually the one that disappears after it does its job. Heavy creams can make the roots sink. Thick oils can flatten the wave line. What you want is grip, memory, and a finish that still moves when you turn your head.
For hold: choose a mousse or foam if your hair is fine or easily weighed down. Choose a light curl cream if your hair is coarse or dry at the ends. If the style needs staying power, layer a flexible-hold hairspray over the finished shape instead of loading it on before styling.
For shine: a small amount of serum on the mid-lengths and ends works better than coating the whole head. Apply it to your palms first, then press and smooth. That keeps the roots from looking greasy in photos.
For humidity: if the air is damp, set the hair in smaller sections and let every section cool completely before you touch it. That cooling time is not optional. It’s the part that helps the shape last when the weather tries to undo it.
For a softer finish: mist hairspray onto your hands or brush and smooth flyaways with the palms, not a heavy spray cloud. The cloud method tends to catch the front pieces and harden them.
How to Match the Style to the Occasion
Presentation: For formal events, go with a clearer shape—side parts, pinned crowns, or a low bun with loose wave pieces. For casual special days, a half-up twist or brushed-out ringlet style feels lighter and more relaxed.
Accessories: Pearl pins suit polished waves. Silk ribbons and small floral accents work best with looser, boho styles. If the outfit already has a lot going on, keep the hair accessories tiny and let the wave pattern do the work.
Outfit balance: High necklines usually pair well with styles that move the hair off the shoulders, like side-swept waves or low chignons. Strapless or one-shoulder dresses can handle more hair around the front and collarbone.
Longevity: If you need the style to survive a long stretch of time, choose the looks with more structure at the crown—half-up twists, pin curls, or humidity-smart waves. If the event is short and photo-heavy, something softer and touchable can be enough.
Additional Tips and Finishing Moves
Shape: Start by deciding where the part belongs before you touch the rest of the head. A deep side part changes the entire mood, and a center part makes the wave read calmer and more balanced.
Root lift: Clip the crown section while it cools. That one step keeps curly hair from falling flat at the top, which is where a lot of special-day styles lose their shape first.
Finish: Brush only when the hair is cool. Warm hair changes shape too easily, and the wave can blur into a puff before you get to the event.
Accessory placement: Put pins and clips where the hair naturally bends. They stay in place better there, and the style looks more deliberate.
Frizz control: Smooth flyaways with a drop of serum or a pea-sized bit of cream on your fingertips. Don’t flood the whole head with product just to tame one fuzzy corner.
Touch-up trick: Carry a travel-size spray and two bobby pins. That is usually enough. You do not need a full arsenal in your bag.
Common Mistakes That Flatten the Shape

The first mistake is styling curly hair while it’s still too damp. The outside may look almost dry, but the inside holds water longer than you think. If you set the wave too soon, it drops faster and often frizzes at the bend. Wait until the hair feels cool and dry through the thicker parts.
Another common slip is brushing out the wave before it has cooled. That’s how you get puff instead of shape. Let each section set, clip it down if needed, then brush gently only when the hair has settled.
A third problem: too much oil at the roots. It’s tempting when the hair feels dry, but the crown is where a special-day style lives or dies. Keep the oil on the ends and mid-lengths, and use a light touch.
The last one is overloading the hair with accessories. One pearl comb, one ribbon, or one barrette can look considered. Three competing decorations can make the hair look busy before the face even gets a chance to breathe.
Variations and Adaptations to Try
Heatless Silk-Rod Waves: Wrap damp hair around silk rods or flexi rods, let it dry fully, then separate the curls into a softer wave. This is a good pick if you want less heat and more structure.
Short-Hair Ripple Set: For bobs and lobs, use a smaller iron and concentrate on the front and top layers. Short curly hair often looks best when the wave is more visible near the face and a little looser at the back.
Thick-Curl Velvet Waves: If your hair is dense, work in smaller sections and use stronger pins while the hair cools. Thicker curls need more control at the crown or the style can spread out too much.
Humidity-Guard Waves: Use mousse, set the curls smaller, and finish with a flexible anti-humidity spray. This version is the one to reach for when the day might get warm or damp.
Fine-Hair Lifted Waves: Use a smaller amount of product, keep the roots clipped while cooling, and avoid heavy oils. Fine curls need lift more than weight, or the wave line sinks fast.
Make-Ahead, Overnight Care, and Next-Day Refreshing
A lot of these styles can be built the day before the event, which is a relief when your schedule is already crowded. The safest method is to set the waves, let them cool fully, then clip or pin the front sections while they’re still in shape. If you need to sleep on the style, use a silk scarf or a satin pillowcase so the cuticle doesn’t rough up overnight.
If you’re doing pin curls or a braided style, leave the pins or braids in until the hair is fully dry and cool. Rushing that part is how the wave drops before you even leave the house. For half-up styles, you can prep the base and leave the loose lengths to be shaped the next day.
The next-day refresh is simple. Mist the hair very lightly with water or a water-and-leave-in mix, scrunch the ends, then re-curl only the pieces that lost their bend. Usually that means the front sections, a side piece, or the top layer near the crown. You do not need to redo the whole head unless the weather was rough.
If a style uses a lot of pins, remove them only after the hair has settled back to room temperature. Hot hair bends quickly. Cool hair remembers.
Questions People Ask Before Styling Romantic Waves
Can I do romantic waves on curly hair without straightening first?
Yes, and that’s often the better choice. Start from your natural texture, stretch it a little with a diffuser or blow-dry brush if needed, then shape only the sections that need a cleaner bend. The hair keeps more life that way.
What barrel size works best for curly hair?
A 1.25-inch barrel is the safest all-around pick for medium to long curls. Smaller barrels create tighter bends that can look busy once brushed out, while larger barrels give a broader, softer finish.
How do I keep the waves from going frizzy?
Let the hair cool before brushing, and use product with a light hand. Frizz often comes from too much touching, not from the style itself. A soft brush, not a rough one, helps too.
Will these styles work on a bob or lob?
Absolutely. Shorter cuts often look best with S-waves, flip waves, or face-framing curtain waves. The goal is shape and clean direction, not long, sweeping lengths.
What if my curls shrink after I set them?
That usually means the sections were too small or the hair was too dry when you styled it. Use slightly bigger sections, keep a little moisture in the mids, and set the hair while it still has some bend.
Can I wear these styles in humidity?
Yes, but pick one with more structure and use stronger setting product. Humidity-friendly waves need cooling time, small sections, and less brushing after the fact.
Is it better to use a wand or a flat iron?
A wand gives softer curves and is easier for most wave styles. A flat iron is better for S-waves, sharp bends, or a more polished front section. Pick the tool based on the shape you want, not habit.
How much product is too much?
If the roots feel damp or the ends stick together in chunks, you’ve crossed the line. Start with less than you think you need and add a touch more only where the style loses shape.
A Softer Kind of Glam
The nicest thing about romantic waves on curly hair is that they don’t ask the hair to become someone else. They take the bend that’s already there and shape it into something cleaner, gentler, and a little more dressed up. That leaves room for movement, which is what makes the style feel alive in the first place.
Pick the version that fits the neckline, the weather, and the amount of time you actually want to spend in front of the mirror. A half-up twist is not the same job as brushed-out ringlets, and that’s the point. Once you stop trying to make every wave do everything, the hair starts behaving better.
Practice one style before the special day if you can. The curl pattern tells you a lot once you’ve worn it for an hour, and that little rehearsal saves a lot of guesswork when the real event shows up.