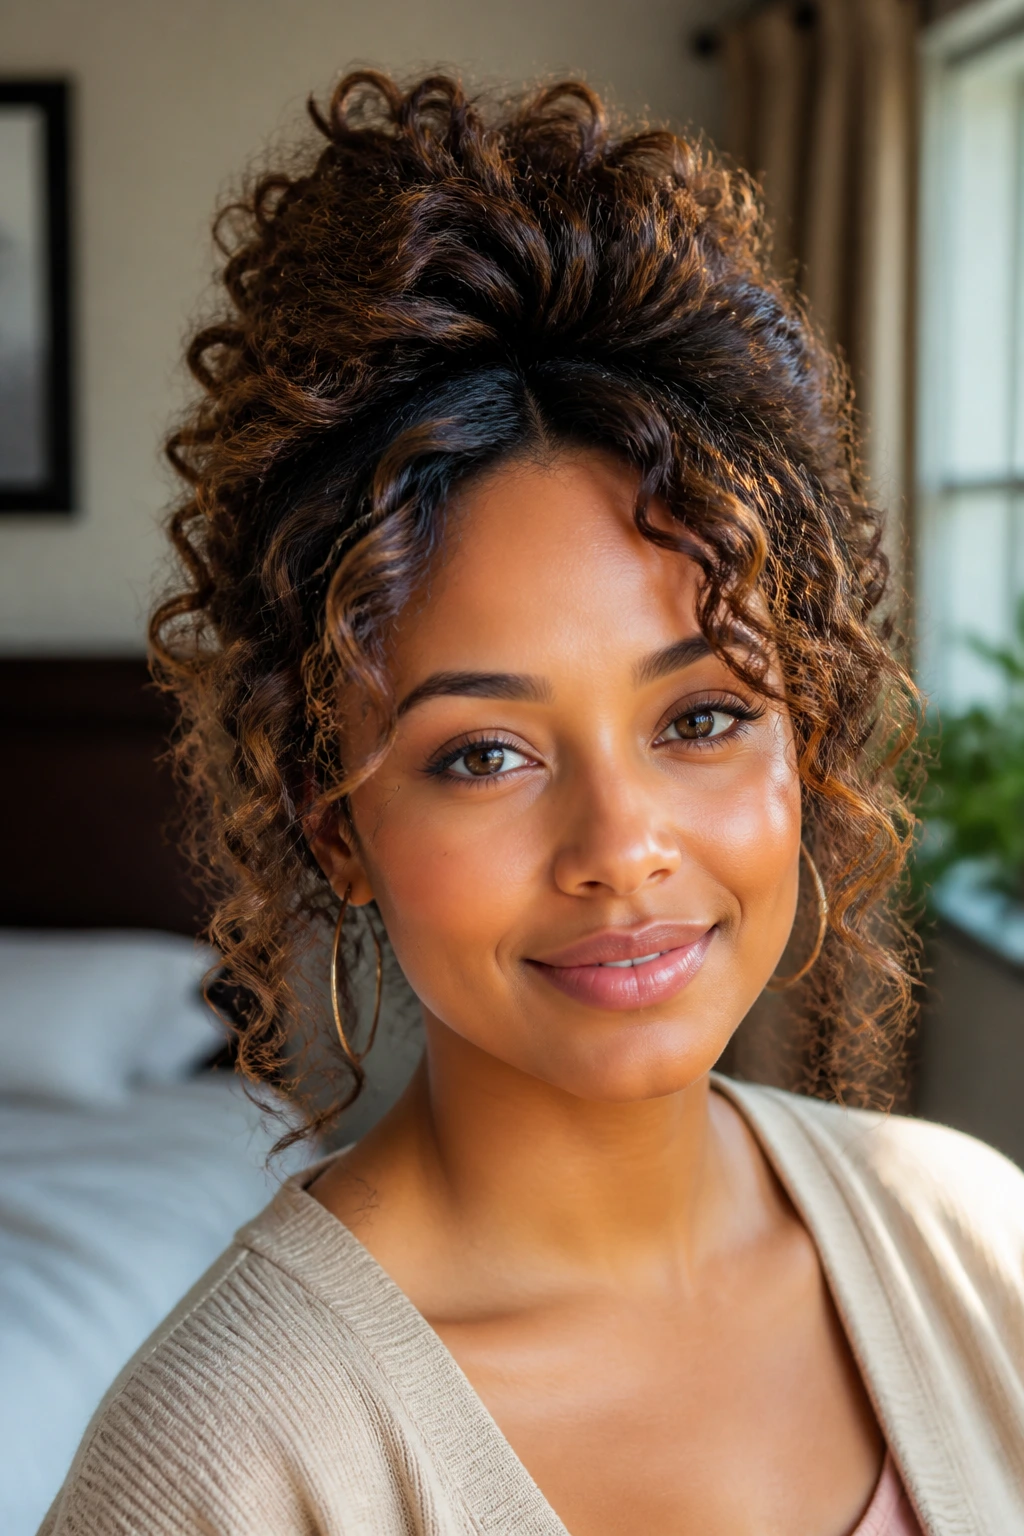
Soft curls for natural hair and round faces work best when they do one simple thing well: they pull the eye up before they spread it out. That’s the whole trick. A style can be full, touchable, and soft without adding width right at the cheeks, and that distinction matters more than people think.
Round faces already have their own charm — fuller cheeks, gentler jawlines, a shape that reads friendly even before you do anything to it. The problem is that a lot of curl inspiration ignores geometry. It piles volume at the widest point of the face and calls it balance. I’m not interested in that. Give me curls that skim the cheekbone, a little lift at the crown, and ends that move instead of sitting in one heavy line.
Natural hair makes this easier than you’d expect, because texture gives you built-in lift. Shrinkage, layers, stretch, and part placement all change the way the eye moves across the face. That means you can build shape with a twist-out, a rod set, a wash-and-go, or a puff without forcing your hair into a look that fights its own pattern.
Why These Styles Make Round Faces Look Longer
-
Crown lift changes the whole read: A little height at the top of the head creates a vertical line, and that line does more for a round face than extra width ever will.
-
Side parts break up symmetry: A deep side part cuts across the face shape and keeps the curls from forming one big circular frame around your cheeks.
-
Soft ends keep the shape airy: Ends that curve inward, flick out, or separate lightly are easier on the eye than a blunt curl line that stops at chin level.
-
Layers stop the side volume from ballooning: On natural hair, layers prevent the curls from building a heavy block at the jaw.
-
Texture should look touchable, not frozen: The best soft curls still move when you turn your head. They’re defined, but not stiff.
-
Shrinkage can be your friend: Stretching the hair just enough — not straightening it — gives you length where a round face usually needs it most.
How to Read Your Hair Before You Pick a Curl Shape
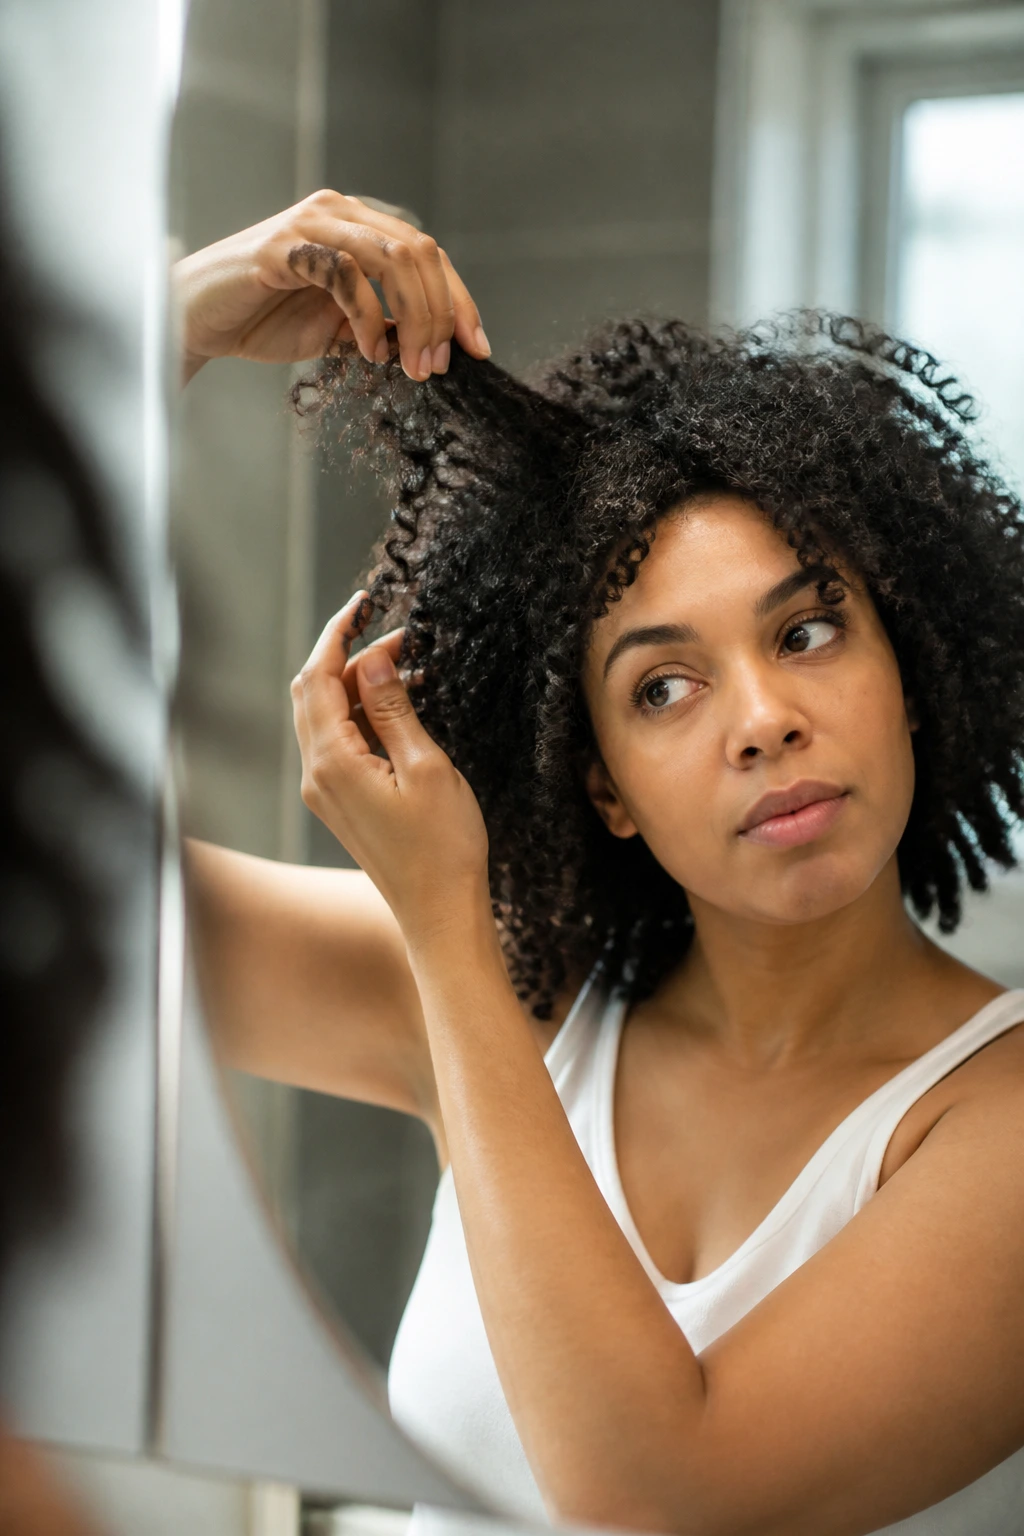
Round faces do not need the same curl strategy on every head. Density, shrinkage, and length change everything. A medium-density 4B coil that shrinks up six inches behaves nothing like a loose 3C pattern that falls with a little weight of its own. If you ignore that, you end up blaming the style when the real issue is placement.
Start with length in the mirror, not length on the chart. Hair that reaches the collarbone wet may sit at the cheek when it dries. Hair that looks short in a braid-out may land right at the chin once it’s fluffed. That matters because the chin, cheekbone, and crown are the three spots that do most of the visual work on a round face.
Density changes the feel of the curl, too. Thicker hair can handle a deeper side part, a taller crown, and larger sections without collapsing. Finer natural hair often looks better with fewer, more intentional pieces around the face, because too much separation can make the style look airy in a thin way rather than soft in a flattering way.
And then there’s shrinkage. I know, everyone talks about shrinkage, but here it actually matters. If your hair shrinks hard, you want your shaping to happen while the hair is still stretched — during setting, twisting, banding, or diffusing. If you wait until the curls are fully dry and compact, you lose the ability to place volume where it helps most.
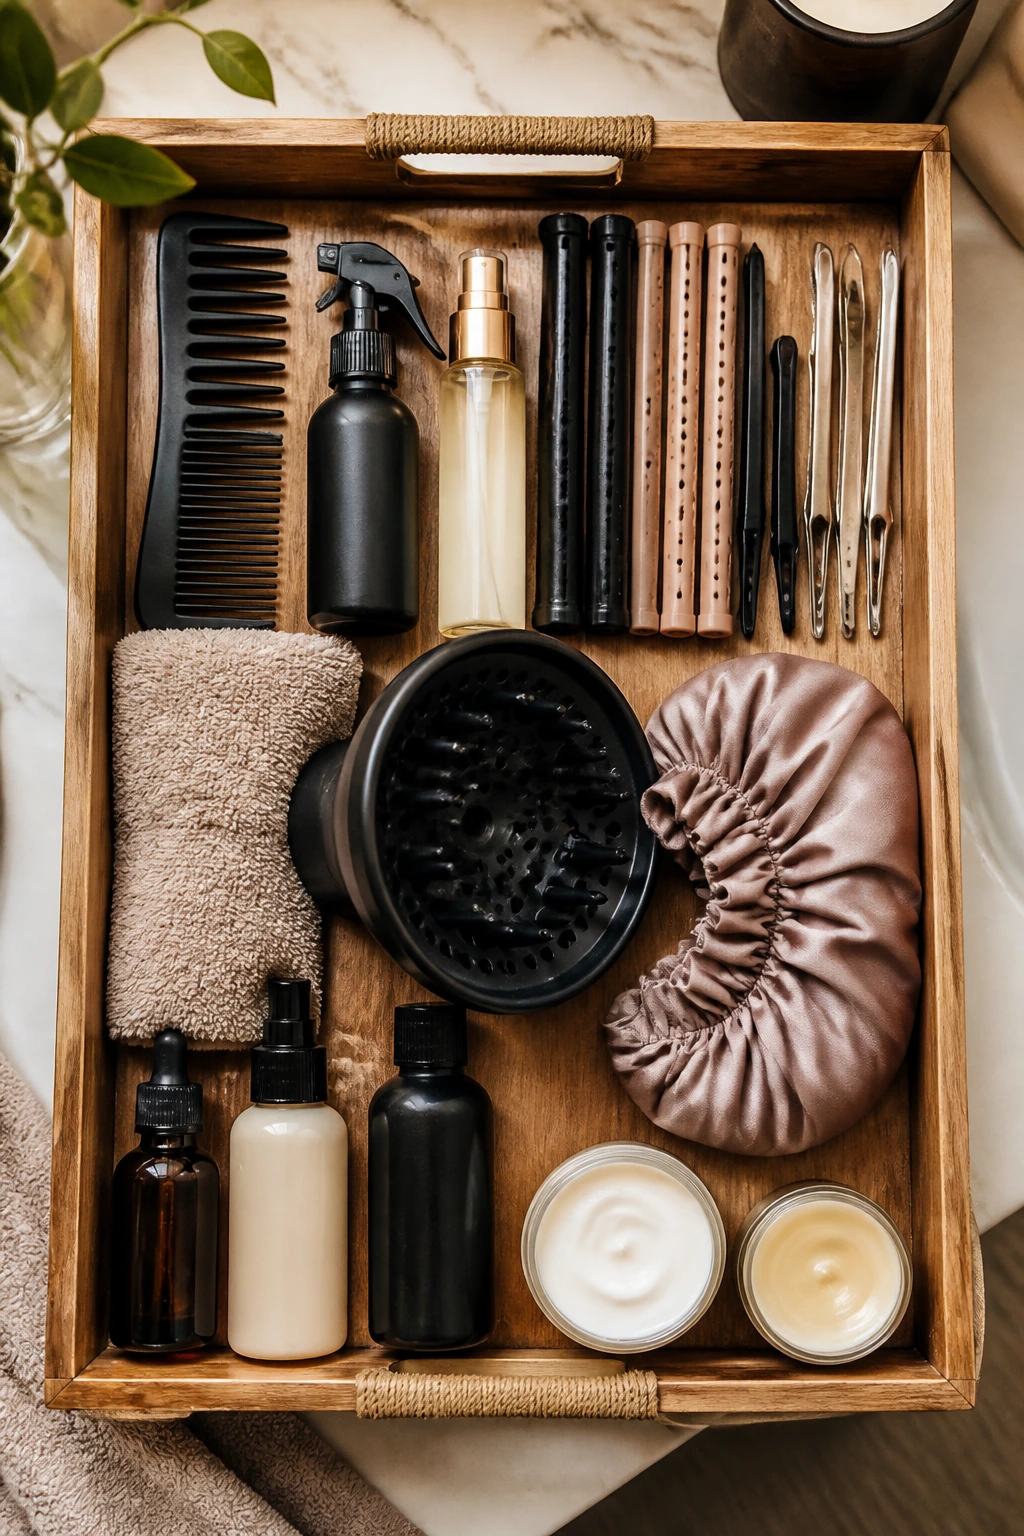
The Tools That Make Soft Curls Easier to Shape
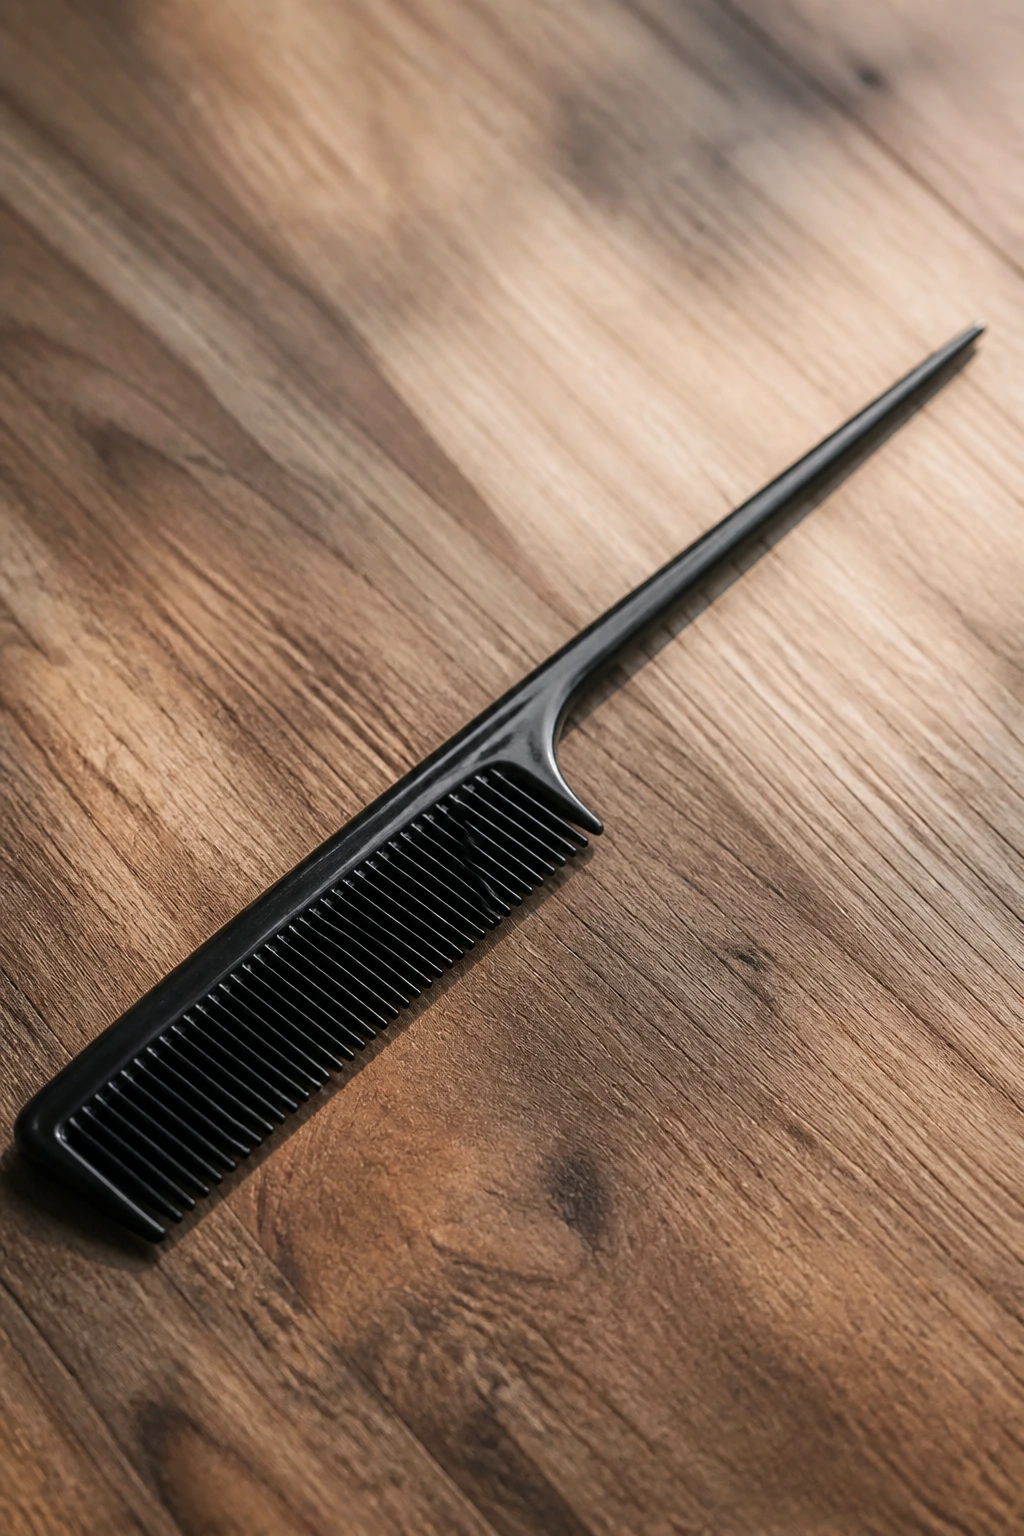
A good curl style does not come from one miracle product. It comes from a few boring tools used well, and boring tools are underrated.
-
Tail comb: Needed for clean parts, especially if you want a deep side part or a sharp crown section.
-
Spray bottle with water: Use this to re-wet sections lightly instead of soaking the whole head and starting from scratch.
-
Leave-in conditioner: A light layer helps natural hair stay pliable while you set the curls.
-
Curl cream or styling foam: Pick one, not five. Too much product weighs down the sides and steals movement.
-
Flexi rods, perm rods, or Curlformers: Choose the size based on the curl you want, not the size that looks cute in a bag.
-
Duckbill clips: These keep sections neat when you’re working around the hairline or crown.
-
Microfiber towel or cotton T-shirt: Better than rough terry cloth when you want to blot without frizzing the cuticle.
-
Diffuser: Handy if you want lift at the roots without blasting the pattern apart.
-
Satin bonnet or scarf: Not glamorous. Very useful.
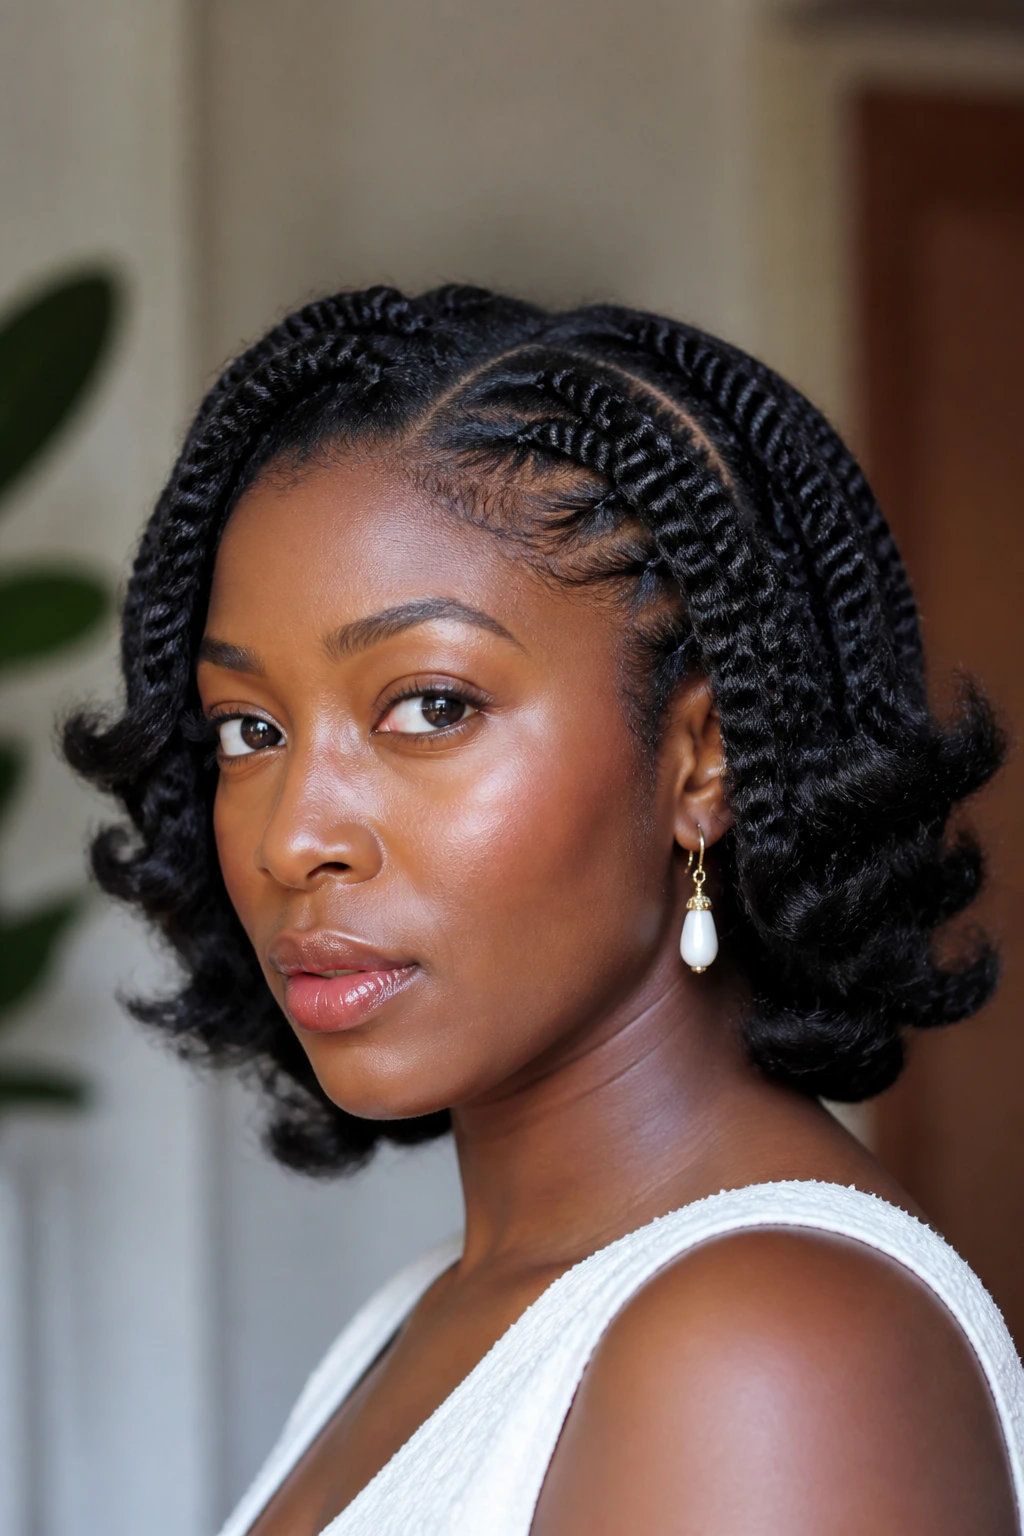
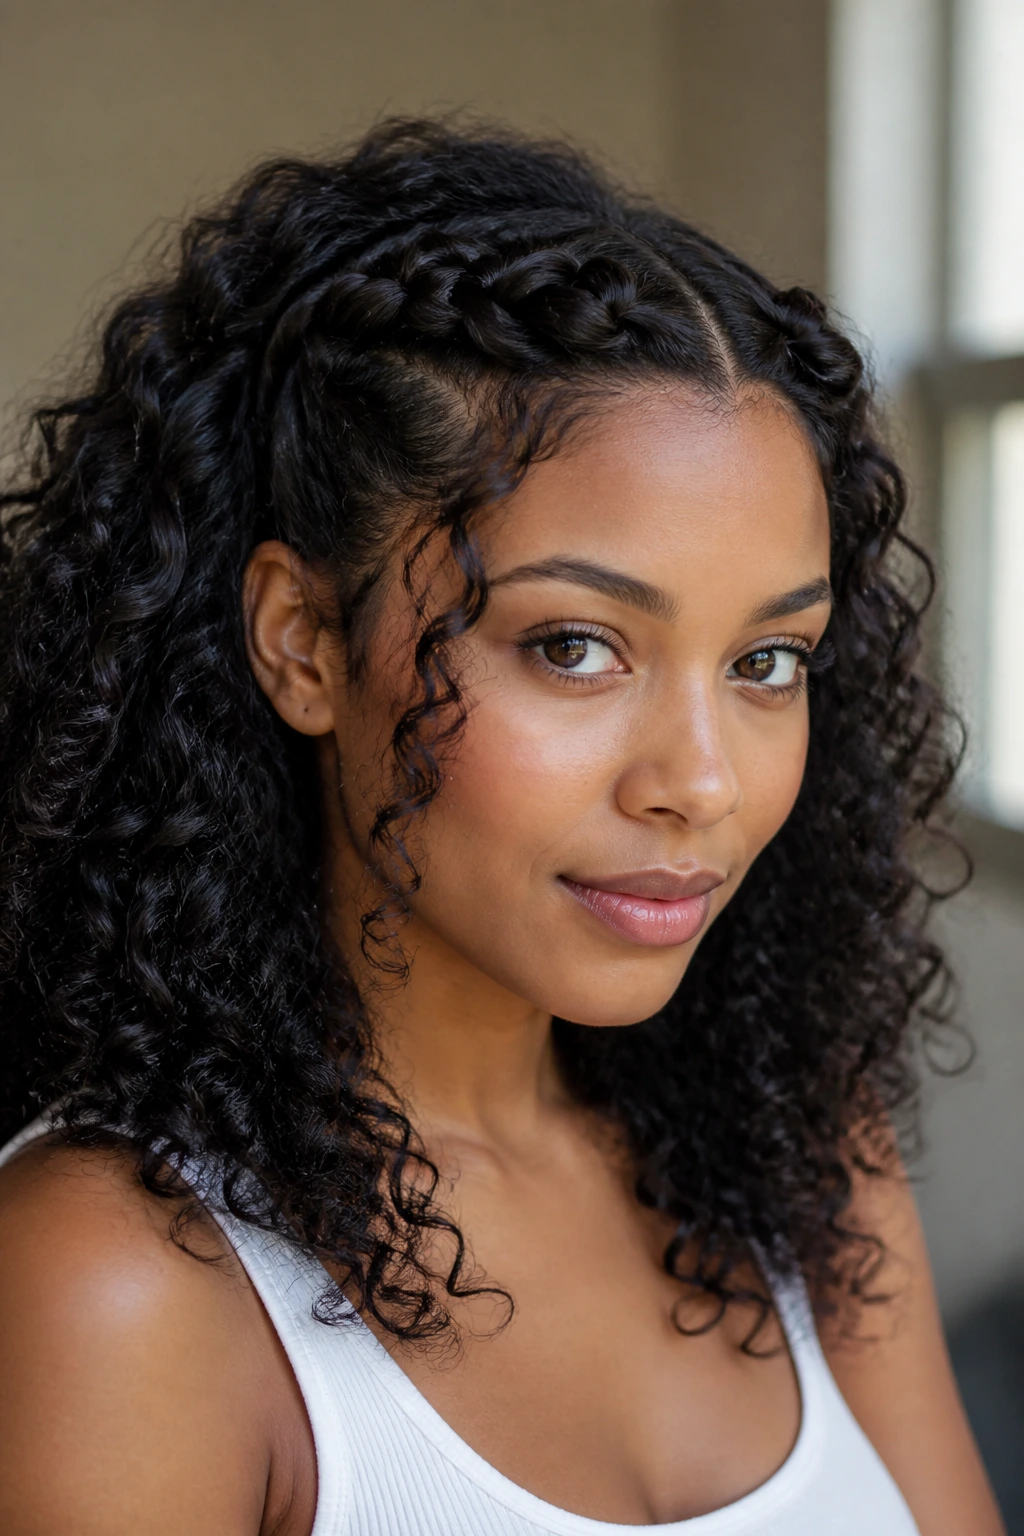
1. Side-Part Twist-Out Lob
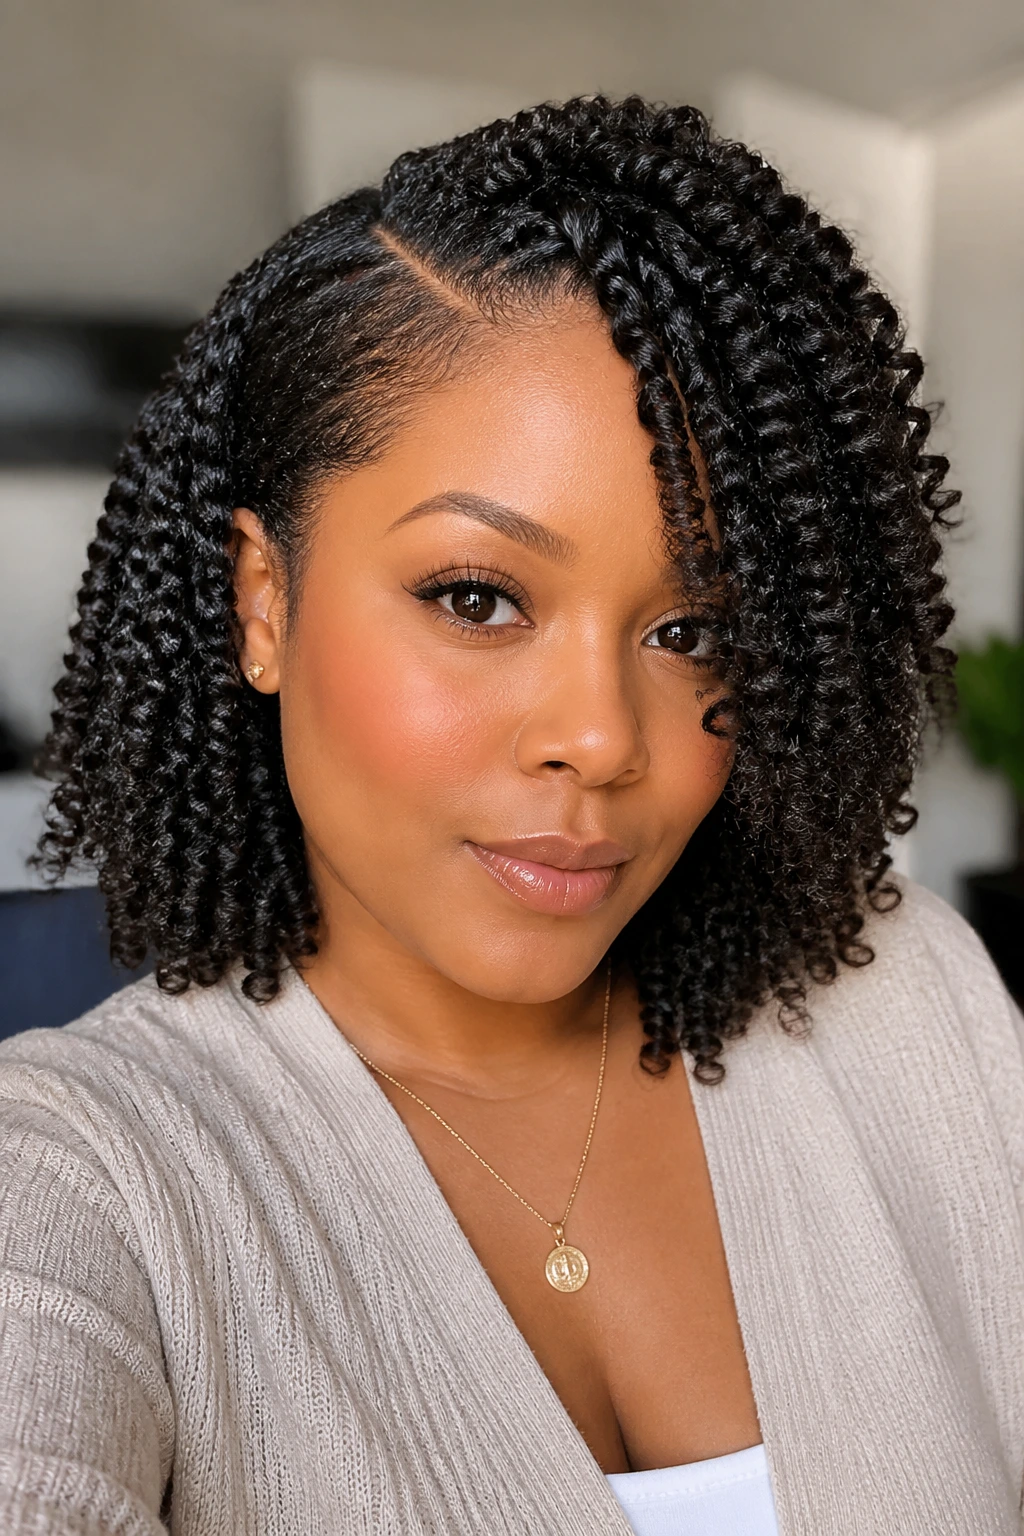
A side-part twist-out lob is one of those styles that does the face-shaping work for you before you even fluff it. The side part throws the curls diagonally across the forehead, and the collarbone length keeps the shape from sitting too square at the jaw. On a round face, that diagonal line matters. It gives the eye somewhere to go besides straight across the cheeks.
Why it flatters
A lob gives natural hair a little weight, which helps the curls hang instead of puffing outward at the sides. I like this especially on thicker textures, because the length keeps the silhouette from turning into a triangle. A medium-size two-strand twist set works well here; if the twists are too tiny, the final shape can get too springy and short around the cheekbones.
Use a light curl cream on damp hair, twist in sections about 1 inch wide, and let the roots dry fully before you separate. If the roots are even a little damp, the whole style can collapse into frizz by lunchtime.
Best for: medium to thick natural hair that shrinks a lot.
Styling note: lift the roots at the crown with a pick, but leave the sides alone unless they sit too flat.
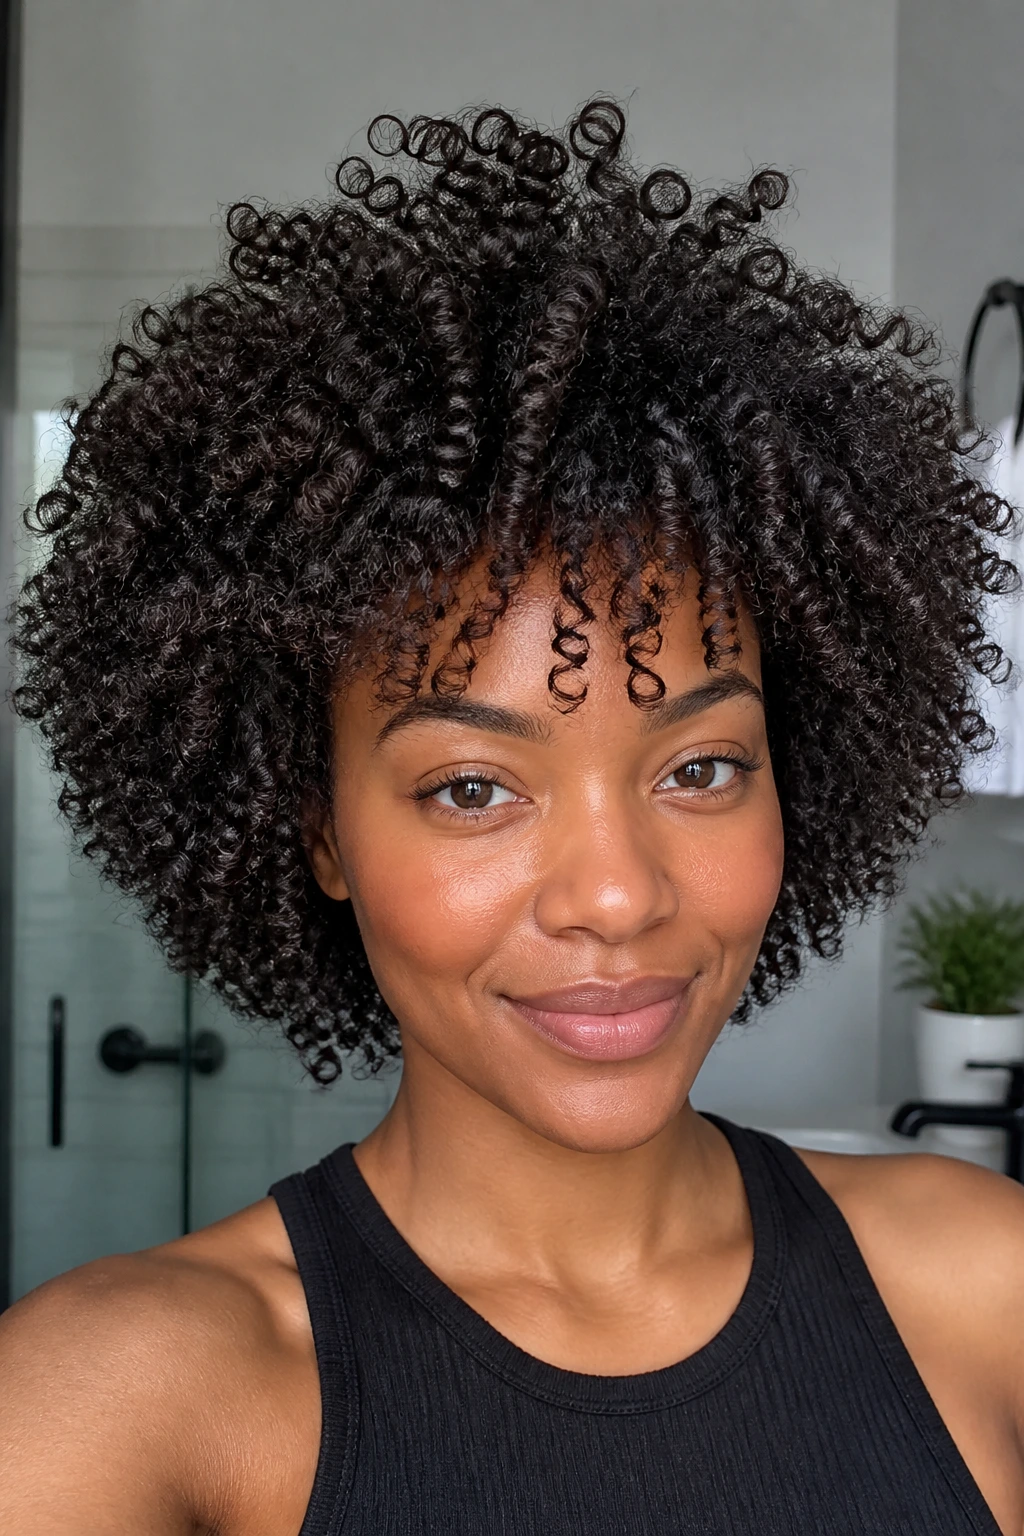
2. Crown-Lift Wash-and-Go
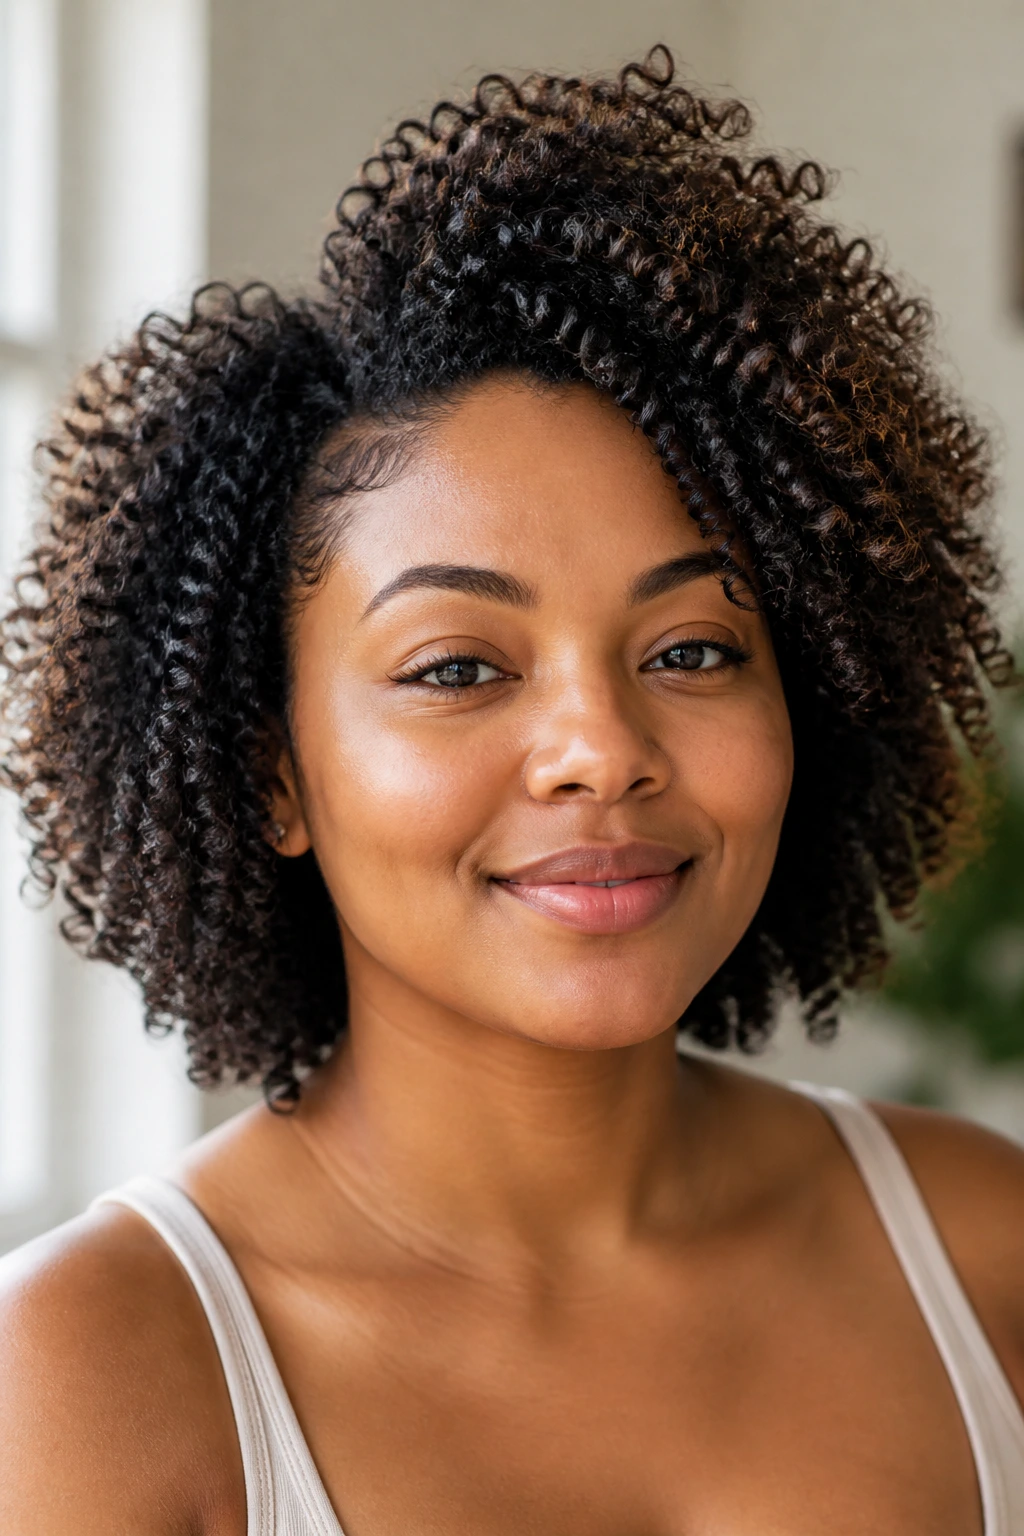
A crown-lift wash-and-go is not about volume everywhere. That would be lazy styling, and round faces tend to pay the price for it. Instead, the volume sits higher up, while the curls around the cheek and jaw stay a little more controlled. It gives the whole style a longer line.
What makes it different
The move here is placement. Apply gel or mousse in smaller sections near the front, then use your fingers to encourage the top curls upward before they set. Let the side sections clump a bit more. That tiny shift keeps the sides from ballooning.
If your curls are loose enough to hang, this style gives you that soft halo effect without turning into a mushroom. If your texture is tighter, use a diffuser on low heat and stop when the roots are about 80% dry. Don’t keep blasting the sides. You’ll pay for it later.
Quick tip: flip your head only at the crown, not all over, while drying. It keeps the lift where you want it.
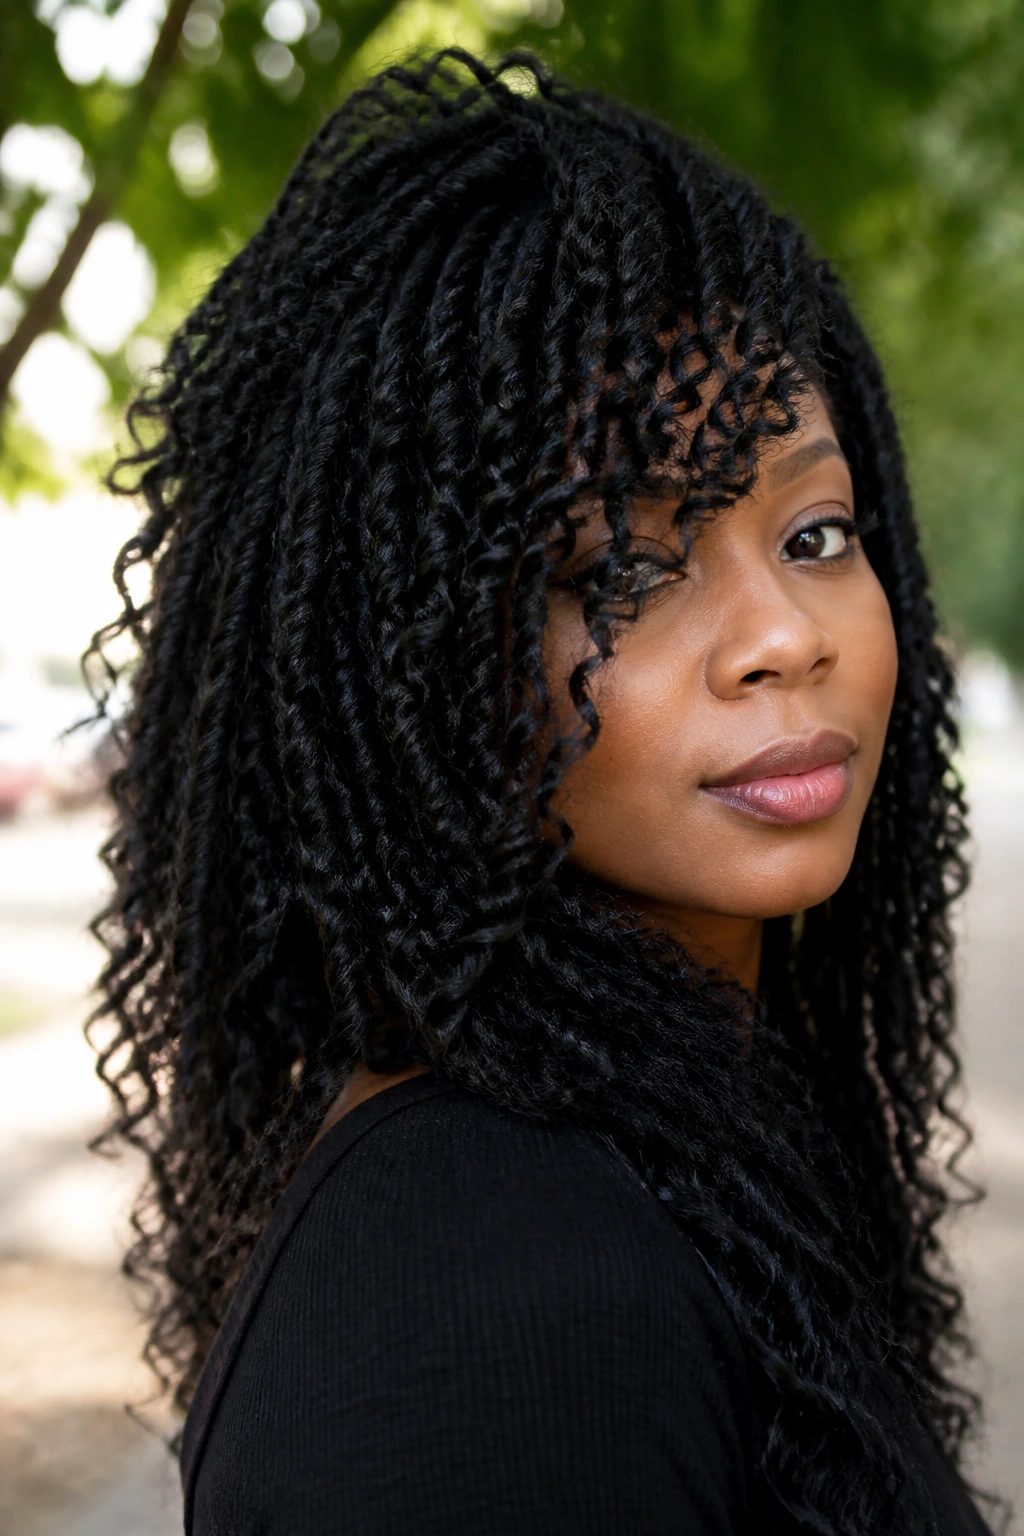
3. Shoulder-Length Flexi-Rod Set
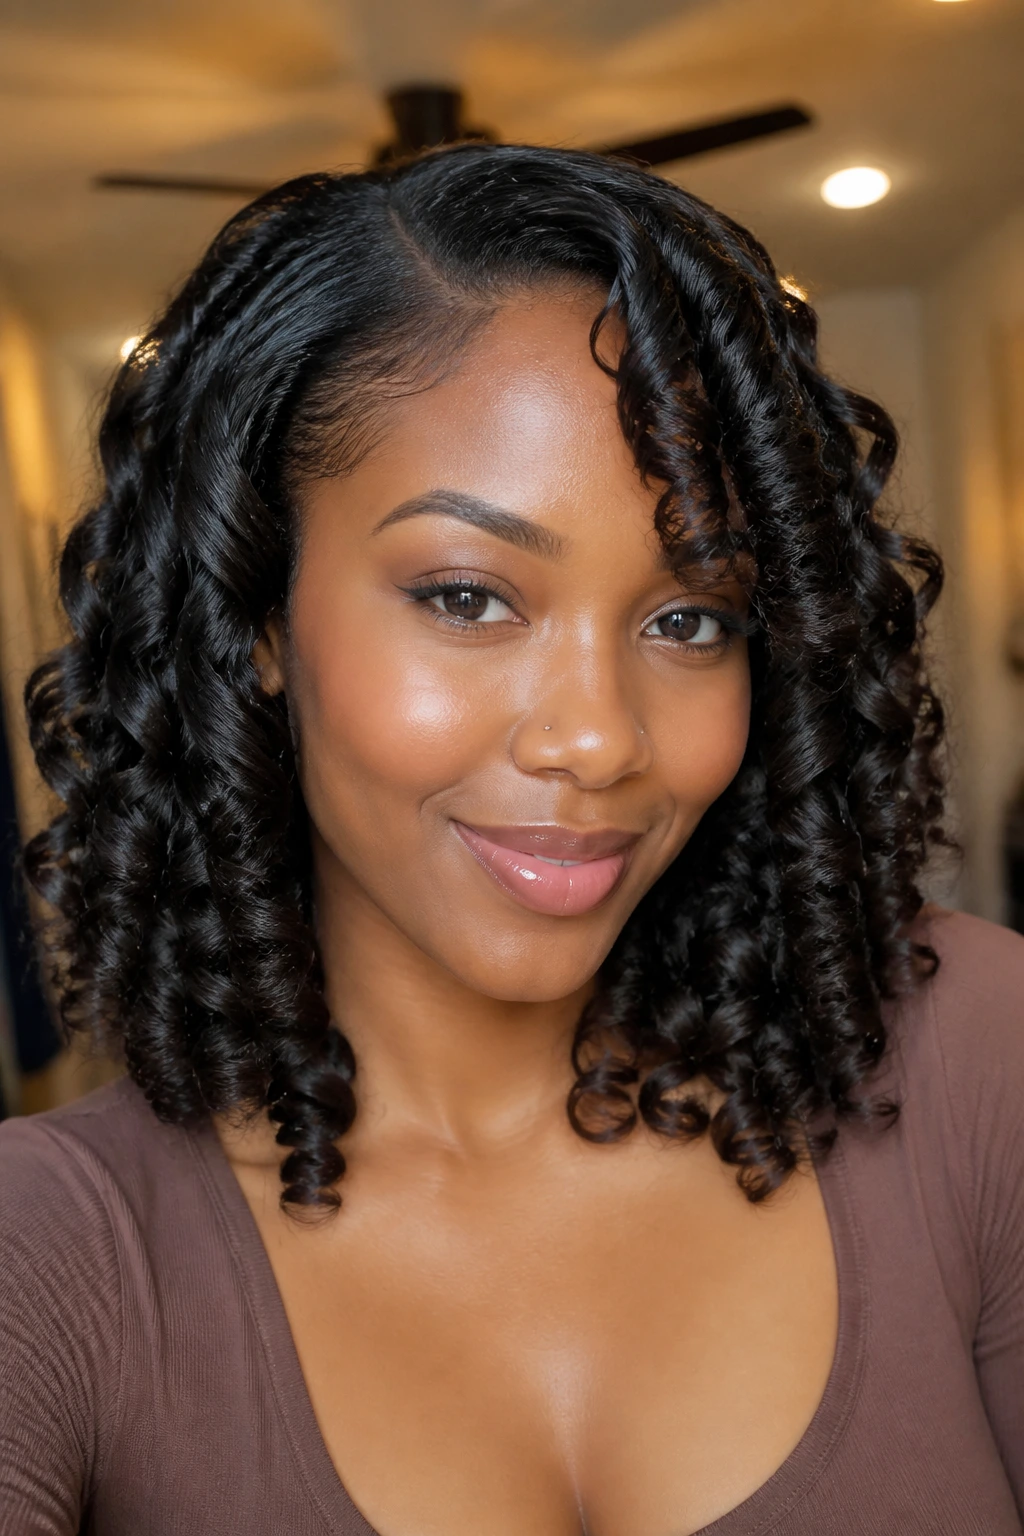
Shoulder-length flexi rods create a soft spiral that has enough shape to frame the face but not enough bulk to crowd it. The curls land around the collarbone and upper shoulders, which is a useful place for a round face. It stretches the outline without flattening the natural texture.
Why this set works
Flexi rods make a smoother curl than a twist-out, and that smoothness matters if you want the face to look a little longer. Go with rods around 1/2-inch to 3/4-inch for defined spirals; larger rods give a softer bend if you don’t want the style to look too springy. The key is drying thoroughly. Half-dry rod sets are a headache.
I’d rather see a fully dry, slightly separated set than a damp, perfect-looking one that loses its shape ten minutes after you leave the house. That’s the trade. Patience here buys you days of good movement.
Best way to wear it
Keep one side tucked behind the ear and let the other fall forward. That small asymmetry stops the style from turning into a circle around the face.
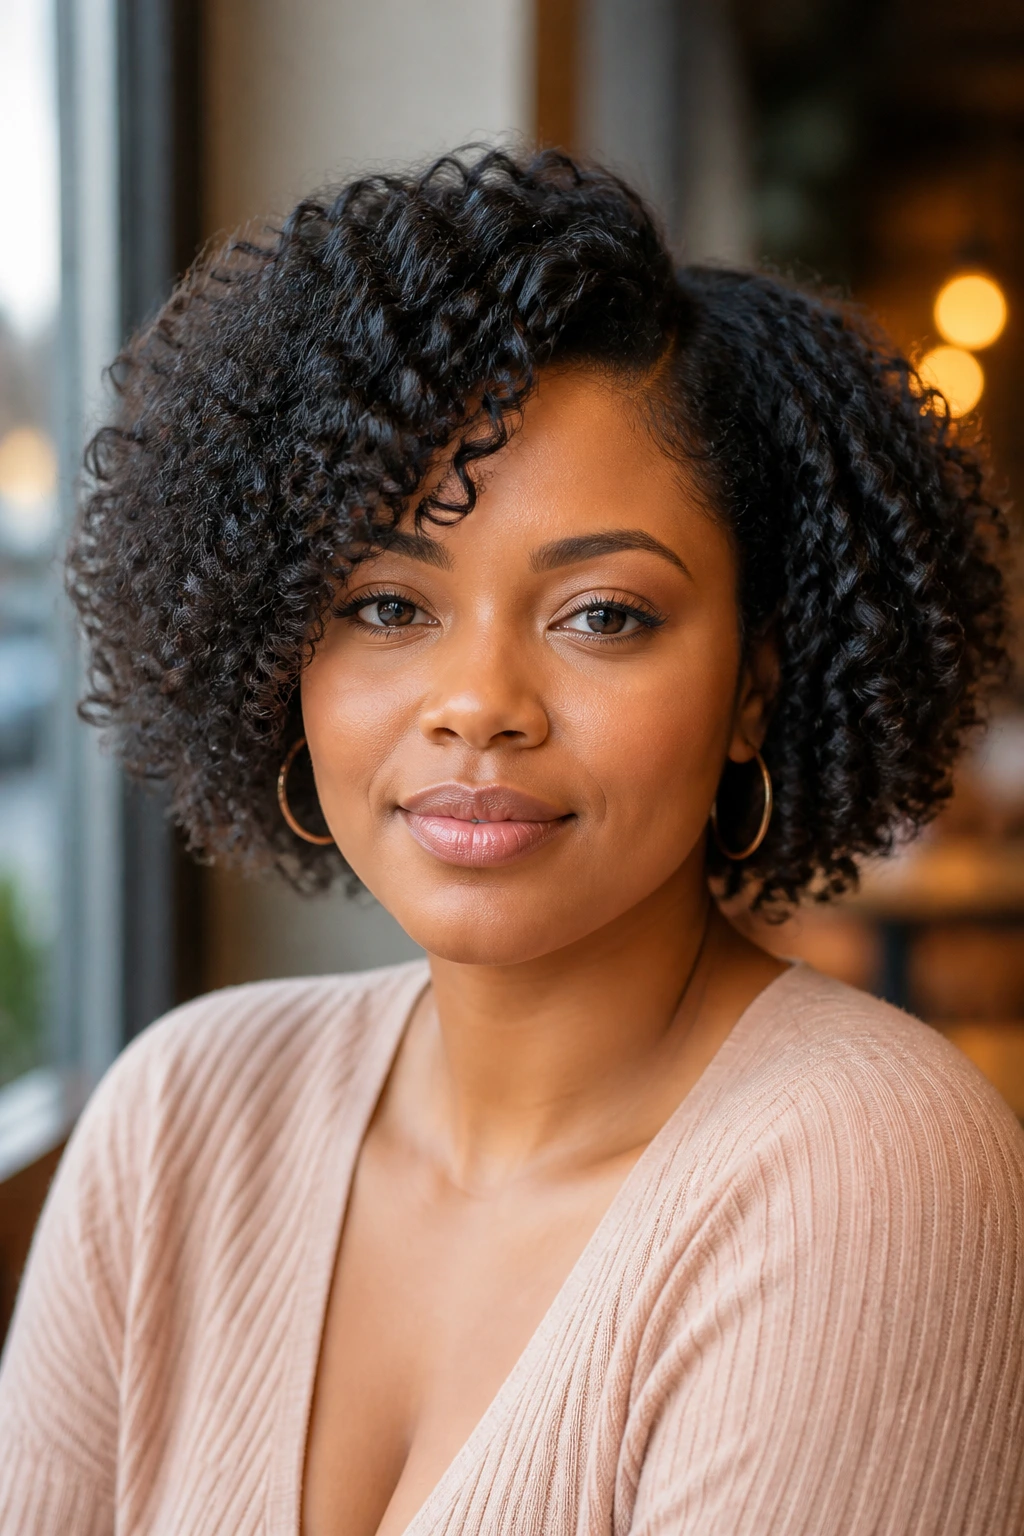
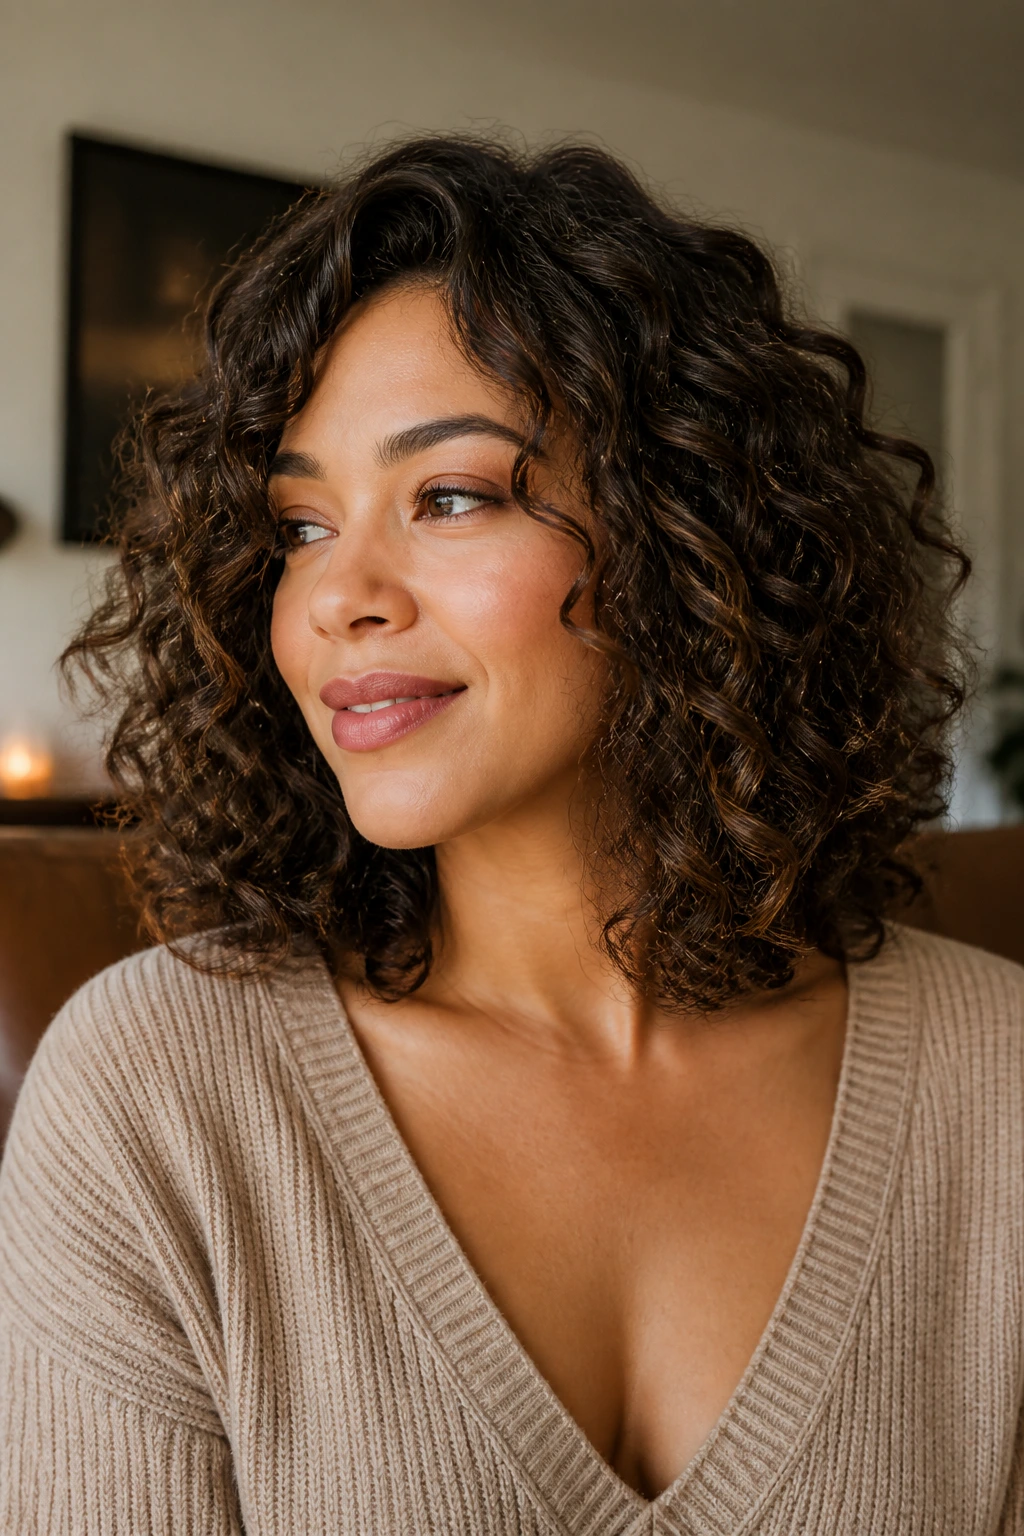
4. Curly Shag With Face-Framing Pieces
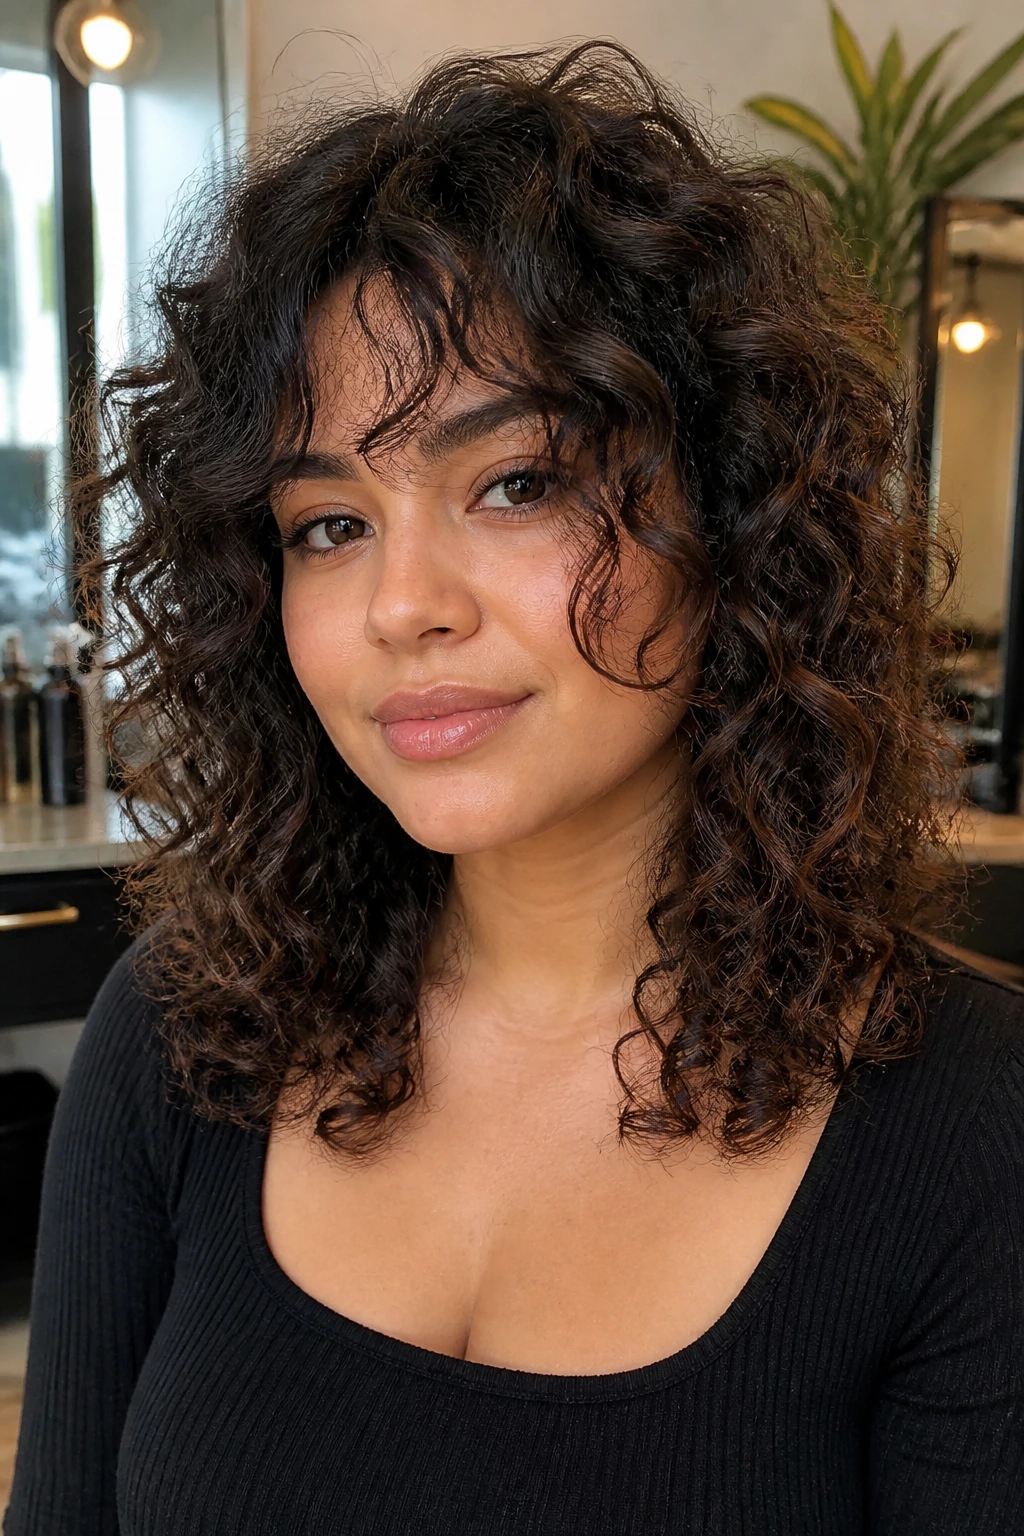
A curly shag gives round faces something they usually need: shape with edges that don’t feel heavy. The layers are the whole point. They break up the width, make the curls move, and keep the hair from sitting like one dense curtain.
This style looks especially good when the shortest layers start around the cheekbone and the longest ones hit the collarbone. Too short, and the style can get frizzy in a very exposed way. Too long, and the shag loses the lift that makes it work.
Where the shape lands
You want the face-framing pieces to curve inward just enough to graze the cheeks, not sit right on them. A curling wand isn’t required if your natural pattern already forms a spiral; a twist set or roller set can give the same effect with less heat.
A blunt cut fights this style. Layers are the reason it works. If your hair is one length and thick, ask for invisible layers or internal layering so the sides move without looking choppy.
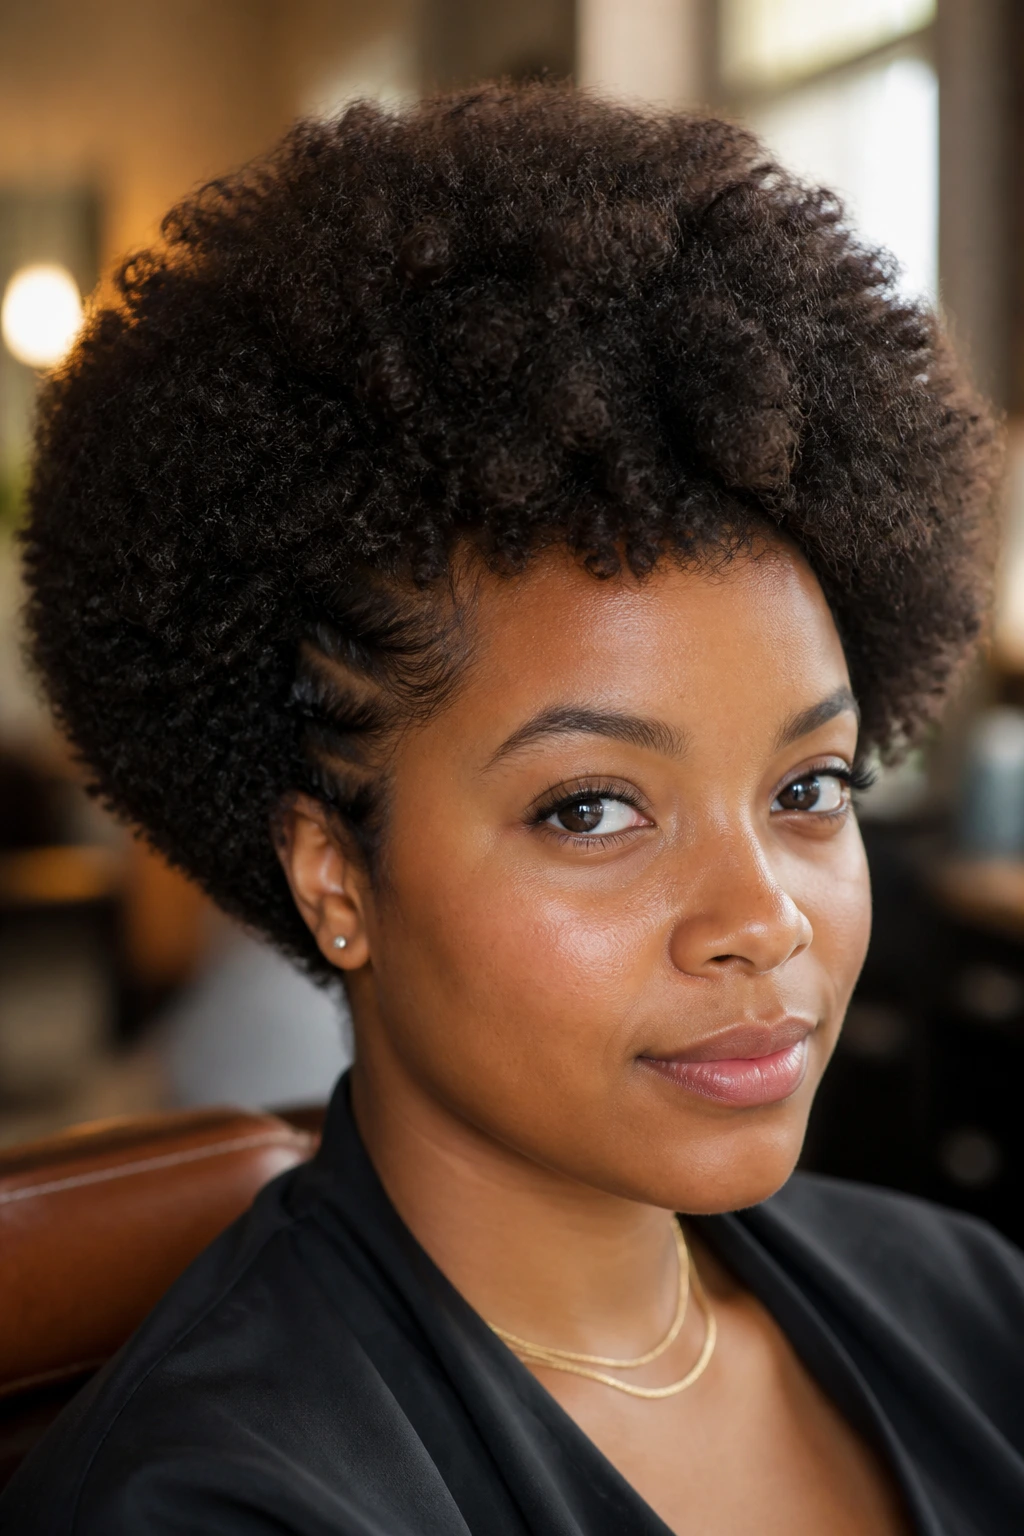
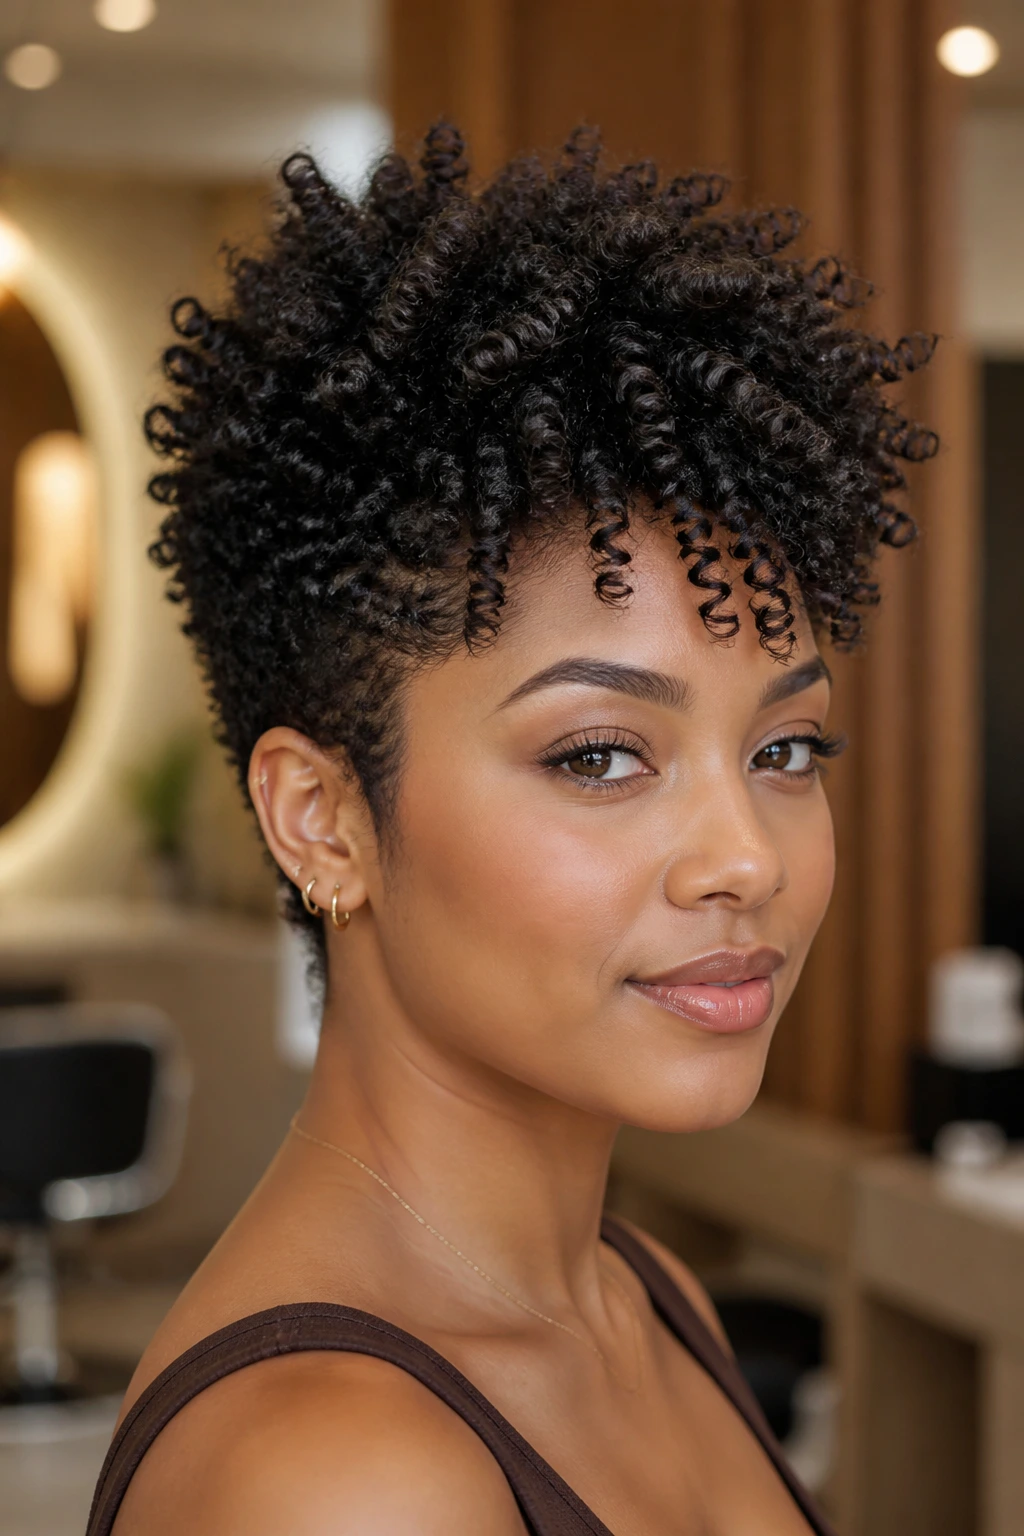
5. Tapered Coil-Out
A tapered coil-out gives you height at the top and a neat, narrow shape near the sides, which is a very good trade for a round face. It’s especially useful on tightly coiled hair because the taper keeps the natural puff from spreading outward too far.
The style works best when the back and sides are shaped a little shorter than the top. Not shaved, unless that’s your preference — just trimmed to keep the outline clean. The result is a soft shape that reads modern without losing the softness of coils.
Styling cue
Coil the top in small sections and allow the side sections to stay a touch looser. That contrast creates lift. If every section is identical, the final shape can look too round.
Use a bit of sheen only at the ends. Too much oil near the roots will flatten the crown, and the crown is doing important work here.
6. Deep Side-Sweep Braid-Out
A deep side-sweep braid-out is one of the easiest ways to cheat a little extra length into a round face shape. The heavy part sits off-center, the curls cascade across the forehead, and the eye follows the line instead of reading the face as one even circle.
A braid-out gives a softer wave than a twist-out, which is useful if you want the style to feel airy rather than dense. Make the front braids a little smaller than the back braids so the curl pattern around the face lands with more detail.
I like this style for hair that looks fuller than it is, because the braid texture adds grip without adding a ton of width. It also photographs nicely in real life — not in a glossy, overworked way, just in a clean, touchable way.
Pro move
Take the first braid on the heavier side and direct it slightly forward when it dries. That tiny bend makes the whole sweep feel intentional.
7. Soft Faux Hawk Puff
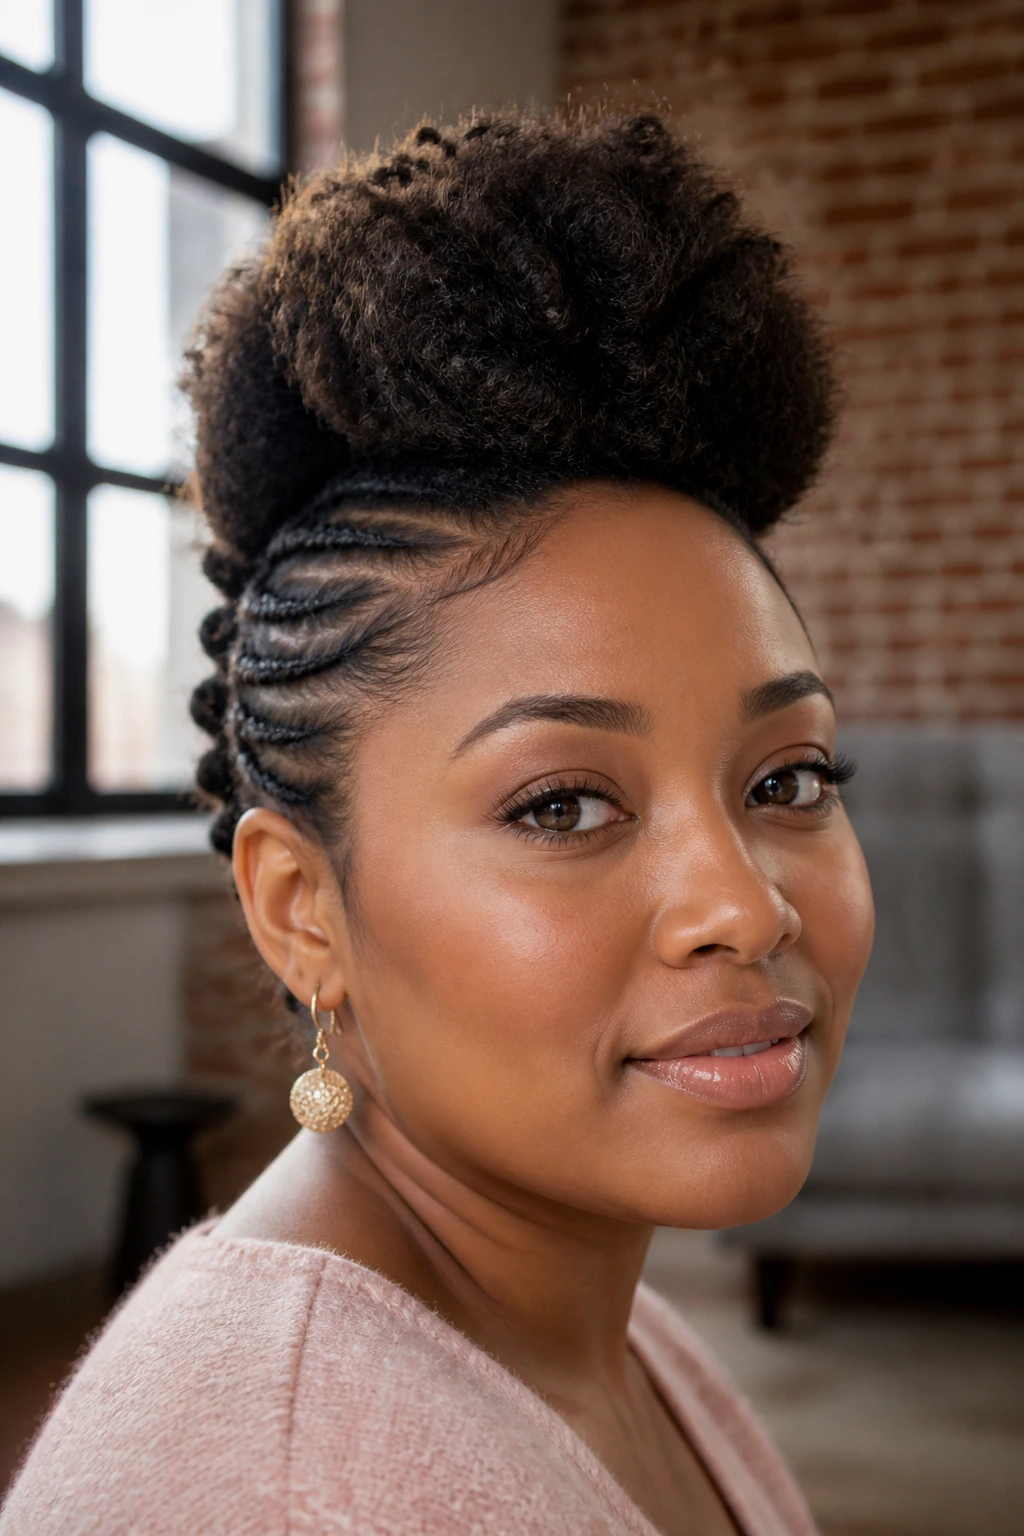
A soft faux hawk puff gives you height down the center of the head and keeps the sides under control. For a round face, that center lift is gold. It draws the eye vertically, and the face reads longer because the volume stays in a narrow strip.
This version should stay soft, though. No hard edges, no shellacked sides. Use flat twists or cornrows on the sides, then gather the middle section into a puff or a loose curl cluster. Leave a few curls loose around the temple if you want the style to feel less severe.
Who it suits
This works beautifully on coily hair with some length on top, even if the sides are shorter. If your hair is longer and dense, the faux hawk can become too wide unless you pin the side sections close to the head.
Keep the side sections smooth, not tight. Tension at the hairline is not worth it. You want lift, not a headache.
8. Medium-Length Roller Set
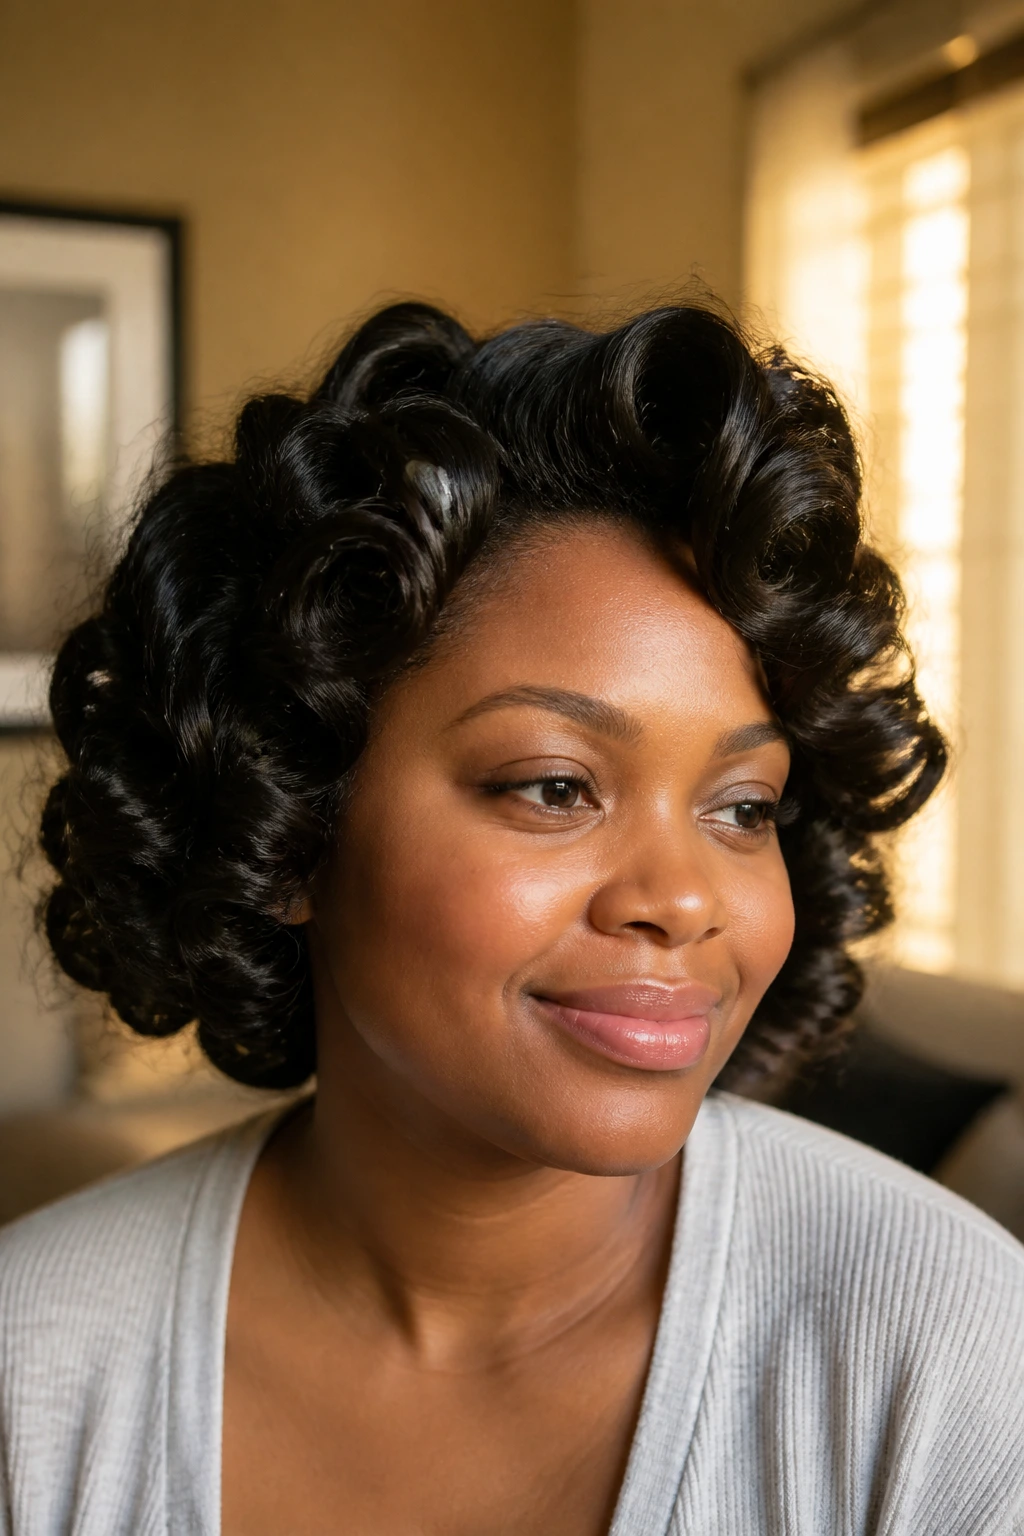
A medium-length roller set gives a round face a clean frame without the fuzziness that can come from over-separating a twist-out. The rollers create a uniform curl, and that uniformity keeps the style polished enough to stretch the face visually.
Choose roller sizes based on the finish you want. Smaller rollers create tighter definition; medium rollers, around 5/8 inch to 1 inch, give a more relaxed curve that lands softly around the cheeks. Dry the set fully under a hooded dryer or with a diffuser until the roots feel cool and the hair no longer has that damp stretch.
The payoff
A roller set is good when you want definition to last. The curls stay neater at the ends, which keeps the silhouette tidy. On round faces, tidy often beats fluffy. Not always, but often.
Separate the curls with oiled fingertips, not a rake comb. A comb can turn a nice shape into a cloud.
9. Half-Up Halo Curls
Half-up halo curls keep fullness where it helps and pull the rest of the hair away from the sides of the face. That alone can change the whole balance. You get soft curl volume, but not the kind that sits at cheek level and makes the face look wider.
The half-up section should sit a little above the crown, not directly in the middle of the head. Higher placement gives more length. Then let the lower half fall in loose curls or a softly stretched pattern.
Best detail to remember
Leave two small front pieces out if your hairline likes a softer frame. Those pieces should be curled away from the face or allowed to bend outward just slightly. If they swing inward too hard, the look gets heavy at the cheeks.
This is also a smart option when you want second- or third-day hair to look fresh without a full restyle. Twist the top half, secure it loosely, and let the bottom curls keep doing their thing.
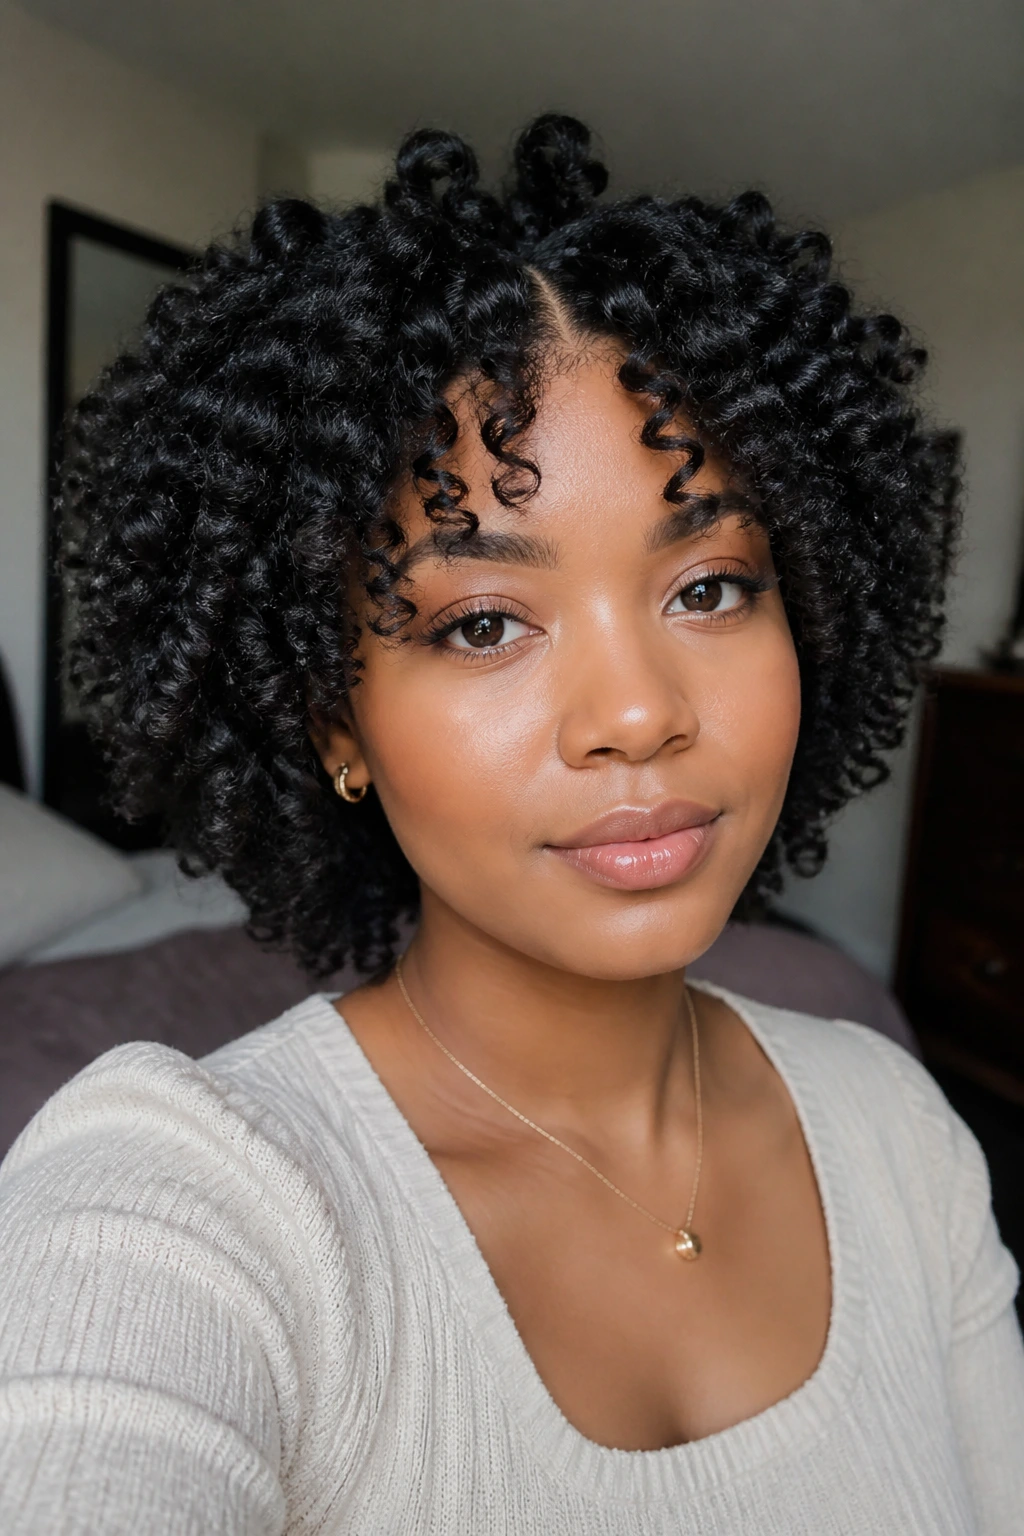
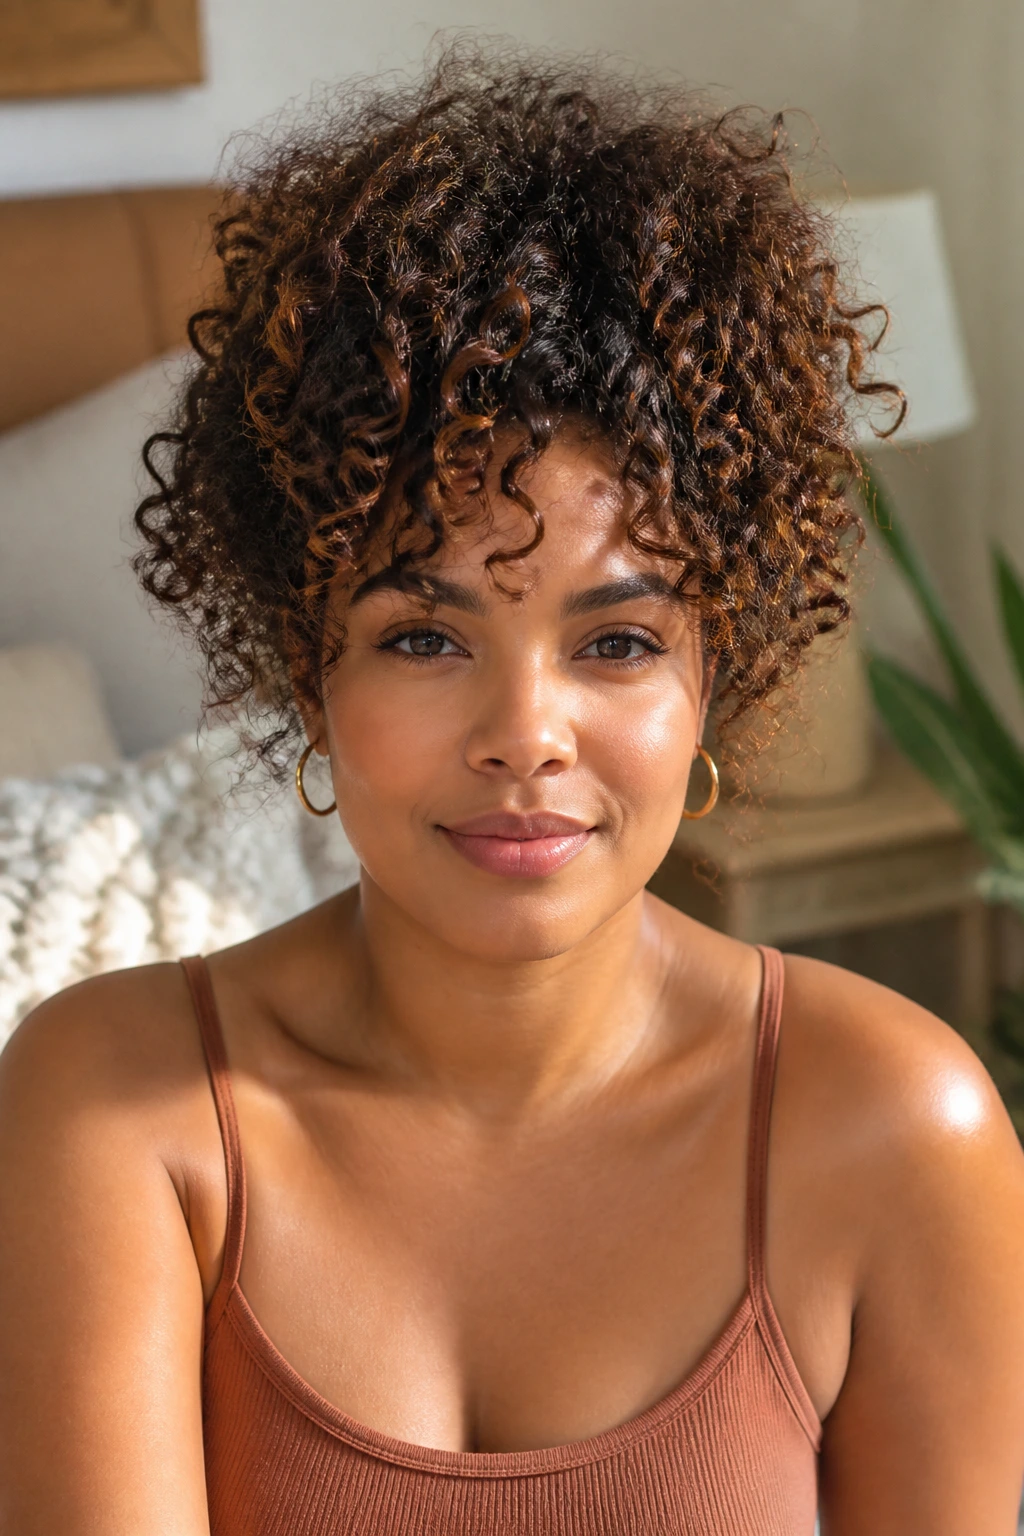
10. Rod Set With Feathered Bangs
Feathered bangs change everything on a round face. They create movement across the forehead and keep the curl shape from starting too bluntly at the hairline. A rod set with this kind of fringe reads soft, not boxy.
The bang section should be a little longer than you think, because natural hair springs up. Curl it on slightly larger rods, and direct the rods forward and a touch to the side. When you separate, you want pieces that feather rather than one hard fringe line.
If your forehead is high, this style gives balance. If your forehead is shorter, keep the bangs lighter and let them arc out of the center rather than sit straight across. Straight-across bangs can shorten the face fast.
Small note: a tiny amount of holding mousse on the fringe goes a long way. Too much makes it tacky and stiff.
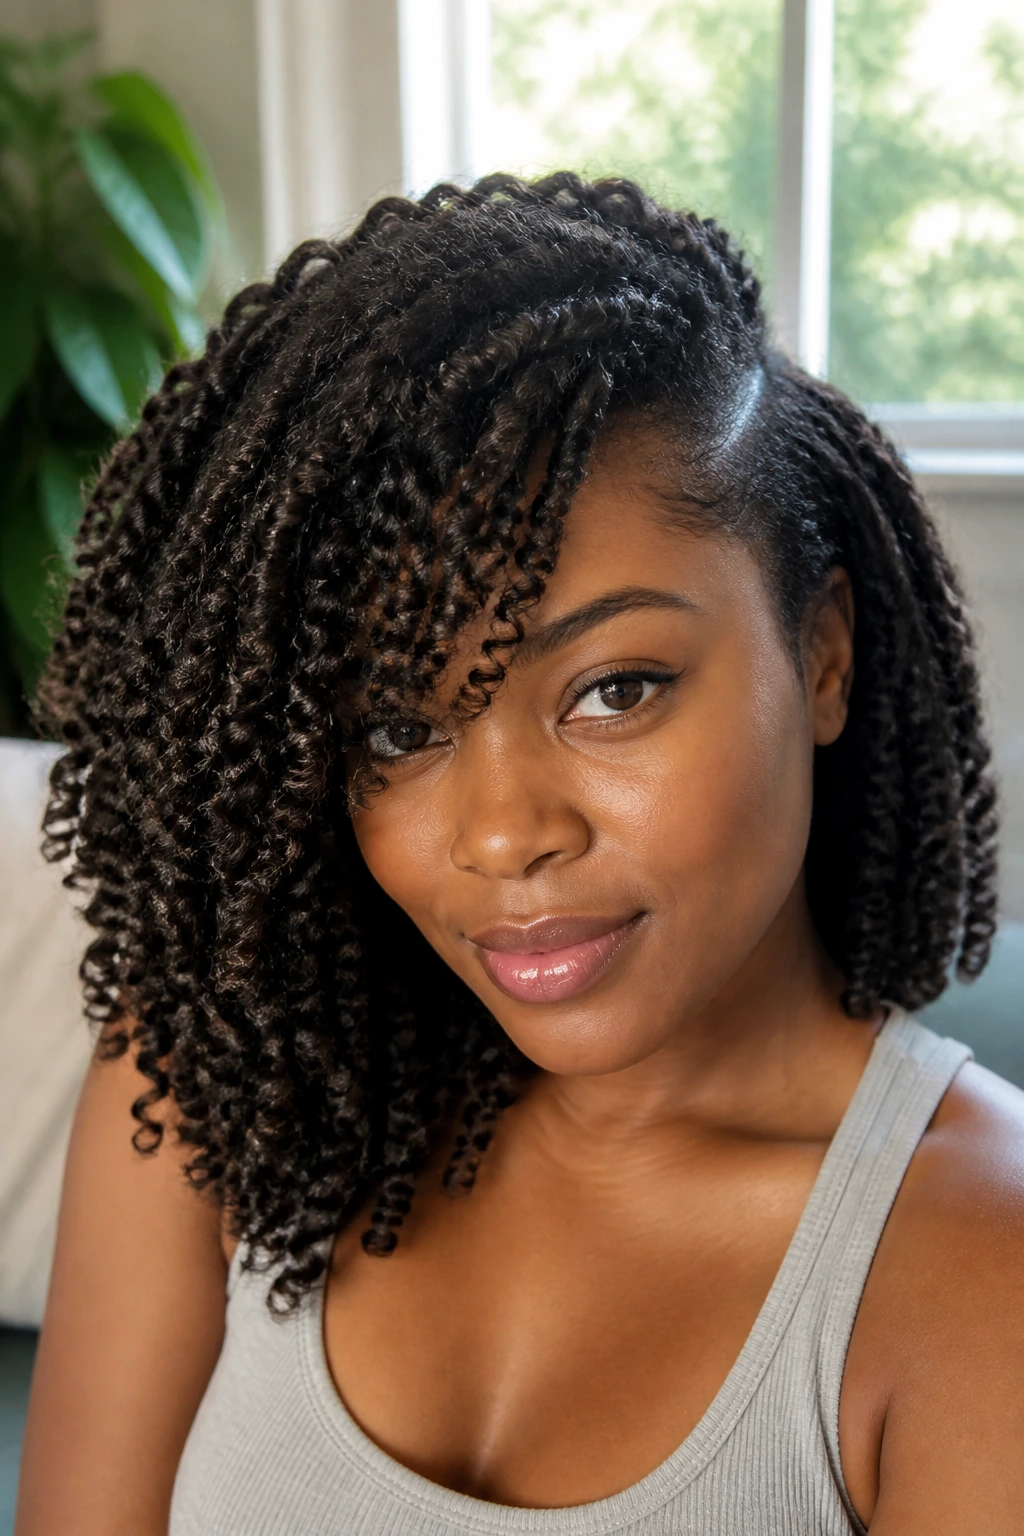
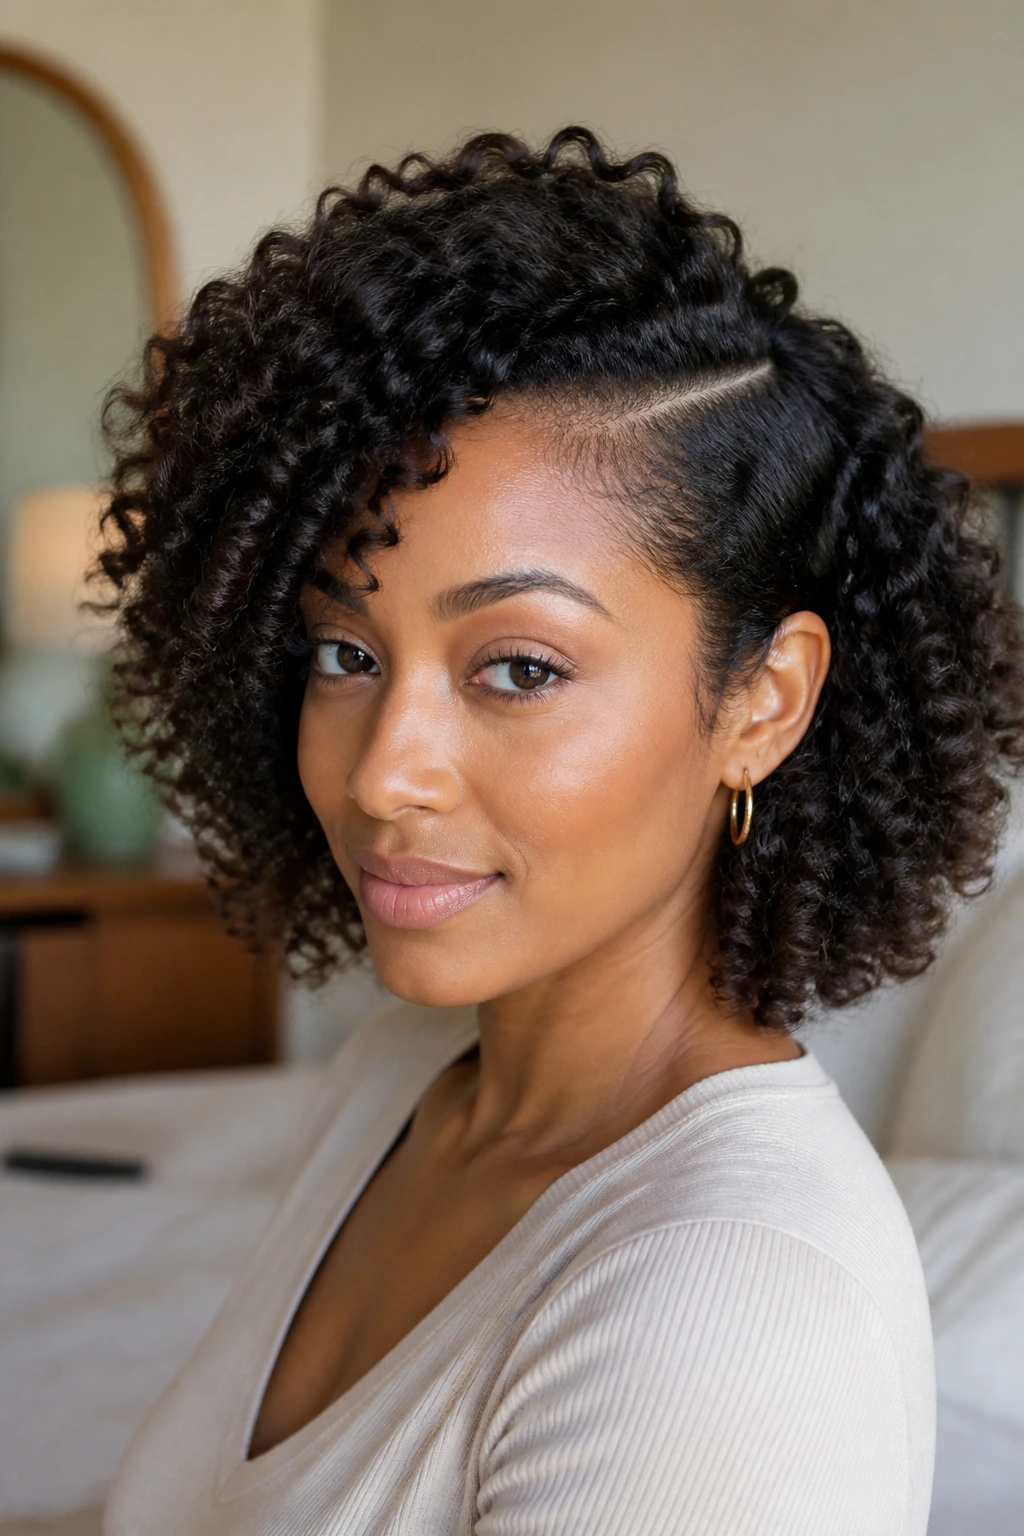
11. Flat-Twist Out With Flipped Ends
A flat-twist out with flipped ends gives you texture at the crown and movement at the bottom, which is a nice combination for round faces. The twist pattern lays the top close to the head, so the shape doesn’t widen too early. Then the ends pop out with a little bounce.
This style is especially good if you want to keep the sides neat but still wear visible curl texture. Make the flat twists travel backward from the front hairline and let the final twist ends stay slightly longer so the curl has room to form. A small perm rod on the ends can help if your hair is stubborn.
Why I like it
It looks deliberate even when it’s not over-styled. The top reads clean; the ends read soft. That contrast is doing a lot of work.
If you want more length, stretch the twists while drying with banding. If you want more fullness, leave them alone and separate lightly.
12. TWA Sponge Coil Shape

A tapered TWA with sponge coils proves that soft curls don’t need length to flatter a round face. The trick is shape. Keep the top a little taller, the sides trimmed close enough to stay tidy, and the curl pattern small and even.
A sponge can create controlled texture fast, but use it lightly. Too much rubbing can rough up the cuticle and make the shape frizz out at the sides, which is exactly what you do not want on a round face.
Best use case
This style shines when the cut already has a shape underneath it. If the haircut is square or all one length, the sponge can exaggerate the width. A clean taper at the sides keeps the silhouette lean.
A dab of curl cream before sponging helps the coils clump instead of separating into fuzz. Don’t soak the hair. Damp is enough.
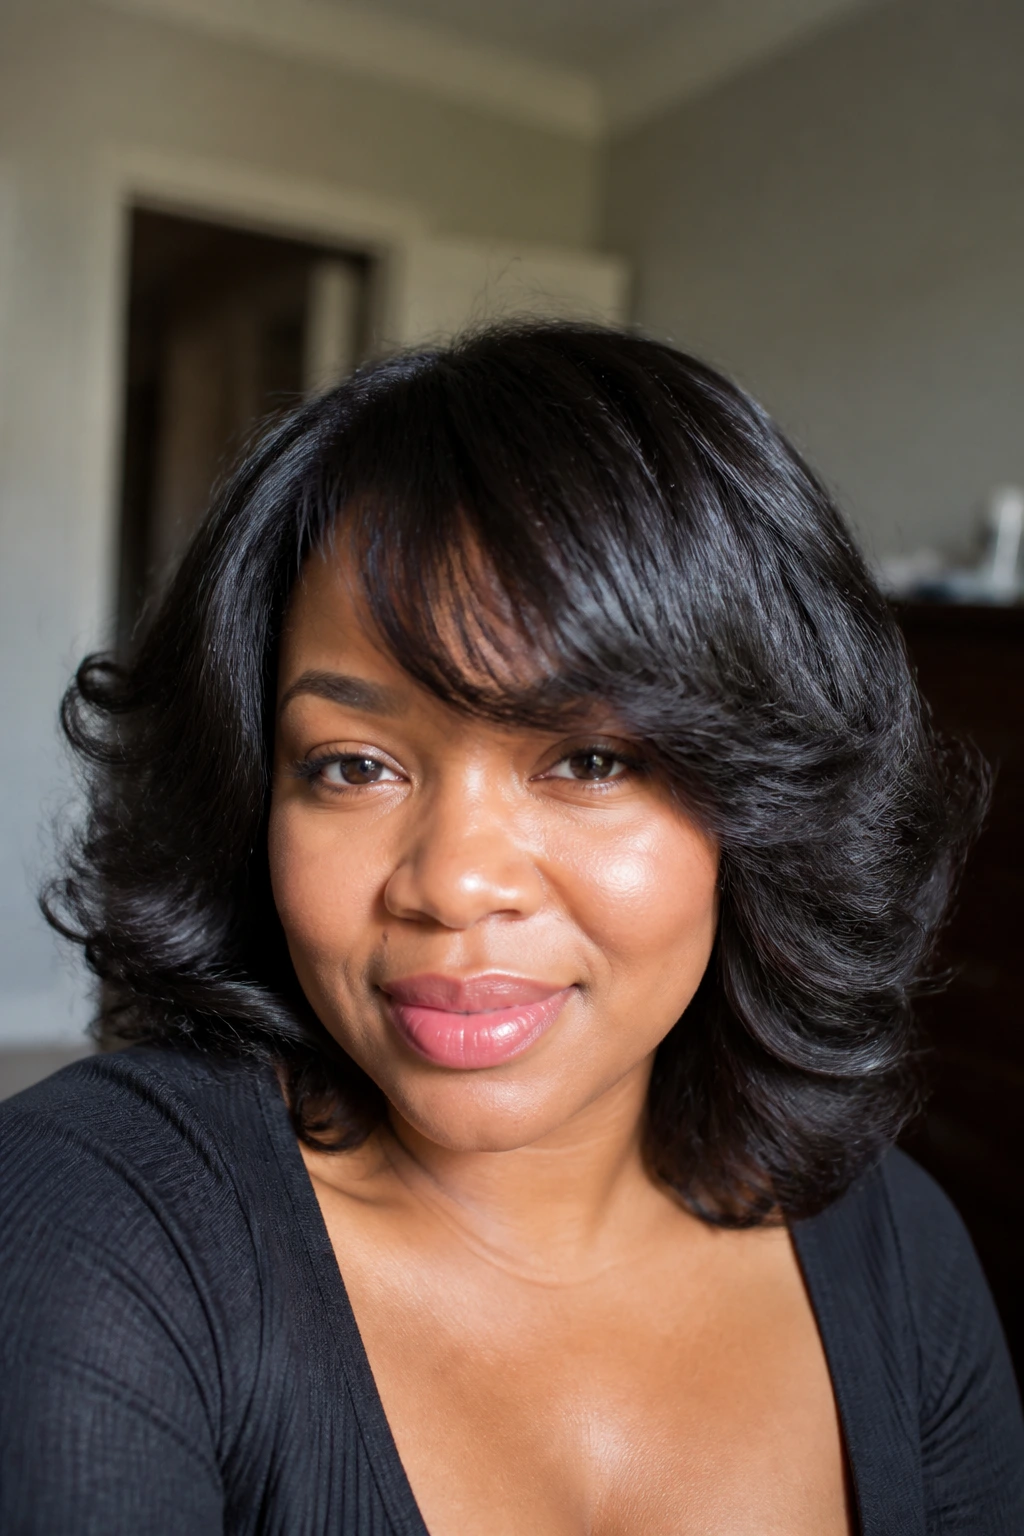
13. Layered Wash-and-Go Bob
A layered wash-and-go bob sits right in the sweet spot: enough curl to feel soft, enough shape to keep the face open. The layers stop the bob from looking like a cap around the cheeks, which is what often happens when natural hair is cut blunt and worn curly.
For round faces, the bob should either fall just below the chin or sit above it with serious crown lift. Right at the chin is the danger zone for a lot of people. It can work, but only if the front pieces are longer or angled.
I prefer a side part here, though a soft center part can work if the layers are doing the heavy lifting. Use a lightweight gel and separate minimally. The shape matters more than the fluff.
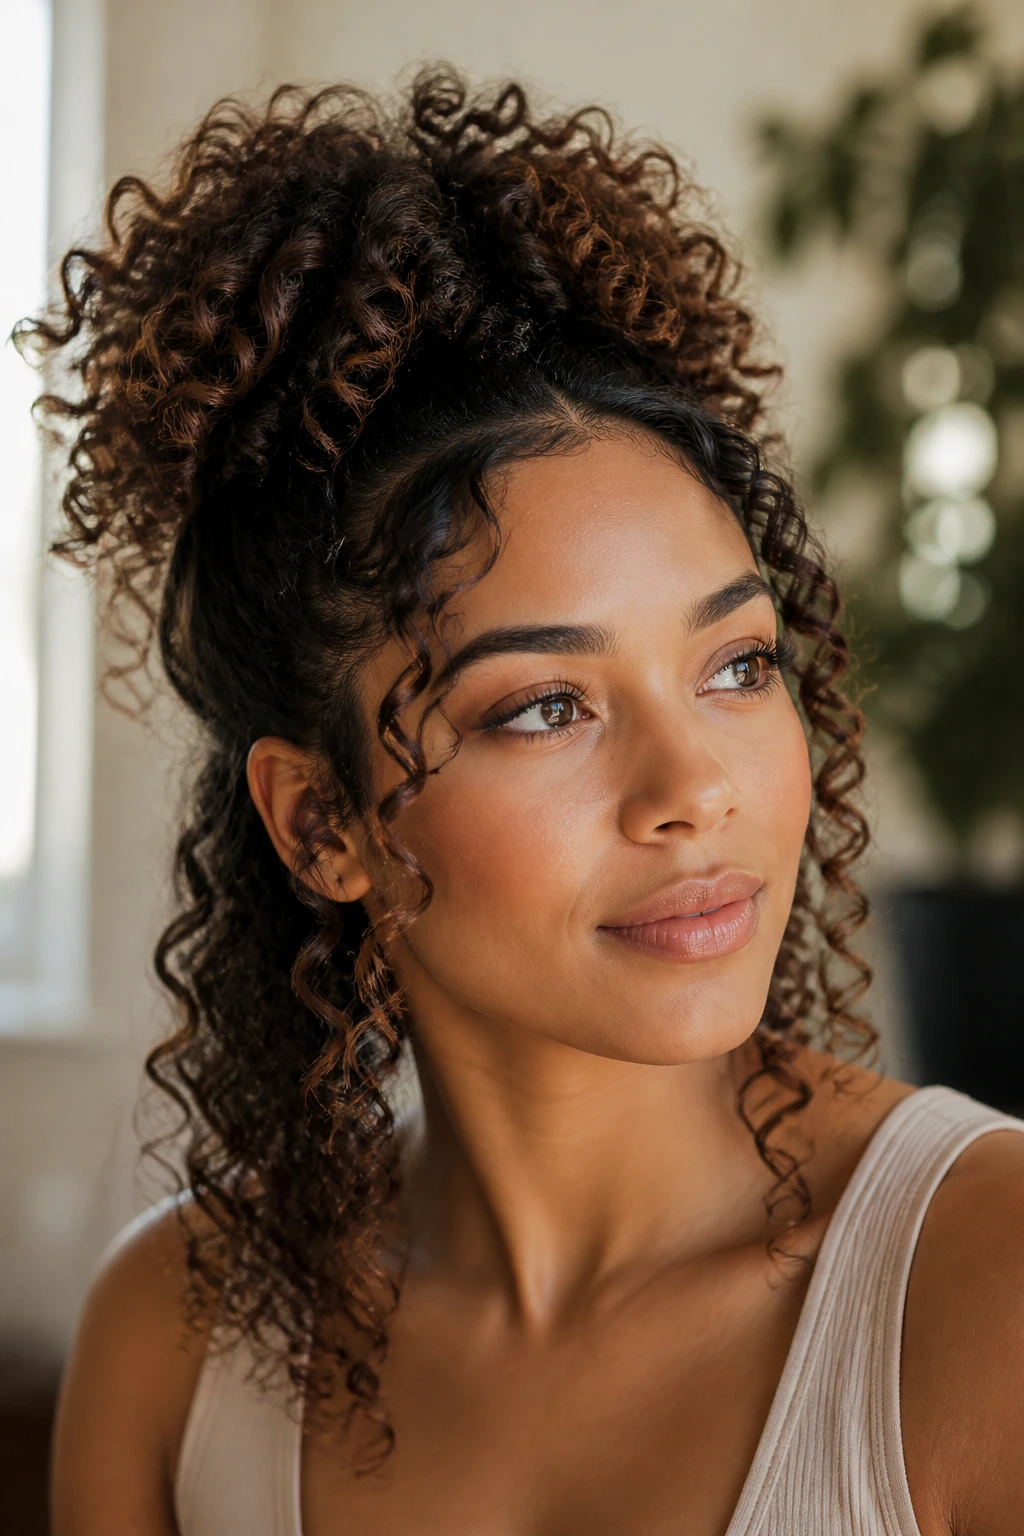
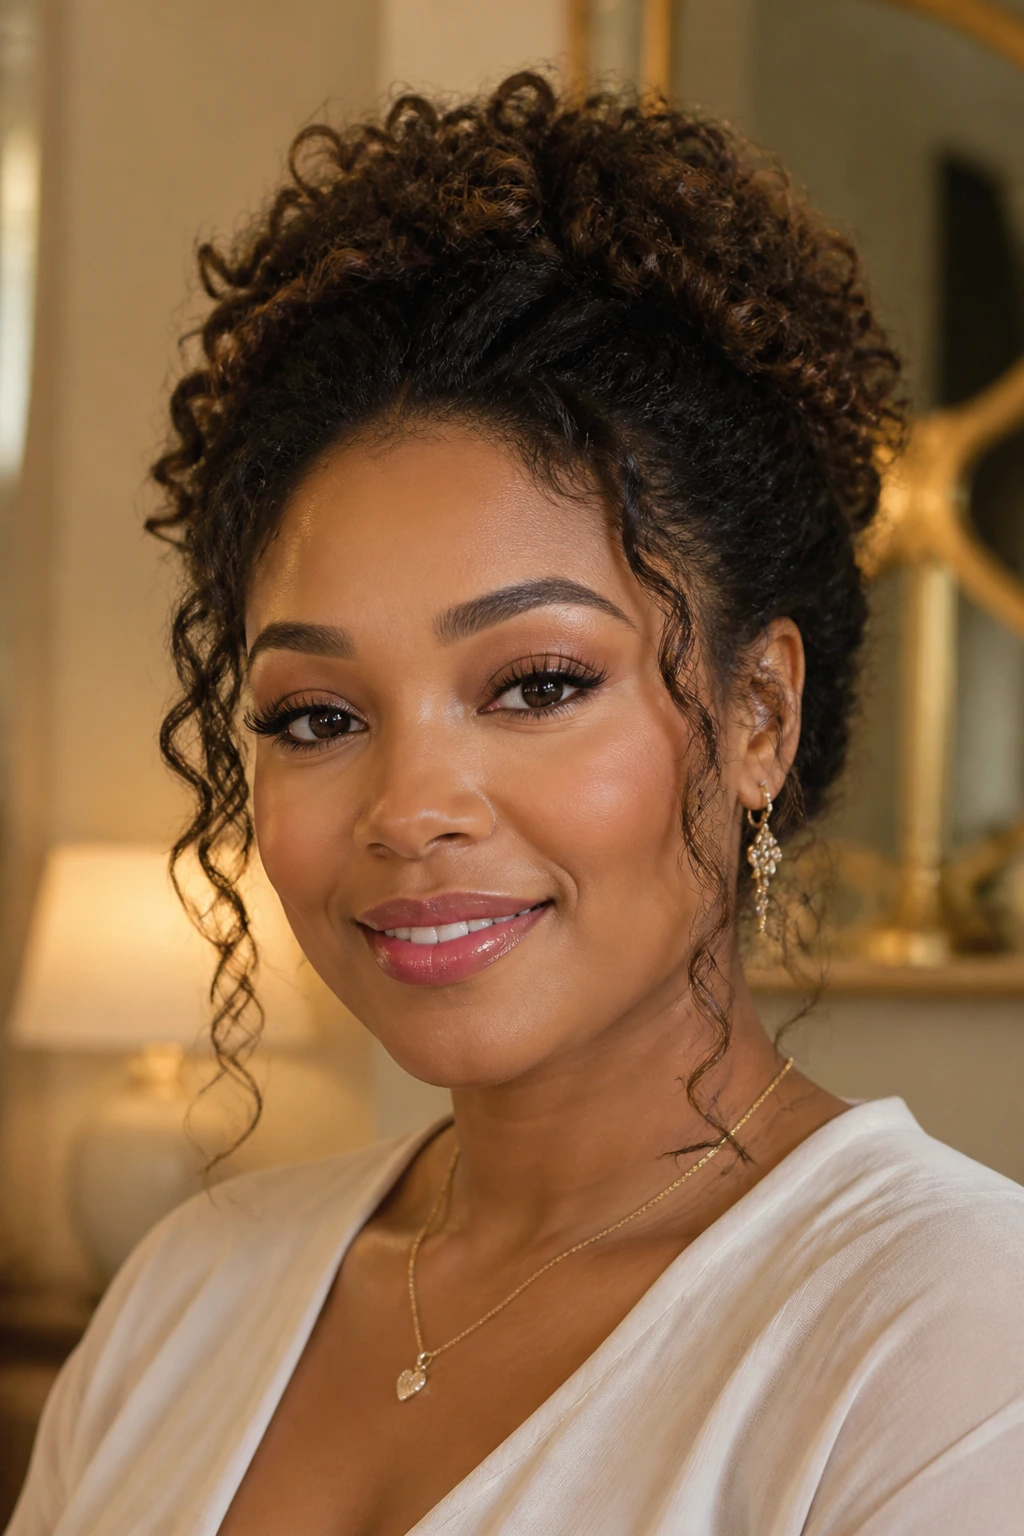
14. Pineapple Half-Style

A pineapple half-style is lazy in the best possible way. The top section pulls up and away from the face, while the lower section keeps the soft curl movement around the shoulders. On a round face, that upper lift is the whole point.
You can wear this style polished or casual. For a more finished look, gather the top section high and secure it with a satin scrunchie, then let a few curls fall around the temples. For a softer, looser look, keep the top section just high enough to clear the widest part of the face.
A useful detail
Don’t pull the front too tight. A pineapple that starts too far back can flatten the crown and make the face look wider by comparison.
This is also one of the easiest ways to refresh curls that have started to collapse. Rework the top, leave the ends alone, and you’re back in business.
15. Bantu Knot-Out With Soft Separation
A Bantu knot-out gives round faces a mix of lift and texture that feels a little more sculpted than a regular twist-out. The knots create a compact curl at the root, then the ends open into soft definition. That contrast is useful. It keeps the hair from spreading sideways too early.
The key is how you separate. Don’t pull the curls apart aggressively. Let them fall into pieces and shape them with your fingers only where needed. If you over-separate, the style gets wide fast.
Best way to wear it
Keep the front a touch higher and let the side curls sit closer to the face rather than fanning out. That keeps the overall shape oval instead of round-on-round.
A satin wrap overnight helps preserve the knot pattern. Without it, the roots puff up and the style loses that neat center lift.
16. Side-Swept Finger Coils
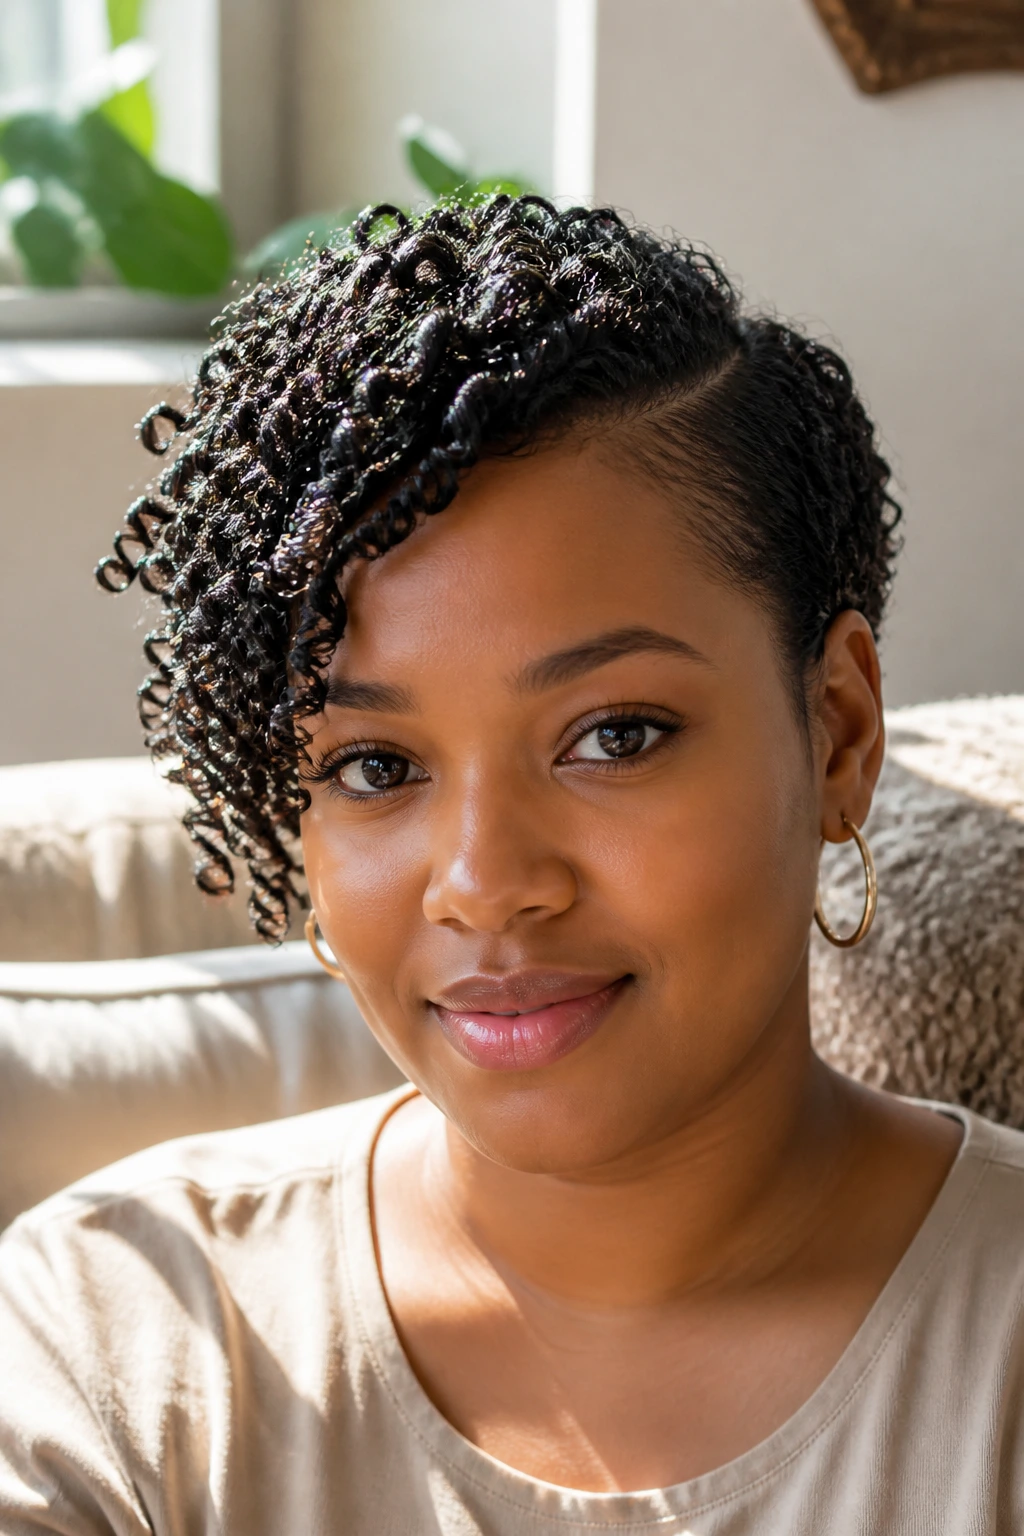
Side-swept finger coils are slow to make and worth it if you want a clean, controlled shape. The side sweep keeps the hair from forming a full circle around the face, while the coils give definition that lasts longer than a loose set.
This style works well on shorter to medium-length natural hair. Use a small amount of cream or gel on each section and coil it around your finger until it springs back on its own. Then direct the finished coils toward one side while they dry.
The result is tidy, but not stiff. And that matters. A round face usually looks better when the curl shape has direction.
If your hair is dense, make the sections small. Big sections can unravel too much and lose the defined sweep.
17. Tucked Curly Updo
A tucked curly updo opens the face and keeps the curl texture where it can be seen without crowding the cheeks. That makes it a smart choice for round faces that need a little breathing room around the lower half of the face.
You can create this with an old twist-out, a set, or second-day curls. Pin the back up loosely and let a few tendrils fall at the temples and nape. The point is not perfection. The point is visible shape.
A useful caution
Don’t build the whole updo low and flat. If everything sits at the back of the head, the face can look wider by comparison. A little height at the front or crown keeps the balance moving upward.
This style is especially handy for formal settings, but it doesn’t have to look formal. Use a matte pin, not a shiny overstuffed bun maker, and keep the curls soft.
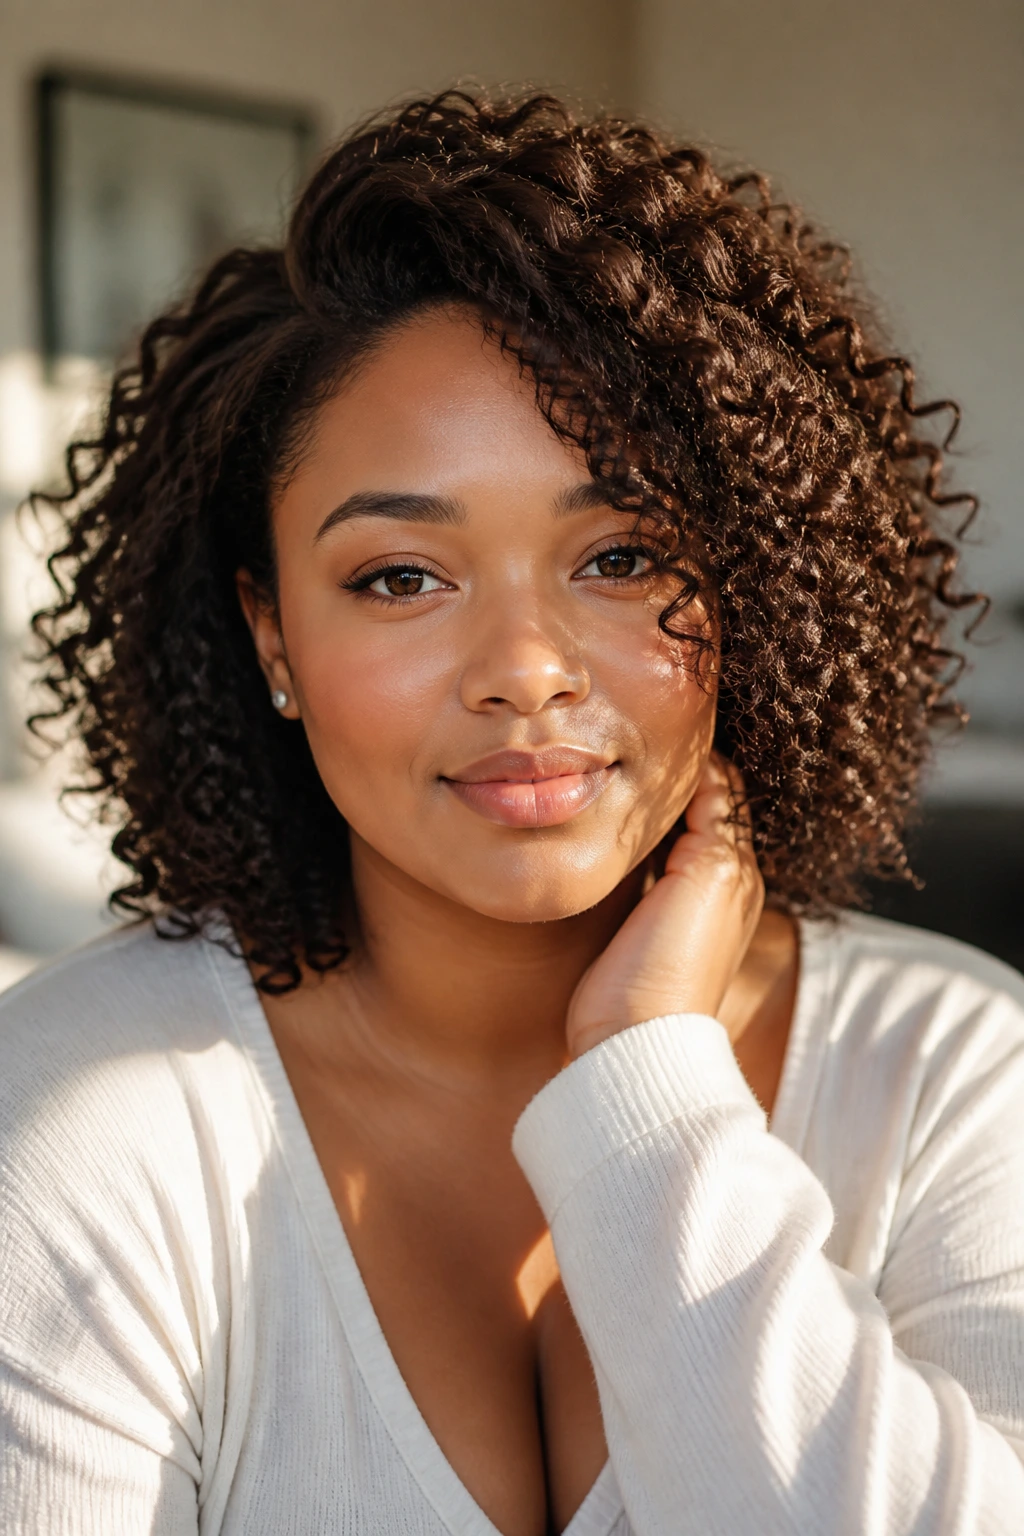
18. Stretch-Then-Curl Blowout
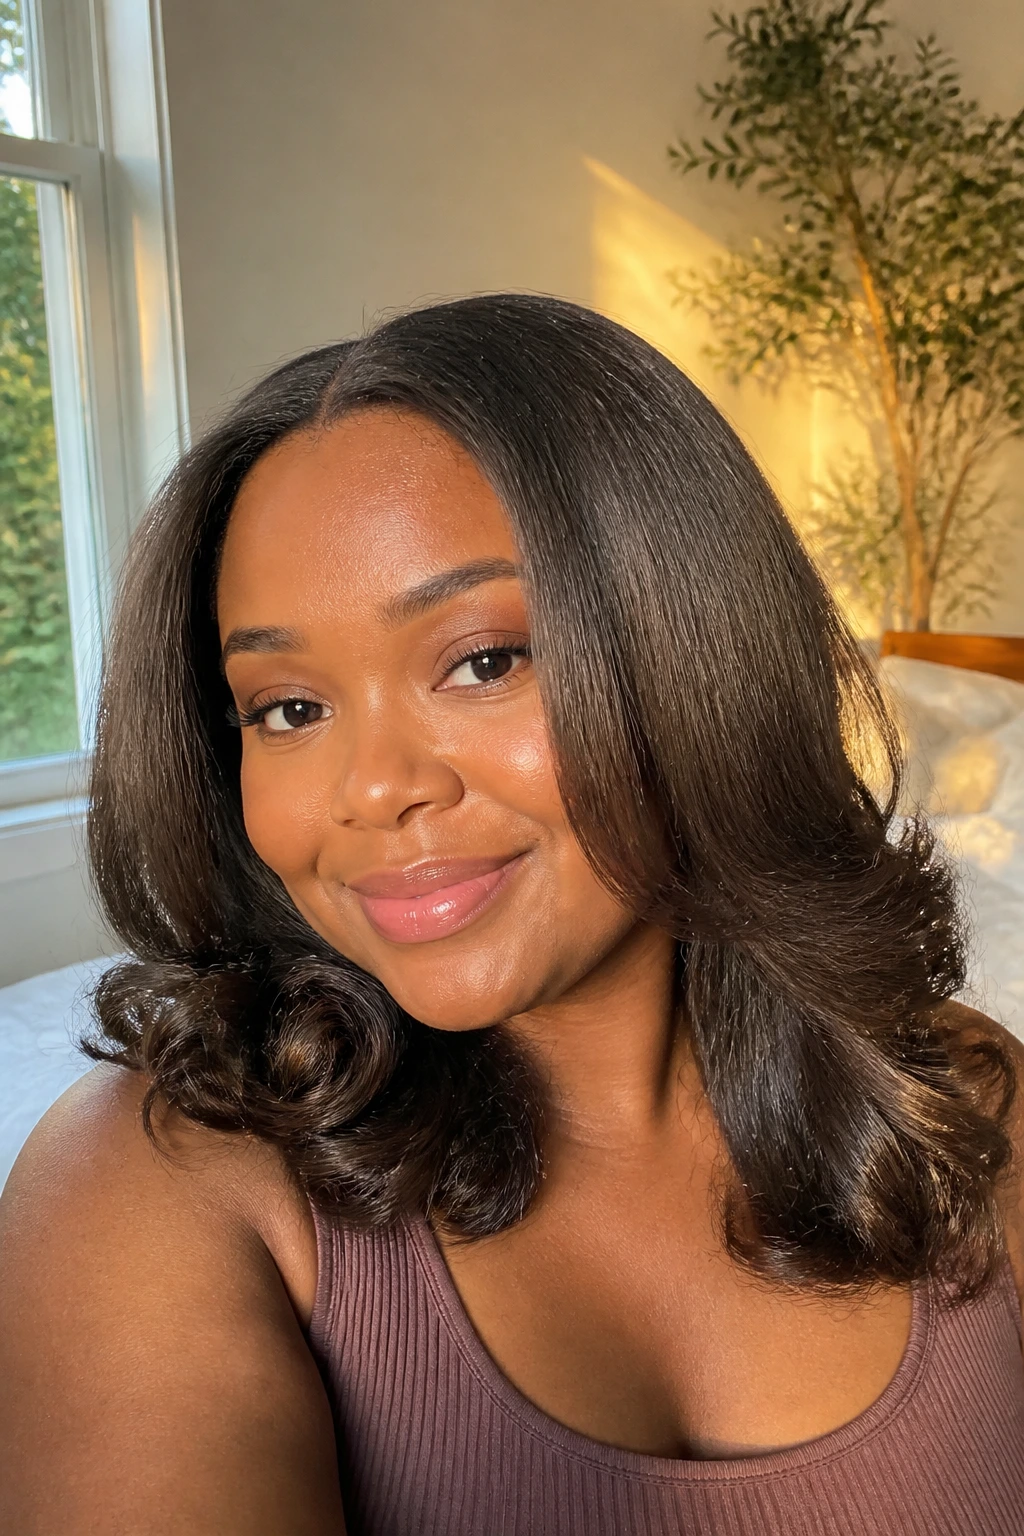
A stretch-then-curl blowout gives natural hair length before the curls form, which is one of the most direct ways to flatter a round face. You’re not straightening the hair. You’re stretching it enough to give the style room.
After banding, African threading, or a gentle blow-dry on low heat, set the ends in soft curls with rods, rollers, or a large curling iron if heat is part of your routine. The result is a fuller shape that falls past the cheeks instead of hovering right on them.
Where it shines
This style works when your hair shrinks hard and you want visible length without losing texture. The curls at the ends keep it from looking stiff. The stretched middle section keeps the silhouette long.
Use heat protectant if you’re using heat, and keep the diffuser or dryer moving. Hot spots are how you get dry ends and a puffy crown.
19. Collarbone Curly Lob
A collarbone curly lob is one of the safest and smartest lengths for a round face. It gives the curls enough room to hang under the jaw while still keeping the shape light and touchable. The ends land where the neck starts to narrow, which is a nice visual trick.
If you want this style to work, the cut needs a little layering. A flat one-length lob can turn boxy once the curls settle. Layers make the edges soften and move.
This is one of those styles that looks polished with almost no extra effort. A side part, a bit of root lift, and a little separation at the front is usually enough.
20. Curly Puff With Tendril Fringe
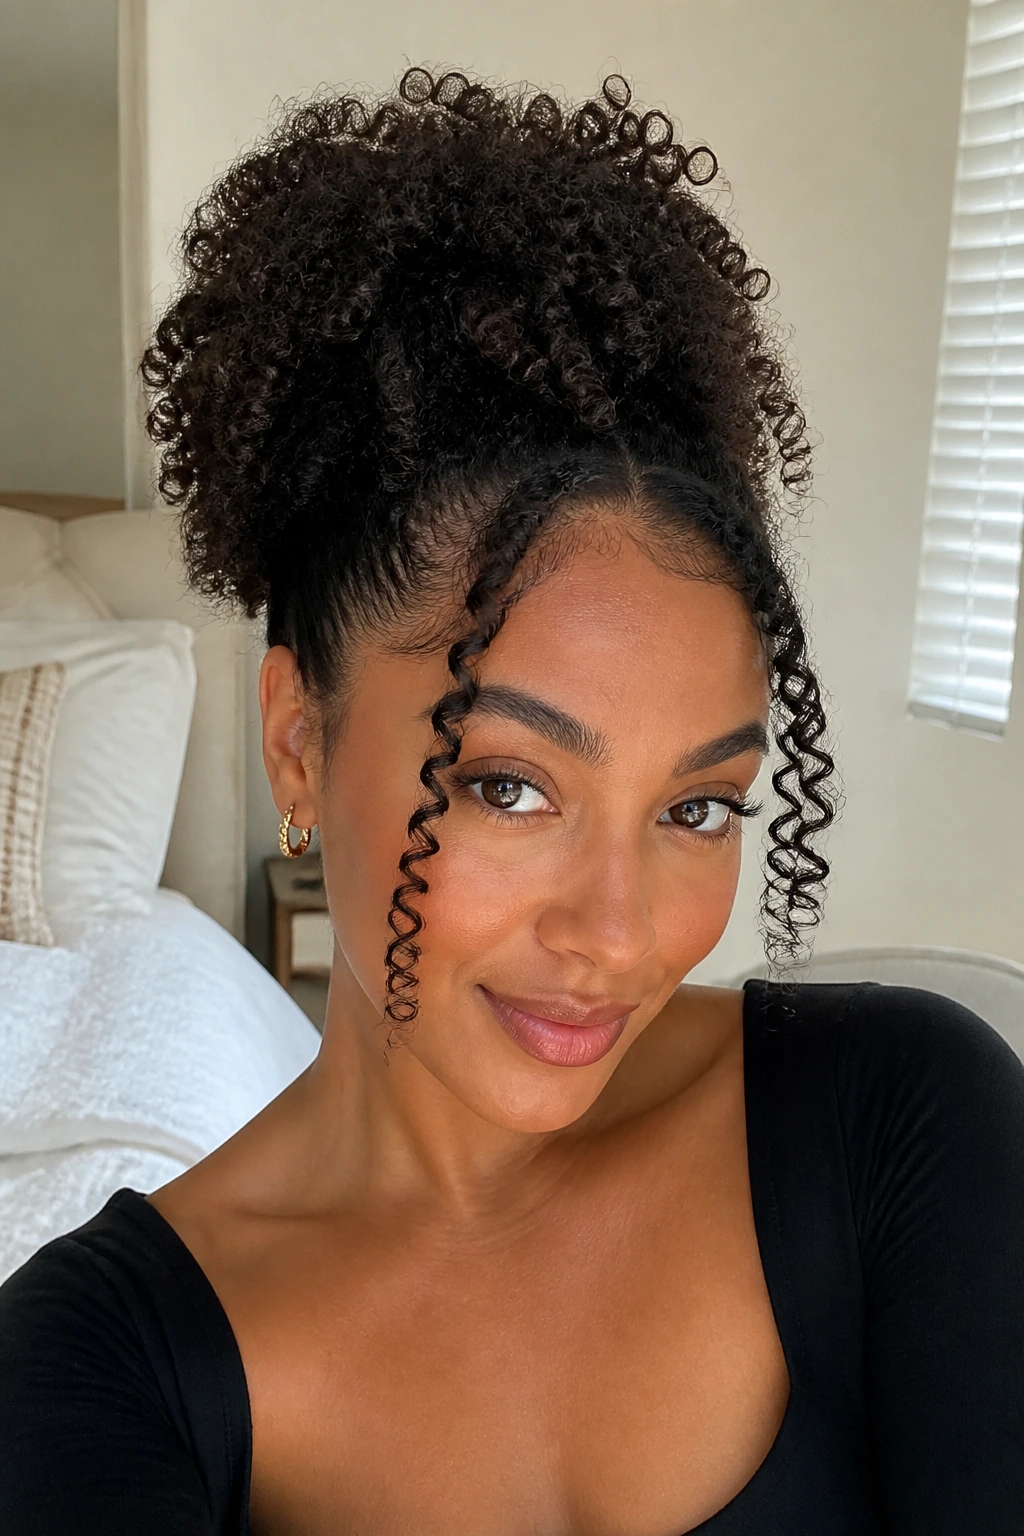
A curly puff with a tendril fringe keeps attention higher on the head and lets a few curls shape the forehead. For round faces, that fringe is the difference between a puff that looks cute and one that looks balanced.
Gather the puff slightly above the crown, not at the exact back of the head. Then leave out two or three front tendrils and curl them loosely away from the face. Those pieces soften the line without crowding the cheeks.
Tiny detail, big effect
If the puff sits too low, the face can look wider. If it sits higher, the whole shape feels longer. That’s true whether your hair is tight or loose.
This style is fast, but the small things matter. A neat base, a lightly defined fringe, and a little shine at the roots are enough.
21. Twisted Crown With Loose Ends
A twisted crown with loose ends gives you built-in height and keeps the face open at the sides. The crown twist acts like a frame that pushes the eye upward, while the loose ends stay soft and curly around the shoulders.
It works well for medium to long natural hair. Create two or more twists across the front hairline, pin them back, and leave the rest free. The front should feel controlled; the rest can breathe.
I like this style for days when I want the hair out of my eyes but don’t want a full updo. It has shape without feeling formal. And for round faces, that lifted front is doing useful work.
22. Diffused Coil-Out With Lift
A diffused coil-out is one of the easiest ways to get a soft curl pattern with a little edge and a little height. The diffuser keeps the root from lying flat, while the coils hold enough definition to avoid puffing out into a halo you didn’t ask for.
Start with small coils or a wash-and-go that has been finger-defined. Use the diffuser on low heat and low speed, and hover at the roots first. Then cup the ends only once the shape is set. Don’t shake the hair all over while drying. That’s how you build frizz at the cheeks.
Best feature: the style can move from casual to dressed up by changing how much you separate it.
23. Long Twist-Out With Front Angle
A long twist-out with front angle gives a round face a diagonal line that feels very flattering in real life. The curls stay longer in front on one side, and that asymmetry breaks up the width of the face almost immediately.
The trick is to twist the front sections in the direction you want them to fall. If you want a soft forward angle, twist slightly forward. If you want the face to open up more, twist backward and let the first few pieces curve away from the cheek.
This style rewards patience. Bigger twists give softer waves; smaller twists create more structure. Both work. I just think the front angle is what makes it special.
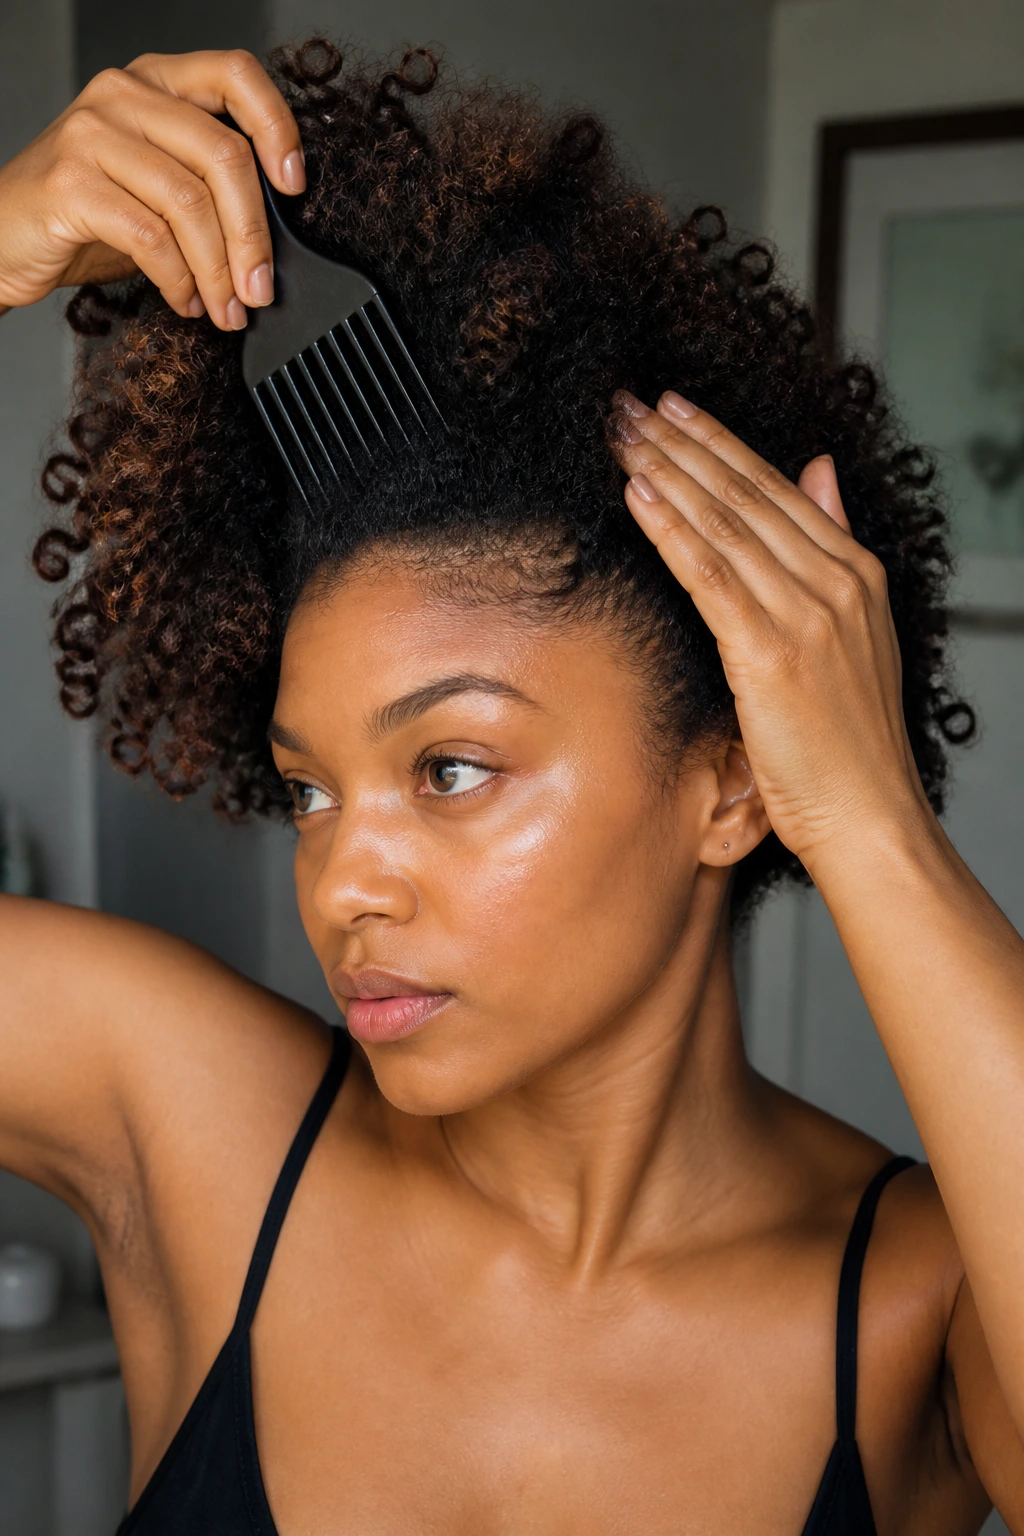
24. Rounded Afro With Carved Layers
A rounded afro can work on a round face if the shape is carved, not left to expand randomly. That distinction matters. You want fullness, yes, but you want it placed with intention so the face doesn’t disappear into one big circle.
Ask for layers that remove bulk around the sides while keeping height on top. Then shape the finished afro with your fingers and a pick, nudging the crown upward and the sides outward only a little. The goal is a soft sphere with lift, not a wide cloud.
This style is bold, and I mean that in the practical sense. It needs a good haircut underneath it. If the cut is off, the shape will tell on you fast.
25. Soft Spiral Updo With Face Tendrils
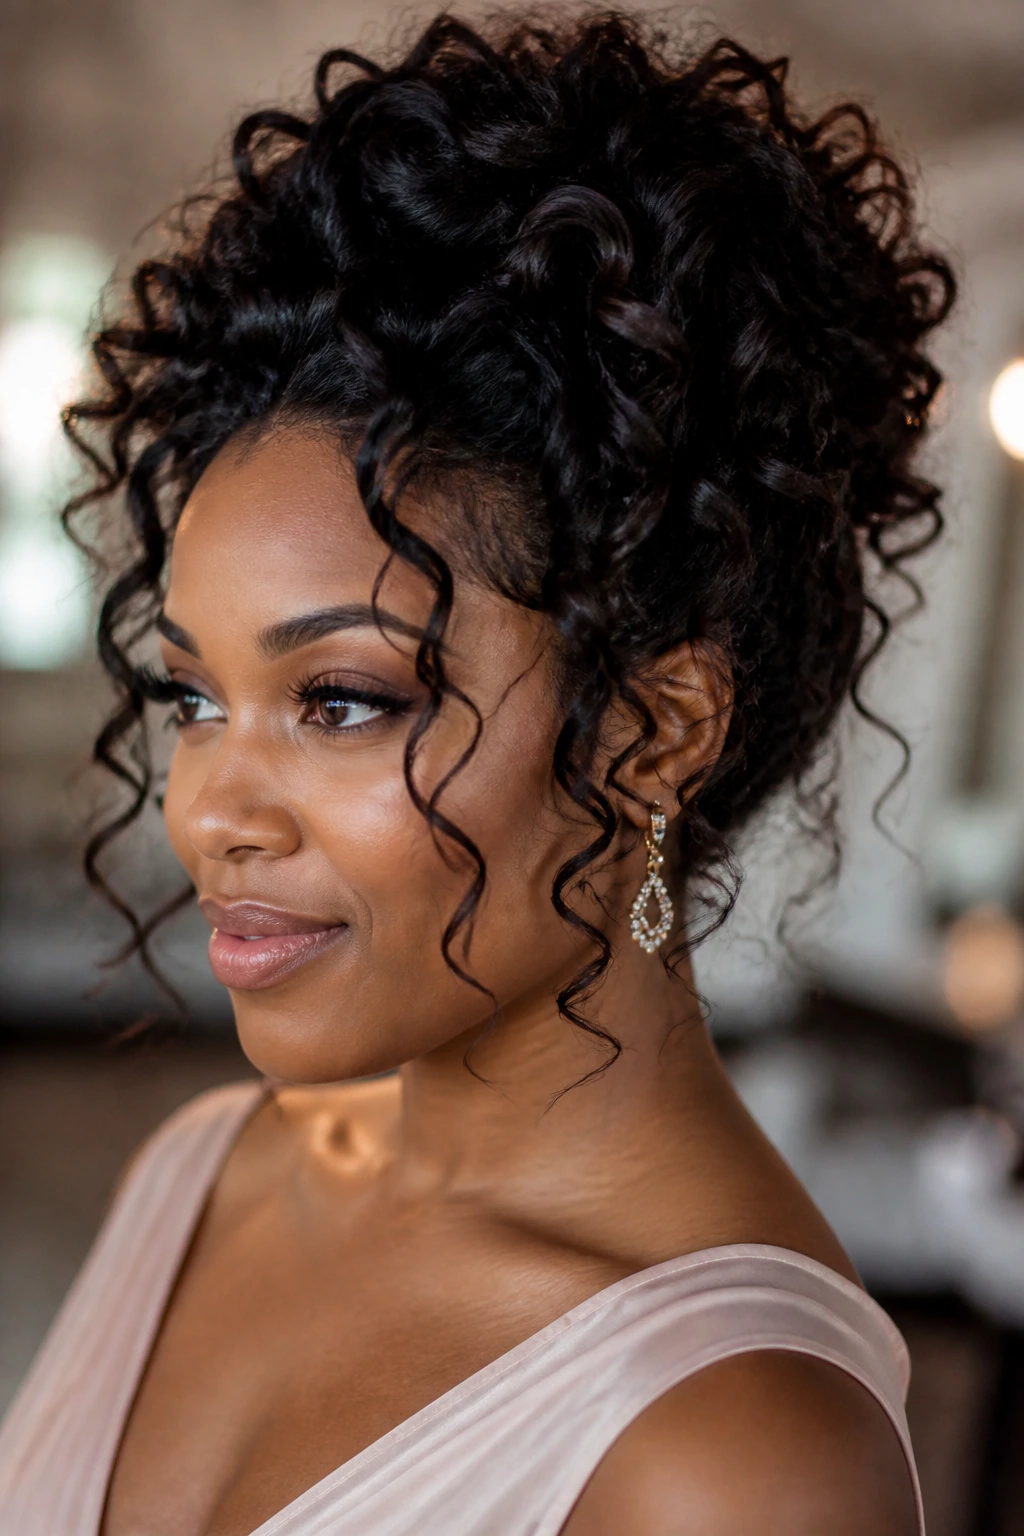
A soft spiral updo with face tendrils is the closing act for a reason: it gives you the elegance of an updo without flattening the curl story. The spirals add texture at the crown and keep the shape light around the jaw, which is exactly where a round face needs relief.
Pin the curls in loose spirals rather than one tight bun. Leave two or three tendrils free around the temples and cheekbones. Those pieces should be soft, not perfect. A tiny bend looks better than a rigid ringlet here.
The updo works for events, workdays, and the kind of mornings when you need your hair out of the way but still want it to look like you thought about it.
How to Make These Curls Sit Where You Want Them
The shape is usually decided long before the last curl dries. That’s the part people skip, and it’s why the finished style can feel wide in all the wrong places. Parting, section size, and drying direction do more work than most products ever will.
Parting: a deep side part softens roundness fast. A center part can work, but only if the crown has height and the sides stay controlled.
Section size: smaller sections around the face give you cleaner placement. Bigger sections in the back keep the style from becoming too fussy.
Drying direction: dry the front in the direction you want it to fall. If you set a curl pointing forward and then hope it behaves later, you’re making the job harder.
Finish: separate only enough to soften the pattern. If you pull every curl apart, the style inflates sideways.
Essential Equipment for These Styles
-
Wide-tooth comb: Best for detangling without tearing through wet curls.
-
Rat-tail comb: Useful for clean parts and neat sectioning at the crown.
-
Spray bottle: Helps revive one section at a time instead of re-wetting the whole head.
-
Flexi rods and perm rods: Good for smooth, shaped curls when you want more definition.
-
Hair clips or duckbill clips: Keep sections out of the way while you work.
-
Microfiber towel or T-shirt: Blots water without roughing up the cuticle.
-
Diffuser attachment: Gives lift at the roots and helps set curl patterns with less disruption.
-
Satin bonnet or scarf: Keeps the shape from getting crushed overnight.
-
Light hold gel or mousse: Enough hold to define, not so much that the hair turns crunchy.
Practical Fixes That Keep the Shape Soft
A lot of curl styles go sideways because people treat every part of the head the same. They don’t. The front, the crown, and the sides each need a different amount of attention.
Flavor of the style — or call it the finish if you want to be less poetic — comes from what you do at the end. If the front is too flat, lift the roots with a pick. If the sides are too wide, smooth them with damp hands and a tiny bit of gel. If the ends look blunt, separate them unevenly so they move.
Time-saver: set the face-framing pieces first. Those are the pieces everyone sees, and they usually take the longest to shape.
Pro move: use two product textures, not five. A light leave-in plus a mousse or gel is often enough. Too many layers make the curls heavy at the sides.
Cost-saver: rods and clips last a long time. A good set pays for itself if you wear curly styles often.
For tighter coils: stretch a little before setting. It keeps shrinkage from stealing all your length.
Common Mistakes That Make Round Faces Look Wider
The biggest mistake is piling too much volume at cheek level. You’ll know it happened when the hair seems to sit like a frame right at the widest part of the face. The fix is simple: move the lift upward, and let the sides fall a little flatter.
Another common problem is a blunt shape with no layers. A one-length curly cut can look heavy around the jaw, especially once it dries and puffs. Ask for face-framing layers or internal layers so the curls don’t form a shelf.
Over-separating is another one. People want definition and end up with a halo of tiny pieces that expand outward. Stop separating when the style already looks soft. You do not need every curl to be a solo act.
Then there’s the side part that’s too shallow. If the part barely shifts the hair, it won’t change the shape much. Go deeper, or don’t bother.
And yes, heavy oils can flatten a good style. A little shine is fine. A slick root and collapsed crown are not.
Ways to Rework These Styles for Different Hair Goals
The Heatless Weekender: swap rod sets and twist-outs for flexi rods, braids, or flat twists. You’ll get softer shapes and less tension on the hairline.
The Low-Manipulation Wash-and-Go: keep the curls defined with one styling product and a diffuser, then stop touching them. This is the easiest way to preserve the natural shape without building width.
The Stretch-First Version: band, thread, or blow-dry on low heat before setting the curls. Better if shrinkage tends to erase your length.
The Short-Length Version: use a TWA coil shape, sponge coils, or tight rod sets. Shorter hair needs the shape placed closer to the crown.
The Dressier Evening Version: pin one side back, add a side sweep, or tuck the ends into a soft updo. Same curl family, different mood.
Keeping the Curl Shape Fresh Overnight and Through the Week
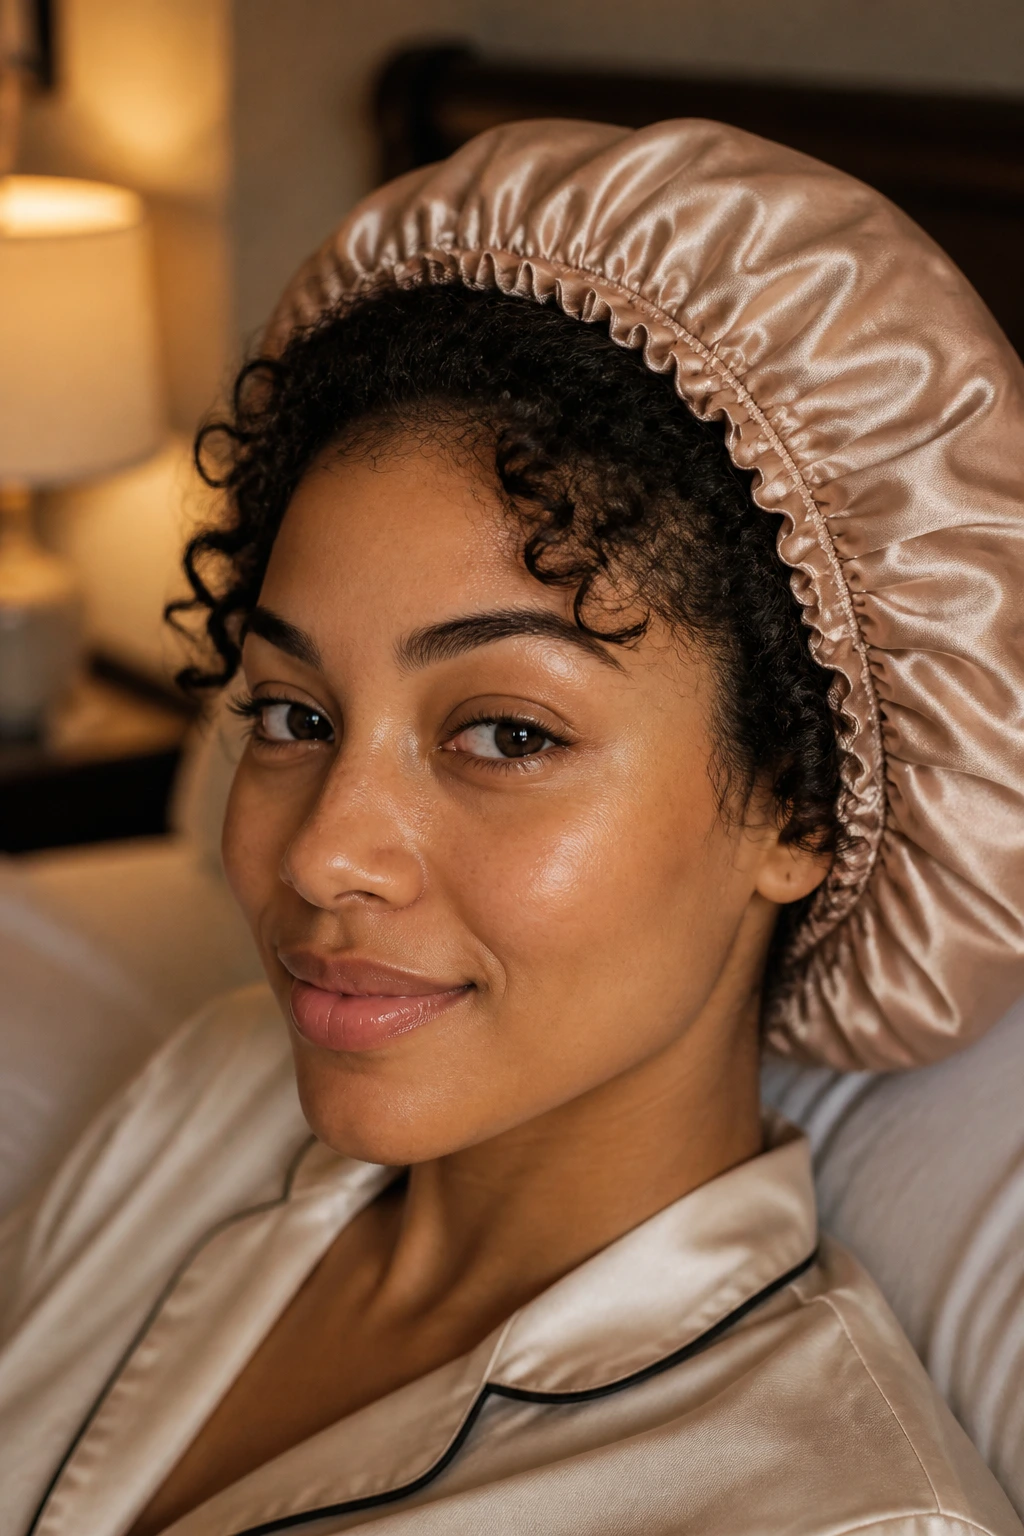
Soft curls need a little protection if you want them to stay soft. Satin is non-negotiable here. A bonnet, scarf, or pillowcase keeps the cuticle from drying out and the curls from getting flattened into a strange half-moon shape.
For twist-outs and braid-outs, pineapple the hair or clip it loosely at the top before bed. Don’t squash the style flat against the pillow. That’s how you wake up with one side looking fine and the other side looking offended.
If the front curls lose shape, mist your hands lightly, twist the pieces back around your finger, and let them dry for 10 to 15 minutes before going out. That’s usually enough. You don’t need to soak the whole section.
For rod sets and roller sets, separate only what you plan to wear that day. Leave the rest intact. Over-handling is the fastest way to turn definition into fluff.
Questions People Ask Before Choosing a Curl Style

Will soft curls make a round face look wider?
They can, if the volume sits right at the cheeks. The fix is to place lift at the crown, keep the sides a little more controlled, and use parts that break up the face instead of circling it.
Is a center part bad for round faces?
Not automatically. A center part works when the hair has height on top and the curls fall past the jaw. If the hair is short and wide, a side part usually does more for the shape.
What curl size works best?
Medium curls are usually easiest to balance. Tiny curls can add too much density, and very large curls sometimes lose structure fast. A rod size around 1/2 inch to 1 inch is a good place to start.
Do layers really matter that much?
Yes. On natural hair, layers are often the difference between soft movement and a wide block. Even subtle face-framing layers help.
What if my hair shrinks a lot?
Set the hair stretched, not straightened. Banding, threading, or a low-heat blow-dry before styling keeps the final shape longer and helps you place the volume.
Can I do these styles on short natural hair?
Absolutely. TWA coil shapes, sponge coils, mini twist-outs, and cropped rod sets work well on short lengths. You just need to think about crown height and side width a little more carefully.
How do I keep curls from getting crunchy?
Use less product than you think, and stop touching the hair while it dries. Crunch usually comes from too much hold product or too much manipulation before the set is dry.
A Shape That Feels Soft Without Going Flat
The best soft curl styles for round faces do not hide the face. They frame it with a little strategy. That means the curls lift where the head needs height, soften where the cheeks need breathing room, and move enough to look alive when you turn your head.
That’s why the same general idea — soft curls — can look completely different from person to person. A twist-out with a side part, a rod set with feathered bangs, a tapered coil-out, and a curly shag all solve the shape problem in their own way. The trick is choosing where the volume lands. Once you start noticing that, styling gets a lot less random.
The good styles tend to have one thing in common: they look like they belong to the hair you already have. Not forced. Not overworked. Just shaped well enough to make the face and the curls meet in the middle.
If you want, the next time you style your hair, start with the part and the crown before you even think about the ends. That small shift changes everything.