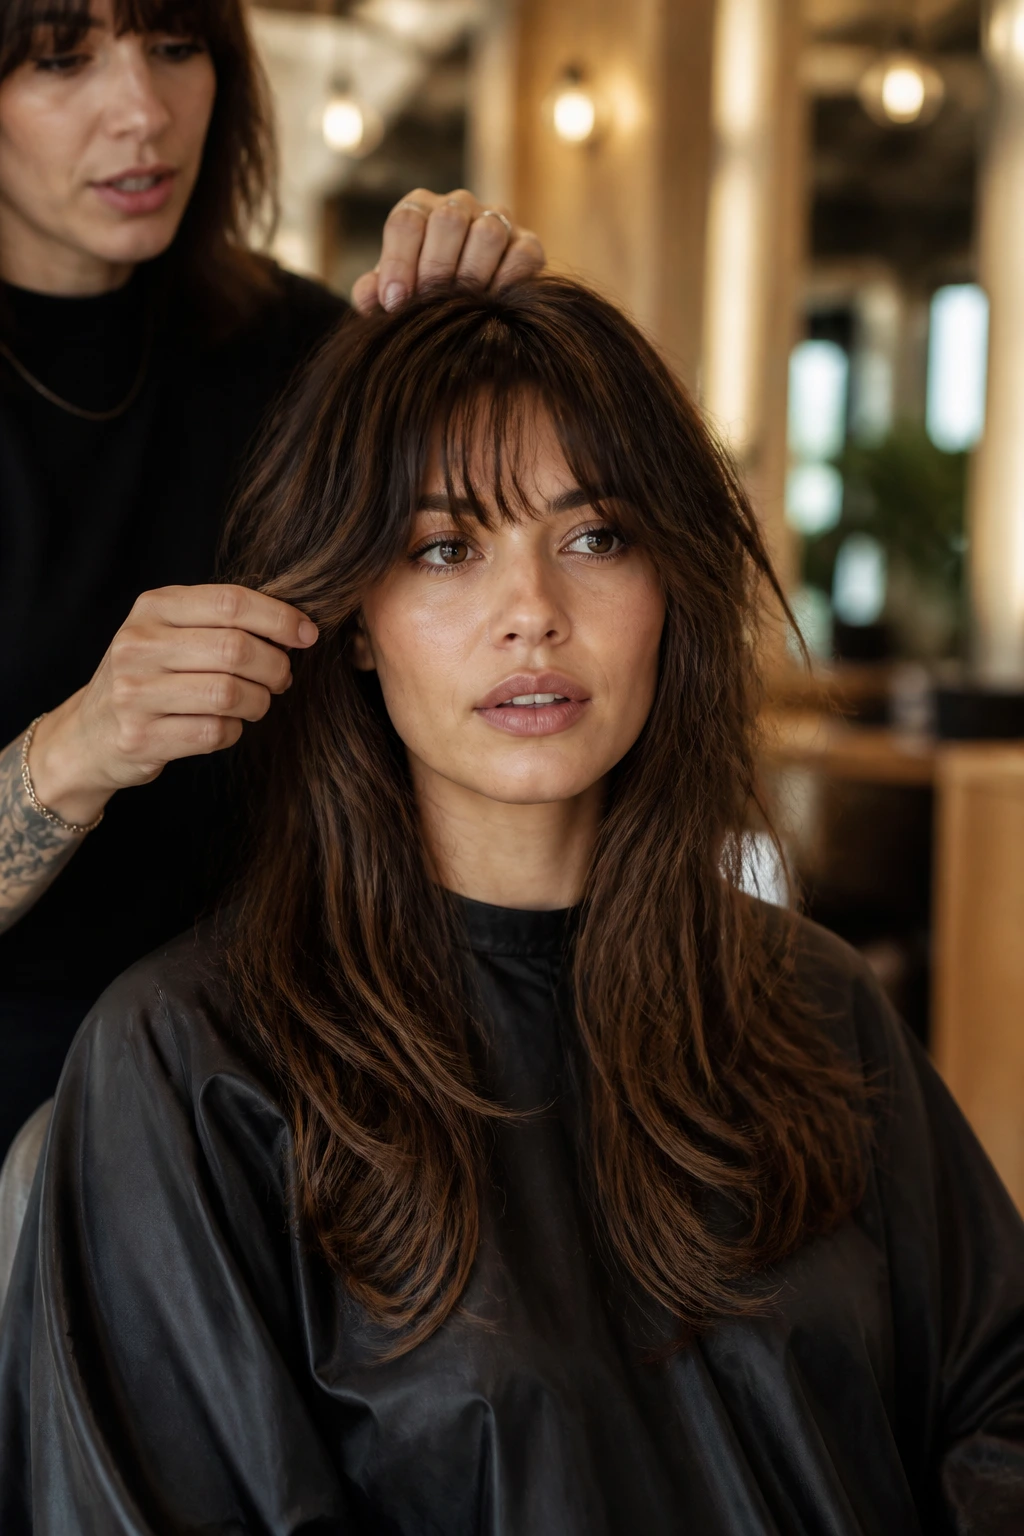
Short shag haircuts for long hair do something blunt cuts almost never do well: they keep the length, but they let the top breathe. Once the crown is carrying less weight, hair stops hanging in one heavy sheet and starts moving around the face, shoulders, and collarbone.
The trick is restraint. The good versions do not chew up the ends; they carve out space through the interior, usually with curtain bangs, cheekbone layers, or a short crown section that melts into longer lengths. Push that too far and the cut turns stringy. Keep it controlled and it looks clean in the real-world sense: it grows out neatly, and you can still throw it into a clip on a rushed morning.
That balance is why these cuts keep showing up for straight, wavy, curly, fine, and thick hair alike. Some lean soft, some lean sharp, and a few sit right on the edge of a wolf cut without tipping into full shag chaos. The styles below cover the range, so you can find the version that fits your texture instead of fighting it.
Why These Short Shag Haircuts Work So Well on Long Hair
- The crown loses weight first: Shorter layers at the top stop long hair from collapsing into one flat sheet by midafternoon.
- You keep the length you want: The perimeter still reaches the shoulders, chest, or back, so the cut reads as long hair, not a chopped bob.
- The shape does part of the styling: A little bend, wave, or natural movement is enough to show the layers without a full salon blowout.
- They grow out with less drama: Because the layers are broken up already, you do not get one hard shelf line when the haircut gets a little old.
- Bangs are optional, not required: Curtain bangs, bottleneck fringe, side-swept pieces, or no fringe at all can all work inside the same shag family.
- Texture gets to stay visible: The cut gives waves and curls somewhere to live instead of making them pile up at the bottom and puff out like a triangle.
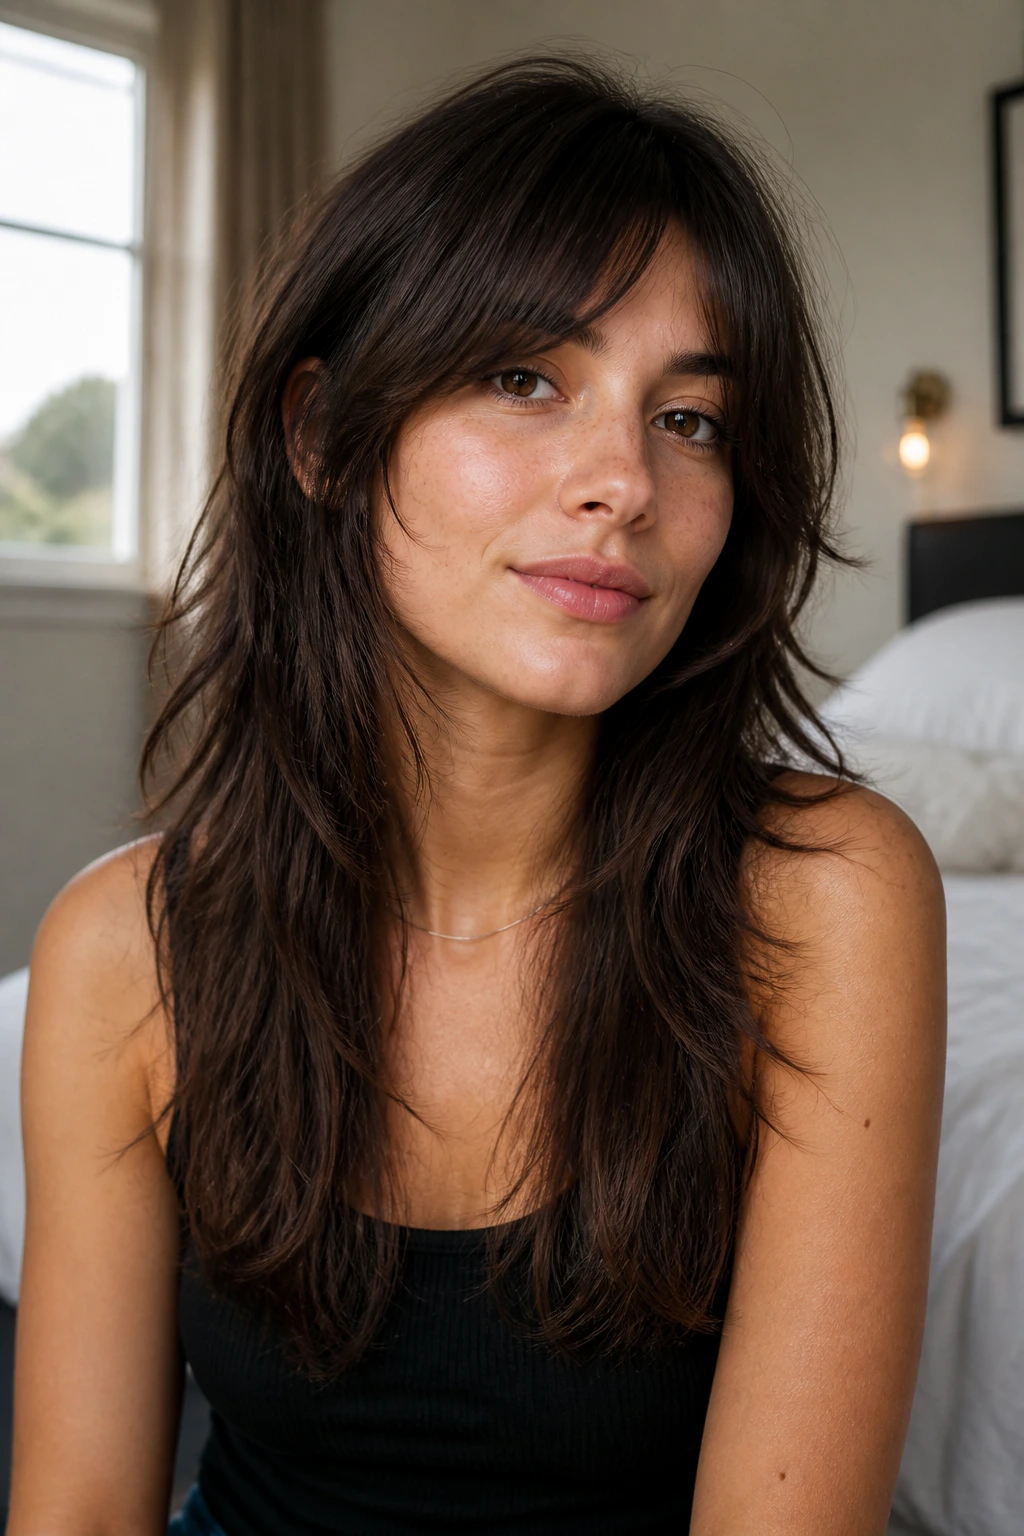
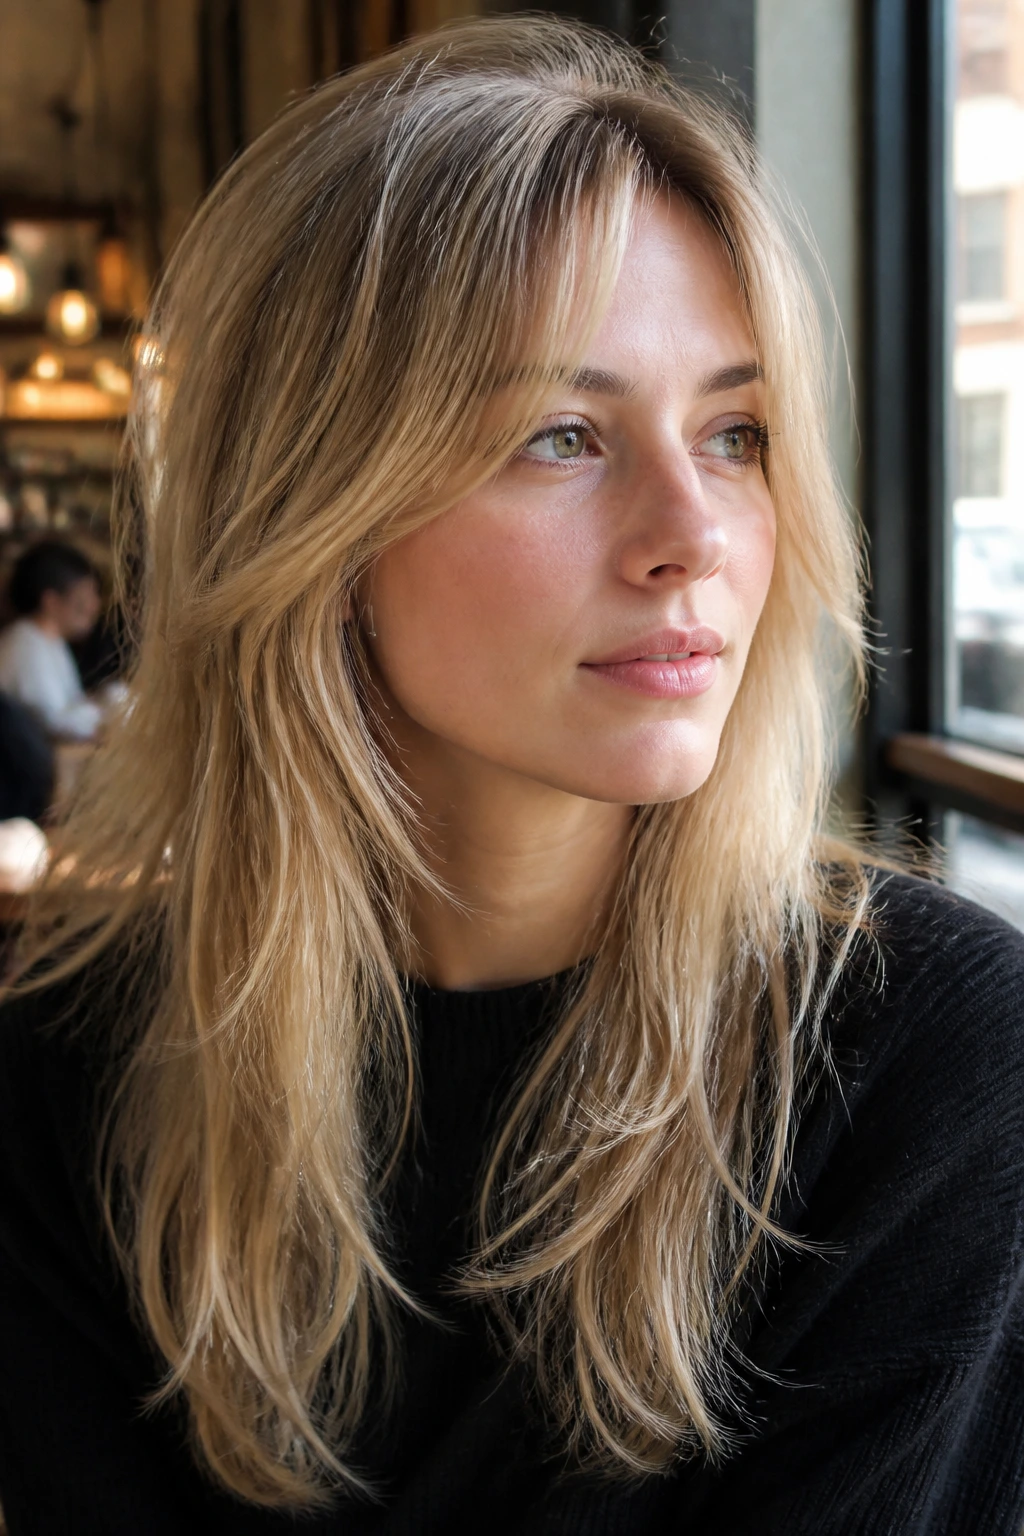
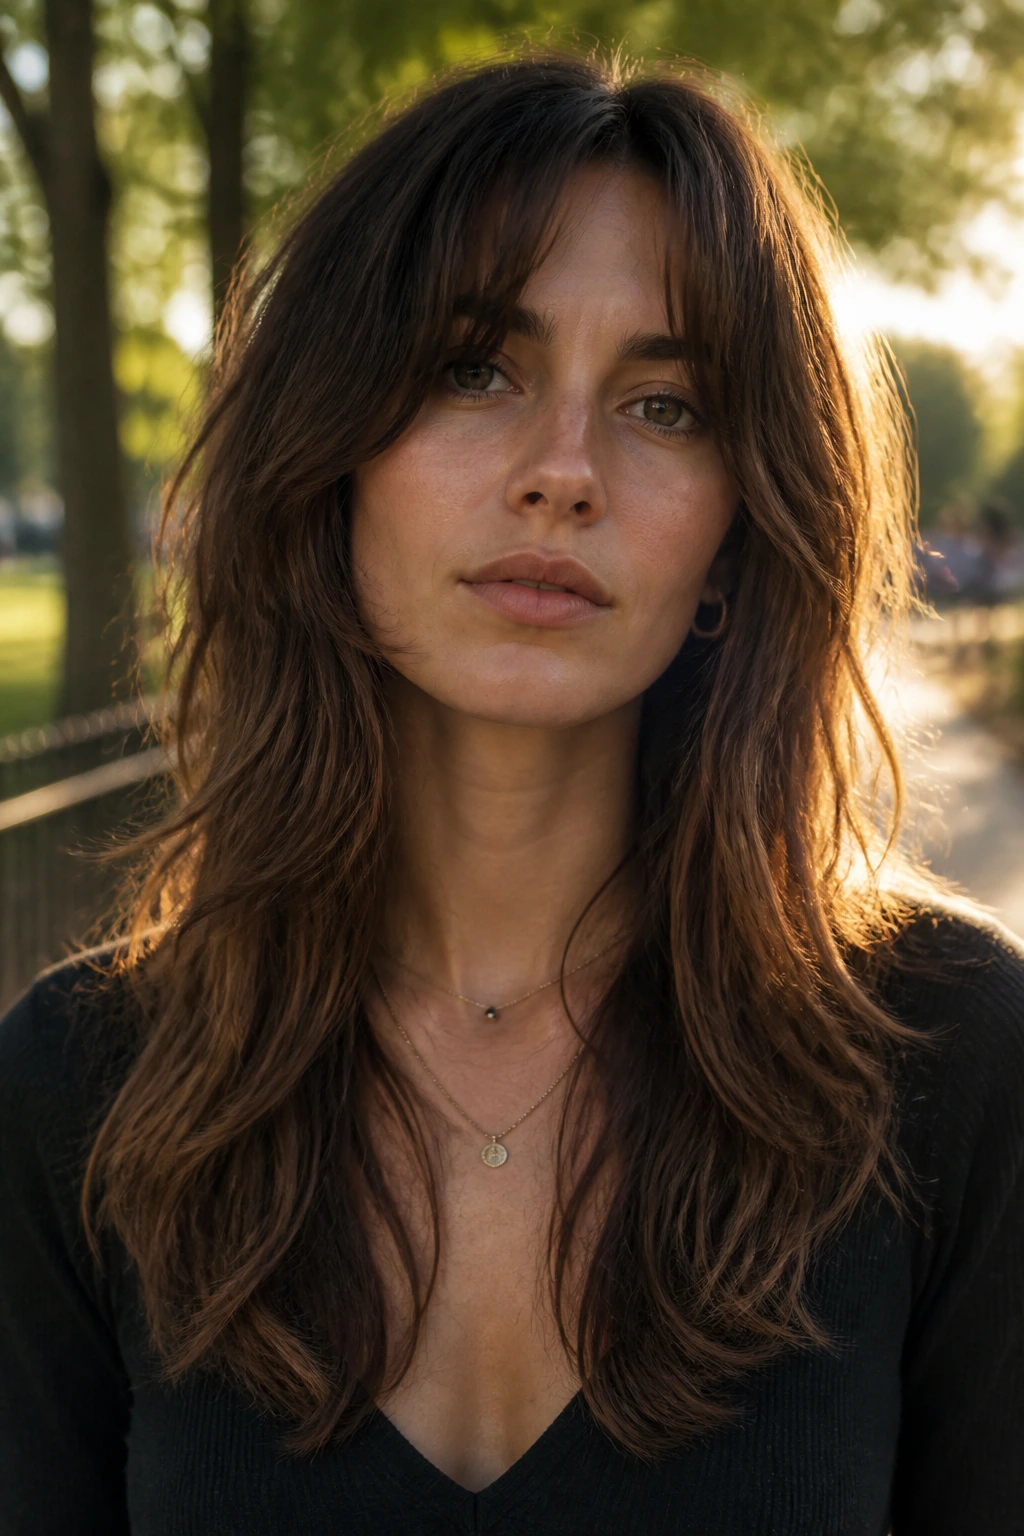
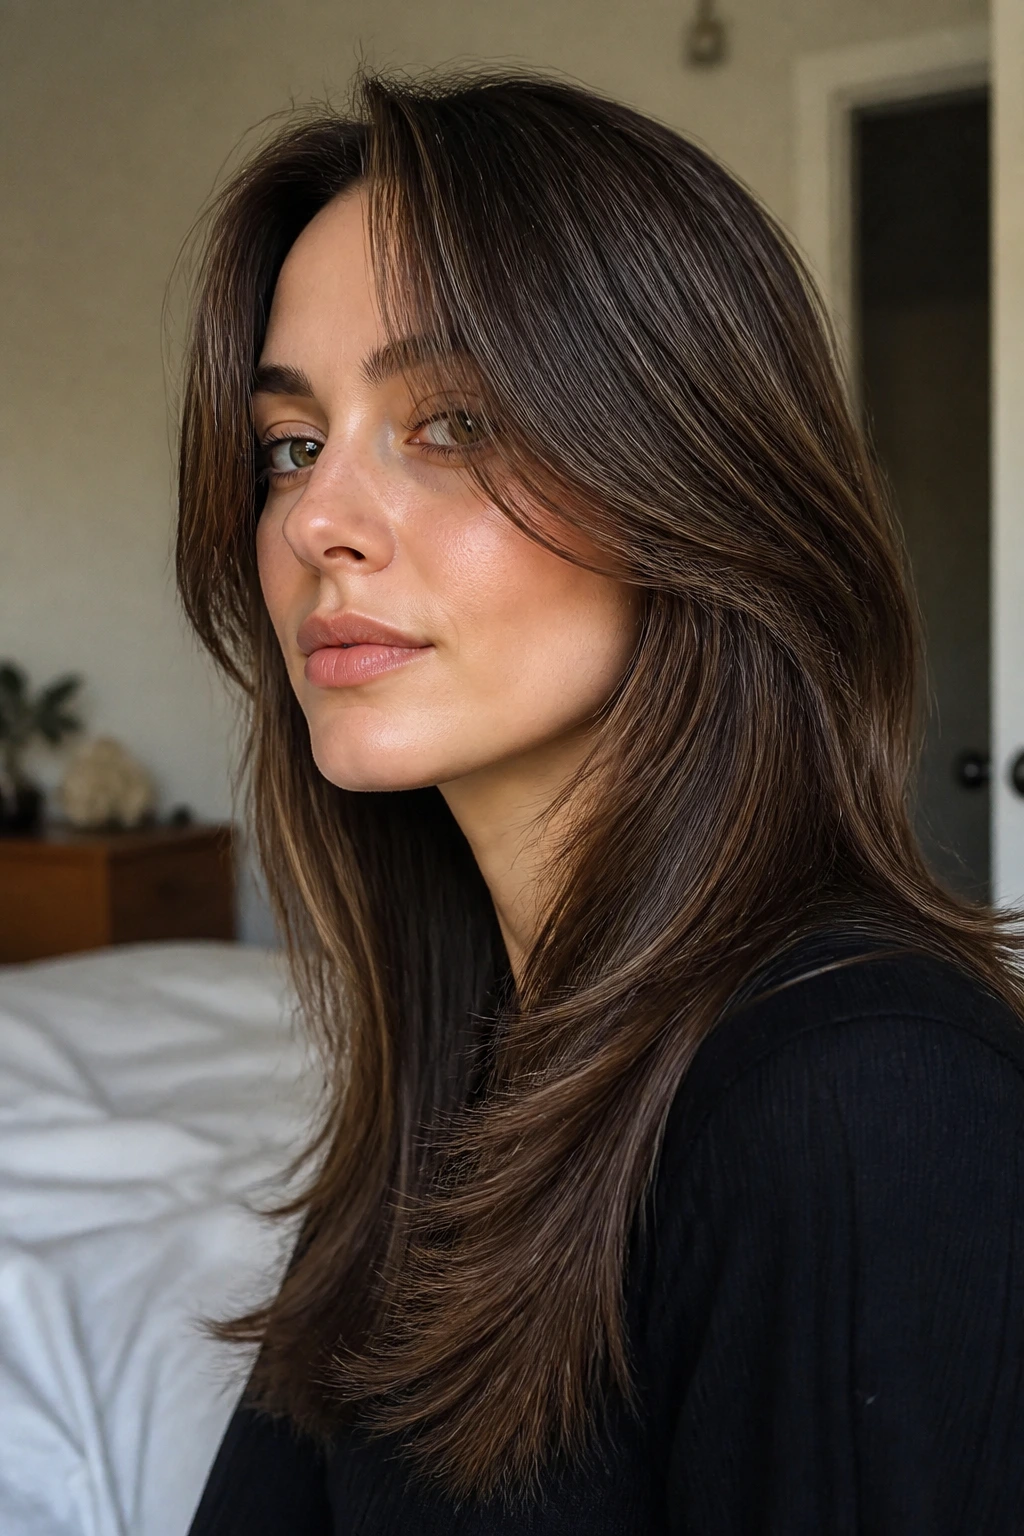
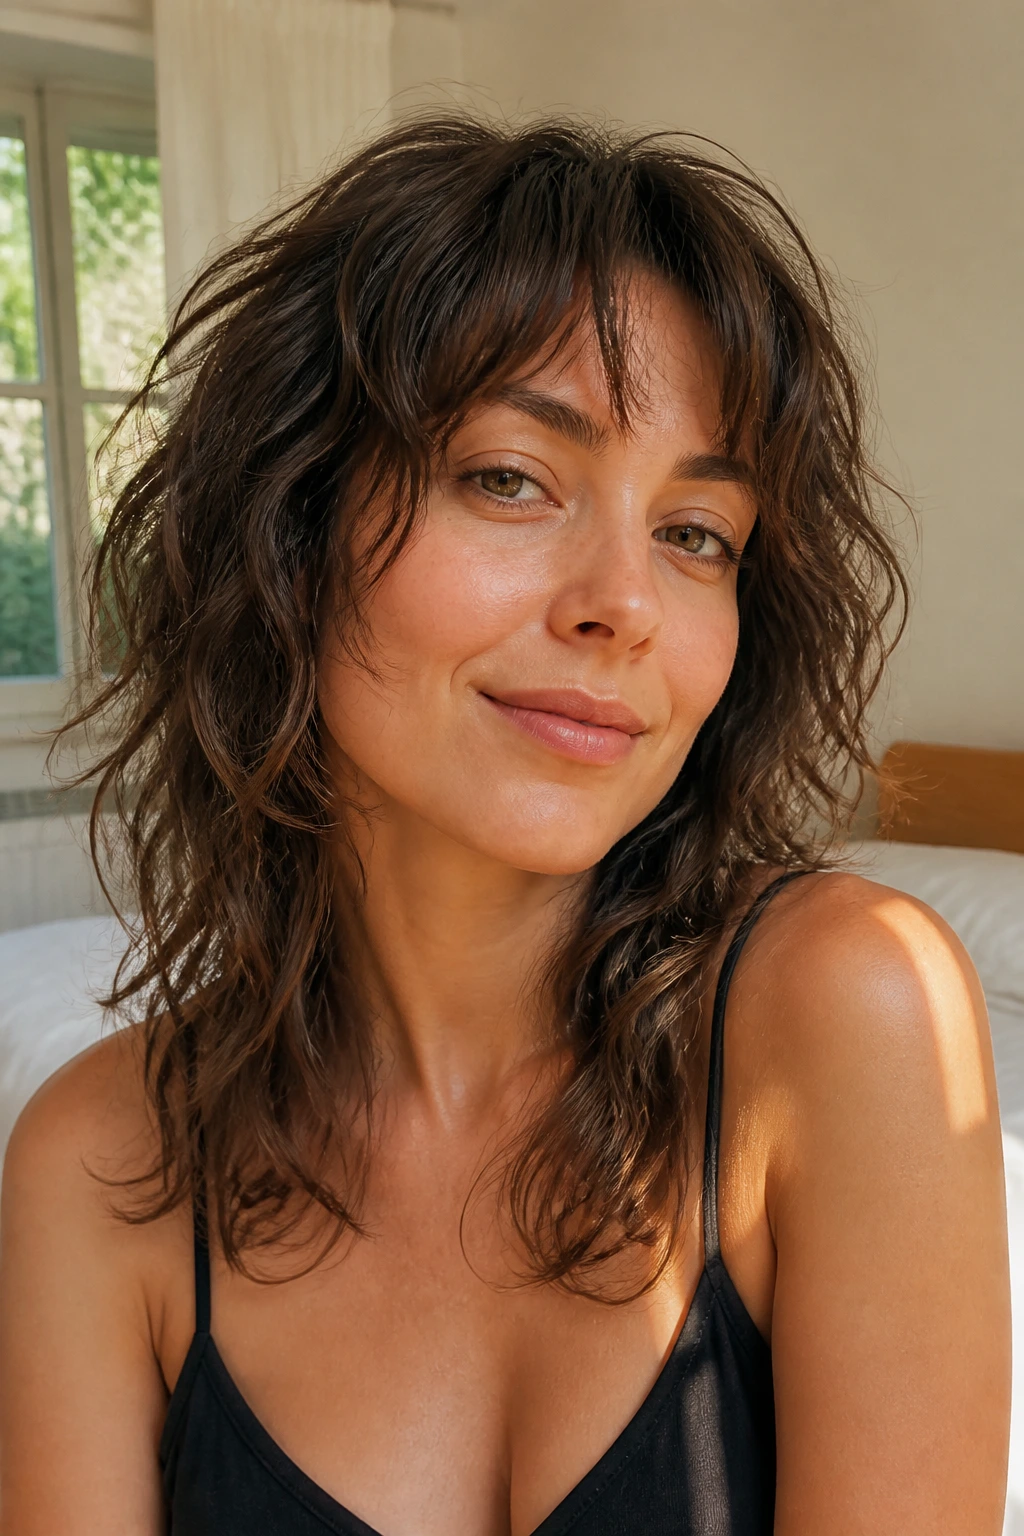
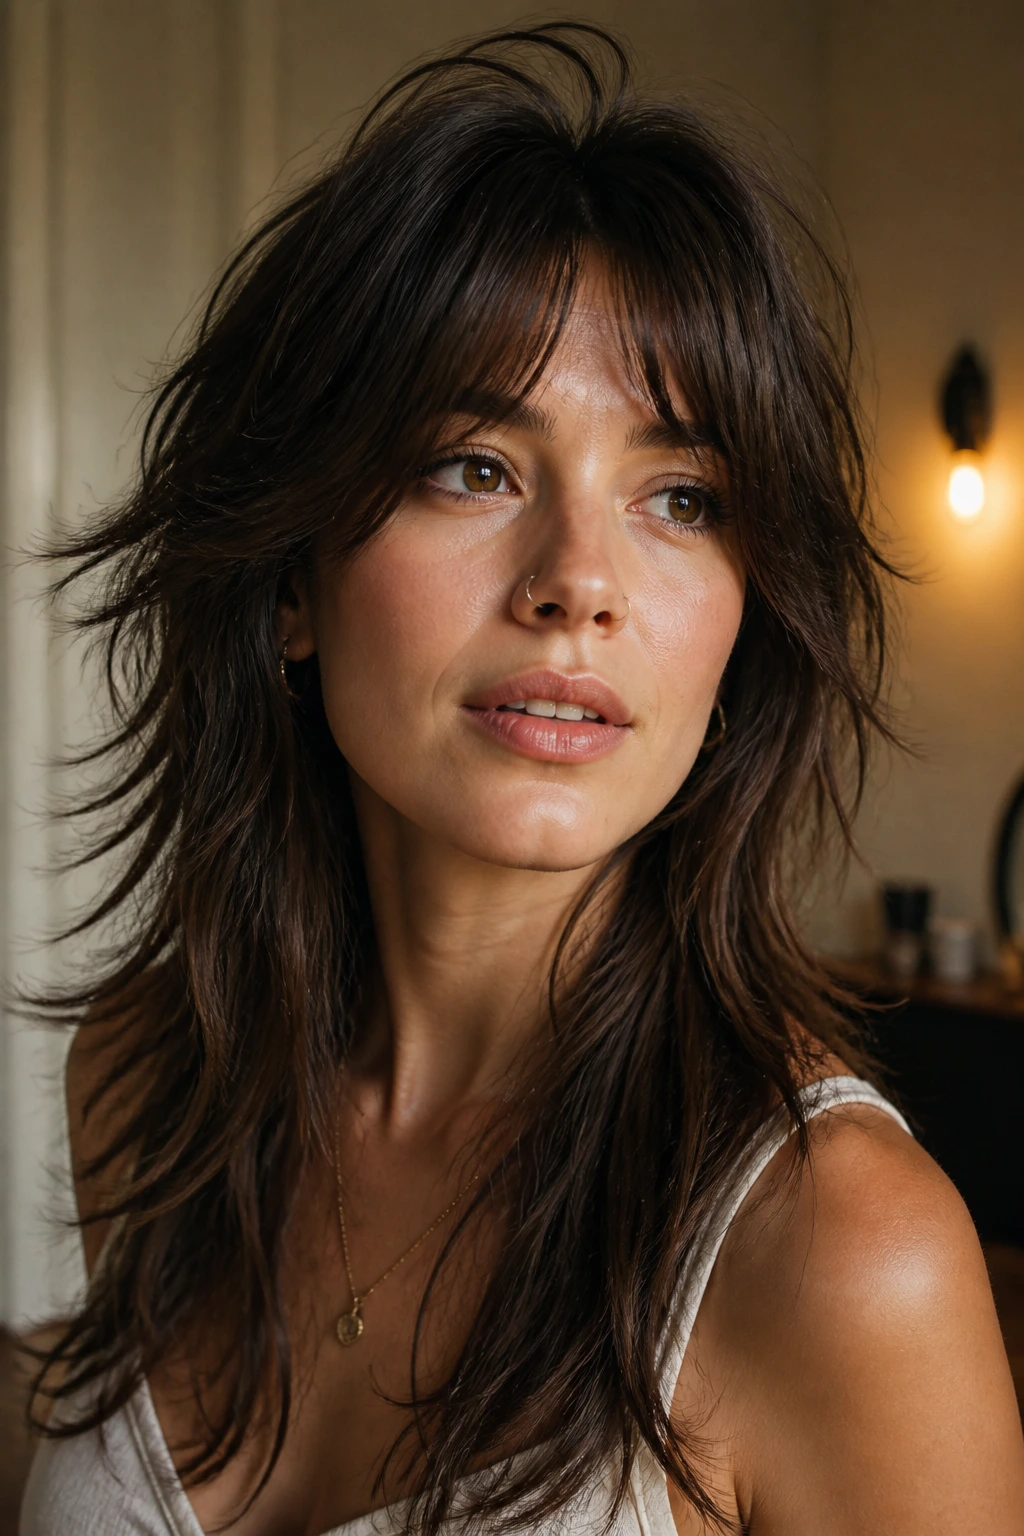
1. Crown-Lift Shag with Long Curtain Ends
This is the version I’d hand someone who says, “I want movement, not a haircut that feels chopped to bits.” The shortest layers sit high around the crown, then melt into curtain pieces that skim the cheekbones and taper into long ends. Straight hair gets a little lift where it usually goes limp. Wavy hair gets shape without losing that long-swinging feel.
Why it works
Ask for point-cut ends and a soft curtain fringe that lands around the cheekbone, not a blunt bang. That keeps the silhouette open and stops the front from feeling heavy. A round brush at the root and a quick bend through the front sections are enough to make it look intentional.
A good version of this cut should still let you pull your hair into a low ponytail without weird gaps. That’s the test.
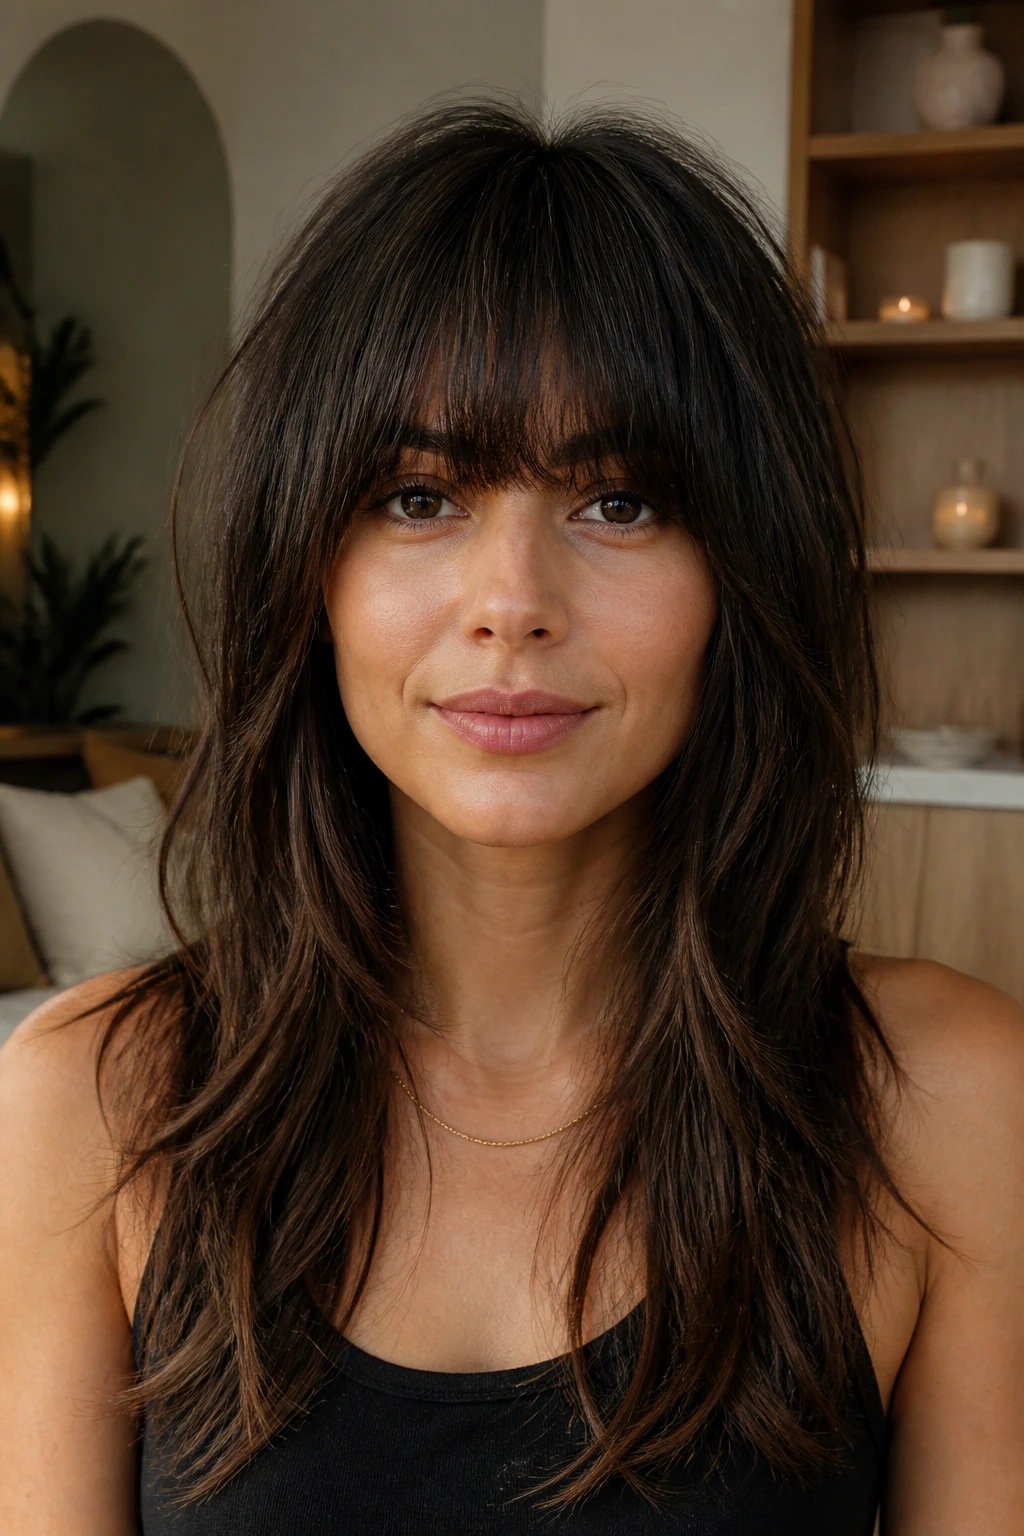
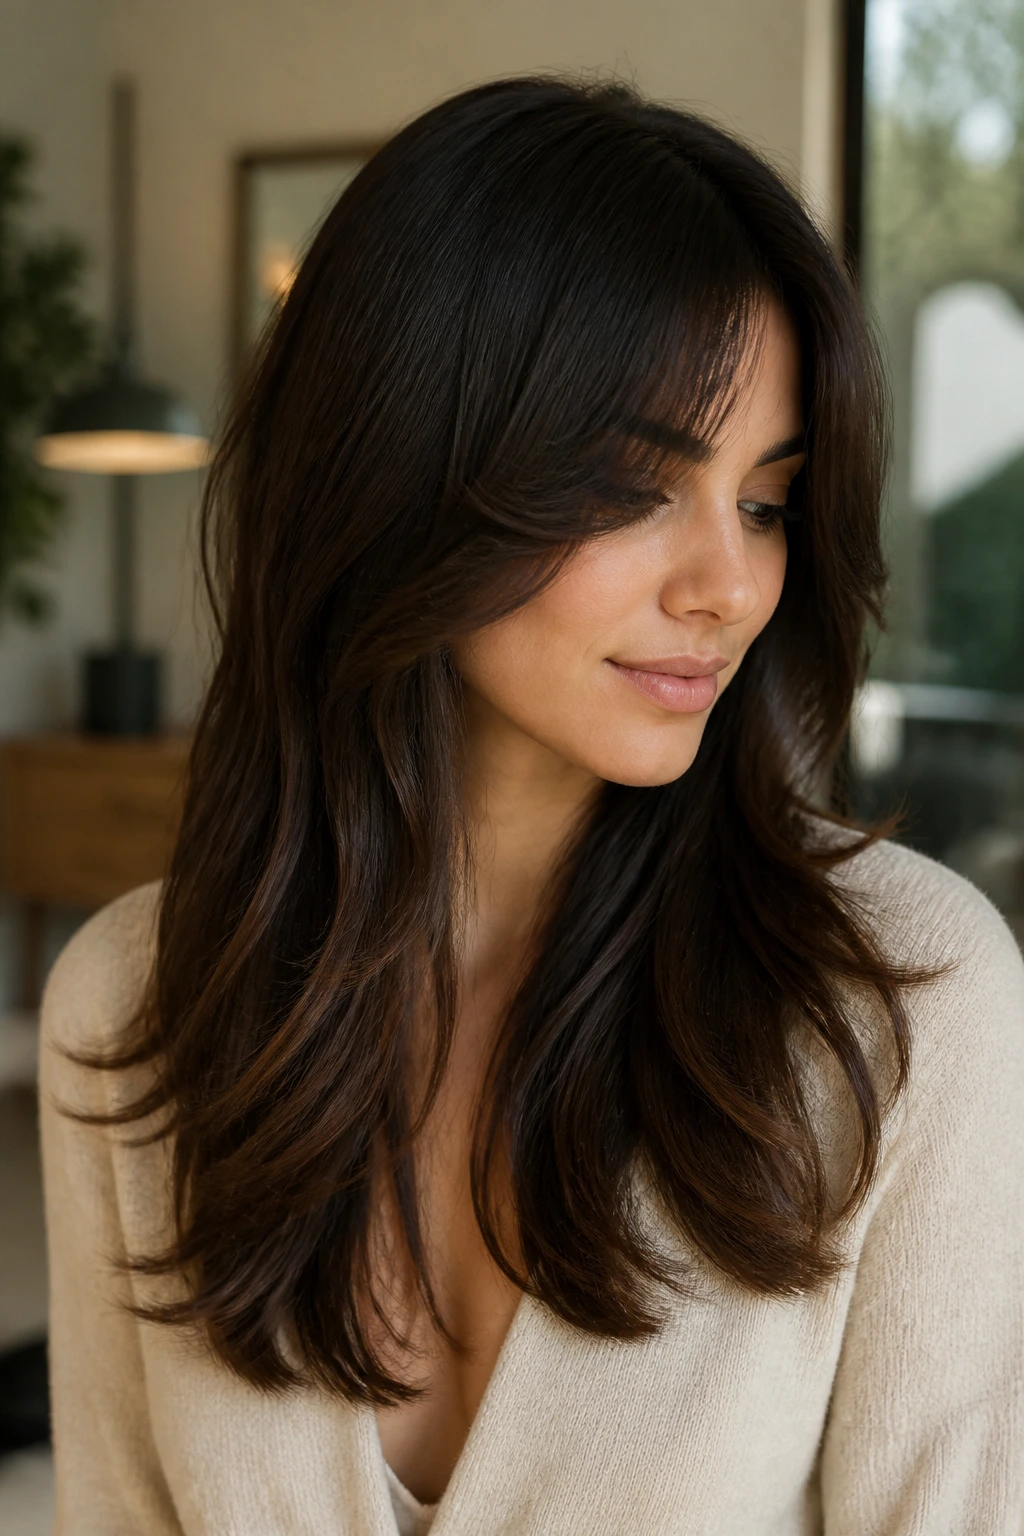
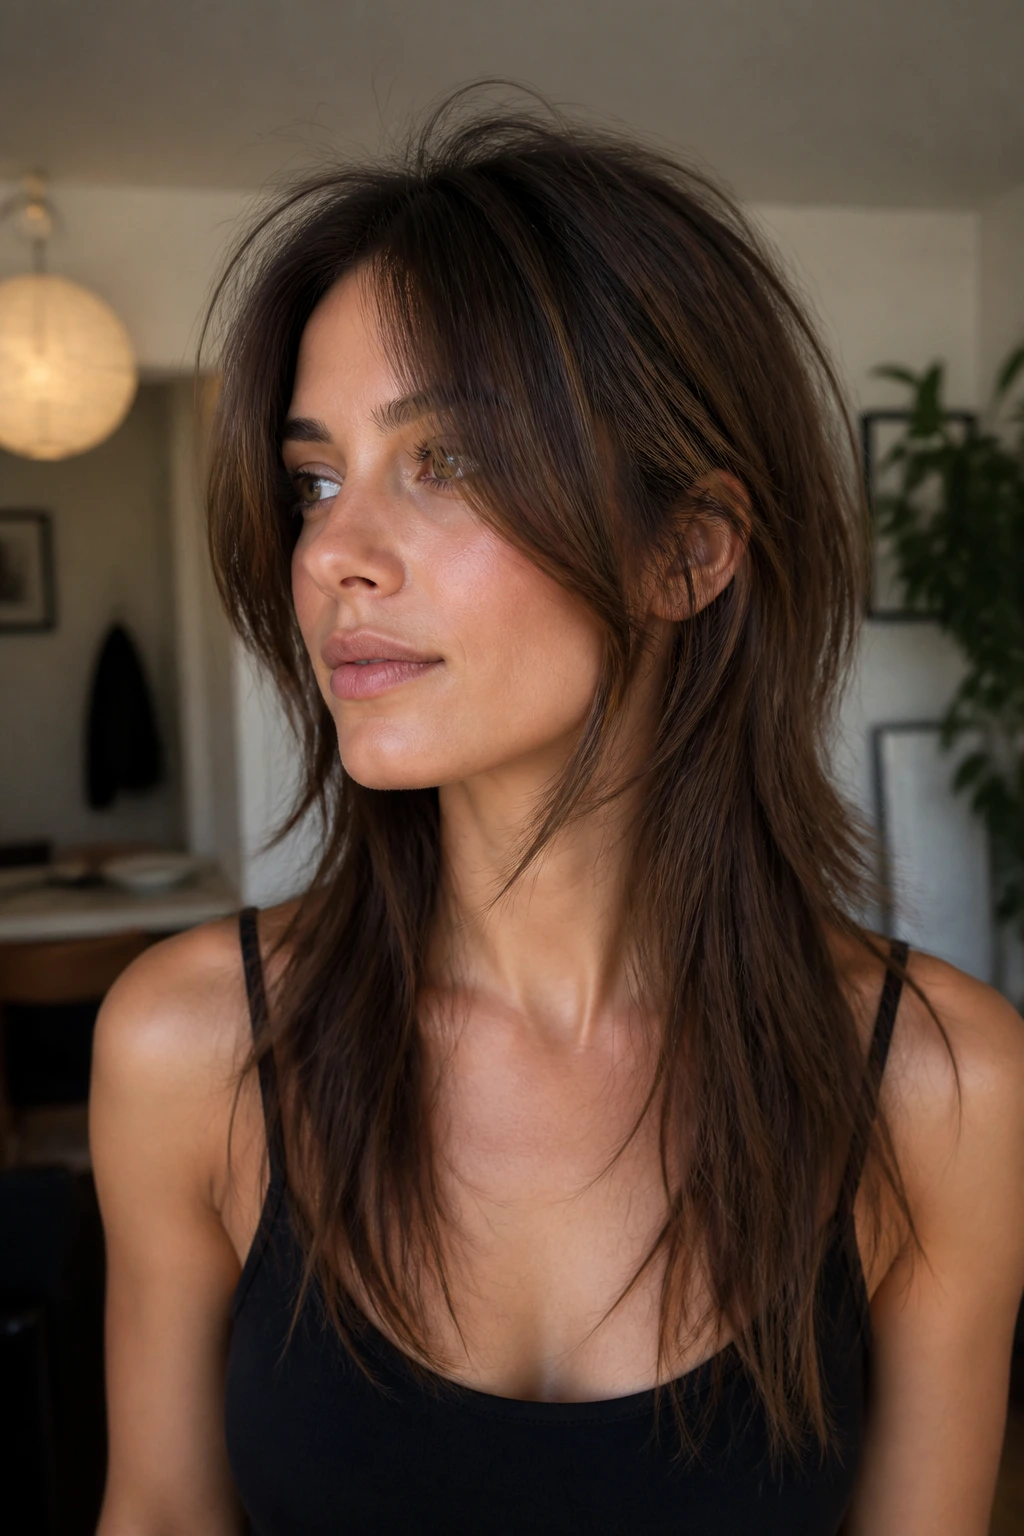
2. Bottleneck Fringe Shag with a Soft Taper
A bottleneck fringe sits in the sweet spot between a full curtain bang and a heavier fringe. In a short shag on long hair, it adds a little shadow near the eyes, then opens through the cheeks so the rest of the layers can move. The result feels edited, not overworked.
This is a smart pick if your hair splits in the middle and lies flat around the temples. The fringe gives the top a point of interest, while the longer sides keep the face from looking boxed in. It’s also easier to grow out than a blunt fringe, which matters more than people think.
Keep the ends soft, not shredded. A light texture spray is enough; you do not need to make every piece behave like a feather.
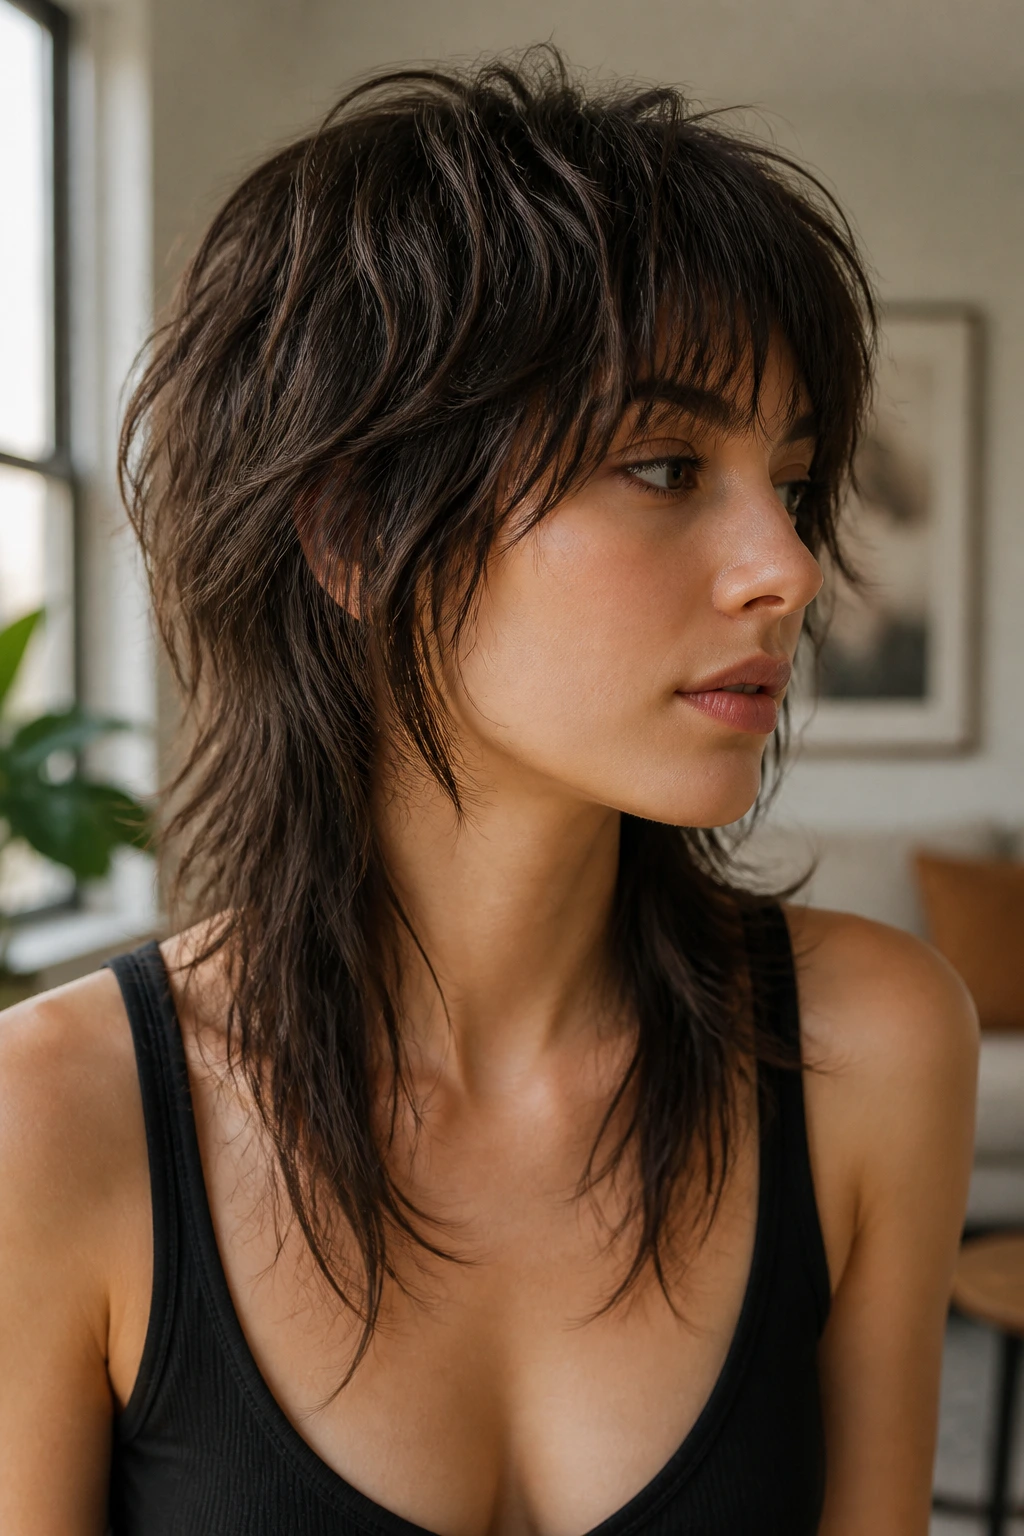
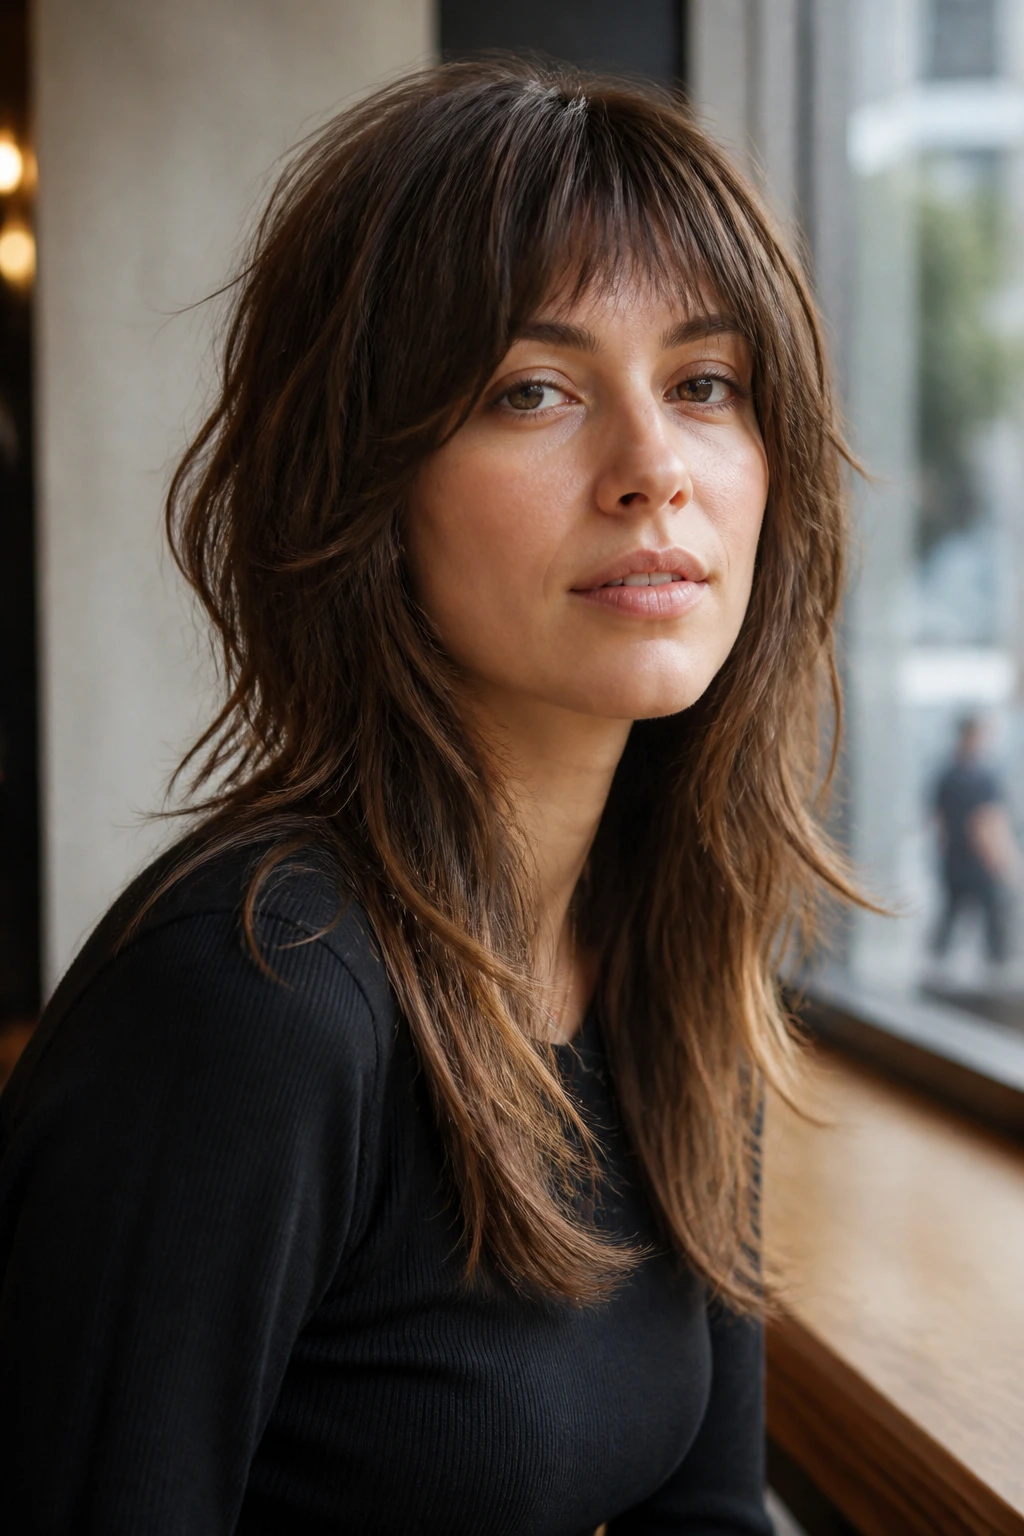
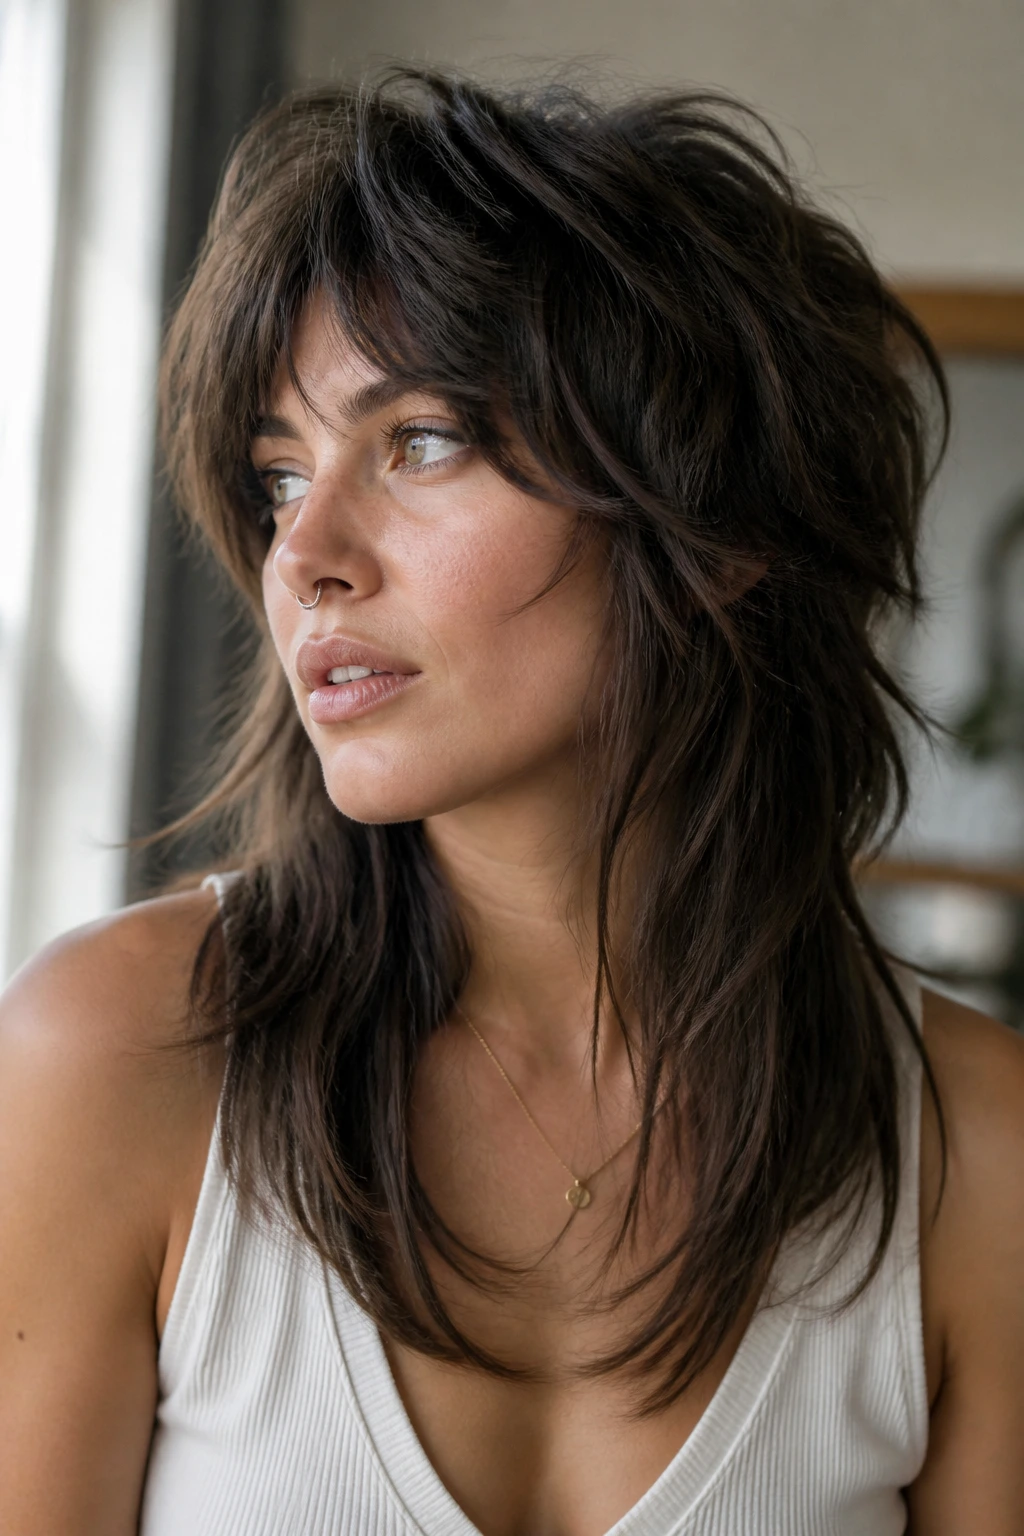
3. Soft Wolf Shag with Tapered Back
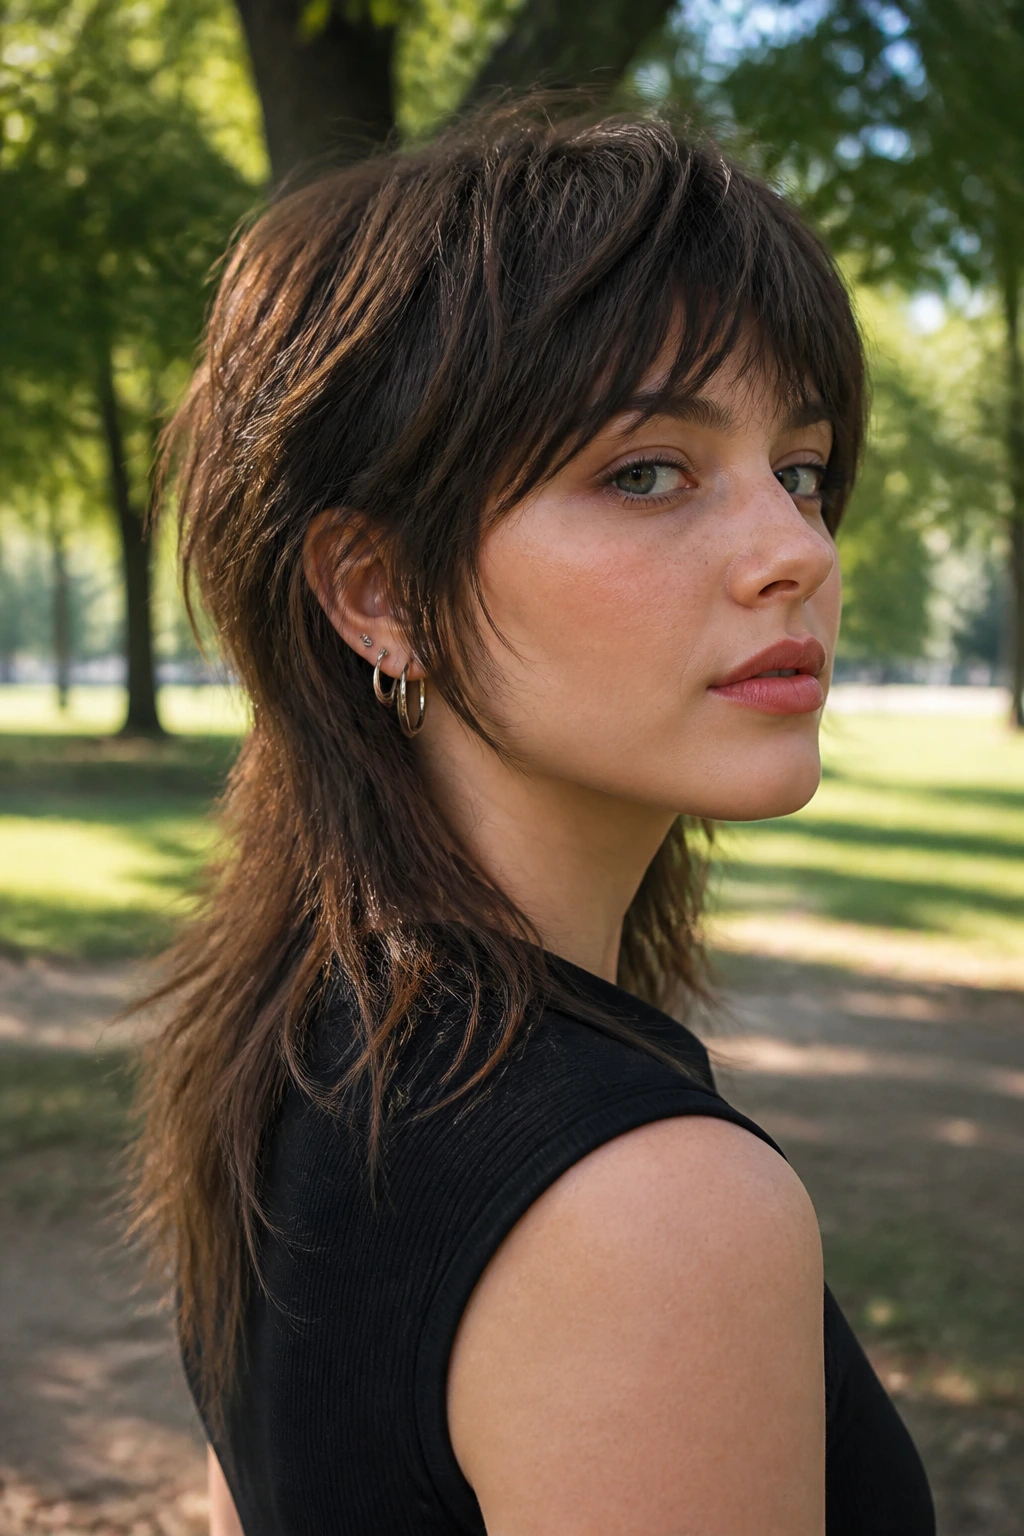
If you like a little edge, this is the one that leans there without jumping off the cliff. The crown and upper sides are cut shorter, while the back keeps a longer, tapered line that skims the shoulder blades or below. It reads like a shag with attitude, but the long back keeps it grounded.
Best for
- Hair with medium to thick density
- Wavy or loose-curly textures
- People who want layers but not a full mullet shape
The key is contrast, not chaos. Ask for the shortest layers to live around the cheekbone and keep the perimeter longer in back, then break up the ends just enough so they don’t look blunt. If you wear your hair half-up a lot, this shape gives you a nice little fall of pieces around the neck.
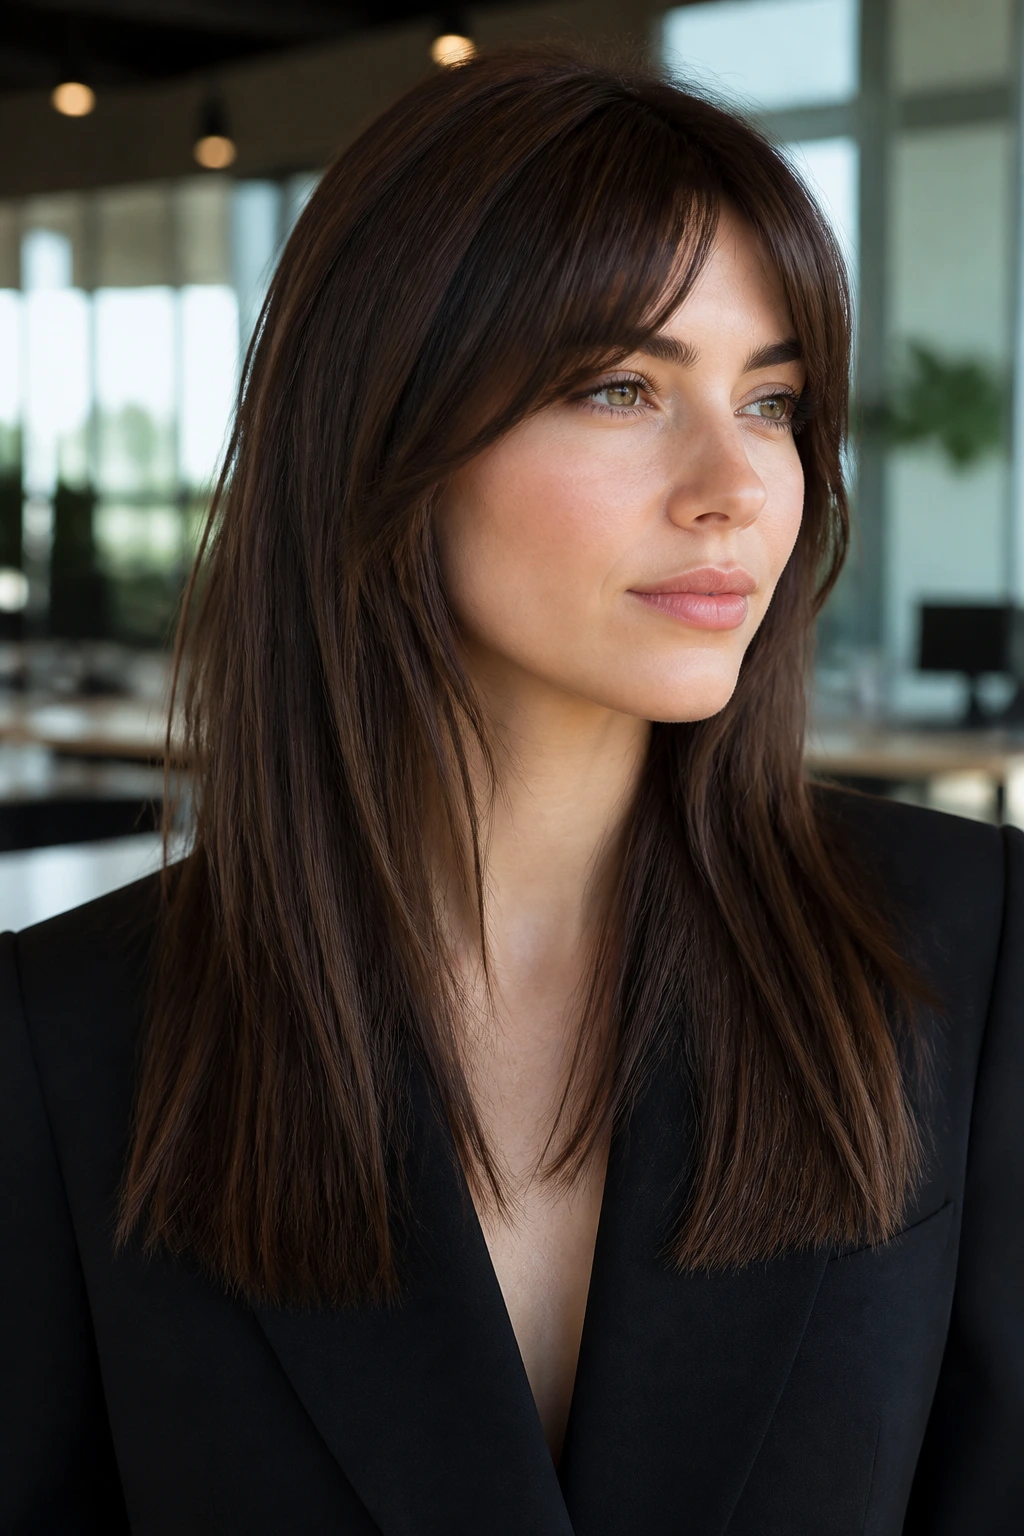
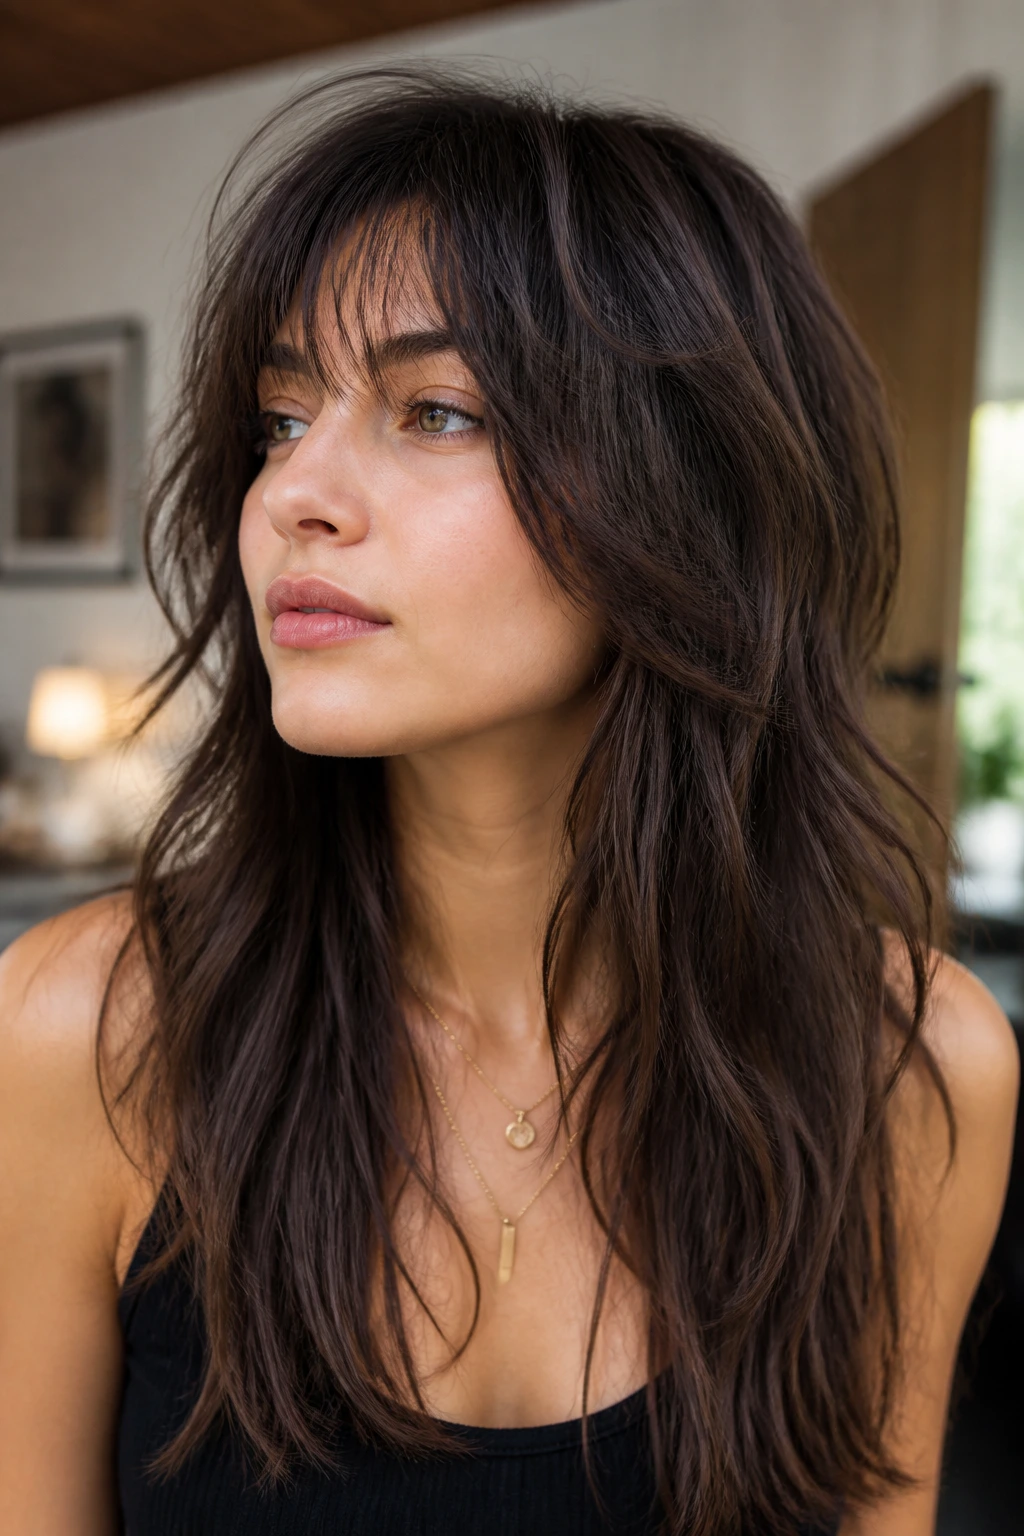
4. Razor-Cut Shag for Pin-Straight Hair
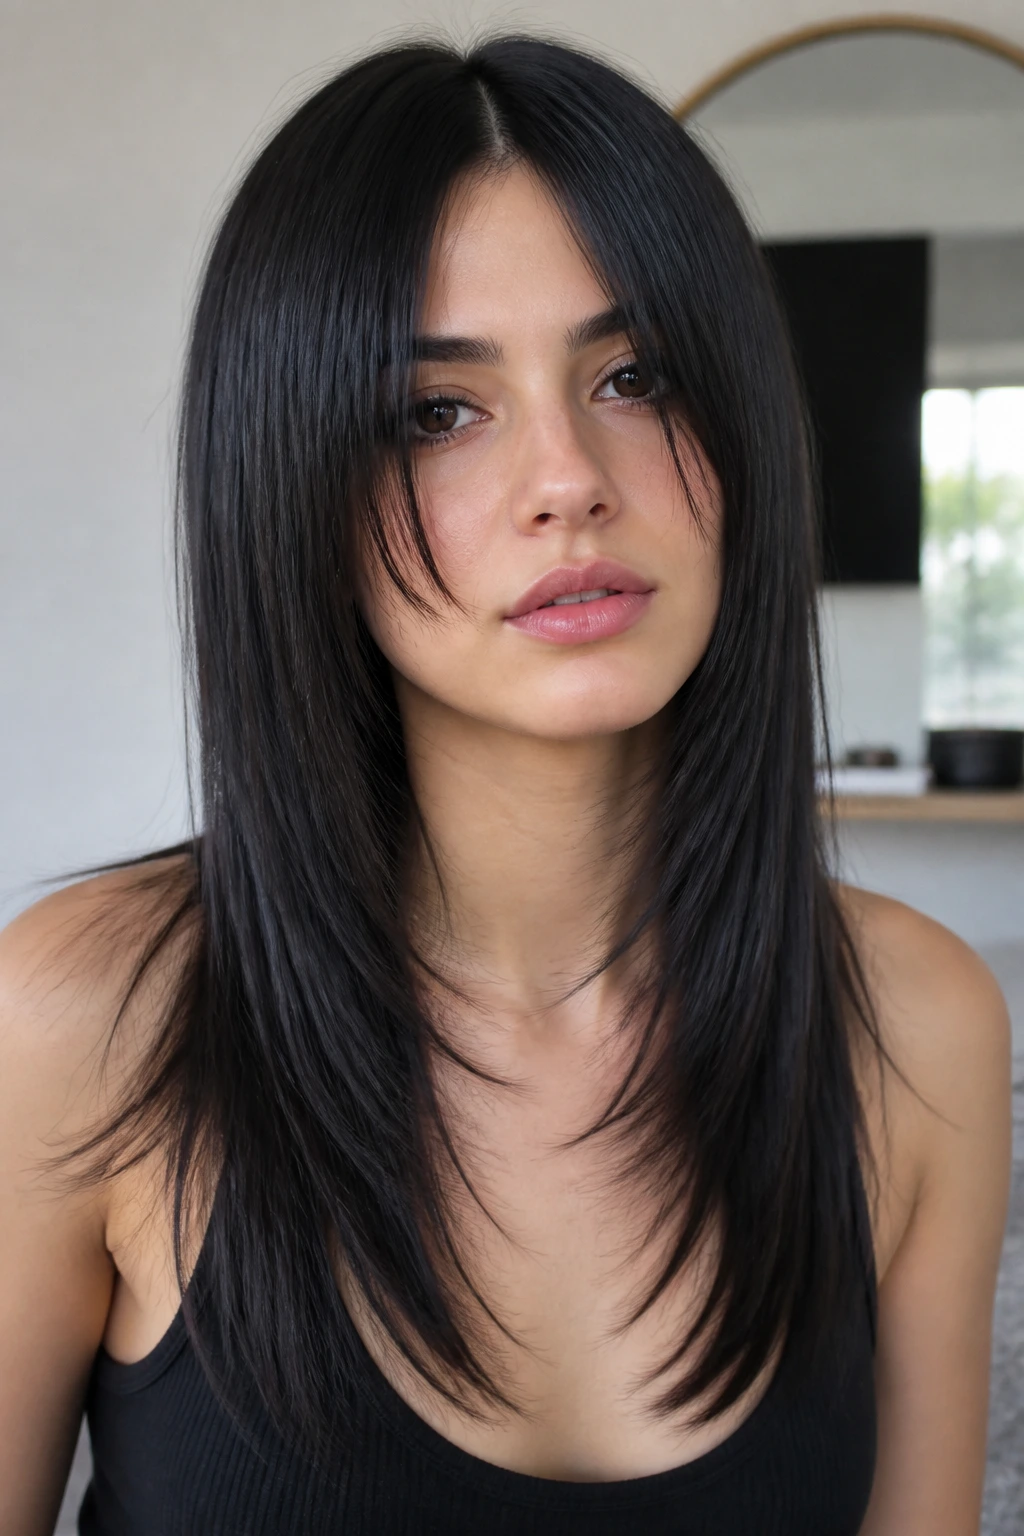
Straight hair can make a shag look flat if the cut is too tidy, which is why a razor finish can help. It softens the edges and gives the layers a lighter fall, especially when the hair tends to hang heavy and stick together. On sleek hair, the texture has to be built into the cut or you’ll lose the shape by lunchtime.
That said, razor work is not a free pass to shred the ends. If your hair is dry, porous, or split at the bottom, scissors may be the smarter choice. The goal is movement, not fray.
I like this version with a sharp center part or a slightly off-center part. It keeps the line clean and lets the shorter pieces at the front do their job.
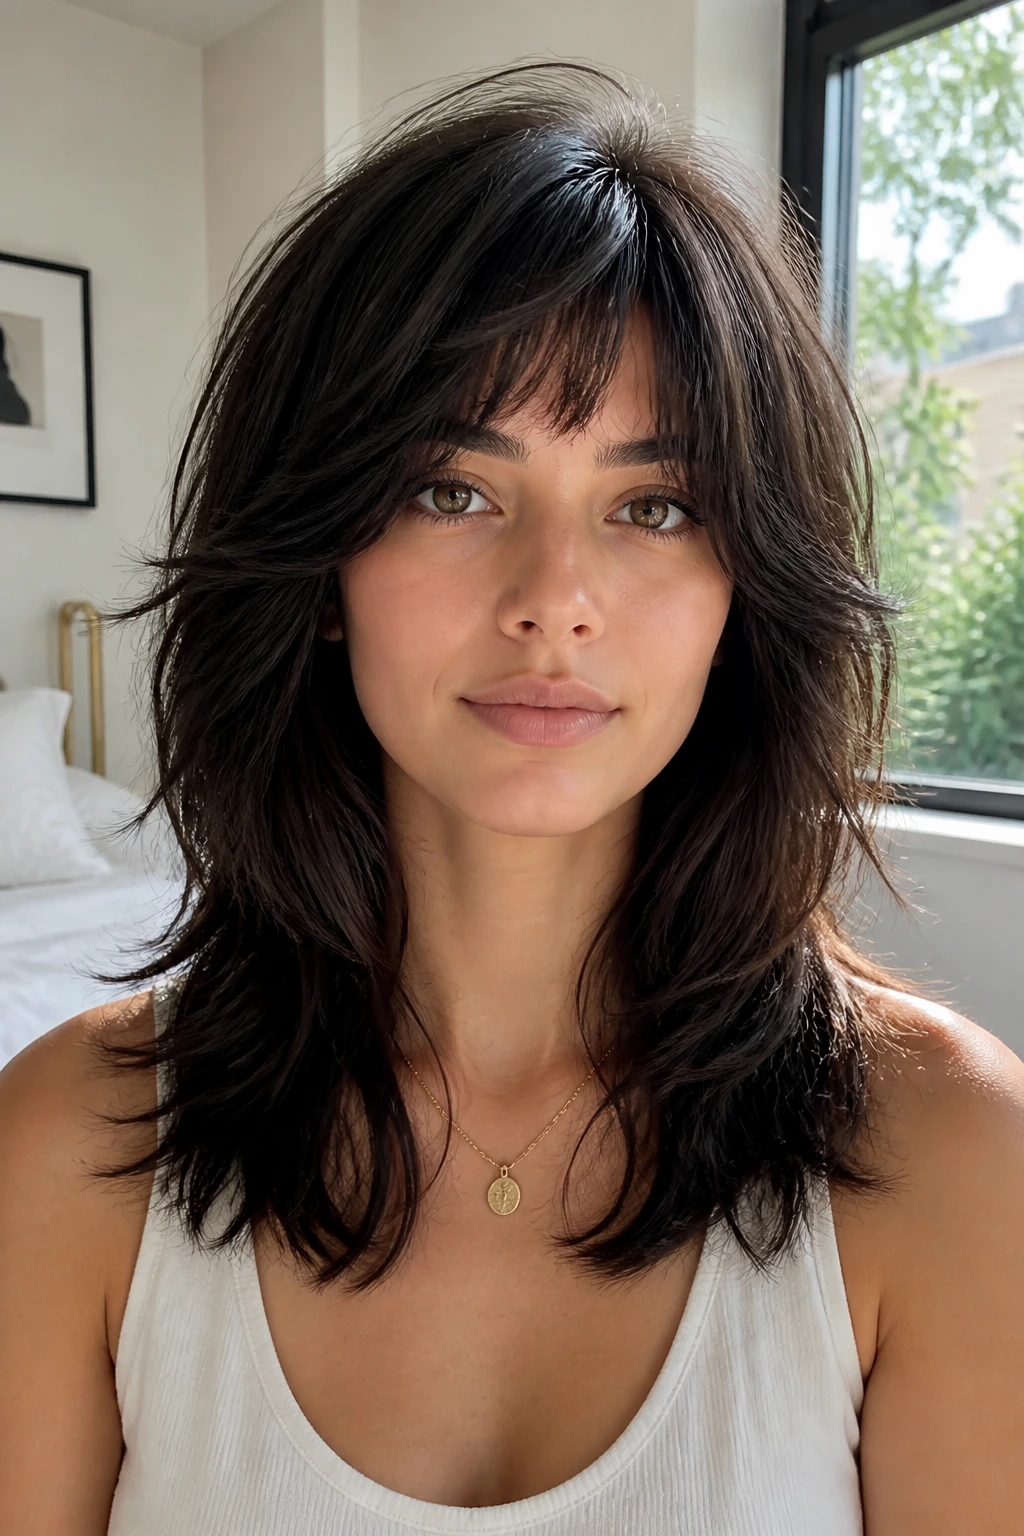
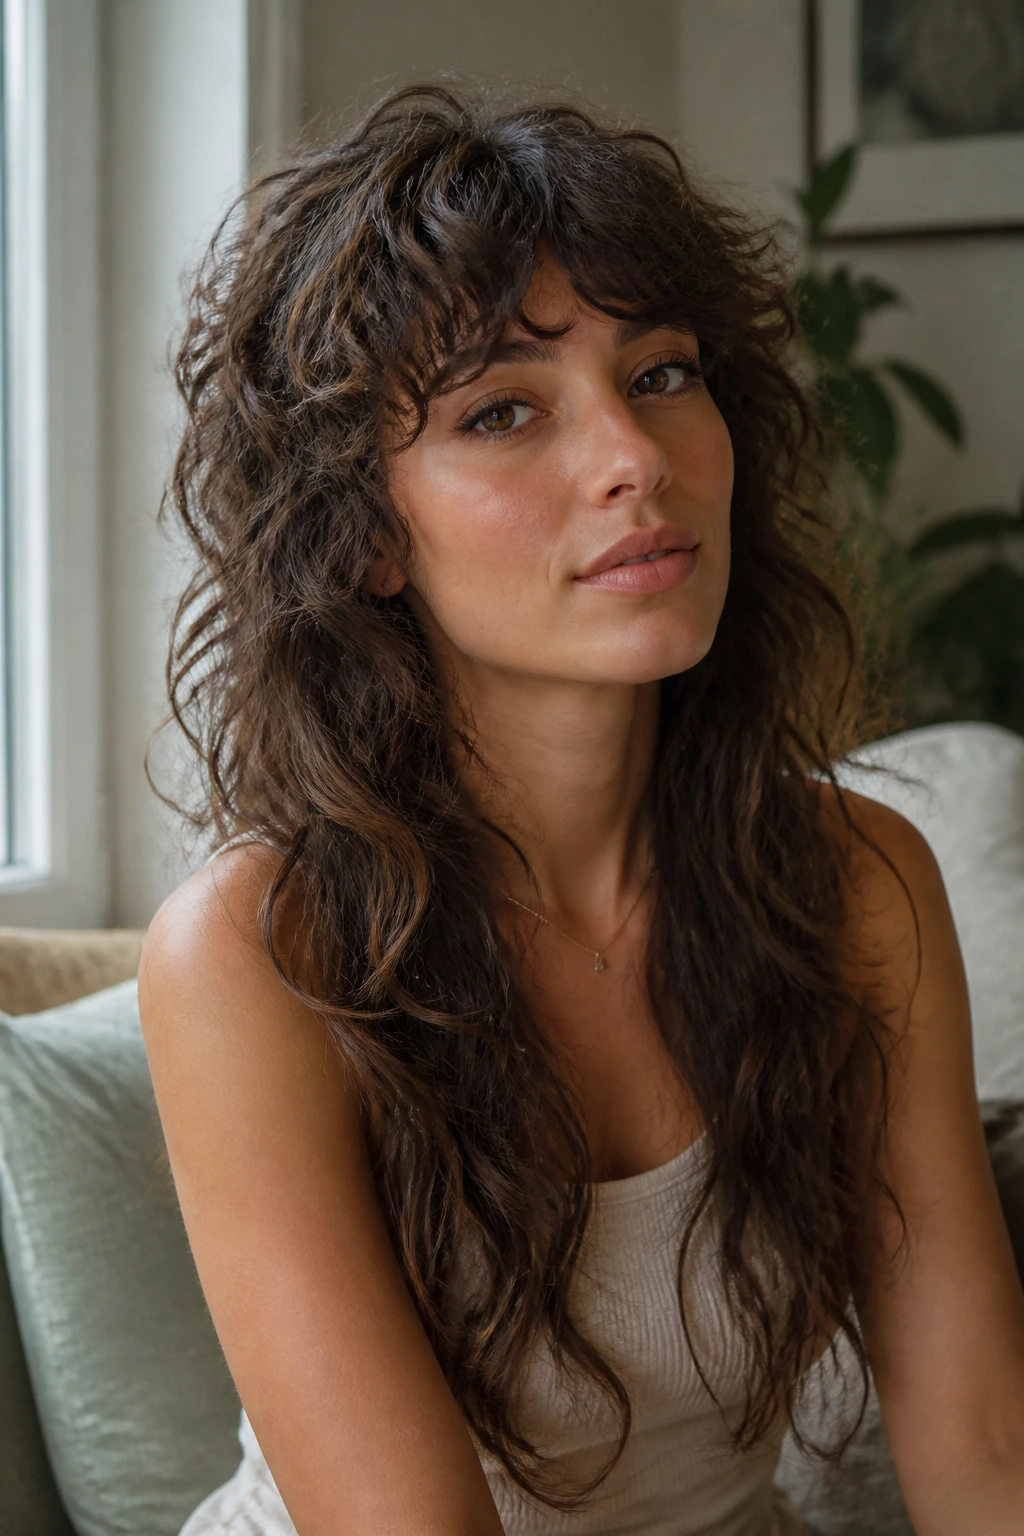
5. Curly Shag with a Lifted Crown
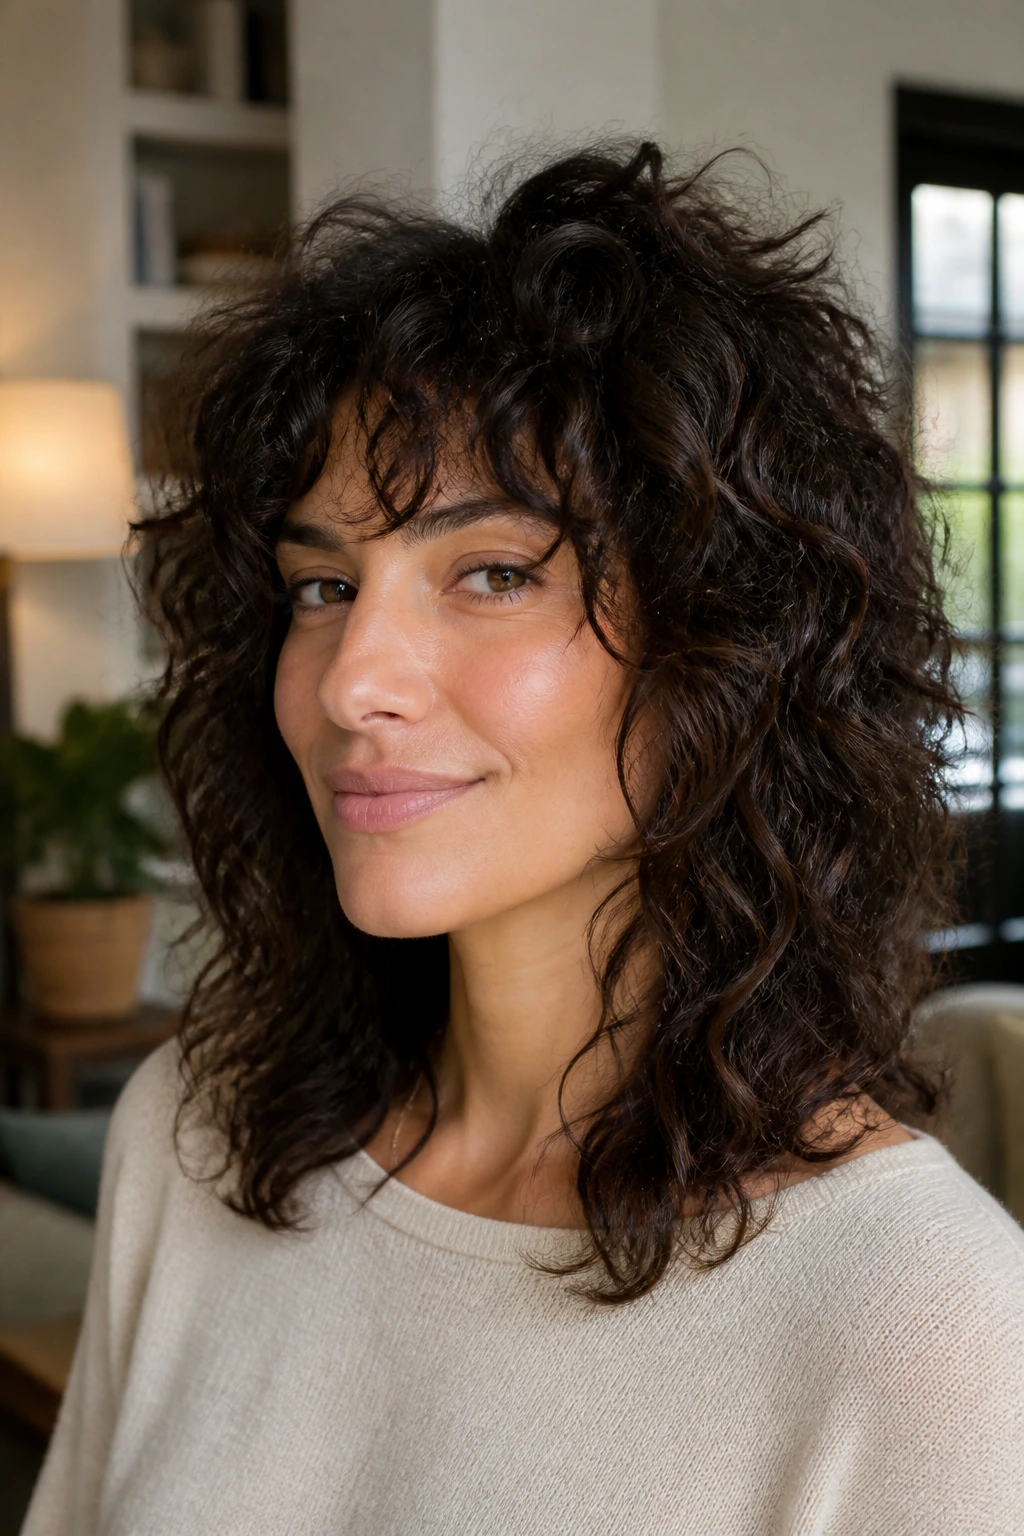
Curly hair changes the whole game. The crown needs room, the front needs balance, and the bottom needs enough length to keep the shape from turning into a halo. A short shag on long curls works best when the stylist cuts with shrinkage in mind, usually while the hair is dry or mostly dry.
What to ask for
Ask for the shortest layers to start where your curls naturally spring, not where they look long when wet. That matters. If the cut ignores shrinkage, the front can jump too high and the back can collapse into a triangle.
This style is at its best with a diffuser and a little leave-in cream, nothing heavy. If the curls are already thick, the cut should remove bulk inside the shape, not strip the ends.
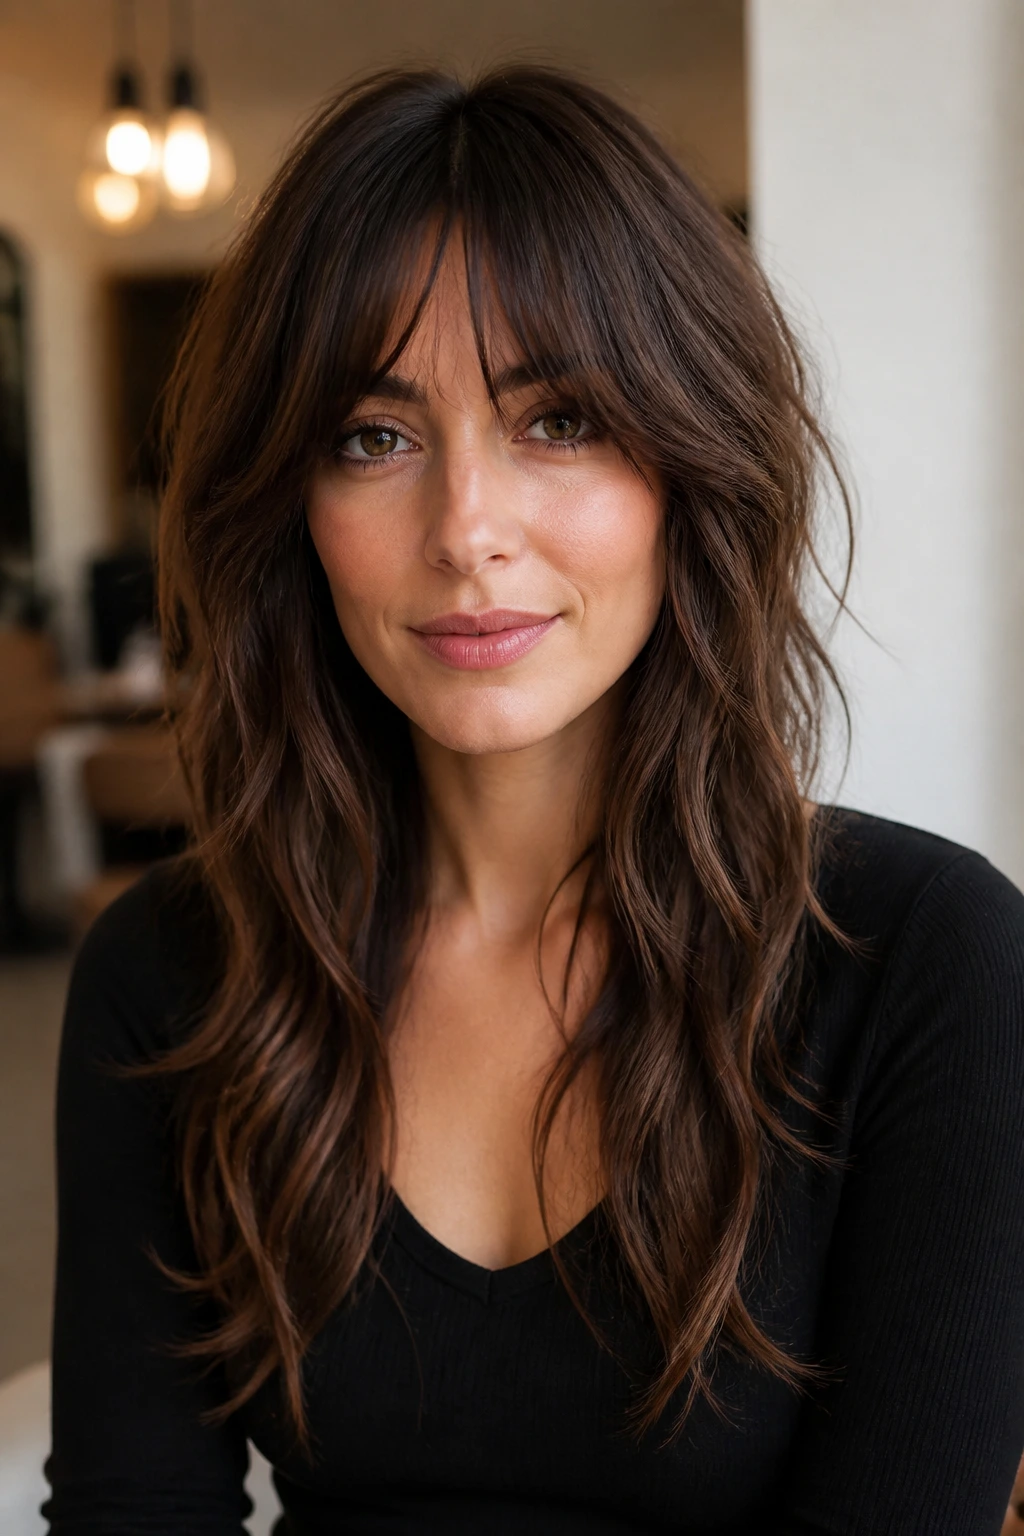
6. Collarbone Shag with Feathered Cheeks

This one sits in a very useful middle zone. The longest ends hit around the collarbone, while the front layers feather along the cheeks and jaw. It gives long hair a lighter outline without making the overall look too chopped or too layered.
The collarbone length matters because it keeps the cut from feeling short when you wear it down. You still get the swing of long hair, but the face frame does a lot more work than it would in a plain one-length cut. On finer textures, this is a safer shape than a very high shag. On thicker hair, it keeps the bottom from ballooning.
If you want a shag that looks polished with a blazer and messy with a T-shirt, this is a strong candidate.
7. Airy Shag for Fine, Long Hair
Fine hair needs a careful hand. Too many layers and you end up with see-through ends that look thinner than they are. The better move is a soft shag with internal weight removal near the crown and only a few face-framing pieces that start around the cheekbone.
Why it works
The cut gives the top some air, but it leaves enough perimeter to keep the hair looking full. That’s the trick. The layers should create lift, not holes.
A root spray or light mousse does a lot here. Work it through damp roots, then rough-dry until the top is about 80 percent dry before touching the fringe. If you see the ends starting to fray, the cut is too aggressive. Fine hair wants lift, not punishment.
8. Heavy Fringe Shag with Soft Sides
If you like a stronger front, this version gives it to you. The fringe sits fuller across the forehead, then the sides soften quickly into long layers. It works well when you want the eyes framed and the face shape anchored, especially if your hair has enough density to hold a stronger bang.
The danger with a heavy fringe is making the rest of the cut too thin. Keep the sides soft but not wispy, and don’t let the top layers disappear entirely. You want a clear front, not a bang with three lonely scraps behind it.
This cut looks sharp with a minimal part and a little bend through the mid-lengths. It’s one of the more face-forward shag options, and it’s not shy about that.
9. Invisible-Layer Shag with a Blunt Perimeter
This is the quiet one in the group. The exterior line stays blunt or close to blunt, while the layers are tucked inside the haircut where they give movement without showing every cut. On long hair, that keeps the ends looking thick while the crown loses enough weight to stop the whole style from dragging.
The point of it
You get the easiest version of a shag to wear in a professional setting. From the front, it still reads as long and clean. From the side, the interior layers start to show their work.
It’s a very good compromise if you want shag movement but hate see-through tips. Ask your stylist to keep the outline solid and place the shortest layers inside the shape rather than slicing deep into the perimeter.
10. Rounded Shag for Thick Hair
Thick hair can look beautiful in a shag, but only if the shape is controlled. A rounded version keeps the top light and the bottom from kicking out in an ugly triangle. The top layers remove bulk, the sides stay soft, and the whole haircut curves around the head instead of flaring out.
That rounded silhouette is the difference between “deliberately textured” and “hair that has too much opinion.” If your hair is dense, you need internal weight removal more than you need more layers. Too many slices at the bottom will leave the ends stringy while the body stays bulky. Nobody wants that.
This cut behaves best with a smooth blowout or a bend created with a large round brush. It looks finished, not fussy.
11. U-Shape Shag with Broken Ends
A U-shaped perimeter keeps long hair looking long, which is useful if you’re attached to the length but want a little more swing. The layers are broken up through the interior so the top doesn’t fall flat, but the bottom still curves instead of coming to one blunt edge.
That broken edge matters. It stops the haircut from looking too heavy when the hair is worn down, especially around the back. If your hair grows into a blunt block, this shape softens that fast.
Best when
- You want to keep a clear length line
- You wear half-up styles a lot
- Your hair feels bulky at the bottom but flat at the crown
Ask for the shortest layers to hit around the mouth or cheekbone, then let the longest perimeter keep its U. It is neat, but not stiff.
12. Side-Part Shag with a Sweepy Fringe
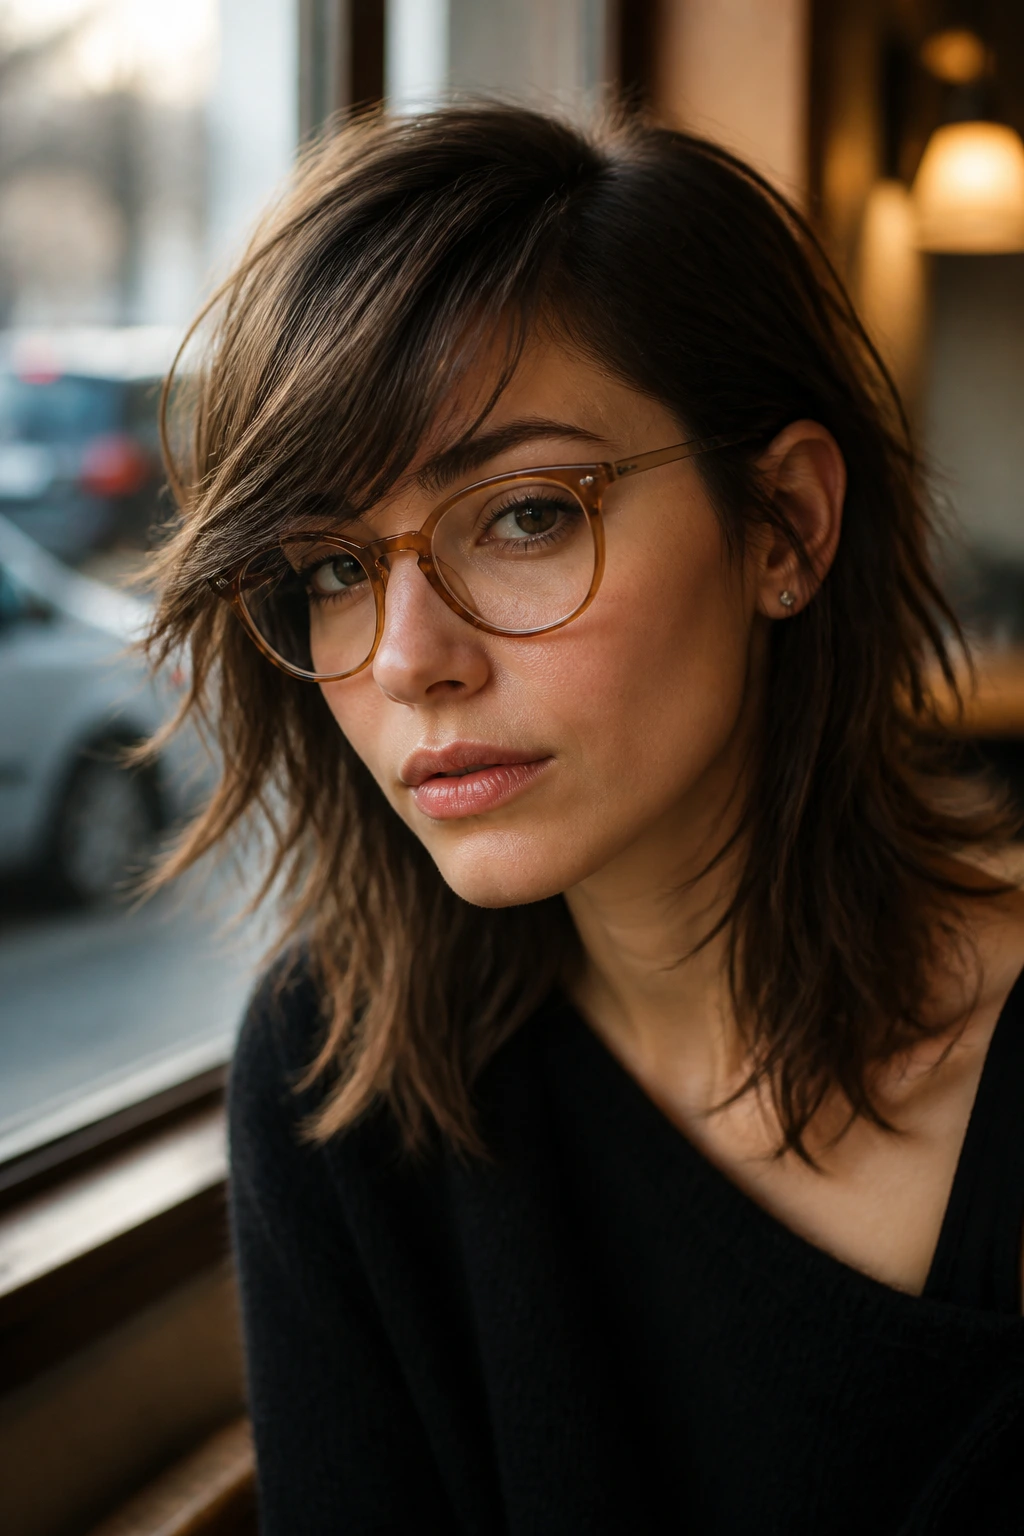
A side part changes the whole mood of a shag. Instead of the classic center-part curtain, this version sweeps across the forehead and drops into longer face-framing pieces. It can be a nice fix for a stubborn cowlick or a forehead that feels too exposed with a middle part.
The best part is how it softens the layers on one side while keeping the other side a little sharper. That asymmetry gives the cut some energy. It also lets you tuck one side behind the ear without making the whole style collapse.
This is one of the easiest shag variations to wear with glasses, by the way. The fringe sits high enough to avoid the frames, which saves a lot of fiddling.
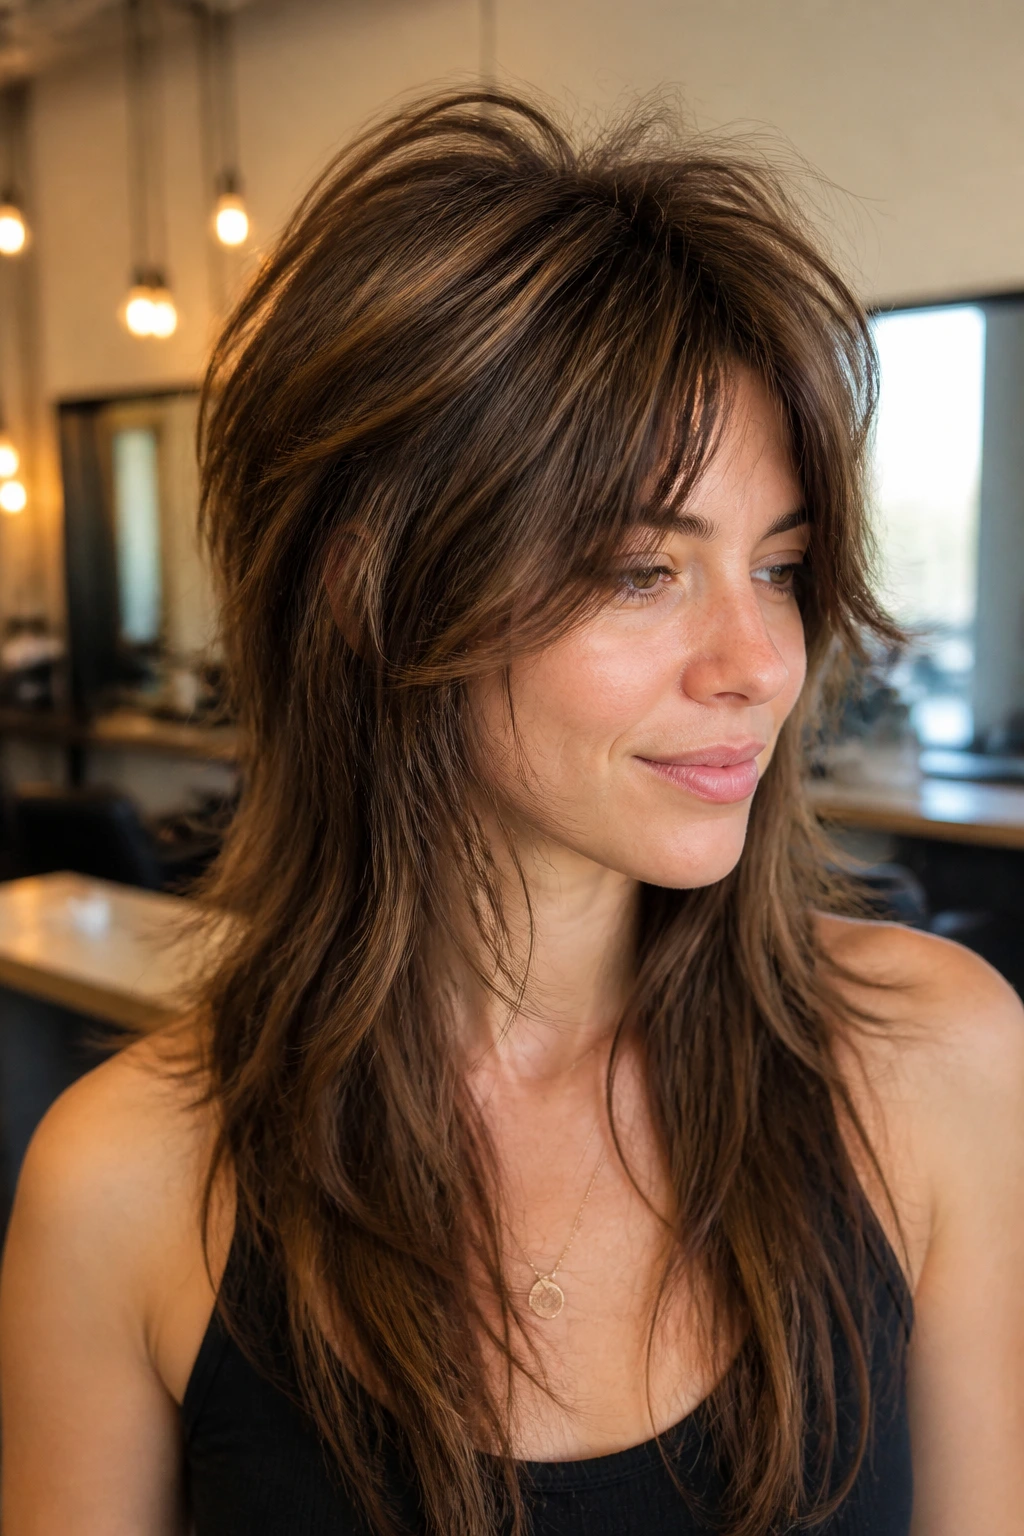
13. Boho Shag with Wispy Texture

This is the softer, airier cousin of the sharper wolf-leaning shag. The layers are lighter, the fringe is wispy, and the whole cut relies on loose texture instead of dramatic contrast. It’s a good answer if you like the shag idea but do not want it to feel edgy or severe.
The texture should look touched, not shredded. That means small bends, soft ends, and enough separation to show the layers without making them obvious from across the room. Think of it as a shag with its voice lowered.
A salt spray or light mousse can help, but use a small amount. Too much and the ends go crunchy, which kills the whole easy shape.
14. Piecey Shag with Razor-Soft Ends
Piecey cuts live or die by the separation in the hair. This version keeps long hair moving by softening the ends with a razor or point-cut finish, then building texture through the front and crown. It’s especially useful if your hair naturally wants to clump together.
Why it works
The piecey finish helps the layers show up without needing a lot of heat. On straight or slightly wavy hair, the shorter layers create a broken silhouette that feels lighter and more relaxed than a classic blowout shag.
Be careful with product here. A pea-size amount of cream or serum is enough; anything more and the pieces turn into chunks. That’s not the same thing, and the difference shows fast.
15. Long-Length Mullet Shag
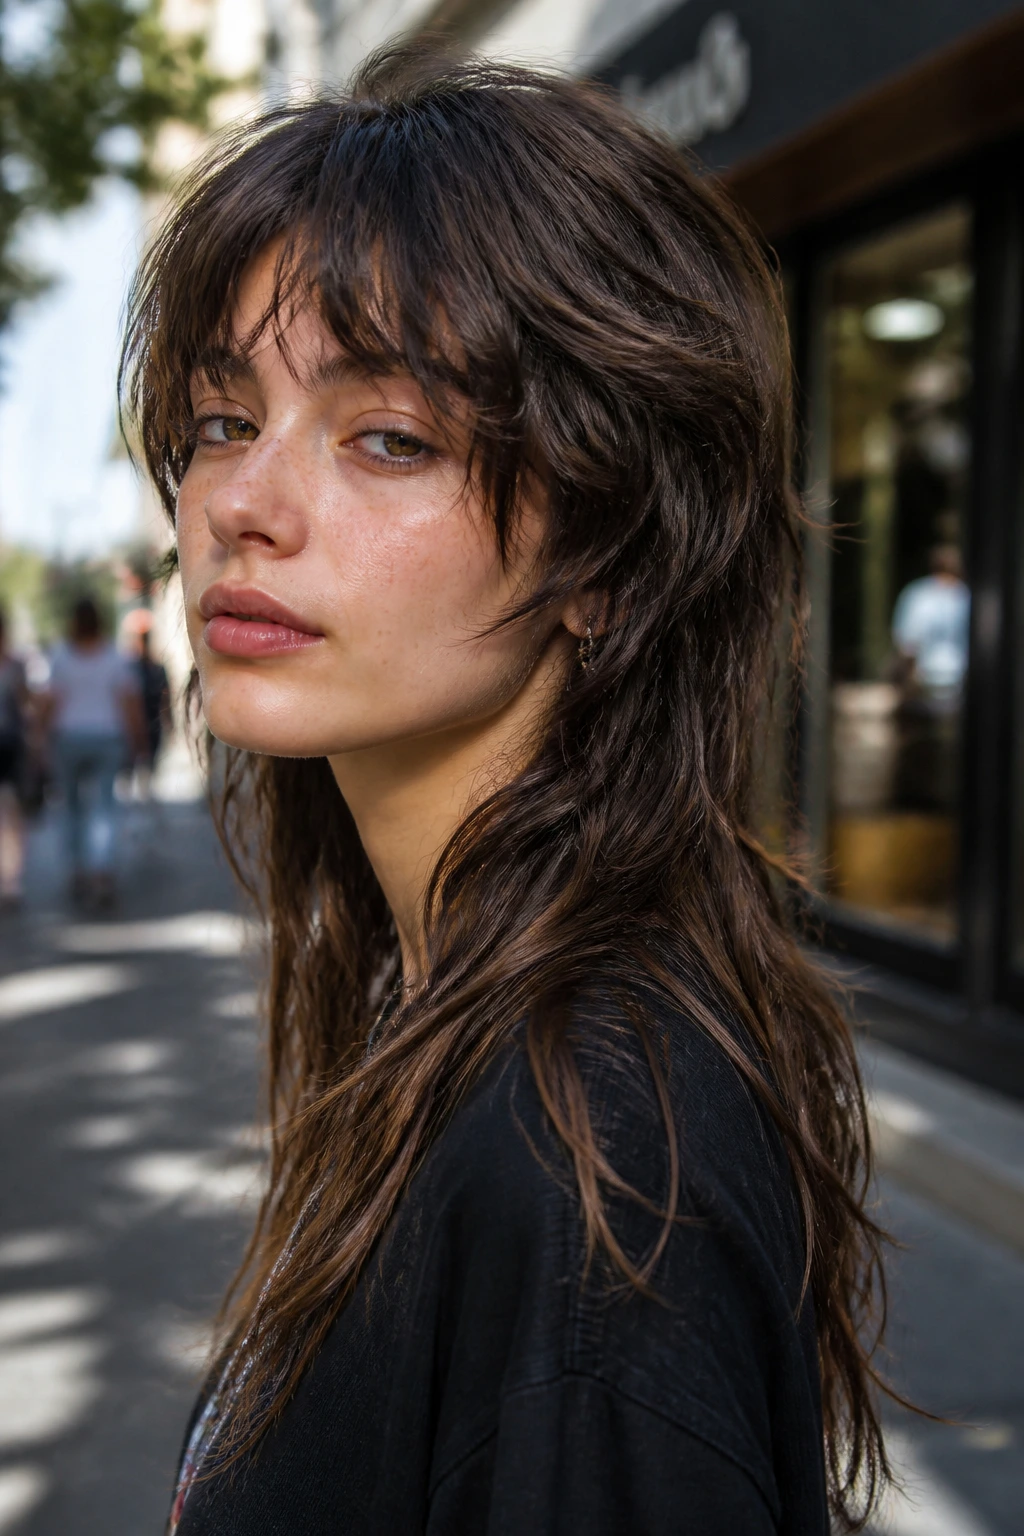
This one is for people who don’t mind a little attitude. The front and crown are shorter, the back keeps more length, and the contrast is the point. It’s a modern mullet-shag hybrid, but with enough softness in the layers that it still works on long hair.
The key is keeping the transition smooth. You do not want a hard disconnect unless that’s your preference. A softer mullet-leaning shag can actually be very wearable because the longer back keeps the overall look grounded while the front brings the shape forward.
It looks especially good with some bend through the lengths and a bit of height at the roots. Flat styling defeats the whole idea.
16. Minimal-Layer Shag with One Strong Face Frame
If you’re nervous about layers, start here. The cut keeps most of the long hair intact and adds only a few strategic pieces around the face and crown. That gives you movement without opening up the ends too much.
The face frame does the heavy lifting. Usually it starts around the cheekbone or jawline and tapers into the rest of the hair. The back stays calmer, which means the haircut can still be pinned up or braided without looking choppy.
This is the version I’d suggest to someone who wants to test shag territory without jumping in headfirst. It’s the least fussy option in the group.
17. Beachy Shag with Long Waves
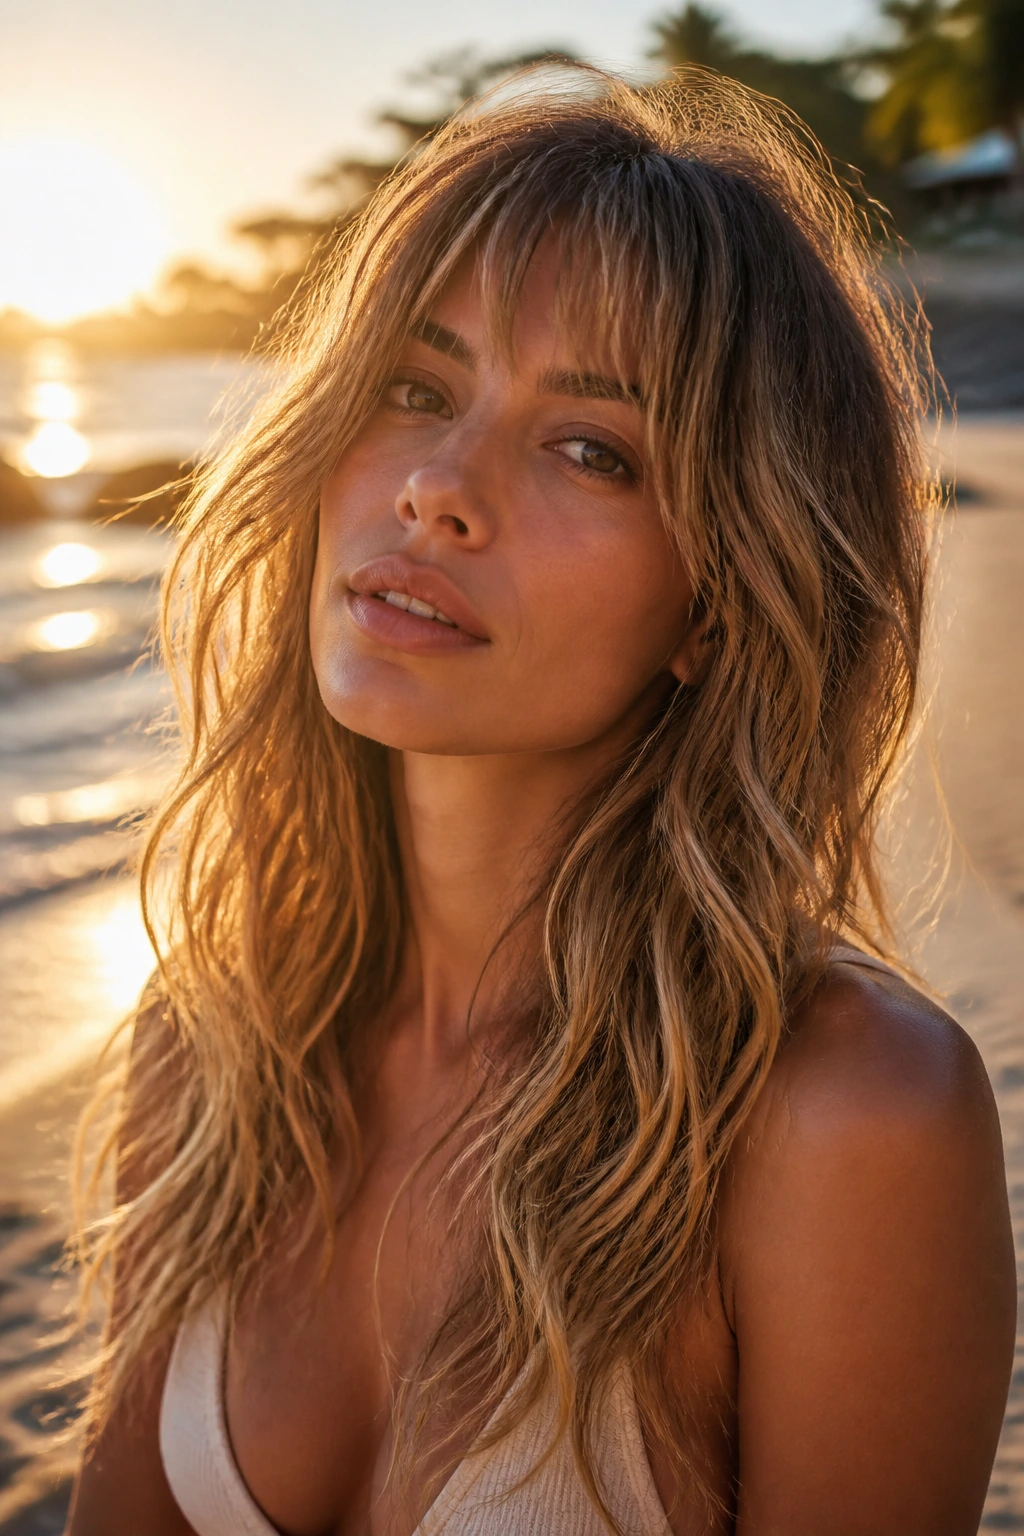
Some haircuts need a blowout to make sense. This one needs a bend. The layers are cut to catch loose, beachy waves, so the whole shape comes alive once you scrunch, braid, or use a curling iron with a large barrel.
The wave pattern should be loose and inconsistent. If every bend is identical, the haircut can look too styled. A little irregularity is what makes this one work. The layers show up where the waves break, and the long ends keep it from feeling short.
A 1.25-inch iron or a quick braid-dry method usually does the trick. Don’t curl all the way to the ends; leaving the last inch straighter keeps the shag from looking too uniform.
18. Face-Framing Shag for Round Faces
This cut is about opening the sides and drawing the eye downward, not pinning everything to the cheeks. The shortest pieces should start below the cheekbone or just at it, with longer layers that slip past the jaw. That creates length in the silhouette without making the haircut feel severe.
What to avoid
- Bangs that stop too high on the forehead
- Layers that flare wide at the cheeks
- A blunt bottom line that cuts the face in half
The point is to keep the shape vertical. Long, softly broken pieces near the front do more than a heavy fringe ever could. If your hair is straight, a little bend through those front layers helps them drape instead of sticking out.
19. High-Volume Shag with Crown Structure
This is the cut for hair that needs root lift and has enough density to support it. The crown is the focus, with shorter layers placed high and direct so the top does not collapse. It works especially well when the hair tends to sit flat at the scalp but feels full through the mid-lengths.
The shape should not get too puffy on the sides. That’s the balancing act. Keep the sides a little softer so the volume stays at the crown where it belongs, not out at the ears where it starts to look triangular.
If you blow-dry, dry the crown first. Lift the roots with the brush, aim the airflow up and back, and let the top cool before you touch it again. That cooling step matters more than people realize.
20. Wash-and-Go Shag with Air-Dried Bend
This is one of the few shag variations that actually makes sense for low-maintenance people. The layers are placed so the hair can air-dry with shape instead of needing a heated finish every time. Wavy and loosely curly textures tend to love it.
The haircut has to be cut for the natural bend, not against it. If the layers are too short or too uniform, air-drying can turn into a frizz problem fast. The better version uses a little internal weight removal and leaves the perimeter long enough to keep the shape from poofing out.
A leave-in cream and a small amount of gel or mousse usually do enough. Scrunch, leave it alone, and don’t keep touching it while it dries. That last part is hard for people. Still worth doing.
21. Polished Shag with Smooth, Glossy Ends
Not every shag has to look undone. This version keeps the layers visible but finishes them with a smoother, sleeker bend, which is a nice option if you like structure more than rough texture. It works on long hair that has good shine and enough density to hold a soft wave.
The ends should look clean, not fluffy. Ask for soft layering through the top and face frame, then finish with a round brush or a large curling iron to polish the surface. A drop of serum on the last few inches helps, but keep it light or the layers will go limp.
This cut is a good bridge between classic long hair and the shag family. It gives you the shape without the mess.
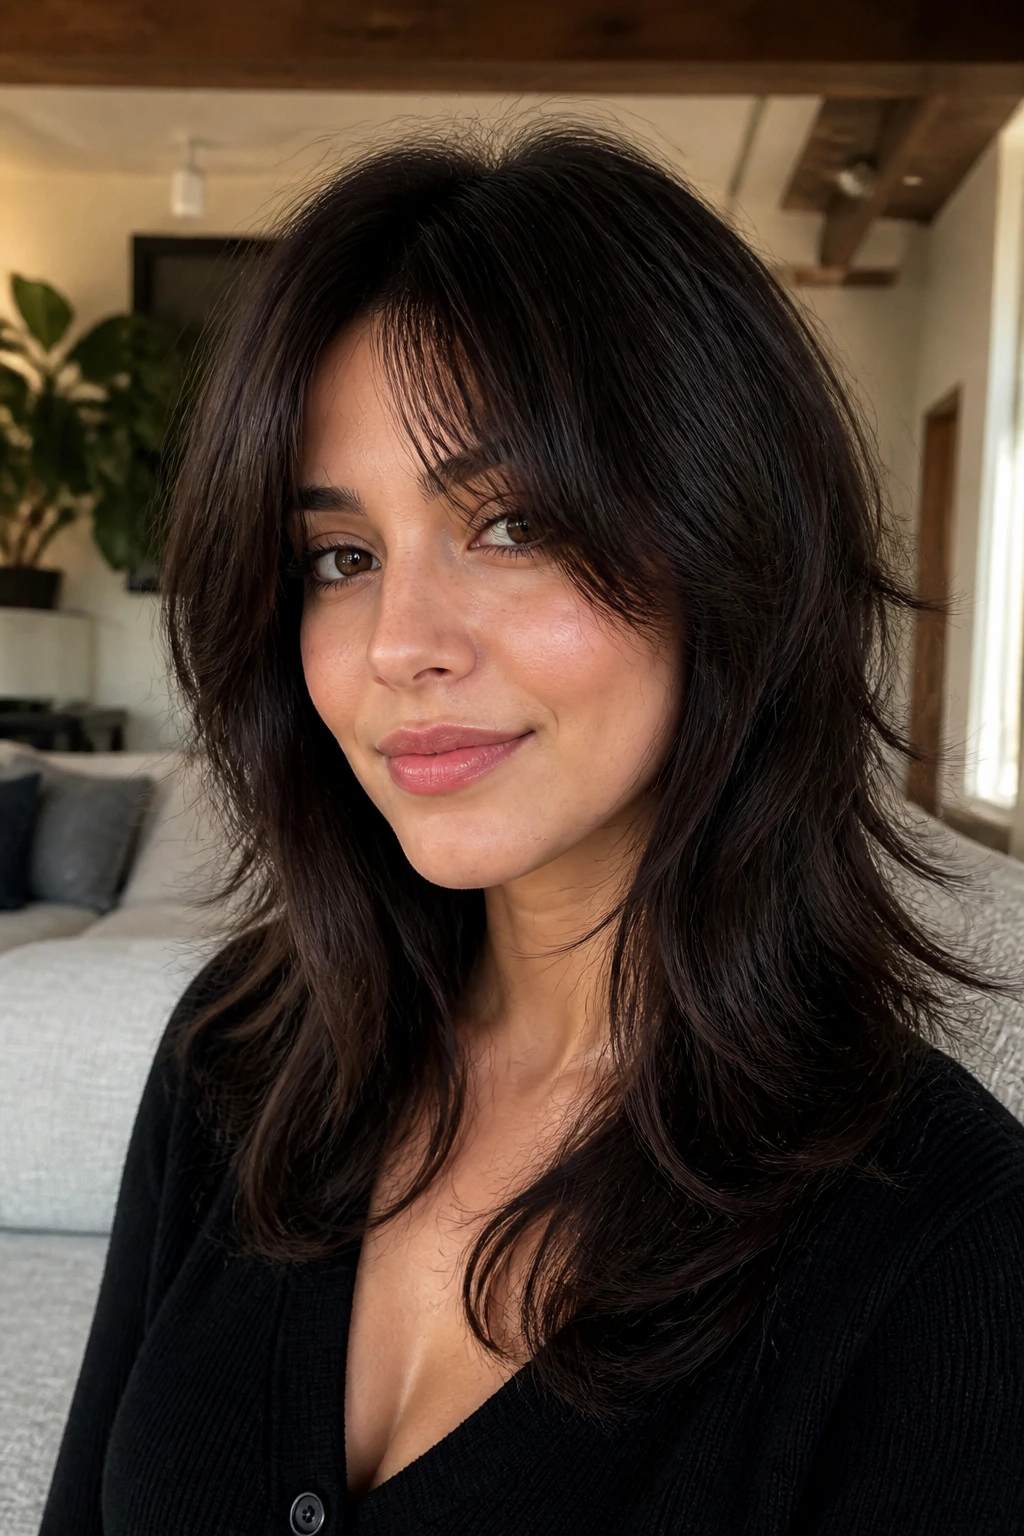
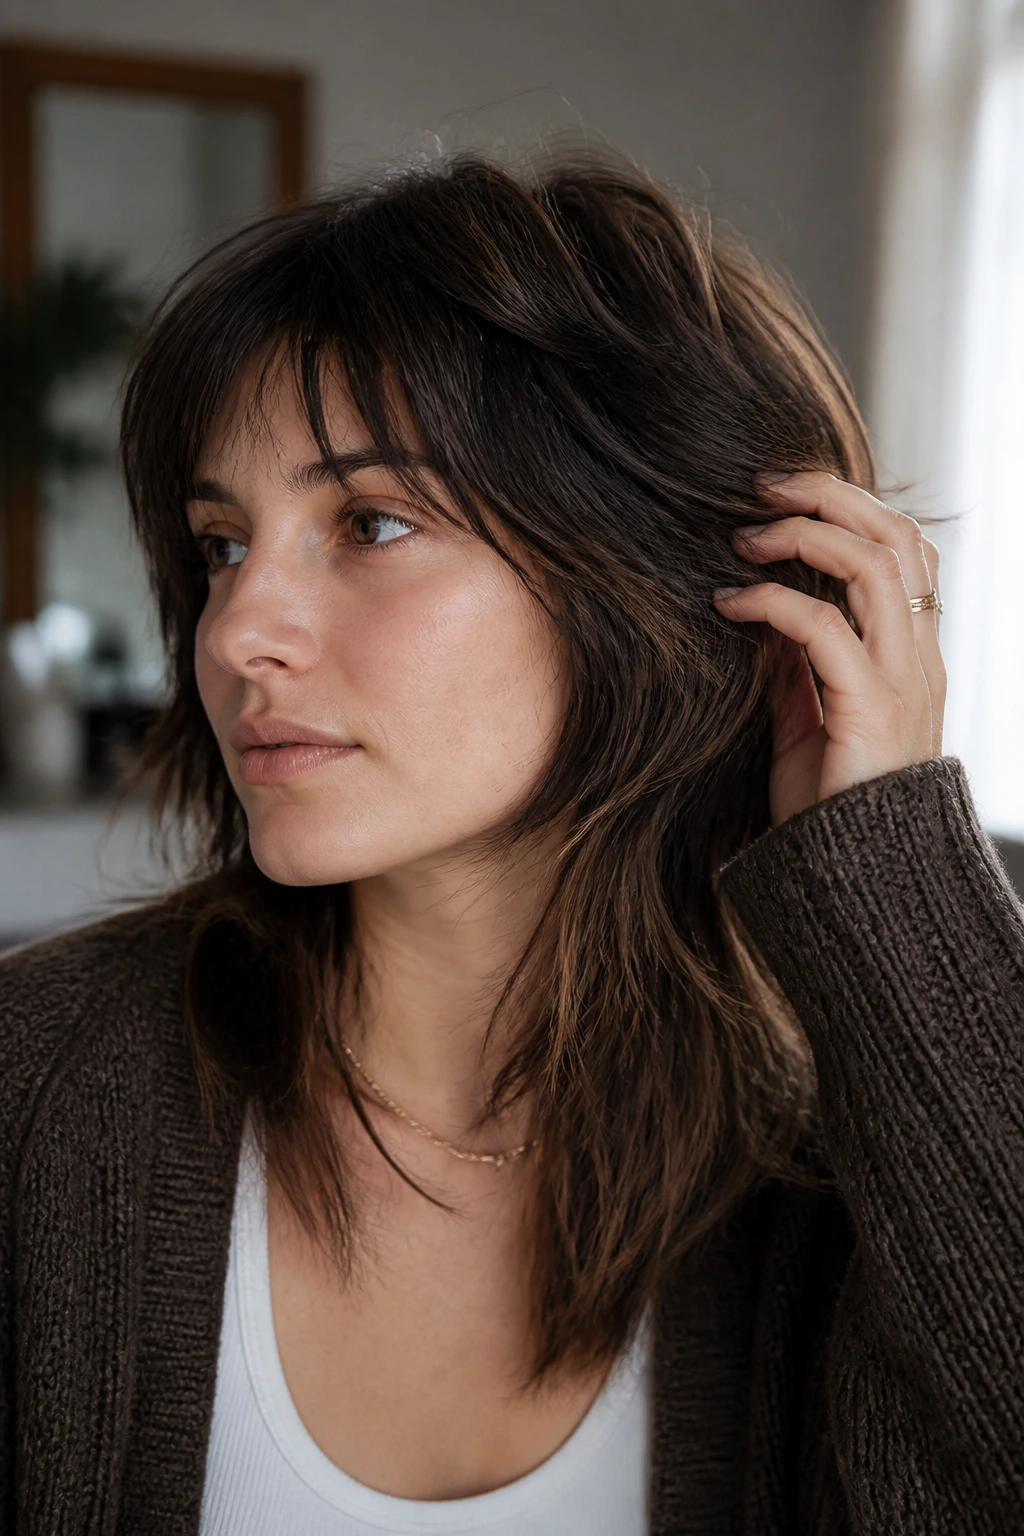
22. Soft Tousled Shag with a Narrow Fringe
The last one in the set is probably the easiest to wear. A narrow fringe keeps the forehead light, and the rest of the haircut stays softly tousled through the sides and back. It has movement, but it doesn’t shout about it.
That narrow fringe is useful if you have a small forehead or you hate a full curtain bang sitting in your eyes. It gives the cut personality without taking over the whole face. The long layers around it should be gentle and broken, not aggressively sliced.
This is the shag for people who want a little texture and a little polish in the same haircut. It doesn’t need much to look finished.
Why the Short Shag Shape Works on Long Hair
The reason these cuts hold up is simple: they redistribute weight. Long hair gets heavy at the bottom, and when the crown and upper sides are too full, the whole head shape collapses into one long rectangle. A short shag interrupts that. It lifts the top, opens the sides, and keeps the perimeter long enough to preserve the feel of long hair.
The best versions rely on internal layers, point cutting, and a little overdirection. Those terms matter. Internal layers remove bulk where you can’t see them, point cutting softens the line so it doesn’t look hacked at, and overdirection lets the stylist shape the fall of the hair instead of just stacking pieces on top of one another. That’s why a good shag looks like it has movement even before you style it.
There’s another reason this cut keeps winning: it adapts. A center part makes it feel modern. A side part makes it softer. Curls make it bouncier. Straight hair makes the layers more obvious. Same haircut, different mood. That flexibility is the whole appeal.
What to Tell Your Stylist Before the First Snip
Bring photos, but bring the right photos. One should show the overall shape you want, and one should show the fringe or face frame. That gives your stylist a picture of both the silhouette and the detail work, which are not always the same thing. If you only show one angle, you can end up with a cut that looks right from the front and strange from the side.
Say how much length you are willing to lose, and say it in inches if you can. “I want to keep the longest pieces below my collarbone” is more useful than “don’t cut too much.” Point to the spot where you want the shortest layer to land. That single detail changes the whole haircut.
Also tell them how you wear your hair. If you air-dry, say so. If you curl it once a week and leave it alone the rest of the time, say that too. A shag that depends on daily blow-drying is a bad fit for a person who reaches for a claw clip and goes.
For curly hair, ask whether the cut will be done dry or on stretched hair. For very fine hair, ask them not to over-layer the ends. Those little conversations save a lot of regret.
Essential Tools for Styling a Shag at Home
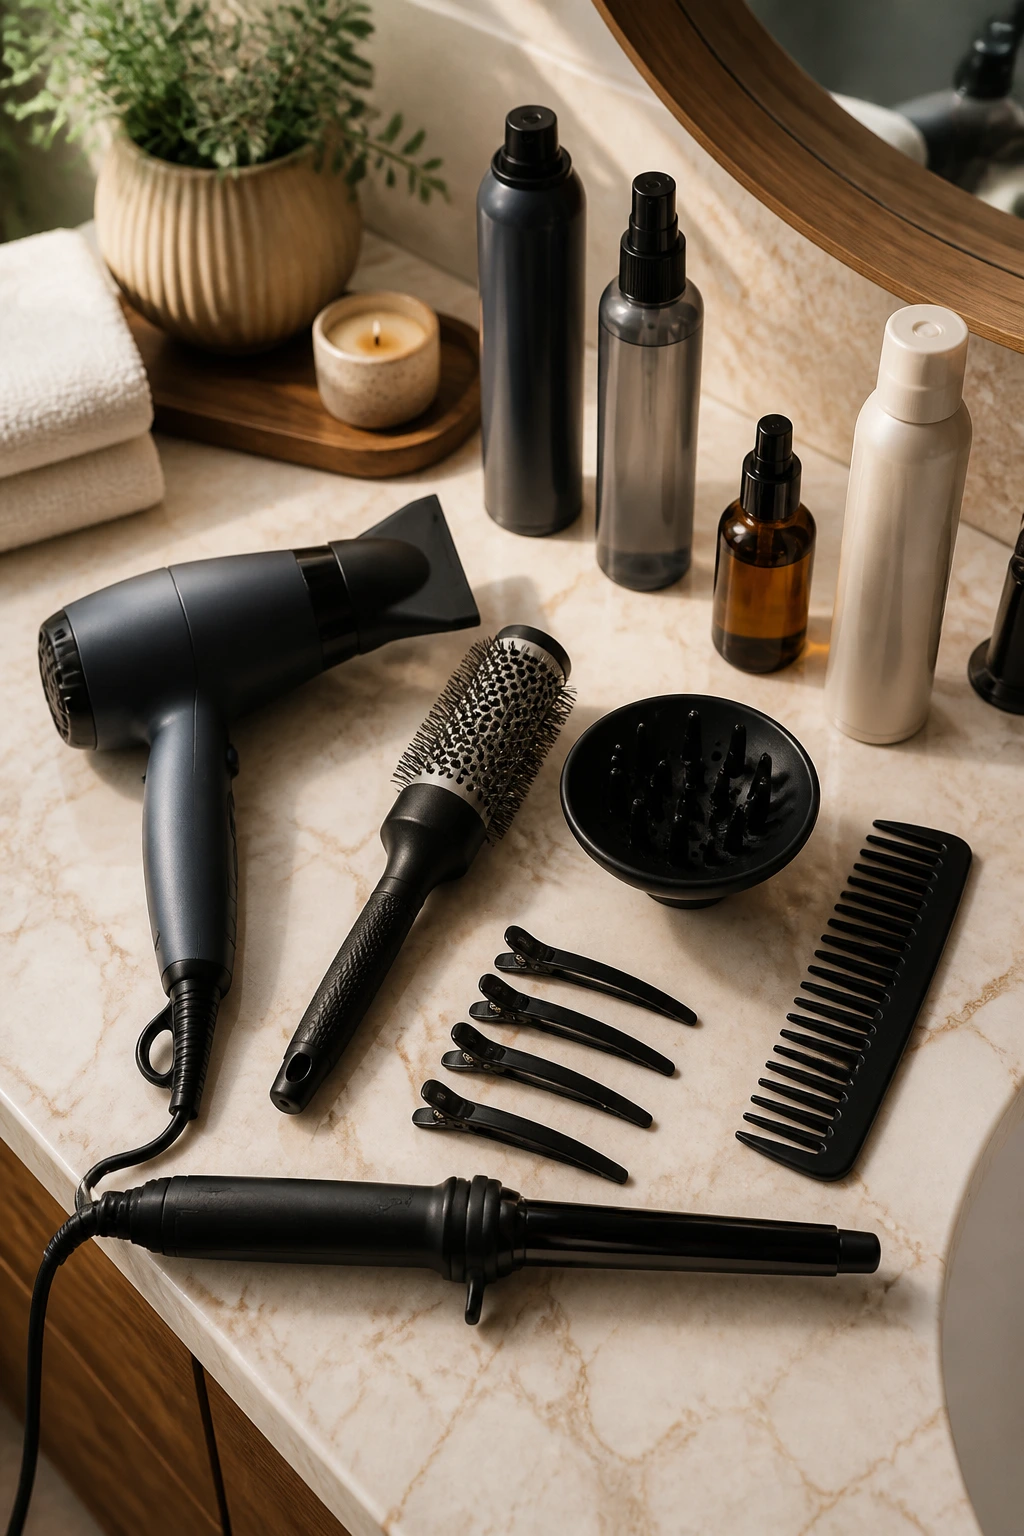
- Hair dryer with a nozzle attachment: Concentrates airflow at the roots so the crown lifts instead of puffing out.
- 1-inch to 1.25-inch round brush: Useful for bending the fringe and face frame without making tight curls.
- Diffuser: The safest choice for wavy and curly hair when you want the layers to dry with shape.
- Sectioning clips: Keep the top, sides, and fringe separate while you dry or iron.
- Light mousse or root lift spray: Gives fine hair enough hold to keep the layers visible.
- Texturizing spray: Best for straight or silky hair that needs a little grit after drying.
- Wide-tooth comb: Gentle on waves and curls, especially when hair is damp.
- Light serum: Smooths the last few inches of the hair without flattening the crown.
- 1-inch curling wand or iron: Good for adding a soft bend to the front pieces when your natural texture needs help.
- Dry shampoo: Helps the crown hold volume on day two or three, especially on fine hair.
How to Style Short Shag Haircuts for Long Hair
Root Lift: Work a walnut-size amount of mousse or root spray through damp roots, then dry the crown first. If you wait until the lengths are dry, the top usually lies down before the rest of the hair is finished.
Shape the front first: The fringe and face frame set the whole mood of the cut. Bend those pieces away from the face with a round brush or small iron, then leave the rest looser. If the front looks flat, the haircut looks flat.
Pick one texture lane: Choose straight, soft bend, or loose wave. Trying to force every section into a different pattern usually makes the layers look random instead of textured.
Use product where the cut needs it: Put smoothing cream on the last two or three inches only, and keep heavier oils away from the roots. A shag dies fast under weight.
Finish with a cool blast: Whether you blow-dry or diffuse, a final cool shot helps the shape set. It sounds small. It isn’t.
Trims, Grow-Out, and Day-to-Day Maintenance
A short shag on long hair needs regular dusting if you want the shape to stay clear. For a sharper version with bangs, plan on a trim every 8 to 10 weeks. For a softer shag with no fringe, you can usually stretch that to 10 to 12 weeks before the layers start losing their rhythm. Waiting much longer tends to make the crown heavy again.
At night, protect the front pieces. A loose braid, a silk scrunchie, or a soft clip at the crown keeps the fringe from kinking hard against the pillow. If you sleep with wet hair, the shorter layers can dry in odd bends that take a full wash to fix. That is not a fun surprise at 7 a.m.
On day two, use dry shampoo at the roots before the hair goes limp. Shake it in, wait a minute, then brush lightly at the crown. For a quick refresh, mist the face frame with water and scrunch just the ends. Do not soak the whole head unless you want to start from zero.
If you want to grow the cut out, ask for “ribbon layers” or “soft blending” at the next trim instead of letting the shape disappear completely. That keeps the haircut wearable while it gets longer.
Additional Tips for More Movement and Less Puff
Lift: The fastest way to wake up a shag is a little root spray at the crown and a rough dry with your head tipped forward for the first minute or two. That small move keeps the top from collapsing before the hair even dries.
Texture: If your hair is straight and slippery, wrap a few sections around a 1.25-inch iron, leave the ends out, then finger-comb once they cool. The bend should look broken, not curled into rings.
Softness: Thick hair often needs a heavier perimeter than people expect. If the ends get too thin, the haircut can puff at the sides while the bottom disappears. Ask your stylist to keep some density at the outline.
Make-it-yours: Fine hair likes fewer, smarter layers. Curly hair likes shape cut with shrinkage in mind. Coarse hair usually does better when the interior is debulked but the ends are left a little fuller. Same shag family, different math.
Common Mistakes That Flatten the Cut
- Taking too much off the perimeter: The symptom is obvious. Your ponytail gets skinny, and the whole haircut starts looking shorter than you wanted. The fix is to keep the outer line below the collarbone or shoulder line if length matters to you.
- Over-texturizing the ends: If the tips look feathery, dry, or see-through, the cut has gone too far. Ask for more interior layering and less attack on the last inch of hair.
- Ignoring your part: A center part won’t work for every face, and a side part won’t work for every cowlick. Style the cut where your hair naturally wants to fall, then adjust from there.
- Using heavy serum at the roots: This kills crown lift fast. Keep smoothing products on the bottom few inches only.
- Going too long between trims: The layers lose shape, bangs split, and the crown starts collapsing again. A shag needs maintenance if you want the movement to stay visible.
- Styling every piece the same way: Uniform curls or identical bends can make the cut look staged instead of alive. Leave some pieces looser and let the layers breathe.
Variations and Texture Tweaks to Try
Curly Crown Version: Keep the top layers short enough to encourage lift, but let the perimeter stay long so the curls do not spring too far above the shoulders. This version works best when the stylist cuts with shrinkage in mind and uses the natural curl pattern as the guide.
Fine-Hair Air Layer Version: Ask for fewer layers, placed mostly around the crown and face frame. The goal is to create movement without opening holes in the ends. If your hair is soft and slippery, this is the safer version.
Thick-Hair De-Bulk Version: Keep the outline full and remove weight from the interior only. This lets the cut move without turning the ends wispy. It’s the cleanest fix for hair that feels heavy at the roots and bulky at the bottom.
No-Fringe Version: If bangs are not your thing, start the shortest layers around the cheekbone and let the front pieces sweep naturally. You still get the shag shape, but the forehead stays open.
Polished Shag Version: Finish the hair smooth, with a soft bend instead of rough texture. This is a nice fit if you want the haircut to read refined during the week and messier on the weekend.
Frequently Asked Questions
Will a short shag make my long hair look shorter?
A little, yes, but not in a bad way. The perimeter still keeps the length, while the shorter layers make the top feel lighter and more lifted. If you want to preserve every inch, ask for a minimal-layer shag instead of a high crown shag.
Is this cut good for fine hair?
It can be, but only if the layers are controlled. Fine hair usually needs lift at the crown and a fairly solid outline at the bottom so the ends do not look thin. Too many layers can backfire fast.
Can curly hair wear a shag without looking triangular?
Yes, if the cut is shaped with shrinkage in mind. That usually means dry cutting or cutting on stretched hair, plus enough weight left at the perimeter to stop the sides from flaring out too wide.
How often should I trim it?
If you have bangs or a sharper fringe, every 8 to 10 weeks keeps the shape honest. Softer, fringe-free versions can often go 10 to 12 weeks before they start feeling sloppy.
What if I hate styling my hair every morning?
Choose a wash-and-go shag or a minimal-layer version. Those cuts rely more on the natural bend of the hair and less on a polished blowout, which makes them much easier to live with.
Should I ask for layers or a wolf cut?
They overlap, but they are not the same thing. A shag usually feels softer and more blended, while a wolf cut leans heavier into contrast and shorter top layers. If you want long hair that still behaves like long hair, ask for a soft shag.
Can I still wear my hair up?
Absolutely. In fact, that’s one reason this cut makes sense on long hair. A low ponytail, clip twist, or half-up style looks better when the front and crown already have shape.
What happens if the layers feel too choppy after the cut?
That usually means the shortest layers were taken too high or the ends were texturized too aggressively. A stylist can soften the line with blending on the next visit, but in the meantime use a smoother finish and keep product light so the pieces do not separate too much.
The Cut That Keeps Its Shape
A good short shag on long hair never feels lazy. It has a point of view. The crown is lighter, the face frame does real work, and the length still gives you that swing you wanted in the first place. That combination is the reason these cuts keep coming back, even when the styling mood changes.
Pick the version that matches your texture instead of the version that looks most dramatic in a photo. That is where the cut starts to pay off, because it stops being a style you manage and becomes one that moves with you.