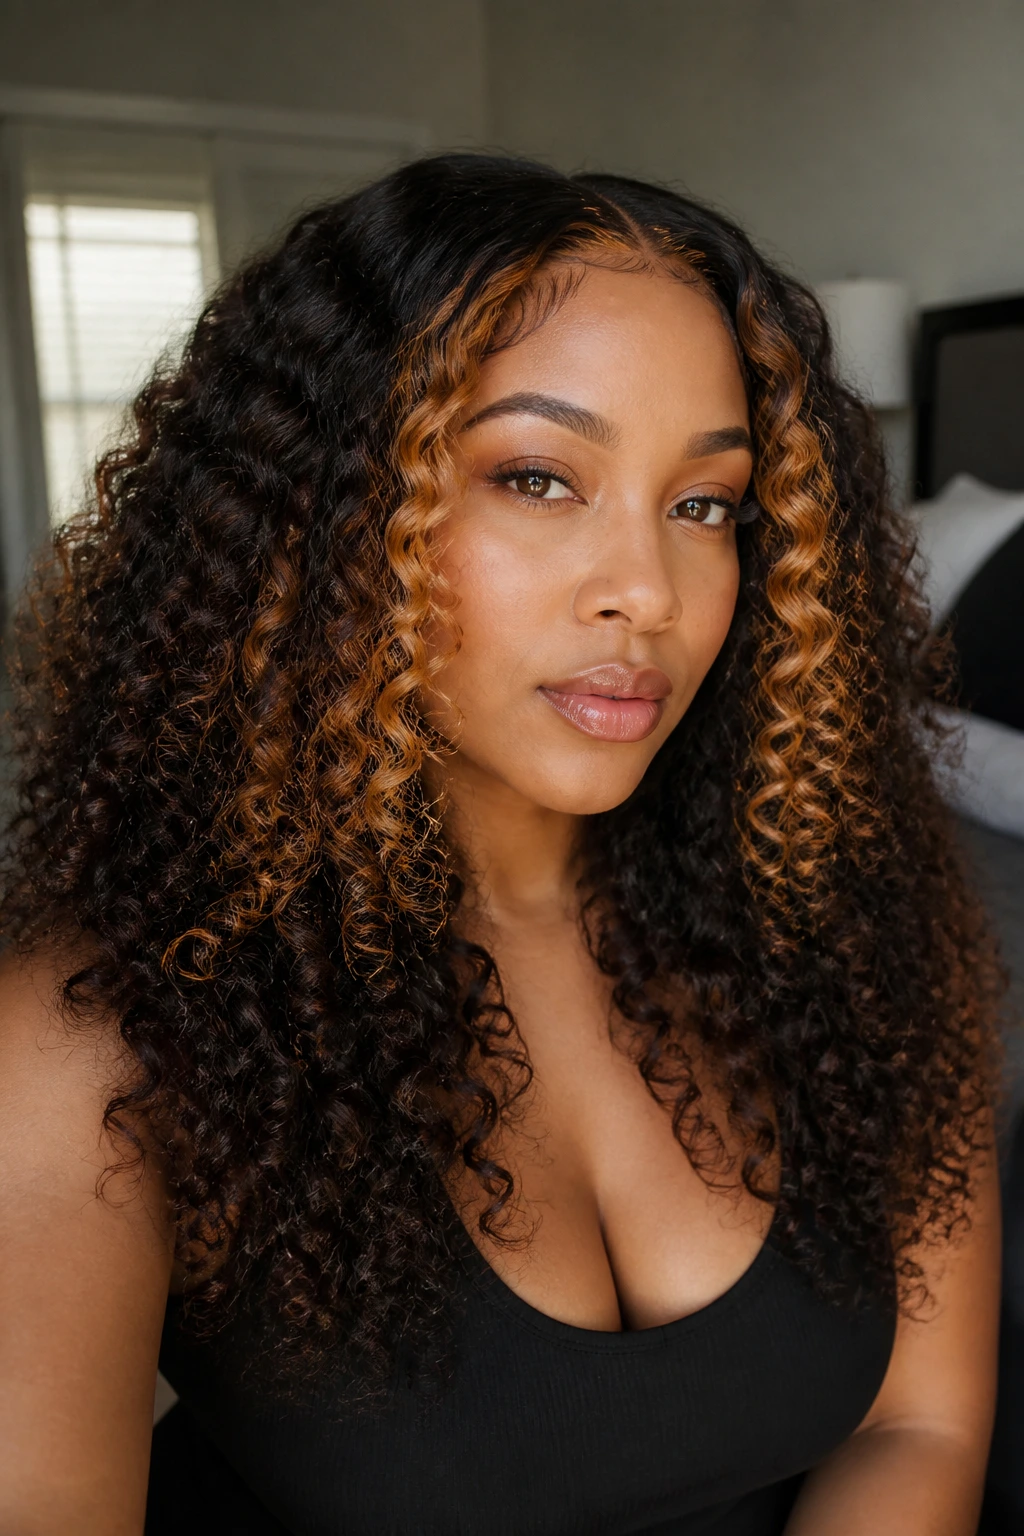
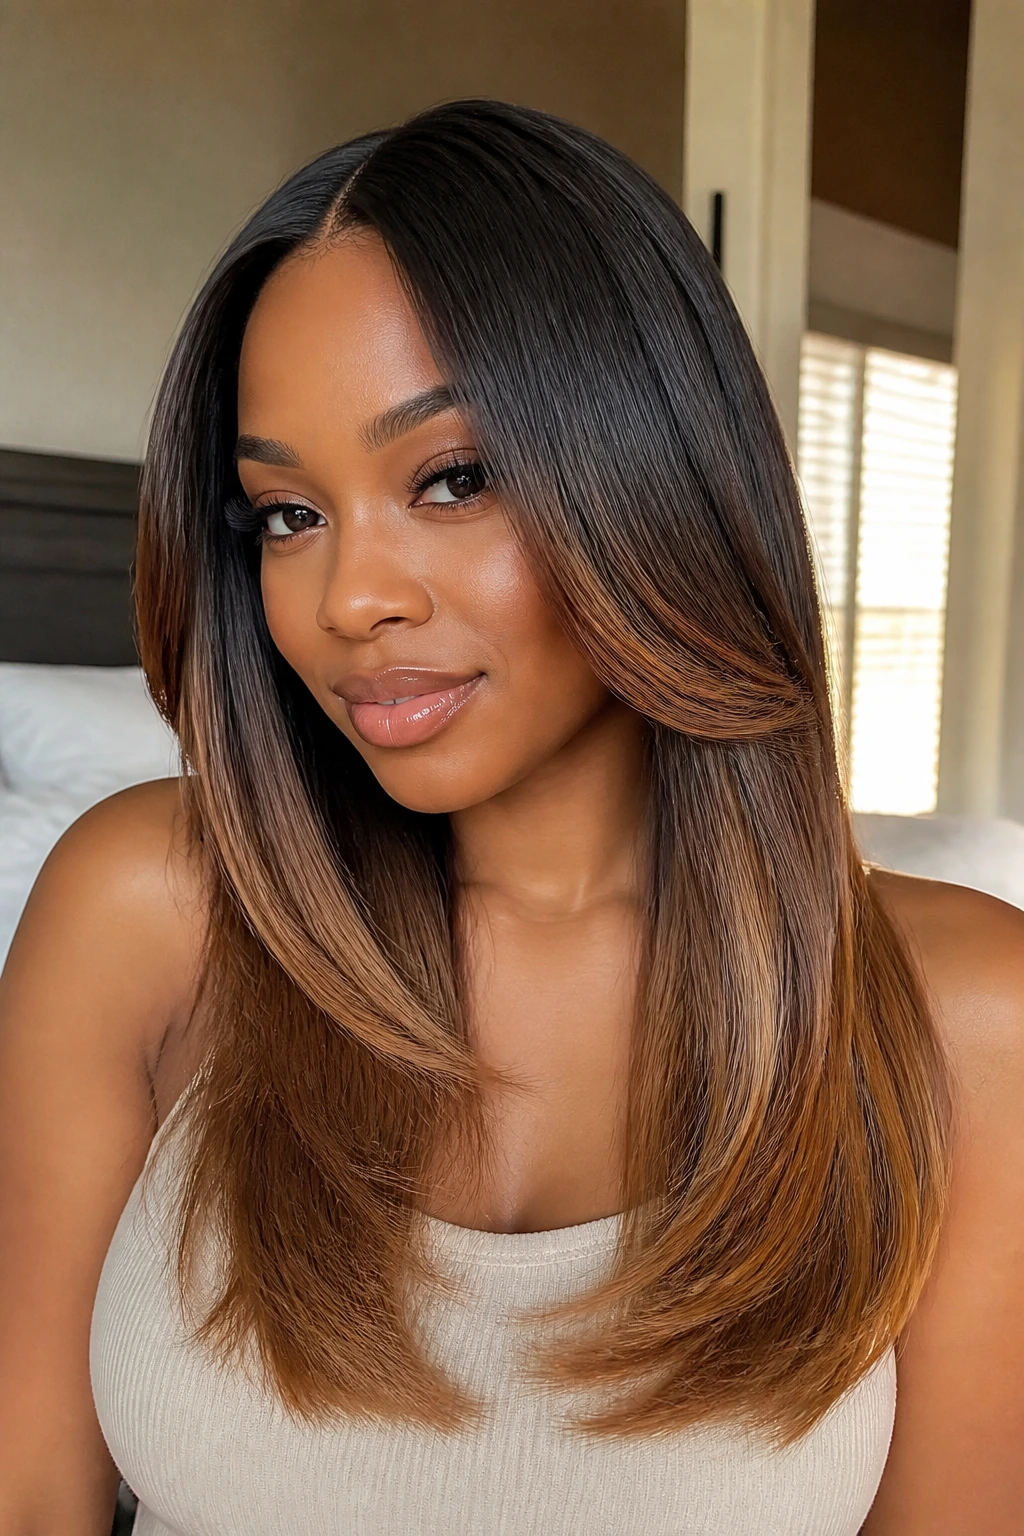
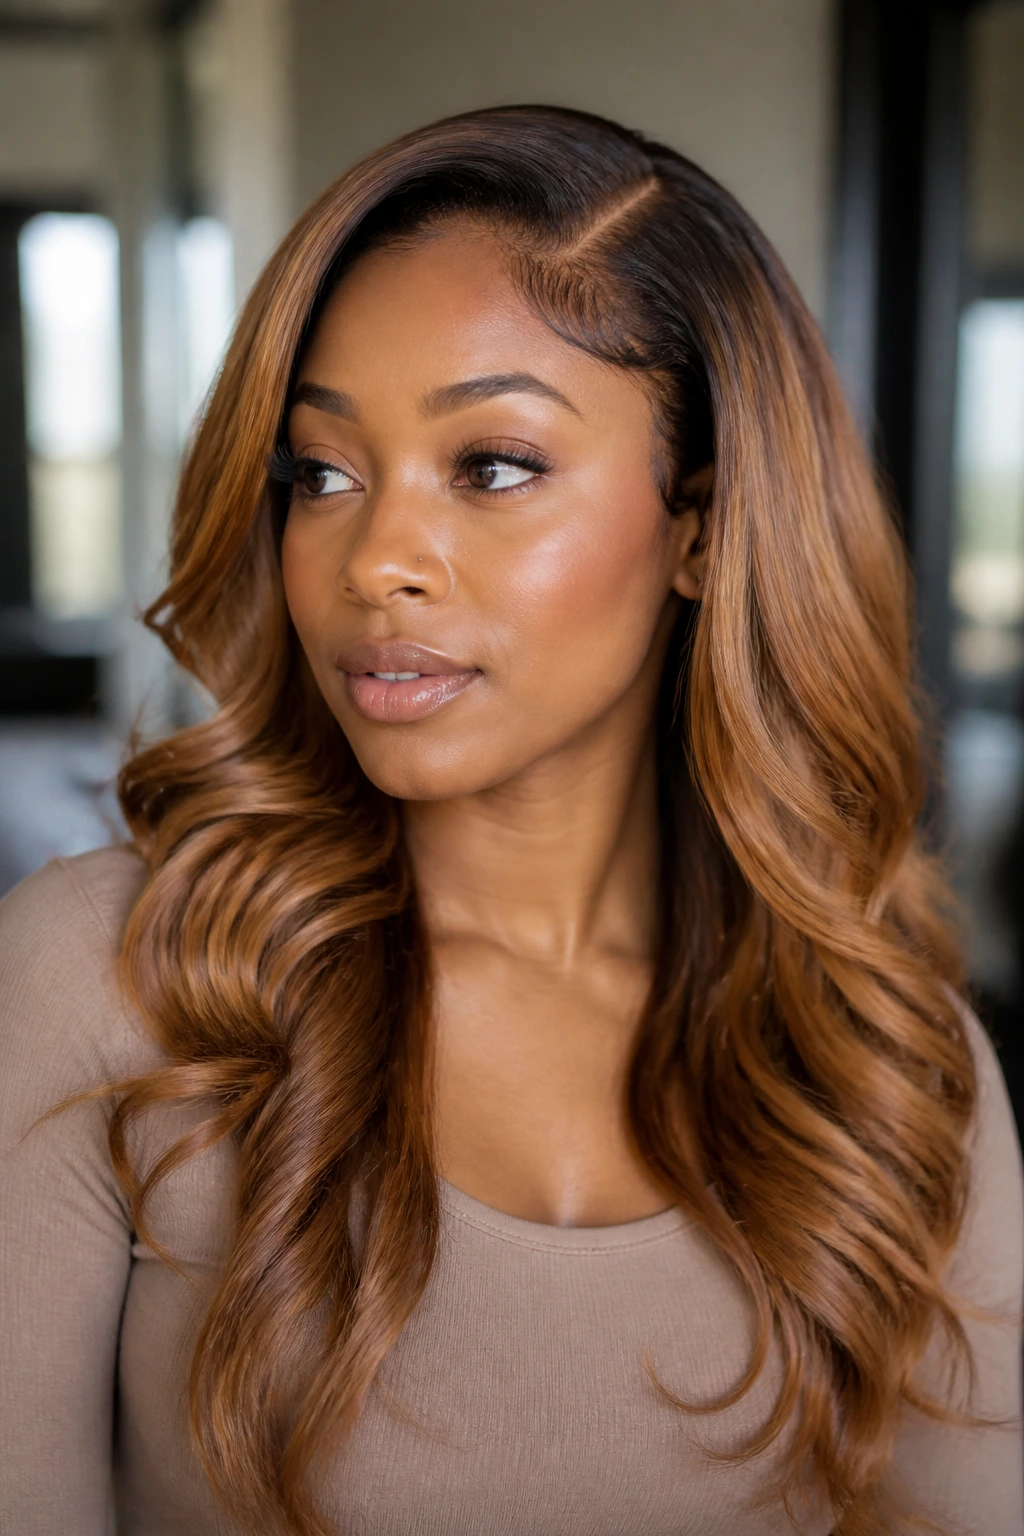
Thick hair and caramel tones have a way of making each other look better. The density gives the sew-in something to sit on, and the color keeps that density from turning into one heavy, dark sheet. When the install is shaped well, you get movement in the ends, warmth around the face, and enough contrast to show off every curl, wave, and bend in the hair.
That is why sew-in hairstyles for thick hair with caramel tones tend to look so good in real life, not just in a salon mirror. Thick hair can carry longer lengths, fuller bundles, and a little more color drama without collapsing. Caramel does the rest. It softens black and deep brown bases, brings out texture, and gives the whole style a little dimension even when the cut is simple. The trick is choosing the right kind of caramel for the shape you want — ribbons, ombré ends, face-framing pieces, or a full melt that reads richer than flashy.
The bad versions are easy to spot. The color sits too high and looks striped. The bundles are too blunt for the density. The leave-out is fried from too much flat ironing. None of that is hard to avoid, but it does take a little intention. And once you see how much better the right caramel placement works on thick hair, it’s hard to go back to one flat, one-note install.
Why These Looks Earn Their Keep
-
Thickness does the heavy lifting: Dense natural hair gives a sew-in a fuller foundation, so long layers and larger curl patterns hold their shape instead of looking limp by midday.
-
Caramel adds shape without shouting: Warm brown-blonde tones break up a dark base in a way that shows movement through the ends, the part, and the face frame.
-
The styles age better between salon visits: A good blend of caramel and deep brown hides a little root growth and a little frizz far better than a stark platinum stripe ever will.
-
You can choose your level of heat: Closure installs, U-parts, and leave-out options all work here, which means you can protect your own hair more or less depending on how much blending you want to do.
-
Thick hair can carry a cleaner silhouette: Blunt bobs, layered lobs, glam waves, and high ponies all hold their lines better when there’s actual density underneath them.
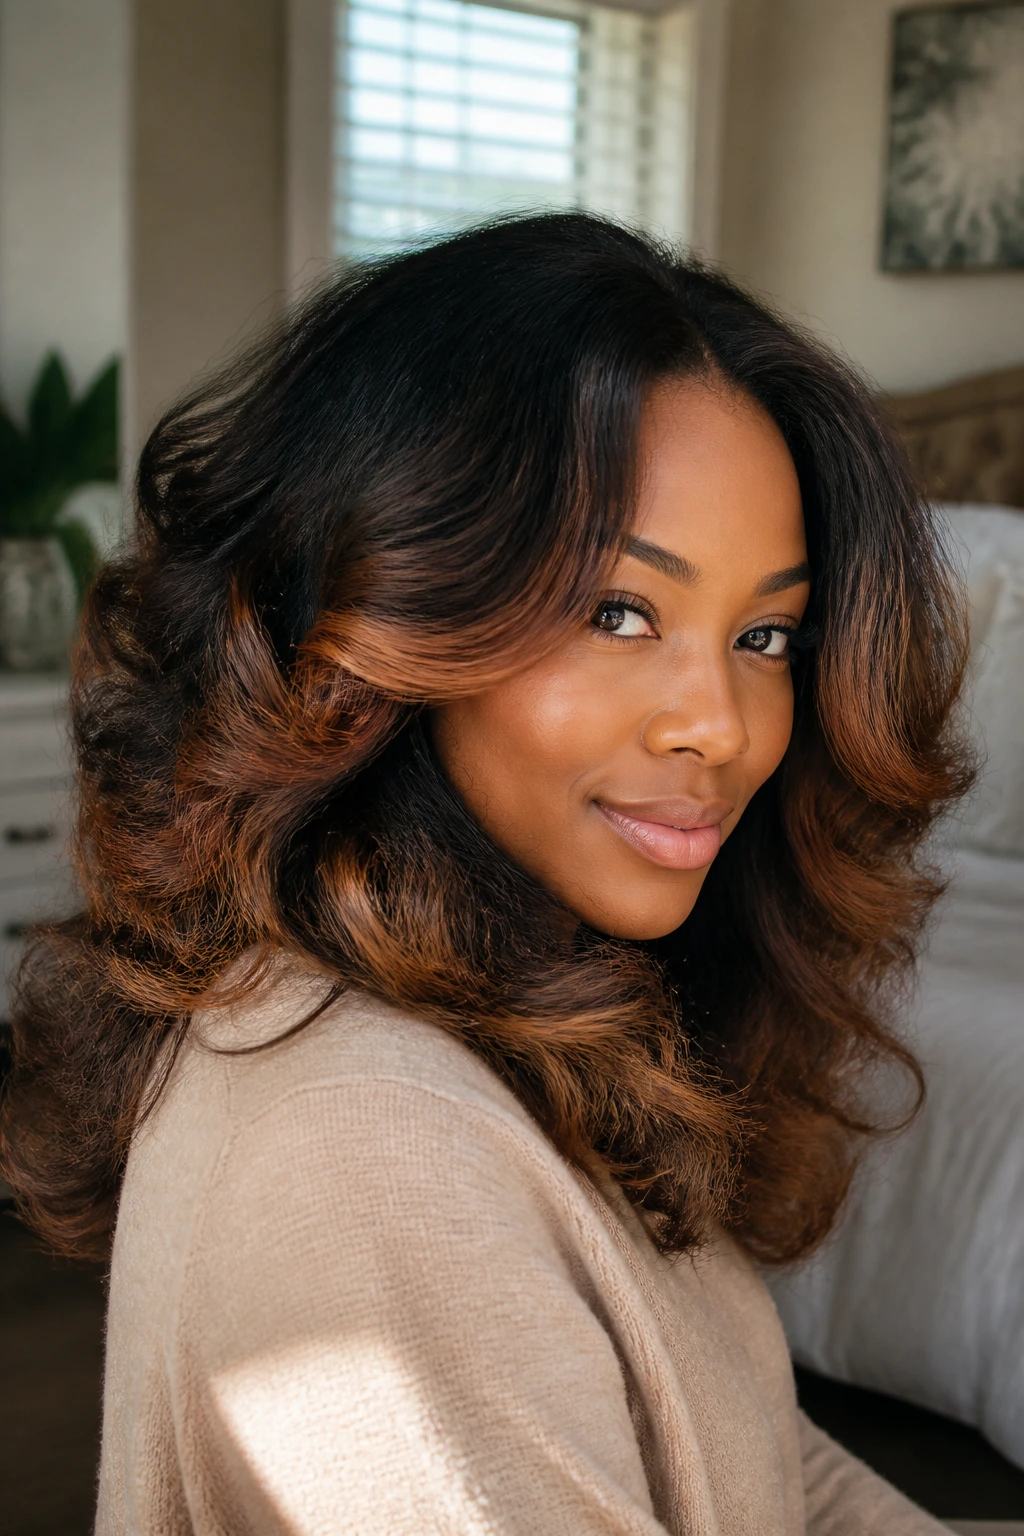
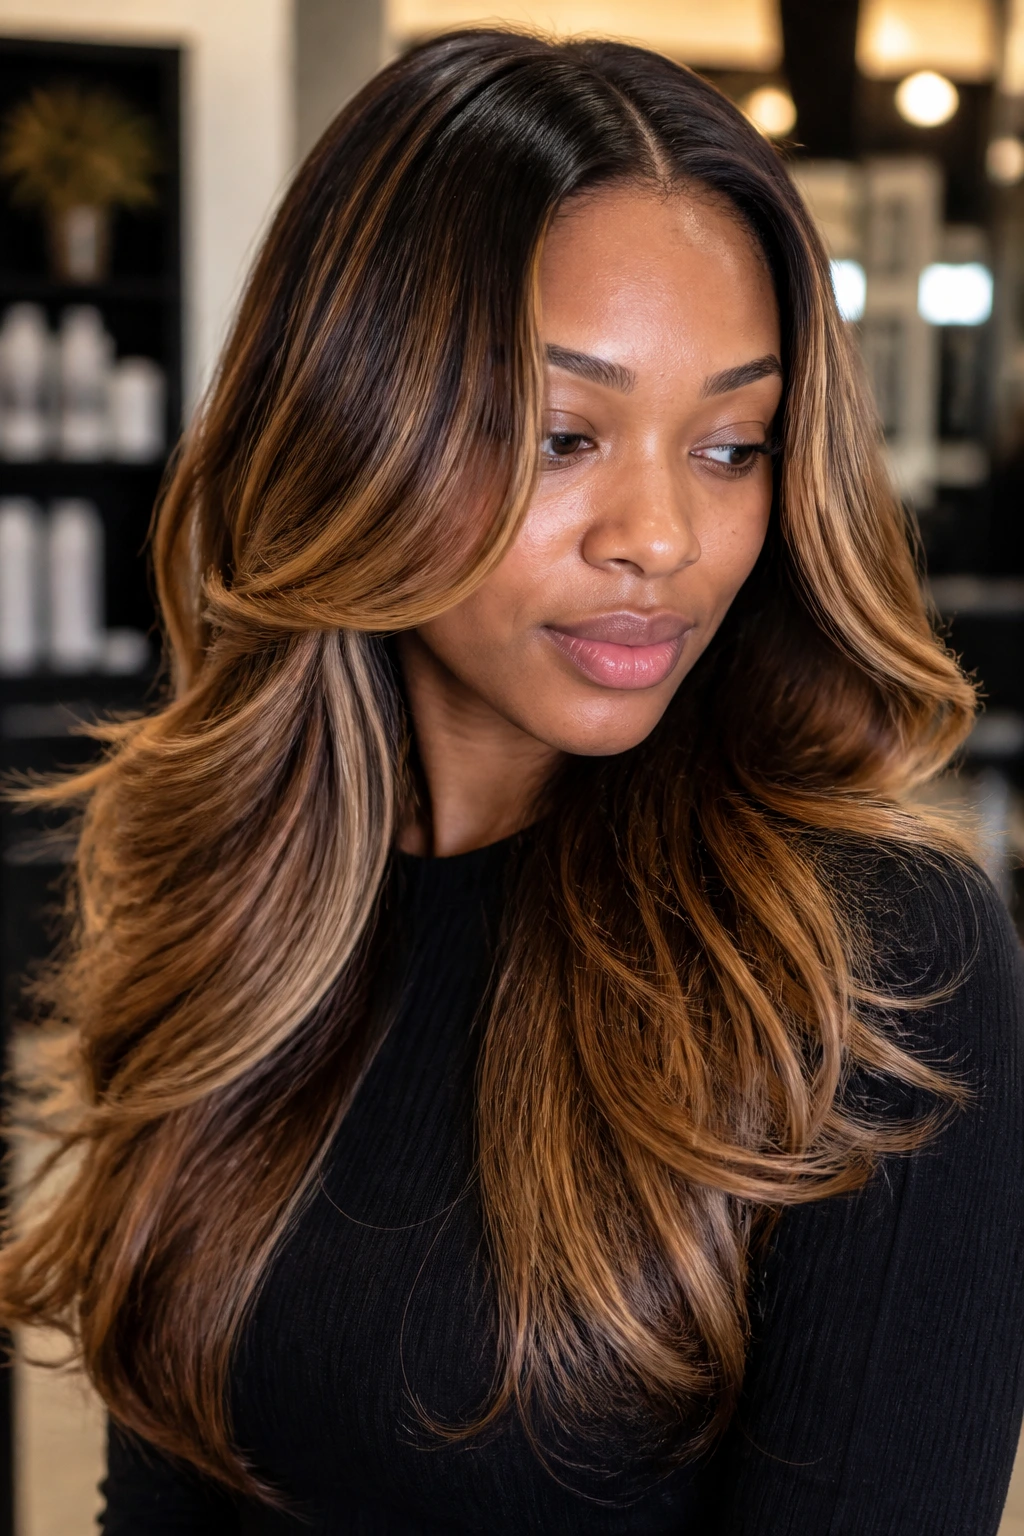
1. Long Body Waves with Caramel Ribbons
Long body waves are the style people reach for when they want the hair to move every time they turn their head. On thick hair, that movement matters even more, because the density underneath can make a straight install feel heavy fast. Add caramel ribbons through the mid-lengths and ends, and the whole look stops reading as one solid block.
The best part is the softness around the face. Caramel placed in thin, curved ribbons near the front of the hair catches the eye without looking stripey. Ask for a dark brown base with level 7 to level 8 caramel ribbons, not chunky blocks. Those thinner panels look cleaner once the waves are brushed out.
Why it works on dense hair
Body waves give thick hair a place to relax. The S-shape keeps the style from sitting flat against the shoulders, and the caramel makes the texture easier to see from across a room. If the waves are too uniform, the look can turn stiff. If they’re too loose, the install can feel blown open. The sweet spot is a bend that starts from about ear level and falls into soft, brushed-out ends.
For the chair, I’d ask for minimal layers through the top and a little more removal of weight through the lower lengths. Thick hair can take it. In fact, it usually needs it. If you want the color to show, keep the roots deep and let the caramel live in the movement.
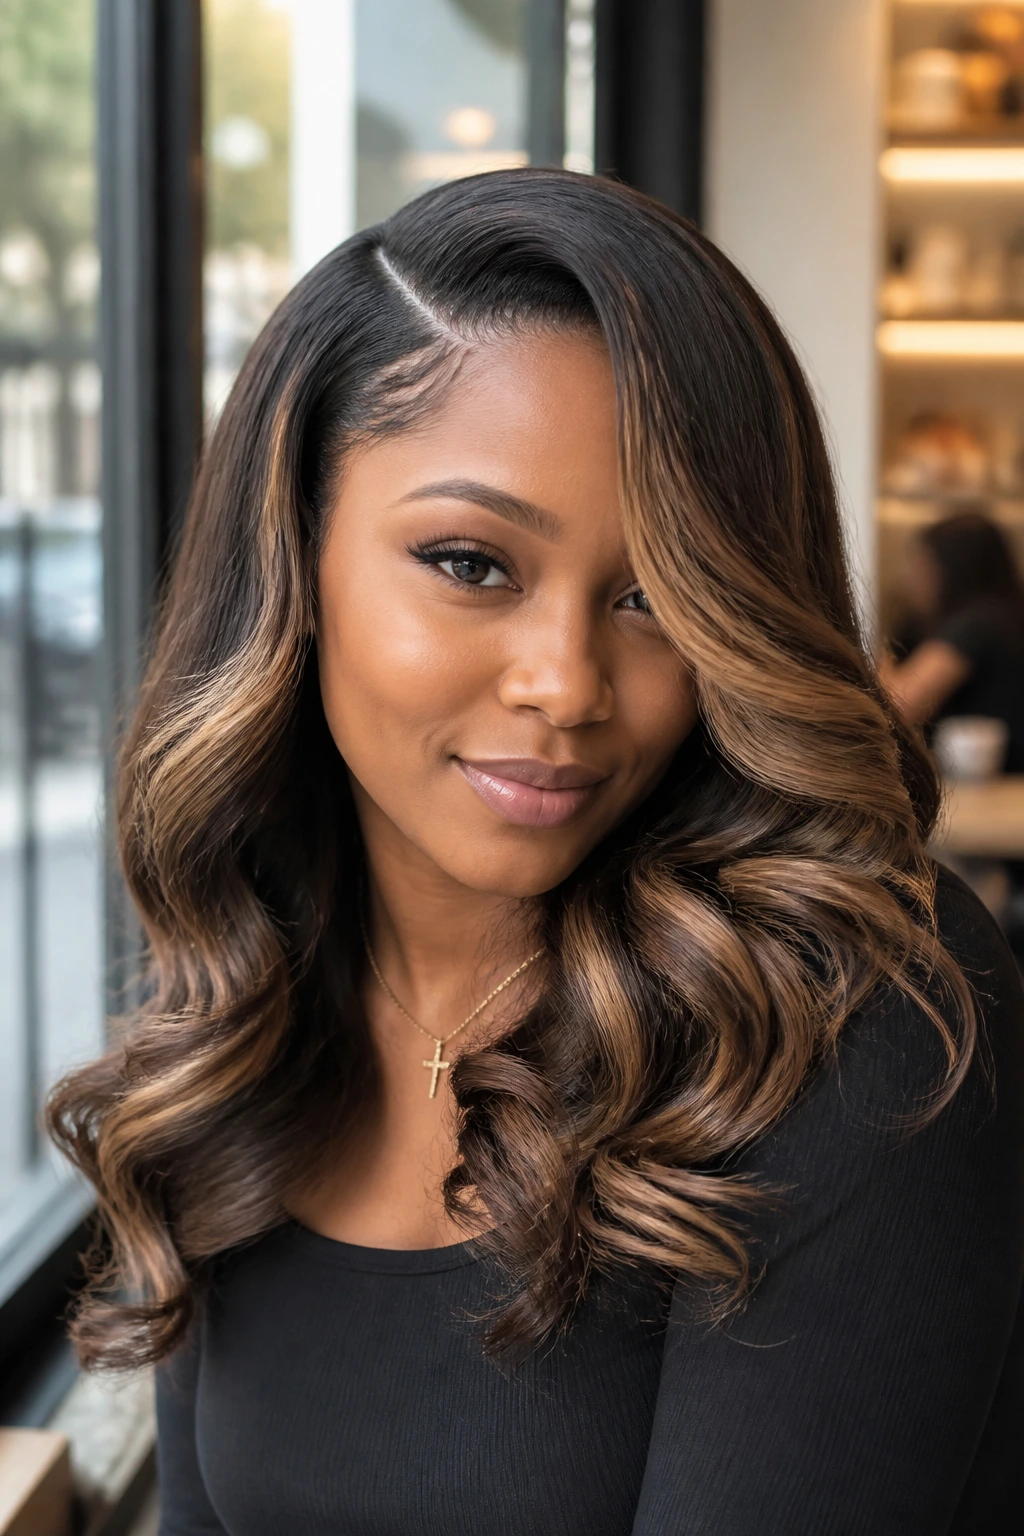
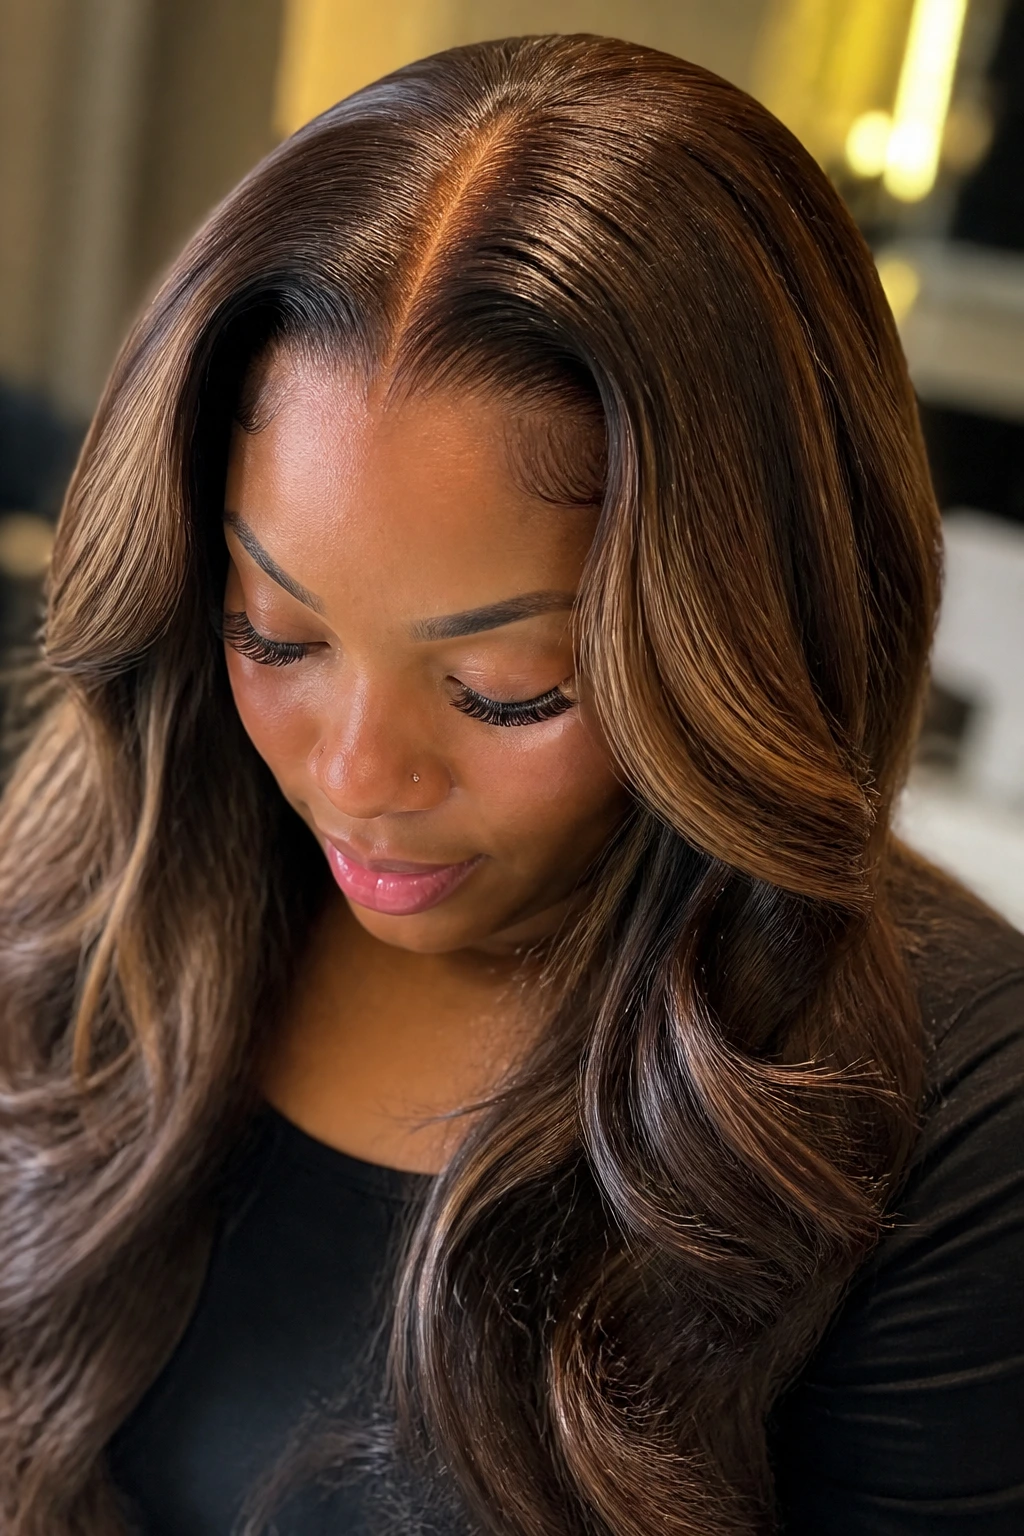
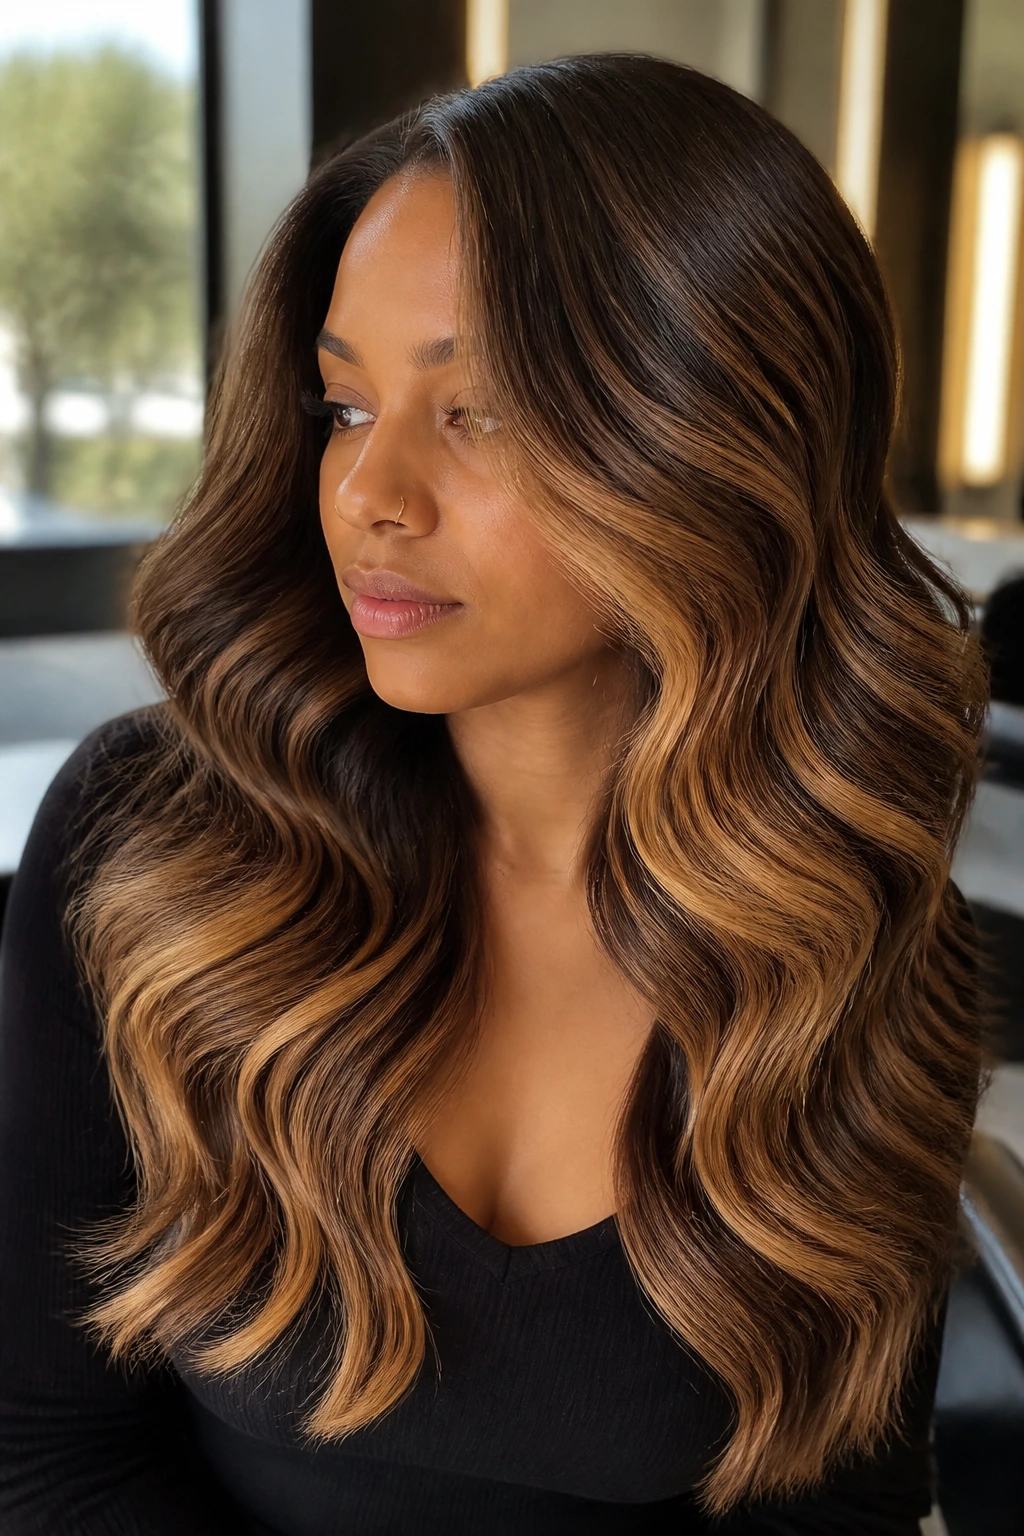
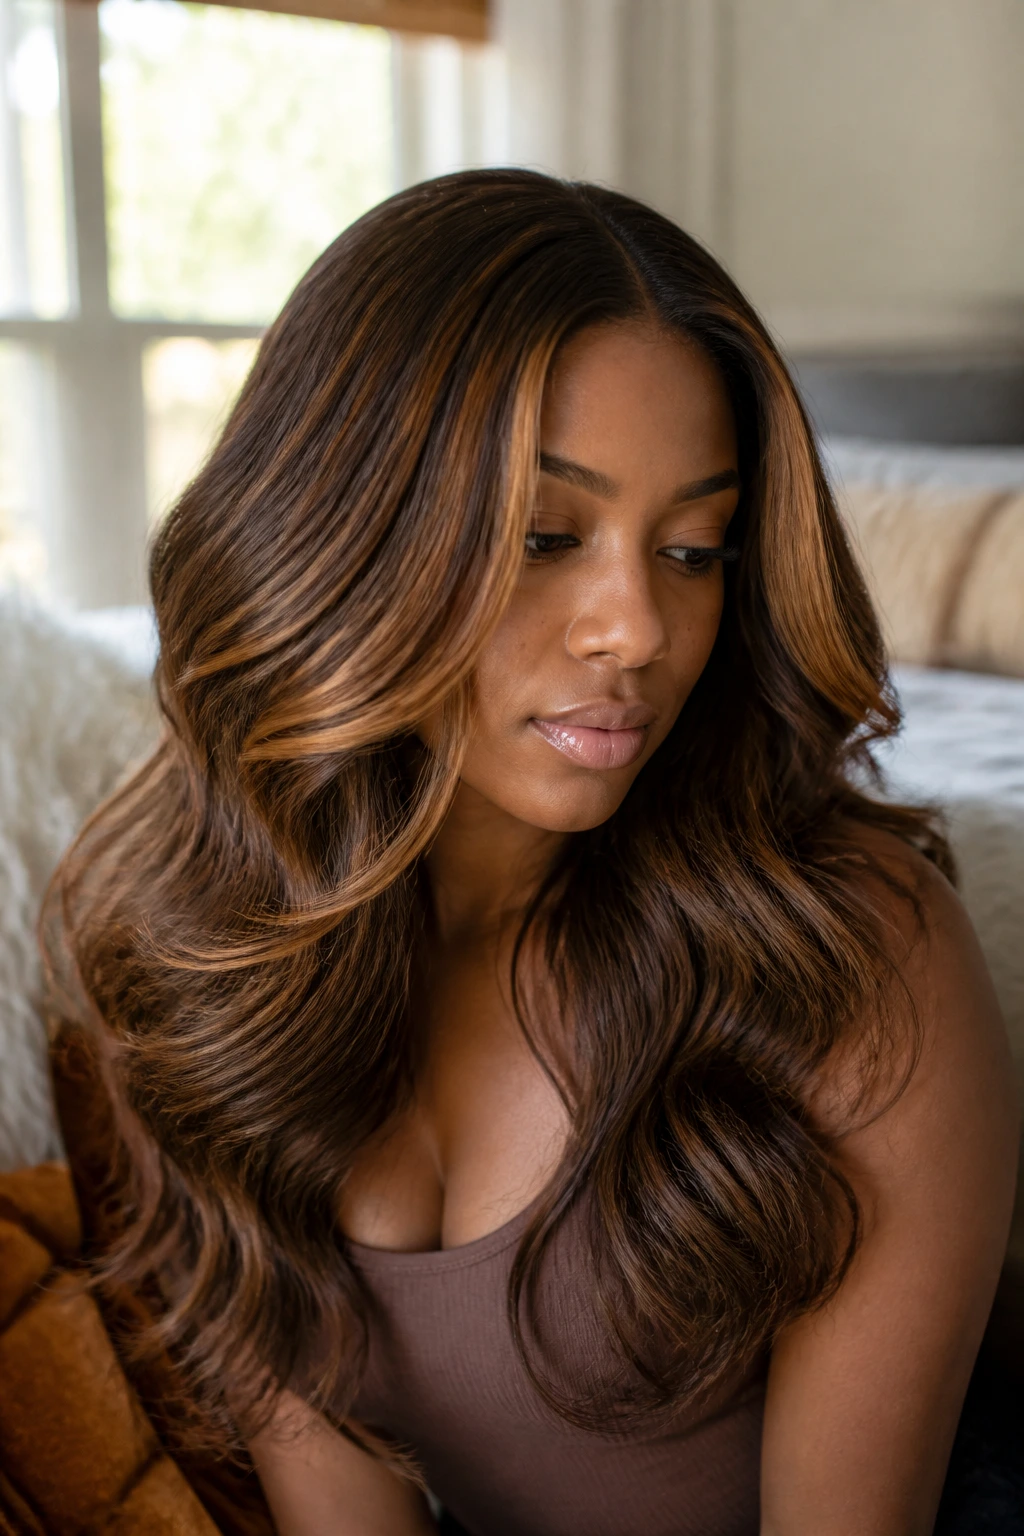
2. Layered Middle-Part Sew-In with Melted Balayage
A center part can be unforgiving on thin hair. On thick hair, it looks deliberate, clean, and expensive-looking in the best way. A layered middle-part sew-in with a melted caramel balayage is one of those styles that seems simple until you notice how much shape is buried in it.
The melt matters. Instead of a hard line where dark hair turns light, the caramel should shift gradually from the midshaft down to the ends. That soft fade gives the install depth from every angle, especially when the hair falls straight or in a loose bend. Thick hair helps the whole style sit in place; the layers keep it from feeling boxy.
If you like polished hair but hate the helmet effect, this is the one. Ask for face-framing layers starting below the cheekbone and a color melt that stays warmer than ash. Ashy caramel can look dusty against a deep base. Warm caramel reads richer, and richer is the point here.
A middle part also gives you a lot of flexibility. Wear it sleek with a flat iron bend, or add a soft barrel curl at the ends. Either way, the layers should move before the color does. That’s the part people notice first.
3. Side-Part Glam Waves with Honey Face-Framing Pieces
What happens when you want volume without dragging the whole style forward? A deep side part solves that. Add honey-toned face-framing pieces, and thick hair suddenly looks carved instead of merely full.
This style leans into drama. One side opens the face, the front pieces slide across the cheekbone, and the caramel shows up exactly where light naturally hits. It’s a smart move if your own hair is dense around the perimeter and you want the install to feel airy near the front without losing fullness in the back.
Ask for this at the chair
- A deep side part with the heavier side tucked behind the ear.
- Honey caramel face-framing pieces starting around the chin or cheekbone.
- Loose, brushed-out waves rather than tight spirals.
- A little extra fullness at the crown so the style doesn’t cave in on the part side.
The best thing about this one is the balance. Thick hair keeps the side part from going flat, and the honey pieces keep the face from disappearing behind all that dark length. If your natural undertone runs warm, this shade does even more work. If your undertone is cooler, keep the honey closer to beige-caramel than golden-yellow.
4. Bone-Straight Sew-In with Cinnamon Gloss
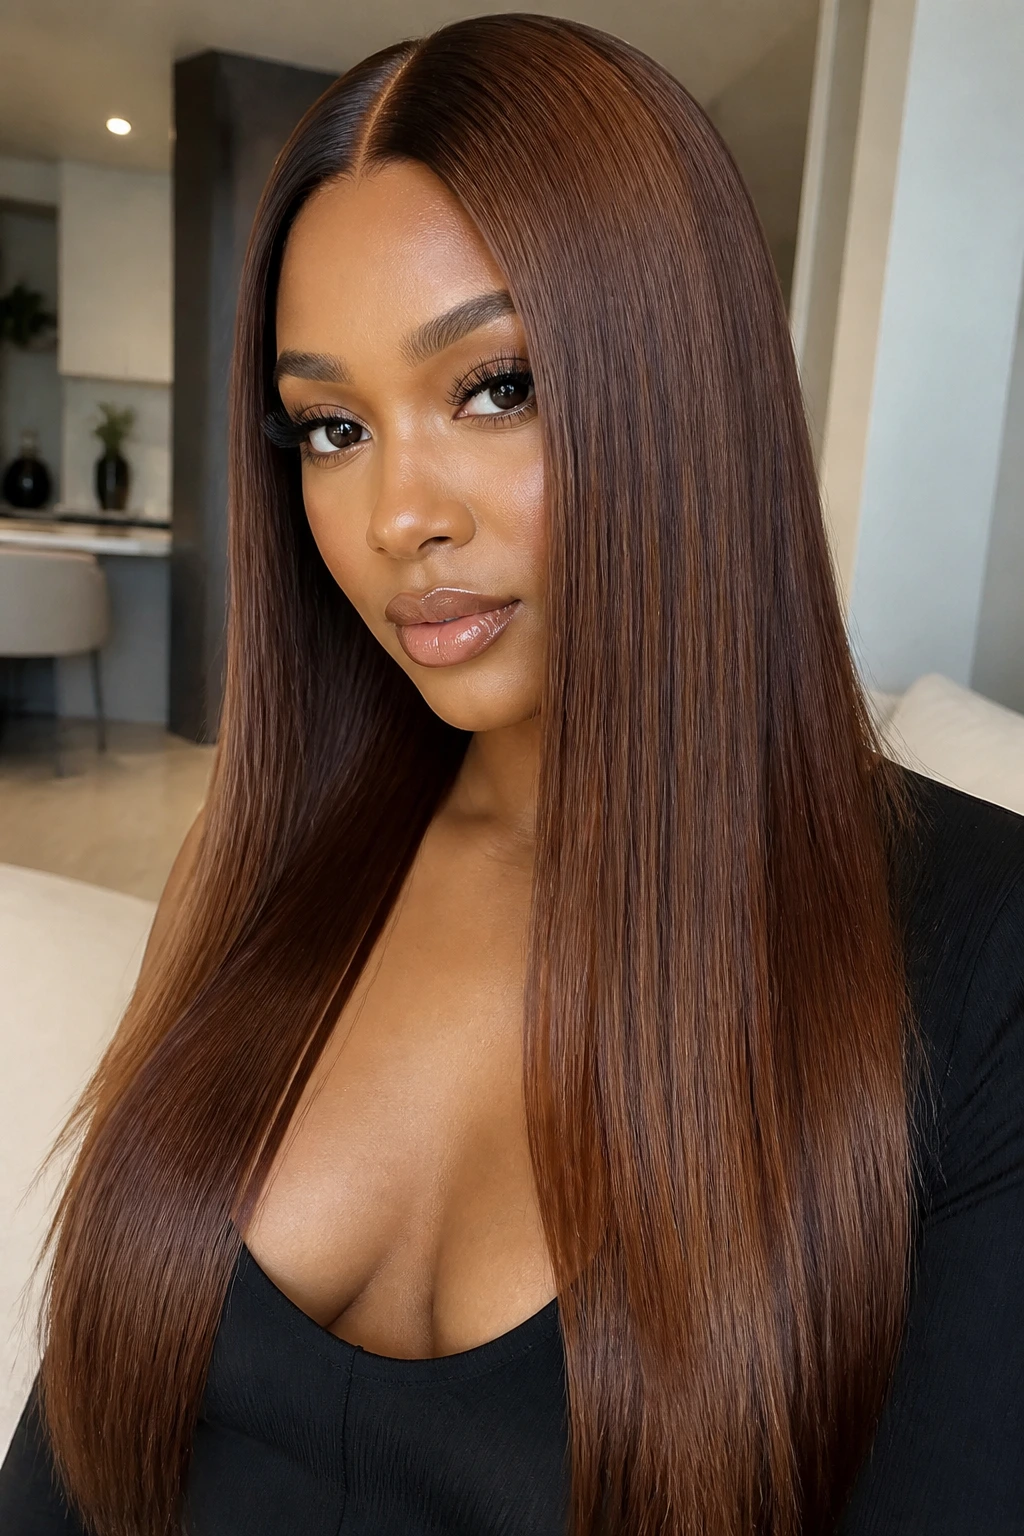
Straight hair on thick hair is not boring. It’s sharp. It’s clean. And when the color has a cinnamon-caramel gloss running through it, the style stops looking severe and starts looking expensive in a quiet, tailored way.
The key is shine, not just flat ironing. Thick hair can handle a crisp line from roots to ends, but it needs polish. A bone-straight sew-in with a deep brown base and a cinnamon glaze around the mid-lengths gives you that slick finish without making the hair look lifeless. I like this look best when the caramel is subdued — think toasted brown sugar rather than bright gold.
The clean part really matters here. A crisp middle part works well, but a side part can soften the face if the hairline is very full. And if you’re leaving some of your own hair out, keep the temperature controlled. 375°F is plenty for human-hair leave-out if you’re doing repeated passes. More heat does not fix a bad blend. It just burns it faster.
Straight styles are honest. Every bump shows. Every uneven bundle shows. That is exactly why a cinnamon gloss works so well: it adds visual depth without depending on curls to hide anything.
5. Collarbone Lob with Toasted Ends
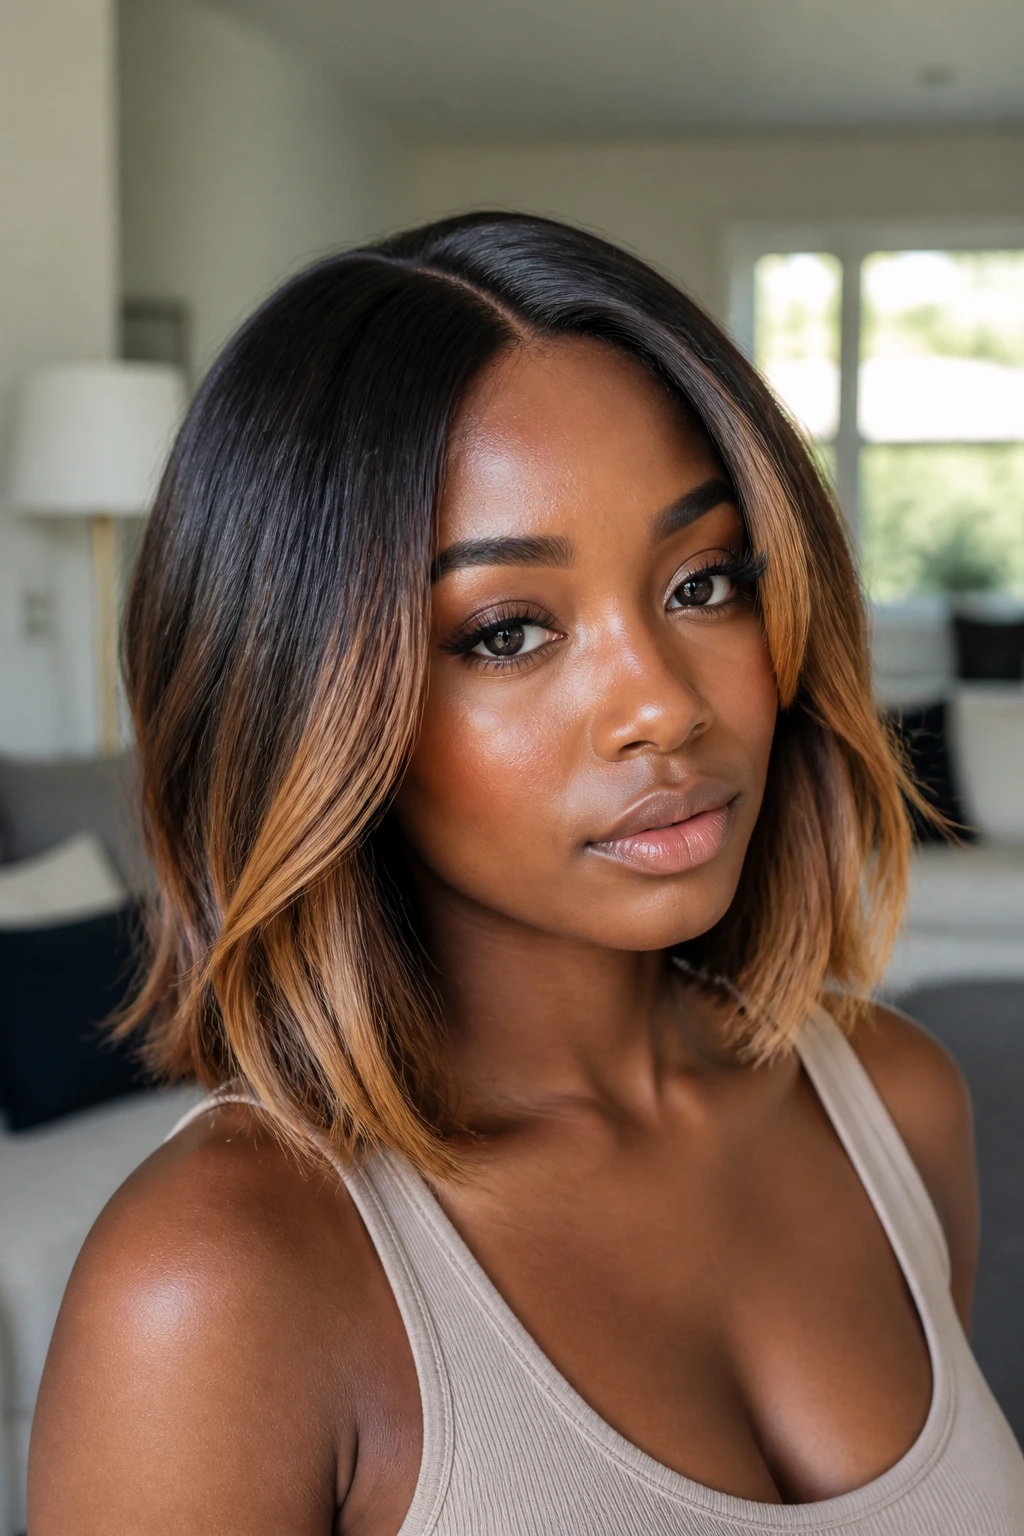
If thick hair keeps dragging every long style downward, cut the length back to collarbone range and watch the whole shape wake up. A lob gives the head room to breathe. Add toasted caramel on the ends, and the style gets a little warmth without losing its crisp outline.
This is one of my favorite options for people who love a polished look but don’t want the maintenance of long bundles every single day. The cut sits right where the neck starts to taper, so it feels lighter. The toasted ends also keep the bottom edge from looking too blunt or heavy. Thick hair can support a blunt line, sure, but a soft lob often looks more modern because it moves instead of sitting like a shelf.
A good version of this style usually uses slight internal layering so the ends don’t puff out. The caramel should stay concentrated from the lower third down, not sprayed all over the head. That keeps the shape clean. If the color climbs too high, the lob can start looking busy.
It’s a practical style too. Less length means less tangling, less friction on the nape, and less time spent trying to make the ends behave.
6. Curly Sew-In with Caramel Money Pieces
Curly sew-ins on thick hair have a built-in advantage: the density underneath stops the curls from looking sparse. Add caramel money pieces near the front, and you get the kind of bright frame that makes the whole face look a little more awake.
The curl pattern matters here. Loose 3B curls give a bigger, cloudier finish. Tighter 3C curls create more shrinkage and a fuller silhouette. Either works, but the caramel placement should stay deliberate. Two or three brighter pieces on each side of the face is usually enough. More than that, and the contrast starts stealing attention from the curl itself.
This style is also forgiving when it comes to upkeep. Curly hair doesn’t need to be pin-straight to look finished. A little frizz at the ends is fine. A little separation between curls is fine. In fact, too much combing makes the whole thing look overworked.
If your goal is warmth around the face without committing to full highlights, this is the smartest route. The rest of the hair can stay deep espresso or chocolate brown while the money pieces do the talking.
7. Deep Wave Sew-In with Ombré Caramel

Deep wave and caramel ombré make sense together because both rely on movement. The wave pattern gives the color something to sit in, and the color gives the wave pattern more depth than a solid dark install ever could.
I like ombré on thick hair because the density helps the transition feel gradual. The roots can stay darker, which keeps the install grounded. Then the caramel lifts through the mid-lengths and ends in a way that looks sun-warmed rather than streaky. On straighter hair, ombré can look harsh fast. On a deep-wave texture, the pattern breaks it up.
This style is one of the better choices if you want volume without a lot of daily styling. Deep wave hair holds its shape with mousse and a little scrunching. If you want to wear it more loosely, use a wide-tooth comb on damp hair and let the wave pattern do the rest.
The color should stay warm, not brassy. A caramel that leans amber or toffee tends to sit better against the curve of the wave. Bright gold can work too, but only if the base is rich enough to hold it.
8. U-Part Sew-In with Seamless Leave-Out
A U-part sew-in is for the person who wants the install to vanish into her own hair. Thick hair is one of the best candidates for this, because there’s usually enough density in the leave-out to cover the seam without having to press the hair into submission every day.
The best thing about a U-part on thick hair is how natural the part line can look when the texture match is good. If your own hair is blown out, a straight or soft-body-bend extension makes sense. If your hair holds a curl well, choose a texture that sits somewhere between straight and light wave. Caramel tones help here by breaking up the visual boundary between your hair and the extensions.
Best when you want less heat on your own hair
- Keep the leave-out small and clean.
- Match the curl or blowout pattern before adding heat.
- Choose caramel that sits close to your natural brown base.
- Keep the top section slightly longer so the seam stays hidden when you move.
I prefer this option when the goal is daily wear and a softer grow-out. There’s no lace front to keep glued down, and no heavy frontal to babysit. Just a well-made part, a good blend, and enough density at the crown to cover what needs covering.
9. Half-Up, Half-Down Sew-In with Peekaboo Caramel Layers
Half-up, half-down styles are where thick hair gets to show off a little. The top section gives you height, the bottom section gives you length, and the peekaboo caramel layers keep the whole thing from looking like one dense curtain.
This style is especially useful when the top of the head has natural fullness that you don’t want to flatten. Pulling half the hair up creates shape right away. The caramel pieces tucked underneath do a nice job of flashing through when the hair swings. It’s a small detail, but it’s the kind that makes the style feel finished from every angle.
A good half-up sew-in needs a strong base. The braids under the crown should sit flat enough for the top to smooth, but not so tight that the scalp feels strained. Thick hair can tolerate a sturdy foundation, yet the edges still deserve respect. Tight doesn’t mean better.
I’d keep the caramel in soft layers under the top section, not all over the crown. That way the top knot or puff stays dark and rich, while the lower lengths bring the warmth.
10. 90s Flipped-Out Sew-In with Warm Brown-to-Caramel Ends
Some styles are all about shape, and this is one of them. The 90s flipped-out finish gives the ends a little kick, which is perfect for thick hair because straight-down lengths can start looking heavy fast. With warm brown roots and caramel tips, the whole style reads playful instead of flat.
The flip at the bottom does a lot of work. It lifts the eye and stops the hair from hanging like a curtain. On thick hair, that little outward bend can save the entire silhouette. If you want this look to hold, use a round brush or a flat iron with a slight wrist turn at the ends — not a hard curl, just enough bend to keep the line from dropping straight.
The caramel should stay concentrated lower down so the flip looks intentional. If the lighter tone starts too high, the style loses that polished, retro edge and begins to look overdone. A warm brown-to-caramel gradient is better than a harsh light tip. It feels softer and far more wearable.
This is a fun one if you like structure but don’t want stiffness. The haircut shape does the drama. The color keeps it warm.
11. Blunt Bob with Chunky Caramel Highlights
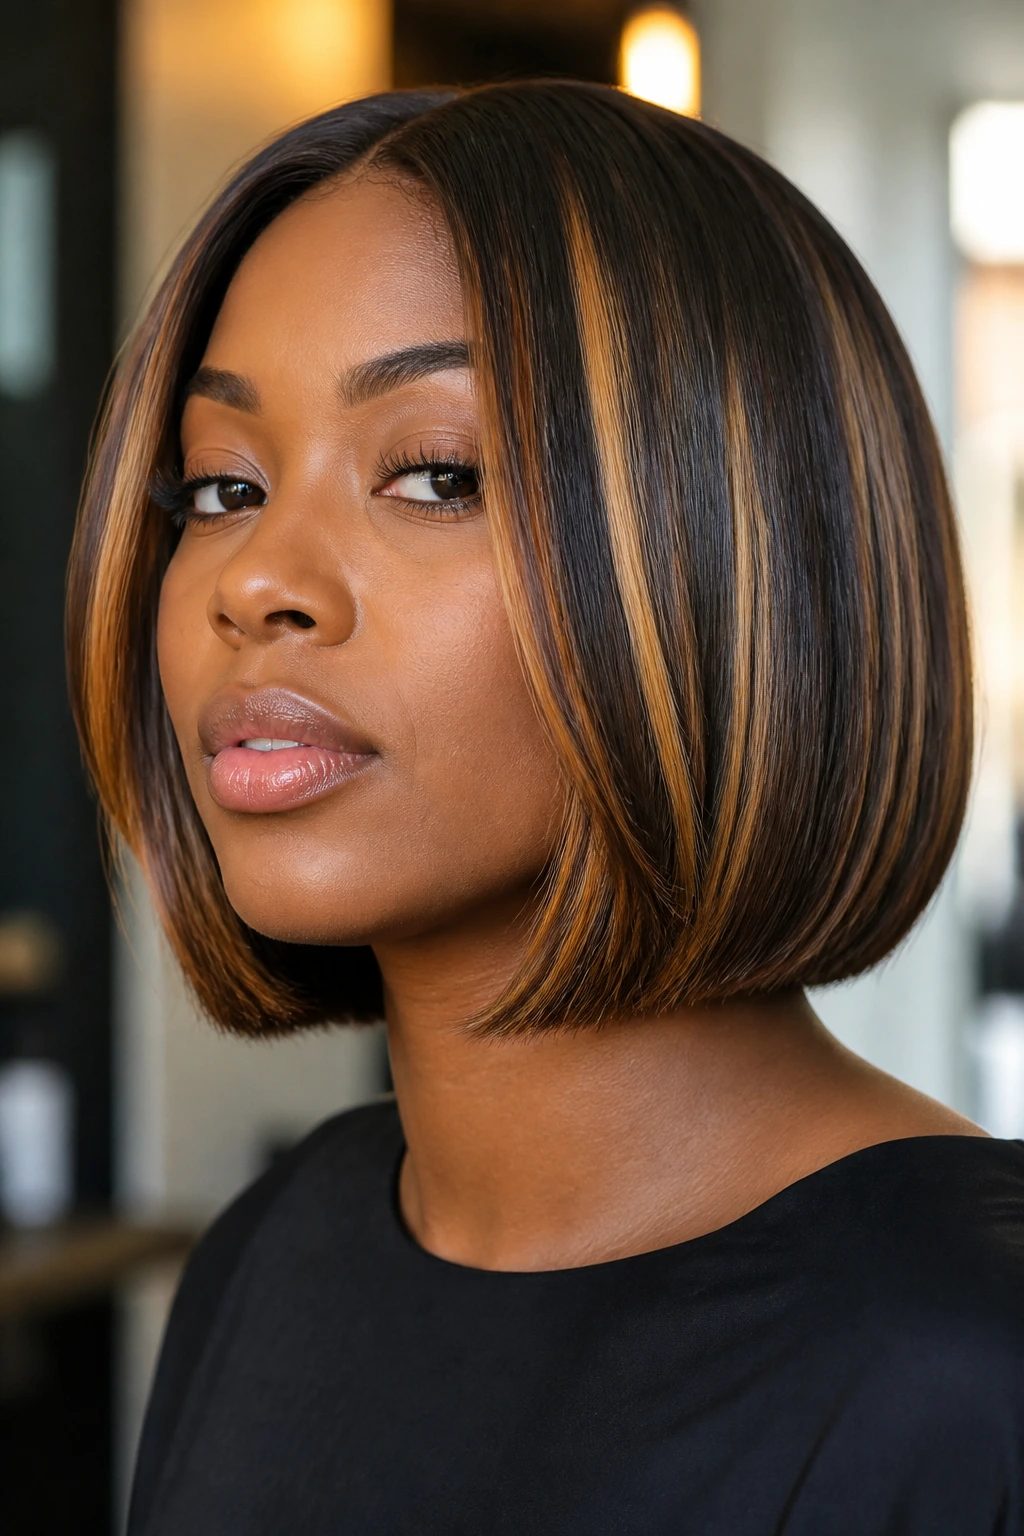
A blunt bob on thick hair is one of those cuts that looks almost architectural when it’s done well. The density gives the bob a full, clean edge. Chunky caramel highlights break that edge up just enough so it doesn’t feel too severe.
This style is not shy, and that’s the point. Thick hair can support the shape without looking hollow at the ends. The highlights should be placed with purpose — a few wider ribbons through the top layer, a couple around the face, and maybe one or two deeper pieces in the interior so the whole bob doesn’t flatten visually. Too many highlights, and the bob loses its punch. Too few, and you miss the entire effect.
I like this best when the bob sits between jaw and chin length. That range keeps the neckline open and lets the caramel pieces show without competing with a lot of extra length. If the hair is perfectly straight, the line reads crisp. If you add a slight bend, the highlights turn softer and more dimensional.
Blunt cuts can look severe on thin hair. On thick hair, they look deliberate. That’s a nice difference.
12. Asymmetrical Sew-In with Contour Caramel
An asymmetrical sew-in has a little attitude built in. One side sits longer, the other side lifts the face, and the caramel placement can either sharpen the shape or soften it depending on where you put it.
This is where contour color matters. Put the caramel along the longer side and near the front, and the eye follows the line of the cut. It’s a smart move for thick hair because the density makes asymmetry read clean rather than choppy. There’s enough weight to hold the shape, which is half the battle.
The install works best when the difference between sides isn’t wild. A subtle inch or two is plenty. The goal is movement, not a dramatic geometry lesson. The caramel should support the cut, not fight it. I’d stay with warm bronze-caramel shades rather than very light gold, because the warmth keeps the shape cohesive.
If you like styles that do a little face-framing work for you, this one earns its spot. It looks especially nice when one side is tucked behind the ear and the caramel catches along the cheekbone.
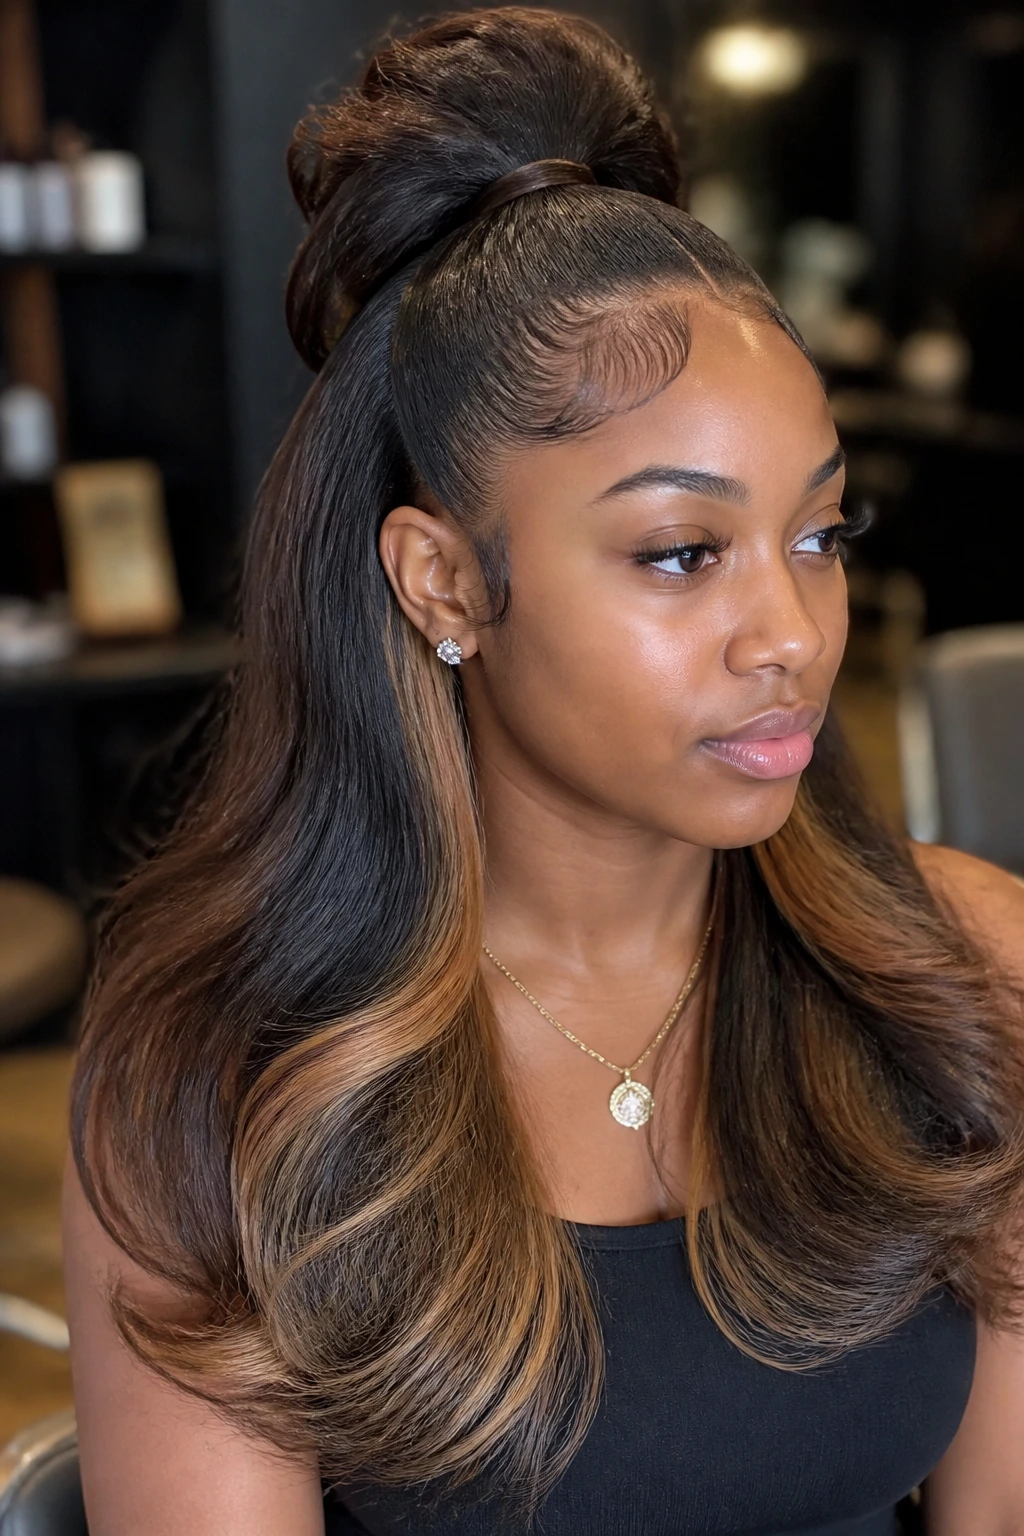
13. High Pony Sew-In with Wrapped Base and Caramel Lengths
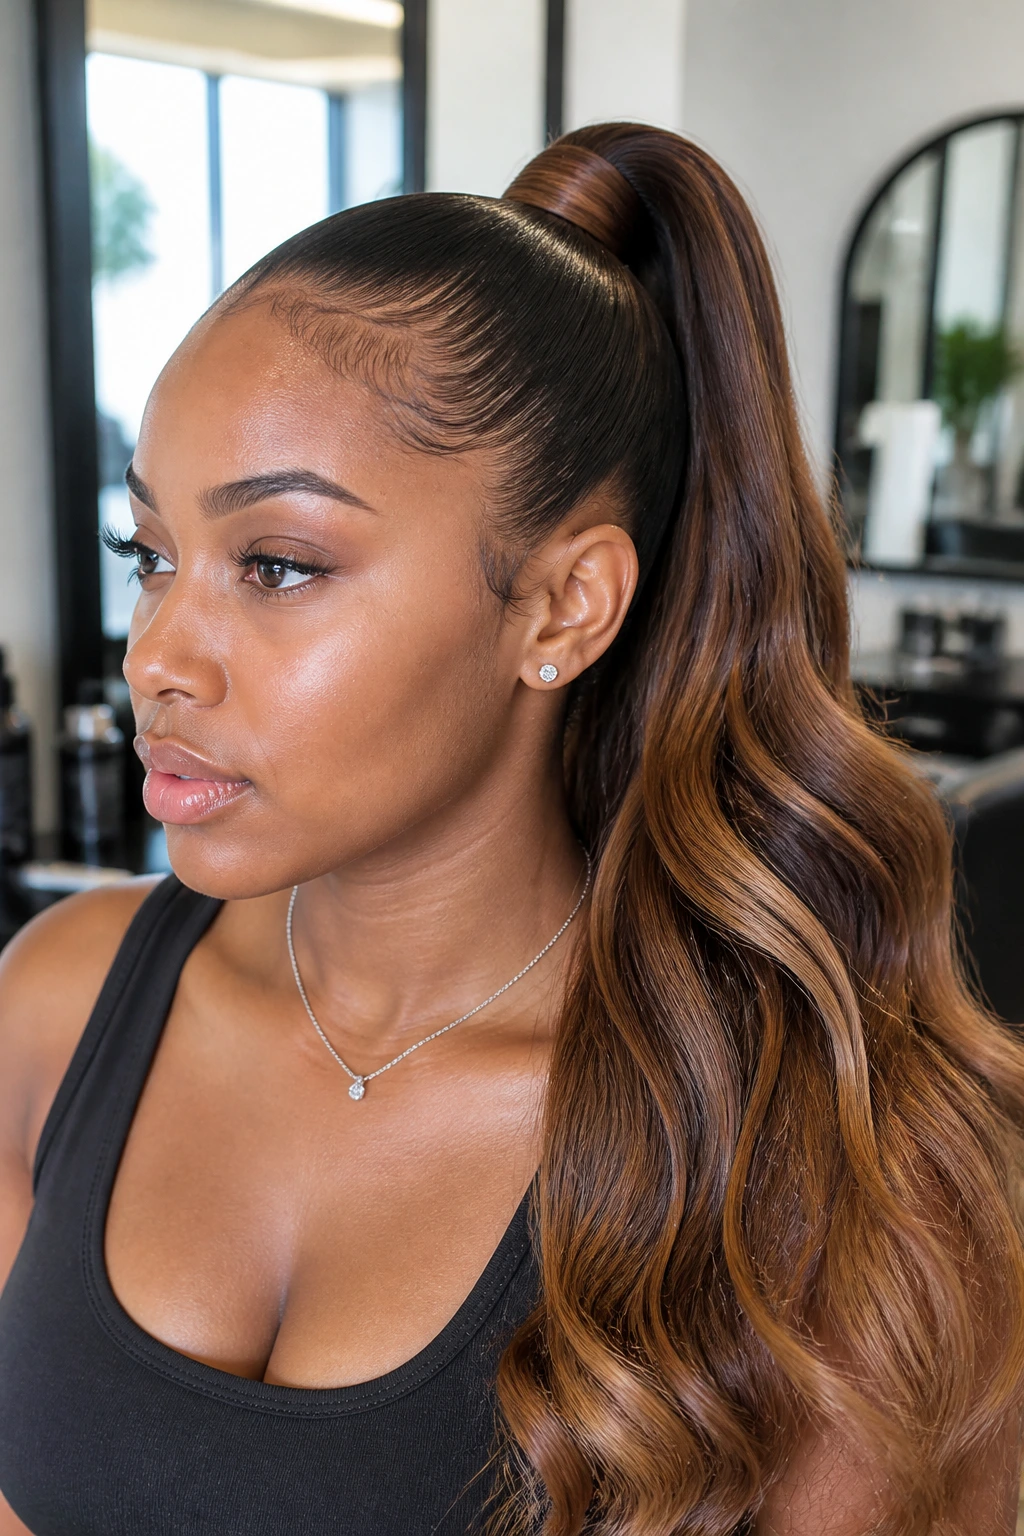
A high pony sew-in can look sleek and sharp on thick hair, provided the base is smooth and the pony itself has enough density to swing. Caramel lengths make the pony read richer, especially when the color starts a shade darker at the root and brightens through the tail.
The wrapped base matters more than people think. It hides the seam and makes the pony look like it belongs to the head instead of sitting on top of it. Thick hair is useful here because it gives the stylist more to work with when creating a clean foundation. If your natural hair is bulky around the nape, a well-designed braid pattern makes the top sit flatter.
When to choose this look
- You want the face fully open.
- You like movement in the tail.
- You need a style that survives heat, humidity, and long days.
- You want caramel to show in motion, not in static layers.
I’d keep the pony tail length mid-back to waist depending on your frame. Too short, and you lose the swing. Too long, and the weight can pull the base if the install isn’t built well. The caramel reads best when it’s placed in soft streaks through the tail, not just on the top layer.
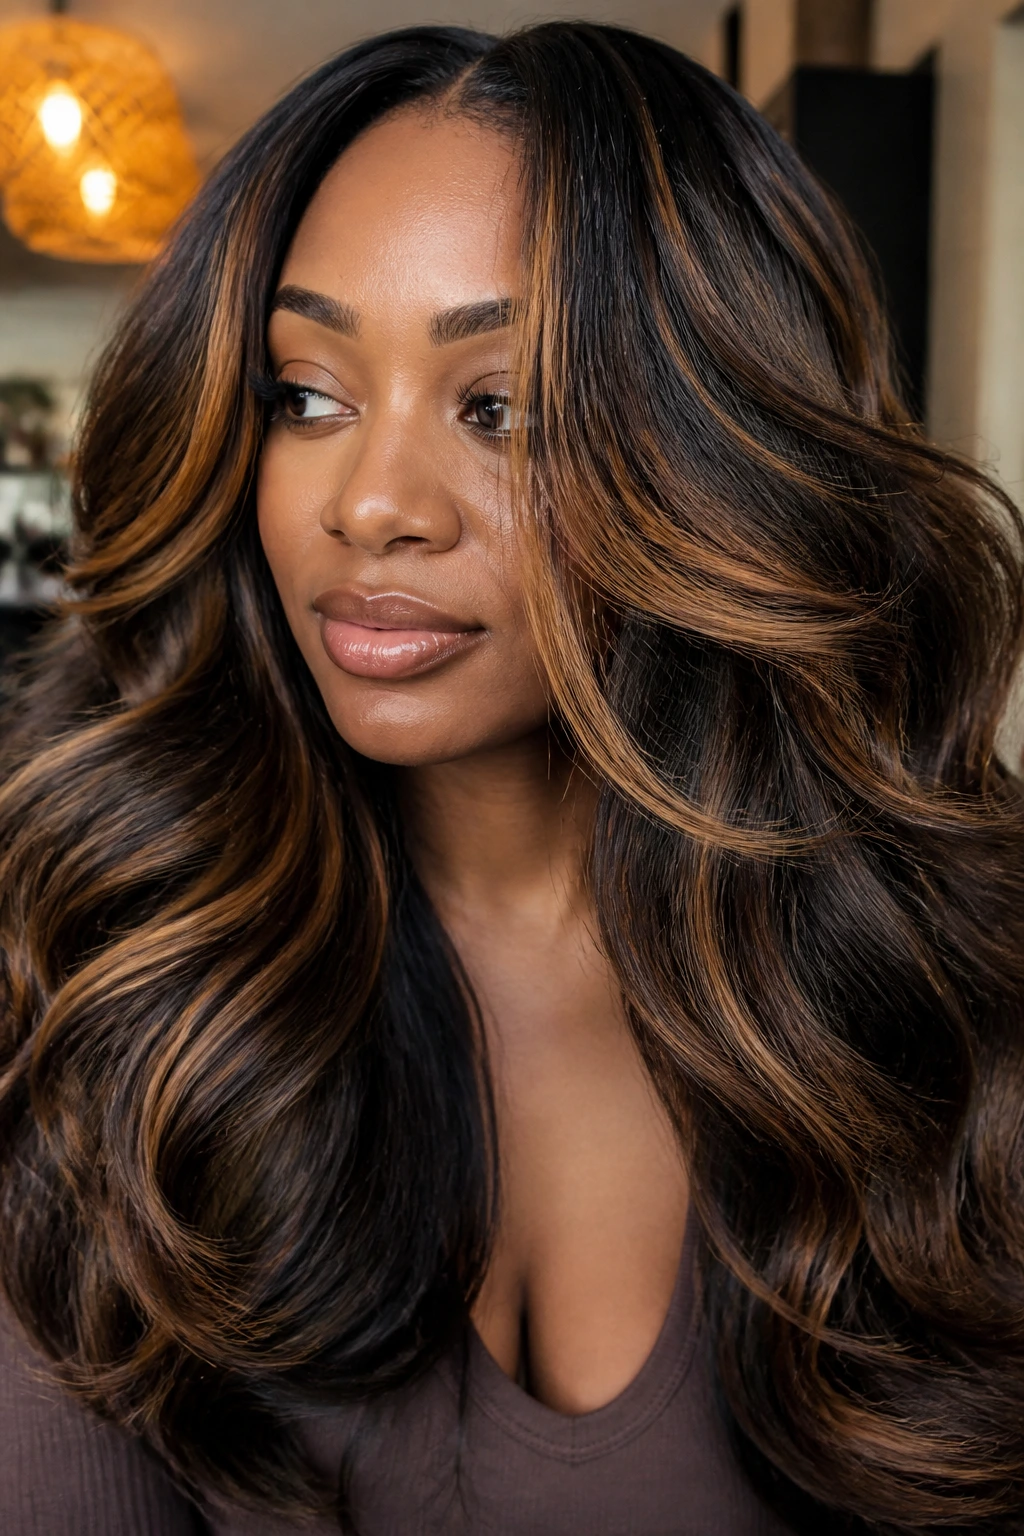
14. Goddess Curls with Warm Bronze Lowlights
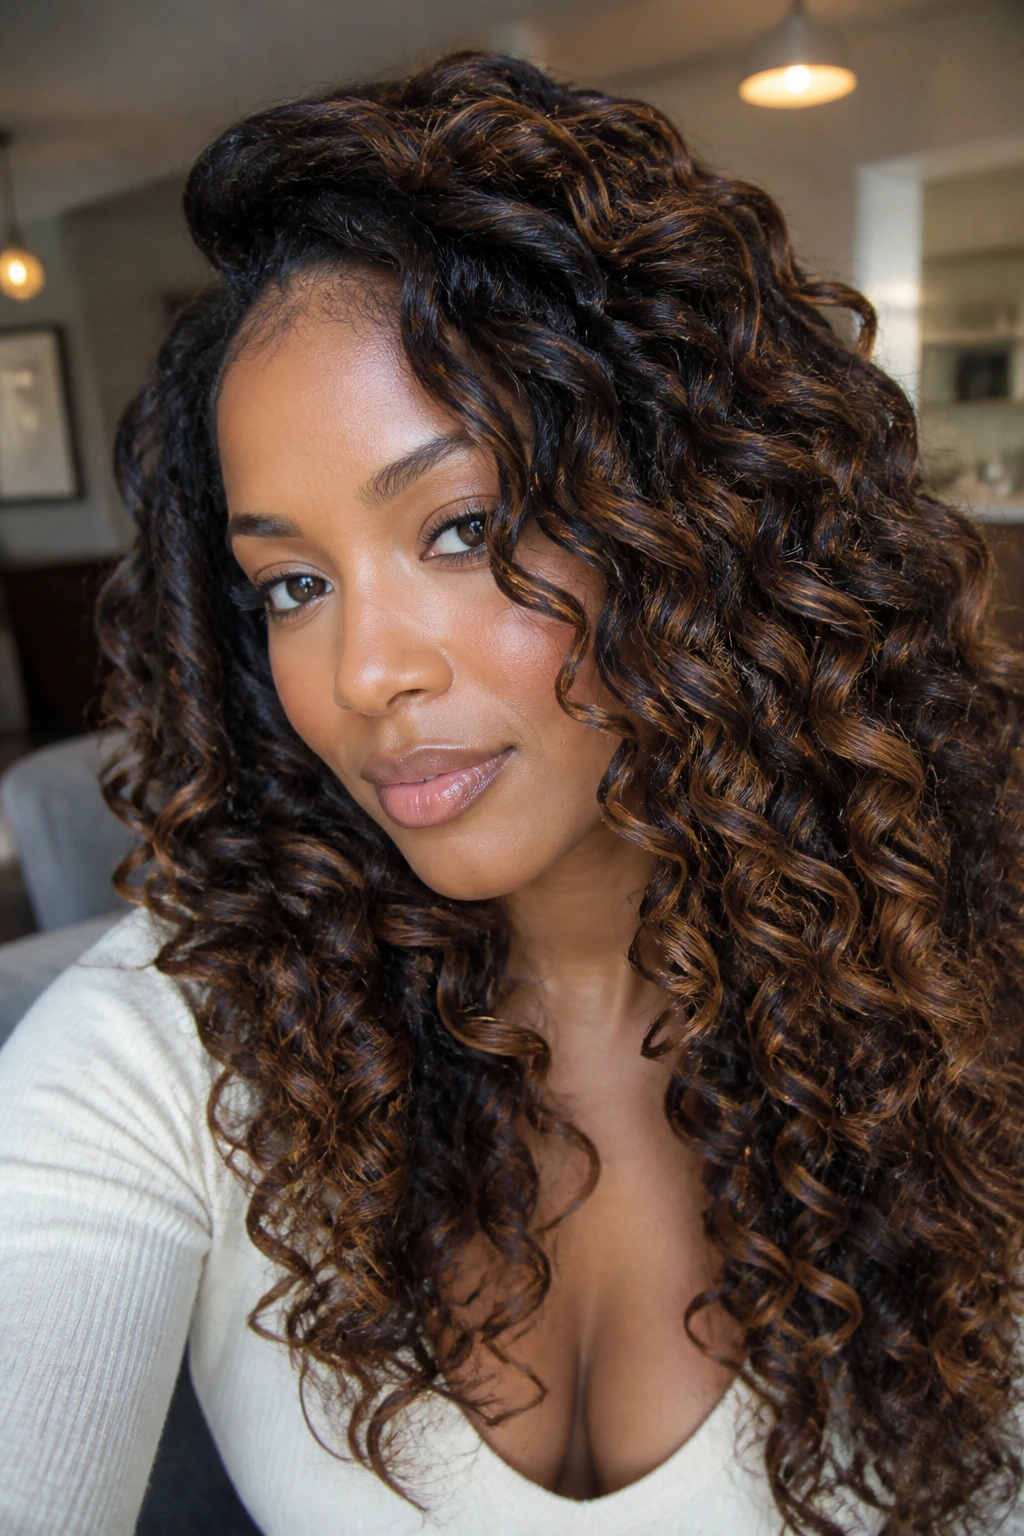
Goddess curls are a little softer than a tight curl set and a little more relaxed than a glam wave. On thick hair, they have room to breathe, which is why they look so full without feeling stiff. Warm bronze lowlights make the curls deeper, not lighter, and that matters more than people admit.
A lot of color talk focuses on highlights, but lowlights are useful when the base already has warmth. They create shadow inside the curl pattern so the hair doesn’t blur into one giant light mass. That shadow gives the style depth, especially around the back and underlayers where light usually doesn’t hit as hard.
This is a good choice if you want the caramel family to feel rich instead of bright. Bronze, amber, and toasted brown shades sit nicely in curls because they move with the pattern. The color shows as the curls separate rather than sitting on top of the hair like makeup.
If your install is dense, keep the curl size medium to large. Tiny curls on thick hair can look like a lot of hair, which may or may not be the point. Medium curls keep the shape elegant without losing fullness.
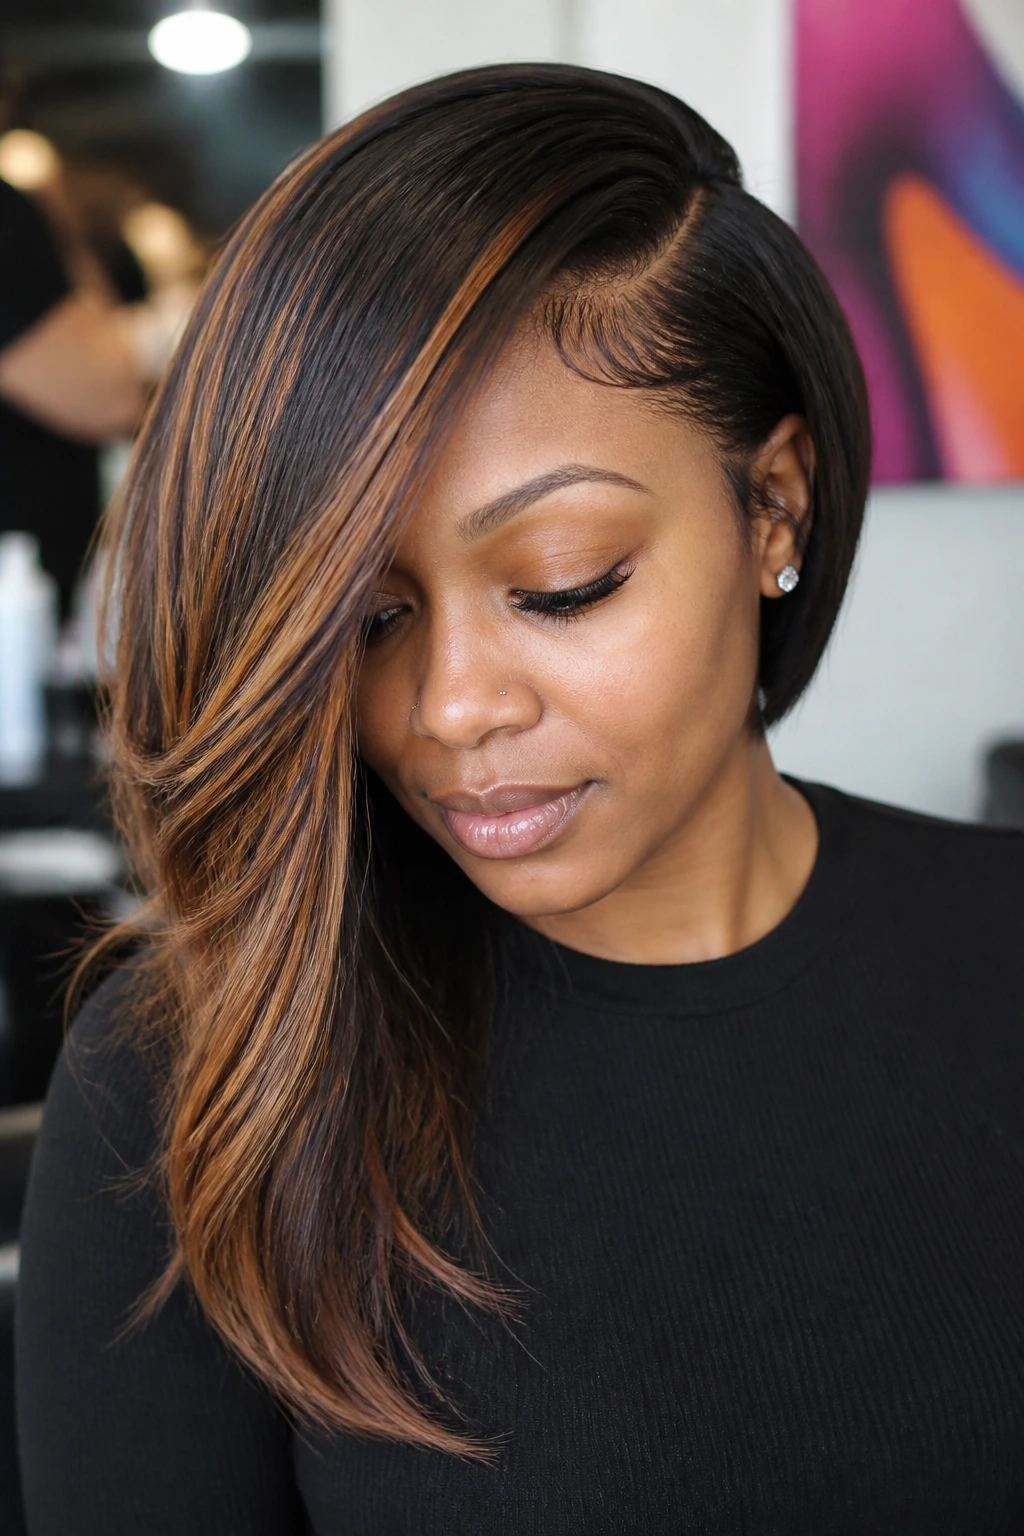
15. Chest-Length Layered Straight Sew-In with a Soft Caramel Melt
A chest-length layered straight sew-in is the quiet one in this group. No extra drama. No obvious curl pattern. Just a sleek shape, a controlled length, and a caramel melt that gets prettier the more you move.
This is my pick for thick hair when you want polish but not bulk. Chest length gives enough room for the layers to fall, but it doesn’t drag on the shoulders the way longer straight styles can. The layered ends stop the hair from looking too boxy, and the soft caramel melt keeps the style dimensional even when it’s pinned behind one ear.
The color should be subtle here. Think a deep brunette base that fades into caramel-brown ends, not a hard blonde strip. The transition is what makes the style feel refined. On straight hair, every color line is visible. That is why the melt has to be clean. If it’s done well, the whole style looks expensive without trying hard. If it’s done badly, you will notice it from across the room.
For thick hair, this is one of the most wearable options in the bunch. It’s sleek, but it still has movement. That’s the useful combination.
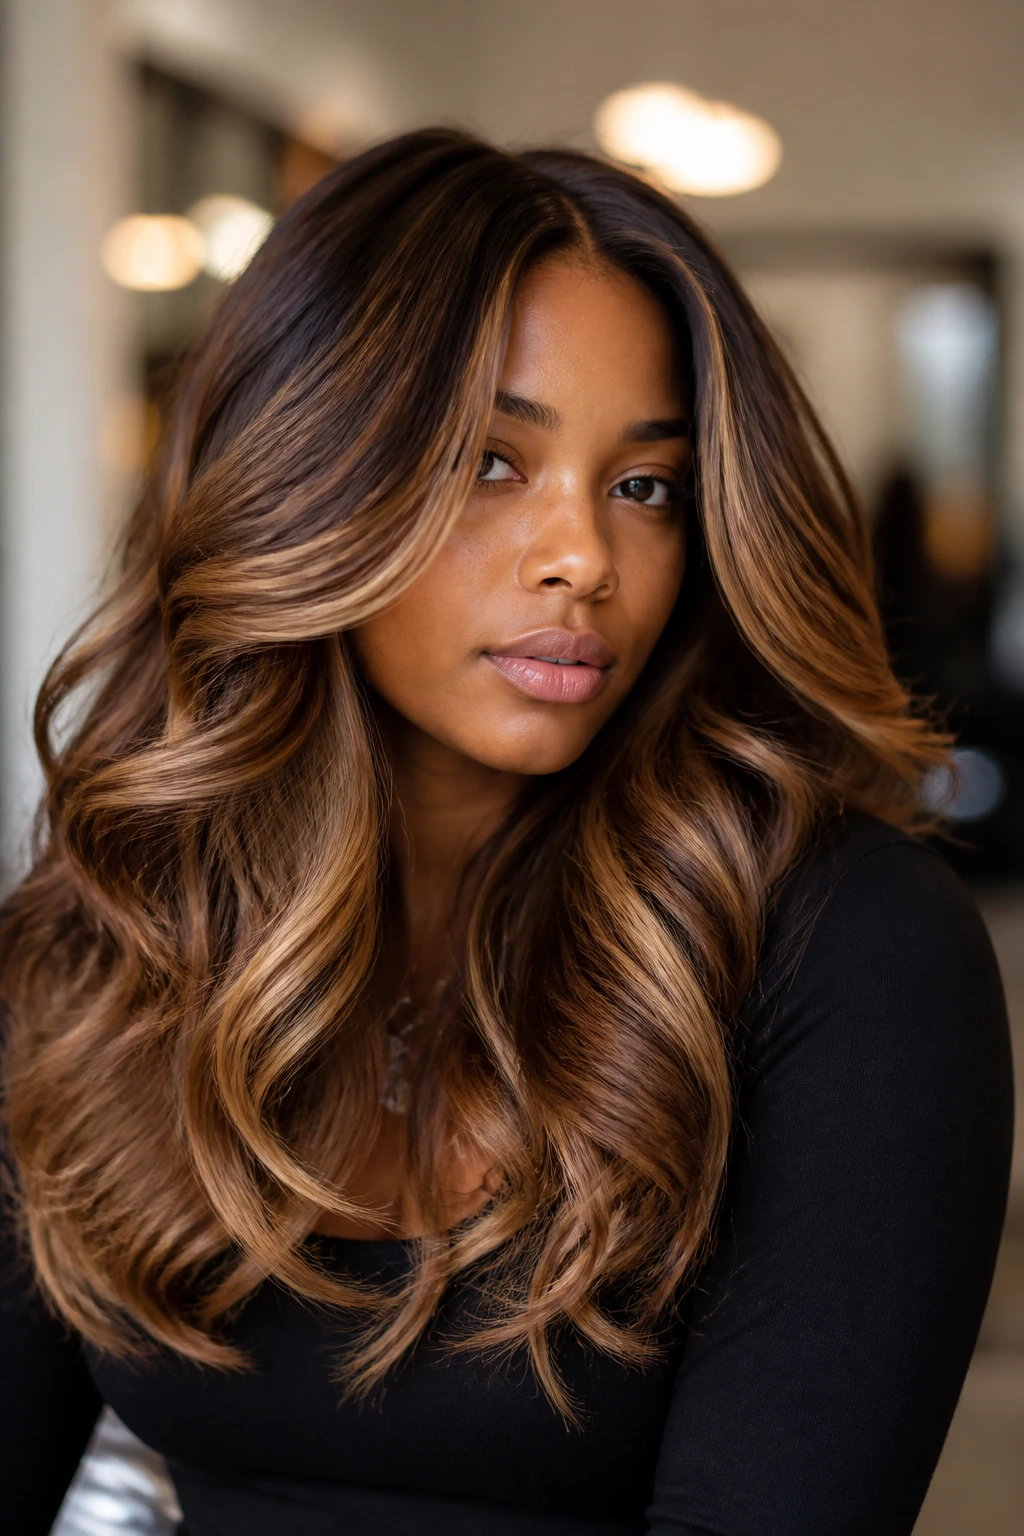
Why Thick Hair and Caramel Sew-Ins Work So Well Together
Thick hair changes the math. A lot of sew-in styles depend on volume from the bundles alone, which can leave the install looking disconnected if the base is too small or the shape is too flat. Thick hair gives the stylist a stronger foundation to work with, which means the braid pattern, the part, and the perimeter all have more support.
Caramel tones do a separate job. They break up the visual mass of dense hair. Dark hair on thick bundles can read as one uninterrupted wall if the cut is blunt and the finish is straight. Caramel interrupts that wall. It makes the waves look deeper, the layers look clearer, and the ends look lighter even when the overall style stays rich and dark.
Why the color reads better on dense hair
Thick hair holds shadow. That sounds odd, but it matters. When the hair has density, light and dark sections sit beside each other instead of disappearing into each other. That’s why caramel ribbons show up more clearly in body waves and why a honey face frame looks sharper in a side part. You get contrast without needing neon brightness.
Why the install lasts longer visually
Dense hair also helps the style hold shape between refreshes. If a few curls loosen or a wave drops, there’s still enough fullness underneath that the style doesn’t fall apart. That’s a small but useful advantage. It means you can wear caramel dimension for longer before the whole head starts looking tired.
And honestly, caramel is kinder than a colder blonde on thick hair. Warm tones sit closer to brown, so the grow-out is softer and the overall effect stays rich even when the style has been worn a few times.
Tools That Make These Styles Easier to Wear
-
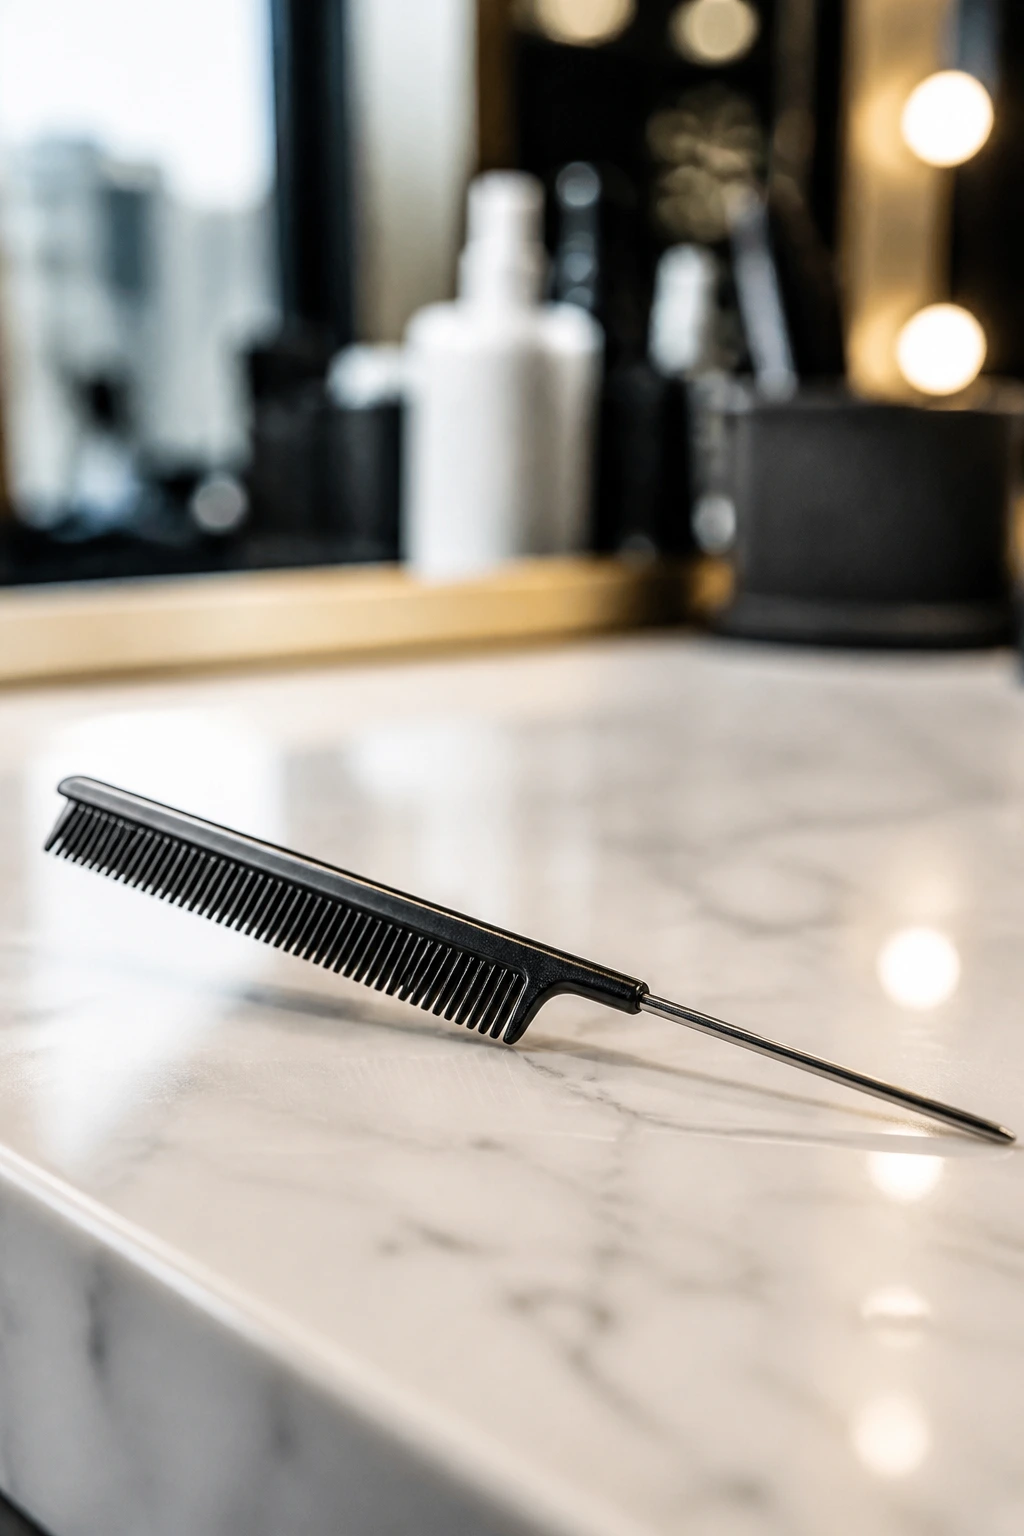
Rat-tail comb: Best for crisp parts, sectioning, and keeping the leave-out tidy without ripping through thick roots.
-
Wide-tooth comb: Use this on waves and curls when they need refreshing; it separates without wrecking the pattern.
-
1-inch or 1.25-inch curling iron: Handy for body waves, glam waves, and those soft bent ends that keep thick hair from looking square.
-
Flat iron with adjustable heat: Necessary for straight styles and leave-out blending; keep the heat controlled so you’re not chasing frizz with higher and higher temperatures.
-
Heat protectant spray: Non-negotiable if any of your own hair is being pressed or curled.
-
Mousse or foam wrap lotion: Useful for deep waves, curls, and smoothing the top of the install without piling on grease.
-
Silk or satin scarf: Keeps the part flat and the edges from getting crushed overnight.
-
Bonnet with enough room for long lengths: A tight bonnet will drag on the ends and mess with caramel pieces at the front.
-
Applicator bottle: Makes scalp cleansing easier between installs and helps you place shampoo without soaking the whole sew-in.
Smart Shopping and Color-Match Notes
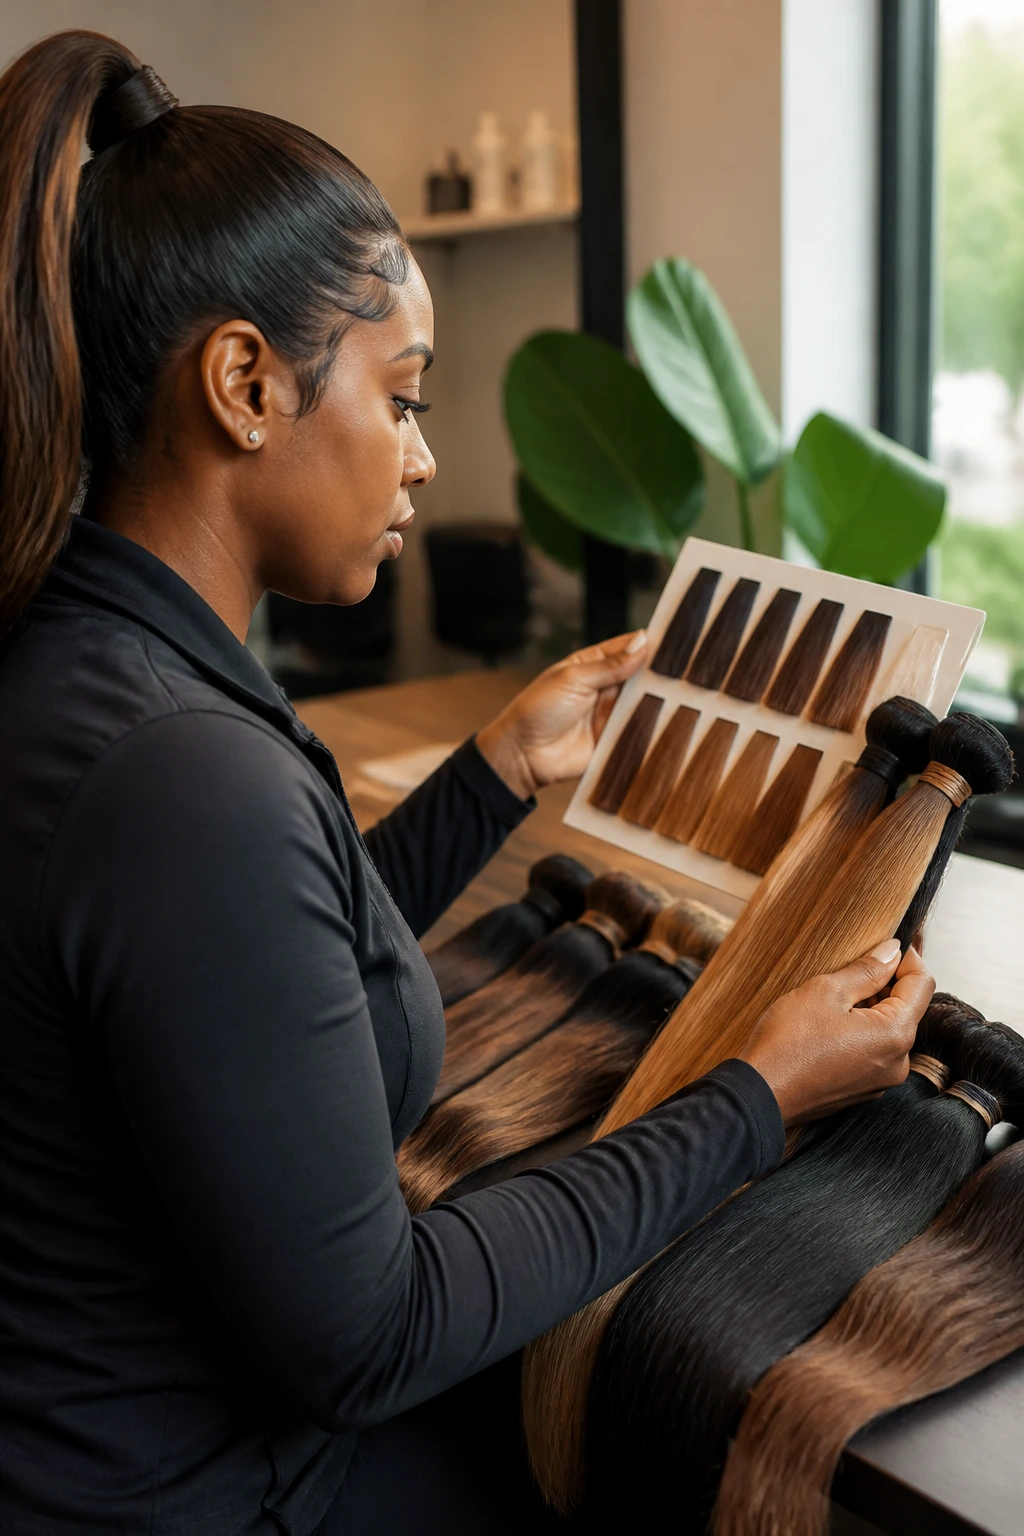
If you’re buying bundles for a caramel-toned sew-in, start with the base, not the color. A level 1 jet-black bundle and a level 4 dark-brown bundle behave differently once caramel is added. Dark brown usually blends more naturally into caramel melts because it gives the lighter pieces a warmer landing place. Jet black can be gorgeous too, but it creates a harder contrast. That’s a choice, not a mistake.
Human hair matters here. If you want to tone, dye darker, add gloss, curl with heat, or adjust the finish later, human hair is the safe choice. Synthetic hair does not take toner the same way, and it can melt or deform under the tools people use on sew-ins. If a seller says a synthetic bundle can be treated like human hair, I’d be skeptical.
The caramel itself should match the mood of the install. Honey caramel is brighter and reads lighter on camera. Toffee caramel stays richer and works well with straight styles. Amber caramel leans warm and can flatter deep brown bases. Bronze caramel is slightly deeper and looks good when you want dimension without obvious streaks. None of those are interchangeable once the hair is installed, so don’t pick blind.
One more thing: on thick hair, you often need fewer bundles than you think. The natural density fills in space that thinner hair would need bundles to cover. Buying too much hair can make the install bulky at the crown and heavy at the nape. That’s one of those details people learn after paying for extra hair they never really needed.
How to Wear the Blend So It Stays Clean
The easiest way to ruin a caramel sew-in is to treat it like a one-day style and then ignore it for a week. Thick hair can hide a lot, but it can’t hide buildup forever. A quick nightly wrap, a little heat discipline, and a sane parting routine go a long way.
Heat: Keep flat ironing to the minimum needed for the finish you want. For leave-out, one or two careful passes are better than chasing every kink with the iron on max heat. If the extensions are human hair, stay in the range that gets the job done without smoking the ends.
Parting: Recreate the part every couple of days so the hair doesn’t start bending in the wrong place. A rat-tail comb and a scarf are enough. Press the part while the hair is slightly warm, not wet.
Refresh: For waves and curls, mist lightly with water, add a small amount of mousse from mid-shaft down, and scrunch the pattern back into place. Don’t soak the whole head. That only makes the install take longer to dry and encourages frizz at the base.
Edges and leave-out: Keep product light. Thick hair often gets weighed down by heavy edge control, and then the front starts looking stiff instead of smooth. A small amount around the perimeter is enough.
Mistakes That Make Caramel Sew-Ins Look Off
-
Putting the caramel too high: If the lighter tone starts near the roots on a dark base, the install can look striped. Keep the brightest pieces mid-length to ends unless you’re intentionally doing a money-piece effect.
-
Choosing the wrong undertone: A cool ash blonde on warm brown hair often looks dusty, not rich. Match warm caramel with warm brunette bases; save cooler tones for a very specific look.
-
Overloading the install with bundles: Thick hair already brings volume to the table. Too many bundles can make the crown puff up and the nape feel heavy, especially on long straight styles.
-
Flattening curl patterns with too much heat: Repeated high-heat passes kill the bend in body waves, deep waves, and curls. Once the texture goes dead, the caramel loses the movement that made it work in the first place.
-
Skipping the shape before the color: A bad cut with good color still looks bad. Layers, blunt ends, and part placement matter first. Color only looks right when the silhouette is clean.
-
Ignoring the foundation braids: Tight or uneven braids make the install sit strangely, and that can push the whole style off balance. The base should be secure, not painful.
Variations and Alternatives to Try
Honey-Only Melt
If you want the softest possible version, keep the entire install in the honey-to-caramel family and skip the darker amber ribbons. It reads lighter, but still stays warm enough to look natural against deep brown hair. This works well when you want the color to lift the face without looking highlighted.
Bronze Brunette Blend
This leans deeper and moodier. The caramel pieces sit closer to bronze, which makes the style look richer and less golden. I like this for straight sew-ins and blunt lobs where the shape is already doing the talking.
Face-Frame First Color
Instead of spreading caramel everywhere, put the brightness only around the face and keep the rest of the install dark. That’s a strong move for thick hair because the density behind the face frame keeps the look grounded. You get contrast without a lot of upkeep.
Curly Dimension Set
Swap straight or wavy bundles for deep curls or loose coils, then add caramel lowlights rather than obvious highlights. The darker pieces inside the curl pattern create more depth, and the whole style feels fuller from root to end.
Low-Heat Closure Version
If you want less daily styling, use a closure and skip most of the leave-out. The caramel will show up through the mid-lengths and ends, and you can keep your own hair protected under the braids. This is the one I’d choose when heat has already had too many chances to misbehave.
How to Keep the Install Fresh for Weeks
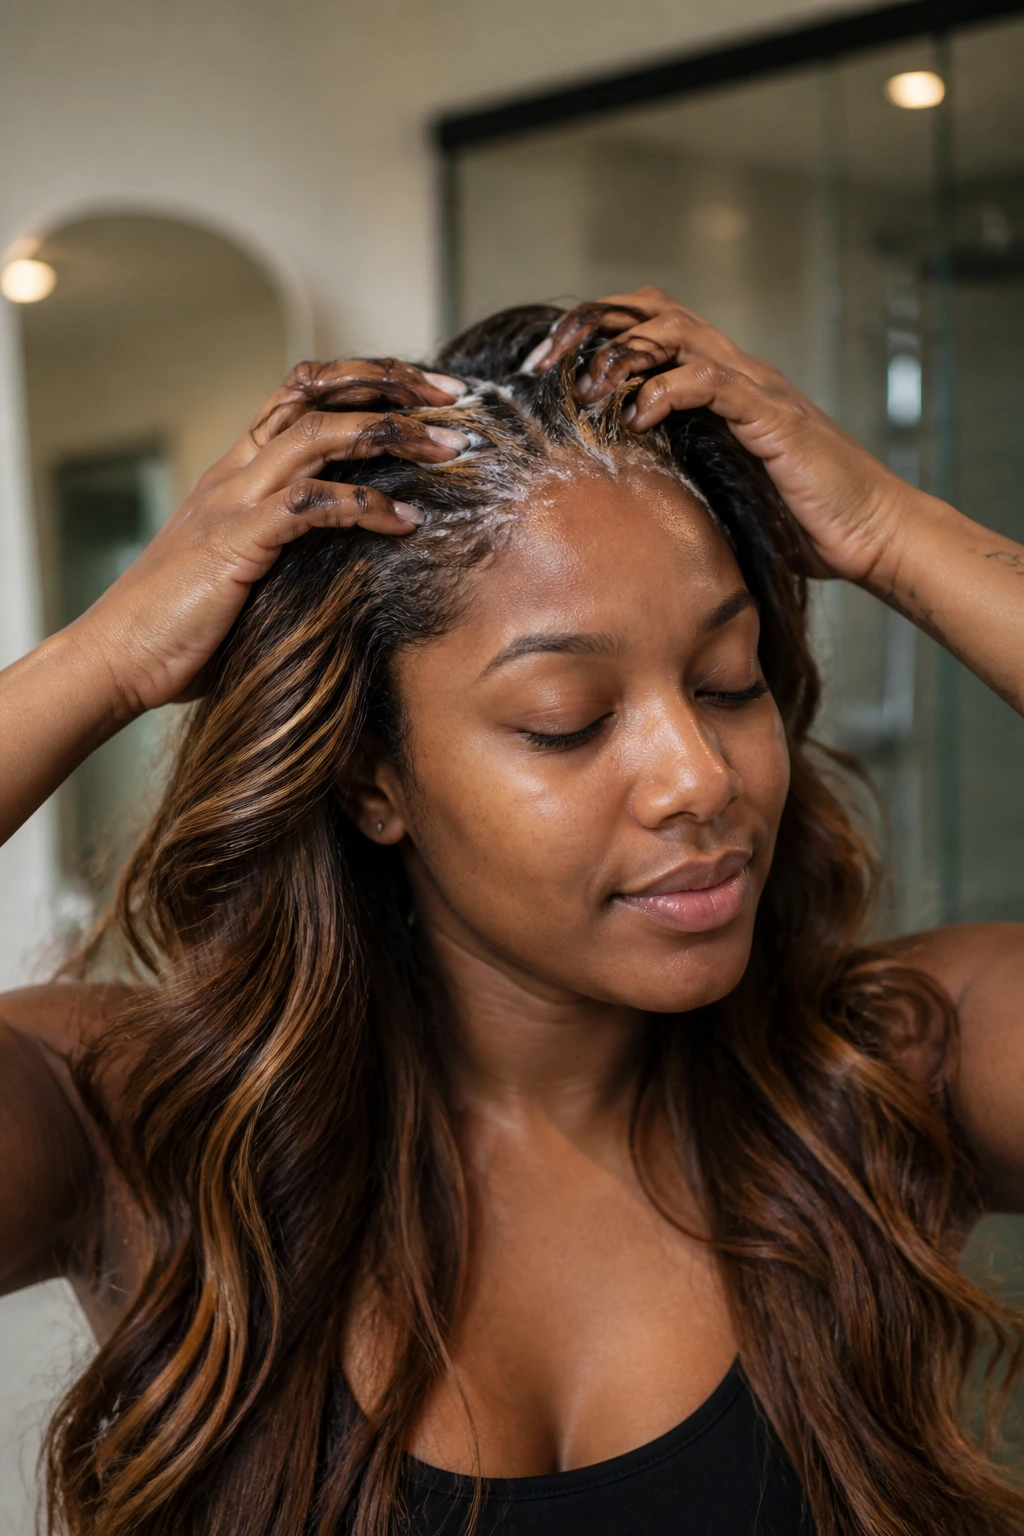
A sew-in can look neat for a long time, but only if you treat the scalp and the hair separately. Clean the scalp without flooding the bundles. Refresh the bundles without loading the roots with product. That balance matters more on thick hair because buildup shows up as weight first, then as dullness.
Wash the scalp every 1 to 2 weeks with a diluted shampoo in an applicator bottle. Focus on the parts between the tracks, massage gently with the pads of your fingers, and rinse well. Thick hair underneath can hide residue for a while, but it does not stop residue from smelling or itching.
For the extension hair, use a sulfate-free shampoo and a light conditioner on the mid-lengths and ends only. Rinse thoroughly. If the style is curly or wavy, let it air dry in a loose braid or low section so the pattern doesn’t puff out at the crown. Straight styles do better with a wrap and a cool blow-dry if needed.
A good sew-in on thick hair usually wears well for 6 to 8 weeks before it starts looking tired around the perimeter. Some installs can last a bit longer, but I would not push the foundation much past that. After 8 to 10 weeks, most people need the braids removed, the scalp rested, and the hair fully cleaned before the next install.
Sleep with a silk scarf or bonnet every night. If the hair is long, tuck the ends loosely so they don’t rub on the pillow and rough up the caramel pieces. That small step saves more shine than most people expect.
Questions People Ask Before Booking This Look
Can caramel tones work on very dark hair without looking orange?
Yes, if the shade is chosen carefully. On deep brown or black bases, caramel should usually stay in the warm brown-blonde range, not bright copper unless that’s the look you want. Amber, toffee, and bronze read more natural than a yellow-gold shade on dark hair.
Is a closure better than leave-out for thick hair?
If you want less heat on your own hair, a closure is the safer choice. If your natural texture blends well and you don’t mind occasional flat ironing, leave-out can look more seamless at the part. Thick hair can support either, but the maintenance is different.
How many bundles do I need?
For thick hair, many installs look balanced with 2 to 3 bundles plus a closure or frontal, depending on length and desired fullness. Very long or very dense looks may need more, but overbuying can make the install too heavy. The braid foundation and the hair’s length matter as much as the number of bundles.
Will caramel tones show up on curly sew-ins?
Absolutely, and sometimes better than on straight hair. Curls catch light at different angles, so even a subtle caramel lowlight can show clearly once the hair separates. The trick is using enough contrast to show dimension without making the curls look patchy.
What’s the best way to blend leave-out with caramel extensions?
Match the texture first, then match the color. If your natural hair is warmer or darker than the extensions, a quick gloss or tone on the leave-out may help, but don’t force a light shade to match a dark one with too much heat. That usually leaves the leave-out looking dry.
Can I dye the bundles after they’re installed?
If they’re human hair, yes, but keep it restrained. It’s easier to deepen color or add a warm glaze than to bleach the hair lighter once it’s sewn in. For a caramel look, I’d rather start with the right bundle shade than gamble with after-coloring.
How do I keep the part from puffing up?
Set it at night with a scarf, avoid piling heavy oils near the roots, and press the part with a warm comb or low-heat flat iron when needed. Thick hair underneath can push the surface up if the foundation is too bulky, so the braid pattern matters too.
What if the caramel looks too brassy after installation?
That usually means the shade leans too yellow for the base. A salon gloss or a darker warm toner can pull it back toward toffee or bronze. Don’t pile on purple shampoo unless the hair is actually reading orange-yellow; too much of it can dull the whole install.
The Shade That Does the Most With the Least Fuss
Thick hair already gives you volume, shape, and a little drama before the extensions even go in. Caramel tones work because they don’t fight that. They break up the density, soften the edges, and make layers and waves look intentional instead of heavy.
The styles that hold up best are the ones that respect the hair’s weight. Keep the shape clean. Keep the caramel warm. Keep the foundation sturdy, not tight. Do those three things, and a sew-in stops looking like “just extensions” and starts looking like a style with its own personality.
If you’re picking one look to try first, I’d start with either the layered middle-part melt or the long body wave with ribbons. Both give you movement, color depth, and enough flexibility to wear in real life without constant fuss.