Thin hair can wear Rococo drama without looking weighed down. The trick is to stop chasing bulk and start building a silhouette: a lifted crown, curved sides, and a few front pieces that land exactly where the cheekbones need them.
That is where face-framing layers earn their keep. On a lot of styles, they’re just decoration. Here, they do real work. A soft temple piece can hide a visible pin, a bent front section can blur a sparse hairline, and a curl that breaks at the jawline can make the whole style read fuller than it is.
These looks borrow the best parts of Rococo hair—loops, rolls, ribbons, pearls, and that theatrical bit of height—but they’re built for real hair, not wig-stuffed fantasy. Good thin-hair styling does not ask for more hair. It asks for smarter placement.
The styles below lean on that idea from different angles. Some are quiet. Some are a little extra. All of them know where the eye goes first.
Why You’ll Love These Looks
-
They build height where it counts: A small lift at the crown changes the whole silhouette, and thin hair usually looks best when the volume is concentrated instead of spread everywhere.
-
Face-framing layers do the flattering for you: Those front pieces soften the hairline, hide pins, and keep the style from looking too stiff or too bare around the temples.
-
Ribbons and pearls do some of the heavy lifting: When the hair itself is delicate, a narrow ribbon or a few pearl pins adds visual weight without making the style feel crowded.
-
Most of these work best on second-day hair: A little grip helps the pins hold, and slightly lived-in hair takes teasing, rolling, and twisting far better than freshly washed strands.
-
You can scale them up or down easily: The same shape can read period-inspired, formal, or quietly romantic depending on whether you keep the curls soft or lean into ornament.
-
They make thin hair look styled, not overworked: That’s the sweet spot. The hair still moves, but the structure is there.
Why Rococo Shapes Work on Thin Hair
Rococo-inspired hair is basically a lesson in optical trickery. The style doesn’t depend on one giant mass of hair. It depends on curve, lift, and a bit of theatrical placement.
The crown carries the illusion
A narrow strip of height at the crown changes how full the rest of the head looks. If the lift sits 1 to 2 inches behind the hairline, thin hair suddenly reads as deliberate instead of flat. Too much teasing all over the head is a waste of time. Put the shape where the eye lands first.
The front layers hide the give-away
Face-framing layers are the reason these styles work on fine or low-density hair. They cover the “see-through” spots around the temples and keep the style from looking like it was pulled too hard. A soft bend near the cheekbone does more for fullness than another round of backcombing.
Ornament fills the negative space
This is the part people miss. Rococo styling loves ribbon, combs, pins, and loops because they give the eye something to follow. Thin hair often looks better with a few intentional gaps and a strong accessory than with one dense, overpacked knot. Empty space is not the enemy. Bad shape is.
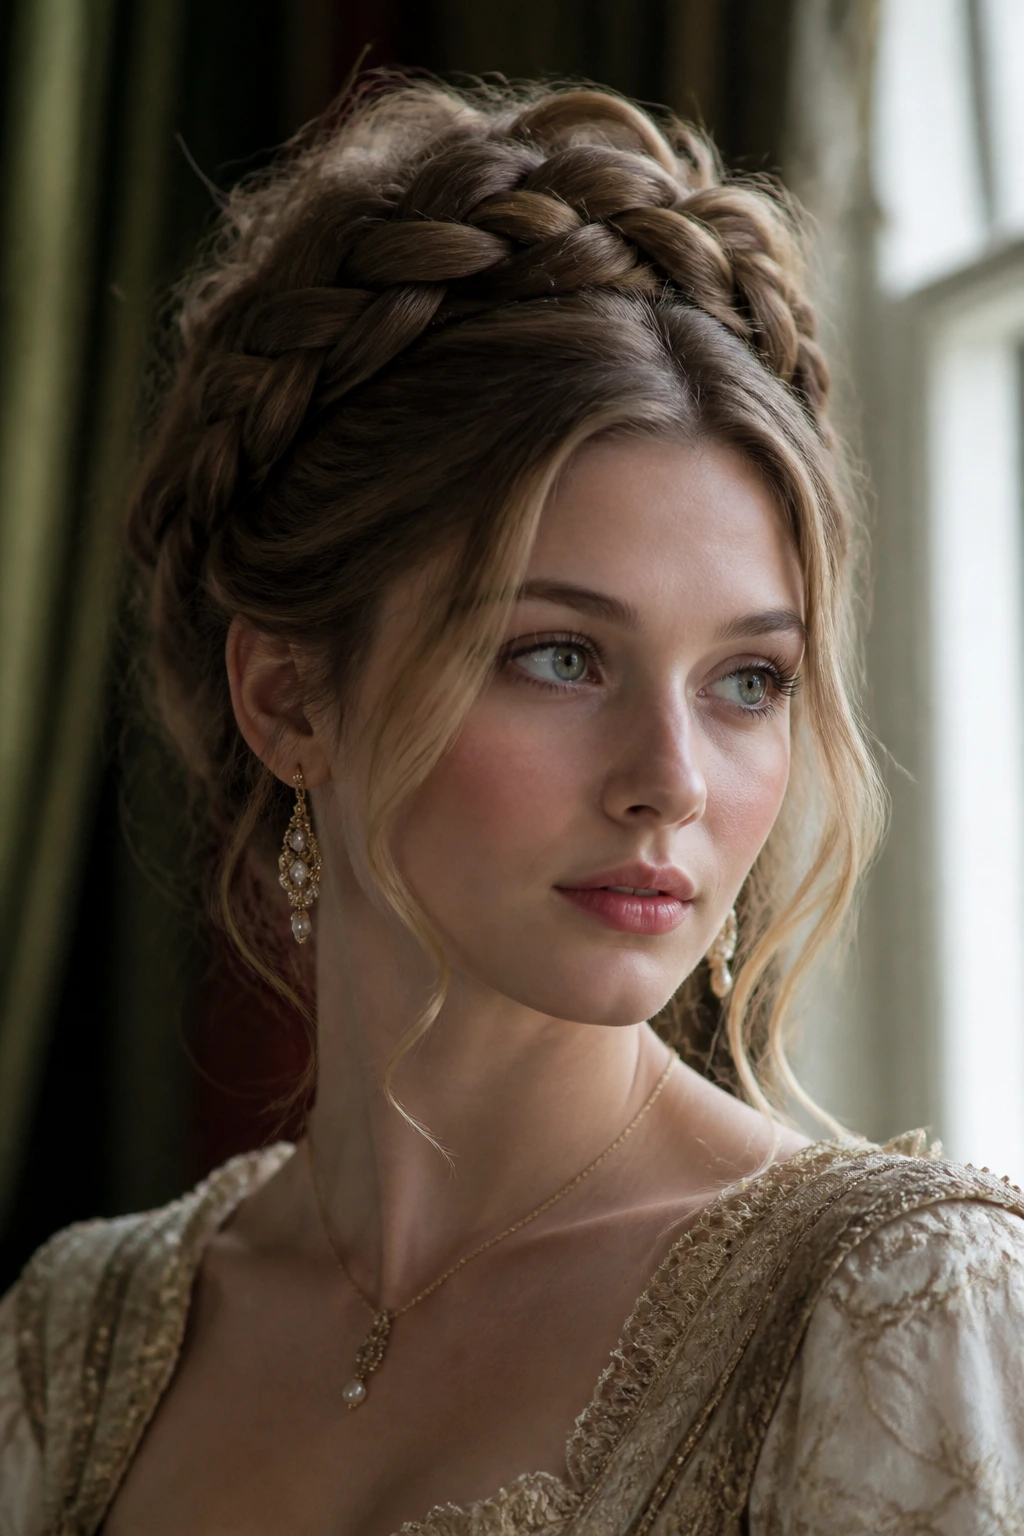
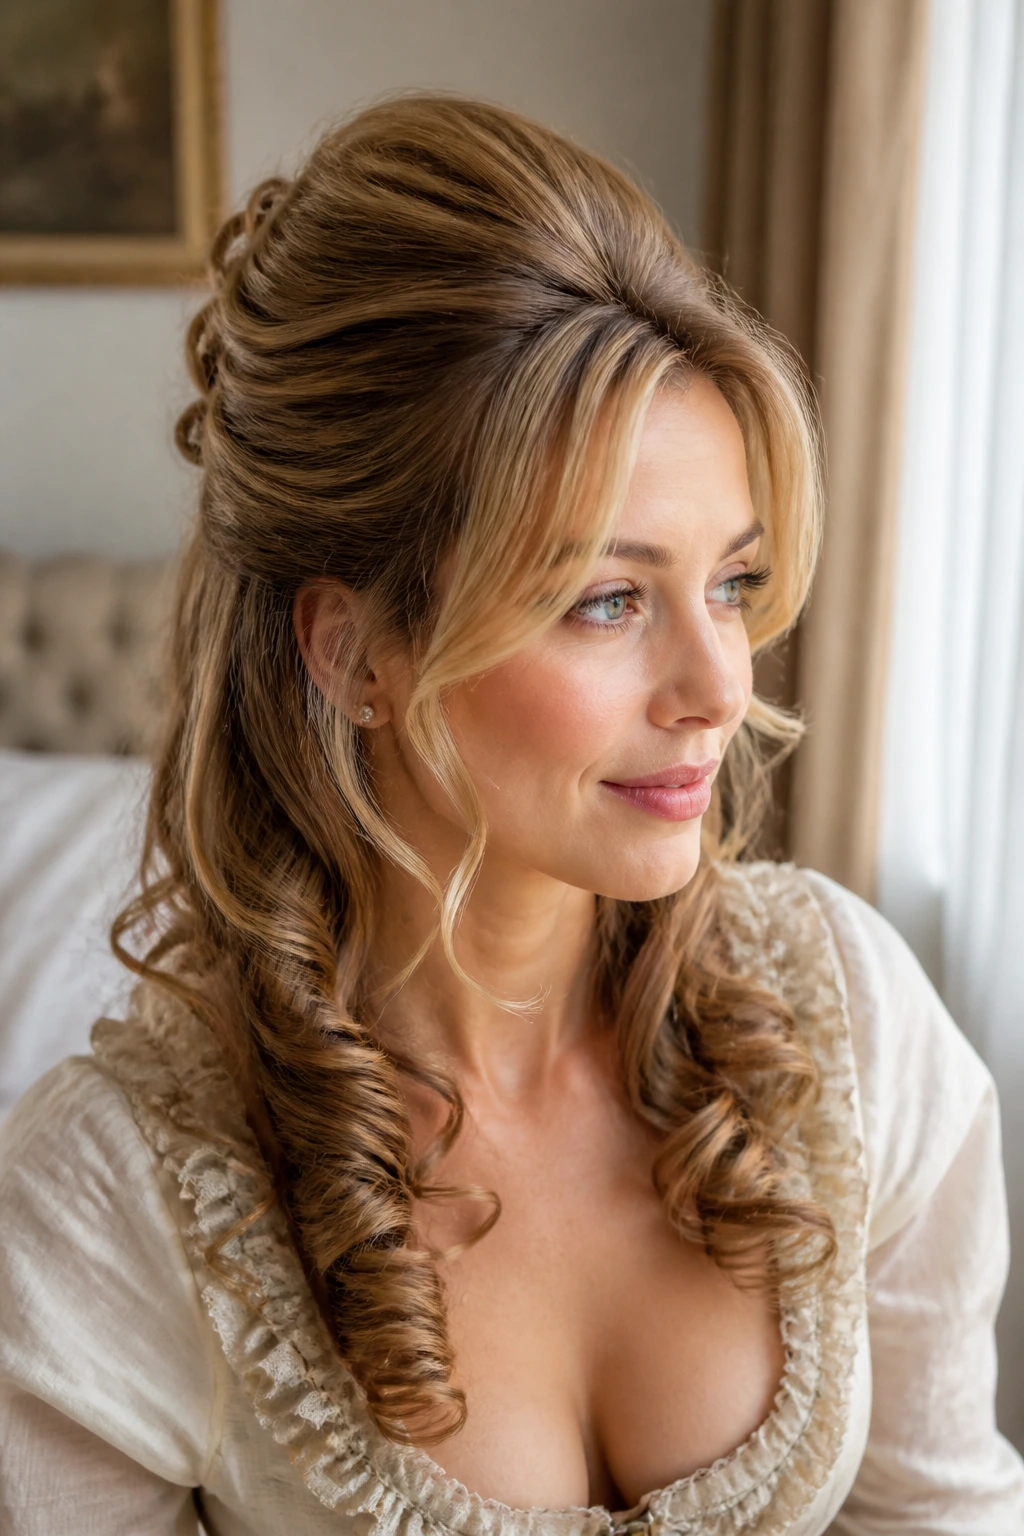
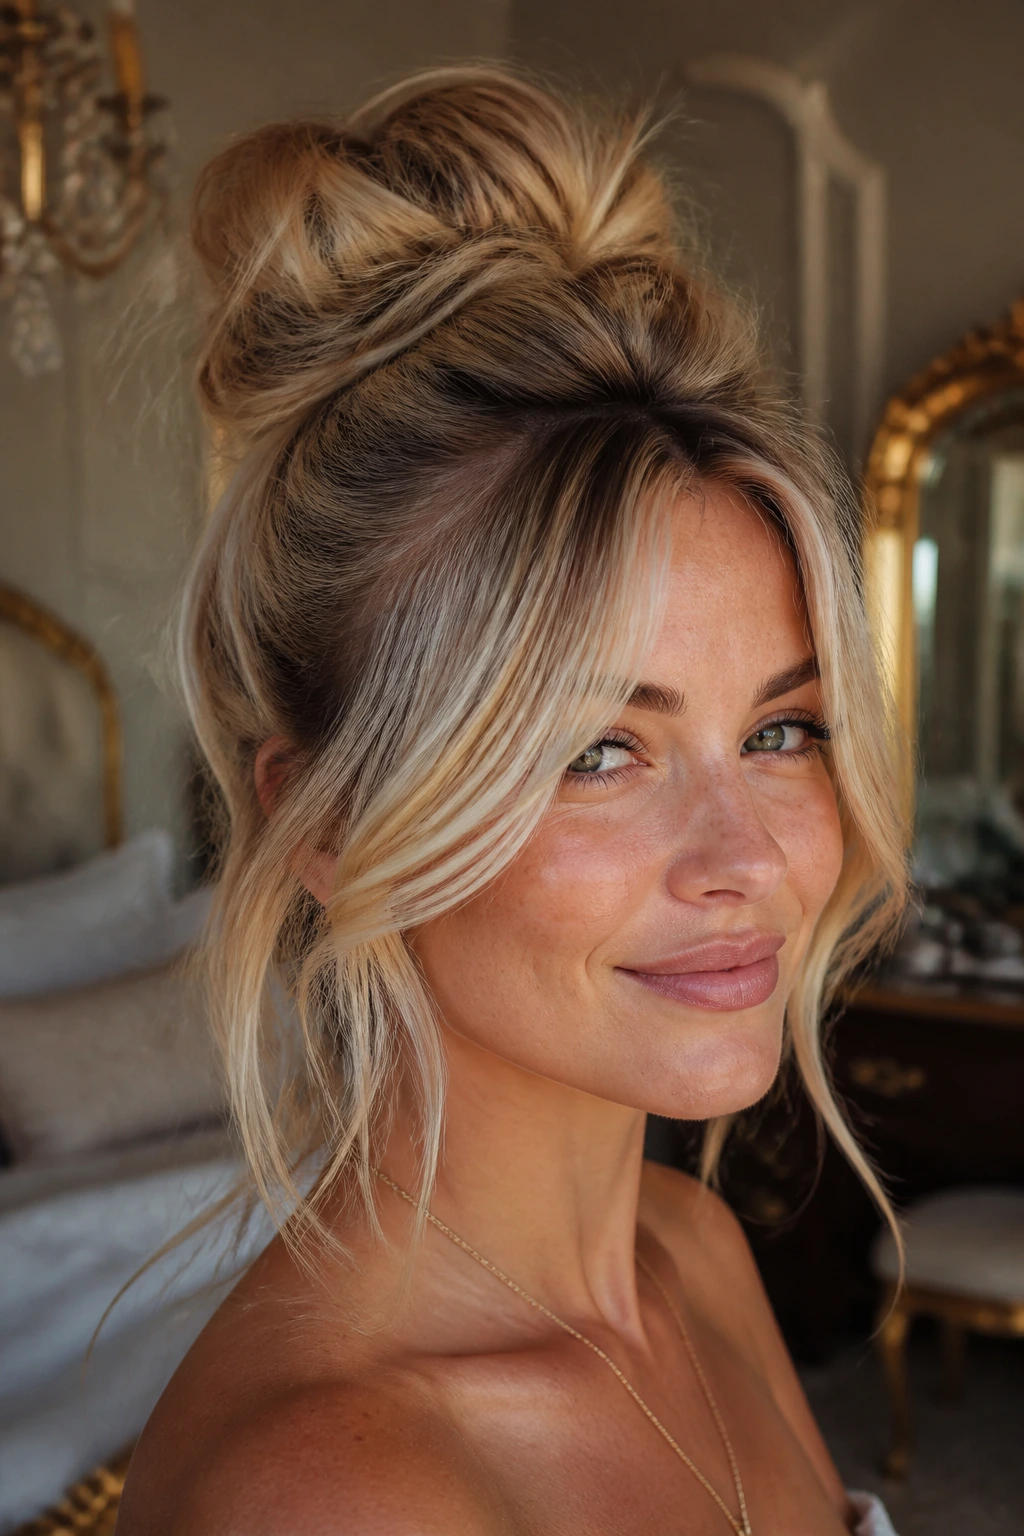
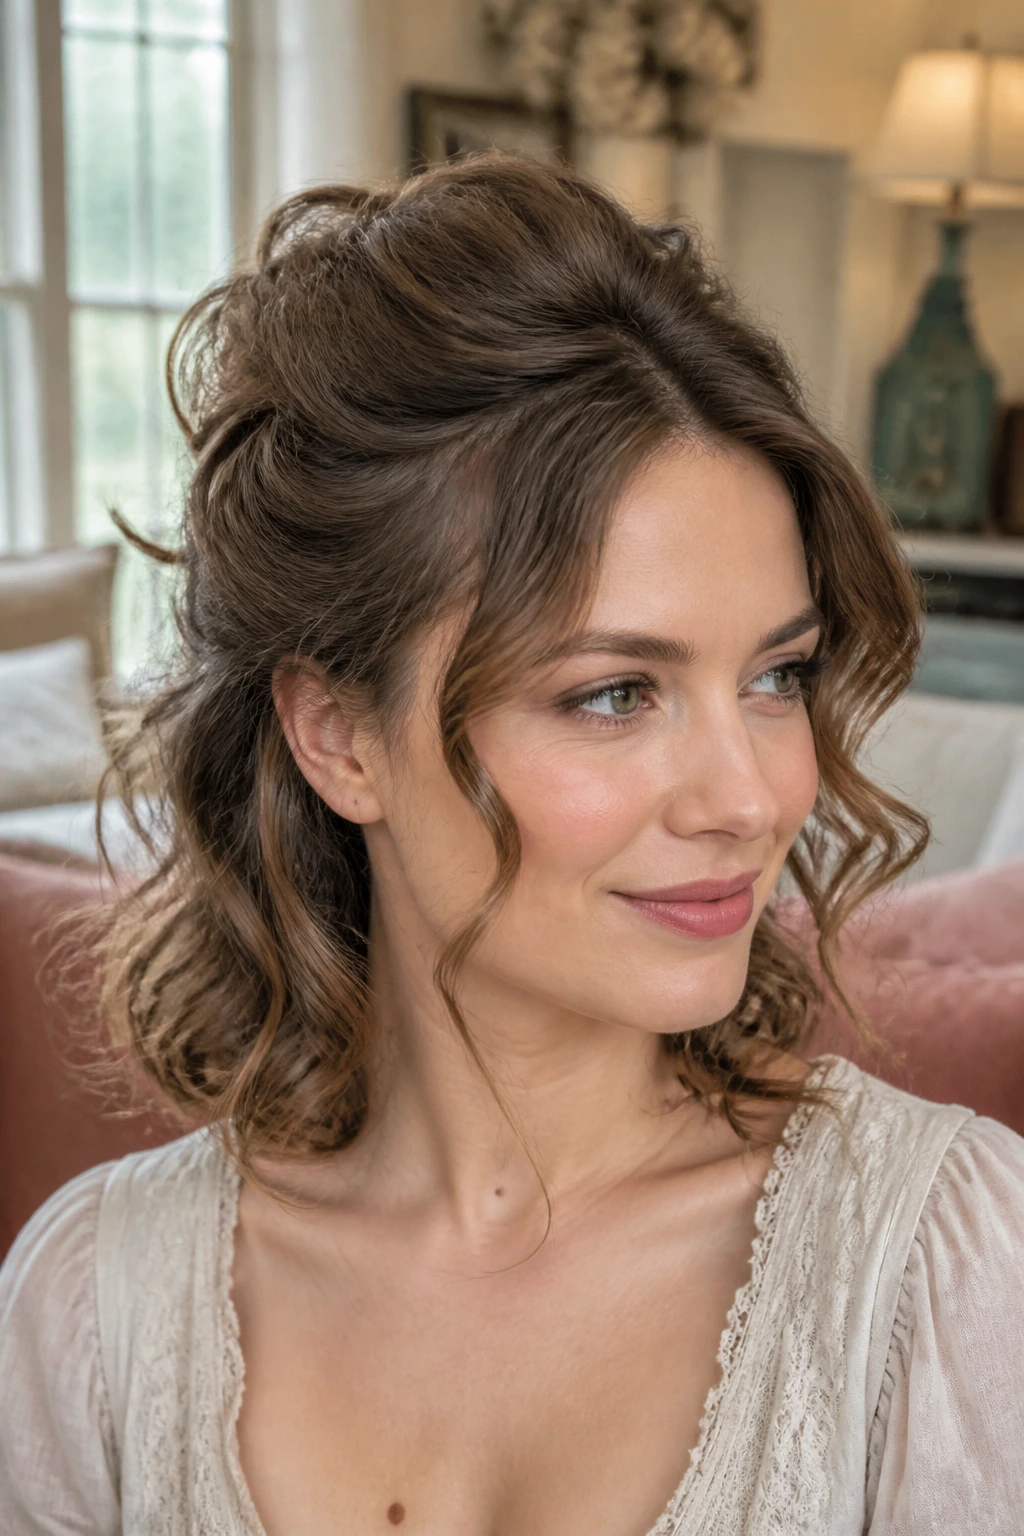
1. Crown-Puffed Half-Up with Curled Tendrils
A little lift at the crown changes everything here. Keep the top section loose, tease only the underside at the roots, then smooth the surface lightly so the puff looks soft instead of frizzy. The curled tendrils at the temples do half the visual work, and that’s exactly why this style is such a good fit for thin hair.
I like this one on shoulder-length cuts with face-framing layers because it lets the front pieces bend forward and do the softening. Curl them away from the face with a 1-inch iron, then pin the half-up section just high enough to create shape without exposing the scalp. It should feel airy. Not stiff.
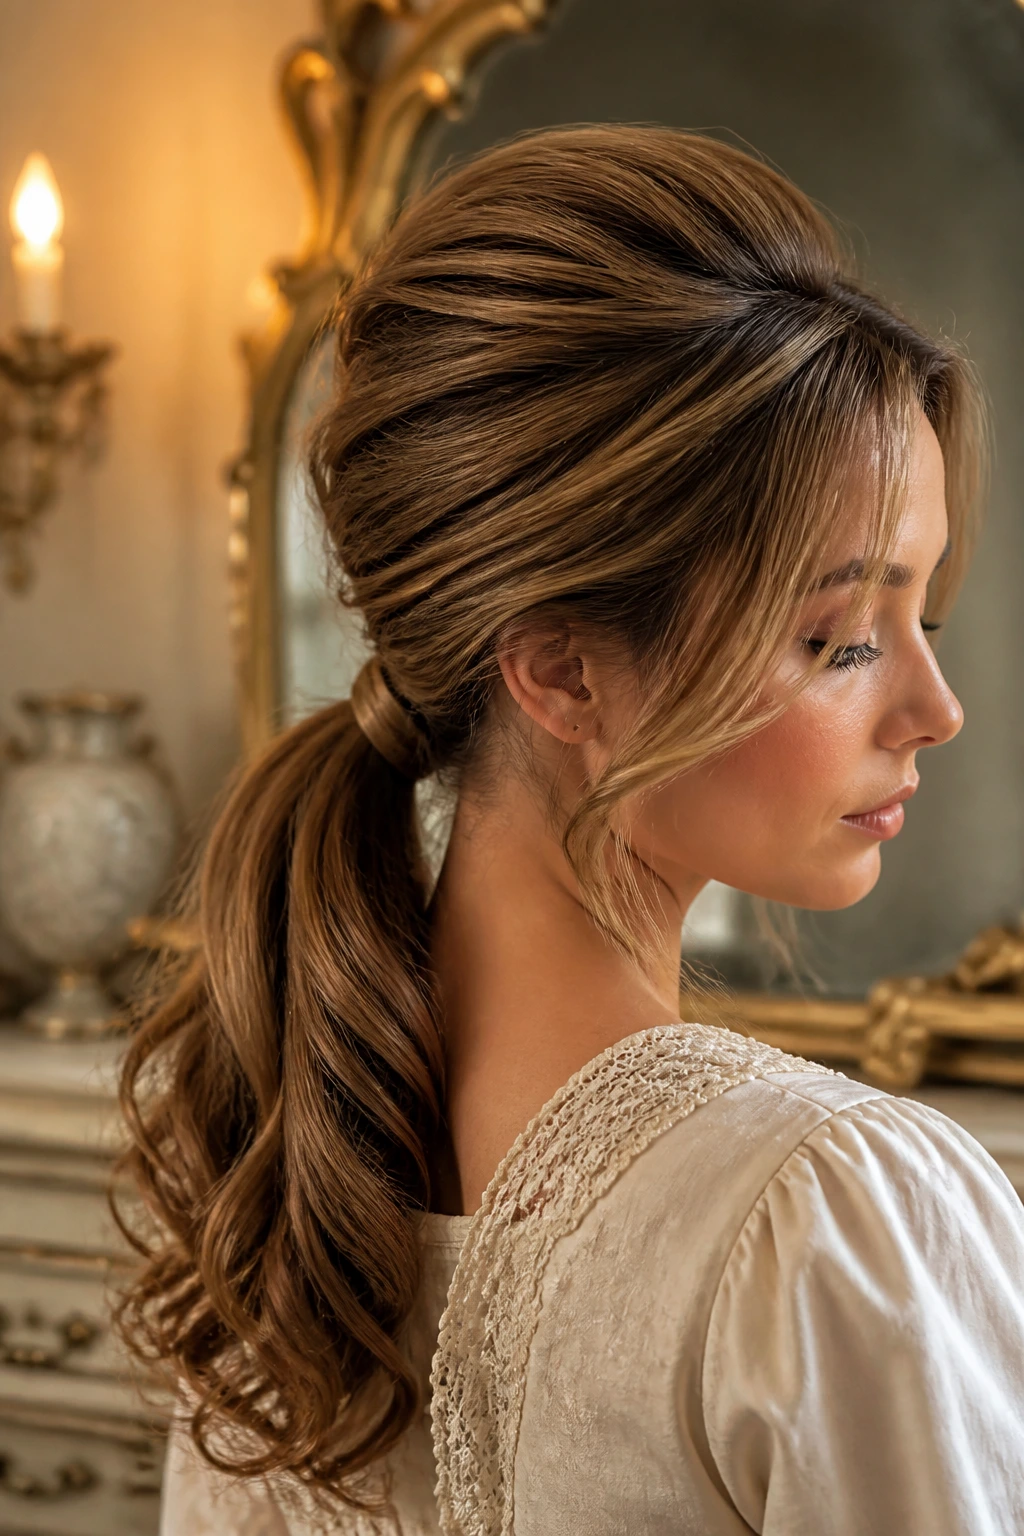
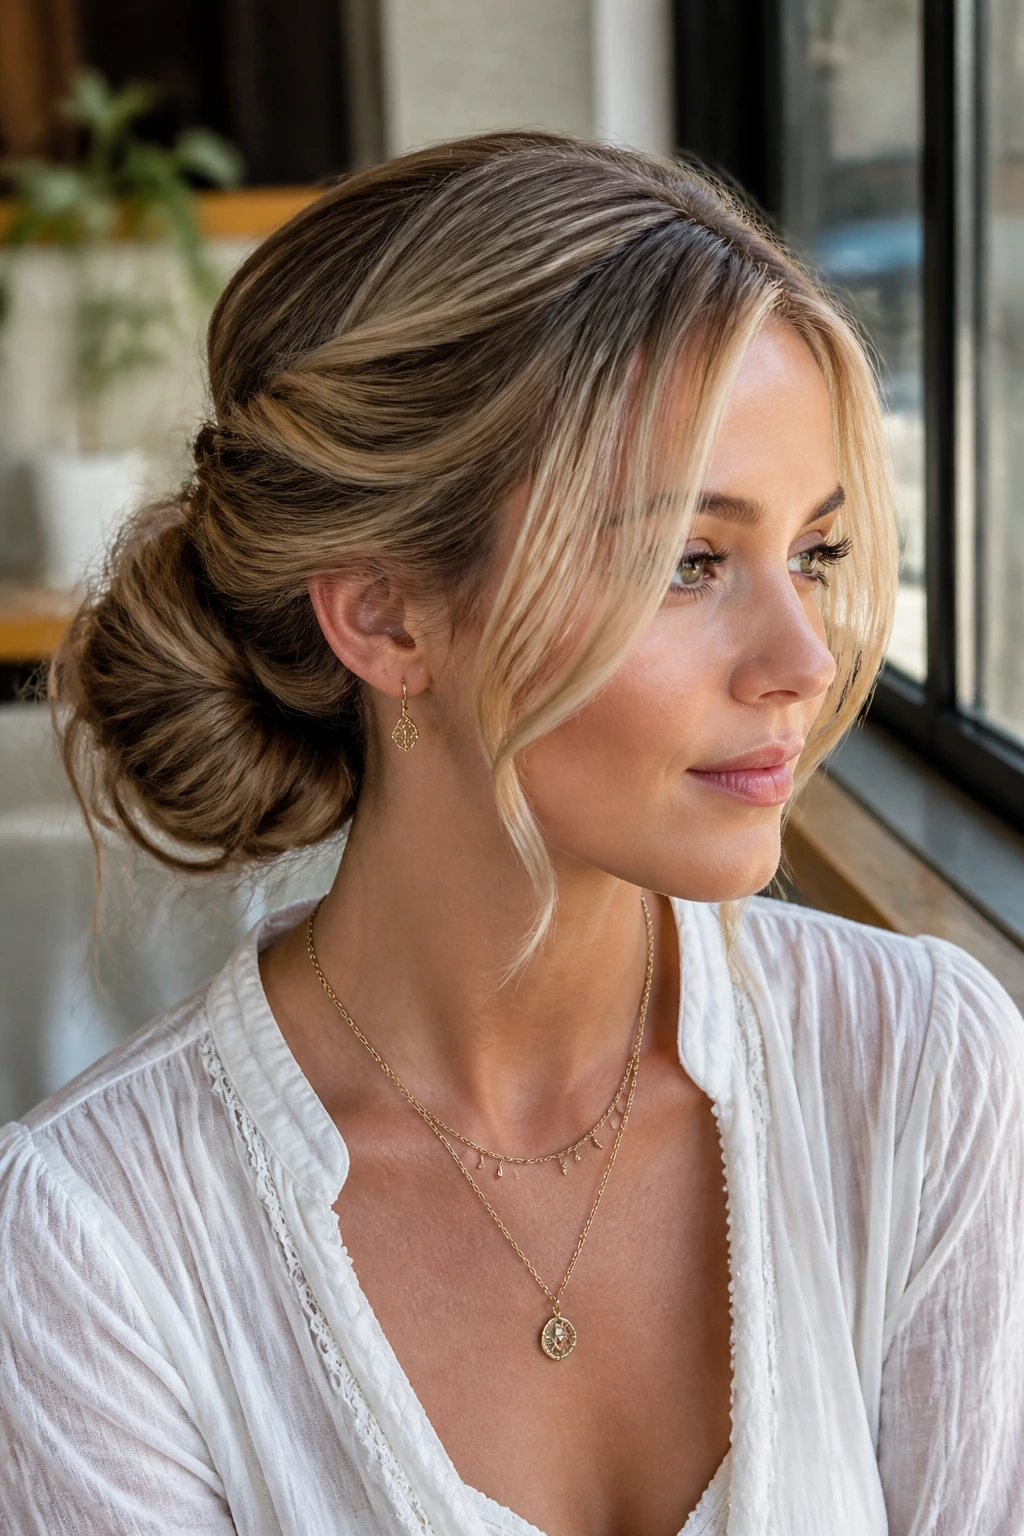
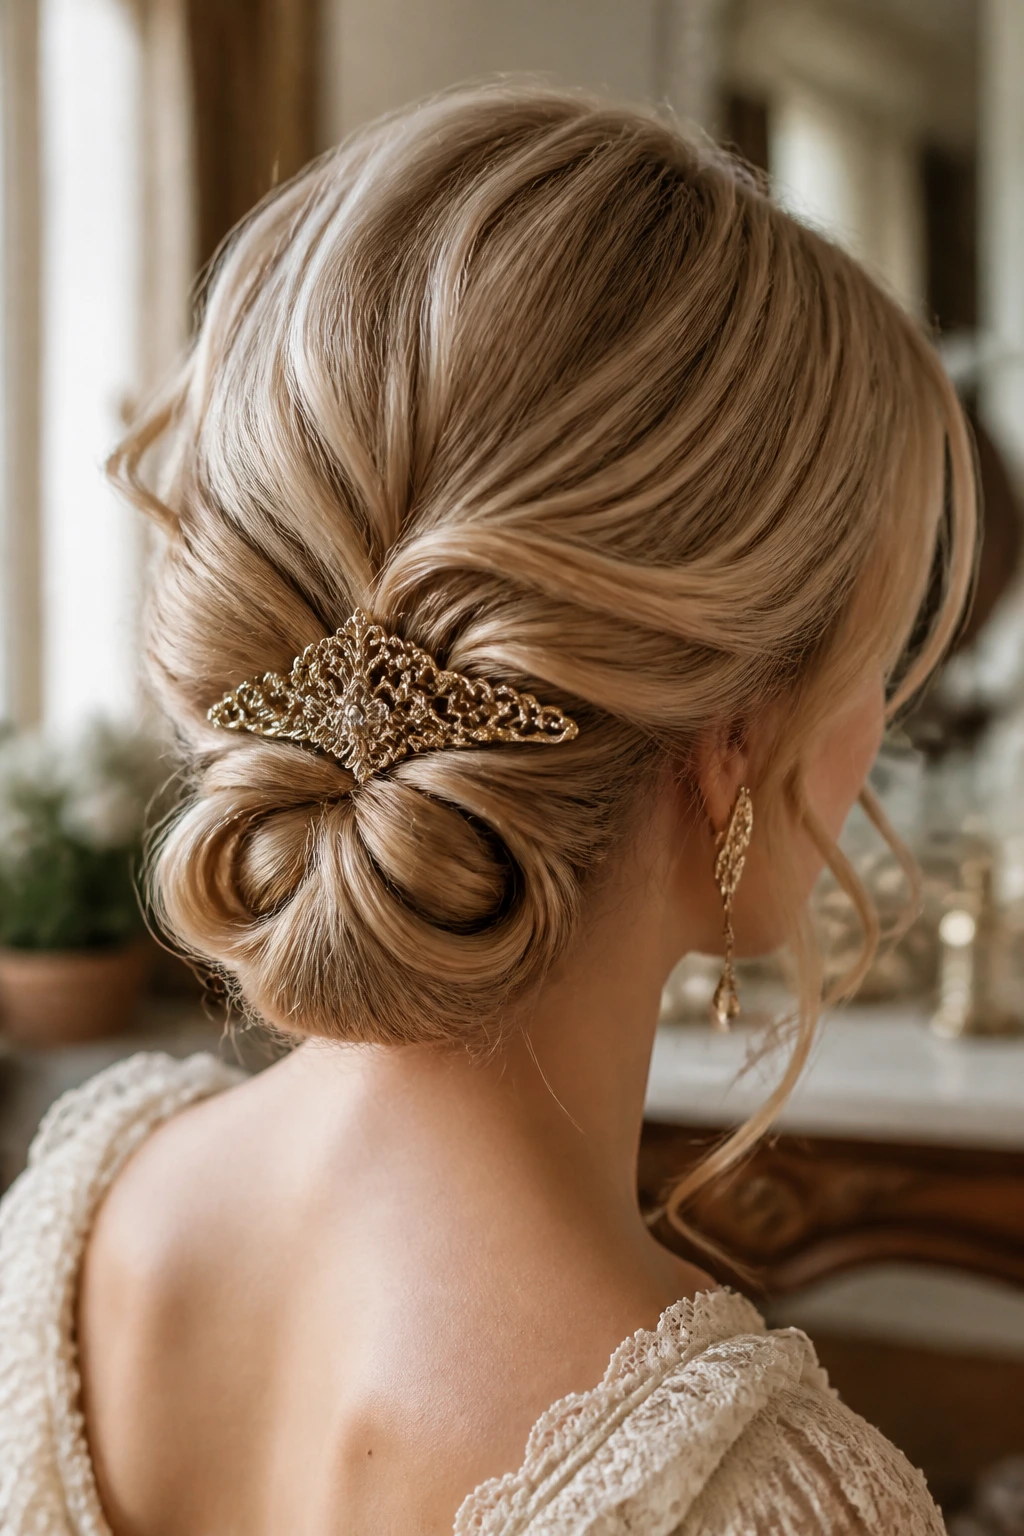
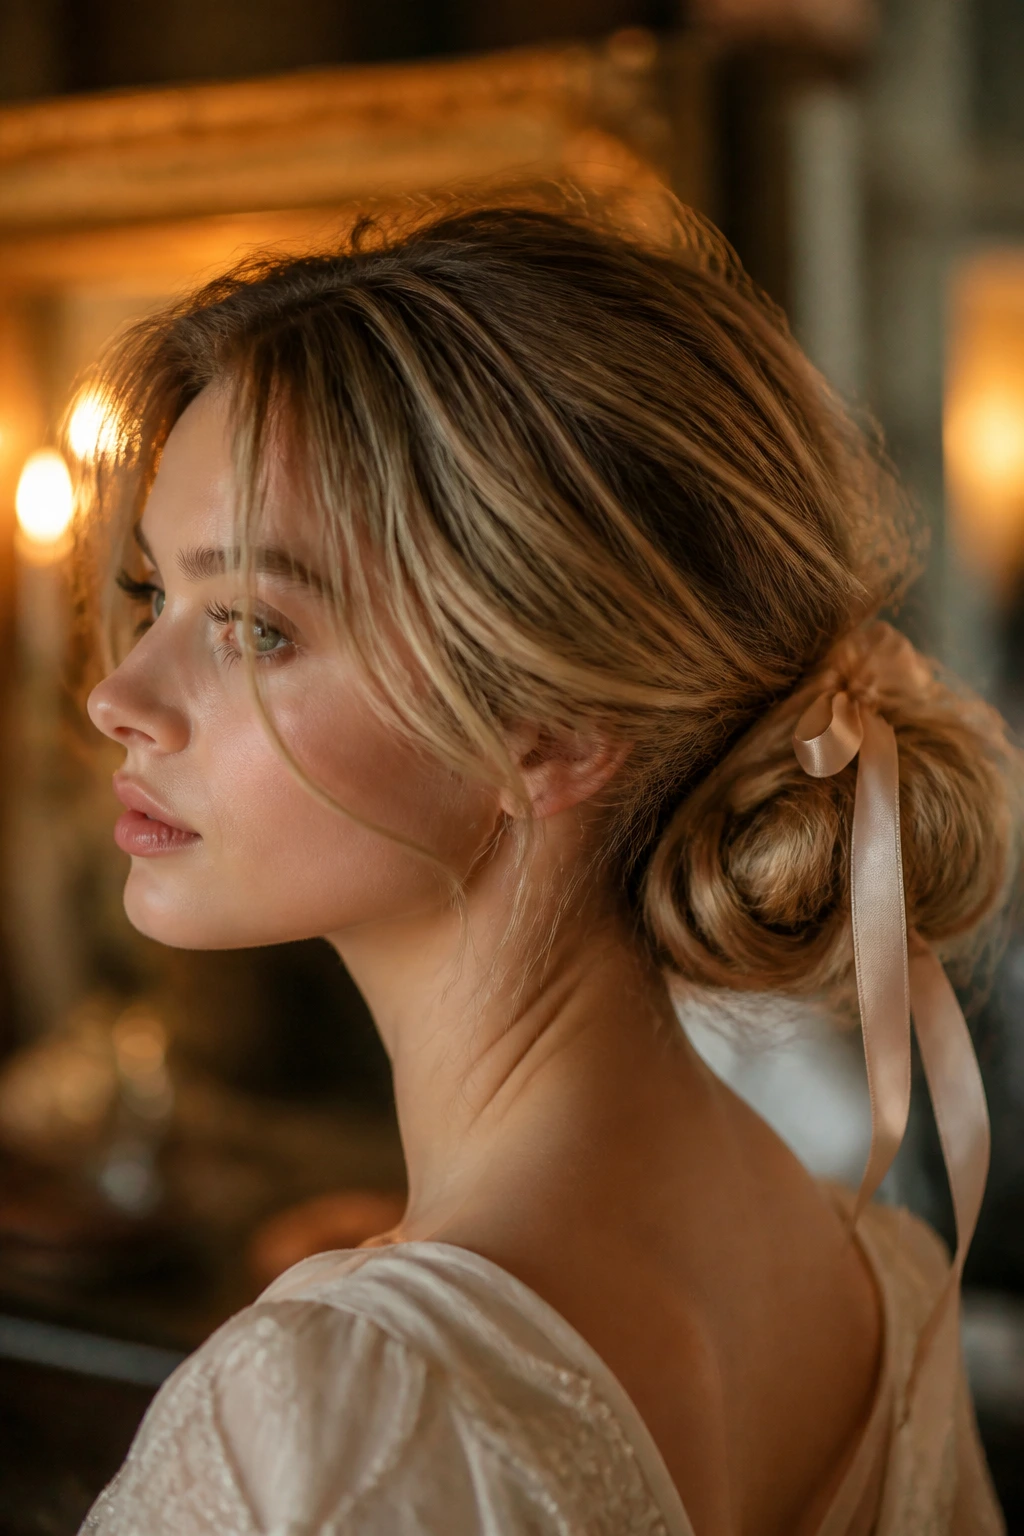
2. Ribbon-Tied Low Chignon with Curtain Layers
Why does a low chignon sometimes look fuller than a high bun? Because the shape sits wider at the nape, and the ribbon gives your eye a clean stopping point. Thin hair often looks better low and broad than high and tight.
Pull the hair into a loose low ponytail, twist it into a soft coil, and secure it with pins before tying a narrow ribbon around the base. Leave the curtain layers out in front and curl them into a gentle bend. If your hair is very silky, mist the roots with texture spray before you start. That extra grit keeps the chignon from slipping flat by lunchtime.
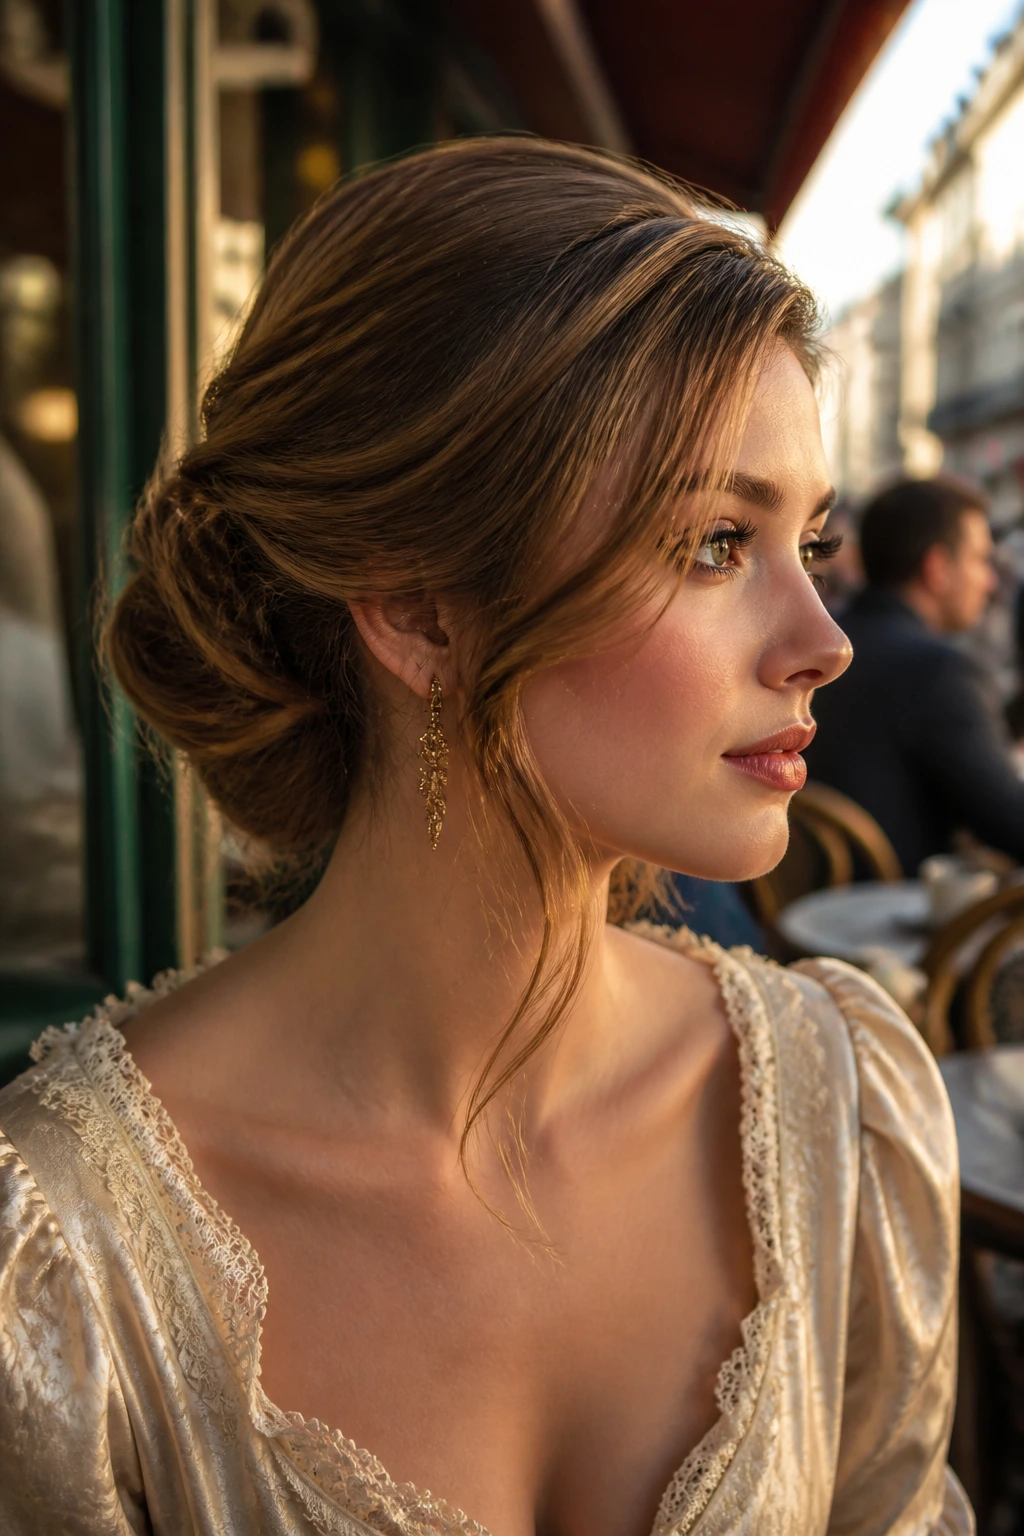
3. Side-Swept Gibson Roll with a Loose Front
If your hair collapses the minute you pin it, the Gibson roll deserves a serious look. The shape tucks length inward, which makes thin hair feel more compact and controlled, and the side-swept front keeps the style from looking severe.
A low side part works best. Roll the length upward from the nape and pin it in a long horizontal line, then leave one face-framing layer to skim the cheek. The result has a vintage profile without the helmet effect. That’s the win here. You get Rococo softness without needing a mountain of hair.
4. Pearl-Pinned French Twist with Feathered Face Pieces
A French twist can go wrong fast on thin hair if it gets too tall or too polished. Keep this version narrow, almost vertical, and let the feathered front pieces soften the edges. The pearls are not just decoration; they break up the line of the twist so it doesn’t look sparse.
How to keep it from looking skinny
Anchor the twist with long U-pins or crossed bobby pins, not just one sad clip at the center. Then let the front layers sit loose enough that they skim the jaw. That little bit of looseness matters. It makes the whole style feel finished instead of squeezed.
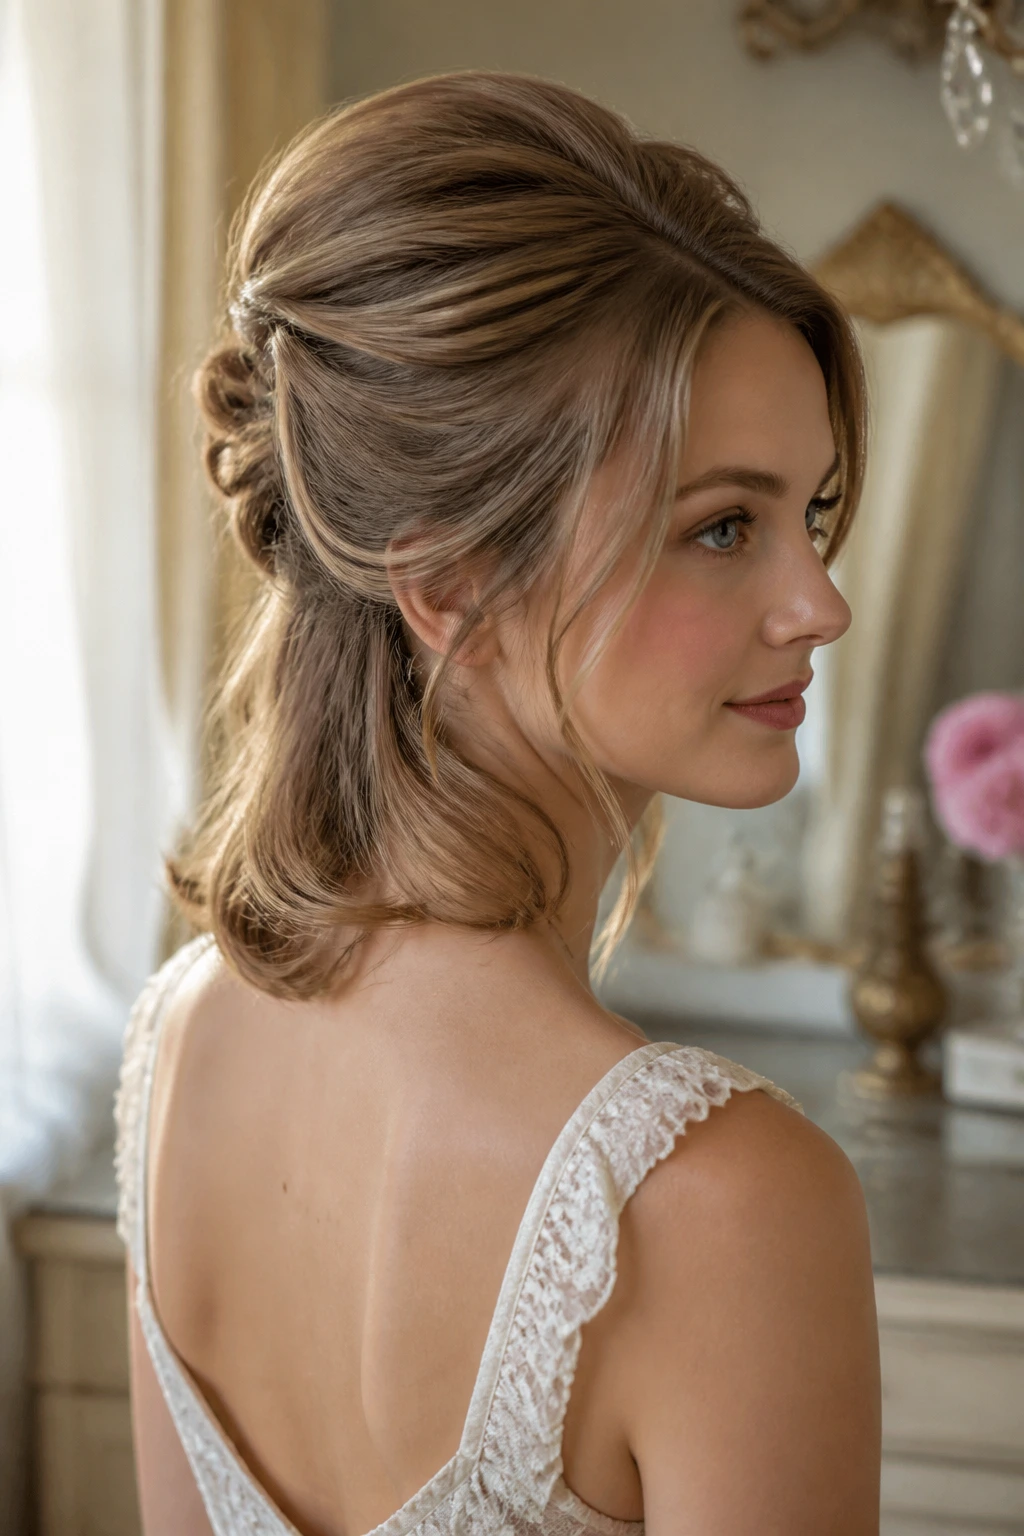
5. Double-Twist Half-Up with Airy Ends
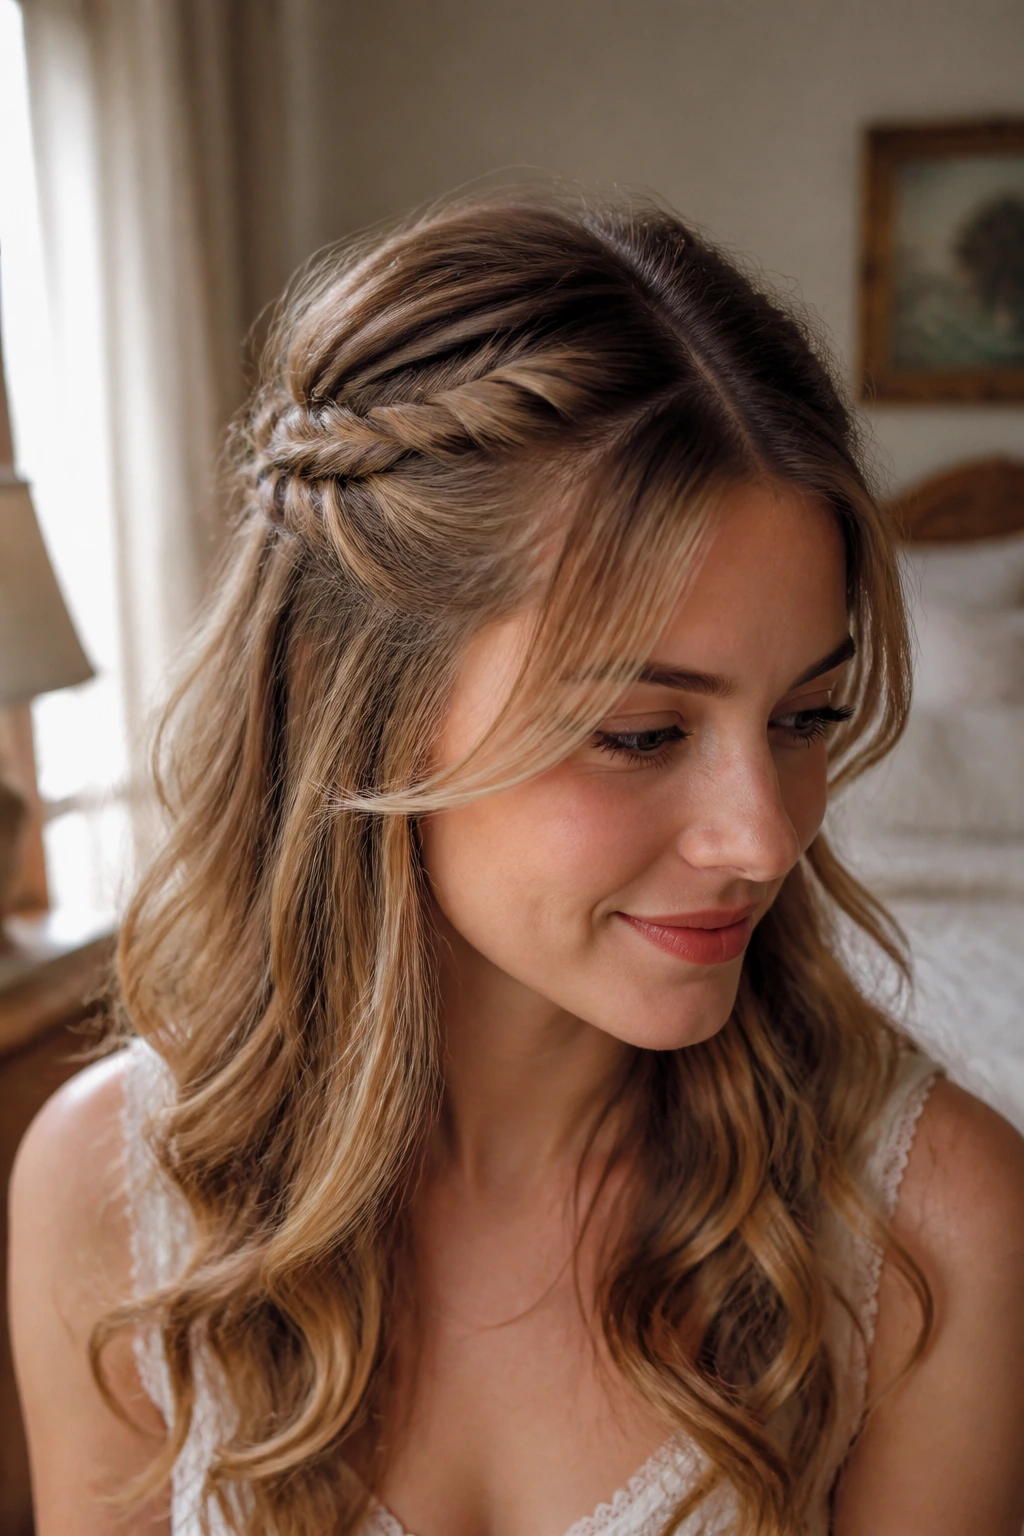
Two small twists beat one big tease job every time. Start by twisting each side from the temple back to the crown, then join them with a pin or a tiny clear elastic. The twin shapes create width, which thin hair rarely has on its own.
Leave the rest of the hair down and curled into soft ends. If the layers around your face are short, let them fall free instead of forcing them back. This one is especially good when you want Rococo flavor without looking like you’re headed to a costume party. It reads romantic. Not fussy.
6. Rope-Braid Halo with a Hidden Cushion
This one cheats, and I mean that kindly. A narrow hidden cushion under the crown braid makes the halo sit higher and look more substantial than the amount of hair would suggest.
- Best for medium-length fine hair.
- Works well with second-day texture.
- Keep the braid loose and pancake it gently with your fingertips.
- Leave a few temple strands out so the halo doesn’t harden the face.
The key is not to over-tighten the braid. If you pull every segment hard, the braid shrinks, and thin hair has nowhere to hide. A soft halo with a little air under it looks richer than a rope that’s been strangled flat.
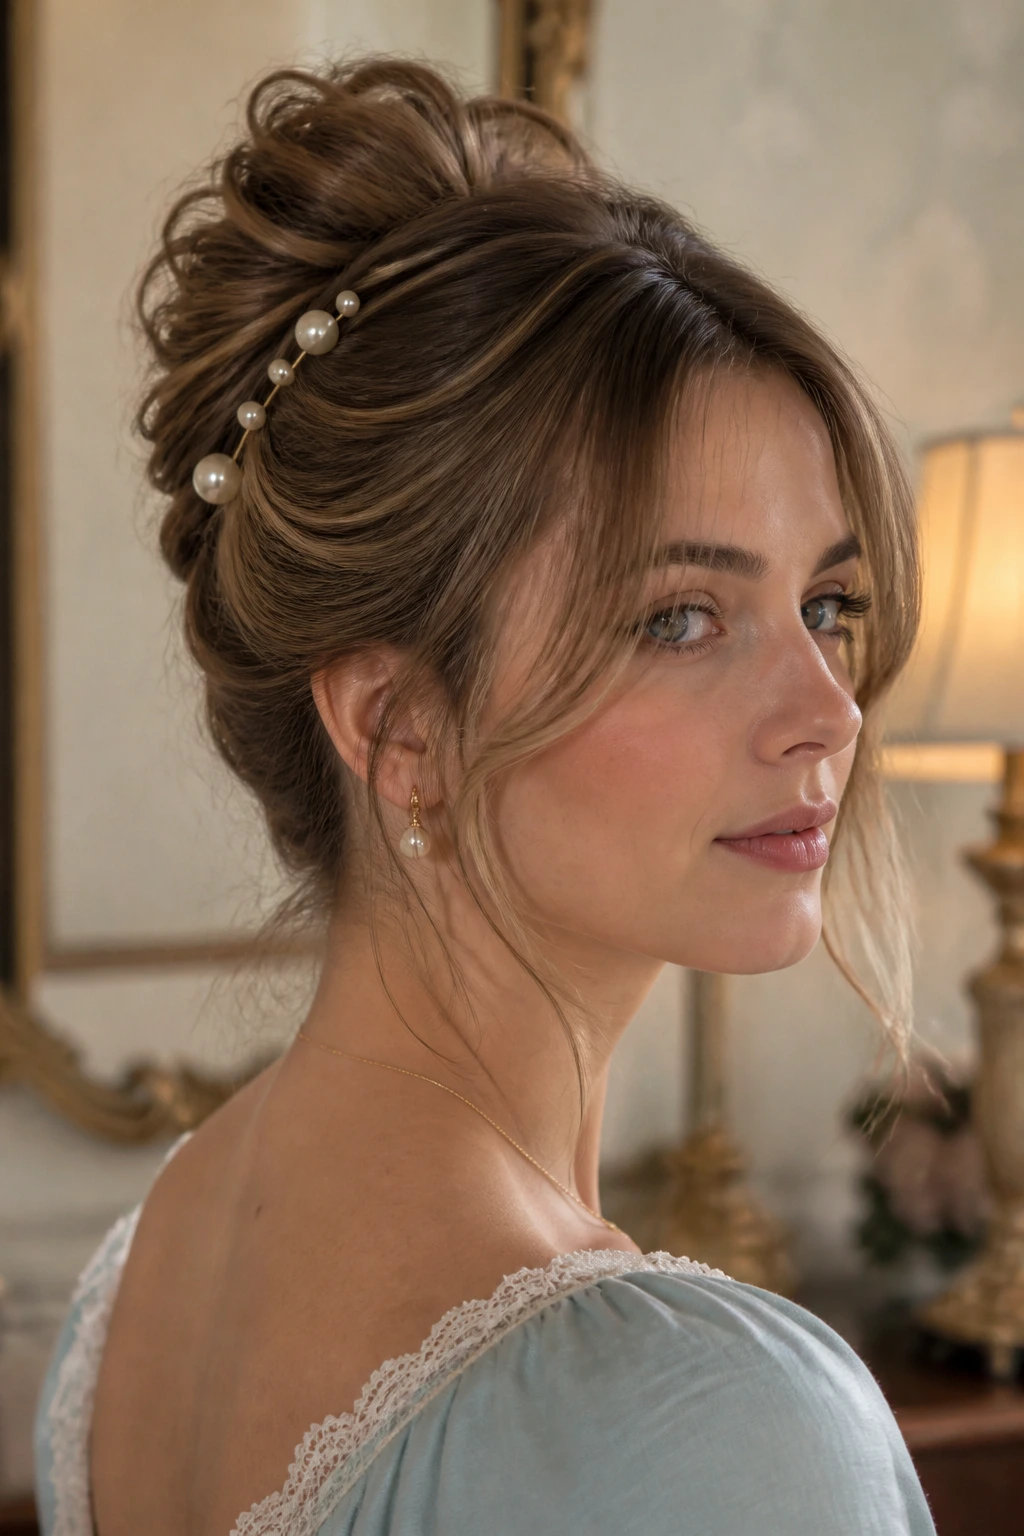
7. Wrapped-Base Ponytail with a Lifted Crown
Start with a low ponytail, then spend the real energy at the crown. That’s the move. Tease the roots lightly, smooth the top layer over the lift, and wrap one small strand around the elastic so the base disappears.
Curled ends help a lot here. Straight ends can make the style look skeletal, which is the last thing thin hair needs. Keep the face-framing layers loose and turned slightly away from the face. The shape ends up looking deliberate, but not severe. A good Rococo ponytail should feel dressed up, not sporty.
8. Gibson Tuck with Soft Temple Strands
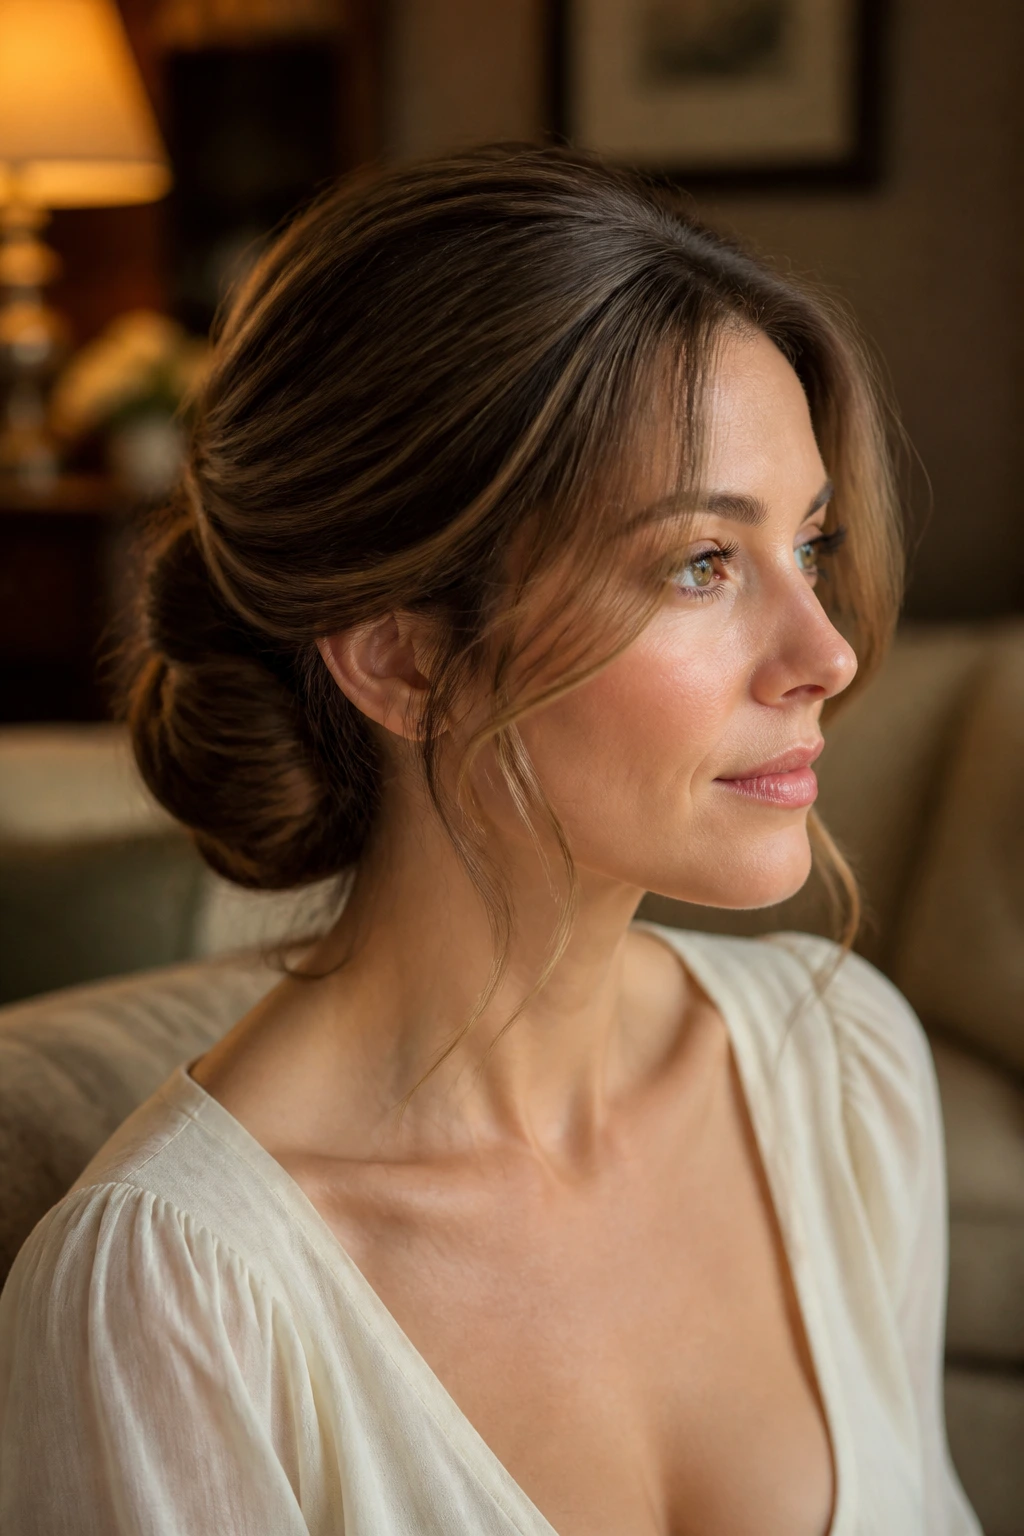
I like this version better than the stiff textbook tuck. It’s softer, and softness is your friend when the hair is fine. A Gibson tuck hides the length inward, which makes the style seem fuller at the nape than it actually is.
Pull the hair into a low loose roll and pin it under itself, then leave the temple strands alone. Those little pieces around the face keep the shape from looking too neat. If your hair is slippery, use a few extra pins on the inside seam. You want the tuck to disappear into the style, not keep unrolling every time you turn your head.
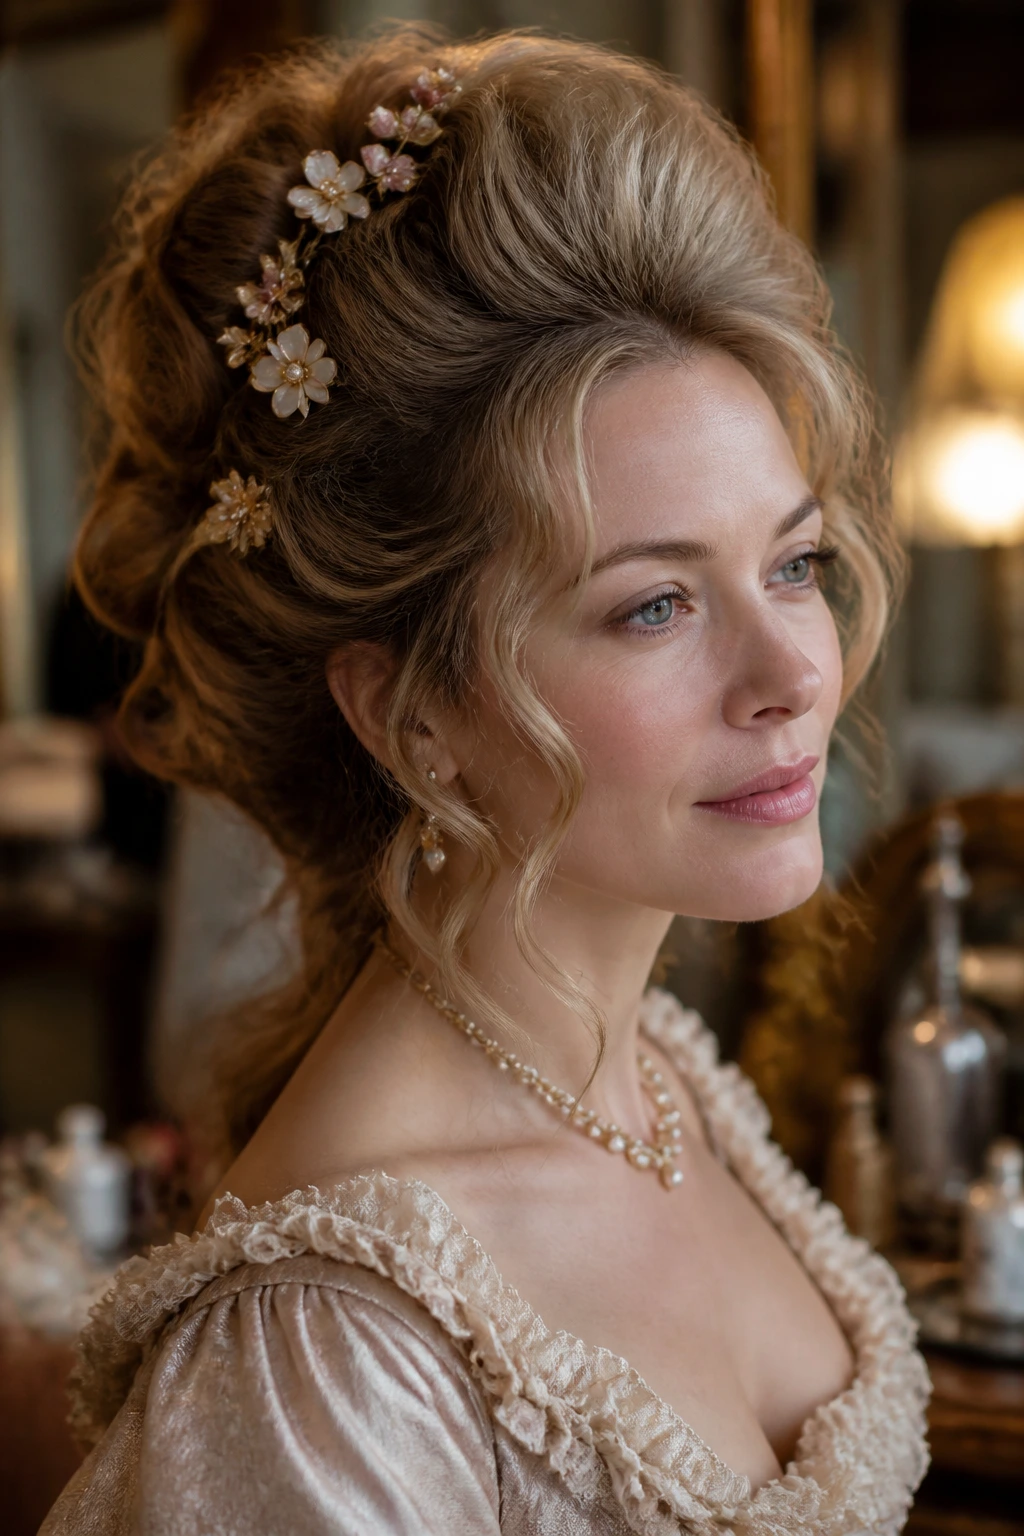
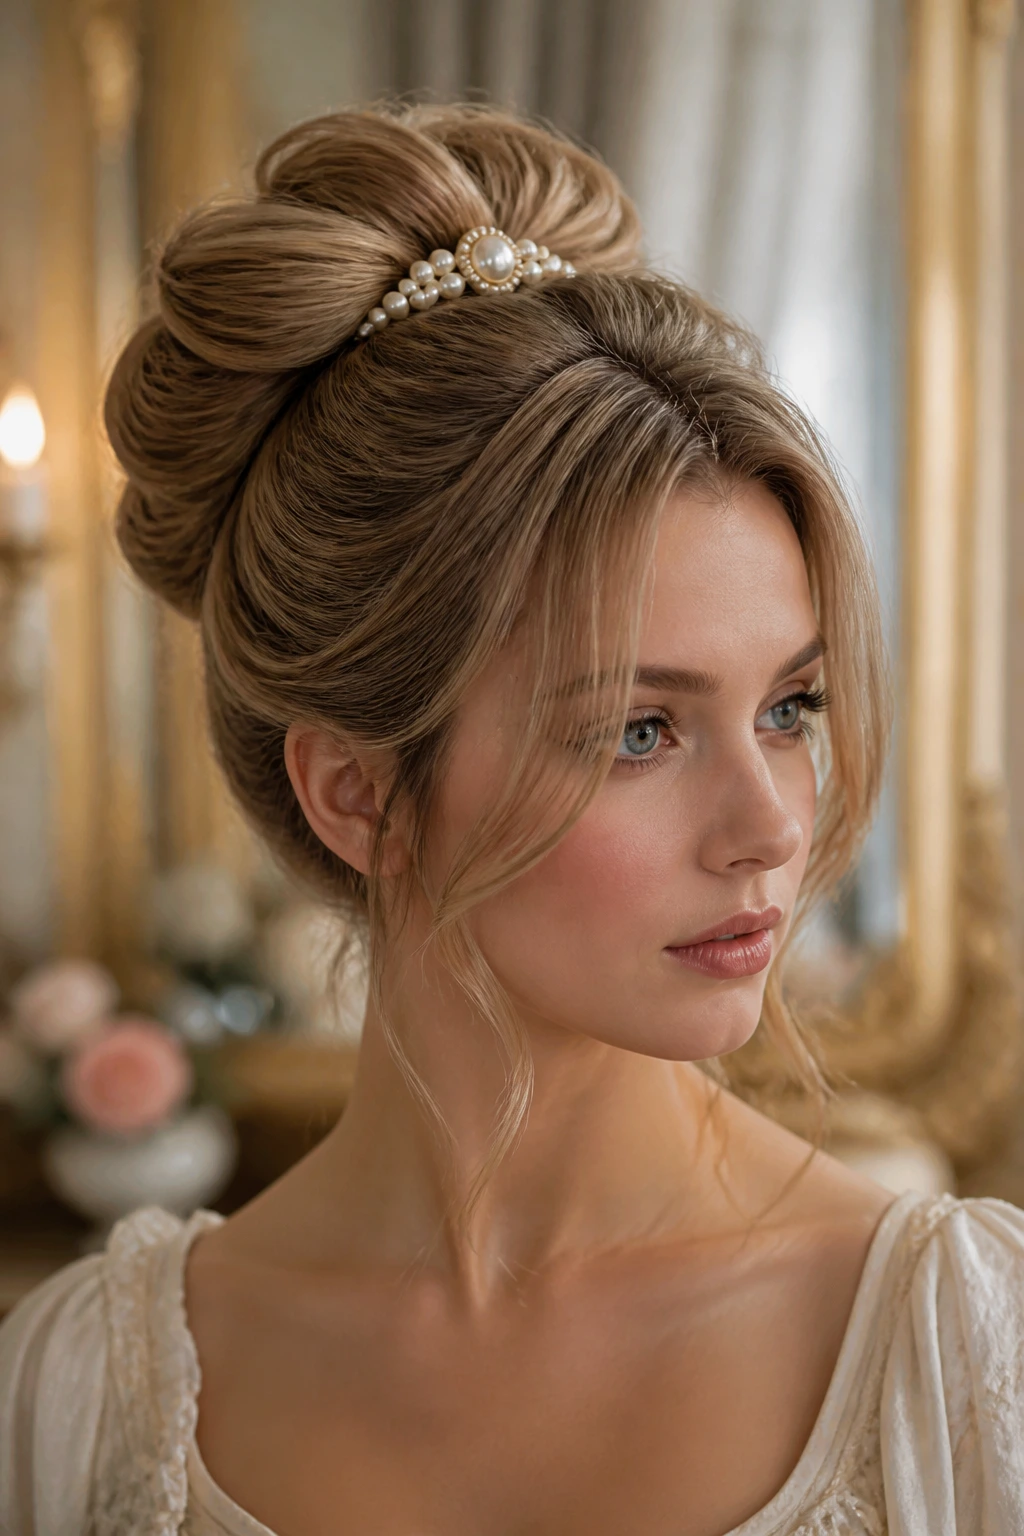
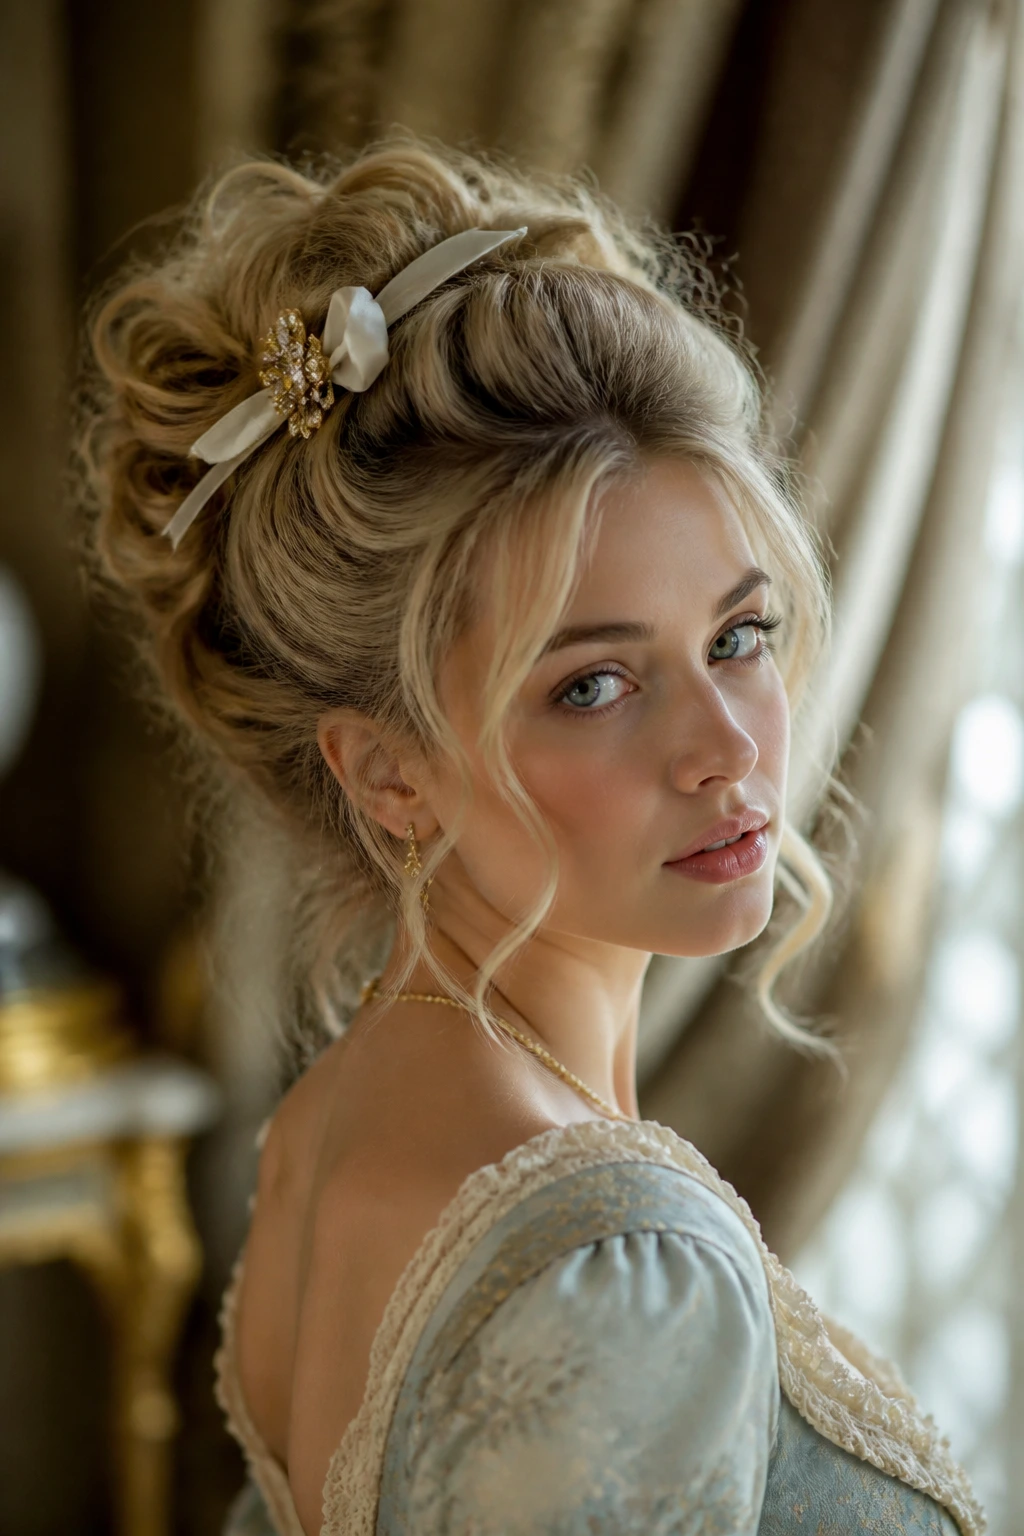
9. Soft Pompadour Bun with a Center Part
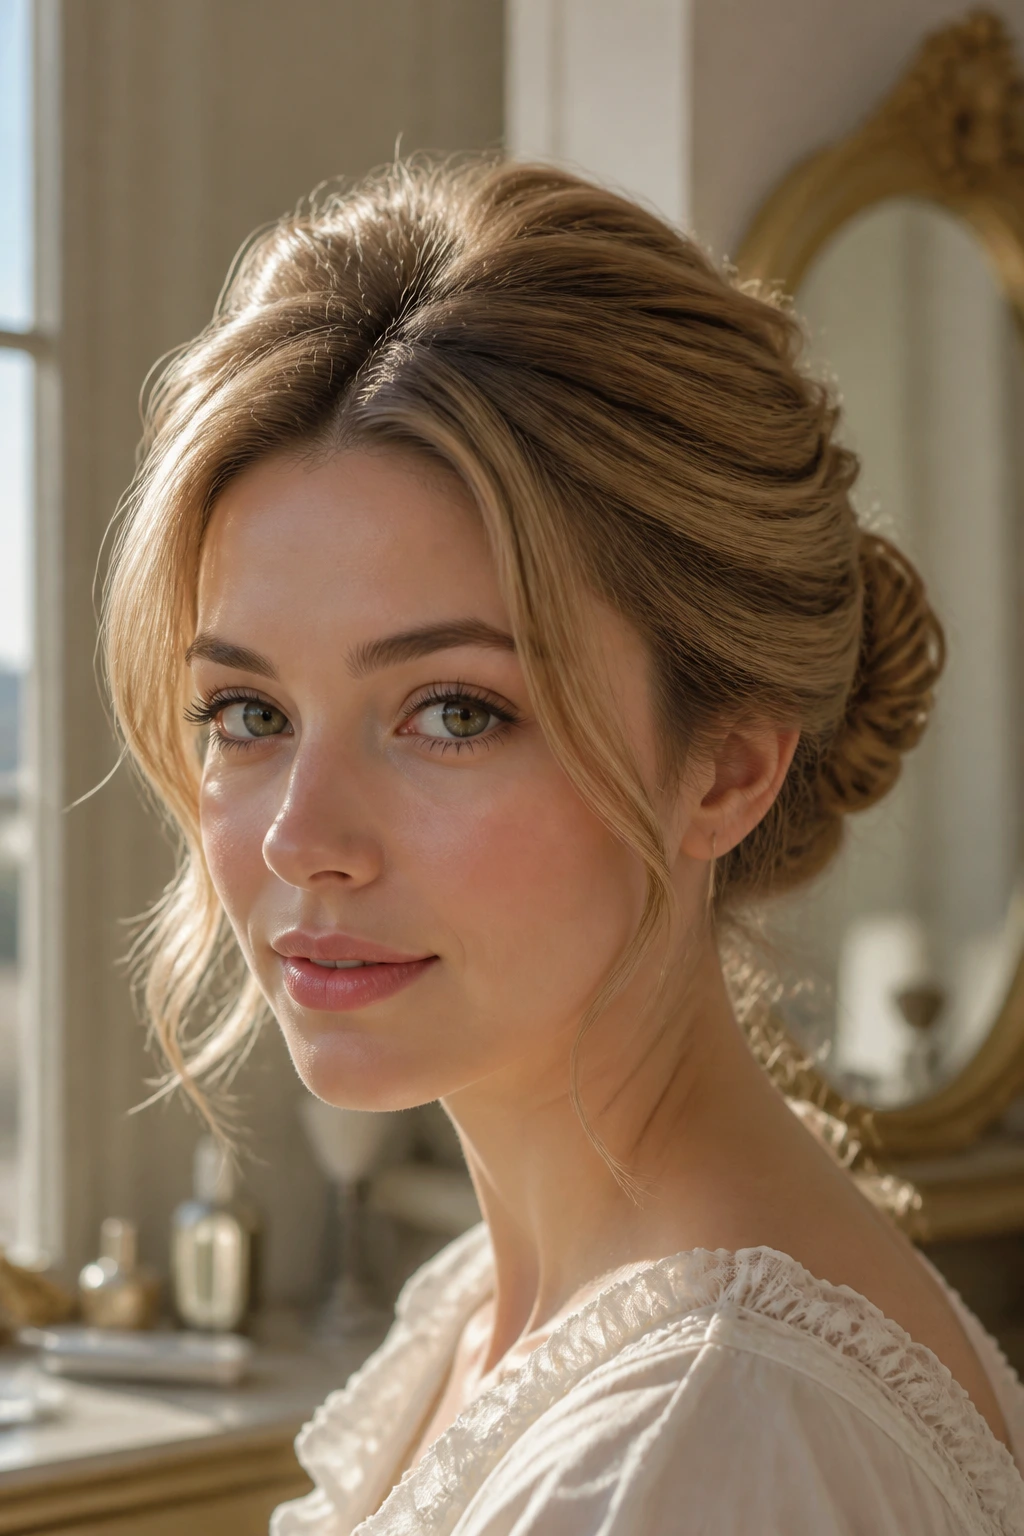
A pompadour is not too much for thin hair if you keep it shallow. Build the lift only at the front third of the head, then gather the rest into a small bun at the back. The center part gives the face-framing layers room to fall cleanly on each side.
What makes this one work
The bun does not need to be huge. In fact, a smaller bun makes the front height look more dramatic. That contrast is the whole trick. Use a touch of volumizing mousse at the roots before blow-drying, then set the front section with a round brush so it has a gentle curve instead of a hard hump.
10. Mini Victory Rolls with a Modern Finish
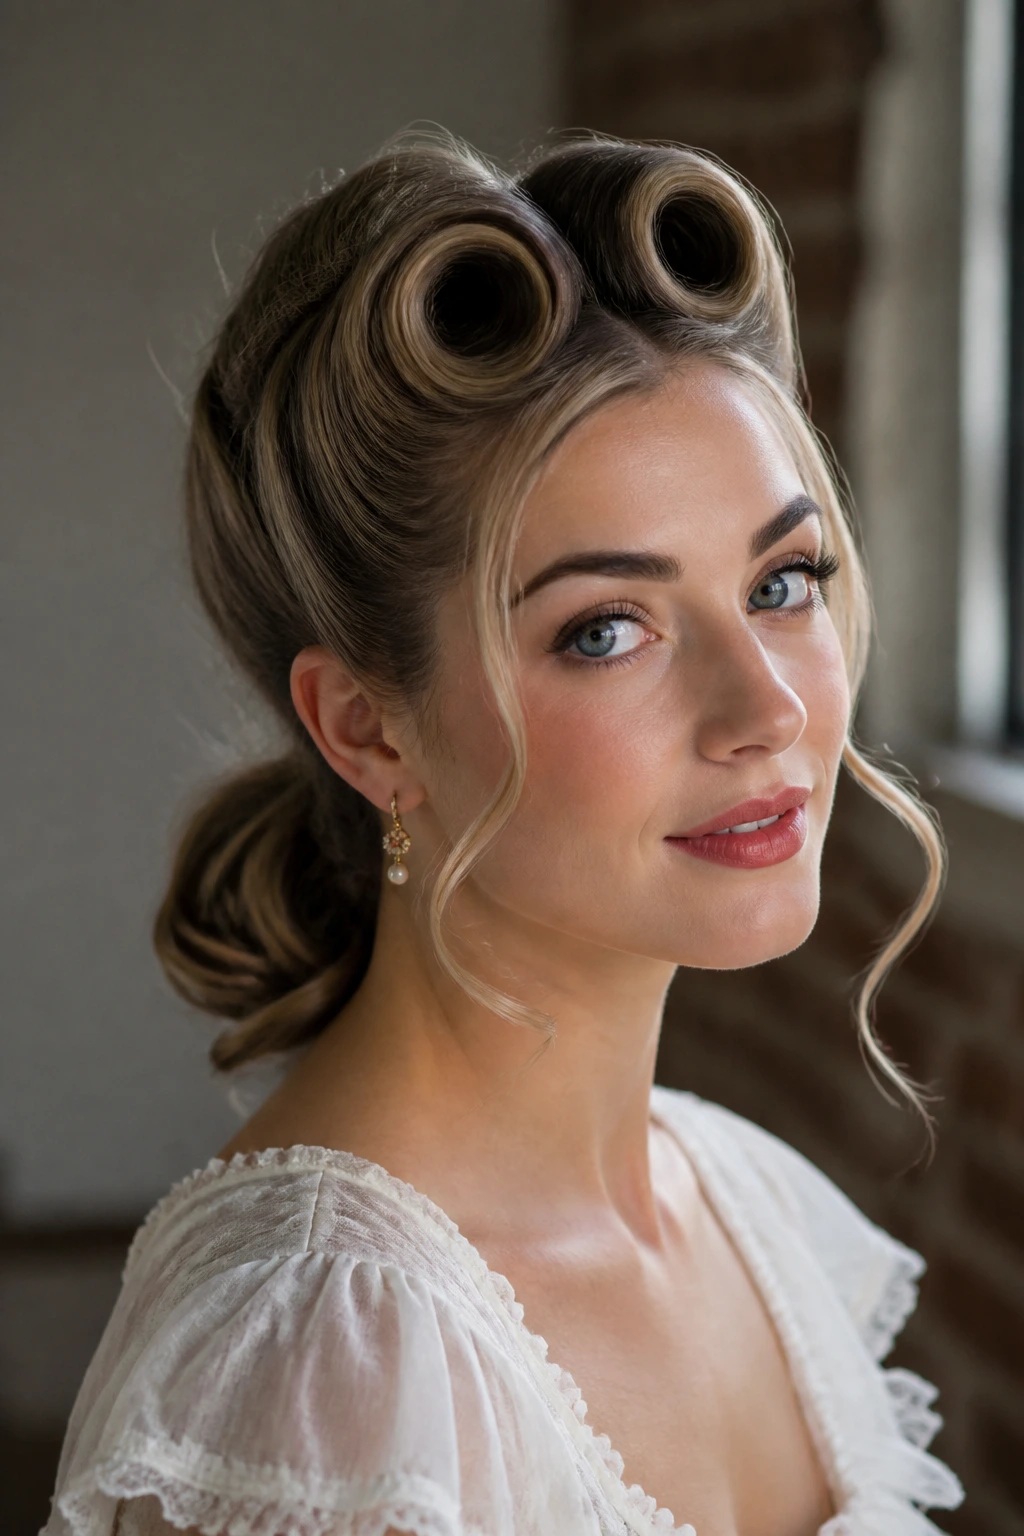
The front should look sculpted, not shellacked. That’s the line to remember. Mini victory rolls sit well on thin hair because each roll uses a narrow strip of hair, and the curve itself creates the illusion of density.
Leave the rest of the hair in a low ponytail, a bun, or even loose waves. The rolls do the heavy visual work. One pearl pin per side is enough. More than that and the style starts to fight itself. This is a good option when you want something that nods to Rococo scrollwork without turning into a full historical imitation.
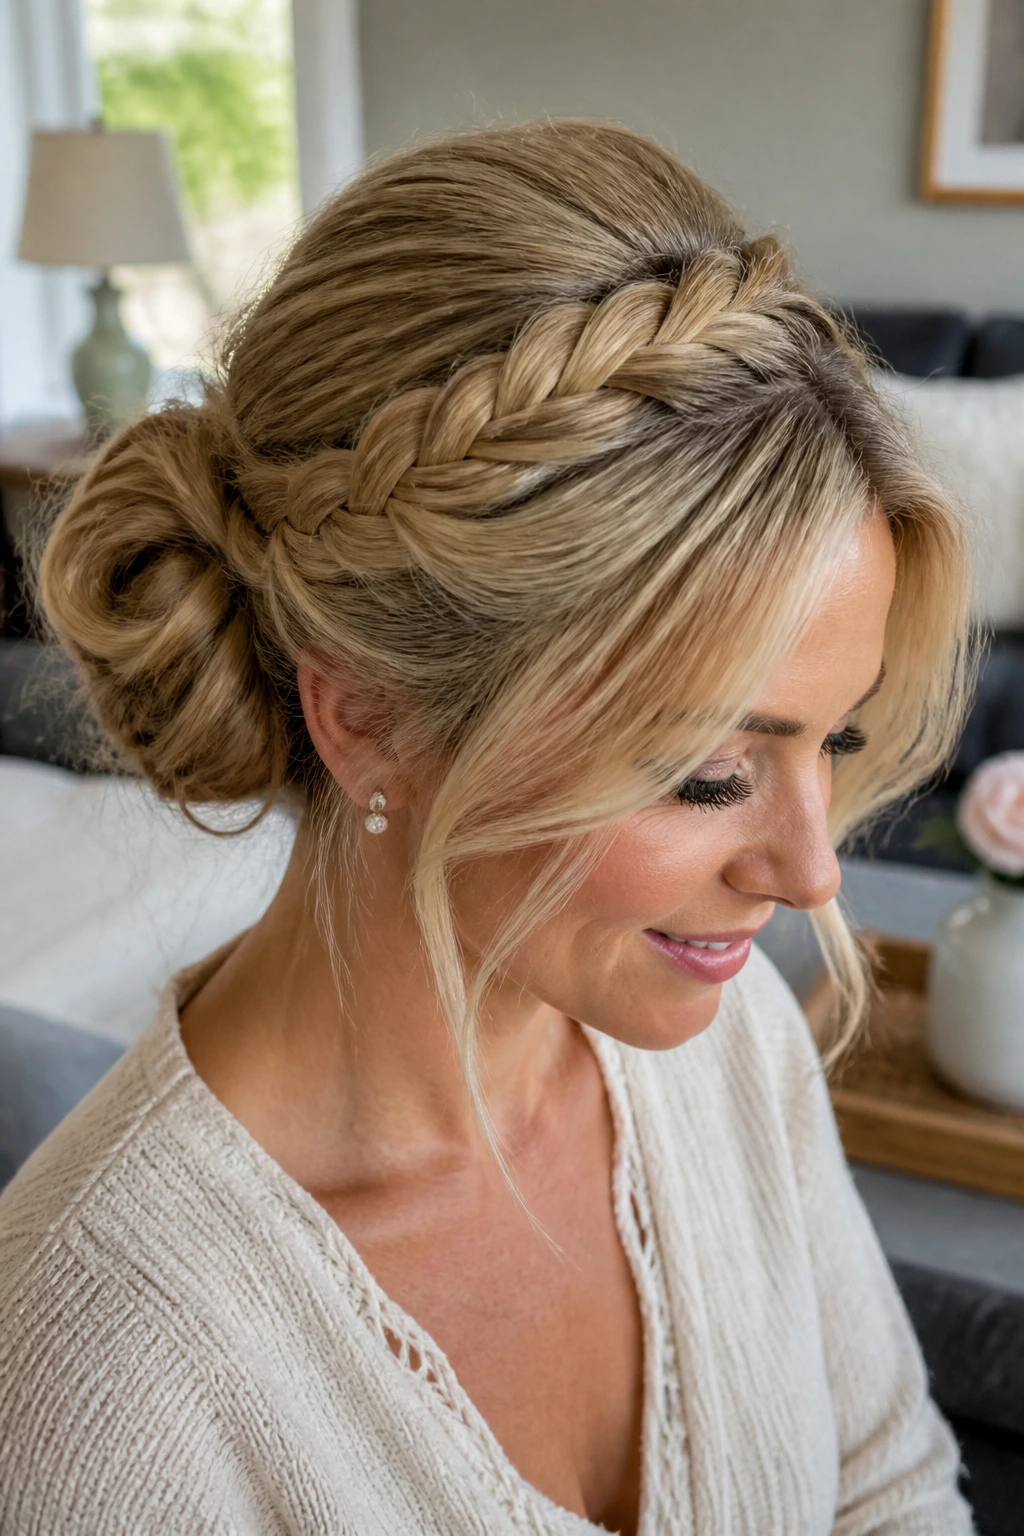
11. Braided Crown with Cascading Length
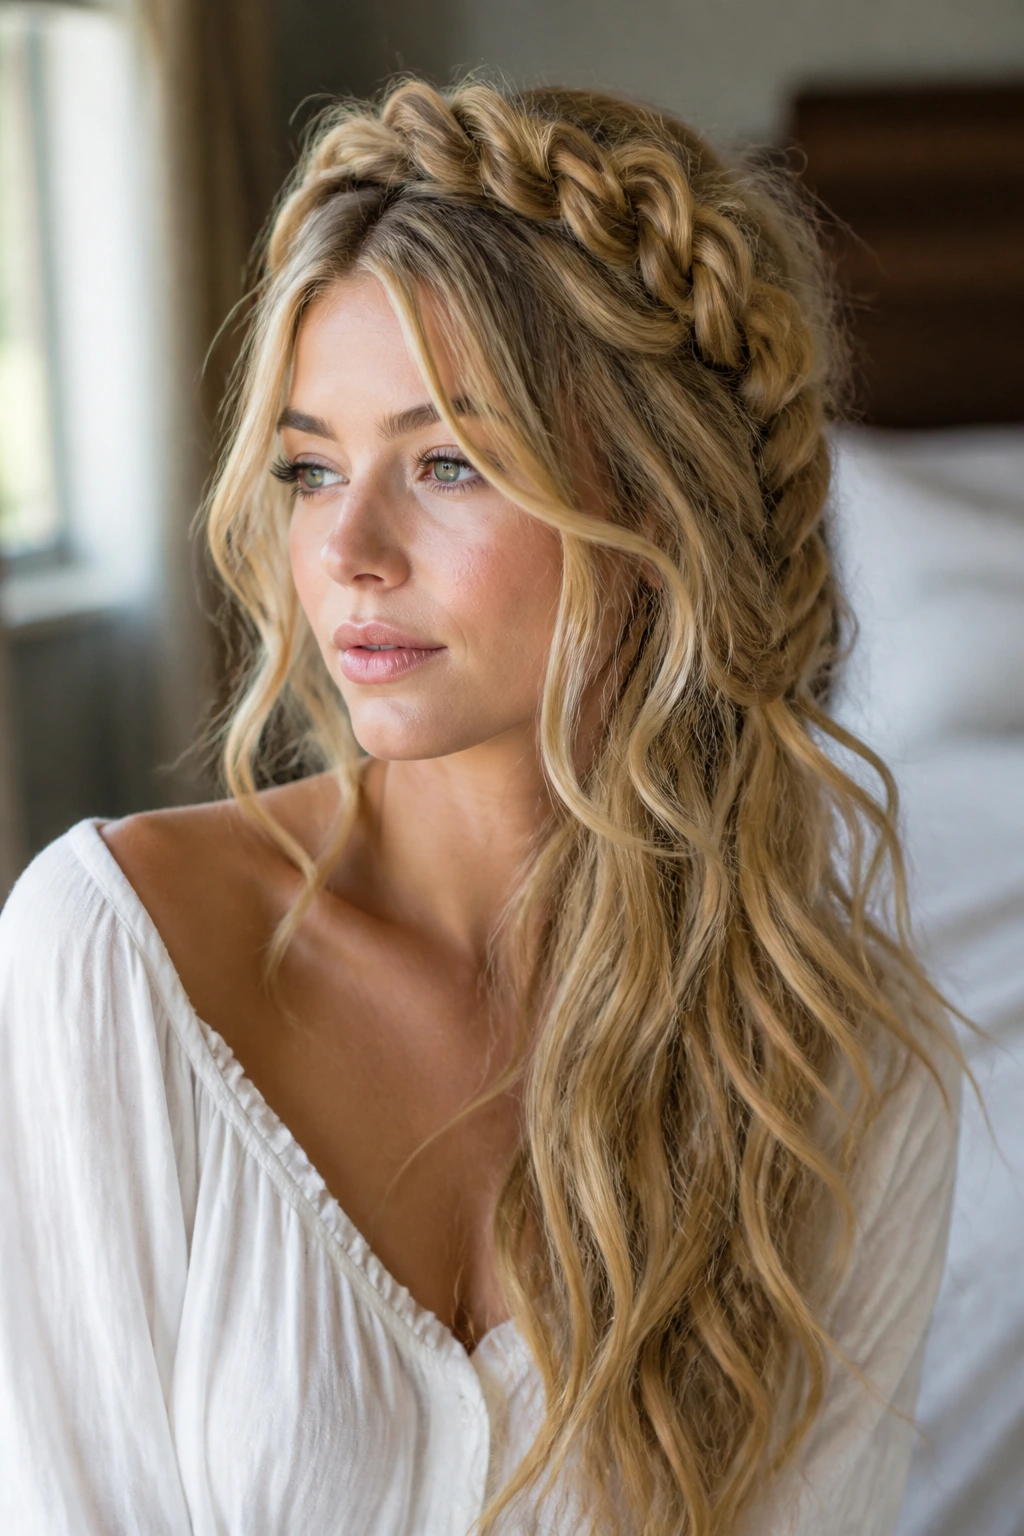
Why does a crown braid often look bigger than loose hair? Because it draws the eye around the head instead of straight down. Thin hair benefits from that circular path. The braid becomes the frame, and the rest of the hair can stay softer.
Keep the braid loose and widen each section after it’s pinned. That little pancaking step matters. If you flatten the braid too much, it disappears. If you leave the back in loose waves, the whole style feels more luxurious than a tight crown ever could.
12. Ribbon-Woven Milkmaid Braid
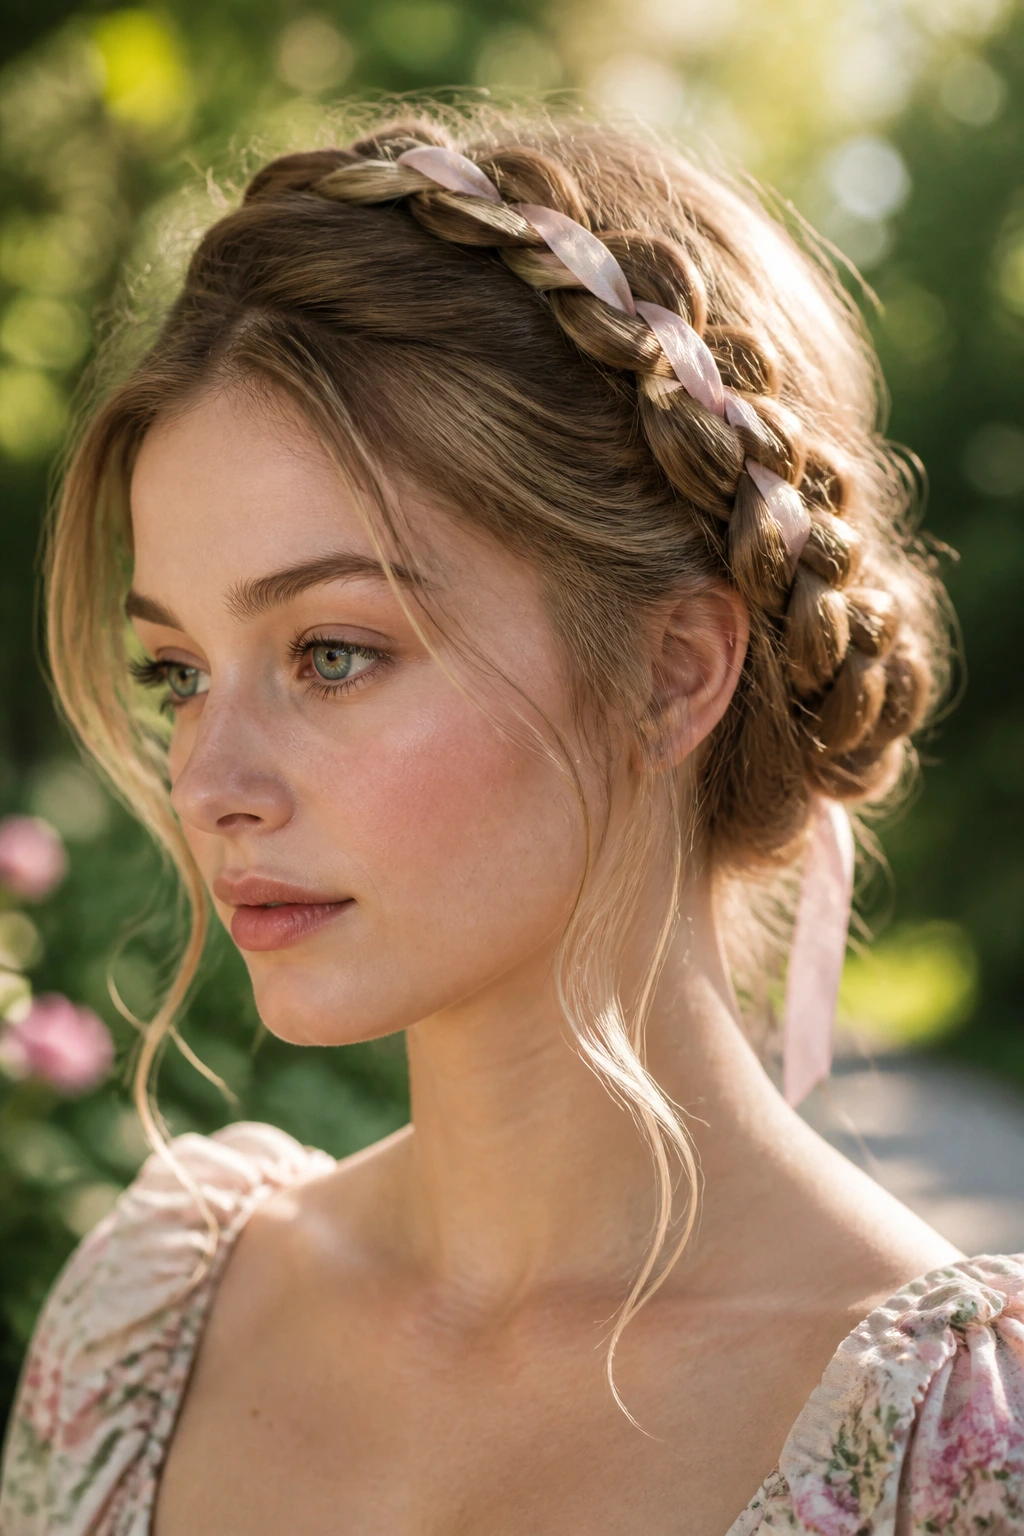
If you want ornament to do half the work, this is the move. A ribbon woven through a milkmaid braid gives the hair extra presence without needing extra density. The braid itself should stay slightly loose, and the ribbon should not be pulled so tight that it puckers.
Use a narrow ribbon in satin, velvet, or grosgrain depending on the mood. Satin reads dressier. Velvet looks richer. Grosgrain stays put better on slippery hair. Keep the part clean and the face-framing layers soft so the braid doesn’t feel like it’s sitting on top of your head like a headband from another century.
13. Low Knot with Sculpted Side Swoops
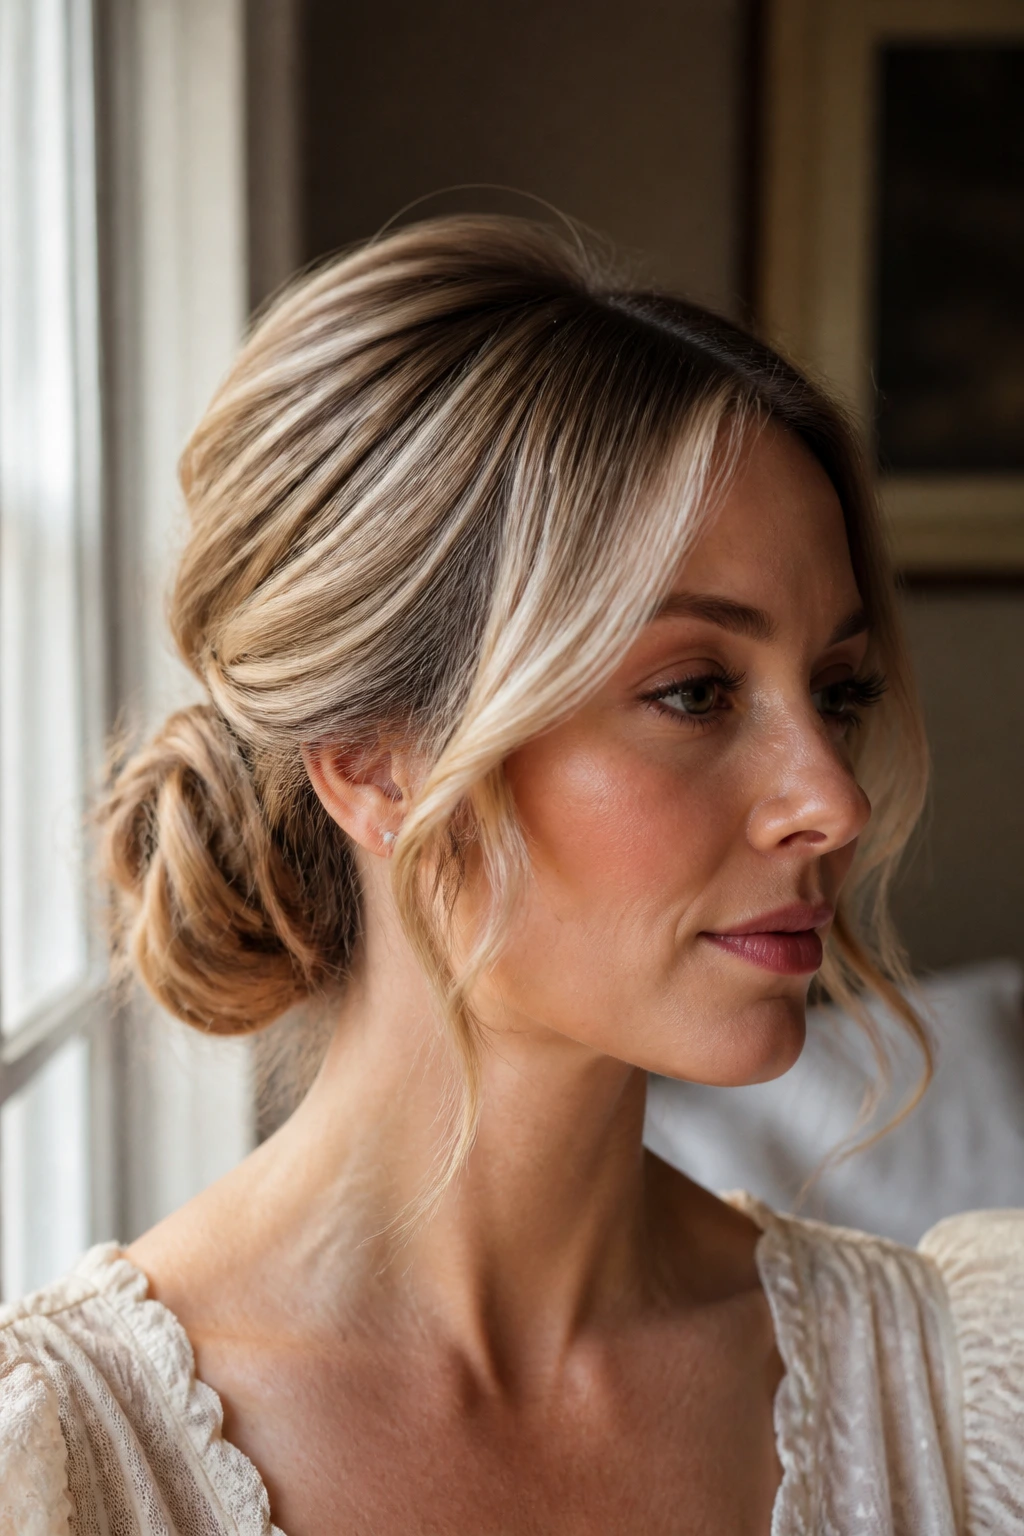
A low knot gets a lot better when the sides aren’t flat. Sculpted side swoops create that Rococo curve around the temples, which is where thin hair usually needs help most. The knot itself can be compact. The swoops are the star.
Pin the side pieces back in a soft arc, not a straight line. Then gather the rest into a small knot or folded bun at the nape. If you use a bun shaper, hide it well. The point is shape, not obvious padding. A good low knot should look like it has been arranged by hand, not assembled from parts.
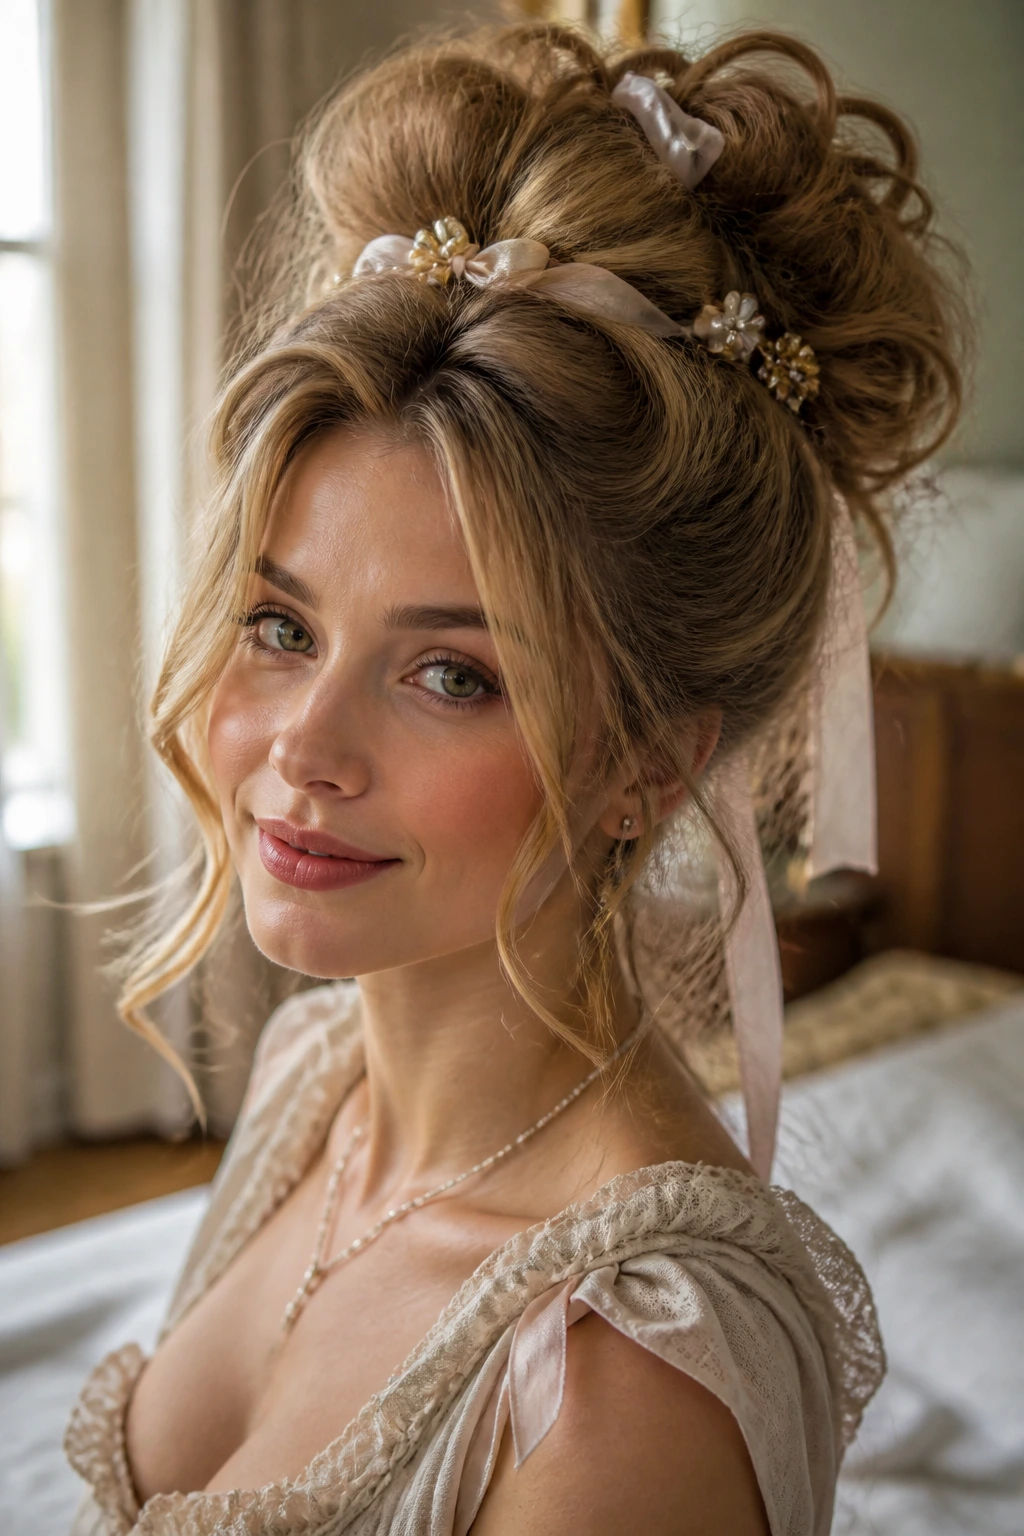
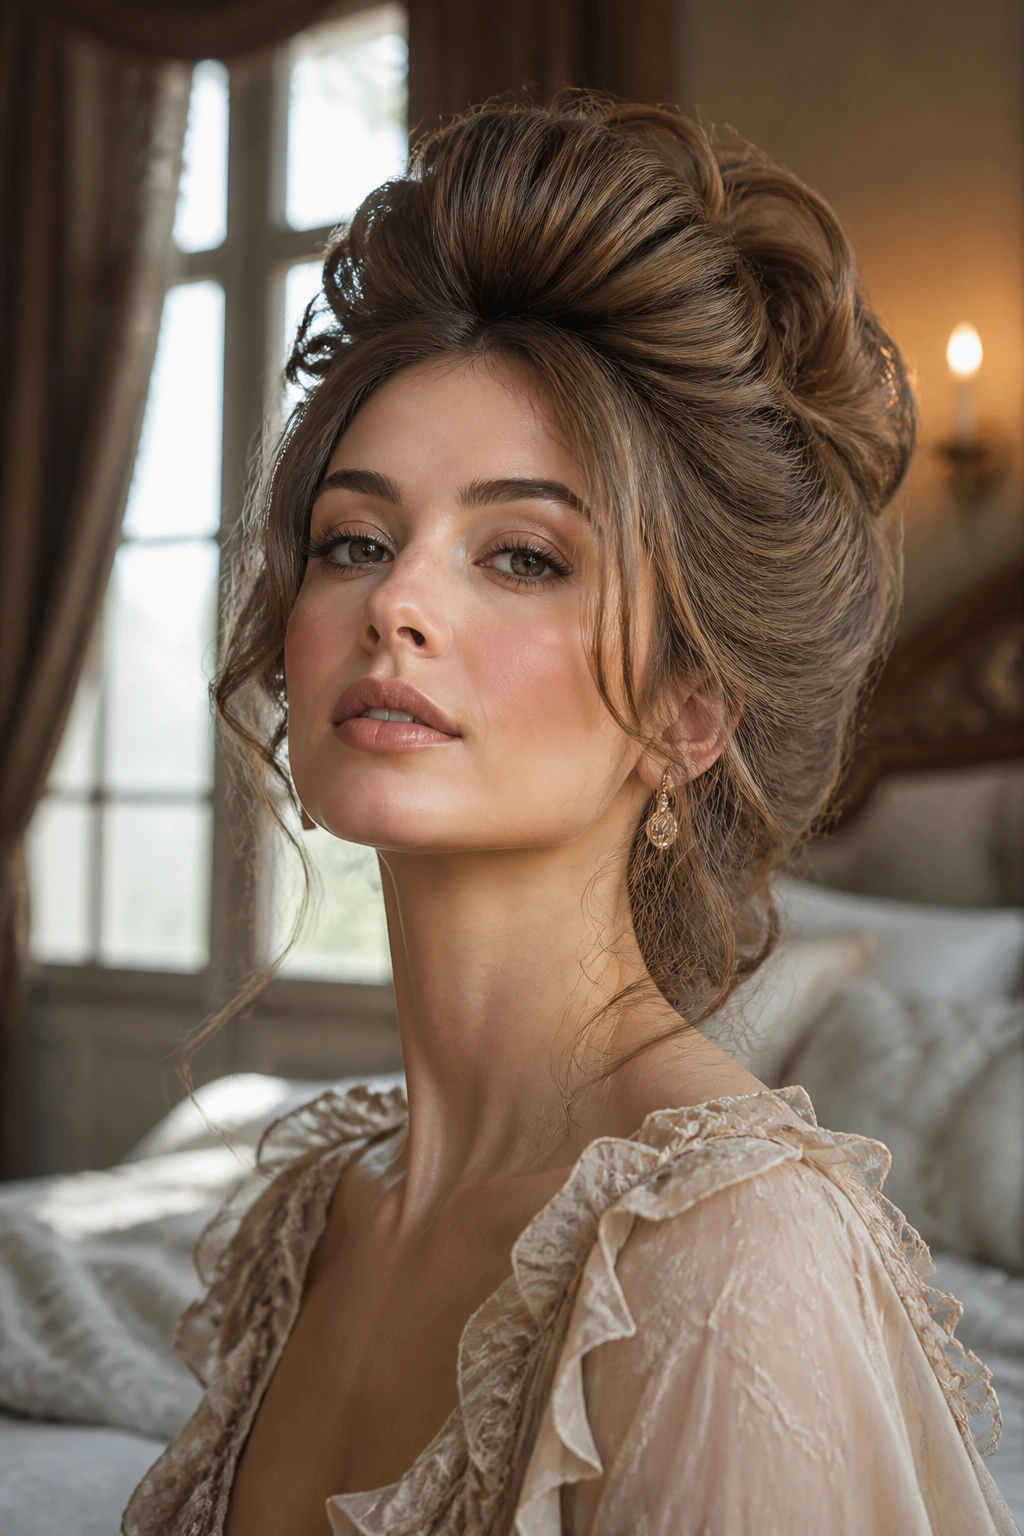
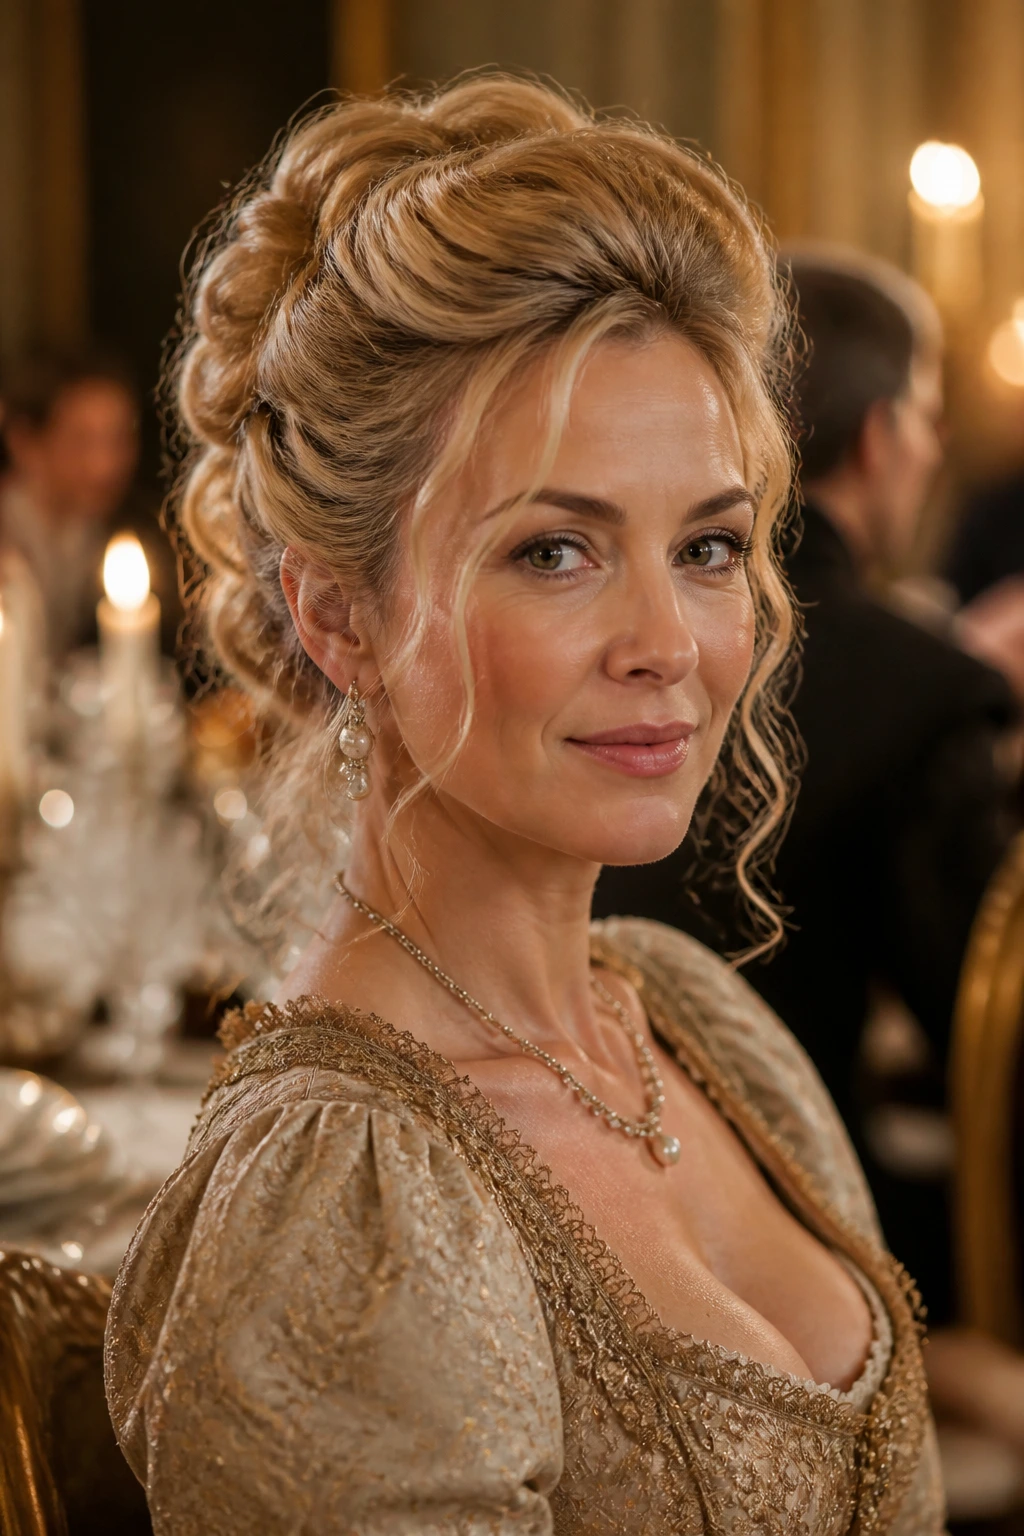
14. Half-Up Bouffant with Spiral Ends
This is the closest thing to a portrait hairstyle without bringing actual wigs into the picture. The half-up bouffant gives you height at the crown, and the spiral ends keep the length from hanging limp.
Why it flatters thin hair
The bouffant sits where the hairline needs support, while the loose back section keeps the style from feeling sealed off. Curl the ends in 1-inch sections, then brush them lightly so they read as spirals instead of tight prom curls. That brushed-out texture looks richer on thin hair. It has movement.
15. Side-Part S-Wave Updo
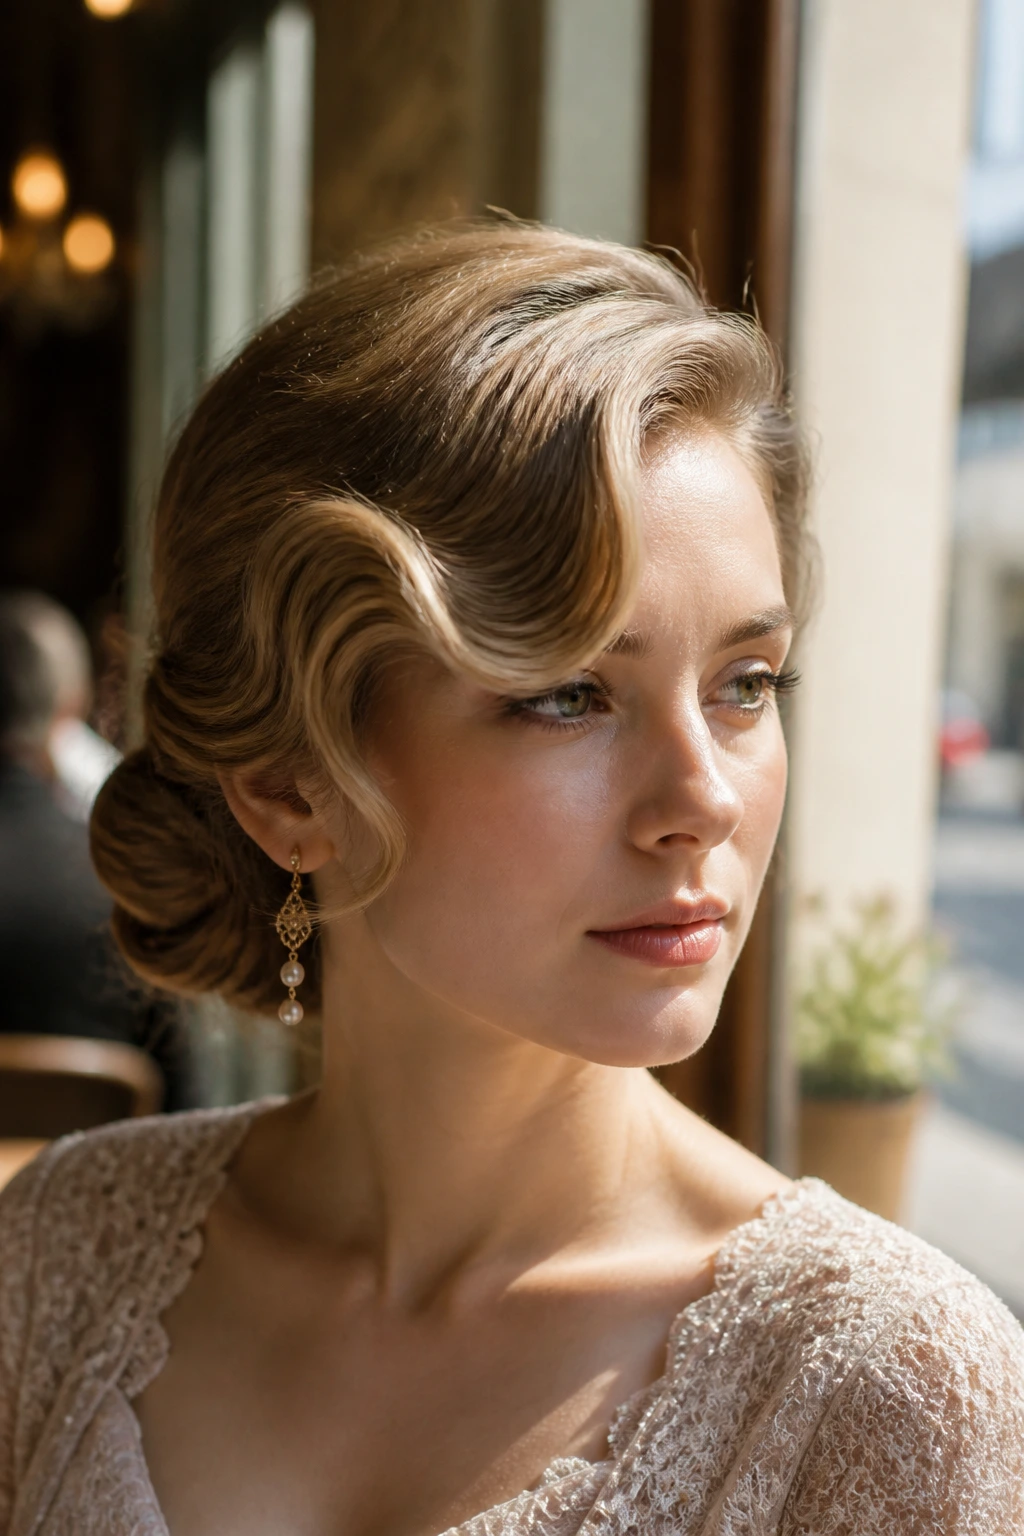
Not every Rococo look needs curls everywhere. A side-part S-wave updo uses one sculpted front wave to add drama, then keeps the rest tucked low and clean. That contrast is what makes it interesting.
Press the front wave into place with a flat iron or set it with a clip while it cools. The rest of the hair can sit in a low twist or tucked bun. This is a smart choice if your hair is fine but very smooth, because too much curling can make it go soft again within an hour. One strong front wave often holds better than six weak spirals.
16. Curled Faux Bob with Tucked Nape

When the hair is too fine to hold a full bun, fake the length. A curled faux bob works beautifully because you get shape at the nape without asking the hair to support a heavy knot. The front layers can fall softly around the chin and cheek.
Roll the ends under in sections, pin them in place against the neck, then curl the face-framing pieces away from the face so they open the features. It looks polished from the front and surprisingly full from the side. This one is especially useful for shoulder-length hair that feels too flimsy for updos but too long to leave alone.
17. Rolled Fringe Updo with Pearls
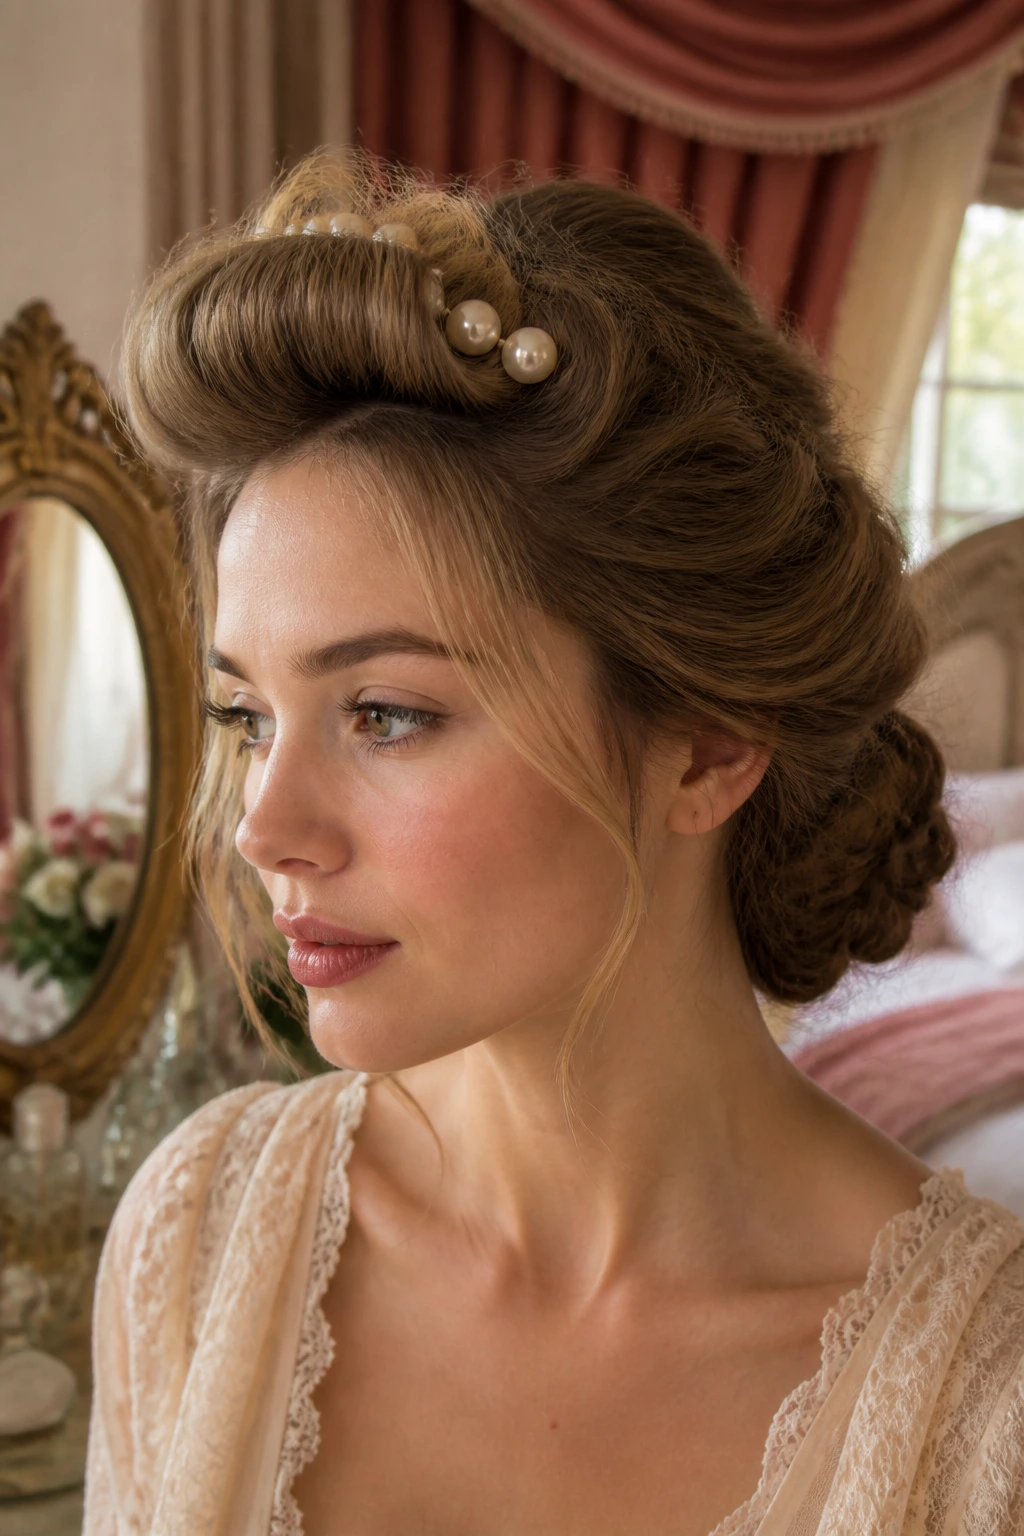
This is for people who love a front detail. Roll the fringe or the shortest front layer into a soft barrel, pin it just above the brow line or at the temple, and gather the rest into a low chignon. The pearl pins sit right where the roll curves, which is a nice place to put the eye.
Keep the roll soft enough that it doesn’t look hard or dated. Fine hair can do that easily if you over-spray it. A light mist is enough. The goal is a little flourish at the front, not a concrete shell.
18. Pinned-Back Waves with a Soft Nape
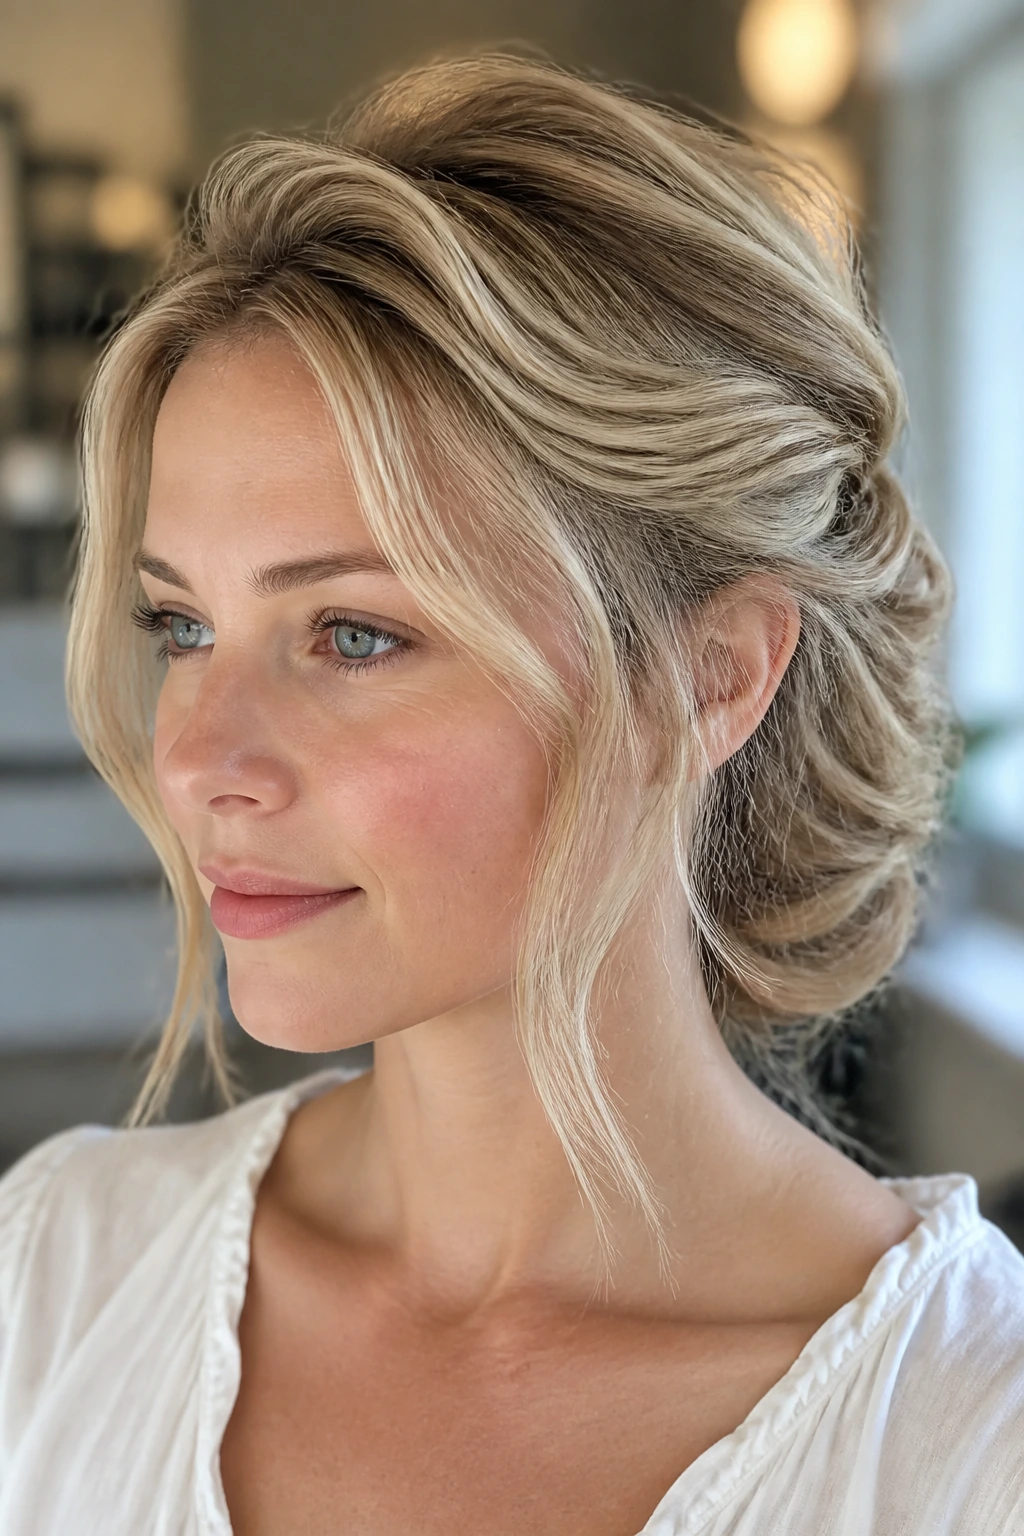
Need something quieter? This is the answer. Pinned-back waves feel less formal, but the Rococo influence comes through in the curved lines and the soft nape finish.
Sweep the front sections back loosely and pin them just behind the ears, then let the back sit in brushed-out waves or a loose knot. Thin hair often looks best when it is not forced into a complicated shape. Here, the softness is the point. You still get the sculpted front and face-framing shape, but the whole look breathes.
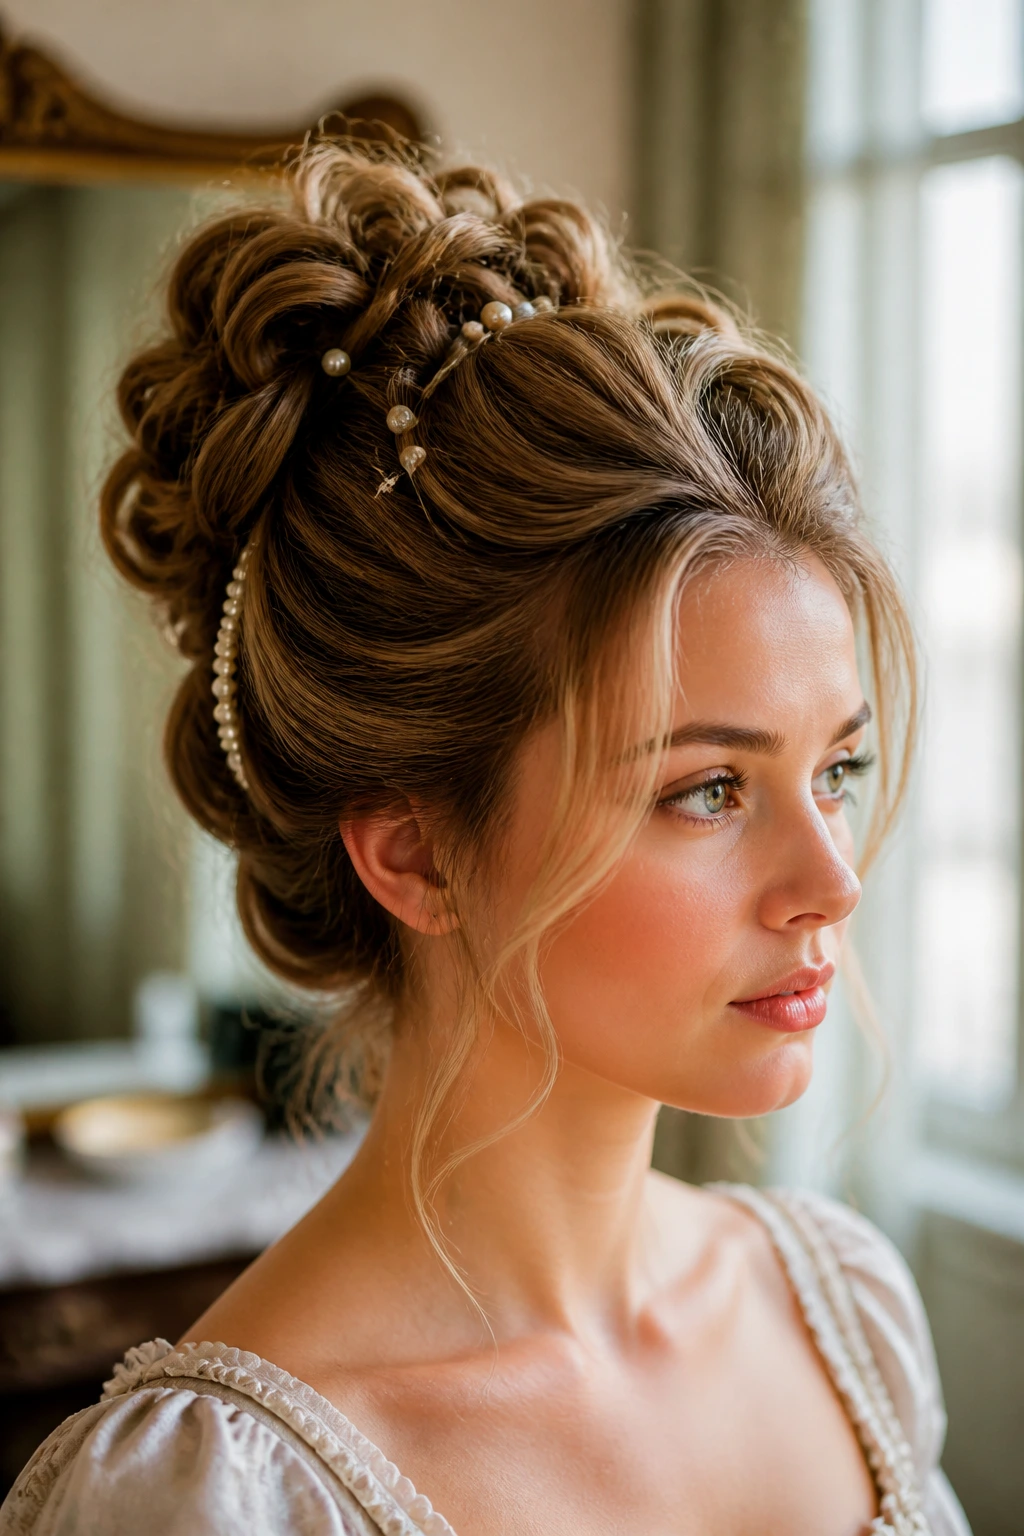
19. Volumized Topknot with Curtain Layers
A topknot can work if you keep it fluffy and controlled, not giant. Place the knot high enough to lift the face, but small enough that it doesn’t expose the scalp around the base. Curtain layers make the difference here; they soften the front and keep the look from becoming too severe.
The clean way to do it
Put a little mousse at the roots, rough-dry with your head upside down, then gather the hair loosely and twist it into a knot. Pin the knot from underneath so the pins disappear. If the ends are too short to wrap neatly, let them fan slightly. That little imperfection feels more Rococo than a neat ball ever will.
20. Braided Crown Bun with Lifted Roots
The crown should feel airy, not glued. That’s the first thing I notice when this style works. A braided crown feeds into a bun at the back, and the braid line gives the illusion of more hair density than you actually have.
Root lift matters here. Use a small round brush or root clips while the hair cools after blow-drying. Then braid from temple to temple, loosen the braid with your fingers, and tuck the length into a bun. The style looks rich because there is movement at the top and a clean finish at the back. Thin hair likes that balance.
21. Twisted Side Bun with Temple Pieces
Left side, right side, no symmetry required. A twisted side bun lets one side carry the ornament while the other side stays soft and open, which is useful when the hair is too fine to support a heavy balanced shape.
Twist the hair toward one ear, pin it into a low side bun, and leave one or two temple pieces to skim the cheek. The asymmetry keeps the style from looking flat. It also gives the face-framing layers somewhere to go. If one side of your hair is weaker or shorter than the other, this is a friendly style. It hides the mismatch instead of exposing it.
22. Headband Drape Style with Loose Ends
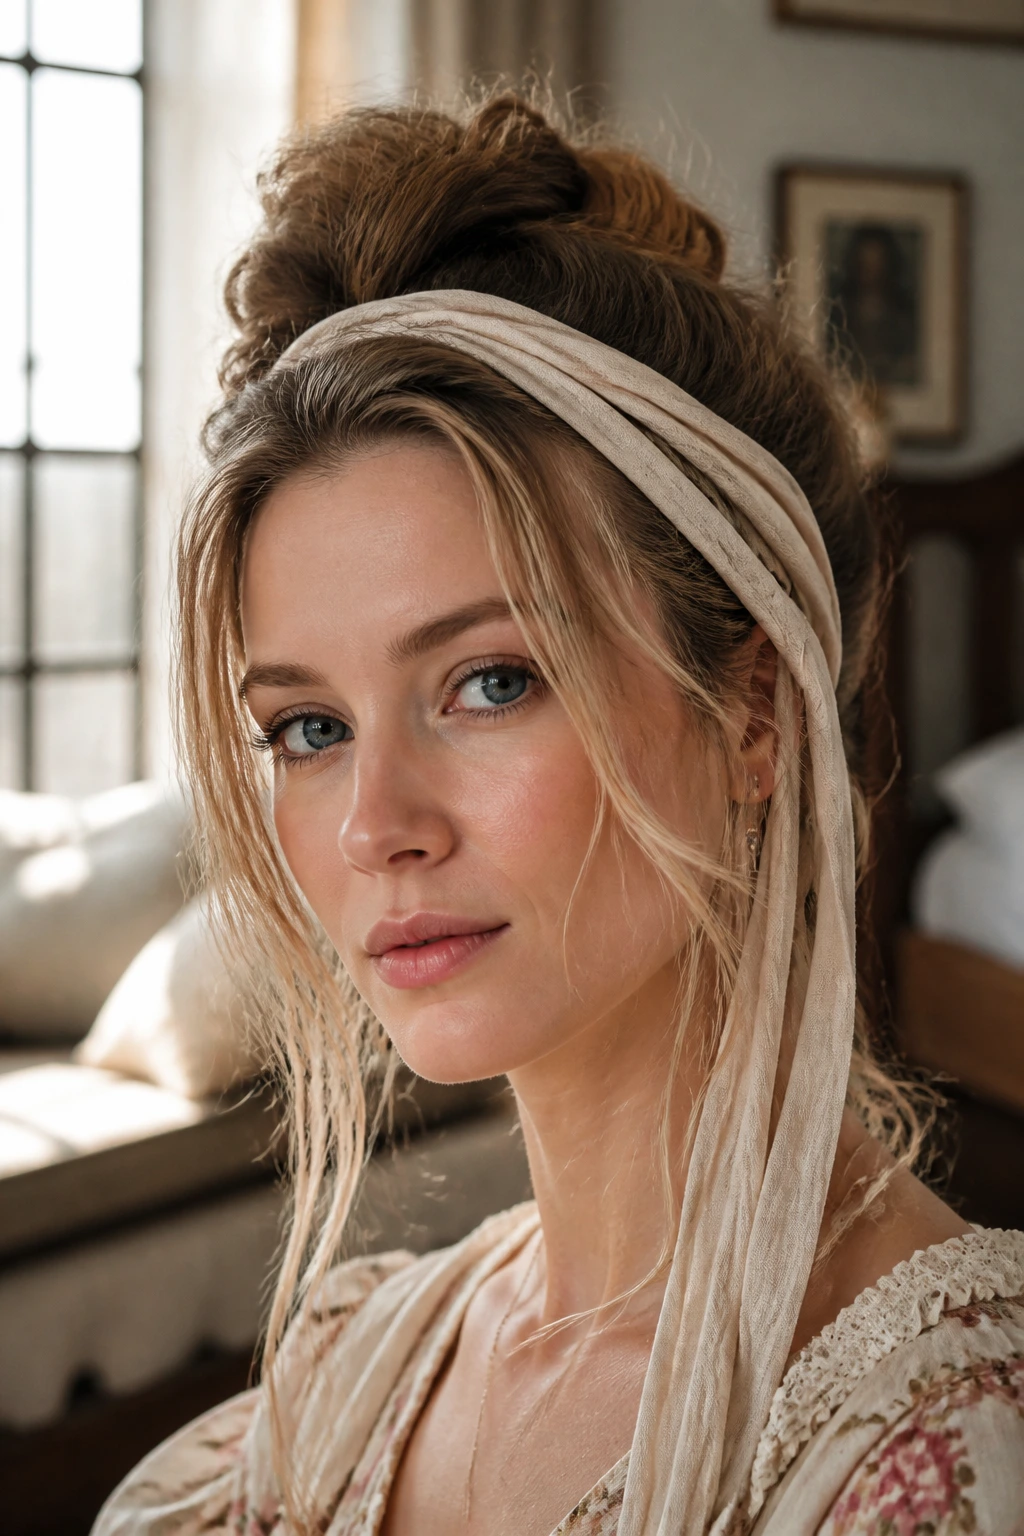
On days when your hair won’t hold much, let the accessory do the talking. A slim velvet or ribbon headband gives the crown a line to sit against, and the draped lengths below can stay soft and slightly curled.
Use a light tease at the roots under the headband so the top does not collapse. Then tuck or pin the sides just enough to create a smooth line. The front layers can fall around the band and frame the face. It’s one of those styles that looks far more considered than the effort suggests. Thin hair and a good headband are old friends.
23. Looped Chignon with a Decorative Comb
This is the version I reach for when the hair feels too flimsy for a full knot. A looped chignon lets you create shape in sections instead of asking the whole head to behave at once.
Form two or three loose loops at the nape, pin each one from the inside, and slide a decorative comb over the seam. The comb hides the joins and adds the Rococo flourish. If the face-framing layers are short, let them curve toward the jaw instead of forcing them back. That slight softness keeps the style from looking pinned into place.
24. Feathered Half-Up Knot with Ribbon
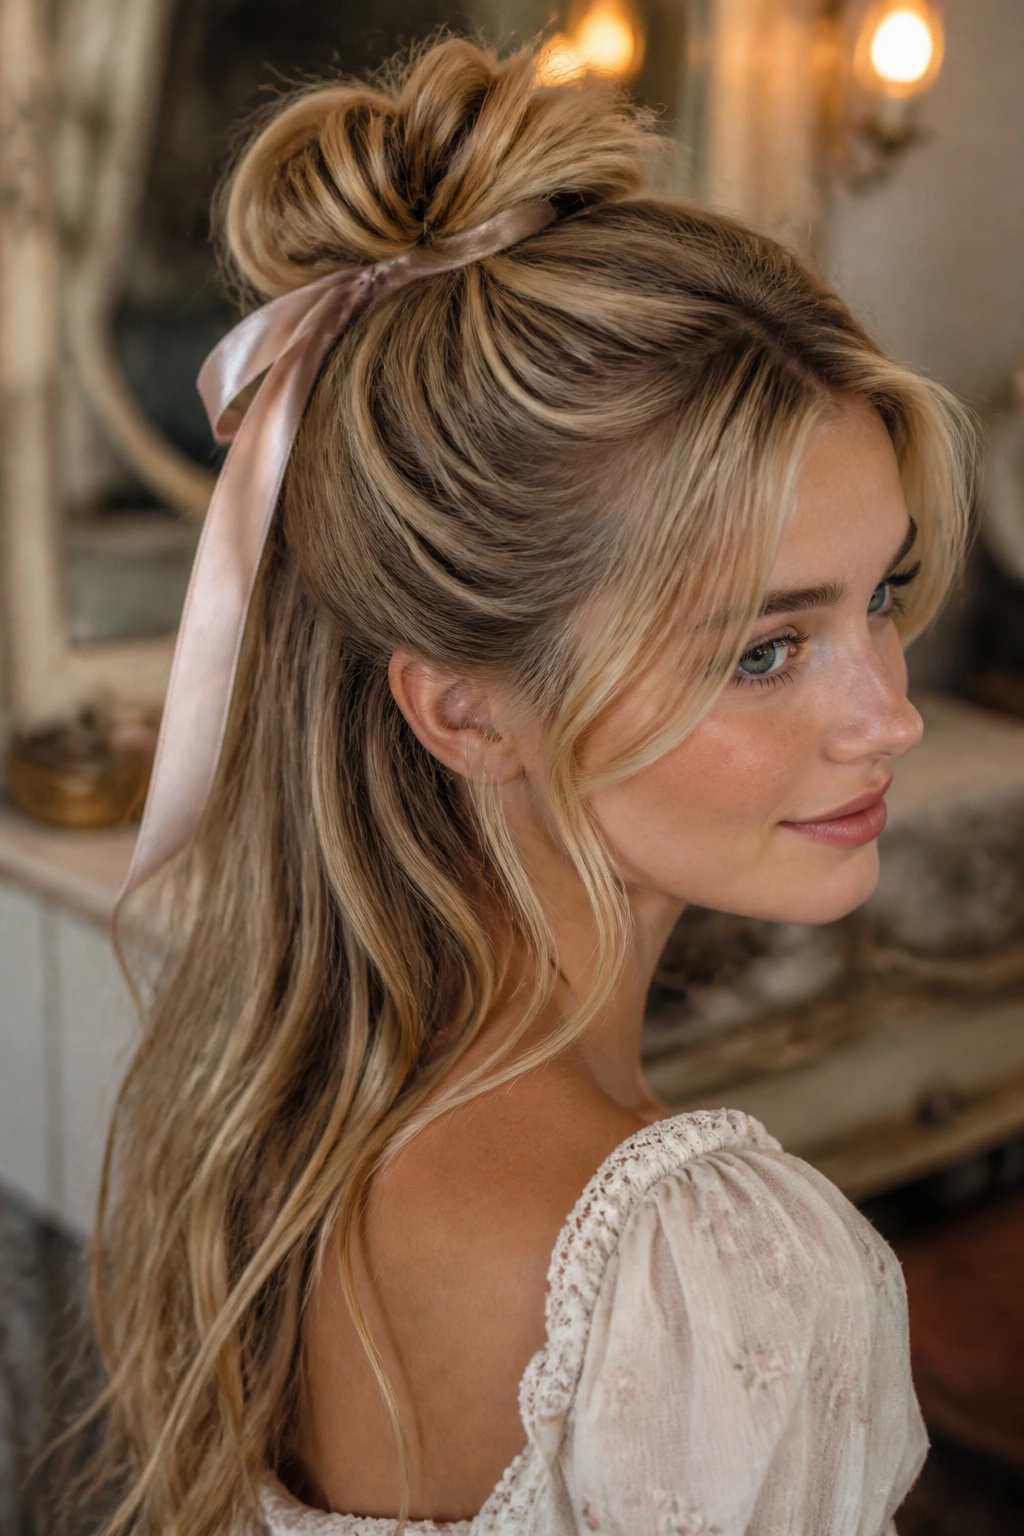
A half-up knot can be Rococo if the finish is soft enough. Gather the top half, tie or pin it into a small knot at the back of the crown, and let the ends feather out instead of hanging in one blunt line.
Ribbon helps here because it gives the knot a focal point without making it bulky. Tie it at the base or let the tails fall into the back length. Thin hair often looks fuller when the ends are broken up this way. The eye reads texture and movement, not strand count.
25. Pearl-Clasped Folded Bun with Curtain Layers
Save the most polished option for last. Fold the length inward in two or three panels, pin each fold flat, and place a pearl clasp right where the layers meet. It sounds fancy because it is a little fancy, but the structure is practical for thin hair.
The curtain layers should stay loose in front and can be curled under or away from the face depending on the neckline. This style works especially well when you want the back to feel elegant but not bulky. The pearl clasp gives the bun a finished center, which thin hair often needs. It creates a point for the eye so the style feels complete.
How to Build Rococo Height Without Making Hair Look Sparse
Thin hair does not need more rough teasing. It needs smarter scaffolding.
Lift the roots first
Apply volumizing mousse or root spray to damp hair, then blow-dry with your head upside down or with a round brush at the crown. That step matters more than the teasing does. If the root is already flat and slippery, pins are fighting uphill.
Keep the sides soft
The sides should not be stretched so tight that the scalp shows through. Leave a little bend near the temples, then smooth only the outer surface. A soft side line keeps the style elegant. A pulled-back, shiny side line can make fine hair look thinner than it is.
Let ornament carry some weight
Ribbon, pearl pins, a comb, or even a narrow velvet band can add more visual richness than another round of backcombing. Use one strong accessory instead of three random ones. Too many small decorations read cluttered on thin hair. One deliberate piece looks finished.
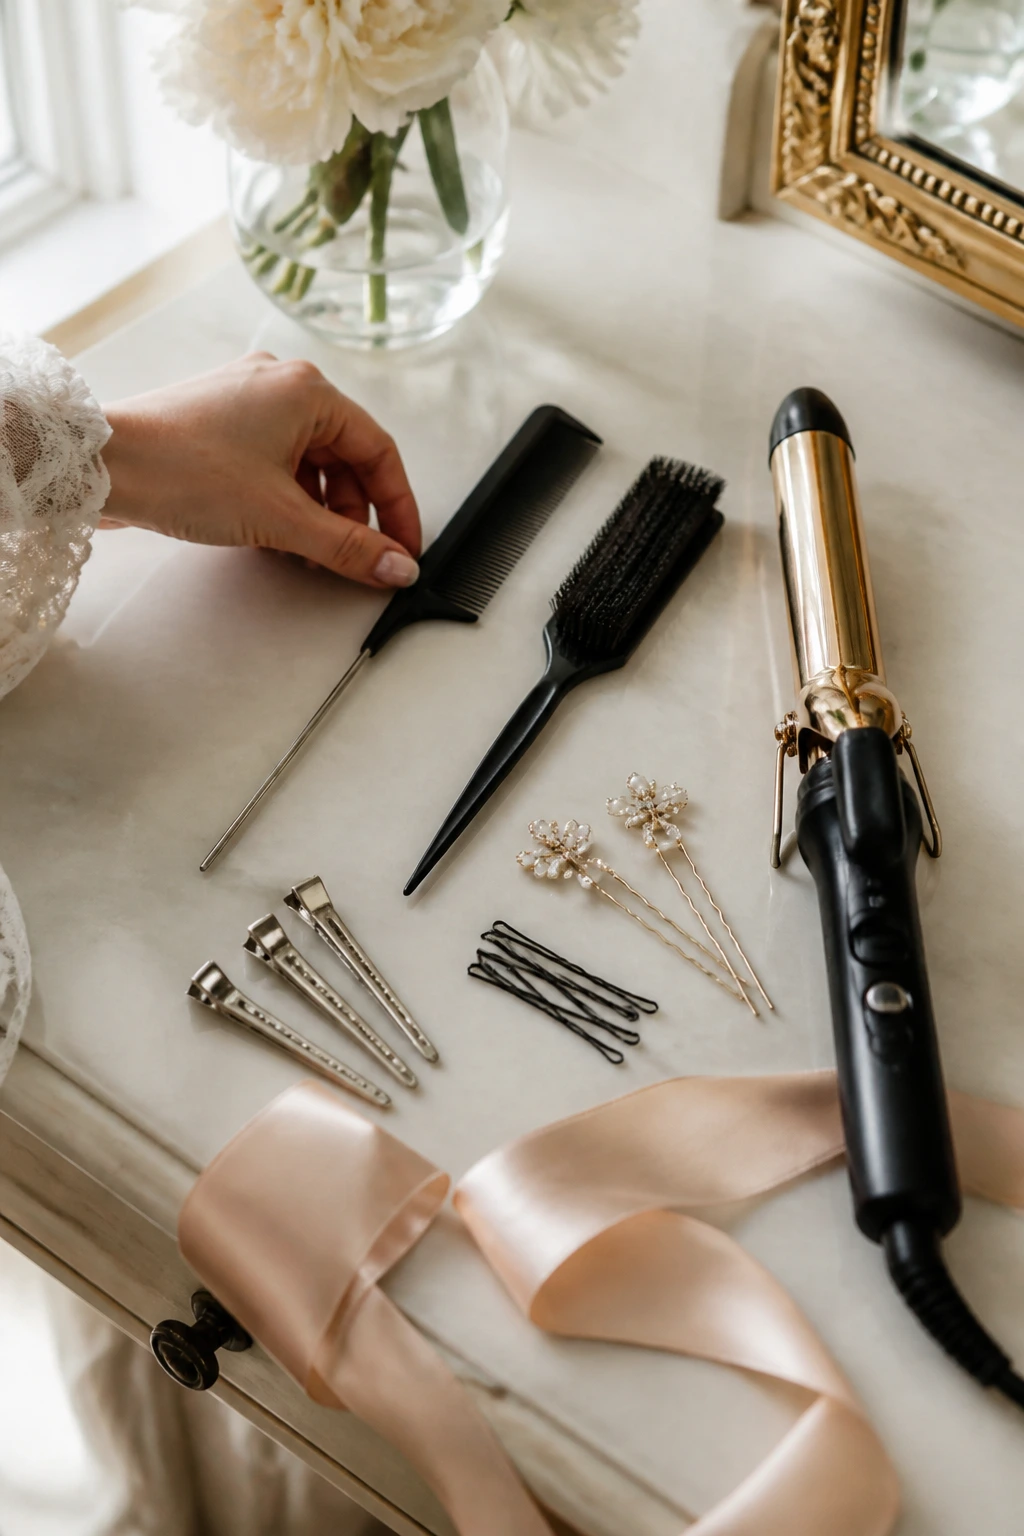
Essential Tools for These Hairstyles
-
Rat-tail comb: Best for clean parts, sectioning the crown, and lifting small subsections without wrecking the shape.
-
Teasing brush or fine bristle brush: Use this at the roots only. A soft brush smooths the surface after teasing so the style doesn’t look fluffy in the wrong way.
-
1-inch curling iron or wand: The safest size for most face-framing layers and soft Rococo bends.
-
Bobby pins and U-pins: Long pins hold twists and rolls better than short ones, especially in slippery hair.
-
Duckbill clips: Great for setting front waves or holding lifted crown sections while they cool.
-
Volumizing mousse or root spray: Gives fine hair grip before heat styling, which matters more than most people think.
-
Texturizing spray or dry shampoo: Adds grit to second-day hair and helps pins stay where you put them.
-
Pearl pins, ribbon, or a decorative comb: These are not optional if you want the Rococo feel; they do the visual work that thin hair cannot.
-
Small bun shaper or foam cushion: Useful for low buns, halo shapes, and any style that needs a little hidden support.
Smart Product and Prep Tips
Root Prep: Put the root product where the style needs it most—crown, temples, and the top third of the head. Heavy conditioner should stay off those areas. If the hair feels silky from the mid-length down, that is fine. The roots need grip, not gloss.
Heat Choice: A 1-inch barrel is the safest all-around pick. Smaller barrels create tight curls that can make thin hair look busy, while larger ones can leave the front pieces too soft to hold their shape. If you want a more historical bend, wrap the front layers vertically and pin them to cool for 5 to 10 minutes before brushing.
Finish Smart: Spray hairspray onto a clean toothbrush or small brush and smooth flyaways by hand. A direct blast from the can often flattens the crown you just built. That tiny change makes a bigger difference than another coat of spray.
Product Texture: Avoid heavy serums at the root. They’re nice on dry ends, terrible at the crown. If your hair is frizz-prone, use a light anti-frizz cream only on the last 2 to 3 inches of the lengths, not near the base.
How to Wear These Looks for Different Settings
Presentation: From the front, the style should show lift at the crown and softness at the temples. From the side, the shape ought to curve rather than spike. From the back, pins can show a little if they’re pearl-tipped or neatly crossed, but the seam itself should disappear into the hair.
Accents: Ribbon, pearl pins, and decorative combs suit these styles best because they echo the ornamental feel of Rococo hair. I’d skip oversized claw clips and heavy crystal pieces. They tend to crush fine hair and pull the line of the style downward.
Outfits: These looks play nicely with square necklines, open collars, satin, lace, and anything with a clean neckline. Drop earrings work if the hair is up. Small studs are better when the front layers are already doing a lot around the face.
Best Settings: Formal dinners, portrait sessions, bridal events, theater nights, and dressy daytime gatherings all fit. If you want the style to feel less costume-like, keep the ornament to one piece and let the front layers stay soft.
Scale: Shorter hair usually does better with half-up shapes, faux bobs, and low twists. Longer hair can handle more braids and folded buns. The idea stays the same. Change the size, not the silhouette.
Keeping the Style in Place All Day
Thin hair usually gives you about one warning before it collapses. Plan around that.
Start with second-day hair or add dry shampoo to clean roots before styling. That single step extends hold because the pins can grip something that is not slick. After the style is set, let the curls and lifts cool completely before you touch them. Five extra minutes of cooling does more than another heavy spray.
If you need the look to last through an evening event, pin the style in layers: structure first, decoration second. Use crossed bobby pins at the base of twists and buns, then add the pearl pins or ribbon last. Sleeping in these styles is possible only in a loose version, and I would not bother unless you’re refreshing the front pieces the next day. A silk pillowcase helps, but it will not save a badly pinned crown.
Common Mistakes to Avoid
-
Teasing the wrong sections: If you rough up the ends instead of the roots, the hair looks frizzy and still falls flat. Tease only the hidden underside at the crown.
-
Using too much oil or cream near the top: Fine hair turns limp fast when the roots are coated. Keep rich products on the mid-lengths and ends only.
-
Pulling the face-framing layers too tight: That exposes the hairline and defeats the whole point. Leave a little bend around the temples and jaw.
-
Making every curl identical: Uniform spirals can look stiff on thin hair. Mix one or two directions, then brush them out lightly so the texture feels softer.
-
Choosing oversized accessories: A giant clip or chunky comb can drag the style down. Narrow ribbons, small pearls, and slimmer combs usually look better.
-
Skipping pin direction: Pins shoved in straight can slide out in ten minutes. Cross them or angle them against the grain of the twist for better hold.
Variations and Adaptations to Try
Very Fine Hair Edition: Use hidden padding at the crown and keep the shapes smaller. Half-up styles, tucked rolls, and low twists will hold better than broad braids or huge buns. Dry shampoo before styling helps more than people expect.
Shoulder-Length Translation: Faux bobs, Gibson tucks, and side rolls are the safest choices. If the hair does not reach a full bun, do not force it. Pin the ends inward and let the front layers do the softening.
Curly or Wavy Version: Keep your natural texture and shape it rather than flattening it. A soft twist or crown braid can look richer on waves than on straight hair, but use a light hold product so the front does not puff unevenly.
Accessory-First Finish: If the hair itself is very sparse, let the ribbon, comb, or pearl pins be the focal point. Choose one ornament and place it at the seam of the style. That gives the eye a center and makes the shape feel complete.
Humidity-Safe Version: Choose lower buns, tighter internal pinning, and less curl in the face-framing pieces. Loose ringlets collapse faster in humid air. A soft wave or bend tends to last longer and look better by hour six.
Low-Effort Everyday Version: Keep the structure simple with a half-up twist, one ribbon, and a soft curl at the front. You do not need a fully dressed-up finish every time. The Rococo mood comes through even when the style is quiet.
Questions People Ask Most
Can thin hair really hold Rococo-inspired styles?
Yes, if you build the shape around the crown and nape instead of trying to bulk up every strand. The trick is to use twist, roll, ribbon, and accessories as structure. Hair density matters less when the silhouette is strong.
Do I need face-framing layers for these looks?
They help a lot, especially around the temples and cheekbones. Without them, the style can look tighter and a bit exposed at the front. If you do not have layers, you can still pull out small pieces and curl them loosely.
Is teasing bad for thin hair?
A little teasing at the roots is fine. Roughing up the entire section is where things go wrong. Keep the teasing hidden, use a light hand, and smooth the top layer after.
What accessory works best on fine hair?
Narrow ribbon, pearl pins, and small combs are the easiest wins. They add visual richness without dragging the style flat. Heavy clips and oversized ornaments are usually too much.
How do I stop the style from collapsing halfway through the day?
Start with texture. Dry shampoo, root spray, or second-day hair gives the pins something to grip. Then use more pins than you think you need, especially where the style meets the scalp.
Can I wear these looks with short hair?
Yes, but stick to half-up shapes, faux bobs, side rolls, and pinned-back waves. Short hair rarely wants a full bun without help. A smaller style often looks more polished anyway.
What if my hair is very slippery?
Prep it with dry shampoo, then use a little mousse at the roots before blow-drying. A matte, grippy base matters more than a lot of spray at the end. If needed, choose a style with more pinning and less hanging length.
A Softer Kind of Drama
Thin hair does not need to apologize for being thin. It needs a shape that understands what it is. Rococo-inspired styling works so well here because it trades brute force for line, curve, and a little ornament at exactly the right places.
That is the whole game: lift the crown, soften the face, and let one ribbon or comb finish the sentence. The result feels dressed up without looking overbuilt, which is rare and useful and, frankly, much better than fighting your hair into a shape it never wanted in the first place. Pick one style, keep the front pieces gentle, and give the silhouette room to breathe.