Curly hair can go boxy in a hurry. The front sits too straight, the sides puff out, and suddenly the whole shape feels wider than your face even when the length is fine. Face-framing layers for curly hair with beachy waves fix that by changing the outline first, then letting the texture do the rest.
The best versions don’t fight the curl pattern. They give it a place to land. A curl that looks tame when wet can jump an inch or two once it dries, and that shrinkage is where a lot of bad haircuts go wrong. Too short, and the front turns into surprise bangs. Too long, and the frame disappears into the rest of the hair.
What makes these cuts worth caring about is the way they move around the face instead of sitting on it. A good frame can soften a jawline, open up the cheekbone, and keep loose waves from collapsing into one heavy curtain. The 25 shapes below cover the whole range — soft, shaggy, polished, low-maintenance, and a few that bring a little edge without asking you to live in a styling chair.
Why These 25 Cuts Stand Apart
-
Shrinkage is built in: Every option assumes curls will spring up after drying, so the face pieces are placed where they still make sense once the hair is fully dry.
-
The front gets its own job: These layers don’t treat the whole head the same way; the shortest pieces are chosen to open the cheekbone, jaw, or chin on purpose.
-
Beachy waves stay soft: The shapes avoid hard shelves and blunt little ledges, which is why the front keeps moving instead of flipping out.
-
Density changes the result: Fine curls, thick curls, and loose wave patterns all behave differently, so these looks cover more than one texture.
-
Styling stays realistic: Some of these cuts want a diffuser and some don’t, but none of them need a daily blowout to make sense.
-
Grow-out matters: A few of these shapes still look intentional after several weeks, which is worth more than a haircut that only behaves for ten days.
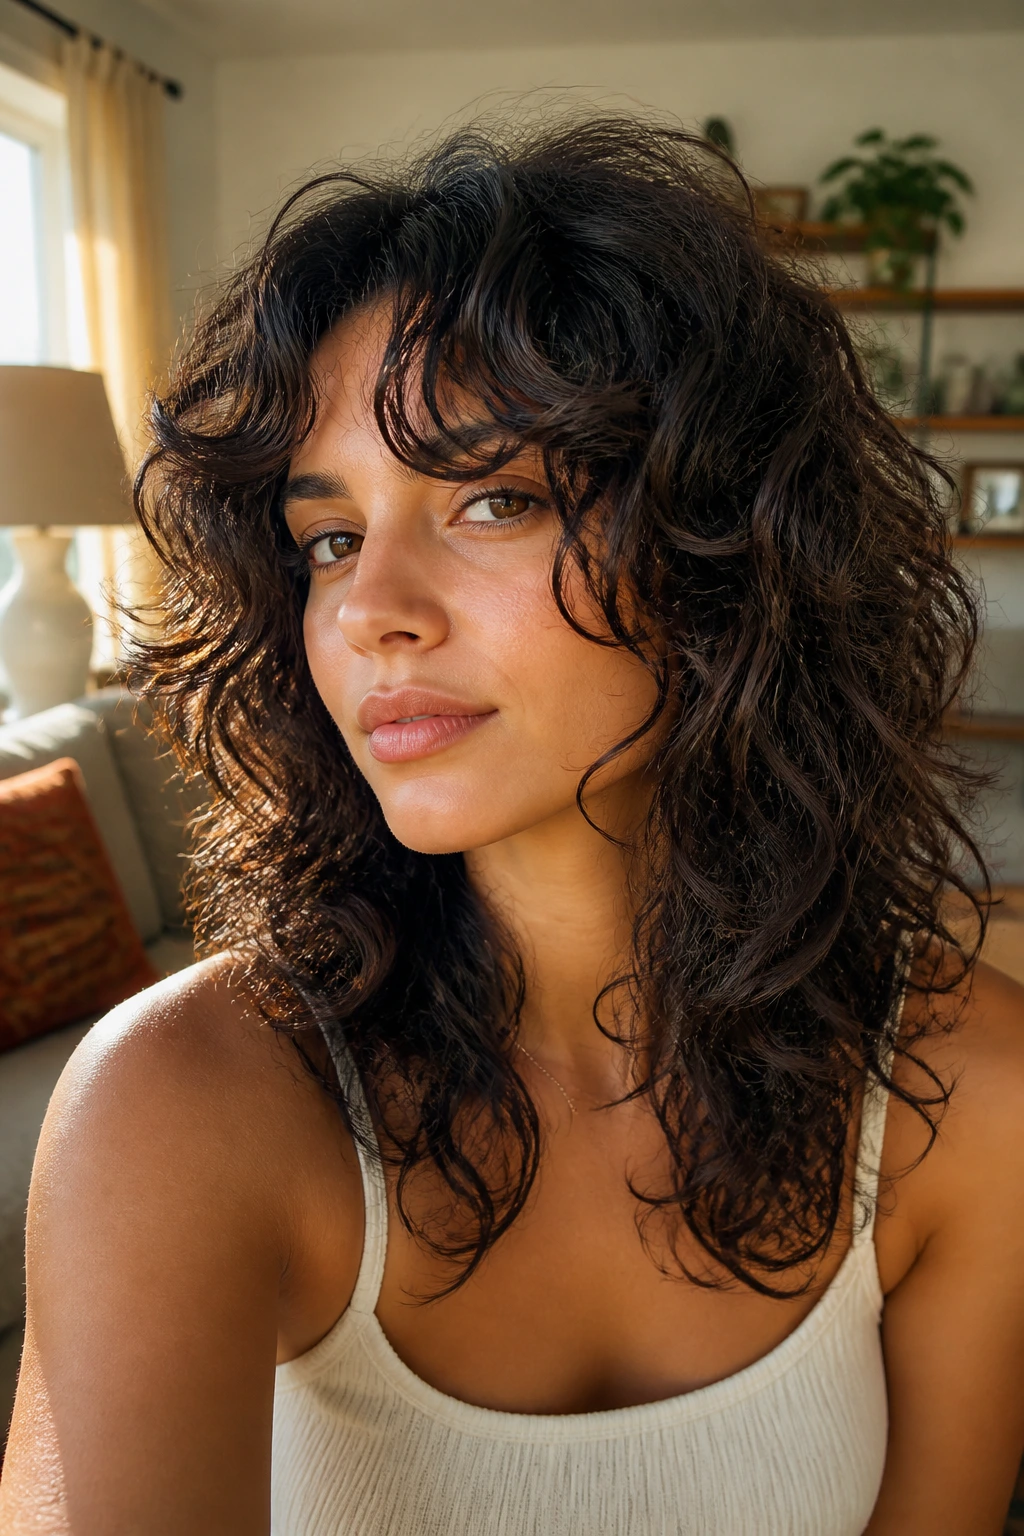
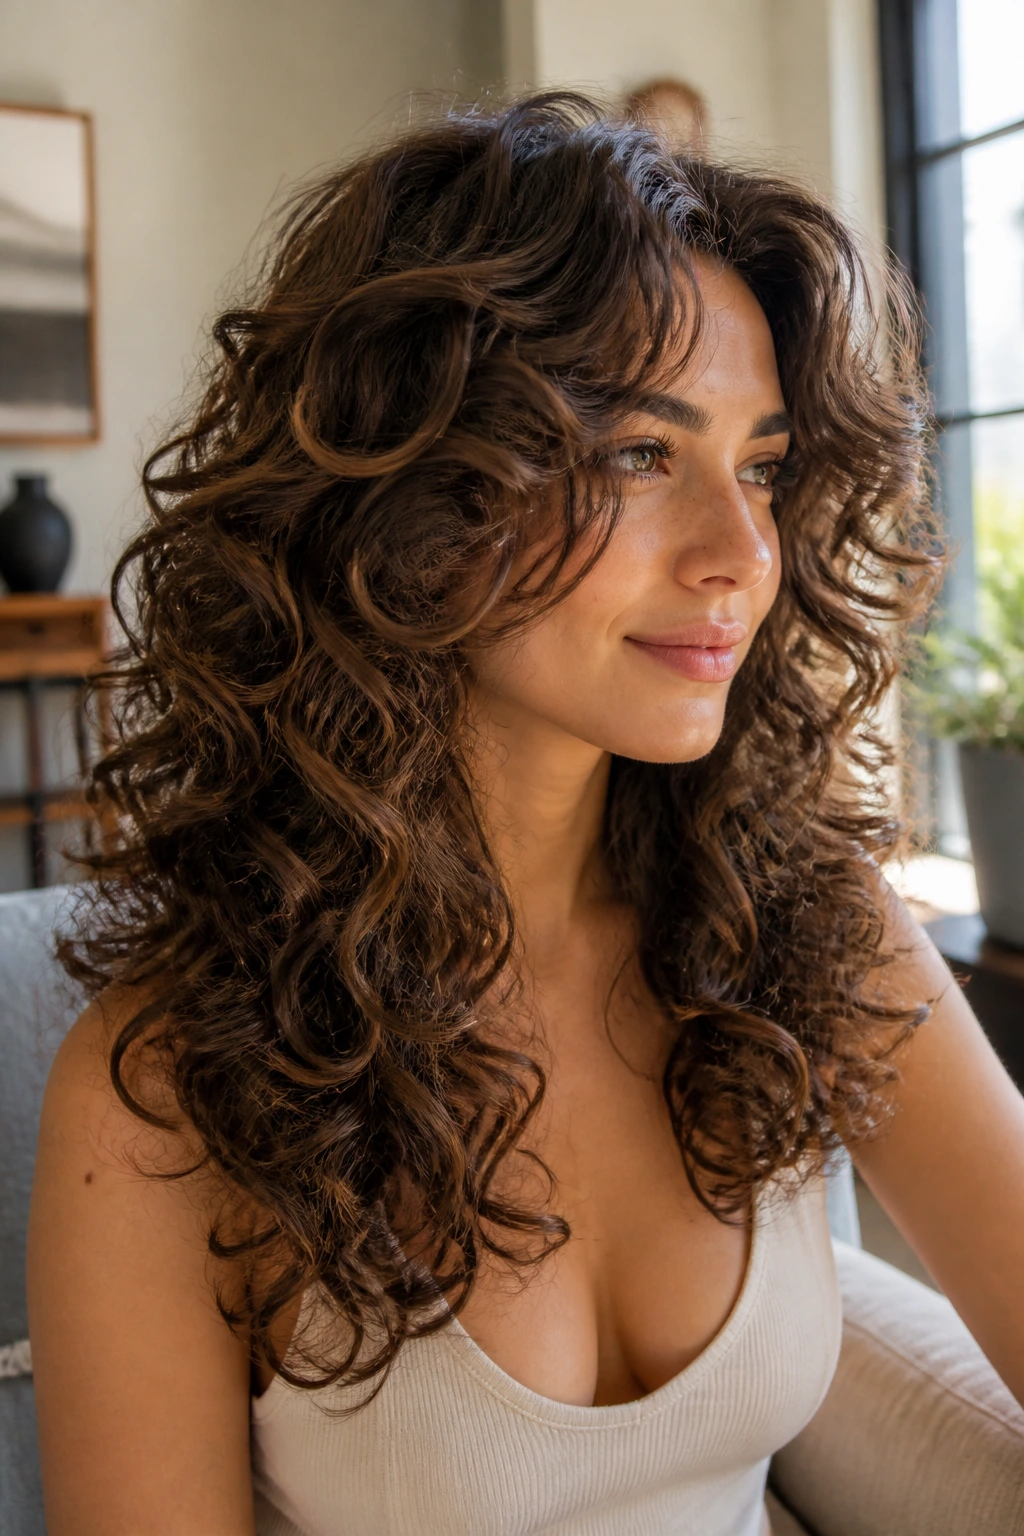
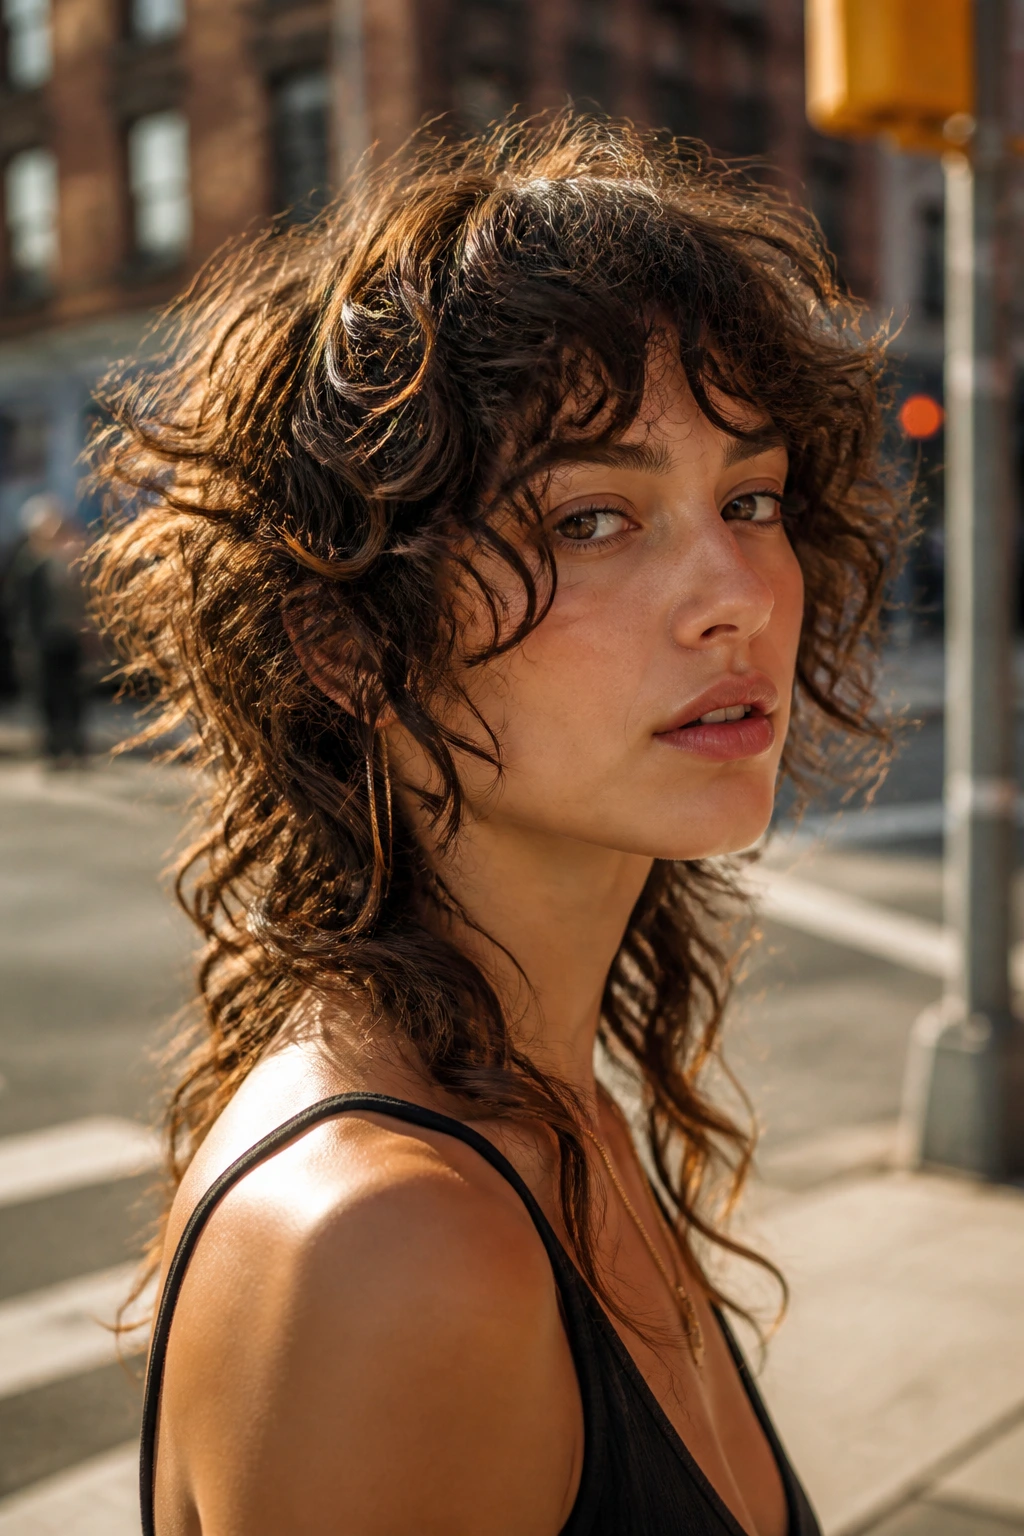
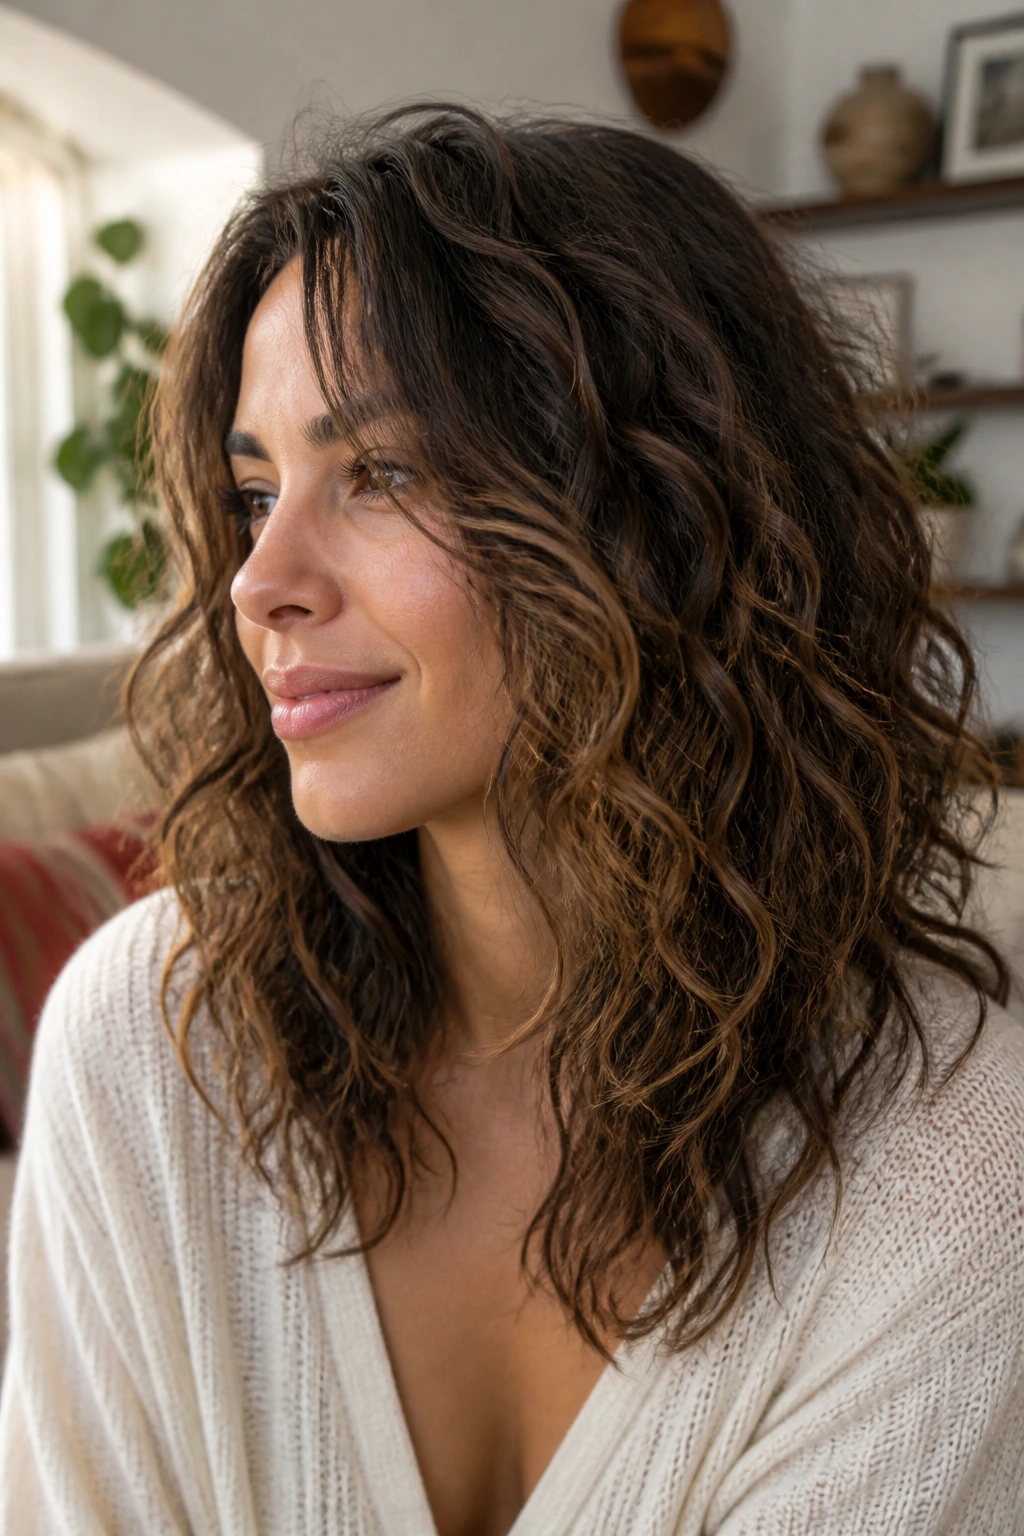
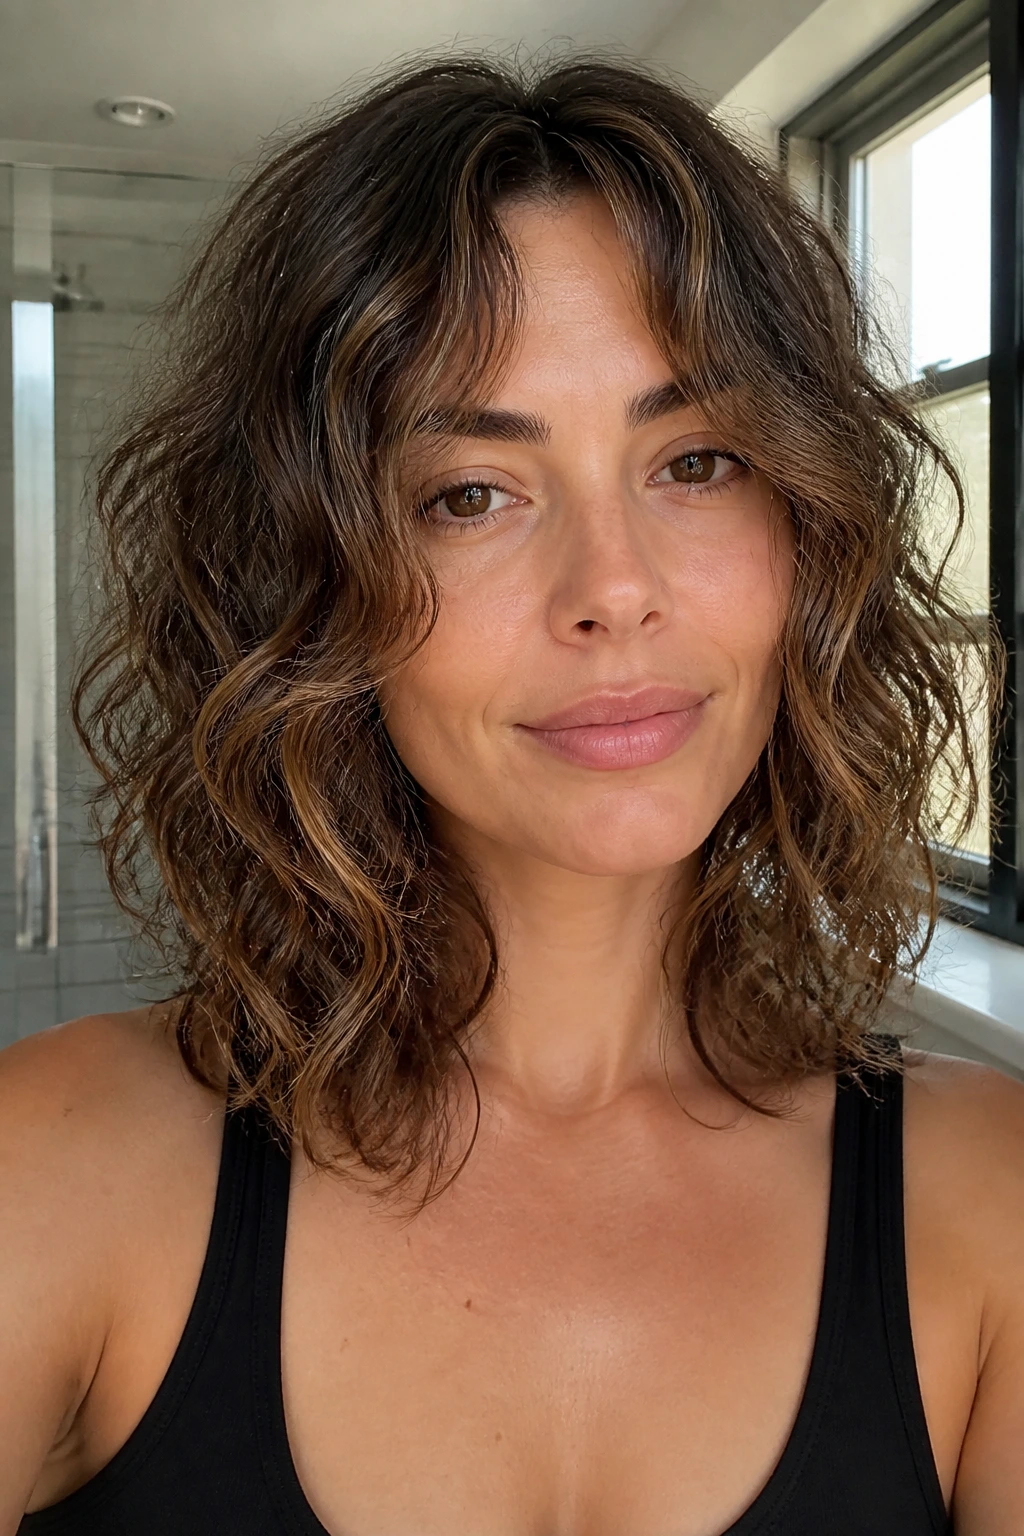
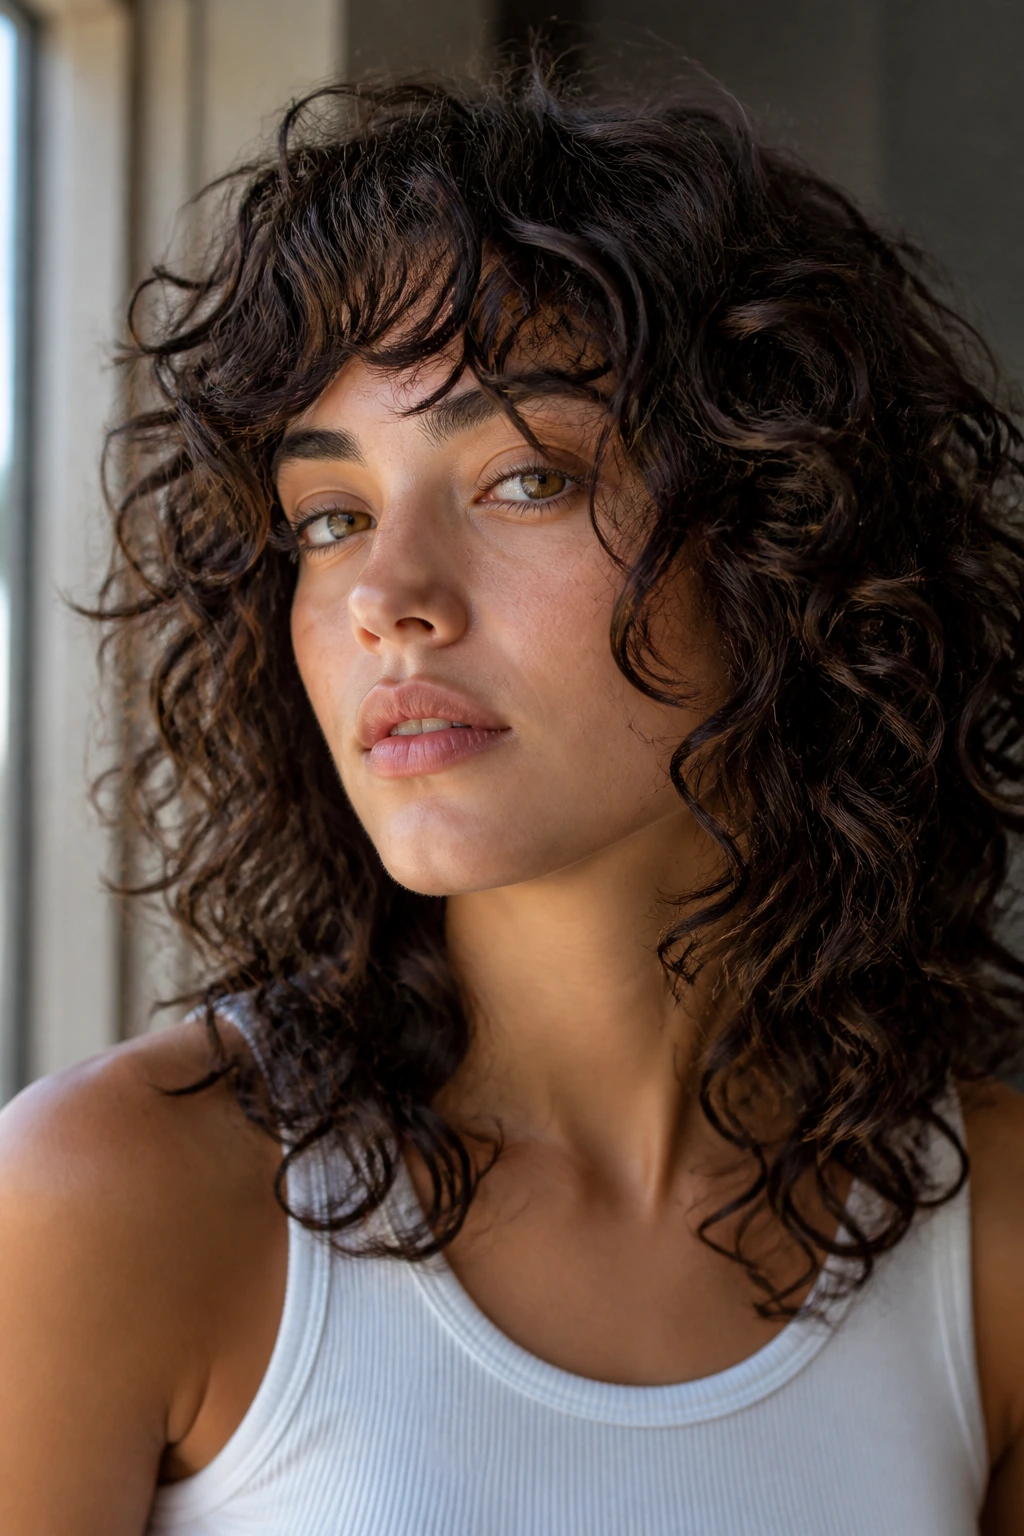
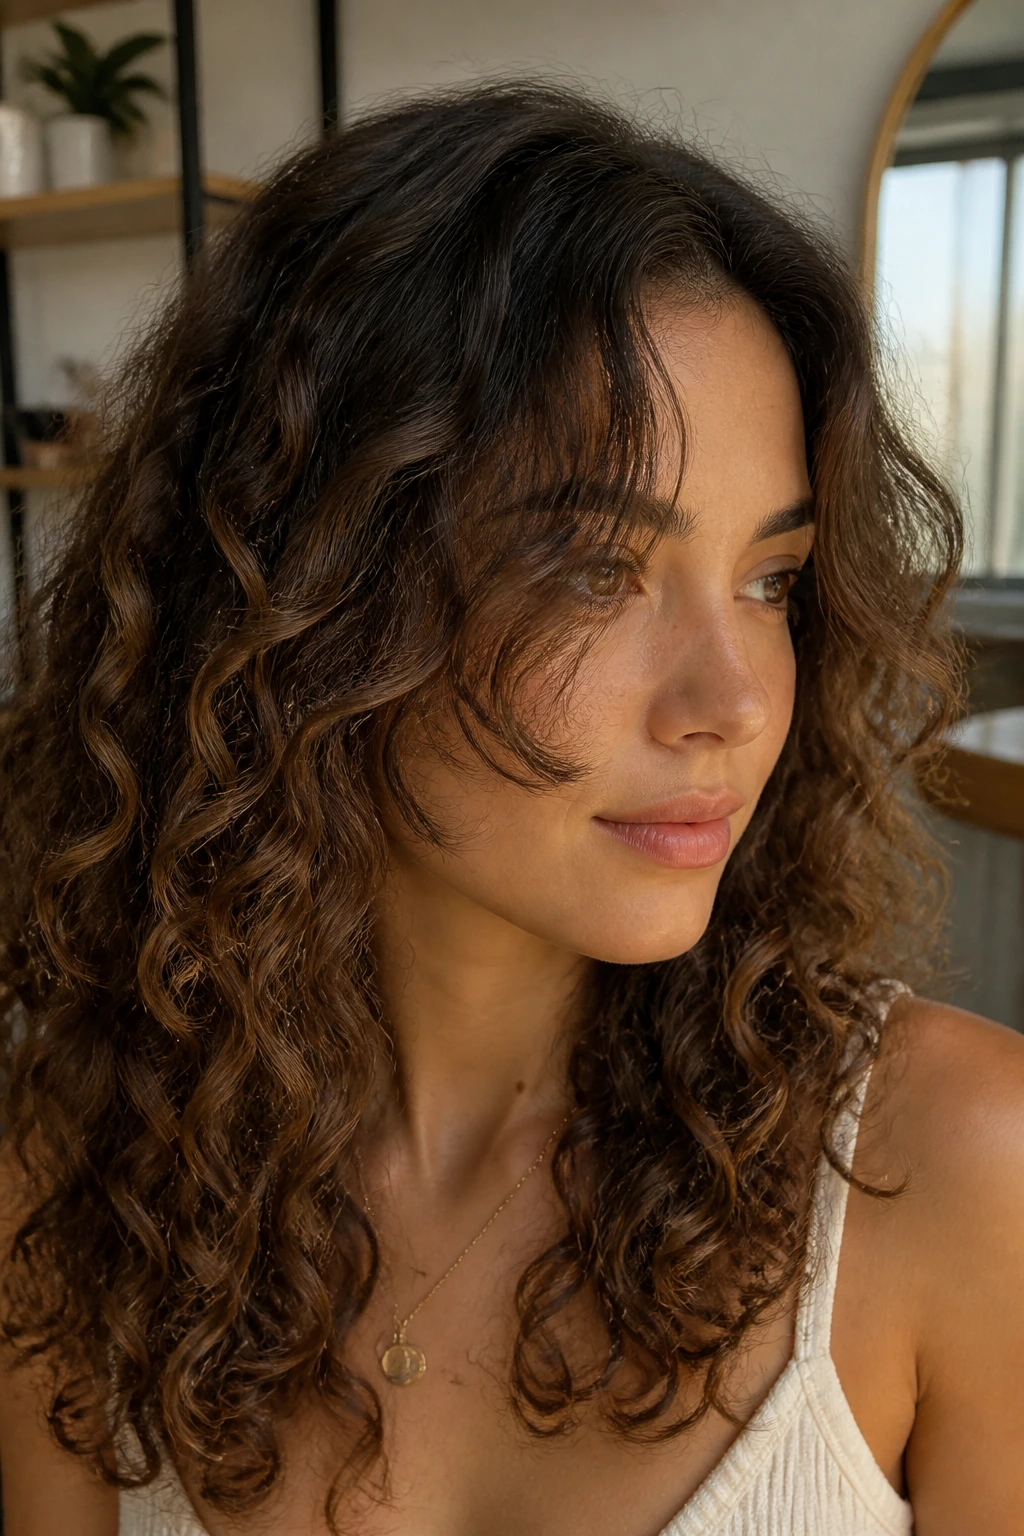
1. Chin-Grazing Curly Framing Layers
This is the one I reach for when curls start swallowing the face. The shortest pieces land around the chin when dry, which keeps the front open and gives the wave pattern a clean fall instead of a heavy shelf.
Ask for the front to be cut with your natural shrinkage in mind — not where the curl sits wet, but where it lives after it dries. If your curls spring up hard, the chin-grazing piece may need to be started closer to the mouth line in the chair.
The result is easy to style. A quick twist away from the face while the hair is damp, then low-heat diffusing for a few minutes, is usually enough. It’s a strong choice for medium-density curls because it changes the outline without making the sides puff out.
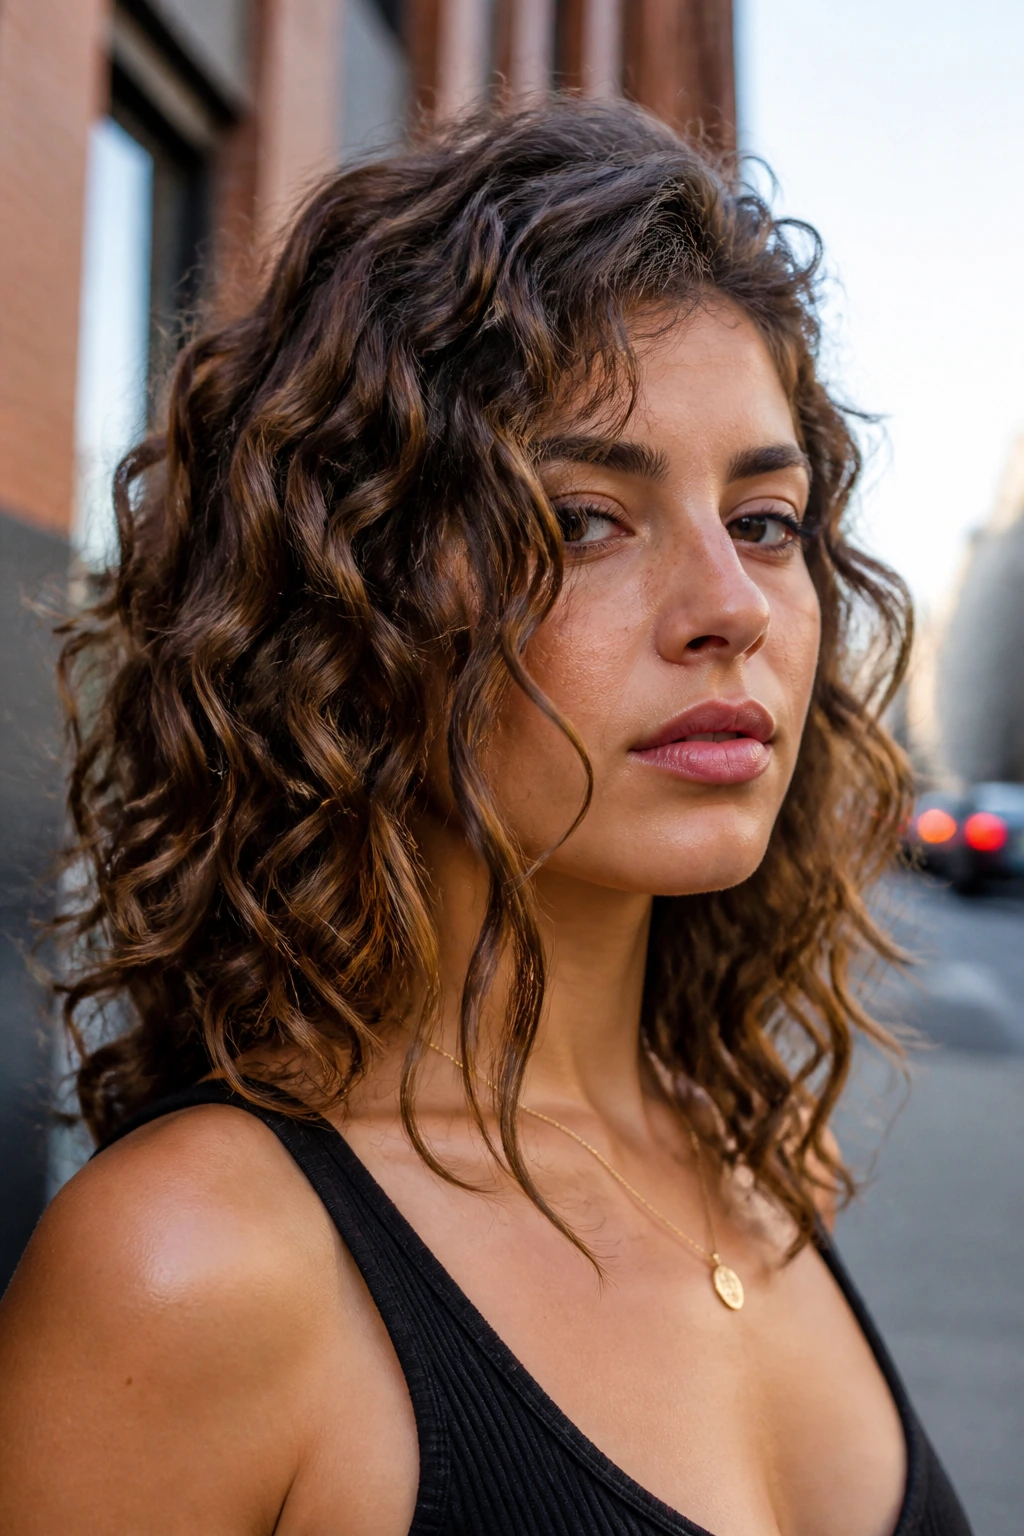
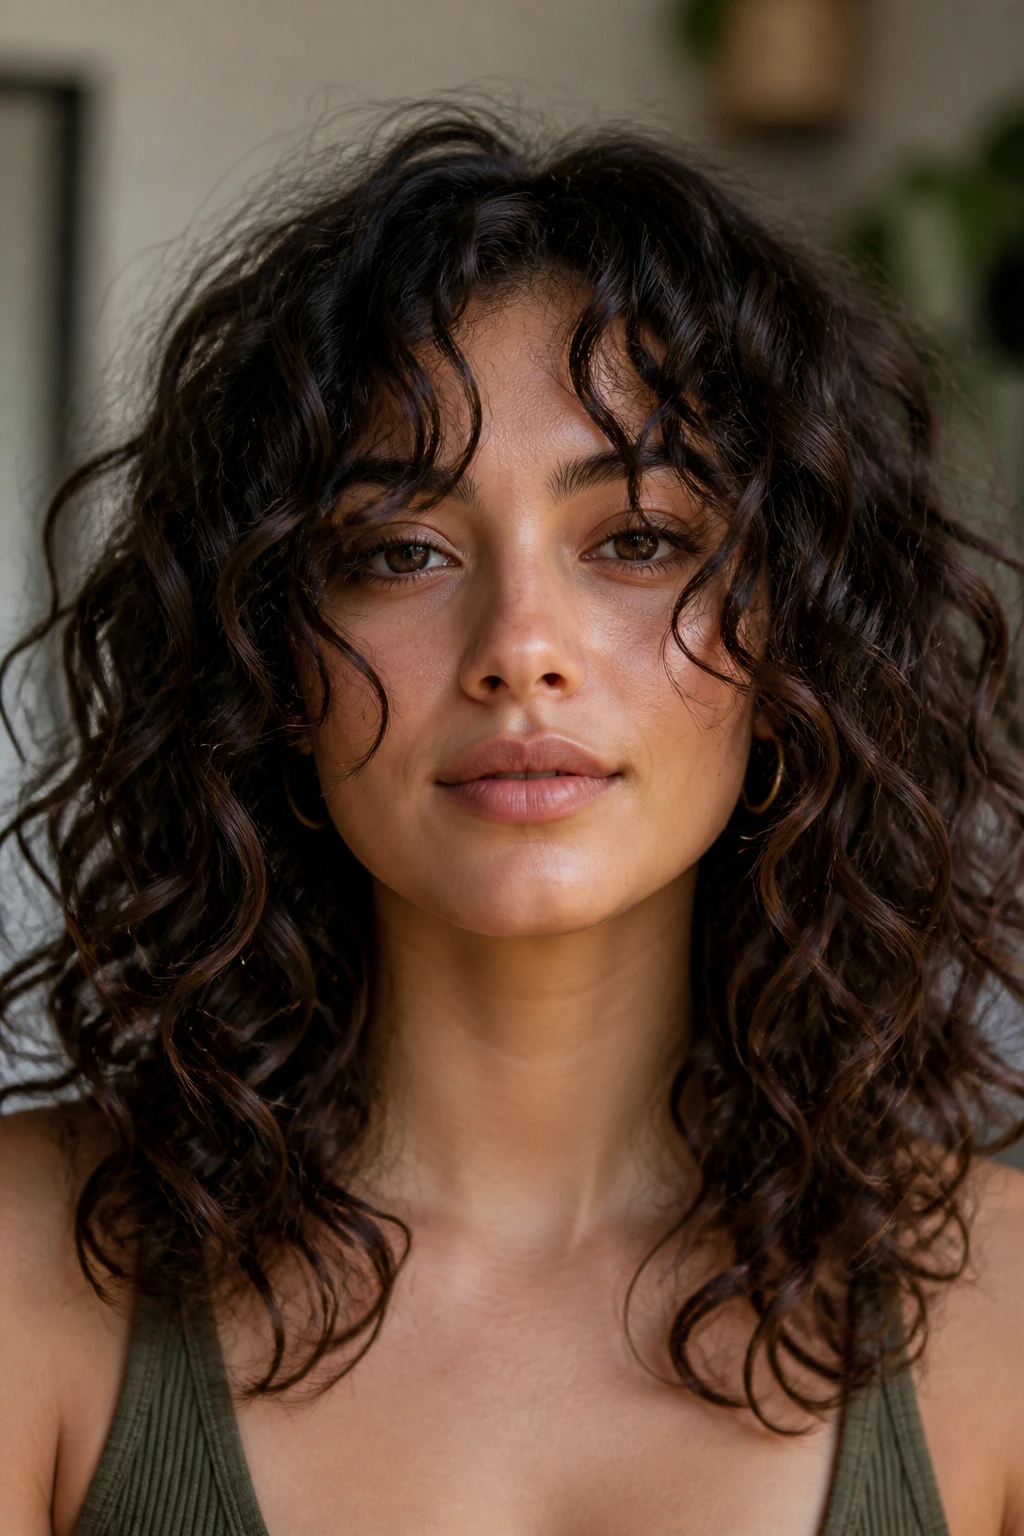
2. Cheekbone Curtain Pieces With Soft Ends
These are the layers that make curls look lifted without looking chopped. The front pieces split around the cheekbone and fall like a soft curtain, which is a nice fix if your forehead feels too exposed with shorter bangs.
Why They Work
The cheekbone is one of the best anchors for curly framing because it stays visible even after shrinkage. You get shape right where people look first, and the rest of the hair can stay long enough to keep that beachy wave movement.
Ask your stylist for a center or slightly off-center part, then keep the ends soft with point cutting rather than blunt scissoring. If the layers are too sharp, the front will stick out instead of bending.
A little mousse at the roots and a touch of curl cream through the mids is usually enough. Let the pieces dry with a gentle bend away from the face, not a tight spiral, and they’ll read as relaxed instead of formal.
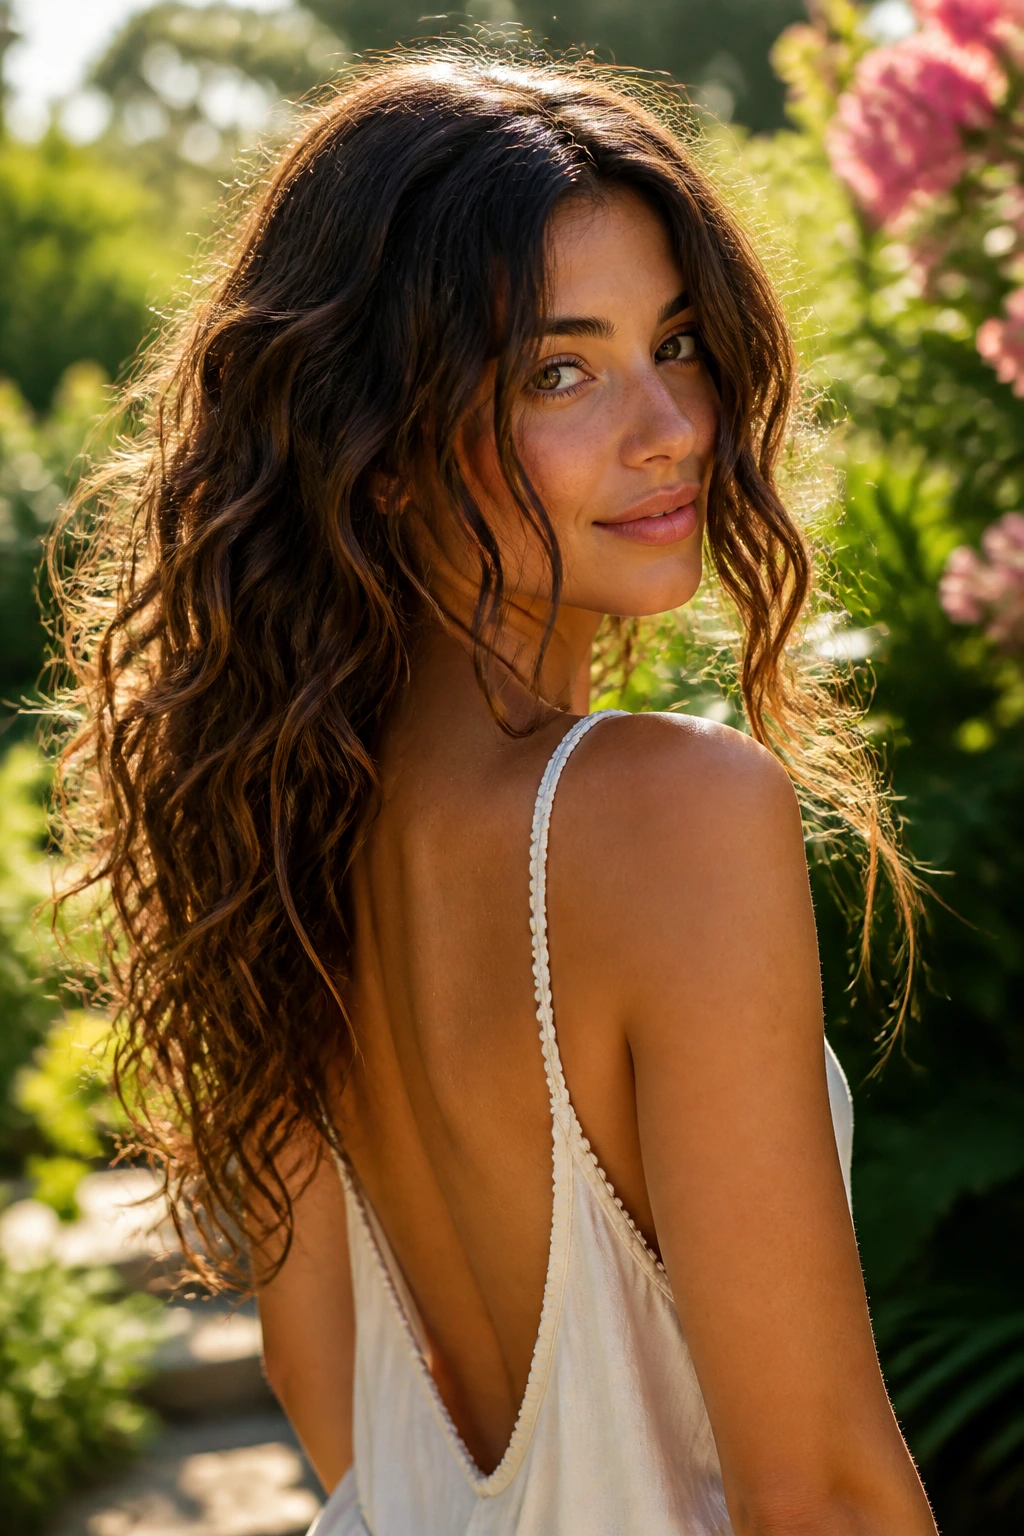
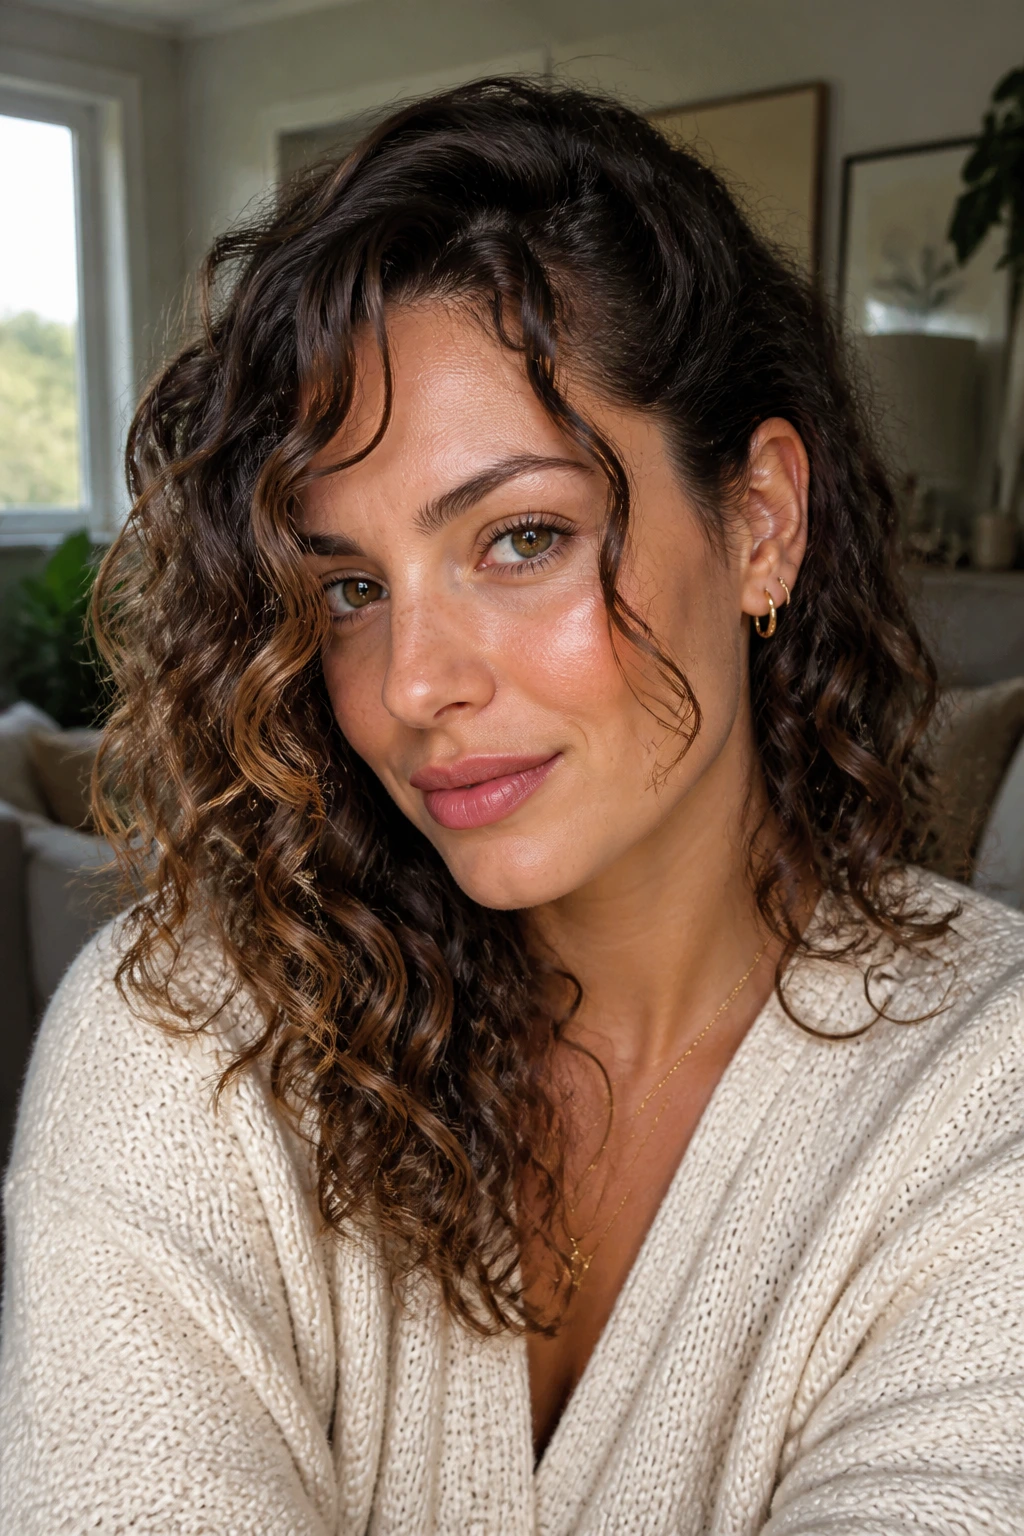
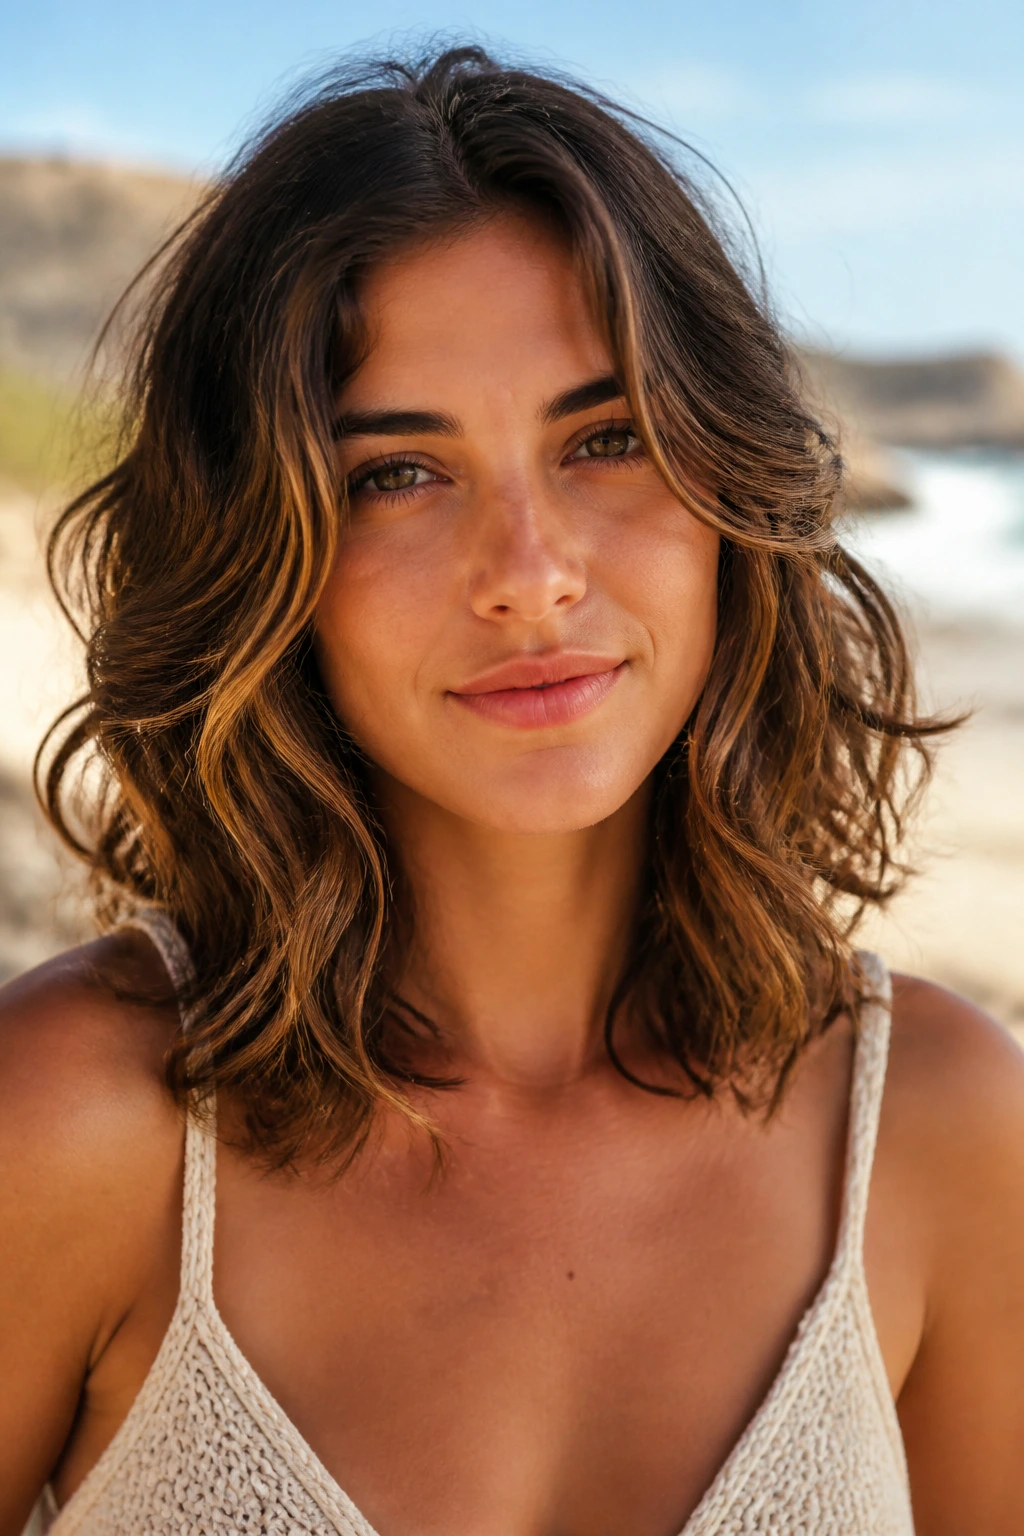
3. Collarbone-Dust Layers for Loose Beach Waves
If you want the front to do something without making a scene, this is the quiet answer. The shortest pieces graze the collarbone, so the cut keeps its length while still opening the face.
This shape is especially good for loose curls and wave-heavy hair that falls flatter when it gets too many short layers. You still get movement, but you don’t lose that long, soft line that makes beachy waves look easy.
Ask for the front pieces to be blended into the rest of the hair with a very gentle angle — think drift, not drop. The key is keeping the layers long enough to move while dry, because a collarbone-length frame on curly hair can bounce up fast.
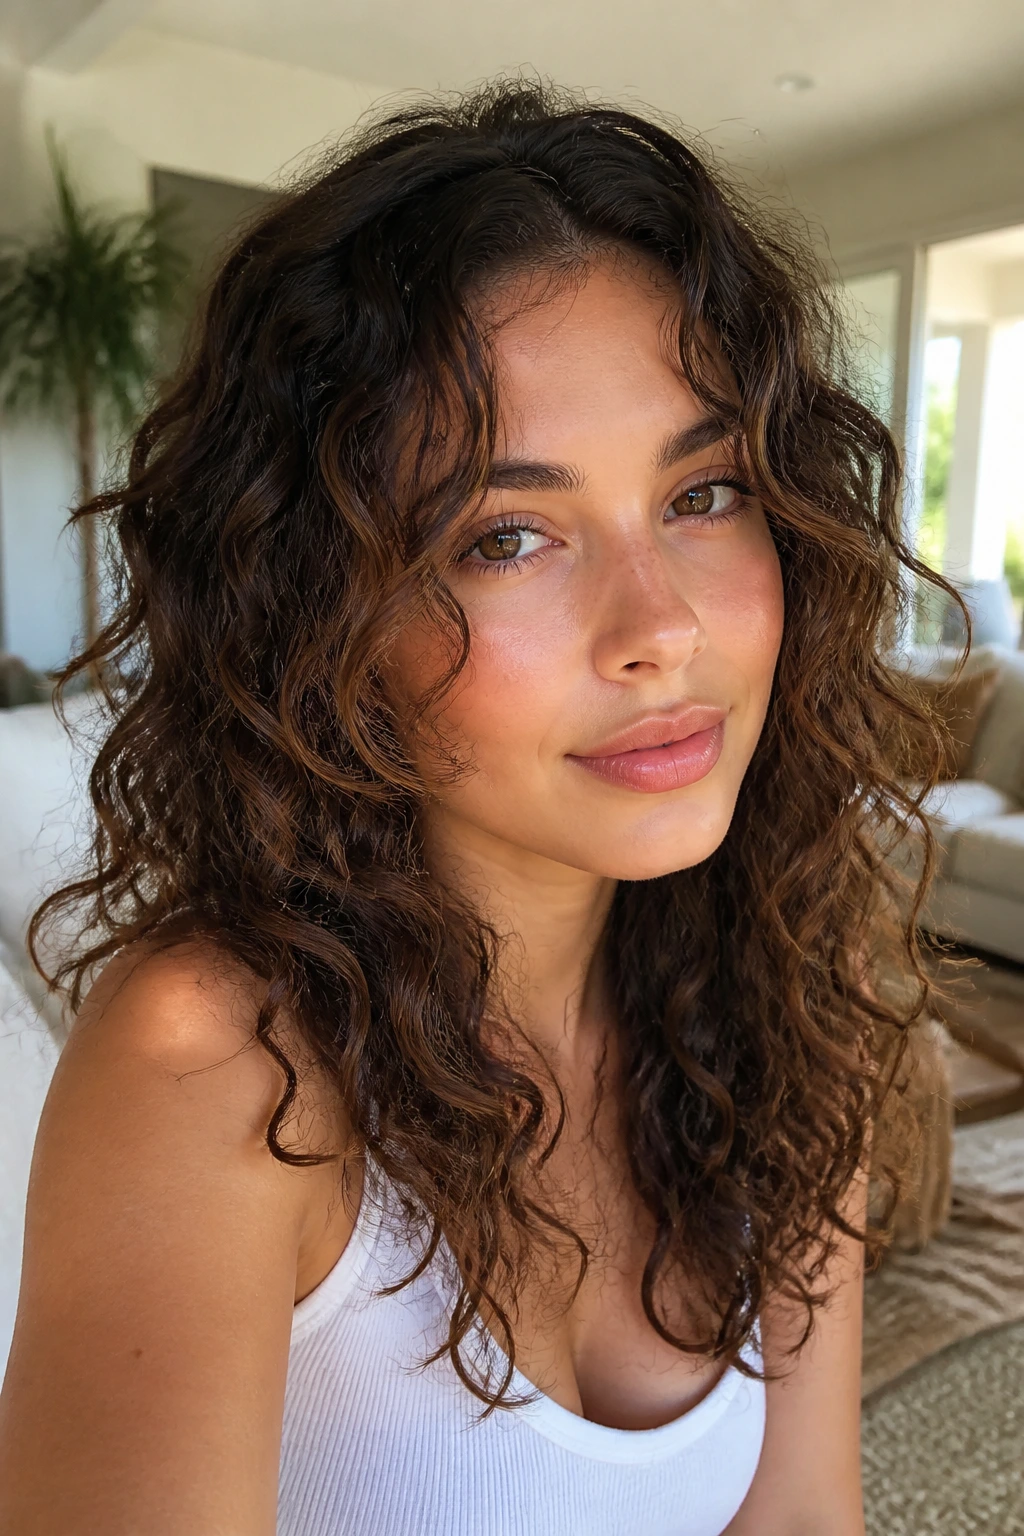
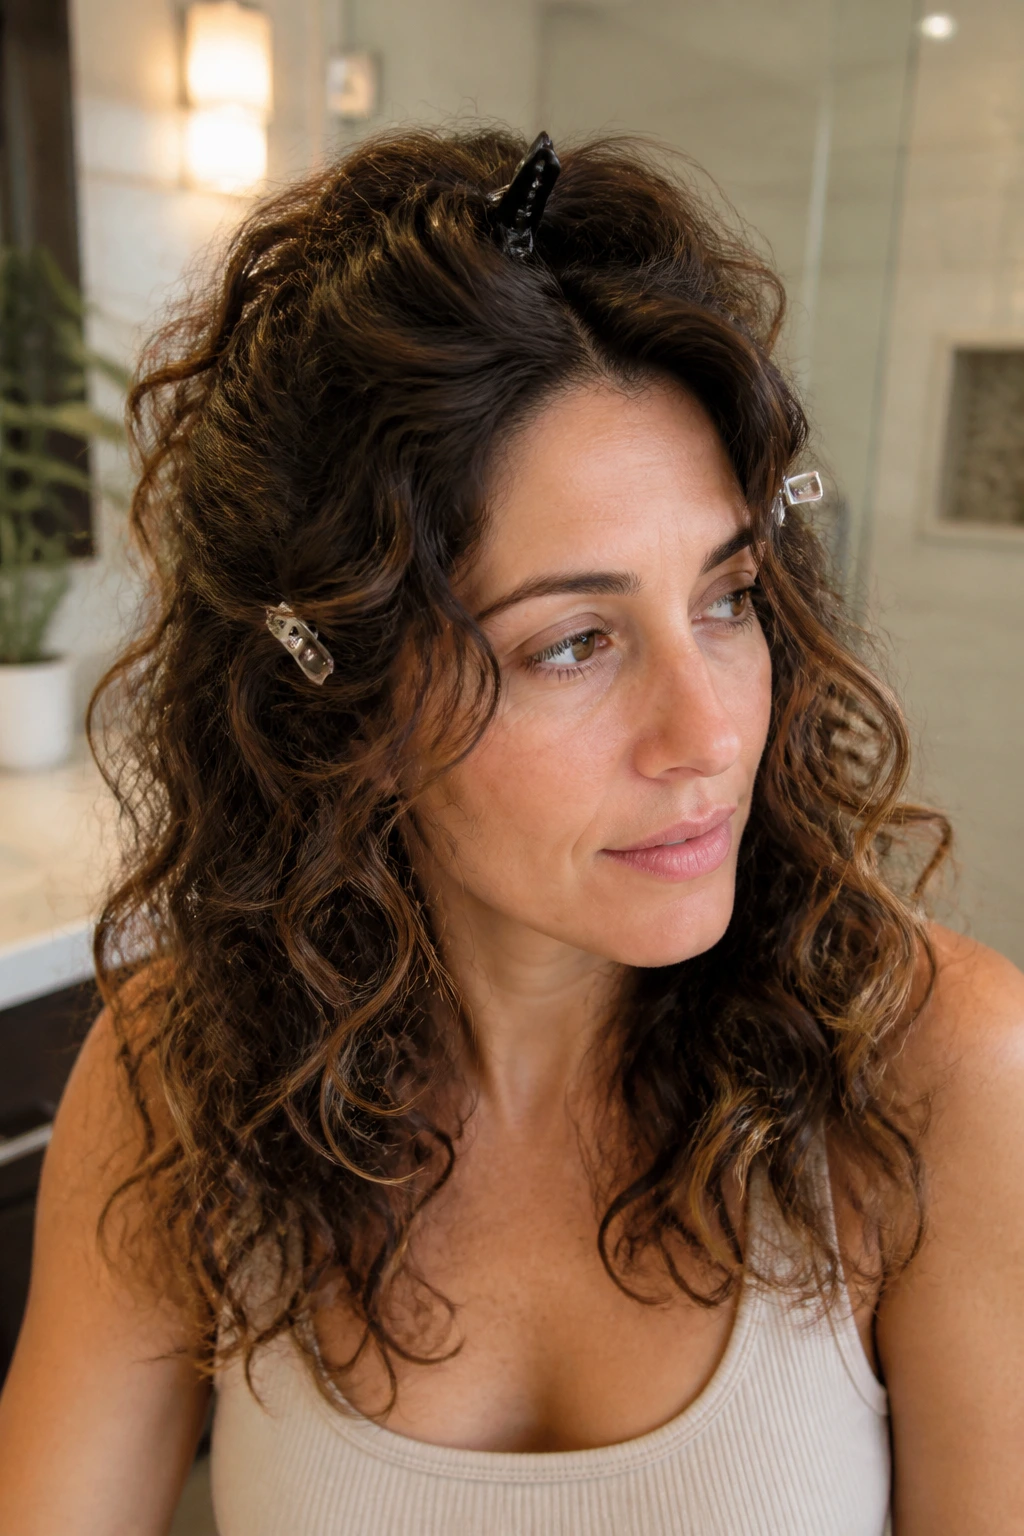
4. Rounded Halo Layers That Follow the Curl Pattern
A halo shape is less about one dramatic front piece and more about a curve that wraps the whole head. The front still frames the face, but it does it as part of a larger rounded outline instead of a single obvious slice.
This works well on dense curls that tend to mushroom out at the sides. A rounded halo keeps the bulk distributed, so the top doesn’t look flat and the bottom doesn’t feel too heavy.
The trick is to keep the shortest layers balanced around the crown and temple, then let the front pieces softly skim the cheek. If the cut is done with curl shrinkage in mind, the finished shape looks airy rather than puffy. It’s one of those cuts that gets better when the curls clump naturally and stop trying so hard.
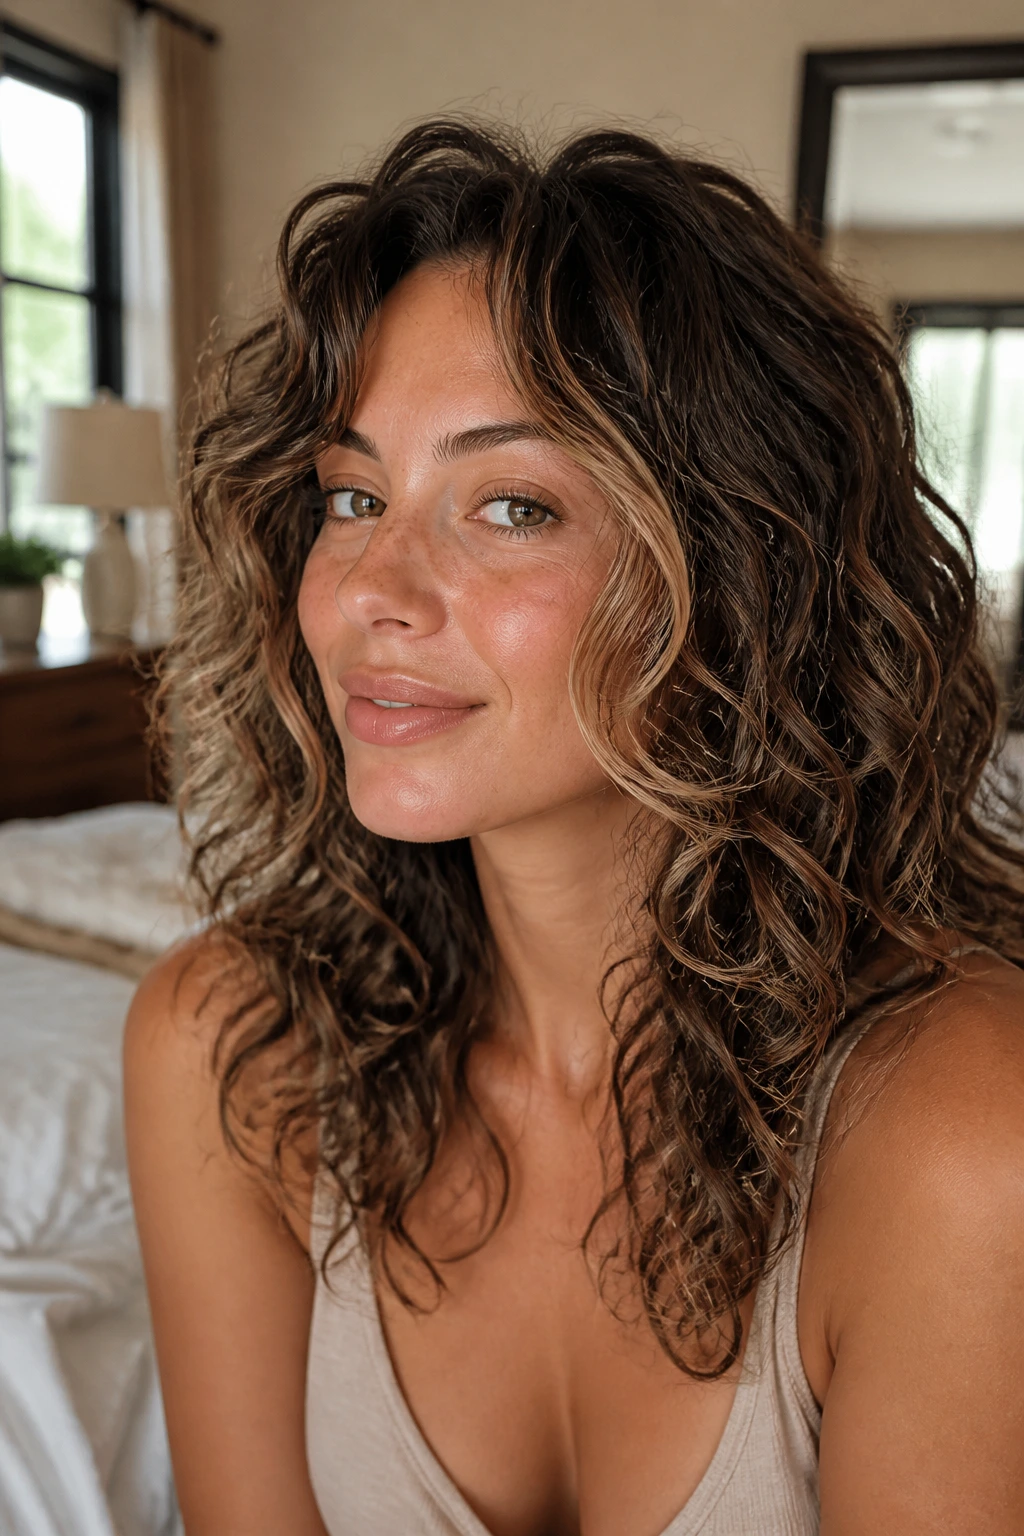
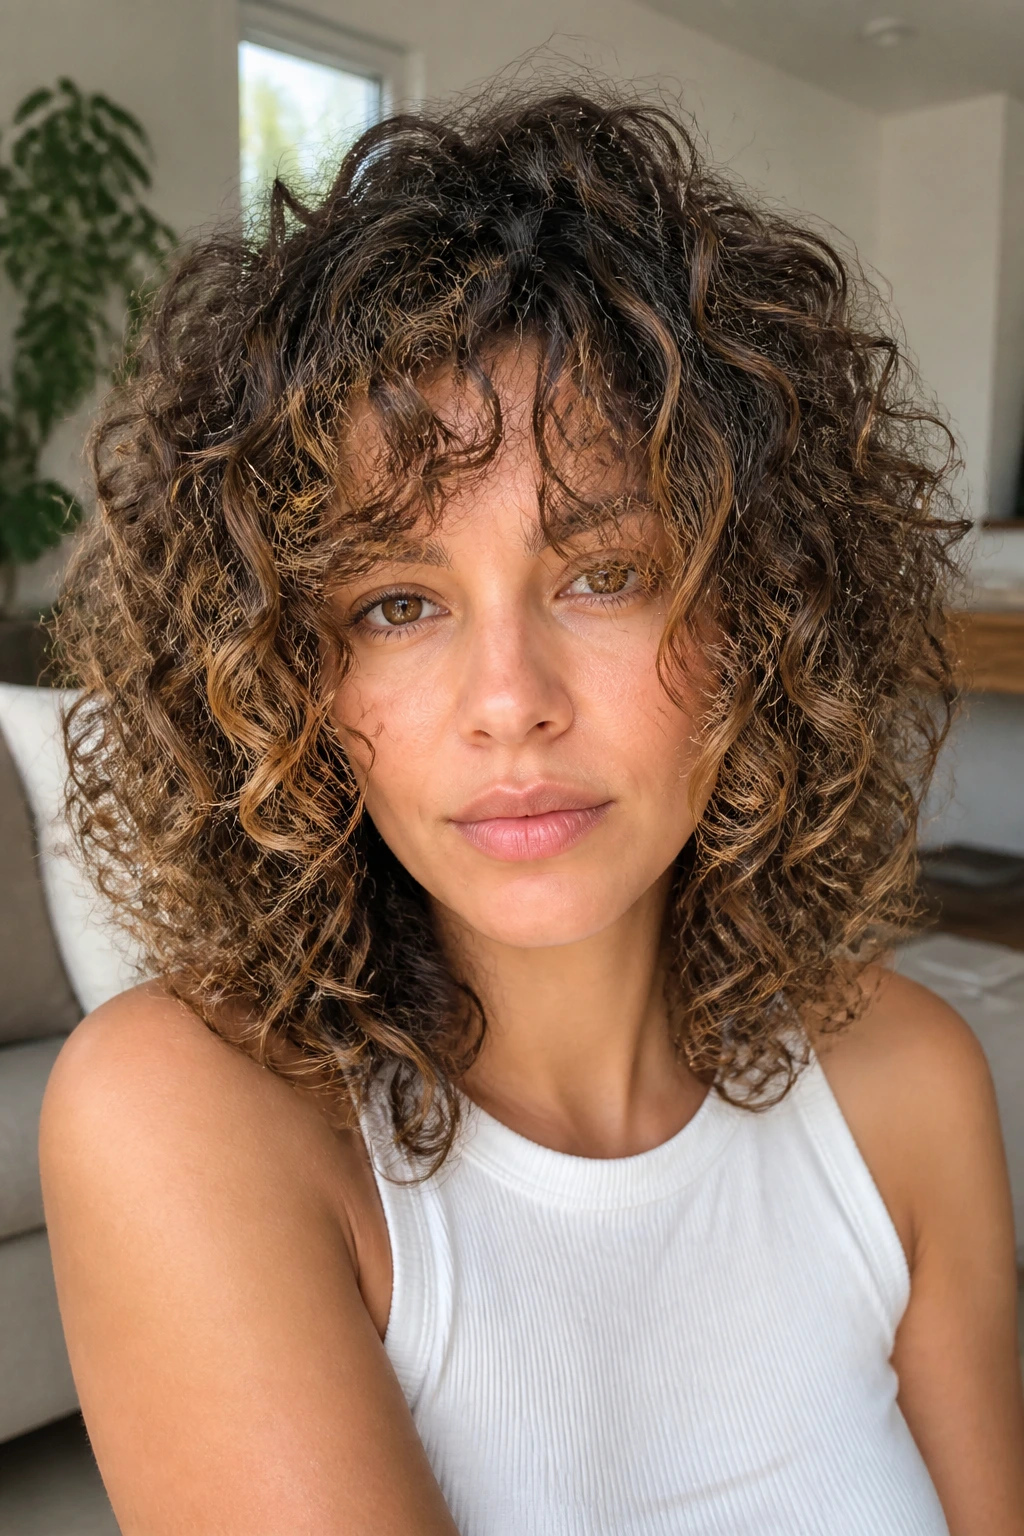
5. The Modern Curly Shag With a Built-In Frame
This one has attitude. A curly shag gives you shorter pieces through the crown and a stronger face frame, which means the texture has somewhere to go instead of stacking up like a triangle.
It’s a smart move if your curls are thick enough to support more layers. The shape is looser around the edges, so the front bends and pieces out in a way that feels lived-in, not precious.
Ask for the front to start around the cheekbone or jaw, then keep the interior light with point cutting. The shag is at its best when the top lifts and the sides don’t drag the whole head down. It’s a little messier than the others, and that’s the point.
6. Bottleneck Bangs That Melt Into Waves
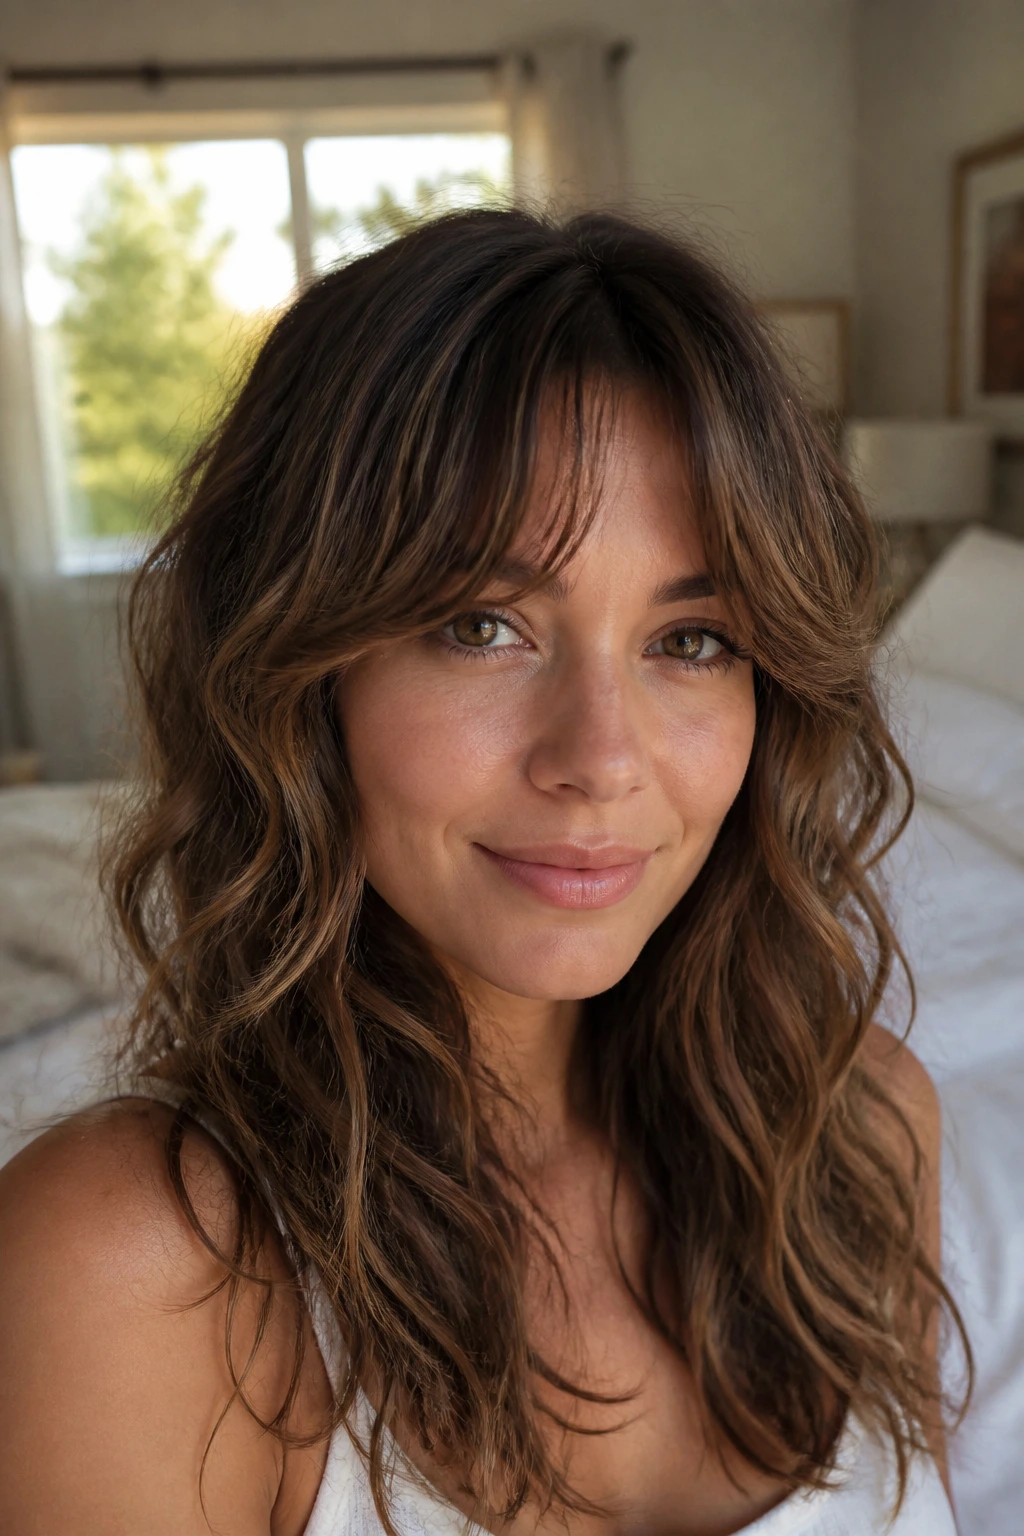
Want softness around the forehead without committing to a full fringe? Bottleneck bangs solve that nicely. They’re narrow in the center, then widen as they move into the face-framing layers, which keeps the look from feeling blocky.
The curl pattern matters here. Loose to medium curls can hold the shape with very little effort, while tighter curls may need a longer center section so the fringe doesn’t spring up too far above the brow.
Ask for This
- Keep the center shortest piece just above or at the brows when dry.
- Let the sides open out toward the cheekbone.
- Cut them dry if possible, or refine them dry after the wet cut.
- Avoid a blunt edge across the whole forehead.
This cut works best when the bangs are allowed to break apart a little. A finger twist and a quick diffuse is enough. You do not want them sealed into one heavy strip.
7. Side-Swept Front Layers for Deep Parts
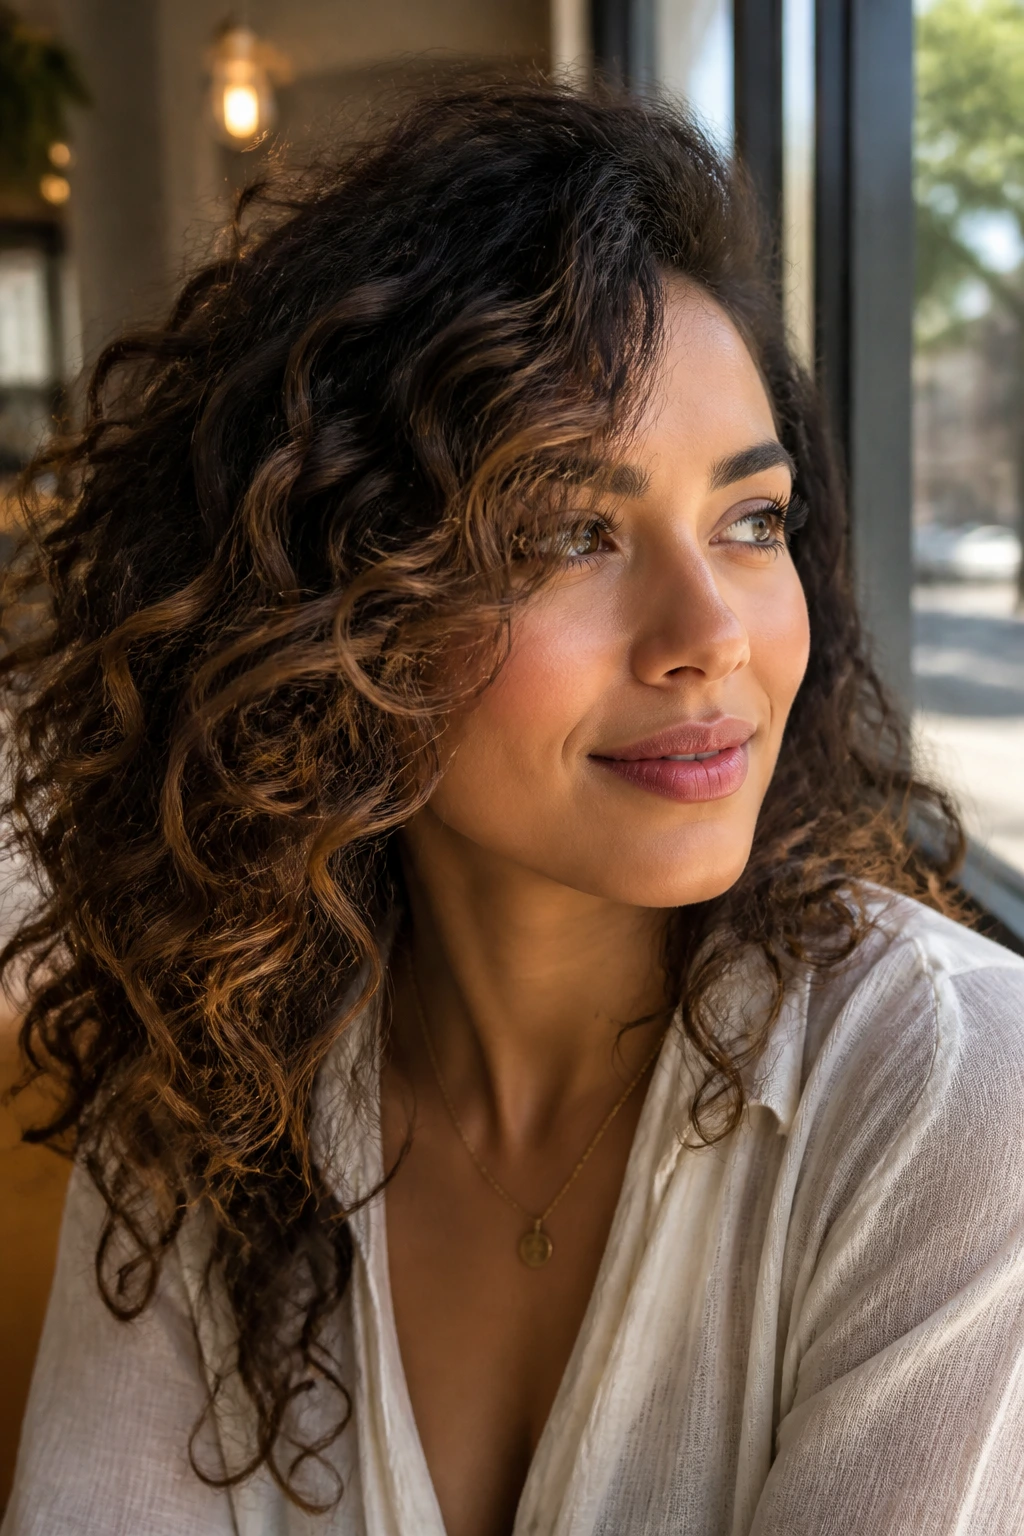
A deep side part changes the whole attitude of a curly haircut. Instead of sitting evenly on both sides, the front layers sweep across the face and give one cheek a softer fall than the other.
That asymmetry is useful. It can make a round face feel a little longer and a square face feel less rigid, especially when the front pieces are left long enough to tuck behind one ear.
I like this look on people who already part their hair to one side and don’t want a haircut that fights that habit. Tell the stylist which side you wear most often, because the shorter layer should support that direction rather than argue with it. One good side part does more for the frame than a pile of products ever will.
8. Razor-Soft Face Framing for Fine Curls
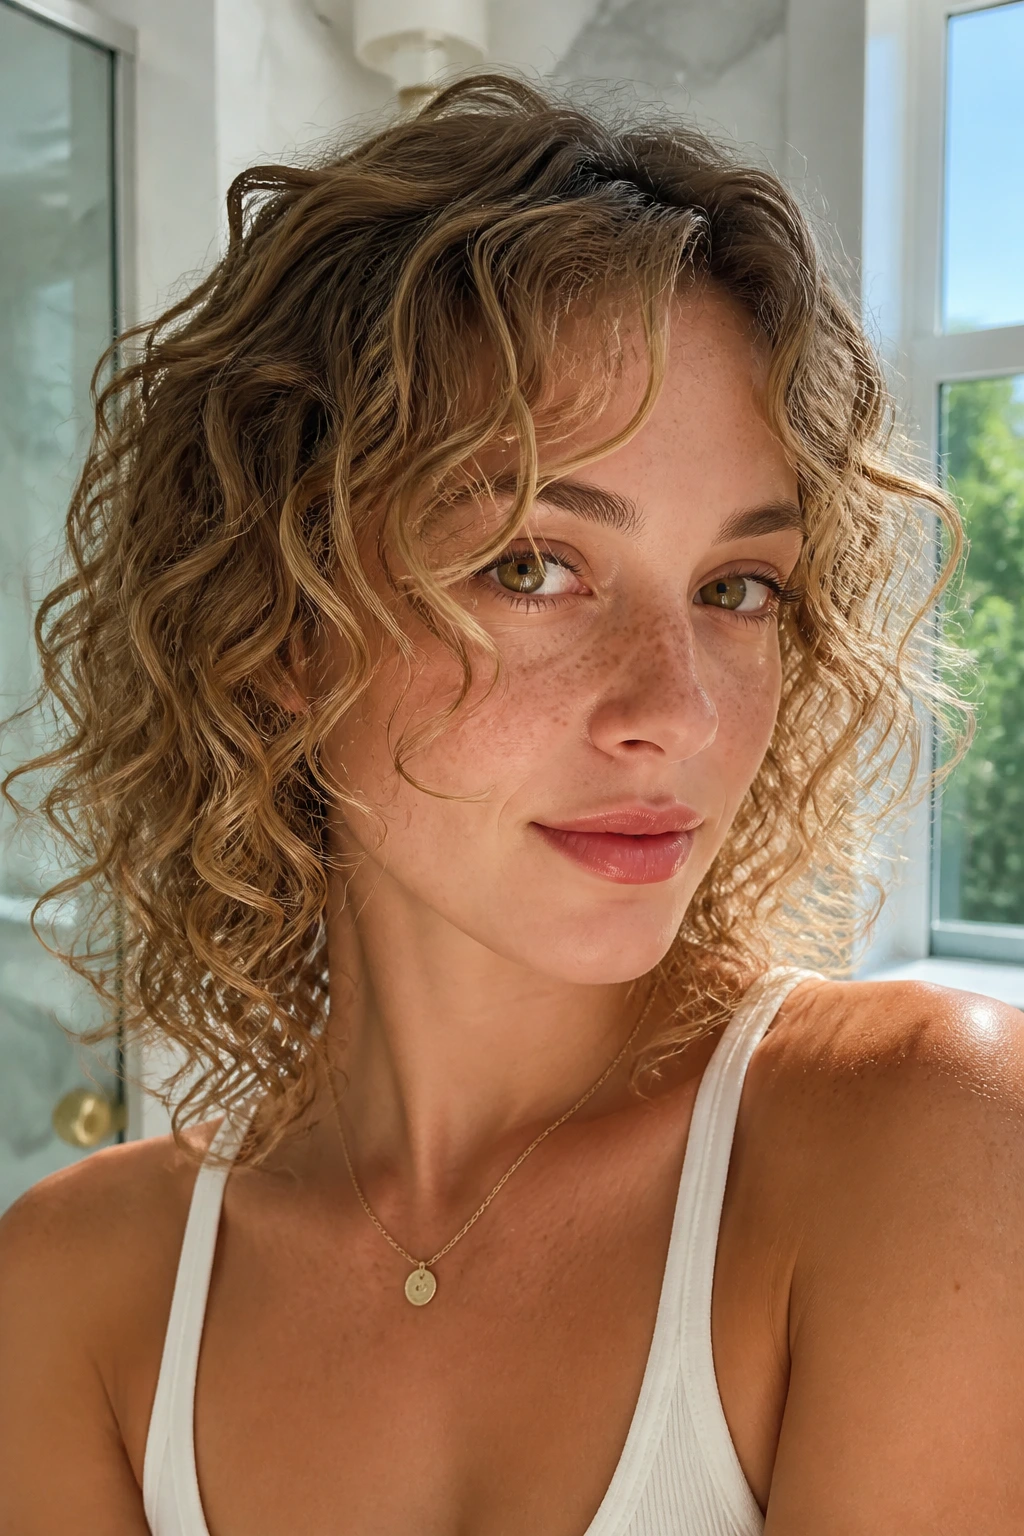
Fine curls need a lighter touch. Too much bulk removal can leave the front looking wispy in the wrong way, so a razor-soft frame is only worth doing with someone who knows how curly hair behaves when it’s cut.
The goal is airy ends that move like loose beach waves, not frayed tips. On fine hair, the best result usually comes from subtle slide cutting or a very careful razor finish on damp hair, never from aggressive thinning.
What to watch for
- The shortest layer should still have enough weight to curl.
- The ends should look soft, not shredded.
- The front pieces should swing, not stick out.
- If your hair frizzes easily, ask for a gentler point cut instead of a razor.
This cut is best when the styling is light. A foam or mousse will usually do more good than a heavy cream, and the front pieces should be encouraged to bend, not cling.
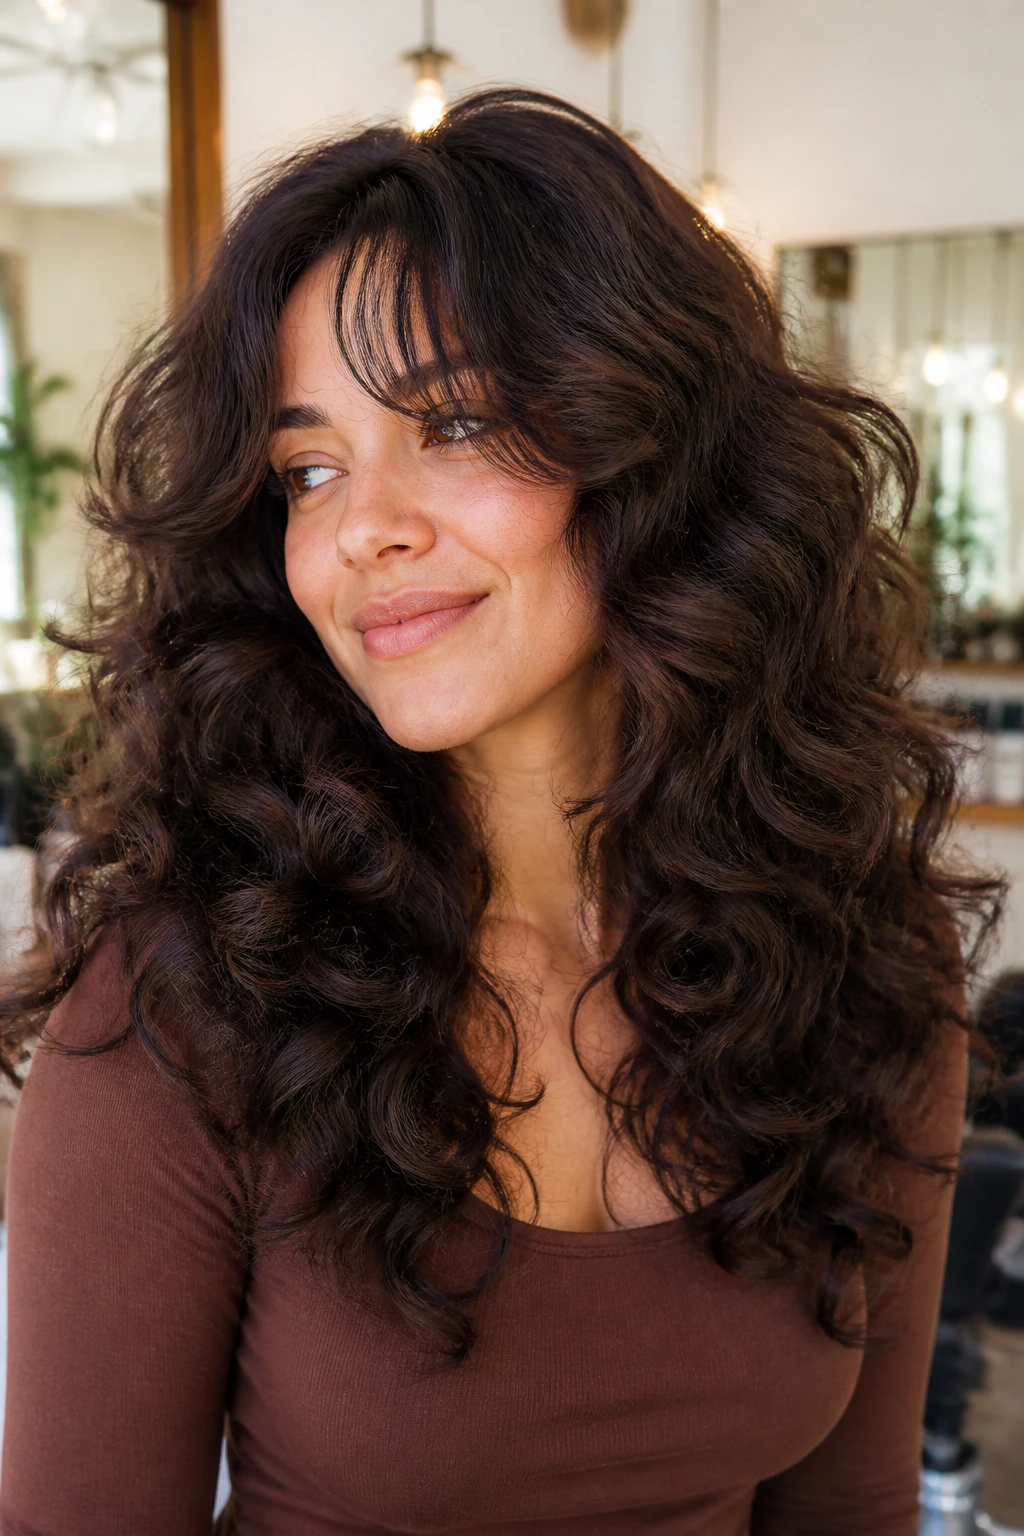
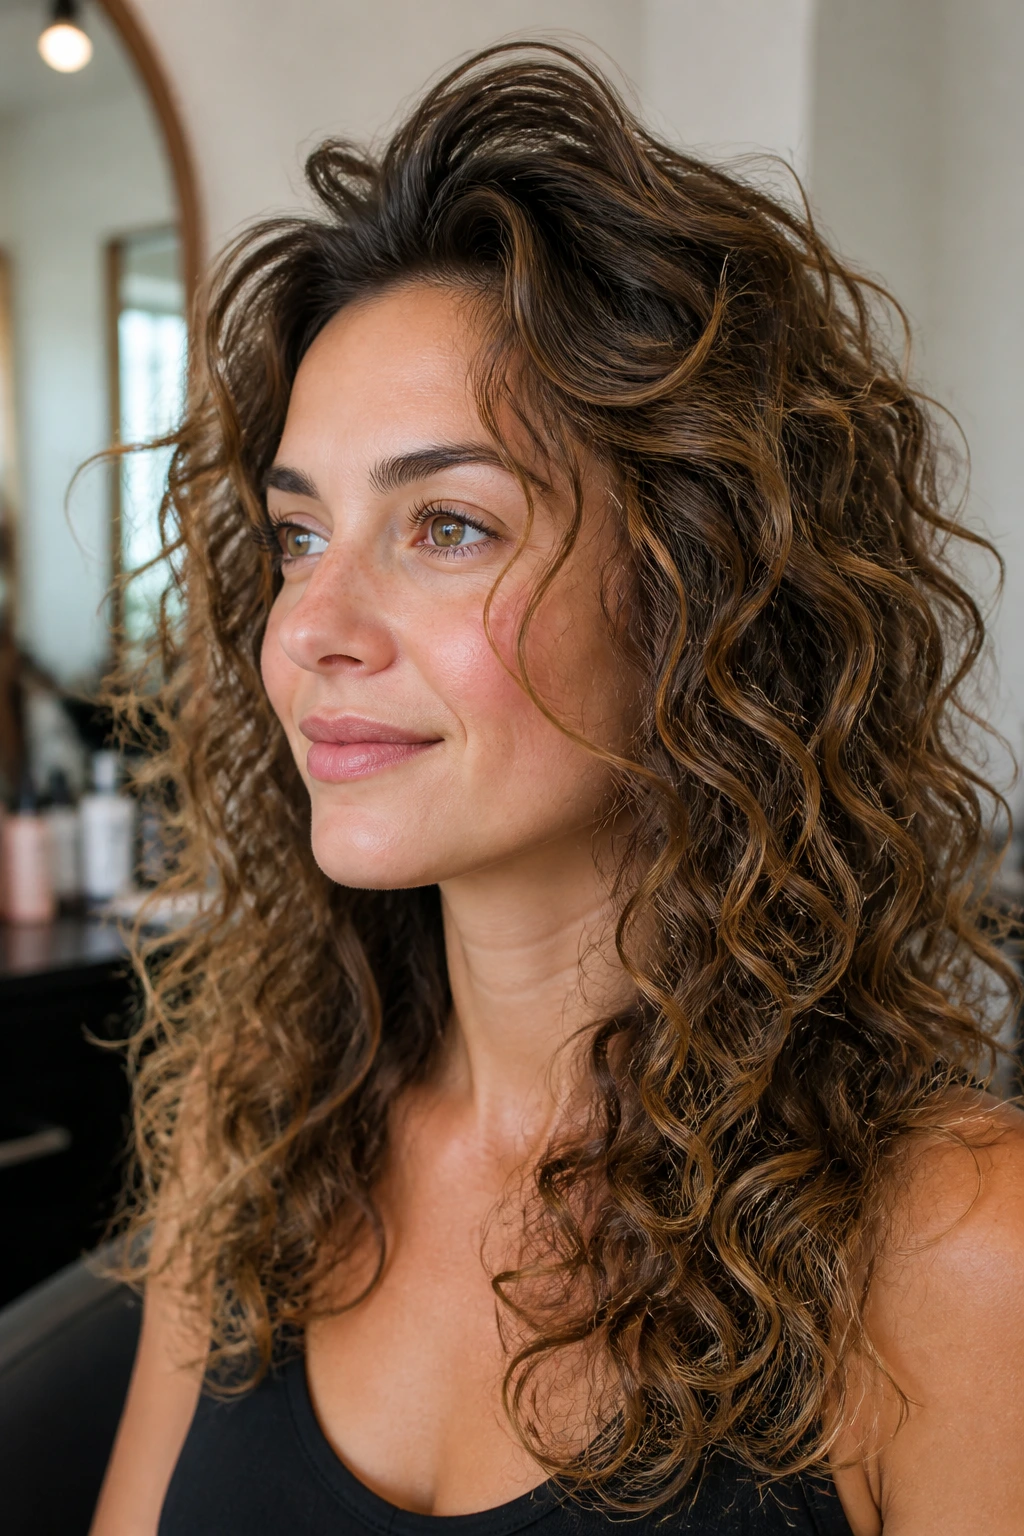
9. Butterfly Layers for Big, Bouncy Texture
Butterfly layers are built for movement. You get shorter pieces near the front and crown, then longer lengths underneath, which creates that cascading effect people usually notice first in photos and then in the mirror.
The face-framing part is what makes the cut feel less dramatic. Without it, butterfly layers can look like a lot of volume with no shape. With it, the front opens up and the whole cut feels more deliberate.
This is a strong choice for thick hair that can handle more structure without going flat. Ask for the shortest pieces to start around the cheekbone and to blend down fast, not in a hard step. When the curls dry, the front should look like it’s falling forward, not hanging off a ledge.
10. Jaw-Starting Layers for Square Faces
If the jawline is the feature you want to soften, start there. Layers that begin around the jaw take some of the visual weight off the sides and keep the cut from emphasizing a strong angle.
The salon note that matters
Tell the stylist you want the first face frame to land at the jaw when dry, not higher. On curly hair, that can mean starting the cut a little longer than you think in the chair, because the curl will shrink and bounce.
That length keeps the look flattering rather than choppy. It also gives beachy waves a little swing when the hair moves, which is better than a layer that snaps outward at the cheek. For square faces especially, this kind of frame gives softness without losing structure.
11. Long U-Shape Layers With Front Draping
The U-shape is for people who want long hair but refuse to live with a flat front. The length stays fuller toward the center back, while the front layers drape down in a way that keeps the face open.
I like this shape on long curly hair because it doesn’t steal the drama from the length. Instead, it gives the hair somewhere to bend near the collarbone and chin, which is where a lot of long curly cuts start to look heavy.
Keep the face frame gentle. A harsh angle here can make the ends kick out in a way that fights the wave pattern. A soft U keeps the front pieces moving and still lets the bulk sit where it belongs.
12. Tapered Lob Layers That Stay Light at the Edges

A lob with tapered layers is one of the easiest curly cuts to live with. The length sits around the collarbone, and the front pieces taper down so the ends don’t feel blunt or boxy.
It works well for people who want a shorter shape but not a dramatic chop. The tapered front makes the curls look touched by air, which is exactly the feeling beachy waves should give you.
How to wear it
- Keep the side pieces a little longer than the center front.
- Diffuse only until the hair is about 80% dry.
- Scrunch out the cast with one drop of oil.
- Let the front pieces cool in place before touching them.
That cooling step matters. If you keep fussing with the front while it’s still warm and damp, the layers can lose the shape they just worked so hard to build.
13. Invisible Internal Layers for Loose Beach Waves
Not every frame has to announce itself. Invisible internal layers remove weight from underneath while keeping the outer line long, so the haircut still moves without looking obviously layered.
This is a smart option for loose waves or curl patterns that go limp when too much length is removed from the outside. The face still gets softness, but the overall shape stays clean.
Tell the stylist you want the movement hidden inside the cut, not carved into the perimeter. That phrase helps. The front pieces can still begin around the cheekbone, but the rest of the layering stays tucked out of sight, which keeps beachy waves from getting too frayed.
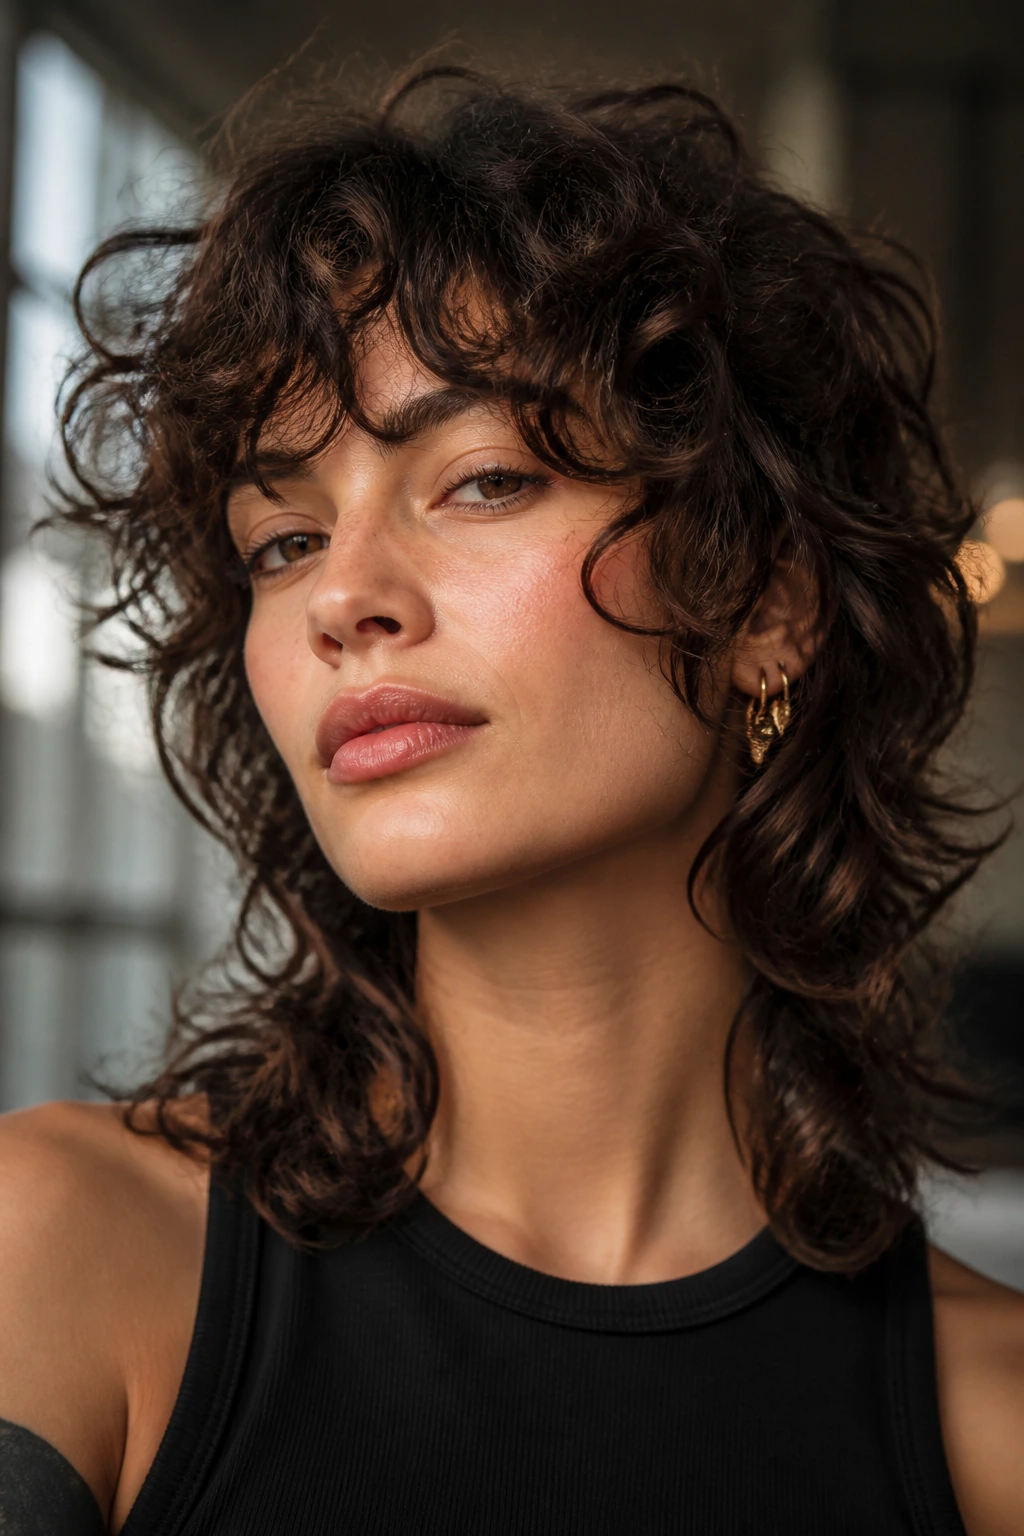
14. Curly Wolf Cut With Soft Face Pieces
If you like a little edge, this is the loudest shape in the pile. The wolf cut brings shorter texture up top and longer, softer pieces around the face, which gives the whole head a rougher, cooler outline.
It’s not for everyone. Fine hair can get swallowed by the crown layers, and very loose waves may lose too much weight. But on thick curls, the cut can look alive in a way that more polite layers never manage.
Ask for the face pieces to stay soft and long enough to frame the cheek and jaw, because the wolf cut works best when the front keeps some movement. The trick is to let the texture feel a little wild without letting the shape turn into a puff ball.
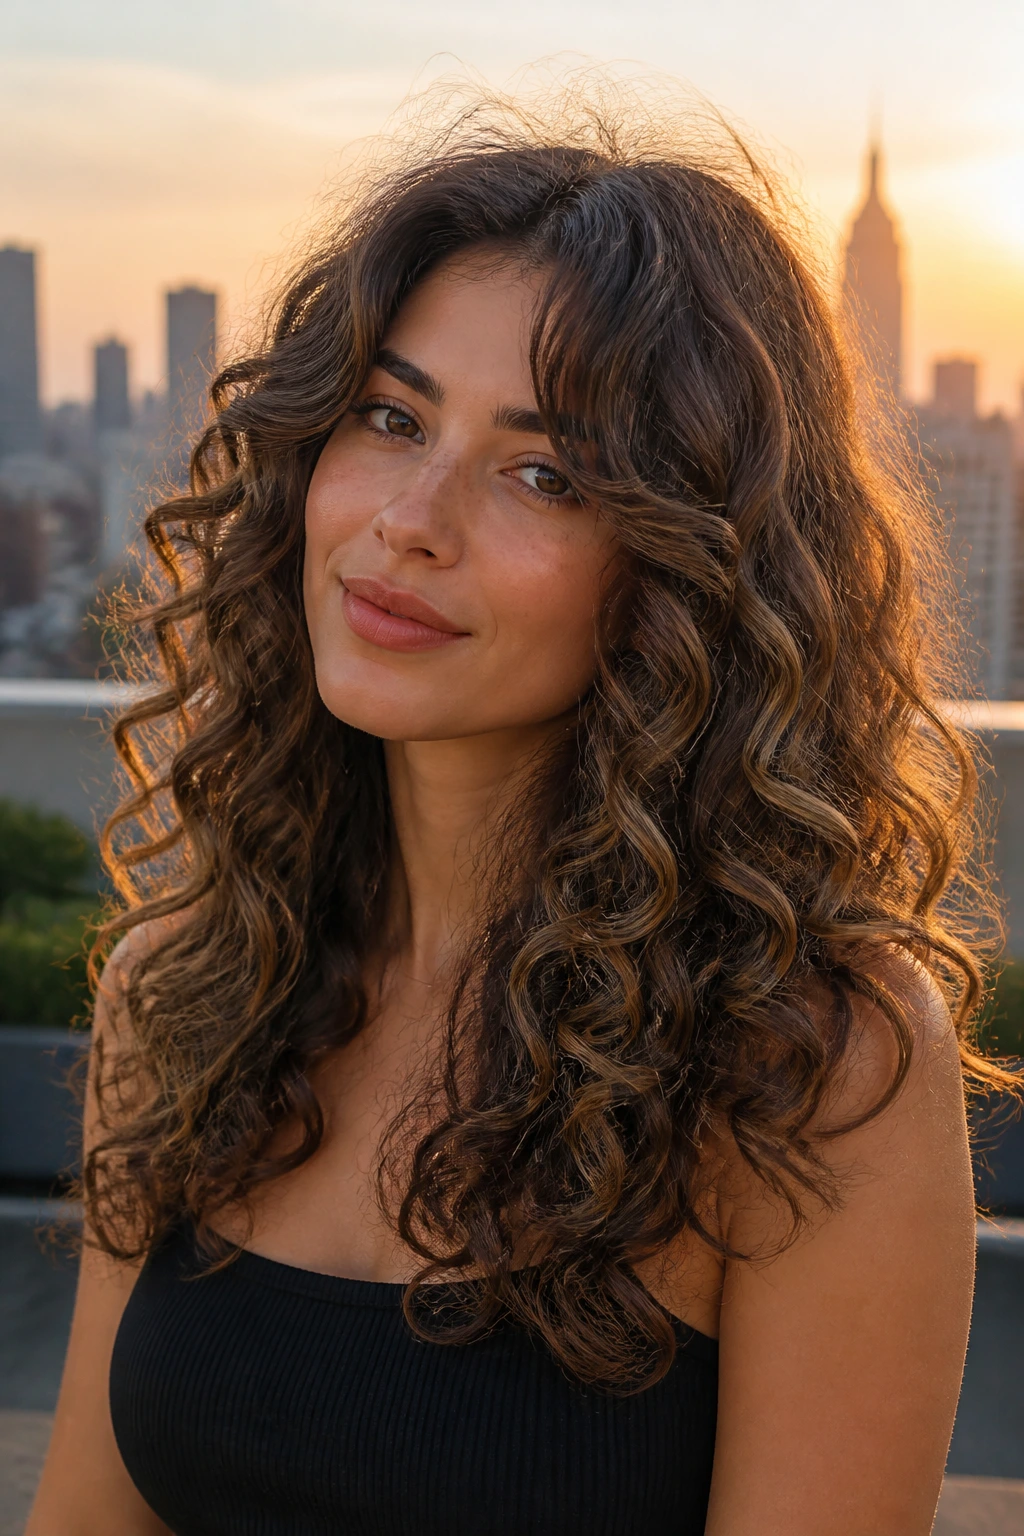
15. Center-Part Curtain Layers for Oval Faces
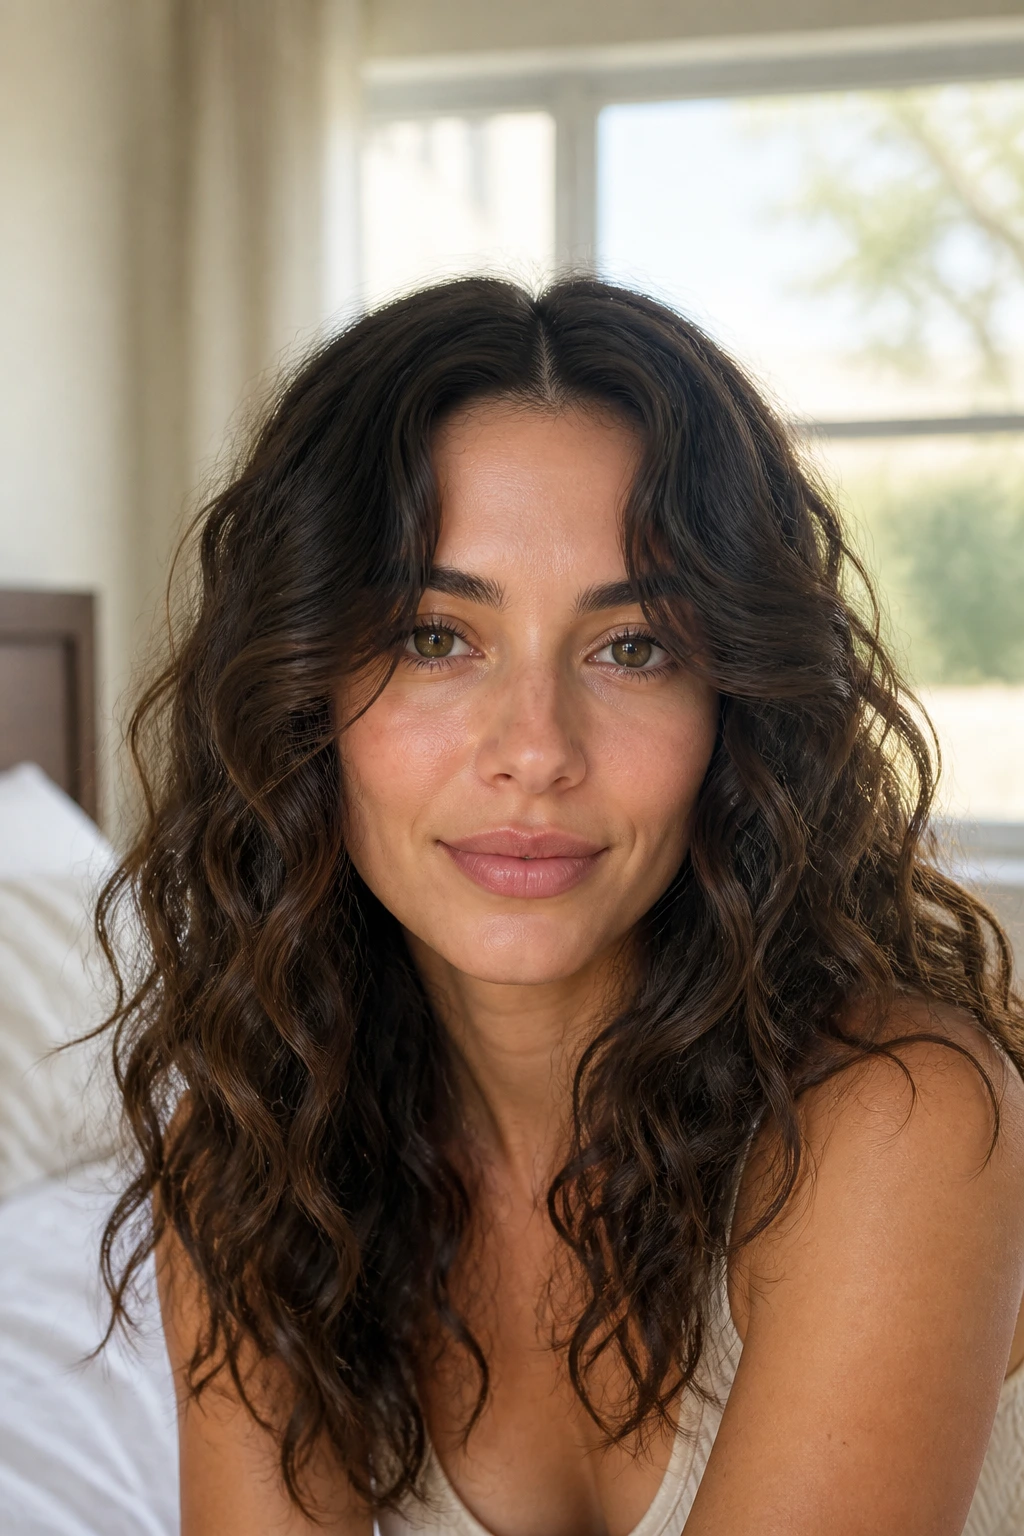
A center part with curtain layers is plain in the best way. It gives the face a symmetrical frame, which tends to flatter oval faces and soften longer ones without forcing the hair into a dramatic shape.
The front pieces usually start around the brow or cheekbone, depending on how much your curls shrink. If they’re too short, the part can look severe. Too long, and the curtain effect disappears.
This cut shines when the waves are separated just enough to show individual clumps. Don’t brush them into a smooth sheet. Let the front pieces breathe a little, and the whole style reads more relaxed and less salon-perfect.
16. Feathered Front Layers for Thick, Heavy Hair
Thick curls can carry more air in the cut, which is why feathered front layers are worth the trouble. They remove some of the density around the face without stripping away the shape.
Use a stylist who knows how to soften thick hair without creating frizz. That usually means slide cutting or careful point cutting, not hacking at the ends with thinning shears and hoping for the best.
Good signs to ask for
- The front pieces should move when you shake your head.
- The ends should look tapered, not chopped.
- The layer line should disappear into the rest of the hair.
- The hair should still feel full, just lighter near the face.
This cut is a relief if your curls feel like they sit on your cheeks. The feathering keeps the shape from going heavy, and it works especially well when you want your beachy waves to look soft instead of bulky.
17. Wavy Micro-Fringe With Long Frame Pieces
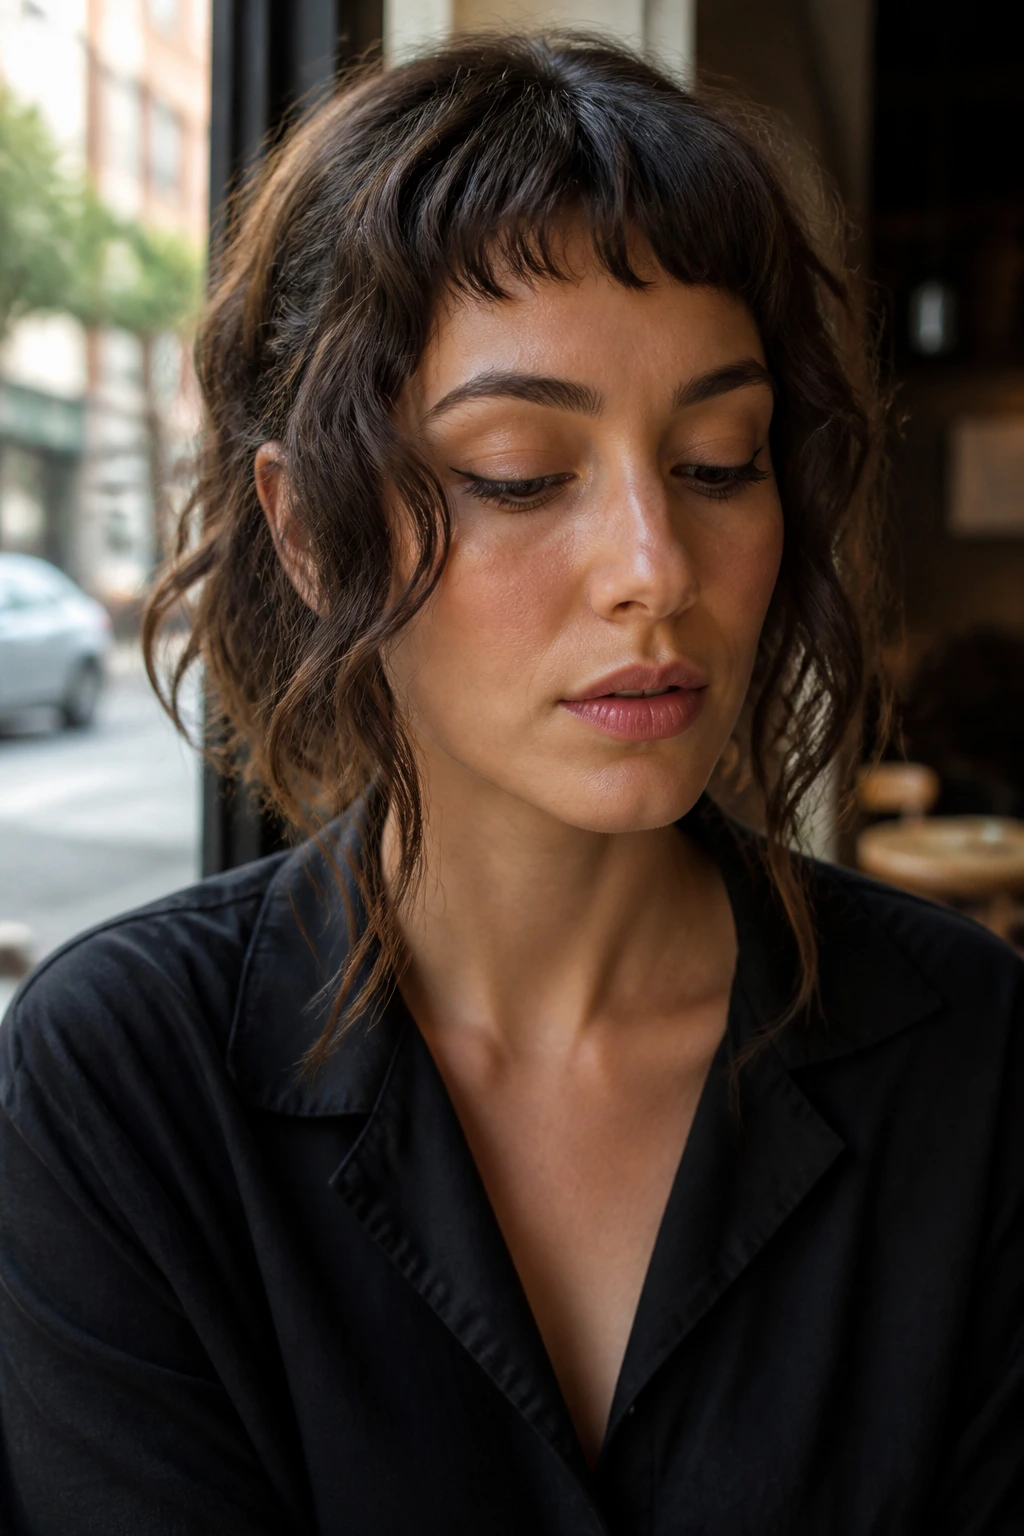
A micro-fringe is a little daring, and that’s what makes it fun. The fringe sits short, but the face-framing pieces stay long, so you get the contrast of a tiny bang without losing softness around the jaw.
It’s a good move if you want something that looks intentional even on a rough wash day. The short fringe can be swept forward or split apart, while the longer side pieces keep the face from feeling boxed in.
Be honest about shrinkage here. A micro-fringe on curly hair can jump up fast, and if the stylist doesn’t cut with that in mind, you can end up with a much shorter result than you meant to ask for. Keep the rest of the frame long enough to balance it out.
18. Angled Layers That Slim the Sides
Angled layers create direction. Instead of letting the hair hang straight down from the cheek, the layers move diagonally toward the collarbone, which helps the sides feel slimmer and the face look longer.
This cut works especially well if your curls are full at the cheeks but flatter at the crown. The diagonal line pulls the eye downward in a smoother way than a blunt edge does.
It’s also useful if you like beachy waves but don’t want them to spread too wide. Keep the angle soft, not severe. If the front pieces are cut into a sharp point, the end result can look more triangle than wave, and nobody needs that.
19. High-Crown Layers That Lift the Front
Sometimes the problem is not the face frame at all. It’s the flat top. High-crown layers build movement higher up, which gives the front pieces room to fall instead of collapsing against the head.
That extra lift matters on heavy curls. Without it, the front can drag the whole style down and make the face-framing layers look smaller than they are.
Use root clips at the crown while the hair dries, and keep the front pieces directed away from the face for the first part of the dry time. Once the roots have memory, the whole cut reads lighter. It’s a simple fix, but it changes the balance fast.
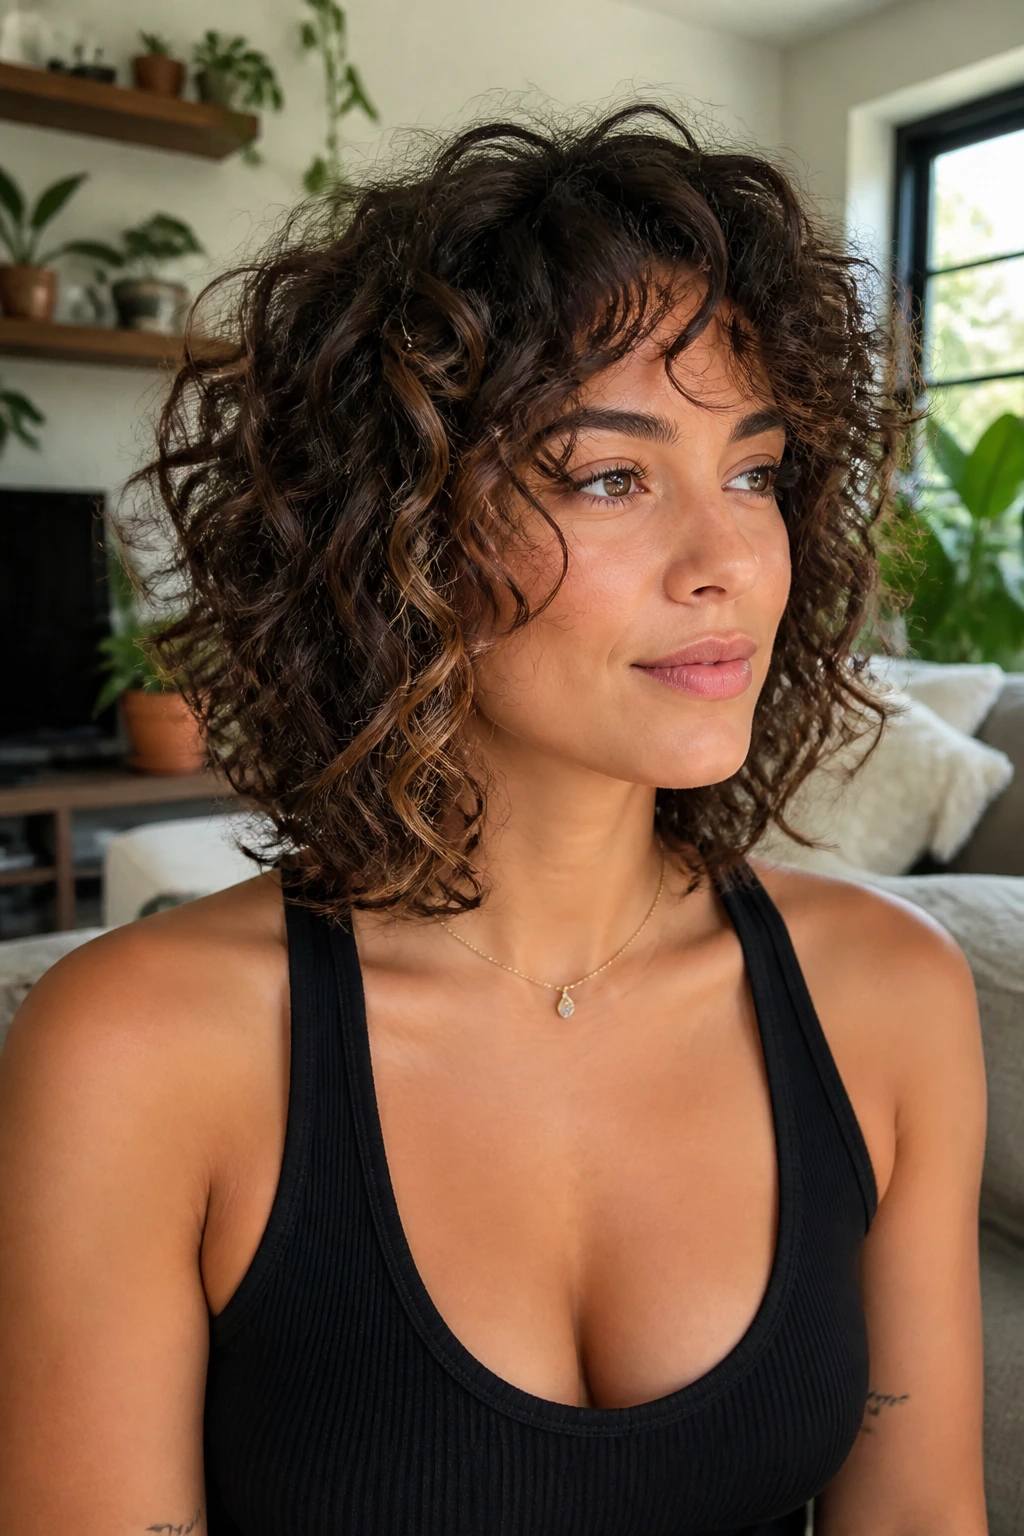
20. Layered Bob With Curled-In Face Pieces
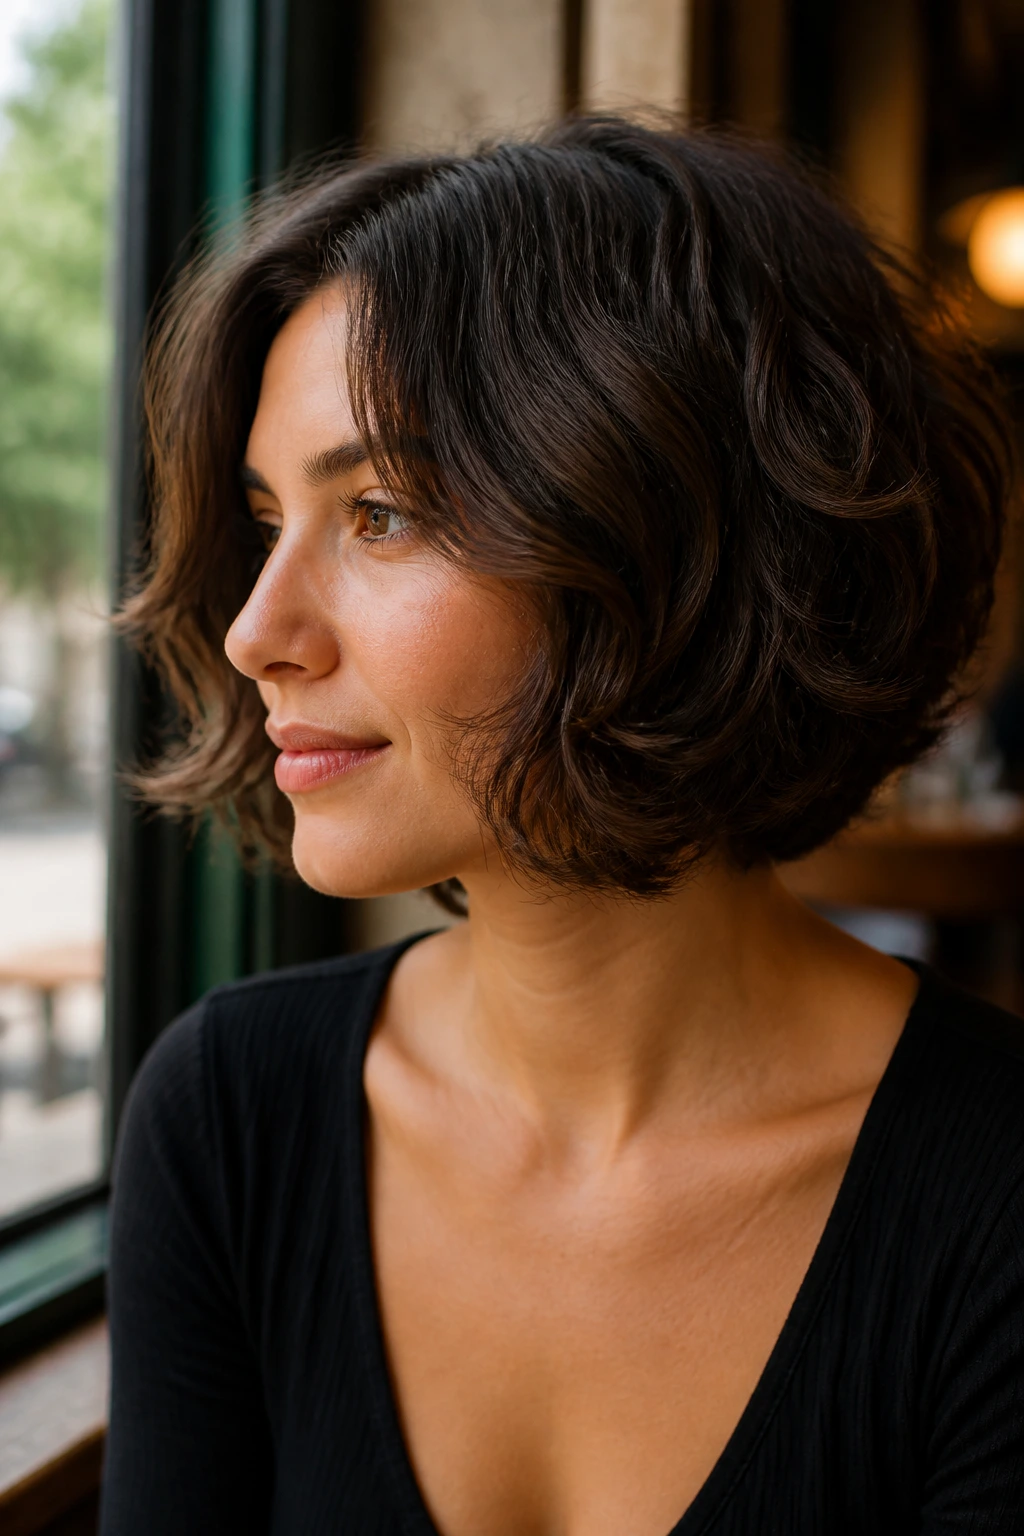
A bob doesn’t have to be blunt. A layered bob with softly curled-in face pieces gives you shape at the jawline and enough movement that the ends don’t sit like a helmet.
The face frame is what keeps this haircut from looking too boxy. The shortest front pieces usually land around the jaw or just below, with the rest of the bob sitting a touch longer in back.
This is one of the best short options for curly hair because it keeps the neck open and still gives the front some softness. If your curls are springy, leave a little extra length in the chair. Short bobs have a habit of showing every inch of shrinkage, and that’s not where you want to improvise.
21. Deep V Layers With Long Front Strands
A deep V gives the back a point and leaves the front long enough to frame the face like a soft drape. It’s a dramatic shape, but the drama stays in the line, not in the styling.
This cut is best on longer curly hair that already has enough length to show the V clearly. On shorter hair, the shape can disappear into the bulk. Long front strands keep it from looking severe, and they make the beachy wave effect feel more fluid.
Ask for this if you like length
- Keep the front pieces below the chin when dry.
- Let the back taper into the point without sharp steps.
- Leave enough length around the face to tuck behind the ears.
- Avoid heavy layers that break the V into chunks.
The whole haircut feels a little more sculpted than the others on this list, which is exactly why it works when you want movement and length at the same time.
22. Air-Dried Shoulder-Length Frame Layers
This is for the person who does not want to stand under a diffuser every wash day. Shoulder-length frame layers are built to dry on their own with a little product and not much drama.
The cut should be loose around the ends and slightly shorter around the front so the face doesn’t disappear behind the length. Because the shoulder line can make curls flip in strange ways, the layers need to be soft enough to avoid a hard bend at the ends.
A lightweight leave-in, a small handful of mousse, and a patient air-dry are usually enough. If the front wants to dry flat, clip the roots near the temples for 10 to 15 minutes. That tiny lift keeps the face frame from sitting like a wet napkin.
23. Asymmetrical Front Layers for a Sharp Edge
One side longer than the other can look very sharp in a good way. Asymmetrical front layers add a little attitude and work especially well if you already wear a deep side part.
The longer side helps the curl fall toward the cheek, while the shorter side keeps the face open. It’s a nice move if one side of your hair always behaves better than the other anyway — which, if we’re being honest, happens a lot.
Keep the difference subtle. A dramatic asymmetry can turn into a costume fast, but a small uneven line makes the cut feel modern and deliberate. I like this shape on people who tuck one side behind the ear or wear glasses, because the contrast reads cleanly.
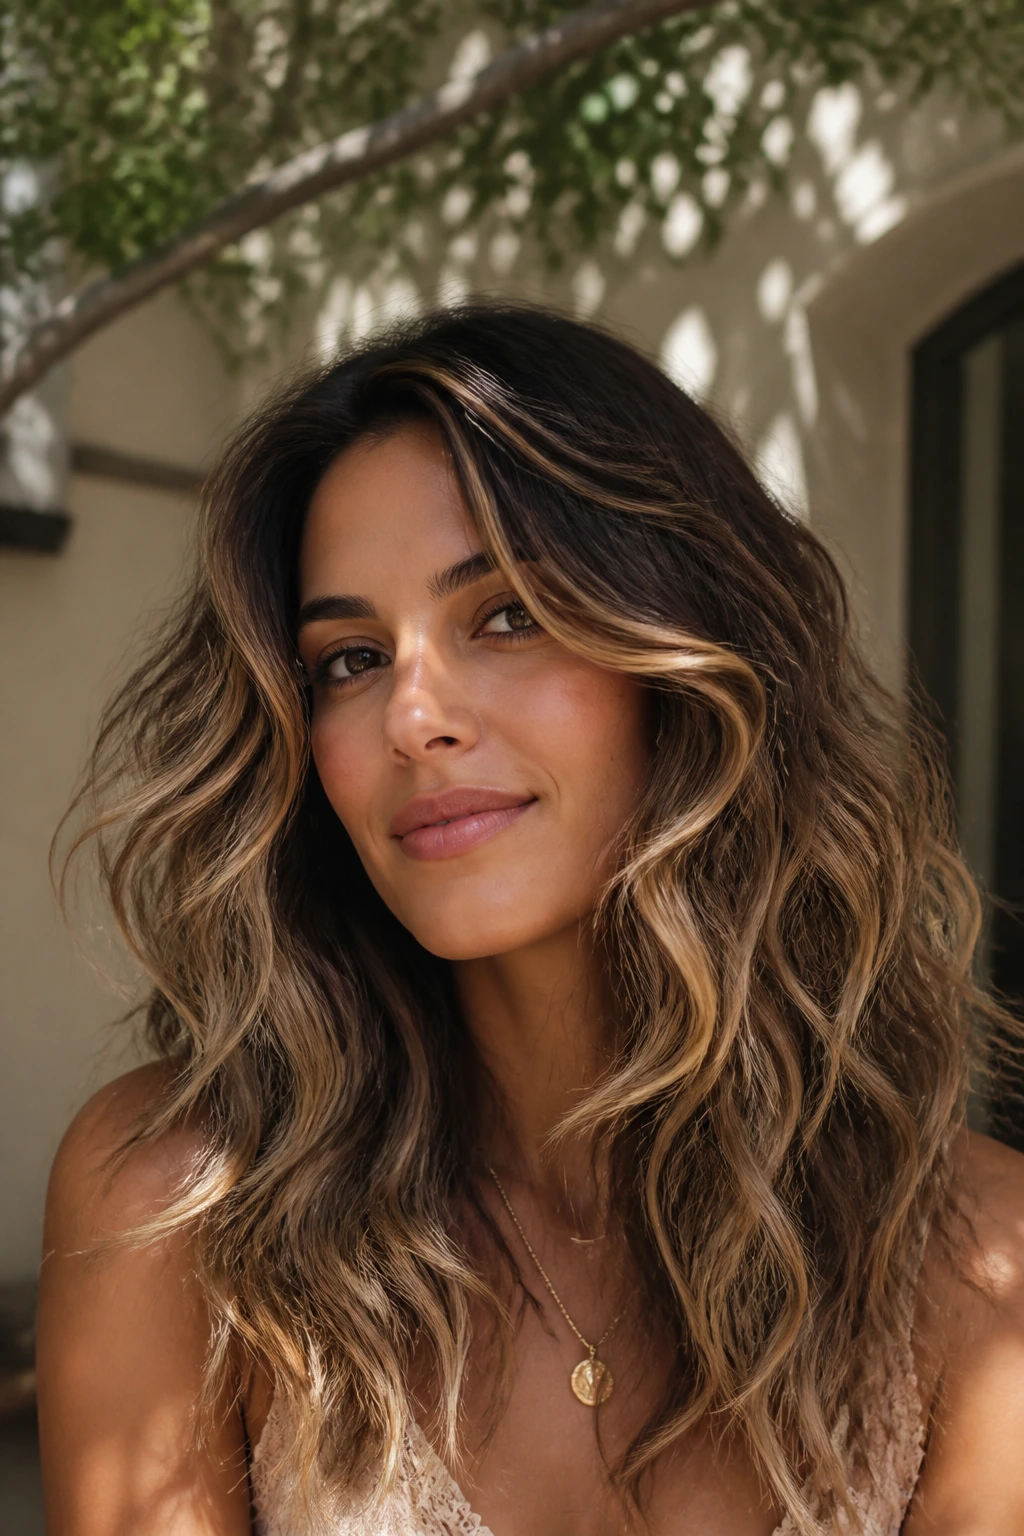
24. Soft S-Curve Layers at the Cheek and Jaw
An S-curve frame is all about bend. The front pieces start near the cheek, arc toward the jaw, and then soften again as they drop, which gives the face a gentler outline.
This is one of the nicest shapes for strong jawlines or square faces because it avoids a straight vertical drop. The curve does the work. You get movement, but it doesn’t feel choppy.
Finger-drying the front pieces helps here. Twist them lightly away from the face, then let them release as they dry so the bend stays soft. If you like beachy waves that look touchable instead of crunchy, this is the shape to ask for.
25. Grow-Out Friendly Face-Framing Layers
The best haircut is the one that still looks good when you forget to book the next trim. Grow-out friendly face-framing layers are blended enough that the shape stays useful even after a month or two of extra length.
That means no hard shelf lines and no tiny shortest pieces that vanish the second your curls get longer. The front should begin somewhere around the cheekbone or mouth, then melt into the rest of the cut.
This is the safest option if you want flexibility. You can wear the pieces loose, tuck them behind your ears, pin them back, or let them dry into beachy waves without fighting the shape. It’s not flashy, but it has a long memory, which I appreciate more than I should.
Why Layer Placement Changes Curly Hair So Much
A blunt line is the enemy here. Curly hair naturally builds width as it dries, so when the perimeter is too straight, the whole shape reads wider and heavier than it needs to. A good face frame breaks that line and gives the eye somewhere softer to land.
Shrinkage is the other piece people underestimate. A curl that sits at the mouth when wet can spring up to the cheekbone after drying, and that jump changes the haircut more than almost anything else. That’s why curly hair should be judged in its dry state, or at least very close to it.
Beachy waves live in the middle ground between curl and bend. They should look loose enough to move, but not so relaxed that the front collapses into one flat sheet. The right layers help the hair hold that in-between shape without a lot of daily coaxing.
Essential Tools for Styling Curly Face-Framing Layers

-
Wide-tooth comb: Use it in the shower to detangle with conditioner; it keeps the front from snagging and breaking.
-
Microfiber towel or cotton T-shirt: Squeeze water out instead of rubbing, which cuts down on frizz around the face.
-
Leave-in conditioner: A small amount keeps the front pieces soft and stops the ends from feeling dry and fuzzy.
-
Light mousse or foam: This gives beachy waves hold without the heavy, coated look that some creams leave behind.
-
Curl cream: Best for thicker curls that need a little more slip in the front and around the jaw.
-
Diffuser: A diffuser on low heat helps the front pieces dry in place instead of flinging outward.
-
Duckbill or root clips: Handy for lifting the crown and temples while the hair sets.
-
Spray bottle: Useful on day two or day three when the front needs a quick refresh.
-
Tiny serum or oil: Use a drop or two on the ends only; too much near the roots will flatten the shape fast.
How to Ask for the Right Face-Framing Cut on Curly Hair
Bring your hair in the state you actually wear it. If you usually air-dry, don’t show up with blown-out hair unless that’s the finish you expect to repeat. Your stylist needs to see how the curls sit when they’re left alone.
Be specific about the point where you want the front pieces to land once dry. “Around the chin” means something different on curly hair than it does on straight hair, so say whether you want the shortest piece at the cheekbone, mouth, jaw, or collarbone. If your shrinkage is strong, mention that early.
A few details help a lot:
- Tell them your usual part.
- Say whether you tuck hair behind your ears.
- Mention glasses, hats, or clips if you wear them often.
- Ask for dry refinement after the main cut if your curl pattern is uneven.
- Bring one or two photos where the model has the same density or curl pattern, not just a similar color.
One more thing. If your stylist reaches for thinning shears too quickly, ask what they’re removing and why. Curly hair needs shape, not random holes.
How to Style Curly Hair Into Beachy Waves

-
Start with damp, not dripping hair. Squeeze out excess water first, then apply leave-in conditioner from mid-lengths to ends.
-
Work in a light hold product. Use a golf-ball-sized amount of mousse or foam for shoulder-length hair, a little less for fine textures, and more only if your curls are very dense.
-
Define the front pieces by hand. Twist the face-framing sections away from the face with your fingers so they dry in the direction you want.
-
Diffuse on low heat. Cup the curls and dry for a few minutes at a time, stopping when the hair is about 80% dry. Do not blast the front on high heat if you want shape.
-
Clip the roots if they go flat. Temple and crown clips for 10 to 15 minutes can save a front that wants to collapse.
-
Break the cast gently. Once the hair is fully dry, use one or two drops of serum on your hands and scrunch the ends lightly.
-
Leave the front alone for a minute. Seriously. The face pieces settle better when you stop touching them every five seconds.
If you air-dry instead, the same front-twist step still helps. The difference is patience: let the curls dry all the way before separating them, or you’ll pull the shape apart too early.
How to Wear the Shape in Daily Life
Presentation: Let the shortest front pieces sit where the cheekbone meets the jaw, then tuck one side behind the ear if you want the frame to look cleaner. A little asymmetry makes the whole cut feel more lived-in.
Accompaniments: Glasses, hoop earrings, open collars, and a center or deep side part all change how the layers read. Rounder frames tend to like softer layers; sharper frames usually pair well with a more sculpted front.
Portions: If your face is round, keep the shortest piece around cheekbone or just below. If your face is long, ask for more length at the front so the layers don’t climb too high and narrow the face.
Vibe Pairing: A matte lip, brushed brows, and a little cheekbone definition usually work well with beachy waves because the haircut already brings movement. You do not need much else.
Extra Tricks for More Lift, Less Puff
Root Lift: Clip the temples and crown while the hair dries, then remove the clips only after the roots have cooled. That keeps the front from sinking toward the cheeks.
Wave Separation: Once the hair is dry, use one drop of serum between your palms and separate only the ends. If you separate from the root down, you’ll blow apart the frame.
Humidity Strategy: On damp days, use a touch more gel and a touch less cream. Cream gives slip; gel gives memory. Curly face-framing layers usually behave better when the front has a firmer hold.
Shape Memory: Twist the face pieces in the same direction after every wash. That tiny habit makes the layer learn where to sit.
Cost-Saver: A spray bottle and a dab of mousse can refresh the front better than re-wetting the whole head. Less product, less frizz, less time.
Common Mistakes That Flatten the Front
-
Cutting the front too short when wet. Curl shrinkage can steal more length than you expect. Fix it by asking for the cut to be checked dry before the final snip.
-
Starting every layer at the same level. That makes the haircut look stacked and boxy. The remedy is a staggered front where the cheekbone, jaw, and collarbone each get their own role.
-
Overloading the roots with cream. Heavy product around the face makes layers droop and look greasy by midday. Keep creams on the mids and ends, then use mousse or gel for hold.
-
Brushing dry curls into one sheet. You lose the clumps that create the beachy wave effect. Finger-separate instead, and only after the hair is fully dry.
-
Ignoring your part line. A cut that looks great on a center part can fall apart on a side part. Tell the stylist how you actually wear it.
-
Using the wrong thinning method. Aggressive thinning shears can leave frizz and holes in curly hair. If you need weight removed, ask for point cutting or internal layering instead.
Variations and Alternatives for Different Curl Patterns
Fine Curl Edition: Keep the front pieces long enough to hold their own weight, and avoid removing too much from the interior. Fine curls need shape, but they also need mass to form a clean bend.
Thick Curl Control: Ask for more internal layering and a softer perimeter. Thick hair can handle volume, but it gets bulky fast if every layer starts too high.
Short-Length Swap: If your hair sits above the shoulders, keep the face frame around the jaw and use a bob or lob shape underneath. Shorter hair needs room to move, or it starts to look puffed out.
Long-Length Preservation: If you love your length, choose collarbone, chest, or deep-V framing instead of chin-level layers. That keeps the front soft without sacrificing the long line.
Heatless Finish: If you never use hot tools, ask for soft layers that encourage air-drying and pair them with mousse or foam. The cut should work on its own, not depend on a round brush.
Frequently Asked Questions About Curly Face-Framing Layers
Should face-framing layers on curly hair be cut wet or dry?
Dry cutting is often better for curly hair because you can see where the curls actually live once they’ve shrunk. Some stylists do a wet cut first and then refine the front dry, which is a good middle ground if they’re experienced with curl pattern and density.
What face-framing layers work best for round faces?
Longer frames that start at the cheekbone, jaw, or collarbone usually help more than short pieces around the mouth. You want vertical movement, not a wide horizontal line that stops at the cheeks.
Will layers make fine curly hair look thinner?
They can if the stylist removes too much bulk or starts the layers too high. Fine curls need careful shaping, with the front left long enough to keep weight and the ends softened rather than stripped.
How often should I trim face-framing layers?
Shorter face frames usually need a trim every 8 to 10 weeks because shrinkage shows fast at the front. Longer, grow-out-friendly layers can go a little longer, especially if the shape stays balanced around the collarbone.
Can I keep my length and still get a good face frame?
Absolutely. Collarbone, chest, and deep-V framing all keep the length while giving the front some movement. The trick is asking for the shortest layer to live low enough that it doesn’t fight the rest of the hair.
What if my curls shrink more than I expected?
Tell the stylist your shrinkage pattern before the first cut, and ask for the front to be checked dry. If the piece seems too short after styling, a little extra length in the next appointment is usually safer than trying to rescue it with product.
Can beachy waves work on tighter curls?
Yes, but they’ll read more as soft separation than loose S-waves. The goal is still the same: keep the front pieces moving, remove some heaviness, and let the shape breathe instead of forcing a straight look.
What if the front pieces puff out after styling?
That usually means the cut is too short, the product is too heavy, or the hair was touched while it was still drying. Use less cream, more hold near the roots, and let the front dry fully before you separate it.
The Shape That Lets Curls Breathe
Good face-framing layers do one thing most people want from a haircut and never say out loud: they make the hair feel lighter without making it disappear. That’s the sweet spot. The front pieces open the face, the curls keep their character, and the whole shape looks like it belongs to your head instead of to a salon poster.
Pick the version that matches your curl pattern, your length, and how much styling patience you actually have on a Tuesday morning. A cut should make your routine easier to live with, not turn it into a rescue mission.
And if you get the placement right, the front does half the work for you. The rest is just letting the curls fall where they want to — which, when the layers are good, is usually exactly where you hoped.