Round faces and wavy hair can work against each other if the cut is lazy. A blunt line parked right at the cheeks makes the face read wider, and waves that kick out at the jaw only add to the problem. The fix is not “more layers” in some vague salon-poster sense. It’s the right layers, in the right places, with the weight removed where it helps and kept where it matters.
The best layers for wavy hair and round faces do one very specific job: they pull the eye downward. That can mean collarbone length, long face-framing pieces, an angled front, or a soft fringe that breaks up the width across the cheeks. I’m picky about this. I almost never like layers that start at the widest part of the face, because they tend to puff outward the minute your hair hits humidity, car heat, or a bad sleep wrinkle.
Waves make this trickier, which is why the details matter. A cut that looks neat on straight hair can turn bulky on a bendy texture if the shortest pieces sit too high or the ends are thinned to wisps. The good versions below keep the silhouette moving vertically, not sideways, and they still grow out without looking choppy after six weeks.
Why These Layers Earn Their Keep
-
They stretch the face visually: Layers that begin below the cheekbone and taper toward the collarbone keep the widest part of the face from being the haircut’s loudest line.
-
They respect the wave pattern: Wavy hair already has shape, so these cuts use that bend instead of forcing a straight, overstyled finish every morning.
-
They reduce side puff: The right internal shaping removes bulk from the middle and back, not from the outer edge that sits next to your cheeks.
-
They grow out with manners: Long face-framing pieces and soft ends stay readable longer, which means fewer awkward weeks between trims.
-
They work at different lengths: Some of these look best at the lob stage, others want shoulder length or past-the-collarbone length, but all of them keep the face open.
-
They give you styling options: You can air-dry some, diffuse others, and smooth only the front pieces when you want a neater finish.
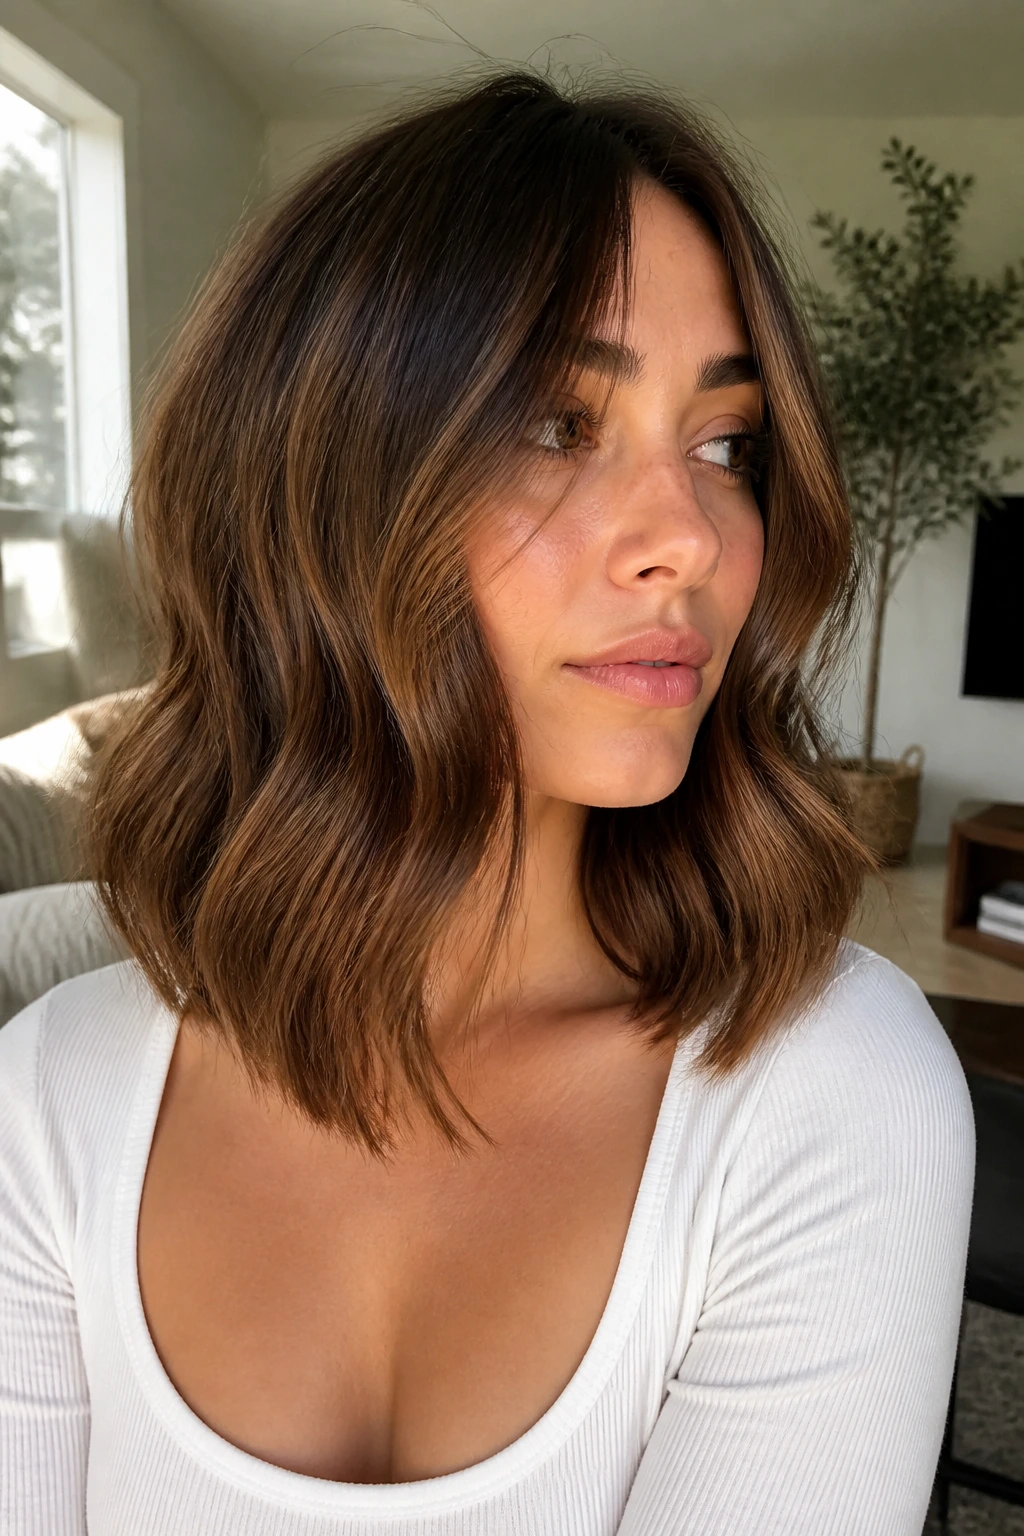
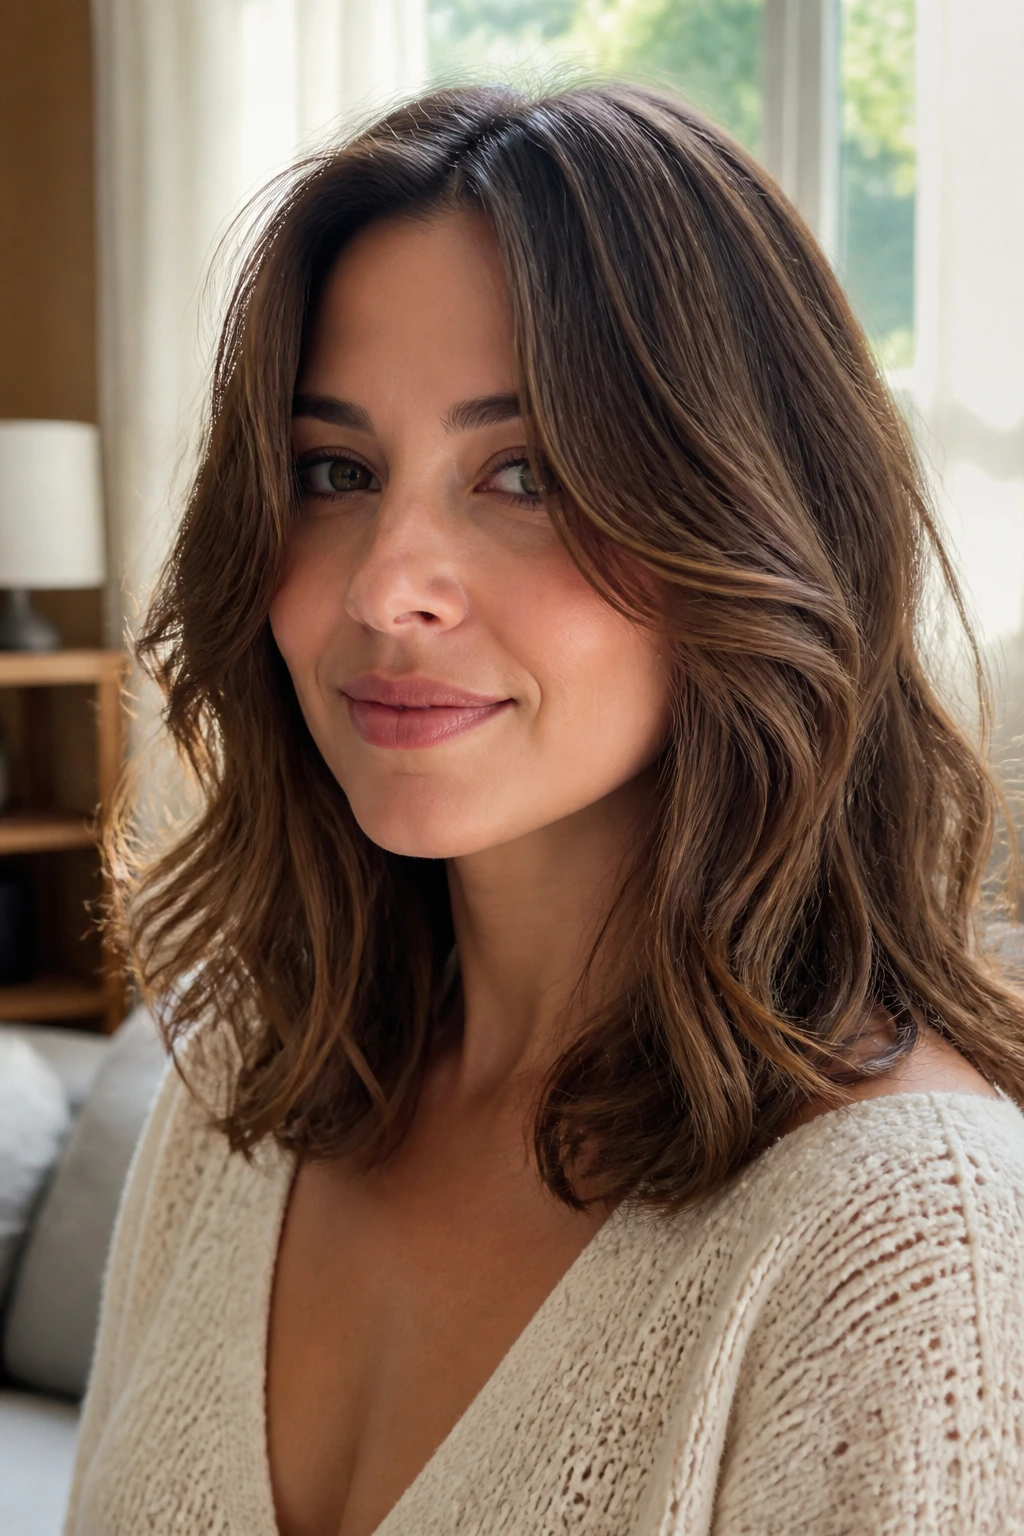
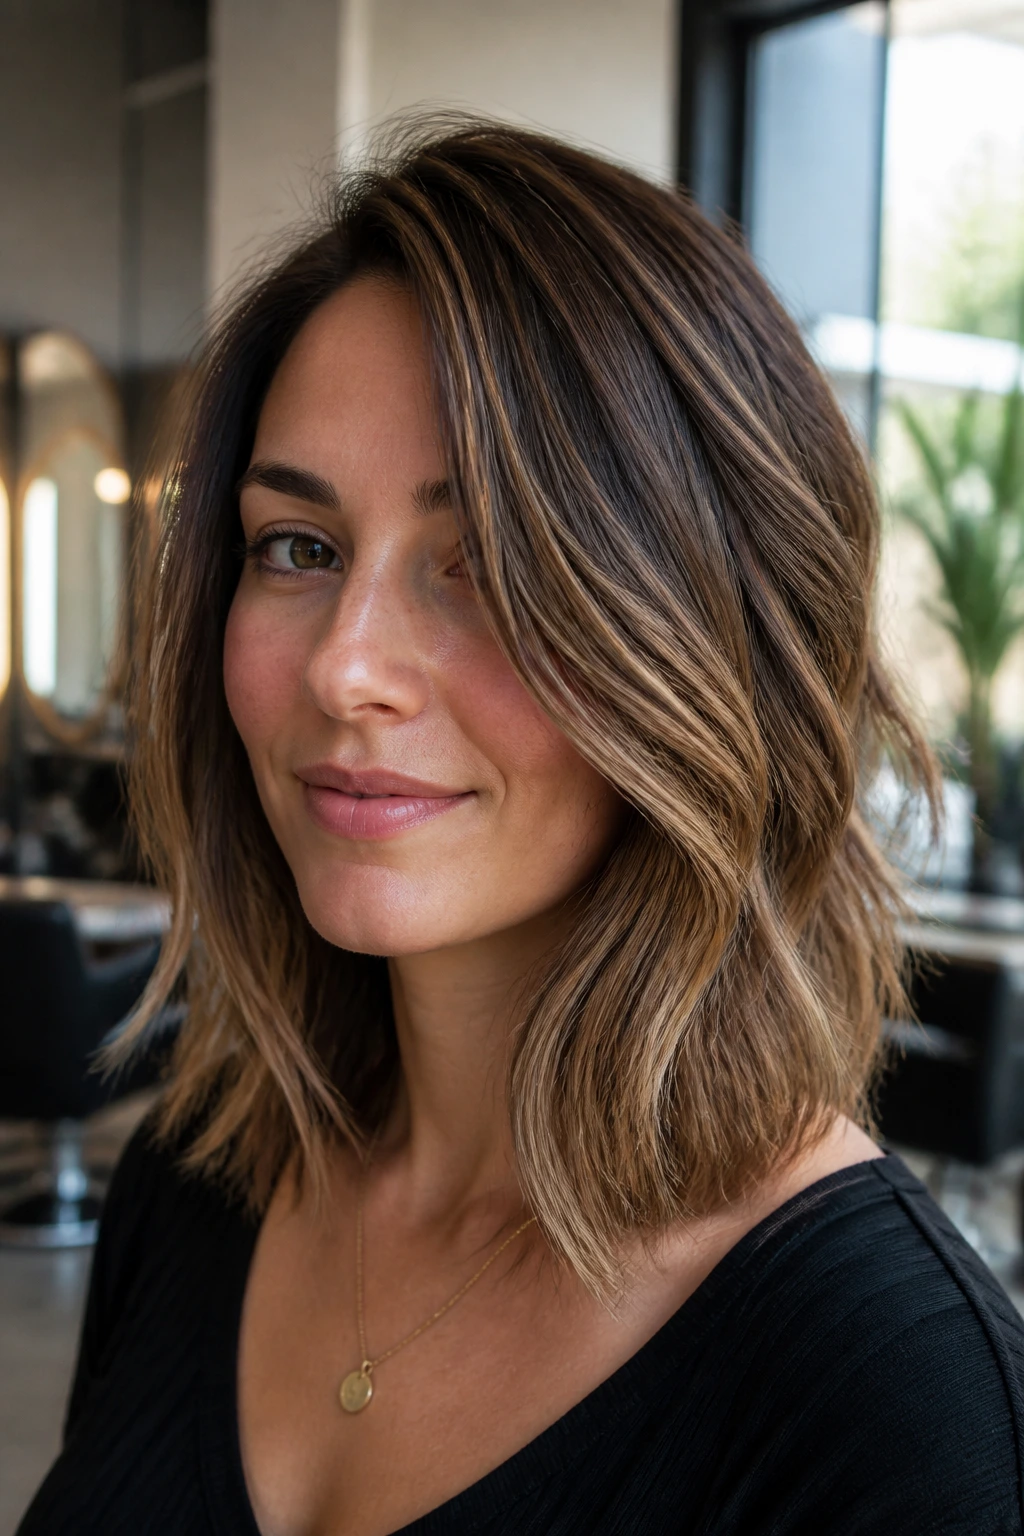
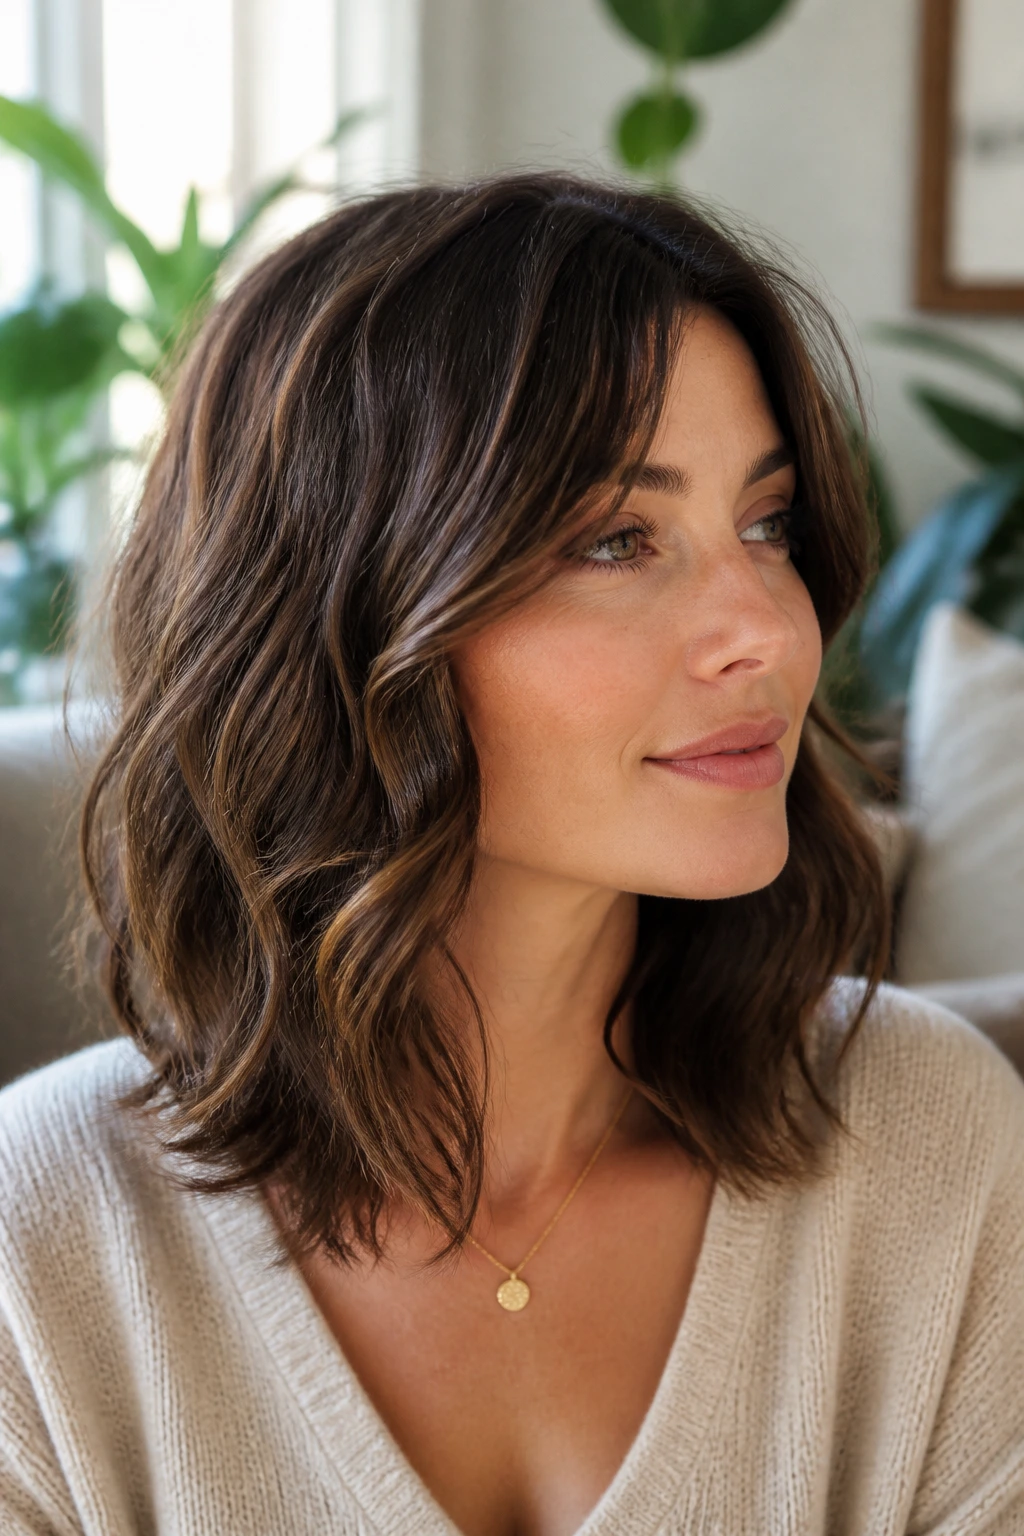
1. Collarbone Lob With Long Face-Framing Pieces
A collarbone lob is one of my favorite starting points because it lands where the face can breathe. The length brushes the collarbone, which keeps the ends from flaring out at the cheeks, and the long front pieces create a quiet diagonal line instead of a hard horizontal shelf. That diagonal matters on a round face. It softens the width without making the cut feel severe.
Tell your stylist you want the front to sit below the cheekbone, not at it, and keep the layer drop gentle through the sides. I like this shape when the wave pattern is loose to medium and the hair wants to bend on its own. A little mousse at the roots, a scrunch through the mid-lengths, and a diffuse on low heat are usually enough.
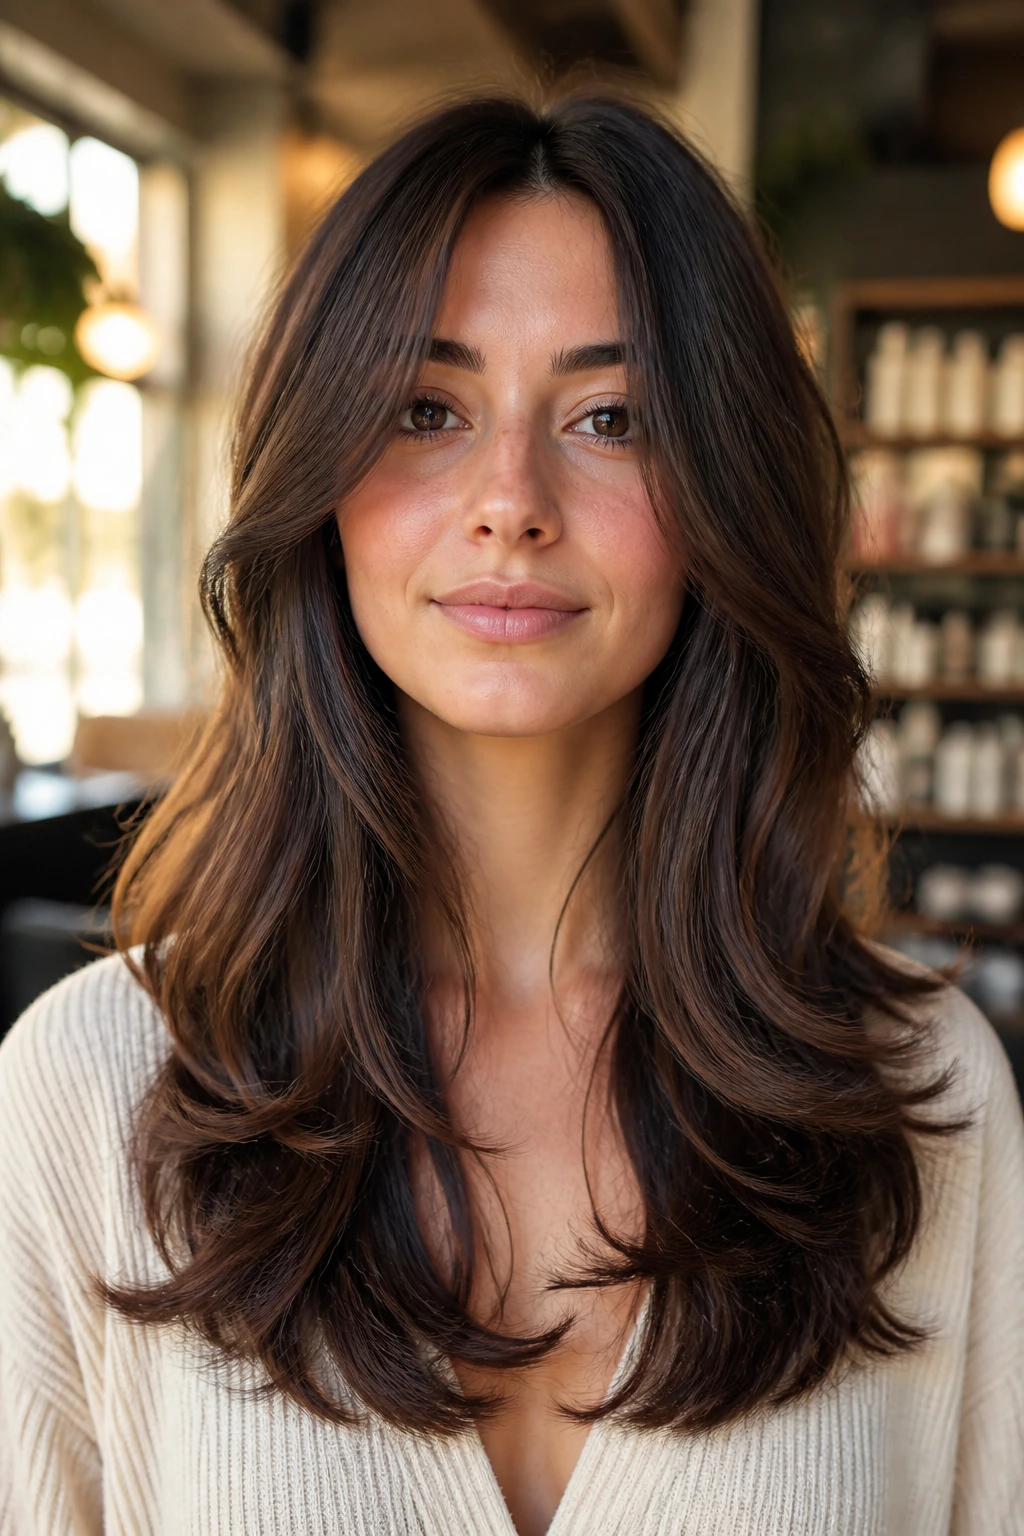
2. Center-Part Curtain Layers
Why do curtain layers work so well here? Because the center part draws a straight line down the face while the longer front pieces sweep away from the cheeks. On a round face, that little bit of separation changes everything. It keeps the eye from camping out on the widest area and gives the whole cut a cleaner, longer look.
The trick is not to make the shortest curtain piece too short. If it lands at the cheekbone, it can bulge outward once the wave dries. Keep the shortest point around the mouth or just under it, then let the lengths taper back into the rest of the cut. This style looks especially good when the wave pattern is loose enough to form a soft bend instead of a tight bendy halo.
3. Butterfly Cut With Soft Crown Lift
The butterfly cut gets talked about like it’s a high-drama haircut, but the quieter version is the one I trust most on round faces. The shorter upper layers create lift near the crown and cheek area, while the longer layers stay down around the chest or collarbone. That split in length gives you movement without turning the sides into a triangle.
Where the shorter layers should land
Keep the top layers long enough to skim the upper cheek or temple, not jump right out at the widest point of the face. That’s the part people get wrong. If the short layers are too aggressive, the shape can widen fast.
I’d choose this when you like blow-drying the front sections but want the back to fall more naturally. It also helps if your waves flatten at the roots and then puff at the ends. The butterfly cut gives the top some lift so the bottom does not have to do all the work.
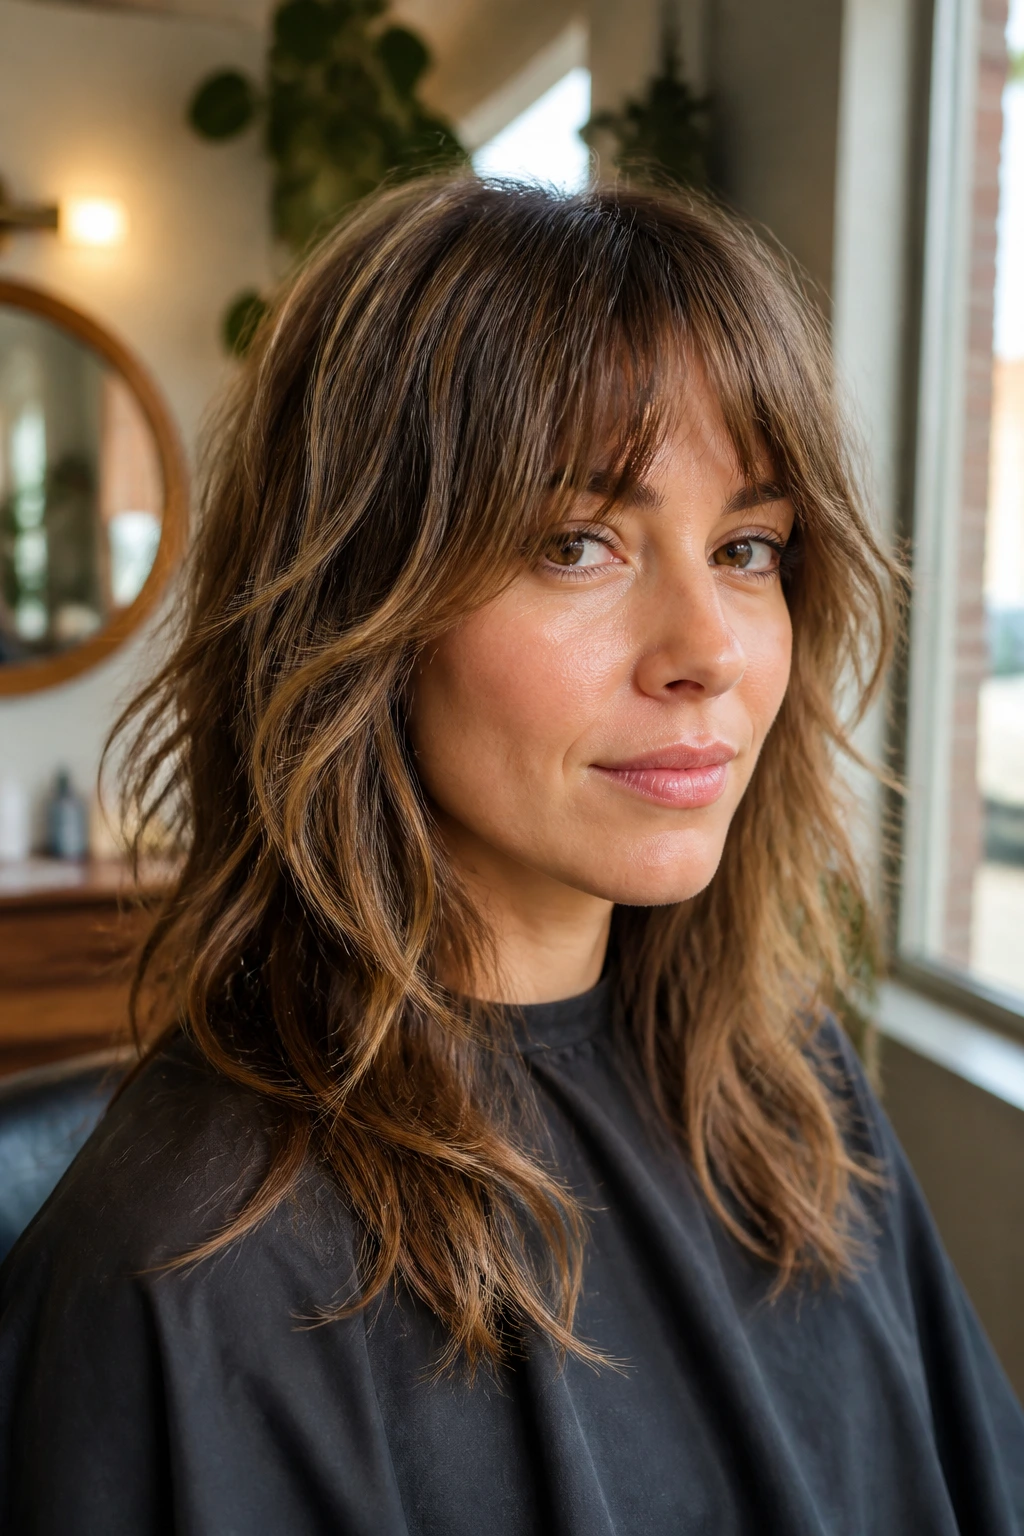
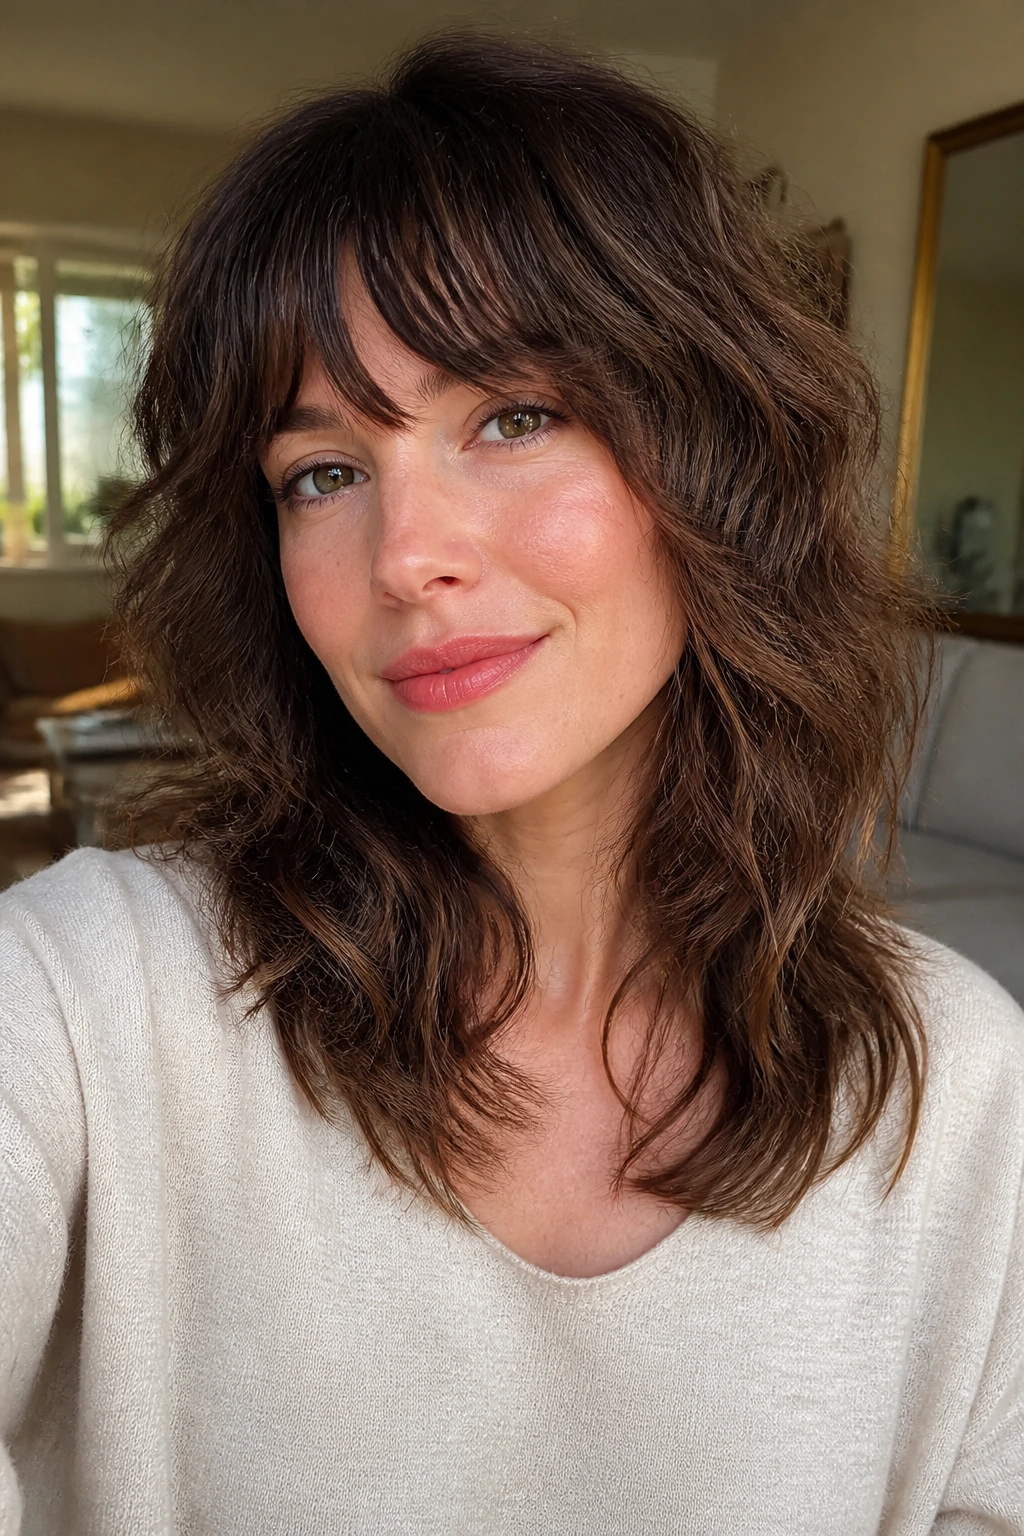
4. Feathered Shag With a Soft Fringe
A feathered shag can go wrong quickly, so I’m particular about the softer version. The crown should feel airy, not spiky, and the fringe should touch the brow or sit just above it without becoming a heavy wall. On wavy hair, this cut breaks up the circle of a round face with texture, but it does it with softness instead of a hard outline.
Best for hair that wants body
This shape shines on medium-density waves that hold a bend but don’t need a ton of heat to wake up. A lightweight cream or foam is enough; too much oil can make the fringe sit flat and the sides hang greasy by noon. The goal is separation, not piecey chaos.
If you like a little rock-and-roll edge without looking like you borrowed the haircut from a poster, this is the one. Keep the ends soft and the layers blended, and it will still look like a grown-up cut instead of a costume.
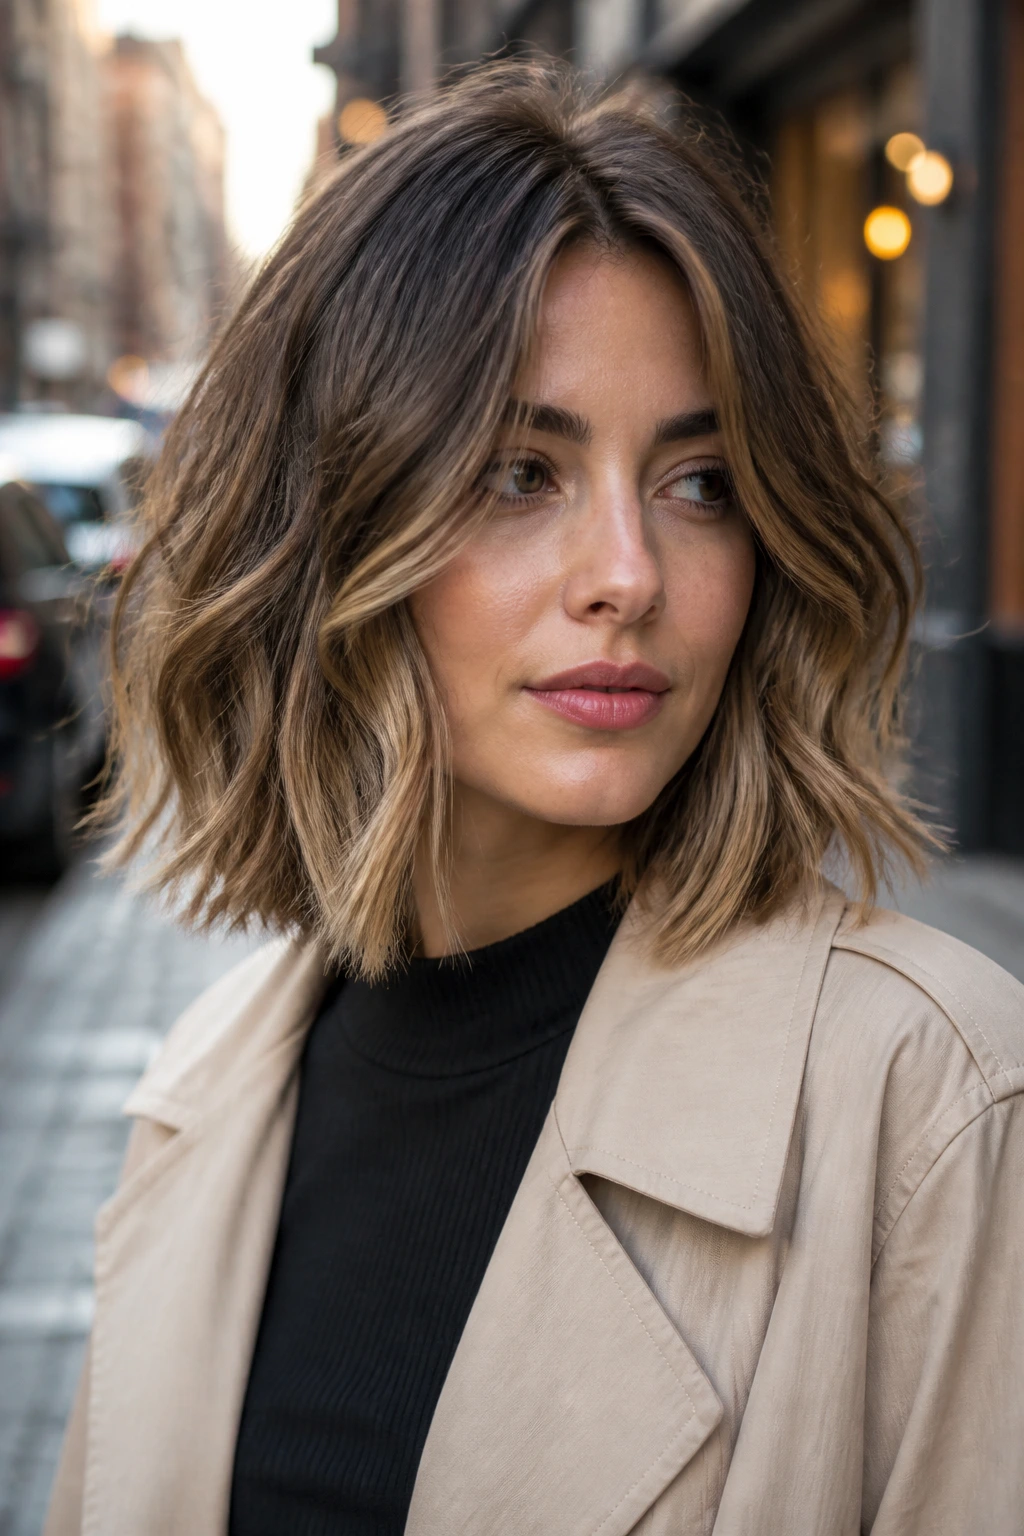
5. Angled Lob That Stays Longer in Front
The angled lob is a bluntly practical choice, and I mean that as praise. It’s shorter at the back and a bit longer toward the front, which creates a subtle forward tilt that flatters a round face without screaming for attention. The line is doing the work for you, quietly. That’s usually the best kind of haircut.
Compared with a one-length bob, this version gives your waves somewhere to fall. The front pieces should hit below the jawline — I like them around the base of the neck or just touching the collarbone — so they narrow the face instead of ending right at its widest point. This cut is especially nice if you want a style that air-dries with shape but can be polished fast with a brush on the front sections only.
6. U-Shaped Long Layers
If you like length and do not want to surrender it, a U-shaped cut is the least fussy answer. The back curves into a soft U, the sides stay longer, and the layers are added in a way that keeps the perimeter full. On wavy hair, that full bottom edge matters because it stops the hair from mushrooming out around the cheekbones.
The best part is the grow-out. A U-cut keeps its outline even when the layers start to blur a little. For round faces, I’d keep the shortest face-framing pieces well below the cheekbone and let the longer side pieces drape past the jaw. That leaves the face open without cutting the hair into obvious steps.
7. Side-Swept Midi Cut
A side-swept midi cut has a built-in cheat code: asymmetry. The side part and angled front piece break the face into longer-looking lines, which is exactly what you want when your features are soft and full. The wave pattern helps here because it gives the side-swept section a little bend instead of a stiff sweep.
This cut is good if center parts make your face feel too round or if your hair naturally falls to one side anyway. Keep the heavier front section long enough to brush the cheek, then let the opposite side sit a touch quieter. I like this one on mid-length hair because it gives you shape without asking for constant heat styling.
8. Invisible Layers in a Medium-Length Cut
Invisible layers are the haircut version of good lighting: you notice the result before you notice the trick. The outer line stays smooth, but the interior is lightly shortened to remove bulk and help the wave collapse into a cleaner shape. That is useful on round faces because the silhouette stays tidy near the cheeks while the movement happens inside the cut.
This is one of my favorites for thicker wavy hair. It avoids the “stack of steps” look that some layered cuts get when the hair is cut too aggressively. Ask for movement through the mid-lengths, not tiny chopped pieces at the surface. The result is softer, calmer, and easier to grow out.
9. Soft Wolf Cut With Rounded Ends
A wolf cut can become too blunt around the crown if it’s not softened, and that is where the face can start looking wider than necessary. The gentler version keeps the top layers loose, the fringe light, and the ends rounded rather than shredded. It still has attitude. It just doesn’t swing the door open and yell.
What makes this one different
The layers should blend from crown to shoulder instead of separating into obvious chunks. If your hair is wavy and dense, this cut can remove enough mass to keep the sides from puffing out, but it needs restraint. Too much internal chopping near the cheeks is a bad idea.
I like it for people who want motion and a little edge, but not a haircut that requires a tutorial every morning. With a dab of mousse and a quick scrunch, it usually falls into place faster than people expect.
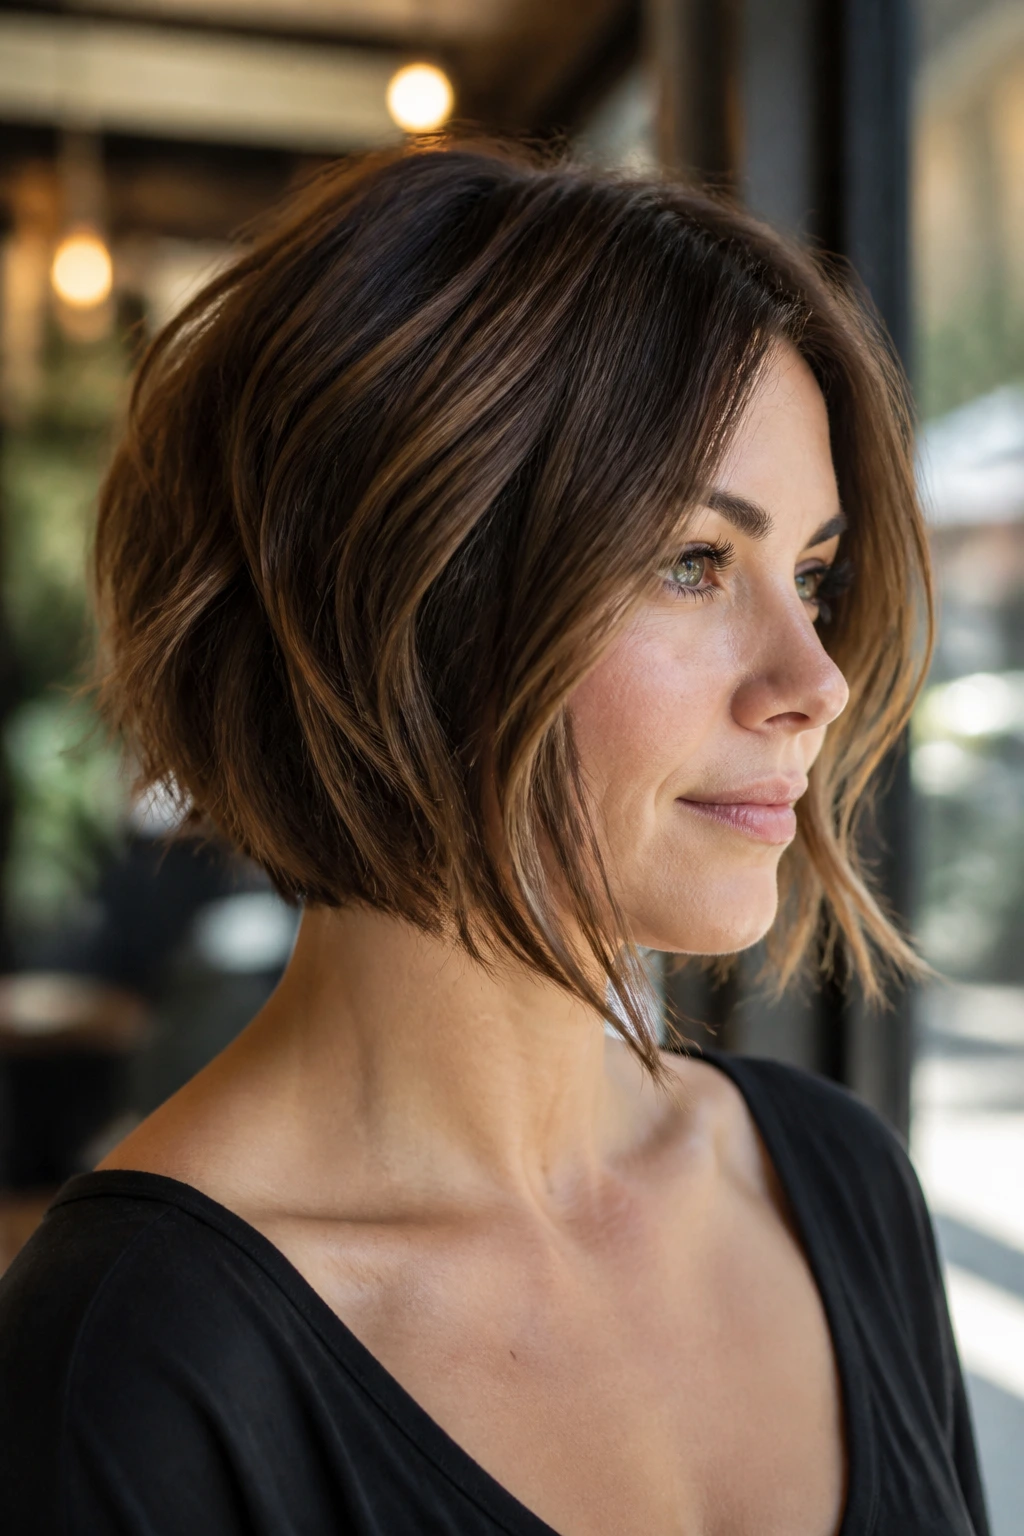
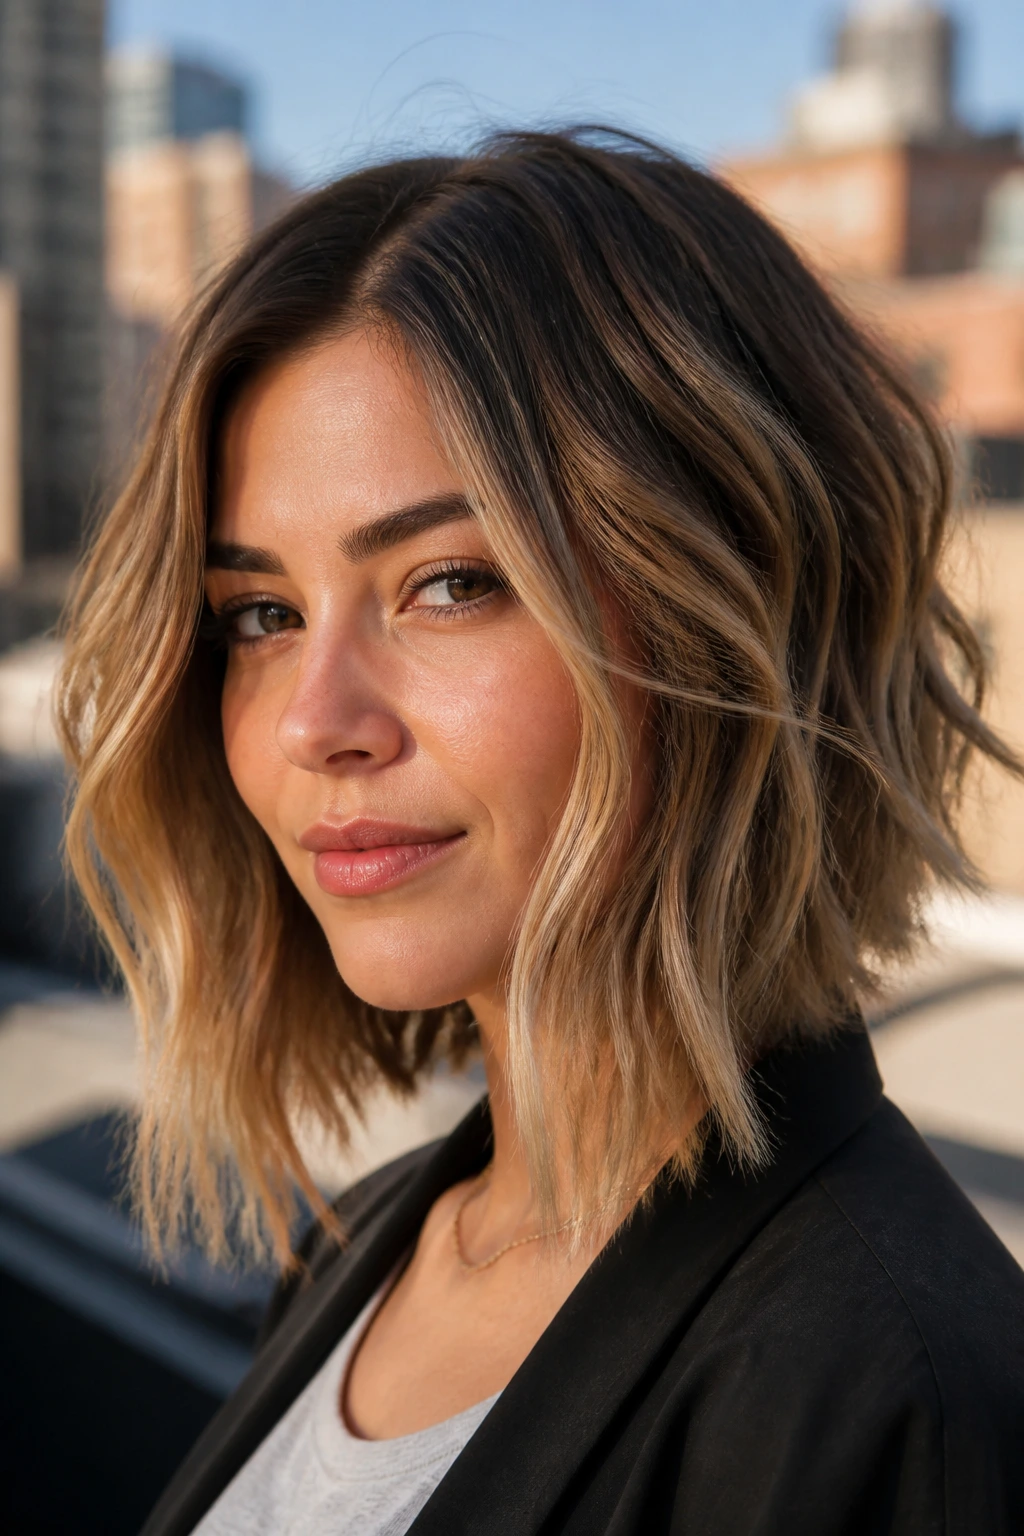
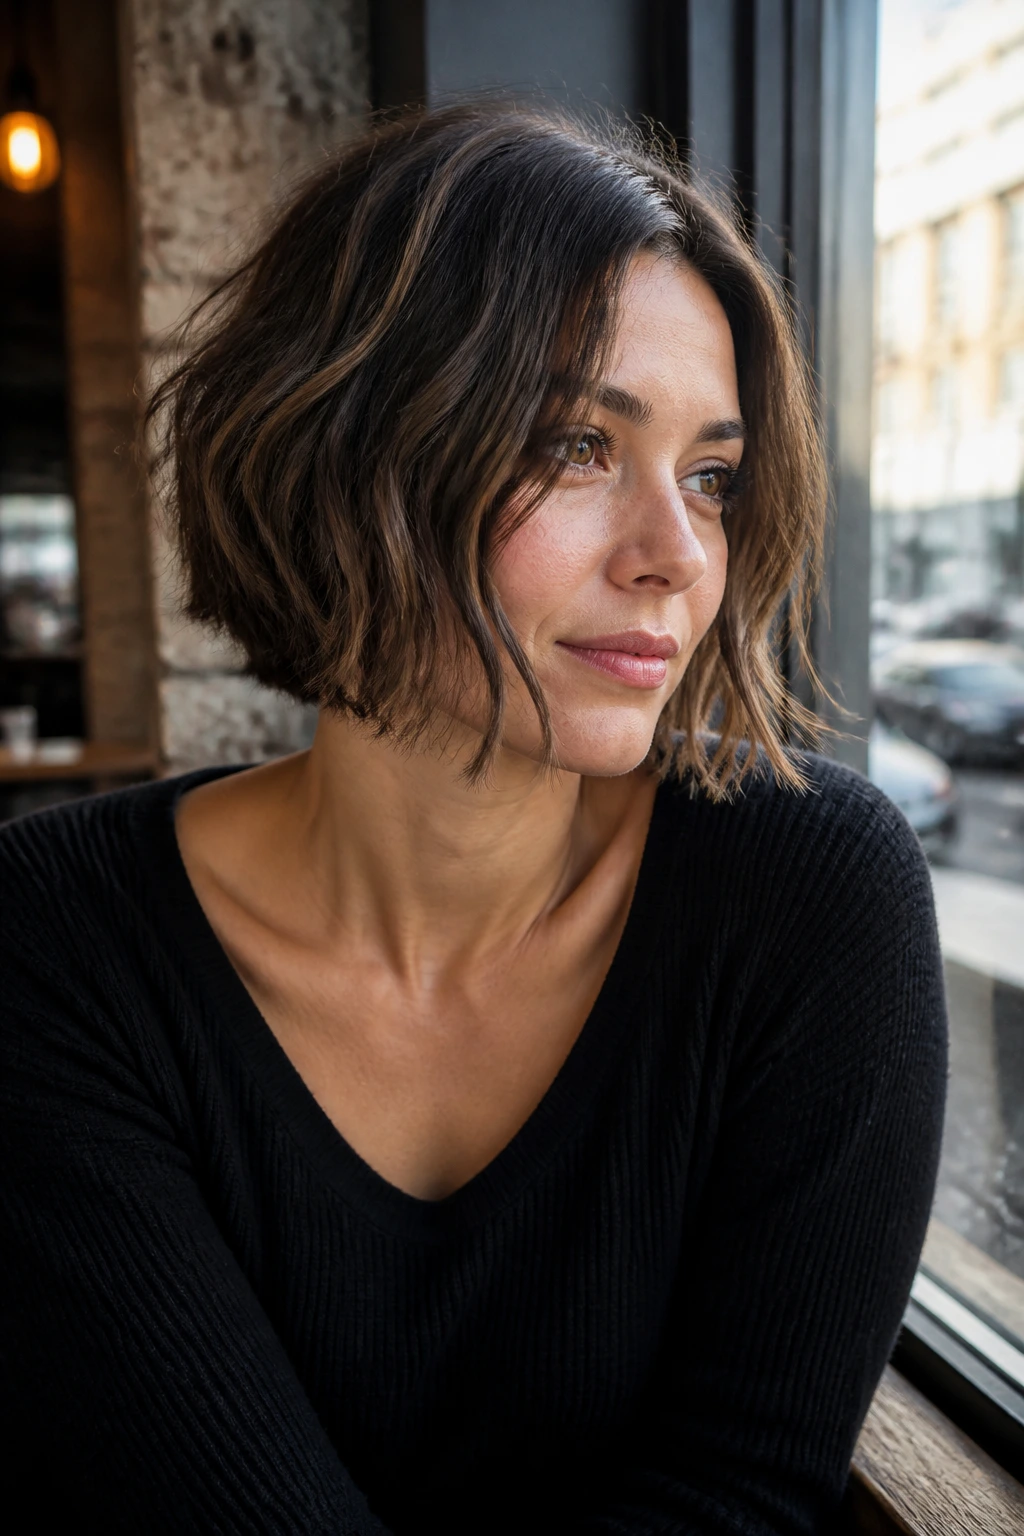
10. Chin-Skimming Bob With Longer Sides
Short hair can work on a round face, but only when the line is handled with care. A chin-skimming bob needs longer front pieces and a back that stays tidy enough to keep the shape from ballooning. If the bob ends exactly at the chin with no angle, it can make the face look boxier than it is. That’s the trap.
The version I’d choose on wavy hair has a slight forward lean and a side part or soft off-center part. The front should graze below the jawline, not sit on top of it. That lets the waves tuck in or flick out without adding width where you don’t want it. It’s sharp, but not harsh.
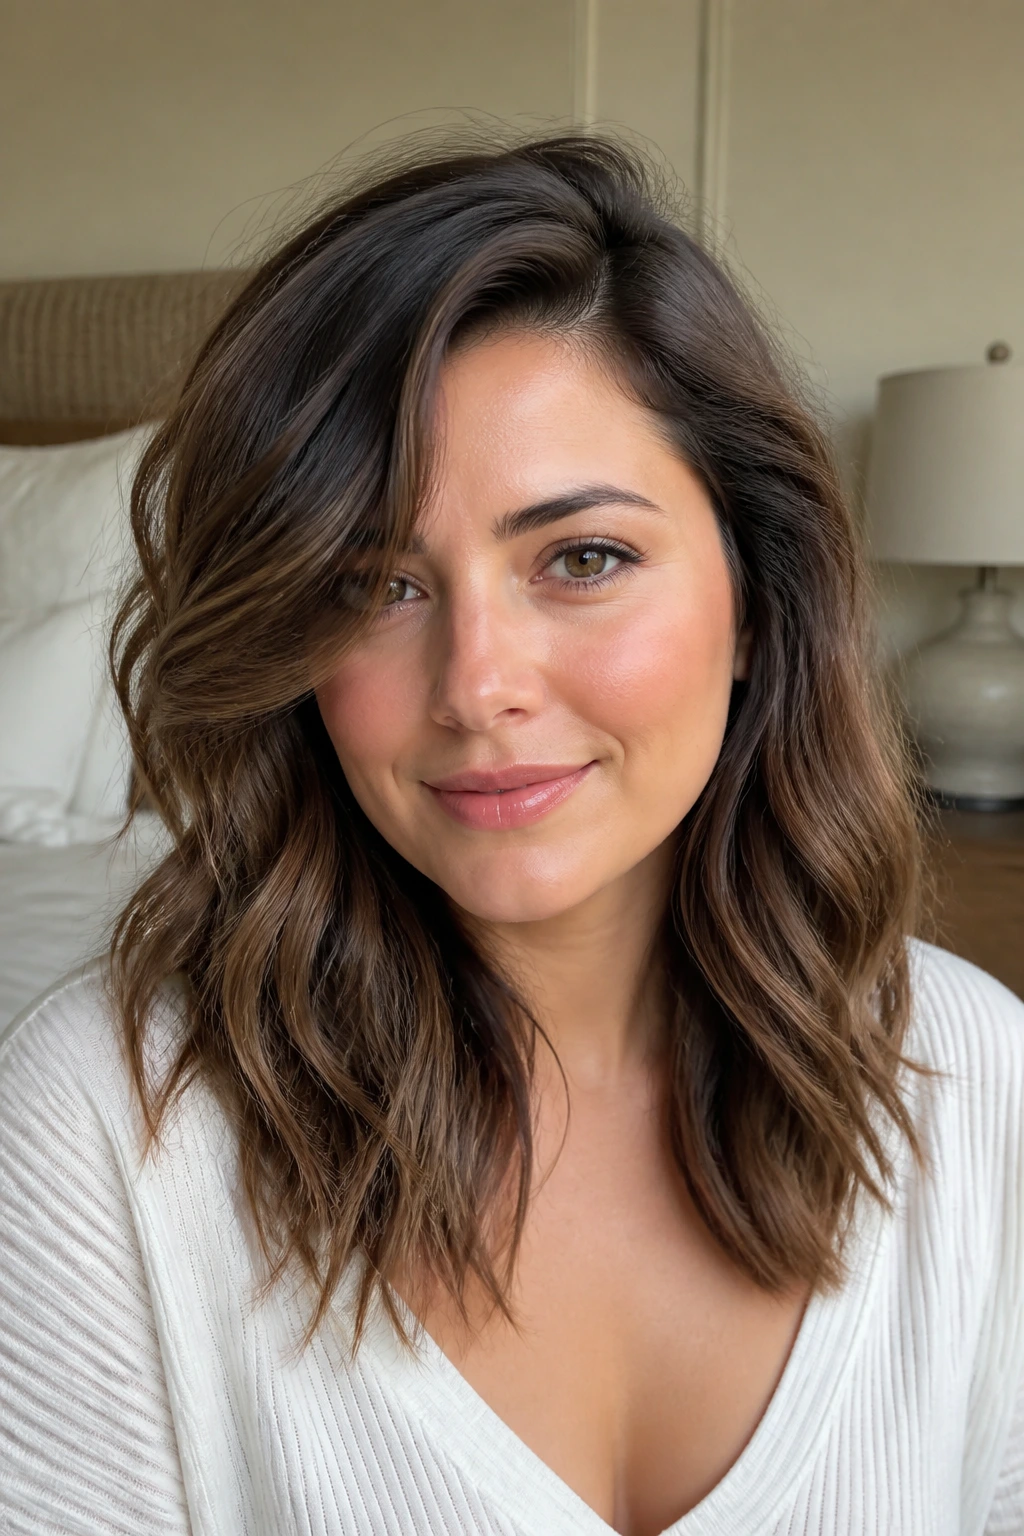
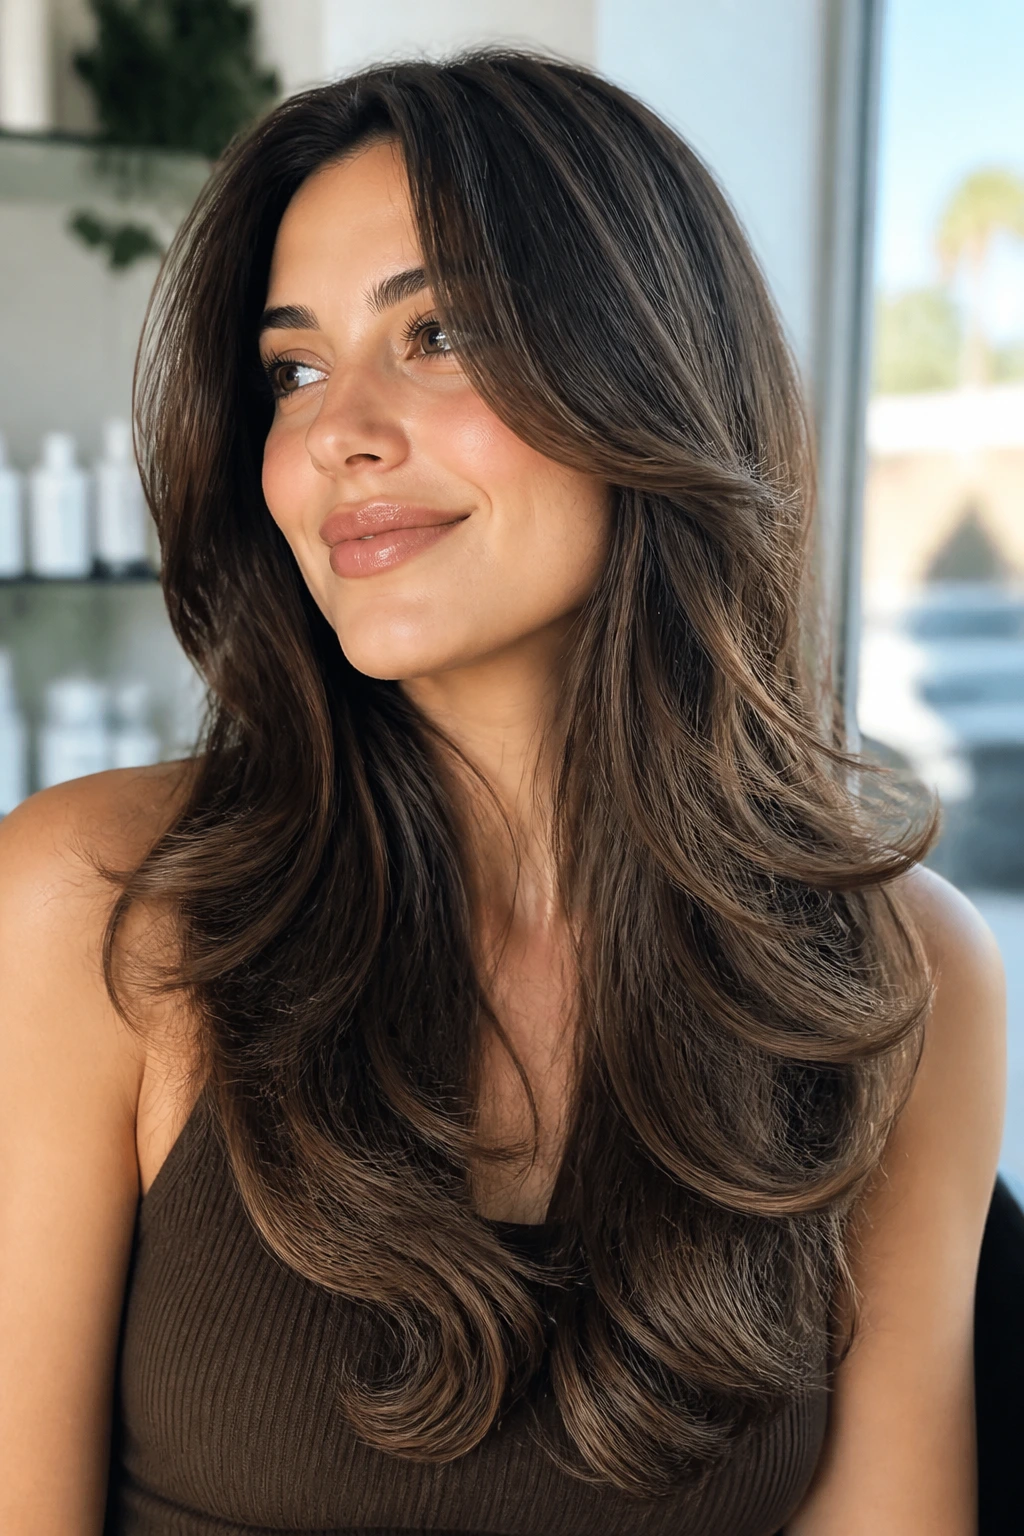
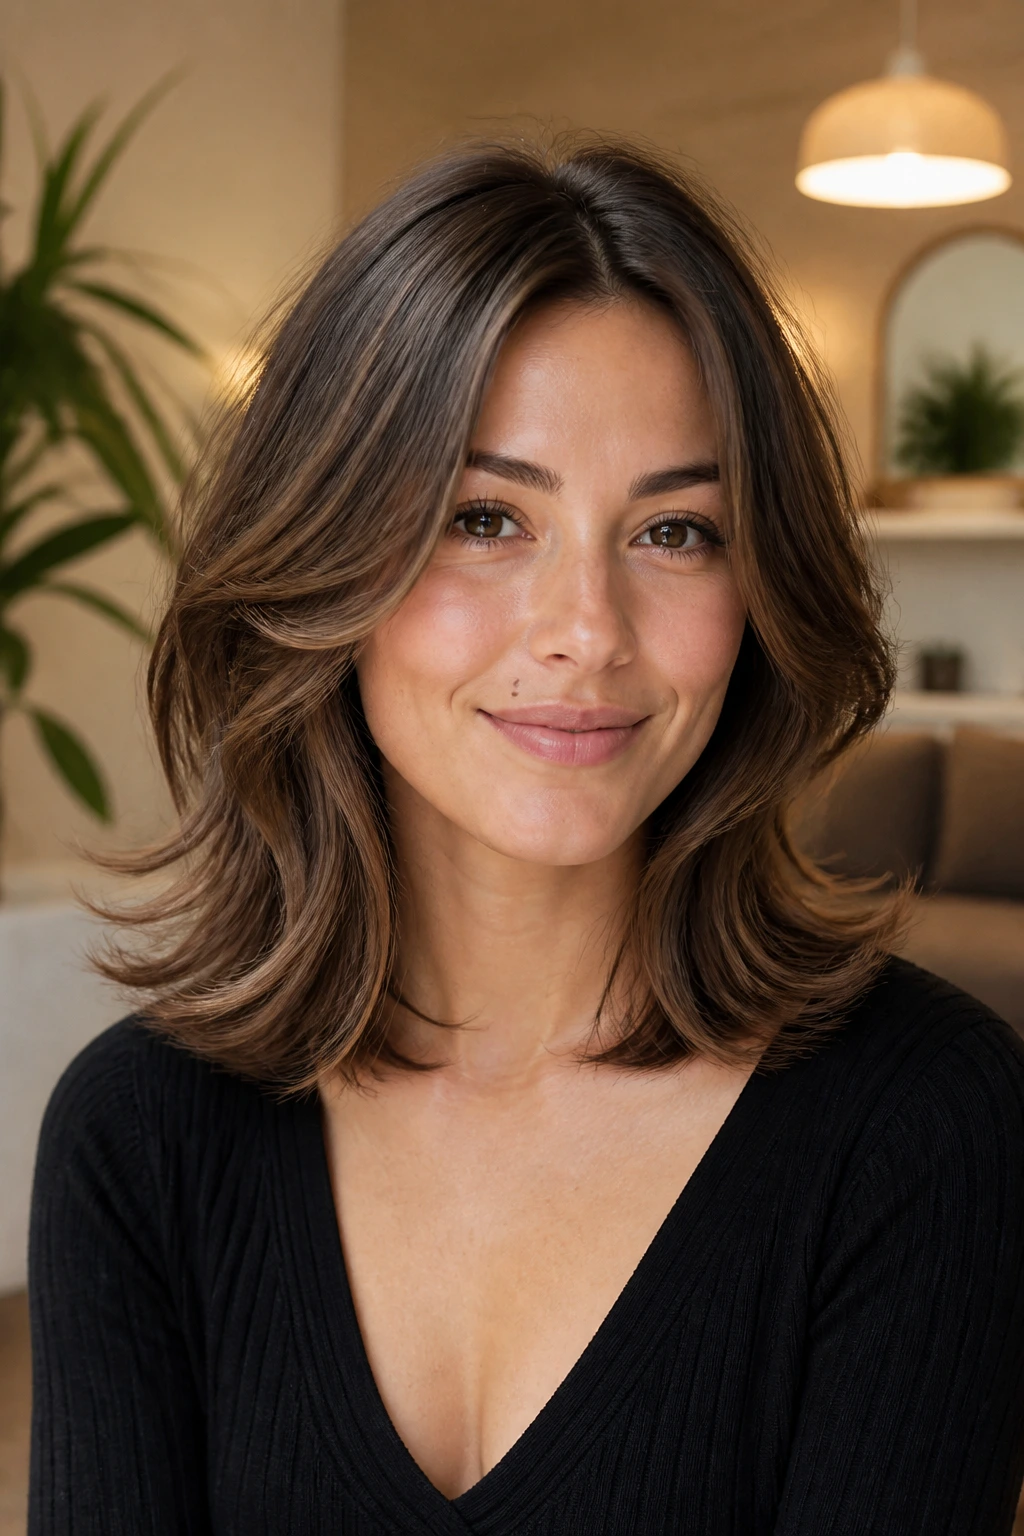
11. Shoulder-Length Flip Layers
This is the haircut that reminds me why classic salon layers lasted so long in the first place. Shoulder-length flip layers give you movement at the ends, where it’s flattering, instead of piling all the action around the cheeks. The outer pieces flick away from the face, which creates a little visual lift without volume overload.
If you like a brushed finish, this is a nice middle ground between polished and natural. The layers should start low enough that the upper section still feels solid. Then the ends can move. That’s the part that matters on round faces: not every inch needs texture. Sometimes the top half should stay calmer so the bottom half can do the flattering work.
12. V-Cut Layers on Long Hair
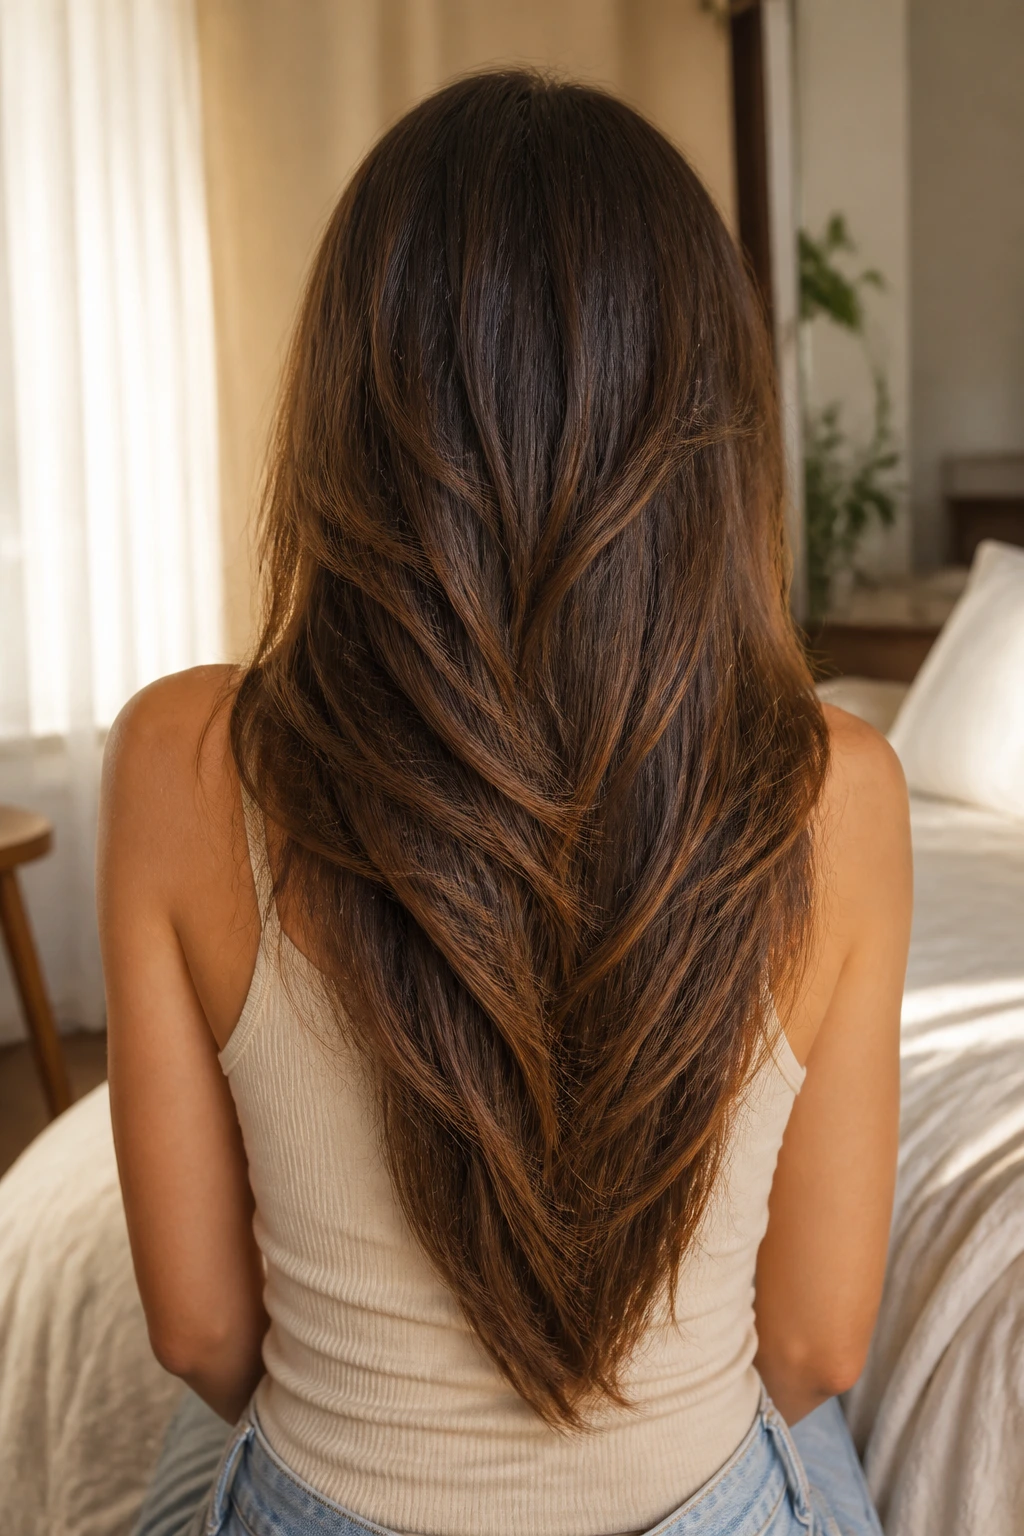
A V-cut gives long wavy hair a tapered center line, which helps stretch the silhouette downward. The back points into a soft V, while the sides remain longer and more connected than they would in a choppy shag. For a round face, that downward movement is gold. It draws attention past the cheeks and toward the length.
This cut is best if you do not want to lose inches. It keeps the perimeter long, which helps waves fall in a more controlled way. The one thing I’d watch is the front: don’t let the shortest pieces land too high. If they sit below the mouth, the face stays open. If they ride up toward the cheekbones, the shape can widen fast.
13. Bottleneck Bangs With Long Waves
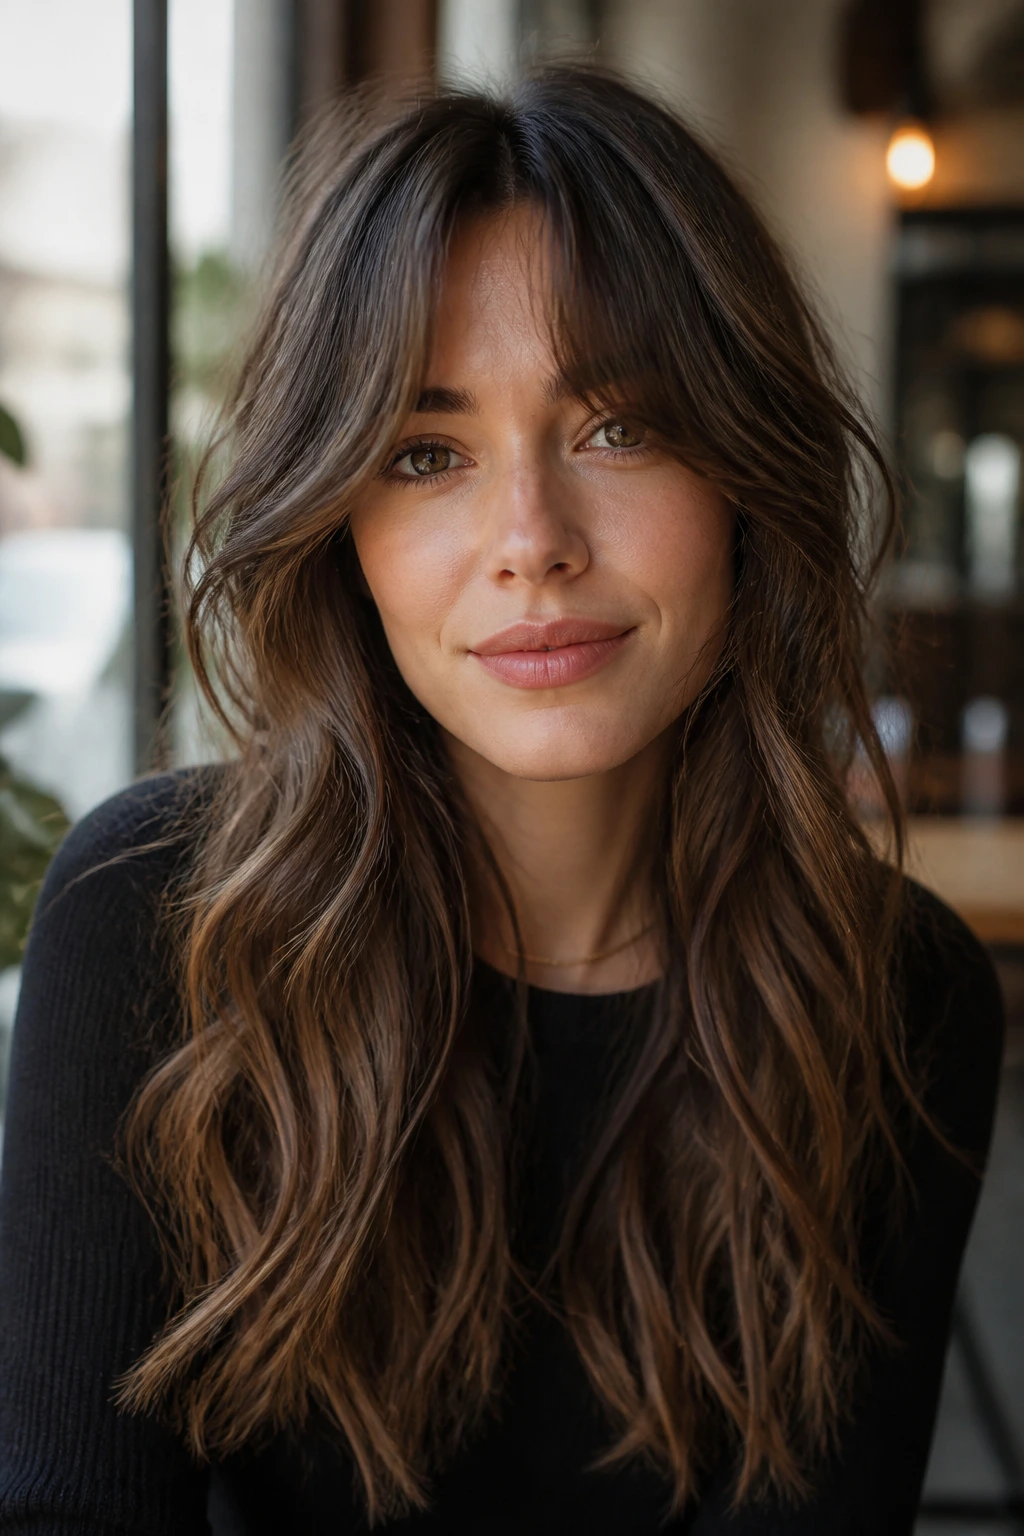
Bottleneck bangs are a smart compromise if you want fringe without a heavy block across the forehead. They sit narrower in the center and get longer at the sides, which helps a round face by creating a slimmer opening through the middle. On wavy hair, they usually dry with a soft bend rather than a stiff curtain, and that feels more natural.
Why they’re less fussy than straight bangs
The sides of the fringe blend into the face-framing pieces, so the whole front section can move instead of sitting like a cap. That makes them easier to wear with waves, especially if your hair tends to separate a little when it dries. Keep them light. Heavy bangs on a round face can drag the shape down in the wrong way.
I’d go this route if you want the forehead softened and the rest of the length to stay long and loose. It’s one of the few fringe styles that can look intentionally undone without looking unfinished.
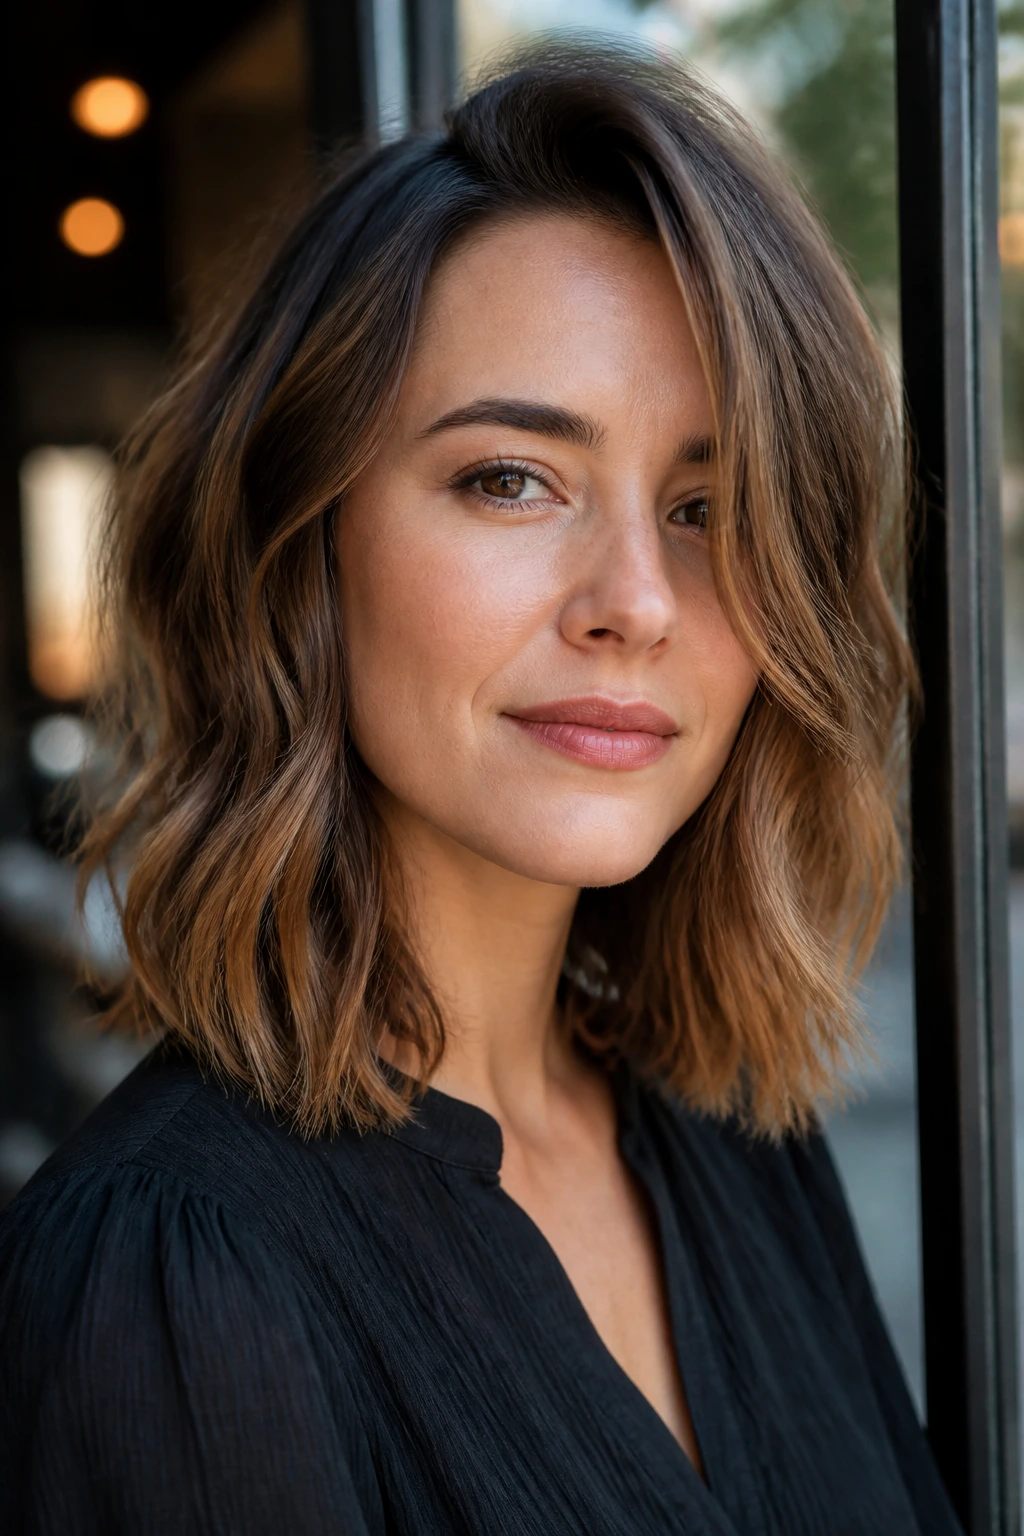
14. Razor-Layered Lob
Razor cutting can be fantastic on dense wavy hair, but only when the stylist knows where to stop. A razor-layered lob takes some weight out of the mid-lengths and gives the ends a freer fall. That can be exactly what a round face needs, because the hair stops inflating around the sides and starts dropping in cleaner lines.
The catch is over-thinning. If the ends are shaved too much, the waves can fray and puff, and that never flatters the cheek area. Ask for soft texture, not wispy ends. This cut works best if your hair has some thickness and you want it to move with a little less force than a scissor-cut lob.
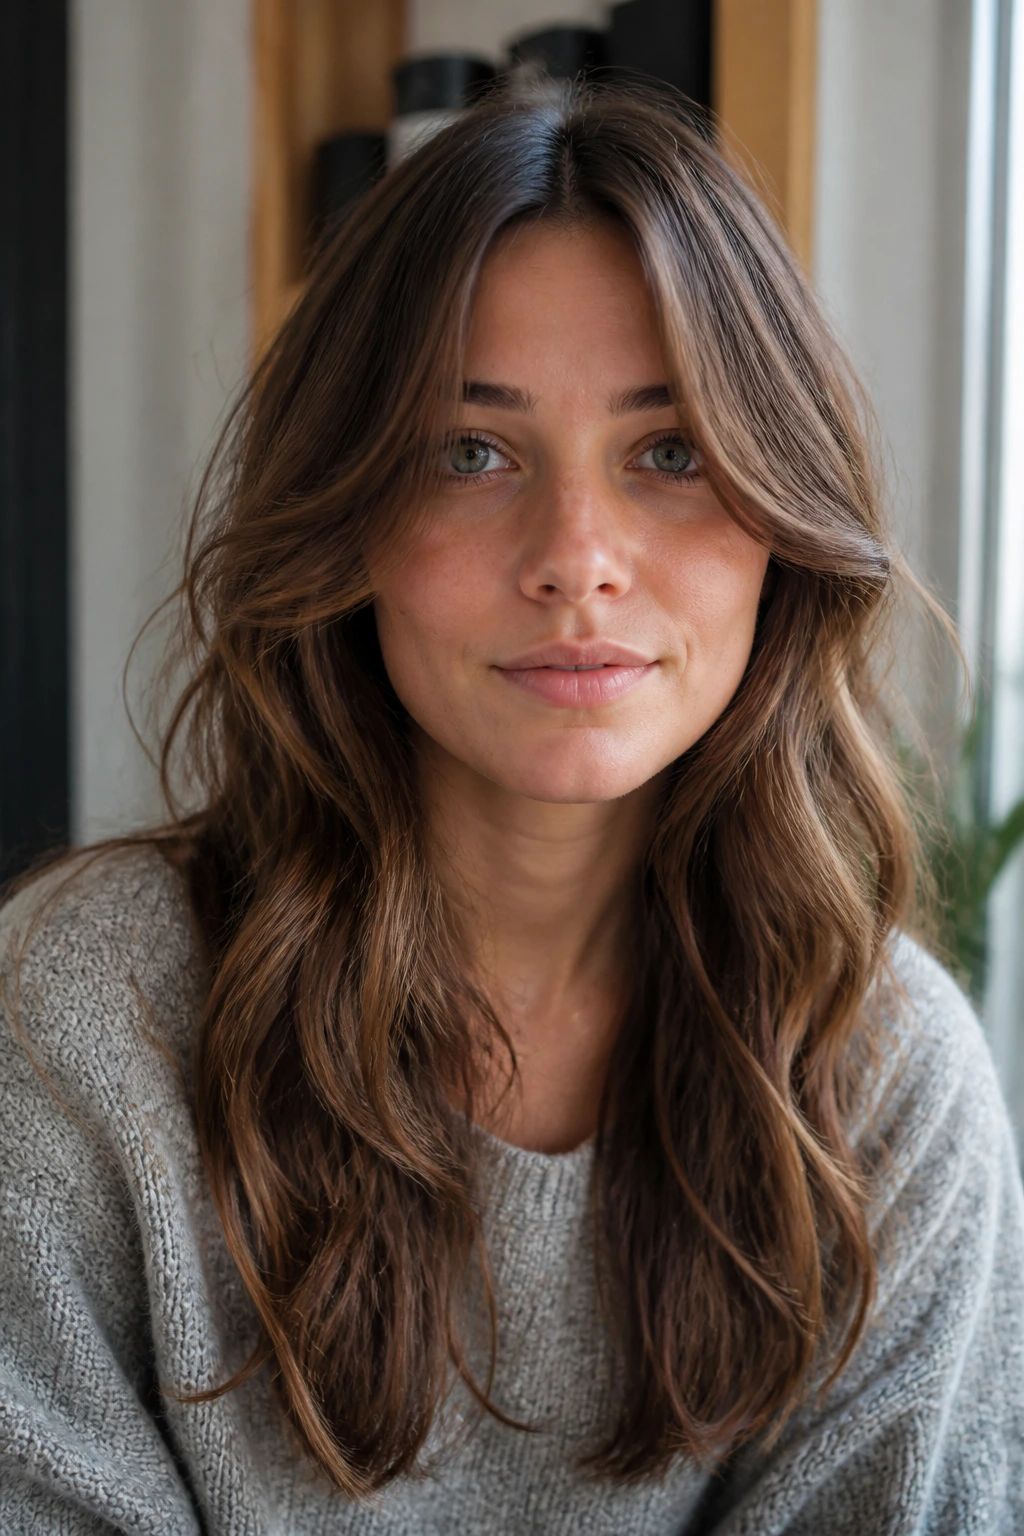
15. Airy Mid-Length Layers
Not every layered cut needs a big personality. Sometimes the best choice is the one that quietly takes out bulk and leaves the outline alone. Airy mid-length layers do that well. They keep enough length to frame the face, but the interior shaping gives the wave room to bend without sitting out at the sides.
This is a strong option if your hair already has a decent wave pattern and you just need it to stop looking heavy around the jaw. It’s easy to dress up with a quick bend at the front or wear plain after a scrunch and air-dry. No drama. No extra width.
16. Soft Pixie Bob With a Tapered Nape
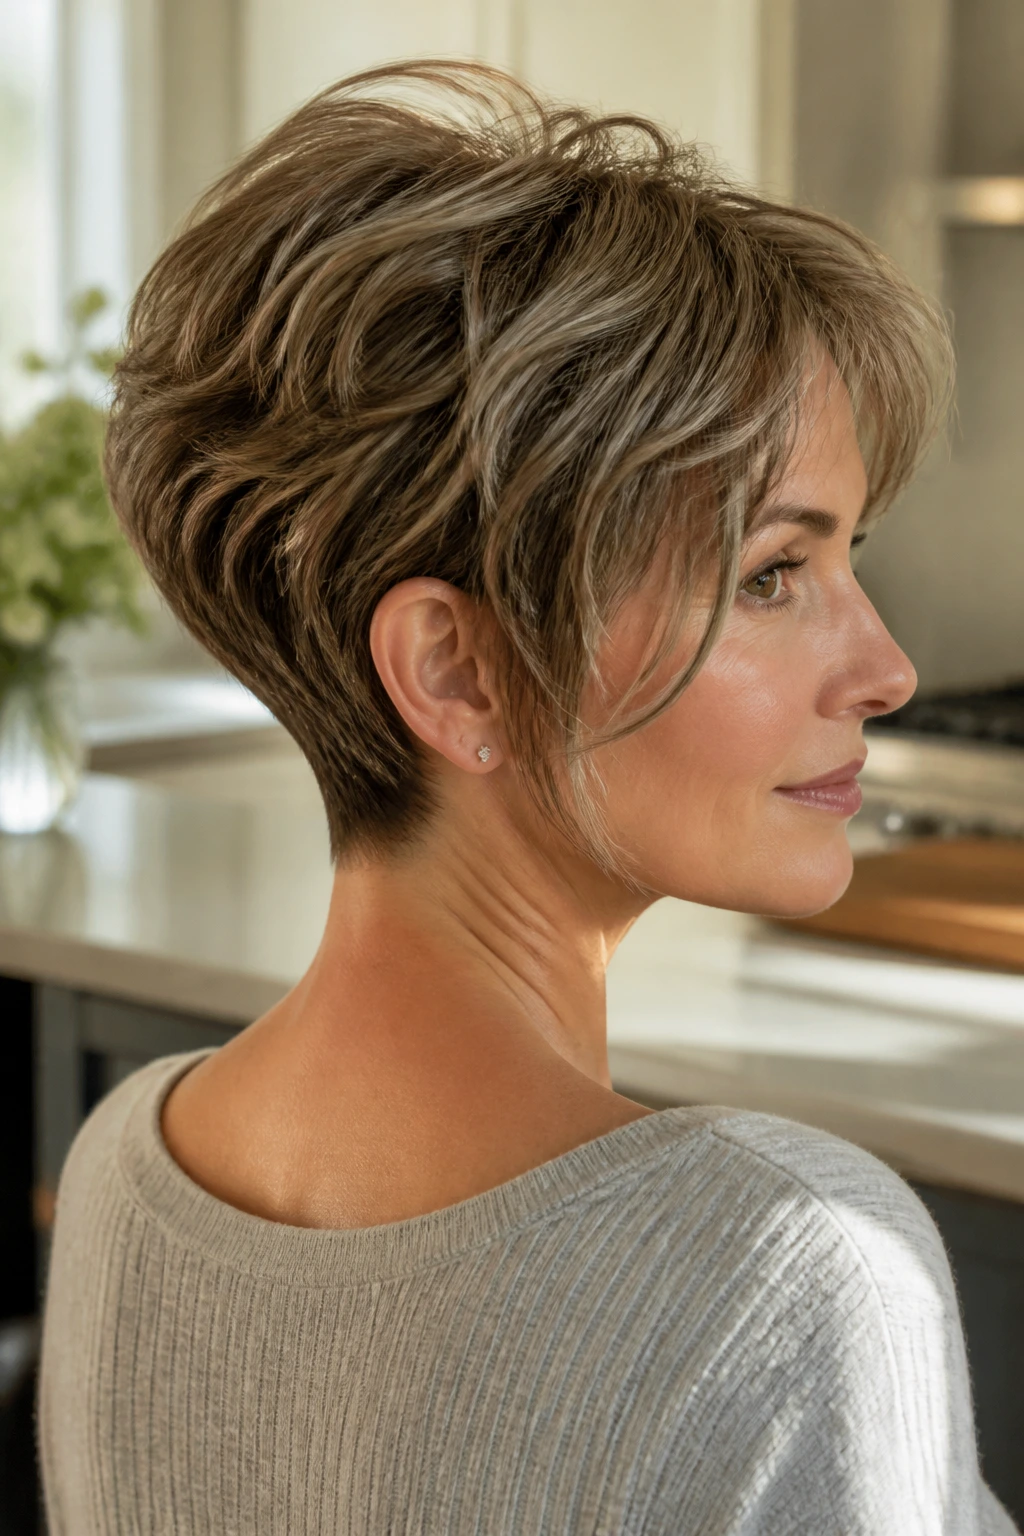
Shorter cuts can suit round faces when the top has lift and the sides stay controlled. A soft pixie bob keeps the nape close, the crown a little taller, and the front pieces long enough to brush the cheek or jaw. That balance is what keeps the cut from looking like a helmet. The wave pattern gives it life.
If your hair is fine to medium and naturally wavy, this can be a sharp little cut with very little daily effort. The tapered nape prevents the back from feeling bulky, while the longer front softens the face. I would not do this if you hate regular trims. Short layered shapes grow out faster than people think.
17. Face-Framing Layers Starting Below the Cheekbone
This is the simplest rule in the whole list, and probably the one I repeat most when talking to stylists. Start the face-framing pieces below the cheekbone. Not at it. Below it. That one move changes the whole haircut because it keeps the widest point of the face from being marked by the shortest layer.
The sweet spot for the first layer
For most round faces, I like the shortest visible piece to land around the mouth, chin, or just past the jaw. That gives the hair a downward path. With wavy hair, the bend adds a little softness on its own, so you don’t need the layer to do much more than avoid sitting on the cheek.
This is a flexible idea, not a single haircut. You can pair it with a lob, long hair, shoulder-length cuts, or even a soft shag. The placement is the point.
18. Deep Side-Part Layers
A deep side part does more than change where your hair falls. It changes where the eye goes. On a round face, that side-swept line breaks up symmetry and creates a longer-looking shape, especially when the front layer starts high enough to sweep across the temple but low enough to avoid the cheekbone shelf.
This cut is useful if your hair naturally wants to collapse flat in the middle. The side part gives it a little root lift on one side and a softer fall on the other. It’s also one of the easiest ways to make a layered cut feel fresh without changing the actual length. Sometimes the part does most of the work. That’s not a cop-out. It’s efficient.
19. Graduated Bob With Piecey Ends
A graduated bob gets a bad reputation when it’s too stacked, but the softer version is excellent for wavy hair. The back is slightly shorter to keep the neck area neat, while the front stays longer and the ends are broken into small, piecey sections. That gives you movement without a puffball shape.
For round faces, the front length is the guardrail. Keep it past the jawline and let the graduation happen behind the ears and at the nape. If the front gets too short, the face starts reading wider. If the back is too heavy, the whole cut loses its lightness. The balance is narrow and specific, which is exactly why it works.
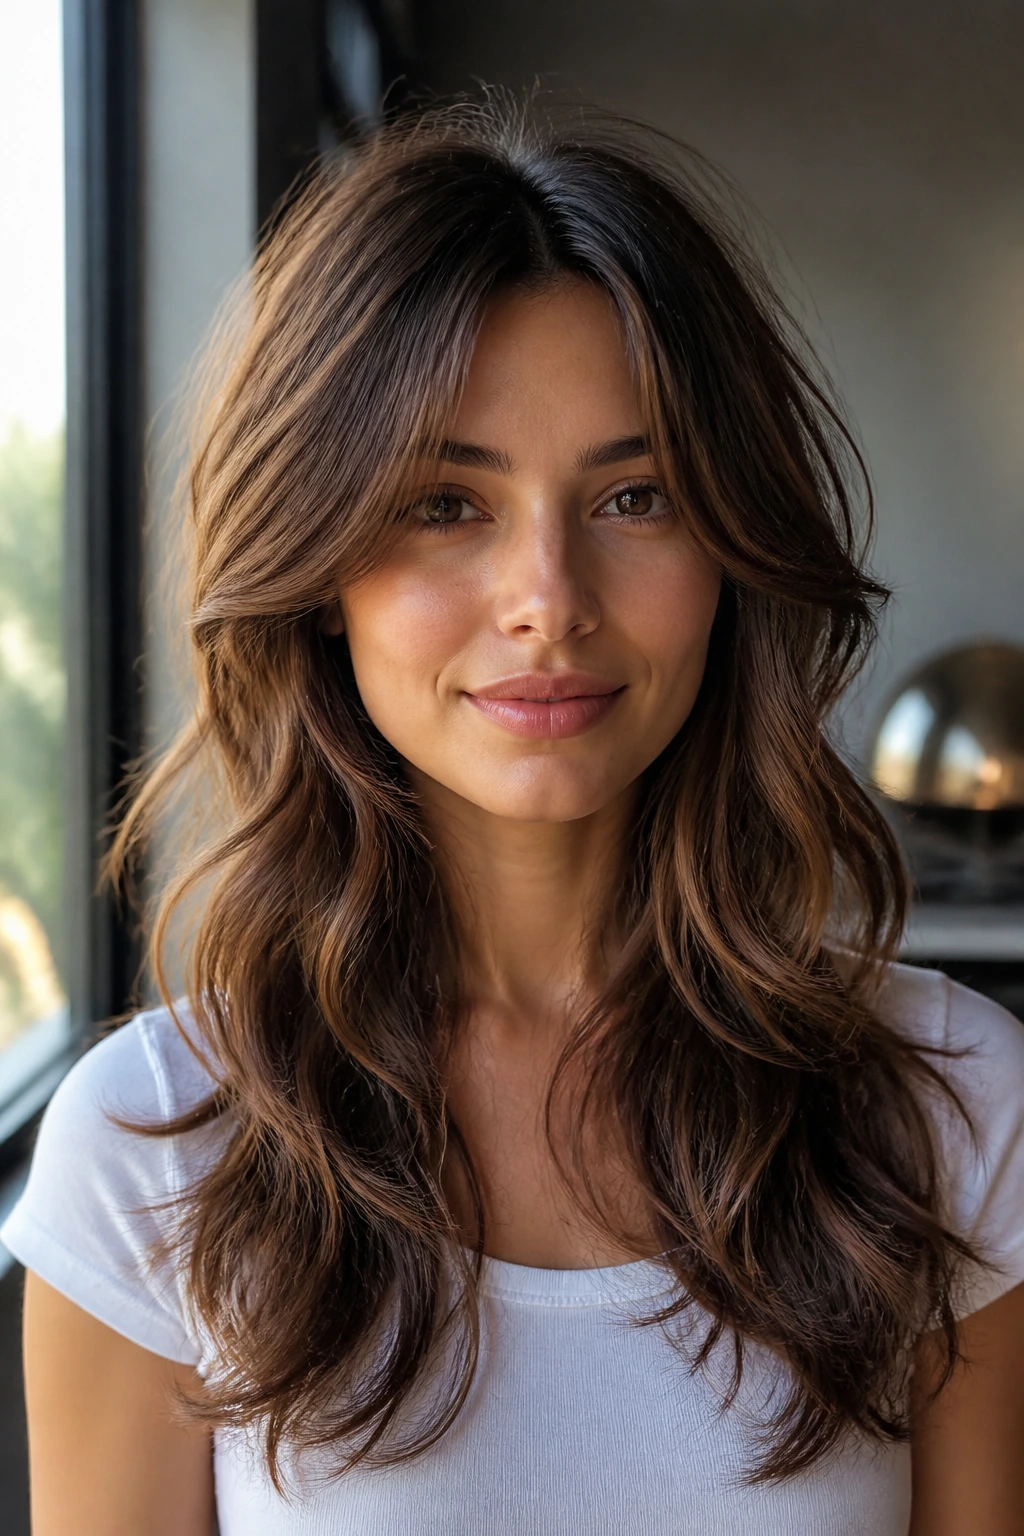
20. Cascade Layers for Extra Length
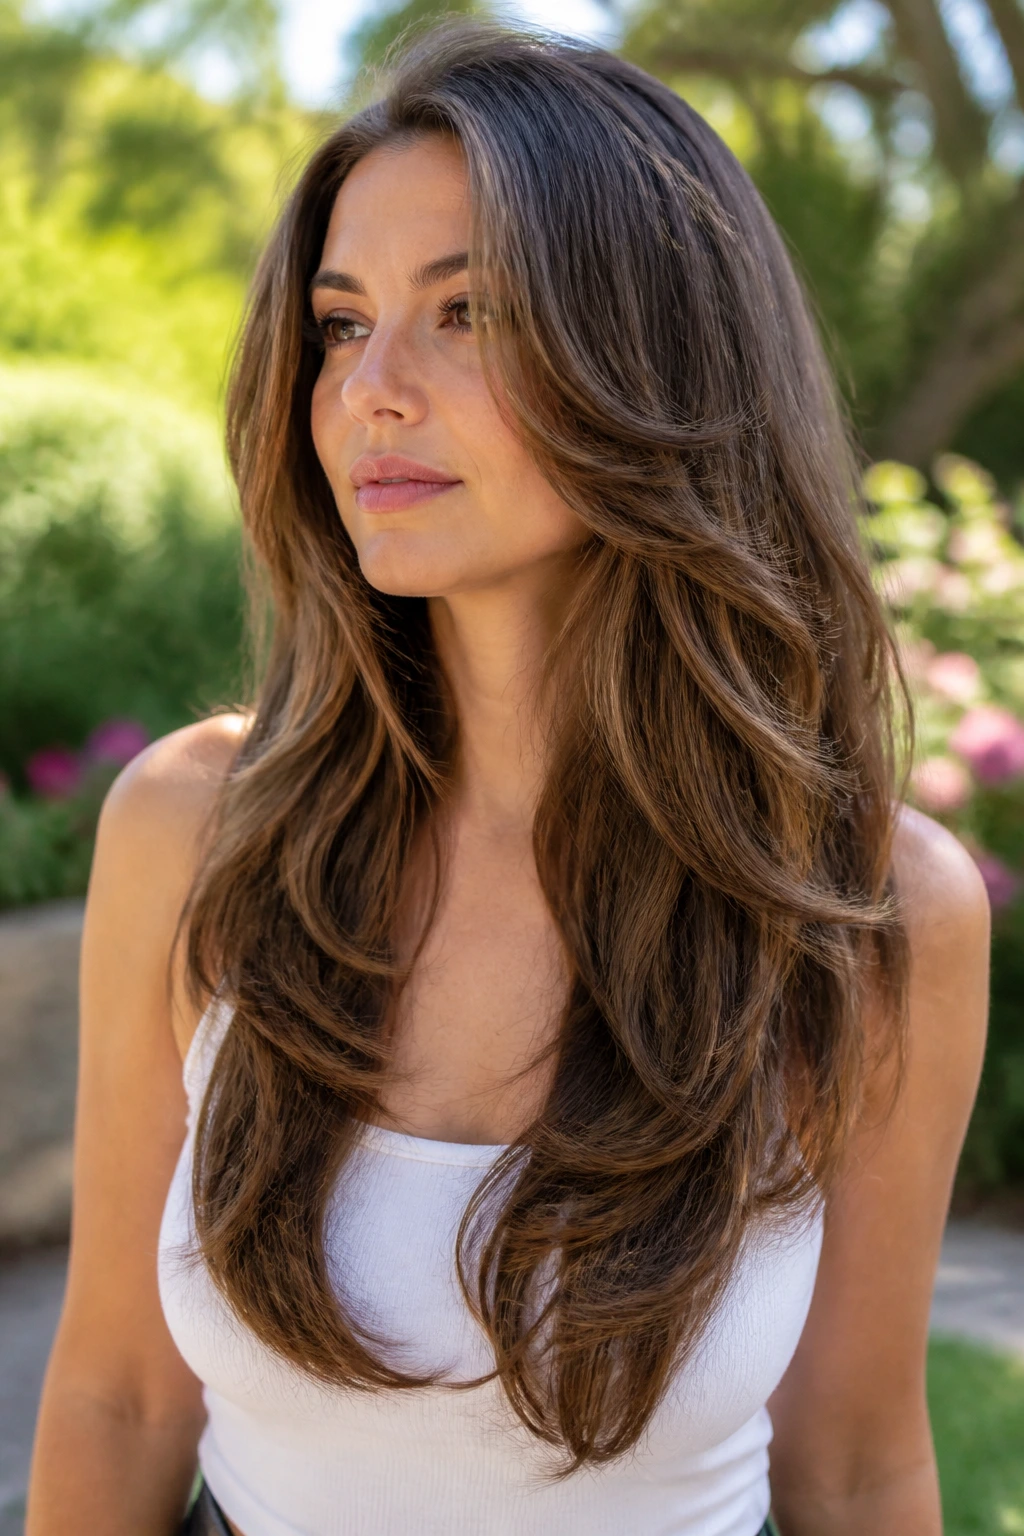
Cascade layers are for the person who wants the length to feel like a waterfall instead of a curtain. The layers fall in descending sections, so the hair moves downward in visible steps that still blend together. On wavy hair, that lets the bends catch one another instead of sitting in one thick block.
This shape flatters round faces because the eye keeps traveling down the line of the hair. I like it when the shortest face-framing layer is kept low and the back maintains real length. The result feels long, soft, and a little polished without needing a hard blowout. If you’ve been afraid layers would cost you too much length, this is a safe place to start.
21. Off-Center Part Lob
A slightly off-center part can do more for a round face than people expect. It doesn’t have the strong asymmetry of a deep side part, but it still breaks the face into a longer line and keeps the hair from sitting in a perfectly even frame. That tiny shift matters with waves because the bend falls a little differently on each side.
This cut is good if you want balance without looking like you’ve made a dramatic styling decision. The lob length keeps the silhouette tidy, and the off-center part stops the hair from ballooning symmetrically around the cheeks. It’s a quiet haircut. That’s the point.
22. Rounded Layers With Controlled Volume
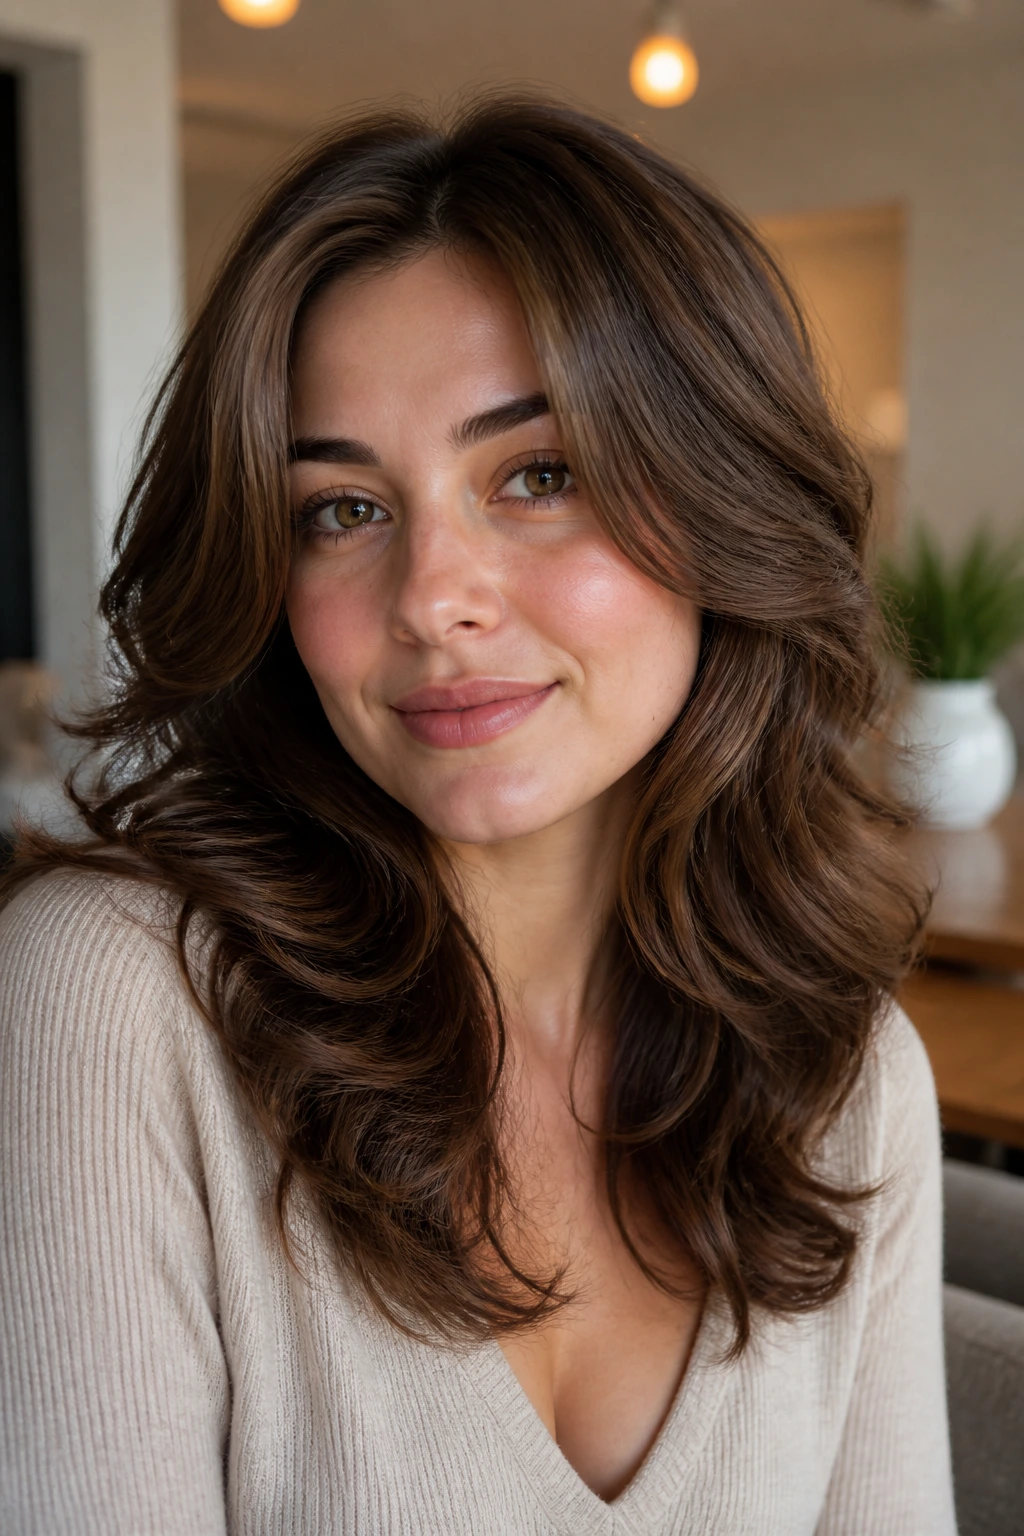
Rounded layers can sound risky on a round face, and I get that. The difference is where the rounding happens. If the curve lives in the back and through the lower lengths, not across the cheek area, the haircut feels soft and controlled instead of wide. Wavy hair likes that kind of direction because it bends with the shape instead of fighting it.
Keep the volume low, not flat
You want fullness through the ends and a little lift at the crown, but not a halo at the sides. That means the layers should be feathered enough to move, not chopped so short that each wave sticks out like a shelf. I’d use this shape when you want softness more than edge and when your hair likes to air-dry with volume on its own.
23. Layered Cut With Heavy Bottom Weight

A lot of people think layers automatically mean lots of removal everywhere. Not so. Sometimes the smartest cut keeps the bottom perimeter heavier so the waves settle downward instead of floating out at the sides. That heavy bottom weight can be a lifesaver on round faces, because it stops the silhouette from expanding at cheek level.
This is a good choice if your hair is thick, frizzy, or prone to puffing in humidity. The layers live inside the haircut, not all over the surface. The outline stays calm. The movement happens underneath. I like this shape for people who want their waves to look defined rather than fluffy.
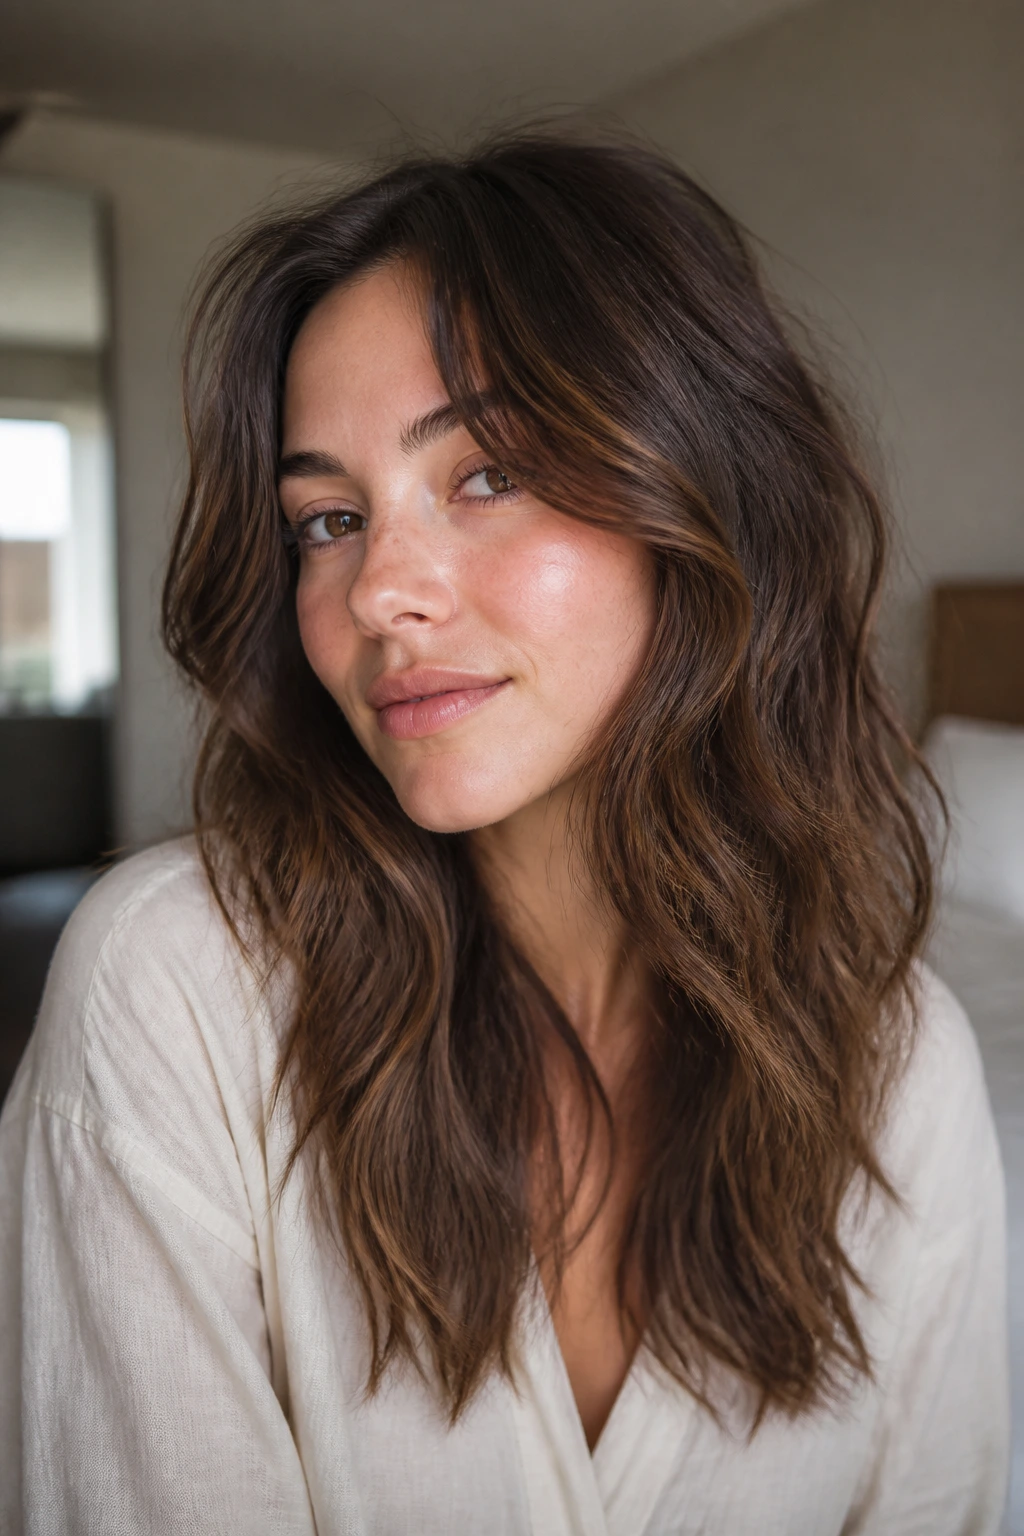
24. Grown-Out Shag With a Soft Fringe
The grown-out shag is the grown-up answer to anyone who likes movement but hates a haircut that needs constant rescuing. The fringe is lighter than a full blunt bang, the layers are softer than a heavy wolf cut, and the ends stay long enough to keep the face from widening. On round faces, that softness matters. A hard shag line can be too much.
This version is forgiving on wavy hair because it doesn’t demand symmetry. A little unevenness looks intentional. A little frizz doesn’t ruin the shape. The key is keeping the shortest pieces long enough to frame rather than crowd the face. If you want texture without looking choppy, this one earns its place.
25. Long Layers That Flip Away at the Ends
There’s a reason long, flipped layers keep coming back. They do a simple thing well: they send the ends away from the cheeks. That outward flick can be brushed in, diffused, or left to happen naturally if your wave pattern already wants to bend. On a round face, that little turn at the ends keeps the cut lively without adding width in the middle.
I like this as a finishing shape for hair that sits past the shoulders. It keeps the overall length intact, but it breaks up the heavy curtain effect that can make wavy hair drag the face down. If you want a cut that feels classic, easy to recognize, and still flattering from the front, this is a strong finish to the list.
Why Layer Placement Changes the Silhouette
A good layered cut is less about the number of snips and more about where those snips land. On a round face, the widest part usually sits around the cheeks, so the haircut should avoid parking volume there. That’s why the safest starting point for face-framing pieces is usually below the cheekbone, with longer pieces brushing the mouth, jaw, or collarbone.
Wavy hair adds another layer of physics. It expands when it dries. If you remove too much bulk near the outer edge of the hair, the wave can spring outward and make the face look broader instead of slimmer. If you keep some weight on the perimeter and shape the interior, the hair falls with more control. That’s the move.
The sweet spot for length
For shorter cuts, the line should lean forward a little so the front pieces narrow the face. For longer cuts, the layers should keep the eye moving down, not out. Either way, the goal is the same: create a vertical path that works with the wave pattern instead of making the wave fill more horizontal space.
What to avoid at the cheeks
I’ll say this plainly. Avoid the shelf. A layer that ends exactly where the cheek is fullest can make the whole face look wider, especially once the hair dries and expands. A tiny difference of an inch or two changes the result a lot. That’s why a real conversation with your stylist matters more than a vague request for “some layers.”
Tools, Photos, and Products That Make the Cut Behave
You do not need a suitcase of gadgets, but a few things matter enough to keep on hand.
- A good diffuser: Low heat and low airflow help wavy layers dry with shape instead of frizz.
- Sectioning clips: These help when you want to dry the front pieces separately from the back.
- A wide-tooth comb: Better than a brush for wet waves; it keeps the shape from getting stretched.
- Heat protectant: If you smooth the front pieces or touch up the ends, use it every time.
- Light mousse or foam: This gives the layers some hold without turning them crunchy.
- Wave cream or leave-in conditioner: Useful when the haircut needs softness and definition at once.
- A 1.25-inch curling iron or flat iron: Not for full styling, just for fixing a front piece that flips the wrong way.
- Microfiber towel or cotton T-shirt: Regular bath towels rough up the cuticle and add frizz.
- Silk or satin pillowcase: It won’t create the haircut, but it helps keep the layers from waking up smashed on one side.
What to Tell Your Stylist Before the First Snip
Bring photos, yes, but bring the right ones. One picture should show the length you want from the front. Another should show the texture or silhouette you want from the side. Those are not the same thing, and people mix them up all the time. A haircut can look soft from the front and too stacked from the side if the reference is only one angle.
Length anchor: Tell your stylist where you want the longest pieces to land. If you want a collarbone lob, say collarbone. If you want long layers, name the chest or ribcage area instead of saying “long.”
Layer start point: Point to the exact spot where the shortest face-framing piece should begin. On a round face, that’s usually below the cheekbone. If the stylist starts there by default, you’re already ahead.
Drying routine: Say whether you air-dry, diffuse, or smooth the front pieces with a brush. A cut that looks good only after a 20-minute blowout is not a low-maintenance cut.
Density note: If your hair is thick, ask for weight removal inside the cut, not just around the edges. If it’s fine, keep the layers softer so the ends don’t go see-through.
How to Wear the Cut on an Ordinary Morning
The right cut should not need a full styling sermon every day. If your waves are decent on their own, let them do half the work. Start with damp hair, work a small amount of mousse or wave foam through the roots and mid-lengths, and leave the front pieces a little more controlled than the rest. That front detail is where round faces get their shape.
Parting: A center part is clean and elongating, but an off-center part can be kinder if your waves separate unevenly. Deep side parts add more angle and are useful when the face feels broad at the cheeks.
Air-drying: Scrunch the hair, then leave it alone. Touching it while it sets is how good cuts turn fuzzy. If you like a more polished front, twist the face-framing pieces away from the face while they’re damp.
Diffusing: Use low heat, low speed, and stop before the hair is bone-dry. A little moisture left in the ends helps keep the bend soft instead of brittle-looking.
Finish: If the front pieces need help, hit only those sections with a brush or iron. Don’t over-style the whole head just because two pieces misbehave.
Small Tweaks That Make the Layers Work Harder
Salon Calibration: Ask where the shortest face-framing layer will sit when the hair is dry, not just when it’s wet. Wavy hair can jump an inch or more as it dries, and that matters.
Texture Choice: If your hair frizzes easily, skip aggressive razoring around the sides. Scissor-cut layers usually keep the shape calmer.
Daily Habit: Flip your part to the other side for a minute while your hair is damp, then switch it back. That tiny move helps the roots lift instead of setting flat against the scalp.
Finish Line: Keep a pea-sized amount of cream or oil for the ends only. Putting product near the cheeks can make the face area look heavier fast.
Trim Timing: Dusting the ends before they split keeps the layers from turning ragged at the bottom, which is where a lot of round-face-flattering shape gets lost.
Common Mistakes That Add Width Instead of Shape
The first mistake is starting the shortest layers too high. When the layer lands right on the cheekbone, the hair tends to puff out where the face is already fullest. The fix is boring but effective: move that shortest piece lower, usually to the mouth or jaw area, and let the wave travel downward.
Another one is over-thinning the ends. If the perimeter gets too wispy, the hair can frizz outward and look bigger, not smaller. Keep some weight at the bottom, especially if your waves are coarse or your hair grows in thick.
People also ask for “more layers” when what they actually need is better placement. More cuts do not automatically mean a better shape. If the interior is already behaving, adding short pieces everywhere just creates movement in the wrong spots.
And then there’s the blunt bob problem. A chin-length cut with no angle can make a round face look wider unless the front pieces are longer and the back is controlled. Short hair can work here, but the line has to lean forward a little.
Variations for Fine Waves, Thick Hair, and Shorter Lengths
The Fine-Wave Edit: Keep the layers long and soft, with little to no razoring. Fine waves can lose body fast, so this version leans on shape rather than heavy texturing. It works best when the ends stay full and the front pieces fall below the cheekbone.
The Thick-Wave Edit: Remove bulk through the interior and leave the outline heavier. Thick hair can handle more shaping, but it needs discipline near the sides so the wave does not expand outward. This is the version I’d choose if your hair gets big in humidity.
The Short-Length Edit: Pick a lob or a soft bob with longer front pieces and a slight forward angle. A round face can wear short layers, but only when the front is doing the narrowing. A boxy bob near the chin is the wrong idea.
The Fringe-Forward Edit: If you want bangs, keep them light and blended. Curtain bangs or bottleneck bangs usually work better than a straight, heavy fringe because they leave room around the cheeks and still give the face some definition.
Keeping the Shape Between Salon Visits

Wavy layered cuts usually need a little maintenance, but not as much as people fear. If your hair is shoulder length or shorter, plan on a trim every 6 to 8 weeks before the ends start flipping in odd directions. Longer cuts can often stretch to 8 to 12 weeks, especially if the layers are soft and the perimeter stays intact.
Sleep care matters more than most people admit. If you go to bed with hair that’s damp and flattened to one side, the front layers can wake up with a bend that fights the shape of the cut. A loose pineapple, a silk pillowcase, or just flipping the part before bed can save you from a strange morning silhouette.
On wash day, use the least product needed to get the hair to hold. Too much cream at the sides makes the haircut heavy near the cheeks. If the ends start looking dry between trims, use a tiny amount of oil only on the last inch or two. The goal is to keep the outline clean so the layers keep framing, not fraying.
Questions People Ask Before They Sit in the Chair
Will layers make my round face look wider?
They can, if the shortest pieces land at the cheekbone or the sides are cut too short. Layers that start below the widest part of the face usually do the opposite, because they draw the eye downward and keep the outer shape from ballooning.
Are curtain bangs good for round faces with wavy hair?
Yes, when they’re cut long enough to sweep away from the cheeks. Curtain bangs that hit around the mouth or jaw usually work better than short ones, because they leave room for the face to breathe.
Should I choose a side part or a center part?
Both can work. A center part gives a longer line down the face, while a side or off-center part can break up width at the cheeks. If your waves fall unevenly, an off-center part is often the easiest place to start.
What if my hair is thick and poofy?
Ask for interior weight removal and a perimeter that stays strong. Thick wavy hair usually looks better with controlled layers than with a lot of short pieces near the surface.
Can I wear short layers on a round face?
Yes, but the front should stay longer than the jawline and the crown should carry the lift. A tight, blunt shape at the chin is the part that usually fails.
Do I need heat styling for these cuts to work?
No. A lot of them are better when air-dried or diffused lightly. Heat is there for cleanup, not rescue.
How do I keep the layers from flipping out strangely?
Dry the front pieces in the direction you want them to fall and stop roughing them up once they start setting. If one side still kicks out, a quick pass with a brush or iron on just that section is usually enough.
A Shape That Keeps Its Balance
The cuts that flatter wavy hair and round faces share the same idea, even when they look different from one another: keep the width away from the cheeks and let the hair travel downward. Some do that with length. Some use a side part. Some lean on curtain pieces or a soft fringe. The tool changes, but the logic stays steady.
That’s why I keep coming back to long face-framing layers, angled front pieces, and soft interior shaping. They’re not flashy. They just make sense once the hair dries and starts moving on its own. If you bring the right reference photo and name the exact spot where the shortest layer should land, you’ll usually get much closer to the result you wanted in the first place.