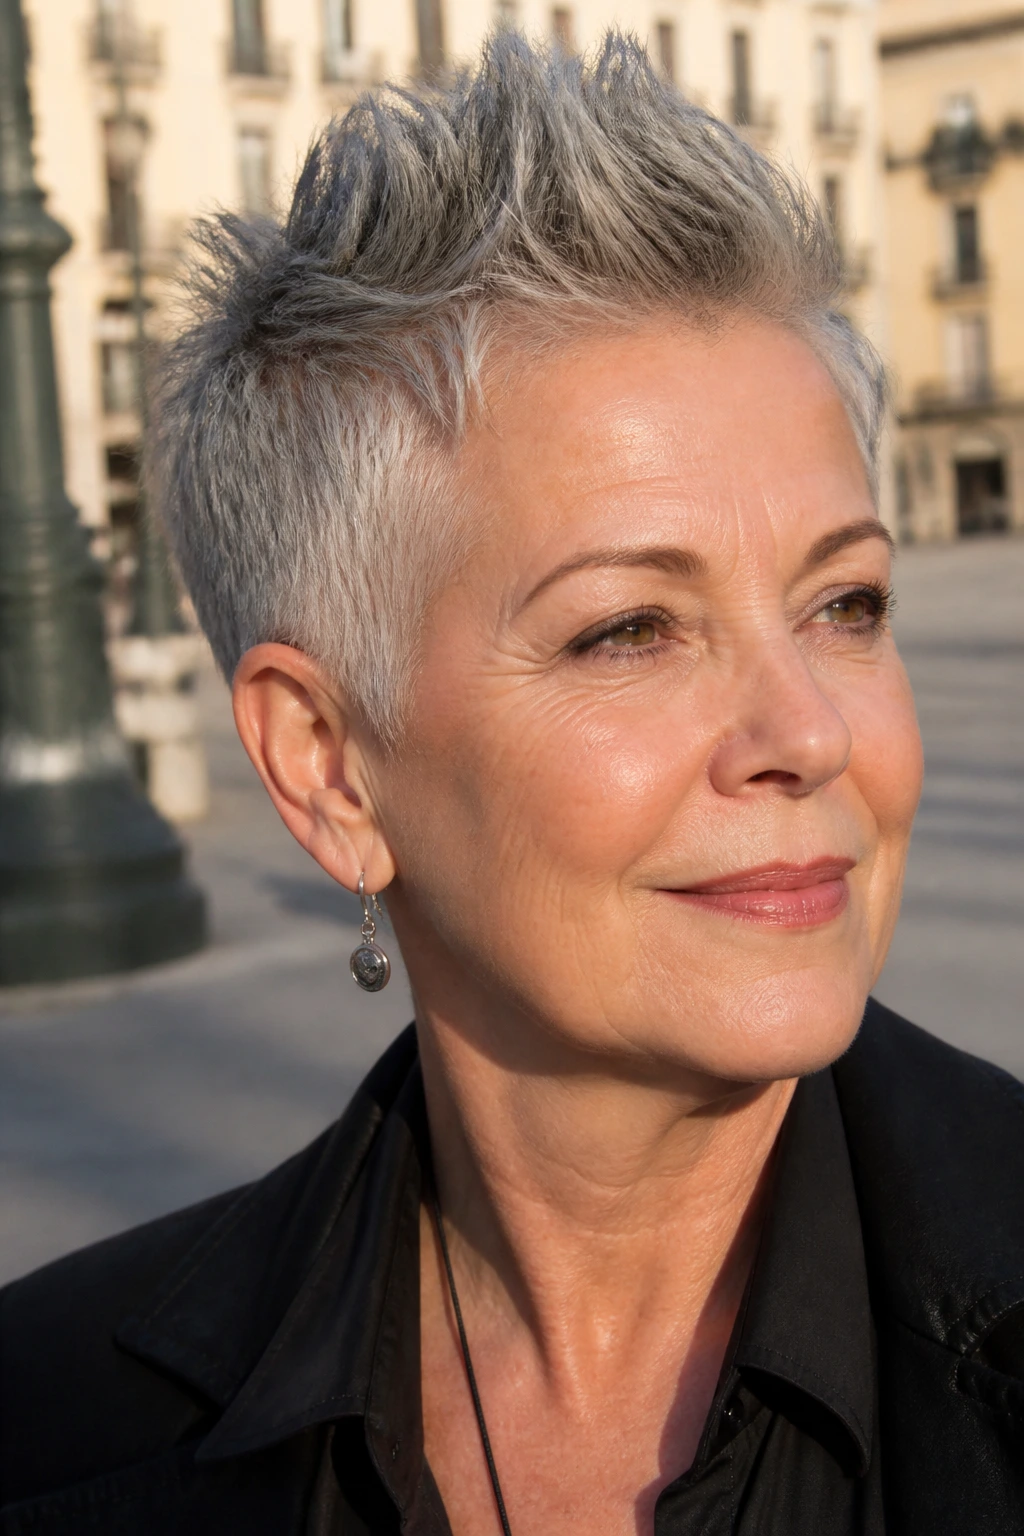
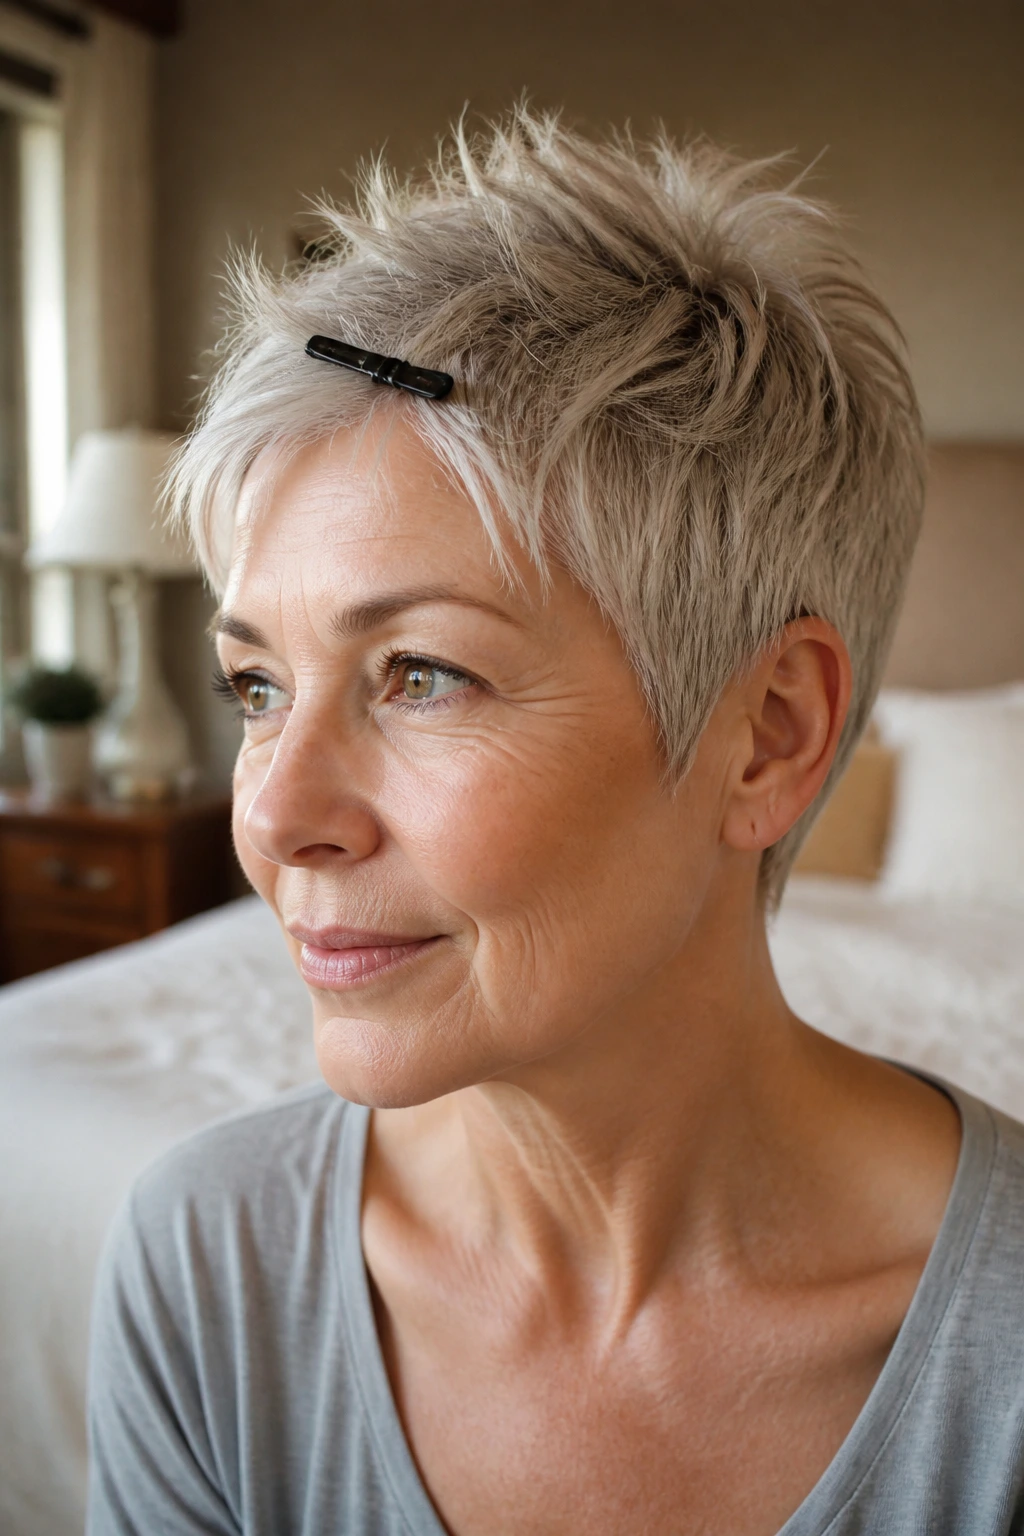
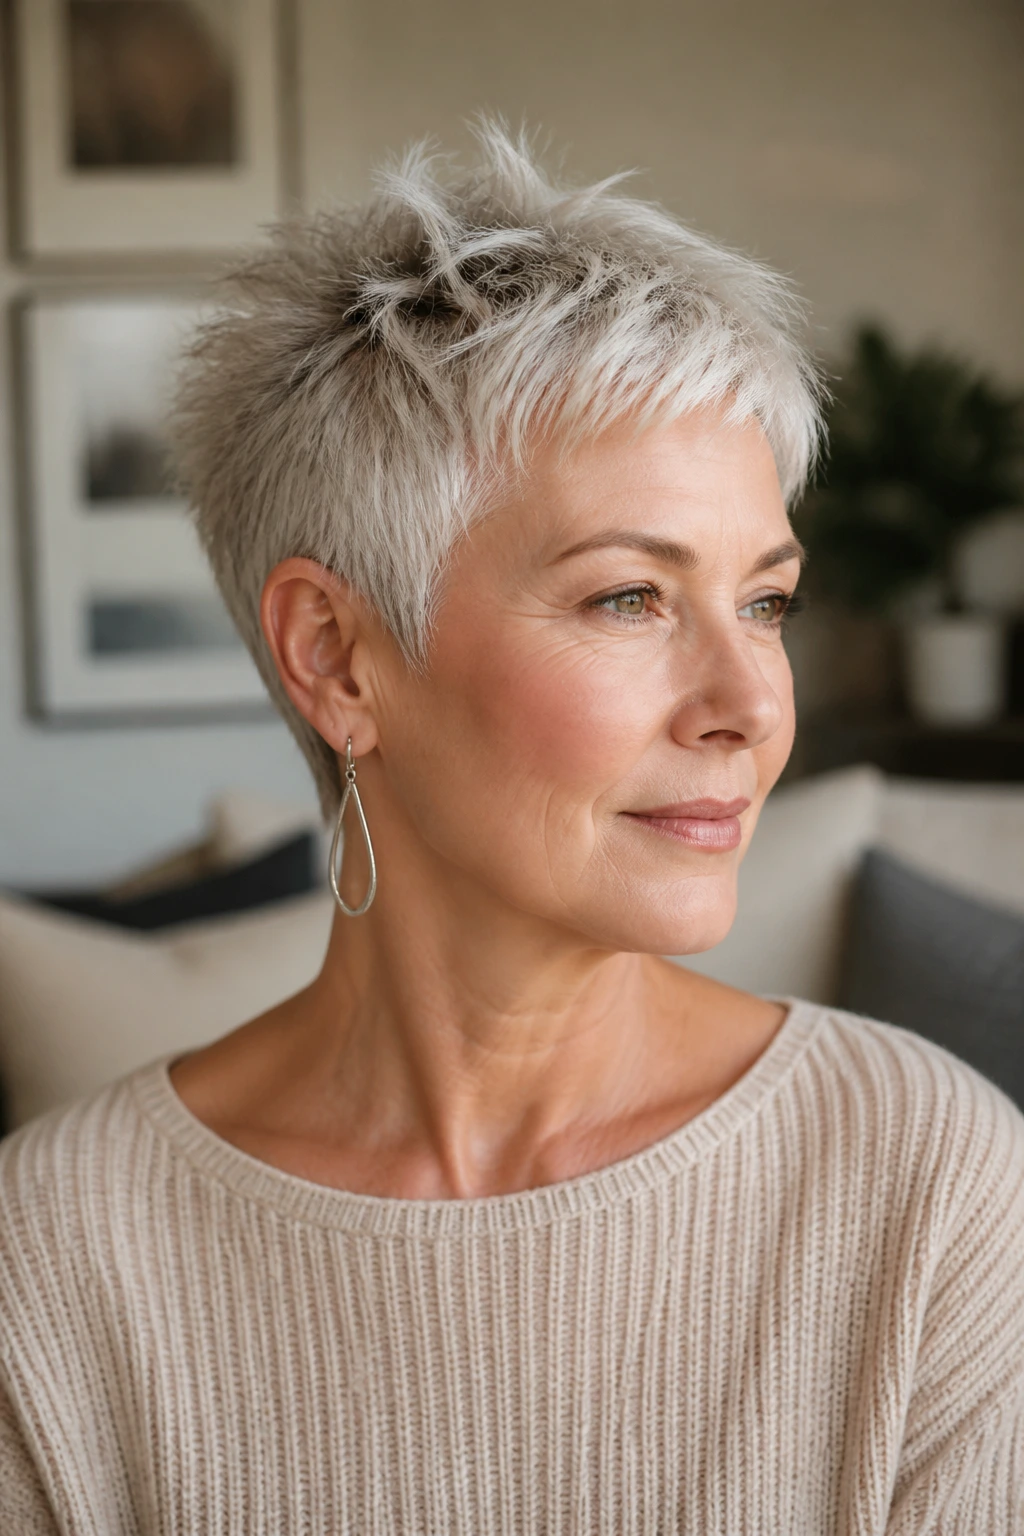
A choppy pixie cut can do something thin hair usually resists: it can look fuller without pretending the hair is thicker than it is. The trick is not bulk. It’s shape — short sides, a lifted crown, and ends that are cut into tiny irregular bits so the light has somewhere to land.
After 60, hair often gets finer in both diameter and density, and a blunt, all-one-length crop can make that even more obvious. A choppy pixie, done well, does the opposite. It trims away the limp ends, keeps the top light enough to move, and lets the cut carry the style instead of asking you to drown it in product.
That’s why choppy pixie cuts for women over 60 with thin hair keep showing up in good salons: they work with cowlicks, soften a strong jaw or a narrow chin, and give you a little lift at the crown without asking you to fight your hair every morning. Some versions look polished, others a bit cheekier. The common thread is simple: they make thin hair look intentional, not apologetic.
Why These Choppy Pixie Cuts Earn Their Keep

-
Crown lift without the fluff: A pixie that keeps the top around 2.5 to 4 inches can stand up at the root without needing teasing, which means less breakage and less helmet hair by lunch.
-
Choppy ends fake density better than blunt weight: Tiny, uneven ends catch light differently, so the hair reads as fuller even when the actual strand count hasn’t changed.
-
Short sides make the top look stronger: Tightening the sides and nape removes visual bulk where thin hair tends to collapse, so the crown and fringe get all the attention.
-
Soft fringe handles a high forehead or sparse hairline: A wispy bang or side sweep can blur scalp show-through near the front without sitting heavy on the face.
-
The grow-out is kinder: Choppy pixies can slide into a short crop, a soft bob, or a longer shaggy shape without that brutal “awkward middle” phase.
-
Styling takes less product than most people think: A pea-sized amount of mousse or a light paste is usually enough; too much product does the exact wrong thing and makes thin hair look stringy.
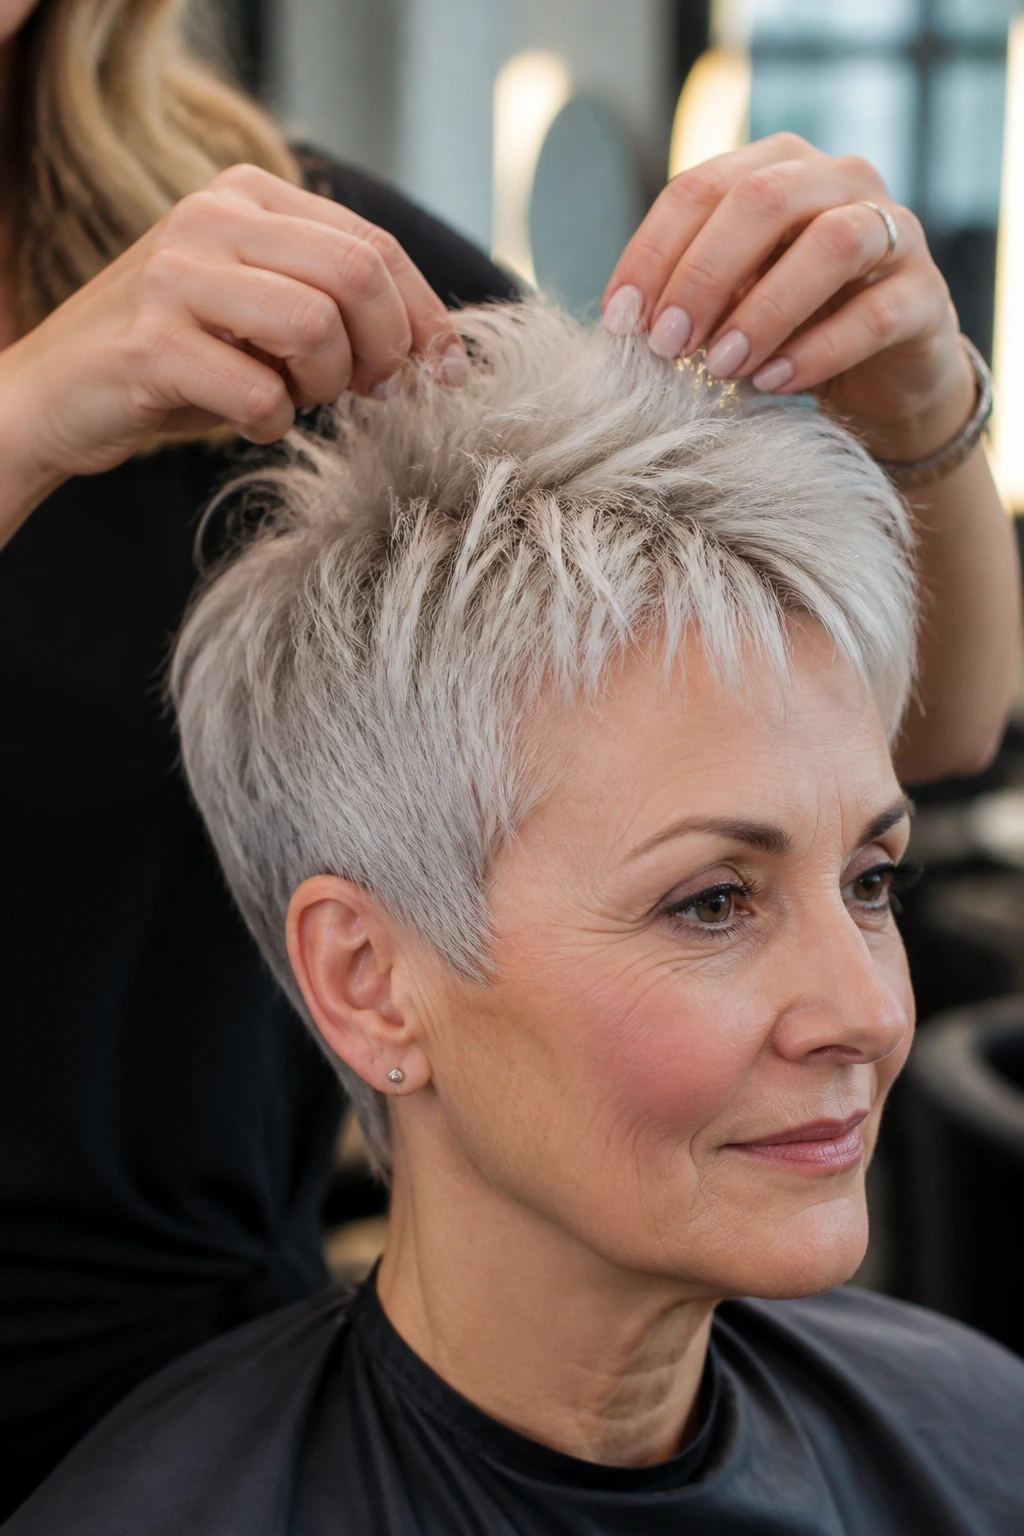
1. Feathered Crown Pixie
A feathered crown pixie is the one I reach for when someone wants lift without the spiky business that can make thin hair look overworked. The top stays soft and airy, usually around 3 inches, while the crown gets gentle feathering so the hair bends instead of clumping. It feels light the minute you run your fingers through it.
This cut flatters thin hair because the movement happens at the top, not at the ends. That matters. When the sides are tapered close and the crown is feathered with a light hand, the whole shape looks taller and cleaner. Ask for scissors, not aggressive thinning shears, if your hair is already wispy. Over-thinning can turn the top into little see-through strings.
A neat styling move here is to blow-dry the crown forward first, then redirect it back with your fingers. That tiny switch gives the roots a bend instead of a flat shelf. If your hair tends to split at the center, a soft side part will help the feathering sit better and keep the scalp from showing in a straight line.
2. Side-Swept Fringe Pixie

Why does a side-swept fringe help thin hair so much? Because it hides the areas people stare at first: the front hairline, the part, and the top edge of the forehead. A fringe that starts longer on one side and tapers toward the temple can break up thinness without looking like a curtain. It gives the eye somewhere to go.
Where it helps most
This shape is especially kind to faces that need a little softness around the front. If your hairline has receded a touch, or if the front has lost some width, the diagonal line of the fringe hides that with almost no effort. Keep the fringe light, not heavy. Heavy bangs on thin hair fall flat in one hour and then sit there like a wet paper towel.
The rest of the cut should stay compact. Ask for the sides to hug the head and the nape to taper in neatly, because the fringe does the visual work here. I like this style with a small amount of root-lift spray at the front and a dab of styling cream only on the ends. Too much cream on the bang area makes it separate into little wet-looking pieces, which is not the goal.
- Best for: high foreheads, mild thinning at the front, and faces that look better with a diagonal line.
- Styling note: blow-dry the fringe across the forehead first, then set it with your fingers.
- Avoid: a thick, blunt bang that covers the whole forehead; it can sit heavy and reveal more scalp at the roots.
3. Tapered Nape Pixie
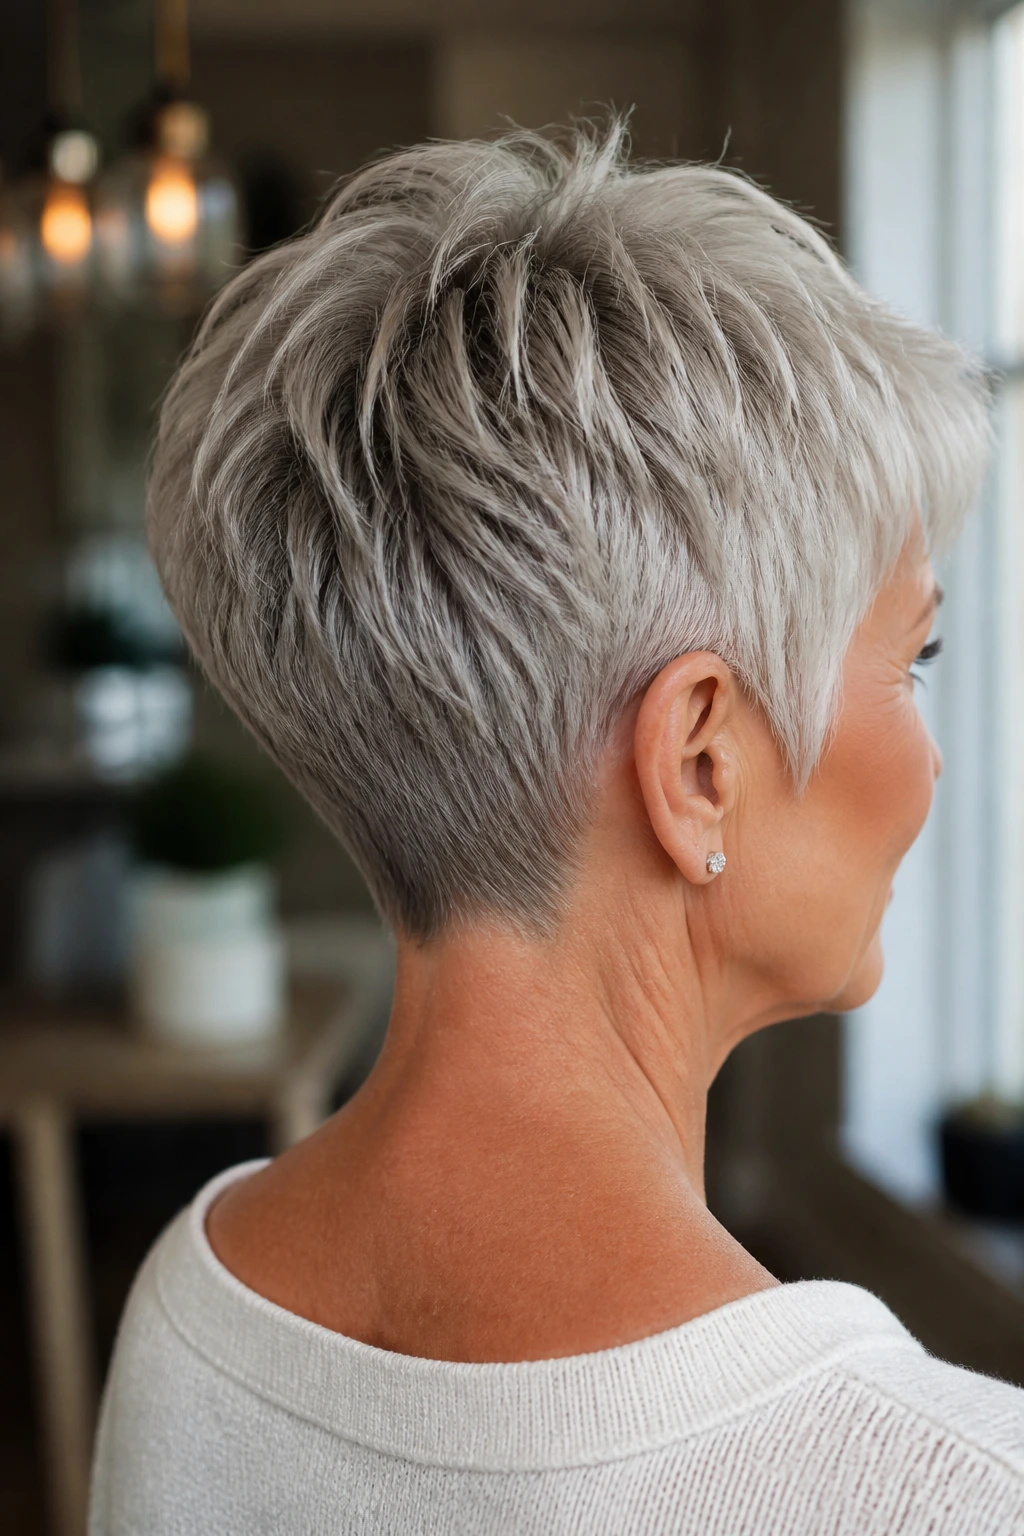
Picture the back of the head first. That’s where this cut earns its keep. A tapered nape pixie cleans up the neckline so the top can look fuller by comparison, and thin hair loves that trick. The nape is cut close, sometimes almost whisper-short, while the upper back layers stay soft enough to move.
The result is tidy without being severe. I like this version for women who wear scarves, collars, or glasses because the back stays neat and doesn’t puff out against fabric. The cut also gives the illusion of a stronger silhouette from the side, which matters more than people realize when hair has lost its body.
Ask your stylist to leave enough texture through the crown so the top doesn’t collapse into the taper. If the top and nape are cut too equally short, you lose that contrast, and contrast is what makes the hair look denser. A little mousse at the roots and a quick blast with a dryer is usually enough. No need to fuss.
4. Wispy Bangs Textured Pixie
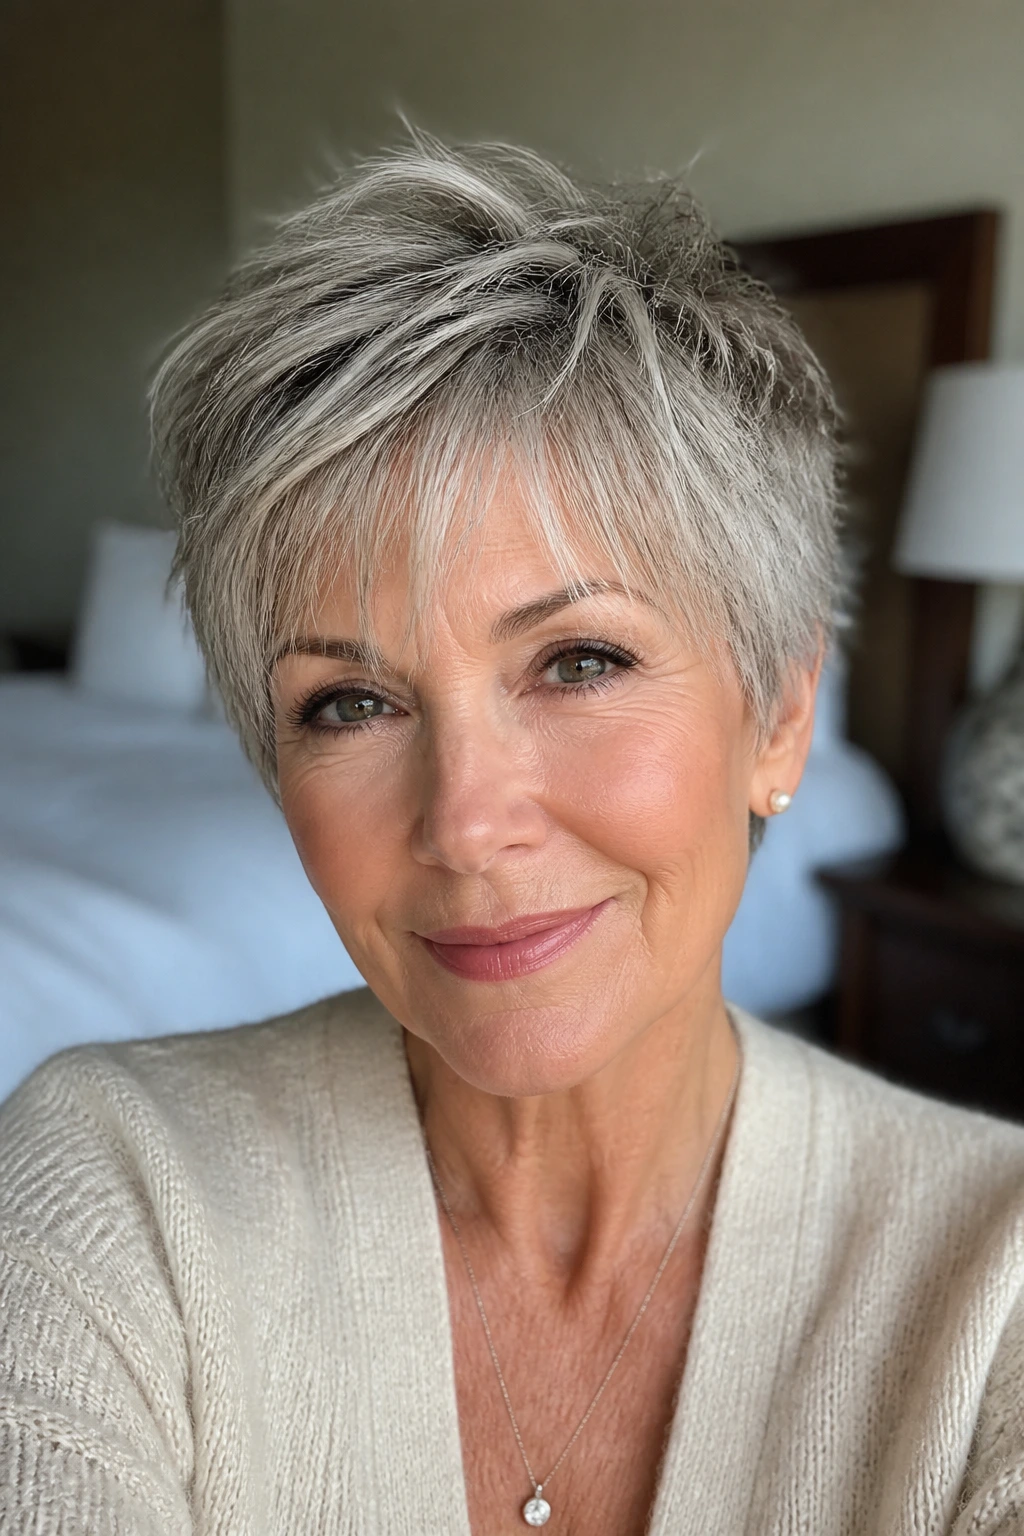
A cut like this lives on detail. Wispy bangs take the pressure off thin hair at the front, and the choppy top keeps the rest of the style from feeling flat or stiff. The bangs should be soft enough that you can see some forehead through them. That gap is the point.
The best version of this cut has a slightly broken texture through the crown and a fringe that isn’t cut as one solid line. That little irregularity keeps the hair from bunching. It also helps if your hair tends to separate in odd places after you sleep. A quick finger-dry and a swipe of lightweight paste can bring the pieces back into line.
One sentence matters here: do not over-layer the bang area. Thin hair with too many short bang pieces can start to look feathery in a dry, unfinished way. Ask for controlled point cutting instead, and keep the shortest pieces near the center a bit longer than you think you need. The fringe will read softer, and the cut will hold up better when you skip a wash.
5. Asymmetrical Sweep Pixie

An asymmetrical sweep pixie has attitude, but it’s not loud about it. One side is a little longer, the top sweeps across, and the whole shape gives thin hair a sense of direction. Direction matters because hair with less density can look limp when it has nowhere to go.
This cut works well if one side of your hair is stronger than the other, which happens more than people admit. The longer side can hide a flatter temple or a sparse corner near the hairline, while the shorter side keeps the shape sharp. You get movement without needing volume everywhere. That’s the smart part.
Ask for the longer side to fall around cheekbone level, not down to the jaw. Too long and it stops being a pixie; too short and you lose the sweep that makes the cut interesting. A flat iron used once at the front — just enough to bend the section — can help the asymmetry sit in place. Keep the rest airy. This is not a style that likes heavy wax.
6. Brushed-Forward Choppy Pixie
Some mornings, hair needs a small push in the right direction. That’s where a brushed-forward choppy pixie comes in. The top is layered so it can move forward and slightly down, with the ends broken up enough that the style still looks textured, not solid.
Why does this help thin hair? Because brushing forward makes the front look fuller without asking the crown to do all the work. It also softens the forehead and can take the edge off a strong hairline. The shape sits close to the head, which is useful if your hair is fine and wants to puff out in odd spots when blown sideways.
How to wear it well
Use a small round brush or just your fingers and a dryer nozzle. Aim the airflow forward at the roots, then switch to a cool shot before the hair settles. A pinch of matte paste on the very ends keeps the pieces separated. Not too much. If the product shines, the cut starts to look thinner, not thicker.
- Best for: straight or slightly wavy hair that loses lift fast.
- Styling trick: dry the crown forward first, then break the direction with your fingers.
- Watch for: too much product at the front, which makes the fringe stick to the forehead.
7. Ear-Hugging Soft Pixie
The ear-hugging version is one of those cuts that looks calm and expensive without trying hard. The sides curve neatly around the ears, the nape stays close, and the top carries the texture. Thin hair does well here because the outline is clean. No wasted volume. No puff around the ears.
This is a particularly good choice if you wear earrings or glasses. The close sides keep the frame of the face visible, and the choppy top keeps the whole thing from feeling severe. I like this shape when the hairline at the temples is a little sparse, because the soft curve around the ears pulls attention away from the area that usually worries people.
What to tell the stylist
Ask for side softness, not a hard clipper line. That distinction matters. A soft scissor taper around the ears will grow out more gracefully than a sharp fade, which can look too bare on fine hair. Leave enough top length to rake a bit of lift through the crown, even if you never plan to spike it up. The difference between tidy and flat is often one extra inch on top.
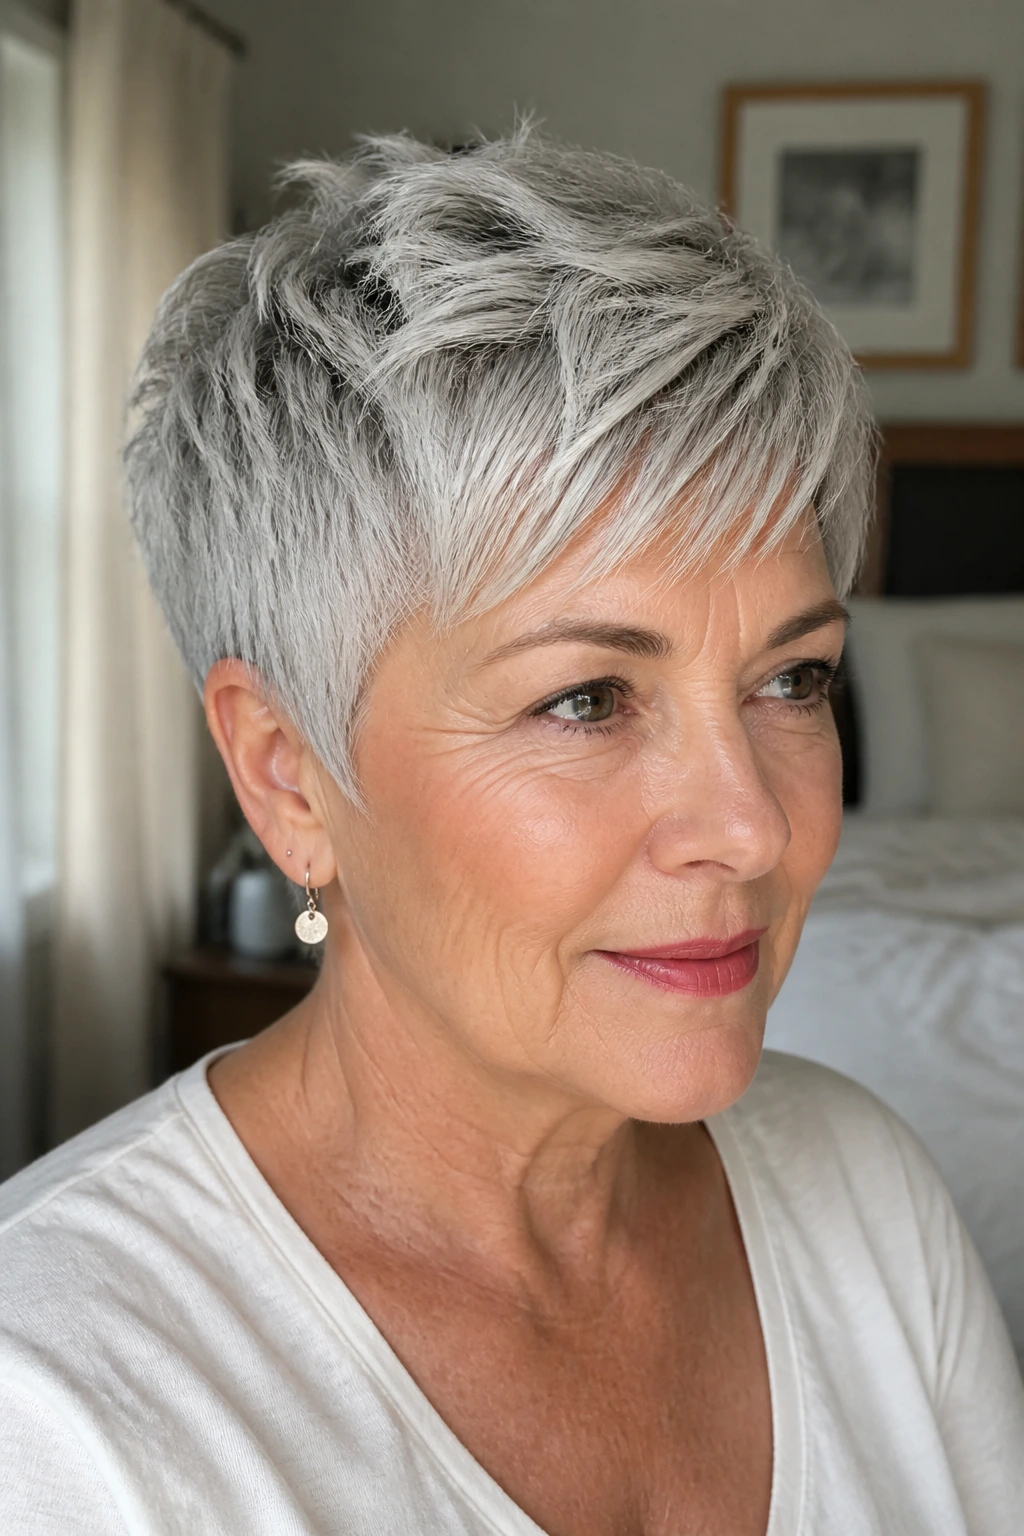
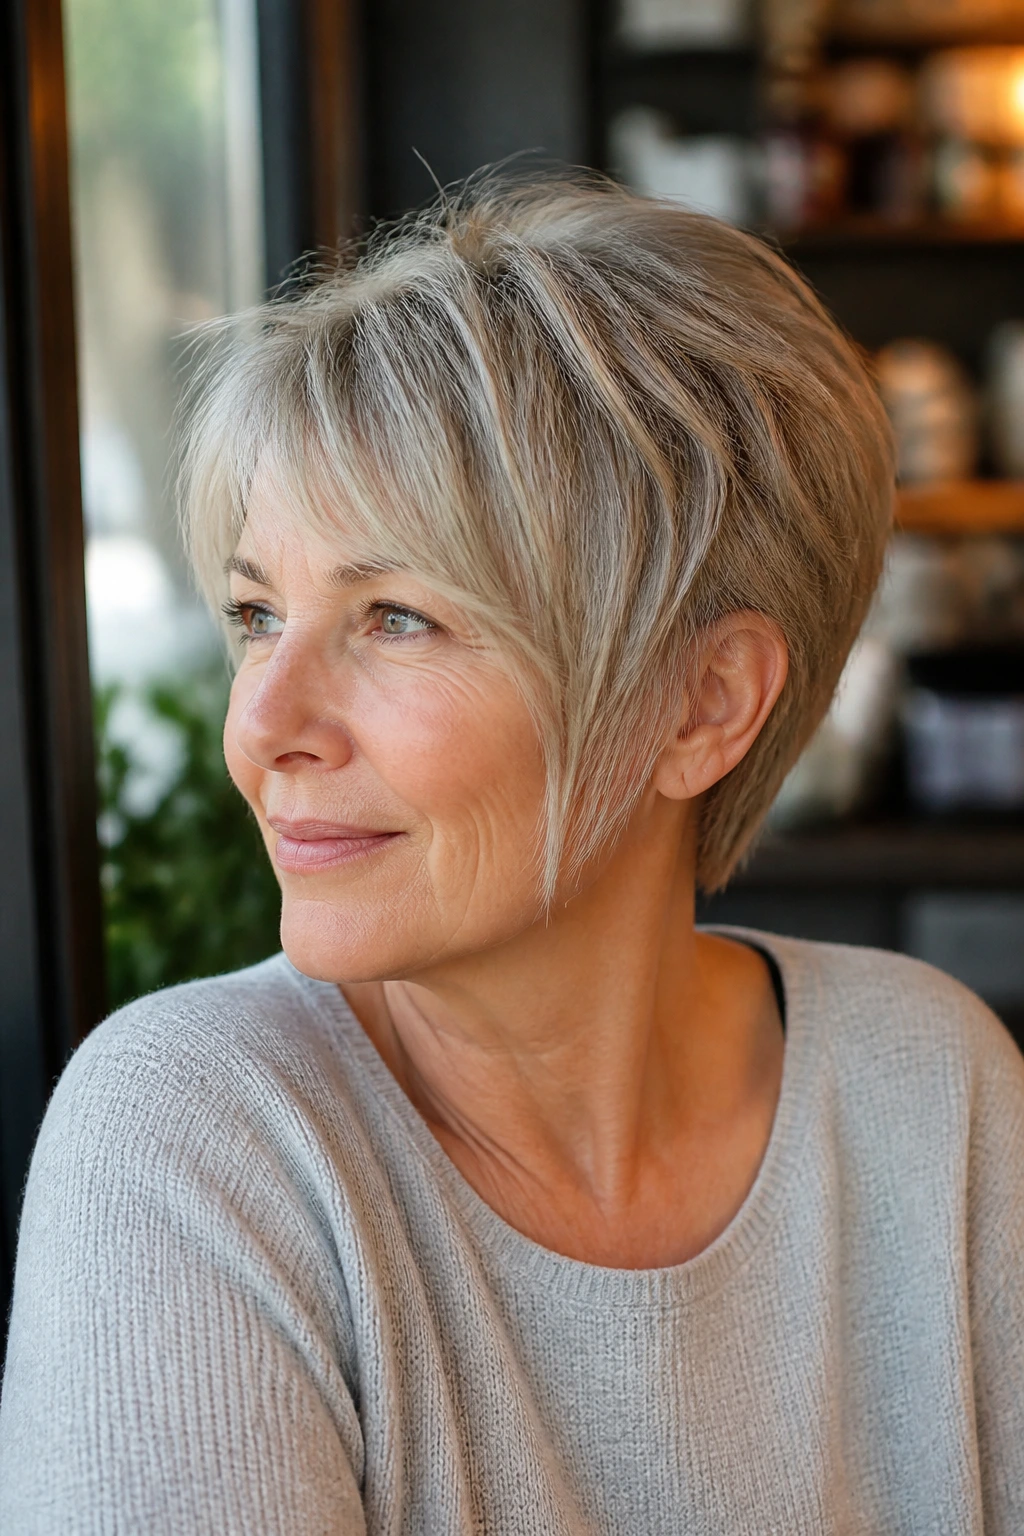
8. Long-Top, Short-Sides Pixie

This is the haircut for anyone who wants a little drama but doesn’t want to fuss with long hair. The top stays longer — usually 3 to 4 inches — while the sides and nape are cut shorter to create contrast. On thin hair, that contrast is gold. It makes the top look like it has more presence than it really does.
What makes this shape work is balance. If the top gets too long, it starts collapsing. If the sides get too bulky, the whole cut loses the lift that makes it useful. A good stylist will point-cut the top so it doesn’t sit in one heavy sheet. That little bit of break in the ends is what keeps the movement alive.
This cut also gives you styling options. Brush the top back for a tidy finish, sweep it across the forehead for softness, or piece it out with a dab of paste for a slightly mussed look. Three different moods. Same haircut. That’s a pretty useful thing when you want one cut to handle errands, dinner, and a day when your hair just refuses to cooperate.
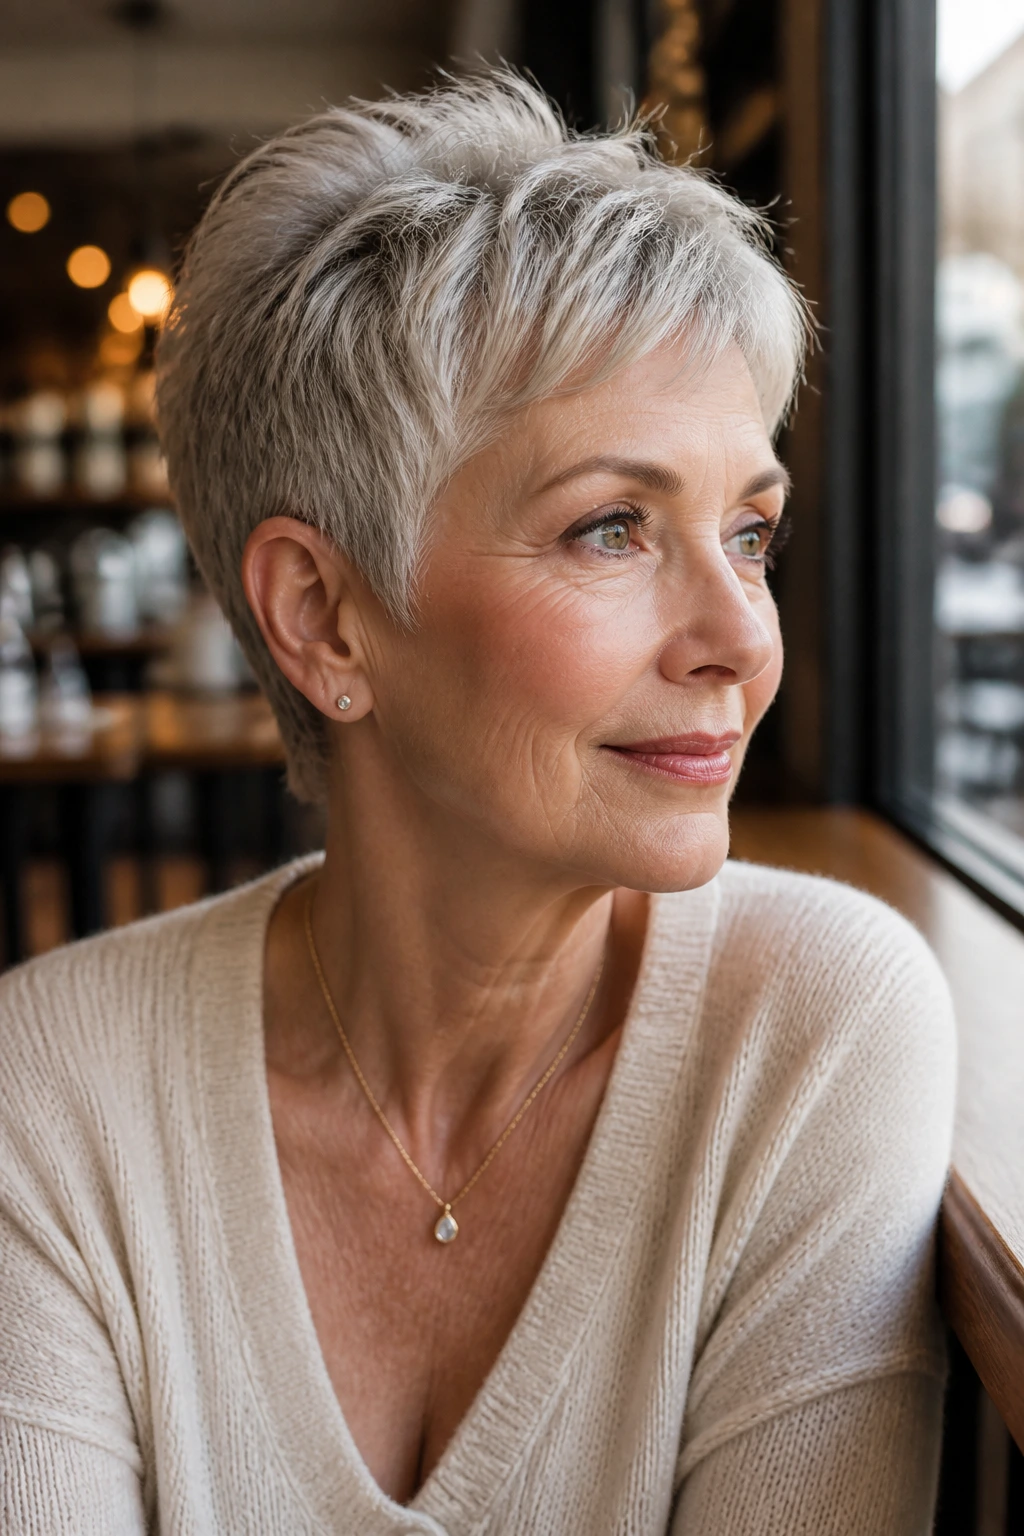
9. Razor-Textured Silver Pixie

Silver hair and choppy texture are old friends. The reason is simple: gray and white strands often feel coarser and lighter at the same time, so a razor-textured pixie can create movement without dragging the hair down. The cut should feel airy at the edges, with ends that look carved rather than chopped bluntly.
A razor can be useful here, but only in careful hands. Thin hair doesn’t need a rough, shredded finish. It needs controlled texture. The goal is to remove weight from the right spots and leave enough line so the cut doesn’t look frayed. If your hair is very fine, a stylist may get a better result with scissors and point cutting instead of a heavy razor pass.
The silver tone does a lot of visual work too. It reflects light, which helps the choppy layers read more clearly. That means you can keep the styling product minimal. A tiny bit of lightweight cream on the ends and a root spray at the crown is usually enough. This cut looks best when it moves. Not when it’s lacquered into place.
10. Rounded Pixie with Soft Fringe

A rounded pixie is the quiet one in the room, and I mean that in a good way. The silhouette follows the head’s natural curve, which can be very flattering on thin hair because it avoids sharp corners and awkward flat spots. A soft fringe rounds out the front so the cut feels finished instead of severe.
This shape works particularly well if your face is narrow or if you want a little fullness around the temples. The rounded outline gives the impression of more body on the sides, while the fringe keeps the front from looking too exposed. Keep the top textured, though. If the crown is cut too smooth, the round shape can become a cap.
The styling move is gentle. Dry the hair with your fingers, lift the roots a little at the front, and let the side pieces settle naturally around the face. I’d skip heavy wax here. It can make the rounded outline look greasy by noon. A soft mousse or foam, brushed through before drying, keeps the shape alive without turning it stiff.
11. Piecey Micro-Pixie

This one is short, smart, and a little cheeky. A piecey micro-pixie keeps the overall length tight while using tiny separated sections to give the illusion of density. The cut is close enough to show the shape of the head, but the pieces on top create enough movement that it doesn’t read as flat.
Why choose this if your hair is thin? Because sometimes thin hair looks better shorter than people expect. Once the dead weight is gone, the remaining hair can sit up more neatly and reveal its texture. The micro length also means less daily styling, which is helpful if your hair gets tired halfway through the day.
Use a matte paste the size of a pea, rubbed between the fingertips and touched onto the top only. A little goes a long way. If you want the pieces to stand up more, push them up at the root after blow-drying and let them cool in place. This is one of those cuts that rewards a light hand. Try to make it too polished and it loses its charm.
- Best for: active mornings and very fine hair that lies too close to the scalp.
- Styling note: use paste only at the top; avoid the nape.
- Avoid: over-smoothing with a brush, which can make it look helmet-like.
12. Curved Side-Part Pixie

What’s the fastest way to make thin hair look less obvious at the scalp? Change the part. A curved side-part pixie moves the eye off the center line and creates a soft arc across the forehead, which gives the top a little visual lift. It’s a small adjustment with a big payoff.
The cut itself should have enough length on top to carry the part over without separating too much. A clean side part can work, but a slightly curved part — starting a bit off-center and sweeping back — tends to soften the appearance of any sparse spots near the front. That curve matters more than the exact inch count.
I like this shape for women who want polish without going severe. It can look elegant on straight hair and slightly casual on wavy hair, depending on how much texture you leave in. Keep the ends lightly piecey, and don’t bury the part under product. Thin hair shows product load fast, especially around the roots.
13. Soft Mohawk Pixie
A soft mohawk pixie sounds more daring than it feels. The center top is kept a little longer, the sides are close, and the ridge through the middle gives the style height without needing a lot of hair. Thin hair can handle this shape surprisingly well because the structure does the lifting.
The key word is soft. You want a gentle ridge, not a stiff punk crest. That means the top should be textured enough to bend, and the sides should taper cleanly into the head. This style flatters women who like a strong line through the face or who wear their hair with a bit of attitude. It also helps if your hair naturally wants to stand up in the center anyway.
A little root spray at the crown and a quick pinch through the top can be enough. If the hair is very fine, don’t chase height all over the head. Keep the lift mostly at the center and let the sides stay tidy. That contrast makes the cut read intentional. Without it, the style can look fuzzy instead of sculpted.
14. Pixie-Bob Hybrid
A pixie-bob hybrid sits right in the useful middle ground. It’s short enough to feel light, but long enough in the front and around the ears to give thin hair a fuller outline. Think of it as a pixie that kept a little extra fabric at the edges. That extra length can be a lifesaver if you’re nervous about going too short.
This cut works especially well when the hair at the temples or nape is finer than the hair on top. Leaving a bit more length around the perimeter creates a frame, and the choppy layers on top keep the whole thing from turning into a stiff mini-bob. The shape is softer than a true cropped pixie, which makes it easier to wear with glasses or a strong jawline.
Ask for the ends to be lightly broken up so the cut doesn’t sit in one blunt line. That line is the enemy here. It makes thin hair look even thinner. With a bit of texture, the hybrid gets movement and a little swing at the cheeks. It’s one of the easiest cuts to grow out if you later decide you want more length.
15. Temple-Soft Pixie

The temples are where thin hair often gives itself away first. A temple-soft pixie handles that by keeping the sides around the front of the ears slightly longer and softer, while the top still stays lifted and choppy. The result is gentler around the face, which can be a relief if you don’t like anything too tight.
This shape suits women who want the haircut to soften their features rather than sharpen them. A little length at the temples can blur a narrow face, and it stops the cut from feeling too bare against the skin. If your hairline is lighter near the edges, this is a smart move. It gives the eye a softer landing.
Styling is straightforward. Push the top upward with your fingertips, then let the temple pieces fall where they want. Don’t force them behind the ears unless you like the look. That gentle front softness is part of the point. A dab of light styling cream on the temple pieces can tame flyaways without flattening the shape.
16. Salt-and-Pepper Tousled Pixie

Salt-and-pepper hair can look especially lively in a choppy pixie because the mix of tones shows off every piece of texture. That’s not a small thing. The contrast between silver, white, and darker strands makes the movement visible even when the cut is short. Tousled is the right word here, but not messy. There’s a difference.
This version is best when the top has a little irregularity and the front is cut to move off-center. A flat, uniform pixie won’t do the color any favors. The contrast in the strands needs some shape to bounce off. If your hair is very fine, a light volumizing foam at the roots can help keep the tousle from collapsing into a soft puff by noon.
The cut should still have structure around the ears and nape. Otherwise the top starts to look like it’s floating. That’s cute in photos and annoying in real life. A bit of control underneath makes the top texture feel deliberate, which is the whole point of a good choppy pixie.
17. Deep Side-Part Lifted Pixie

A deep side part is one of the cheapest tricks in the haircut business, and I say that with affection. Move the hair over several inches, and the top suddenly has more height. For thin hair, that can be the difference between “nice cut” and “why does my scalp feel so visible today?”
The lifted side should have enough length to curve up and over, while the opposite side stays closer to the head. That contrast creates a clean shadow line, which makes the hair look denser at the top. It also gives the face a little asymmetry, which tends to read more modern than a centered part on fine hair.
This style can be polished or casual. Blow it smooth if you want a neater finish, or pinch the front with a little matte paste for texture. If your hair falls flat quickly, clip the heavy side up for two minutes after drying. That small pause at the root can help the lift hold longer than you’d expect.
18. Short Shag Pixie

What if you want your pixie to feel less neat and more lived-in? A short shag pixie is the answer. It keeps the haircut short, but the layers are more broken and the shape is looser, so the hair doesn’t sit in one tidy line. Thin hair often looks better with this kind of movement because it avoids the “too perfect” problem that makes fine hair look sparse.
The top and crown carry most of the texture, while the fringe stays feathered and the sides remain slim. This makes the head look lightly wrapped in hair instead of sheared into a hard outline. I like this cut for women who don’t want to spend a lot of time finishing every strand. Scrunch, dry, separate. Done.
The danger is over-layering. Too many short pieces can make the style look choppy in a bad way, with little gaps that show scalp. Ask for a broken, textured finish, not a shredded one. The right short shag pixie has movement. The wrong one looks like it lost a fight with the scissors.
19. Slicked-Back Polished Pixie

A slicked-back pixie sounds like the opposite of what thin hair needs, but in the right shape it can be elegant. The trick is to keep the top long enough to sweep back without exposing too much scalp, and to use only a small amount of lightweight cream or gel. The finish should look smooth, not wet.
This style works when you want the face open and the haircut neat, especially for evenings or events. It also pairs well with glasses and earrings because the hair stays off the face. Thin hair can actually benefit from this approach on certain days because the sleek shape removes the little fuzziness that sometimes makes fine strands look thinner than they are.
Do not overload the roots. That’s the whole game. A pea-sized amount of gel spread through damp hair is enough for most fine textures. If the hair turns dark-looking or sticky at the crown, you’ve gone too far. Keep the sides clean, brush the top back with your fingers, and let the texture at the ends stay slightly separated.
20. Wash-and-Wear Choppy Pixie

This is the cut for people who want to wash their hair, dry it in a few minutes, and move on with life. A wash-and-wear choppy pixie has enough texture built into the cut that the hair falls into place with minimal help. For thin hair, that often means a bit of root lift, a quick finger-dry, and maybe a touch of paste at the top.
The success of this style starts in the chair. The top needs broken-up layers, the sides need to be neat, and the nape should be tapered so the shape doesn’t puff out after washing. If any one of those parts is off, the cut will demand more styling than it should. That’s the trade-off. A truly easy pixie is easy because the scissor work was thoughtful.
This shape suits women who want a dependable haircut rather than a dramatic one. It won’t pretend to be a big transformation. It just makes daily life simpler. And if you’ve ever stood in front of the mirror trying to rescue limp hair with a round brush before breakfast, that counts for a lot.
How to Ask for the Right Pixie at the Salon
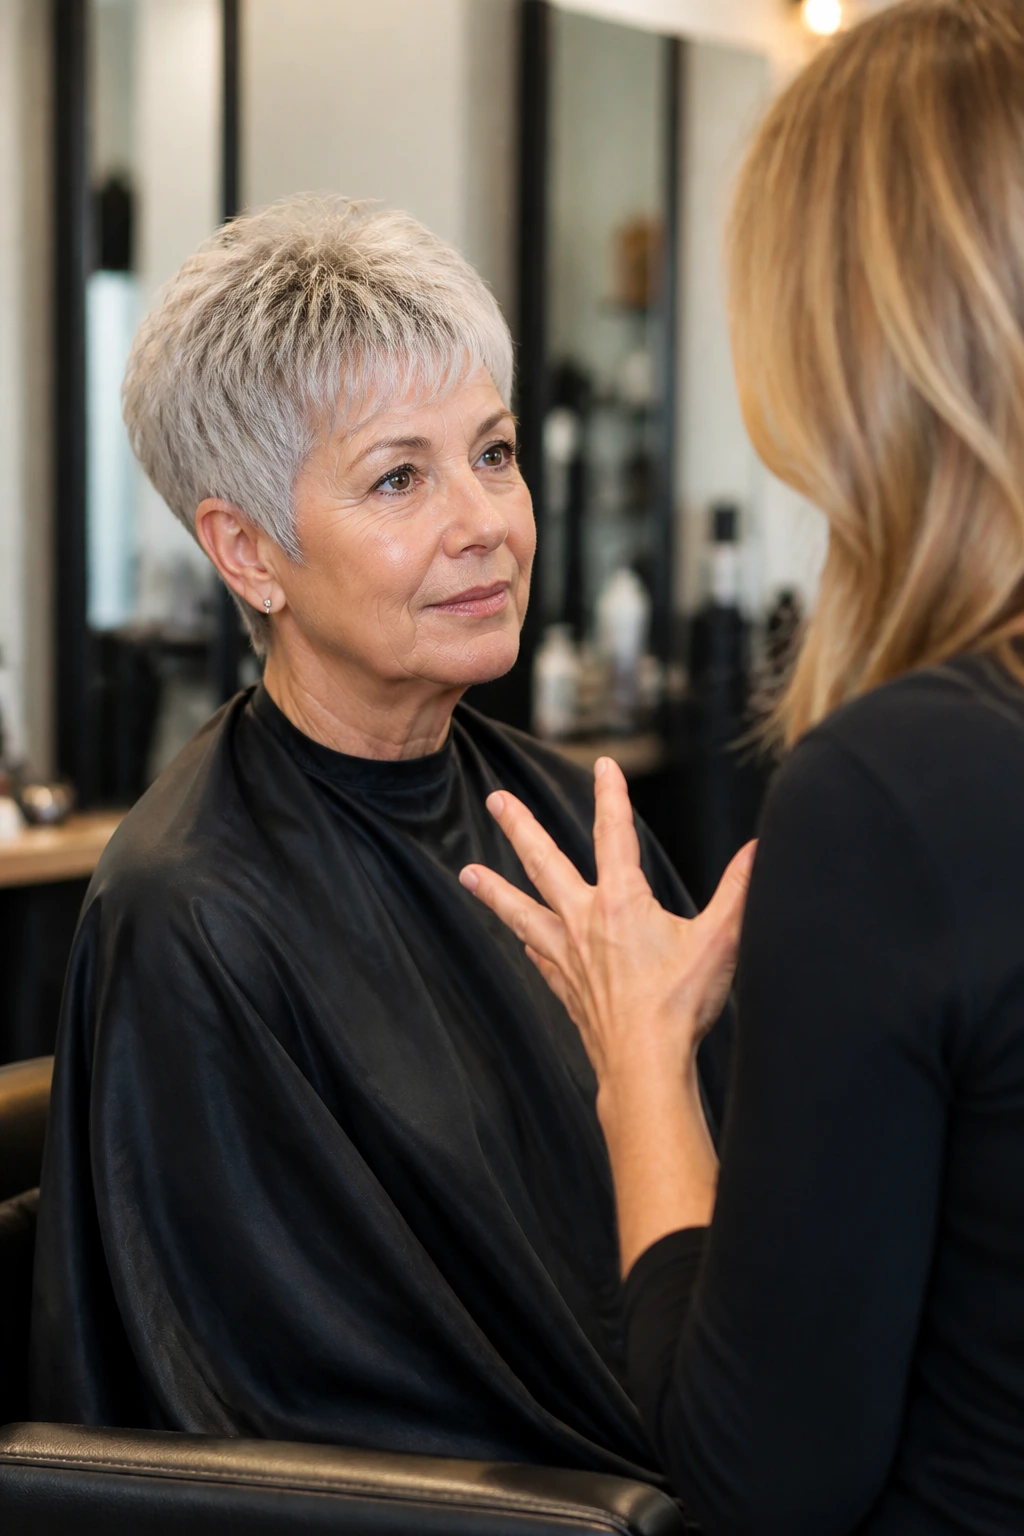
The best salon conversation is not “Give me a pixie.” Too vague. Thin hair after 60 needs a little more direction than that, because the difference between flattering and flat can come down to a quarter inch on top or a softer taper at the sides. Bring a few photos, but also say what you do and do not want to style every morning.
Tell the stylist whether your hair tends to lie flat at the crown, separate at the front, or puff at the sides. That detail matters more than face shape buzzwords. If the crown collapses, you need lift and internal texture on top. If the front looks sparse, ask for a wispy fringe or a side sweep. If the sides flare, keep them close and clean.
Say these things out loud
- “I want lift at the crown, but not teased or bulky.”
- “I need texture on top, not a lot of thinning through the ends.”
- “My hair gets flat fast, so I need the shape to do the work.”
- “Please keep the sides and nape neat so the top looks fuller by comparison.”
That kind of language gives a stylist something practical to work with. It’s better than saying you want volume, which can mean ten different things in ten different chairs. And if your hair is very fine, ask how the cut will grow out after four to six weeks. A good pixie should still make sense when it’s not fresh out of the salon.
The Styling Moves That Make Thin Pixies Look Fuller
The first thing to know is that thin hair usually looks better with less product than people expect. A lightweight mousse at the roots, a small amount of blow-dry cream on the ends, and maybe a touch of matte paste on the crown is often enough. Heavy oils and thick waxes weigh the whole thing down fast. They can make the hair separate into wisps instead of pieces.
Direction matters more than volume tricks. Blow-dry the roots in the direction you want the hair to sit, then flip the front or crown in the opposite direction for a few seconds to create a bend. That little trick gives lift without a lot of teasing, which is kinder to fragile strands. If you use a round brush, keep it small. Big brushes can over-smooth thin hair and make it fall flatter than before.
A quick finger-finish usually beats a polished brush finish on this kind of cut. Fingers leave a little separation at the ends, and separation reads as texture. If your hair gets fluffy in humidity, skip the urge to keep touching it. That only builds frizz. A small comb is handy, but not for everything. Sometimes the best move is to stop messing with it.
Common Mistakes That Flatten a Choppy Pixie Fast

Thin hair is honest. It shows every bad choice. The first mistake is cutting the top too short because you’re nervous about length. If the crown is chopped down to half an inch, there’s no room for lift, and the hair sticks close to the head. The fix is simple: keep enough top length — often around 2.5 to 4 inches — to create bend and movement.
The second mistake is using heavy product to fake fullness. Thick creams, pomades, and oils can make the hair look stringy within an hour. Use a small amount of mousse or paste instead, and keep it away from the roots unless the product is specifically made for lift.
Another common one: too much thinning at the wrong spots. Thinning shears can be useful on dense hair, but on fine hair they can leave soft gaps that show scalp. Ask for point cutting and controlled texture instead. You want piecey, not shredded.
Then there’s ignoring the nape and sides. If those areas puff out or stick to the head unevenly, the whole cut looks unfinished. A clean taper keeps the top from competing with the rest of the head. Finally, skipping trims too long hurts more on a pixie than on longer hair. After six to eight weeks, the shape starts to blur, and thin hair loses the crisp outline that helps it look fuller.
Variations and Alternatives Worth Considering

The Softer Feather: This version keeps the same pixie structure but leaves the edges gentler around the face and ears. It’s a good pick if you want movement without any sharp corners, and it’s easier to wear if your hairline is a little delicate.
The Grown-Out Pixie Bob: If you’re not ready for a short crop, let the front and sides stay longer while keeping the back tapered. You get the lift of a pixie with a bit more coverage at the cheeks and jaw, which can be a relief on fine hair.
The Silver Shimmer Crop: This is a textured pixie that leans into gray, white, or salt-and-pepper tones instead of fighting them. The choppy layers show off the color changes, and the result often looks richer than a smoother cut because the tones move across the head.
The Lifted Front Pixie: Keep the front a touch longer and direct it upward or slightly back. That works well if the crown is flat and the forehead needs a little soft framing. It’s one of the easiest ways to get more shape without changing the whole cut.
The Easy Texture Crop: This one is for people who want low effort first and style second. The layers stay soft, the nape stays neat, and the top gets only enough texture to break up the line. It’s the closest thing to a wash-and-go pixie that still looks styled.
How to Keep the Shape Between Salon Visits
Pixies grow fast in all the wrong places. Around week four, the ears can start to get fuzzy, the nape can thicken, and the crown loses its neat lift. That doesn’t mean the cut has failed. It just means short hair asks for upkeep. A trim every five to seven weeks is a good rhythm for most thin-hair pixies, especially if you want the shape to stay crisp.
At home, the main job is keeping the roots from slumping and the ends from looking dry. A light shampoo is usually enough; heavy conditioners near the scalp can flatten the crown by the next morning. Focus conditioner from the mid-lengths down, even on short hair. That tiny habit changes how the hair behaves after you rinse it.
If your cut starts to feel too puffy at the sides or too flat on top, don’t panic and don’t reach for more product first. Rework the drying pattern. Dry the crown in the opposite direction for a few seconds, then flip it back. That one move often resets the shape better than anything else. And if the front starts falling into your eyes, use a clip for the day instead of cutting at home. Home snips rarely behave.
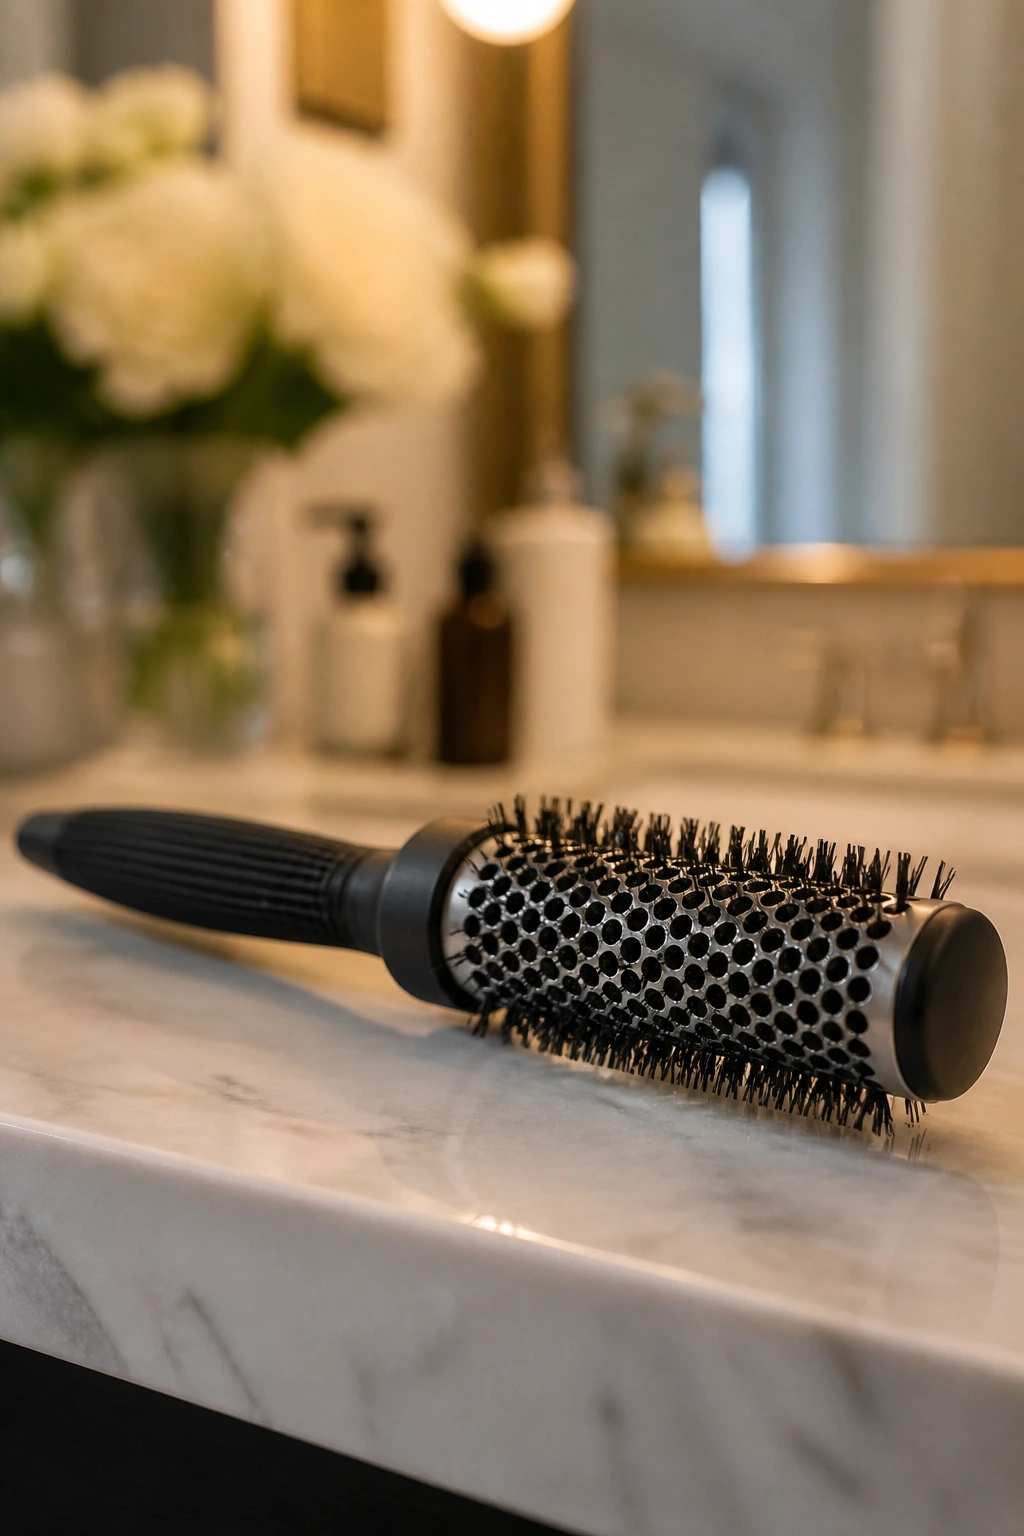
The Tools That Matter for Fine Hair
-
A small round brush, 1 to 1.5 inches: Useful for lifting the crown and giving the front a bend without over-smoothing the hair.
-
A hair dryer with a nozzle: Direct airflow matters on thin hair; the nozzle helps keep the roots from blowing around and collapsing.
-
Lightweight mousse or foam: Gives root support without the sticky feel of heavy styling cream.
-
Matte paste or lightweight wax: Best for piecey ends and tiny bits of separation through the top.
-
Root-lift spray: Handy when the crown lies flat no matter what you do; use it at the scalp, not all over.
-
Fine-tooth comb and styling clips: Good for directing a side part, pinning lift into place, or holding the front while it cools.
-
A texturizing spray: Optional, but useful if your hair gets too soft after drying and needs a bit more grip.
-
Salon scissors, not kitchen scissors: Obvious, but worth saying. At-home trims can wreck the balance of a pixie fast.
Smart Styling Tips That Go Beyond the Basics

Flavor enhancement: A tiny bit of dry texture spray at the crown can wake up a flat pixie in seconds, but mist from 8 to 10 inches away and use only a light pass. If the roots feel crunchy, you used too much.
Time-saver: Wash at night, rough-dry the hair until it’s about 80 percent dry, then sleep on it with the top clipped up loosely. The next morning, a quick re-dry usually takes less than five minutes.
Pro move: If one side always falls flatter, train it by drying that side in the opposite direction for 20 to 30 seconds, then sweeping it back. Hair remembers direction more than people think.
Cost-saver: Ask for a shape that grows out well, not just a fresh-salon photo. A pixie with a clean nape, soft sides, and a textured top stays wearable longer, so you can stretch the trim schedule without looking shaggy.
Questions Women Ask Before Going Short

Will a pixie make my thin hair look thinner?
Not if the cut is built with texture and the sides are kept tidy. A blunt, flat pixie can expose thin spots, but a choppy one creates movement and shape that often make the hair look fuller.
Can I wear a pixie if my hairline is receding a little?
Yes. A side-swept fringe, temple softness, or a curved part can soften the front without hiding your face. The wrong choice is a heavy, straight fringe that sits like a blanket.
How short is too short for thin hair?
If the top is so short that it can’t bend or separate, the cut usually loses its lift. Most thin hair needs at least a little length on top — often around 2.5 inches or more — to keep the shape alive.
Do choppy pixies work with glasses?
They do, especially when the sides are neat and the fringe doesn’t collide with the frames. A soft side sweep or ear-hugging taper keeps the haircut from crowding the face.
Can I air-dry this kind of cut?
You can, but the result depends on your natural texture. Fine straight hair often needs a short blast from a dryer to lift the roots; air-drying alone can leave it too close to the scalp.
What if my hair sticks up in weird places?
That’s usually a cowlick or a growth pattern issue, not a bad haircut. A stylist can work with it by leaving a little more length in that section and cutting the surrounding areas to guide it.
How often should I get it trimmed?
Every five to seven weeks is a sensible range for most pixies. If the nape is the first place to go fuzzy, stay closer to five weeks.
A Short Cut That Carries Its Own Shape
The nicest thing about a good pixie on thin hair is that it stops asking you to fake anything. No padded volume. No sticky layers of product. Just a cut that knows where to be light, where to be neat, and where to leave a little space so the hair can move.
That’s the real appeal of choppy pixie cuts for women over 60 with thin hair. They don’t fight age or density changes. They work with them. And when the shape is right, you can wake up, shake it out, and go — which, honestly, is the best luxury short hair has to offer.