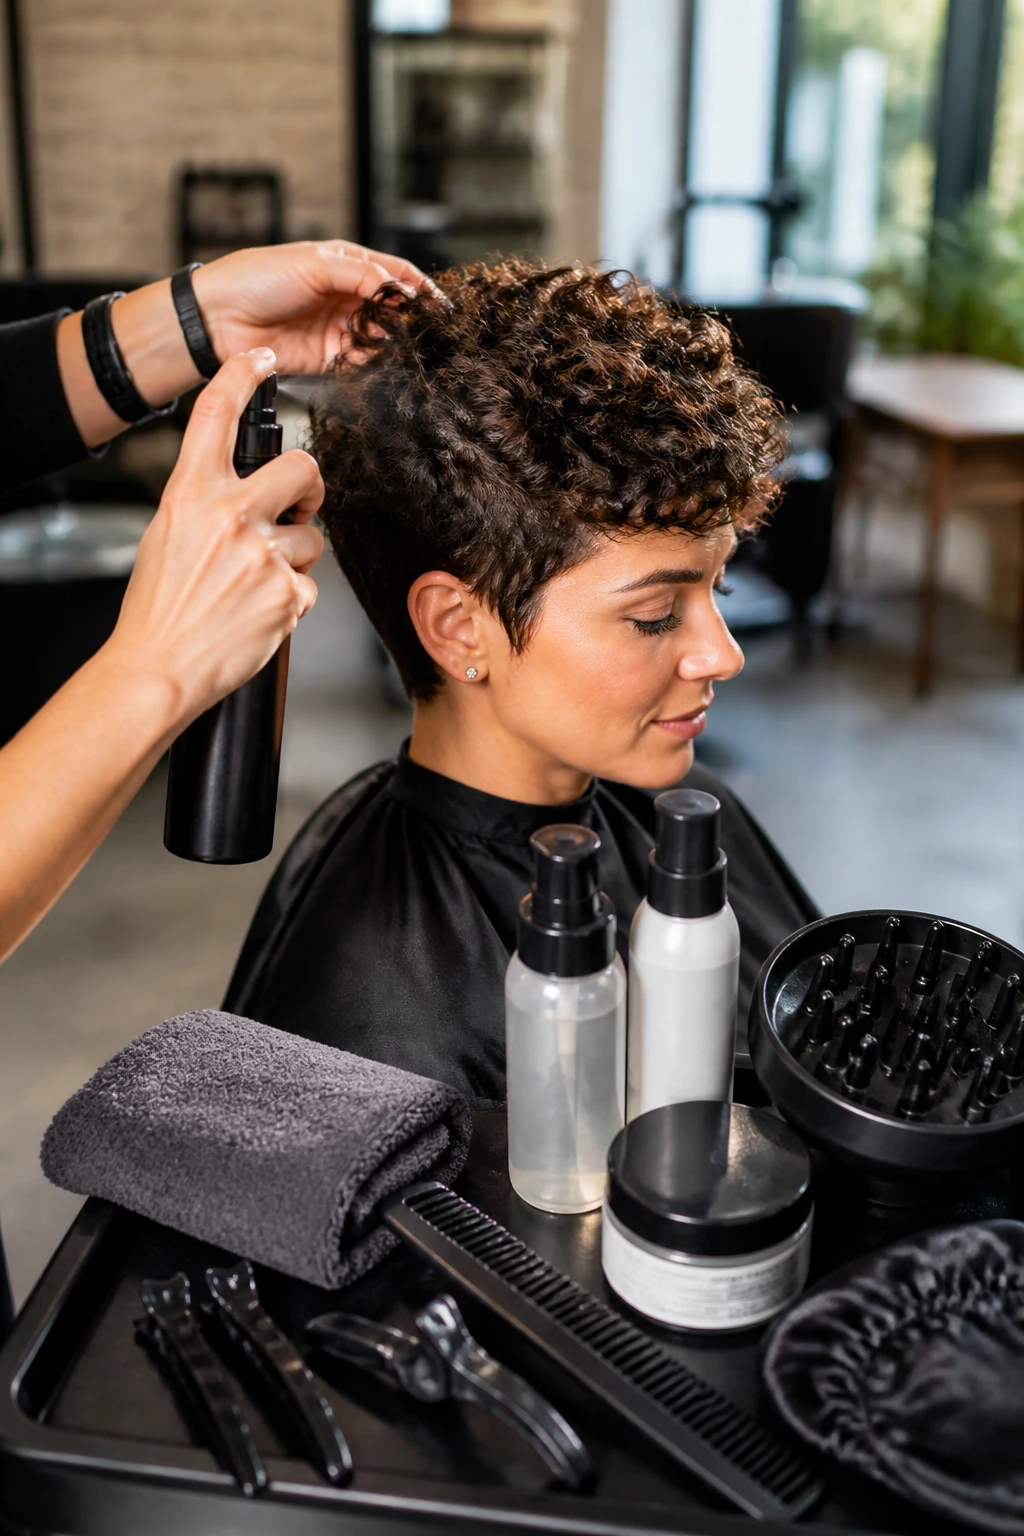
A curly pixie cut can go wrong in two very specific ways. It either balloons out like a soft helmet, or it gets chopped so short that the curl pattern loses all its charm and starts acting like a frizzy afterthought. Neither one is flattering, and both are painfully common when someone asks for “short, textured, and easy” without talking through shrinkage, density, or where the bulk should actually live.
Oval faces get more room to play than most shapes, which is a blessing and a trap. You can wear fringe, height, asymmetry, tighter sides, or a little extra length around the cheekbones. But curly hair changes the whole math. A section that looks like a neat inch and a half in the chair can sit a full inch higher once it dries. That’s why the best textured pixie cuts for oval faces with curly hair are never just short hair with a fancy name. They’re shape jobs.
I’m picky about these cuts, because the difference between a good one and a so-so one usually comes down to restraint. The good versions keep weight where the eye needs it, usually at the crown, the fringe, or one side of the face, and they get rid of bulk where the hair would otherwise puff outward. Dry cutting helps. Point cutting helps. Leaving a touch more length than feels safe in the mirror helps even more.
Why These Pixies Work So Well
Oval faces can handle a lot, but curls still need a plan. The balanced proportions of an oval face let you wear a fringe, an off-center part, or a tighter nape without throwing the whole look off. That freedom is useful, not permission to freestyle. A pixie still needs a shape.
Curly hair shrinks, and that shrinkage changes everything. A cut that looks polished when damp can sit much shorter after air-drying or diffusing. If your curls have a springy pattern, the top usually needs a little extra length so the style doesn’t jump upward and flatten the face.
Texture gives a short cut some movement. Without it, a pixie on curly hair can read stiff or overly groomed. With the right layers and a clean taper, the hair bends, lifts, and settles into a shape that looks lived-in instead of overworked.
These cuts grow out better than most people expect. The right pixie doesn’t hit a wall at week three. It shifts into a tiny shag, then a bixie, then something that still looks intentional while you wait for the next appointment.
You can keep the routine small. Most of these styles want a mist bottle, a light cream or mousse, and five minutes of finger shaping. That’s it. No orchestra pit of products.
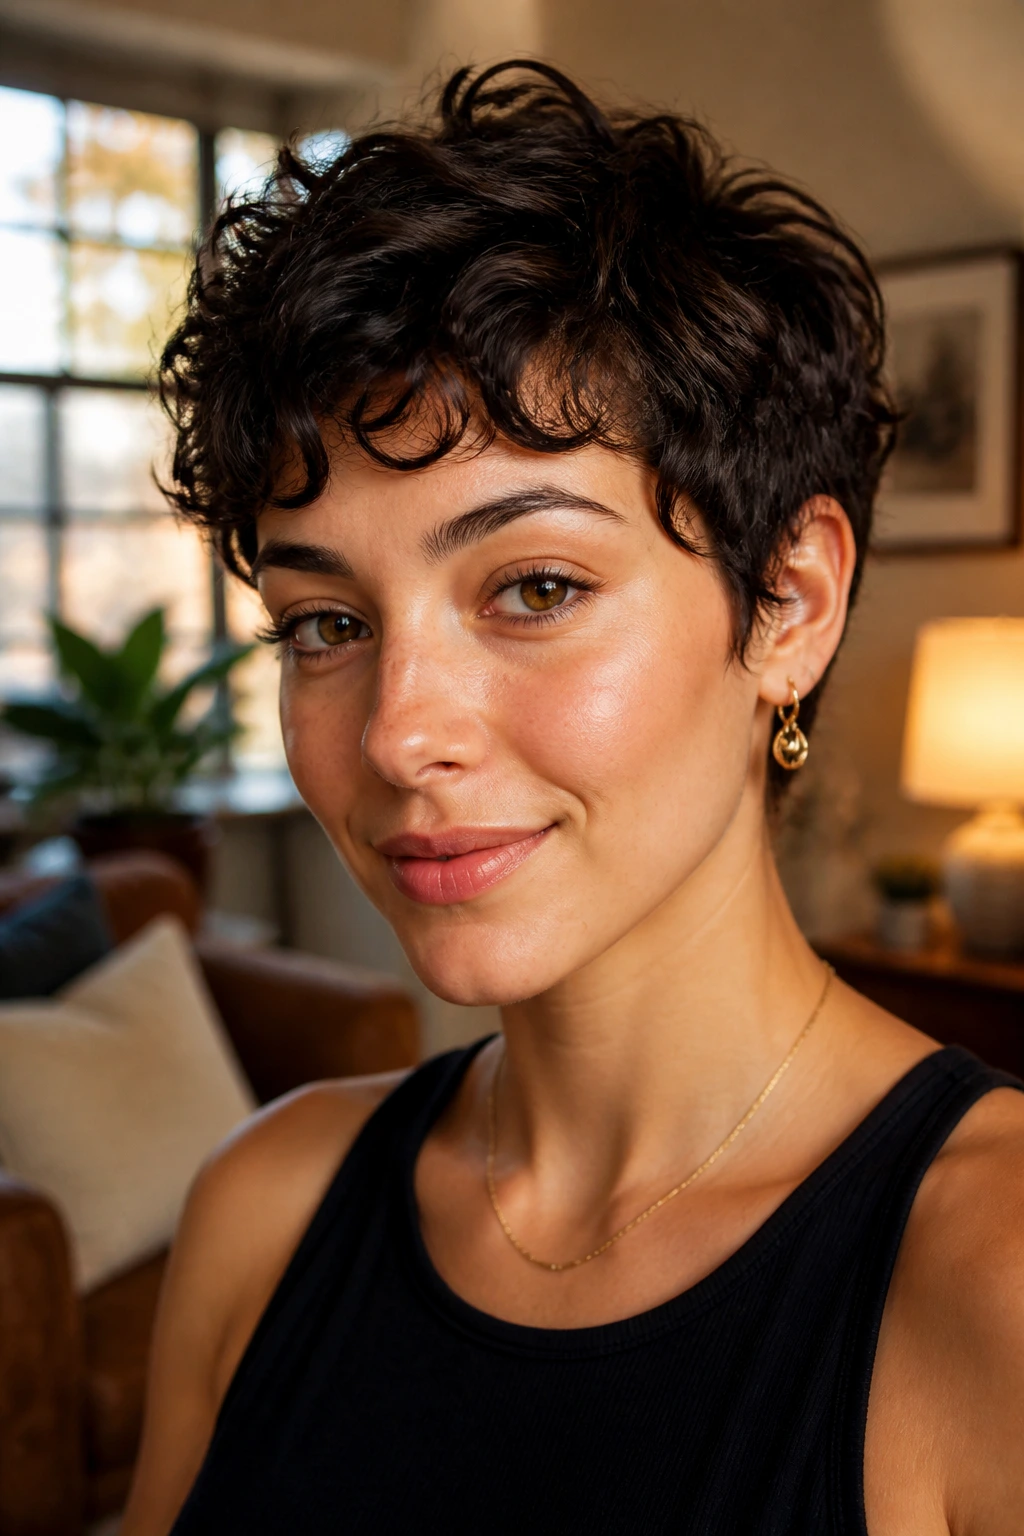
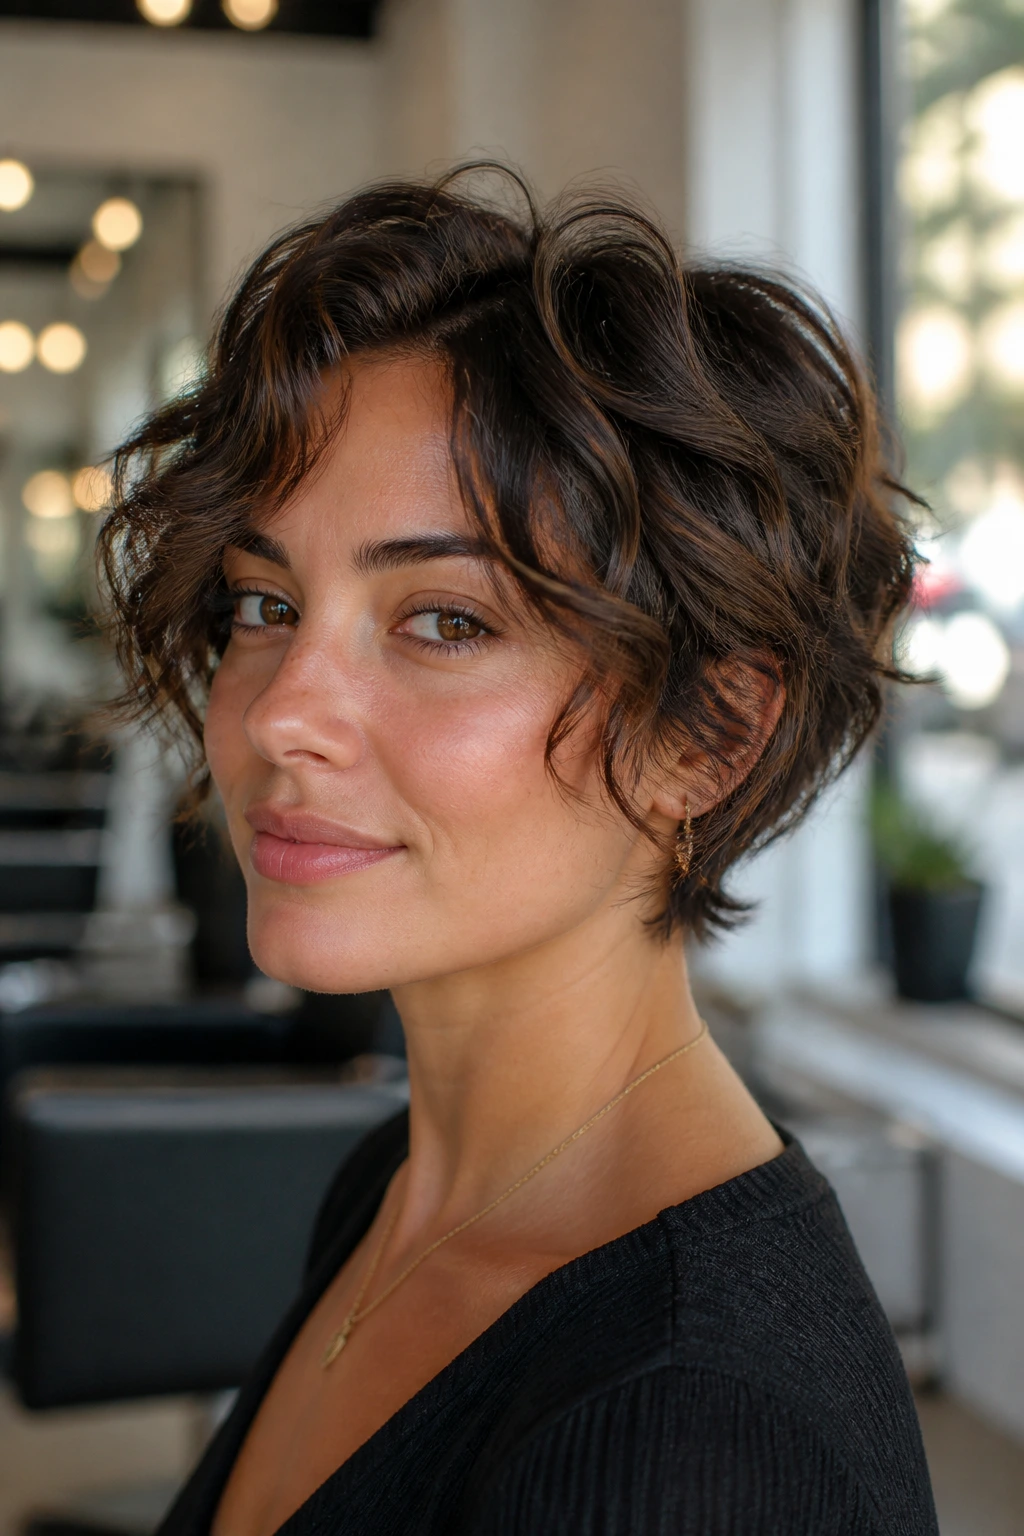
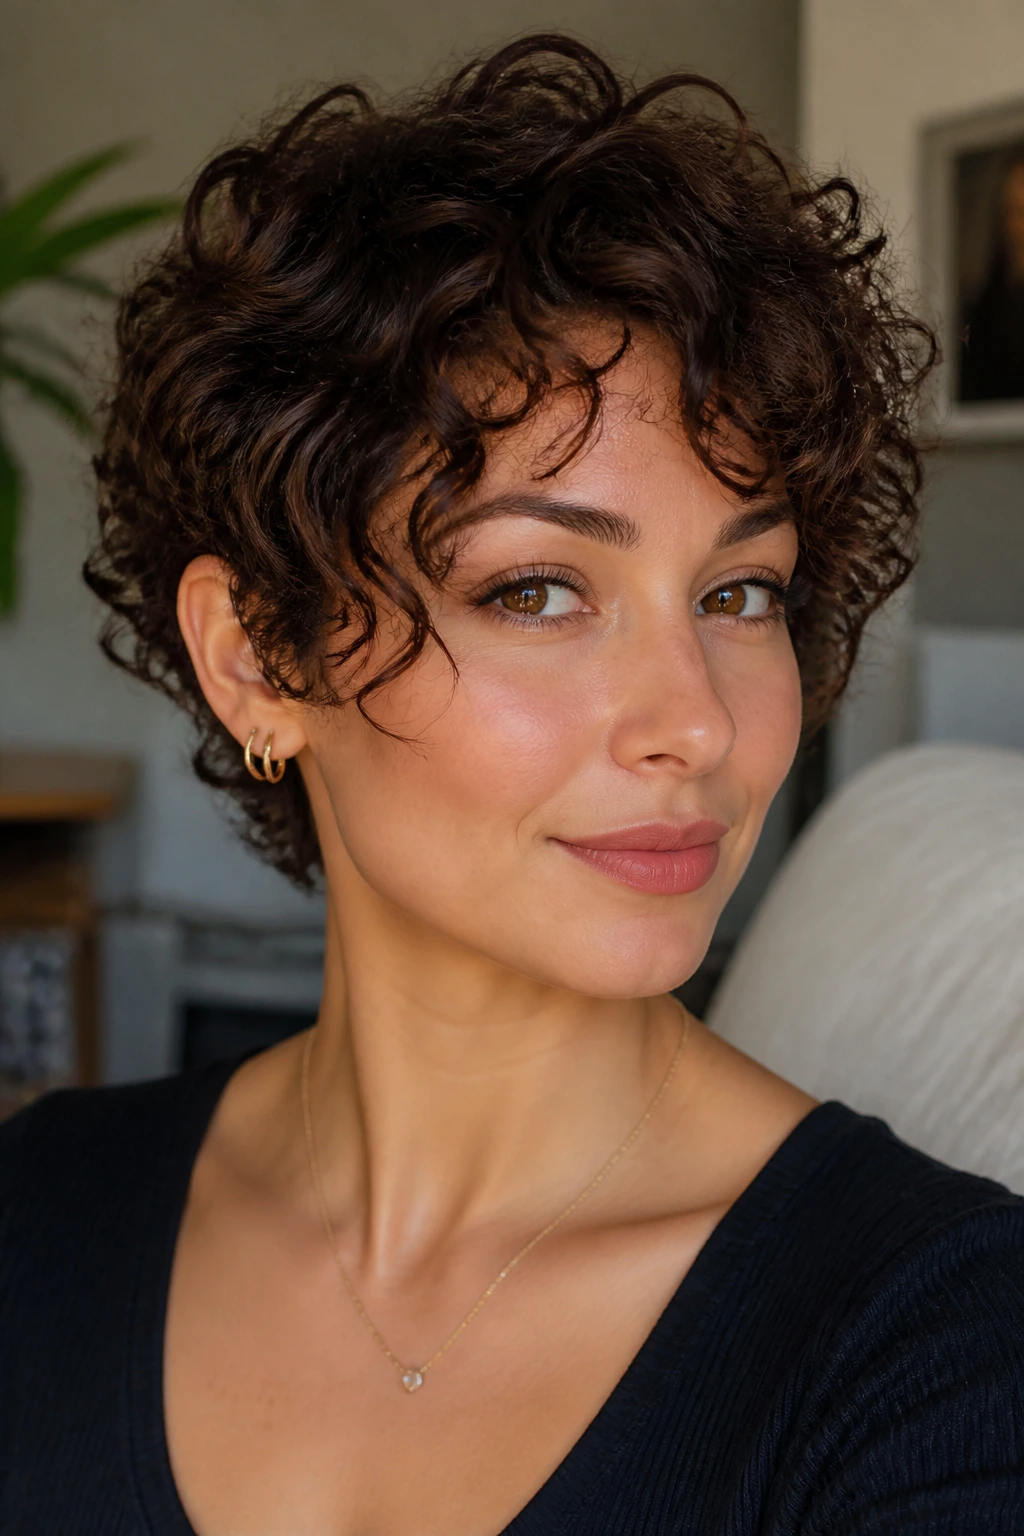
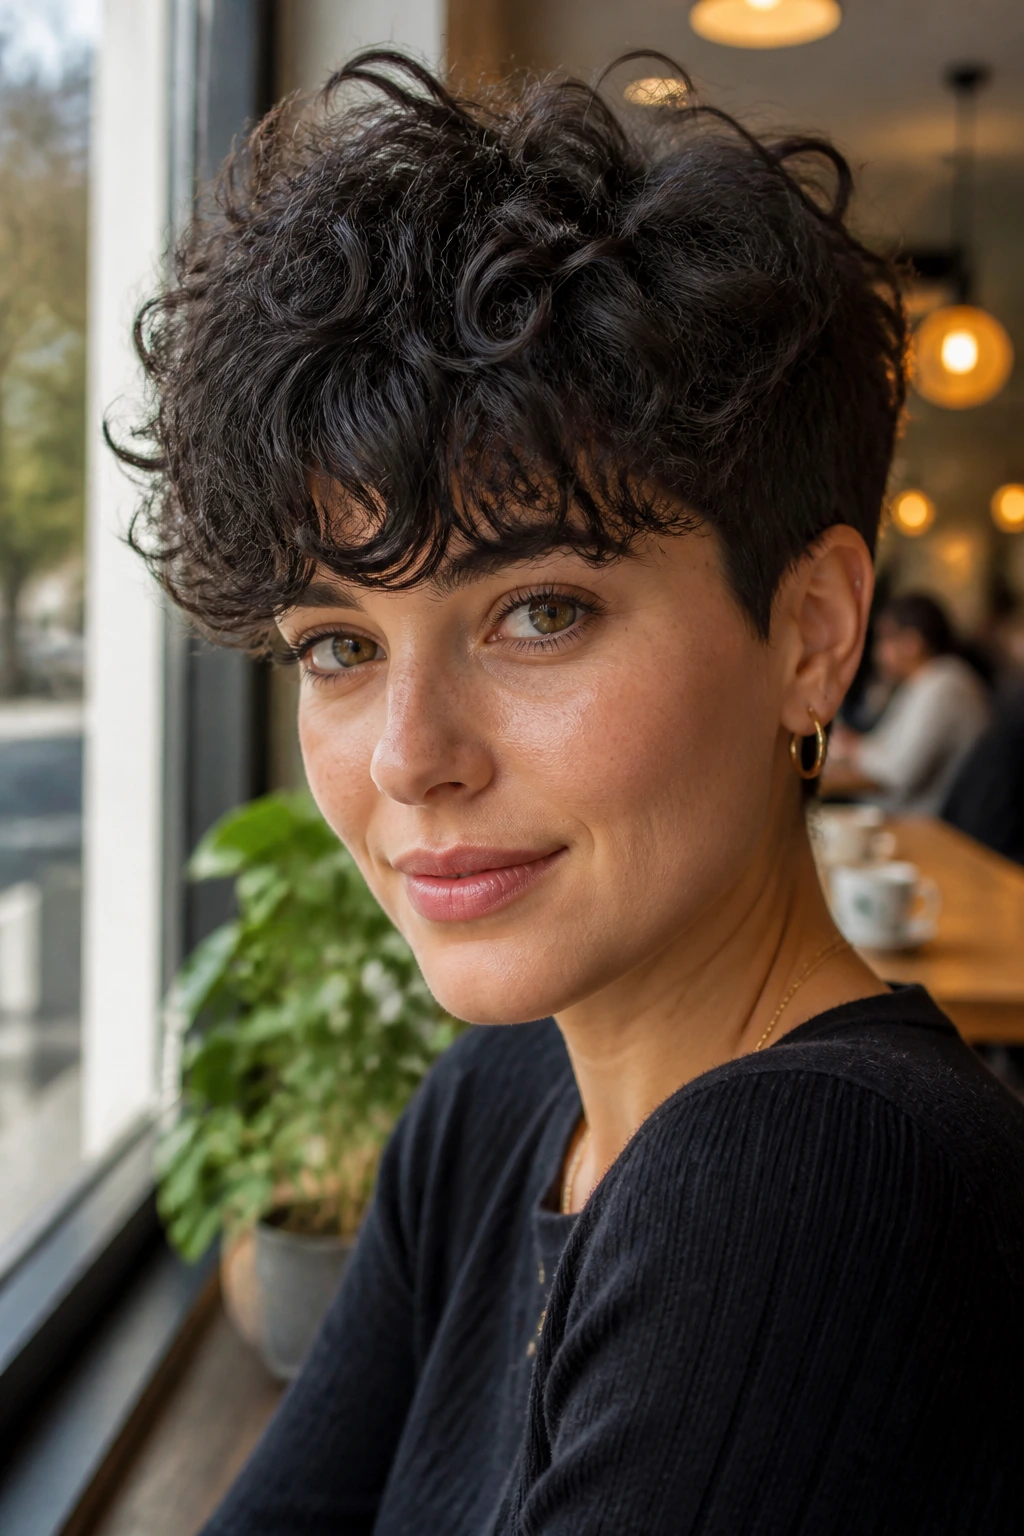
1. Soft Tapered Coil Pixie
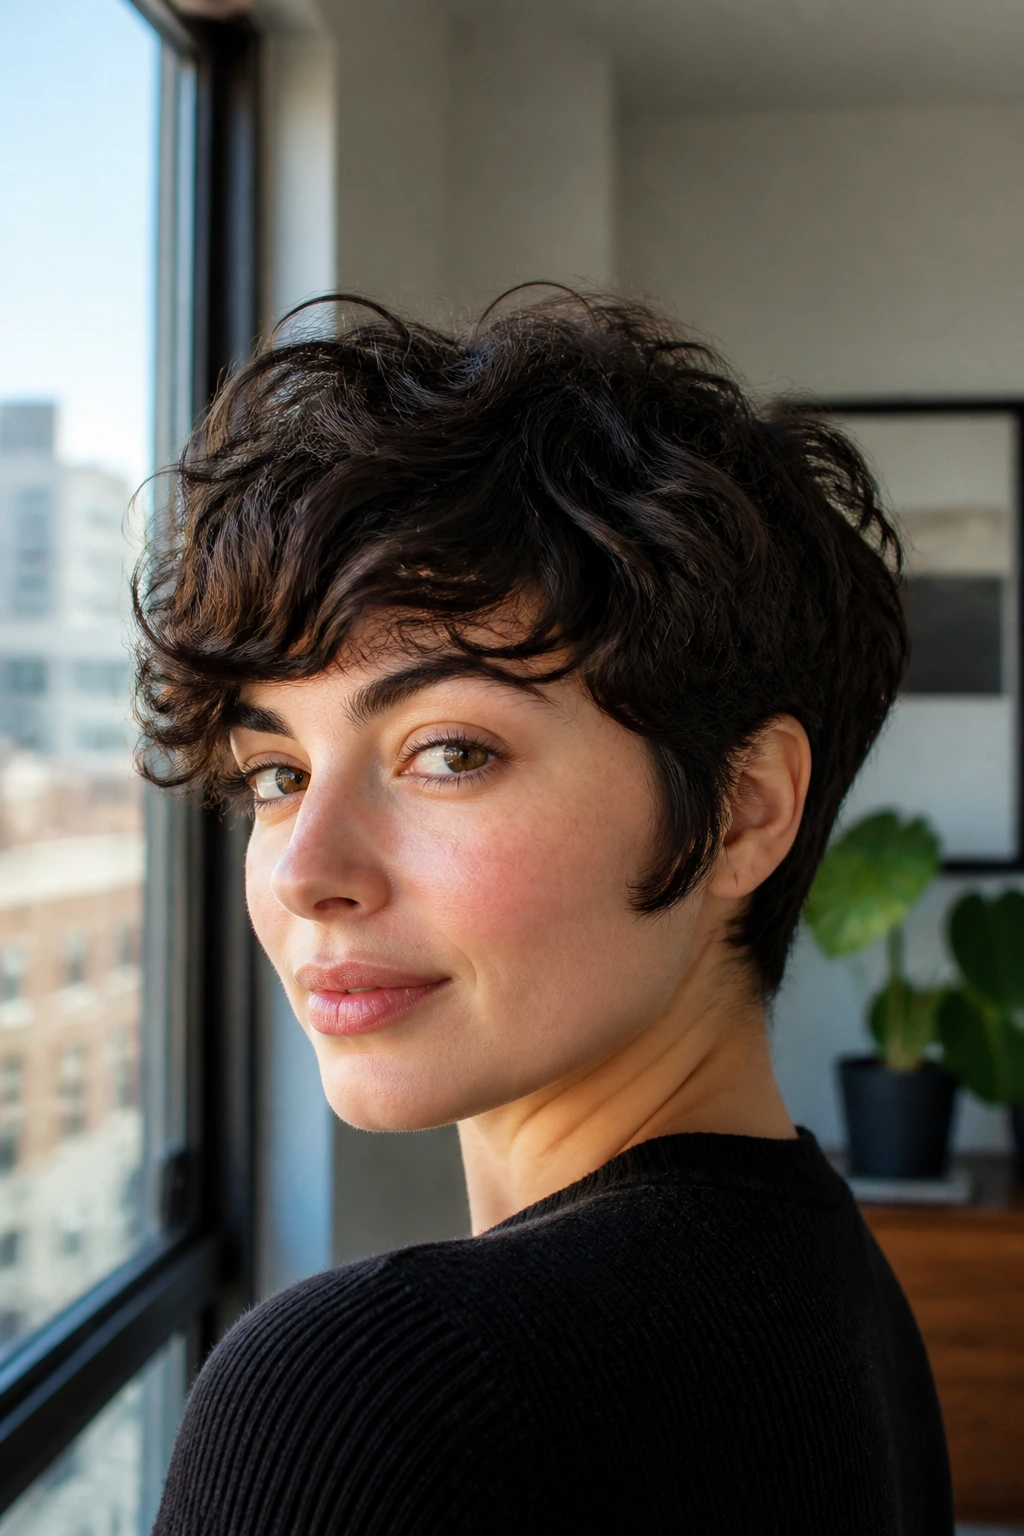
The soft tapered coil pixie is the one I reach for when someone wants short hair without the hard edges. The top stays long enough for the coils to stack and bounce, while the nape and sides are tapered close enough to keep the silhouette neat. On an oval face, that balance is clean and flattering because the cheekbones stay visible and the cut doesn’t swallow the lower half of the face.
Why It Flatters an Oval Face
The shape works because it leaves the face open instead of boxing it in. A tight taper around the ears and neck keeps the outline crisp, while the crown keeps enough length to show curl pattern instead of compressing it into a puff. That matters more than people think. A lot more.
Ask for a dry cut through the top, or at least a dry check at the end, so the stylist can see where the coils naturally spring. If your curls are springy, leave the front a half inch longer than feels necessary. That tiny bit can save you from a fringe that disappears after the first wash.
- Keep about 1.5 to 3 inches on top, depending on shrinkage.
- Taper the nape with scissors or light clipper work, not a harsh line.
- Let the top curls sit loose instead of cutting them into a round cap.
- Use a pea-size curl cream and diffuse on low, not high.
One small thing. If your hair is dense at the crown, ask the stylist to remove bulk from inside the shape, not just from the surface. That keeps the top from puffing outward like a mushroom cap.
2. Curly Fringe Pixie
Can a curly fringe work on an oval face without swallowing your eyes? Absolutely, if the bangs are cut as living curls instead of one blunt shelf. The fringe becomes the point of interest, not a curtain. That’s the difference.
A curly fringe pixie is one of my favorite options for anyone who likes having hair in the front without committing to a full crop all over. The fringe can sit at the brow line, graze just below it, or split softly in the center if the curl pattern wants to move that way. The rest of the cut stays short and textured, which keeps the look airy.
How to Wear It
The key is to cut the fringe a touch longer than the final shape. Curly bangs almost always lift higher once dry, and if the front is too short, the whole style gets stuck in the forehead. A side of my brain still loves a severe fringe, but this is not the place for one unless your curl pattern is very predictable.
For styling, work product into soaking-wet hair, then rake the fringe forward with your fingers and let the curls land where they want. A tiny clip at the roots can help if one side insists on splitting. I like a light gel cast here because it keeps the fringe from fraying without making it crunchy.
- Best for people who want face-framing without a long top layer.
- Good with medium-density curls that need shape at the front.
- Works especially well if your forehead feels visually long and you want a little coverage.
If the fringe starts to separate in odd directions, don’t fight every piece. Curl patterns look better when they’re grouped loosely, not forced into a straight line.
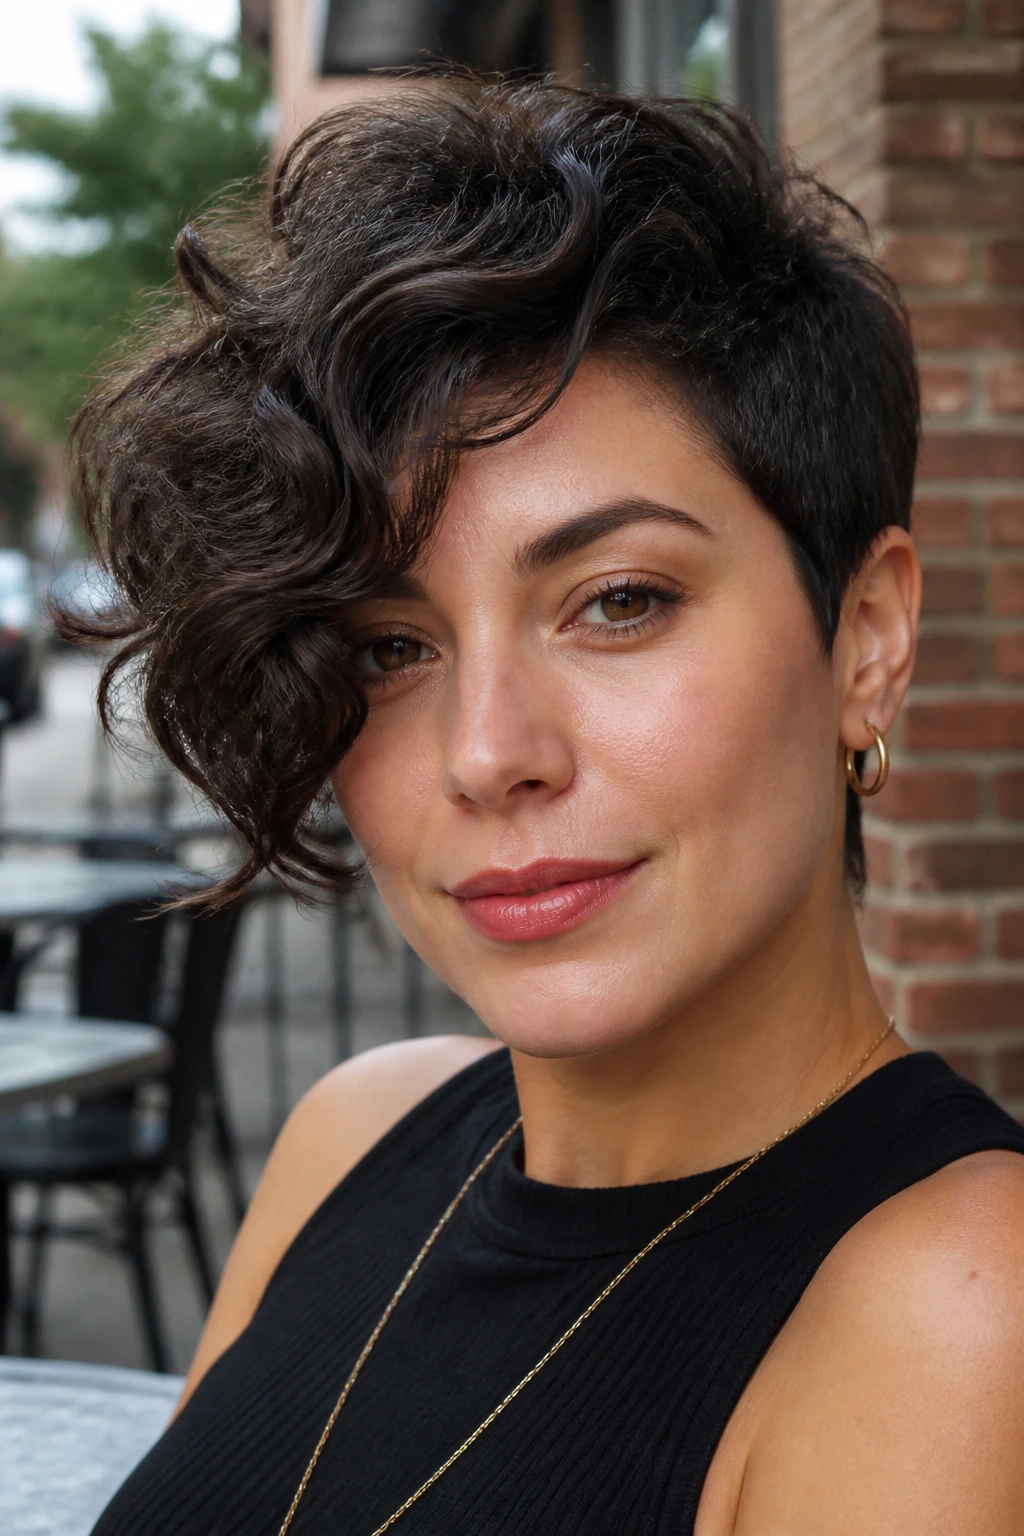
3. Asymmetrical Side-Swept Pixie
Walk into a room with one side tucked and the other side skimming the cheekbone, and the whole cut suddenly feels sharper. That’s the appeal of the asymmetrical side-swept pixie: it uses imbalance on purpose. On an oval face, that slight offset gives the style some tension without breaking the natural symmetry of the face itself.
This cut works especially well if your curls are somewhere between loose ringlets and springy spirals. The longer side can fall forward and soften one temple, while the shorter side keeps the neckline open. The result feels tailored, not stiff.
What Makes It Different
The important detail is where the length sits. You want the heavy side to land somewhere around the upper cheek or just below the eye, not drag down toward the jaw unless you want a more dramatic shape. The opposite side can be cropped tighter around the ear. That contrast is what makes the line read clearly.
A side part that starts about an inch off center usually gives the strongest effect. If the part is too far over, the cut can lose balance and start looking like grown-out hair instead of a deliberate shape. A small amount of mousse at the roots helps the taller side hold up, and a few twists around the face while damp can make the side-swept curl pattern look cleaner.
- Strongest when the stylist preserves one longer front section.
- Good for people who like tucking hair behind one ear.
- Helps an oval face look a little more angular without harshness.
If you wear glasses, this one can be especially nice. The longer side interacts with the frames instead of competing with them.
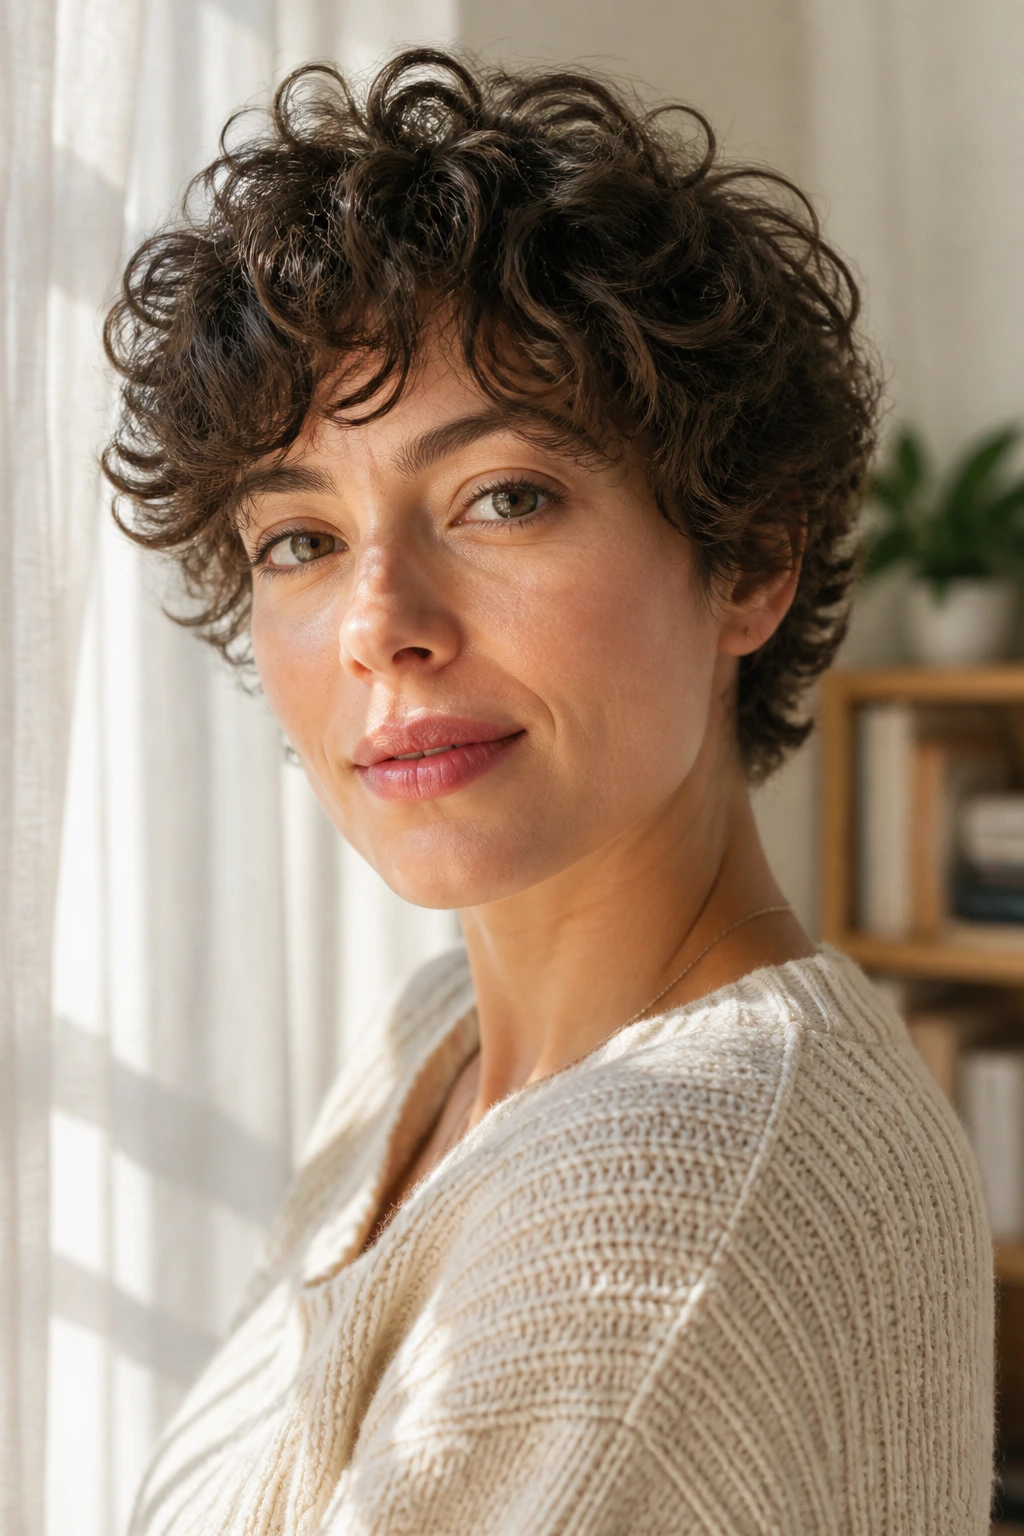
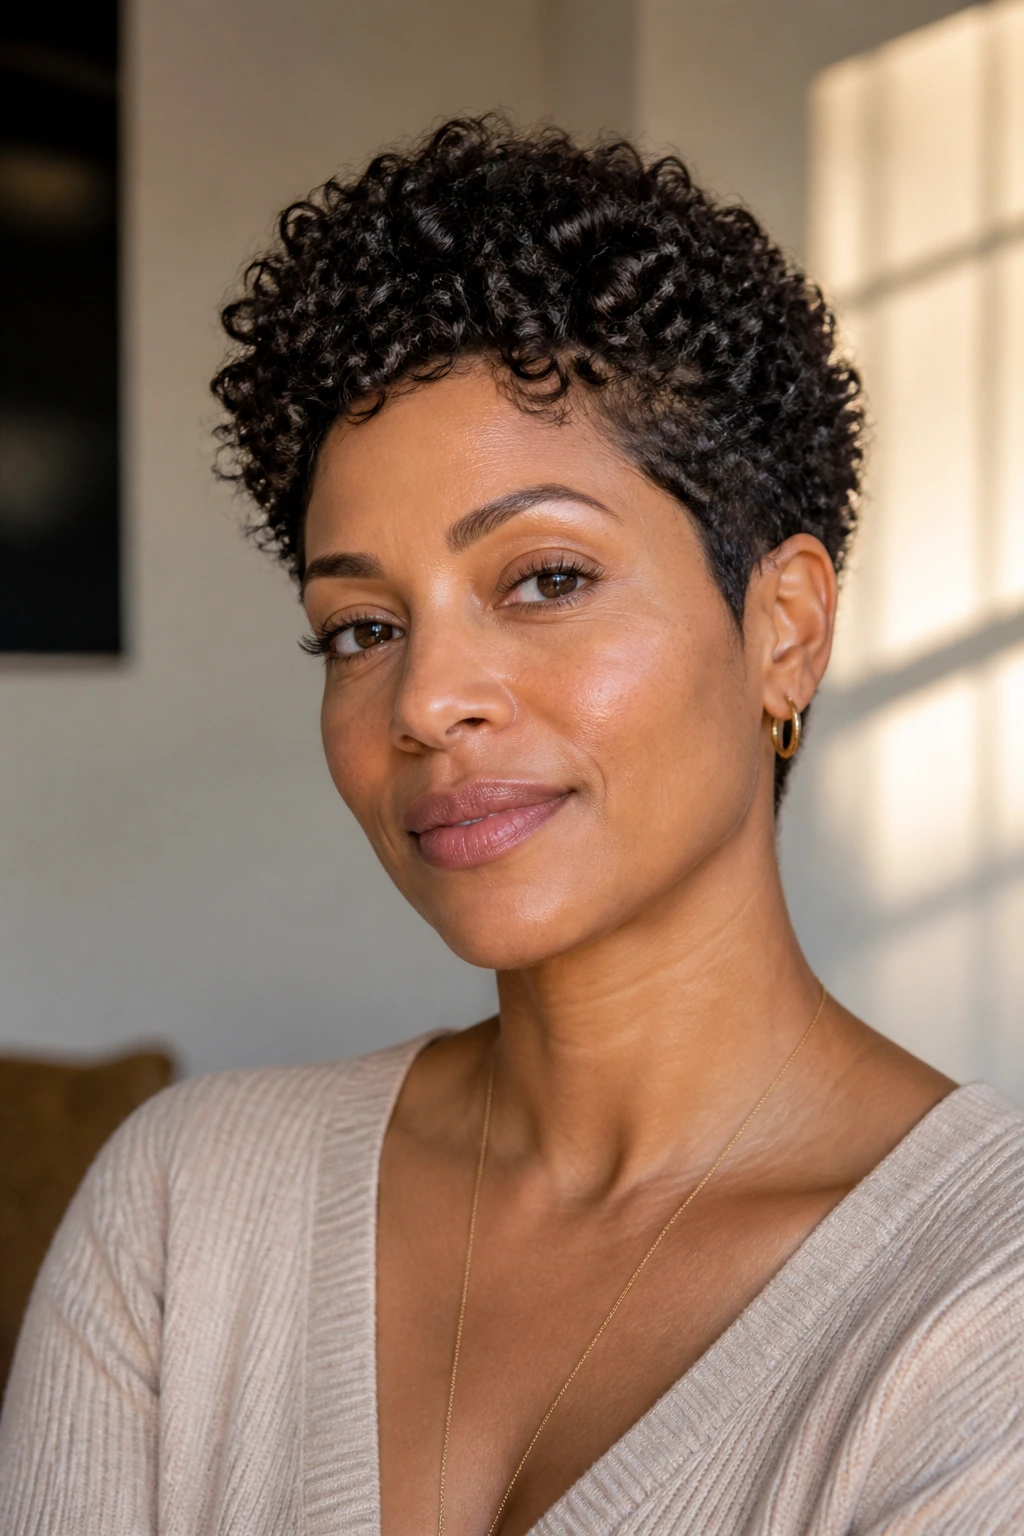
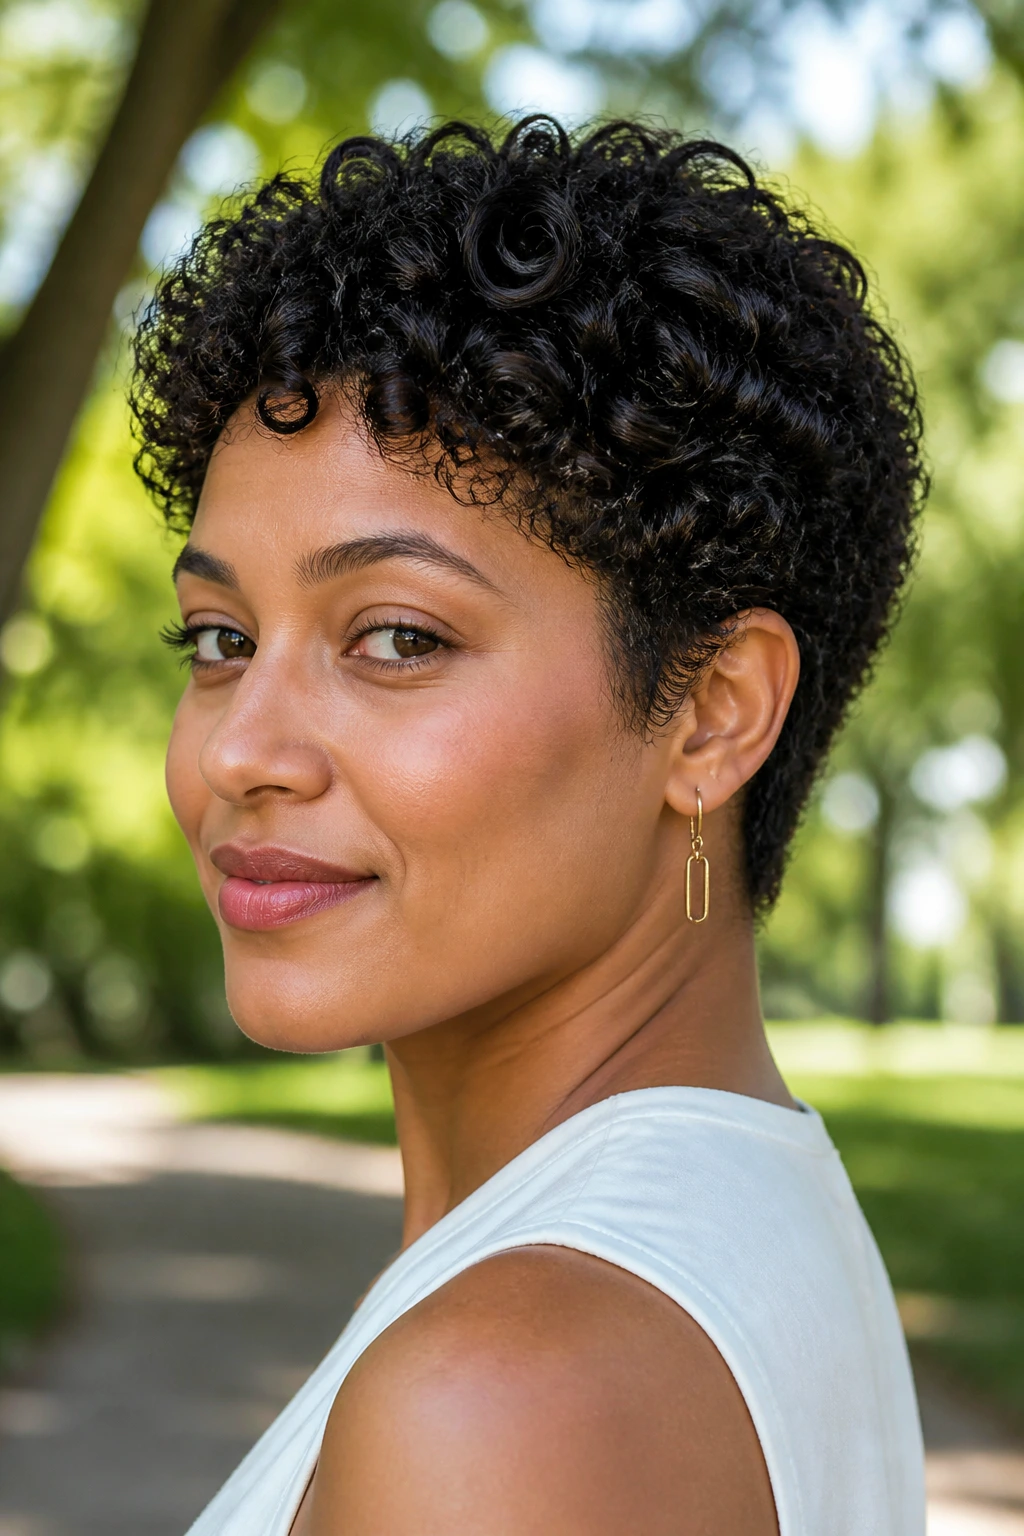
4. Rounded Crown Pixie
The rounded crown pixie is the answer for thick curls that tend to puff sideways the second they dry. Instead of trying to flatten the hair into submission, this shape lets the crown stay full and rounded while the edges stay neat. The look is soft, but not shapeless. That distinction matters.
On an oval face, the rounded crown gives a little lift without making the face look longer than it is. That’s the trap with too much height on top. A touch is good. A tower is not. This cut keeps the crown high enough to show texture, then eases down toward the temples and nape so the silhouette stays balanced.
I like this version best when the stylist uses internal layering instead of aggressive thinning. You want the curls to move, not fray. If the hair is coarse, ask for the bulk to come out underneath the top layer. If it’s dense and springy, ask for the crown to be shaped in sections so the curls stack instead of fanning out.
A little gel at the roots, then a diffuse-dry with your head tilted slightly forward, usually gives the best lift. Don’t shake it to death. Let the curls settle first. Then separate a few pieces by hand if needed.
This is a good cut for people who like the feeling of volume but hate square edges. It has curve. It has air. It still looks like a pixie, not a tiny helmet.
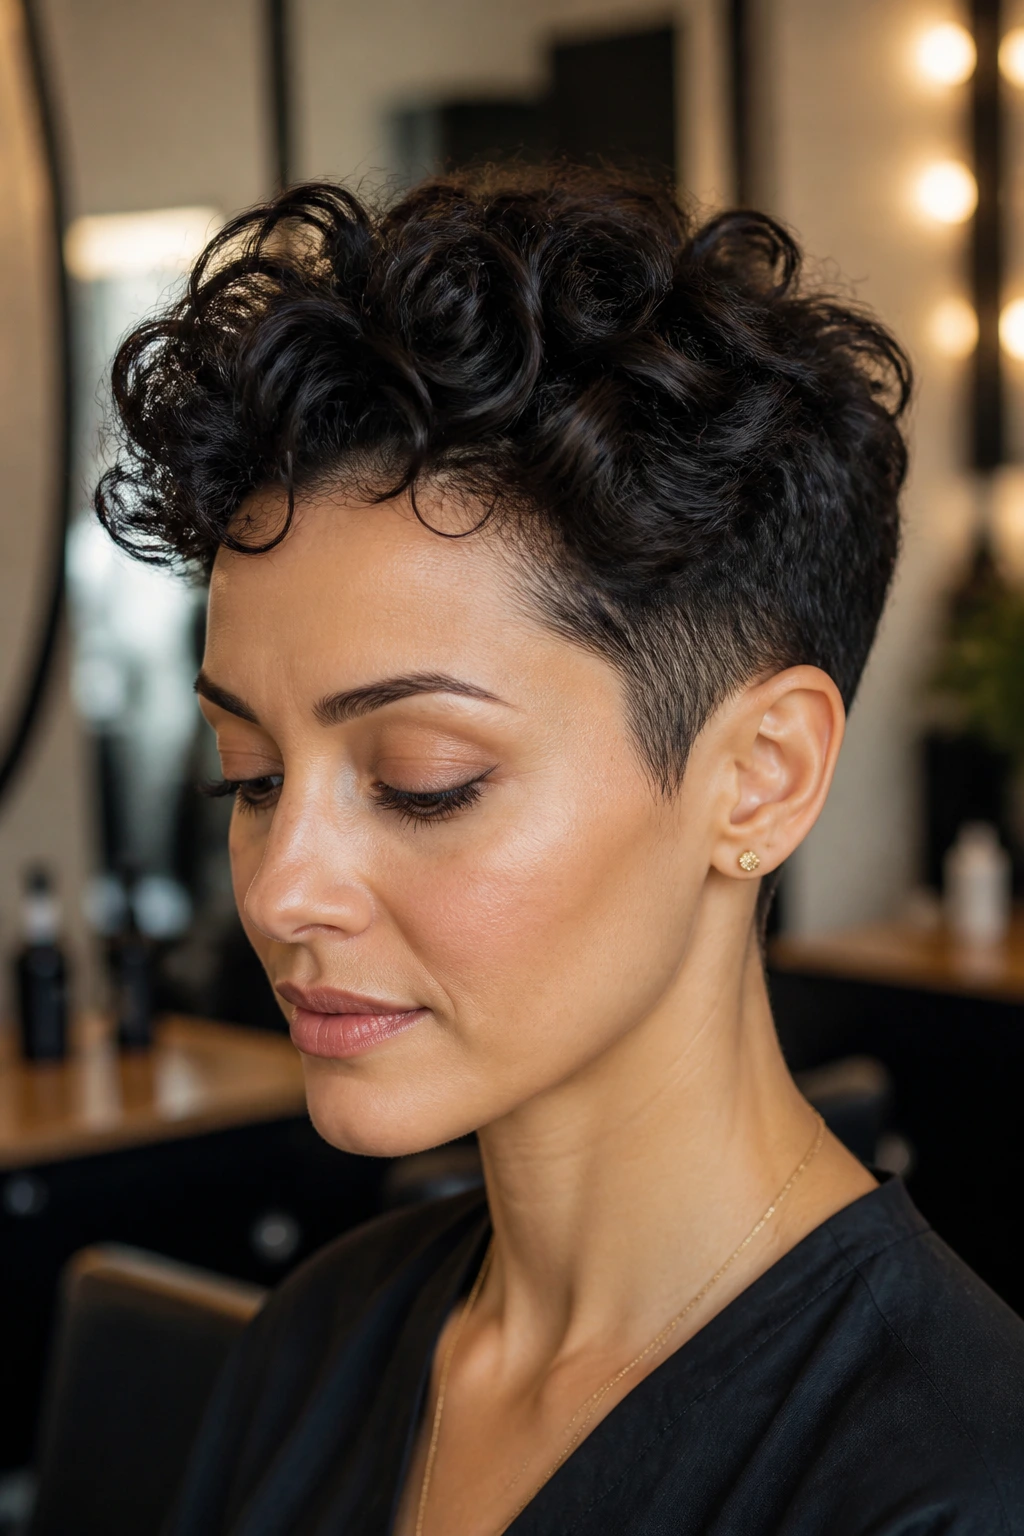
5. Undercut Pixie with Lifted Top
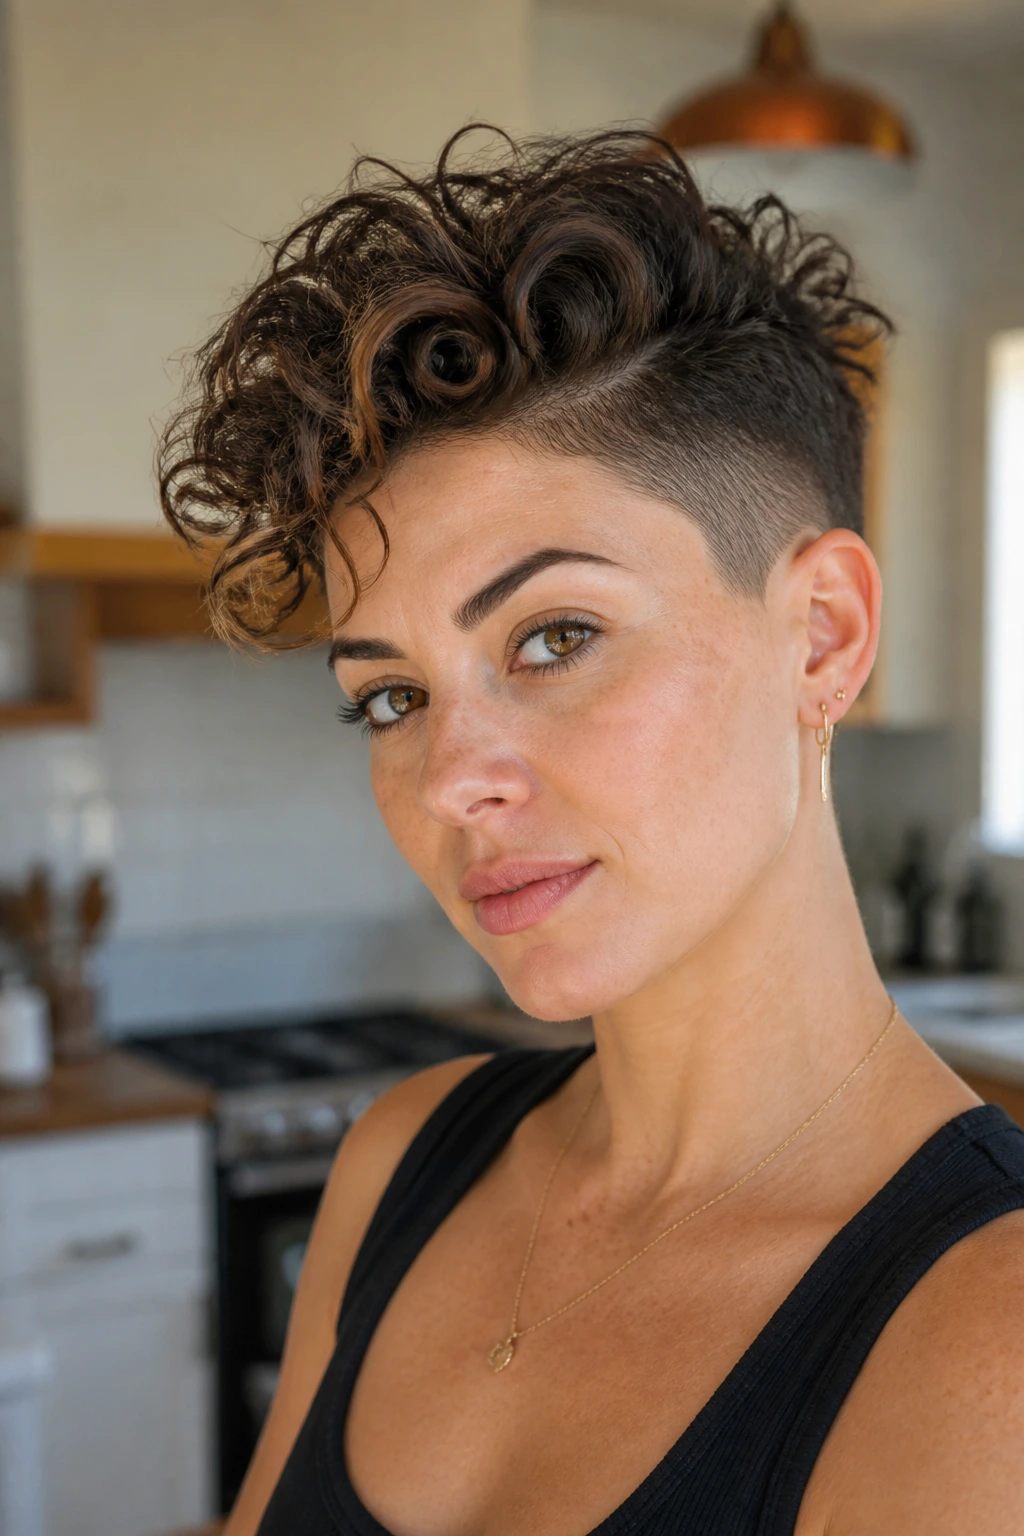
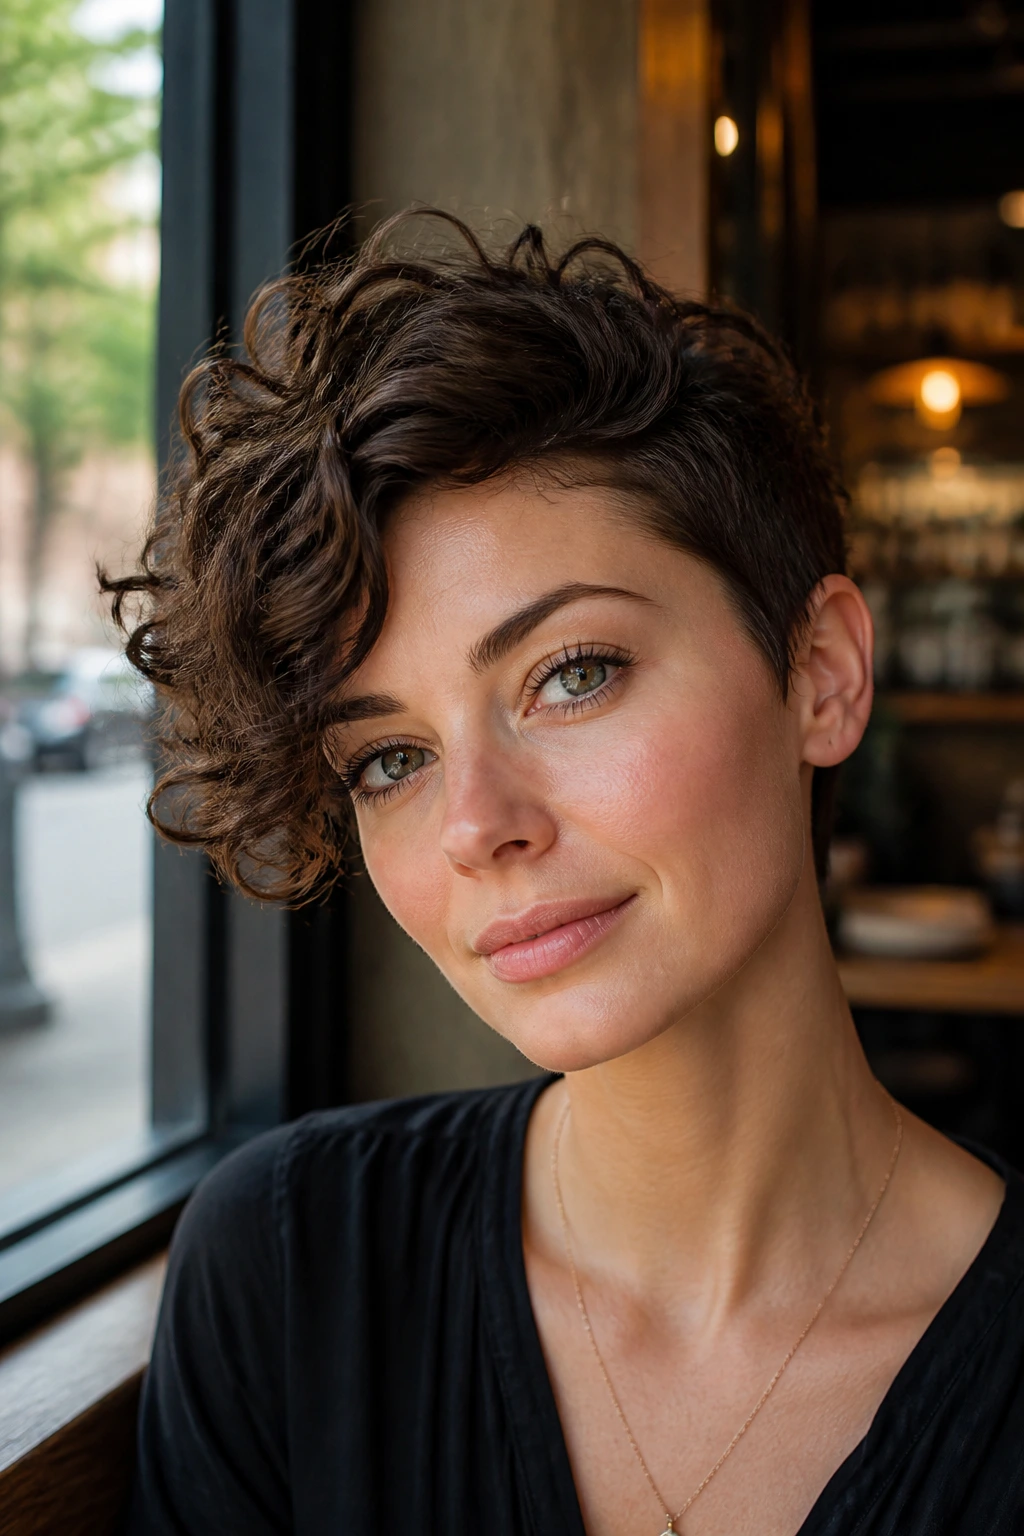
Unlike a classic pixie that keeps everything softly tapered, the undercut version removes bulk from underneath so the top layer can sit up instead of spreading out. That difference is a gift if your curls are dense or coarse. The top gets a clean stage, and the sides stop fighting for attention.
For oval faces, this cut works because it keeps the outline narrow without stealing all the shape from the top. You still get texture at the crown and front, but the undercut clears room around the ears and lower sides. The face stays open, and the whole thing reads sharp without being severe.
The trick is not taking the undercut too high unless you want the shape to look harder. A line that sits just below the round of the head usually keeps the style flexible. If the undercut creeps too far up, the top can look disconnected, and curly hair does not need extra drama there.
This is also one of the easiest ways to cut down on morning styling time. The weight is already gone, so a little curl cream and a quick diffuser pass is often enough. If you like a more polished finish, run a small dab of pomade over the top layer only, keeping it away from the roots. Too much product below the crown defeats the point.
The cut feels bolder than the soft tapered versions, but it’s not high maintenance if the baseline shape is done well. That’s the whole game.
6. Tapered Nape Pixie with Longer Top
The tapered nape pixie is one of those cuts that looks tidy from every angle except a bad one. In other words: it works. The neckline stays slim and close, while the top and front stay long enough to show curl shape and keep the face from looking too exposed.
What to Ask for in the Chair
Ask the stylist to keep the nape tight but not shaved bare unless you know you like that look. Curly hair at the back of the head can spring up in odd ways, and a clean taper usually handles it better than a hard fade line. You want the back to disappear into the neck, not look like it was erased with clippers.
The top should stay a bit longer—often around 2 to 4 inches, depending on curl pattern—so the hair has room to fold over the crown. That extra length matters on an oval face because it keeps the proportions soft. The front can angle down toward the cheekbones, which gives the face a nice frame without collapsing into the jawline.
Why It Stays Neat
The nape is the first place curly pixies start looking messy. A strong taper there buys you time between trims. It also keeps collars, scarves, and jacket necks from rubbing the hair into a fuzzy mess by noon. Small thing. Big difference.
For daily styling, I’d use a light leave-in and then a foam mousse at the roots. Dry with a diffuser for five to seven minutes just to lock the shape, then stop. You do not need to chase every curl into perfect submission.
7. Tousled Piecey Pixie
The tousled piecey pixie is for the person who likes short hair that still looks a little undone on purpose. Fine curls, loose waves, and mixed textures do well here because the cut leans into separation instead of fullness. If your hair tends to collapse when it gets too much cream, this is the better direction.
The silhouette stays close to the head, but the top and fringe are cut in uneven, soft pieces. That gives the eye little changes in length to follow. On an oval face, piecey texture is useful because it keeps the style from looking too round or too precious. It feels casual without turning sloppy.
How to Get the Most From It
This cut wants less product than most people think. Start with a light mousse or foam on damp hair, then scrunch in a tiny bit of cream only on the ends if they need control. Heavy butter or thick curl custards can wreck the separation and make the cut look flat by lunch.
- Best for fine to medium curls that need airy movement.
- Ask for point cutting on the ends, not blunt clipping.
- Keep the fringe slightly irregular so it doesn’t form a straight line.
- Separate a few top pieces after drying, not every curl.
I also like this cut for people who wear it with one ear tucked. It gives the whole shape a lived-in tilt that feels easier than a fully polished crop.
8. Long-Top Pixie with Extended Sideburns
What saves a long-top pixie from looking abrupt? Sideburns. Real sideburns, not a rushed fade at the temple. When the front stays longer and the sideburn area is preserved, the cut gains a softer frame around the face and a little more grace in profile.
This version suits oval faces beautifully because it adds a bit of vertical line without making the cut top-heavy. The longer top lets curls fall forward, while the sideburns carry the eye down toward the cheekbones. If you wear glasses, this is one of the nicest shapes you can choose. The side pieces stop the frames from feeling stranded on the face.
How to Style It So It Doesn’t Flop
The top should be cut with some internal movement, but not so much that it breaks apart. If the hair is loose-curly, a side part can help the top sweep across the forehead. If it’s tighter, let the curls cluster into a soft wave and keep the sideburns sleek with only a touch of cream.
A tiny amount of edge control at the temples can clean up the shape if your hair grows wildly there. Don’t overdo it. The goal is polish, not stiffness.
One small note: the longer front needs regular attention. If it grows past the cheekbone and the rest of the cut stays short, the shape starts feeling uneven in the wrong way. Trim the front before it takes over the entire profile.
9. Finger-Wave Curly Pixie
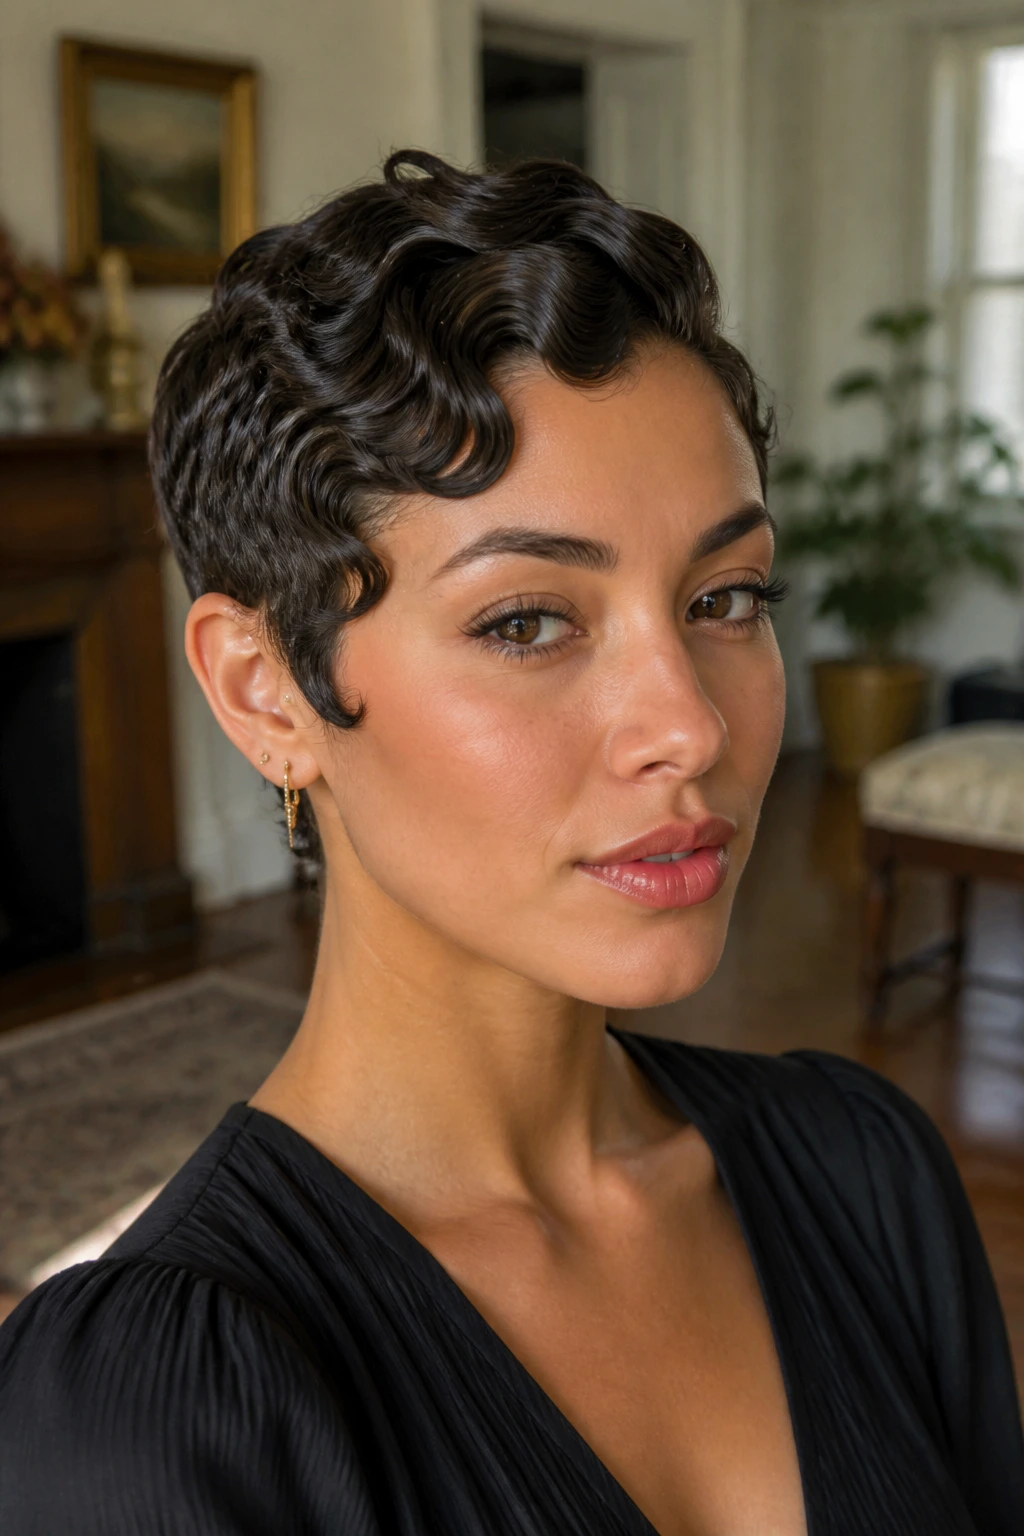
A finger-wave curly pixie is what happens when short curls decide to behave on purpose. It has a more sculpted look than the loose, tousled cuts, and it can be stunning on oval faces because the curves of the waves echo the face shape instead of fighting it. There’s a little old-Hollywood energy here, but it doesn’t have to be costume-y.
This works best on curls that can be trained with gel and a comb, especially looser 2c to 3b textures. The front is usually molded into soft S-shaped bends, while the sides stay close and clean. The result is controlled without looking flat, which is harder to pull off than people think.
The styling is all about the damp set. Apply gel to wet hair, comb small sections into the direction you want, and clip or smooth the front until the waves hold. A diffuser can help set the shape, but low heat is the only setting I’d trust here. High heat makes the definition frizz out faster than you can say mirror check.
This cut is not the fastest option in the bunch. It rewards a little patience. But when the waves land right, the face looks elegant and the curl pattern gets a stage instead of a fight.
10. Layered Shaggy Pixie
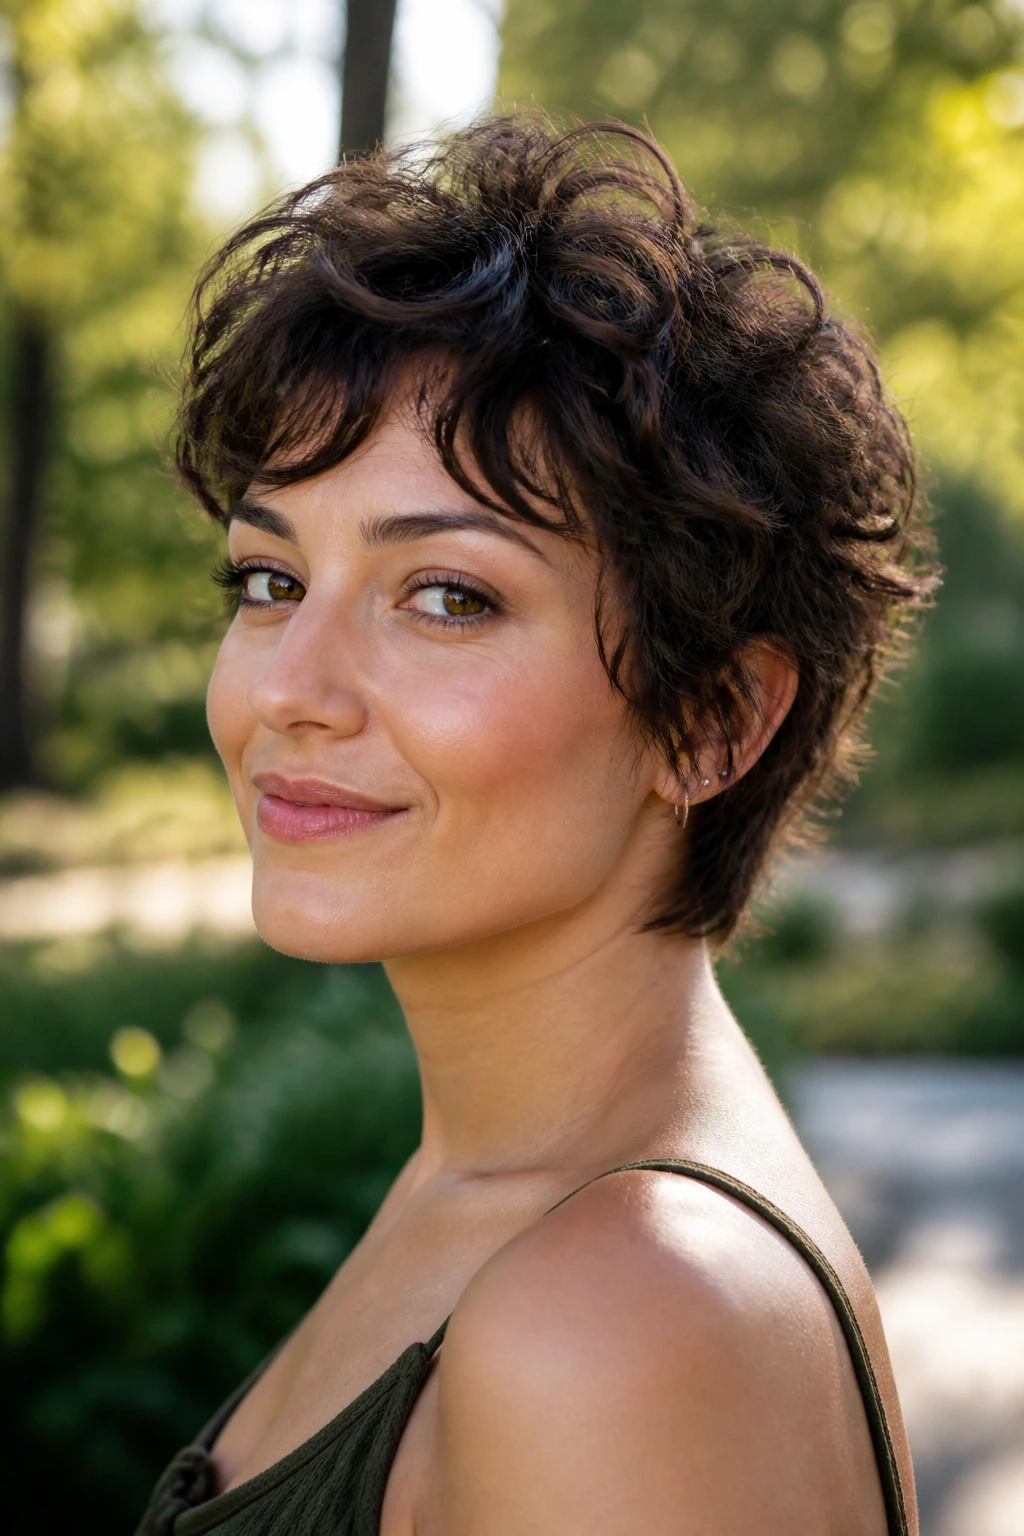
The layered shaggy pixie is the one I recommend when someone says they want short hair, but not hair that looks over-edited. It keeps the crop relaxed, with soft layers that let curls spring in different directions without turning into a puffball. On an oval face, that looseness is useful because it adds texture around the cheeks without changing the natural balance.
This is especially good for thick hair that gets bulky fast. Layers take some weight out of the interior, which helps the curls separate instead of clumping into one heavy mass. If the hair is finer, the same shape can still work, but the layers need to stay gentle. Too many short pieces and the whole cut starts looking thin at the ends.
I like this style air-dried with a little curl cream and then fluffed at the roots once it’s fully dry. Not before. If you mess with it while it’s wet, the layers can stick in odd places and you’ll spend the whole morning trying to fix them. Let it set first.
The shaggy pixie also grows out nicely. That’s a quiet advantage. As the layers lengthen, the cut shifts into a soft mini shag instead of turning into a messy outgrown crop. That’s one of the few times “messy” and “good” live in the same sentence.
11. Deep Side-Part Pixie
A deep side-part pixie changes the whole attitude of the cut without changing much length. That’s why I like it. Move the part over by an inch or two, and suddenly the curls have a direction, the crown has more lift, and the face gets a sharper line across the forehead.
Unlike a centered or barely off-center pixie, this version gives one side of the haircut more visual weight. On an oval face, that asymmetry is useful because it keeps the shape from feeling too even. Too even can get boring. Too even can also make a short curly crop look like a placeholder instead of a decision.
This is a smart option for people with a cowlick near the front, or one side that always lies flatter than the other. The deep part gives that stubborn side a job. A little mousse at the roots on the heavier side, followed by a diffuse-dry with the part clipped in place for a few minutes, can train the shape well enough for daily wear.
If your curls are tighter, you may want the side part to begin just above the arch of the brow rather than too far back. That keeps the front from collapsing. If the hair is looser, you can push the part deeper and get more lift at the crown.
One inch. That’s often all it takes.
12. Pixie-Bob Hybrid

The pixie-bob hybrid is for the person who keeps saying, “I want short hair, but not that short.” Fair enough. This cut keeps enough length in the front and around the ears to feel soft, while the back stays closer to the head, so the shape doesn’t balloon into a mini bob with confusion attached.
Oval faces wear this one well because the longer front pieces can skim the cheekbone or jaw without overwhelming anything. Curly hair gives the style body, but the extra length keeps the curl pattern visible instead of compressed. If your curls are medium to loose, the hybrid shape usually lands in a really nice middle zone.
This cut is also useful for anyone growing out a shorter crop. The silhouette already knows how to behave. It doesn’t look like an awkward pause between two haircuts. It looks like a haircut.
Ask for the front to be left long enough that you can tuck it behind the ear on one side if you want. That little move changes the vibe fast. If the nape stays tapered and the crown has some internal layers, the style reads polished without feeling rigid.
A pixie-bob hybrid is the quiet sibling in this group. It doesn’t shout. It just works.
13. Bixie for Loose Curls
Is a bixie still a pixie? Sort of. That’s the point. A bixie sits between a bob and a pixie, and loose curls love that in-between space because they need a little room to move. On an oval face, the slightly longer outline softens the cheekbones without hiding them.
This cut is best when the curl pattern is relaxed enough to form soft bends or loose spirals. If the hair is too tight and dense, the shape can drift more shag than bixie unless the layers are handled carefully. But with the right balance, the cut has a touch of swing around the face and a close nape that keeps it crisp.
Best for Loose Curls
The biggest advantage here is flexibility. You can wear the front tucked, swept, or slightly lifted at the roots. A light cream plus a foam mousse usually gives enough hold without weighing down the ends. If your hair goes flat fast, keep the product off the roots and focus on the mid-lengths.
The bixie also grows out gracefully because the length is already there. That matters if you’re not interested in chasing a strict haircut every five weeks. Let it get a little shaggy, and it still reads intentional.
If you want something that feels soft but not fussy, this is the one to watch.
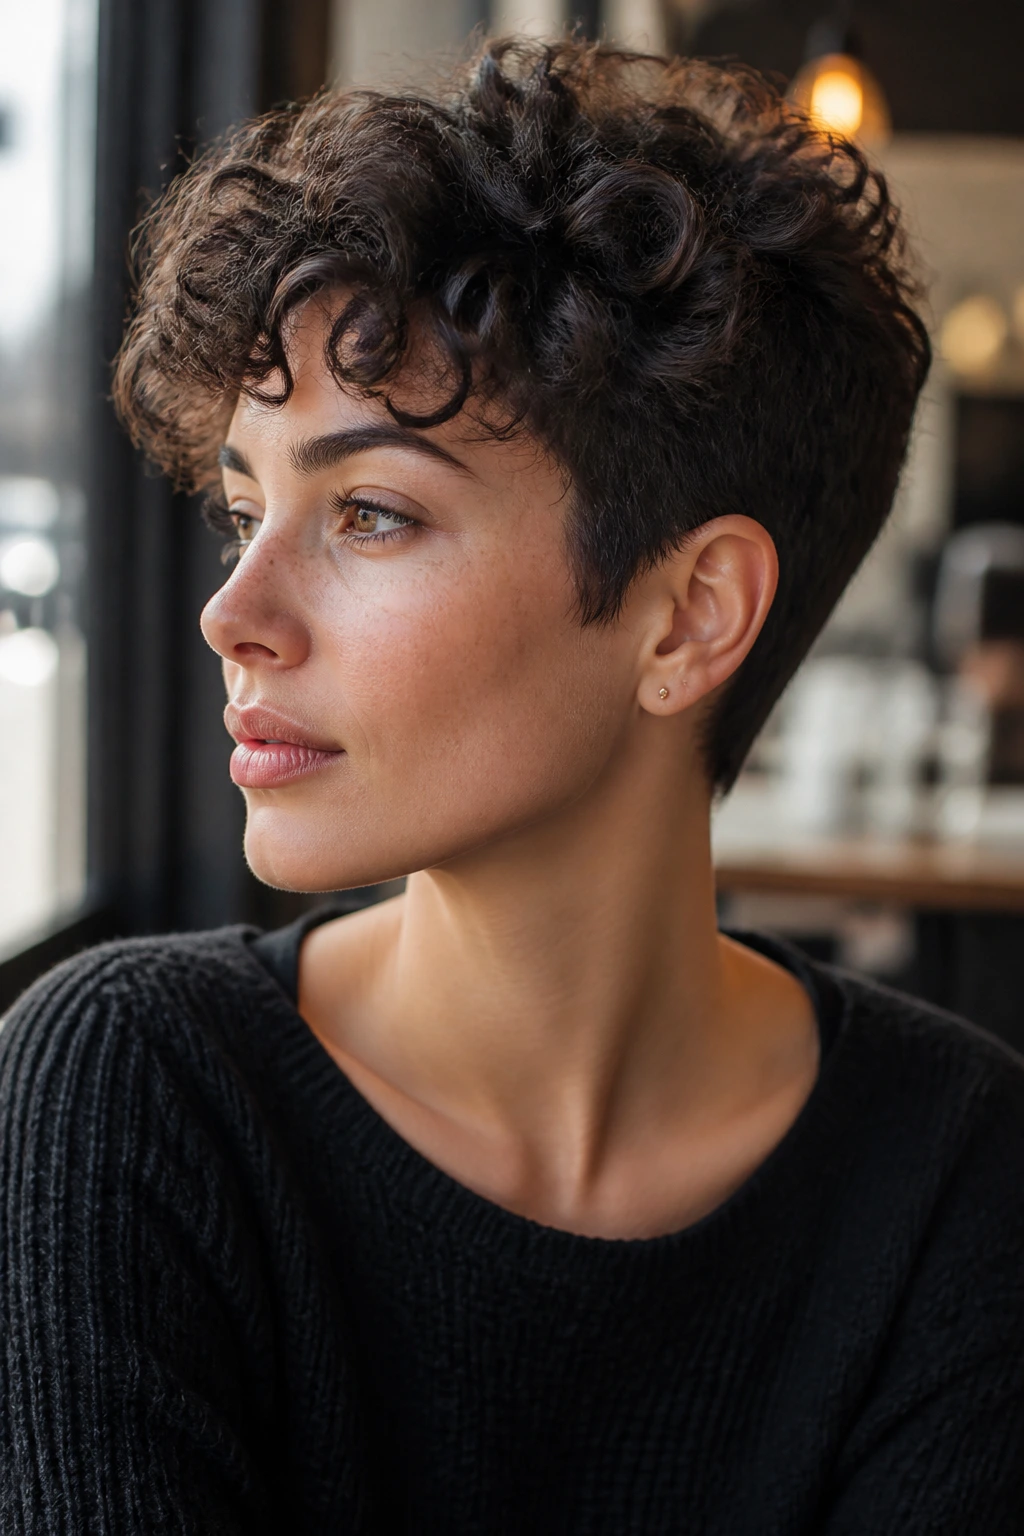
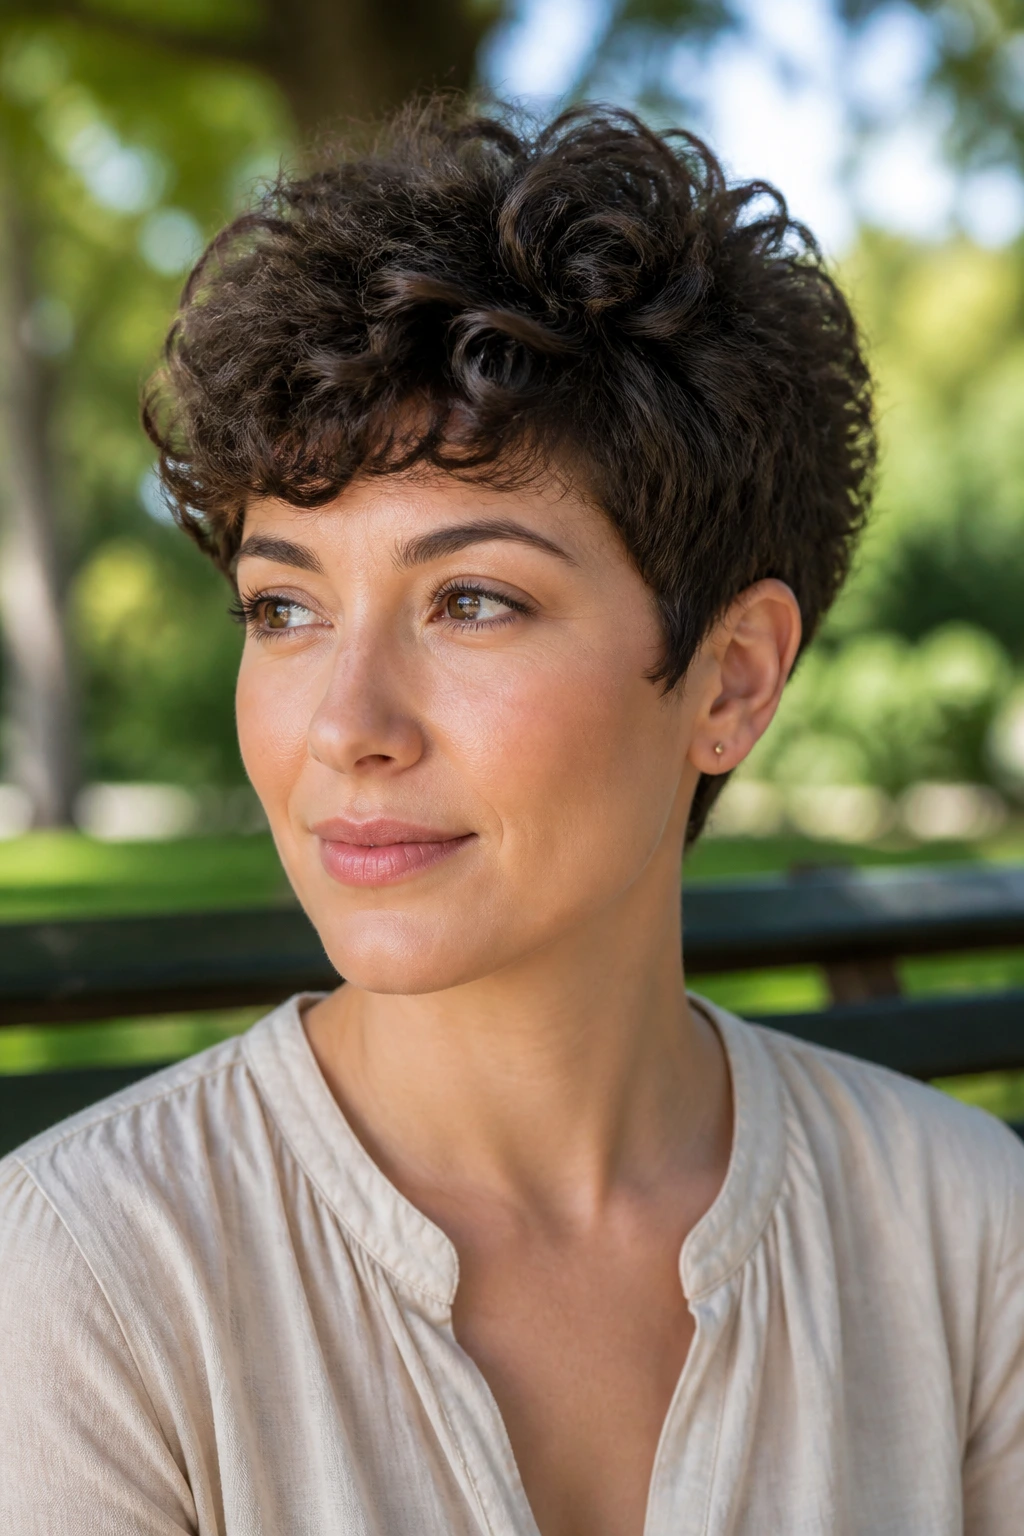
14. Temple-Taper Sculpted Pixie
The temple-taper sculpted pixie is the sharpest cut in this set. The temples are cleaned up, the sides are close, and the top gets enough length to carry the texture without spreading everywhere. It’s a strong look, but oval faces can handle that kind of definition better than most shapes because the face already has balance.
This cut shines when you want the curl pattern to be part of the architecture. Not hidden. Not flattened. Shaped. The top can be left slightly longer at the front, then shortened gradually toward the crown so the line has movement. If the curls are dense, the taper at the temples is what keeps the whole cut from sitting heavy on the face.
I’d call this a good choice for people who like visible earrings, strong brows, or a cleaner wardrobe. The haircut doesn’t compete with those things. It frames them. A small amount of shine cream can make the curls look polished, but the shape should still feel textured, not lacquered.
One warning. The temple area grows fast. If you ignore it for too long, the cut loses the clean edge that makes it special. This one benefits from regular touch-ups a little more than the softer pixies do.
15. Wash-and-Go Soft-Edge Pixie
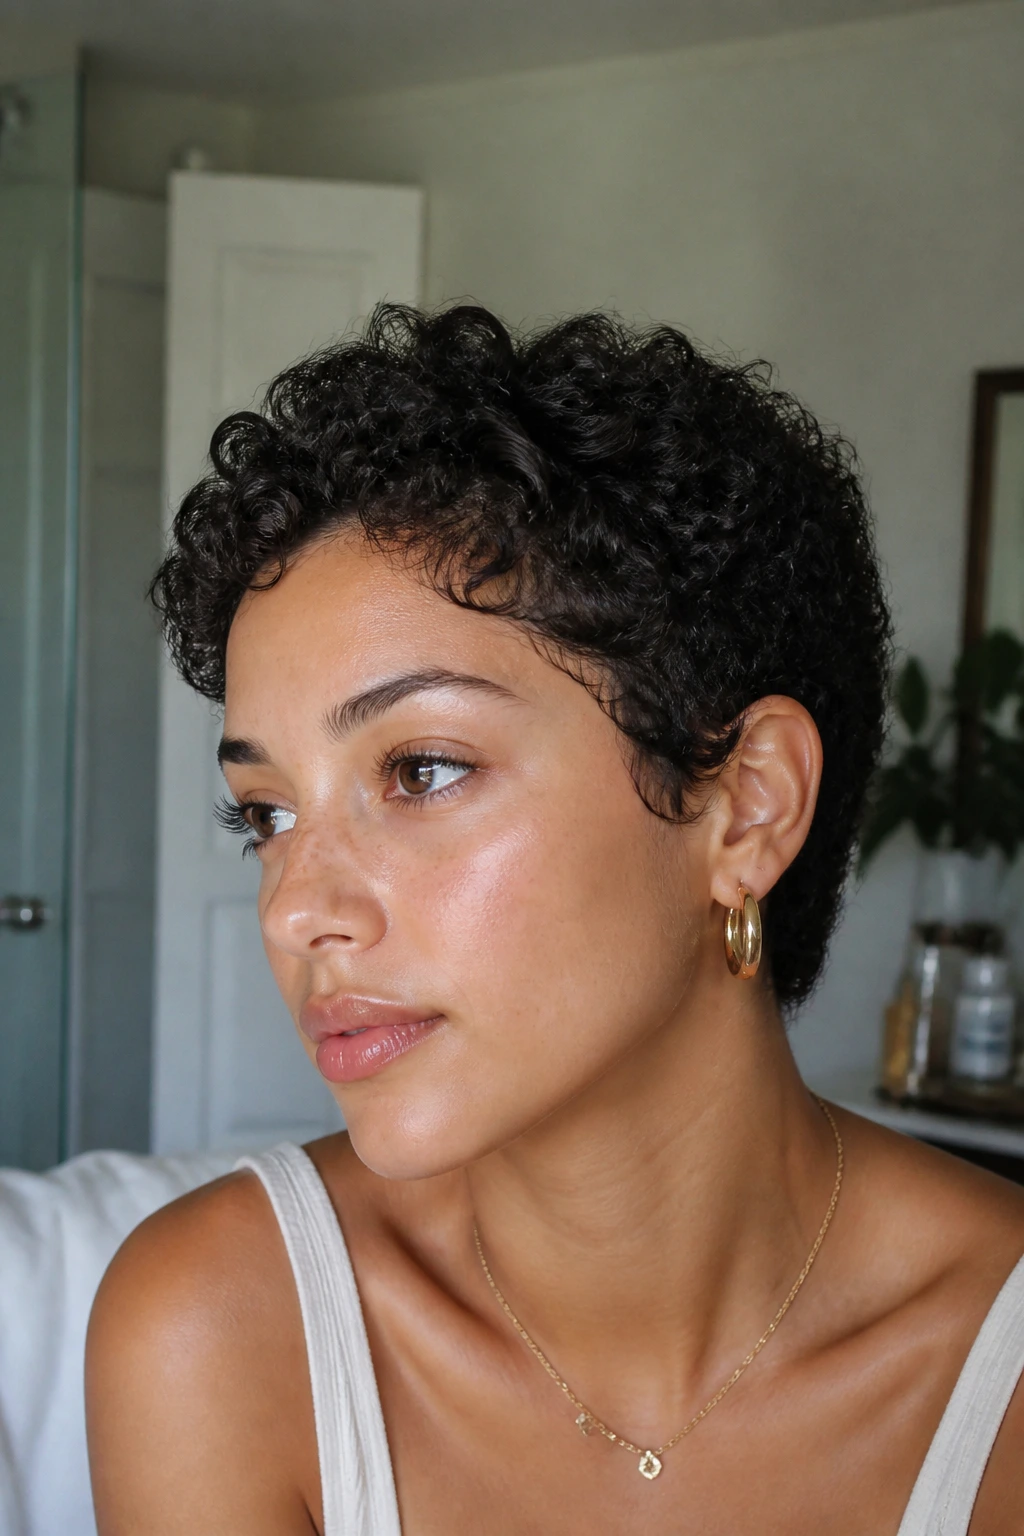
The wash-and-go soft-edge pixie is the least fussy option here, and that’s not a small selling point. The shape is short, rounded, and lightly layered, with soft edges around the ears and neckline so the hair falls where it wants without constant correction. On an oval face, that relaxed outline keeps the look easy instead of severe.
This cut works best when the curl pattern is dependable enough to settle on its own after washing. If your curls have some inconsistency, the style can still work, but the stylist should avoid taking the sides too tight. Leave a little room around the temples and a touch of length at the front. That way, even an imperfect dry day still looks like a style.
The beauty of this pixie is that it doesn’t need a perfect blow-dry to behave. A leave-in conditioner, a touch of mousse, and a gentle scrunch are usually enough. If you want more shape, diffuse for a few minutes and stop before the hair gets too puffy. The point is not to force the cut into submission. The point is to let the curl pattern do its work.
This is the closest thing to a true low-maintenance pixie in the group. Not zero maintenance. That’s fantasy. But definitely less fuss than the sculpted or asymmetrical versions.
Why Curly Pixies Need a Different Cutting Hand
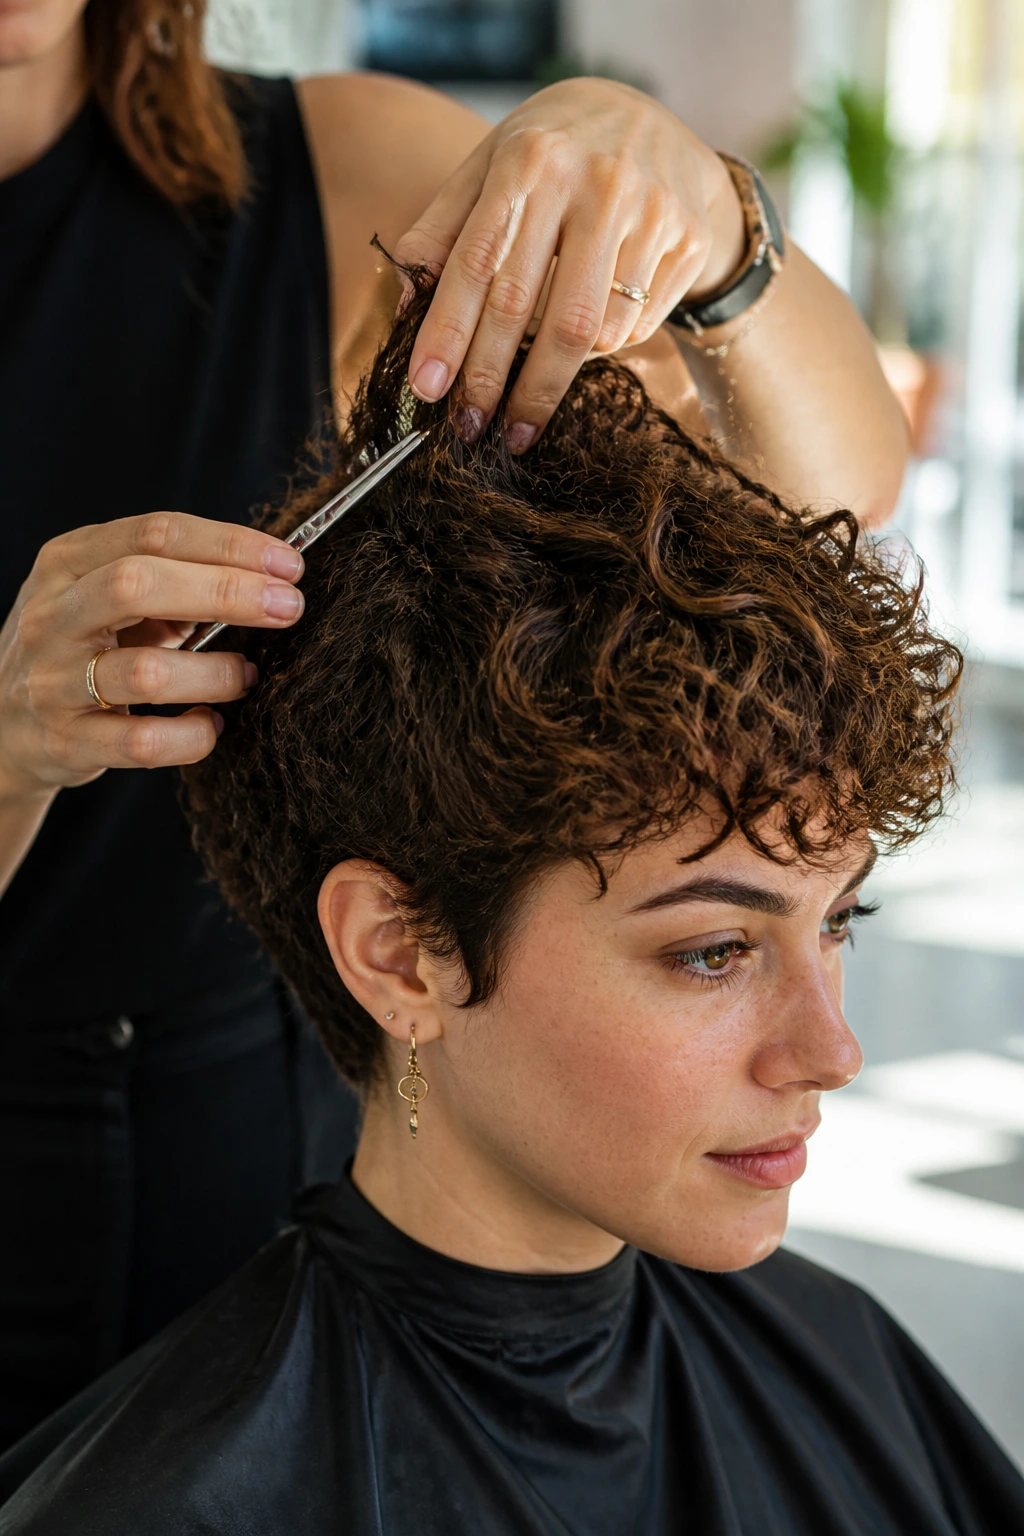
A curly pixie isn’t just a shorter haircut. It’s a shape problem. That sounds blunt, but it’s true, and the stylists who understand curls tend to think that way first. They’re not just taking length off. They’re deciding where the curl should live when it rises, where the silhouette should narrow, and where the face should stay open.
Dry cutting matters here because wet curls lie. They stretch. They hang. They promise obedience and then spring right back when the water leaves. If a cut is made too aggressively while wet, the top can end up too short, the fringe can disappear, and the sides can mushroom. That’s not a curl issue. That’s a cutting issue.
Oval faces make the process a little more forgiving, but not automatic. The face shape can take height, fringe, or asymmetry, yes. Still, the wrong balance can make even an oval face look longer than intended or turn the cut boxy at the sides. The trick is to keep the perimeter soft and the bulk under control.
I also like to remind people that “textured” should not mean “thinned to death.” Curly hair needs air, but it also needs structure. Over-thinning can leave odd frizz pockets and tiny ends that won’t clump together. A little internal layering is plenty in most cases.
Essential Tools for Styling These Pixies
- Spray bottle with water: Useful for waking up curls the next morning without rewashing the whole head.
- Light curl cream: Helps tame frizz and give soft shape to the top without heavy buildup.
- Foam mousse: Good for fine or loose curls that need lift at the roots.
- Flexible-hold gel: Best for fringe, finger-wave shapes, and anything that needs a cleaner cast.
- Diffuser attachment: A low-heat diffuser gives you more control over shrinkage and keeps the sides from puffing.
- Wide-tooth comb or fingers: Detangles gently before styling and helps keep curl clumps intact.
- Microfiber towel or cotton T-shirt: Cuts down on rough frizz after washing.
- Small styling clips: Handy for setting a side part or training the front of a fringe while it dries.
- Satin bonnet or pillowcase: Keeps the crown and nape from getting crushed overnight.
What to Tell Your Stylist Before the First Snip
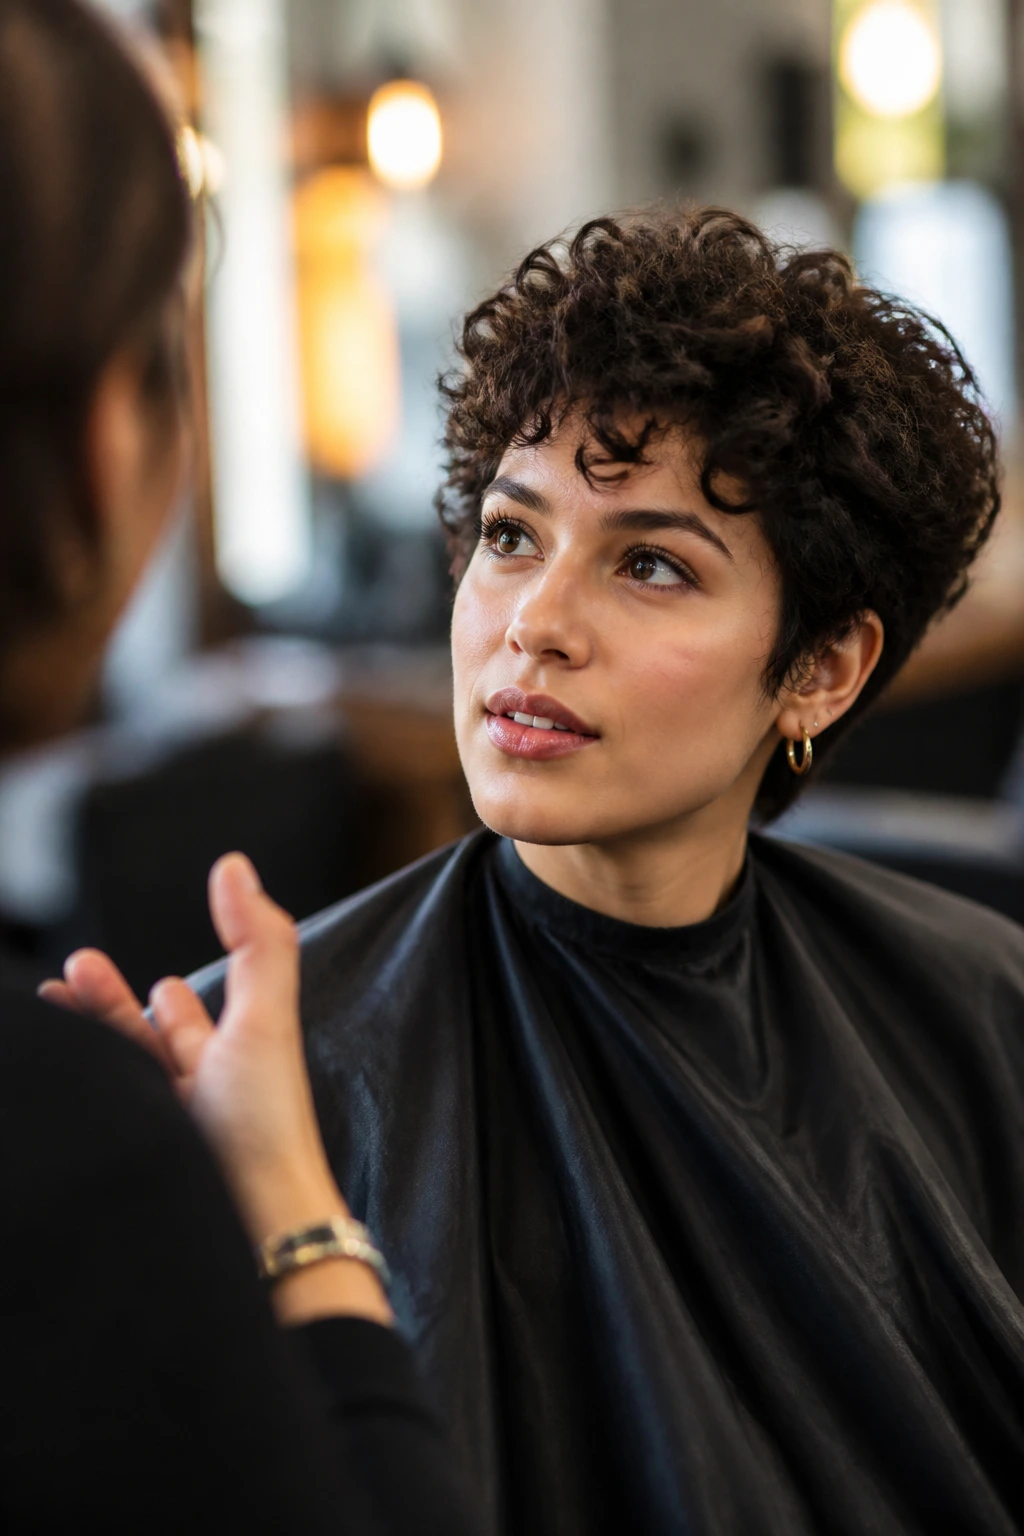
Bring photos, but bring the right photos. Show at least two cuts on hair that looks like yours in density and curl pattern, not just a pretty crop on straight hair that will never behave the same way. A curly pixie on a tight coil pattern and a curly pixie on loose waves are different animals.
Say how much time you want to spend in the morning. That changes everything. If you want a five-minute routine, the stylist should avoid overcomplicated layers and leave enough length in the top and fringe for the curls to settle on their own. If you don’t mind diffuser time, they can shape more aggressively.
Also say whether you like your hair better with volume at the crown or softness around the temples. People often skip that part, then wonder why the cut feels off. On an oval face, the choice is more about preference than correction. Do you want the eye drawn upward, sideways, or toward the front? That’s the real question.
Ask for the first cut to stay a little longer than the final target. You can trim again in two weeks. You cannot reattach hair. That sounds obvious, but I hear the regret in people’s voices more often than you’d think.
How to Wear and Finish the Shape
Front Frame: Keep the front pieces visible. Whether it’s a fringe, a side-sweep, or a longer corner near the cheekbone, the face looks better when the cut has a clear front edge.
Accessories: Small hoops, stud earrings, and slim glasses frames tend to work well because they don’t fight the haircut. Chunky frames can still work, but they need a little length at the temples to balance them.
Outfit Pairings: High necks, collars, and clean neckline lines look sharp with these cuts. A pixie opens up the neck, so it’s a nice place to wear a collarbone, not hide it.
Finish: Decide whether you want a soft matte look or a slight shine. Matte products give the hair separation. A tiny bit of shine cream gives the curls a more polished finish. Pick one. Mixing too many finishing products tends to make short curls collapse.
Extra Styling Boosts for More Definition
Curl Definition: Apply product to soaking-wet hair, not damp hair, if you want curl clumps to stay together. That’s the difference between a neat pixie and a fuzzy one that expands before lunch.
Customization: If your face feels visually long, keep a little more fullness around the fringe or temples instead of stacking all the volume at the crown. If your face feels wide, raise the crown a touch and let the sides stay tighter.
Polish: A pea-size amount of styling paste or pomade can clean up the top layer after the hair is fully dry. Use it sparingly. Too much and the curls start looking sticky instead of defined.
Make-It-Yours: Fine curls usually need mousse and root lift. Dense curls often need a lighter cream and more internal layering. Coarse curls usually prefer a soft taper and a bit more length to avoid standing straight out from the head.
Common Mistakes That Flatten Curly Pixies
The first mistake is cutting the top too short on day one. Short curls look shorter after they dry. If the crown sits too close to the scalp, you lose the shape before the haircut even has a chance to settle.
The second mistake is taking too much weight out of the sides. That sounds helpful, but on curly hair it can leave the top looking puffy and the bottom looking empty. The fix is simple: remove bulk from the interior and keep some visual presence around the temples.
Too much product is another classic mess. A heavy cream or thick butter can make a pixie collapse into greasy clumps. Use less than you think, then add a touch more only if the ends need it.
And please don’t diffuse on full heat until the hair is bone dry. That’s a recipe for frizz and weird halo volume. Low heat, low airflow, and stop around 80 percent dry if you want the curl pattern to stay crisp.
Variations and Adaptations to Try
Fine-Curl Feather Pixie: Keep the layers lighter and the fringe airy if your curls are soft and easily weighed down. This version needs mousse more than cream, and it looks best when the top stays slightly feathered instead of over-shaped.
Dense Coil Taper: If your hair is thick and springy, ask for a stronger taper at the nape and a little extra length on the crown. The cut stays controlled, and the coils get room to stack instead of ballooning.
Glasses-Friendly Frame Pixie: Leave a bit more length at the temples and sideburns so the frames don’t look pasted on. This works especially well if you wear the same glasses every day and want the haircut to sit around them.
Grow-Out Bixie Path: Start with a pixie that keeps the front longer and the nape tight. As it grows, the cut drifts into a bixie instead of a messy in-between stage. That makes the next appointment less dramatic.
Soft-Edge Air-Dry Pixie: Keep the outline looser around the ears and neckline if you hate daily styling. The shape will be less sculpted, but the cut will still read as intentional after a quick wash and a few scrunches.
Maintenance, Refresh Days, and Grow-Out
Short curly hair needs trimming more often than people like to admit. Every 4 to 6 weeks is a safe rhythm for sharper shapes like the undercut, temple taper, or asymmetrical pixie. Softer cuts can sometimes stretch to 6 to 8 weeks, but once the nape grows heavy, the whole outline changes fast.
On non-wash days, a spray bottle is your best friend. Mist the top lightly, add a little leave-in if the curls feel dry, and reshape with your fingers. You do not need to soak the whole head every morning. Usually the fringe and crown need help, while the sides just need a little smoothing.
At night, a satin pillowcase or bonnet keeps the crown from getting crushed. If the top tends to flatten, loosely pinning the front up before bed can preserve the shape enough to save you five minutes the next morning. Small habit. Big payoff.
Growing out a pixie is smoother when the nape stays cleaned up. Even if the top is getting longer, a neat neck area keeps the cut from looking unplanned. That’s the secret nobody likes to say out loud. The grow-out isn’t hard because the hair is short. It’s hard because the bottom half gets ignored.
Frequently Asked Questions
Can oval faces wear very short curly pixie cuts?
Yes, and they often wear them well because the face shape can handle more than one silhouette. The trick is keeping some balance at the crown, fringe, or temples so the cut doesn’t look like it was clipped off without a plan.
Is a dry cut better for curly pixies?
Usually, yes. Dry cutting lets the stylist see how much the hair shrinks and where the curls actually fall. A wet cut can work if the stylist finishes and checks it dry, but going in blind is how people end up with bangs that vanish.
How short should the top be on curly hair?
Shorter than a bob, longer than you think. For many curl patterns, leaving the top around 1.5 to 3 inches gives enough room for shape without turning the cut into a puff. Tighter curls may need even more room depending on shrinkage.
Will bangs make an oval face look longer or shorter?
Both can happen depending on the bang shape. A soft curly fringe shortens the visual length of the face, while a very tall crown with tiny bangs can stretch it upward. That’s why fringe length and crown height need to be planned together.
What if my curls are fine and flat?
Choose a piecey pixie or a soft-fringe style with light layering and use mousse instead of heavy cream. Fine curls usually need lift and separation, not dense product. A diffuser can help, but don’t over-dry them into a puff.
How often should I trim a curly pixie?
Most need a trim every 4 to 6 weeks to keep the outline clean. If the cut is softer and more grown-out in feel, you can stretch that a little longer, but the nape usually shows the problem first.
Can I air-dry a curly pixie without frizz?
Yes, if you start with a good product combo and don’t touch it too much while it dries. A light cream or mousse, applied to wet hair, gives the curls something to hold onto. The less you disturb it, the cleaner the finish.
How do I grow out a pixie without losing the shape?
Keep the nape and temples trimmed while letting the top and front gain length. That gives the haircut a direction, so it turns into a bixie or mini shag instead of a fuzzy in-between stage. It’s a slow grow-out, but not a miserable one.
The Shape That Keeps Working
A good curly pixie doesn’t fight the curl. It gives the curl a job. On an oval face, that job can be cheekbone emphasis, a little crown lift, a soft fringe, or a clean taper that keeps the whole thing from puffing out of control.
Pick the version that matches how your hair actually behaves, not the version that looked cute in a screenshot. That’s where these cuts either win or fail. When the shape respects the curl pattern, the haircut keeps paying you back in the mirror, in motion, and on the mornings when you barely have time for a spray bottle and a few finger combs.