Silver pixie cuts for curly hair with face-framing layers work because they stop trying to force silver curls into a flat little helmet. That never works anyway. Curly hair wants lift, bend, and a bit of airy movement around the cheeks and temples, and silver strands make every line of the cut show up with extra clarity.
That’s the part people miss. On silver or gray hair, a blunt edge can look sharper than it does on darker hair, and on curls that shape gets magnified the second the hair dries. The right face-framing layers soften the whole thing without turning it mushy. They give the cut somewhere to go — a cheekbone piece here, a temple piece there, a nape that stays clean instead of fuzzy.
I’ve always thought the best short curly cuts feel more tailored than trendy. They should work with shrinkage, respect density, and make the silver look deliberate rather than incidental. The styles below range from soft and rounded to choppy and a little rebellious, because short silver curls are not one note. They have range. They should show it.
Why These Cuts Earn Their Keep

- They use shrinkage on purpose: Curly hair always lands shorter than it looks when wet, so these cuts place the front pieces where they’ll actually frame the face once dry.
- Silver tone shows shape fast: Icy strands, pewter tones, and salt-and-pepper ribbons all catch light differently, which makes a good layer map easier to see and a bad one harder to hide.
- The face stays open: Cheekbone pieces, temple layers, and a soft fringe keep the cut from puffing into a round blob around the temples.
- Shorter length cuts the weight: Once the curls aren’t dragging themselves down, the roots lift better and the silhouette gets cleaner.
- Every texture has a version: Loose 2C waves, springy 3A curls, dense 3C spirals, and even tight coils can wear a pixie when the perimeter and interior layers are adjusted properly.
- They age well with growth: A smart silver pixie can grow into a pixie bob, a soft crop, or a shaggy short cut without that awkward “I meant to do this” phase that so many short styles create.
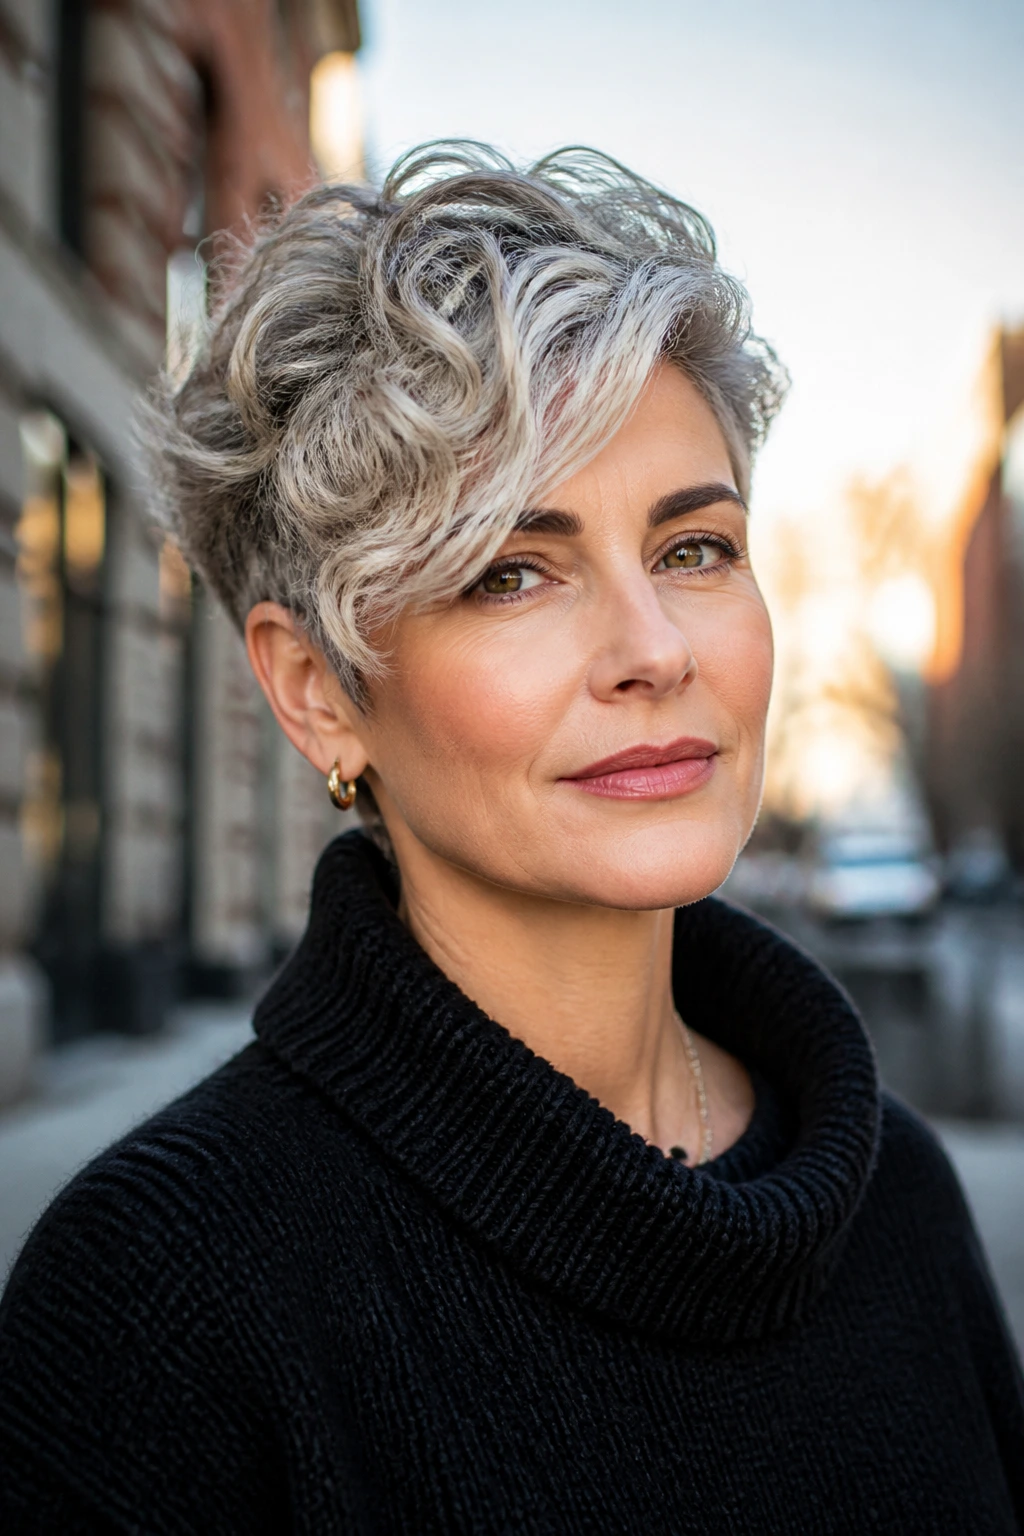
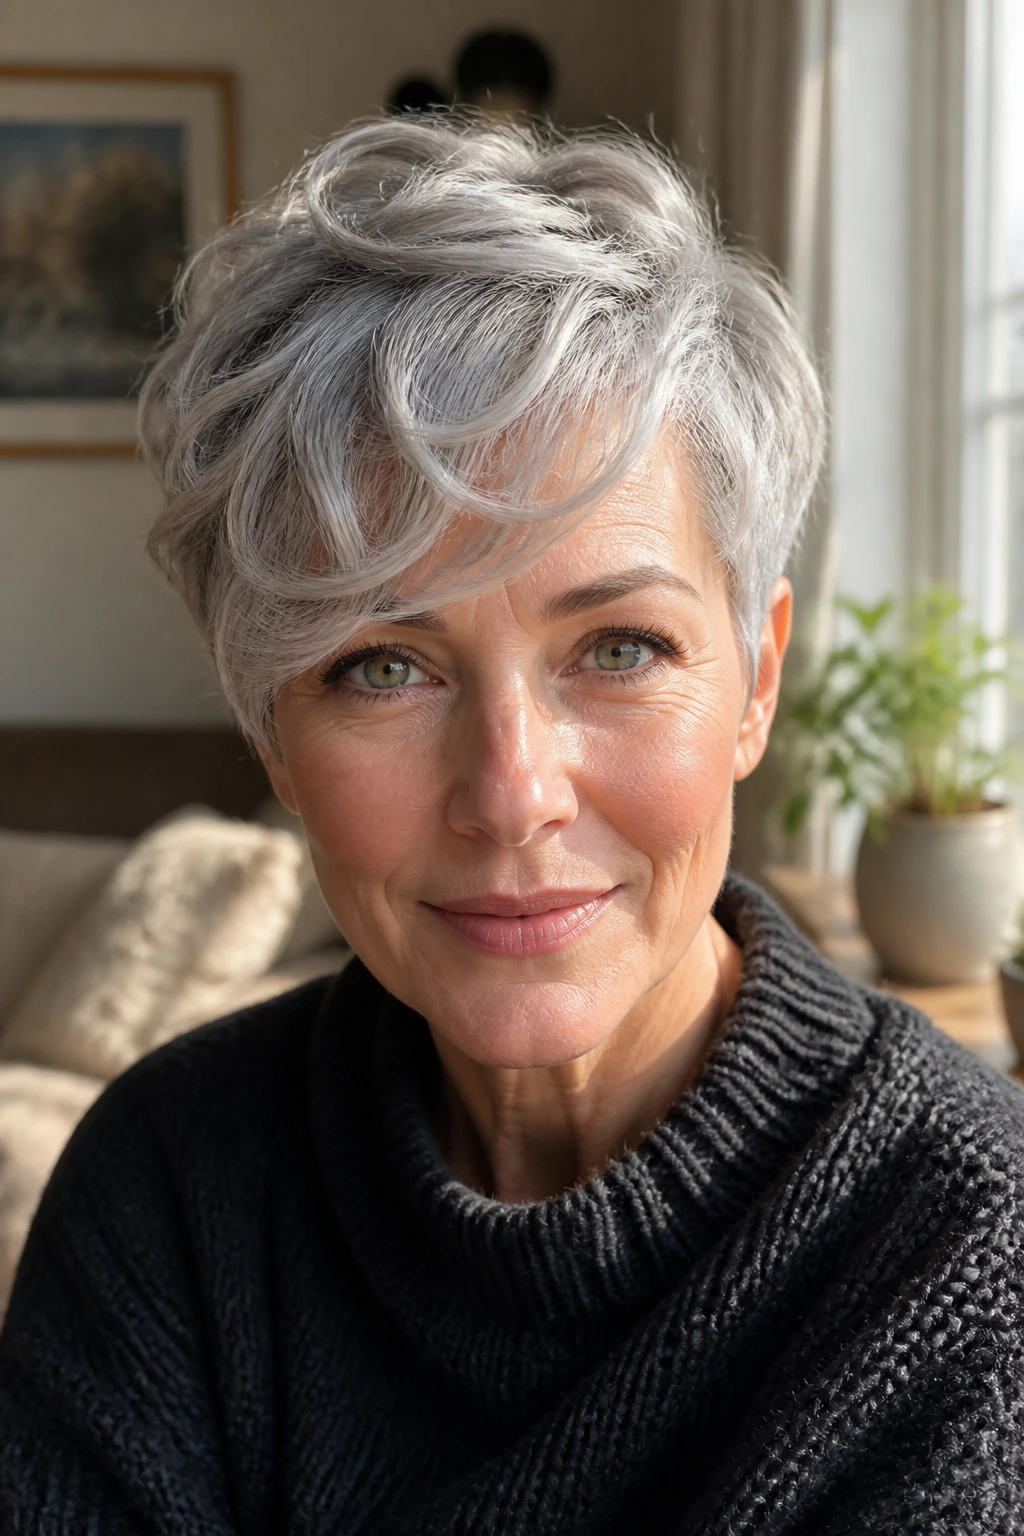
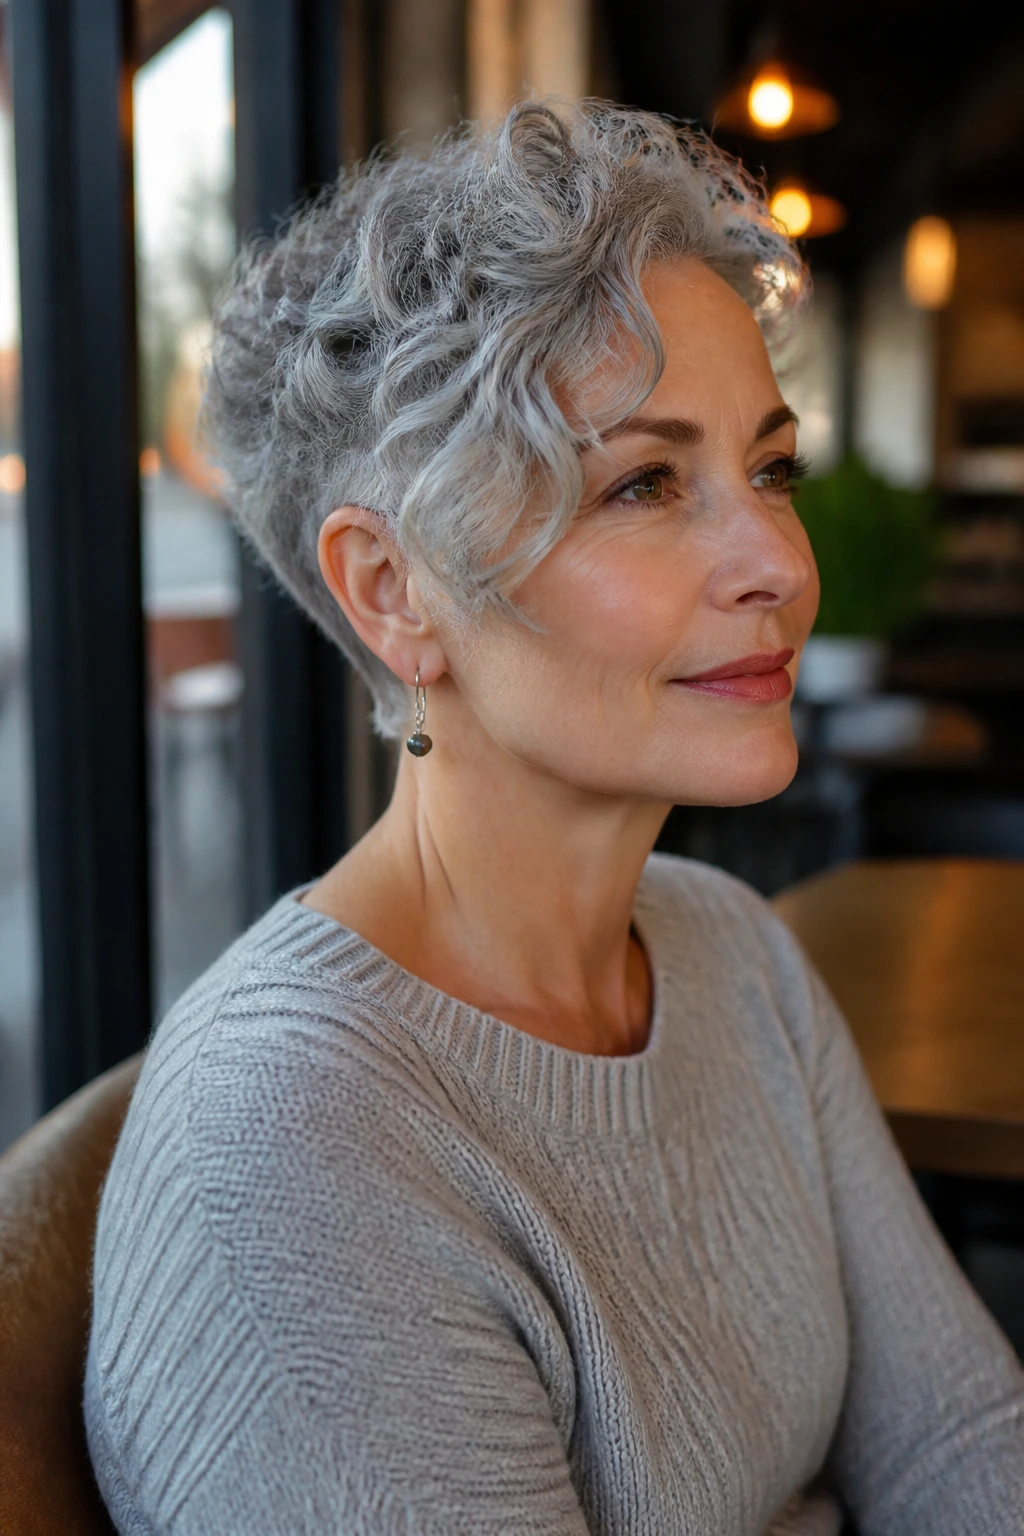
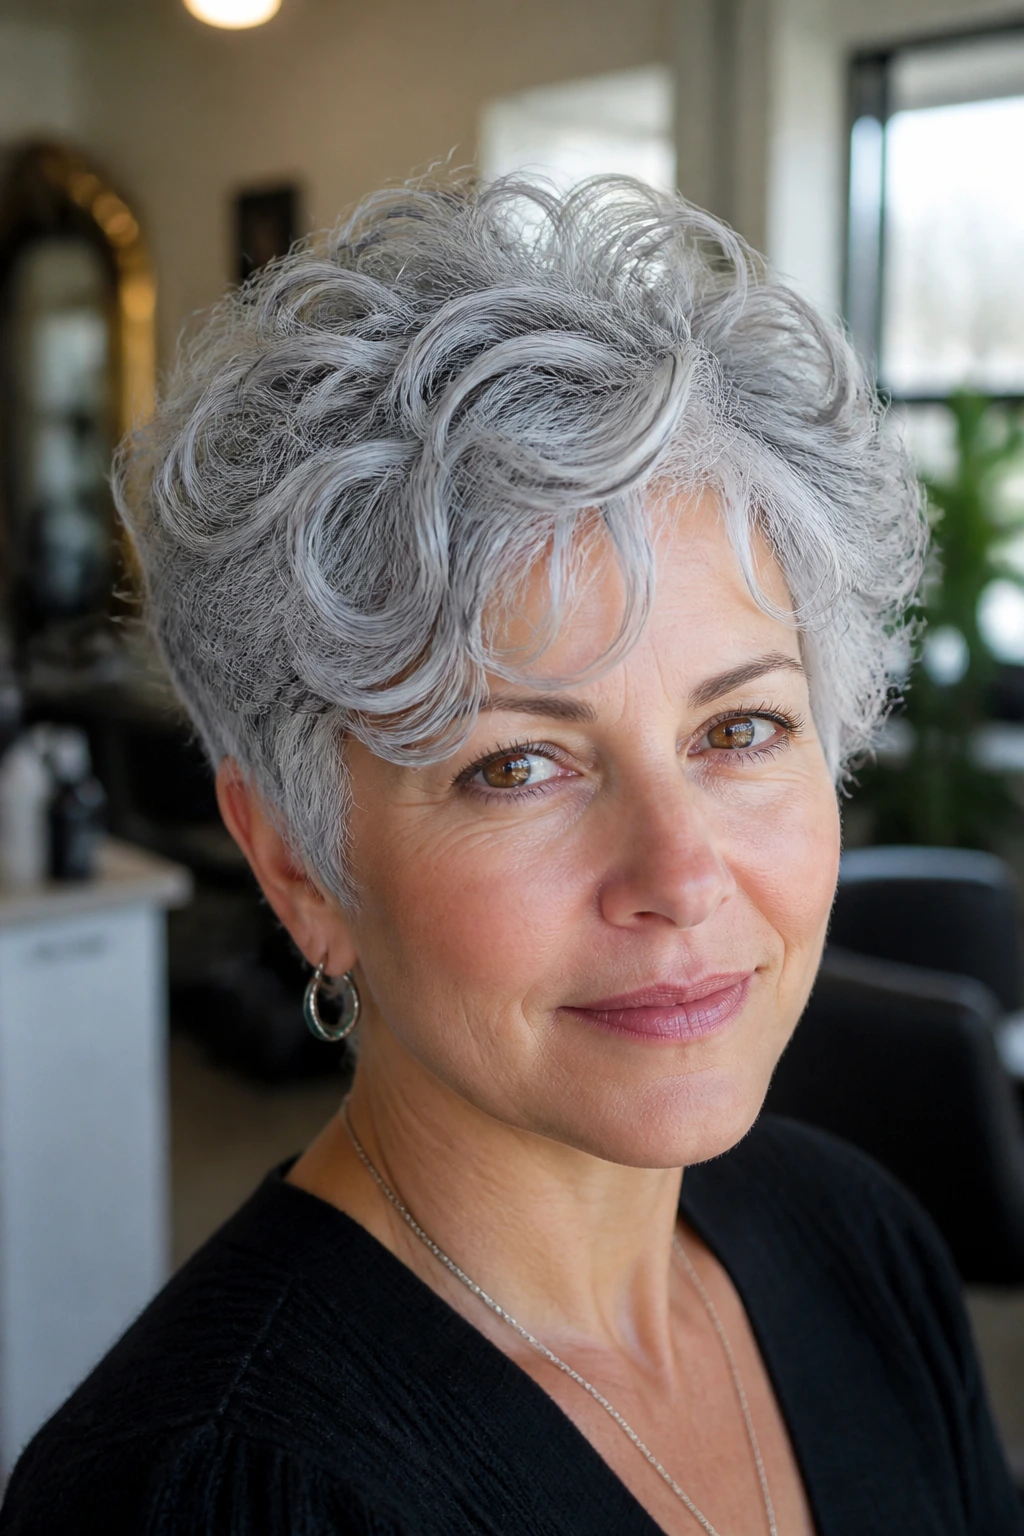
1. The Soft Silver Halo Pixie
A halo pixie is the one I reach for when someone wants short hair that still feels airy around the face. The curls sit close at the back, then open gently through the crown and temples so the whole shape looks lifted instead of chopped. On silver hair, that soft curve reads beautifully because the light hits the upper layers and makes the shape look almost hand-painted.
This cut works best on fine to medium curls that need a little encouragement, not a full reinvention. Ask for rounded interior layers, a slightly longer temple area, and a front piece that lands around the cheekbone when dry. That last part matters. Curl shrinkage can turn cheekbone length into eyebrow length faster than people expect.
Best for: oval, heart, and narrow face shapes that need a little width through the mid-face.
Styling note: A lightweight mousse plus diffuse-dry is usually enough. I wouldn’t bury this cut in heavy cream; silver curls can go limp fast if the product stack is too rich.
The halo shape is one of those cuts that looks polished even when it’s not trying hard. Clean at the nape, soft at the front. That balance is the whole point.
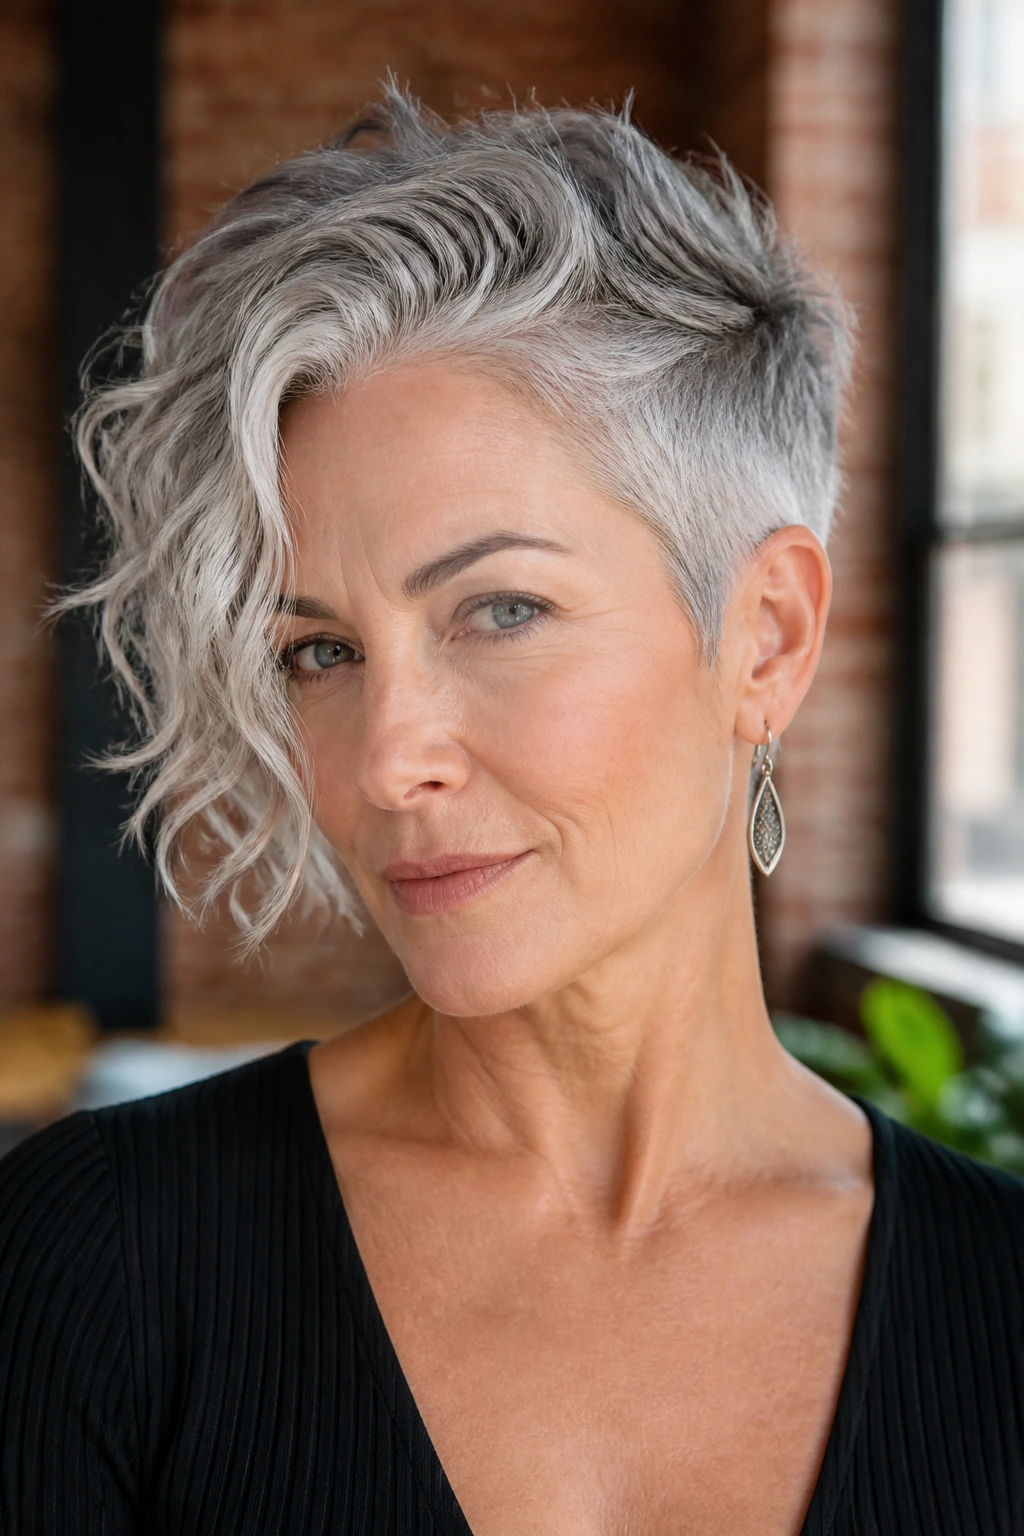
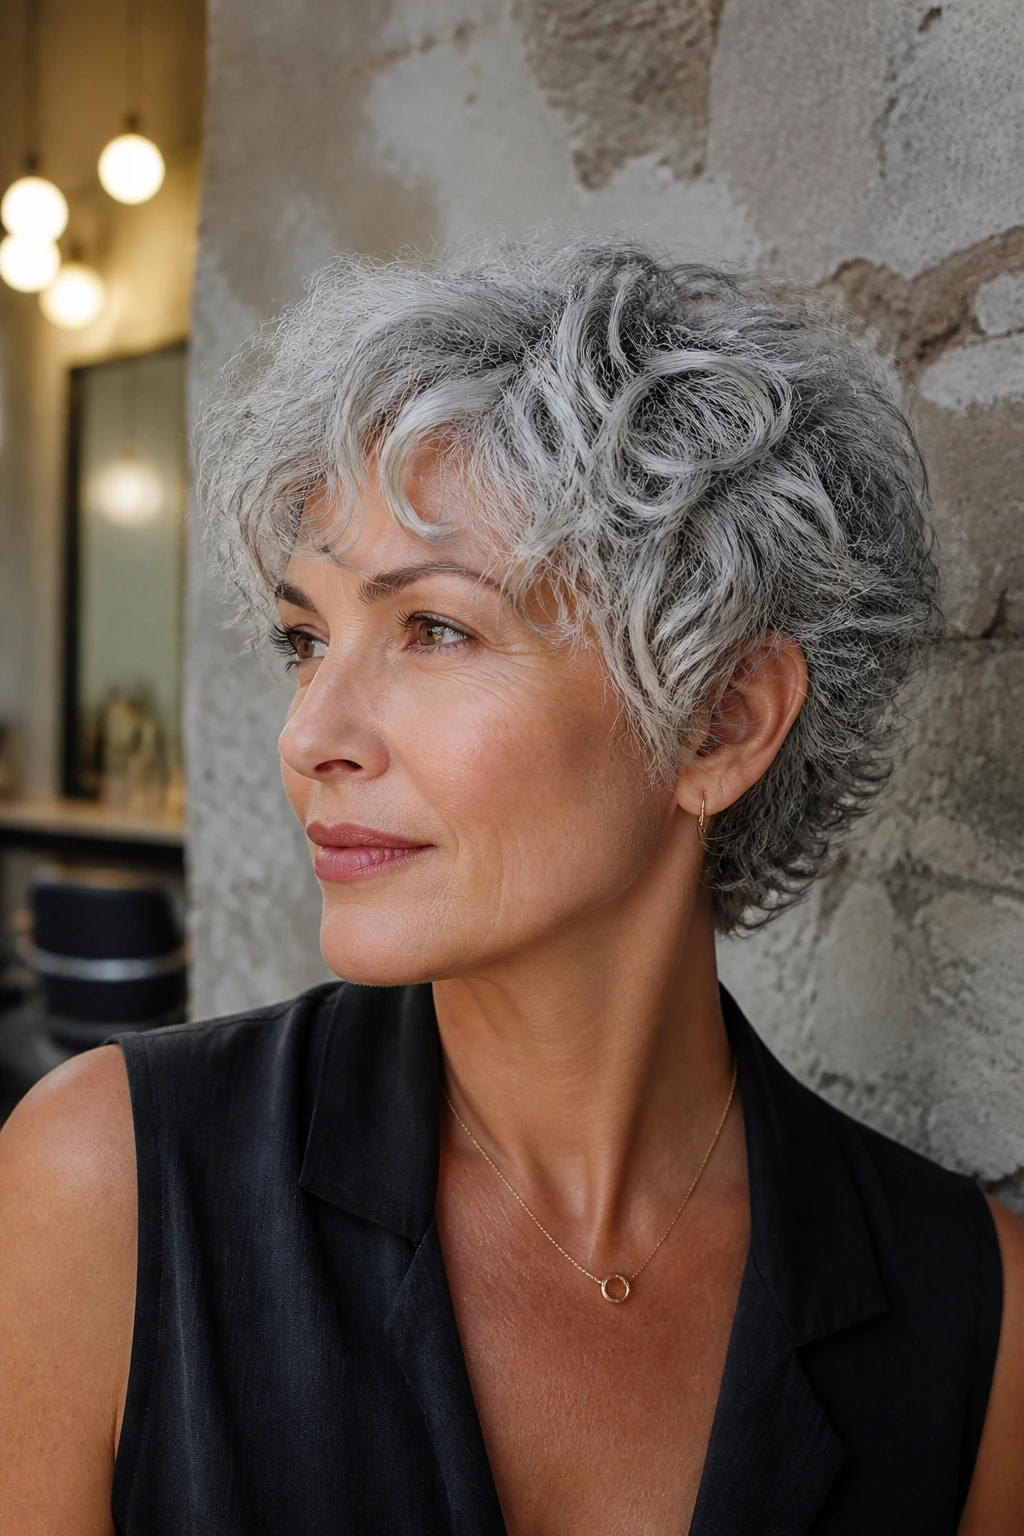
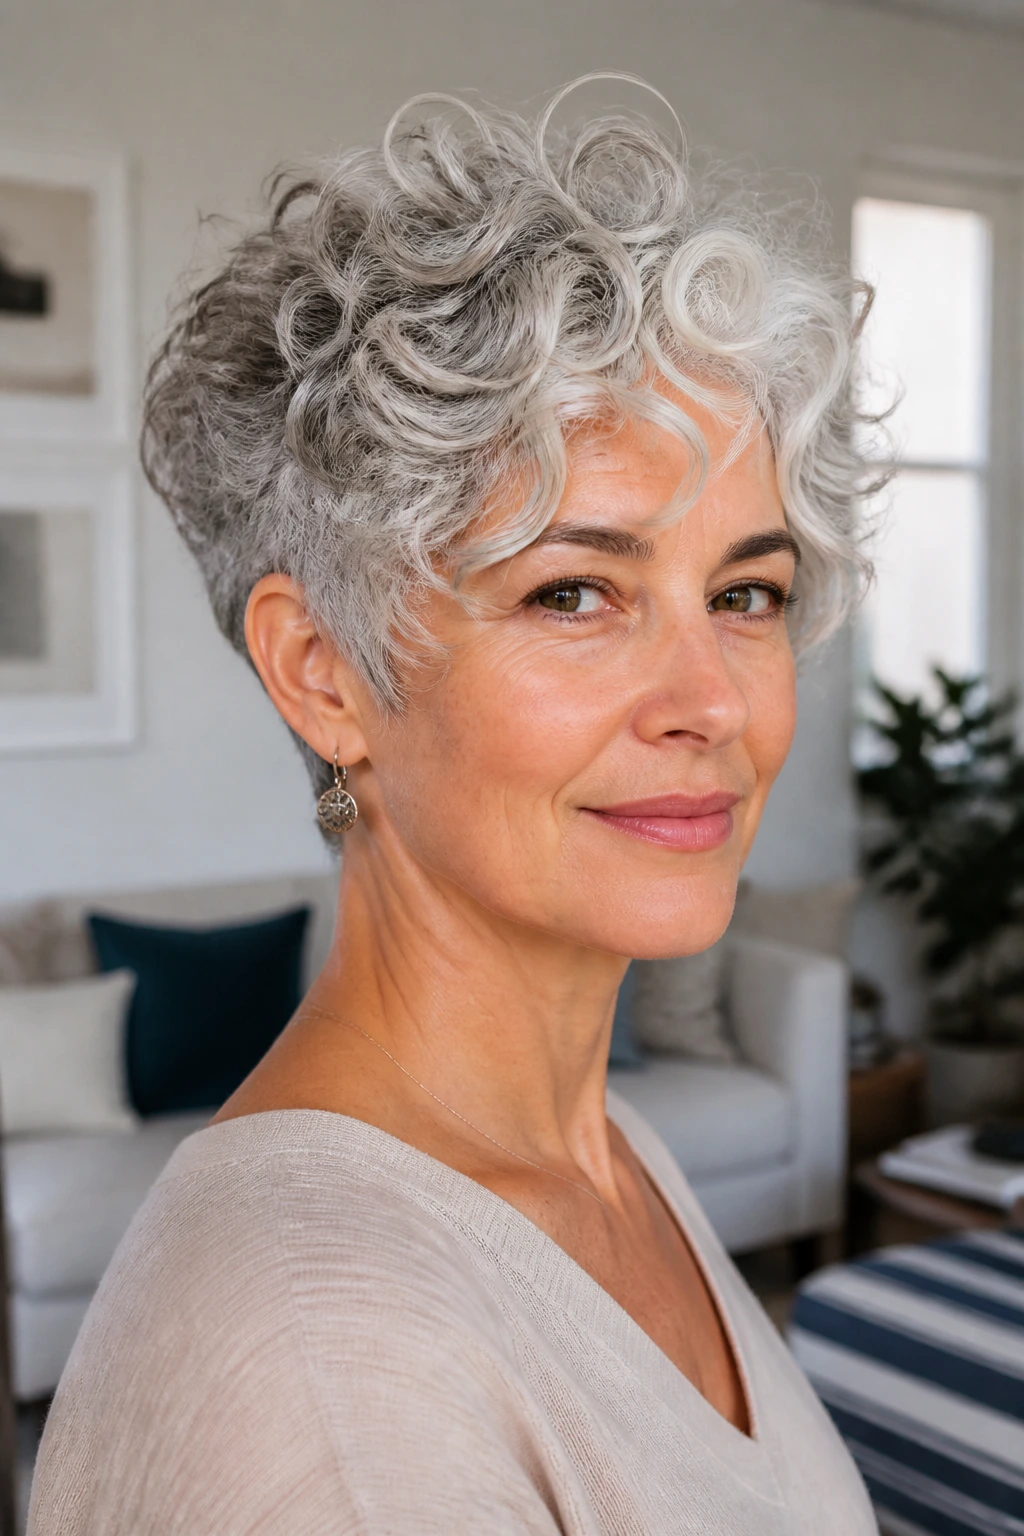
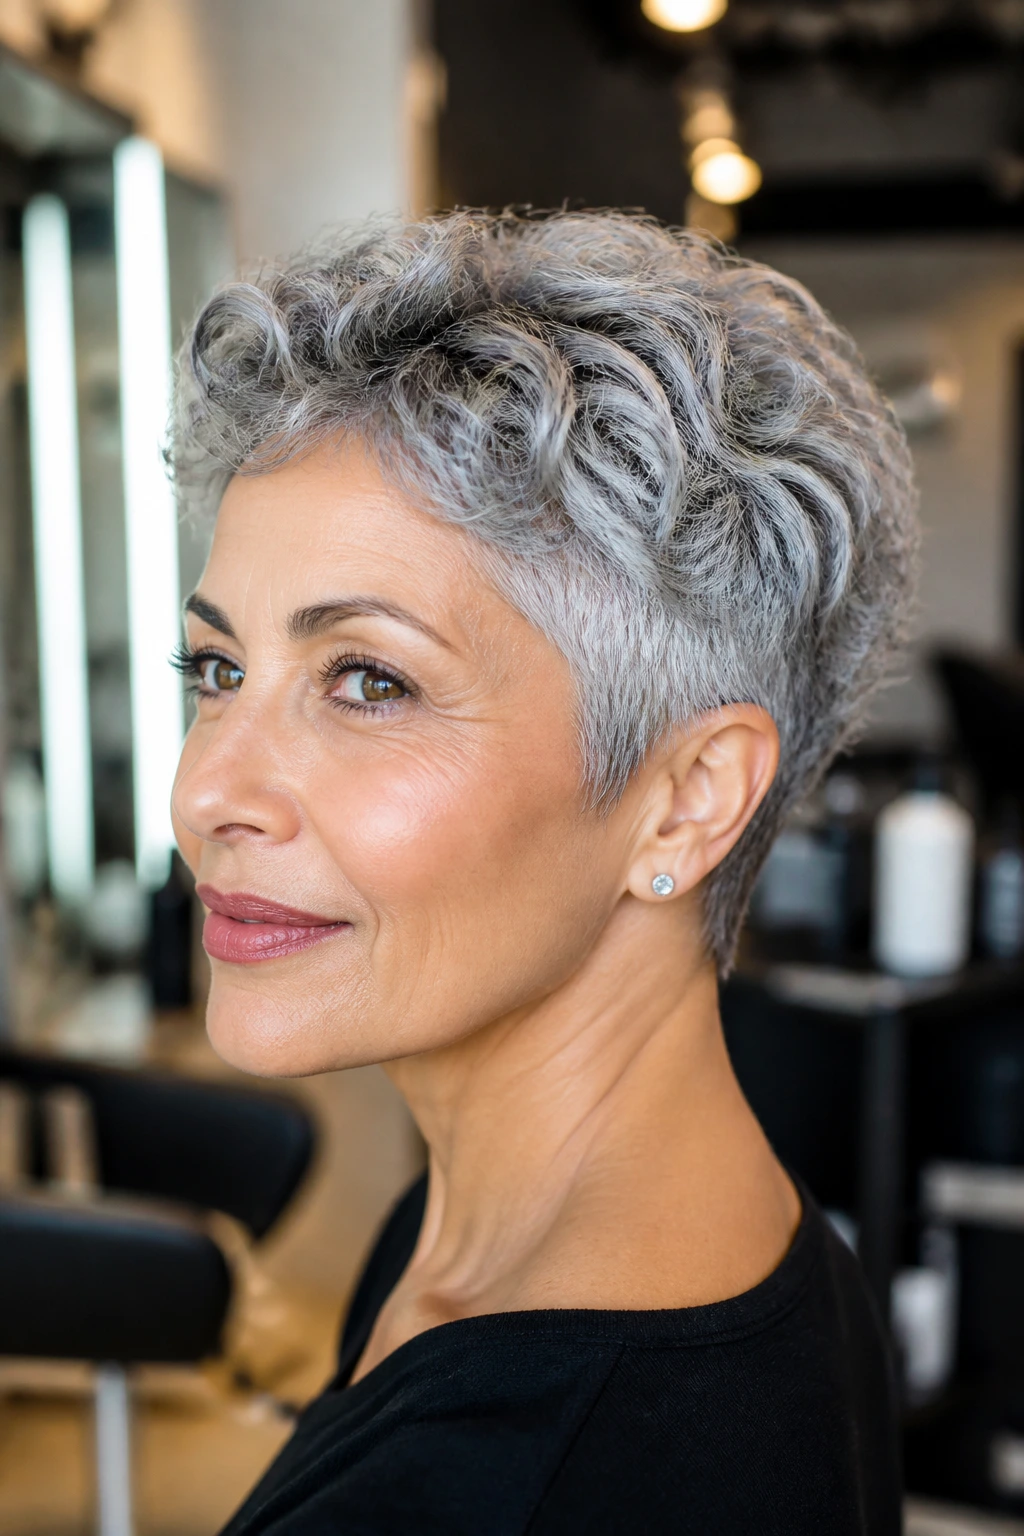
2. The Tapered Nape Pixie With Cheekbone Framing
Why does this one work so well? Because it solves the part of curly short hair that can get sloppy fastest: the back of the neck. A tapered nape keeps the cut tidy from behind, while the front keeps enough length to let the face-framing pieces curl forward instead of bouncing straight out.
On silver hair, the taper matters even more. Gray and silver strands can look a little wiry at the back if they’re left too blunt, and a clean taper gives that area structure. The front stays soft, the back stays crisp, and the cut doesn’t balloon under scarves, collars, or damp weather.
What to ask for
- A short, neat nape taper that follows the natural hairline.
- Cheekbone-length front layers that can be tucked or swept forward.
- Minimal bulk around the lower sides so the silhouette stays close to the head.
This style is a favorite for people who want a pixie but hate the feeling of too much hair at the neck. It also plays nicely with glasses, because the side pieces can curve just enough to avoid crowding the frames. If your curls are thick, this is one of the cleaner ways to keep them from taking over the whole head.
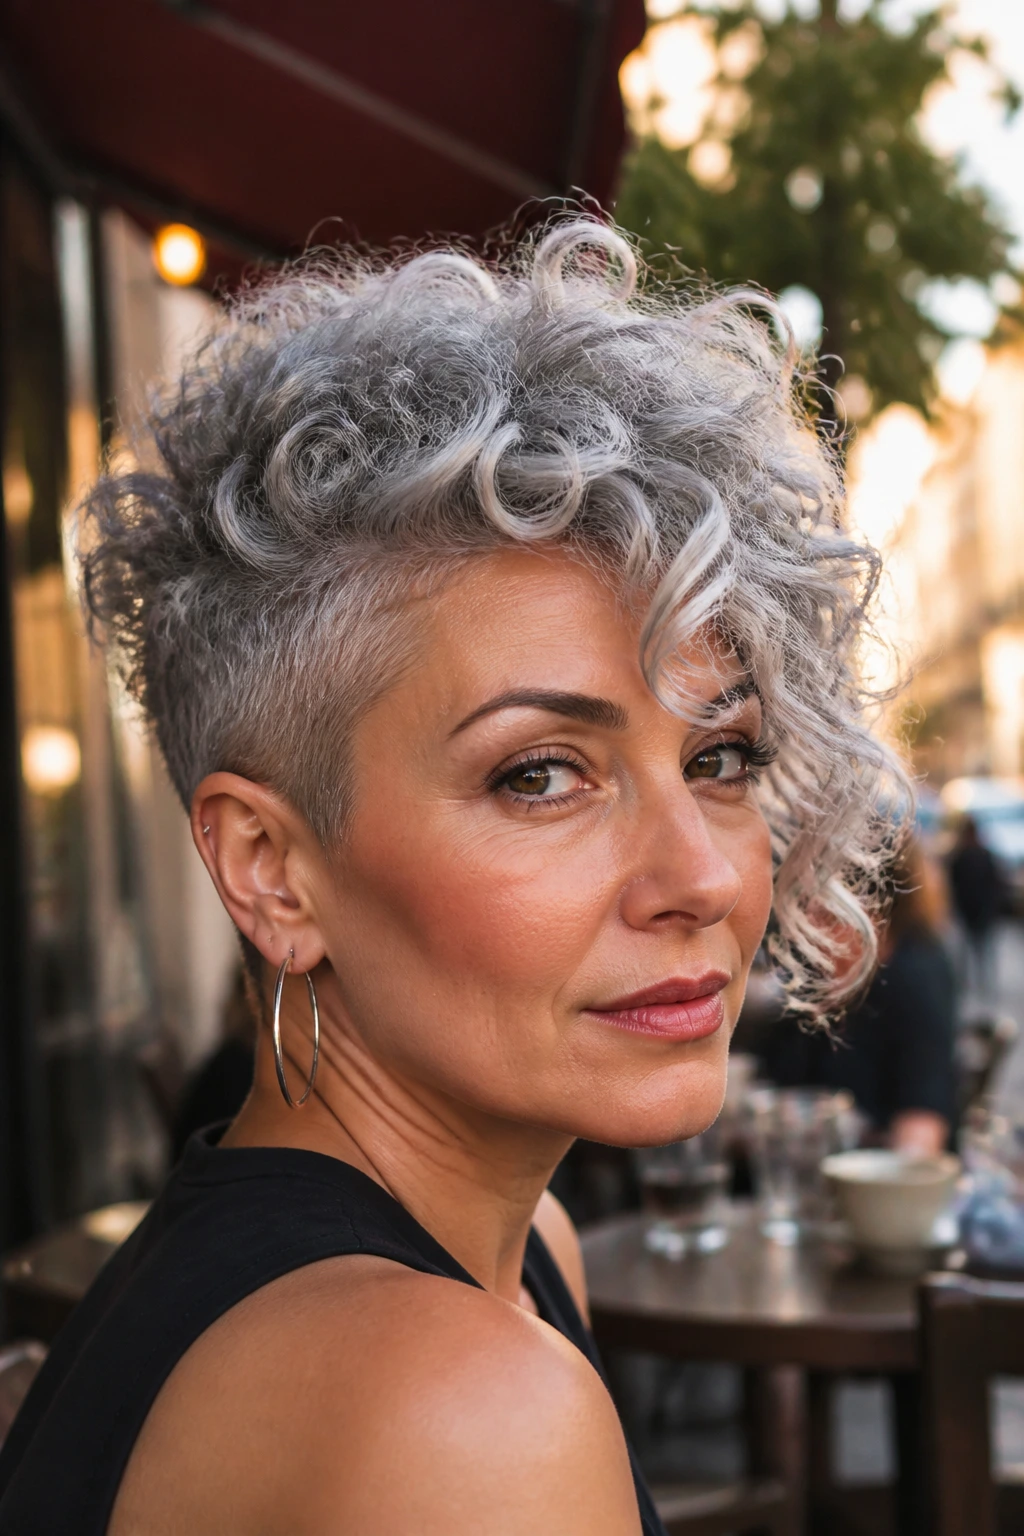
3. The Curly Undercut Pixie With a Long Fringe
A curly undercut pixie is blunt in the best way. The sides and back are kept tight, sometimes almost shaved in the lower section, while the top and fringe stay long enough to curl forward in one dramatic sweep. On silver hair, that contrast looks sharp without needing much styling. The top does the talking.
This is the cut for dense curls, coarse texture, or anyone whose hair builds too much bulk around the ears and temples. The undercut removes that weight. What’s left on top behaves more like a focused curl crown than a puffed-out cap. And because the fringe stays long, the face gets an obvious frame instead of a hard line.
If your curls are 3B or 3C, this cut can be a lifesaver in humid weather. You’re not fighting the same volume on all sides. You’re concentrating it where it looks intentional.
The fringe does need a little discipline. Finger-coil the front pieces after washing, or clip them in the direction you want while they dry. Otherwise the curls may spring up in two different directions, which is not the effect we’re after.
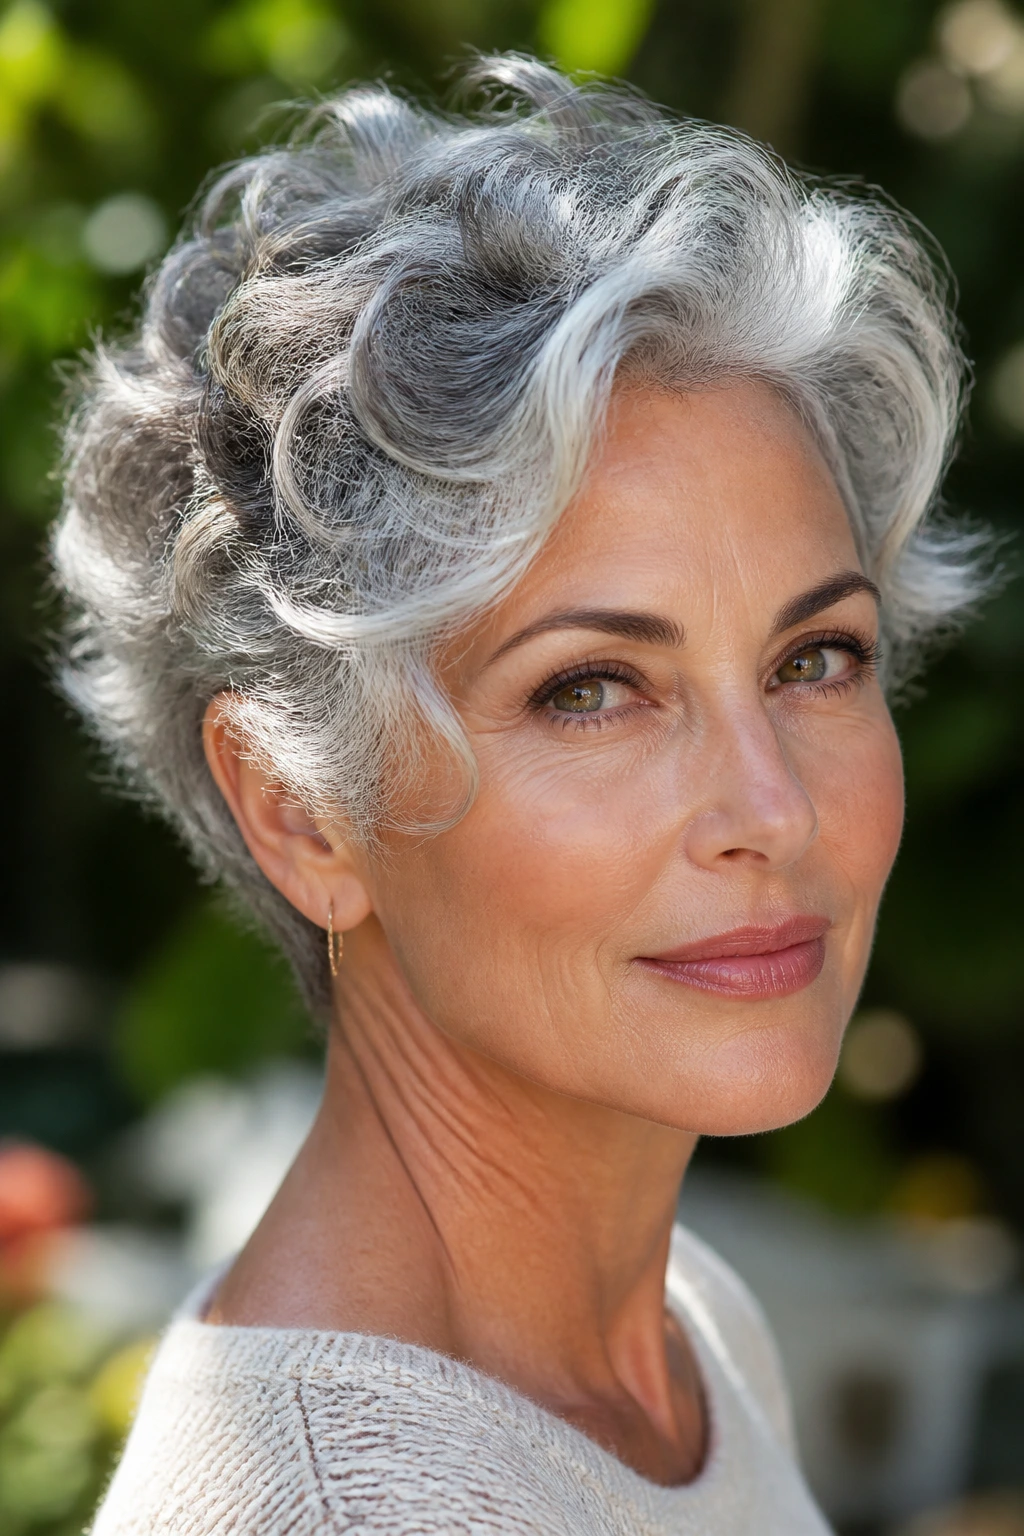
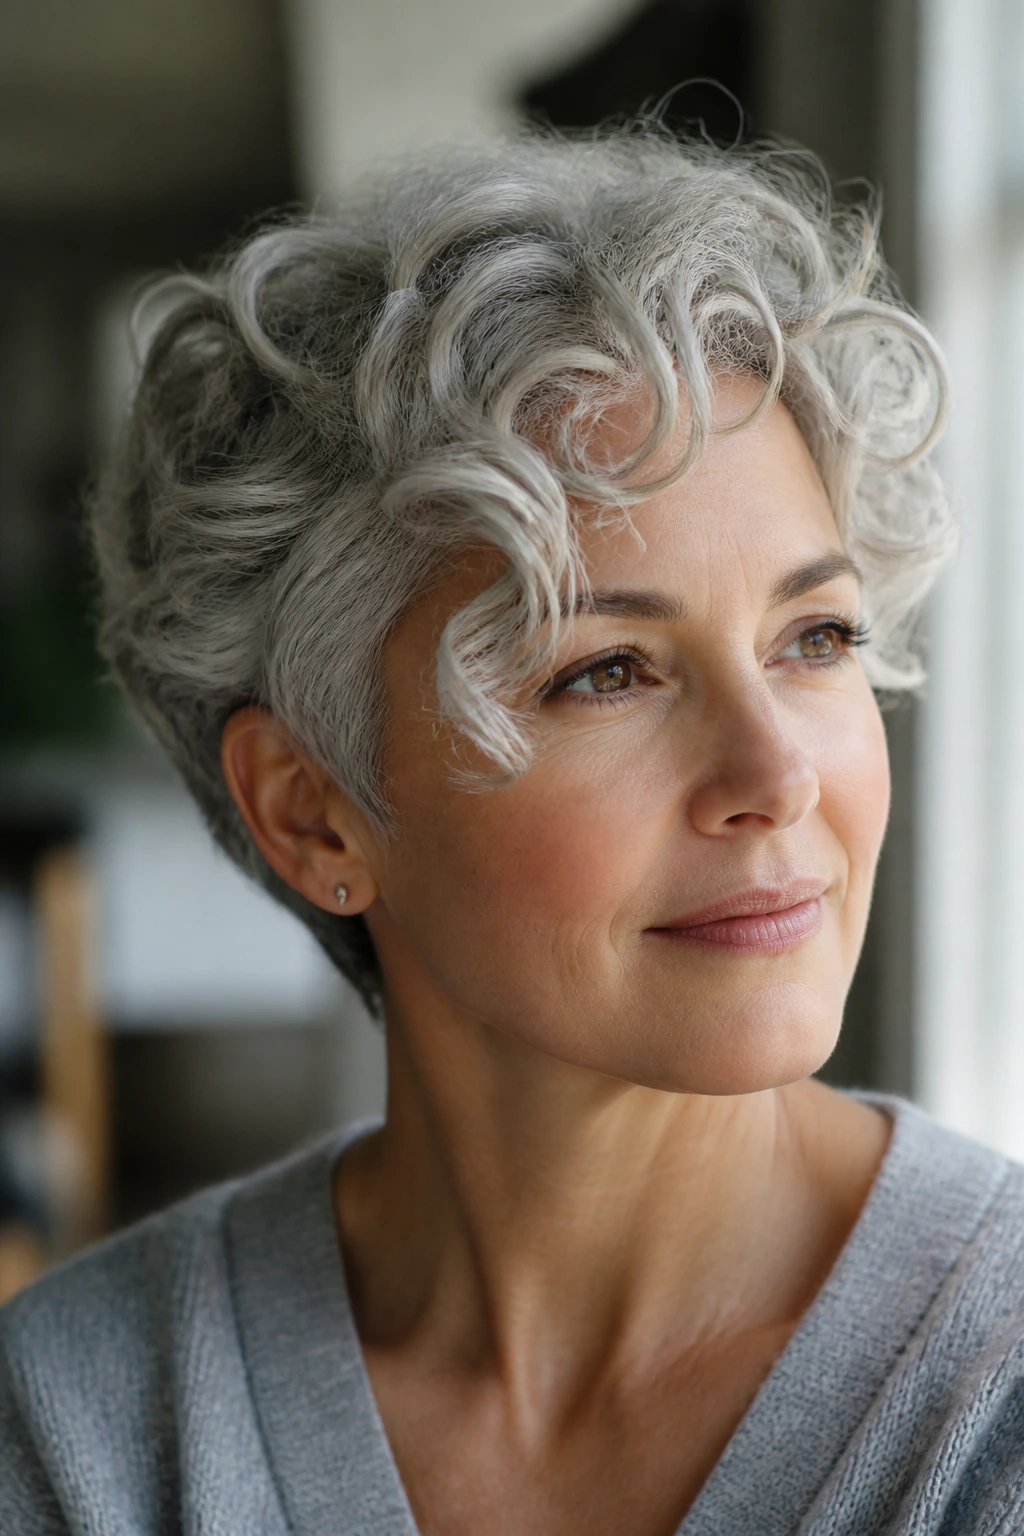
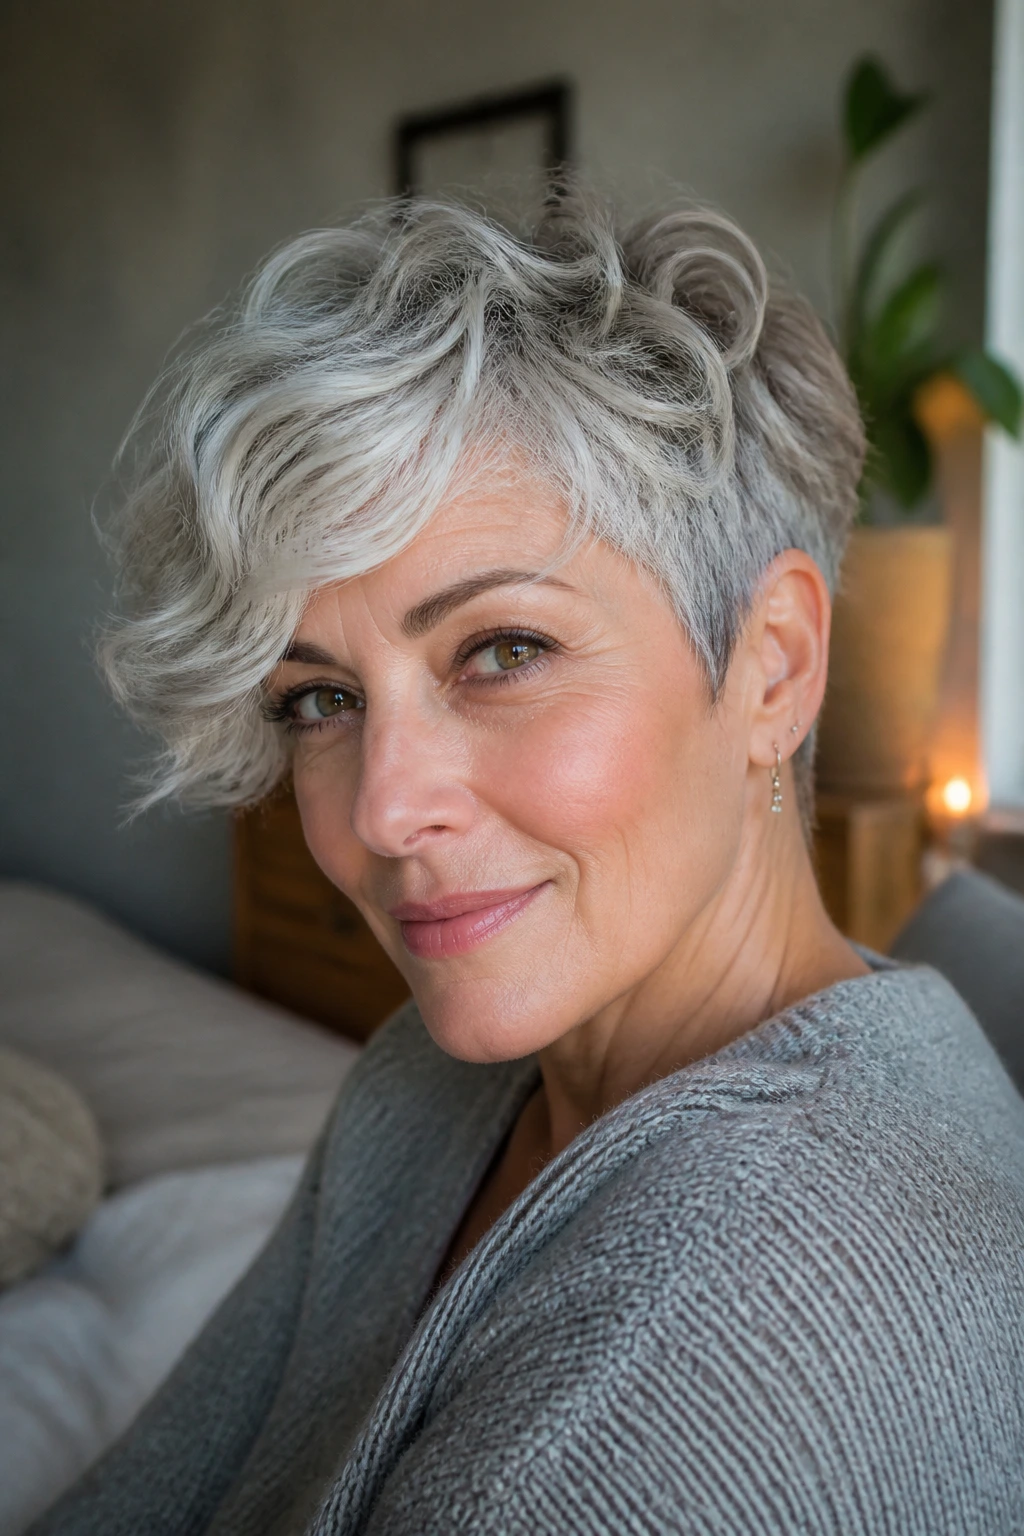
4. The Rounded Crop Pixie With a Side Sweep
A rounded crop is the gentler cousin of the classic pixie. The silhouette curves softly from the crown down to the sides, and a side sweep keeps the front from feeling too severe. It’s one of the best silver pixie cuts for curly hair if you want the shape to look full but not puffy.
The trick here is balance. Too much volume at the crown and the cut starts to read like a mushroom. Too little and it falls flat. A good rounded crop keeps the crown buoyant, then lets the face-framing layer fall diagonally across the forehead or cheekbone, depending on the face shape.
I like this cut on round and square faces because the side sweep breaks the symmetry without looking fussy. It also works on looser curls that need shape more than control. If you’re tired of hair sticking straight out at the sides, this is a smart fix.
Styling note: dry it with the part slightly off-center, not dead center. A tiny shift changes the whole mood of the cut and gives the front pieces a better chance to move.
5. The Piecey Asymmetrical Silver Pixie
One side longer. One side sleeker. That’s the whole charm, and it’s a good one. An asymmetrical pixie gives silver curls a little tension, which keeps the cut from looking too soft or too polite. The longer side can skim the cheekbone or jaw, while the shorter side keeps the profile neat.
This style does especially well on square faces or broad foreheads because the asymmetry breaks up strong lines. If your curls have a strong spring, the longer side will collapse into a soft arc rather than hanging flat. That’s the nice part. It gives movement without needing much styling work.
I prefer this cut when the silver tone is high-contrast — bright white at the front, smoky gray underneath, or a blend with obvious ribbons. The uneven length makes the color shifts easier to see. It’s a cut with a bit of attitude, but not the kind that needs constant fussing.
A little side part. A tiny amount of gel at the front pieces. Done. The structure comes from the cut itself, which is exactly how short curly hair should behave.
6. The Crown-Heavy Pixie for Flat Roots
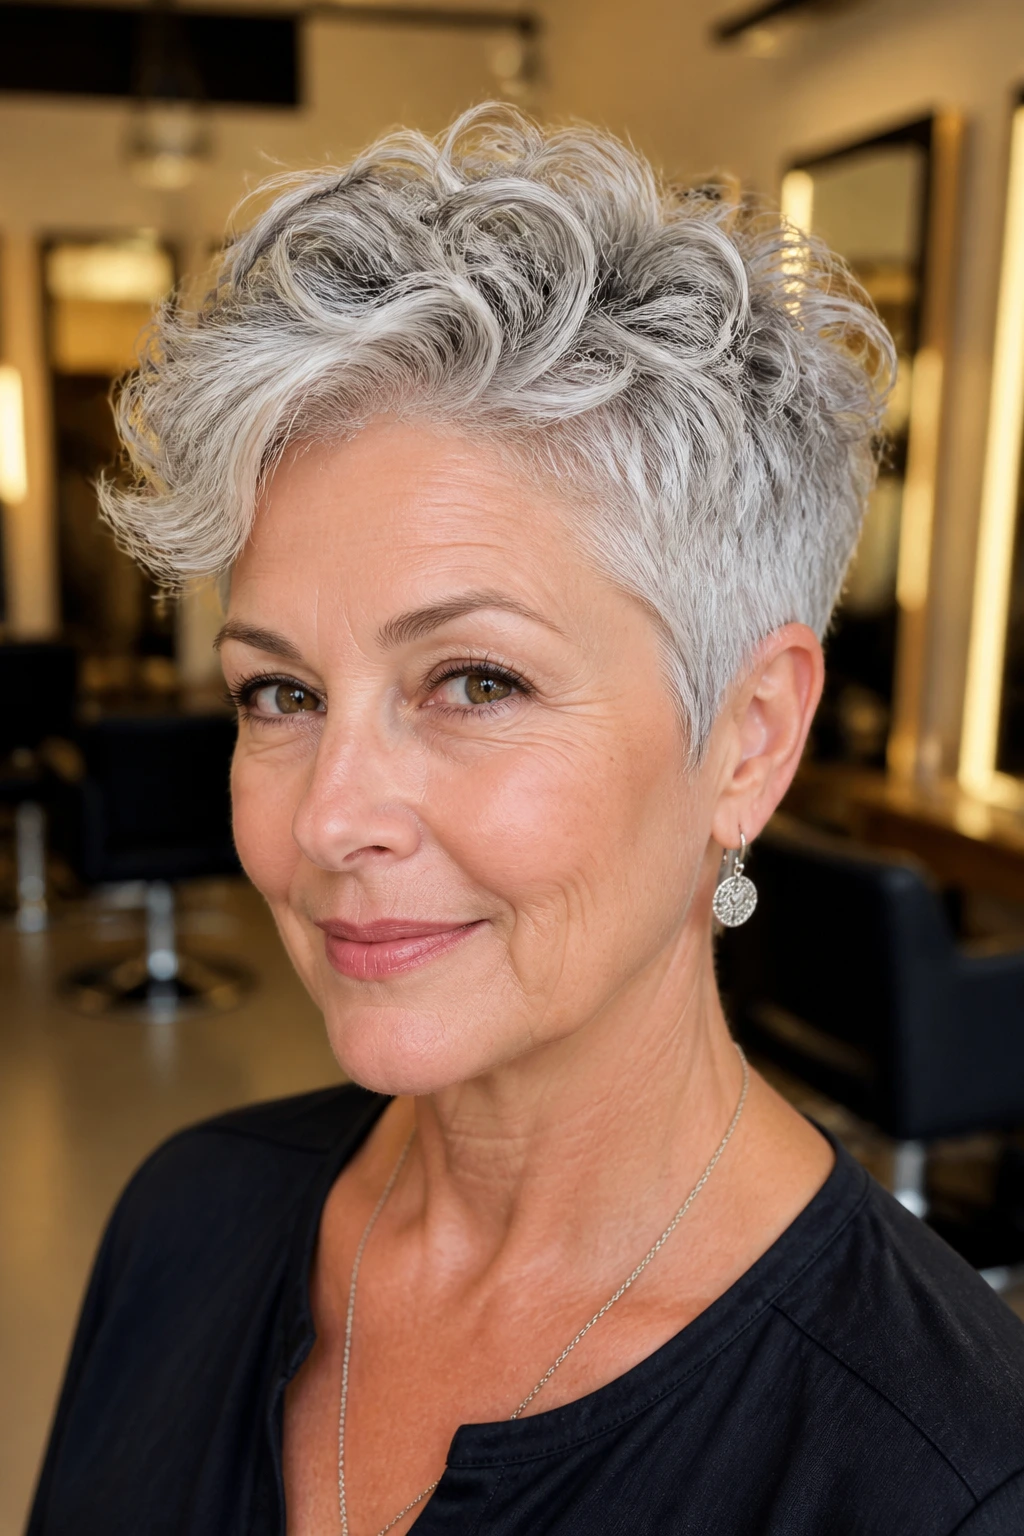
Some curls are all personality through the crown and absolutely no patience at the root. This is the fix. A crown-heavy pixie leaves more height on top and trims the sides tighter so the silhouette lifts instead of sitting down on the head. It’s especially useful when silver curls lose shape after a few hours and need a cut that builds in that lift from the start.
The result is not a fluffy top and skinny sides. Not if it’s cut well. The layers should be stacked in a way that lets the top curl upward while the sides stay close enough to define the head shape. That’s a cleaner look than spreading the volume evenly everywhere.
Why it works
- It gives flat roots somewhere to stand up.
- It stops the sides from widening the face too much.
- It lets silver highlights show on the top layer where the light naturally lands.
If your hair texture is medium to coarse, this cut can hold its shape for days without looking overstyled. A diffuser helps, but the real secret is the layer map. Keep the side sections lighter and the crown a touch longer, and the curls will do the rest.
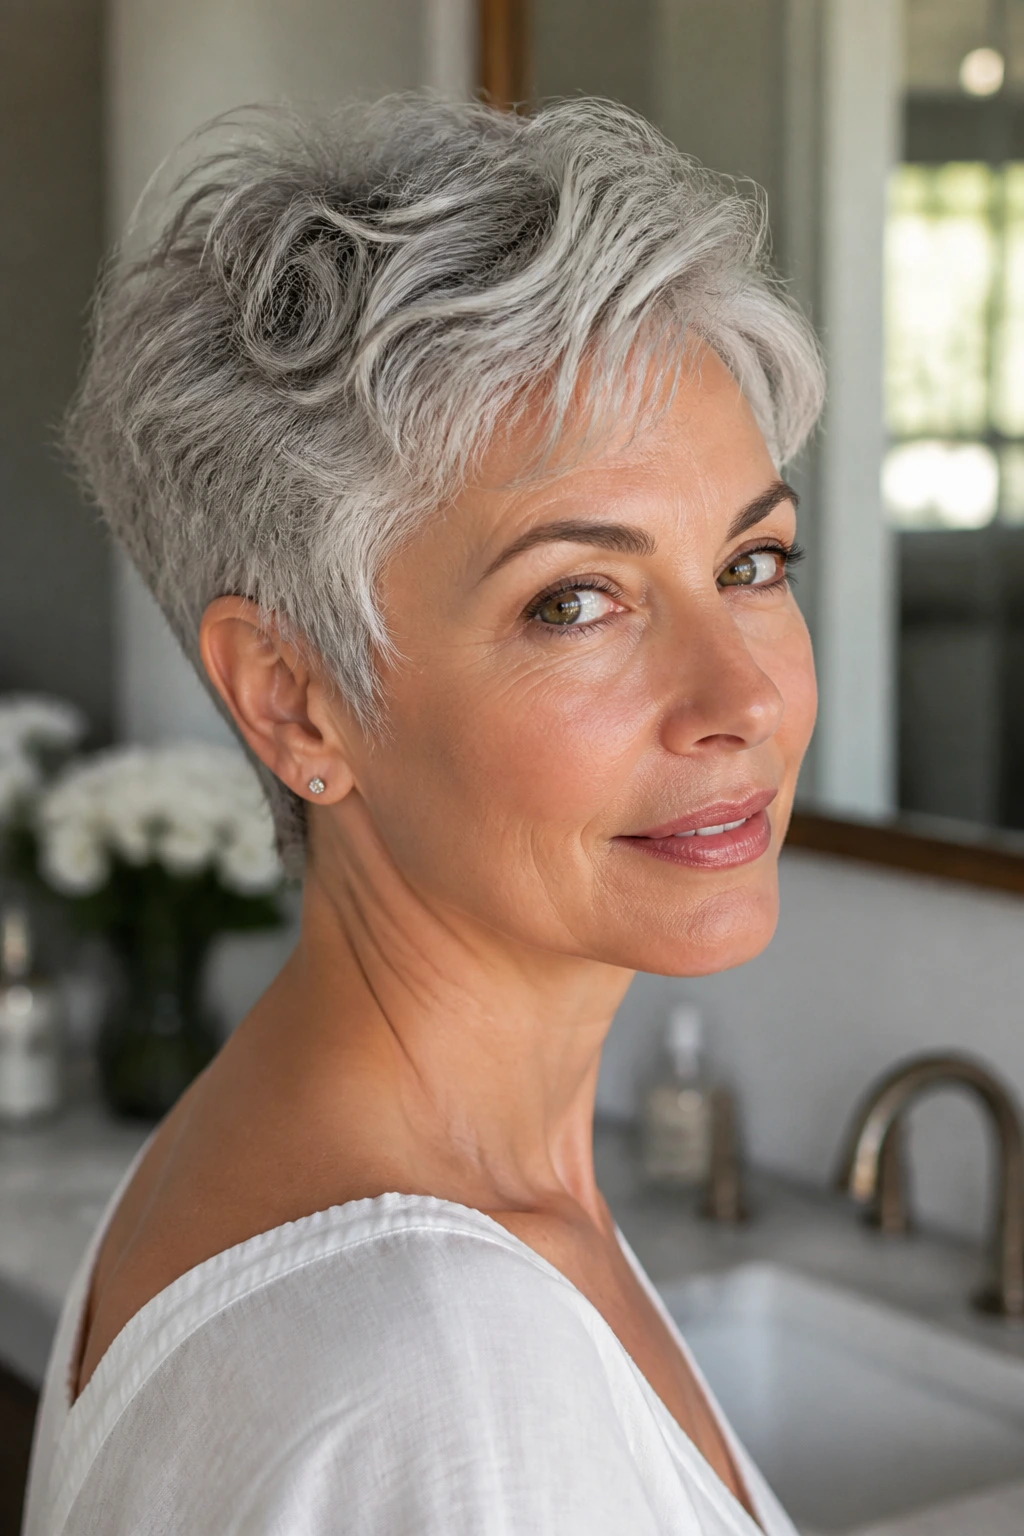
7. The Feathered Micro-Pixie for Fine Curls
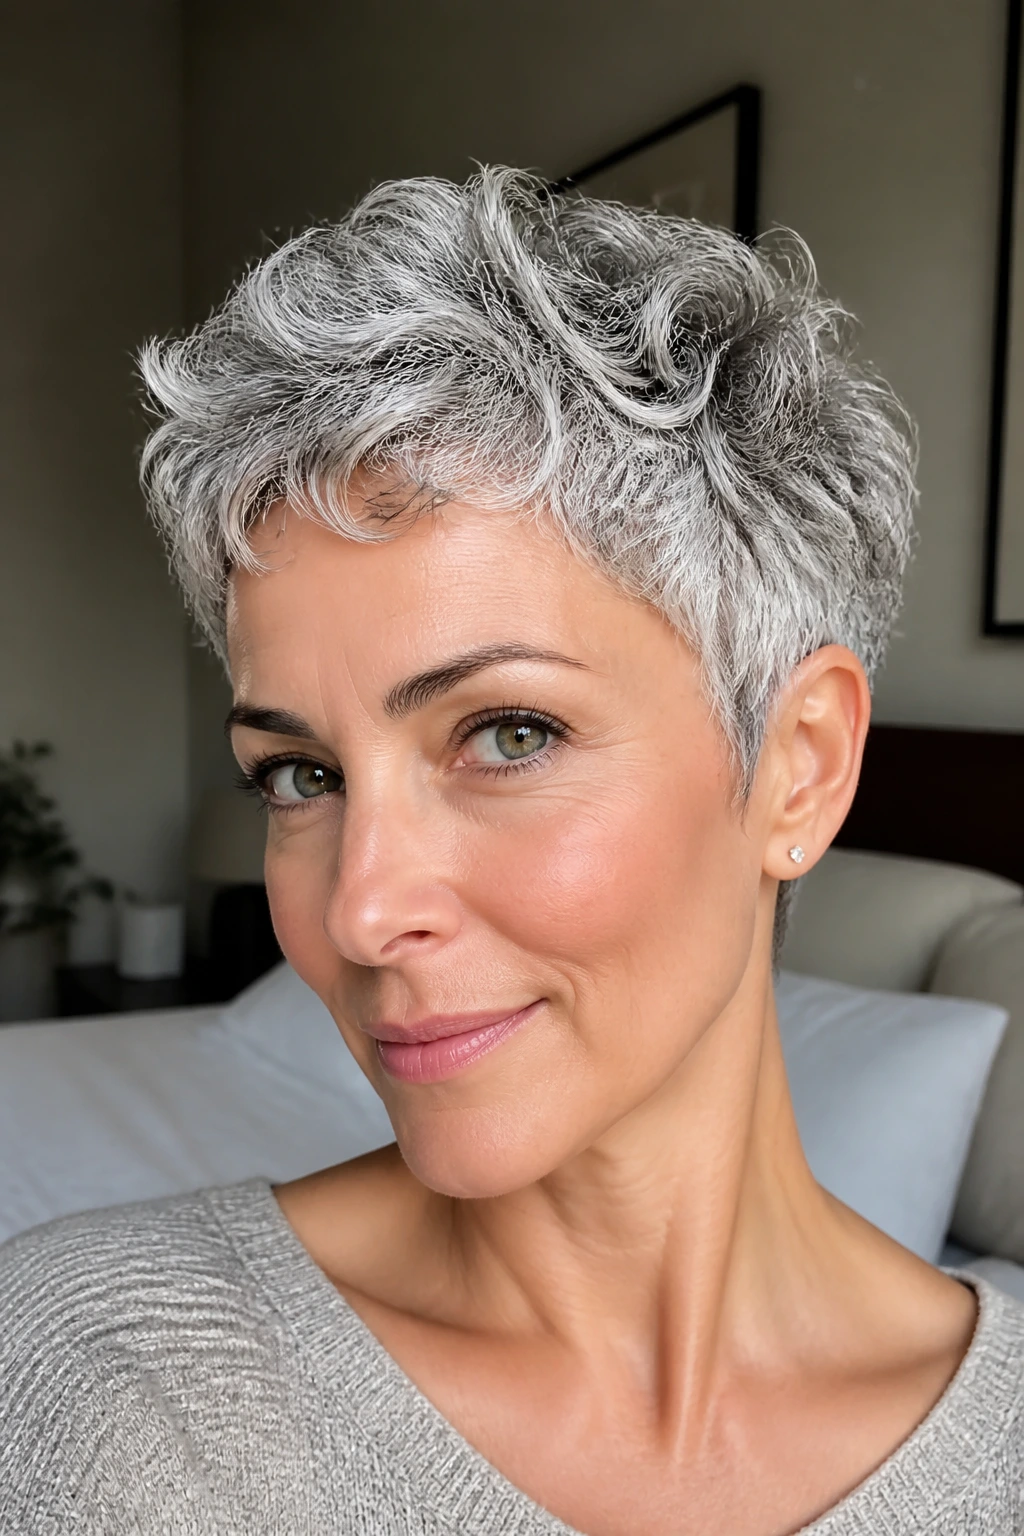
Fine curly hair can wear a pixie beautifully, but it needs restraint. Too much layering and it starts to look wispy in the wrong places. A feathered micro-pixie keeps the shape close, trim, and softly broken at the edges so the hair still has body without turning stringy.
This is the cut I’d suggest for someone whose silver curls get weighed down the second they grow past the ears. The micro length takes that problem off the table. And because the layers are feathered rather than heavily thinned, the cut keeps a little plushness around the head instead of looking sparse.
There’s a nice honesty to this style. It doesn’t pretend to be fluffy or dramatic. It just works. The face-framing pieces are short enough to soften the forehead and temples, but not so long that they start fighting the rest of the cut.
If you wear earrings, this is a fun one. The hair stays out of the way and the jewelry gets to show. Small hoops, a clean neckline, a little shine on the silver ends — that’s all it needs.
8. The Salt-and-Pepper Pixie With Temple Layers
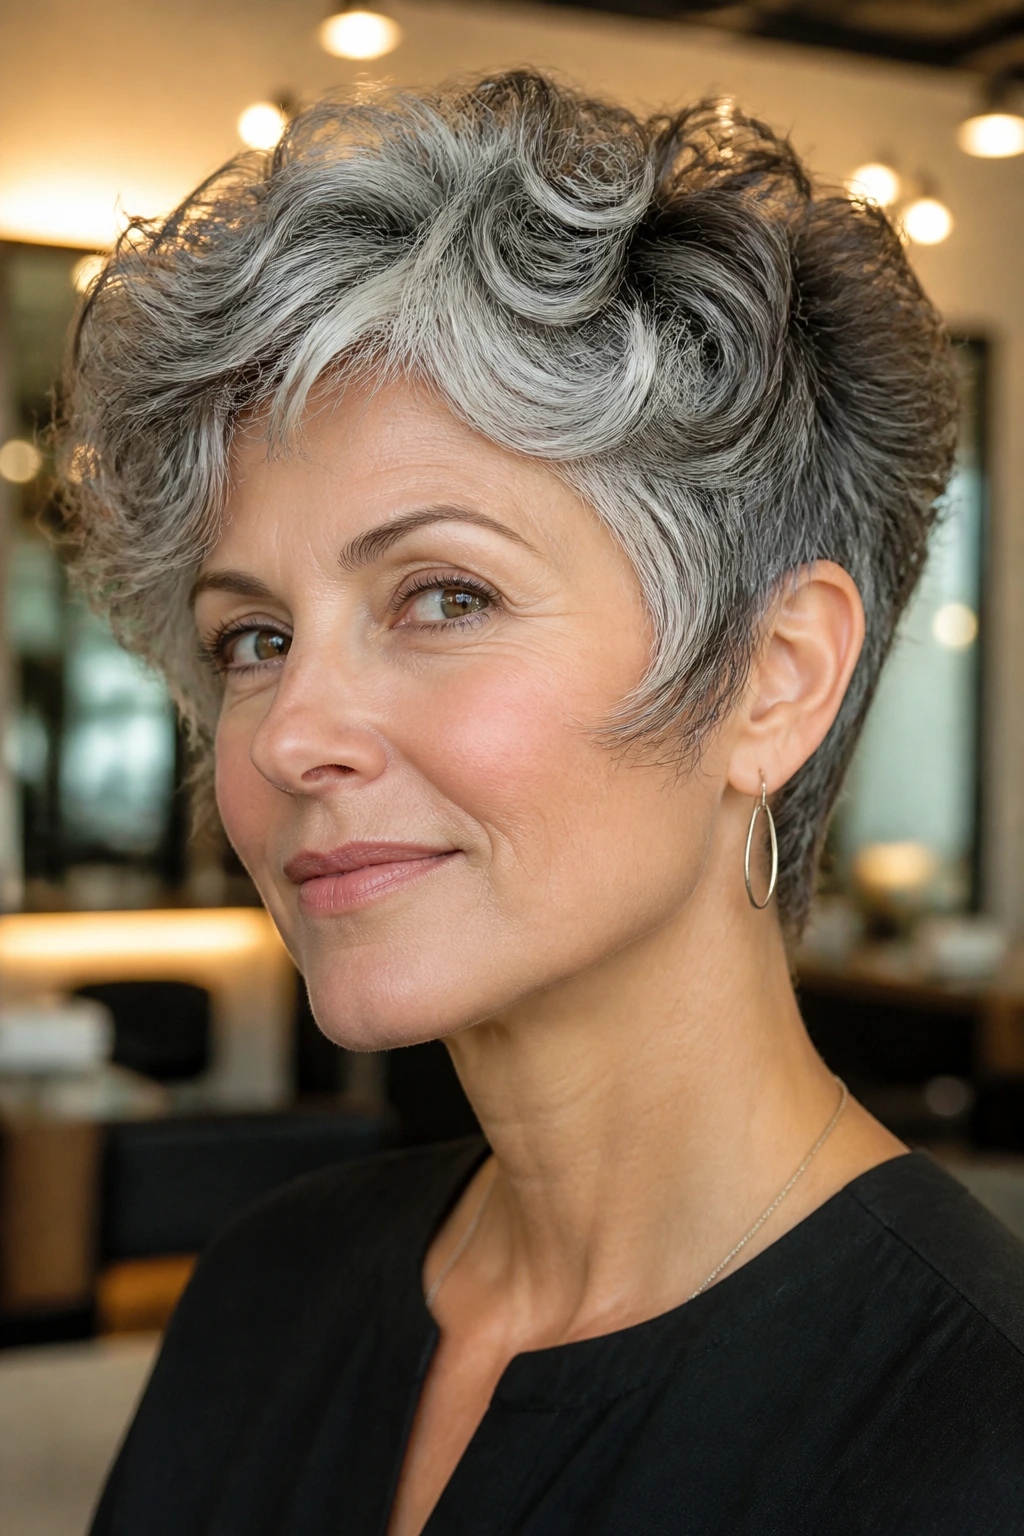
Salt-and-pepper hair has a built-in pattern that darker shades don’t always show as clearly, and a pixie with temple layers makes that texture even more visible. The temple area is where this cut does its best work. Instead of leaving the sides blunt and wide, the layers soften the profile and pull the eye toward the cheekbones.
This one is especially good if your curls have different densities across the head. Maybe the crown is full but the sides are softer. Maybe the nape grows in tighter than the top. Temple layers can smooth that transition without making the cut look overworked.
Best for
- People who want the silver and dark strands to stay visible as dimension, not blur into a helmet shape.
- Curl patterns that are tighter near the face and looser at the crown.
- Glasses wearers who need a little space around the frame arms.
The shape feels polished in a way that’s hard to fake with styling alone. You still need product, yes, but the cut gives the face a cleaner line before the mousse ever touches the hair.
9. The Curly Pixie Bob With Boblet Layers

This is the middle ground for people who like the idea of a pixie but don’t want to lose the comfort of a little length. A pixie bob — sometimes I call it a boblet because the back stays short while the front stretches out — gives silver curls room to form around the jaw without becoming a full bob. It sits in that useful in-between space.
Why it sits between styles
The back is still cropped enough to feel light on the neck, but the front has enough length to frame the lower half of the face. That means the curls can curve under the cheek and out near the jaw instead of sticking out at the sides. It’s a smart shape for anyone growing out a shorter cut and wanting to keep things tidy.
How to wear it
Use a diffuser on low heat and stop once the curls are about 80 percent dry. Let the front pieces finish drying on their own so they don’t collapse into the rest of the cut. A little root lift at the crown helps the longer front layers read as intentional, not heavy.
This cut is one of the easiest transitions if you’re not sure you’re ready for a full pixie. It has enough structure to feel short, but enough sweep to stay soft around the face.
10. The Deep Side-Part Pixie That Changes the Whole Face Line
A deep side part can change a short curly haircut more than most people expect. Move the part a couple of inches off center, and suddenly the silver curls fall in a diagonal line that narrows one side of the forehead and opens the other. The face-framing layers do not need to be long to make this work. They just need to land where the part sends them.
This is a strong choice for heart-shaped and round faces. The side part creates a vertical line that lengthens the face, while the front pieces sweep across the brow instead of sitting straight on it. On curly silver hair, that diagonal catches light in a really clean way. You get brightness without extra length.
It’s also useful on mornings when the hair refuses to cooperate. A deep side part often looks better a little imperfect. If one curl cluster lands forward and another sits back, the shape still feels intentional because the part itself is doing the heavy lifting.
A tiny root clip at the heavier side can help if your curls are prone to collapsing there. That one clip can keep the line open for hours.
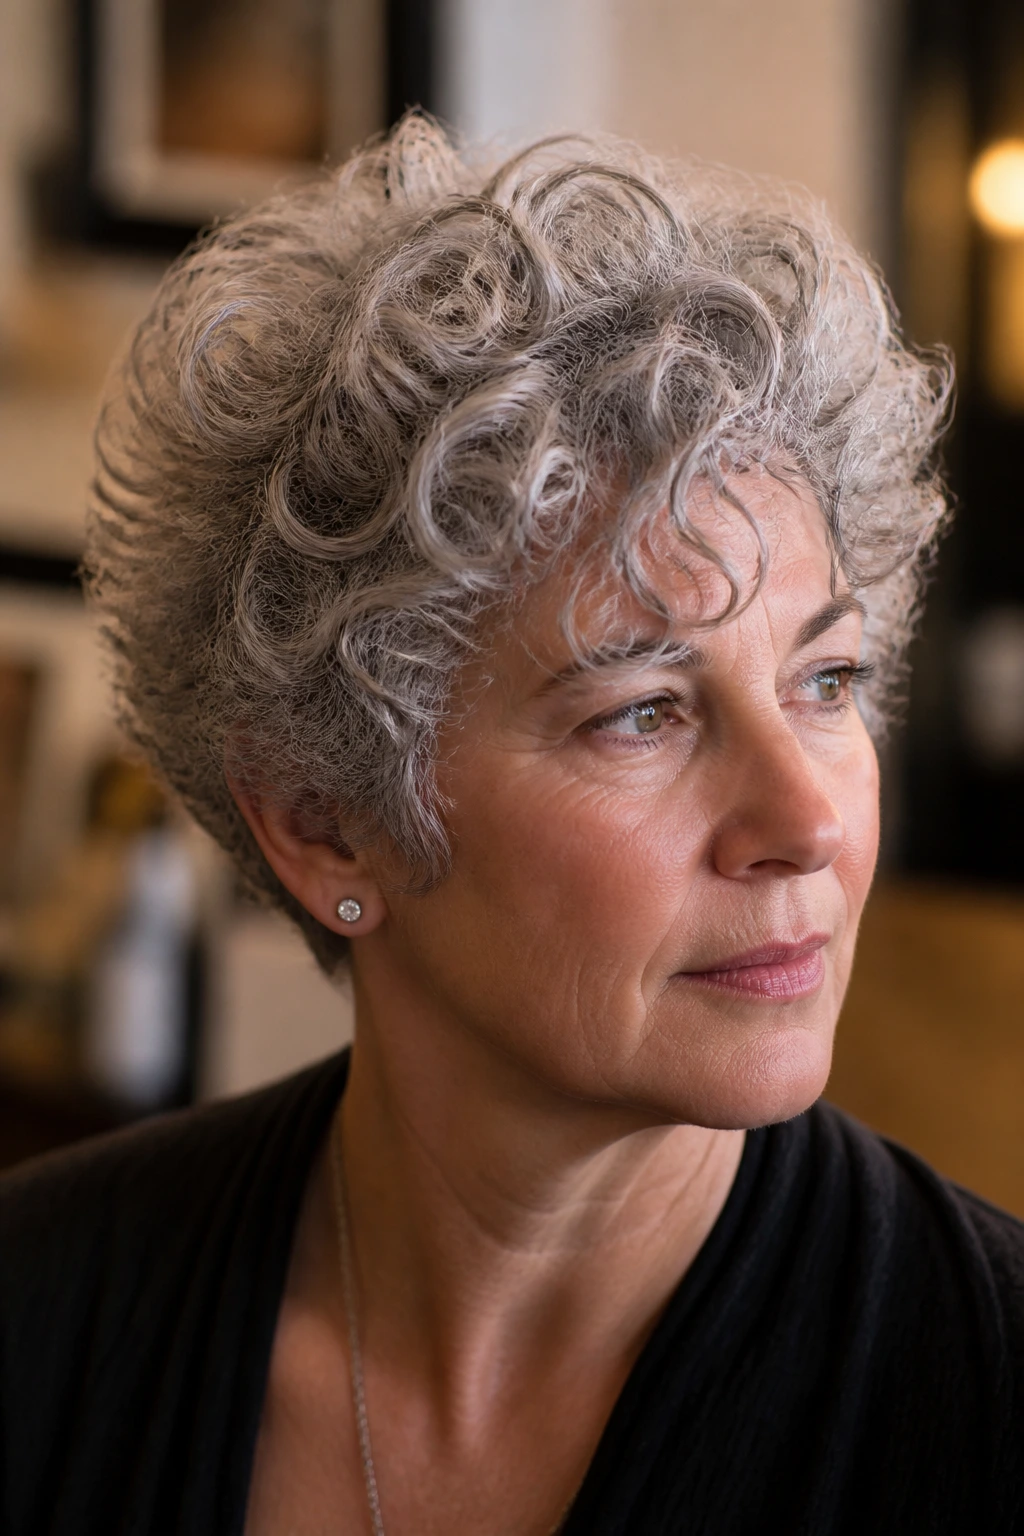
11. The Choppy Shag-Pixie for Dense Curls
Dense curls need room. If they’re cut too neatly, they stack up like little shelves and the whole head starts to feel boxy. A choppy shag-pixie solves that by breaking the interior into uneven, airy layers that let the curls fall in separate groups rather than one solid mass.
This is not a polished, tucked-in cut. It’s a little rougher, a little more lived-in, and that suits silver hair well because the texture already has visual interest. The choppier edges keep the shape from going round and heavy, especially around the crown and sides.
If you’ve got 3C or 4A curls, this may be the most forgiving option in the whole bunch. The layers can be cut to remove bulk without erasing curl definition. The face-framing pieces should still be deliberate, though — not too shredded, not too short. That balance matters.
I’d pair this cut with a medium-hold mousse and a diffuser that moves around the head instead of sitting in one place. Let the curls find their own spacing. Don’t bully them. The whole point is controlled looseness.
12. The Slicked-Back Textured Pixie for Short-Hair Nights
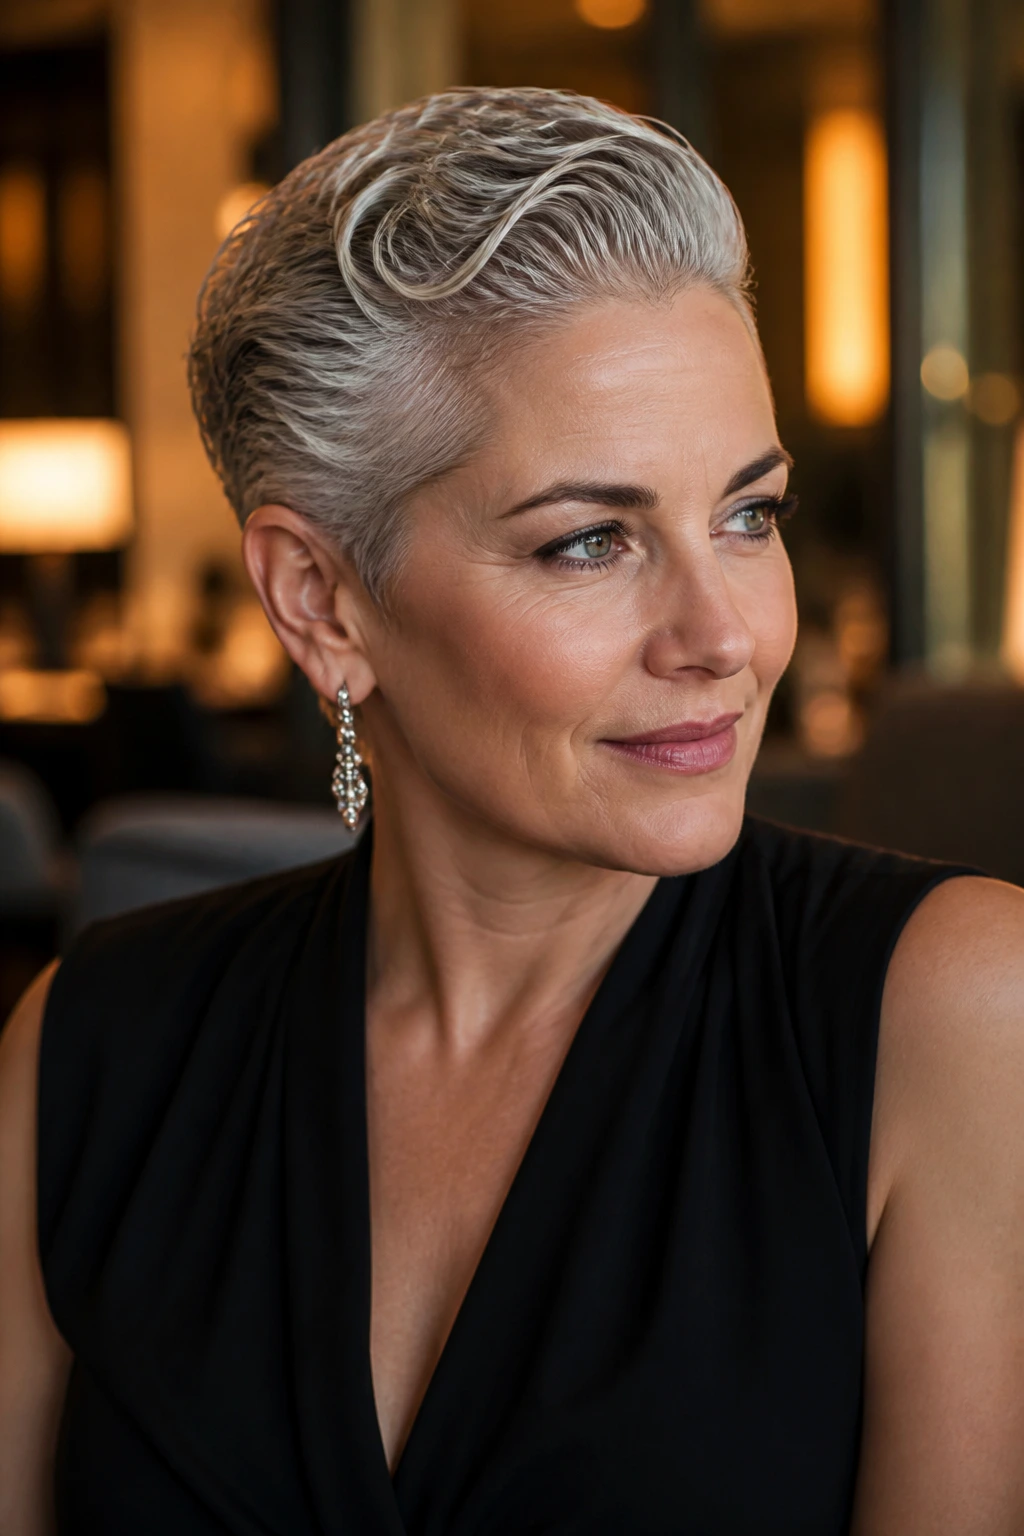
Can a curly pixie be slicked back without turning into a helmet? Yes — if the cut has enough texture built in and the product is used with restraint. This version keeps the top curly enough to stay soft, but smooths the sides and front back from the face for a cleaner, dressier finish.
The trick is to work with damp hair, not soaking wet hair dripping all over your shirt. Use a small amount of gel or styling cream at the front and sides, then comb or finger-smooth the curls back while leaving a little texture on top. The result is not stiff. It should look like the curls were gently persuaded, not forced.
This style is useful for days when you want a silver pixie to look sharper, or when the cut needs a break from everyday volume. It’s also a good way to show earrings, brows, and cheekbones. The face-framing layers don’t disappear; they just change direction.
No, it’s not the everyday setting for every person with curls. But when it works, it works with a kind of easy confidence that a fluffy styling routine can’t always give you.
13. The Mullet-Leaning Pixie With Soft Mutton-Chop Framing
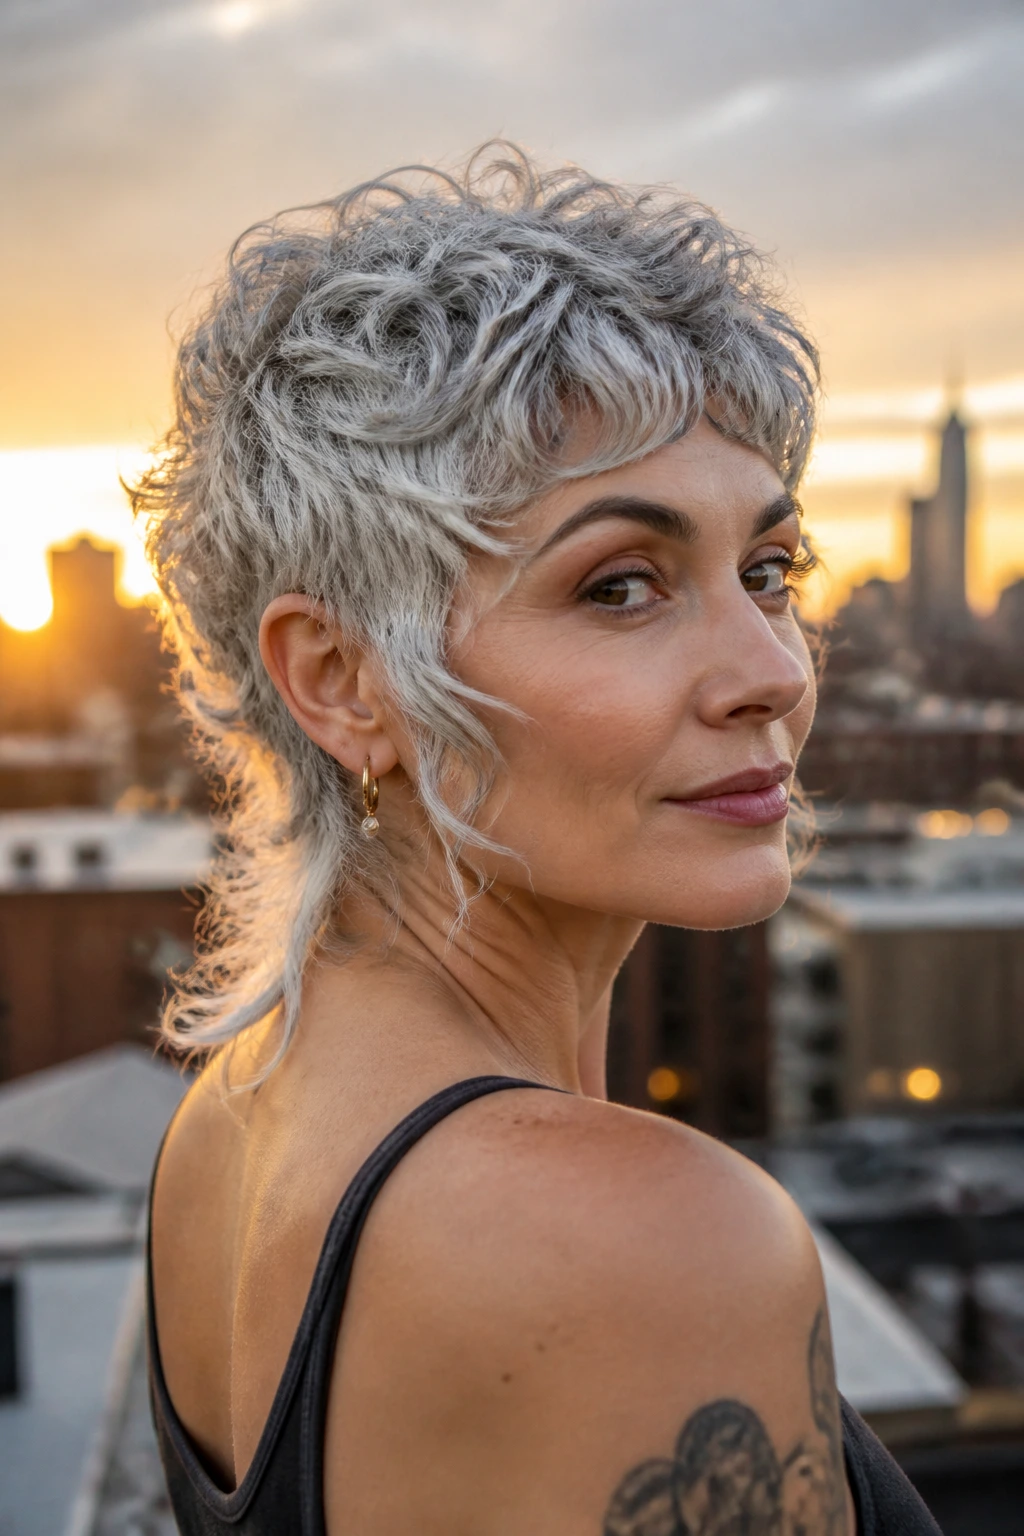
This is the edgy one. A little length in back, a little more attitude around the sides, and a softer front so the whole thing doesn’t feel costume-y. On silver curls, a mullet-leaning pixie can look sharp because the tone keeps the shape from feeling too heavy or too retro. It reads current without screaming for attention.
The secret is in the transition. The back should not drop into a hard tail. It should taper gradually, so the curls at the neck still feel part of the cut. The side pieces — those soft mutton-chop style sections near the jawline — give the face a frame that feels deliberate and slightly undone.
If you like your hair a little less tidy, this is a strong option. It suits dense curls, strong jawlines, and people who do not want the sides to disappear completely. There’s a real advantage here: you get short-hair ease in the front and a little extra shape in back when the curls dry into their own natural curve.
I like this one more than most glossy salon photos suggest. In real life, it has personality. That matters.
14. The Glasses-Friendly Pixie That Tucks at the Ears

Glasses change the haircut more than most stylists admit. Arms at the temples can make a short curly cut feel crowded if the side pieces are too wide or too long. A glasses-friendly pixie solves that by keeping the temple area narrow, the ear line clean, and the front layers soft enough to sit just above or just in front of the frame.
The cut should still frame the face, but it should do it with precision. One longer piece near the cheekbone. A little curve over the brow. Nothing bulky rubbing against the glasses arm every time you turn your head. That kind of detail makes the style easier to live with.
This is a smart choice for silver curls that need shape but not drama. If the hair is thick, the stylist can remove just enough weight around the sides to keep the frames visible. If the curls are looser, the cut can stay softer and the ear line can do more of the work.
One small note: don’t tuck the curls behind your ears all the time when they’re wet. That bends them in a weird way. Let them dry in their own shape first, then tuck if you want the cleaner look.
15. The Long-On-Top Curved-Bang Pixie
If you want fringe without committing to a blunt bang, this is the one. The top stays long enough to curl into a curved fringe, then the sides taper down so the whole cut keeps that pixie shape. On silver hair, the bang curve can be gorgeous because it picks up light right across the front of the face.
This cut is especially useful if your forehead feels like the main feature you want to soften. The curved bang creates a gentler line than a straight fringe, and curly texture keeps it from looking too finished. It lands somewhere between playful and tailored.
Why it works
The long top gives the curls space to form. The curved bang gives the face a frame. The shorter sides keep the haircut from sliding into bob territory. Simple. Clean. Effective.
If your curls are tight, ask for the bang to be cut longer than you think you need. Shrinkage will take care of the rest. If they’re looser, a little more length at the center can keep the fringe from splitting apart during the day.
This is one of the more forgiving silver pixies for people who are nervous about going short. It leaves enough softness around the face that the change feels fresh, not harsh.
Why Silver Pixie Cuts and Curly Hair Work So Well Together
Short silver curls have a built-in advantage: the color makes the shape obvious, and the curl pattern keeps the shape from feeling flat. That combination can be a gift if the cut is thoughtful. It can also be a disaster if the layer placement is lazy.
Silver Reflects, Curls Lift
Silver hair reflects light right off the curve of the curl, which means the crown, cheekbones, and temple pieces show up fast. If the layers are clean, the effect looks crisp. If the cut is boxy, the light lands on every awkward shelf and makes the shape louder than it needs to be.
Face-Framing Layers Prevent the Mushroom

A curly pixie without face-framing pieces can still be cute, but it often turns round. The front needs a little direction — a cheekbone line, a temple sweep, or a fringe that bends toward the face. That tiny bit of planning stops the haircut from becoming all volume and no shape.
Density Decides the Layer Map
Fine curls need compact layers so they keep body. Dense curls need interior removal so they stop building outward. Coarse silver strands often need soft edges more than aggressive thinning because the ends can fray if they’re overworked. Once you know which of those three you’re dealing with, the right cut gets easier to spot.
That’s the real reason these styles earn their keep. They do not fight curl behavior. They shape it.
What to Tell Your Stylist Before the First Snip

Bring pictures, yes, but bring facts too. A good curly pixie starts with a conversation about shrinkage, density, and how you actually wear your hair. If you diffuse every wash, say so. If you air-dry and leave the house while it’s still damp, say that too. The cut should match the life you live, not the fantasy version where you spend 40 minutes with a round brush and a prayer.
I’d also tell the stylist where your hair naturally parts, which direction the front pieces want to fall, and whether you tuck your hair behind your ears. Those details matter more than people think. A face-framing layer that looks perfect on a mood board can land wrong if it cuts straight into a cowlick or sits exactly where your glasses arm lives.
Useful phrases to use in the chair
- “My curls shrink about this much when dry.”
- “I want the front to frame my cheekbones, not stop at my eyes.”
- “Please keep the nape clean but not shaved bare.”
- “I wear glasses, so I need room at the temples.”
- “I’d rather have soft layers than a lot of thinning.”
If a stylist wants to cut everything the same length and call it texture, I’d be cautious. Curly silver hair needs a plan. Not a guess.
Essential Tools and Products for Keeping the Shape
A good cut does a lot of the work, but the right tools stop it from wandering off by noon. You do not need a mountain of product. You need a small set of things that respect curl pattern and keep silver hair from getting dull or frizzy.
- Sharp haircutting shears: Dull scissors tear silver curls and leave fuzzy ends, which show up faster on light hair.
- Sectioning clips: Small clips help you separate the top, sides, and front pieces when styling or cutting.
- Spray bottle: Useful for reactivating curl clumps before diffusing or refreshing the face-framing layers.
- Diffuser attachment: A diffuser lets you dry curls without blasting them into a frizz cloud.
- Microfiber towel or cotton T-shirt: Better than a bath towel for blotting water without roughing up the cuticle.
- Wide-tooth comb: Best used in the shower with conditioner, not on dry curls.
- Leave-in conditioner: Keeps silver strands from feeling rough, especially at the ends.
- Mousse or foam: Gives the top lift without the weight of heavy cream.
- Light gel: Good for defining the front pieces and keeping the shape from puffing out.
- Satin pillowcase or bonnet: Helps the front layers keep their curve overnight.
If you’re choosing only three styling products, I’d pick leave-in, mousse, and a small gel. That trio covers moisture, lift, and hold without drowning the cut.
How to Style the Shape So the Face-Framing Layers Stay Visible
The cut can be excellent and still disappear if the styling is too heavy. Silver curly pixies need a little lift at the root and a little discipline at the front. Not a lot. Just enough to keep the face-framing pieces from merging into the rest of the head.
Start with water, not a product pile
Wet hair gives you control. Saturate the curls, rake in leave-in conditioner through the mid-lengths and ends, then add mousse near the roots. If you use too much cream at the front, the pieces can clump and sink. That’s the opposite of what you want.
Give the face-framing layers their own attention
Clip the front sections forward, or finger-coil the pieces that hit the cheekbones. Those curls are the whole point of the cut. If they dry sideways or backward, the frame gets lost. I like to set the front first, then work out toward the crown.
Dry from the root outward
Diffuse on low heat, starting at the roots for lift and moving down only when the curl pattern starts to lock in. If you hover the diffuser too long in one place, the hair can puff unevenly. Switch sides as you dry. That keeps the part from hardening into one stubborn line.
Finish with less product than you think
A pea-sized bit of gel or a drop of serum is usually enough for silver pixies. Too much shine product makes the cut collapse. Too much cream makes it look soft in the wrong way. The goal is shape, not slickness.
One more thing. If the front pieces look too short when damp, wait. Curly silver hair often settles better after it cools and finishes drying. I’ve seen more than one nervous face relax after that last ten percent of dry time.
Small Tweaks That Make the Cut Sit Better Every Morning
The difference between “cute haircut” and “I actually like this on me” is often one small adjustment. Not a dramatic styling overhaul. A tiny tweak. Short curly silver hair rewards those.
Brightness: If the silver starts looking dull or yellowed, use a blue-violet toning shampoo or mask sparingly — think once every one to two weeks, not every wash. Overuse can leave curly hair dry and oddly matte.
Weight control: If the sides start ballooning, wet the temple area and pinch a little gel into those curls while the rest of the head stays loose. That one move can clean up the silhouette fast.
Frame control: Keep the longest front piece slightly below the cheekbone if your curls are springy. That gives the layer room to bounce up into the right place instead of stopping too short.
Shape memory: If the crown goes flat overnight, clip two small sections at the root while they dry. Root clips are old-school for a reason. They work.
Make-it-yours: Want a softer look? Ask for curved temple pieces and a gentler nape. Want sharper edges? Keep the fringe a touch longer and the back more tapered. Same family of cut. Very different mood.
I like tiny changes like this because they’re honest. They don’t pretend the hair is something it isn’t. They just make it behave a little better.
Common Mistakes That Flatten Silver Pixies
The worst thing a curly pixie can do is look accidental. And that usually happens because somebody cut or styled it as if it were straight hair in disguise.
- Cutting the front too short for shrinkage: The face-framing pieces spring up higher than expected and end up hovering above the features. The fix is simple: leave more length in the front than you think you need, then refine after the hair dries.
- Over-thinning the interior: Silver curls fray fast when the layer work gets too aggressive. If the ends start looking see-through or fuzzy, the cut was thinned too hard. Ask for point-cutting or lighter interior shaping next time.
- Using heavy creams on every wash day: The shape sinks, the crown collapses, and the pixie starts looking tired by noon. Swap some of that cream for mousse or a lighter gel.
- Ignoring the nape and sideburns: If those areas grow out unchecked, the whole cut gets bulky and boxy. A quick trim there can do more than a full restyle.
- Diffusing until every curl is bone dry: Over-drying can make silver hair feel brittle and show frizz more clearly. Stop around 80 to 90 percent dry and let the rest air-finish.
One mistake people make with silver hair in particular is treating dryness like a reason to pile on more oil. Sometimes that helps. Sometimes it just makes the curls collapse and the gray look flat. Hold back. Start lighter.
Variations and Adaptations to Try
These aren’t new haircuts so much as smart edits to the same family of silver pixies. Useful, small, and worth asking for.
The Fine-Curl Edit: Keep the layers compact and avoid heavy texturizing if your curls are soft and small. Fine curls need density to look healthy, so the cut should feel airy, not sparse. This version works well when you want the silver to look plush rather than wispy.
The Dense-Curl Edit: Add stronger interior removal and a tighter nape if your curls stack up fast. Dense hair benefits from reduction in the back and sides, but the top still needs enough length to frame the face. This keeps the cut from becoming too wide.
The Glasses-First Edit: Extend the side pieces slightly and clear the temple area so the frames don’t crowd the curls. This version is one of the easiest to live with day to day, especially if you wear heavier glasses and hate adjusting your hair all morning.
The Low-Heat Wash-and-Go Edit: Ask for a shape that looks good air-dried with minimal product. This means softer layers, not too much razor work, and a front section that falls naturally instead of needing constant directional styling.
The Grow-Out Pixie Bob Edit: Leave the crown and front a little longer so the cut can slide into a boblet shape later. If you know you’ll want more length in a few months, this is the smartest route. It keeps the grow-out from feeling abrupt.
Maintenance, Trim Timing, and Grow-Out Without the Awkward Phase
Short curly hair looks best when the outline stays sharp. That means regular trims, but not so many that the curls lose their shape. For most silver pixies, a tidy-up every 4 to 6 weeks keeps the nape, temples, and face-framing pieces in line. If you’re growing the cut into a pixie bob, stretch that to 6 to 8 weeks and let the front keep a little length.
Silver hair can pick up product buildup and mineral dullness faster than people expect, especially if the water is hard. A clarifying shampoo once a month helps. So does using a chelating wash if the hair starts feeling coated or the curls stop springing back after conditioning. That coated feeling is a clue. Don’t ignore it.
For sleep, a satin pillowcase or bonnet helps keep the front pieces from bending into weird angles. If you wake up with one side flattened, mist it lightly with water, scrunch in a dab of mousse, and let the diffuser warm it for a minute or two. No need to start from scratch.
Silver pixies also grow better when the stylist trims the shape, not just the length. Ask for the temple pieces and nape to be reevaluated at each appointment. Those tiny areas decide whether the cut stays chic or turns mushroom-shaped.
Frequently Asked Questions
How short can a curly silver pixie be before it starts puffing out?
Short enough to remove weight, but not so short that the curls stand up all over the place. Loose curls usually handle a shorter top better than tight coils, which may need a little more length for control. The safest move is to keep the first cut conservative, then trim more on the next visit if the shape behaves.
Should a curly pixie be cut dry or wet?
For inconsistent curl patterns, a dry cut or a mostly dry cut is often easier to judge because you can see where the curls land. Some stylists still use a wet foundation for the back and sides, then refine dry. The best answer is a hybrid one, because curly silver hair rarely behaves one way from root to tip.
Do face-framing layers make round faces look wider?
They can, if they land exactly at the widest point of the cheeks and stop there. If the layers are cut a little above or below that spot, they can actually narrow and lift the face. Placement matters more than length by itself.
What if my silver curls are coarse and frizzy?
Use a stronger hold product, not a heavier oil. Coarse silver hair usually needs structure first, moisture second. A curl cream plus gel combo tends to work better than cream alone because it defines the curl and keeps the face-framing pieces from ballooning.
Can I wear one of these cuts if I have 4A or 4B curls?
Yes, but the silhouette will need more shape through the top and a careful taper at the sides. Tight curls shrink a lot, so the stylist should leave more length than they would on looser patterns. The best versions of these cuts on tighter curls keep the outline compact and let the front pieces curve softly forward.
How often should I trim the nape?
Every 4 to 6 weeks if the haircut depends on a clean neckline. The nape is where a pixie starts to look grown out first, and a tiny trim there can reset the whole shape. If you’re growing the style out, you can stretch that a little, but not forever.
What’s the easiest way to refresh the face-framing layers in the morning?
Mist just the front sections with water, twist them once or twice with your fingers, and hit them with a quick burst from the diffuser. That usually restores the curve without rewetting the entire head. A tiny bit of mousse on the fingertips helps if the pieces are going flat.
Will purple shampoo change the tone of my silver curls?
It can, especially if you use it too often or leave it on too long. On curly hair, over-toning can make the strands feel dry and leave the silver looking muted. Use it only when the hair starts to yellow and follow with a moisturizing conditioner.
A Clean Finish for Silver Curls

The nicest thing about these silver pixie cuts for curly hair with face-framing layers is that they do not ask curls to behave like something else. They let the shape stay short, the silver stay visible, and the face stay open. That’s a pretty good deal.
Pick the version that matches your curl density and your patience level, not the one that looks coolest in a screenshot. A pixie that fits your texture will always look sharper than a more ambitious cut that fights you every morning. Give the curls room where they need it. Trim the spots that get bulky. Keep the front pieces honest.
And if you’re still torn between two shapes, choose the one with better face-framing. That’s usually the detail that keeps the whole cut feeling alive.